Jaguar xjc 4.2
Discussion


Ok, thought maybe someone would know the about the xjs rear anti-rollbar fitment on a xj6. Well the front one will be uprated, just thought fitting the matching rear would be a good factory like modification.
Bought a few panels at the jaguar spares day at stoneleigh, drivers floor panel, left and right sills, passenger door skin and 11 lengths of the steel exterior door seal retainer.
I took advantage of the show offers by taking the coupe dash to the show as it was showing early signs of sun bleaching and a couple of very small splits in the lacquer. Managed a reasonable deal with a veneer specialist. March 2019 is the next spares day and that’s when the restored dash will be picked up and paid for, that then gives an excuse to purchase the new rubber exterior door seals, furflex, carpets and headlining material will be bought. Incidentally i re-carpeted my car about 10 years ago with a rot proof carpet rather than the hessian backed original. That carpet has been removed but although dirty it was still good but for the sake of £20 I’ll just re-cut some new rather than try clean it up. I’ll also try and buy some good original chrome work rather than re-chrome. I noticed the stalls had a lot of good xj6 stuff that had been removed years ago and dry stored. Slowly but surely progress is starting to be made which I’m pleased with
Bobberoo99 said:
Loving reading this, top work sir!! Please keep updating as I love to read restoration threads, who knows one day I may be in a position to do one myself!! 
Thank you I try to show bit by bit. This isn’t a huge budget restoration but I would like to think it’s a thorough approach to putting this 70’s car back on the road.
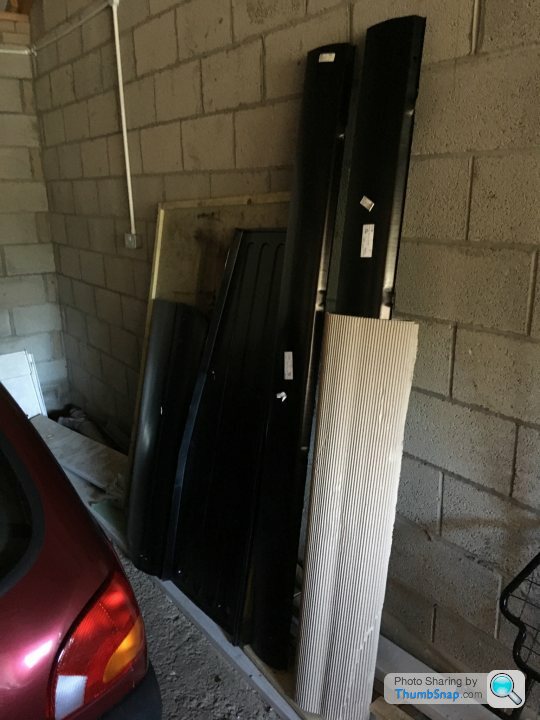
Above picture shows the recent panels I bought. Far too expensive for the quality they are but unfortunately 2 door xj coupe rarity pushes up the price.
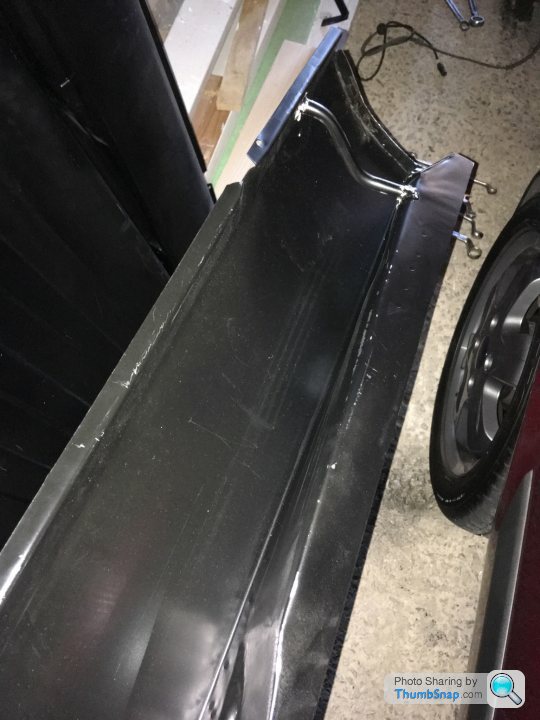
The 2 pictures above show the crude drain assembly spot welded in place within the rear of the sill panel and the perfect place for rust to begin unless modified before assembly.
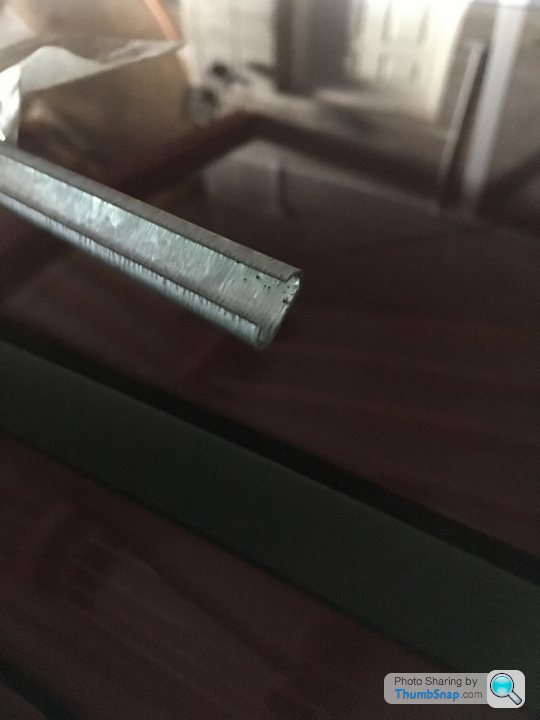
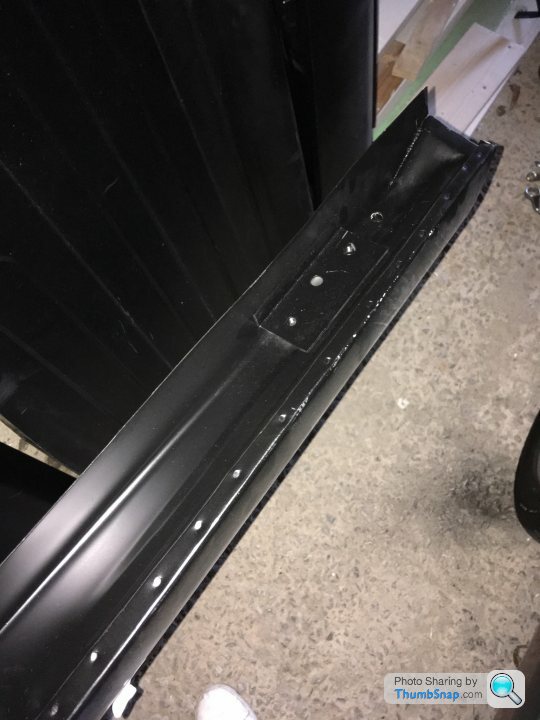
and finally the exterior door seal holding steel. 11 pieces that need to be carefully bent into the form and shape of the original. Original lengths are long since a deleted part. These are for a rear door from a 4 door xj but are original Jaguar
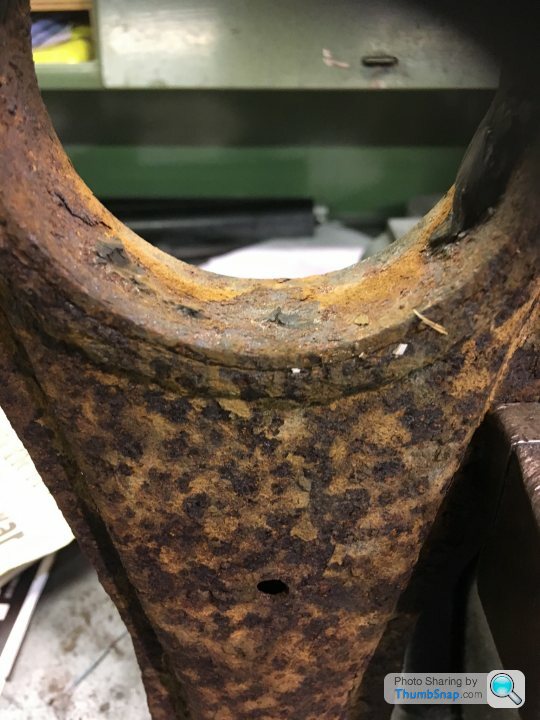
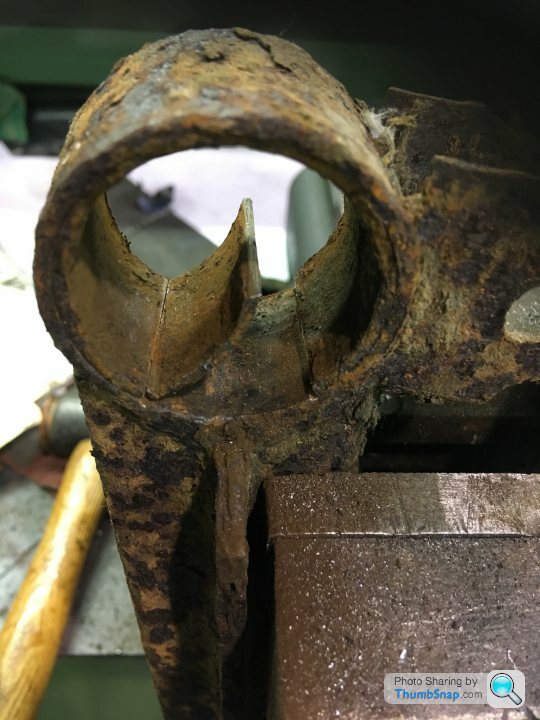
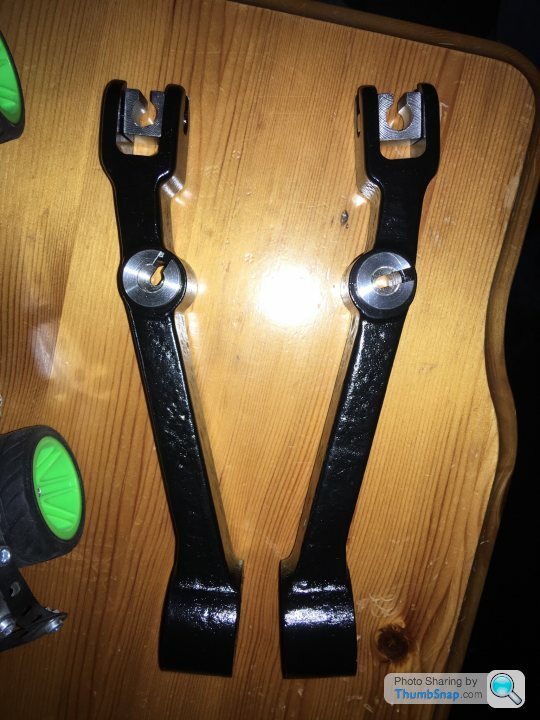
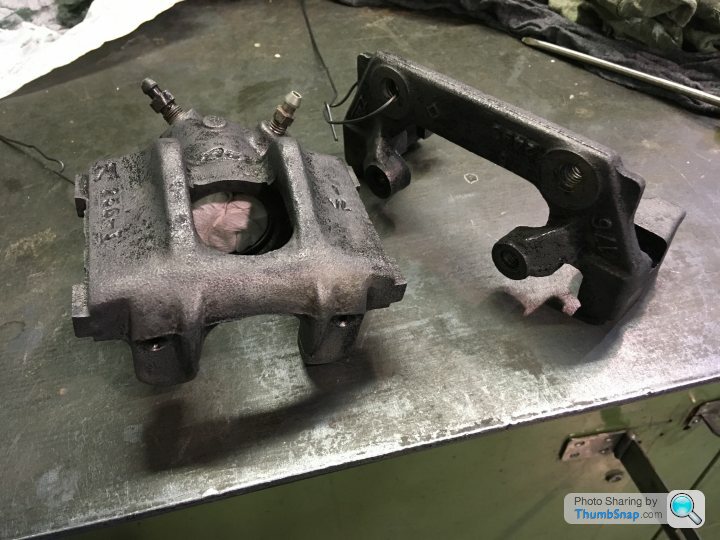
Radius arms now. These came with the recent outboard disc xjs axle. Very orange but worth a try at a refurb to see what’s under that rust.
The original metalastic bushes need removing first well the outside retainer ring. Hard to see with so much rust.
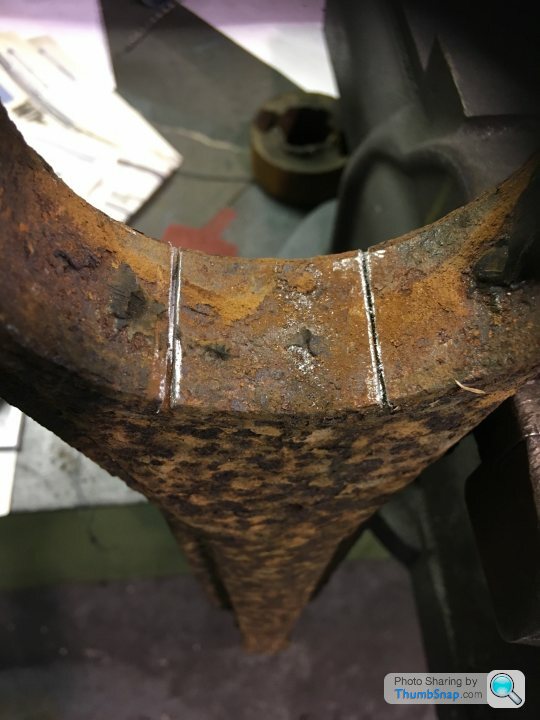
Once the tension is released the bush outer ring simply tapped out with a small chisel and mallet.
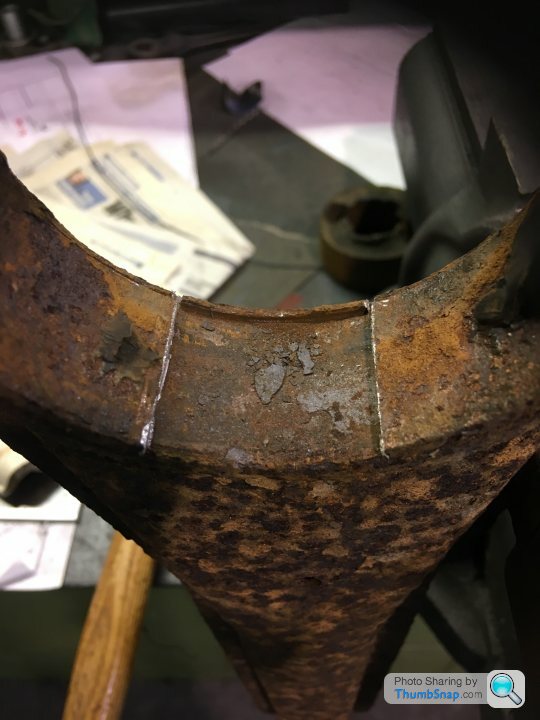
Same technique used on the opposite end small bush.
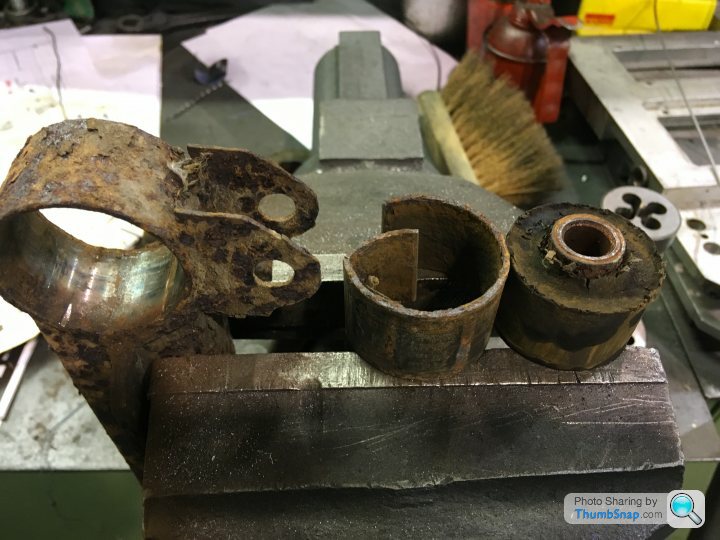
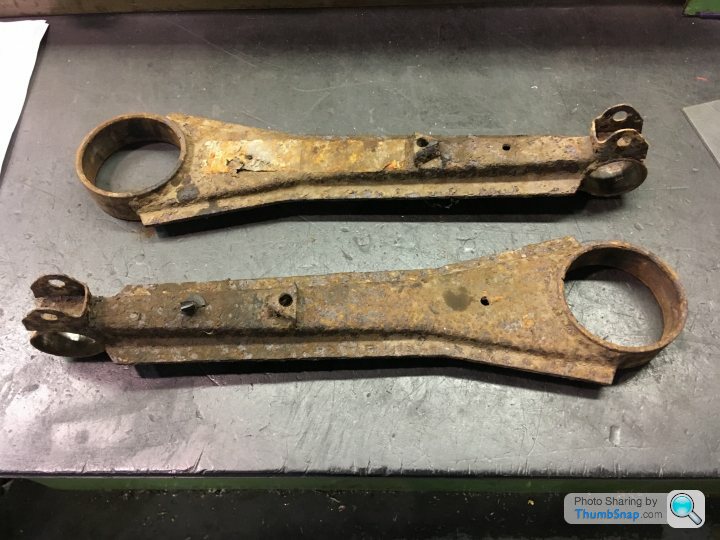
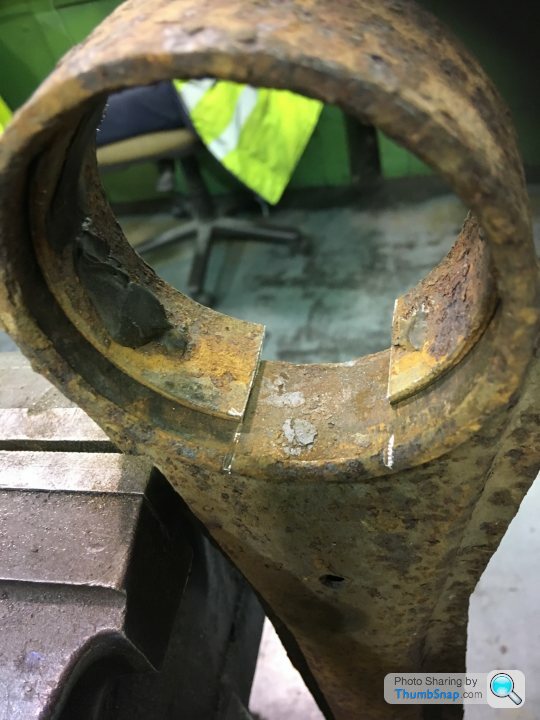
Above a pair of used radius arms ready to shot blast.
Below the same radius arms back to metal and not that bad a condition to use again. These have the bracket to attach a rear anti-roll bar. My XJ6 was never originally fitted with one so I now have that option.
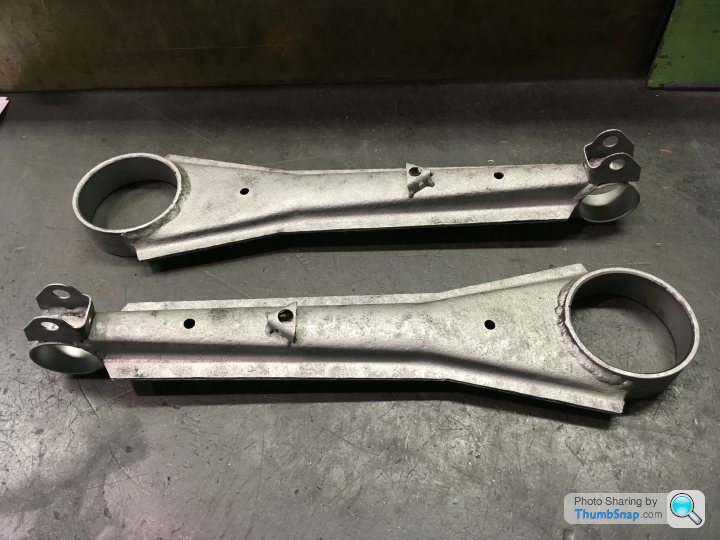
These cleaned up arms will be galvanised then powder coated before fitting upgraded poly bushes
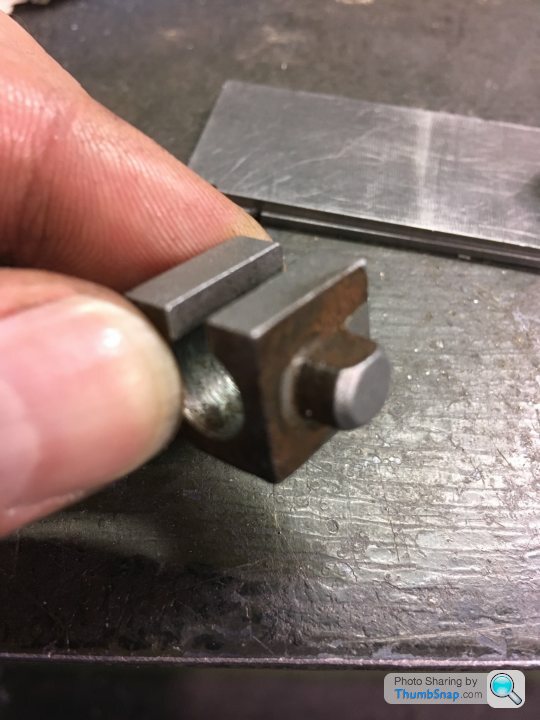
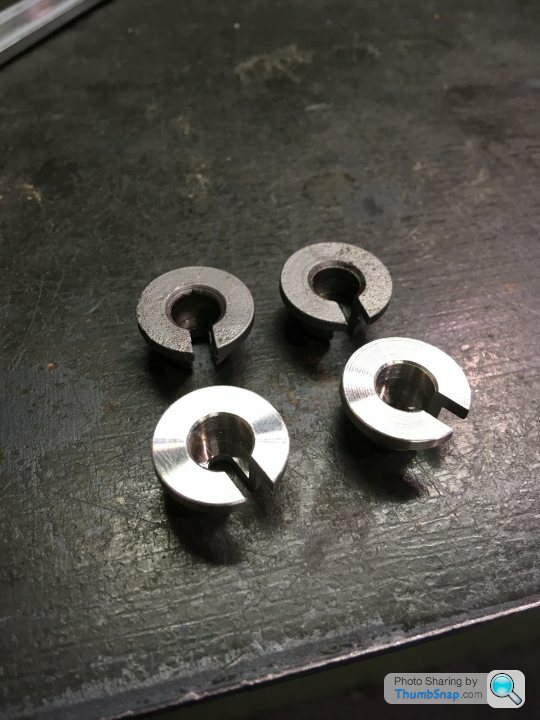
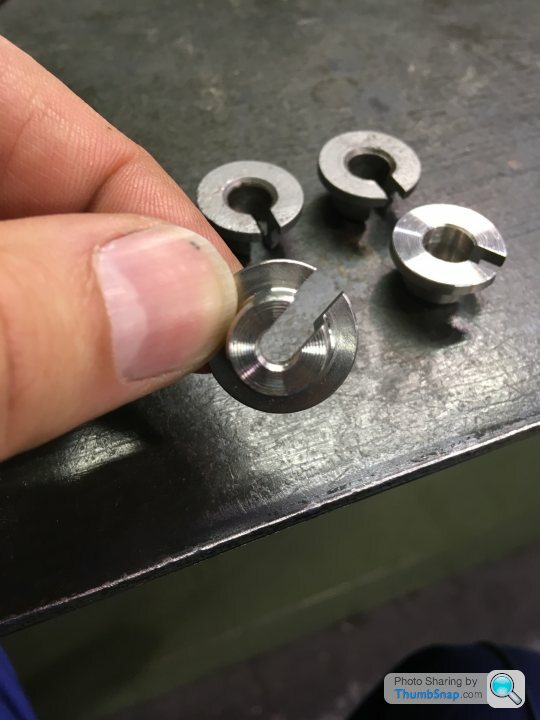
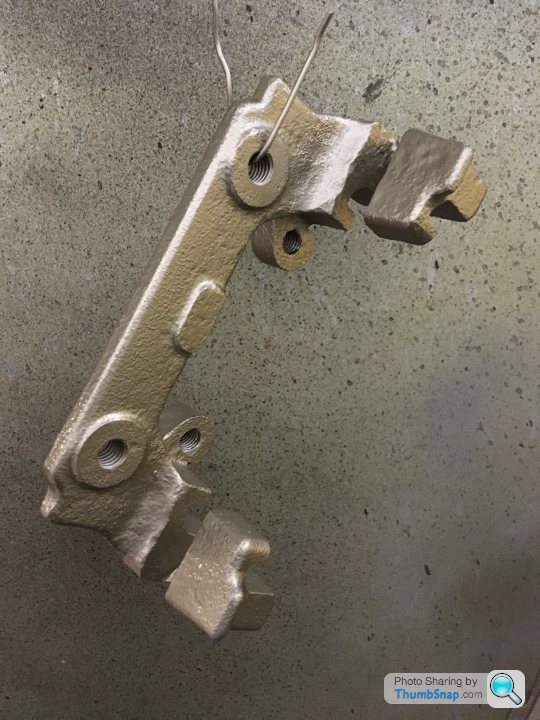
Not sure if the above part has a name but I was missing one.
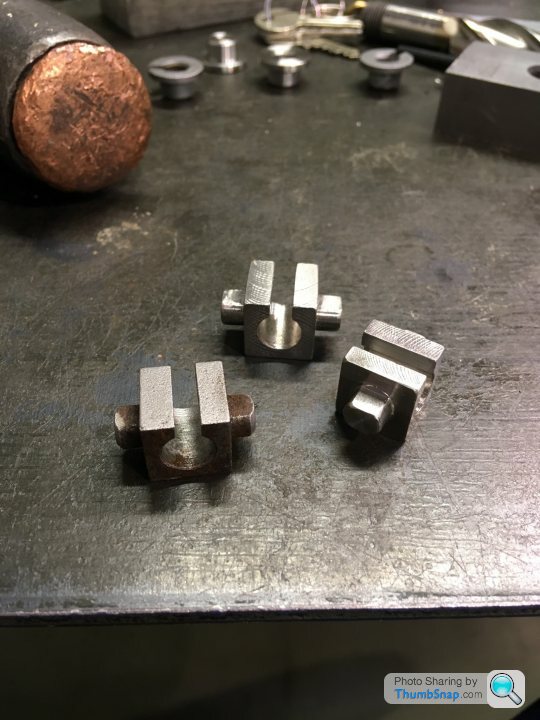
Was going to just make the replacement but then thought make a pair from stainless steel.
They hold the handbrake cable on the rear axle, so will be a fit and forget part.
I have two other little details to finish to do with the handbrake as well. I’ll post pictures when complete
Bobberoo99 said:
Machinist in the aerospace industry, I can either be found twiddling knobs on a semi cnc lathe or pushing buttons on a 5 axis machining centre!!! 
That’s where I was for 25 years as a body press and die toolmaker, now I’m more machinist for the same manufacturer here in South Wales for the past 5 years
larrylamb11 said:
I'm impressed with the way you are getting the rusty parts to come up like new! Great work.
For general interest, have you tried citric acid bath for cleaning rusty parts? I came across the technique last year and have been using it to clean some spectacularly rusty bits with remarkable success - the rust just falls off given time, leaving the bright steel surface. I've adopted a regime of plopping freshly removed bits into an acid bath to soak for a couple of days, quick rinse under the hose and a very light blast in the blast cabinet, followed by a lick of primer and it's sped up the process of restoring parts dramatically. Way less effort required as the acid does all the hard work for you - it's also relatively safe (in workshop / acid terms - it isn't going to burn you horribly like other caustics can) and cheap, being a food stuff ingredient. Easily available online. Just a thought, given the bits you are cleaning.
Yep, I know the stuff . The bottle I’ve started to use is like balsamic vinegar.For general interest, have you tried citric acid bath for cleaning rusty parts? I came across the technique last year and have been using it to clean some spectacularly rusty bits with remarkable success - the rust just falls off given time, leaving the bright steel surface. I've adopted a regime of plopping freshly removed bits into an acid bath to soak for a couple of days, quick rinse under the hose and a very light blast in the blast cabinet, followed by a lick of primer and it's sped up the process of restoring parts dramatically. Way less effort required as the acid does all the hard work for you - it's also relatively safe (in workshop / acid terms - it isn't going to burn you horribly like other caustics can) and cheap, being a food stuff ingredient. Easily available online. Just a thought, given the bits you are cleaning.
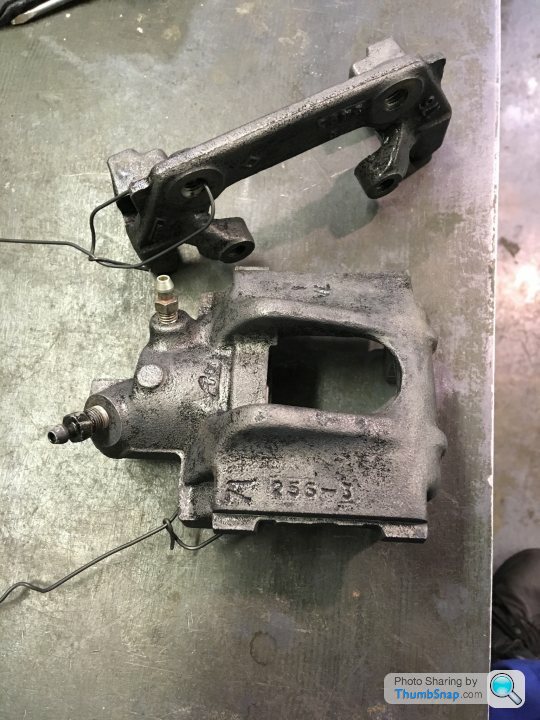
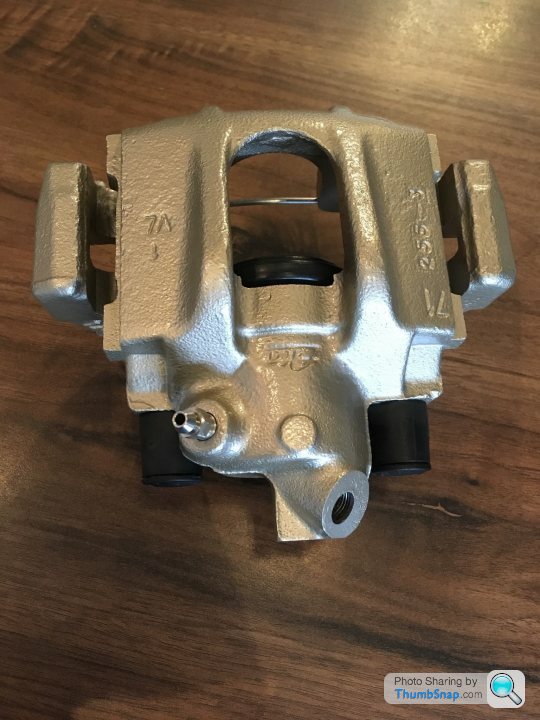
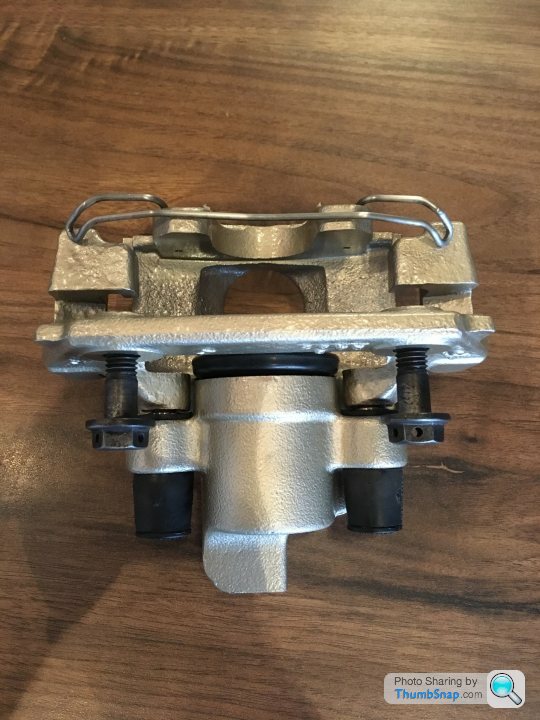
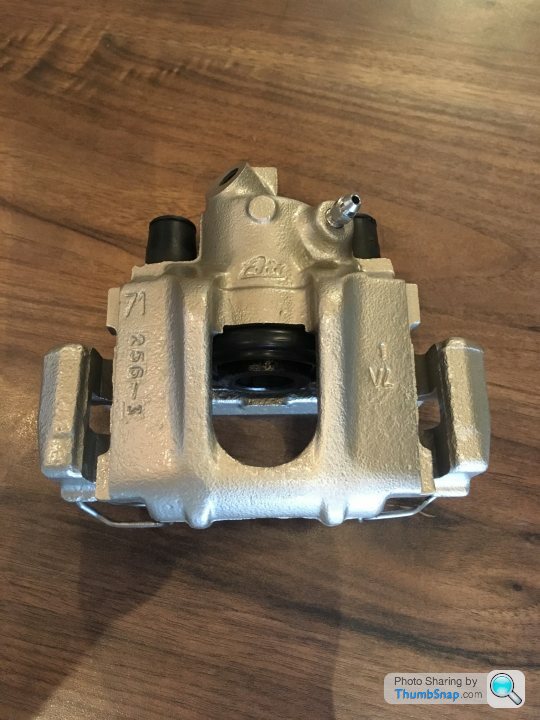
It creates a darkened metal coating on bare steel and iron. I’m trying it out on the rear brake caliper castings before primer and top coat. No pictures as yet
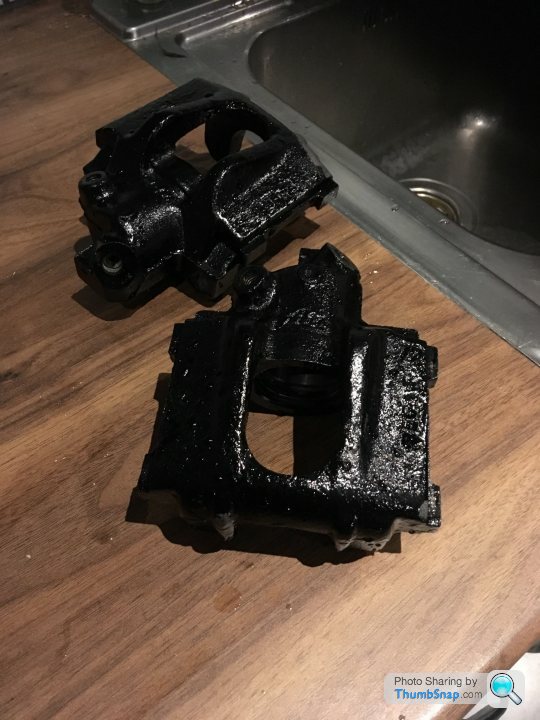
So above shows the rear brake calipers covered with the balsamic vinegar like coating to make sure all rust has been neutralised. It brushes on and I left to dry for approx 48hrs.
The excess black coating was removed with a green Brillo type pad and leaves behind a darkened grey coloured finish on the bare metal and no rust at all.
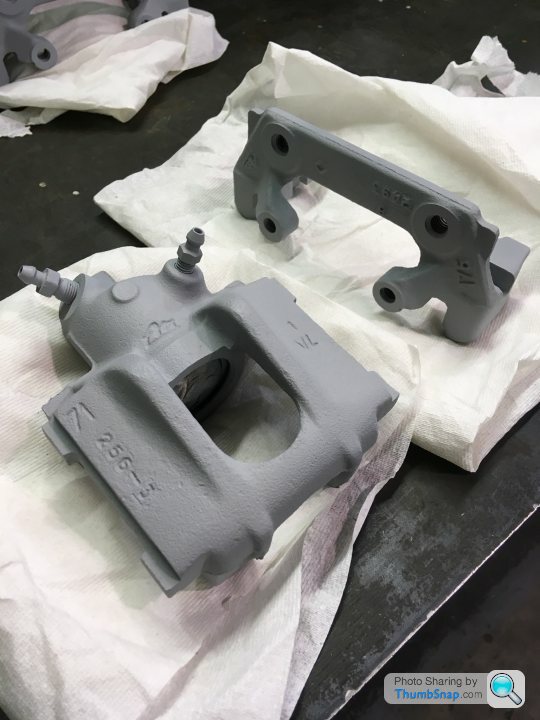
Then an etch primer has been sprayed on followed by an anti-rust primer.
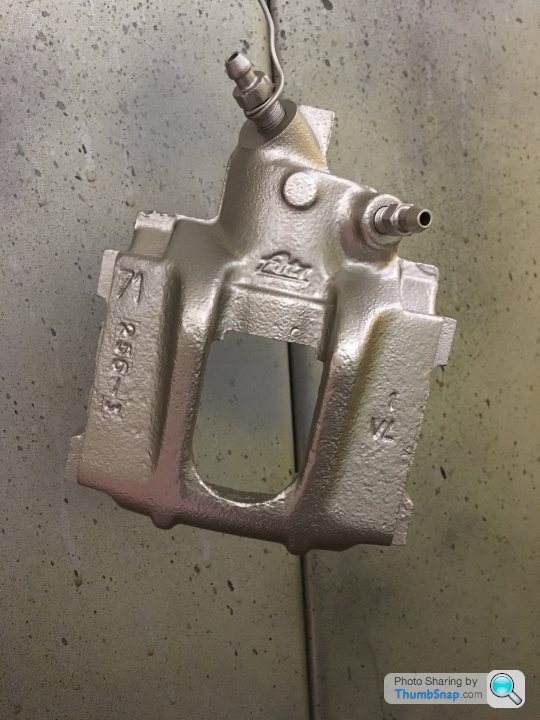
Now two coats of colour has been applied. Tomorrow the clear coat will go on
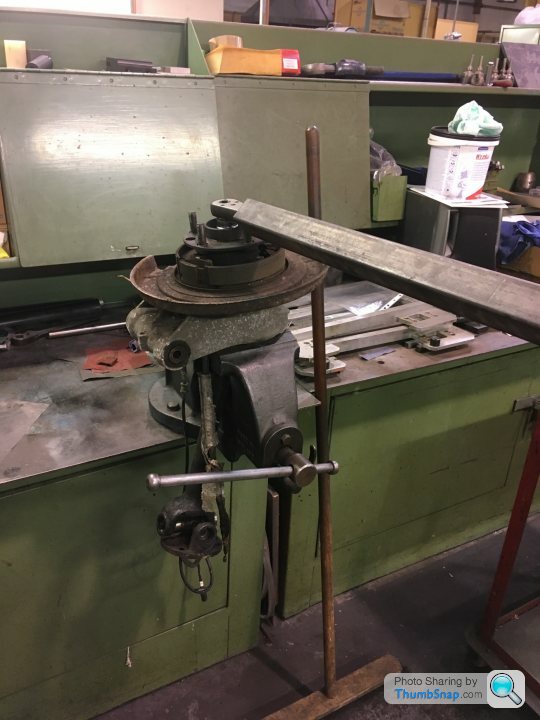
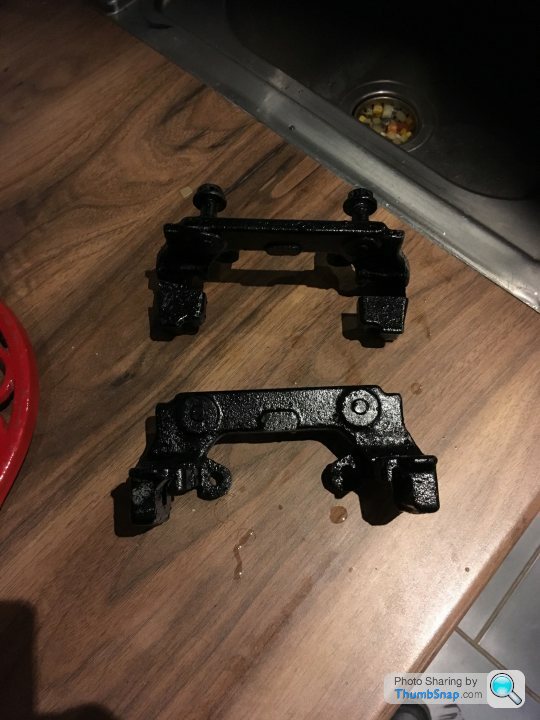
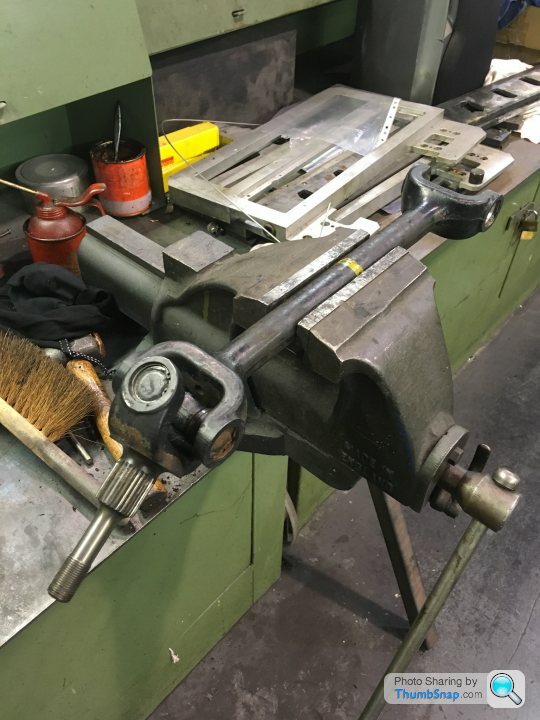
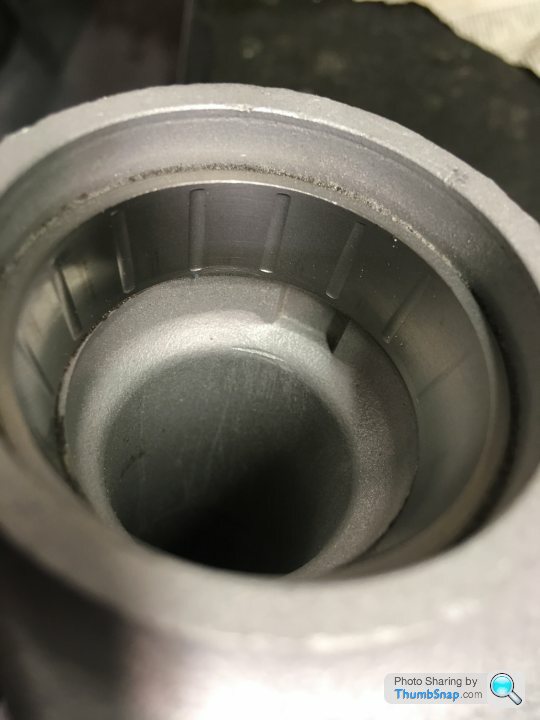
So now the hub and drive shaft strip down. A nice 3ft bar to help with leverage to remove the nut compressing the hub taper bearings. The bar still needed my weight behind it to crack that nut!
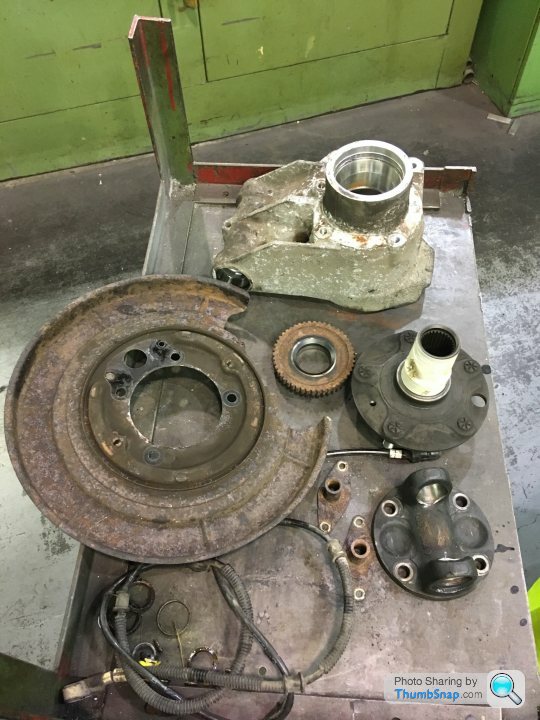
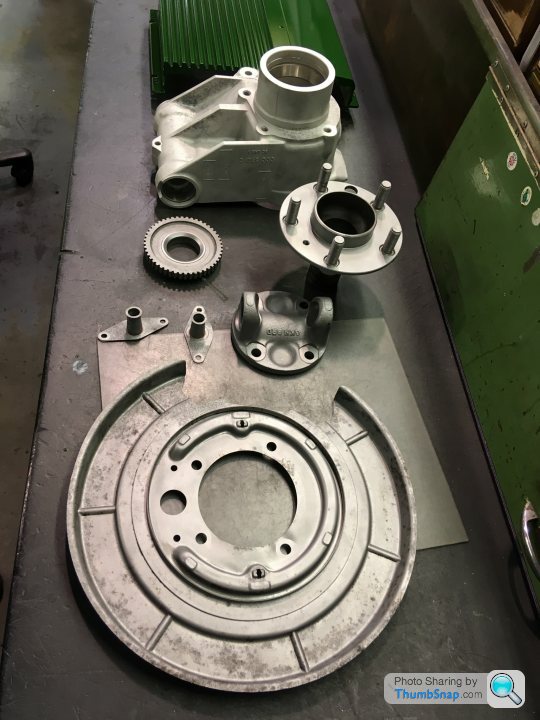
Once the drive shaft removed, the hub comes apart relatively easy. The above parts minus the drum handbrake mechanism ready to shotblast. Outer part of the hub bearings are still fitted while I shot blast so I don’t remove any material that could make the new bearing too slack.
Above one of the rear drive shafts I’ve degreased. The uj is still good with no slack or play. Once thoroughly degreased I will give a couple of coats of satin black before re-greasing the uj. The other end I removed to make access easier to remove from the diff. So new ujs to fit there, as and when I’m ready.
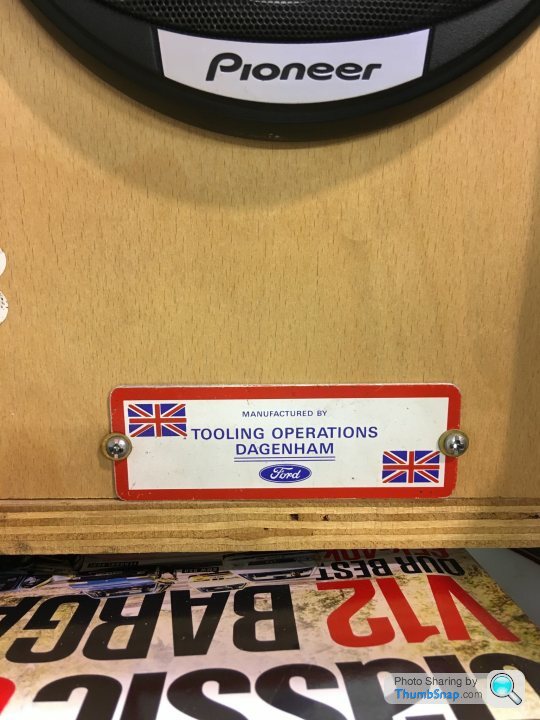
Bit of a relaxing week and not much mechanical goings on so have been thinking of the new audio system design. The components I have are good but are old now so adding is always a challenge as I have to buy second hand. Below is a quick schematic I drew.
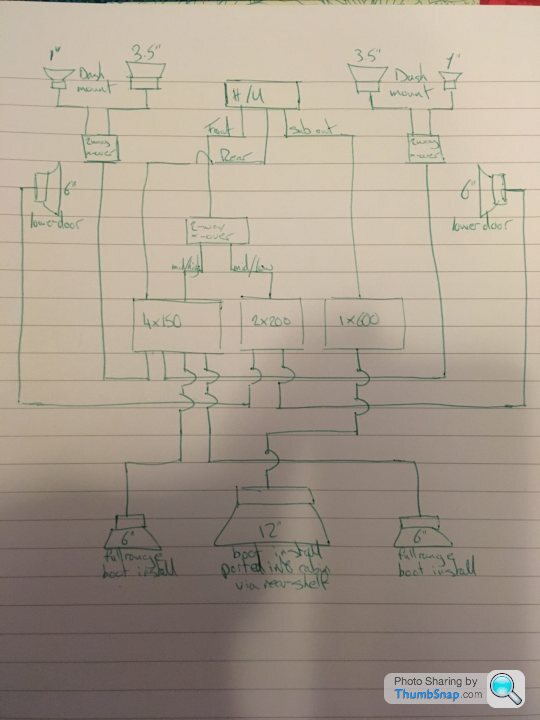
Basically the mids and highs are dash and A pillar mounted, via a passive cross over, the amp running those will have the high pass filter set at 200hz so no bass just clear clarity of mid and high. The door mounted 6” drivers via an active crossover will give the front bass and mid/bass kick and if possible I will create a suitable sealed enclosure behind the trim panel to keep the thump consistent and reduce possible trim vibration. Will see what space I have when the doors go back on. Low cut filter set between 50-80hz and high cut about 6khz. The two way active crossover will give adjustment to balance the door mount drivers with the dash mount components.
I won’t fit rear speakers on the parcel shelf. The parcel shelf will have the ports from the boot mounted subwoofer instead. The rear speakers shown on the schematic will be boot mounted as part of the boot install and I’ll use the rear fader control on the head unit to increase volume on the rear and cancel the interior sounds if the car is being shown with the boot lid open. This gives a nice clear sound without being loud to demo the system.
I did the same on a Jag mk2 system I fitted for a friend about 14 years ago so I know it works well.
I managed to find the extra plug in units for my headunit to enable selection from a variety of auxiliary input sources. I won’t be fitting any screens, as I’m keeping the interior classic with a newly restored wood dash and a subtle change to the dial illumination to match the headunit.
That’s it for stereo really
Basically the mids and highs are dash and A pillar mounted, via a passive cross over, the amp running those will have the high pass filter set at 200hz so no bass just clear clarity of mid and high. The door mounted 6” drivers via an active crossover will give the front bass and mid/bass kick and if possible I will create a suitable sealed enclosure behind the trim panel to keep the thump consistent and reduce possible trim vibration. Will see what space I have when the doors go back on. Low cut filter set between 50-80hz and high cut about 6khz. The two way active crossover will give adjustment to balance the door mount drivers with the dash mount components.
I won’t fit rear speakers on the parcel shelf. The parcel shelf will have the ports from the boot mounted subwoofer instead. The rear speakers shown on the schematic will be boot mounted as part of the boot install and I’ll use the rear fader control on the head unit to increase volume on the rear and cancel the interior sounds if the car is being shown with the boot lid open. This gives a nice clear sound without being loud to demo the system.
I did the same on a Jag mk2 system I fitted for a friend about 14 years ago so I know it works well
.I managed to find the extra plug in units for my headunit to enable selection from a variety of auxiliary input sources. I won’t be fitting any screens, as I’m keeping the interior classic with a newly restored wood dash and a subtle change to the dial illumination to match the headunit.
That’s it for stereo really
Bobberoo99 said:
It's a nice system, couple of questions though, having such a big distance between the mids/tweeters and front mid bass may upset the balance a little, just a bit too much sound field separation for my liking, secondly is the sub in a sealed enclosure? If not having it ported and the then ported again into the cabin may give you resonance issues due it compressing the bass for a second time.
Regarding the subwoofer, I’m going to build a band pass enclosure. The port will vent into the cabin via the rear shelf. If I fancy leaving the boot open at a show perhaps, then the interior port will be plugged. The boot port can then be unplugged. I might fit a Perspex window in the enclosure to visually give the impression of a sealed type enclosure. Haven’t decided that yet though.The fronts as you say could give issues but I have tried it before in that configuration and it worked very well indeed in a car with original dash mount 4” full range and a door mounted 6” bass driver. No fancy time alignment electronics were used either. Just a pair of Philips dap amplifiers and a simple 5 band Kenwood graphic equaliser. The equaliser did introduce a bit of unwanted noise but was only heard through test equipment.
The head unit I have has the parametric equaliser built into it so should be a bit better.
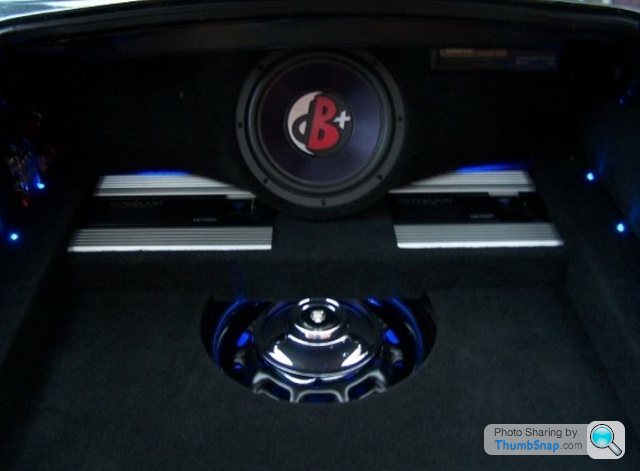
Below is a picture of the boot install I fitted previously. Just a sealed enclosure that really sounded good, if you sat in the boot lol.
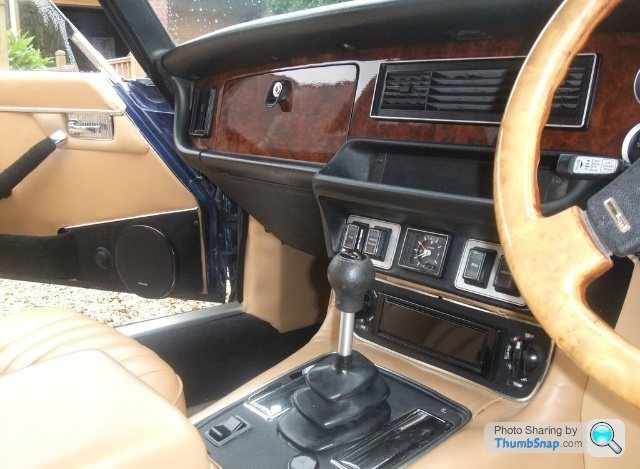
Picture above shows previous door mounted components. Although positioned and angled upwards the sound was still sounding low, hence the small dash and A pillar mounted components.
Thanks for the advice, always appreciated .
If I’m honest, building the stereo is the part I enjoy most. I have a Sony stereo in the regular car which has a function that lifts the sound if speakers are mounted low in the doors. It works really well. The Kenwood unit I’m using for the Jag doesn’t have that function unfortunately. Basically my plan is build the dash mount components and then power them to actually hear what I’ve got with my amp hpf crossover set at 200hz, Ideally I’d like 500hz but to get that I need to fit a better active crossover. Little 3” mids are so expensive compared to 4” mids? So a bit of ingenuity will be needed fitting 4” mids in the dash top and miss the ventilation heating pipes, that supply the dash vents. I possibly need to angle those 4” mids under the dash top and use the windscreen to help reflect the sound towards the driver and passenger. The door mounted bass speakers should be easier to mount now as the directional frequencies can be removed. A flatter mount in keeping with the 70’s fit flat interior door trim.
That’s the plan but I’m sure adjustments will be needed when tested
. If I’m honest, building the stereo is the part I enjoy most. I have a Sony stereo in the regular car which has a function that lifts the sound if speakers are mounted low in the doors. It works really well. The Kenwood unit I’m using for the Jag doesn’t have that function unfortunately. Basically my plan is build the dash mount components and then power them to actually hear what I’ve got with my amp hpf crossover set at 200hz, Ideally I’d like 500hz but to get that I need to fit a better active crossover. Little 3” mids are so expensive compared to 4” mids? So a bit of ingenuity will be needed fitting 4” mids in the dash top and miss the ventilation heating pipes, that supply the dash vents. I possibly need to angle those 4” mids under the dash top and use the windscreen to help reflect the sound towards the driver and passenger. The door mounted bass speakers should be easier to mount now as the directional frequencies can be removed. A flatter mount in keeping with the 70’s fit flat interior door trim.
That’s the plan but I’m sure adjustments will be needed when tested
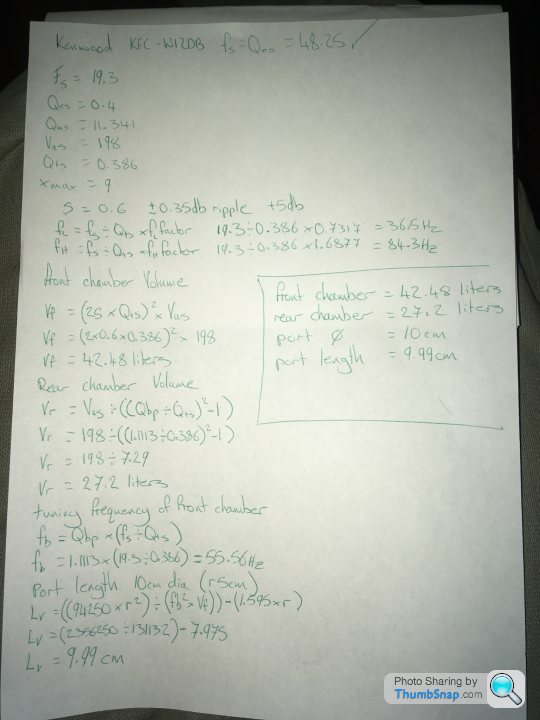
Doing some calcs to build a 4th order bandpass subwoofer enclosure. The equations are readily available on the internet and it’s finding the relevant spec for the subwoofer.
Initial thoughts are that the box volume will be to big for the space I want to use at 69.68 litres. That’s using the 12” kenwood dB+ subwoofer I currently have. A 10” dB+ subwoofer only uses a volume of 34.8 litres with a similar frequency response of between 38hz-93hz with a 4db boost compared to a 36hz-84hz 5db boost of the 12” subwoofer.
Now I’m thinking of using a pair of high excursion 8” subwoofers fitted in a triple chamber enclosure.
Piersman2 said:
On my old XJC I fitted a 10" (or it might have been 12") sub woofer and box in the middle of the boot with the speaker facing straight towards the back panel of the rear seats, and cut a hole in the rear seat back panel for the sounds to pass though into the cabin. A bit of wire mesh affixed over the hole stopped the middle of the rear seat pressing back into boot.
Probable deemed holiganistic abuse of an XJC now, but it did sound superb, could feel the bass in your kidneys!
When I bought my coupe years ago it had something similar fitted. Now the internet is here, info that was once a bit of work to get hold of mow makes things a little easier to build to spec Probable deemed holiganistic abuse of an XJC now, but it did sound superb, could feel the bass in your kidneys!
Gassing Station | Readers' Cars | Top of Page | What's New | My Stuff