Jaguar xjc 4.2
Discussion


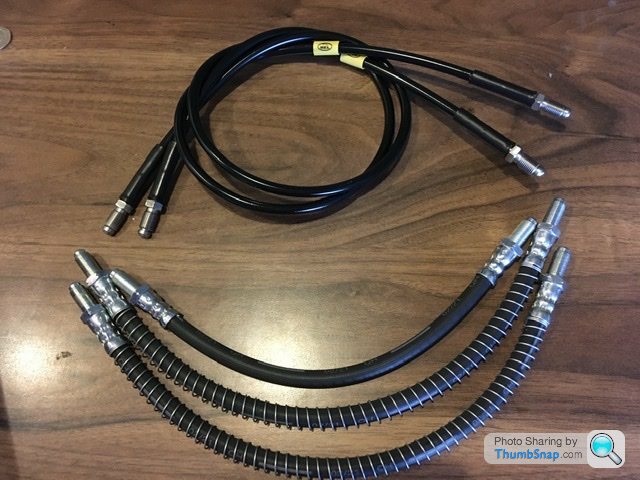
New brake flexi hoses arrived over the weekend. New standard on the front and body to rear axle. Custom length rears to suit the inboard caliper tee piece but to fit outboard metric fittings.
For future reference the custom rears are 840mm long including fittings, both ends the swivel type to ease fitting and removal. Usually one end is fixed (the caliper) and the body/axle mount is the swivel type.
On the series 2 xj6 there is a mix of metric and imperial fittings as standard. Original front calipers are metric with metric flexi hose, body to rear axle is metric flexi hose, original inboard calipers have imperial hard line fittings.
Other hard line fittings to master cylinder are imperial.
Series 1 xj6 are all imperial and series 3 xj6 are all metric.
Below picture shows hose fittings with little grooves on the hex denotes metric.
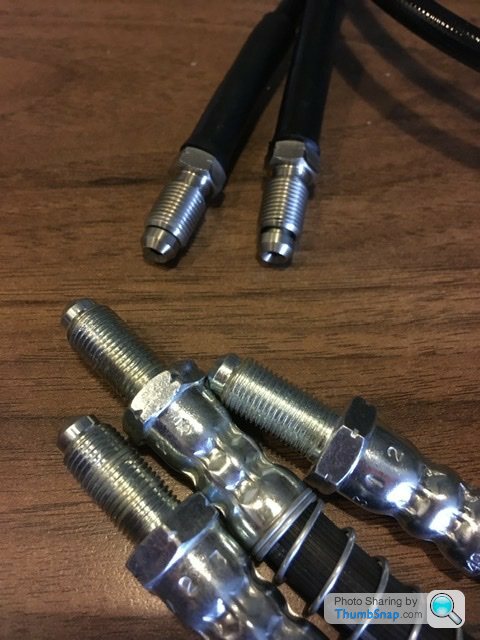
Next picture shows no groove on the hex which denotes an imperial fitting

That info took a while to figure when you look beyond manufactured year of car parts.
The other strange issue is the gearbox mount.
In short it’s a spring and rubber bush but mine doesn’t seem to sit in the correct position either too high and touching the gearstick cover in the interior but when sitting correctly the sliding bolt that limits the upwards movement is too long and would allow the gearbox to crash into the interior gearstick cover.
I’ve dropped the positive of the whole of the gearbox mount frame by an additional 10mm which seems to work by allowing a small amount of sprung movement and just clears the interior gearstick cover. The sliding bolt still requires modification as there isn’t enough thread on it to clamp a nut and the sliding distance tube between the hex and that thick washer to limit the upward bounce. Hard to explain in words.
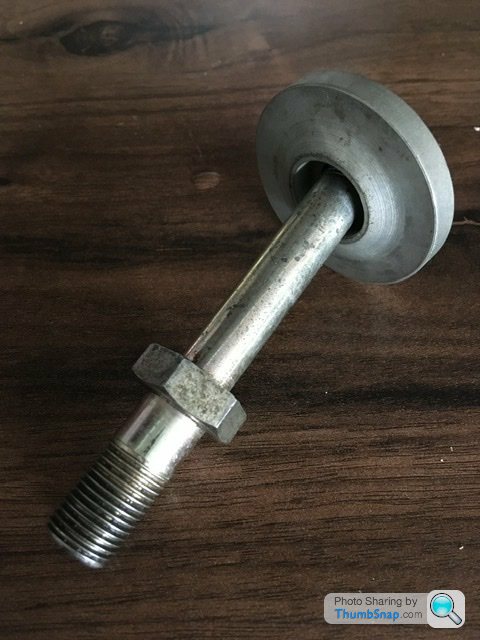

Above pictures show the bolt that bobs up and down slightly attached to the gearbox with a spring and rubber bush in between. It just feels too soft. Currently I need to shorten the bolt by 15mm, increase the threaded position which will limit its upward bounce with a shortened distance tube and stop it touching the interior gearstick cover. Well that’s the plan.
In short it’s a spring and rubber bush but mine doesn’t seem to sit in the correct position either too high and touching the gearstick cover in the interior but when sitting correctly the sliding bolt that limits the upwards movement is too long and would allow the gearbox to crash into the interior gearstick cover.
I’ve dropped the positive of the whole of the gearbox mount frame by an additional 10mm which seems to work by allowing a small amount of sprung movement and just clears the interior gearstick cover. The sliding bolt still requires modification as there isn’t enough thread on it to clamp a nut and the sliding distance tube between the hex and that thick washer to limit the upward bounce. Hard to explain in words.
Above pictures show the bolt that bobs up and down slightly attached to the gearbox with a spring and rubber bush in between. It just feels too soft. Currently I need to shorten the bolt by 15mm, increase the threaded position which will limit its upward bounce with a shortened distance tube and stop it touching the interior gearstick cover. Well that’s the plan.
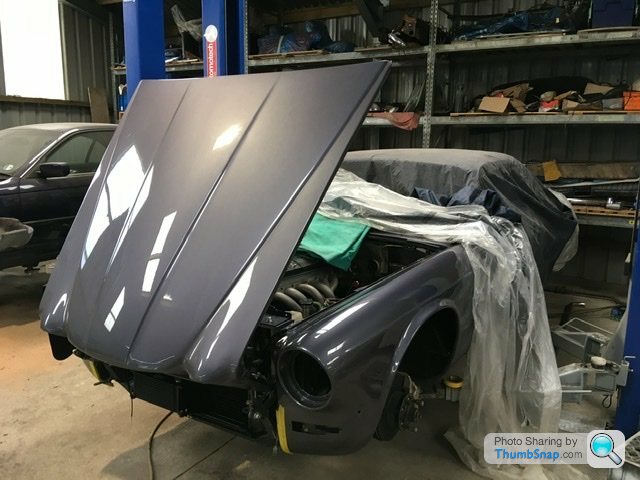
Currently sitting on the lift. Radiator and oil cooler fitted. Radiator top panel bolts are tight in the panel, so rather than damage the paint I’ll reduce the bolt diameter under the bolt head and washer to give the extra clearance. These detail jobs are popping up quite frequently at the moment
Fitted oil cooler picture below that I didn’t post earlier.
[url]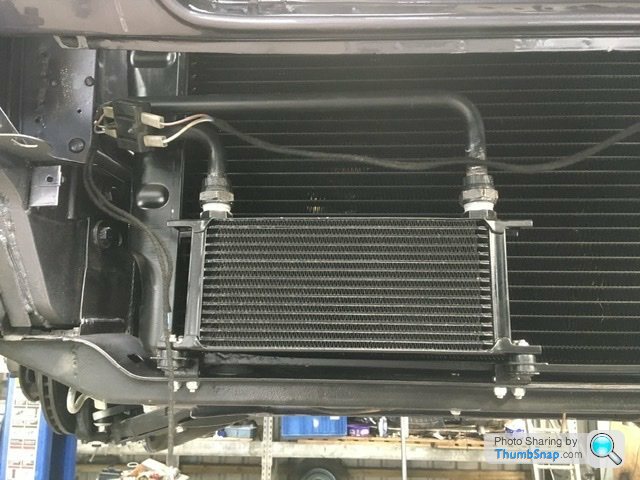 |https://thumbsnap.com/zyMESMoW[/url
]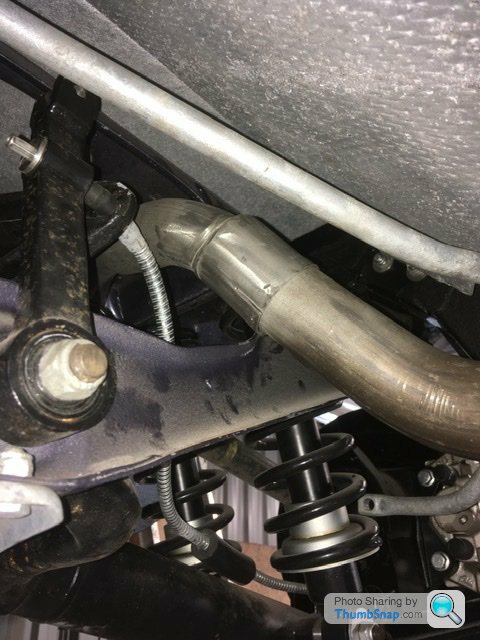
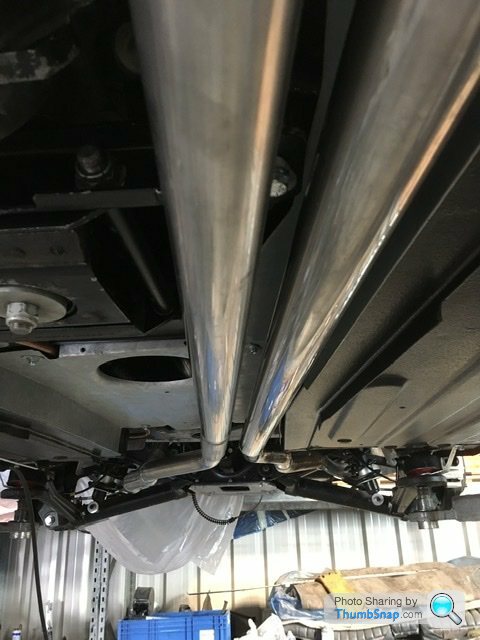
Exhaust being worked on. Original hanging brackets have been removed and repositioned to gain more clearance with the rear anti-roll bar and outboard disc handbrake cable. The 3 bolt clamping flanges were cut off and replaced with a sliding tube fit connection. Quite a bit of work for a standard fit exhaust piece.

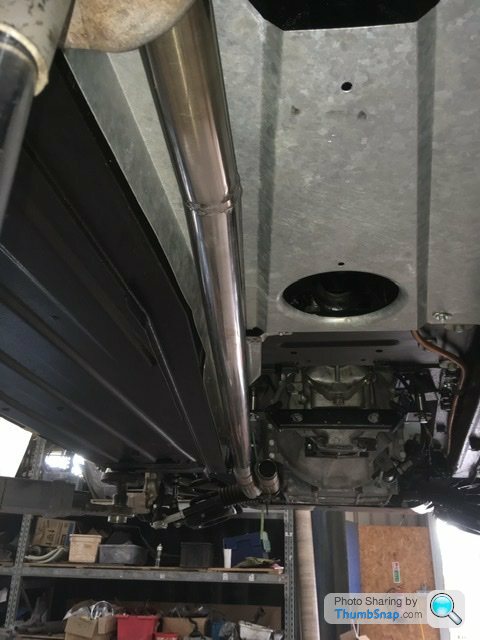

So one pipe is complete. The other not far behind. These will be then removed to be ceramic coated along with the manifold in black to give a more factory/modified look under the bonnet. The tail pipes will remain in stainless.
[url]
|https://thumbsnap.com/zyMESMoW[/url]
Exhaust being worked on. Original hanging brackets have been removed and repositioned to gain more clearance with the rear anti-roll bar and outboard disc handbrake cable. The 3 bolt clamping flanges were cut off and replaced with a sliding tube fit connection. Quite a bit of work for a standard fit exhaust piece.
So one pipe is complete. The other not far behind. These will be then removed to be ceramic coated along with the manifold in black to give a more factory/modified look under the bonnet. The tail pipes will remain in stainless.

Stick Legs said:
RobXjcoupe said:
Pipes will remain straight. Big bore swan necks would look odd.
Fair play. 

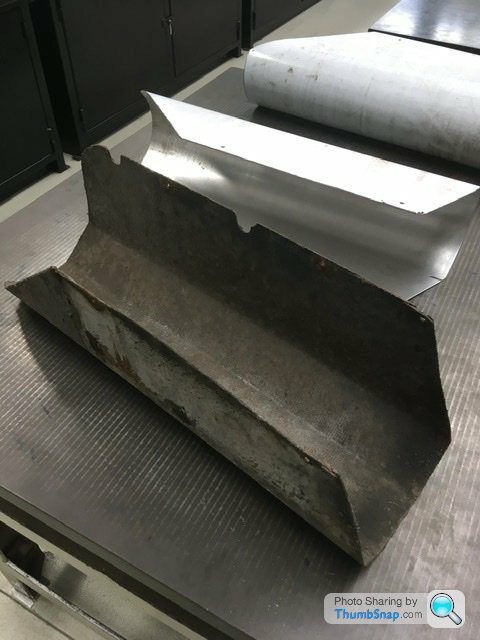
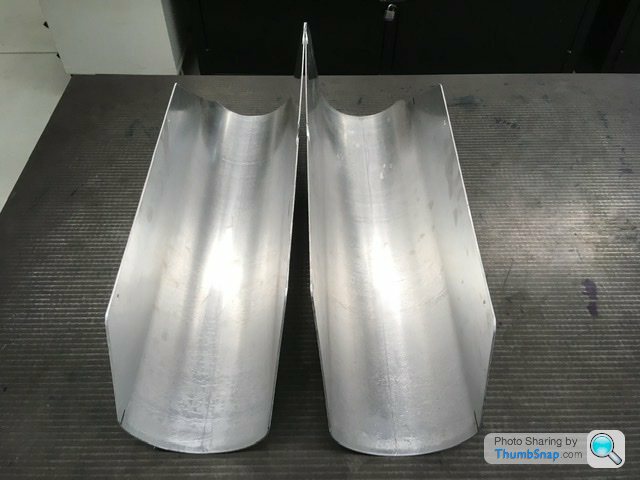
Yet more making of parts. This time exhaust heat shields for the rear silencers. Quite important as one side is the boot interior and the other the fuel tanks. I only had one fitted. Originally an asbestos part shown above.
Ideally I would have used a sheet of stainless steel but as the aluminium sheet was free of charge it was a good alternative


Dropped off the exhaust heat shields this afternoon, had another nosey under the coupe whilst there. The mod to the gearbox mount has worked. That was shortened by 15mm and the thread extended to compensate. Looks good. Won’t know for sure until the car is driven but visually it looks good and pulls the gearbox down nicely. Didn’t get a picture of that because my phone battery went dead.
The exhaust is more or less finished other than clamping together. The heat shields around the rear silencers will need fettling to fit so exhaust stays with the car until that’s completed, then all off to zircotec for coating.
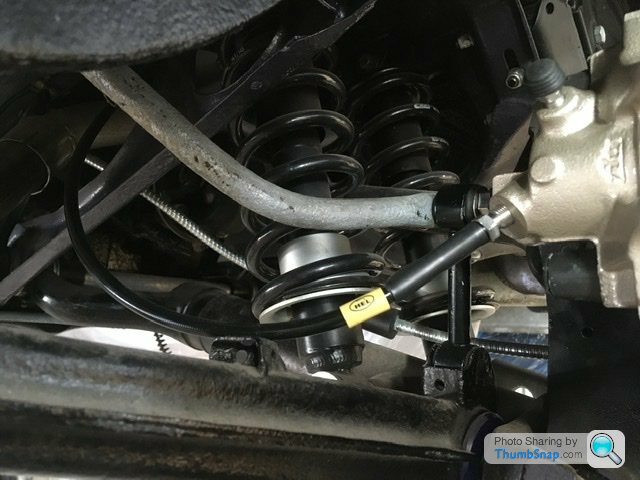
Custom rear brake lines are fitted and a perfect fit. They connect to the original brass tee piece attached to the rear axle.
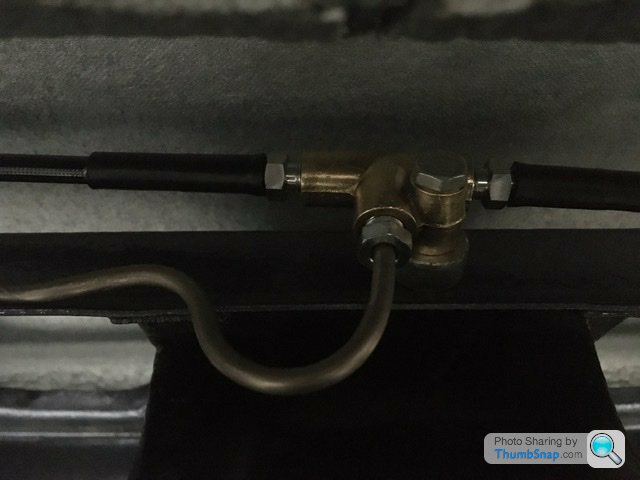
Flexi hose from body to rear axle done together with a new hard line across the rear axle to the brass tee.

Lastly the handbrake cable. All original series 2 xj6 fittings and position to the late outboard disc rear axle. I need to make a small brass bush to a fitting. My mistake rather than Jaguars, I made two parts the same when one should have a smaller hole. I’ll make that Wednesday.
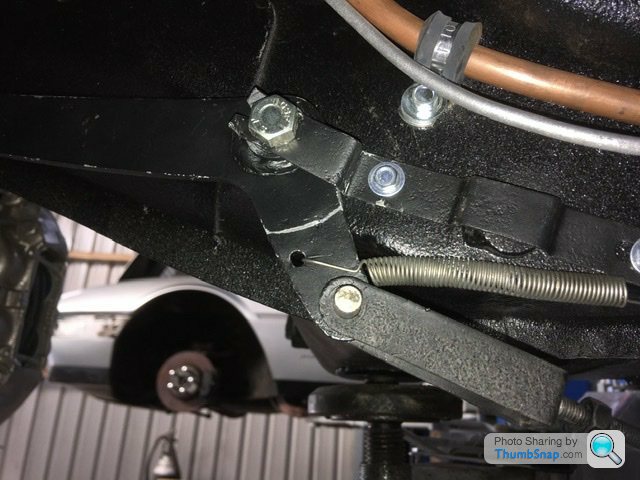
Above shows the handbrake lever under the car which has the adjustment screw to tighten up the handbrake within the outboard brake discs. That has its own bush fitting to rotate around. Keeping all these parts lubricated is essential for correct operation.
The exhaust is more or less finished other than clamping together. The heat shields around the rear silencers will need fettling to fit so exhaust stays with the car until that’s completed, then all off to zircotec for coating.
Custom rear brake lines are fitted and a perfect fit. They connect to the original brass tee piece attached to the rear axle.
Flexi hose from body to rear axle done together with a new hard line across the rear axle to the brass tee.
Lastly the handbrake cable. All original series 2 xj6 fittings and position to the late outboard disc rear axle. I need to make a small brass bush to a fitting. My mistake rather than Jaguars, I made two parts the same when one should have a smaller hole. I’ll make that Wednesday.
Above shows the handbrake lever under the car which has the adjustment screw to tighten up the handbrake within the outboard brake discs. That has its own bush fitting to rotate around. Keeping all these parts lubricated is essential for correct operation.


Gassing Station | Readers' Cars | Top of Page | What's New | My Stuff