Jaguar xjc 4.2
Discussion


carinaman said:
Great work. I like the bottom of the car as much as the styling and paint job.
That praise goes to the body restorer. He did a lovely job of the underside. The work on the exhaust has been fantastic. The mods you don’t see to get it fitting central and even through the gaps of the rear axle. Not something that’s seen once the car is on the ground. The tanks are in next, finish off the fuel lines for the boot mounted fuel pumps, find an accessible place to mount the fuel pressure regulator and finally connect to the carburettors. First bit of chrome to bolt on will be the fuel filler caps. Loving your work, enjoying reading about your progress very much.
Thought you might be interested to see this xjc. A different style to yours of course.....
https://www.streetmachine.com.au/features/hamish-d...
Thought you might be interested to see this xjc. A different style to yours of course.....
https://www.streetmachine.com.au/features/hamish-d...
Superferret said:
Loving your work, enjoying reading about your progress very much.
Thought you might be interested to see this xjc. A different style to yours of course.....
https://www.streetmachine.com.au/features/hamish-d...
That car is another level! Although I’m always disappointed to read that it sits on lowered air bag suspension for the photos. Then up it goes so it can be driven on a road. Thought you might be interested to see this xjc. A different style to yours of course.....
https://www.streetmachine.com.au/features/hamish-d...
I’ve definitely got my work cut out to produce a stunning interior just with standard parts let alone modify the frames and seat foams. My interior will be somewhat simple by comparison
 .
. 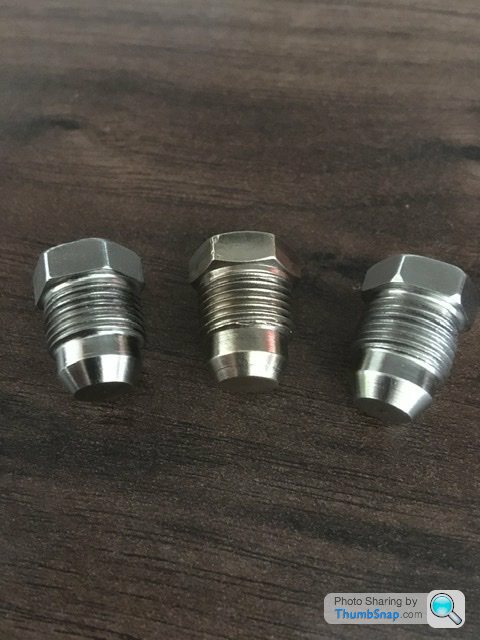
Above is just a very small part but unavailable to buy new……….well I couldn’t find them. The middle version is a borrowed original part in brass. I found a bit of 13mm across flats hex steel bar. Saved cutting a hex on the end after the lathe work. The bungs seal the hole via the chamfer on the front.
The new tanks I bought required a blank to be fitted. If it was a fuel injection car I believe it has a specific pipe fitted for a return feed to the tank. Mine being carburettor fed needs these screw in bungs.
The thread diameter measured 12.5mm with a 24tpi pitch. To finish I zinc plated the parts so hopefully will help last a little longer.
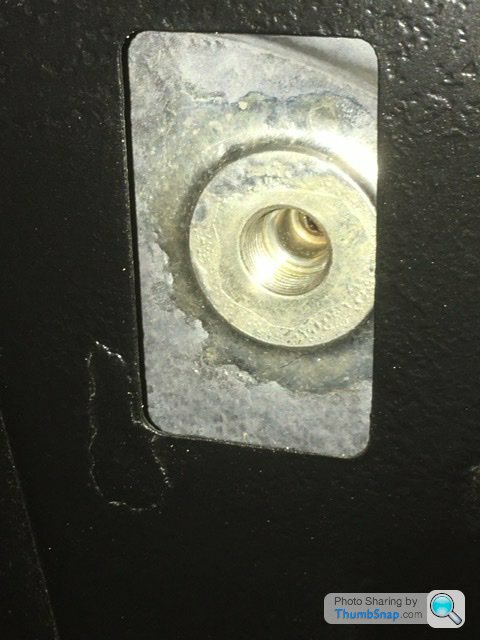
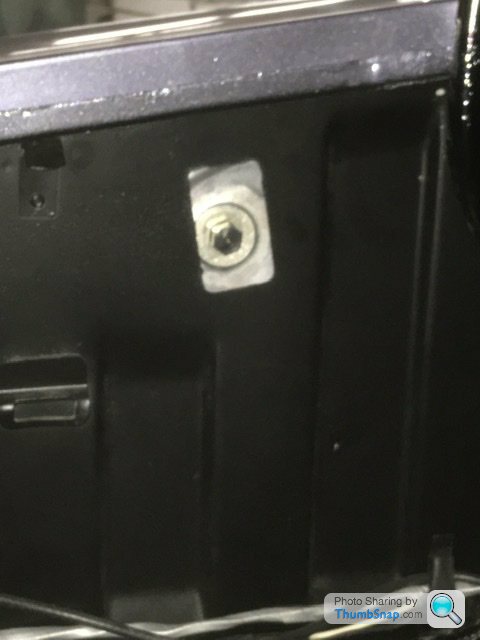
Pictures below shows the hole and fitted. Not exciting but needed

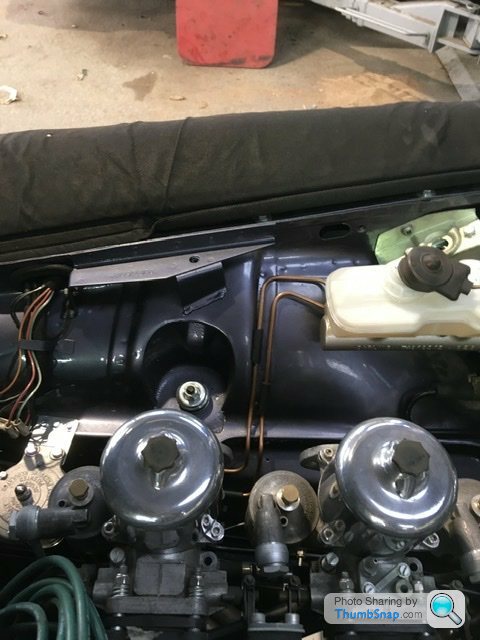
To add to the previous post, additional fuel lines are being made from the tanks to the boot mounted fuel pumps. These are routed similarly to a series 1 xj6 into the boot space. The difference being I’m using the series 2 in tank pump outlet. So a small flexi hose from the tank to a hardline, hardline routed from there to boot, then another flexi hose inside boot to connect to the inlet of the fuel pump. The route of that hardline is above the exhaust rear silencer heat shields. So that hardline will be wrapped in another heat shield as double protection against heat. In the engine bay a suitable position was found for the fuel filter pressure regulator on the driver side inner wing. This needs to be set via a gauge to 4psi initially. Hopefully not too much pressure for the carburettor float valves but enough to feed the 3 carbs when fully open.
Once all connected the new fuel lines will be pressure tested and fingers crossed no leaks.
Once all connected the new fuel lines will be pressure tested and fingers crossed no leaks.
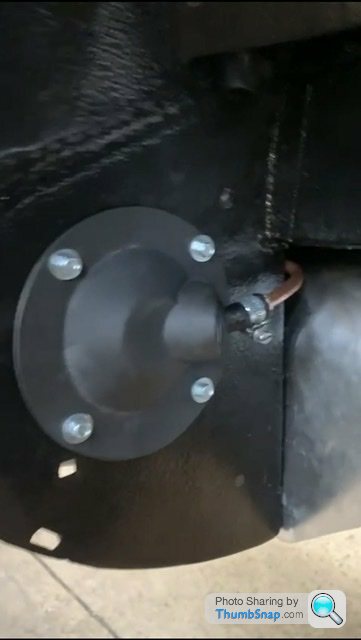

Above shows the breather pipe from the fuel cap clipped to the right hand edge and the circular plastic trim I cleaned an age ago on the other side of that panel with the new fuel line to feed the boot mounted pump.
Below shows the aluminium rear silencer heat shield fitted. Lots of space above it for the fuel line. I won’t wrap those as I said earlier after it was pointed out the fuel line the other end in the engine bay is subject to more heat and that isn’t wrapped. Fair point I thought


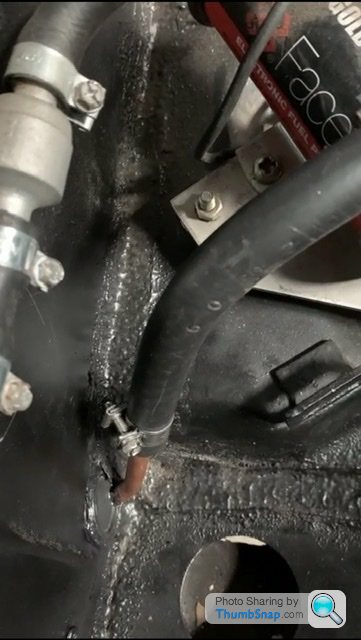
Above it’s a bit awkward to see but it’s the inlet fuel line entering the boot going to the pump. Using existing holes fitted with rubber grommets it makes a neat installation.
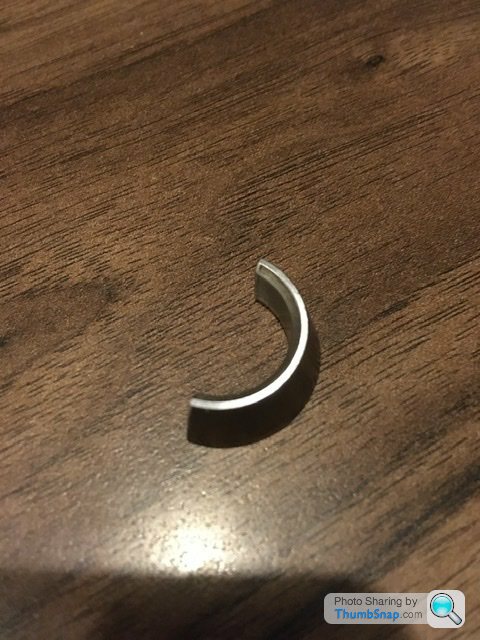
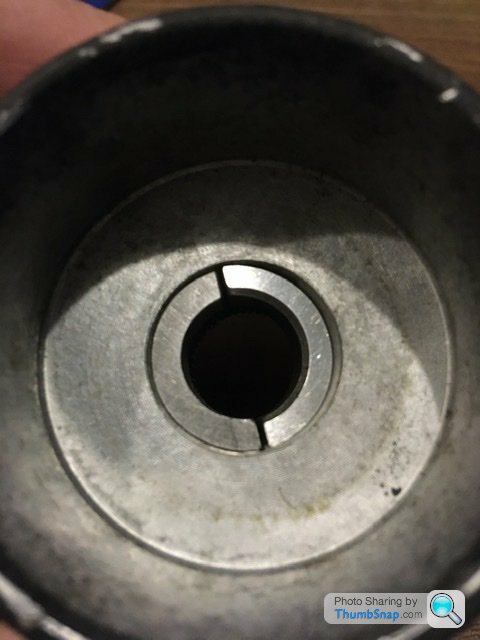
Another irritating missing part was half of the collet fitted into the steering wheel hub.
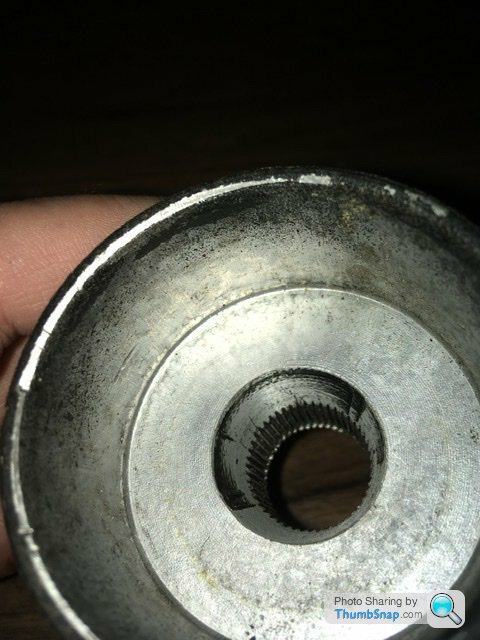
Picture above shows one collet was missing when I dismantled the steering wheel hub. A clear mark only one part was fitted. This is an aftermarket replacement steering wheel hub so I reckon the half of collet was possibly lost when originally fitted.
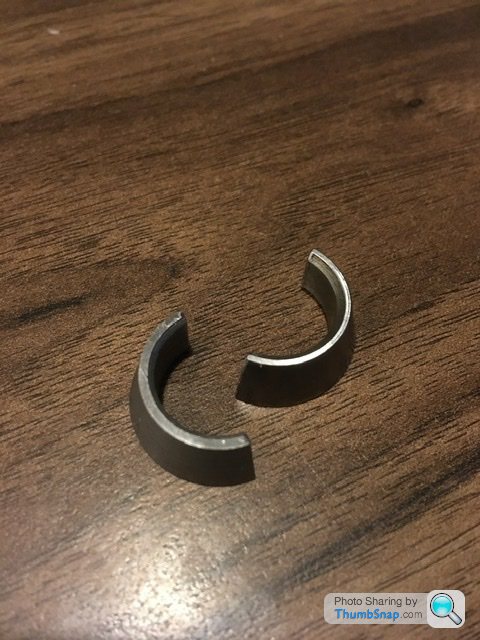
Below showing the half of collet I made. Mine looks like a different diameter internal hole but it isn’t. I didn’t put a chamfer on as big as the original
Picture above shows one collet was missing when I dismantled the steering wheel hub. A clear mark only one part was fitted. This is an aftermarket replacement steering wheel hub so I reckon the half of collet was possibly lost when originally fitted.
Below showing the half of collet I made. Mine looks like a different diameter internal hole but it isn’t. I didn’t put a chamfer on as big as the original

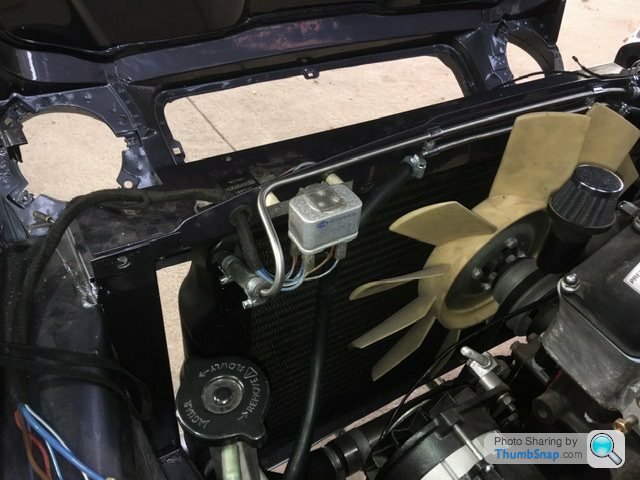
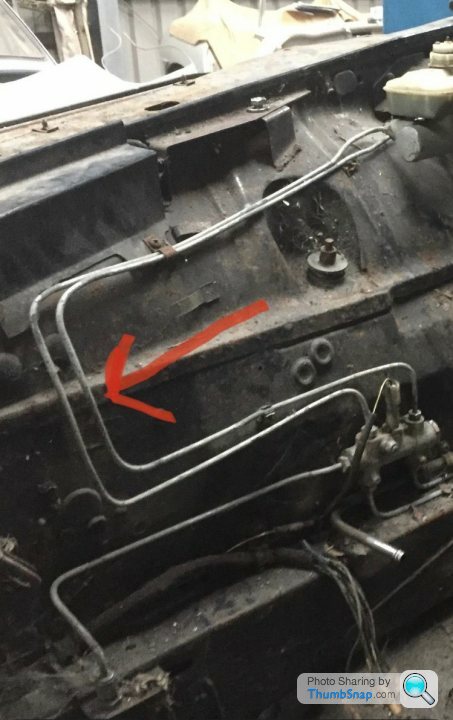
The new brake pipes from the master cylinder deserve a picture. I didn’t make these. These were made by the body restoration firm.
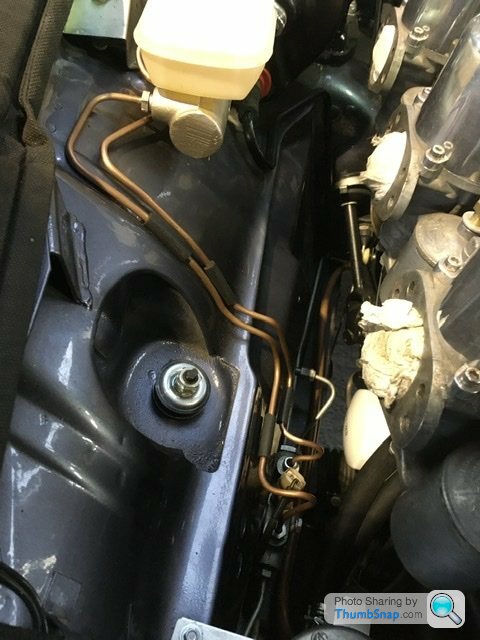
Originals are rather crude, running along the inner wing with screw and holes into the inner wing. These have been made neater and shorter with nicely formed expansion loops running nice and parallel. The rubber on the pipes will stop any possible vibration issues against the inner wing.

Originals are rather crude, running along the inner wing with screw and holes into the inner wing. These have been made neater and shorter with nicely formed expansion loops running nice and parallel. The rubber on the pipes will stop any possible vibration issues against the inner wing.
Probably last post for this year.
With fitting the outboard disc rear axle there have been small bits to machine to try keep everything as standard fit parts. Hopefully this is the last. The handbrake cable on the series 2 is short by approx 20mm. There is a fair bit of adjustment but still a tad short.
Picture below shows the original screw on adjustment and below I made a new one 25mm longer so a bit extra adjustment.
[url]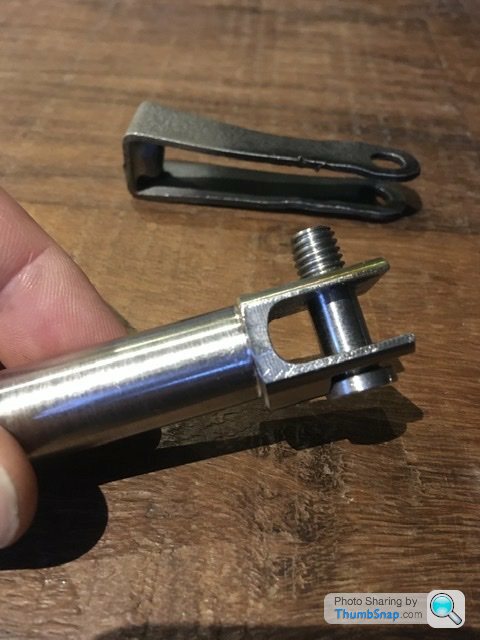 |https://thumbsnap.com/ABmv1wJY[/url
]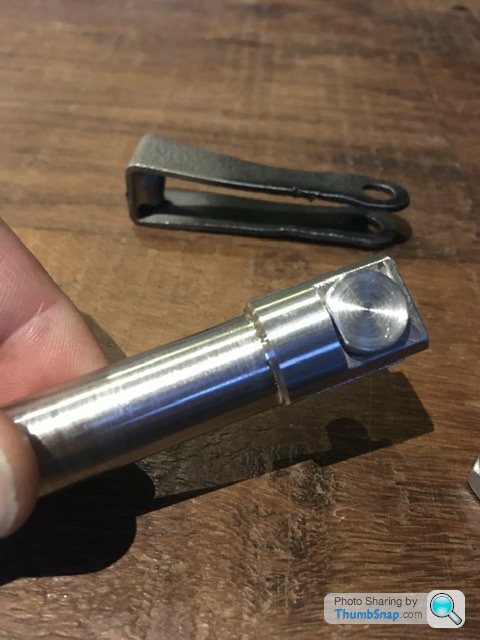
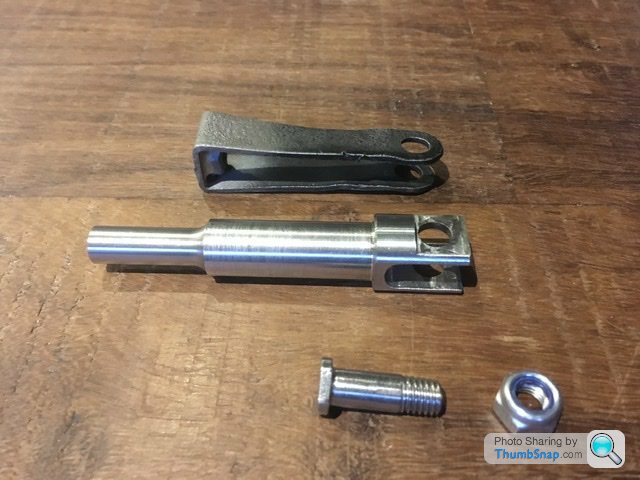
Found a bit of stainless steel bar. The pivot pin also stainless steel. Probably overkill compared to the original, but if the handbrake cable is replaced in the future this end piece can simply be swapped over to suit.
Fingers crossed this completes the fitting of the outboard disc rear axle.
With fitting the outboard disc rear axle there have been small bits to machine to try keep everything as standard fit parts. Hopefully this is the last. The handbrake cable on the series 2 is short by approx 20mm. There is a fair bit of adjustment but still a tad short.
Picture below shows the original screw on adjustment and below I made a new one 25mm longer so a bit extra adjustment.
[url]
|https://thumbsnap.com/ABmv1wJY[/url]
Found a bit of stainless steel bar. The pivot pin also stainless steel. Probably overkill compared to the original, but if the handbrake cable is replaced in the future this end piece can simply be swapped over to suit.
Fingers crossed this completes the fitting of the outboard disc rear axle.
RobXjcoupe said:
Probably last post for this year.
With fitting the outboard disc rear axle there have been small bits to machine to try keep everything as standard fit parts. Hopefully this is the last. The handbrake cable on the series 2 is short by approx 20mm. There is a fair bit of adjustment but still a tad short.
Picture below shows the original screw on adjustment and below I made a new one 25mm longer so a bit extra adjustment.
[url]|https://thumbsnap.com/ABmv1wJY[/url
]
Found a bit of stainless steel bar. The pivot pin also stainless steel. Probably overkill compared to the original, but if the handbrake cable is replaced in the future this end piece can simply be swapped over to suit.
Fingers crossed this completes the fitting of the outboard disc rear axle.
Nice bit of machining there.With fitting the outboard disc rear axle there have been small bits to machine to try keep everything as standard fit parts. Hopefully this is the last. The handbrake cable on the series 2 is short by approx 20mm. There is a fair bit of adjustment but still a tad short.
Picture below shows the original screw on adjustment and below I made a new one 25mm longer so a bit extra adjustment.
[url]
|https://thumbsnap.com/ABmv1wJY[/url]
Found a bit of stainless steel bar. The pivot pin also stainless steel. Probably overkill compared to the original, but if the handbrake cable is replaced in the future this end piece can simply be swapped over to suit.
Fingers crossed this completes the fitting of the outboard disc rear axle.
A new year and still going. Must be the longest restoration ever!
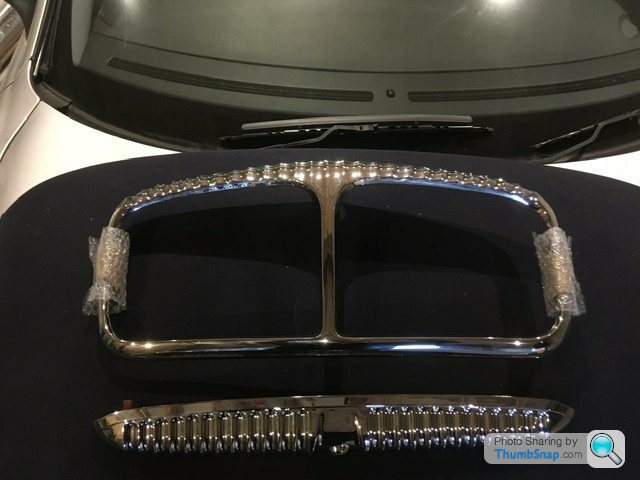
All about the lack of available funds so with that in mind I’ve had a think with where this is going. Not that I’m throwing in the towel, just getting this finished. I’ve mentioned before that I just can’t find a good series 2 front radiator grille. Had a quote of over £500 to strip, repair and triple chrome the existing grille. Together with a huge amount wanted to coat the exhaust system and manifold I’m looking at the best part of £2000.
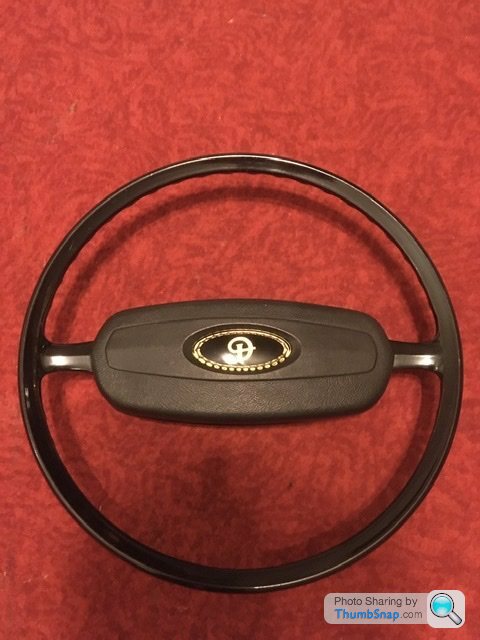
So I’ve gone down the Daimler trim route. I’ve bought a new old stock Daimler front grille and a series 3 new old stock Daimler boot trim together with the appropriate boot opening latch. The original steering wheel I’ve stored for the best part of 20 years is in near perfect condition so I’ve bought a Daimler steering wheel badge to finish that off. I have a Daimler badged cam cover for the engine and a replacement Daimler chassis plate. The original Jaguar one will be kept with the vehicle documents. The only part I don’t have are Daimler kick plates, these can be bought as aftermarket market stainless versions. That lot of Daimler trim parts has totalled just £300
The exhaust coating I’ve also decided to budget with just the manifold being professionally coated as that is the part that gets really hot. The rest of the system will be coated myself with high temp paint which being past the manifold should be up for the job. I’m looking at £300 for the manifold and £50 for the rattle cans. With no council tax to pay the next 2 months it’s perfect man maths.
All about the lack of available funds so with that in mind I’ve had a think with where this is going. Not that I’m throwing in the towel, just getting this finished. I’ve mentioned before that I just can’t find a good series 2 front radiator grille. Had a quote of over £500 to strip, repair and triple chrome the existing grille. Together with a huge amount wanted to coat the exhaust system and manifold I’m looking at the best part of £2000.
So I’ve gone down the Daimler trim route. I’ve bought a new old stock Daimler front grille and a series 3 new old stock Daimler boot trim together with the appropriate boot opening latch. The original steering wheel I’ve stored for the best part of 20 years is in near perfect condition so I’ve bought a Daimler steering wheel badge to finish that off. I have a Daimler badged cam cover for the engine and a replacement Daimler chassis plate. The original Jaguar one will be kept with the vehicle documents. The only part I don’t have are Daimler kick plates, these can be bought as aftermarket market stainless versions. That lot of Daimler trim parts has totalled just £300
The exhaust coating I’ve also decided to budget with just the manifold being professionally coated as that is the part that gets really hot. The rest of the system will be coated myself with high temp paint which being past the manifold should be up for the job. I’m looking at £300 for the manifold and £50 for the rattle cans. With no council tax to pay the next 2 months it’s perfect man maths.
Edited by RobXjcoupe on Monday 29th January 20:03
Gassing Station | Readers' Cars | Top of Page | What's New | My Stuff