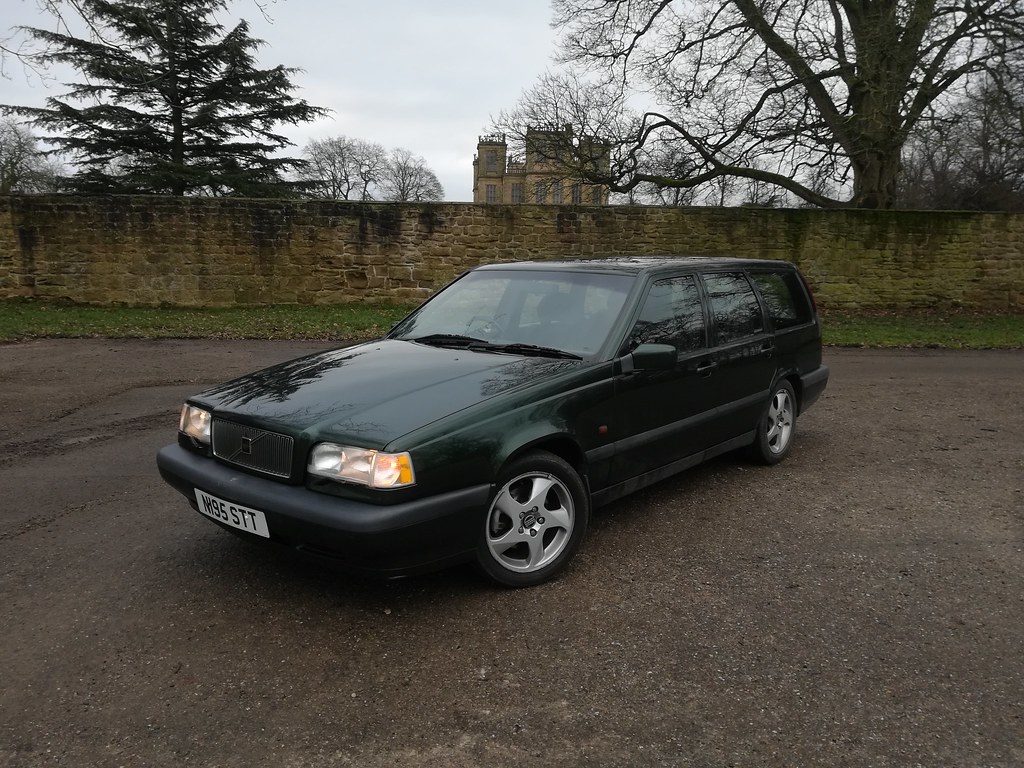
850 T5 Project - Ivy
Discussion


klunkT5 said:
Handy tip for the air con compressor clutch, I think i will check mine as air cons never worked, Cheers.
Cheers. Yes, do try the zip tie fix. Large compressor clutch gaps are a really common cause of failure that most don't even consider. cosworth330 said:
Nice work.
I need to remove my battery tray at some point as I’ve a bit of surface rust just in front of tray where that earth is.
Thanks. I have a smidge too, wire brushed the flakes and then put some rust convertor on. Now looking for some body coloured paint to touch it in. I need to remove my battery tray at some point as I’ve a bit of surface rust just in front of tray where that earth is.
Davie said:
Excellent.
It's the little details that make the difference. I'd love to say I've been doing the same but mine is looking a tad used thanks to a run north followed by several days commuting down mud covered rural tracks. Now sat deliberating whether I need to really push it for sale or equip it with all season tyres and meet the forthcoming Scottish winter head on...
All season it and push on. I survived West Wales and snow with summer tyres with ease, I'm sure with winters it will be quite capable. In all honesty if you sold it now you'd probably find yourself looking at adverts of them again come spring. It's the little details that make the difference. I'd love to say I've been doing the same but mine is looking a tad used thanks to a run north followed by several days commuting down mud covered rural tracks. Now sat deliberating whether I need to really push it for sale or equip it with all season tyres and meet the forthcoming Scottish winter head on...
There's software that shows parts and part numbers (called VIDA) but I don't have that, I've managed to get by with lots of Googling. There's also a US based website called volvopartswebstore.com which is very useful. That's generally where I get most of my parts numbers from. The advantage of this site is that they also have the parts diagrams from VIDA so you can see how it fits and also find part numbers for other fasteners/pieces in the same area.
Trim clip wise, whilst Volvo has several of them still available, the seller 227sparts on eBay is far cheaper and the clips are just as good. Same with vehicleclips.co.uk.
Heres a parts diagram for the tailgate and boot area, respectively. Should help you find the part numbers and then you can either go via Volvo, or via eBay, or vehicleclips.co.uk
https://www.volvopartswebstore.com/showAssembly.as...
https://www.volvopartswebstore.com/showAssembly.as...
Thank you, Cambs_Stuart. I've properly fallen for this car, so I cant seem to help but pile my limited free time into it.
eBay is much cheaper, and the one I used. You can also get them in packs of 10 or 50.
If the part number doesn't bring up anything, then sadly yes, its a case of looking for the right clip visually. Which isn't fun as there are so many clips, and sometimes a few look very similar but are rather different dimensions (I'm looking at you push rivets).
marky911 said:
Excellent info, thanks very much.
I need a couple of No32’s from the luggage compartment diagram.
So now I just go to that eBay seller or that other parts website you linked to and visually look for something the same?
That’ll give me something to do at work tonight.
Cheers.
Yes, so that site will give you the part numbers (i.e. 9132879 for no.32), you can then either Google/eBay that and see what pops up, or, because that happens to be the part I bought recently you can just click either of these links: eBay or vehicleclips.I need a couple of No32’s from the luggage compartment diagram.
So now I just go to that eBay seller or that other parts website you linked to and visually look for something the same?
That’ll give me something to do at work tonight.
Cheers.
eBay is much cheaper, and the one I used. You can also get them in packs of 10 or 50.
If the part number doesn't bring up anything, then sadly yes, its a case of looking for the right clip visually. Which isn't fun as there are so many clips, and sometimes a few look very similar but are rather different dimensions (I'm looking at you push rivets).
Edited by Cookeh on Thursday 5th September 14:00
marky911 said:
I forgot to pop back on and say thanks for that.
I’ve ordered some of the clips I need and have saved that info.
Cheers. : thumbup:
Very welcome. Glad it helped.I’ve ordered some of the clips I need and have saved that info.
Cheers. : thumbup:
Been a busy few weeks, I was swamped at Uni, but my thesis is now submitted - just awaiting the viva now. Sadly whilst that means I have a surplus of time, I have a deficit of cash, I got paid the last shred of my PhD stipend back in July; so not much disposable income for car parts.
Anyway, I decided to look into the rear washer which stopped working over the last week or so - cos that should be a free fix. Given I could hear the motors fire up I knew it wasn't either of the pumps, so I started checking the various components that are next in the chain that terminates with the washer jet itself. There are around five in total:
- The hose itself, which can have a tendency in the P80 Volvos to disconnect just beneath the boot floor. This was intact on mine.
- The in-line filter that again sits under the boot floor. Mine was still flowing, but rather slowly and had a quite severe build up of crud in the filter. I cleaned it out with some water and tiny bit of fairy. The amount of crap that came out was quite something, but sadly no pictures as the drain is quicker than my phone!
- The connection between two hoses occuring behind the speaker trim in the D-panel.This was fine in my car.
- The hose that passes through the hinge and into the inner tailgate skin. This can break next to the hinge or just inside the tailgate. This was intact on mine.
- The fifth and final link post-pump is the washer jet itself.
 Tailgate panel removed
To remove, pop off the high-level brake light cover, then using a pry tool (or a screwdriver if you dont have one) push in the top edge of the boot handle trim at either corner to release the clips. With that removed, most guides then tell you to pull down the top trim and then push down to release the bottom. I don't like this, guarantees maximum trim clip breakage. Instead, I would suggest releasing the bottom of the panel first, by levering out and down. There are four clips to release, on in each corner and one of either side of the latch. I would then suggest pushing firmly upwards to release the larger top clips (which are also most costly to replace!).
I broke one of the eight clips, which by some immense luck, happened to be the exact trim clip that I found floating in the spare boot well about a year ago!
 Replacement trim clip
The top trim piece that covers the washer jet then just pops out by pulling towards the bottom of the tailgate.
With that done, you can remove the washer jet by releasing its clip, and then release the hoses from their clip to check for holes/clogs.
 Washer jet removed
At this point, I put the hose over the side of the car and turned the rear jet on to see if there was a clog somewhere... clearly not! Seems to have good pressure too. Not the best pic, given I'm 4m away from the jet on my phone, but it works.
 Jet receiving solution
That leaves the washer jet as the culprit. It was filthy, and the retaining clip was mounted upside down - which would explain why there was a slight leak on the inside of the boot window whenever it rained. The dirt probably wasn't helping the seal either.
 Dirty mating surfaces
Cleaned them up and then noticed that I was unable to blow air through the jets. Cleaned them up with a safety pin, re-aligned the holes - which were pointing in useless directions.
 Cleaned mating surfaces
 Clogged and misaligned
With that done, I reconnected everything and put the trim back on (no clips broken this time!). Quick test and I have a rear jet again!

 Re-plumbed and realigned
 Washer working
Small updated, but one I personally find very gratifying. I finally managed, after 20 months, to find an 850 being broken with ECC. This meant, at long last, I could block the holes in my replacement headliner that accomodate the ECC sensors.
 Breaker parts
 Annoying hole
This is what the sensors look like (along with an 850 badge I scavenged) and of course that hole that I've been staring at everytime I'm in the car for the last 608 days.
 Sensor installed
To install the sensor you need to remove the A-pillar trim, and the grab handles (been covered in here before). With that done, you can very carefuly pull the headliner forwards enough for the ECC sensors to clear the frame and settle in their hole. Then its a case of doing up the 2x T25s (tiny tiny things, 5mm in length), putting the trim back on, and then finally plugging that hole for the first time in 14,613 hours!
 Trim in place
Through some luck, the sensors actually appear to be intact so should I ever lose my mind and decide I never ever want my AC or heating to work, I could retrofit ECC... :lol:
The last thing I acquired from the breakers was a new bonnet liner. Mine had sagged, lost its form and had several tears along the bottom - here's a recycled picture highlighting part of the issue:
 Oil throttle cable
The new one needs a clean, but at least its all black still, with no rips and it holds it form. All the clips came out without a break on both breaker and my liner, so I now have a surplus.
 Bonnet liner no rips
 Newer bonnet liner
That was all from the breaker this time. May pop back when I have been paid for some work... In the interim, I decided to make use of the Deox-C and Electrox that I bought a while ago and tidied up some of the fasteners from the engine bay that were particularly grotty or unappealing.
 Rust bolts
 Sprayed bolts
 Installed battery tray
 PS bracket
 Treated p-clip
The process was very simple, 20 mins or so of Deox-C, then attack the now loosened rust with a wire wheel, then back into the Deox-C for 20-60 mins to tidy up the rest of the grime and newly exposed corrosion. Repeat until satisfied. Then it's just a couple of thin coats with Electrox and let dry.
Yes, I know p-clips are £1.something on eBay, but I already had the DeoxC and Electrox I also made the effort to reinstall it in the correct place, instead of at the front of the tray like it previously was. There is a preformed groove for it to sit in at the back, which also keeps the cables out of the way when removing the battery:
 P-clip installed
That was all for my Saturday afternoon!
Breaker partsAnnoying holeThis is what the sensors look like (along with an 850 badge I scavenged) and of course that hole that I've been staring at everytime I'm in the car for the last 608 days.
Sensor installedTo install the sensor you need to remove the A-pillar trim, and the grab handles (been covered in here before). With that done, you can very carefuly pull the headliner forwards enough for the ECC sensors to clear the frame and settle in their hole. Then its a case of doing up the 2x T25s (tiny tiny things, 5mm in length), putting the trim back on, and then finally plugging that hole for the first time in 14,613 hours!
Trim in placeThrough some luck, the sensors actually appear to be intact so should I ever lose my mind and decide I never ever want my AC or heating to work, I could retrofit ECC... :lol:
The last thing I acquired from the breakers was a new bonnet liner. Mine had sagged, lost its form and had several tears along the bottom - here's a recycled picture highlighting part of the issue:
Oil throttle cableThe new one needs a clean, but at least its all black still, with no rips and it holds it form. All the clips came out without a break on both breaker and my liner, so I now have a surplus.
Bonnet liner no ripsNewer bonnet linerThat was all from the breaker this time. May pop back when I have been paid for some work... In the interim, I decided to make use of the Deox-C and Electrox that I bought a while ago and tidied up some of the fasteners from the engine bay that were particularly grotty or unappealing.
Rust boltsSprayed boltsInstalled battery trayPS bracketTreated p-clipThe process was very simple, 20 mins or so of Deox-C, then attack the now loosened rust with a wire wheel, then back into the Deox-C for 20-60 mins to tidy up the rest of the grime and newly exposed corrosion. Repeat until satisfied. Then it's just a couple of thin coats with Electrox and let dry.
Yes, I know p-clips are £1.something on eBay, but I already had the DeoxC and Electrox
I also made the effort to reinstall it in the correct place, instead of at the front of the tray like it previously was. There is a preformed groove for it to sit in at the back, which also keeps the cables out of the way when removing the battery:P-clip installedThat was all for my Saturday afternoon!
Thanks, I'm not that attentive I swear, its just things you see everything day that start to grind.
An even smaller update now, spurred by the recent numerous deluges I've been caught in. The variable intermittent wiper mod, which requires swapping the Volvo intermittent wiper relay (one setting, wipes every 6s) which sits in position 203 for a VAG 99. relay.
 Relay 99
 Relay 99 PN
These are sub-£10 from breakers, and fortunately have the exact same pinouts so are plug and play. Remove the drivers side kick panel (3x T25s and slide out), then reach up and pull the old relay (203). It son the top row and third one in, slightly tricky to get at but doable. If you cant get up in there, you can remove the wipers, the scuttle, and the four bolts holding the main fuse box in place and then just pull that up a few inches and do it from the top.
With the old relay out, make sure you align the 99. in the same orientation (the numbers 203 on the Volvo relay will be read as '203' when installed), and push it in. Jobbed.
 Relay 203
Then just flick the wiper to intermittent for one swipe, turn it off, and then flick it on again once the delay duration you want has passed. That's it, easy.
An even smaller update now, spurred by the recent numerous deluges I've been caught in. The variable intermittent wiper mod, which requires swapping the Volvo intermittent wiper relay (one setting, wipes every 6s) which sits in position 203 for a VAG 99. relay.
Relay 99Relay 99 PNThese are sub-£10 from breakers, and fortunately have the exact same pinouts so are plug and play. Remove the drivers side kick panel (3x T25s and slide out), then reach up and pull the old relay (203). It son the top row and third one in, slightly tricky to get at but doable. If you cant get up in there, you can remove the wipers, the scuttle, and the four bolts holding the main fuse box in place and then just pull that up a few inches and do it from the top.
With the old relay out, make sure you align the 99. in the same orientation (the numbers 203 on the Volvo relay will be read as '203' when installed), and push it in. Jobbed.
Relay 203Then just flick the wiper to intermittent for one swipe, turn it off, and then flick it on again once the delay duration you want has passed. That's it, easy.
It's been a while. The car has been running faultlessly and I've been too busy with other things to sort out some of the smaller niggles. With that being said, I've managed to find the odd hour or so in the last few evenings to address some issues.
Firstly, every time I drive somewhere at night I get reminded by my lovely partner that the so-called 'princess mirror' light isn't working. This is because I had to cut the wires when swapping the headlining out many many months ago. Simple fix, remove the A-pillar trim, stick some solder sleeves on and job done:
 Fixed vanity mirror
Next up, I was getting tired of not being able to see what was in my boot at night. The measly 5W halogen in there was not up to illuminating such a large area. £1.29 on eBay later, I had an LED bulb:
 Halogen boot light
 LED boot light
I'm not at all a fan of these bright white LEDs, I can't stand the colour and think they look too clinical - but in this instance, the illumination benefits outweigh the cosmetics, so its staying.
When I first went to look at the car, it was missing its n/s wing mirror glass. When I went to collect it, the dealer had stuck a new piece of glass on, but it was not heated and it was far from sitting square on the backplate. I got fed up of seeing it misaligned and replaced it with an eBay item. The spade connectors on the aftermarket mirror glass are much closer together than OE but has just enough space to make it work. It's nice to have working heated mirrors again, and even nicer to see a nicely squared glass when checking my mirrors!
 Removed wing mirror
 New wing mirror
As with the vanity mirror, there had been the odd not-so-subtle request for the n/s heated seat to be fixed, so that came next. Whipped the seat out (4x 14mm bolts, 1x 12mm bolt for the seatbelt), and quickly diagnosed the problem as a broken wire to the thermostat:
 Broken thermostat wiring
I removed the connectors and de-pinned the terminal - which took far longer than it should have as I could not find the retaining tang to save my life... I actually couldn't even find it when the pin was removed either, so who knows! With that done I repinned the broken cable, put it back in the connector and wired it up again. I'll need to repeat this process on the o/s, as whilst the heated seat does work there is clearly a thermostat fault there too as it gets rather too warm! Sadly no grimy/interesting pictures of the state beneath the seats as it was clean and there was no debris in sight. There's pretty good clearance beneath and around the seats, so I can cover it all when vacuuming. Sorry.
 Re-pinned thermostat wiring
I've also recently had an intermittent ABS light, which I presumed was being caused by a break in the insulation in the power wires to the ABS pump. As it transpires, that is a big headache but its likely not the primary cause of the ABS light. When I went to investigate the ABS pump wires, all the insulation simply disintegrated when I touched it, leaving me with two very bare wires... For now, I have wrapped this in electrical tape until I can find a better solution. I can't figure out how to heatshrink these cables, as once de-pinned from the connector you can see that they are covered in some very thick moulded on weatherproofing (pictured). Any ideas for this? I suppose I could just cut the wires somewhere, add heatshrink to the two halves, then solder the cut up and cover that with more heatshrink?
 Insulation break
 Pin style and disintegrated insulation
 Wrapped wires - temporary
Excuse the grime, it's been a while since I could give the engine bay a deep clean. The aforementioned primary cause was found when I was ohming the sensor cables, all readings were within tolerance, but one would sometimes read as open and other times read in spec. This lead me to suspect a broken wire, and lo and behold:
 ABS wire break
This is one of the wires from the sensor to the ABS module. It appears the wire itself has been rubbing on one of the additional tabs son the Bilstein struts. After some Googling, it would seem that this actually quite a common problem with Bilstein struts in the P80 cars. I have ordered a repair kit from FRF Swansea, which includes a new connector, and 1m of the harness with heatshrink tubing for the splice. I am not looking forward to this as the coating is rubberised and rather thick, so I'm expecting it to be a pain to split. When I have the new harness in, I will add some thick fuel hose or similar to try and protect it from rubbing in the future.
Lastly, I did a winter prep wash. Power Maxed TFR, followed by Krystal Kleen snowfoam, then a 2BM contact wash with CarChem 1900:1, a chemical decontamination, and a fresh coat of Obsession Wax Phaenna - which was a joy to apply.
 Winter prep wash
The car needs a compound though, you can see some of the clarity and depth is missing from the paint.
Firstly, every time I drive somewhere at night I get reminded by my lovely partner that the so-called 'princess mirror' light isn't working. This is because I had to cut the wires when swapping the headlining out many many months ago. Simple fix, remove the A-pillar trim, stick some solder sleeves on and job done:
Fixed vanity mirrorNext up, I was getting tired of not being able to see what was in my boot at night. The measly 5W halogen in there was not up to illuminating such a large area. £1.29 on eBay later, I had an LED bulb:
Halogen boot lightLED boot lightI'm not at all a fan of these bright white LEDs, I can't stand the colour and think they look too clinical - but in this instance, the illumination benefits outweigh the cosmetics, so its staying.
When I first went to look at the car, it was missing its n/s wing mirror glass. When I went to collect it, the dealer had stuck a new piece of glass on, but it was not heated and it was far from sitting square on the backplate. I got fed up of seeing it misaligned and replaced it with an eBay item. The spade connectors on the aftermarket mirror glass are much closer together than OE but has just enough space to make it work. It's nice to have working heated mirrors again, and even nicer to see a nicely squared glass when checking my mirrors!
Removed wing mirrorNew wing mirrorAs with the vanity mirror, there had been the odd not-so-subtle request for the n/s heated seat to be fixed, so that came next. Whipped the seat out (4x 14mm bolts, 1x 12mm bolt for the seatbelt), and quickly diagnosed the problem as a broken wire to the thermostat:
Broken thermostat wiringI removed the connectors and de-pinned the terminal - which took far longer than it should have as I could not find the retaining tang to save my life... I actually couldn't even find it when the pin was removed either, so who knows! With that done I repinned the broken cable, put it back in the connector and wired it up again. I'll need to repeat this process on the o/s, as whilst the heated seat does work there is clearly a thermostat fault there too as it gets rather too warm!
Sadly no grimy/interesting pictures of the state beneath the seats as it was clean and there was no debris in sight. There's pretty good clearance beneath and around the seats, so I can cover it all when vacuuming. Sorry.Re-pinned thermostat wiringI've also recently had an intermittent ABS light, which I presumed was being caused by a break in the insulation in the power wires to the ABS pump. As it transpires, that is a big headache but its likely not the primary cause of the ABS light. When I went to investigate the ABS pump wires, all the insulation simply disintegrated when I touched it, leaving me with two very bare wires... For now, I have wrapped this in electrical tape until I can find a better solution. I can't figure out how to heatshrink these cables, as once de-pinned from the connector you can see that they are covered in some very thick moulded on weatherproofing (pictured). Any ideas for this? I suppose I could just cut the wires somewhere, add heatshrink to the two halves, then solder the cut up and cover that with more heatshrink?
Insulation breakPin style and disintegrated insulationWrapped wires - temporaryExcuse the grime, it's been a while since I could give the engine bay a deep clean. The aforementioned primary cause was found when I was ohming the sensor cables, all readings were within tolerance, but one would sometimes read as open and other times read in spec. This lead me to suspect a broken wire, and lo and behold:
ABS wire breakThis is one of the wires from the sensor to the ABS module. It appears the wire itself has been rubbing on one of the additional tabs son the Bilstein struts. After some Googling, it would seem that this actually quite a common problem with Bilstein struts in the P80 cars. I have ordered a repair kit from FRF Swansea, which includes a new connector, and 1m of the harness with heatshrink tubing for the splice. I am not looking forward to this as the coating is rubberised and rather thick, so I'm expecting it to be a pain to split. When I have the new harness in, I will add some thick fuel hose or similar to try and protect it from rubbing in the future.
Lastly, I did a winter prep wash. Power Maxed TFR, followed by Krystal Kleen snowfoam, then a 2BM contact wash with CarChem 1900:1, a chemical decontamination, and a fresh coat of Obsession Wax Phaenna - which was a joy to apply.
Winter prep washThe car needs a compound though, you can see some of the clarity and depth is missing from the paint.
Cambs_Stuart said:
I'd say that paint looks amazing. Makes my car look like a grubby mess!
Looks great until its under forecourt lights or car park lighting, then all the swirls come out to play. A good glaze hides some of them in natural light, luckily.marky911 said:
Great work as ever.
These are the type of niggles most of us just ignore and put down to shed motoring, so it’s good to see someone working through them all.
Good work. :thumb:
Thank you. Whilst they are ignorable, they're also very cheap and easy to fix. Each crimp costs about 14p and each solder sleeve is 16p, so I fixed the heated seats and vanity mirror for all of about 90p and an hour and a half to two hours work. Wing mirror took 5 mins and cost £7.99 on eBay. Well within shed-price limits and easy to justify (for me, anyway!) in terms of added comfort/convenience.These are the type of niggles most of us just ignore and put down to shed motoring, so it’s good to see someone working through them all.
Good work. :thumb:
Small update, after taking out the drivers seat. As with the passenger side, the thermostat wiring was disconnected and had breaks in the wires. I was lucky in that one wire still had a length of cable attached to the pin, so I could just solder the broken wire back together again. The second broken wire required a new pin to be crimped, just like the passenger side.
 Thermostat issue o/s
 Repaired broken wire
A shot of the solder sleeves I've been using for broken wires. Make life very easy indeed, especially for automotive purposes or where access is tricky with a soldering iron!
January is MOT month for my 850, so started doing the normal checks and preparations. Obviously the ABS issues are a major issue, so I started by addressing that. Lots of troubleshooting eventually showed that there was a break in one of the wires. Now this might seem like something that should have been a lot quicker and easier to diagnose, but it appears as if in some positions (like wheel straight) there was enough contact between the remnants of wires for them to complete a circuit - therefore everytime I diagnosed wires and sensors by ohming the pathways it came up as okay. Eventually, after swapping in a spare ABS module that I had already repaired (the normal culprit for random ABS wires), and confirming that the sensors were working (voltmeter whilst spinning the wheels) I gave up and started searching the loom:
ABS wire break
Just a smidge of an issue. Luckily for me, Volvo still sell repair kits for this new. £34 and 2 days later I had a spare 1.5m of harness with a new connector. I chose to splice this in in the engine bay, as far away from any sources of strain as I could possibly find. This kit comes complete with crimps, and three pieces of adhesive lined heatshrink, actually really good quality heatshrink tbh! Dont worry, I did clean up the excess adhesive!
 New ABS wire harness
 Splice of new ABS wires
After a quick drive to let the ABS system self-test itself, I'm pleased to report that the ABS light has gone out...for now!
Next up, I wanted to change the fuel filter as I had no evidence of this being done any time recently (actually I dont recall seeing it in any of the service history!). The car has now ticked over 194k so over three times the recommend 60k service interval. With that in mind, I hopped onto everyones favourite site, eBay, and grabbed an OE Bosch item for £16.
 850 T5 Fuel filter
These are dead easy to change on the 850s. They're located by the o/s rear wheel, and are held in place by 1 bolt. Its literally a 10 minute job. With the o/s jacked up and supported you can unplug one side of the lines at a time, using the caps on the new filter to block the old fiter. With both hoses removed, simply undo the 12mm bolt beneath them to loosen the bracket and slide it out. Slide the new one in, connect it up, jobbed.
Except for me it wasn't. My bracket had lost its factory protection and was looking sorry for itself, like the filter itself for that matter...
 Old filter
Couldn't stick that back on the car, so I wire wheeled it and gave it a coat or two of some Hammerite blaaaaack. I'm going to try and find one on a scrappy for cheap and do it properly in the future. Deox-C bath, lots of wire wheeling, etch priming, topcoating - but that can wait for now.
After seeing the state of the filter externally, I was curious to see what would come out of it. I drained it into a bottle and was rather shocked at the amount of sediment present. I started by draining the filter against its normal flow, just to confirm the fuel itself was clear and not filled with sediment or rust from a bad tank; it was. So I drained it in the direction of flow and got this:
 Fuel from filter
Anyway, with the painted bracket and new filter connected up I left the car in pos II to let fuel pressure rebuild before starting it, and she started right up with no leaks. I'd have been quite embarrassed if I managed to fluff up such a simple job, but it is always nice when everything works regardless.
 New filter installed
Next weekend I'll do general checks like bushes and drop links etc, then get it booked ino before the 25th.
ABS wire breakJust a smidge of an issue. Luckily for me, Volvo still sell repair kits for this new. £34 and 2 days later I had a spare 1.5m of harness with a new connector. I chose to splice this in in the engine bay, as far away from any sources of strain as I could possibly find. This kit comes complete with crimps, and three pieces of adhesive lined heatshrink, actually really good quality heatshrink tbh! Dont worry, I did clean up the excess adhesive!
New ABS wire harnessSplice of new ABS wiresAfter a quick drive to let the ABS system self-test itself, I'm pleased to report that the ABS light has gone out...for now!
Next up, I wanted to change the fuel filter as I had no evidence of this being done any time recently (actually I dont recall seeing it in any of the service history!). The car has now ticked over 194k so over three times the recommend 60k service interval
. With that in mind, I hopped onto everyones favourite site, eBay, and grabbed an OE Bosch item for £16.850 T5 Fuel filterThese are dead easy to change on the 850s. They're located by the o/s rear wheel, and are held in place by 1 bolt. Its literally a 10 minute job. With the o/s jacked up and supported you can unplug one side of the lines at a time, using the caps on the new filter to block the old fiter. With both hoses removed, simply undo the 12mm bolt beneath them to loosen the bracket and slide it out. Slide the new one in, connect it up, jobbed.
Except for me it wasn't. My bracket had lost its factory protection and was looking sorry for itself, like the filter itself for that matter...
Old filterCouldn't stick that back on the car, so I wire wheeled it and gave it a coat or two of some Hammerite blaaaaack. I'm going to try and find one on a scrappy for cheap and do it properly in the future. Deox-C bath, lots of wire wheeling, etch priming, topcoating - but that can wait for now.
After seeing the state of the filter externally, I was curious to see what would come out of it. I drained it into a bottle and was rather shocked at the amount of sediment present. I started by draining the filter against its normal flow, just to confirm the fuel itself was clear and not filled with sediment or rust from a bad tank; it was. So I drained it in the direction of flow and got this:
Fuel from filterAnyway, with the painted bracket and new filter connected up I left the car in pos II to let fuel pressure rebuild before starting it, and she started right up with no leaks. I'd have been quite embarrassed if I managed to fluff up such a simple job, but it is always nice when everything works regardless.
New filter installedNext weekend I'll do general checks like bushes and drop links etc, then get it booked ino before the 25th.
Cambs_Stuart said:
I always look forward to updates on this thread.
It's amazing how much crud that fuel filter caught. I'm now wondering how old the ones on my cars are...
Thanks! Yes, quite an astounding amount. I'm rather paranoid about how much got past it, though... I'm going to be running some PEA-based fuel system cleaners through it with some regularity over the next few months, as well as using the premium go-go juice, just to try and ensure there is as little debris as possible.It's amazing how much crud that fuel filter caught. I'm now wondering how old the ones on my cars are...
Xenoous said:
Fantastic thread. Always loved the 850, it just has a special something that you can't quite put your finger on. Whilst mines not a Volvo (2006 Ford Focus ST), it does share the T5 drive train, so it's been interesting reading your stories. Plenty of work needs doing to it, just trying to get the motivation to crack on and do the parts!
Good luck with your motor. Hope it provides you with many more happy miles
Thank you, glad it's being of some use! I agree with the sentiment about the 850 having something you can't quite pin down, and unless circumstances change significantly, or something mega goes boom I can't really see myself getting shot of it any time soon.Good luck with your motor. Hope it provides you with many more happy miles
AceKid said:
Awesome effort being put in here.....having owned a few Volvos in our family, the 850 has a certain appeal and yours looks stunning.
Its amazing how all the little niggly jobs actually make a huge amount of difference to the ownership experience once they are fixed...very satisfying i bet!
Thanks! It's got plenty of battle wounds and there is plenty more I could do to it! You are spot on though, some fo the tiny little jobs are far more satisfying than I initially expect.Its amazing how all the little niggly jobs actually make a huge amount of difference to the ownership experience once they are fixed...very satisfying i bet!
As mentioned last weekend, this weekend would be some more MOT prep. It's not due until the 25th, but better to know in advance if I have any bushes/components/whatever to replace. I sidled over to a friendly local garage and got the car up on a lift to get a better look at the underside. I'm pleased to report that short of some slight perishing on the front ARB bushes, I couldn't find any play or anything worth worrying about in the brakes, bushings or suspension components. We'll see how accurate my amateur assessment is come MOT time though!


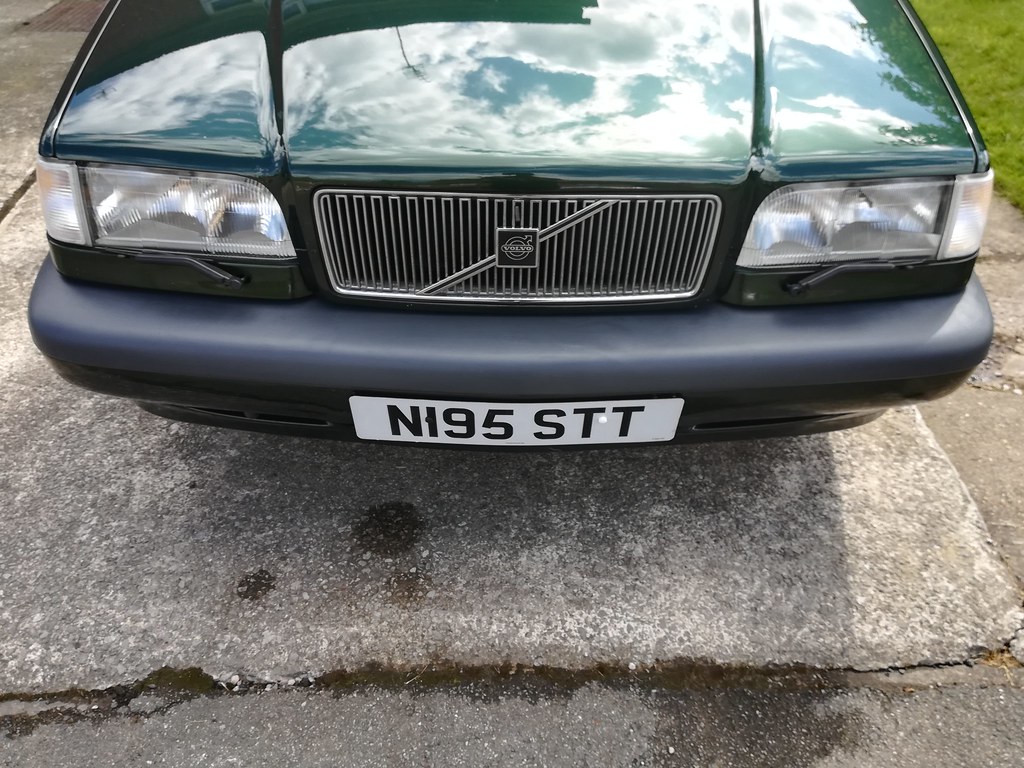
One thing I had to do cosmetically for the MOT was to address the rear numberplate. My partner (as always) slammed the boot shut on Christmas eve and the numberplate dropped clean off. Being 250mi from home at my parents, with no tape on me, and lacking the confidence to do the drive home without a plate I had to do something 'drastic'. The only thing we had to hand were two M6 bolts. So the plate got drilled and threaded onto the factory-drilled holes. With the car home, and with some plastic numberplate bolts finally completing their arduous journey in the hands of the Royal Fail I could finally address the state that was my boot.
 Plinth before
The plinth beneath the plate was looking sorry for itself, with the paint being trashed, layers of tape on tape, and wearing the battle scars of lazy individuals wielding self-tappers. I cleaned that up with a caramel wheel, some glue and tar remover, then did a 1-step correction on the paint to at least make it look clear again. The rust will have to be addressed in the future as I lacked the time to do it today. I think I'll also have to wetsand the area to deal with some areas where the plate clearly rubbed at one time.
 Plate final
After that, it was time for some fresh oil and a new filter. I also put stop leak in there, as whilst I don't have a noticeable leak (no puddles or drips!) I do suspect I'm burning some through the stem seals. It's only just above what is considered 'normal' consumption for these engines, but no harm in attempting to stem the oil loss. I used Wynns Engine Oil Stop Leak, as it was about the only product I could find that specifically mentioned conditioning steam seals, and came recommended by some fellow Volvo owners. I'll let you know how it goes... Anyway, 6.3L of Mobil1, a new filter, and a new crush washer later she's good for another 6 months or so.
I've also yet to try the Techron PEA-based fuel system cleaner, as I'm trying to get the tank down to 15L or so before using it so it's nicely concentrated! Will report on that too.
With the history of ABS issues I've had with this car, and given its somewhat presentable state at the minute I'm rather tempted to MOT it almost two weeks early (whilst the ABS light is off!
) but we shall see.MOT passed this afternoon, with a single advisory. Whilst checking bushes/suspension/bearings I clearly should have taken a peek at the exhaust. 2mm hole in the weld between backbox and tailpipe. Annoyingly my first advisory since I started driving, ah well.
Pleasantly surprised to see my CO emissions being 1/10th of the legal limit too, either PEA-based Techron I added 50mi ago made a difference (unlikely) or my engine is in better condition than I anticipated (possibly also unlikely!).
Pleasantly surprised to see my CO emissions being 1/10th of the legal limit too, either PEA-based Techron I added 50mi ago made a difference (unlikely) or my engine is in better condition than I anticipated (possibly also unlikely!).
Minor cosmetic upgrade, courtesy of a birthday present. I much prefer it, and on a 90s car everything should be tango'd (suits the rest of the car better, as tango side repeaters and rear indicators anyway). I also prefer the effect it has on the DRLs, illuminating the whole side instead of just the top corner, so it looks far more balanced.
 New Vs Old
 Tango-everything
 DRLs
DRLs
This picture is just the DRLs, not the dipped beams, so they aren't bright at all - only 5W.
New Vs OldTango-everythingDRLsThis picture is just the DRLs, not the dipped beams, so they aren't bright at all - only 5W.
[QUOTE="agw_01, post: 33307008, member: 23650"]In my experience, they're cheap and poor quality (but then, they are cheap to buy). I've had two Klarius exhausts on my ZT and both have failed where the hangers are welded to the backbox, right on the back box seam. The first one failed after 12 months, the second after about 18 months. I'm not buying another so I'll be taking it to get the hole plated over and the hanger welded to the plate. Hopefully this will spread the weight of the exhaust over a larger area and stop it being a failure point.[/QUOTE]
That's mildly irritating, will be saving up for a custom cat-back then (same price as the Bosal that I can't find in stock anywhere!)
[QUOTE="MagicBoy, post: 33307258, member: 1219"]Is the rest of the exhaust good? Could be worth tickling the dodgy weld to fix up the existing exhaust considering it's OE.[/QUOTE]
It's crusty but serviceable. The weld is in a dreadfully awkward place (between the fuel tank and rear delta-link arms, and the rest of weld in that area does look a bit worse for wear. Might take it to a proper exhaust place to check out this option - thanks.
Stanced it through the application of 225 odd engineering bricks. Had about 1cm of travel left, yet actually handled better than normal with the rear being much less floaty... Suggests the rear springs aren't quite the correct weighting.
 Stancedlyf
 RIP travel
After transporting these bricks, fresh from my sisters house renovation, my car was in quite a state...
 Brick aftermath
 Trashed mats
The liner got pre-treated with APC and stiff-brush scrubbing before being chucked in the washing machine, and everything else got vacuumed with a bit of spot-stain removal. This got it presentable again...!
 Vac'd boot
 Cleaned boot liner
 Cleaned
This car really does get abused! Oh well, it is a Volvo wagon and a shed.
That's mildly irritating, will be saving up for a custom cat-back then (same price as the Bosal that I can't find in stock anywhere!)
[QUOTE="MagicBoy, post: 33307258, member: 1219"]Is the rest of the exhaust good? Could be worth tickling the dodgy weld to fix up the existing exhaust considering it's OE.[/QUOTE]
It's crusty but serviceable. The weld is in a dreadfully awkward place (between the fuel tank and rear delta-link arms, and the rest of weld in that area does look a bit worse for wear. Might take it to a proper exhaust place to check out this option - thanks.
Stanced it through the application of 225 odd engineering bricks. Had about 1cm of travel left, yet actually handled better than normal with the rear being much less floaty... Suggests the rear springs aren't quite the correct weighting.
StancedlyfRIP travelAfter transporting these bricks, fresh from my sisters house renovation, my car was in quite a state...
Brick aftermathTrashed matsThe liner got pre-treated with APC and stiff-brush scrubbing before being chucked in the washing machine, and everything else got vacuumed with a bit of spot-stain removal. This got it presentable again...!
Vac'd bootCleaned boot linerCleanedThis car really does get abused! Oh well, it is a Volvo wagon and a shed.
Evening all, hope you're managing to keep your sanity throughout this pandemic. Having recently being awarded my PhD and begun the job hunt (at entirely the wrong time!!) I have lots of time on my hands. This gave me the opportunity to give the paint a quick freshen up. Nothing special, as I don't have all the right materials yet, just a single stage paint correction to remove some of the haziness and marring present.
I used Ultimate Compound on a white hexlogic pad, which did a pretty good job of removing this marring and haziness - pleasingly it also removed about 80% of the swirling. Plenty deeper scratches and swirls left (25 years of abuse!), which will give me something to do in the future.
The paint, as mentioned was quite hazy...
 Hazy paint
But it was also rather swirled, and some areas had some rather bad marring!
 More swirls
 Swirls and marring
My process was simple, being a singe stage correction it just involved 4 passes with my Das6 Pro, before being wiped down with a panel wipe. That left me with the following: N.B. Please excuse the poor 50/50, forgot to tape!
 Crude 50/50
 After single stage
So thankfully a decent reduction in swirls and the haziness cleared up nicely. Cant really comment on gloss levels yet, as I've not seen any sun since returning to the UK (typically...!), but here is the gratuitous reflection shot.
 Reflection shot
Quick spray sealant for protection, as I ran out time, but I'm still reasonably pleased with the outcome. There is some significant etching on the roof that I tried to tackle with M205 and an orange hex logic pad, but after two sets of 4 passes I wasn't making any progress so gave up - for now.
Next to do, weather permitting and when I get a chance, is to dye the trim again, and then paint the rotor hats and caliper mounts to tidy them up.
Thanks, and keep safe!
I used Ultimate Compound on a white hexlogic pad, which did a pretty good job of removing this marring and haziness - pleasingly it also removed about 80% of the swirling. Plenty deeper scratches and swirls left (25 years of abuse!), which will give me something to do in the future.
The paint, as mentioned was quite hazy...
Hazy paintBut it was also rather swirled, and some areas had some rather bad marring!
More swirlsSwirls and marringMy process was simple, being a singe stage correction it just involved 4 passes with my Das6 Pro, before being wiped down with a panel wipe. That left me with the following: N.B. Please excuse the poor 50/50, forgot to tape!
Crude 50/50After single stageSo thankfully a decent reduction in swirls and the haziness cleared up nicely. Cant really comment on gloss levels yet, as I've not seen any sun since returning to the UK (typically...!), but here is the gratuitous reflection shot.
Reflection shotQuick spray sealant for protection, as I ran out time, but I'm still reasonably pleased with the outcome. There is some significant etching on the roof that I tried to tackle with M205 and an orange hex logic pad, but after two sets of 4 passes I wasn't making any progress so gave up - for now.
Next to do, weather permitting and when I get a chance, is to dye the trim again, and then paint the rotor hats and caliper mounts to tidy them up.
Thanks, and keep safe!
Max M4X WW said:
Great improvement!
Knowing how easily the door trims come off I would probably have removed those to make things easier.
You say that, I did try but couldn't get them to budge. Undid the screw in the door and then tried to get them to slide but the would not move a millimetre. When I do a more thorough correction I will definitely have another stab!Knowing how easily the door trims come off I would probably have removed those to make things easier.
Makes me wonder if someone has been in there before and bonded them for whatever reason (broken clips maybe?!)
Edited by Cookeh on Tuesday 31st March 21:32
Thanks for that link, I've been looking for a more permanent solution than redying it ever 4-6 months!
More (mandatory) free time, more updates. This time more cosmetic items, most of which were bought well over 6 months ago! The first such item was a minor inconvenience to fit by oneself...
 Cosmetic upgrade
Sticking with the exterior, for now, something had to be done about the exhaust tip. It is in a right state, and I don't just mean dirty. It's cracked in about 15 places, and the rim is about to fall off - meaning the amount of carbon build-up is frankly insane. It's also caked on in areas it really shouldn't be, like through all these cracks and the base of the exhaust. Now, I really could do with a new tip but this one is rust welded on, and I need to replace the backbox section in the future too so I'll probably wait for a while until I pull the trigger on one.
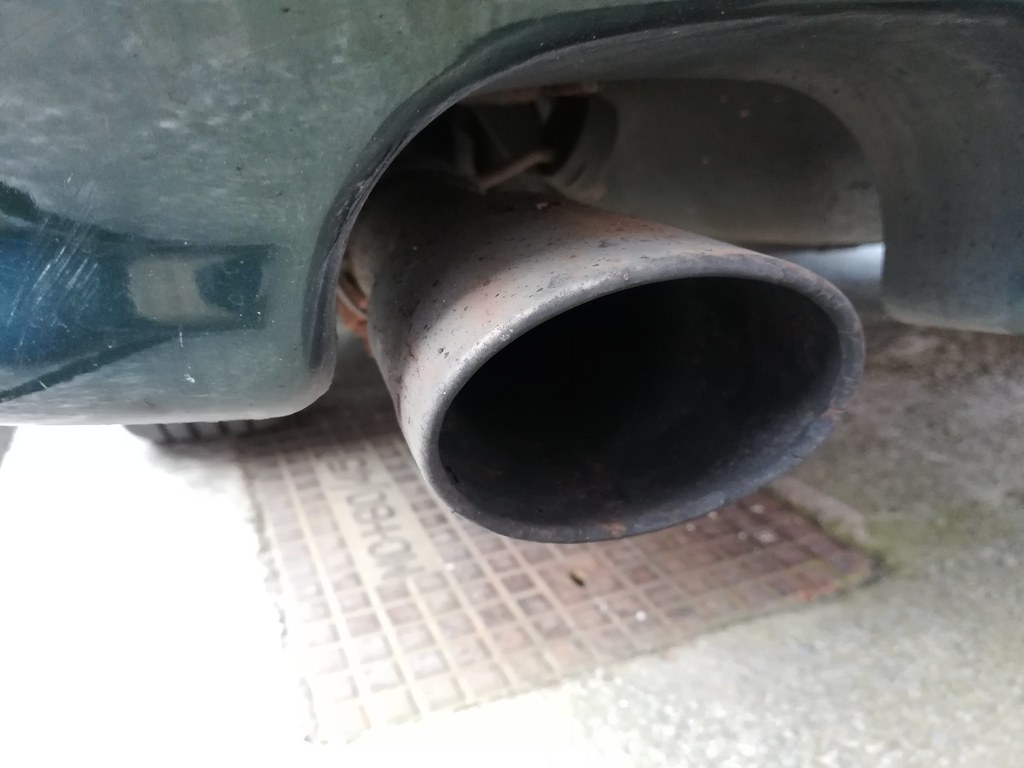 Tip before
Here's how it started. Rusty, coked up, and covered in road film. After 1.5hrs (yes seriously, yes, the lockdown is that boring!) of serious scrubbing with APCs and IPA to try and brake down the grime and carbon build up we were getting somewhere. A quick polish with autosol left this:
 Tip after
 Tip after 2
You can see the state the tip is in, the rim is cracked in multiple places and there are cracks on the side. The bottom and other side is no better. The bottom had a huge buildup of carbon from the cracked edges, which took the bulk of the 1.5hrs to shift, most of what looks like coking on the base is actually pitting.
So after that mess, I moved to the interior to fit the steering wheel I acquired back in August. It is a slight downgrade, moving to vinyl instead of the leather one currently on there. The leather is badly worn however and will be refurbed. Until it is refurbed the vinyl one is much more pleasing to hold and from an aesthetics point of view. This was a little bit daunting to be honest, there is the potential to mess up quite a lot! From airbag issues to SRS codes, from faulty or disabled horns to unravelled clock springs, from faulty indicators and wipers to loss of self-cancelling. Oh, and of course the possibility of the wheel being completely off-angle!
To do this, the first step was disconnecting the battery (to try and avoid the SRS codes), before removing the column shroud. You don't have to remove the shroud, you can simply turn the wheel to get at the airbag screws; this method puts a lot of strain on the steering rack though, or involves jacking the car up. In my opinion, the shroud is a quicker and easier approach. It also allowed me to swap out another part! :thumb:
 Shroud removed
With the shroud out, you can undo the two T30 torx screws at 3 and 9 o'clock holding the airbag in. You must undo the RHS (O/S) first or your horn will not work on refitting (daft, eh?! :wall. With those two screws out, the airbag will be loose and you can remove the cable (orange/green in pic) running to it. You can see the level of wear on the leather wheel in this image.
 Airbag out
Next step is vital to stop the clockspring unwinding. Bottom left of the wheel there is a T20 screw, remove that from the wheel and put it into the hole at 1 o'clock position for the clockspring. With that done, mark the wheel position (I used the two squares as a reference and marked the column relative to those), and break the 18mm nut loose. Off comes the wheel!
 Wheel off
As per Haynes, fitting is the reverse of removal, et voila:
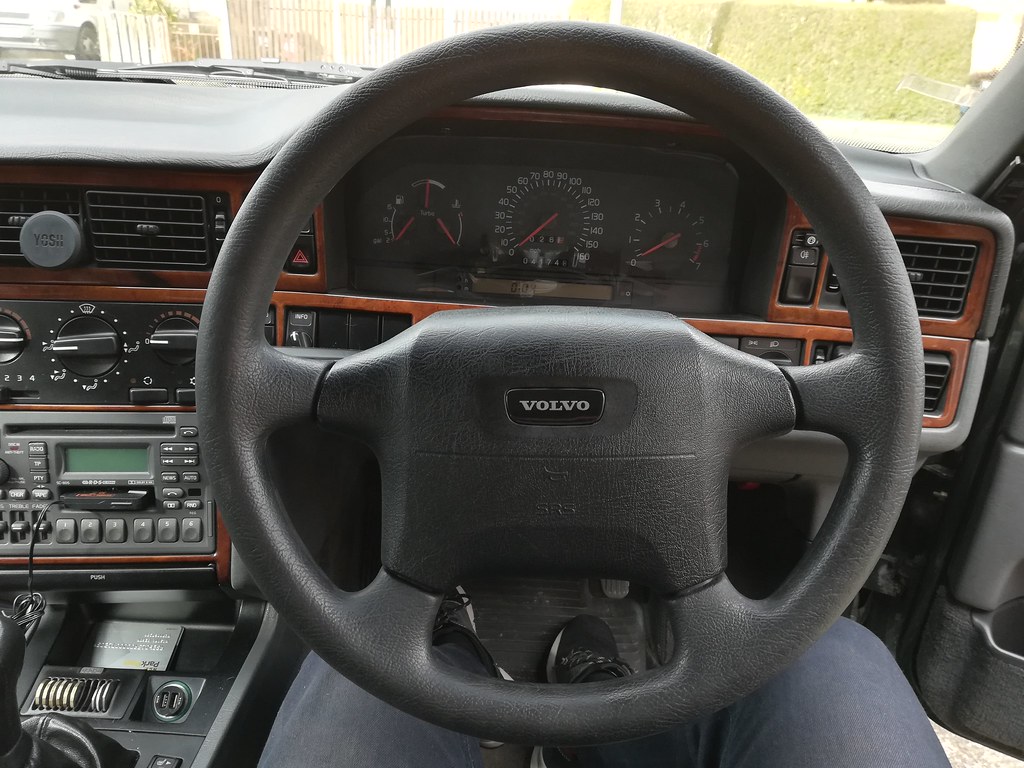 Replacement wheel
As a bonus, with the shroud out of the way I was able to swap wiper stalks out for one with a bit more visible writing. Its condition is far from perfect, but better, and one must take what one can get with these cars!
 Old stalk
 Replacement stalk
Lastly, the foam insulating around some wires was disintegrating so a bit of Tesa tape was employed to smarten that up, as per the 50/50.
 Cable wrap
That's all for now, and I've finally run out of leftover parts to fit!
More (mandatory) free time, more updates. This time more cosmetic items, most of which were bought well over 6 months ago! The first such item was a minor inconvenience to fit by oneself...
Cosmetic upgradeSticking with the exterior, for now, something had to be done about the exhaust tip. It is in a right state, and I don't just mean dirty. It's cracked in about 15 places, and the rim is about to fall off - meaning the amount of carbon build-up is frankly insane. It's also caked on in areas it really shouldn't be, like through all these cracks and the base of the exhaust. Now, I really could do with a new tip but this one is rust welded on, and I need to replace the backbox section in the future too so I'll probably wait for a while until I pull the trigger on one.
Tip beforeHere's how it started. Rusty, coked up, and covered in road film. After 1.5hrs (yes seriously, yes, the lockdown is that boring!) of serious scrubbing with APCs and IPA to try and brake down the grime and carbon build up we were getting somewhere. A quick polish with autosol left this:
Tip afterTip after 2You can see the state the tip is in, the rim is cracked in multiple places and there are cracks on the side. The bottom and other side is no better. The bottom had a huge buildup of carbon from the cracked edges, which took the bulk of the 1.5hrs to shift, most of what looks like coking on the base is actually pitting.
So after that mess, I moved to the interior to fit the steering wheel I acquired back in August. It is a slight downgrade, moving to vinyl instead of the leather one currently on there. The leather is badly worn however and will be refurbed. Until it is refurbed the vinyl one is much more pleasing to hold and from an aesthetics point of view. This was a little bit daunting to be honest, there is the potential to mess up quite a lot! From airbag issues to SRS codes, from faulty or disabled horns to unravelled clock springs, from faulty indicators and wipers to loss of self-cancelling. Oh, and of course the possibility of the wheel being completely off-angle!
To do this, the first step was disconnecting the battery (to try and avoid the SRS codes), before removing the column shroud. You don't have to remove the shroud, you can simply turn the wheel to get at the airbag screws; this method puts a lot of strain on the steering rack though, or involves jacking the car up. In my opinion, the shroud is a quicker and easier approach. It also allowed me to swap out another part! :thumb:
Shroud removedWith the shroud out, you can undo the two T30 torx screws at 3 and 9 o'clock holding the airbag in. You must undo the RHS (O/S) first or your horn will not work on refitting (daft, eh?! :wall
. With those two screws out, the airbag will be loose and you can remove the cable (orange/green in pic) running to it. You can see the level of wear on the leather wheel in this image.Airbag outNext step is vital to stop the clockspring unwinding. Bottom left of the wheel there is a T20 screw, remove that from the wheel and put it into the hole at 1 o'clock position for the clockspring. With that done, mark the wheel position (I used the two squares as a reference and marked the column relative to those), and break the 18mm nut loose. Off comes the wheel!
Wheel offAs per Haynes, fitting is the reverse of removal, et voila:
Replacement wheelAs a bonus, with the shroud out of the way I was able to swap wiper stalks out for one with a bit more visible writing. Its condition is far from perfect, but better, and one must take what one can get with these cars!
Old stalkReplacement stalkLastly, the foam insulating around some wires was disintegrating so a bit of Tesa tape was employed to smarten that up, as per the 50/50.
Cable wrapThat's all for now, and I've finally run out of leftover parts to fit!
I managed to address a couple more small items in the recent sun we've had, the first of which was to redye the trim. I last applied the trim dye on March 2019 so it lasted well over a year. I've now had three applications out of that tube of Wurth Dye-Plast PT, which cost £23. That's pretty cost-effective! This time I took the time to remove the trim pieces at the bottom of the taillights and beneath the headlights to maximise the amount of trim I could treat. Then as usual, just a thorough degreasing before two coats of the dye.

[URL='https://flic.kr/p/2j8XFtG']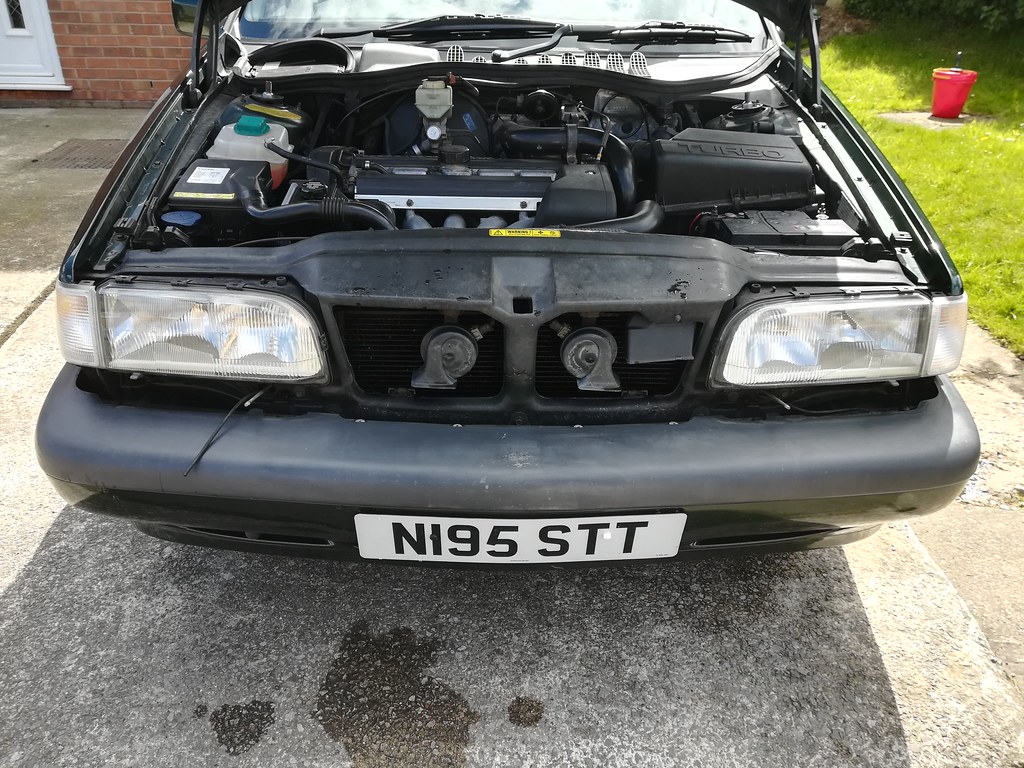
[/URL]

[URL='https://flic.kr/p/2j8TFkQ'][/URL]
Paint looks much better post-correction too!
Next up, and inspired by the work of one chap on a different forum, I bought a small pack of Whitemorph and used it to repair some broken trim mounts on my column shroud. I was very surprised by how economical this product was, I must have only used about 10g to make both these. It also has quite a long work-time, which is excellent for fine-tuning or awkward areas. One of the mounts is threaded two, I assembled the shroud off the car, put the fastener in place and then moulded it around the fastener and remnants of the old mount. Its easy to drill, easy to sand, and very east to get a nice smooth finish with if it were to be used in a visible area. Very impressed!


[URL='https://flic.kr/p/2j8XFtG']
[/URL]
[URL='https://flic.kr/p/2j8TFkQ'][/URL]
Paint looks much better post-correction too!
Next up, and inspired by the work of one chap on a different forum, I bought a small pack of Whitemorph and used it to repair some broken trim mounts on my column shroud. I was very surprised by how economical this product was, I must have only used about 10g to make both these. It also has quite a long work-time, which is excellent for fine-tuning or awkward areas. One of the mounts is threaded two, I assembled the shroud off the car, put the fastener in place and then moulded it around the fastener and remnants of the old mount. Its easy to drill, easy to sand, and very east to get a nice smooth finish with if it were to be used in a visible area. Very impressed!
Gassing Station | Readers' Cars | Top of Page | What's New | My Stuff