BMW E36 M3 - Reckless Restoration
Discussion


RoverP6B said:
Who are you learning to fly with, where? Alas, economic circumstances prevented me taking my PPL, but I did a load of gliding in my youth and was then taught to fly powered by the late, great Ted Girdler (ex-Red Arrows QFI).
Learning with the Goodwood Flying School as although they’ not the cheapest, their aircraft are quite new, instructors are excellent and it is literally across the road from work and 20mins from home. It’s a distraction, but immensely enjoyable!You should try to find a way back into it!
Hi all, I can confirm I am still alive! My landings are bumpy but not quite fatal! The usual squeezes on my time have kept me away from the garage and the M3 but Sunday’s terrible weather cancelled plans and so found me with a few hours to spare (thanks rain).
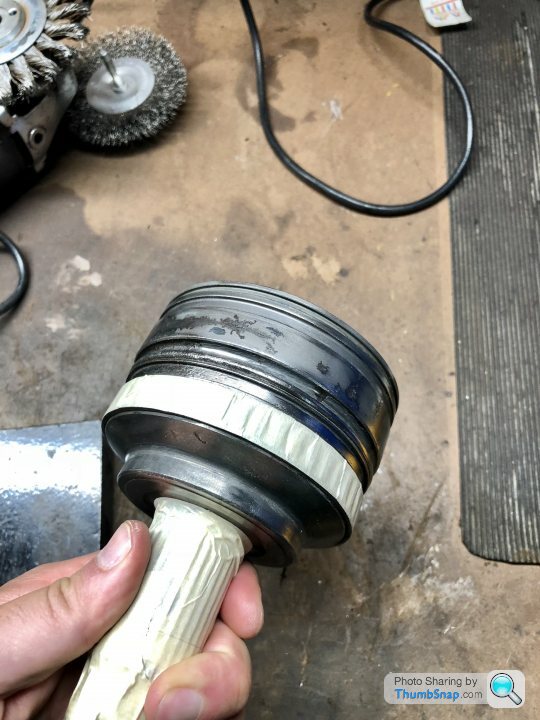
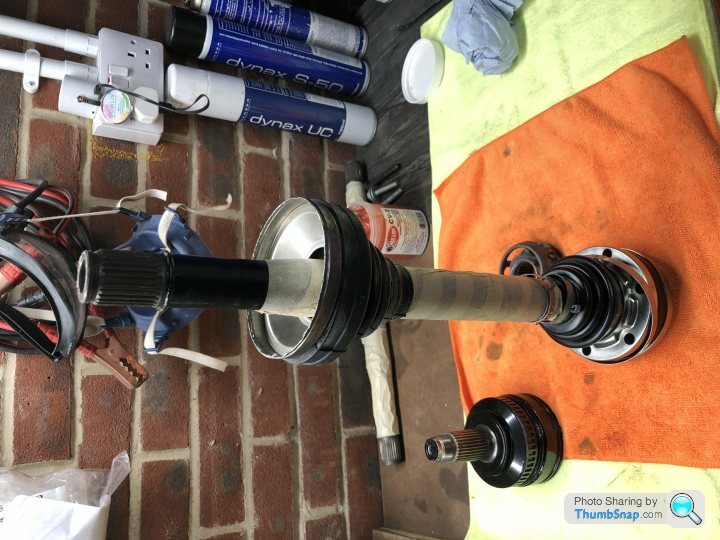
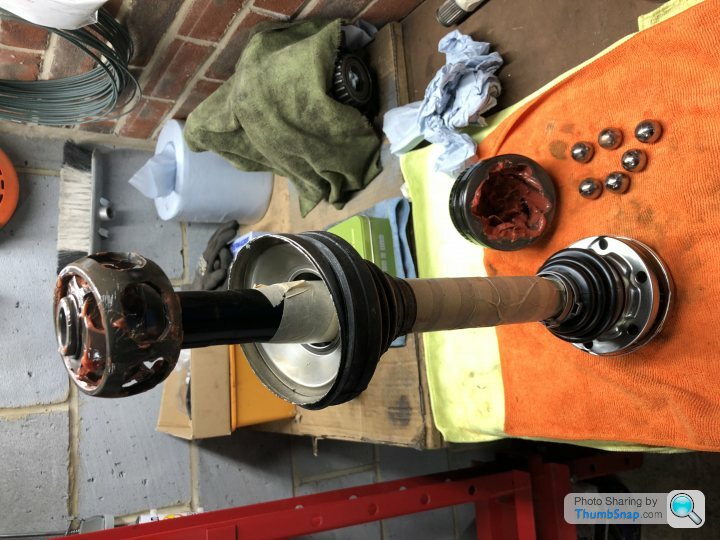
To that end, and having collected an exciting bubble wrapped bundle of shiny goodness from the powdercoaters last week, I got on with refitting the fuel tank. Closely followed by rebuilding the drive shafts - what a frustrating and fiddly job! I thought I had patience, I don’t. I thought I had decent mechanical ability, I don’t. I thought I had a lightness of touch, I don’t have that either. In fact i was left very much questioning my species.....
But persistence (and calming music) paid off. Ball bearings? Ball b ds more like.
Enough rambling; some photos.

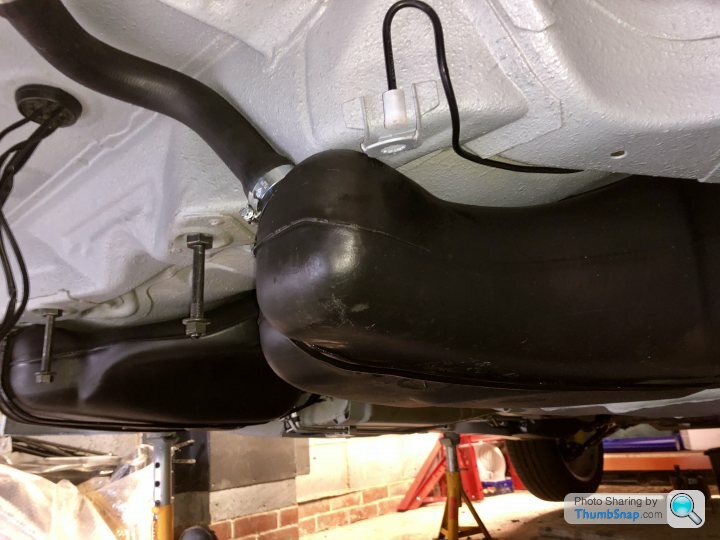
Tank thoroughly cleaned and installed with powder coated straps and new breather, feed and return lines where appropriate.
The bits

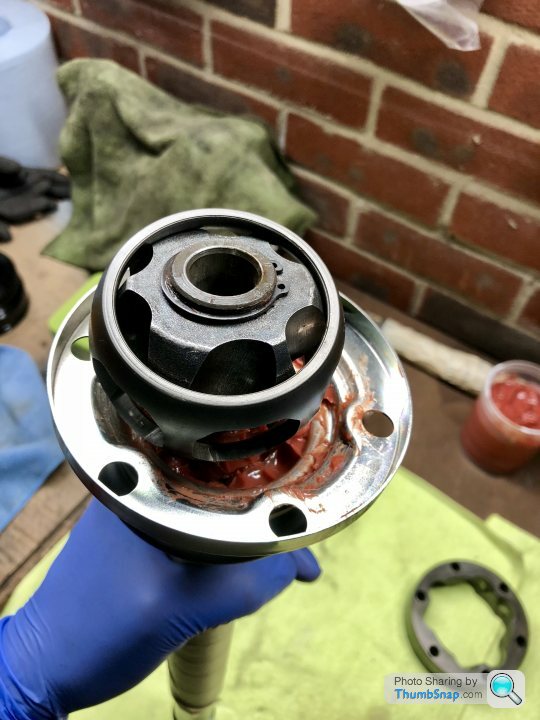
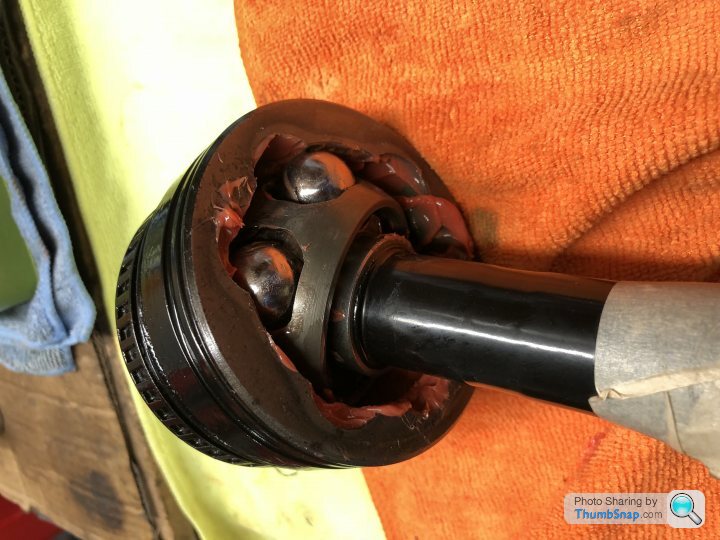
Inner drive shaft joint rebuild with new boot and Redline CV2 grease.


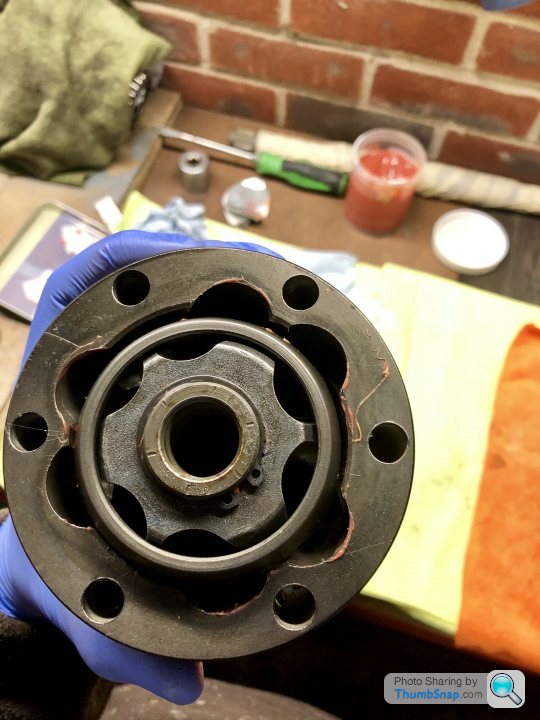
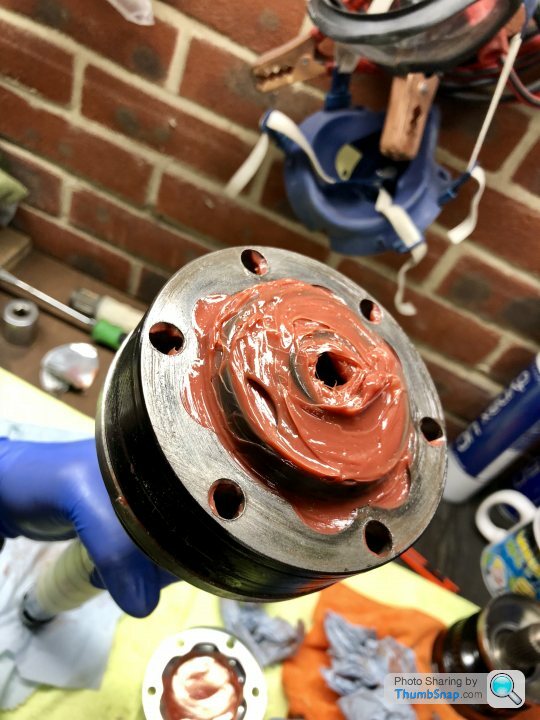
Balls in (!) and packed with grease.

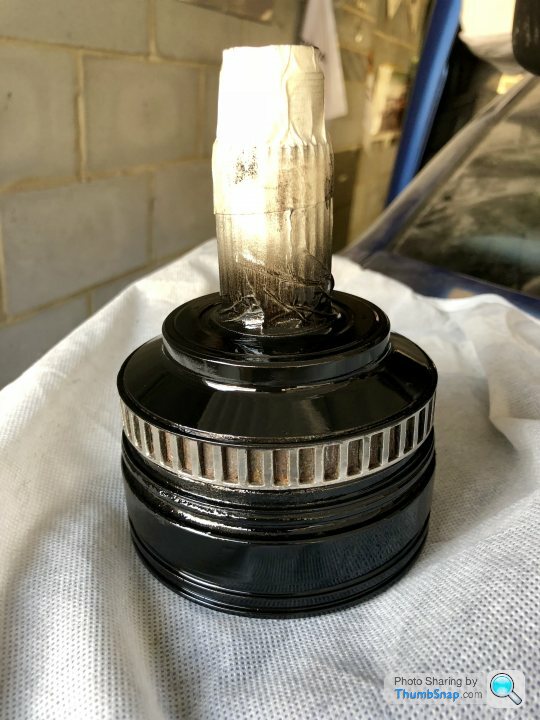
Boot and cap in place - inner joint complete.
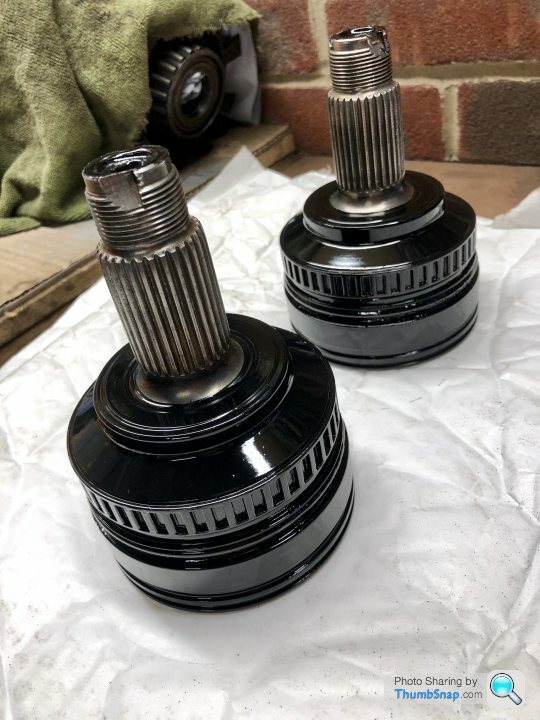
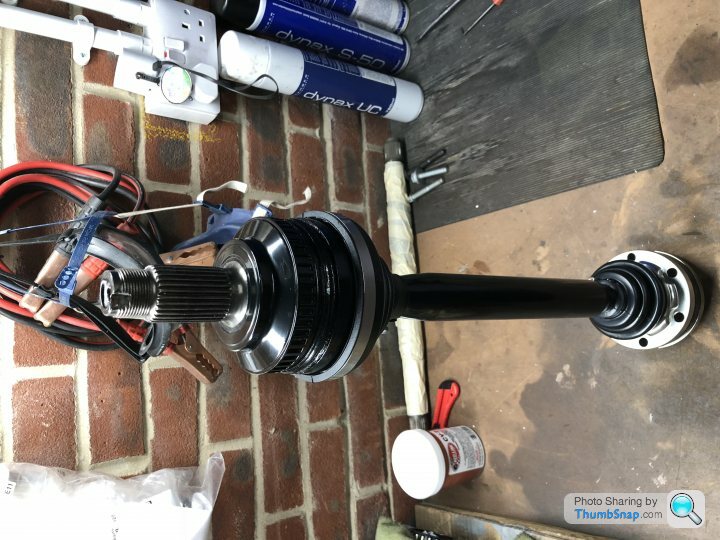
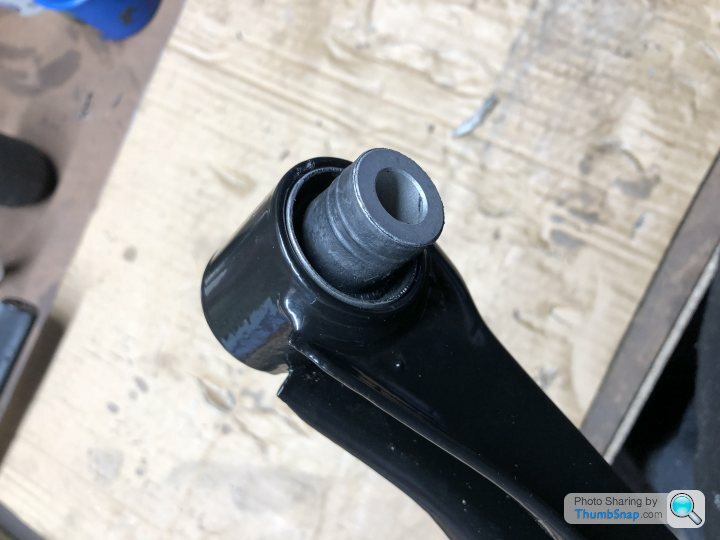
Outer joints

How they came off
Cleaned up and masked up (not too much paint in those sensor rings now!!)
Ready for the last coat
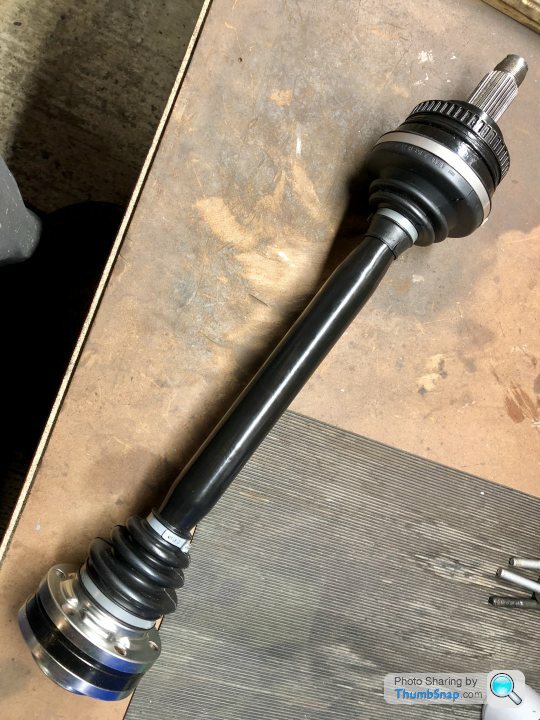
That’s better. Ready for the rebuild now.

Until next time folks.
To that end, and having collected an exciting bubble wrapped bundle of shiny goodness from the powdercoaters last week, I got on with refitting the fuel tank. Closely followed by rebuilding the drive shafts - what a frustrating and fiddly job! I thought I had patience, I don’t. I thought I had decent mechanical ability, I don’t. I thought I had a lightness of touch, I don’t have that either. In fact i was left very much questioning my species.....
But persistence (and calming music) paid off. Ball bearings? Ball b
ds more like.Enough rambling; some photos.
Tank thoroughly cleaned and installed with powder coated straps and new breather, feed and return lines where appropriate.
The bits
Inner drive shaft joint rebuild with new boot and Redline CV2 grease.
Balls in (!) and packed with grease.
Boot and cap in place - inner joint complete.
Outer joints
How they came off
Cleaned up and masked up (not too much paint in those sensor rings now!!)
Ready for the last coat
That’s better. Ready for the rebuild now.
Until next time folks.
Edited by T-bagger on Thursday 30th August 00:13

Forced to take some annual leave from work before the year ends, i’ve had a couple of (disruption free) days on the M3.
So putting this time to good use I liberally applied about £500 worth of parts to the car’s underbelly. Blimey these nuts, bolts and bushings don’t ‘arf add up!
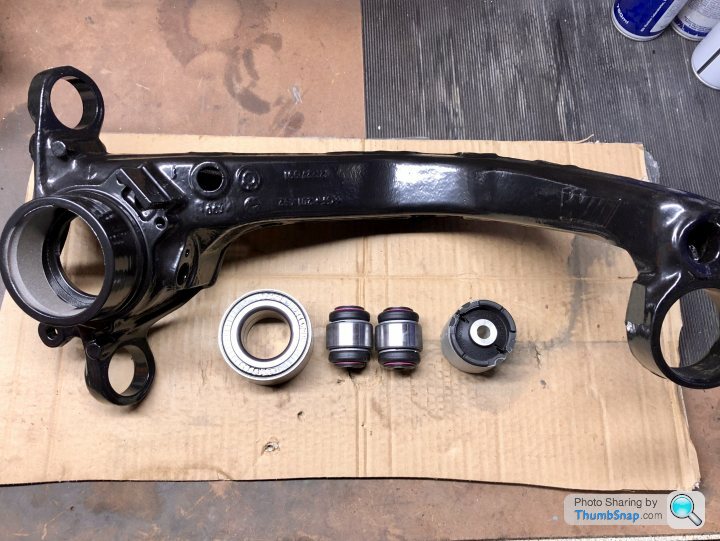
First up; build up the trailing arms
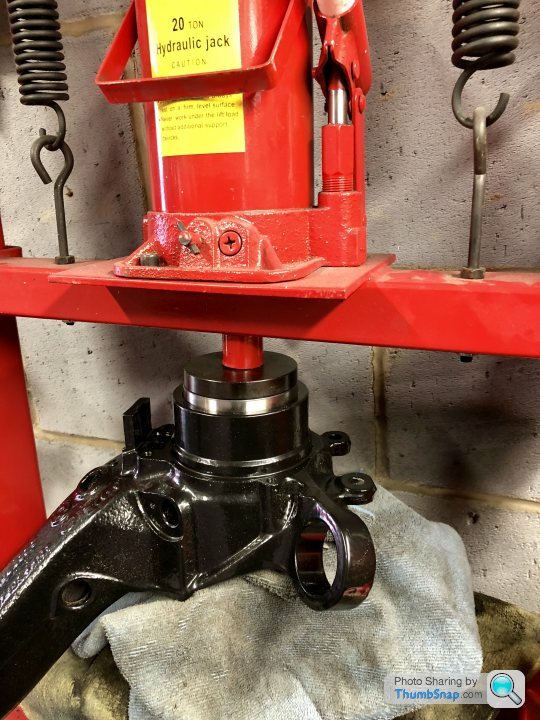
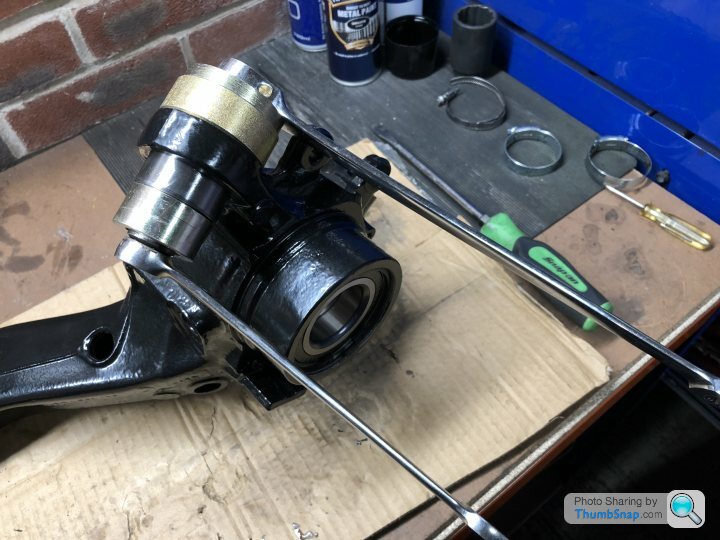
Upper arms getting new bushes

Running the threads through ready to take various fixings - it’s all about the detail
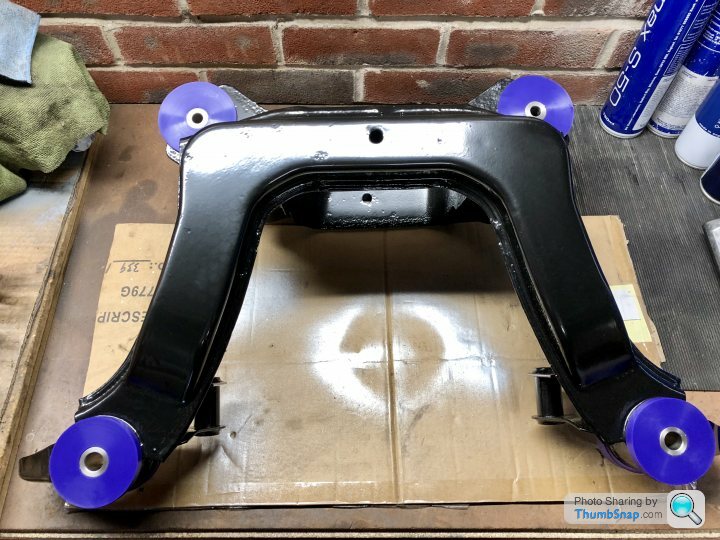
Powerflex rear axle carrier bushes - shock horror not OEM!! I hear you cry. Or maybe you don’t care, I’ll explain nonetheless....
Having done my research, to the extent of speaking with current BMW chassis engineers, full and correct function of the Z axle relies upon rubber bushings. Therefore anything with a degree of articulation was replaced with BMW rubber bushings. However where there is a solid mounting, upgrading to poly, especially as they last longer, cannot hurt. Just a shame they are purple.
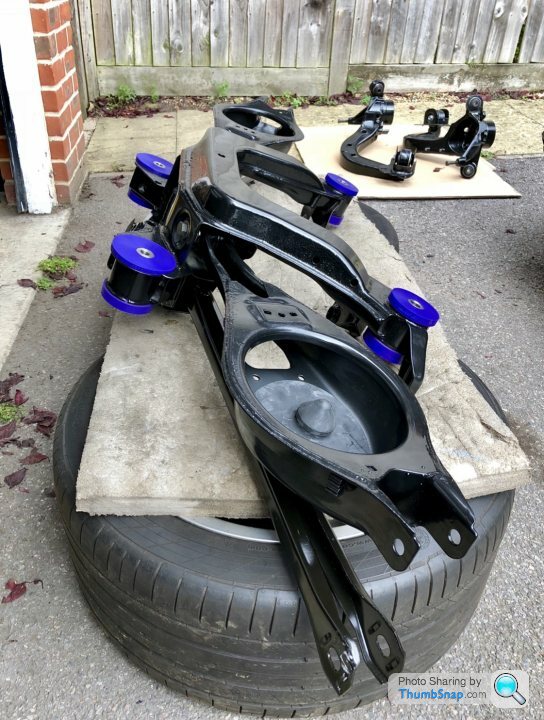
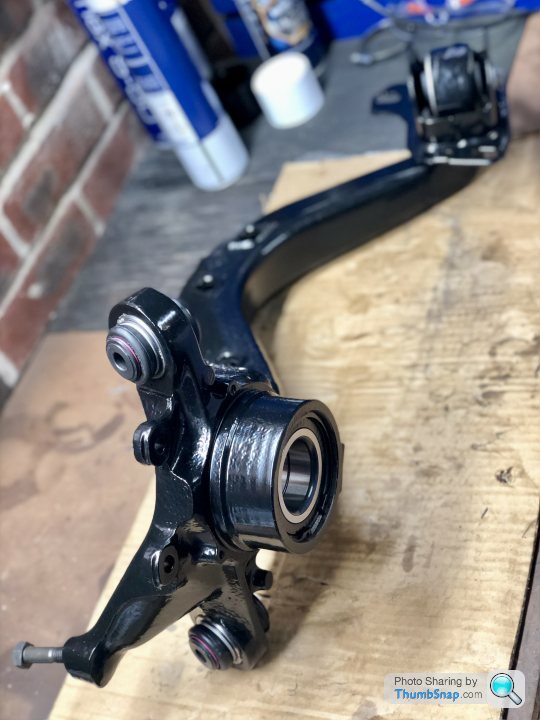
Upper and lower arms bolted on and ready to go up


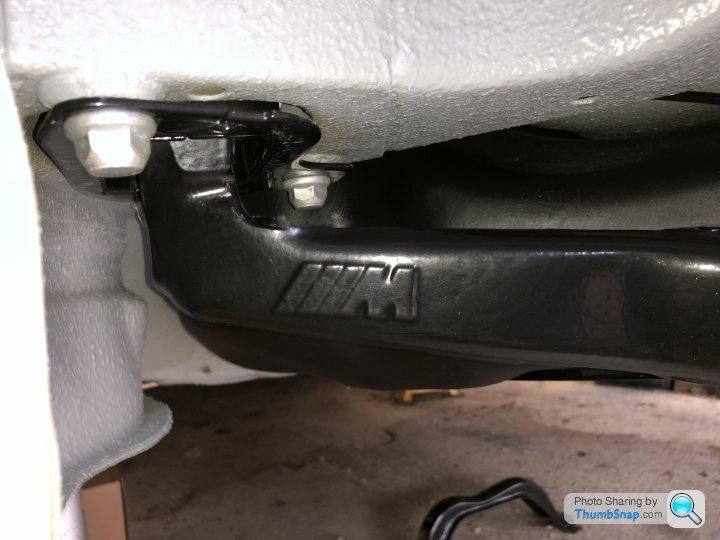
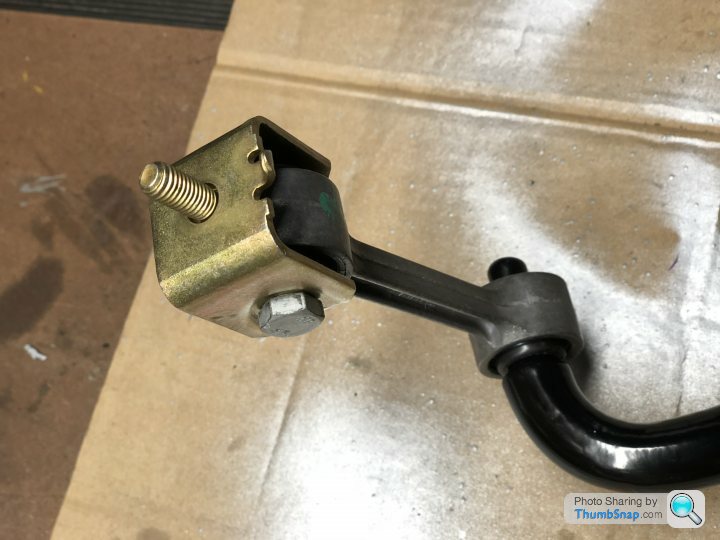
New ARB links and mounts
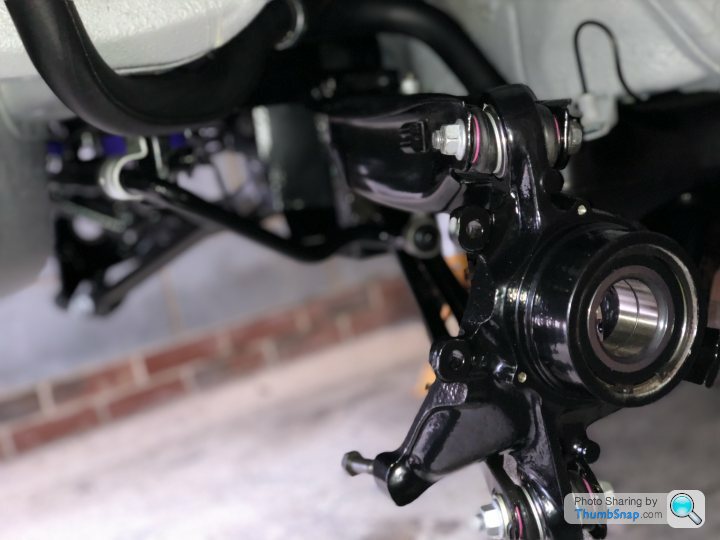
Next: order some brake back plates (yes I forgot) and then fit the hubs and driveshafts. Then I need to rebuild that diff....
So putting this time to good use I liberally applied about £500 worth of parts to the car’s underbelly. Blimey these nuts, bolts and bushings don’t ‘arf add up!
First up; build up the trailing arms
Upper arms getting new bushes
Running the threads through ready to take various fixings - it’s all about the detail
Powerflex rear axle carrier bushes - shock horror not OEM!! I hear you cry. Or maybe you don’t care, I’ll explain nonetheless....
Having done my research, to the extent of speaking with current BMW chassis engineers, full and correct function of the Z axle relies upon rubber bushings. Therefore anything with a degree of articulation was replaced with BMW rubber bushings. However where there is a solid mounting, upgrading to poly, especially as they last longer, cannot hurt. Just a shame they are purple.
Upper and lower arms bolted on and ready to go up
New ARB links and mounts
Next: order some brake back plates (yes I forgot) and then fit the hubs and driveshafts. Then I need to rebuild that diff....
After the customary long breaks between actual progress, today I finished the differential rebuild. Looking back at the large hunk of rusty metal to the shiny diff that is sitting on my workbench, it’s quite the transformation even though most of the work is hidden! Including the ratio upgrade to 3.62 for a little more pep....
Here’s a few pics for those who are interested.
Pulling apart the diff


All apart
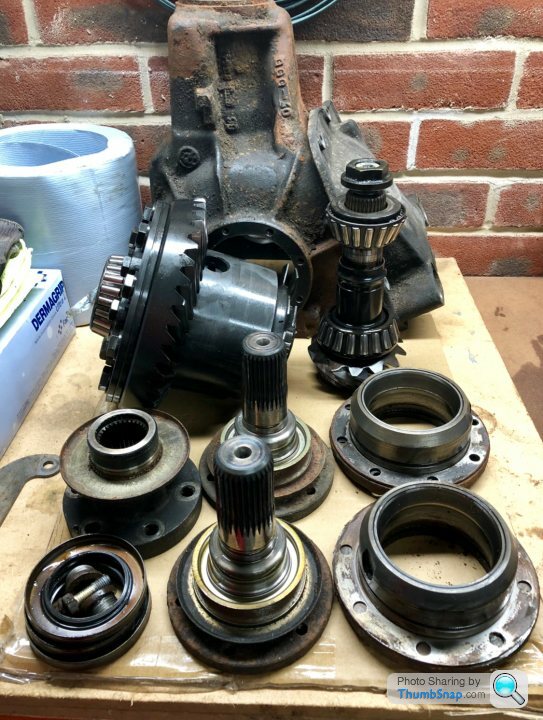
Powdercoating done and parts laid out

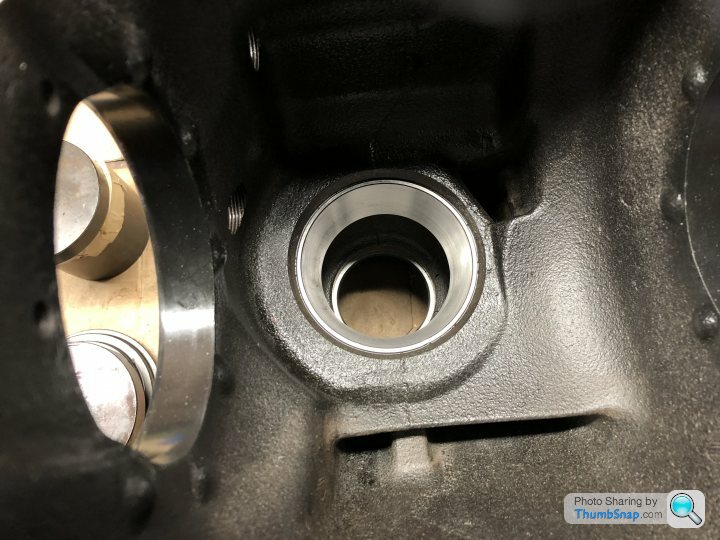
Cleaning the case up ready for reassembly

New pinion bearing outers pressed in
3.62 pinion with new bearing fitted

Pinion fitted and preload set to correct tolerance. Somewhat of a fiddly job to compress the crush washer just enough to provide the correct drag on the conical pinion bearings. In truth a couple of trial fits come before the final fit.

Next is a full strip of the LSD carrier; ring gear removed (those bolts are SUPER tight), old bearings removed from either end and cap off.


Now the interesting part! Pull everything out of the casing, lay out methodically, clean and inspect prior to rebuilding.

Spider gears!


The contents!
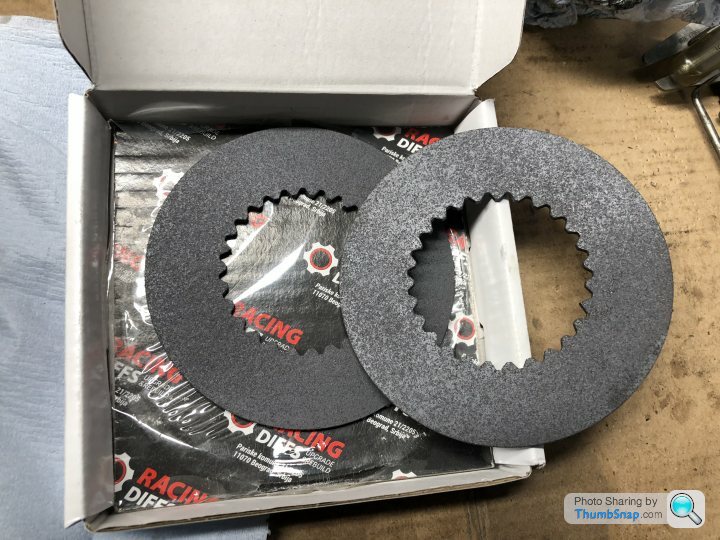
New clutch plates ready to go in after a good soaking in gear oil

Back together
Now on with the 3.62 ring gear and getting those bolts torqued to 100nm + 40 degrees - lucky I had the press to hold the thing whilst i swung off the bar


Back into the casing (i’ve spared you all the multiple rounds of shimming to get the carrier preload in spec - this is boring enough eh??!)
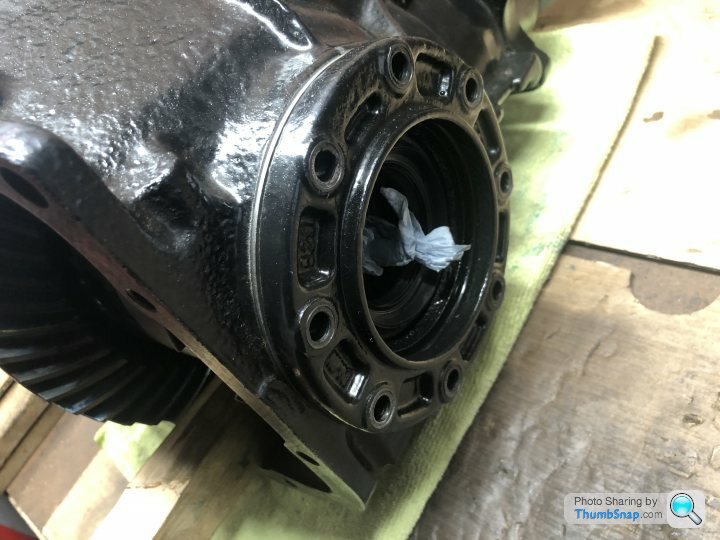
Side covers on complete with new bearing outers and oil seals obviously
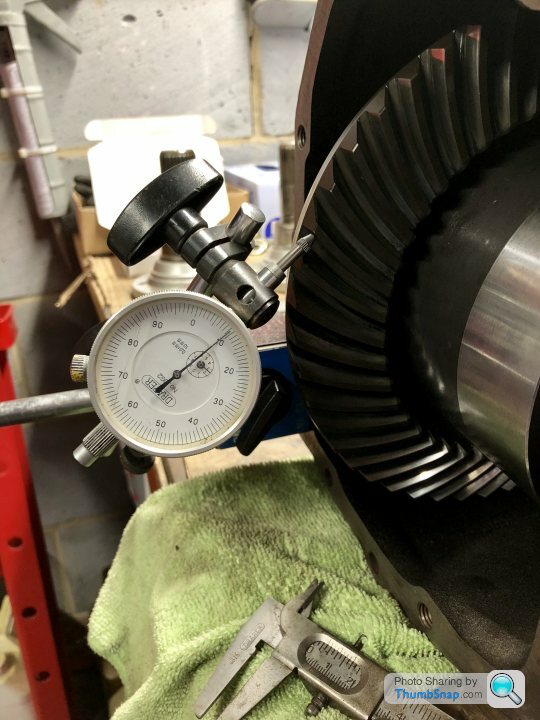
Getting the backlash bang on in the middle of the spec; 0.06 - 0.14mm.

Back cover on, new hardware and we’re done!
Looks pretty good - hope it works just as well!

Here’s a few pics for those who are interested.
Pulling apart the diff
All apart
Powdercoating done and parts laid out
Cleaning the case up ready for reassembly
New pinion bearing outers pressed in
3.62 pinion with new bearing fitted
Pinion fitted and preload set to correct tolerance. Somewhat of a fiddly job to compress the crush washer just enough to provide the correct drag on the conical pinion bearings. In truth a couple of trial fits come before the final fit.
Next is a full strip of the LSD carrier; ring gear removed (those bolts are SUPER tight), old bearings removed from either end and cap off.
Now the interesting part! Pull everything out of the casing, lay out methodically, clean and inspect prior to rebuilding.
Spider gears!
The contents!
New clutch plates ready to go in after a good soaking in gear oil
Back together
Now on with the 3.62 ring gear and getting those bolts torqued to 100nm + 40 degrees - lucky I had the press to hold the thing whilst i swung off the bar
Back into the casing (i’ve spared you all the multiple rounds of shimming to get the carrier preload in spec - this is boring enough eh??!)
Side covers on complete with new bearing outers and oil seals obviously
Getting the backlash bang on in the middle of the spec; 0.06 - 0.14mm.
Back cover on, new hardware and we’re done!
Looks pretty good - hope it works just as well!
AndrewGP said:
Fantastic work! One of my favourite threads in Readers Cars 
Have you finished your PPL yet?
Have you finished your PPL yet?
Thanks! Unfortunately still in training for my PPL, the great British weather and work commitments combined have meant that I’ve only clocked up a measly 11hrs since May. Still progress has been decent and I reckon another 2-3hrs and i’ll be solo hopefully.
T-bagger said:
Thanks! Unfortunately still in training for my PPL, the great British weather and work commitments combined have meant that I’ve only clocked up a measly 11hrs since May. Still progress has been decent and I reckon another 2-3hrs and i’ll be solo hopefully.
 )
)
TroubledSoul said:
I am properly struggling to remove the rubbery underseal stuff above the rear axle and fuel tank, despite using a grinder and wire wheel. Also managed to put a hole in one of the tank vent pipes as I tried to work around them FFS 
You need a 'Strip wheel' or Body prep wheel. Will make light work of it.- https://www.screwfix.com/p/non-woven-preparation-w...Those ones are ok, dont last too long though
This is the sort of thread that restores my faith in PH - great read, great skills on display.
Love e36s, have a tatty 323 convertible and my brother has a 328 Sport that he has grown weary of and I would love to take it off hands and do a similar job, but for a lack of skill, lack of time, and lack of money.
I shall have to live vicariously through your thread. For me the e36 is pretty much the perfect balance of classic simplicity with modern daily-ability.
Gassing Station | Readers' Cars | Top of Page | What's New | My Stuff