160,000 Mile TVR Chimaera
Discussion


Shed TVR said:
Spunagain said:
Great so see another one being revived!
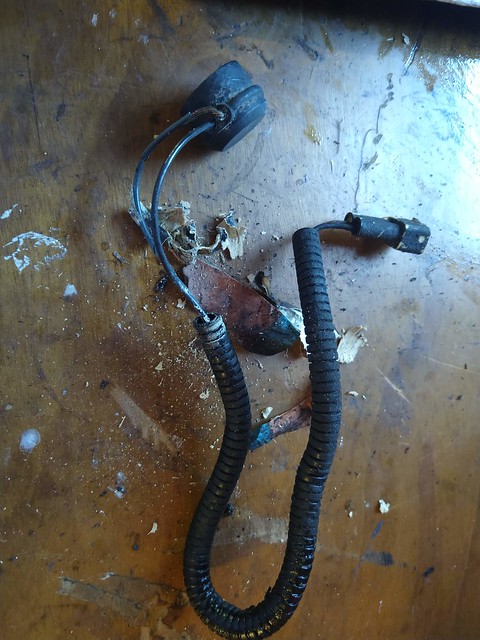
Re your fuel pump condenser, this Nissan Vannette one from Ebay worked for me - just needed to widen the earth hole a bit!
Thanks so much I've been stressing trying to find a replacement for this! I had no idea what the capacitor was for or what a fuel pump condenser was lol. I've ordered that now.Re your fuel pump condenser, this Nissan Vannette one from Ebay worked for me - just needed to widen the earth hole a bit!
Edited by Spunagain on Wednesday 8th July 14:39
I take you have also seen this current thread - Another body off thread - by PHer Classic Chim.
https://www.pistonheads.com/gassing/topic.asp?h=0&...
Keep the updates coming!
https://www.pistonheads.com/gassing/topic.asp?h=0&...
Keep the updates coming!
Spunagain said:
Shed TVR said:
Spunagain said:
Great so see another one being revived!
Re your fuel pump condenser, this Nissan Vannette one from Ebay worked for me - just needed to widen the earth hole a bit!
Thanks so much I've been stressing trying to find a replacement for this! I had no idea what the capacitor was for or what a fuel pump condenser was lol. I've ordered that now.Re your fuel pump condenser, this Nissan Vannette one from Ebay worked for me - just needed to widen the earth hole a bit!
Edited by Spunagain on Wednesday 8th July 14:39
I work with electrical engineers although I'm a design engineer and every time there's a mystery issue with no obvious cause they start to mutter about noise and adding capacitors. Electrical Engineering really can be an art as much as a science.
Hello again all, sorry if I don't reply to people I keep forgetting to check/update this!
Progress has slowed quite a bit on this as I'm still wating for my chassis to come back, but I've still managed to get a lot done.
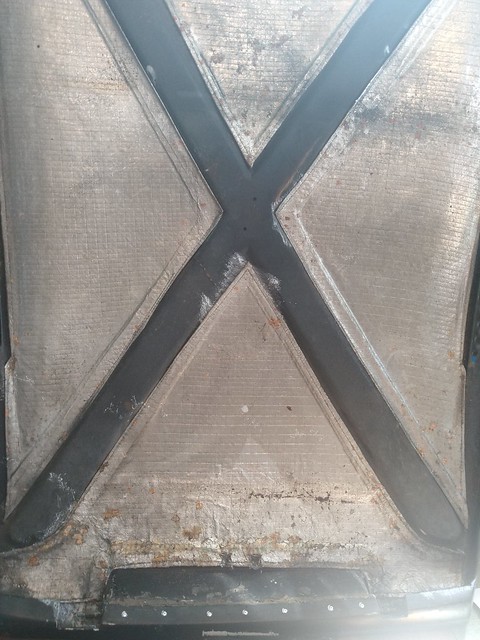
Completed all the broken fibreglass repairs, until I find more that is:


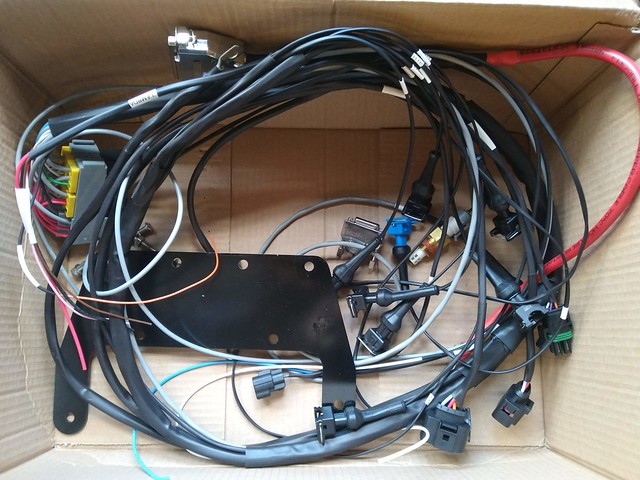
Got my wiring loom from MS2 tuning, I was really impressed with the quality:
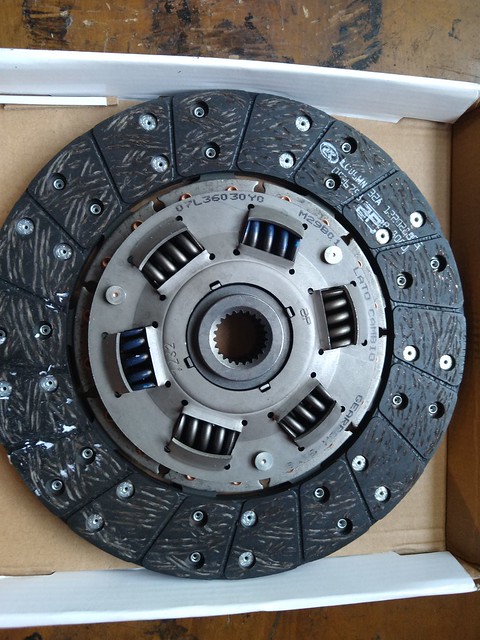
New clutch friction plate. Don't judge me but I didn't replace the pressure plate because it looked fine, and I was struggling to source the correct item at non-ridiculous prices
Top notch shipping from a well known tuning parts supplier for my bucket seats:
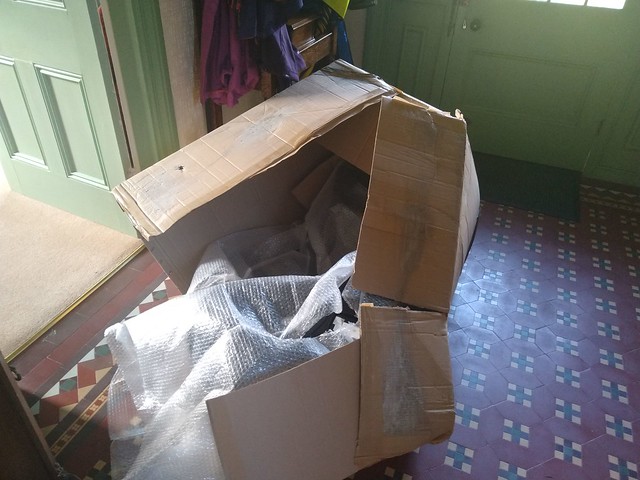
Luckily undamaged so all is well. Went for these OMP units in the end as the Cobras I initially ordered were out of stock.

I had the sump off as it had been leaking to replace the gasket, this was the old one

If you go back to the start of this thread I replaced it when I bought the car, so not impressed with how well this lasted.
I've started replacing all of the battery cables in the car with thicker 50mm2 cable; the cables fitted by TVR from factory are very marginal and a lot of these cars have trouble starting when hot. I splashed out a bit and got some rather pricey UK made marine grade cable:

Some of the old cable, I'm surprised I didn't have any issues starting to be honest!

Difference in thickness:

Then I went about replacing what I could of the fuel lines with no chassis to mount them to. Some of the old fuel lines were a bit scary

I ran all new flexi lines and used 8mm copper pipe for the hard lines, I have clips on order:

Next, due to a fairly major cock up on my part I had to partially re-assemble the gearbox. Note to anyone with a borg warner t5: if you try to take the top cover off you can't re-seal it properly without taking the whole gearbox apart!
Whoops. Anyway, it was interesting to take a look inside:


The condition was remarkably good given the 164,000 miles of probable abuse Only thing I could find wrong inside was one chipped synchro tooth on 5th gear! I mentioned earlier I was planning on doing some strengthening mods to the gearbox, but unfortunately I wasn't able to get any parts as the US seller wasn't willing to ship to the UK so that will have to be shelved for now.
I fixed up the reverse switch wiring as it didn't look the best:


New re-inforced clutch fork, clip and bushings. I went for the re-inforced unit as the standard items have a habit of bending when heavier pressure plates are used:


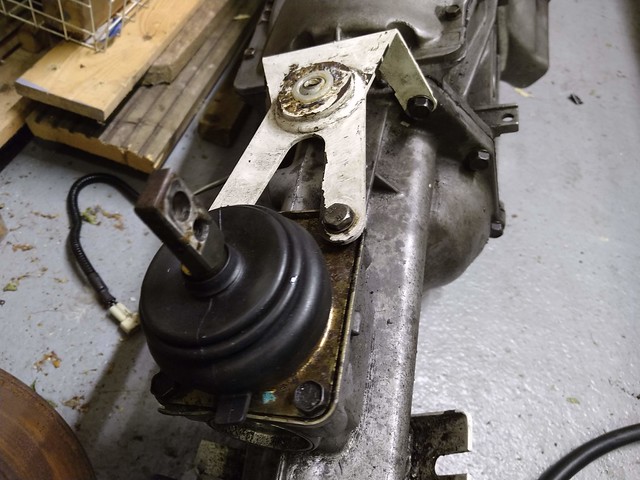
New shifter bush as the old one was damaged:

I have a new "big bore" slave cylinder as well but don't have a picture yet.
Next comes another cock up. I thought the new loom included everything that goes to the engine, but it doesn't. Also, I didn't realise that the dodgy looking loose relay under the dash forms a crucial part of the immobiliser circuit Also, some of the relay outputs from the loom are using positive switching and they need to be negative.
This led to me spending a rather long time trawling through dozens of tiny wires trying to find what I needed to save from the original loom. This combined with the slightly lacking TVR factory diagram made this quite difficult!
Thankfully I found this website that has some very nice hand drawn schemes which are kindly provided for free which helped things a bit.
In the end I had to make up some of my own diagrams to understand what was going on, as I believe for a lot of these cars drawings simply don't exist for many parts of the wiring:

(Not sure how that got sideways)
I narrowed it down to these parts of the old loom that were still needed:

The original loom is poorly made. Lots of these dodgy splices everywhere wrapped in electrical tape:

Decided to try to improve the weird relay circuit shown a couple of pictures up. Started by removing the electrical tape from everything. Why does a red wire need to be wrapped in red electrical tape?!

My plans are to either fix this to the battery box or re-locate it elsewhere.
Next I connected my spaghetti loom back into the car. I will tidy it up and run it in conduit, but only once it's tested and all works. I found this was the most comfortable position under the dash

I connected the battery up and there was life! I managed to get my dodgy wideband controller, wideband meter and Megasquirt connected to my laptop and each other after about a day of messing about:


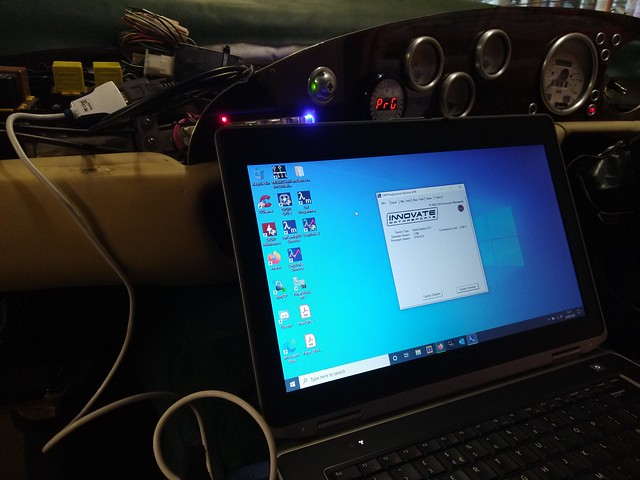
No wiring mistakes or smoke as of yet but it's early days
Will update this again once I have enough done!
Edit: removed pictures of immobiliser scheme whoops
Progress has slowed quite a bit on this as I'm still wating for my chassis to come back, but I've still managed to get a lot done.
Completed all the broken fibreglass repairs, until I find more that is:
Got my wiring loom from MS2 tuning, I was really impressed with the quality:
New clutch friction plate. Don't judge me but I didn't replace the pressure plate because it looked fine, and I was struggling to source the correct item at non-ridiculous prices
Top notch shipping from a well known tuning parts supplier for my bucket seats:
Luckily undamaged so all is well. Went for these OMP units in the end as the Cobras I initially ordered were out of stock.
I had the sump off as it had been leaking to replace the gasket, this was the old one
If you go back to the start of this thread I replaced it when I bought the car, so not impressed with how well this lasted.
I've started replacing all of the battery cables in the car with thicker 50mm2 cable; the cables fitted by TVR from factory are very marginal and a lot of these cars have trouble starting when hot. I splashed out a bit and got some rather pricey UK made marine grade cable:
Some of the old cable, I'm surprised I didn't have any issues starting to be honest!
Difference in thickness:
Then I went about replacing what I could of the fuel lines with no chassis to mount them to. Some of the old fuel lines were a bit scary
I ran all new flexi lines and used 8mm copper pipe for the hard lines, I have clips on order:
Next, due to a fairly major cock up on my part I had to partially re-assemble the gearbox. Note to anyone with a borg warner t5: if you try to take the top cover off you can't re-seal it properly without taking the whole gearbox apart!
Whoops. Anyway, it was interesting to take a look inside:
The condition was remarkably good given the 164,000 miles of probable abuse
Only thing I could find wrong inside was one chipped synchro tooth on 5th gear! I mentioned earlier I was planning on doing some strengthening mods to the gearbox, but unfortunately I wasn't able to get any parts as the US seller wasn't willing to ship to the UK so that will have to be shelved for now. I fixed up the reverse switch wiring as it didn't look the best:
New re-inforced clutch fork, clip and bushings. I went for the re-inforced unit as the standard items have a habit of bending when heavier pressure plates are used:
New shifter bush as the old one was damaged:
I have a new "big bore" slave cylinder as well but don't have a picture yet.
Next comes another cock up. I thought the new loom included everything that goes to the engine, but it doesn't. Also, I didn't realise that the dodgy looking loose relay under the dash forms a crucial part of the immobiliser circuit
Also, some of the relay outputs from the loom are using positive switching and they need to be negative.This led to me spending a rather long time trawling through dozens of tiny wires trying to find what I needed to save from the original loom. This combined with the slightly lacking TVR factory diagram made this quite difficult!
Thankfully I found this website that has some very nice hand drawn schemes which are kindly provided for free which helped things a bit.
In the end I had to make up some of my own diagrams to understand what was going on, as I believe for a lot of these cars drawings simply don't exist for many parts of the wiring:
(Not sure how that got sideways
)I narrowed it down to these parts of the old loom that were still needed:
The original loom is poorly made. Lots of these dodgy splices everywhere wrapped in electrical tape:
Decided to try to improve the weird relay circuit shown a couple of pictures up. Started by removing the electrical tape from everything. Why does a red wire need to be wrapped in red electrical tape?!
My plans are to either fix this to the battery box or re-locate it elsewhere.
Next I connected my spaghetti loom back into the car. I will tidy it up and run it in conduit, but only once it's tested and all works. I found this was the most comfortable position under the dash
I connected the battery up and there was life! I managed to get my dodgy wideband controller, wideband meter and Megasquirt connected to my laptop and each other after about a day of messing about:
No wiring mistakes or smoke as of yet but it's early days
Will update this again once I have enough done!
Edit: removed pictures of immobiliser scheme whoops
Edited by Shed TVR on Saturday 29th August 22:43
Edited by Shed TVR on Saturday 29th August 22:46
ivanhoew said:
cant beat a bit of innovate 
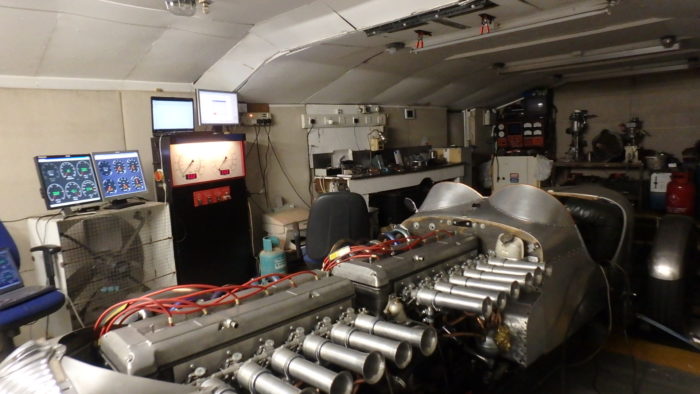
That looks bonkers Ivan what on earth is that?? 2 Jag straight 6s?Mr lestat said:
The fuel lines in mine were in a right state. I had them changed and the chap said they were very poor and I was probably lucky nothing had happened. It did stink of fuel / oil / resin etc for a while before but I thought that was typical TVR
I think on my car some had been replaced and some hadn't, the short sections on the fuel pump looked original to me!Rob-c33sg said:
Nice work! Why does taking the top of the gearbox create an issue?
Thanks Rob! On the T5, the top cover also forms part of the shifter assembly and holds 1-2 and 3-4 synchro forks. If you try to remove it, it will slide sideways enough to break the silicone seal but won't actually come off the gearbox without taking everything apart. Has your Tuscan got a T5? I thought most were 6 speed.Well i will come clean and say i was the Bristol based chap who bought it from the apparent 'Mr bodgelot' or maybe it was before the person i bought if from? Do i have any regrets? No. I loved it and absolutely devoured it for the grand total of 2 weeks. But i basically wanted to trial a TVR and scratch a childhood itch and this one was the cheapest in the UK when it did come up, it ran, it worked. It put a massive smile on mine and my brothers mouths. But it was impractical for me, i had a pregnant girlfriend, the roof having to go into the boot was a pain. It was amazing and terrifying and was actually fantastically reliable for the two weeks i did have it for. But all good things come to an end and i got a good offer for it that paid for the fuel and insurance i had paid over the last two weeks. My personal highlight was taking it to snowdonia and ripping around the elan valley. I actually miss it a great deal and it brings me great joy to see it being renovated. I honestly didn't touch anything mechanical in my time of ownership so my hands are clean when it comes to the list of bodges! Good luck. 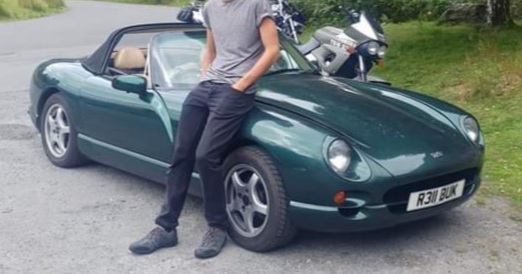
05needhamn39 said:
Well i will come clean and say i was the Bristol based chap who bought it from the apparent 'Mr bodgelot' or maybe it was before the person i bought if from? Do i have any regrets? No. I loved it and absolutely devoured it for the grand total of 2 weeks. But i basically wanted to trial a TVR and scratch a childhood itch and this one was the cheapest in the UK when it did come up, it ran, it worked. It put a massive smile on mine and my brothers mouths. But it was impractical for me, i had a pregnant girlfriend, the roof having to go into the boot was a pain. It was amazing and terrifying and was actually fantastically reliable for the two weeks i did have it for. But all good things come to an end and i got a good offer for it that paid for the fuel and insurance i had paid over the last two weeks. My personal highlight was taking it to snowdonia and ripping around the elan valley. I actually miss it a great deal and it brings me great joy to see it being renovated. I honestly didn't touch anything mechanical in my time of ownership so my hands are clean when it comes to the list of bodges! Good luck.
Hello and thanks for sharing! Appreciate you taking the time to sign up and reply. What you did made sense financially as the car obviously had a lot of issues so I don't blame you at all. I've come to realise with this car it's not just one person who's responsible for some of the workmanship, more just an accumulation of things over the years. Honestly some of the things I did when I first got the car I'd consider bodges now, but you learn from it and improve the work you do. As you said it's great fun to drive and I'm glad you enjoyed it!So the restorer got around to starting work on my chassis, after some delays due to workload. Unfortunately after shot blast it was a lot worse than it first appeared:


There are a lot of pinholes in the main chassis legs unfortunately which weren't visible before shotblast. There is also some dodgy welding going on (my welding aside) that has been done at some point in the last picture.
Worst of all though is this, the outriggers were brazed on! The restorer says they have never seen anything like this on a TVR. This was work done by a specialist around 2006
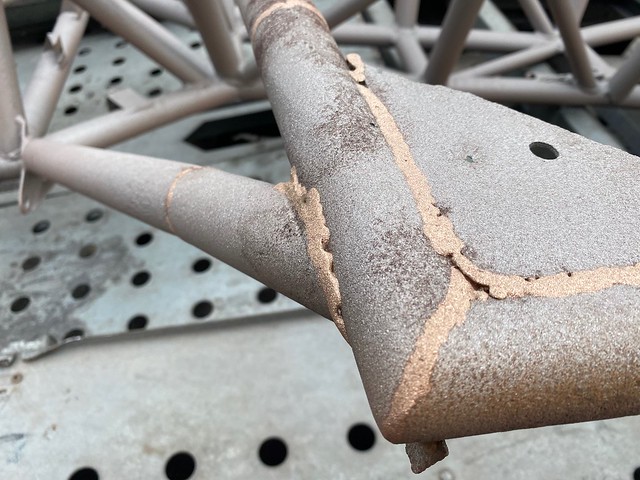
The end result of this is that the chassis cannot be repaired, so unfortunately the car will be getting broken for parts.
Just kidding, it's not time for this shed to die yet! The restorer offered me the options of:
- Patch up the existing chassis as best as possible, although they let me know this was not a good option in their opinion
- Create a chassis using a good old stock chassis "spine"
- Create an entirely new chassis using their jig
In the end the price difference wasn't huge between the second two options, so I decided to go for a brand new chassis for which they offered me a generous discount. This will be built from scratch (albeit they have the tubes/box section cut already) and will be better than TVR made it from the factory with better welds and better paint

If you are reading this and somehow haven't been put off buying a TVR, this thread just goes to show what everyone on the TVR forum has been saying all along, and what I wish I knew before I bought this car:
Don't buy a TVR unless it has had a recent body off restoration! Or if it hasn't budget for one.
I will update at some point but it might not be for a while as I'm out of the country until December, thanks for reading!
Speed 3 said:
They tried that on a racing wedge in the 80's. IIRC it didn't flex (normally a good thing, but not in this case as it kept cracking). There's a thread or conversation on PH somewhere about it.
Gotcha thank you ,i suppose it depends on how thick the walls are on the tubes .Well I'm finally back with another update! Again sorry for replying to comments so slowly, I keep forgetting to check this.
So a few weeks ago I got my chassis back and have been working away at getting the car back on the road. The restorer called the old chassis "the worst one ever" and he must have done dozens of these at least, so very glad I got it replaced in the end instead of just patched up!
Before I start I should say, I'm a total amateur at this so if you see something that looks wrong please say so I can fix it! And of course any suggestions are welcomed.
Here's some pictures of when it turned up:

Shiny new wishbones got polybushed. Some of the old ones did get saved and powdercoated, but apparenely about 2-3 "fell apart" on shotblast

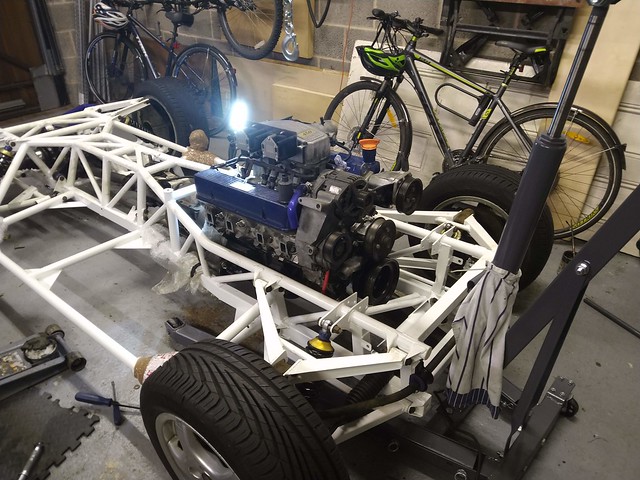
Starting to build it back up:

Diff and driveshafts going in:


Fuel pump and new fuel lines:

Engine and box in:
Fuel lines all connected up:

I actually ended up finding out that none of the original fuel lines had the correct clips on them!
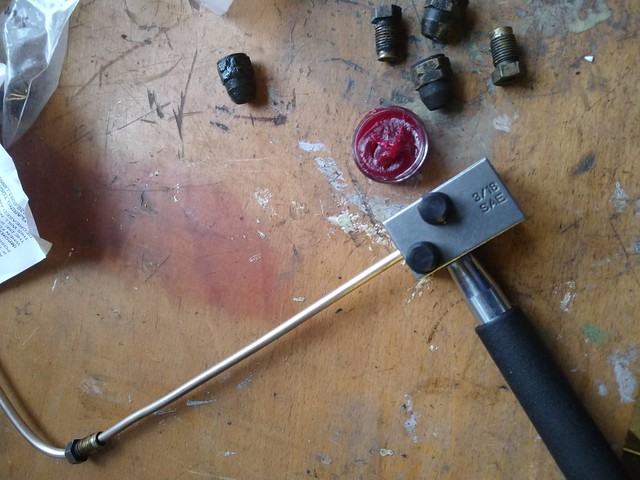
Making up brake lines, never done this before but it's really satisfying. Happy with the flares but the pipes could certainly look better I went with cupronickel lines which should last better than the originals.


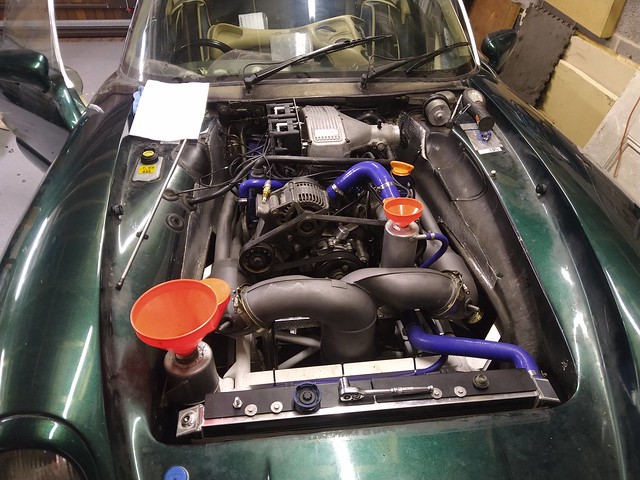
Filling up oils while the access is easy. One day I will buy a proper pump to do this


Just warming up the oil

Final fuel pipe routing:

It looks kind of like a car again!

Connecting up the new battery cables:

Finishing off the new brake lines:

Starting to connect the loom up:

Still a mess but getting there slowly:
Replaced the top radiator mounts with these funky exhaust polybushes for a classic mini. Worked great! I also fitted bottom mounts as these were missing.


Ended up making my own HT leads as I wasn't able to get in touch with the guy who made my loom, which also probably means I will have to map the car myself as he's the only person in my area that can do it! oh well, I don't mind learning. Anyway, I made this awful diagram figuring out what HT lead needs to be connected to where

And apparently I forgot to take photos while I was making the leads but it wasn't too bad once I got some practice. Hardest thing was working out what type of connectors I needed for the coilpack! The routing of them could have been better but I was happy enough for a first attempt. And I went for black so at least it got a bit more blue out of the engine bay
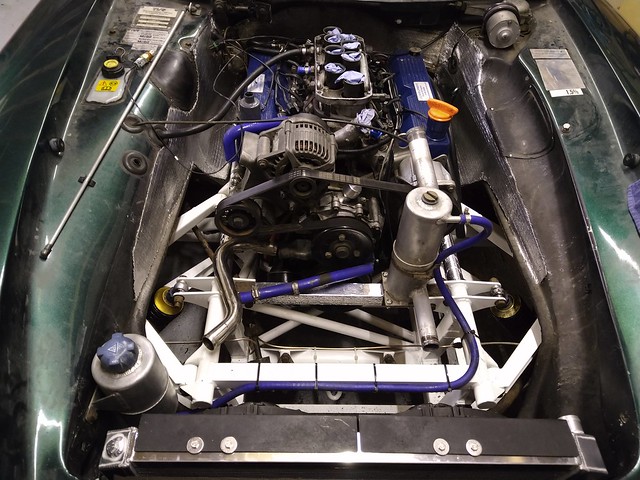
Cooling and electrical systems all connected.

Exhaust on and filling up the coolant:
Fuel tank fitting:
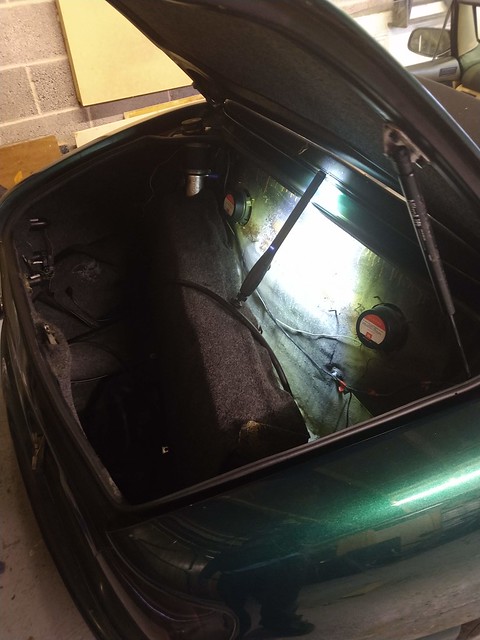
Routing of fuel hoses:

ECU final mounting spot. I re-located the relays here under the dash, and went around and solidly attached everything possible to the dash so it isn't all loose under there like from factory!

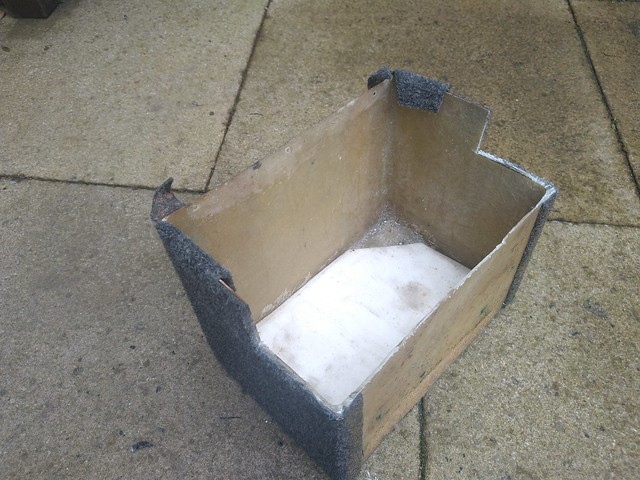
I also attacked the battery box with a grinder and a cut off wheel to get better access to the battery terminals. I'm really glad I did this in the end as it made fitting so much easier.
Also found this in the interior trim

After all of that it was time to try starting and seeing what happened! I contacted Phil at ExtraEFI to make sure I'd connected the HT leads up correctly which I did surprisingly lol. So first I checked for fuel at the feed and return rails - yep! (and sprayed it everywhere like an idiot).
- Cranked the engine with the fuel pump disconnected, first impressions wow it cranks so much faster than before. Those larger battery cables have definitely helped a lot.
- Attempted to start it but not getting spark. After a bit of messing around I found that I wasn't getting any crank speed signal. Adjusted the bracket a bit, tried again and imagine my amazement when it fired straight up into a stable idle
After this I did quite a lot of messing around in the ECU. First of all I verified the timing which I stupidly forgot to do earlier (and it was out by about 8 degrees). Then I went through and made up an AFR table and ignition table that looked half decent based on some others I found on the TVR forum as a starting point.
I'm still plugging away at improving the idle, but so far I:
- Set up the stepper motor warm up to be half decent
- Improved the warm up enrichment
- After some adjustment was able to get the AFR to follow the AFR table, but the PID values need tuning some more
So what's left to do on the car? Well there is a quite large list of items, some of which are preventing me from driving and MOTing it. To point out the main ones:
- Brake caliper needs to be replaced at the rear, and the brakes need to be bled
- Handbrake needs adjusting
- Clutch needs bleeding
- Fit seats (still waiting for new seat rails to arrive)
- Fit battery bus-bar, this is something I added to try and further get rid of the old wiring mess in the passenger footwell. This way only 2 leads need to be run to the battery.
- Fix coolant leak at the heater matrix
- Rev counter not working
- Touch up chassis paint where it got scratched in places during building up the chassis
- Seal fuel hoses into the body
- Fit the rest of the exhaust and weld new bracket
That's it for now, I'll update when I can!
200Plus Club said:
Get them to drill access holes in each chassis leg on the new one and liberally fill it with dinitrol cavity wax before you rebuild it all. No point doing all this again in 15yrs :-)
Well they have assured me it will last another 20 years but we'll see, certainly a good idea and something I could do myself at a later point.B'stard Child said:
Surprised how pin holey that chassis was after blasting - was it just in high traffic areas or in places that weren’t exposed?
Me too, I think it was mainly in areas where the paint protection had worn away. Rob-c33sg said:
I was planning to do some ‘normal’ winter jobs this season and also moving house. Then next year after summer get the body off. Now I’m scared 
Good luck Rob! Hows the Tuscan?So a few weeks ago I got my chassis back and have been working away at getting the car back on the road. The restorer called the old chassis "the worst one ever"
and he must have done dozens of these at least, so very glad I got it replaced in the end instead of just patched up! Before I start I should say, I'm a total amateur at this so if you see something that looks wrong please say so I can fix it! And of course any suggestions are welcomed.
Here's some pictures of when it turned up:
Shiny new wishbones got polybushed. Some of the old ones did get saved and powdercoated, but apparenely about 2-3 "fell apart" on shotblast
Starting to build it back up:
Diff and driveshafts going in:
Fuel pump and new fuel lines:
Engine and box in:
Fuel lines all connected up:
I actually ended up finding out that none of the original fuel lines had the correct clips on them!
Making up brake lines, never done this before but it's really satisfying. Happy with the flares but the pipes could certainly look better
I went with cupronickel lines which should last better than the originals.Filling up oils while the access is easy. One day I will buy a proper pump to do this
Just warming up the oil
Final fuel pipe routing:
It looks kind of like a car again!
Connecting up the new battery cables:
Finishing off the new brake lines:
Starting to connect the loom up:
Still a mess but getting there slowly:
Replaced the top radiator mounts with these funky exhaust polybushes for a classic mini. Worked great! I also fitted bottom mounts as these were missing.
Ended up making my own HT leads as I wasn't able to get in touch with the guy who made my loom, which also probably means I will have to map the car myself as he's the only person in my area that can do it! oh well, I don't mind learning. Anyway, I made this awful diagram figuring out what HT lead needs to be connected to where
And apparently I forgot to take photos while I was making the leads but it wasn't too bad once I got some practice. Hardest thing was working out what type of connectors I needed for the coilpack! The routing of them could have been better but I was happy enough for a first attempt. And I went for black so at least it got a bit more blue out of the engine bay
Cooling and electrical systems all connected.
Exhaust on and filling up the coolant:
Fuel tank fitting:
Routing of fuel hoses:
ECU final mounting spot. I re-located the relays here under the dash, and went around and solidly attached everything possible to the dash so it isn't all loose under there like from factory!
I also attacked the battery box with a grinder and a cut off wheel to get better access to the battery terminals. I'm really glad I did this in the end as it made fitting so much easier.
Also found this in the interior trim
After all of that it was time to try starting and seeing what happened! I contacted Phil at ExtraEFI to make sure I'd connected the HT leads up correctly which I did surprisingly lol. So first I checked for fuel at the feed and return rails - yep! (and sprayed it everywhere like an idiot).
- Cranked the engine with the fuel pump disconnected, first impressions wow it cranks so much faster than before. Those larger battery cables have definitely helped a lot.
- Attempted to start it but not getting spark. After a bit of messing around I found that I wasn't getting any crank speed signal. Adjusted the bracket a bit, tried again and imagine my amazement when it fired straight up into a stable idle
After this I did quite a lot of messing around in the ECU. First of all I verified the timing which I stupidly forgot to do earlier (and it was out by about 8 degrees). Then I went through and made up an AFR table and ignition table that looked half decent based on some others I found on the TVR forum as a starting point.
I'm still plugging away at improving the idle, but so far I:
- Set up the stepper motor warm up to be half decent
- Improved the warm up enrichment
- After some adjustment was able to get the AFR to follow the AFR table, but the PID values need tuning some more
So what's left to do on the car? Well there is a quite large list of items, some of which are preventing me from driving and MOTing it. To point out the main ones:
- Brake caliper needs to be replaced at the rear, and the brakes need to be bled
- Handbrake needs adjusting
- Clutch needs bleeding
- Fit seats (still waiting for new seat rails to arrive)
- Fit battery bus-bar, this is something I added to try and further get rid of the old wiring mess in the passenger footwell. This way only 2 leads need to be run to the battery.
- Fix coolant leak at the heater matrix
- Rev counter not working
- Touch up chassis paint where it got scratched in places during building up the chassis
- Seal fuel hoses into the body
- Fit the rest of the exhaust and weld new bracket
That's it for now, I'll update when I can!
Gassing Station | Readers' Cars | Top of Page | What's New | My Stuff