Caddy Van VR5 Conversion
Discussion


I have an update 
I got a call while walking home this evening to say the engine mounts are all but done and the van will be ready to collect tomorrow
That creates a slight space issue on the driveway with my Mk2 Golf currently residing there but I’m hoping to get that moved to work in the next couple of days and then the van can come back
I got a call on Thursday morning to say the van was being collected and would be dropped back to mine later that day
I popped home from work a bit later and helped get the van back onto the driveway. BDS Performance in Dorking have done an excellent job with the mounts and have managed to use as much of the factory engine mounts as possible When I popped to Bruno’s (owner of BDS) house the night before to pay him he was telling me about the amount of interest that had been shown in the van while it had been sat in the workshop. Keeping in mind some of expensive racing cars etc he has going through his place and the owners were interested in a rather knackered looking old van haha.
Here are a couple of pictures of the mounts. He’s left them in primer so I can spray them when the time comes.


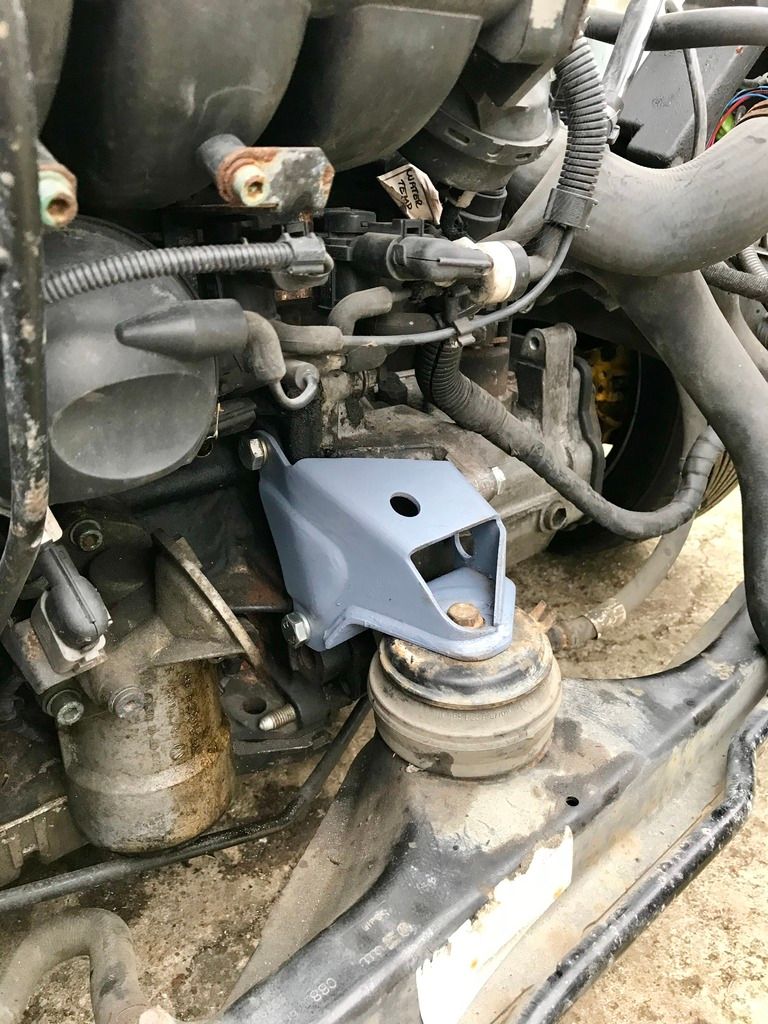
Now that the van is back I need to remove the engine to replace some gaskets, bits of rubber hose, the big plastic coolant hose on the front of the block and finish making the EGR blanking plate. Then it can go back in, driveshafts in, finish the wiring and see if it starts. Doesn’t sound like much but with the crap weather it might take a little while.
I popped home from work a bit later and helped get the van back onto the driveway. BDS Performance in Dorking have done an excellent job with the mounts and have managed to use as much of the factory engine mounts as possible
When I popped to Bruno’s (owner of BDS) house the night before to pay him he was telling me about the amount of interest that had been shown in the van while it had been sat in the workshop. Keeping in mind some of expensive racing cars etc he has going through his place and the owners were interested in a rather knackered looking old van haha. Here are a couple of pictures of the mounts. He’s left them in primer so I can spray them when the time comes.


Now that the van is back I need to remove the engine to replace some gaskets, bits of rubber hose, the big plastic coolant hose on the front of the block and finish making the EGR blanking plate. Then it can go back in, driveshafts in, finish the wiring and see if it starts. Doesn’t sound like much but with the crap weather it might take a little while.

Mrs Sammo got a puncture today so I had to get out there and put the spare on. As I was now outside I decided to do a bit to the van. I couldn’t face taking the engine out today so decided to start getting the DBW accelerator pedal fitted
If you can remember far enough back, I had a mount made for the pedal so it would tuck up next to the pedal box and sit in the same place as the original cable pedal. This involved a bit of CAD (cardboard aided design).


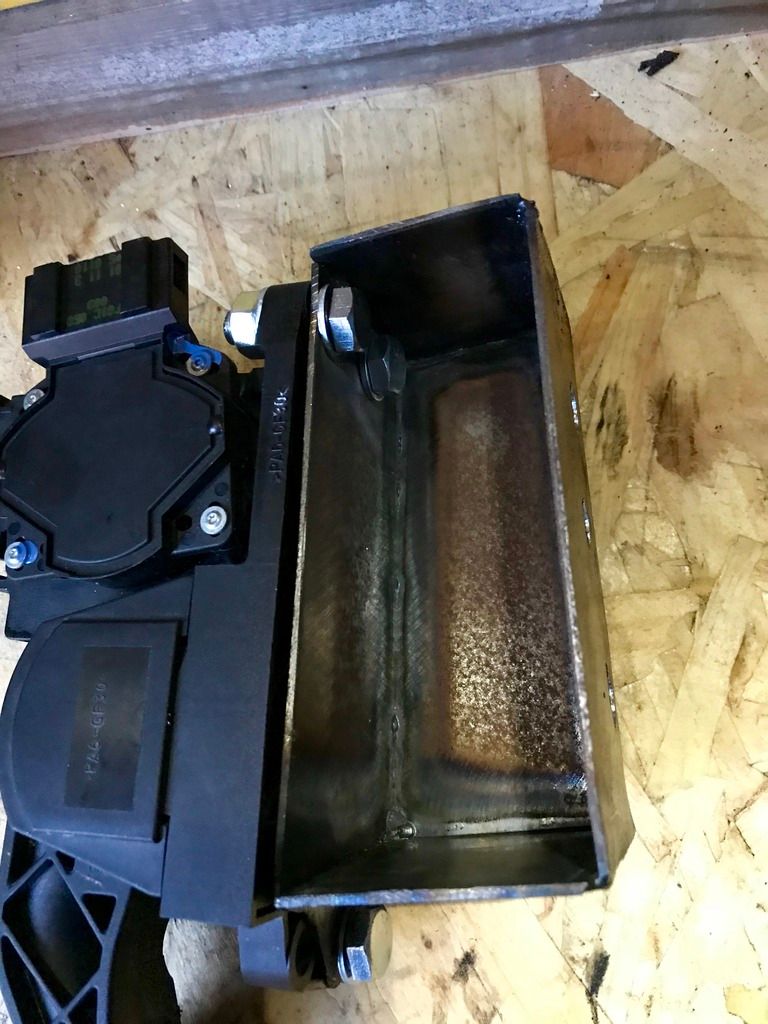
That was then turned into an exact replica in steel I forgot to take a picture of it until today when I was drilling the holes. First I had to drill three holes on the back to allow the studs coming from the brake servo, through the bulkhead and then through the pedal mount. Annoyingly I couldn’t find my decent set of drill bits so had to do what I could with a knackered old set and then open the holes out with the Dremel, so the holes don’t look great, but they do the job

Then I drilled three more on the front and got the pedal bolted on


Once I was happy the pedal was where I wanted it to be I unbolted it from the mount and then gave it a liberal coating of black hammerite. I’ve been slacking today and forgot to take anymore pictures so that’s all you’re getting today haha. We’re off to London to see Santa at Harrods tomorrow so that’s it for this weekend.
If you can remember far enough back, I had a mount made for the pedal so it would tuck up next to the pedal box and sit in the same place as the original cable pedal. This involved a bit of CAD (cardboard aided design).


That was then turned into an exact replica in steel
I forgot to take a picture of it until today when I was drilling the holes. First I had to drill three holes on the back to allow the studs coming from the brake servo, through the bulkhead and then through the pedal mount. Annoyingly I couldn’t find my decent set of drill bits so had to do what I could with a knackered old set and then open the holes out with the Dremel, so the holes don’t look great, but they do the job 
Then I drilled three more on the front and got the pedal bolted on


Once I was happy the pedal was where I wanted it to be I unbolted it from the mount and then gave it a liberal coating of black hammerite. I’ve been slacking today and forgot to take anymore pictures so that’s all you’re getting today haha. We’re off to London to see Santa at Harrods tomorrow so that’s it for this weekend.
Another little update. Due to the awful weather we’ve had over the last few months I haven’t been near the van! However today it was sunny outside. Unfortunately we’ve got the family coming round later which has stopped me being able to do anything really.
Anyway, I was putting some stuff in the shed and spotted my accelerator pedal box sitting on the side. A while ago I’d sprayed it in black Hammerite and then left it there.
Apparently I didn’t take a picture of it sprayed. So heres one in bare metal.
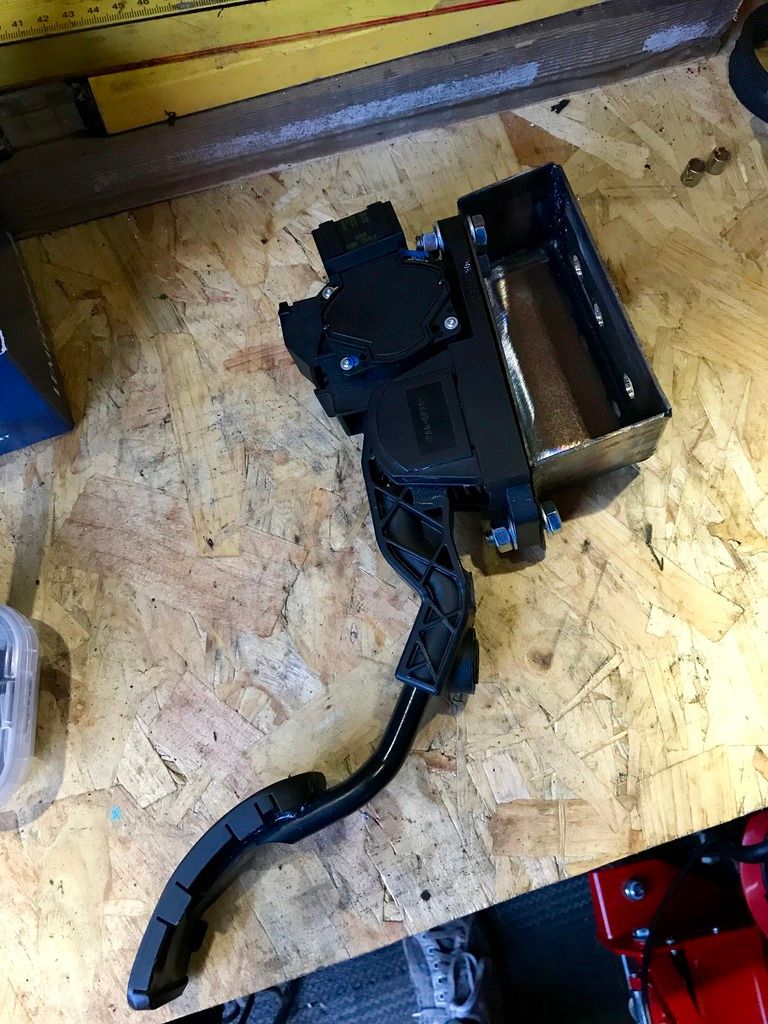
While I was in the shed I figured I’d spend a couple of minutes just bolting the pedal to the box. They were both sat there so why not.
Once I’d finished that I thought to myself “well the van is just there on the driveway. I might as well fit the pedal!” So I did

I’m happy to say that my CAD (cardboard aided design) designed pedal box fits perfectly and the pedal is in exactly the right position! I even got the angle right!!!
That’s it for today. Hopefully it will stop all this winter nonsense soon and I can start getting back out there
Anyway, I was putting some stuff in the shed and spotted my accelerator pedal box sitting on the side. A while ago I’d sprayed it in black Hammerite and then left it there.
Apparently I didn’t take a picture of it sprayed. So heres one in bare metal.
While I was in the shed I figured I’d spend a couple of minutes just bolting the pedal to the box. They were both sat there so why not.
Once I’d finished that I thought to myself “well the van is just there on the driveway. I might as well fit the pedal!” So I did

I’m happy to say that my CAD (cardboard aided design) designed pedal box fits perfectly and the pedal is in exactly the right position! I even got the angle right!!!
That’s it for today. Hopefully it will stop all this winter nonsense soon and I can start getting back out there
V1nce Fox said:
epic journey so far. can I ask a couple of questions pls?
how much power are you looking to make when it's finished?
have you finalised a colour choice?
As standard these engines are 170bhp. To begin with that will be more than enough. Once it’s been running without problems for a while then I’ll have a look at what can be done to increase the power. how much power are you looking to make when it's finished?
have you finalised a colour choice?
The exterior of the van will stay as it is. Moss and all
Sammo123 said:
As standard these engines are 170bhp. To begin with that will be more than enough. Once it’s been running without problems for a while then I’ll have a look at what can be done to increase the power.
The exterior of the van will stay as it is. Moss and all
Is the correct answer, loving reading this, keep up the good work!!! The exterior of the van will stay as it is. Moss and all
At about 3am this morning I woke up feeling rather unwell and then proceeded to spend the next five hours being sick! I rang in sick at about 6am and stayed in bed / continued running to the bathroom for a couple more hours. Thankfully I stopped being sick and got a few hours sleep, eventually waking up at about 1pm.
After having some dry toast (possibly the most boring piece of food in the world!) I decided to get on with extending the small piece of loom for the DBW throttle pedal. Due to the size of the plugs on each end of this loom I had to cut it, solder on an extension, feed the extension through the hole in the bulkhead and then solder the other plug back on!
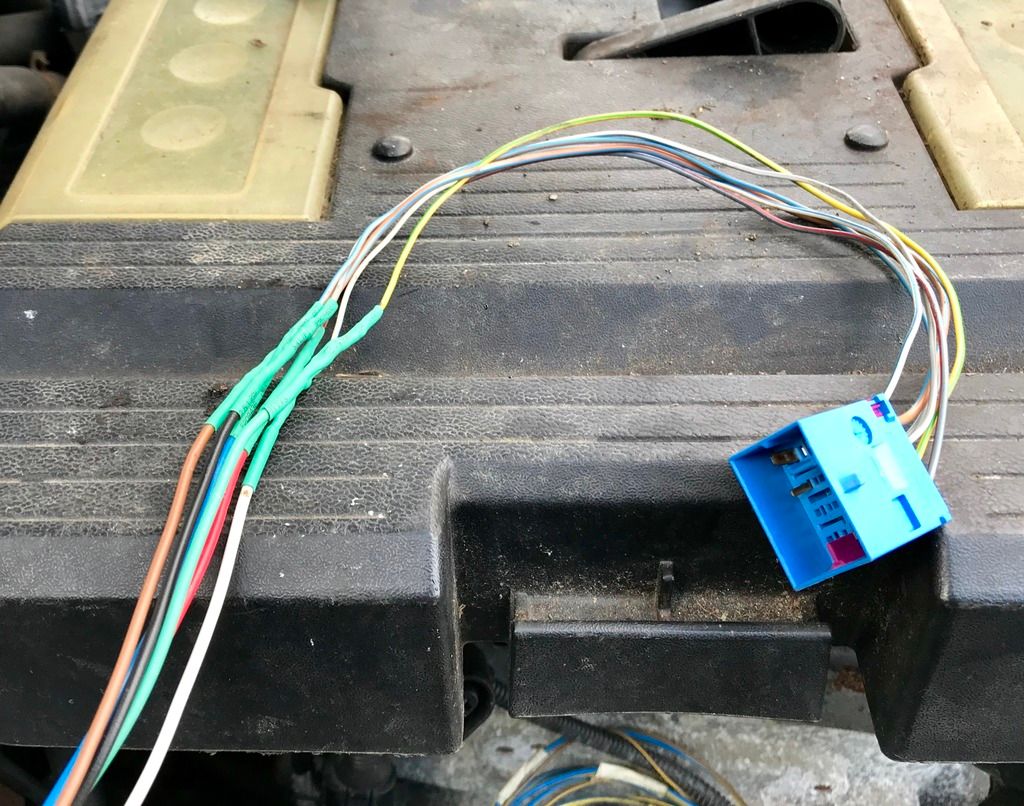
Anyway, I got stuck straight in, chopped the loom and started getting it ready to extend. I forgot to take a picture of the loom beforehand. This was it after being cut and clamped ready to extend.

My soldering has improved massively over the years. This could actually be considered tidy now

Six wires and some heat shrink later and we had this.

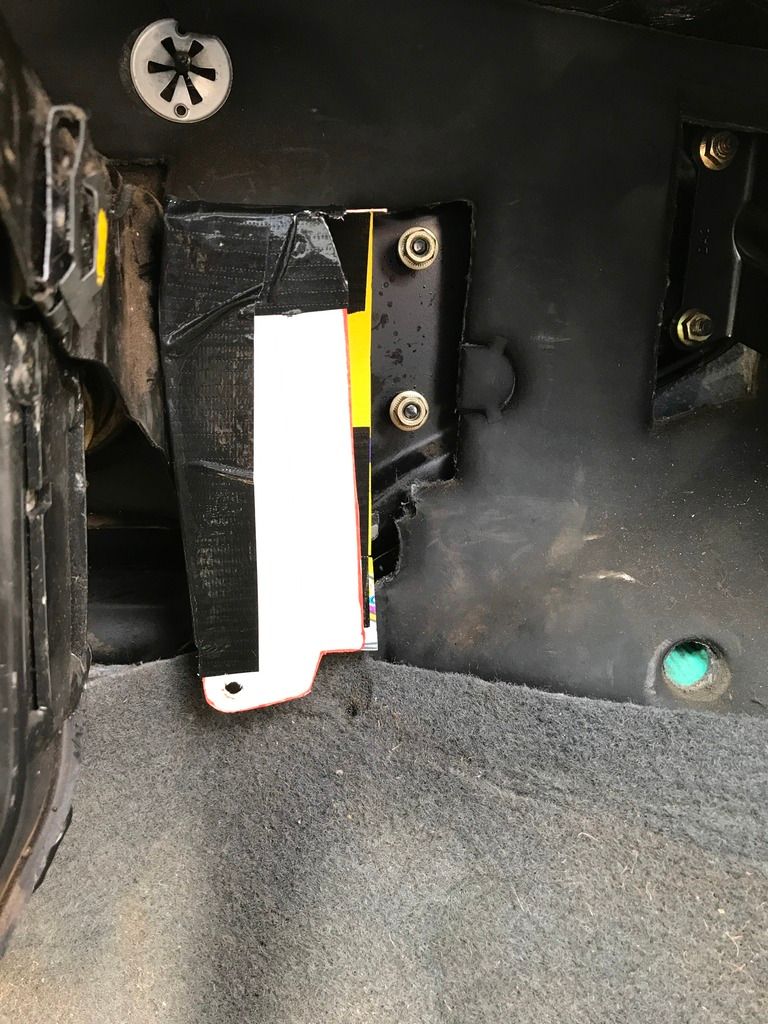
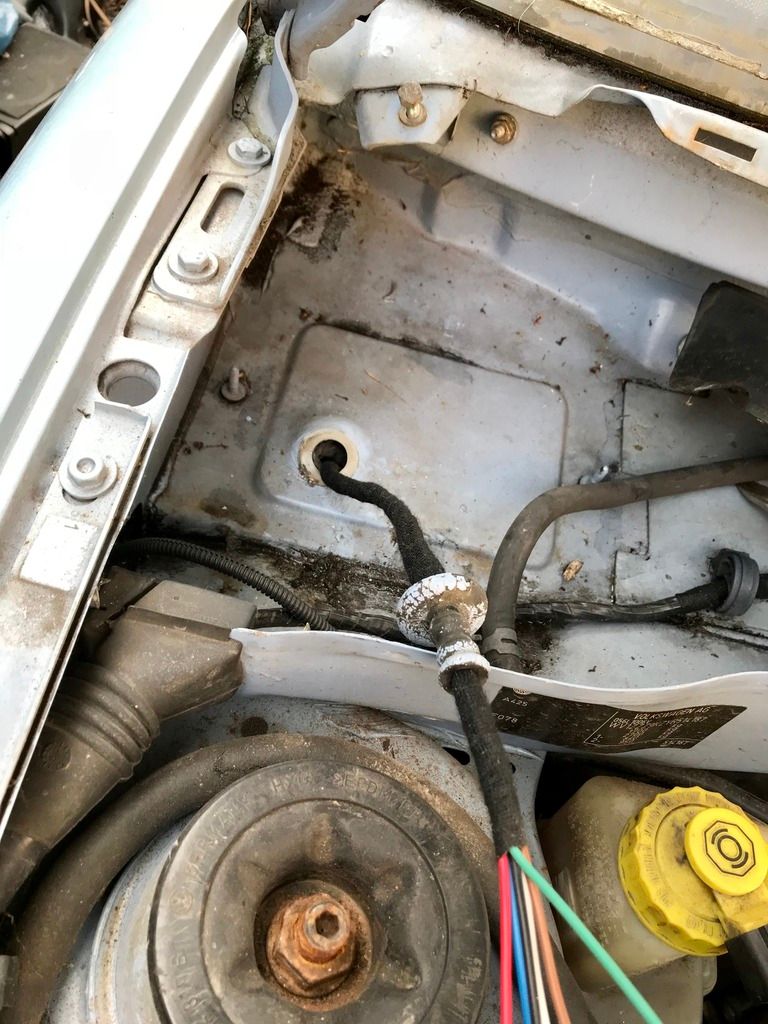
With the extension wiring attached it was time to head outside and find a hole to feed it through. I found this one which I think is for the bonnet release cable. It was in the perfect position so it’s been hijacked for this instead. I’ll find another way of routing the bonnet release.

I fed the cable through from inside.


With the bare wires now in the engine bay it was time to crack out my gas powered soldering iron. It’s a handy little thing but takes an age to heat up!

It was really cold outside so I didn’t waste any time and just got on with it as quick as possible!

All done and heat shrinked
All that was left to do was to wrap the loom in loom tape and then get back indoors and defrost!

Only a small step again but at least it’s another thing I can cross off the list
After having some dry toast (possibly the most boring piece of food in the world!) I decided to get on with extending the small piece of loom for the DBW throttle pedal. Due to the size of the plugs on each end of this loom I had to cut it, solder on an extension, feed the extension through the hole in the bulkhead and then solder the other plug back on!
Anyway, I got stuck straight in, chopped the loom and started getting it ready to extend. I forgot to take a picture of the loom beforehand. This was it after being cut and clamped ready to extend.

My soldering has improved massively over the years. This could actually be considered tidy now

Six wires and some heat shrink later and we had this.

With the extension wiring attached it was time to head outside and find a hole to feed it through. I found this one which I think is for the bonnet release cable. It was in the perfect position so it’s been hijacked for this instead. I’ll find another way of routing the bonnet release.

I fed the cable through from inside.


With the bare wires now in the engine bay it was time to crack out my gas powered soldering iron. It’s a handy little thing but takes an age to heat up!

It was really cold outside so I didn’t waste any time and just got on with it as quick as possible!

All done and heat shrinked

All that was left to do was to wrap the loom in loom tape and then get back indoors and defrost!

Only a small step again but at least it’s another thing I can cross off the list
Sammo123 said:
At about 3am this morning I woke up feeling rather unwell and then proceeded to spend the next five hours being sick! I rang in sick at about 6am and stayed in bed / continued running to the bathroom for a couple more hours. Thankfully I stopped being sick and got a few hours sleep, eventually waking up at about 1pm.
Only a small step again but at least it’s another thing I can cross off the list
Your employer must be very understanding given all your "sickies" - still it lets you make some progress with your Van! Only a small step again but at least it’s another thing I can cross off the list
Might be tricky if you had a proper job though!
Jeff may not be impressed, but I doubt you care.
Mr Tidy said:
Your employer must be very understanding given all your "sickies" - still it lets you make some progress with your Van!
Might be tricky if you had a proper job though!
Jeff may not be impressed, but I doubt you care.
All my sickies? You’ve got my work record to hand have you? Might be tricky if you had a proper job though!
Jeff may not be impressed, but I doubt you care.
Oh so you know what my job is too? So you know that I start work at my main job at 7.30 every morning, don’t stop for lunch, finish between 5.30-6pm and then three nights a week drive straight to my second job which I do until 10pm? Plus the occasional Saturday I do at my main job too. Well it’s good to know someone is keeping an eye on how hard I work!
I’m sure Jeff wouldn’t be impressed knowing a member of staff is off sick, however what Jeff is or isn’t impressed with isn’t really any of your business.

Sammo123 said:
Mr Tidy said:
Your employer must be very understanding given all your "sickies" - still it lets you make some progress with your Van!
Might be tricky if you had a proper job though!
Jeff may not be impressed, but I doubt you care.
All my sickies? You’ve got my work record to hand have you? Might be tricky if you had a proper job though!
Jeff may not be impressed, but I doubt you care.
Oh so you know what my job is too? So you know that I start work at my main job at 7.30 every morning, don’t stop for lunch, finish between 5.30-6pm and then three nights a week drive straight to my second job which I do until 10pm? Plus the occasional Saturday I do at my main job too. Well it’s good to know someone is keeping an eye on how hard I work!
I’m sure Jeff wouldn’t be impressed knowing a member of staff is off sick, however what Jeff is or isn’t impressed with isn’t really any of your business.


Gassing Station | Readers' Cars | Top of Page | What's New | My Stuff