Audi S5 full fat version
Discussion


some of you may remember this being a constant eye sore for me every time i lifted the bonnet...

after having the promise of help from someone else who became unresponsive sadly i went on the hunt for a solution to my sticker replacement, it no longer being available from Audi, nor any dealers having any in stock.
I found this chap,
https://www.ebay.co.uk/usr/alex20dm11
no affiliation in any shape size or form, but he responded quickly and said he was able to help.
I sent him a pic of what i wanted, with the original size and today these turned up...

whilst not being on exactly the same foil as OE, they are certainly close enough for me and look a 1000 times better than the peeling, lifted original.


all for £3.92 delivered......
to say i am chuffed more than a chuffed thing is an understatement.
after having the promise of help from someone else who became unresponsive sadly i went on the hunt for a solution to my sticker replacement, it no longer being available from Audi, nor any dealers having any in stock.
I found this chap,
https://www.ebay.co.uk/usr/alex20dm11
no affiliation in any shape size or form, but he responded quickly and said he was able to help.
I sent him a pic of what i wanted, with the original size and today these turned up...
whilst not being on exactly the same foil as OE, they are certainly close enough for me and look a 1000 times better than the peeling, lifted original.
all for £3.92 delivered......
to say i am chuffed more than a chuffed thing is an understatement.
89forever said:
good old ebay came up trumps for the face lift window, boot and mirror switches i'd been after.

the passenger side and boot release are due to arrive tomorrow so that'll be tomorrows job.
I couldn't believe how mossy green in all the nooks and crannies my S5 had got, so out came the TFR and a toothbrush and went in to deep clean, the worst ones were the lower door rubbers, windows down and be careful I thought... of course some splashed onto the bloody leather....
Of course it marked the silver napa, however it looked like it actually really cleaned the leather... so I got some new clean TFR and a microfibre and wiped it across an inconspicuous area and I couldn't believe how clean it brought the area, so I did the whole seat... (only one in case tomorrow the leather is melted), I did a panel at a time, wipe, dry and then went over it with a Dr Leather wipe and buffed.... At no time did I leave the TFR to sit on the surface.
Before

After

surface feels great and has a lovely matt finish as it should.... now, I am not saying anyone else should try this in any shape size or form, at all.....
but I've never seen my seat so clean before....
if the leather hasn't melted by tomorrow then i'll do the passenger seat etc....
If you try it, it is at your OWN risk...
Finally got around to using a Christmas present from the other half.
Q2M Iron remover
My wheels were not particular dirty, having only done 150miles since the MOT.

impressed with it.
then I got on with the rest of the clean... clay, wash, dry (new towels), polish, wax and Ceramic Coat....


just need to find some cost effective Piano Black trims and i'll be happy with the interior upgrades (yeah right... who am I kidding..!!!)
Those seats look great. Can I ask what you used on them ? the passenger side and boot release are due to arrive tomorrow so that'll be tomorrows job.
I couldn't believe how mossy green in all the nooks and crannies my S5 had got, so out came the TFR and a toothbrush and went in to deep clean, the worst ones were the lower door rubbers, windows down and be careful I thought... of course some splashed onto the bloody leather....
Of course it marked the silver napa, however it looked like it actually really cleaned the leather... so I got some new clean TFR and a microfibre and wiped it across an inconspicuous area and I couldn't believe how clean it brought the area, so I did the whole seat... (only one in case tomorrow the leather is melted), I did a panel at a time, wipe, dry and then went over it with a Dr Leather wipe and buffed.... At no time did I leave the TFR to sit on the surface.
Before
After
surface feels great and has a lovely matt finish as it should.... now, I am not saying anyone else should try this in any shape size or form, at all.....
but I've never seen my seat so clean before....
if the leather hasn't melted by tomorrow then i'll do the passenger seat etc....
If you try it, it is at your OWN risk...
Finally got around to using a Christmas present from the other half.
Q2M Iron remover
My wheels were not particular dirty, having only done 150miles since the MOT.
impressed with it.
then I got on with the rest of the clean... clay, wash, dry (new towels), polish, wax and Ceramic Coat....
just need to find some cost effective Piano Black trims and i'll be happy with the interior upgrades (yeah right... who am I kidding..!!!)
Edited by 89forever on Friday 3rd April 16:45
Mattiebmw said:
Those seats look great. Can I ask what you used on them ?
nothing more than TFR
applied very carefully as i stated above, and then cleaned again with Dr Leather wipes

prior to spilling the TFR on the seats i'd always used the Dr Leather wipes...
I would always proceed with caution as different leathers may respond differently....
You ever started a job and wished you hadn't bothered? yup... today was one of those days, and i choose to do 2 jobs and both f ked up halfway through but i did actually get there in the end... even after the mother of all tantrums thrown....!!!
Under the bonnet the main engine cover has a shiny detail on the plastic, the lacquer has clearly failed at some point.

so this was all sanded back

masked up and a threw some clear lacquer on it.... and of course it reacted, despite tacking it down and an alcohol wipe.... so i started again....
and finally ended up with something half decent....

after that i thought i'd tackle the small corrosion showing on the upper face of the slam panel..... of course Audi in it's infinite wisdom manufactured this panel as the complete radiator support so to remove involves dismantling the whole front end, i'm not feeling that dedicated today... if ever.!!!
What was ever more annoying, there are plastic ribs along the length which of course can't be removed, so an absolute ball ache, multiplied by infinite... if you are considering doing this.... i wouldn't...
all loose surface rust was wire brushed off and the whole upper face was hit with Deox


left to dwell and washed off, every thing was dried up and then a zinc rich primer and high build primer where applied one after the other

and then the satin black....


it's one of those jobs where i've had to accept a 90% level of finish, it's not perfect, but it's better than it being rusty...
ked up halfway through but i did actually get there in the end... even after the mother of all tantrums thrown....!!!Under the bonnet the main engine cover has a shiny detail on the plastic, the lacquer has clearly failed at some point.
so this was all sanded back
masked up and a threw some clear lacquer on it.... and of course it reacted, despite tacking it down and an alcohol wipe.... so i started again....
and finally ended up with something half decent....
after that i thought i'd tackle the small corrosion showing on the upper face of the slam panel..... of course Audi in it's infinite wisdom manufactured this panel as the complete radiator support so to remove involves dismantling the whole front end, i'm not feeling that dedicated today... if ever.!!!
What was ever more annoying, there are plastic ribs along the length which of course can't be removed, so an absolute ball ache, multiplied by infinite... if you are considering doing this.... i wouldn't...
all loose surface rust was wire brushed off and the whole upper face was hit with Deox
left to dwell and washed off, every thing was dried up and then a zinc rich primer and high build primer where applied one after the other
and then the satin black....
it's one of those jobs where i've had to accept a 90% level of finish, it's not perfect, but it's better than it being rusty...
Edited by 89forever on Thursday 23 April 18:02
Edited by 89forever on Thursday 23 April 18:03
As we all have time to ponder, like all of us when we originally buy our cars we jump in and tweak various settings via VCDS, whilst i had changed the settings for the ADS behind the scenes i could never get the MMI display to show the "ADS" on the display

I followed this excellent write up on how to enable the codings and adaptions etc
http://www.audienthusiasts.com/Project_ADS.html
however the hidden menu graphics on my 2007 S5 are different then as shown on the write up, so i could never get the display correct.
So, reminded of this from another thread (Thanks Dave) and armed with a bit of time, i knew the setting was there somewhere.
So, onto the green menu....
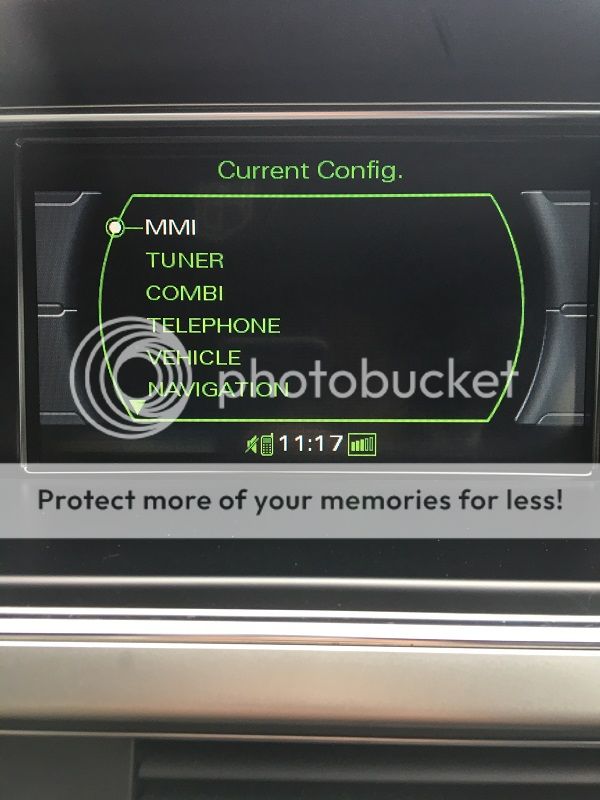
(if you haven't enabled it, follow the how to on the above link)
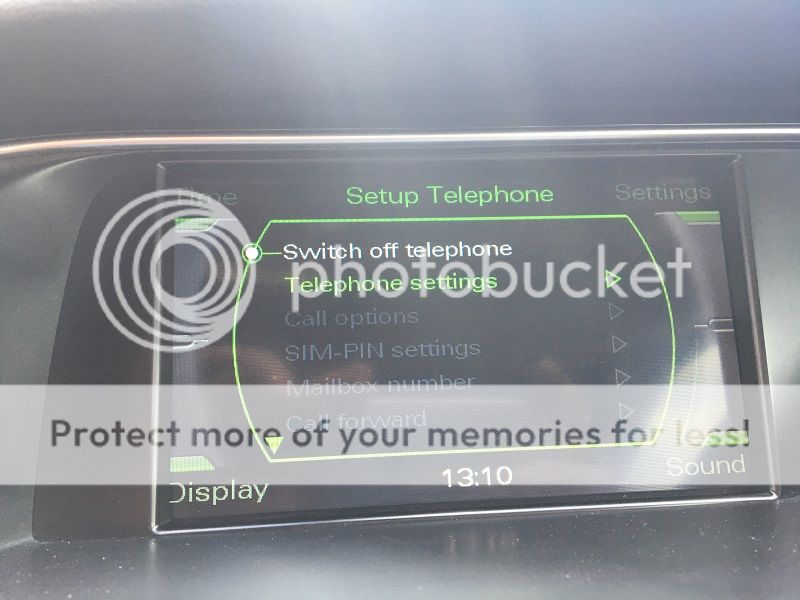
Scroll down to "DIAG SETTINGS"
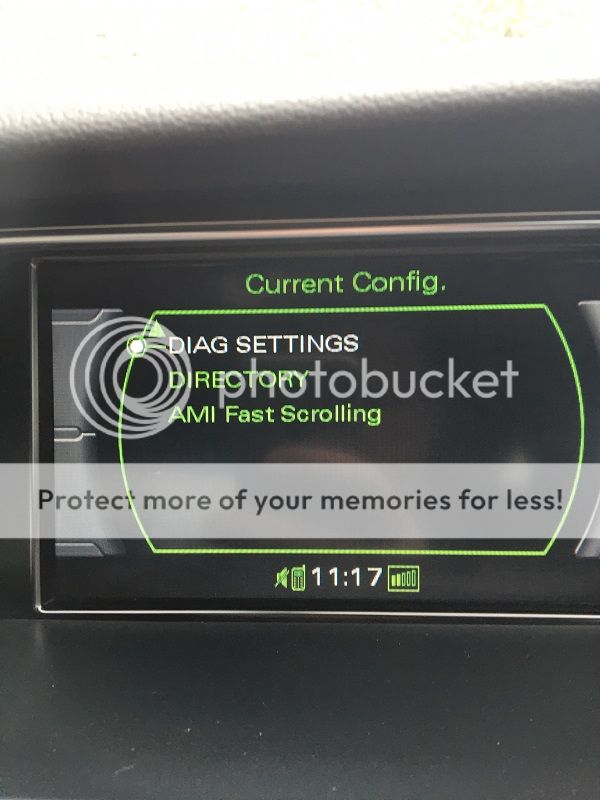
click it, then scroll down to "APK 0x01 0x0B 0x0C"

click it, then scroll down to "Charisma"
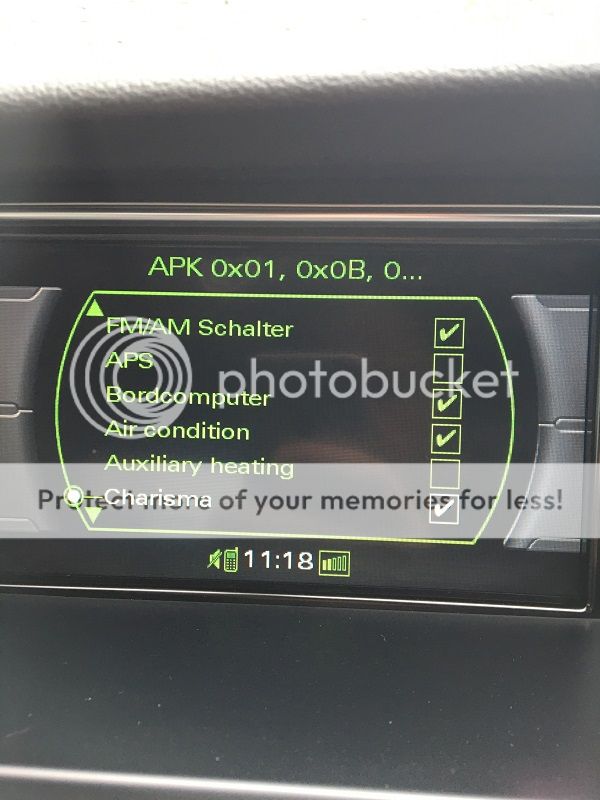
and make sure the box is ticked (click it), scroll down to accept changes, click it. Then exit the green menu (return etc) and do a hard reboot of your head unit and taaaaa daaaaa
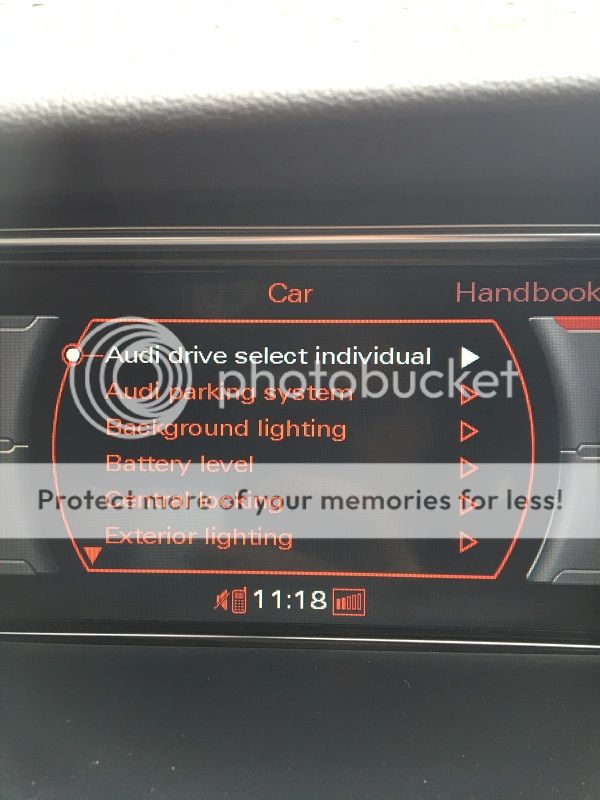
it works..... hopefully this may be of use to others?
I followed this excellent write up on how to enable the codings and adaptions etc
http://www.audienthusiasts.com/Project_ADS.html
however the hidden menu graphics on my 2007 S5 are different then as shown on the write up, so i could never get the display correct.
So, reminded of this from another thread (Thanks Dave) and armed with a bit of time, i knew the setting was there somewhere.
So, onto the green menu....
(if you haven't enabled it, follow the how to on the above link)
Scroll down to "DIAG SETTINGS"
click it, then scroll down to "APK 0x01 0x0B 0x0C"
click it, then scroll down to "Charisma"
and make sure the box is ticked (click it), scroll down to accept changes, click it. Then exit the green menu (return etc) and do a hard reboot of your head unit and taaaaa daaaaa
it works..... hopefully this may be of use to others?
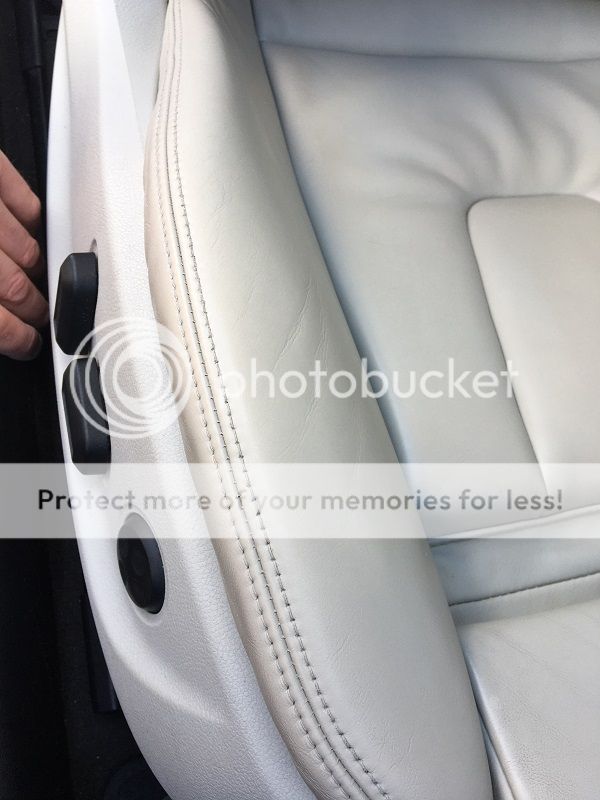
like so many of our cars after a few miles the bolsters start to show their age, no amount of cleaning brings them back to that "as new" look.
Mine are no different and they are similar on both drivers and passengers (drivers more so)
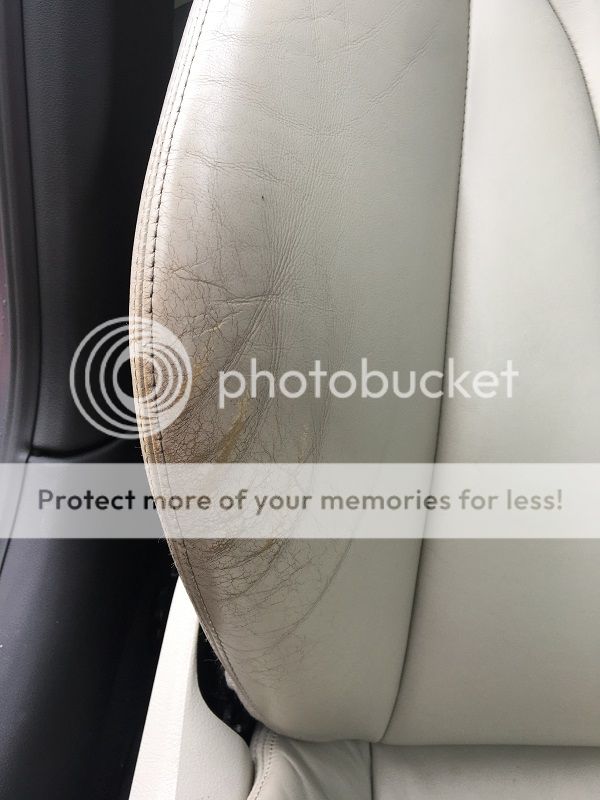
so having had a good look around as to what is available, i liked the look of what Colourlock had to offer and they had my colour of leather available (although they will mix up your colour if they don't list it, which they are currently doing for my Dad's TT as they don't have his colour).
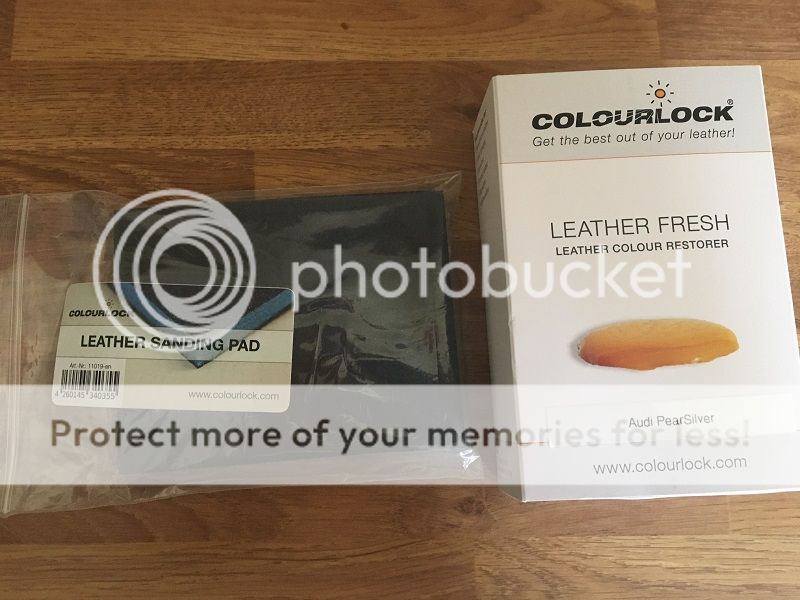
i bought the sanding pad and the 150ml dye, as that is more than enough for my needs. I have enough chemicals to clean the Bismark, so i didn't buy their cleaners etc.
So, the delivery arrived today and i set too.... and then it rained (heavily) so i stopped....
however 2 coats in... it is looking promising
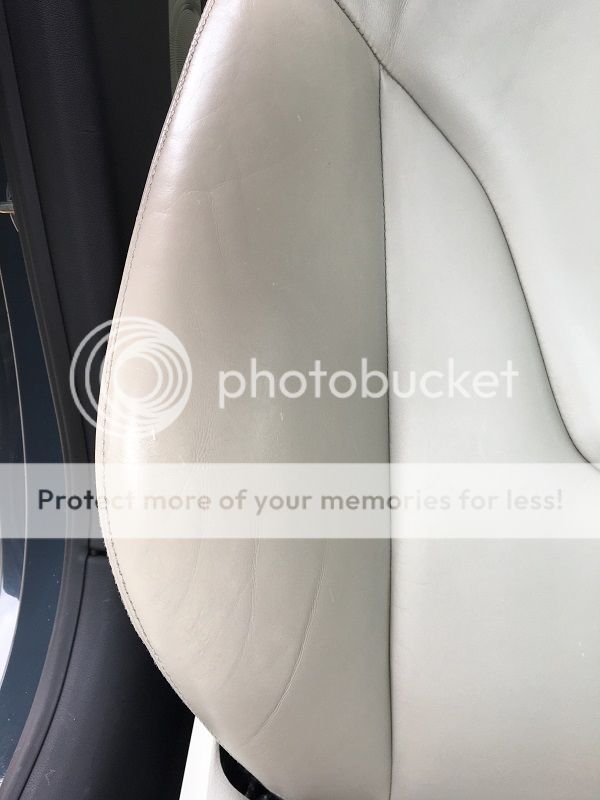
i just need the sunshine to come back like last week (pretty please)
Mine are no different and they are similar on both drivers and passengers (drivers more so)
so having had a good look around as to what is available, i liked the look of what Colourlock had to offer and they had my colour of leather available (although they will mix up your colour if they don't list it, which they are currently doing for my Dad's TT as they don't have his colour).
i bought the sanding pad and the 150ml dye, as that is more than enough for my needs. I have enough chemicals to clean the Bismark, so i didn't buy their cleaners etc.
So, the delivery arrived today and i set too.... and then it rained (heavily) so i stopped....
however 2 coats in... it is looking promising
i just need the sunshine to come back like last week (pretty please)
So the very nice mailman decided to deliver the first piece of the Piano Black trim, there were a few very light scratches on the black but nothing that didn't buff out... Can't wait for the remaining pieces...
Before

After

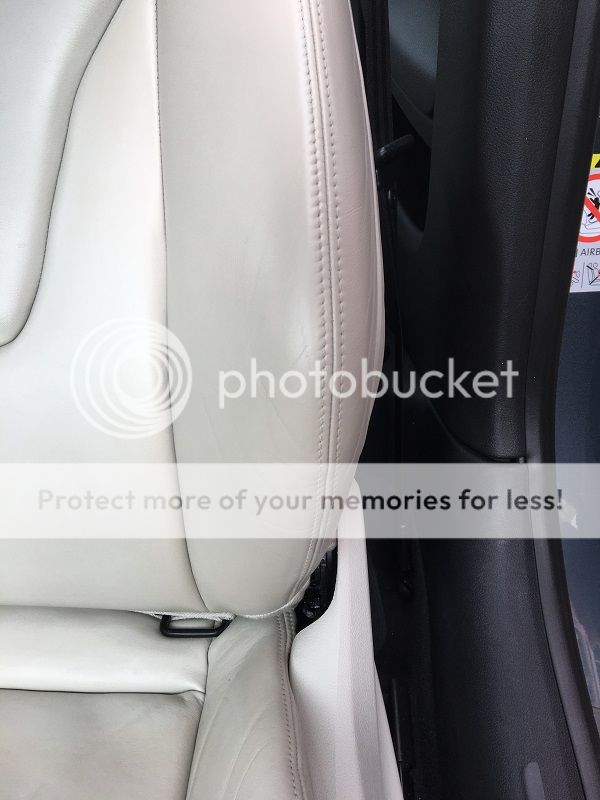
and despite the rain first thing this morning it dried up enough to finish the drivers seat with the Colourlock dye...
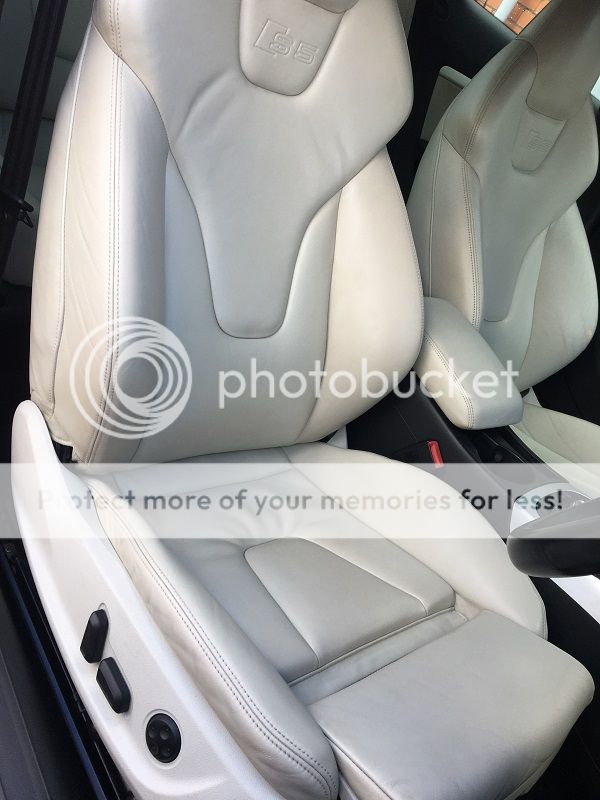

Now just need to wait 24 hours and can do a final buff. To say i am over the moon with the results is an understatement.... absolutely fantastic, the colour match is incredible and the product is so easy to use. Their website has numerous tutorials and the service was second to none.
I would advise that if you are getting the sanding pad that a lot of care is taken near any stitching as i'd imagine that it would be easy to muller that quite quickly.
Just before it rained again i thought i'd start the passenger seat....
What i was starting with....

3 applications in and it started to spit, i noticed the water spots marking the dye so i stopped until no rain...

excellent product... 2 thumbs up from me....!!!
Before
After
and despite the rain first thing this morning it dried up enough to finish the drivers seat with the Colourlock dye...
Now just need to wait 24 hours and can do a final buff. To say i am over the moon with the results is an understatement.... absolutely fantastic, the colour match is incredible and the product is so easy to use. Their website has numerous tutorials and the service was second to none.
I would advise that if you are getting the sanding pad that a lot of care is taken near any stitching as i'd imagine that it would be easy to muller that quite quickly.
Just before it rained again i thought i'd start the passenger seat....
What i was starting with....
3 applications in and it started to spit, i noticed the water spots marking the dye so i stopped until no rain...
excellent product... 2 thumbs up from me....!!!

With another week of lockdown the Mailman thankfully delivered the remaining Piano Black trims... a good polish to remove surface scratches and onto fitting.

dash inserts, the right hand side fresh air vent decided to fall to bits so that was fun putting it back together, what a fiddly **** job that was....

rears
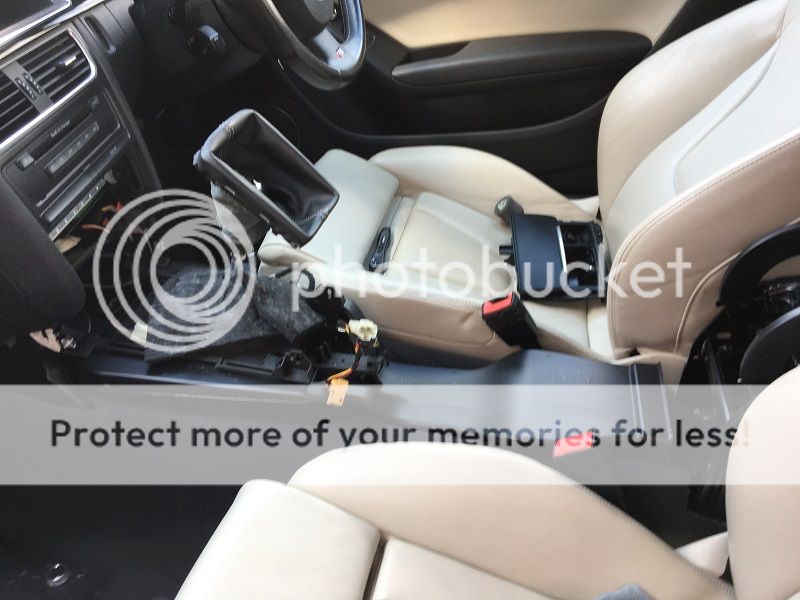
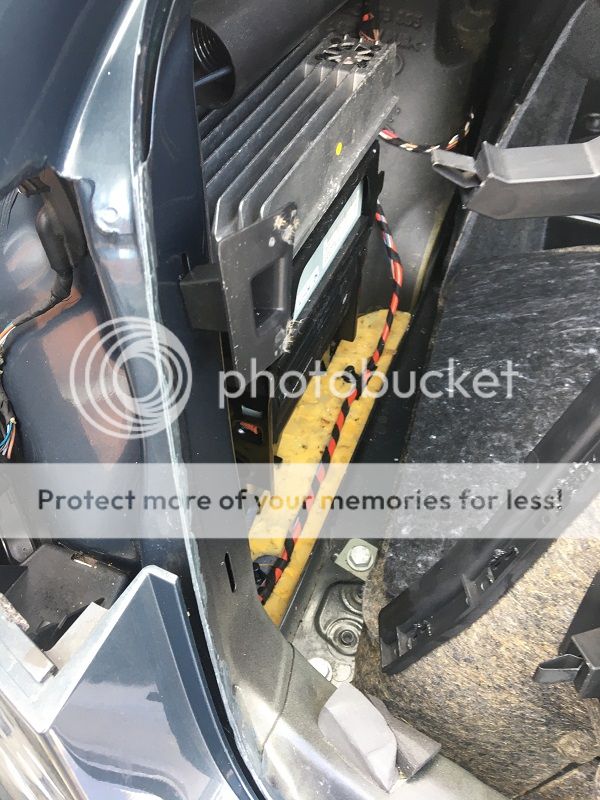
Then onto the centre console, this involves removing the whole assembly... it starts as this...

it just fell out... so much to remove to get the bloody thing out... however i thought it a good time to clean underneath it... wasn't bad, but no money...
and all back together
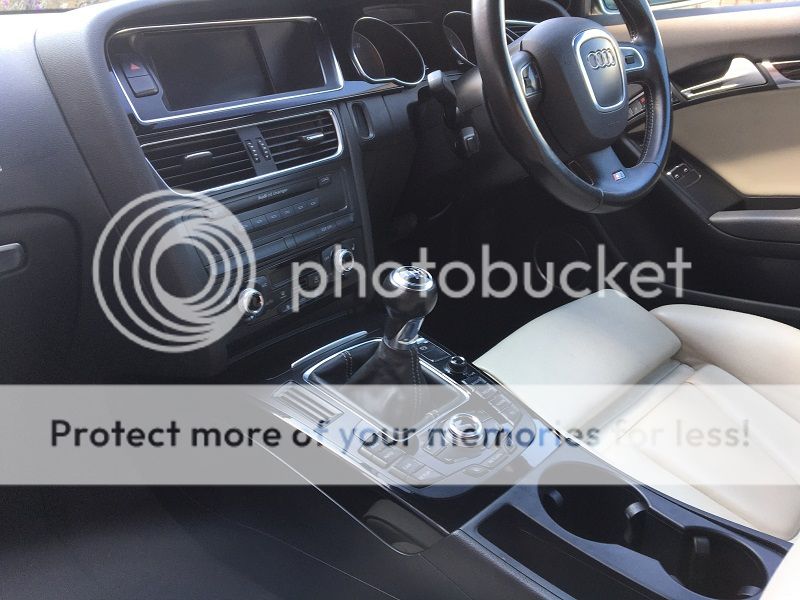
a much nicer place to be now...

dash inserts, the right hand side fresh air vent decided to fall to bits so that was fun putting it back together, what a fiddly **** job that was....
rears
Then onto the centre console, this involves removing the whole assembly... it starts as this...
it just fell out... so much to remove to get the bloody thing out... however i thought it a good time to clean underneath it... wasn't bad, but no money...
and all back together
a much nicer place to be now...
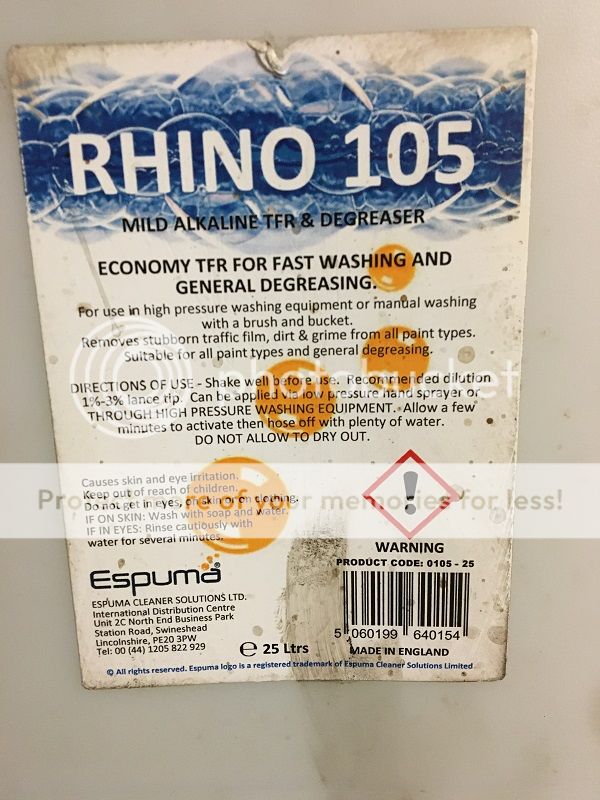
So, it being commented yesterday that my steering wheel was too shiny and that a decent degrease was in order...
Not having any Surfex to hand and being of an impatient disposition...!!! i'd previously used my TFR on the seats to good effect... so feeling a bit gung-ho this morning and thinking what's the worst that can happen i thought why not...
My TFR is fully water soluble and is alkaline, so not that dissimilar to Surfex (in my mind anyway, the technical boffins would disagree i'm sure lol)
This is what i have as my degreaser...
and the offending shinyness
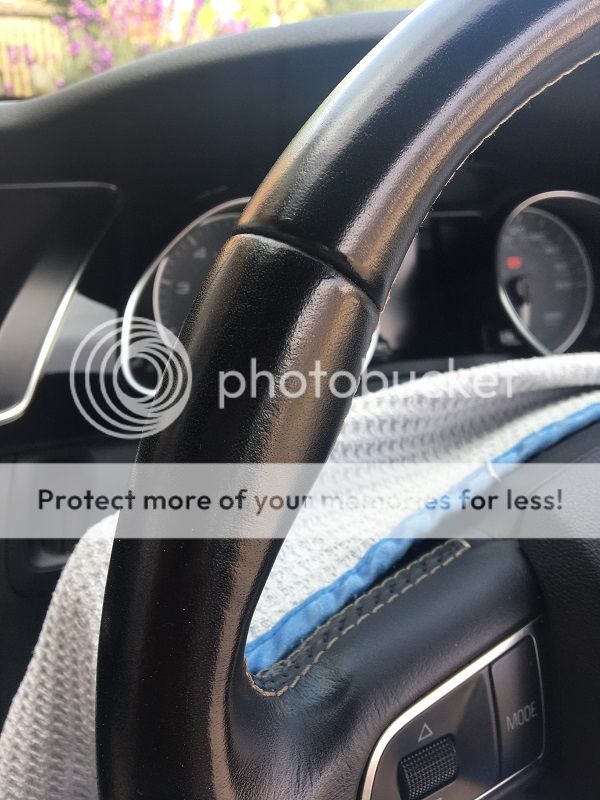
so a small test area was tried...
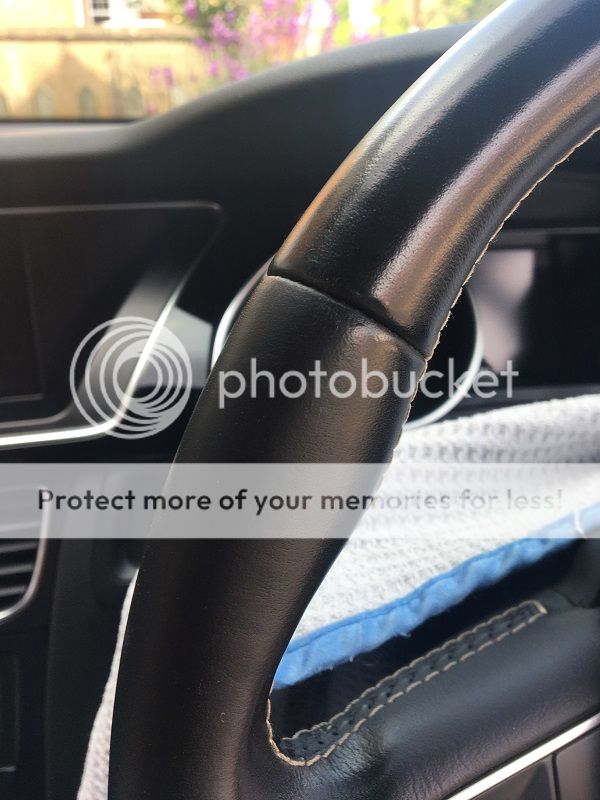
looked promising so i did the whole wheel...

1 none shiny wheel.... (did the gearknob also as it would be rude to leave your knob out of the equation if there's rubbing involved...!!!)
Not having any Surfex to hand and being of an impatient disposition...!!! i'd previously used my TFR on the seats to good effect... so feeling a bit gung-ho this morning and thinking what's the worst that can happen i thought why not...
My TFR is fully water soluble and is alkaline, so not that dissimilar to Surfex (in my mind anyway, the technical boffins would disagree i'm sure lol)
This is what i have as my degreaser...
and the offending shinyness
so a small test area was tried...
looked promising so i did the whole wheel...
1 none shiny wheel.... (did the gearknob also as it would be rude to leave your knob out of the equation if there's rubbing involved...!!!)
Every day i try to refine a panel, cleanse, buff, polish and wax to improve the clarity

getting there slowly....
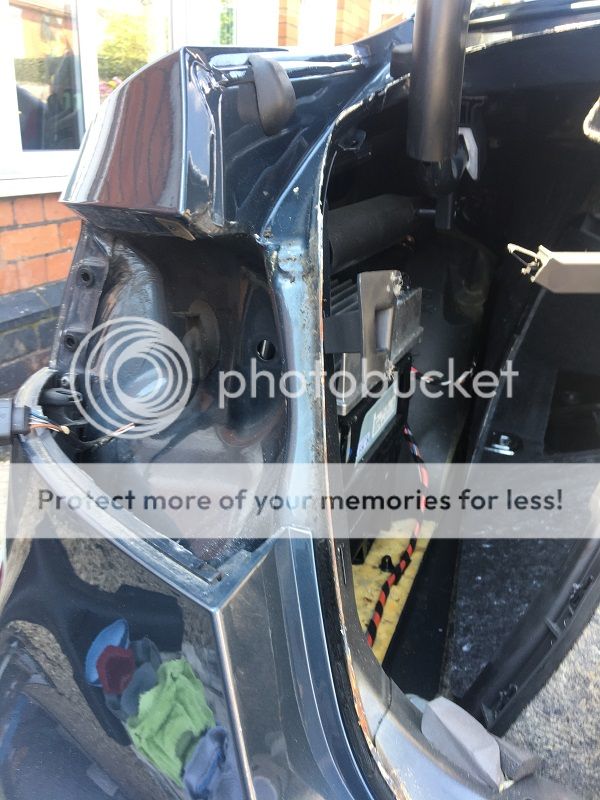
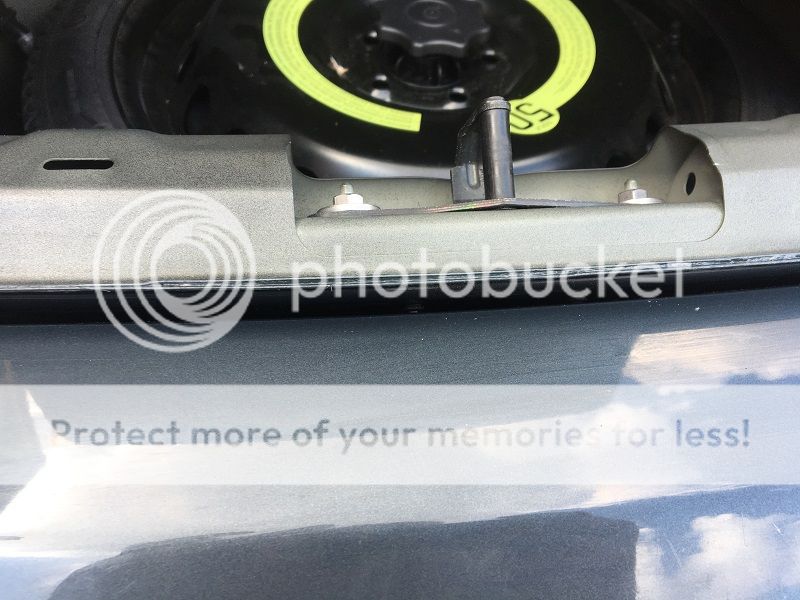
today i thought i'd clean the shuts and when i got to the boot opening there was a tiny bit i couldn't get to without taking the seal out, so i did and OMG...!!!

the seal was retaining a lot of crud and moisture.... so much so that corrosion was just starting to show in a couple of the seams.

so i stripped the lights and interior panels out to get it treated.
BiltHamber deox gel applied as per usual and allowed to dwell.... cleaned off and primed
and painted in body colour
and all back together until next time....

These things certainly aren't built to last as the older Audi generations....
getting there slowly....
today i thought i'd clean the shuts and when i got to the boot opening there was a tiny bit i couldn't get to without taking the seal out, so i did and OMG...!!!
the seal was retaining a lot of crud and moisture.... so much so that corrosion was just starting to show in a couple of the seams.
so i stripped the lights and interior panels out to get it treated.
BiltHamber deox gel applied as per usual and allowed to dwell.... cleaned off and primed
and painted in body colour
and all back together until next time....
These things certainly aren't built to last as the older Audi generations....
Every day's a school day, when i changed to the Piano Black trim, i had assumed the dash panels for the displays were all the same.... apparently not, the new black one had a slightly smaller opening for the MMI display, which meant that one edge was ever so slightly cut off....
so what should i do.... options were
1. look for the correct one in Piano Black (nope)
2. live with it.... (definitely not, nope, nada...)
3. butcher the two to make the correct one.... perfect plan
The black trim is bonded to the backing and rather than destroy the black trim i wanted to see how well the original aluminium trim was boned to the backing
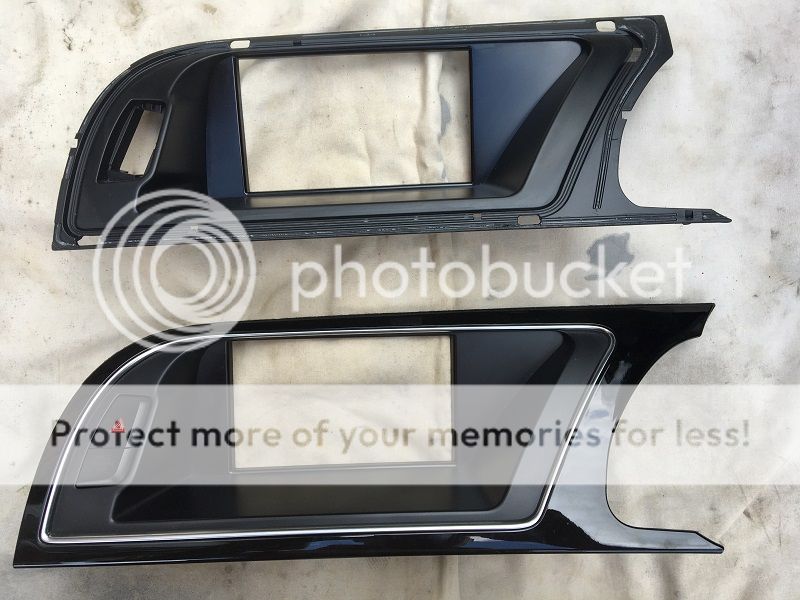
It came off quite easily thankfully, so i attacked the Piano Black trim version
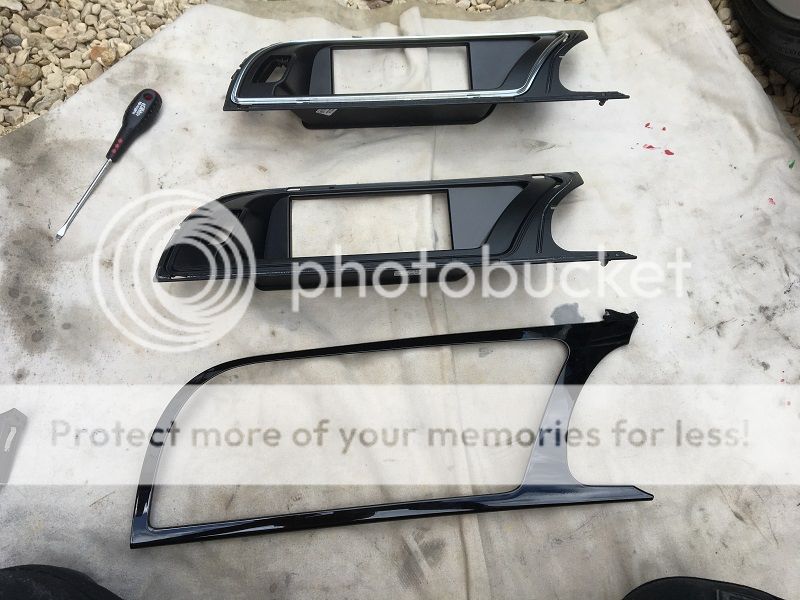
bizarrely this was bonded on a little bit better and took a little bit more effort to separate. Both gluing faces were cleaned up and the trim was bonded back on to the backing....
Now just sat watching it dry so it can be put back into the car....
so what should i do.... options were
1. look for the correct one in Piano Black (nope)
2. live with it.... (definitely not, nope, nada...)
3. butcher the two to make the correct one.... perfect plan
The black trim is bonded to the backing and rather than destroy the black trim i wanted to see how well the original aluminium trim was boned to the backing
It came off quite easily thankfully, so i attacked the Piano Black trim version
bizarrely this was bonded on a little bit better and took a little bit more effort to separate. Both gluing faces were cleaned up and the trim was bonded back on to the backing....
Now just sat watching it dry so it can be put back into the car....
Edited by 89forever on Sunday 17th May 11:57


Gassing Station | Readers' Cars | Top of Page | What's New | My Stuff