Audi S5 full fat version
Discussion


Where the sound deadening slots into the bonnet on the underside in the engine bay the edges have all got a crusty edge. If it's anything like the ur quattro's of old these suffer with the leading edges rusting out, so to future proof that ever happening i thought i'd tackle it and give it a fighting chance.

Sound deadening removed and hoovered

All areas were attacked with a grinder with a wire brush attachment and then the edges were feathered out. Then the bare metal had BiltHamber Deox gel applied and left to sit for a couple of hours.

Then zinc primer, followed by a high build primer.

and then the top coat

All in all took about 6 hours this morning, it's not like there's a rush to go anywhere at the moment so it's a great time to get all these little fiddly jobs done.....
I want to redo the cam covers, inlet manifold and a general tidy up around the engine next, if i'm removing all them then i'll do a carbon clean whilst i'm in there.....
Sound deadening removed and hoovered
All areas were attacked with a grinder with a wire brush attachment and then the edges were feathered out. Then the bare metal had BiltHamber Deox gel applied and left to sit for a couple of hours.
Then zinc primer, followed by a high build primer.
and then the top coat
All in all took about 6 hours this morning, it's not like there's a rush to go anywhere at the moment so it's a great time to get all these little fiddly jobs done.....
I want to redo the cam covers, inlet manifold and a general tidy up around the engine next, if i'm removing all them then i'll do a carbon clean whilst i'm in there.....
Edited by 89forever on Thursday 28th May 13:35
TTOBES said:
This is an enjoyable read, thank you!
Have a MK 1 TT and will now attempt to improve the steering wheel after reading your effort!
so do we lolHave a MK 1 TT and will now attempt to improve the steering wheel after reading your effort!
https://www.pistonheads.com/gassing/topic.asp?h=0&...
what flavour is yours?
TTOBES said:
Ah nice, just had a look through the last couple of pages.
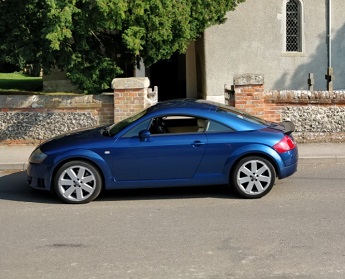
Mine's a 2005 3.2 Coupe manual. Mauritius Blue with Anis leather. Had it 14 months.
Have just ordered some Rhino for some careful steering wheel restoration!
you need the Dr Leather wipes as well once you've cleaned it with the rhino and certainly with Anis Leather be very VERY careful to not spill the TFR onto it else you'll be cleaning them also lol....Mine's a 2005 3.2 Coupe manual. Mauritius Blue with Anis leather. Had it 14 months.
Have just ordered some Rhino for some careful steering wheel restoration!
Stick up a pic, lets have a look
having renovated the drivers side headlight a while ago, the old school way of varying grades of wet and dry down to 3000 grit, and then polished to death. To be fair i lost the will to live having spent ages and ages rubbing the surface until it was improved i didn't have the enthusiasm to do the passenger.....
Spurned on by seeing what others have done recently i felt it was time to try the Autoglym headlight restoration kit...

and today i set to.... like others with the B8 A5/S5 headlights as they are ventilated varying levels of crud, dust, small animals etc accumulate inside the headlight

there were a few specs of dust, but it bugged me... sadly the the headlights are not easy to split as others are in the Audi range, even baking them in the oven isn't successful.... So headlight removed and all covers off on the rear to see if there was a path through for a pokey stick to be worked and prodded...
Armed with a piece of TIG welding wire and some cotton buds i came up with this

and snaked it through the back till i made a difference

There went 2 hours of my life i'll never get back...!!! EXTREME care is needed that you don't scratch the inside of the lens or the black trim at the bottom, they mark far to easy, ask me how i know...!!!
Headlight back into place so it could be held securely....

This is what the passenger side started out like and onto unboxing the restoration kit, the Autoglym kit was well packaged and contained 1, drill attachment, 6no 800 grit discs, 6no 1500 grit, 1no 2000, 1no 3000, a foam pad polishing, a microfibre and a small bottle of polish.
I tried the drill attachment on a battery powered drill and started with a 800 grit as there were a few small stonechips.... the 800 wasn't man enough to cut into that and i found the using a drill for sanding awkward, the attachment really needs to suit a polishing machine type attachment.
Luckily i already have a 60mm velcro backing pad for my DA, so i used that and went to it with 800 grade pads.... they had absolutely no cut, so they got binned and i went old school...
800 grit wet and dry, cut into small pieces and some soapy water and sanded the lens until all the marks were gone....
I then went onto the 1500 grade and they were ok, they removed the previous 800 grade marks but not totally.
I would have rathered the 800 and 1500 grade to be suitable for a water application to prevent heat build up and not dry, they clogged to quickly and having tried a water application the glue which held the abrasive to the velco bit let go.... so that didn't work.
Out came the 1500 wet and dry until all the previous marks were gone....
The 2000 grit pad could have a water application and that and the 3000 grit worked very well....
A final polish with the white foam pad on my DA and the supplied polishing compound resulted in a decent level of clarity....

The kit was ok, but it wasn't great and definitely not worth the £25 it cost... there certainly wouldn't have been enough to do 2 headlights... which was a shame as i want to doo the TT's headlights.... A range of bodyshop grade 3M Trizact discs, which i know i can get in grades ranging from 600 down to 3000 in a 75mm size...

but it kept me busy for a day.....
Spurned on by seeing what others have done recently i felt it was time to try the Autoglym headlight restoration kit...
and today i set to.... like others with the B8 A5/S5 headlights as they are ventilated varying levels of crud, dust, small animals etc accumulate inside the headlight
there were a few specs of dust, but it bugged me... sadly the the headlights are not easy to split as others are in the Audi range, even baking them in the oven isn't successful.... So headlight removed and all covers off on the rear to see if there was a path through for a pokey stick to be worked and prodded...
Armed with a piece of TIG welding wire and some cotton buds i came up with this
and snaked it through the back till i made a difference
There went 2 hours of my life i'll never get back...!!! EXTREME care is needed that you don't scratch the inside of the lens or the black trim at the bottom, they mark far to easy, ask me how i know...!!!
Headlight back into place so it could be held securely....
This is what the passenger side started out like and onto unboxing the restoration kit, the Autoglym kit was well packaged and contained 1, drill attachment, 6no 800 grit discs, 6no 1500 grit, 1no 2000, 1no 3000, a foam pad polishing, a microfibre and a small bottle of polish.
I tried the drill attachment on a battery powered drill and started with a 800 grit as there were a few small stonechips.... the 800 wasn't man enough to cut into that and i found the using a drill for sanding awkward, the attachment really needs to suit a polishing machine type attachment.
Luckily i already have a 60mm velcro backing pad for my DA, so i used that and went to it with 800 grade pads.... they had absolutely no cut, so they got binned and i went old school...
800 grit wet and dry, cut into small pieces and some soapy water and sanded the lens until all the marks were gone....
I then went onto the 1500 grade and they were ok, they removed the previous 800 grade marks but not totally.
I would have rathered the 800 and 1500 grade to be suitable for a water application to prevent heat build up and not dry, they clogged to quickly and having tried a water application the glue which held the abrasive to the velco bit let go.... so that didn't work.
Out came the 1500 wet and dry until all the previous marks were gone....
The 2000 grit pad could have a water application and that and the 3000 grit worked very well....
A final polish with the white foam pad on my DA and the supplied polishing compound resulted in a decent level of clarity....
The kit was ok, but it wasn't great and definitely not worth the £25 it cost... there certainly wouldn't have been enough to do 2 headlights... which was a shame as i want to doo the TT's headlights.... A range of bodyshop grade 3M Trizact discs, which i know i can get in grades ranging from 600 down to 3000 in a 75mm size...
but it kept me busy for a day.....
89forever said:
well as lockdown is still here for some of us, the cars are being ever more cleaned, and cleaned and cleaned again. It's been a chance to layer wax on like Mr Miyagi.....
and a gratuitous shiny shot

That looks fantastic! and a gratuitous shiny shot
I've been looking at these a lot for the past few months as my lease is due to end soon and they seem a lot of car for the money. I just have to convince myself the running costs are worth it somehow...

_Rob_ said:
That looks fantastic!
I've been looking at these a lot for the past few months as my lease is due to end soon and they seem a lot of car for the money. I just have to convince myself the running costs are worth it somehow...
Thank you, she is a labour of love..... If you are able to do all the oily stuff yourself then the running costs are ok... it's when things go wrong and you have to trust a garage where they can get eye wateringly expensive....I've been looking at these a lot for the past few months as my lease is due to end soon and they seem a lot of car for the money. I just have to convince myself the running costs are worth it somehow...
Other than for an MOT no one but me works on my S5 as i can control the costs and i know what's done to it....
The previous owner in the months prior to him getting rid of my S5 must have been eye watering for him trying to chase a vibration... the garage who did the work for him changed the following
DM flywheel
Clutch
Propshaft
Engine mounts
Rear diff mounts
Multiple wheel balances and tyre changes
None of them cured the vibration so he sold it, i bought it and the fault was the drivers side driveshaft, the garage who did the work clearly did no investigations before diving in and changing many needless parts... yet had no accountability for spending the poor sod's hard earned money....
I think i got the benefit of the incompetent garage and is why i have never had anyone else work on my cars or bikes (except for MOT's)
89forever said:
Thank you, she is a labour of love..... If you are able to do all the oily stuff yourself then the running costs are ok... it's when things go wrong and you have to trust a garage where they can get eye wateringly expensive....
Other than for an MOT no one but me works on my S5 as i can control the costs and i know what's done to it....
The previous owner in the months prior to him getting rid of my S5 must have been eye watering for him trying to chase a vibration... the garage who did the work for him changed the following
DM flywheel
Clutch
Propshaft
Engine mounts
Rear diff mounts
Multiple wheel balances and tyre changes
None of them cured the vibration so he sold it, i bought it and the fault was the drivers side driveshaft, the garage who did the work clearly did no investigations before diving in and changing many needless parts... yet had no accountability for spending the poor sod's hard earned money....
I think i got the benefit of the incompetent garage and is why i have never had anyone else work on my cars or bikes (except for MOT's)
Ouch... I'm not surprised the previous owner wanted to sell after all of that!Other than for an MOT no one but me works on my S5 as i can control the costs and i know what's done to it....
The previous owner in the months prior to him getting rid of my S5 must have been eye watering for him trying to chase a vibration... the garage who did the work for him changed the following
DM flywheel
Clutch
Propshaft
Engine mounts
Rear diff mounts
Multiple wheel balances and tyre changes
None of them cured the vibration so he sold it, i bought it and the fault was the drivers side driveshaft, the garage who did the work clearly did no investigations before diving in and changing many needless parts... yet had no accountability for spending the poor sod's hard earned money....
I think i got the benefit of the incompetent garage and is why i have never had anyone else work on my cars or bikes (except for MOT's)
Working on your own car is definitely a big positive and it looks like you're taking good care of it.

What seems like years ago I removed and painted the trim around the window. The lower trims on the rear side windows had got a couple of marks on them.....
Removed, sanded down, etch primered and a couple of coats of satin black.....

The last time I did them I hung them off the washing line and it was a bugger to paint as the slightest of breeze has them dancing in the wind. A couple of bent welding rods and I had 2 floating stands lol

will need flatting back and another coat tomorrow......
Removed, sanded down, etch primered and a couple of coats of satin black.....
The last time I did them I hung them off the washing line and it was a bugger to paint as the slightest of breeze has them dancing in the wind. A couple of bent welding rods and I had 2 floating stands lol
will need flatting back and another coat tomorrow......
spurned on by the success of the redying of the seats on the S5 and Dad's TT i wanted a black dye to do the steering wheels and gearknobs on the S5 and TT and also to do the black leather on my other half's A3...
a kit was duly ordered and despite Royal Mail losing the first delivery, fair play to Colourlock they quickly addressed the issue and sent out another kit with no quibbles at all... i have promised that if the other kit arrives that i'll advise them and either send it back or pay for the second kit.

So with everything set up and hair dryer to hand (never any need to do this on the TT as they came built in didn't they...??? :lol
The areas of concern where on the top outer diameter where your hands normally grab, it being slightly worn.


Isn't bad, but can be better....
The steering wheel was wiped with TFR to degrease (not that it is dirty by any stretch of the imagination) it and give a clean base to start with.
Then the surface was lightly keyed with 800 grit wet and dry, it doesn't need much...
Then the dye was applied following Colourlock's tutorial... light dabbing, then dry with the hair dryer... repeat as necessary. I did about 10 applications all in


much improved and is now a uniform colour all over again, obviously as i have the light coloured stitching, i had to be very careful not to get the dye on that and the dye is a perfect match to the unworn areas so have blended in superbly....

Gearknob can be tomorrows effort as the chrome trim on that will need masking up.... and the steering wheel will need buffing up after leaving the dye to cure for 24 hours....
a kit was duly ordered and despite Royal Mail losing the first delivery, fair play to Colourlock they quickly addressed the issue and sent out another kit with no quibbles at all... i have promised that if the other kit arrives that i'll advise them and either send it back or pay for the second kit.
So with everything set up and hair dryer to hand (never any need to do this on the TT as they came built in didn't they...??? :lol
The areas of concern where on the top outer diameter where your hands normally grab, it being slightly worn.
Isn't bad, but can be better....
The steering wheel was wiped with TFR to degrease (not that it is dirty by any stretch of the imagination) it and give a clean base to start with.
Then the surface was lightly keyed with 800 grit wet and dry, it doesn't need much...
Then the dye was applied following Colourlock's tutorial... light dabbing, then dry with the hair dryer... repeat as necessary. I did about 10 applications all in
much improved and is now a uniform colour all over again, obviously as i have the light coloured stitching, i had to be very careful not to get the dye on that and the dye is a perfect match to the unworn areas so have blended in superbly....
Gearknob can be tomorrows effort as the chrome trim on that will need masking up.... and the steering wheel will need buffing up after leaving the dye to cure for 24 hours....
It's been a funny year..... to date it has been eventful....
Pretty much the same as everyone else's I suppose but we've had to cope with....
floods
a pandemic
pasta shortages
toilet roll shortages
idiots who can't social distance
idiots who cannot wear a mask
going onto furlough (which I saw as a blessing for increased family time and I got to see my daughter...
My daughters 1 year old birthday (life defining moments I love like this)
got made redundant (hooray...!!!)
secured another position, enabling me and my family to finally relocate back over to Norfolk (double hooray)….
So, I am sat here writing this from temporary accommodation in Norfolk, as we don't complete on the new house until 29th August, my new position started 2 weeks ago, so it'll be a tough couple of weeks away from family as I won't have time to get home as am busy setting up the new facility for the business I've been engaged by....
The S5 for the short term has been pressed back into daily use as the company car went back, and I don't want another company, the allowance will do as I fancy a 2008 ish era A8 4.2 diesel for the daily.... but not found one yet, and may not sort that till new year.... which means the S5 can go back to a holiday car.
however I still have little jobs needing doing on the S5 (can't do the A3, or Dad's TT as they're 200 miles away in the opposite direction lol
As the S5 is only ever used in sunshine the original washer jets had gummed up as they are never used. So I took it as an Omen from the Audi gods to upgrade from the jet style originally fitted, to the fan style as fitted to the A6
Part numbers
left side 4G0 955 987A
right side 4G0 955 988A
they are handed, so ensure you have them the right way around... fitting is a doodle, once you've removed your old jets empty your previous screen wash as it is recommended to only use the Audi version (it may be b ks but I bought some anyway)
The jets were £9.76 + VAT each from my now local Norwich Audi lol

old and new side by side
and fitted.... not the most exciting of pics haha

and back to fully working screen washers...
I also finally had delivered the new air con pollen filter, I went for the anti microbial variety.
Mann part number FP2450
old and new together, the old one had a dated stamp of 2007... surely not the original one???

should hopefully remove the subtle musty smell on start up from the aircon in the early mornings....
Pretty much the same as everyone else's I suppose but we've had to cope with....
floods
a pandemic
pasta shortages
toilet roll shortages
idiots who can't social distance
idiots who cannot wear a mask
going onto furlough (which I saw as a blessing for increased family time and I got to see my daughter...
My daughters 1 year old birthday (life defining moments I love like this)
got made redundant (hooray...!!!)
secured another position, enabling me and my family to finally relocate back over to Norfolk (double hooray)….
So, I am sat here writing this from temporary accommodation in Norfolk, as we don't complete on the new house until 29th August, my new position started 2 weeks ago, so it'll be a tough couple of weeks away from family as I won't have time to get home as am busy setting up the new facility for the business I've been engaged by....
The S5 for the short term has been pressed back into daily use as the company car went back, and I don't want another company, the allowance will do as I fancy a 2008 ish era A8 4.2 diesel for the daily.... but not found one yet, and may not sort that till new year.... which means the S5 can go back to a holiday car.
however I still have little jobs needing doing on the S5 (can't do the A3, or Dad's TT as they're 200 miles away in the opposite direction lol
As the S5 is only ever used in sunshine the original washer jets had gummed up as they are never used. So I took it as an Omen from the Audi gods to upgrade from the jet style originally fitted, to the fan style as fitted to the A6
Part numbers
left side 4G0 955 987A
right side 4G0 955 988A
they are handed, so ensure you have them the right way around... fitting is a doodle, once you've removed your old jets empty your previous screen wash as it is recommended to only use the Audi version (it may be b
ks but I bought some anyway)The jets were £9.76 + VAT each from my now local Norwich Audi lol
old and new side by side
and fitted.... not the most exciting of pics haha
and back to fully working screen washers...
I also finally had delivered the new air con pollen filter, I went for the anti microbial variety.
Mann part number FP2450
old and new together, the old one had a dated stamp of 2007... surely not the original one???
should hopefully remove the subtle musty smell on start up from the aircon in the early mornings....
.jpg?width=1920&height=1080&fit=bounds)
Gassing Station | Readers' Cars | Top of Page | What's New | My Stuff