How many American trucks do I need? N+1 obviously! 1977 C10
Discussion


sprouting said:
Either plan is a winner. Press ahead with the second option to tide you over, then make up your mind in a couple of years when you finish all the other projects. Lol.
That is probably what will happen. Please don't use the "f" word on one of my threads ever again! 
Krikkit said:
I'd be tempted (and acknowledge you may think this'll look s t) to just get the whole body lacquered over as-is, I quite like the patina of it.
t) to just get the whole body lacquered over as-is, I quite like the patina of it.madtoro said:
Slight drop, new wheels and tyres, matt clearcoat it.
I know where you are both coming from, an old truck with genuine time-worn paint and patina looks superb and if it had that I would probably be doing what you are suggesting. Unfortunately, to me a lot of the paint damage looks exactly like what it is - someone started prepping it for paint and then lost interest!An alternative would be to reinstate the blue on the door and bonnet to a reasonable standard without going OTT, and then have a go at adding some ageing via paint - not something I've done and not sure how it would turn out.
That said, I'm not sure how I feel about faking up pseudo patina - to me it just feels a bit fraudulent. Although on a classic, it's a better option to my mind than deliberately stripping areas of paint and letting it rust...
Eddieslofart said:
454 will slot in there lovely.... 
You are a very bad man!! 
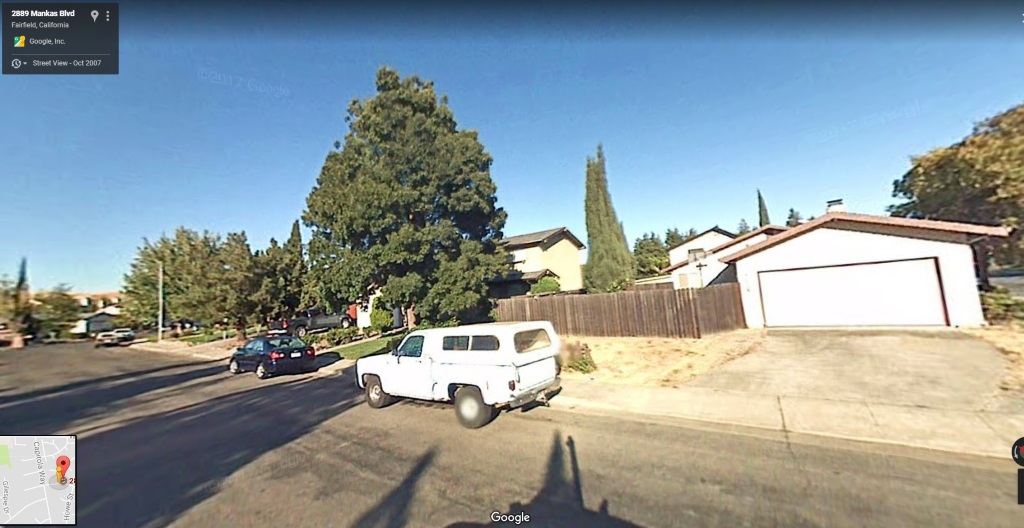
As an aside, and quite possibly of no interest to anyone except me, I found a letter in the car with (possibly) a previous owner's name and address on - so I looked on google maps...
2007
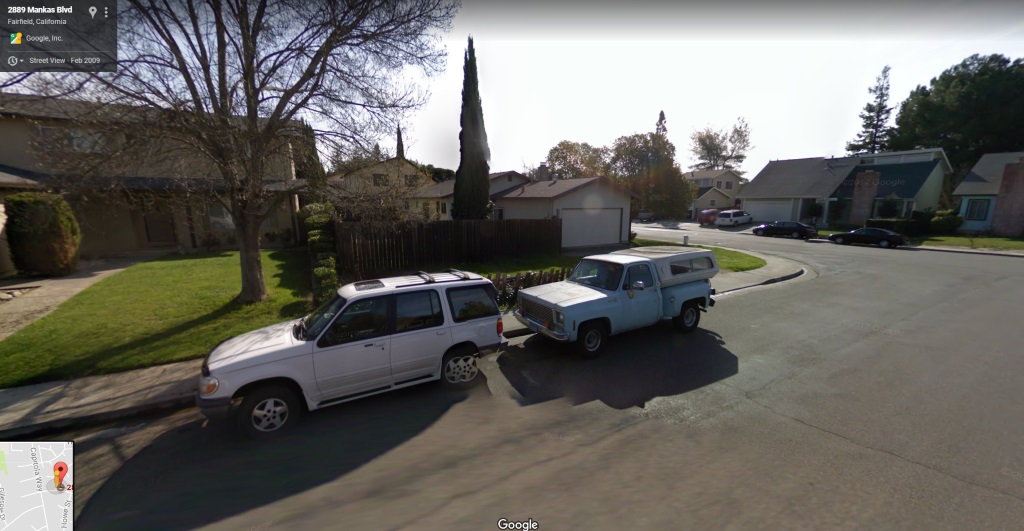
2009 (and possibly a contender for the classics dwarfed by moderns thread!!)
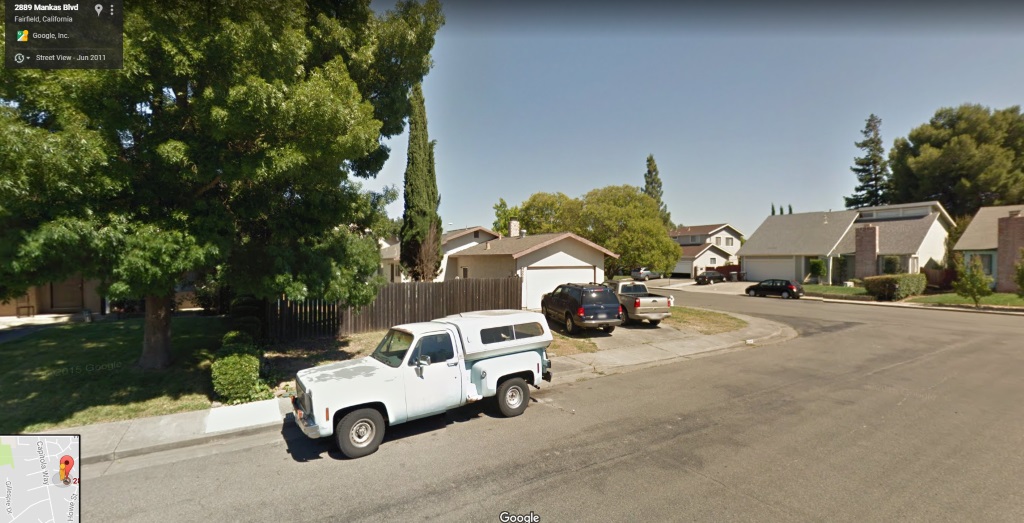
2011
2015
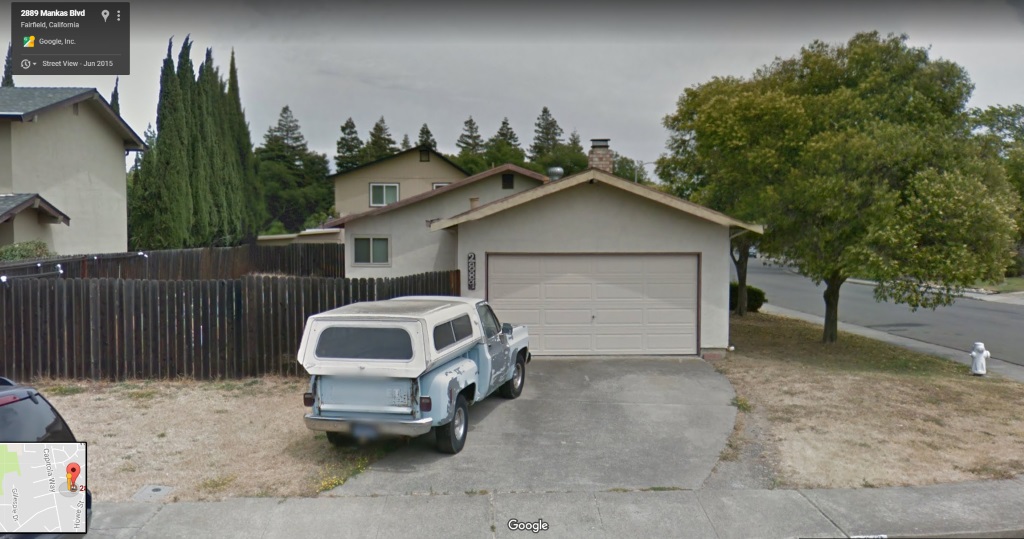
Other than the little orange lights on the front, it looks exactly the same - right down to the missing trim on the rear wheel!
Good to see it appears to have had the same owner for the best part of a decade!
2007
2009 (and possibly a contender for the classics dwarfed by moderns thread!!)
2011
2015
Other than the little orange lights on the front, it looks exactly the same - right down to the missing trim on the rear wheel!
Good to see it appears to have had the same owner for the best part of a decade!
I would remove all the emissions stuff and tidy up the engine bay, then as you say put some original blue paint on but with a finish that somehow matches the rest ( may be hard to 'match' it that way !), use the drop kit, some wider steel wheels and a nice custom stainless exhaust....to keep it still looking 'original' but with a subtle enhancement. Then maybe a supercharger....
I think whilst it runs as well as it does, I will be leaving the engine bay well alone. Rest of the plan sounds good 
Maybe if it suffers running issues in the future, then I will take that opportunity to clean up the plumbing and optimise things a bit.
Need to sort a few things that irritate me when driving first - the doors cannot be adjusted to close with a sensible amount of force without leaving them banging and rattling when driving along. The hinge pins look pretty new and there isn't really any obvious play, but the striker pins are worn away and the main seals are shot and baked hard so don't provide much in the way of cushioning or sealing.
Door seals turned up first, so set to...
Typical section of old seal
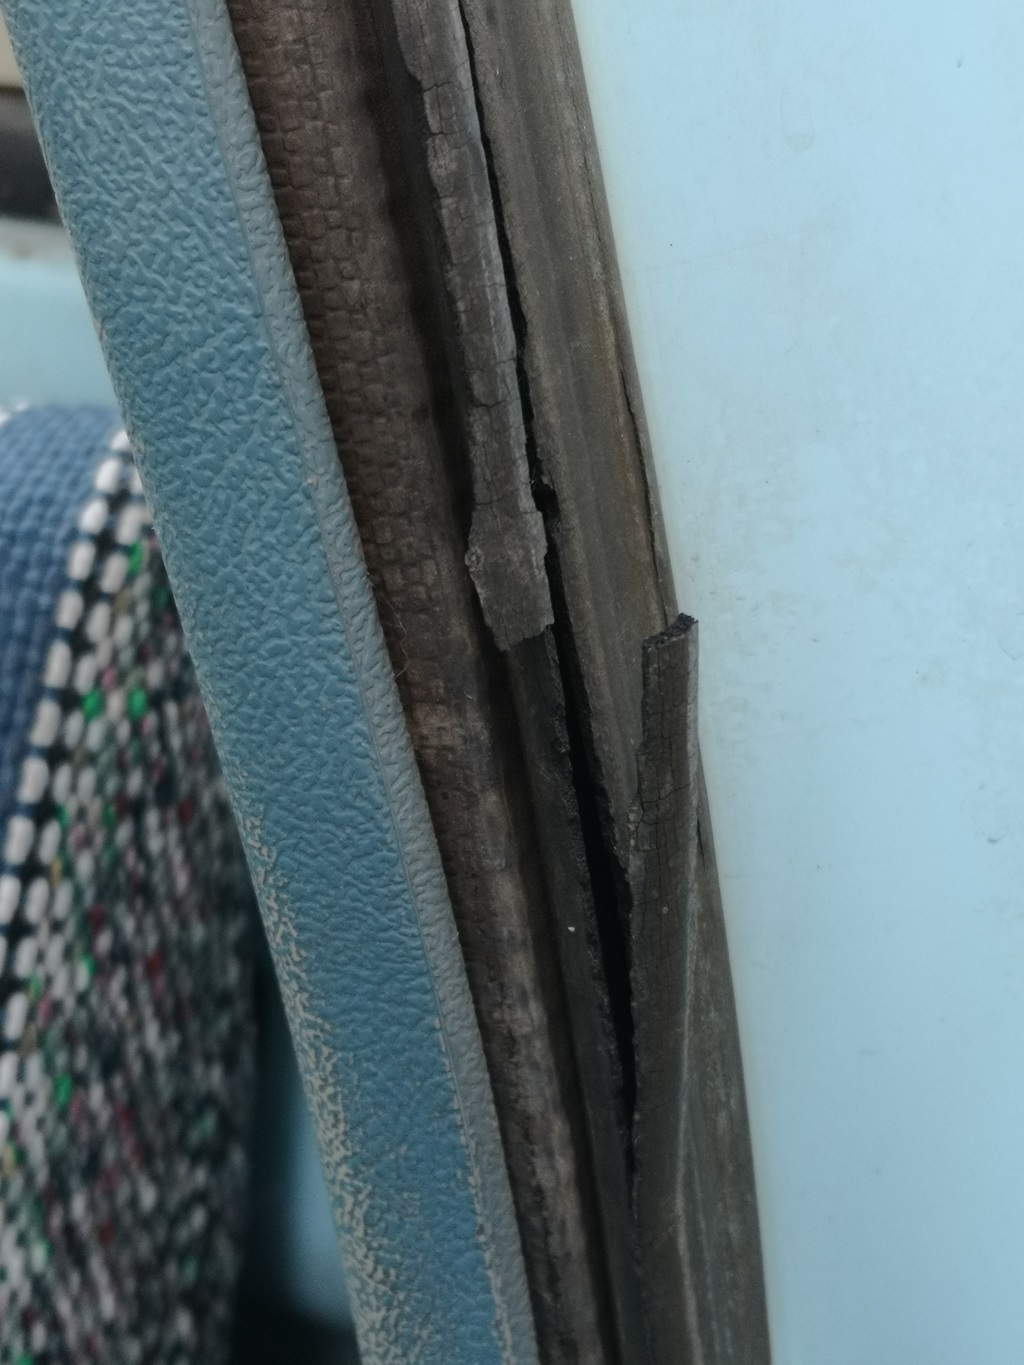
Seal removed, pleased to see the pinch weld / flange is very close to perfect, other than being a bit grubby
New seals are nice and soft and fitted well
Doors still need a fair slam, but was able to adjust the striker to let them sit pretty flush with the bodywork - again it's no Lexus but on something like this I'm happy with large but relatively even gaps and virtually flush panels.
Striker pin awaits replacement, hopefully be able to make a further improvement when they arrive.
Even with just the seals done it sounds so much better, no banging from the doors over bumps at all
Horribly rattly speedo cable is next on the hit-list!
Maybe if it suffers running issues in the future, then I will take that opportunity to clean up the plumbing and optimise things a bit.
Need to sort a few things that irritate me when driving first - the doors cannot be adjusted to close with a sensible amount of force without leaving them banging and rattling when driving along. The hinge pins look pretty new and there isn't really any obvious play, but the striker pins are worn away and the main seals are shot and baked hard so don't provide much in the way of cushioning or sealing.
Door seals turned up first, so set to...
Typical section of old seal
Seal removed, pleased to see the pinch weld / flange is very close to perfect, other than being a bit grubby
New seals are nice and soft and fitted well
Doors still need a fair slam, but was able to adjust the striker to let them sit pretty flush with the bodywork - again it's no Lexus but on something like this I'm happy with large but relatively even gaps and virtually flush panels.
Striker pin awaits replacement, hopefully be able to make a further improvement when they arrive.
Even with just the seals done it sounds so much better, no banging from the doors over bumps at all
Horribly rattly speedo cable is next on the hit-list!
Think the California version was strangled to produce about 10hp less than versions sold elsewhere. Think most factory versions were around 175hp in '77. They are quite torquey though.
Best bang for the buck on the original L48 is reckoned to be a change of cam. Headers and a dual exhaust after that, then heads and compression will all give gains, but before getting to that stage one has to consider whether the money is better spent on dropping in a complete crate engine...
Best bang for the buck on the original L48 is reckoned to be a change of cam. Headers and a dual exhaust after that, then heads and compression will all give gains, but before getting to that stage one has to consider whether the money is better spent on dropping in a complete crate engine...
Ordered some paint today - it is being matched by eye from a sample of factory painted metal that I posted to the supplier from the lower dashboard area.
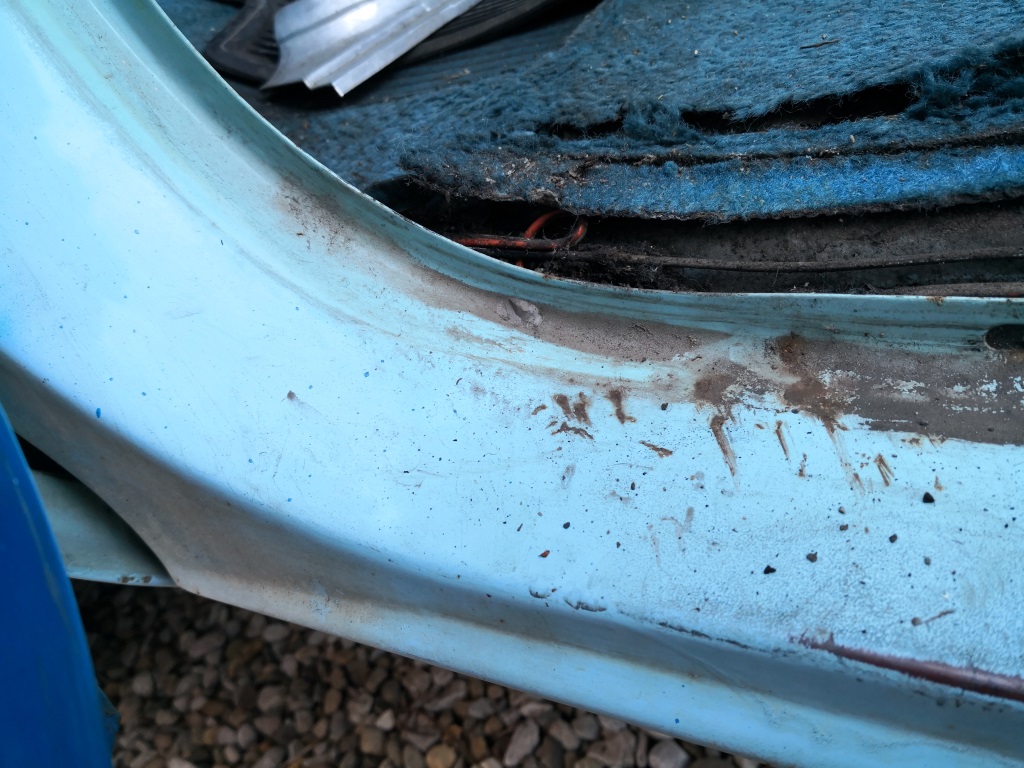
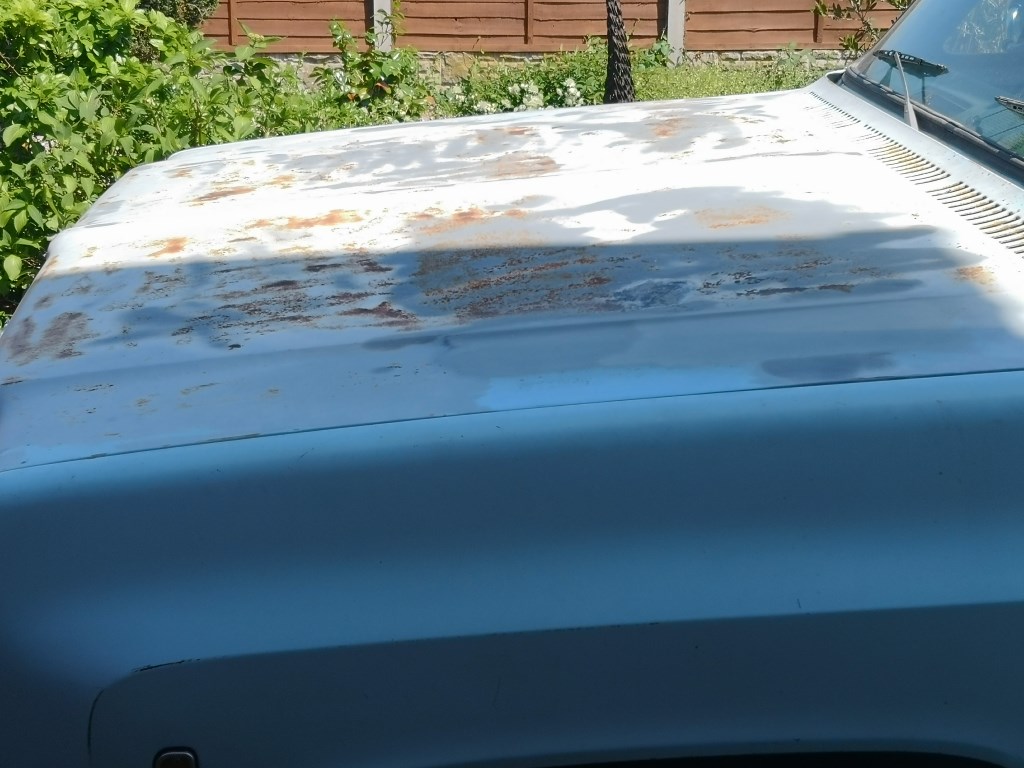
There was no point trying to match the paint to any of the exterior bodywork. Clearly it has had touch ups and repaints over the years, which have then faded at varying rates depending on the age of the paint and orientation of the panel to the California sun!
I know the new paint will be substantially less faded when applied, but it surely can't match any less than the bonnet and door do at the moment!
I've worked on the basis that, by ordering celly, hopefully it will weather in nicely over time. But if it doesn't, I've ordered enough to do the whole thing!!
The old C10 has been earning its keep a little, firstly collecting some new patio furniture - is it wrong that I quite wanted to unwrap the chairs and leave them exactly where they were??!!
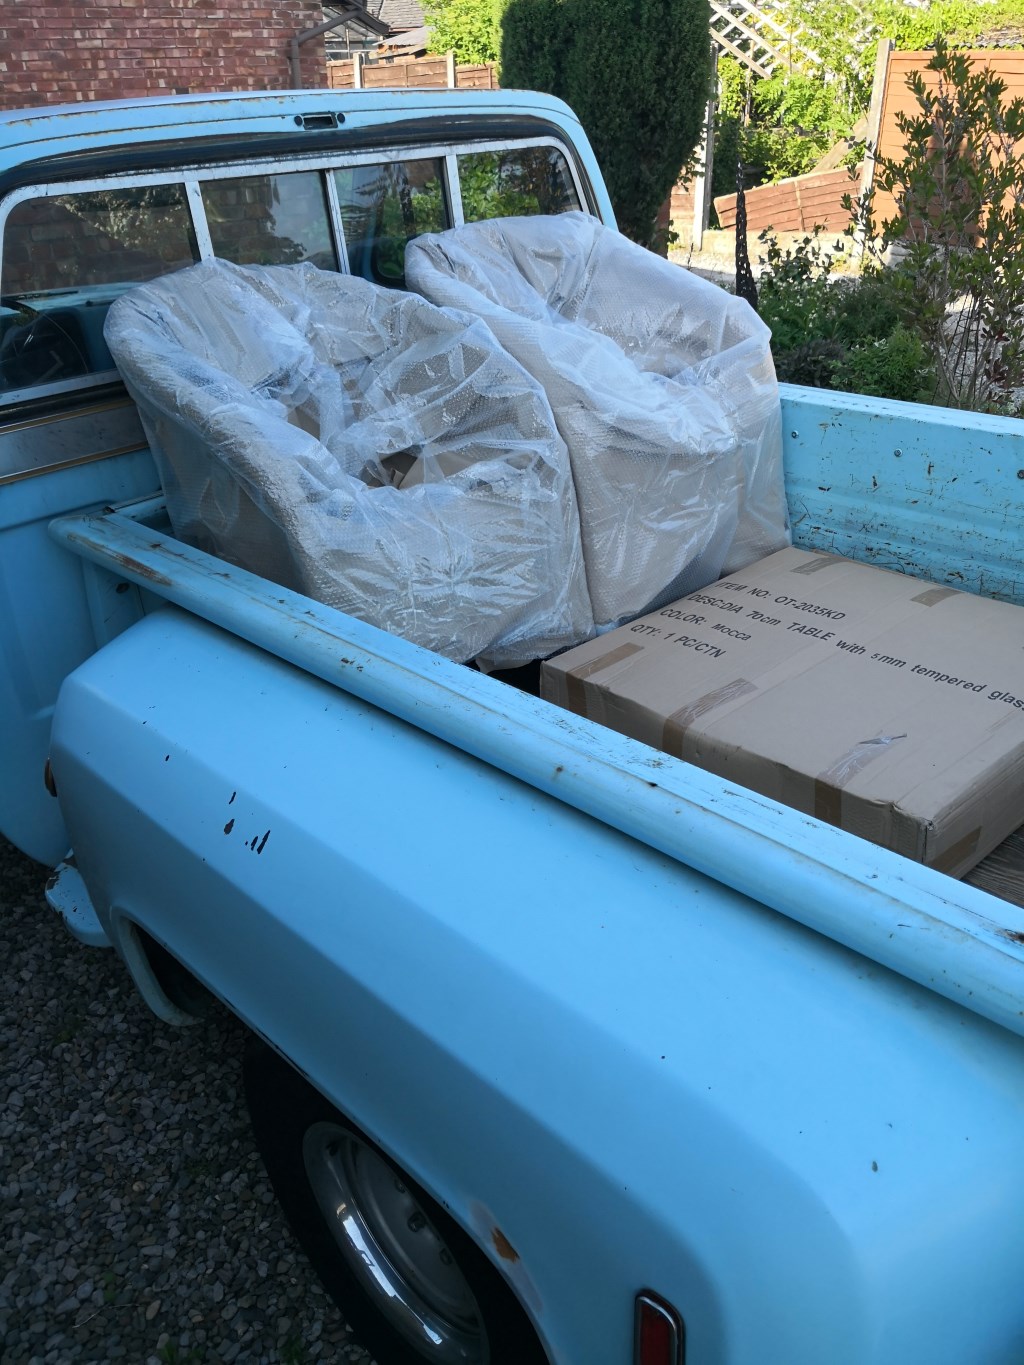
Then fully loaded for a tip trip (obviously this is the "before" picture)!!

Then a bit more tweaking at the weekend.
Door striker pins arrived, so fitted them and spent a little time fettling their positioning. Both doors close pretty well now, still need to be closed firmly against the new rubber seals but no longer need a comedy slam (times three or four attempts!)
Next up was the driver's side bonnet alignment. The hinge was excessively worn to the point that it had run out of adjustment and the bonnet sat a good centimetre high of the wing.
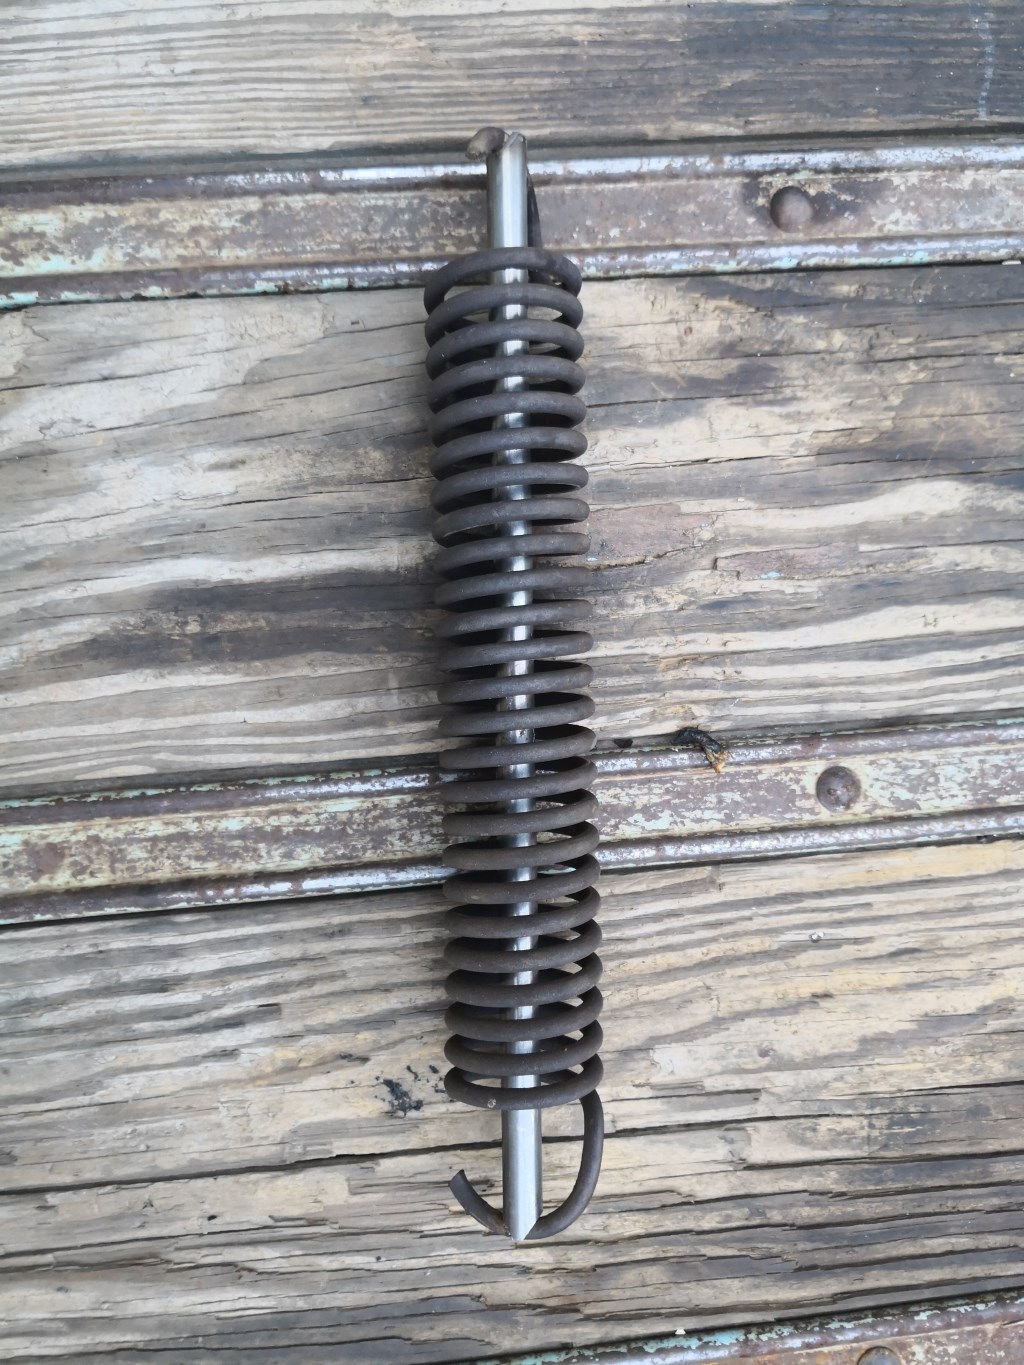
Before removing the hinge, the bonnet spring needed to come off it. Some people seem to make hard work of these using levers, threaded pullers, even old seat belts tied to a tree one end and the spring the other, before reversing the truck a few inches! I chose to copy the simplest tool from Google Images and have to say it worked very well.
The removal process is - open the bonnet about two inches, just enough to access the spring. Insert rod between the ends of the spring with one hand whilst opening the bonnet a little further and simultaneously seating the rod at both ends. Open the bonnet fully at which point the spring falls off! Refitting is simply the reversal etc..

Old vs new hinge. Massive play in the pivot points of the old one.
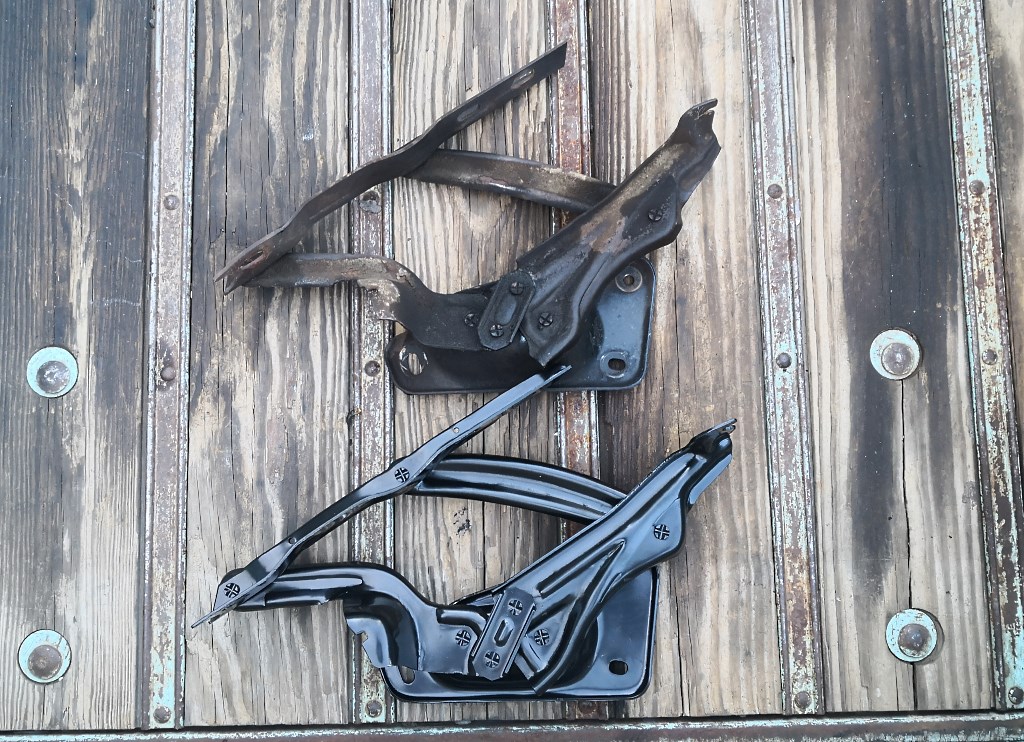
New hinge fitted and voila?! Er no, the bonnet was still too high at maximum adjustment. Maybe only 5mm now. Looking online, this isn't unheard of with the aftermarket hinges. Typical re-pop parts quality unfortunately. Slotting the mounting holes is apparently often necessary...
Some time "disassembly, drilling, filing, test fitting, swearing, repeat all again" later, I achieved an acceptable alignment
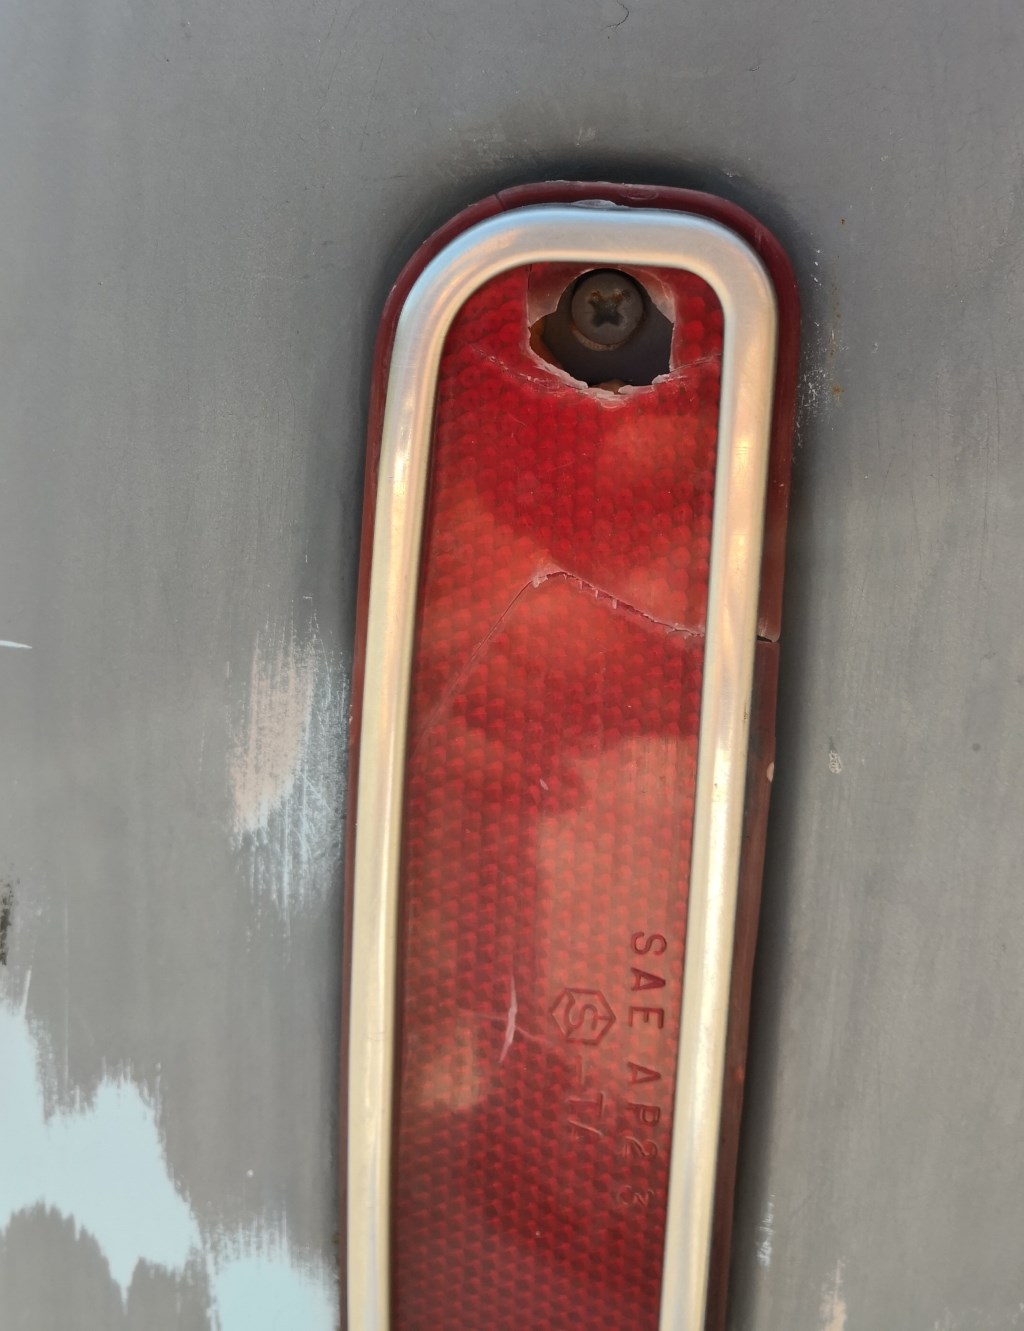
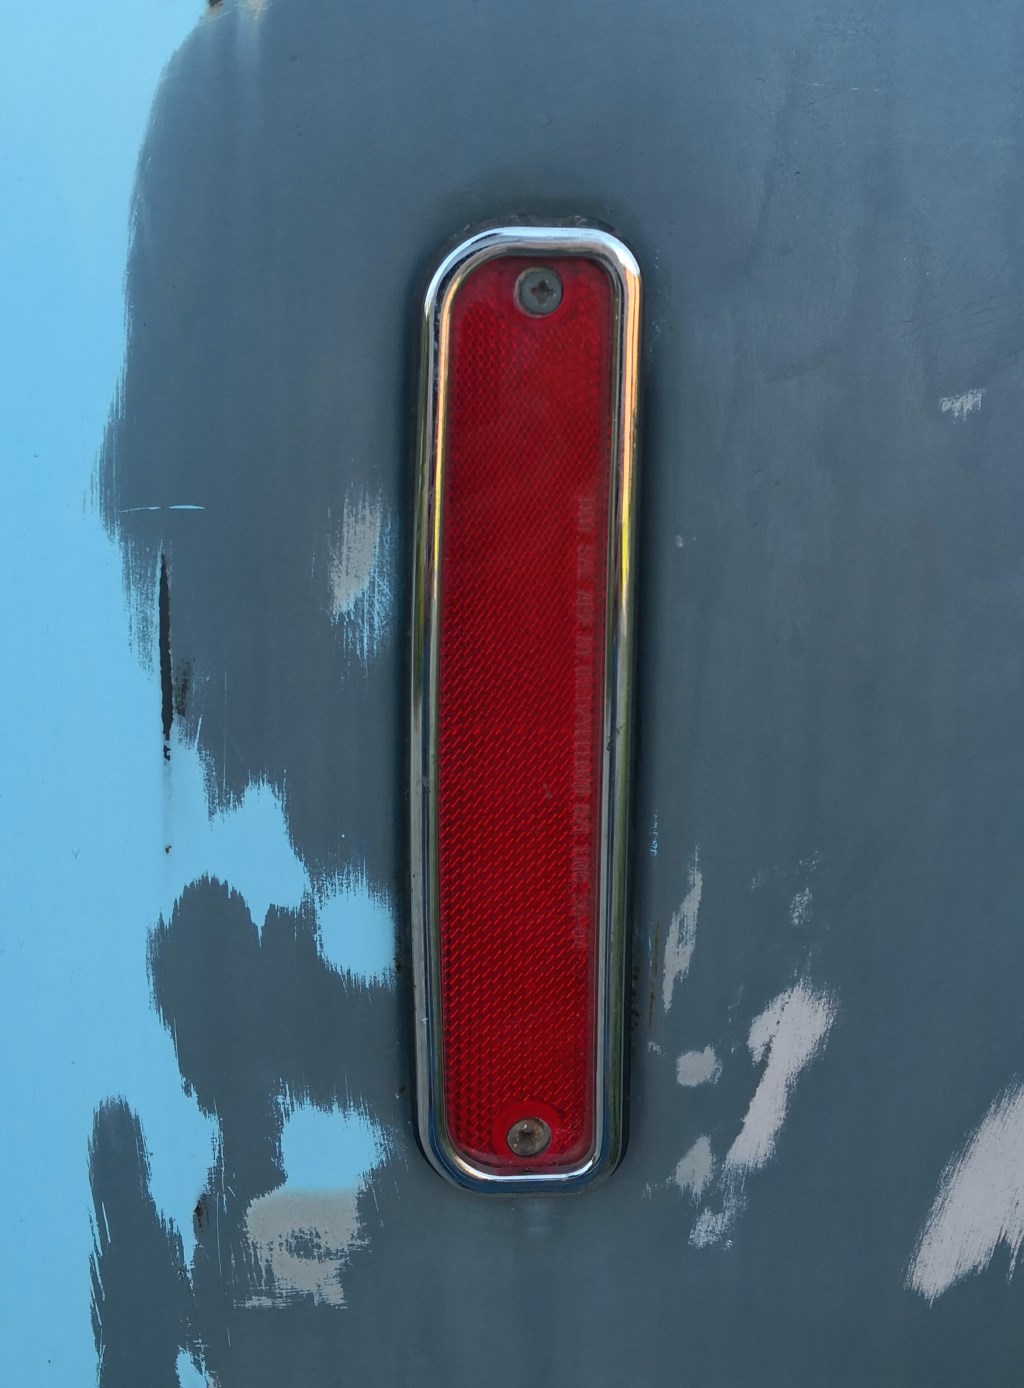
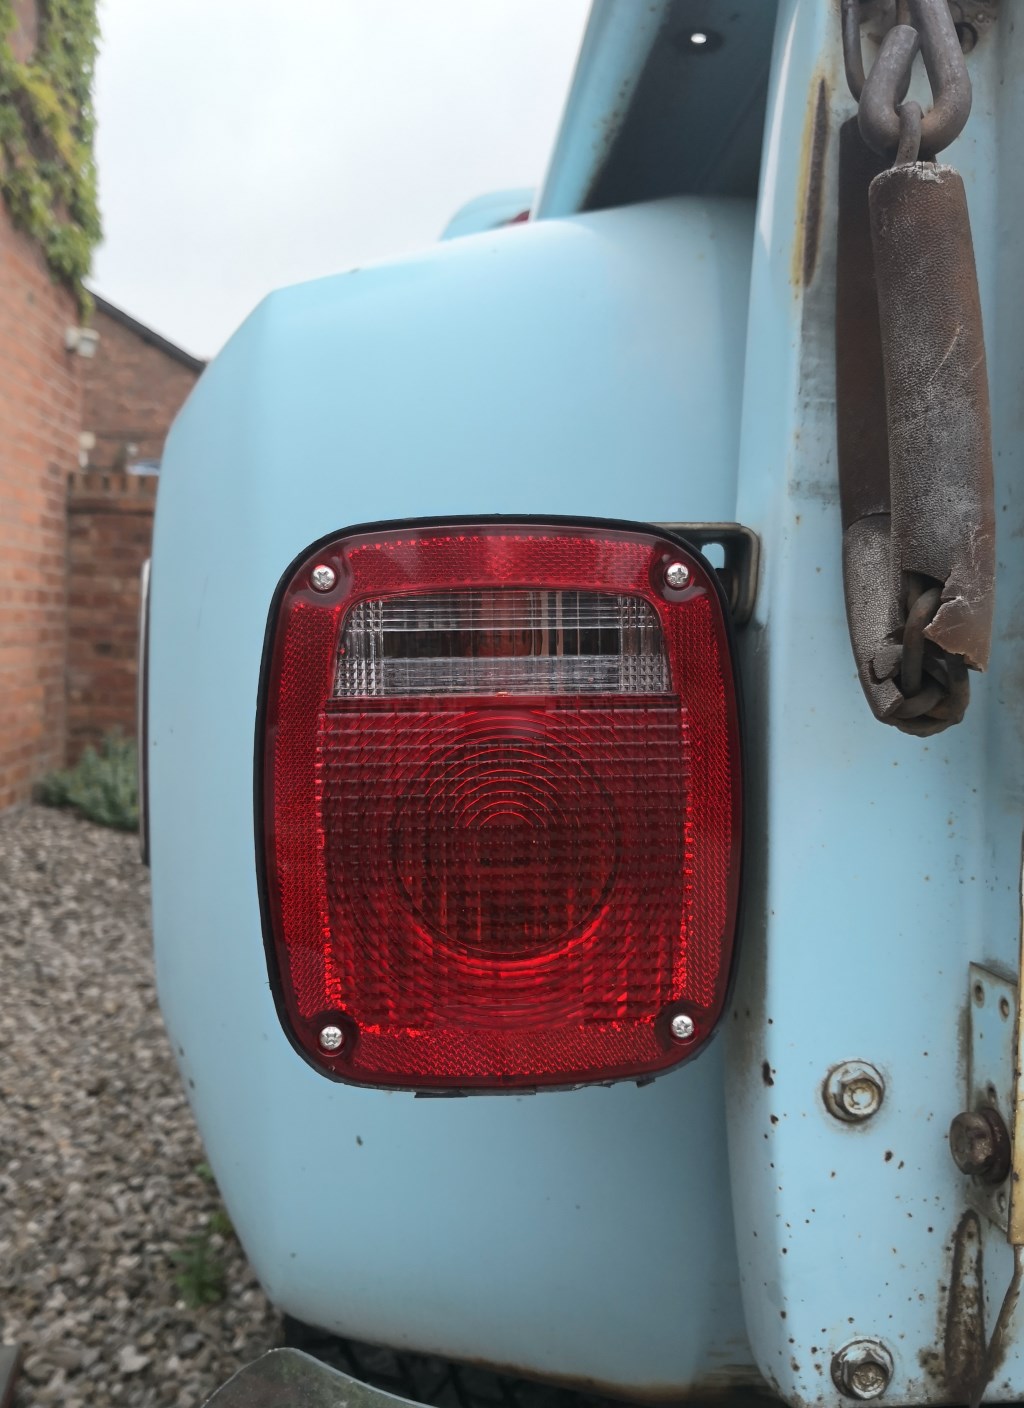
After that right old faff, I needed some simple jobs, so replaced a broken rear marker light with a good used one, and both rear light lenses (yellowed and crazed) with new ones.

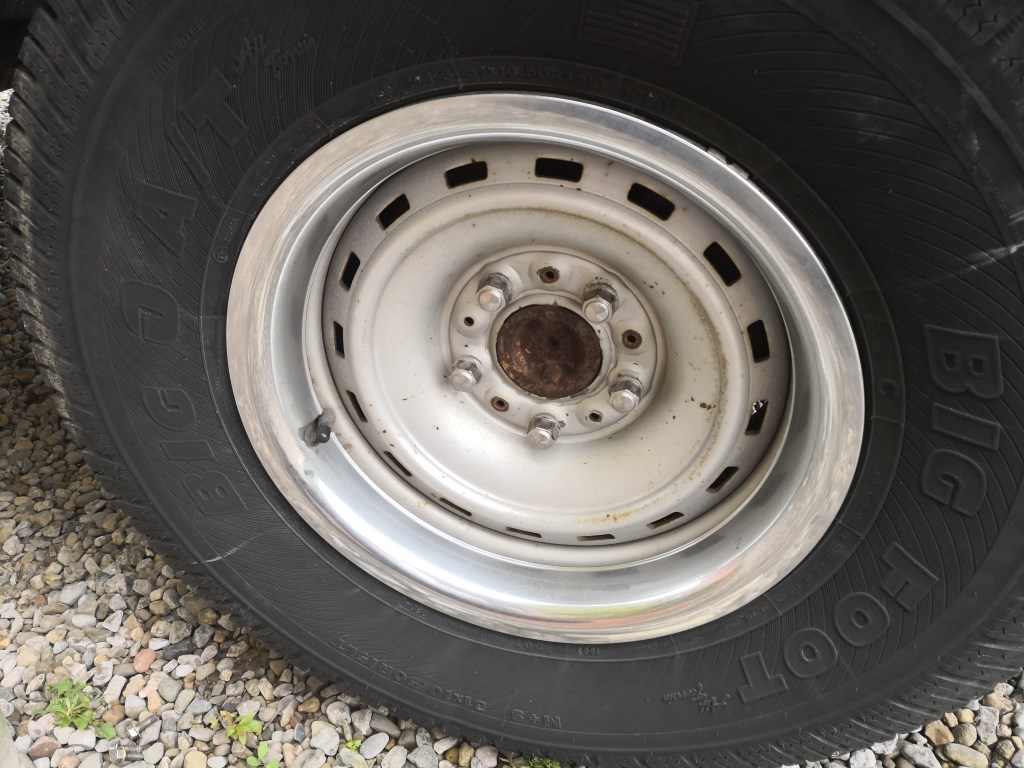
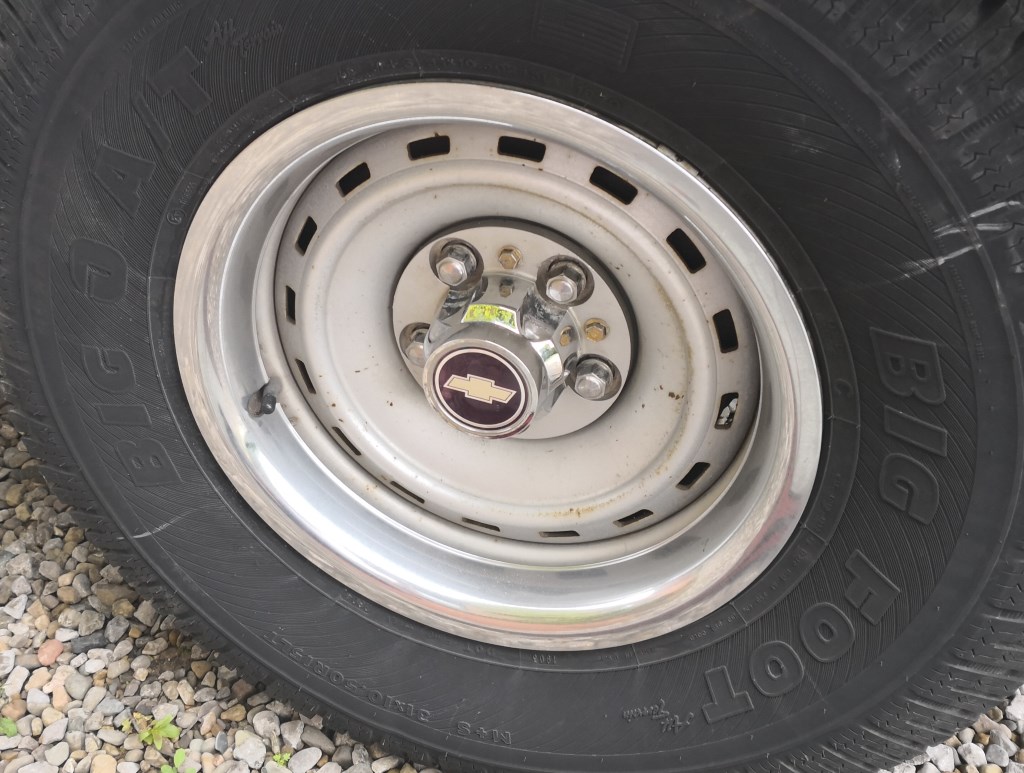
Tracked down a set of wheel centre caps, had to buy four to replace the one that was missing, hey ho!
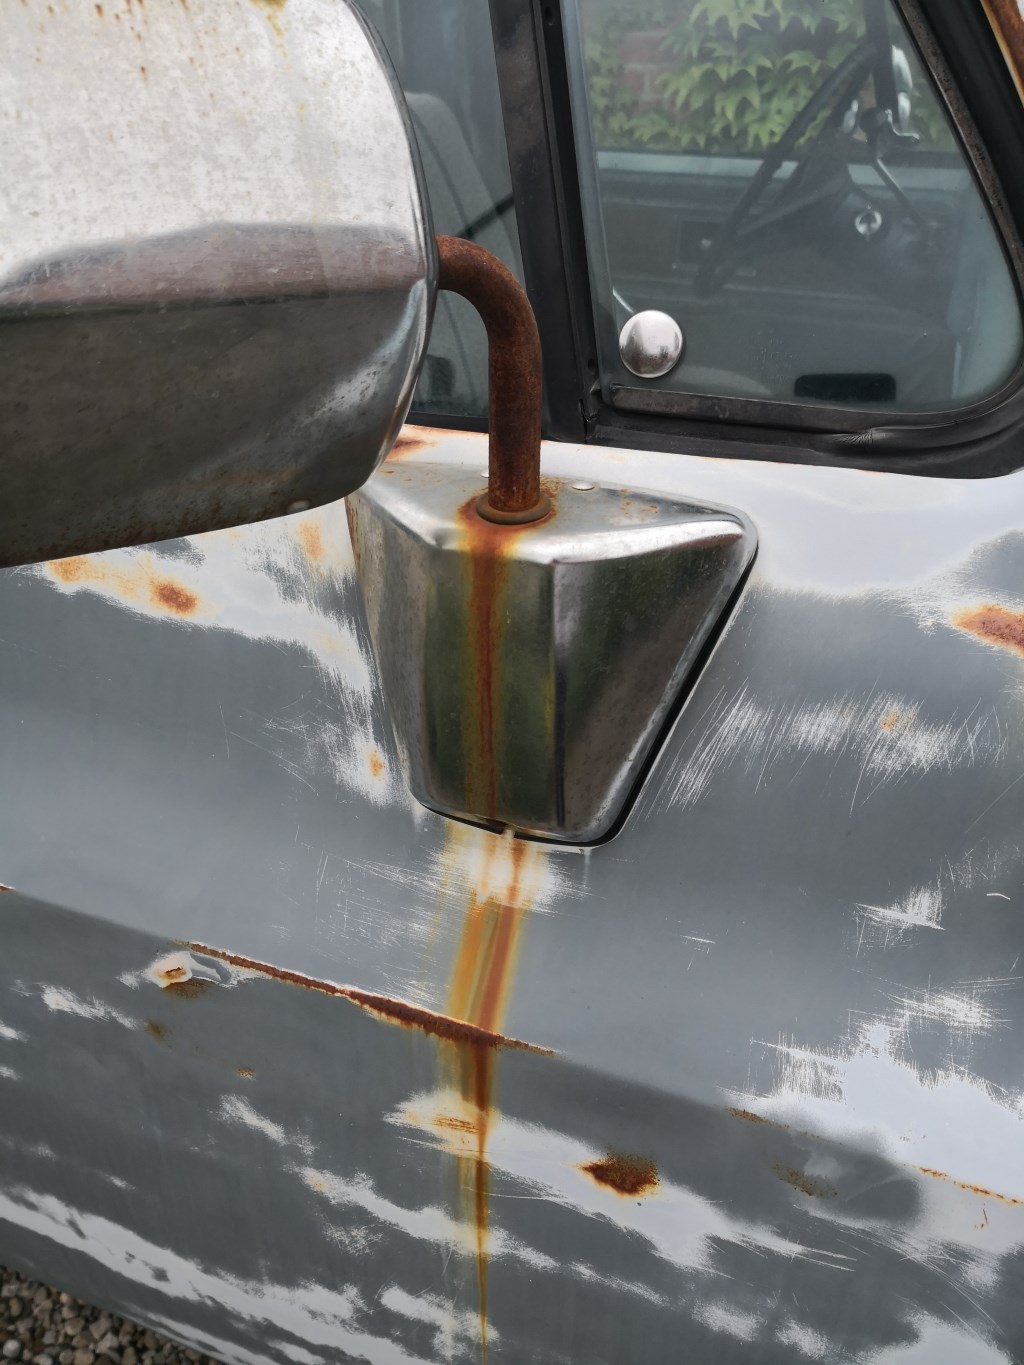
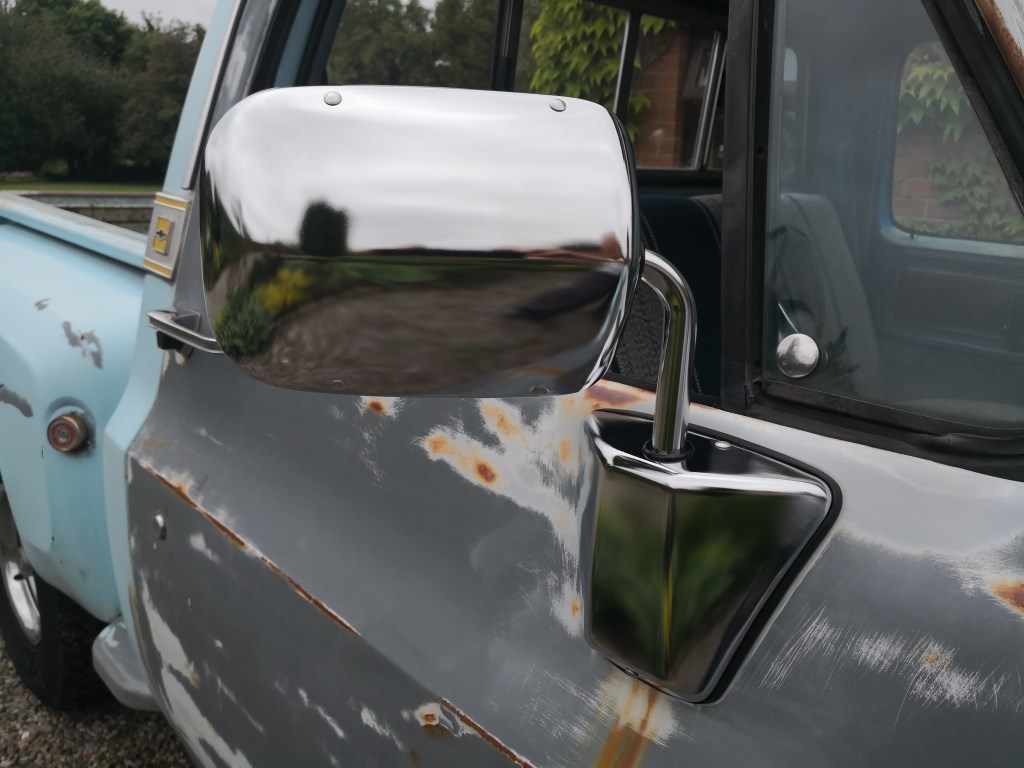
Final job was to replace the passenger side mirror that no amount of polishing was ever going to make good.
Finally the suspension lowering parts arrived in a damn heavy package. The courier was happy to relieve me of £126 in VAT and duty before he would release it
Fitting looks like it might be a bit of a slog and the instructions recommend removing the bed for better access, so a bit of planning is going to be needed. I may delay fitting until winter as I'm sure to find some bushes and ball joints that need replacing too, so would rather have her off the road waiting for parts when the weather is rubbish rather than now...
Then fully loaded for a tip trip (obviously this is the "before" picture)!!
Then a bit more tweaking at the weekend.
Door striker pins arrived, so fitted them and spent a little time fettling their positioning. Both doors close pretty well now, still need to be closed firmly against the new rubber seals but no longer need a comedy slam (times three or four attempts!)
Next up was the driver's side bonnet alignment. The hinge was excessively worn to the point that it had run out of adjustment and the bonnet sat a good centimetre high of the wing.
Before removing the hinge, the bonnet spring needed to come off it. Some people seem to make hard work of these using levers, threaded pullers, even old seat belts tied to a tree one end and the spring the other, before reversing the truck a few inches! I chose to copy the simplest tool from Google Images and have to say it worked very well.
The removal process is - open the bonnet about two inches, just enough to access the spring. Insert rod between the ends of the spring with one hand whilst opening the bonnet a little further and simultaneously seating the rod at both ends. Open the bonnet fully at which point the spring falls off! Refitting is simply the reversal etc..
Old vs new hinge. Massive play in the pivot points of the old one.
New hinge fitted and voila?! Er no, the bonnet was still too high at maximum adjustment. Maybe only 5mm now. Looking online, this isn't unheard of with the aftermarket hinges. Typical re-pop parts quality unfortunately. Slotting the mounting holes is apparently often necessary...
Some time "disassembly, drilling, filing, test fitting, swearing, repeat all again" later, I achieved an acceptable alignment
After that right old faff, I needed some simple jobs, so replaced a broken rear marker light with a good used one, and both rear light lenses (yellowed and crazed) with new ones.
Tracked down a set of wheel centre caps, had to buy four to replace the one that was missing, hey ho!
Final job was to replace the passenger side mirror that no amount of polishing was ever going to make good.
Finally the suspension lowering parts arrived in a damn heavy package. The courier was happy to relieve me of £126 in VAT and duty before he would release it
Fitting looks like it might be a bit of a slog and the instructions recommend removing the bed for better access, so a bit of planning is going to be needed. I may delay fitting until winter as I'm sure to find some bushes and ball joints that need replacing too, so would rather have her off the road waiting for parts when the weather is rubbish rather than now...


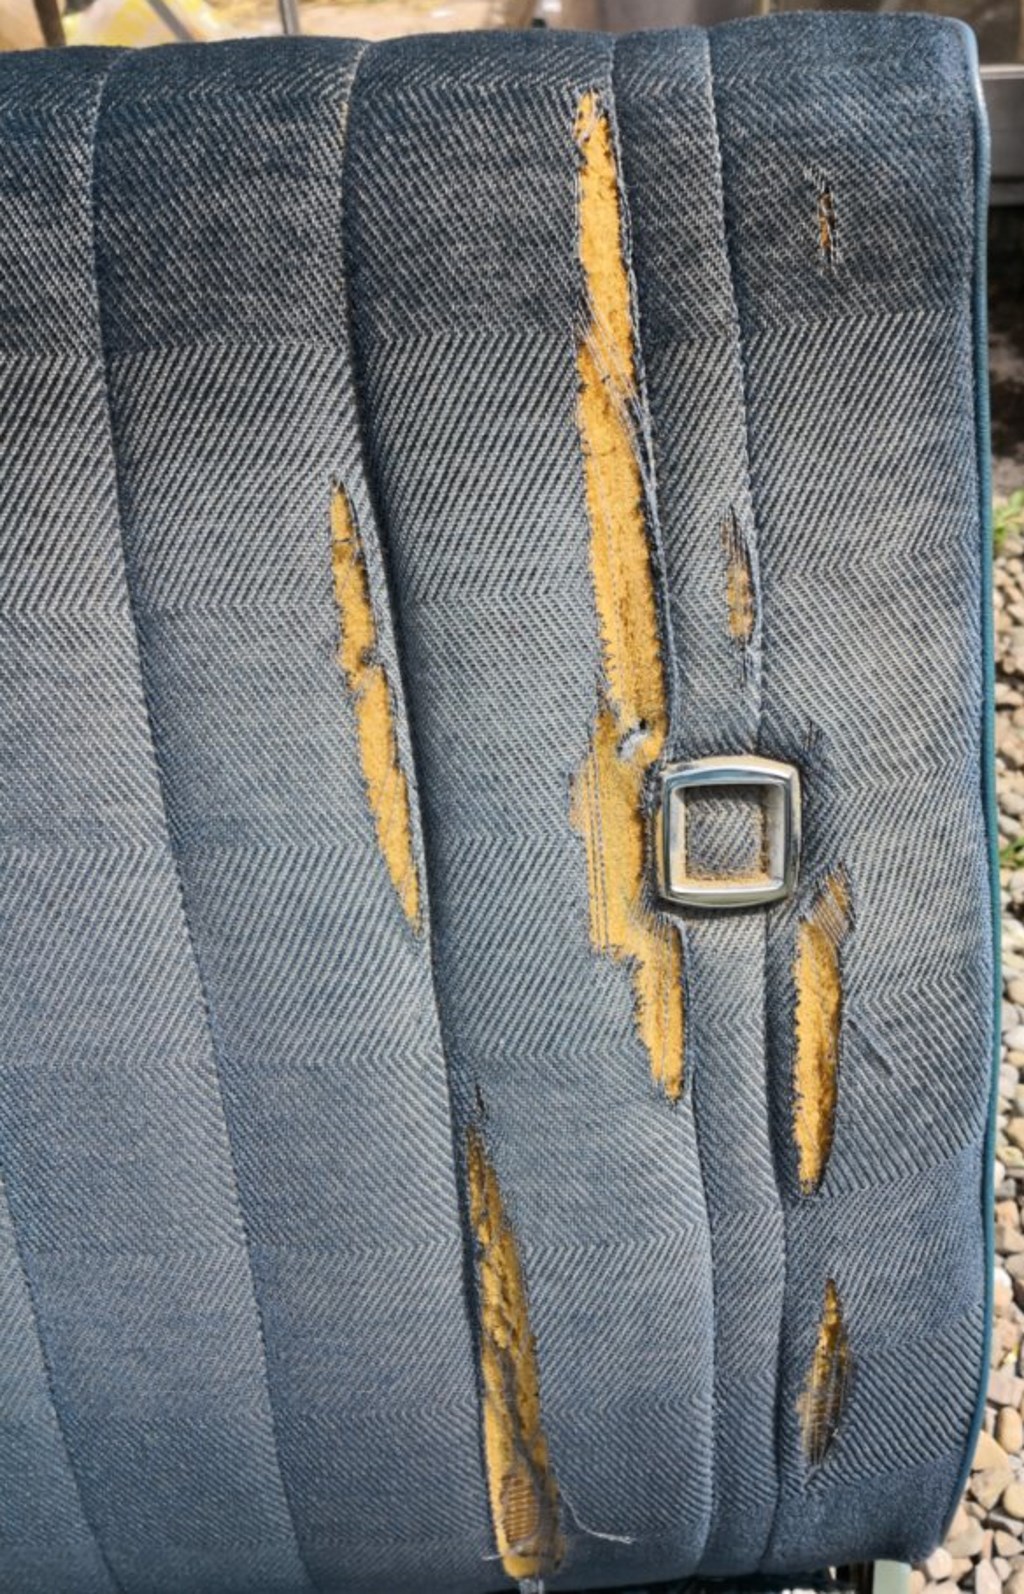
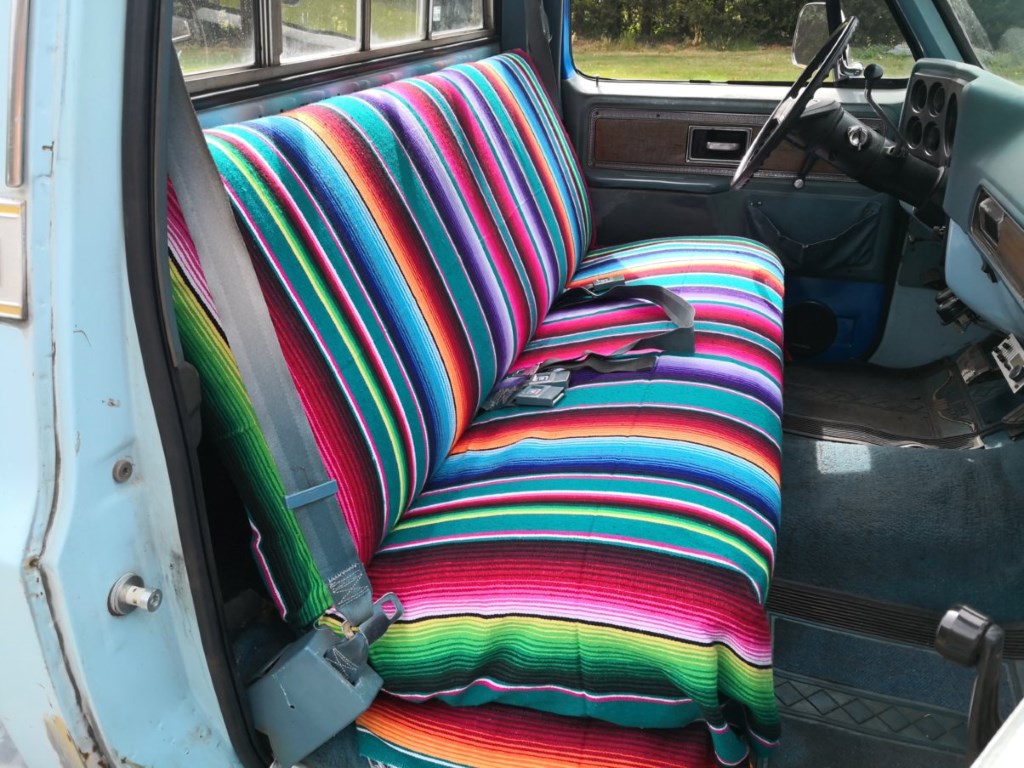
The seat cover the C10 came with was a pretty nasty nylon affair with rough scratchy edges. Pretty uninspiring to look at too
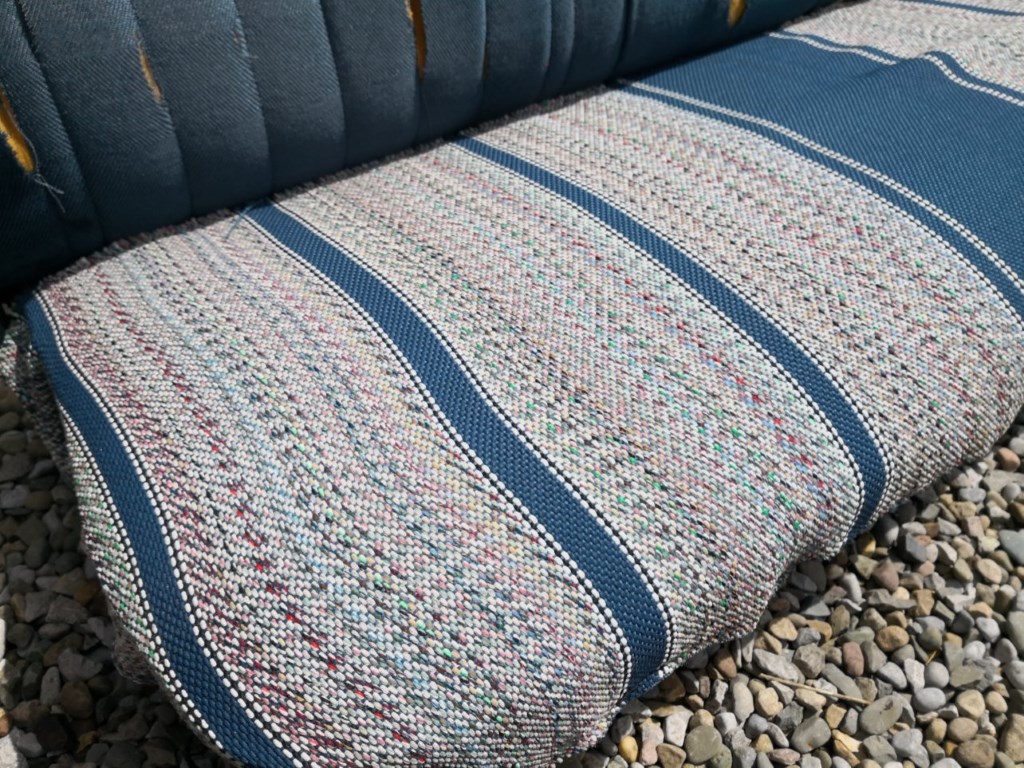
Underneath, the original seat was pretty much as expected after 40 years in the Californian sun
The solution, well with a C10 you've either got to go Mexican or go home!!

Underneath, the original seat was pretty much as expected after 40 years in the Californian sun
The solution, well with a C10 you've either got to go Mexican or go home!!

Of course running old trucks, even one as solid as this, isn't all Mexican blankets and Siestas!
Last couple of journeys, I had became aware of a new knock / clunk from the front end, steadily getting worse.
It didn't take much finding, the front passenger damper was loose at the top where it bolts to the chassis.
A bit of research revealed it to be a common fault due to the damper mount being woefully under-engineered. Basically a pin bolts to the chassis, to which the damper then bolts. No outer support to the pin is provided. Eventually shock loads through the damper loosen the pin to chassis attachment at which point the pin levers away at its mounting hole, enlarging it and in extreme cases cracking the chassis and ripping out completely.
Common "fixes" include clamping a couple of large washers either side of the hole, which mine already had. This is only ever partially successful as, once the original hole is enlarged, the pin will always move slightly under load and the whole (hole?!) process begins again.
A better fix is to add an additional bracket to the chassis, supporting the outside of the damper pin. These are available but look such a basic shape I'm sure I can knock something up in sheet metal myself that will do the job - Google images example:

Step one though, repair the chassis.
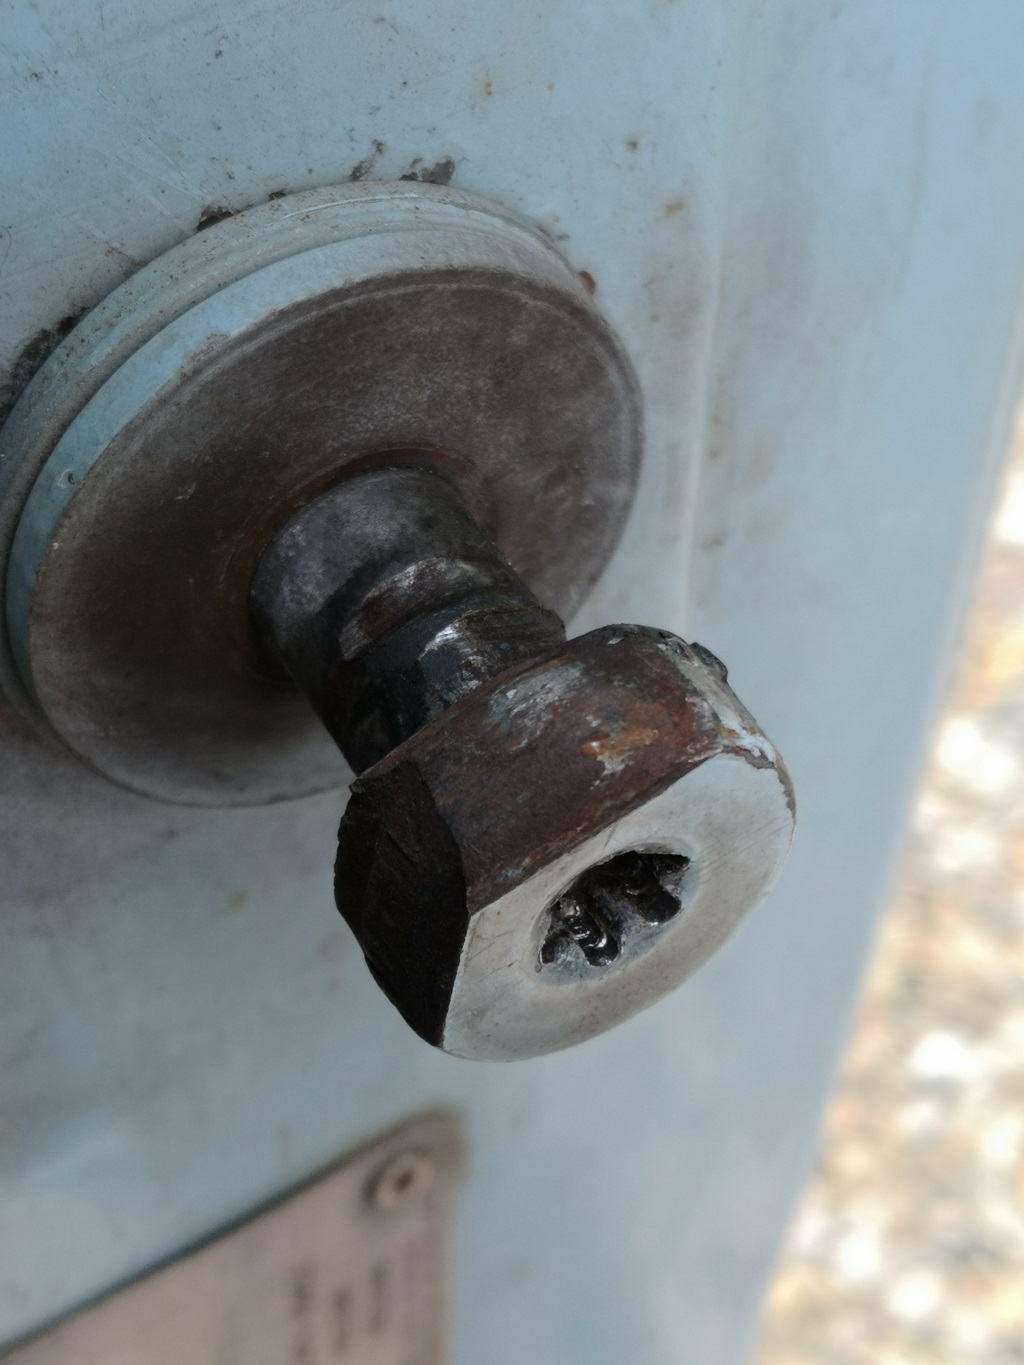
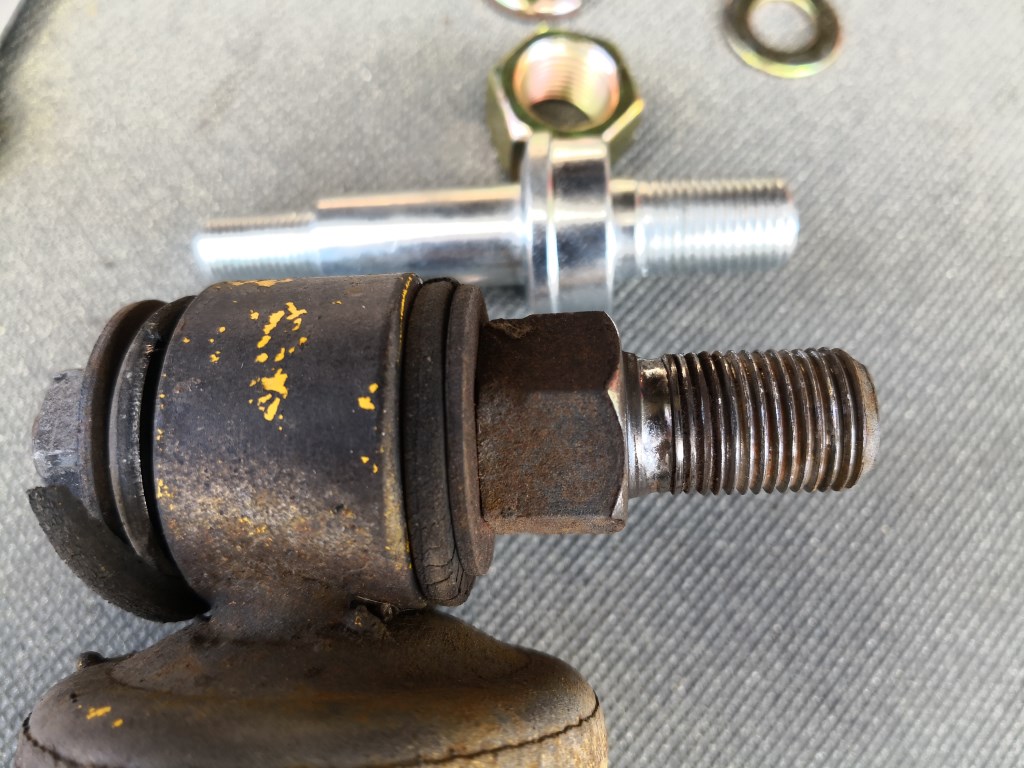
Old mounting pin and top of damper. Note the state of rubber bush, and the groove worn by the chassis next to the threads which should be a raised collar as per the new one behind.
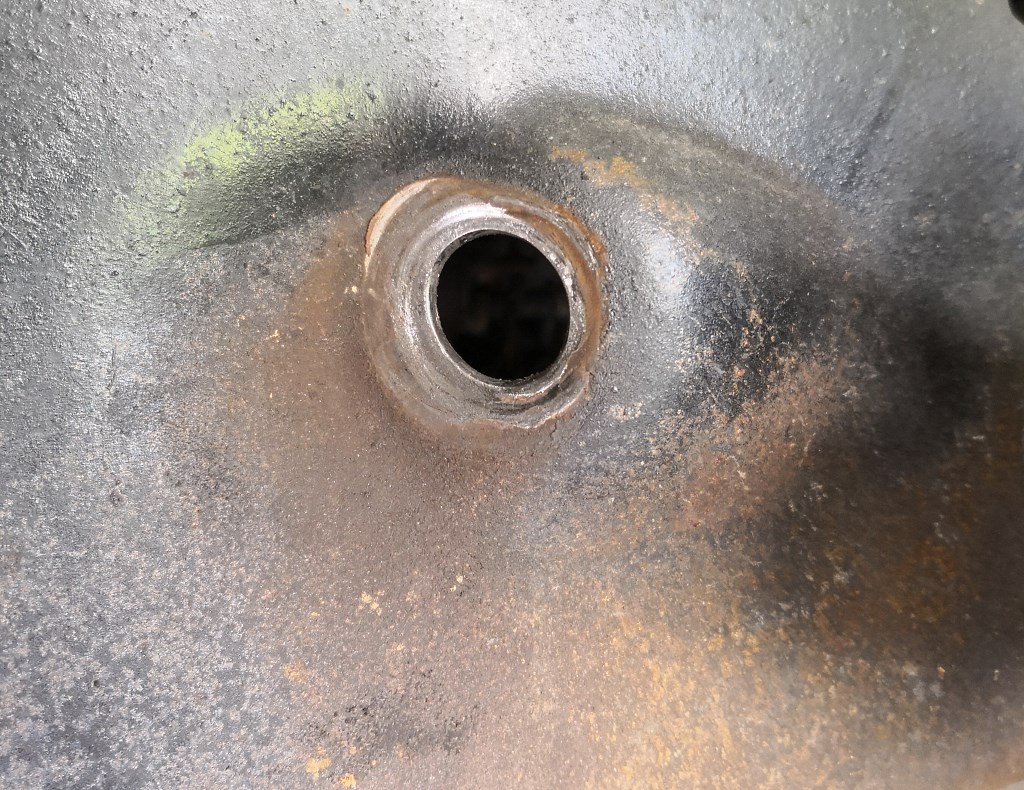
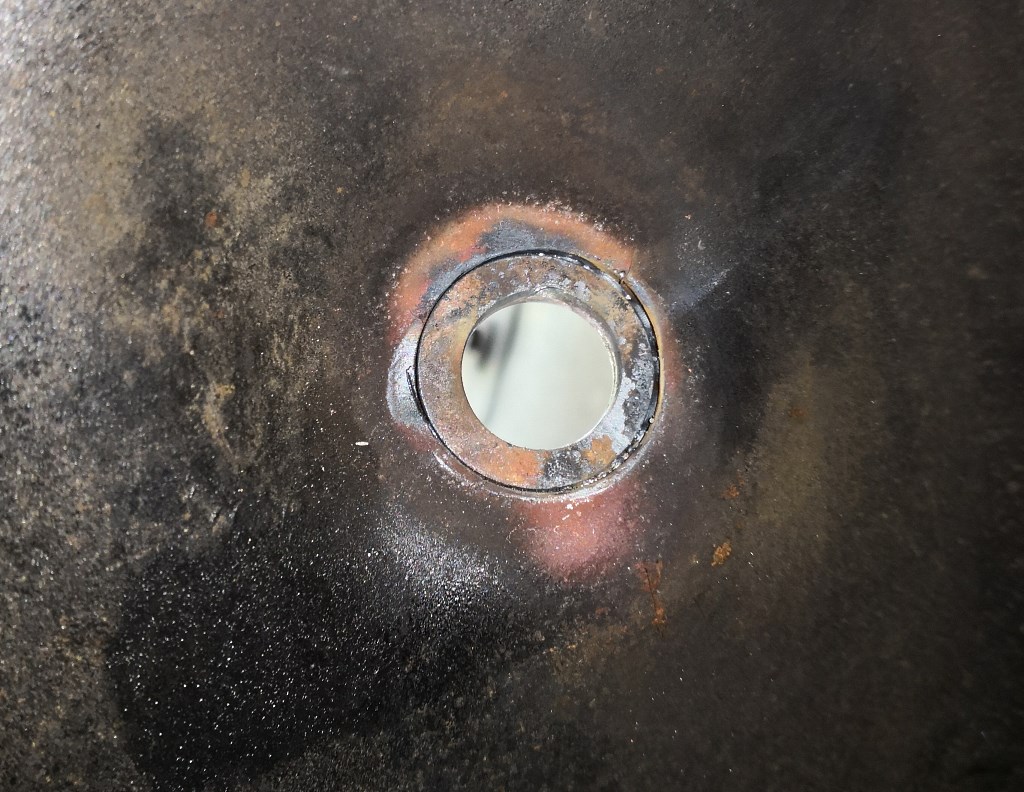
The enlarged hole in the chassis - doesn't look too bad but is about 2mm larger than it should be. Fortunately no cracking.
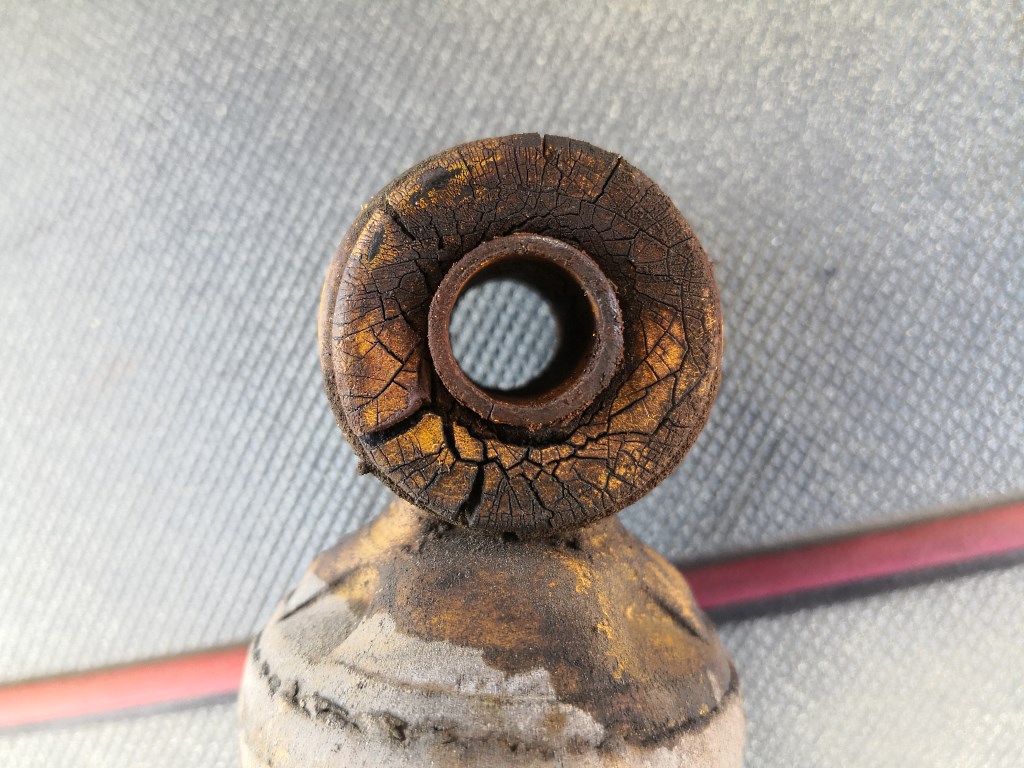
Lower bush on the damper past its best too
I found a suitable sized washer, the same thickness as the chassis and drilled it out to fit the new pin. Then drilled out the hole in the chassis to fit the washer. Bit of welding and grinding later I had the correct sized hole in the chassis.
View inside the chassis before clean up and weld (outside had been welded at this point)
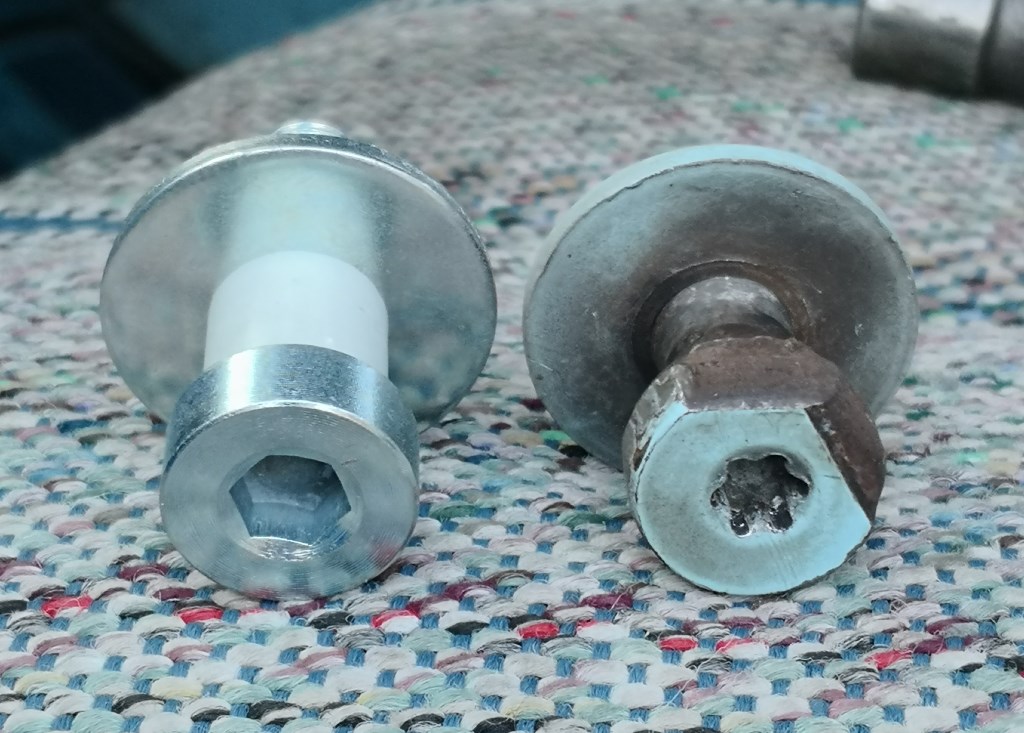
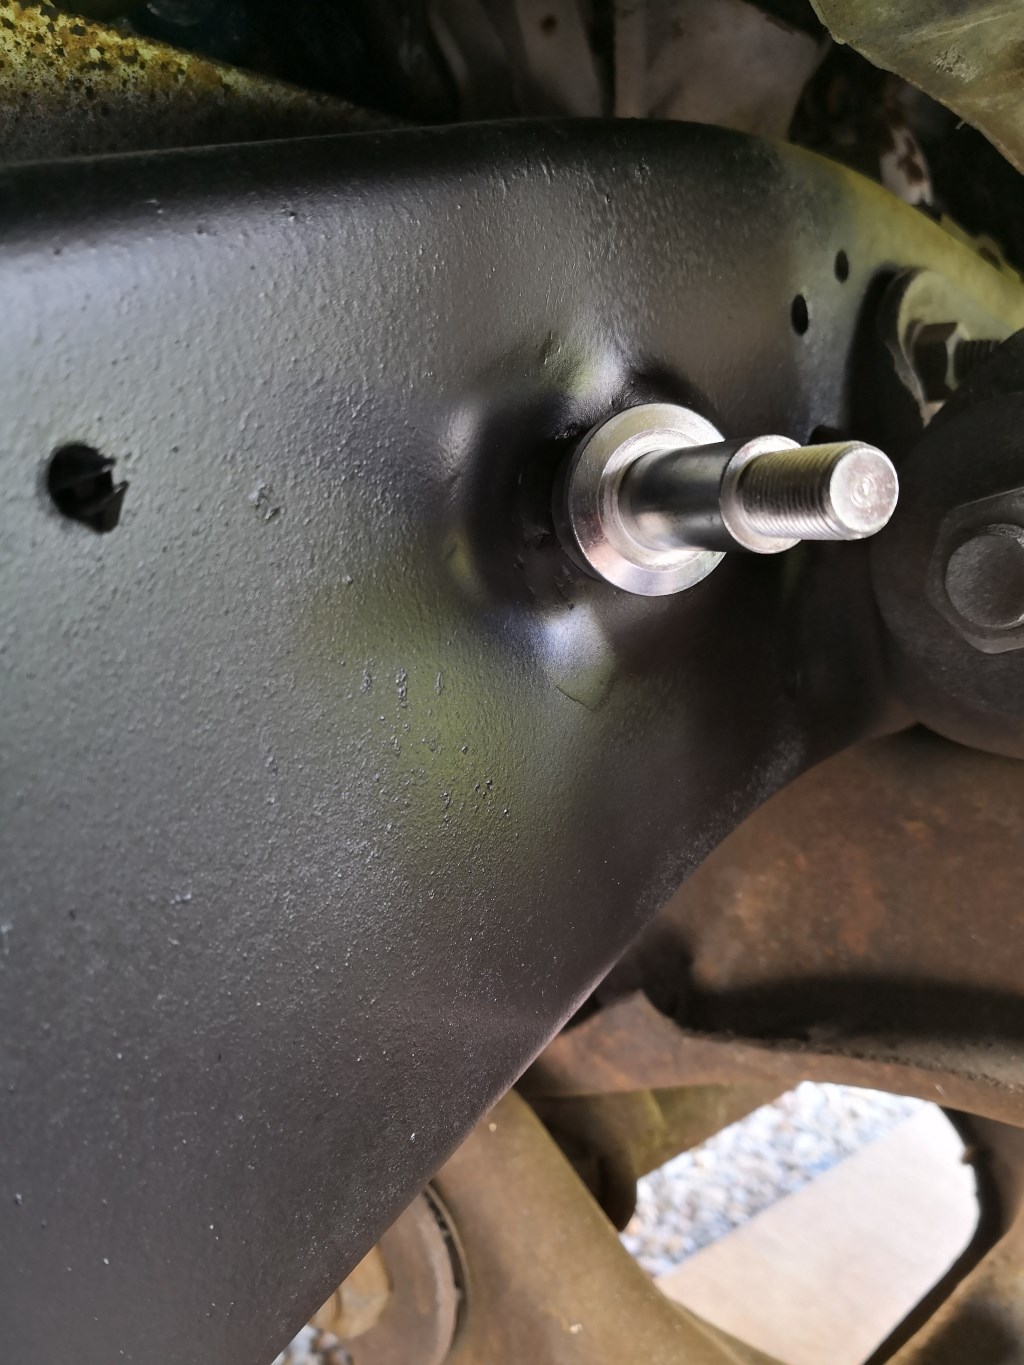
Quick spray of chassis black and then bolted the new pin up. Note the new pin has a much larger flange area than the original so will spread the load better.
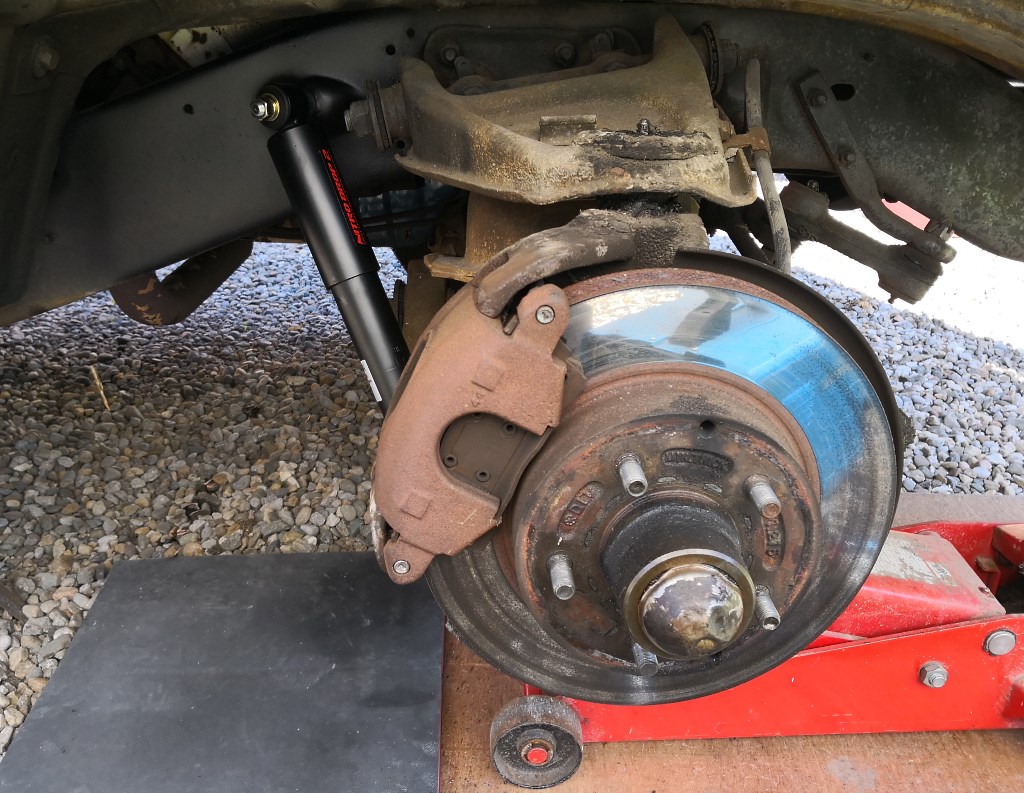
Bolted on one of my new dampers from the lowering kit that I have purchased. Checked it is the same length as the standard damper, just uprated to cope with the shorter springs that I will be fitting in due course. Certainly felt a lot stiffer when compressing and extending by hand so should reduce front end float.
Obviously I'll need to fit the other front damper now so as not to compromise the "handling" too much!!
I will make and add the extra support brackets when I fit the lowering kit but it will hold it for now and stop the chassis damage getting any worse.
Last couple of journeys, I had became aware of a new knock / clunk from the front end, steadily getting worse.
It didn't take much finding, the front passenger damper was loose at the top where it bolts to the chassis.
A bit of research revealed it to be a common fault due to the damper mount being woefully under-engineered. Basically a pin bolts to the chassis, to which the damper then bolts. No outer support to the pin is provided. Eventually shock loads through the damper loosen the pin to chassis attachment at which point the pin levers away at its mounting hole, enlarging it and in extreme cases cracking the chassis and ripping out completely.
Common "fixes" include clamping a couple of large washers either side of the hole, which mine already had. This is only ever partially successful as, once the original hole is enlarged, the pin will always move slightly under load and the whole (hole?!
) process begins again.A better fix is to add an additional bracket to the chassis, supporting the outside of the damper pin. These are available but look such a basic shape I'm sure I can knock something up in sheet metal myself that will do the job - Google images example:
Step one though, repair the chassis.
Old mounting pin and top of damper. Note the state of rubber bush, and the groove worn by the chassis next to the threads which should be a raised collar as per the new one behind.
The enlarged hole in the chassis - doesn't look too bad but is about 2mm larger than it should be. Fortunately no cracking.
Lower bush on the damper past its best too
I found a suitable sized washer, the same thickness as the chassis and drilled it out to fit the new pin. Then drilled out the hole in the chassis to fit the washer. Bit of welding and grinding later I had the correct sized hole in the chassis.
View inside the chassis before clean up and weld (outside had been welded at this point)
Quick spray of chassis black and then bolted the new pin up. Note the new pin has a much larger flange area than the original so will spread the load better.
Bolted on one of my new dampers from the lowering kit that I have purchased. Checked it is the same length as the standard damper, just uprated to cope with the shorter springs that I will be fitting in due course. Certainly felt a lot stiffer when compressing and extending by hand so should reduce front end float.
Obviously I'll need to fit the other front damper now so as not to compromise the "handling" too much!!
I will make and add the extra support brackets when I fit the lowering kit but it will hold it for now and stop the chassis damage getting any worse.
Gassing Station | Readers' Cars | Top of Page | What's New | My Stuff