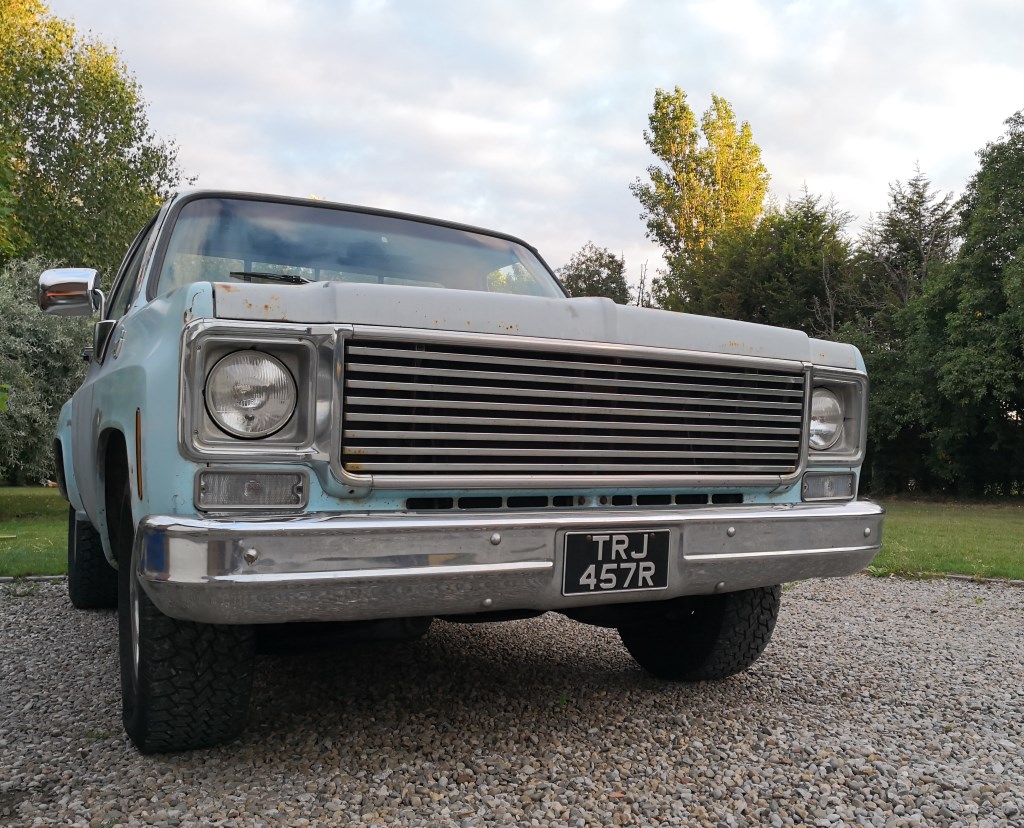
How many American trucks do I need? N+1 obviously! 1977 C10
Discussion


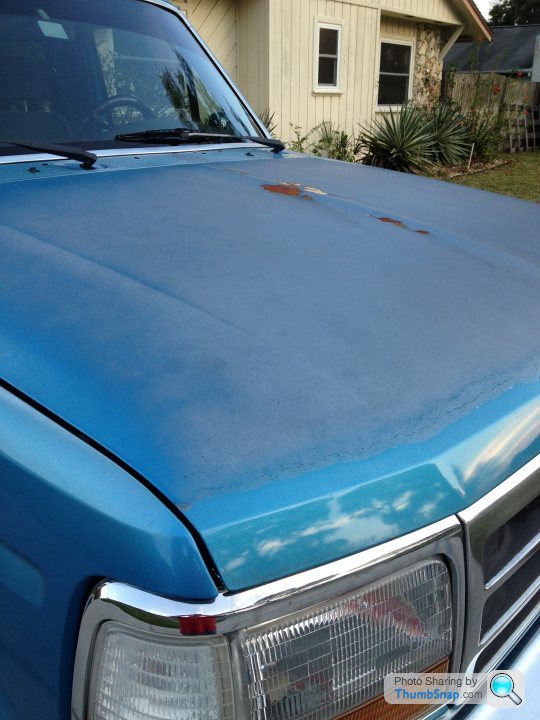
Here in the US, Step/Flare side trucks are experiencing something of a resurgence in popularity - which is interesting, given they are less practical than regular over-wheels pick-up beds. Although it might not impact it's value in the UK, I would try to keep it as stock as possible and retain as much of it's originality as is feasible.
I have a 1992 F-150 Flareside XLT Lariat that I am trying to keep as factory as budget allows - reason being that non-dicked-about examples are worth so much more in the long run. My truck is substantially younger than yours, so doesn't have quite the same cache - but it will have eventually, if it is looked after.
I'm sure you are aware, but you can but re-upholstery kits for your truck, that include springs, pre-cut foams and fabric covers that will make that interior so much nicer and more comfortable than throwing a rug over the knackered original bench.
Congratulations - it has the makings of a really desirable truck.
Here's mine:
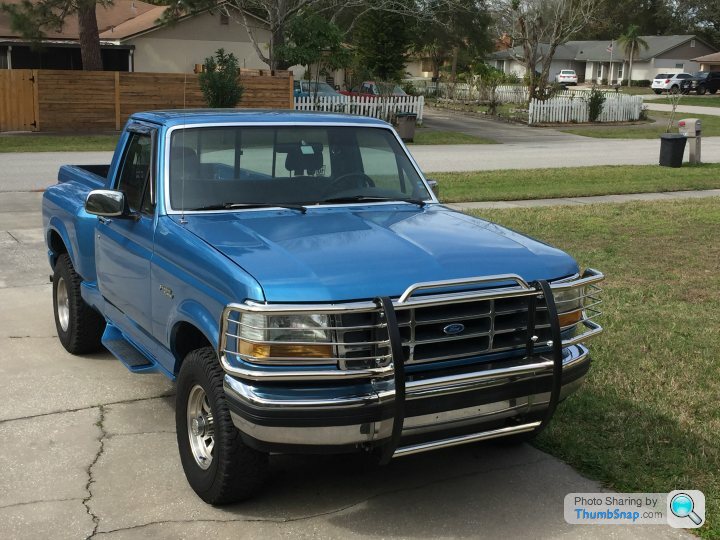
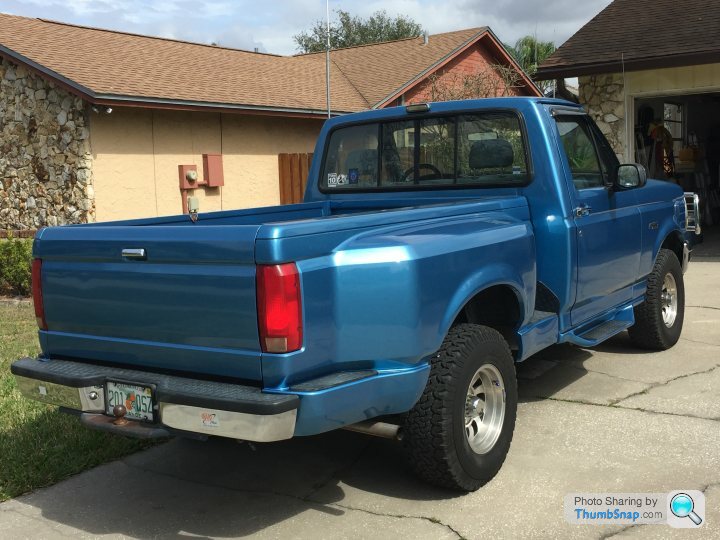
Matt Harper said:
Here in the US, Step/Flare side trucks are experiencing something of a resurgence in popularity - which is interesting, given they are less practical than regular over-wheels pick-up beds. Although it might not impact it's value in the UK, I would try to keep it as stock as possible and retain as much of it's originality as is feasible.
Yes, the 73-87 "square body" values appear to be starting to move in the US, mainly for better examples. This will be partly a generational thing and partly due to prices of the earlier models climbing out of reach of those who would like one.This will likely knock on to UK prices eventually, as prices of better examples climb in the US, so they drag up values of lesser examples. As a result even projects become increasingly expensive to import here and that then makes better examples already here all the more attractive.
Although as can be seen below, since mine is probably condition 4, I'm not going to be retiring on the profits any time soon!!

Matt Harper said:
I'm sure you are aware, but you can but re-upholstery kits for your truck, that include springs, pre-cut foams and fabric covers that will make that interior so much nicer and more comfortable than throwing a rug over the knackered original bench.
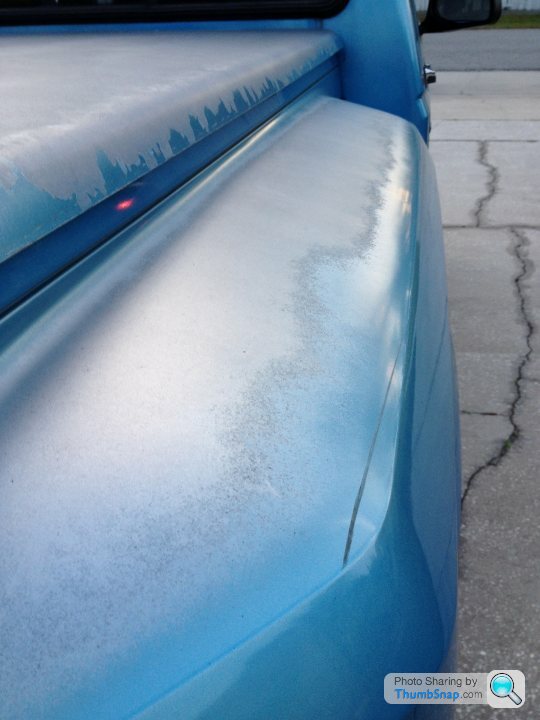
Sure, although the foam wasn't bad. Whilst I work on the El Camino, this one only gets the minimum attention and spend really. In a few years time, who knows. But I'll not be doing anything irreversible or "dicking it around" too much!Found, well heard initially, that one of the rear damper mounts had worked loose in the chassis, just the same as the front one had.
Same fix was applied as before. It seems that the roads here can destroy what lasted forty years in California in a couple of months!
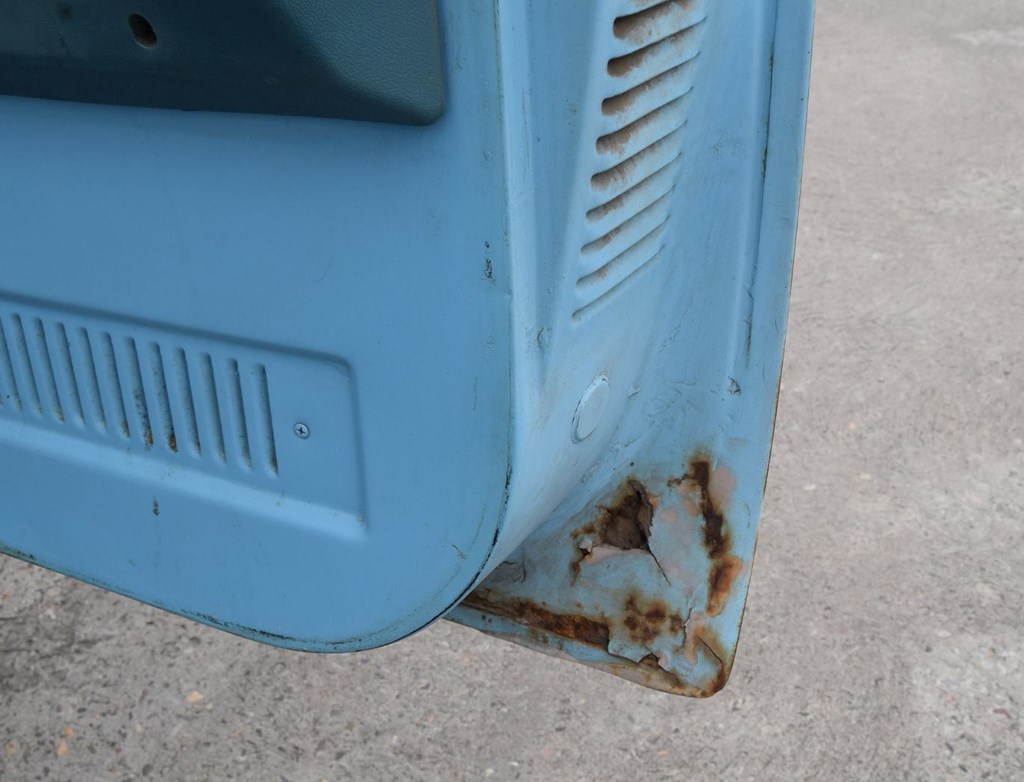
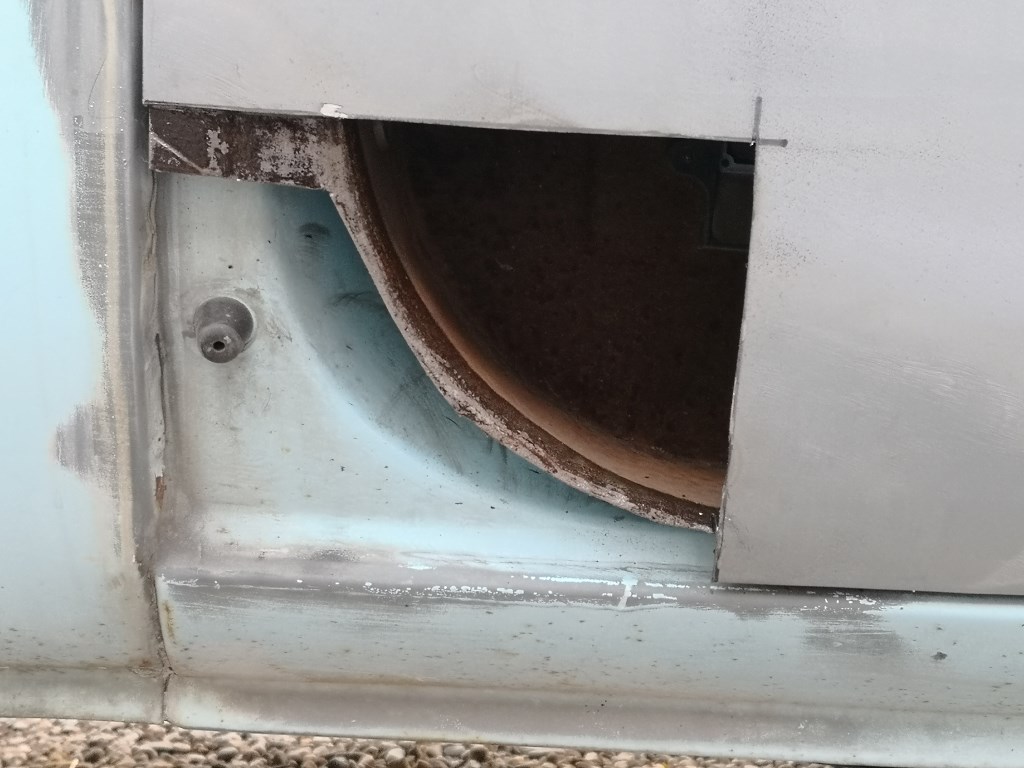
I purchased a new toy, and decided to test it out on the rotten lower corner of the passenger door. I'm pretty sure this door has been swapped at some point as it is the only panel on the truck with "proper" rust - i.e. perforations in both lower corners, so presumably it came from a donor that had lived near the coast or outside of California completely.
Before
After
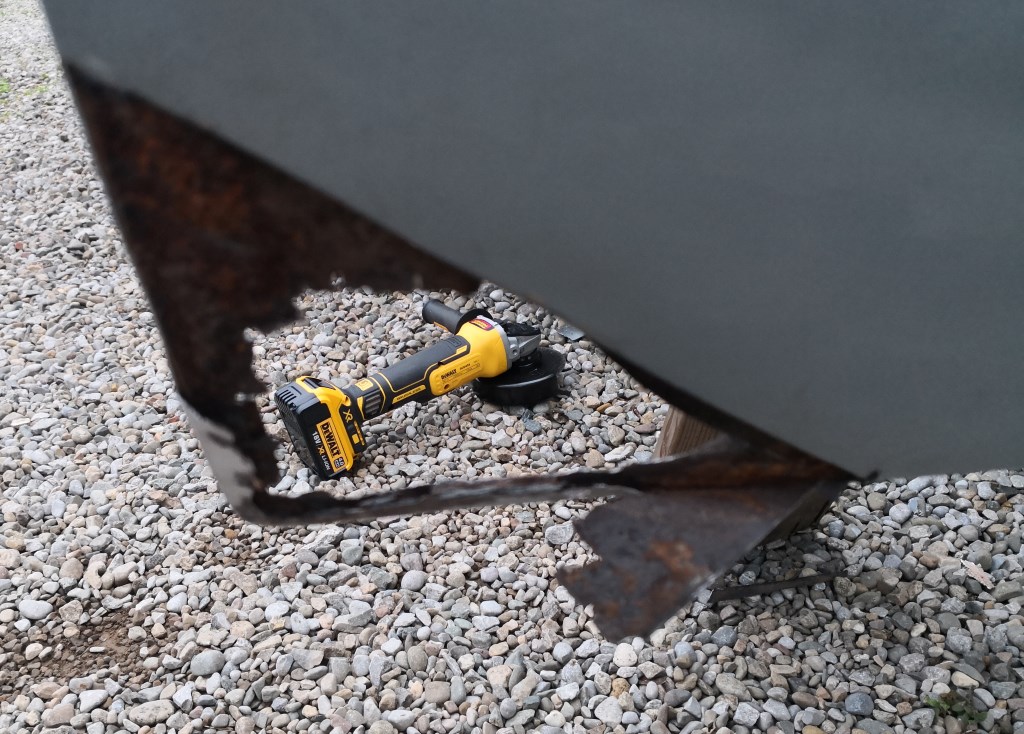
It works!! And well
Will slap some fresh metal into both bottom corners before I paint the door. Not aiming for concours (or anywhere near) but I draw the line at painting over filler and rot!!
Bit more cutting back needed yet though...
Same fix was applied as before. It seems that the roads here can destroy what lasted forty years in California in a couple of months!
I purchased a new toy, and decided to test it out on the rotten lower corner of the passenger door. I'm pretty sure this door has been swapped at some point as it is the only panel on the truck with "proper" rust - i.e. perforations in both lower corners, so presumably it came from a donor that had lived near the coast or outside of California completely.
Before
After
It works!! And well
Will slap some fresh metal into both bottom corners before I paint the door. Not aiming for concours (or anywhere near) but I draw the line at painting over filler and rot!!
Bit more cutting back needed yet though...
I like it too!
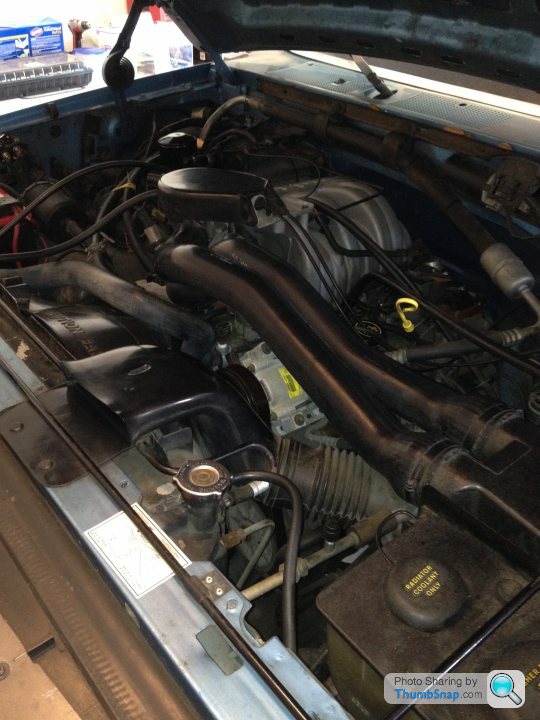
I think it is a combination of its Tonka toy looks and rugged all metal build (there are a few bits of plastic inside and for lenses etc, but not many). Been using it quite a bit whilst the weather has been good and it hasn't missed a beat.
It sounds good, goes well enough (not quick but nowhere near slow enough to be annoying) and is fairly refined to drive, much better since I've stopped the doors and dampers banging over every bump!!
It can tramline and wander around quite a bit on cambered country lanes and motorway carriageways that have been grooved by wagons, and there is a fair old bit of slop in the steering so I'm sure some new bits and pieces underneath, when I upgrade the suspension, would yield an improvement if not exactly transforming it into a B-road weapon!!
I did get caught in a rain shower yesterday and can confirm that old, hard tyres combined with little weight out back and a bit of torque is an absolutely hilarious combination. It would be even more so with an LSD I suspect...
In other news, the hole in the door has got rather larger, but at least I have found solid metal now!!
No more work done due to holidays and general post-summer lethargy.
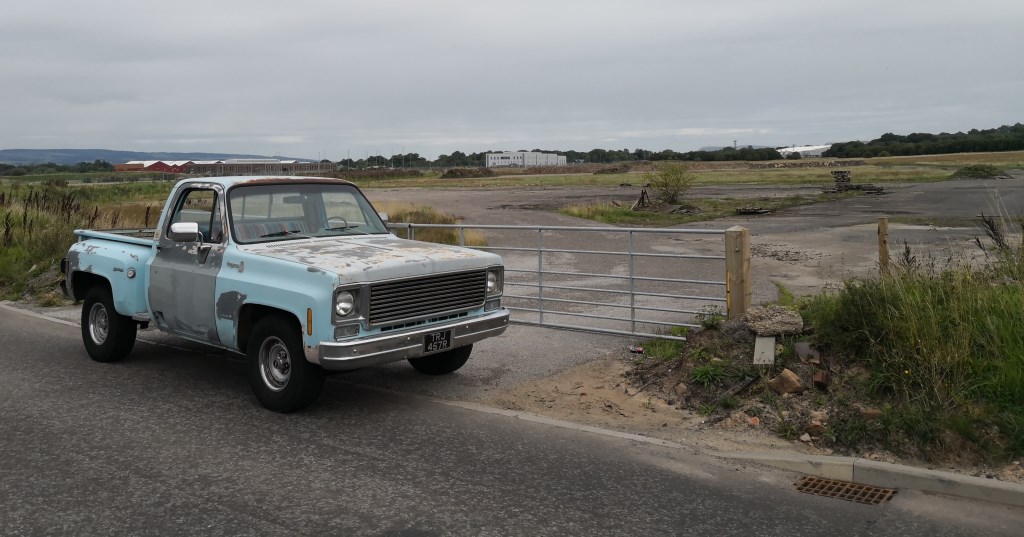
Started the c10 up at the weekend after a few weeks standing, started second turn of the key so not too bad.
Went for a nice run to the badlands of Salmesbury...
and collected a barely used crosstrainer to gather dust for a few months until I pass it on to its next custodian!!
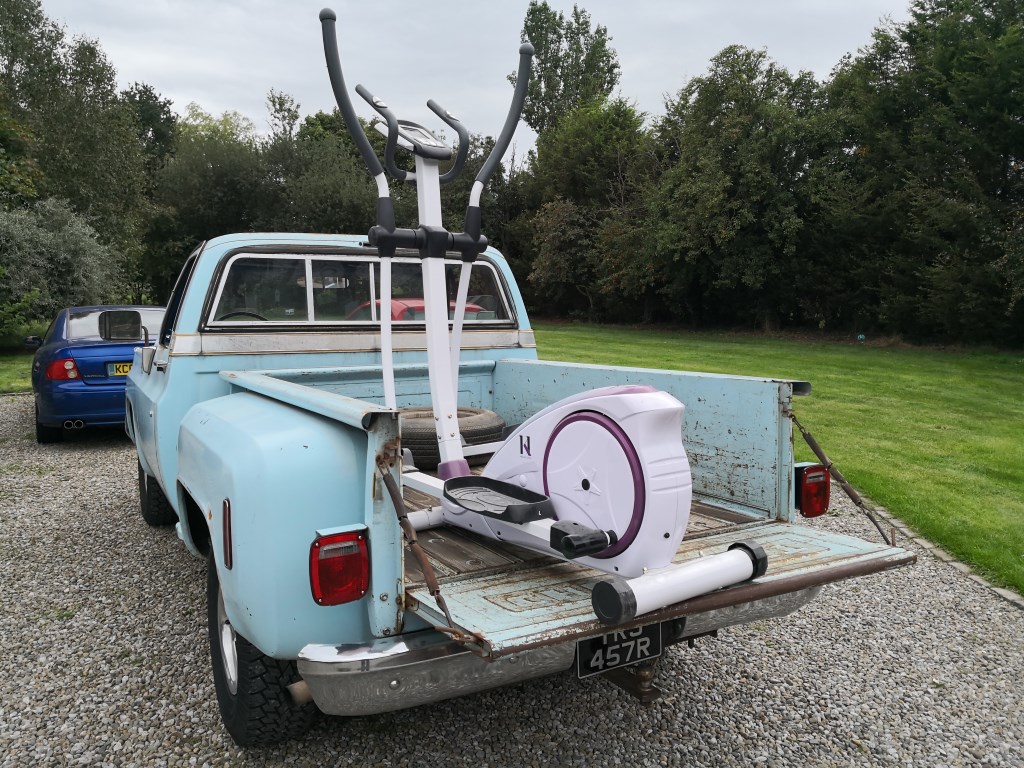
To be fair, I'm sure it would have fitted in the back of the 9-5 with minimal disassembly, but where's the fun in that??
Started the c10 up at the weekend after a few weeks standing, started second turn of the key so not too bad.
Went for a nice run to the badlands of Salmesbury...
and collected a barely used crosstrainer to gather dust for a few months until I pass it on to its next custodian!!
To be fair, I'm sure it would have fitted in the back of the 9-5 with minimal disassembly, but where's the fun in that??
Important vehicle jobs awaiting my attention
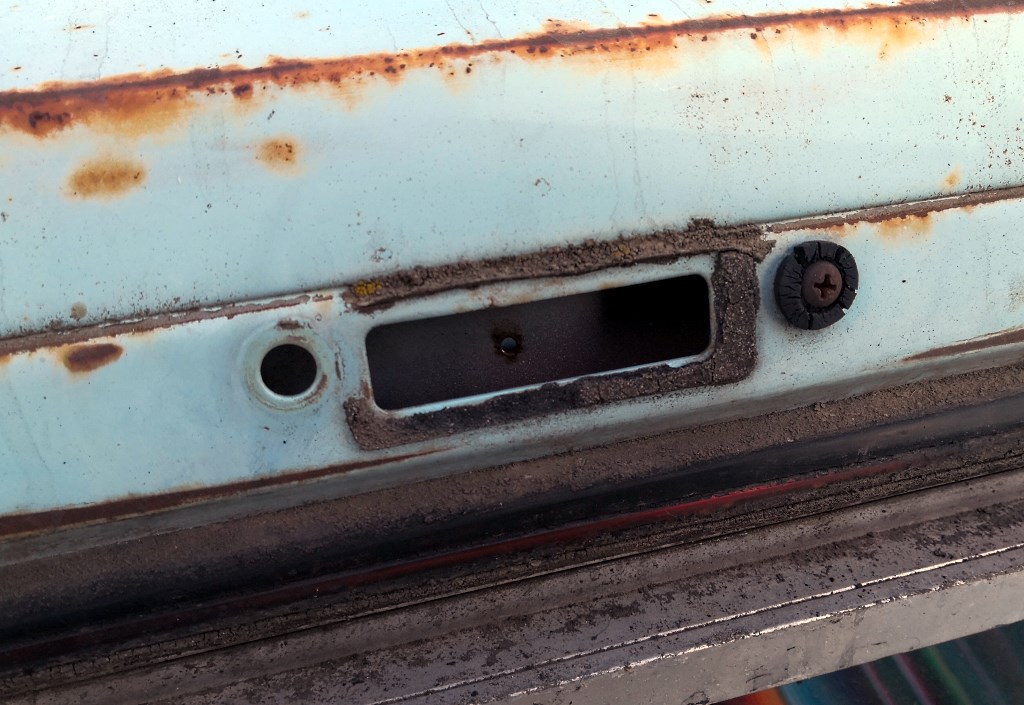
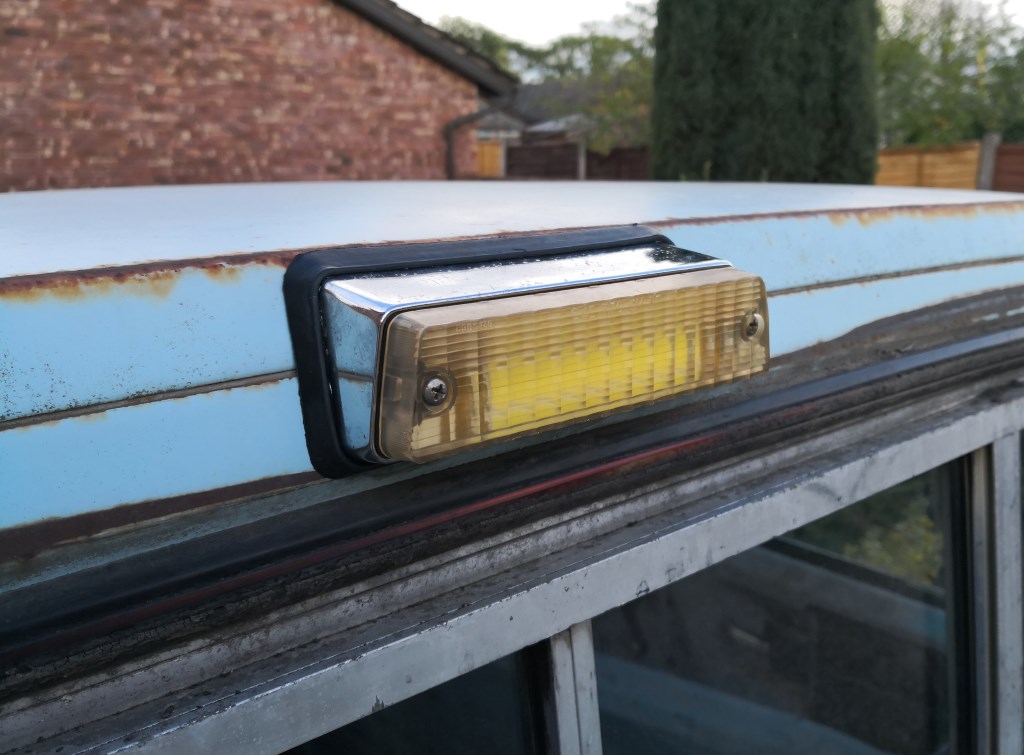
Little background, when my C10 was fitted with the 'orrible topper way back when, the standard cargo bay light had to be removed as it sticks out from roof above the rear window and would have been in the way of the topper. Removing the topper revealed the mounting holes in the rear of the cab roof.
However the switch was still in place in the B pillar
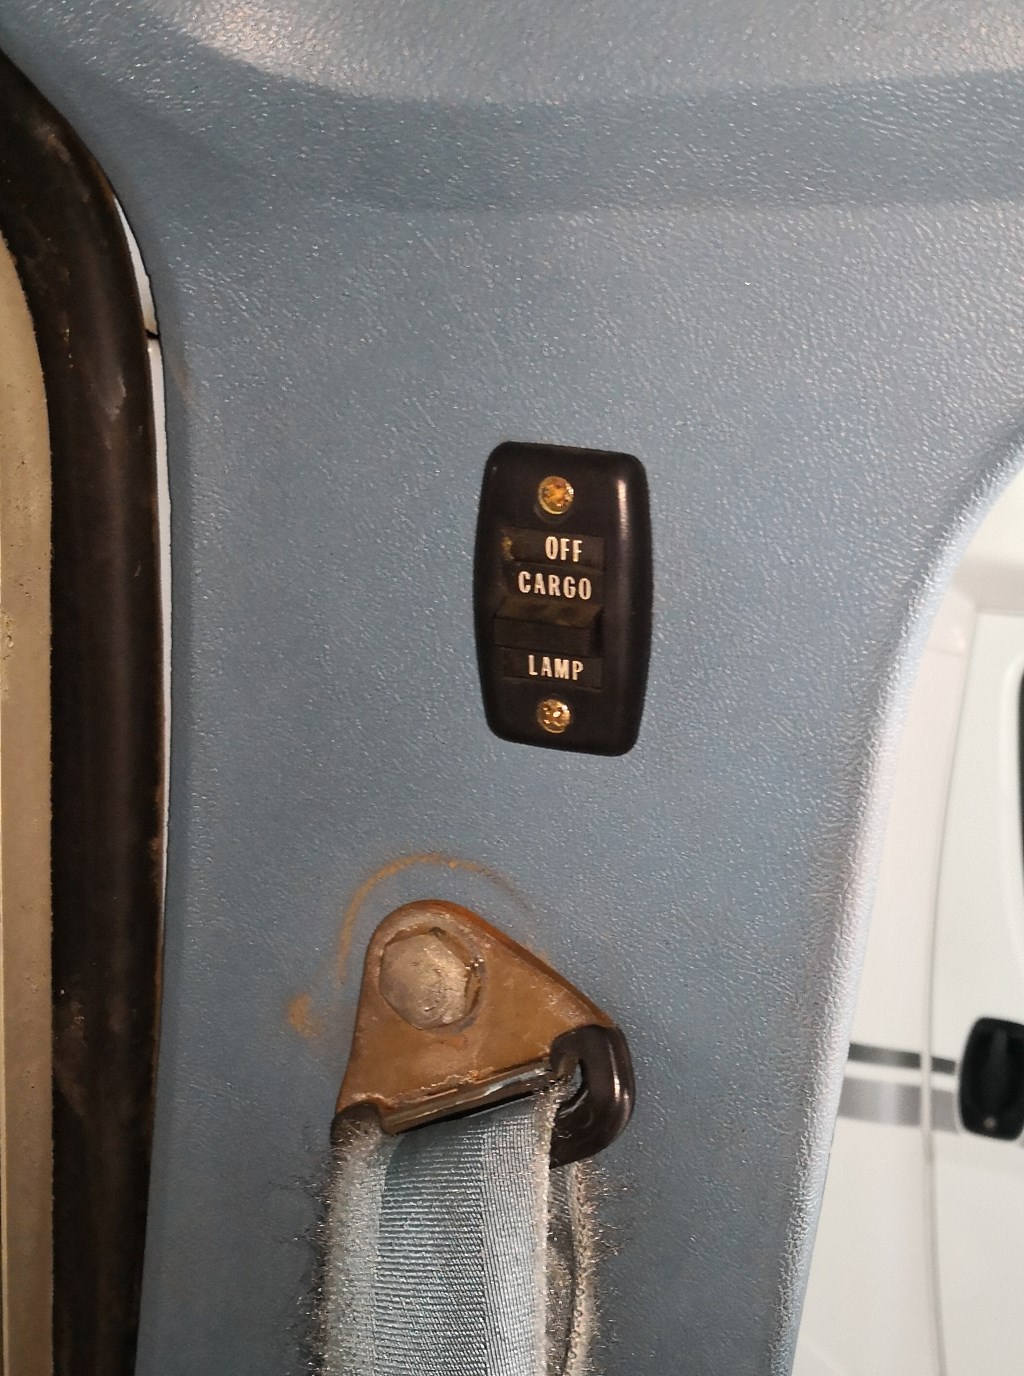
As was the wiring behind it, which pleasingly was still live
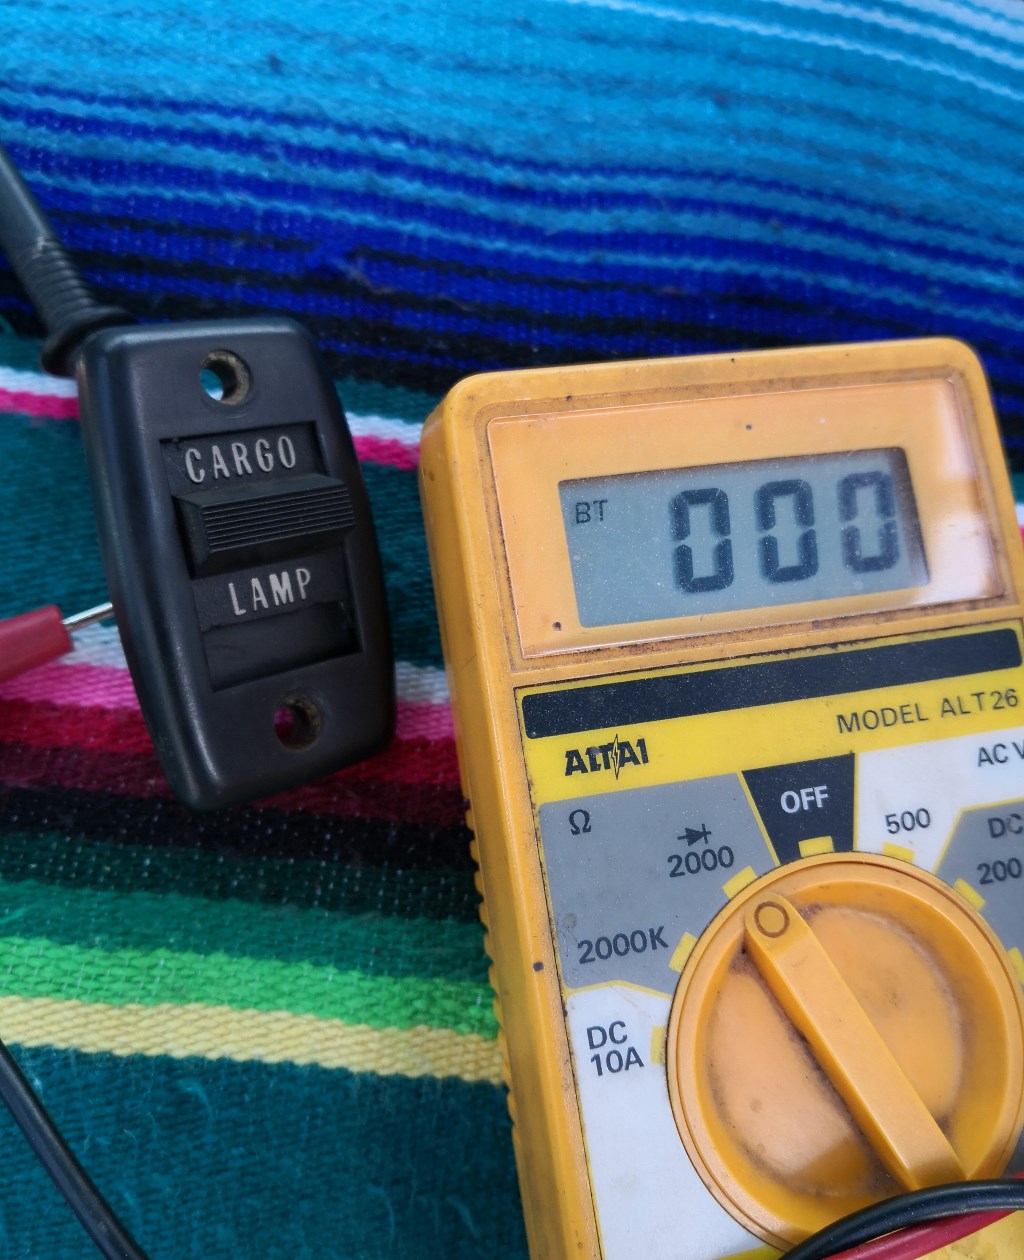
Unfortunately the switch was producing infinite resistance in all positions, so a little bit of Dremel action later
A gentle rub down produced nice, clean contacts
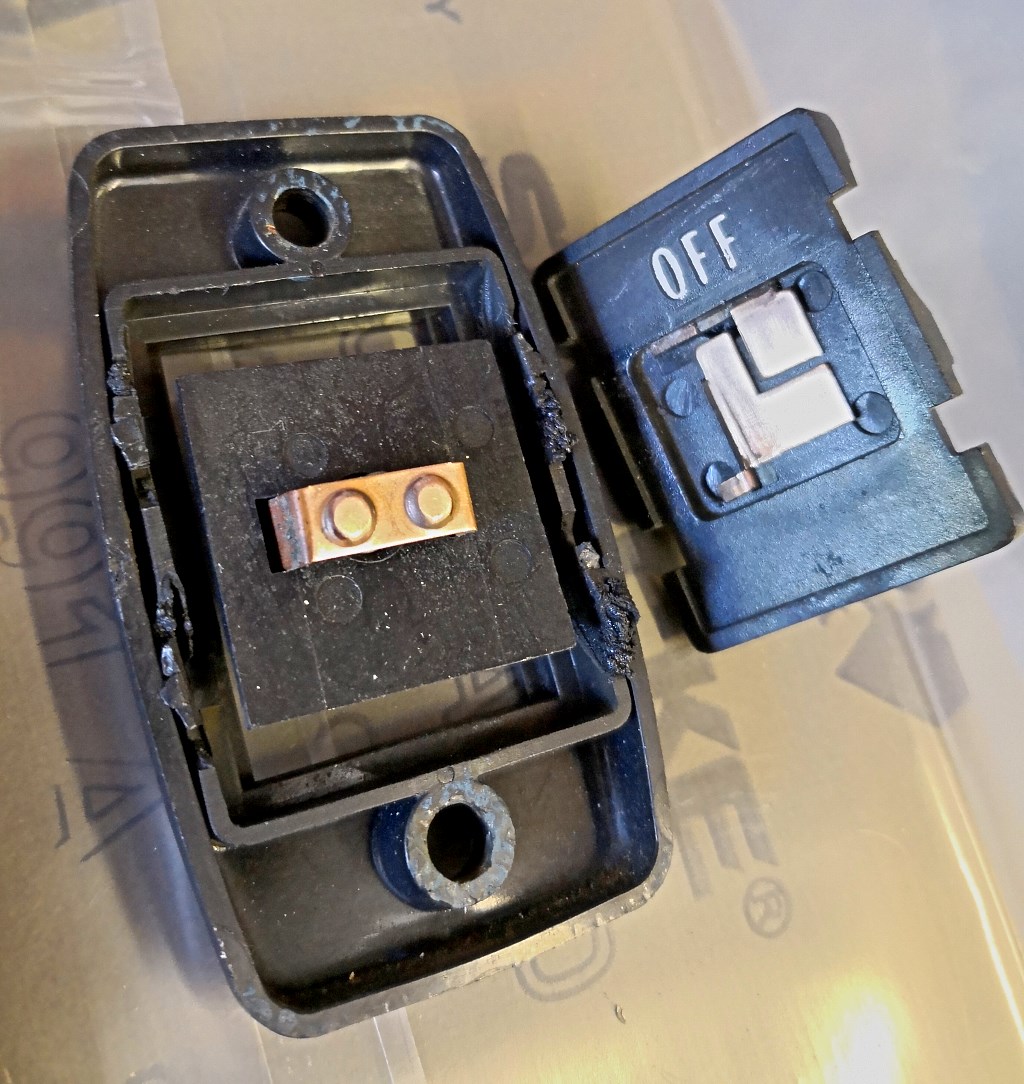
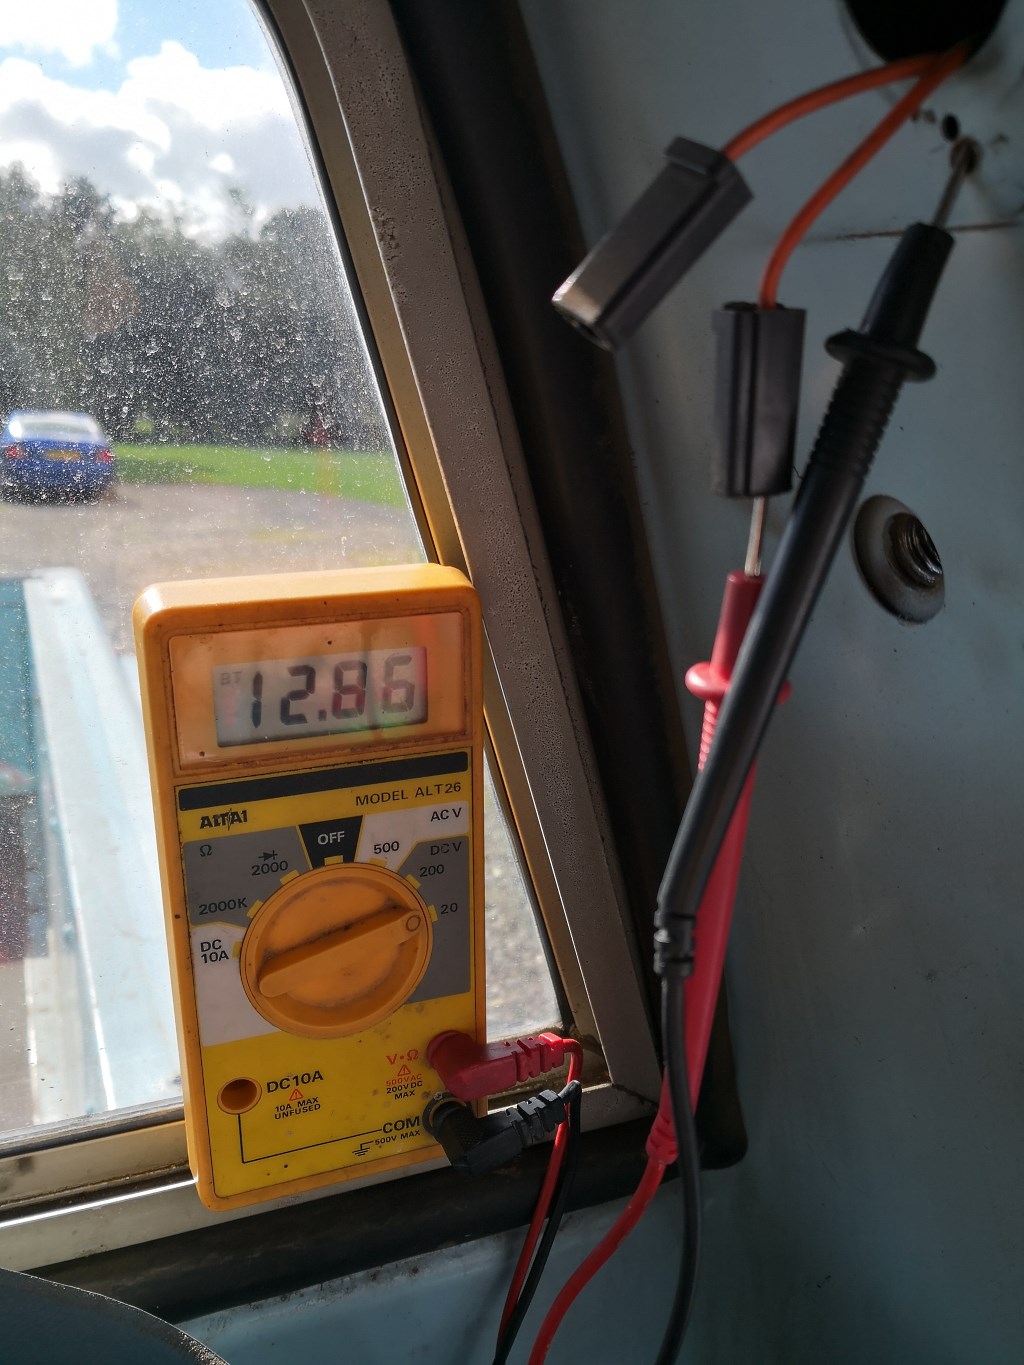
Applied switch lube and glued it back together. Pleased to see the resistance had dropped substantially
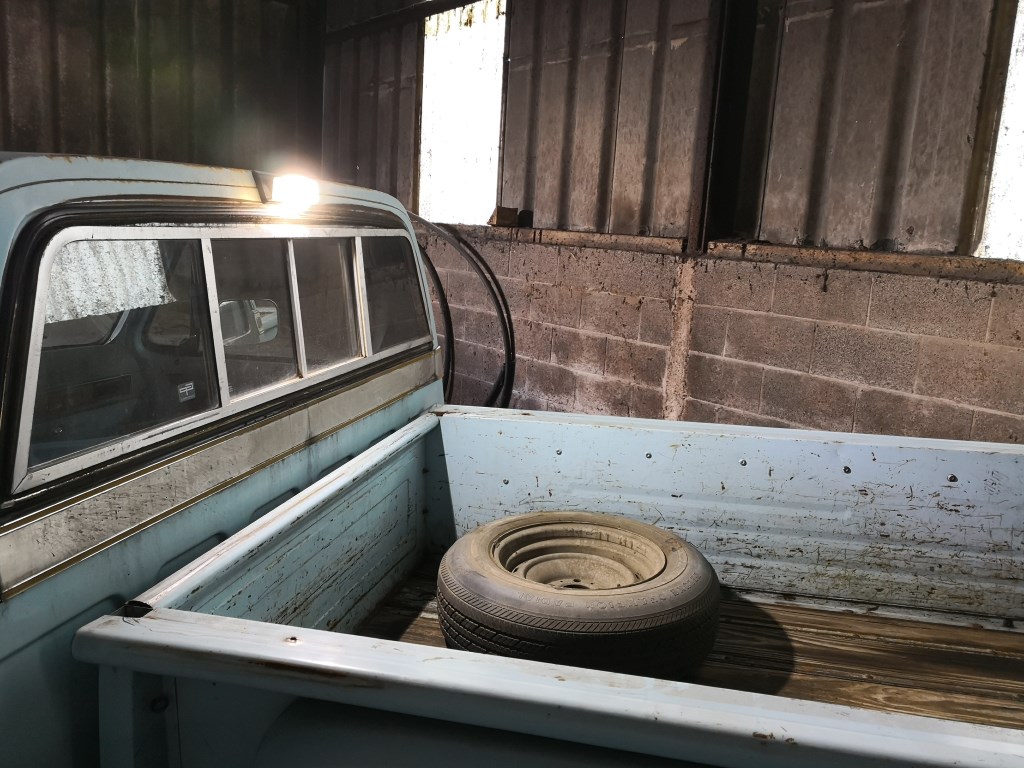
I had already obtained a genuine cargo light from the US, complete with a suitable level of patina. Since the C10 has no reversing lights, I though I might be able to make this dual purpose by making it super-bright with a little jiggery pokery
Glued four 5w COB LED strips to a piece of aluminium to provide extra heat sink capacity and wired them up, covering the bare wires with hot glue to protect against damp and vibration. It's not pretty but having tested it indoors, it is damn bright!

I'd like to say that fitting it was the work of five minutes, sadly not as the original wires had been cut off very short and had no slack, sitting in the box section above the rear window, about here
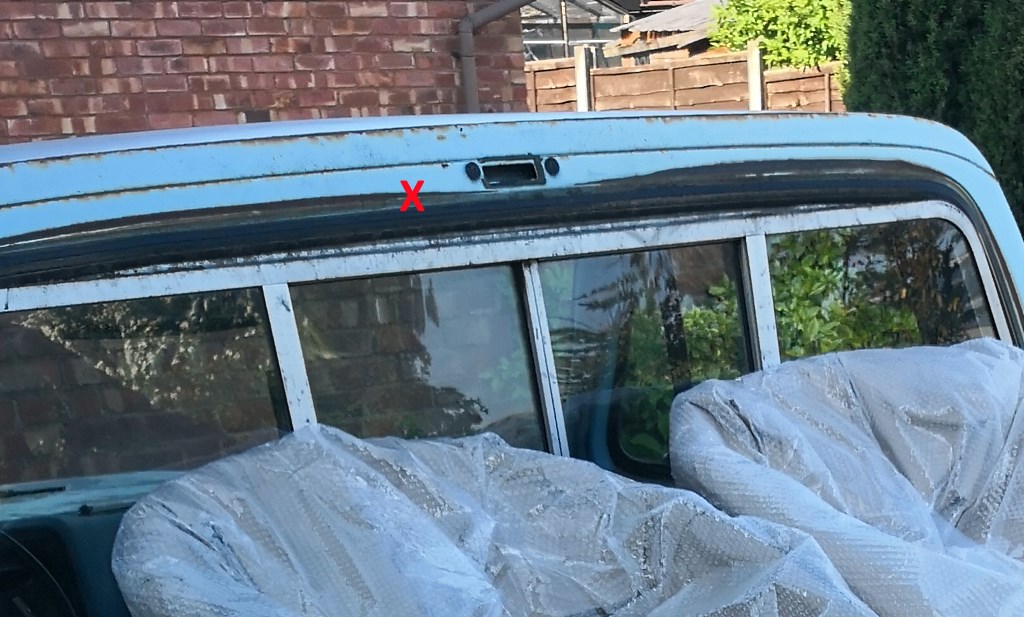
No chance of extending or connecting to them in situ, thus began a game of thread the needle as I tried to pass a new wire through the hole above the window, horizontally along the box section and then around a ninety degree bend and slightly forward towards the single finger-sized hole that the switch wires poke through.
This took a long time. Much swearing. Quite a bit of removed skin from my finger, feeling around blind trying to "hook" the new wire.
Eventually I managed to pull the new wire through. Confident that I could now get it back into place, I then hooked and pulled the old wires back down through the switch hole too.
At that point it genuinely was a five minute job to solder new to old and pull the whole lot back up and out of the light hole.
In reality the above five lines of text took about three hours to do!
Fitting and connecting the light was then straightforward
Quite bright in daylight
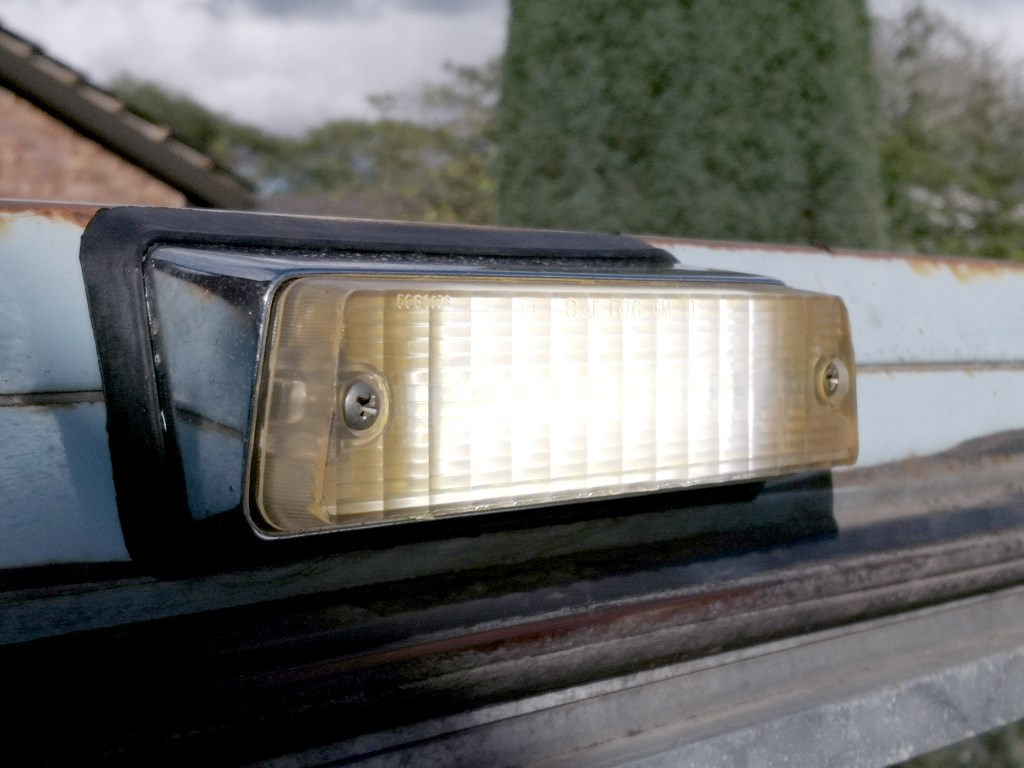
In the relative gloom of the barn
Throws a good amount of light behind too, obviously the pickup box casts a big shadow, but much better than nothing.
Another important job ticked off the list! Next time, polishing the inside of the valve caps...
- Monaro - seized front caliper (currently away for rebuild)
- Monaro - snapped fuel tank strap
- Saab 9-5 - change PS fluid for correct grade
- Saab 9-5 - rebuild entire rear suspension
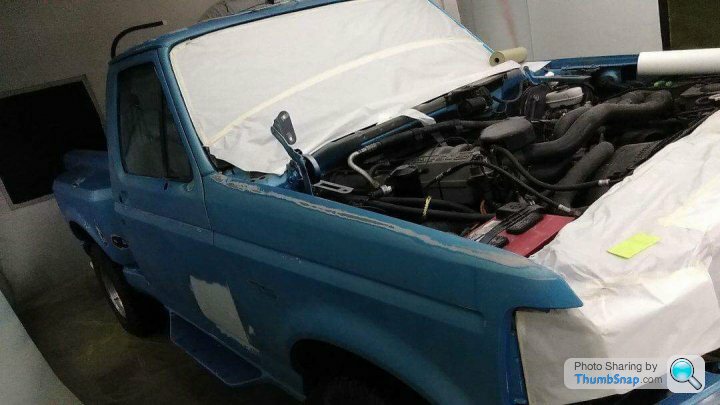
- El Camino - paint roof
- El Camino - Refit screen and interior
- C10 - weld up hole in passenger door
- C10 - fit suspension upgrades and refresh all bushes and ball joints
- C10 - fit cargo bay light
Little background, when my C10 was fitted with the 'orrible topper way back when, the standard cargo bay light had to be removed as it sticks out from roof above the rear window and would have been in the way of the topper. Removing the topper revealed the mounting holes in the rear of the cab roof.
However the switch was still in place in the B pillar
As was the wiring behind it, which pleasingly was still live
Unfortunately the switch was producing infinite resistance in all positions, so a little bit of Dremel action later
A gentle rub down produced nice, clean contacts
Applied switch lube and glued it back together. Pleased to see the resistance had dropped substantially
I had already obtained a genuine cargo light from the US, complete with a suitable level of patina. Since the C10 has no reversing lights, I though I might be able to make this dual purpose by making it super-bright with a little jiggery pokery
Glued four 5w COB LED strips to a piece of aluminium to provide extra heat sink capacity and wired them up, covering the bare wires with hot glue to protect against damp and vibration. It's not pretty but having tested it indoors, it is damn bright!
I'd like to say that fitting it was the work of five minutes, sadly not as the original wires had been cut off very short and had no slack, sitting in the box section above the rear window, about here
No chance of extending or connecting to them in situ, thus began a game of thread the needle as I tried to pass a new wire through the hole above the window, horizontally along the box section and then around a ninety degree bend and slightly forward towards the single finger-sized hole that the switch wires poke through.
This took a long time. Much swearing. Quite a bit of removed skin from my finger, feeling around blind trying to "hook" the new wire.
Eventually I managed to pull the new wire through. Confident that I could now get it back into place, I then hooked and pulled the old wires back down through the switch hole too.
At that point it genuinely was a five minute job to solder new to old and pull the whole lot back up and out of the light hole.
In reality the above five lines of text took about three hours to do!
Fitting and connecting the light was then straightforward
Quite bright in daylight
In the relative gloom of the barn
Throws a good amount of light behind too, obviously the pickup box casts a big shadow, but much better than nothing.
Another important job ticked off the list! Next time, polishing the inside of the valve caps...


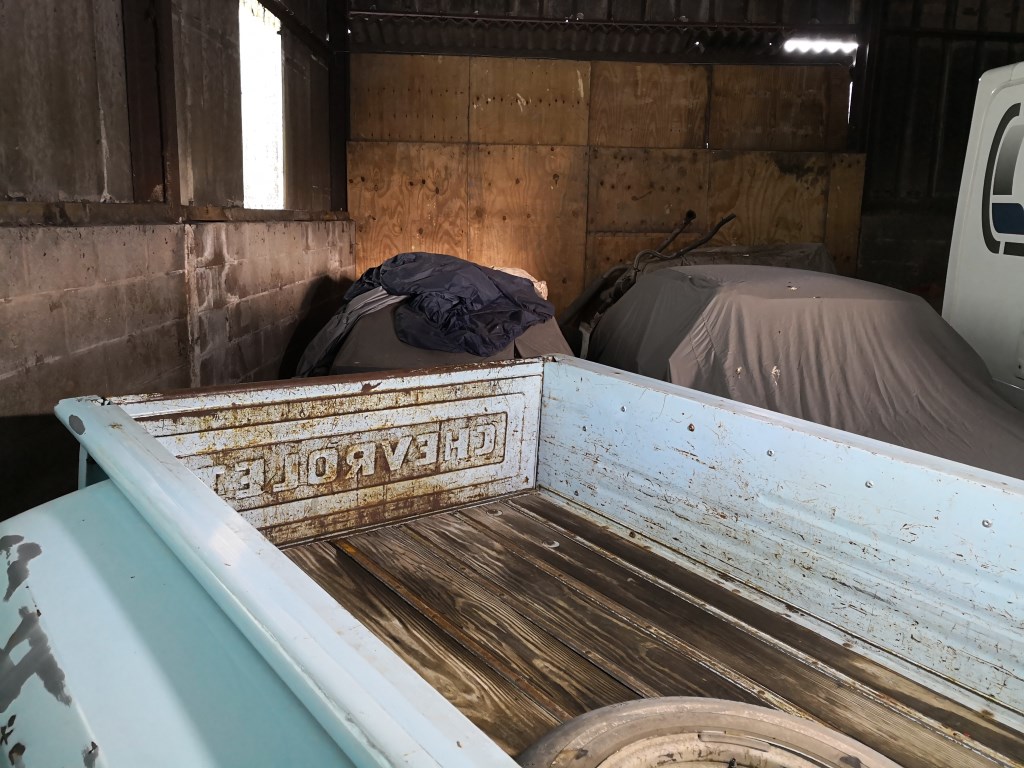
Went to wake the C10 from winter hibernation yesterday.
Last time I was at the barn a few weeks ago, I had noticed a small gearbox leak. Since then, it had worsened considerably...
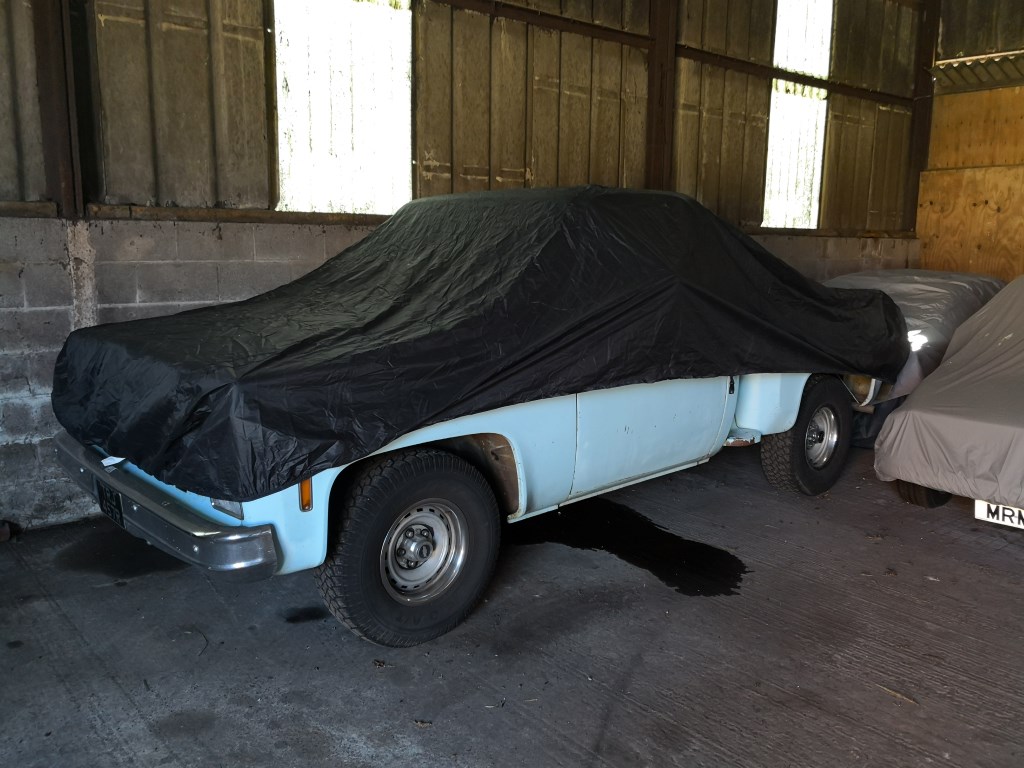
Couldn't access the gearbox dipstick whilst parked up against the wall (well not without climbing into the engine bay and performing contortions) so decided to hope there was enough fluid left to get some drive and bring them old girl home for some attention.
After a bit of cranking to get fuel through, she started easily enough, and fortunately drove and shifted ok.
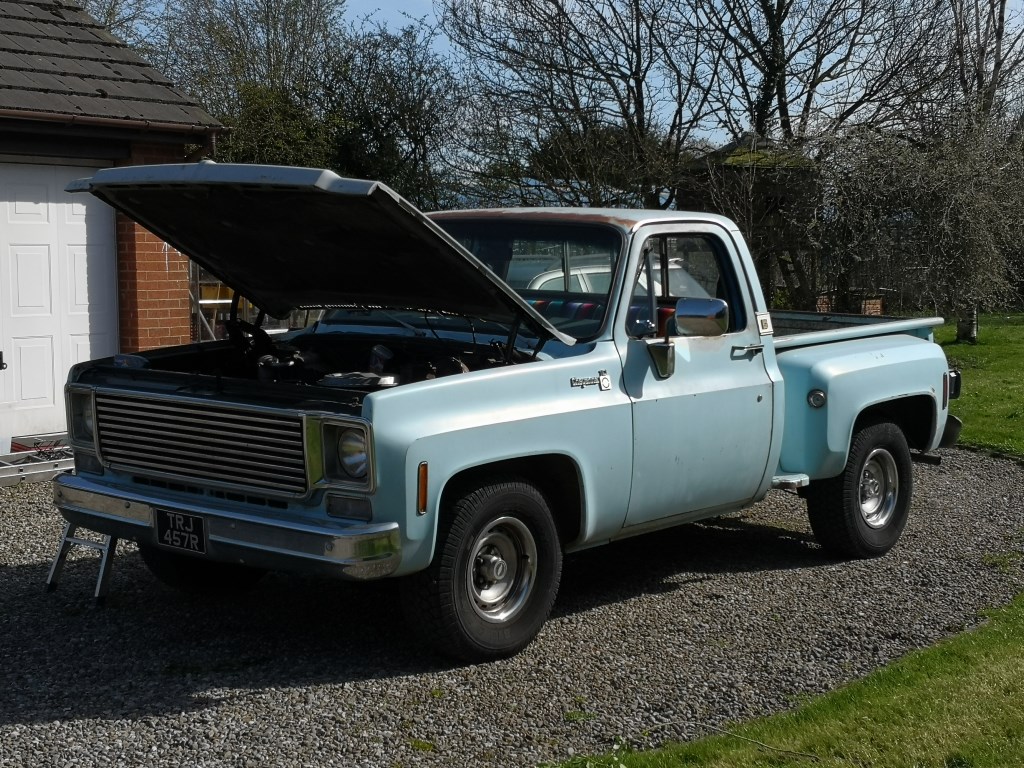
Yes that is a small step by the front wing - the dipstick is very central and right by the firewall, no chance of reaching it from the floor.
Took just over a litre to get the level correct (checked warm, idling etc)
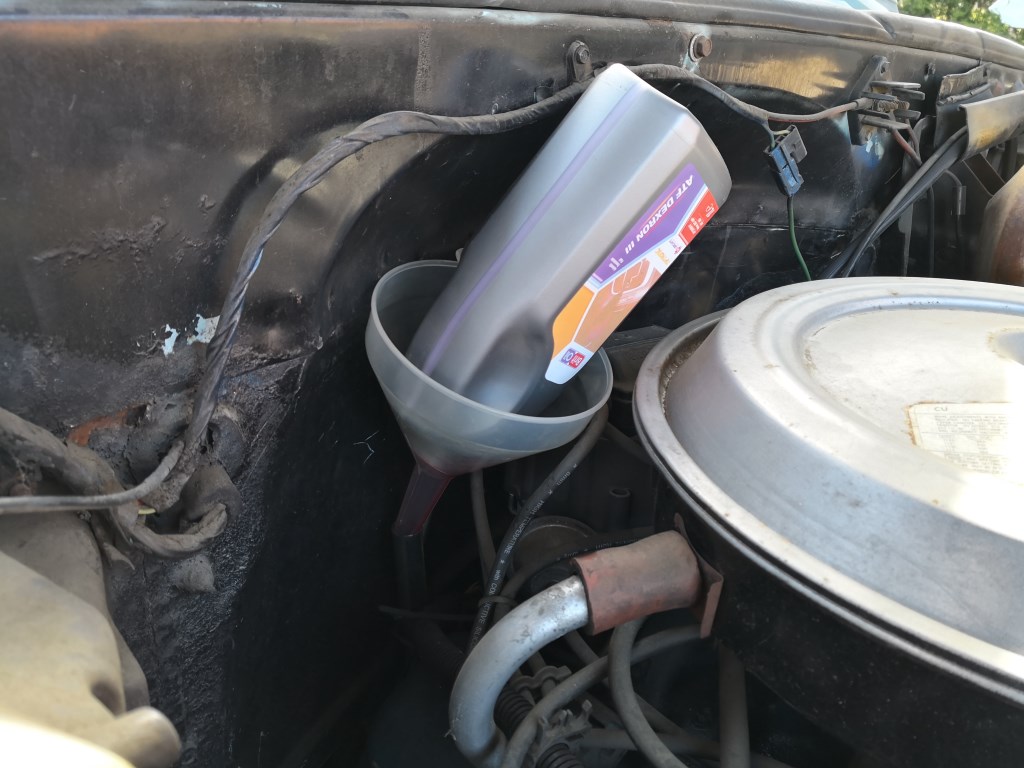
The obvious question - where was it leaking from? The underside of the gearbox was damp all over, with a drip hanging from the speedometer cable fitting, and another from the drain plug. However after wiping down and topping up, both have remained dry whilst racking up a few miles pottering around locally.
Reading up online, TH350 leaks when stood are pretty common, the suggestion being that wear to internal seals allows the converter to drain down over time, raising the level in the sump above the gasket line, speedo cable and selector seals, none of which are intended to sit below the oil level for long periods, hence major leakage.
Certainly when running and when parked immediately afterwards, there appears to be no obvious leaking going on, so if the worst problem it causes is losing a litre of ATF over winter, I can live with that. At least I know to put a large tray under it in future, although that wisdom comes a little late for my landlord's concrete floor!!
The short journey home also revealed a pull to the left under braking, although only on initial application. I pulled the offside brake apart (very large single piston sliding calipers on the front) and cleaned and lubed the sliders and exercised the piston, which although not entirely seized, needed much effort to move in or out.
I though I had loosened it up a bit so reassembled and tested, still pulling left. Called into my local MOT station and luckily timed it just right - the ramps were clear so straight onto the brake tester which confirmed a lazy offside caliper - it is working, and actually reaches the same braking effort as the nearside, but lags behind by about a second in doing so, hence the initial tug left on pressing the pedal.
Ordered a new caliper last night, even with the core charge (as I won't be posting the old one back to U.S.) it was less than £30, plus the same again in postage of course, but still very reasonable. Almost defies belief that, if you live in the U.S. and return the core, you can get a re-manufactured and guaranteed caliper for under a tenner!!
Final job, as I wanted to finish with something easy and satisfying, was to replace the broken plastic trim under the steering column with a new replacement that I had ordered a few months back.
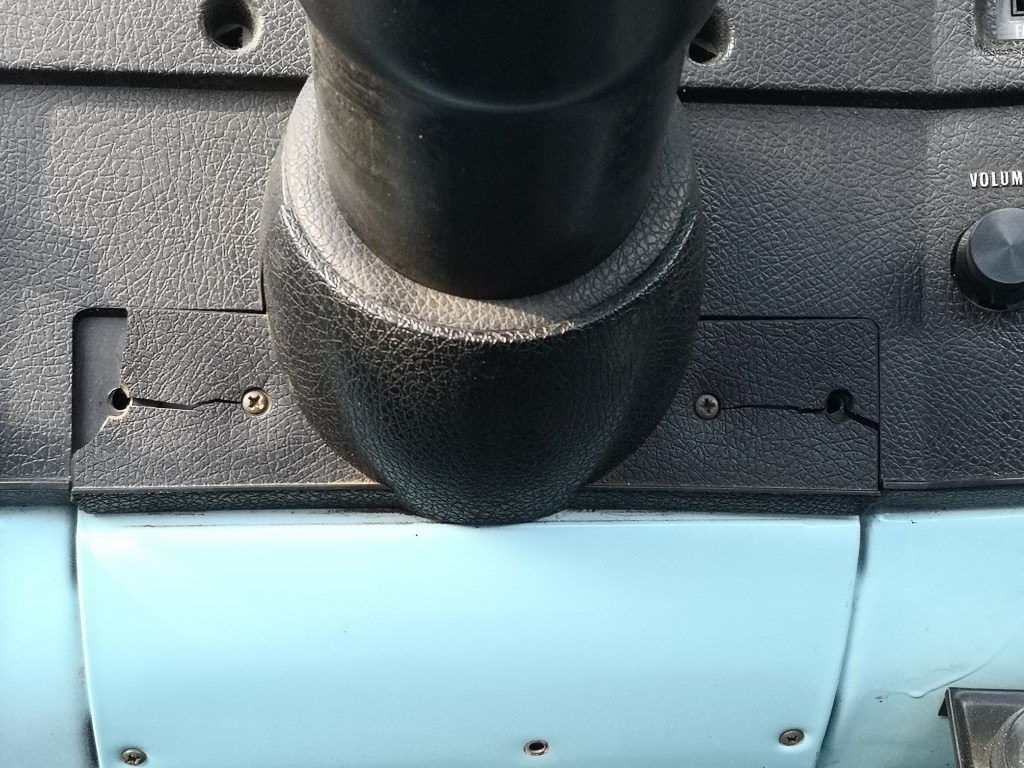
Unfortunately, when I came to unwrap it, the new one was
a) too long
b) a completely different "grain" and
c) a different shape at the lower edge.

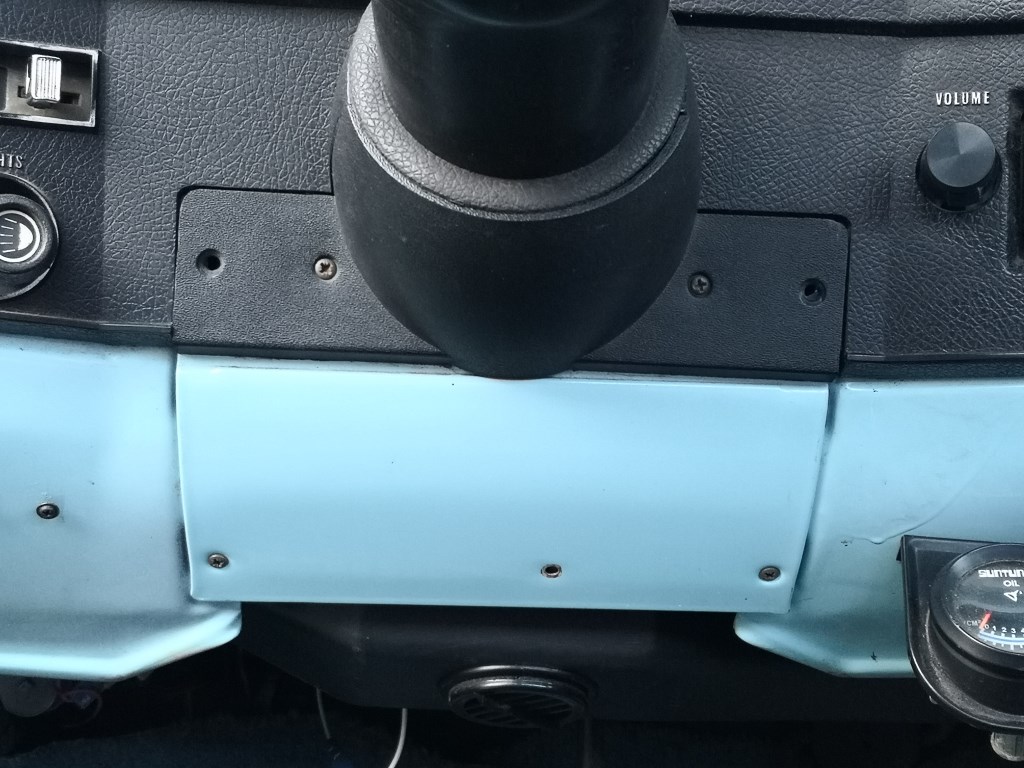
I bodged it to fit as it is marginally better than the broken piece, but will have to keep an eye out for an original piece as, looking more closely, all the repro ones seem to be incorrect for my dash...
Easy and satisfying little job my a e!!
e!!
Despite these minor trials and tribulations, I still reckon the C10 provides more smiles per mile than anything else I own
Last time I was at the barn a few weeks ago, I had noticed a small gearbox leak. Since then, it had worsened considerably...
Couldn't access the gearbox dipstick whilst parked up against the wall (well not without climbing into the engine bay and performing contortions) so decided to hope there was enough fluid left to get some drive and bring them old girl home for some attention.
After a bit of cranking to get fuel through, she started easily enough, and fortunately drove and shifted ok.
Yes that is a small step by the front wing - the dipstick is very central and right by the firewall, no chance of reaching it from the floor.
Took just over a litre to get the level correct (checked warm, idling etc)
The obvious question - where was it leaking from? The underside of the gearbox was damp all over, with a drip hanging from the speedometer cable fitting, and another from the drain plug. However after wiping down and topping up, both have remained dry whilst racking up a few miles pottering around locally.
Reading up online, TH350 leaks when stood are pretty common, the suggestion being that wear to internal seals allows the converter to drain down over time, raising the level in the sump above the gasket line, speedo cable and selector seals, none of which are intended to sit below the oil level for long periods, hence major leakage.
Certainly when running and when parked immediately afterwards, there appears to be no obvious leaking going on, so if the worst problem it causes is losing a litre of ATF over winter, I can live with that. At least I know to put a large tray under it in future, although that wisdom comes a little late for my landlord's concrete floor!!
The short journey home also revealed a pull to the left under braking, although only on initial application. I pulled the offside brake apart (very large single piston sliding calipers on the front) and cleaned and lubed the sliders and exercised the piston, which although not entirely seized, needed much effort to move in or out.
I though I had loosened it up a bit so reassembled and tested, still pulling left. Called into my local MOT station and luckily timed it just right - the ramps were clear so straight onto the brake tester which confirmed a lazy offside caliper - it is working, and actually reaches the same braking effort as the nearside, but lags behind by about a second in doing so, hence the initial tug left on pressing the pedal.
Ordered a new caliper last night, even with the core charge (as I won't be posting the old one back to U.S.) it was less than £30, plus the same again in postage of course, but still very reasonable. Almost defies belief that, if you live in the U.S. and return the core, you can get a re-manufactured and guaranteed caliper for under a tenner!!
Final job, as I wanted to finish with something easy and satisfying, was to replace the broken plastic trim under the steering column with a new replacement that I had ordered a few months back.
Unfortunately, when I came to unwrap it, the new one was
a) too long
b) a completely different "grain" and
c) a different shape at the lower edge.
I bodged it to fit as it is marginally better than the broken piece, but will have to keep an eye out for an original piece as, looking more closely, all the repro ones seem to be incorrect for my dash...
Easy and satisfying little job my a
e!!Despite these minor trials and tribulations, I still reckon the C10 provides more smiles per mile than anything else I own
Edited by 99t on Tuesday 26th March 11:19
Edited by 99t on Tuesday 26th March 11:27


Gassing Station | Readers' Cars | Top of Page | What's New | My Stuff