1985 Rover 3500 Vitesse
Discussion


It all reads really well Joe 
Interior looks really good and I hate to be a doom monger, but what glue did you use for the head lining? I’ve tried a variety of “Extra Strong, Heavy Duty” aerosol contact adhesives over the years and they’ve all failed as soon as the sun comes out I finally found AS Trims contact adhesive and never looked back.
I’m really hoping you have better luck than I did.
Interior looks really good and I hate to be a doom monger, but what glue did you use for the head lining? I’ve tried a variety of “Extra Strong, Heavy Duty” aerosol contact adhesives over the years and they’ve all failed as soon as the sun comes out
I finally found AS Trims contact adhesive and never looked back. I’m really hoping you have better luck than I did.
Edited by J.C... on Tuesday 14th August 08:44
There are a few threads on here that leave me shaking my head with admiration. I have about 3% of your ability application and resolve.
It makes the To do list for my Corrado seem comical, although it's good to be inspired and challenged.
If you ever sell the Vitesse this thread should help you get the best possible and deserved price.
It makes the To do list for my Corrado seem comical, although it's good to be inspired and challenged.
If you ever sell the Vitesse this thread should help you get the best possible and deserved price.
Cupramax said:


Bobberoo99 said:
Absolutely amazing!! Top work sir!!!!
Much appreciated, glad you like the work I've put in. CarlosV8 said:
Fantastic job, really enjoying reading about this. I don't think I'd be brave enough to tackle the headlining though!
This thread is making me think a lot about my SD1s. Wish I'd been able to keep the Vitesse and finish it properly. In fact I've now got an SD1 alert set up on EBay
The headlining was always going to be the trickiest job, I enjoy reading classified adds for SD1's saying "slightly sagging headlining, easy fix" I've also viewed cars that have had their boards replaced, but not the sunroof aperture. This thread is making me think a lot about my SD1s. Wish I'd been able to keep the Vitesse and finish it properly. In fact I've now got an SD1 alert set up on EBay
You know the pain better than most of getting these cars to be nice! I've finally got mine running nicely, and it is lovely.
Ebay alerts are always dangerous...
J.C... said:
It all reads really well Joe
Interior looks really good and I hate to be a doom monger, but what glue did you use for the head lining? I’ve tried a variety of “Extra Strong, Heavy Duty” aerosol contact adhesives over the years and they’ve all failed as soon as the sun comes out I finally found AS Trims contact adhesive and never looked back.
I’m really hoping you have better luck then I did.
I've used specialist headlining adehsive as recommended by woolies, so I'm really hoping for good long term results. I did a few tests and it's held up well so far. Interior looks really good and I hate to be a doom monger, but what glue did you use for the head lining? I’ve tried a variety of “Extra Strong, Heavy Duty” aerosol contact adhesives over the years and they’ve all failed as soon as the sun comes out
I finally found AS Trims contact adhesive and never looked back. I’m really hoping you have better luck then I did.
We've had some scortching days and the cars sat out in the heat with no problems so far...
I'll be monitoring it though.
The material I got from AS-Trim, hopefully I won't regret not getting their adhesive as well.
gforceg said:
There are a few threads on here that leave me shaking my head with admiration. I have about 3% of your ability application and resolve.
It makes the To do list for my Corrado seem comical, although it's good to be inspired and challenged.
If you ever sell the Vitesse this thread should help you get the best possible and deserved price.
That is very much appreciated, it's really nice to have the hardwork I've put in recognised. It makes the To do list for my Corrado seem comical, although it's good to be inspired and challenged.
If you ever sell the Vitesse this thread should help you get the best possible and deserved price.
I know the feeling of the ever expanding to do list, this was a good two years of work! I love a Corrado, my friend just sold his VR6, I tried my best to talk him out of it!
I like to think it adds an air of transparency of all the work I've done, I'm not hiding anything I've done!
Joe
J.C... said:
It all reads really well Joe
Interior looks really good and I hate to be a doom monger, but what glue did you use for the head lining? I’ve tried a variety of “Extra Strong, Heavy Duty” aerosol contact adhesives over the years and they’ve all failed as soon as the sun comes out I finally found AS Trims contact adhesive and never looked back.
I’m really hoping you have better luck than I did.
I've used specialist headlining adehsive as recommended by woolies, so I'm really hoping for good long term results. I did a few tests and it's held up well so far. Interior looks really good and I hate to be a doom monger, but what glue did you use for the head lining? I’ve tried a variety of “Extra Strong, Heavy Duty” aerosol contact adhesives over the years and they’ve all failed as soon as the sun comes out
I finally found AS Trims contact adhesive and never looked back. I’m really hoping you have better luck than I did.
We've had some scortching days and the cars sat out in the heat with no problems so far...
I'll be monitoring it though.
The material I got from AS-Trim, hopefully I won't regret not getting their adhesive as well.
I’m actually a Corrado VR6 owner myself and same as GForce, my to do list is shameful when I look at what people like yourself and Kelvinator achieve

Edited by J.C... on Tuesday 14th August 08:45
J.C... said:
Nah that should be fine mate. I was just worried you’d grabbed a can of No Nonsense spray glue from Screwfix.
I’m actually a Corrado VR6 owner myself and same as GForce, my to do list is shameful when I look at what people like yourself and Kelvinator achieve
Definitely not, I spent almost as long choosing the adhesive as I did the material! I’m actually a Corrado VR6 owner myself and same as GForce, my to do list is shameful when I look at what people like yourself and Kelvinator achieve
Excellent choice, I've got a real soft spot for the VR6. My dad had a golf VR6 highline, and my daily driver is a A3 with the 3.2 VR6 engine, it's an amazing motor!
Going through my pictures I realise I've still got a bit to cover before the sunroof goes in the car!
First was the sunroof seal and the associated hold down brackets.


These were actually in pretty good nick, the one for the front leading edge was perfect! But I have a spare sunroof cassette so I thought I'd remove the lid and see if it was in better nick.

It was not, it was definitely not better.

The brackets didn't even exist, they'd dissolved!
It did have one saving grace though, the seal was perfect, so I crumbed the brackets off and retrieved the seal.
I then set to refinish my existing brackets.


Of course brand-new stainless fixings and washers replaced the crusty old ones.
With the perfect seal cleaned and prepped, it was carefully placed onto the freshly painted lid, and the refinished brackets screwed down with new stainless fixings again.

Sadly I didn't get any pictures of the other side, major boob on my part, but trust me when i say it looked amazing.
The seal is then glued to the rear edge of the sunroof. You actually see a large part of the seal when the sunroof is closed, so the condition is quite important.
With the lid finished the rear slides under the tabs on the sliding part of the cassette, and bolts into place along the front edge. This is now ready to go into the car.
Next up was the three brackets that hold up the rear of the headlining.
These push through the board and hook onto the rear hatch lip.


Certainly wasn't going to stain my new headlining with these!

First round of rust removing.
This took a few more aggressive passes to get them rust free and smooth.
Then treated, primed, and top coated in the closest shade I could find to the headlining material.

Which turned out to be Ford Dove Grey.
Now it's time for the sunroof to finally go back into the car!
Joe
E24man said:
Can I ask what adhesive you used as I have a headlining that's lost its grip over the summer.
Of course, I used the spray version as supplied by woolies. https://www.woolies-trim.co.uk/product/1554/high-h...
I made sure that both contact surfaces were perfectly clean, with no residual foam, and followed the instructions of alternating the spray direction on each side and it stuck really nicely. You don't really get a second chance once it tacks though. It gripped hard from first contract.
Hopefully it's just your adhesive that's failed and not the foam, as there's nothing you can do with that apart from a full replacement of the material.
Joe
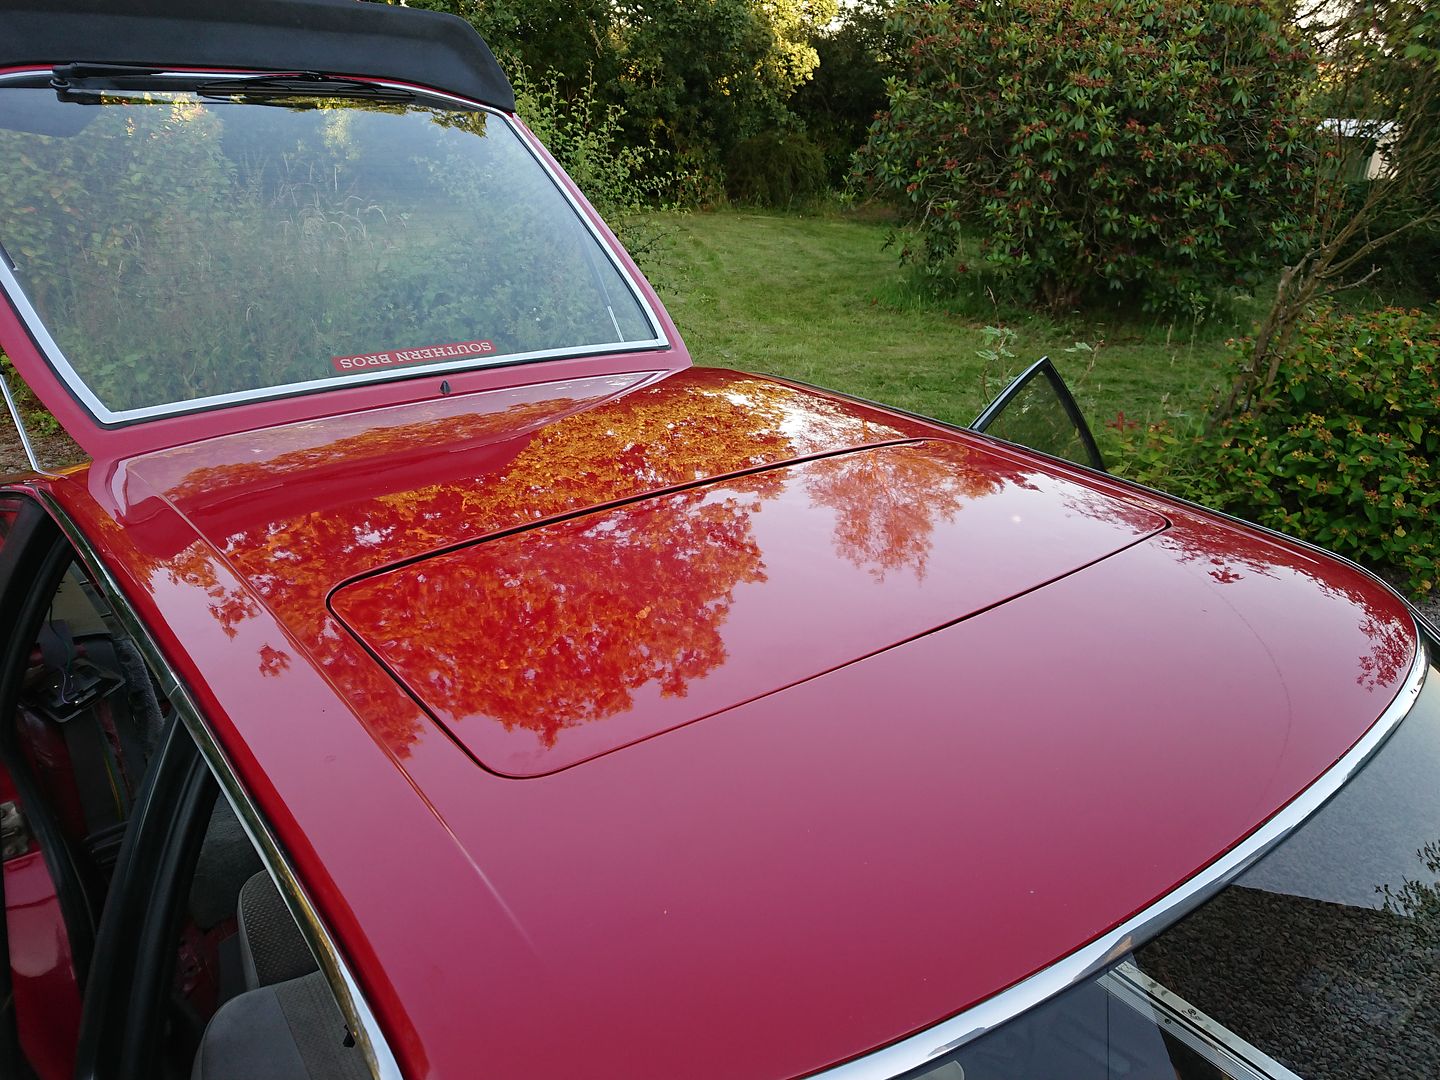
With all the prep done, it was finally headlining and interior fit day.
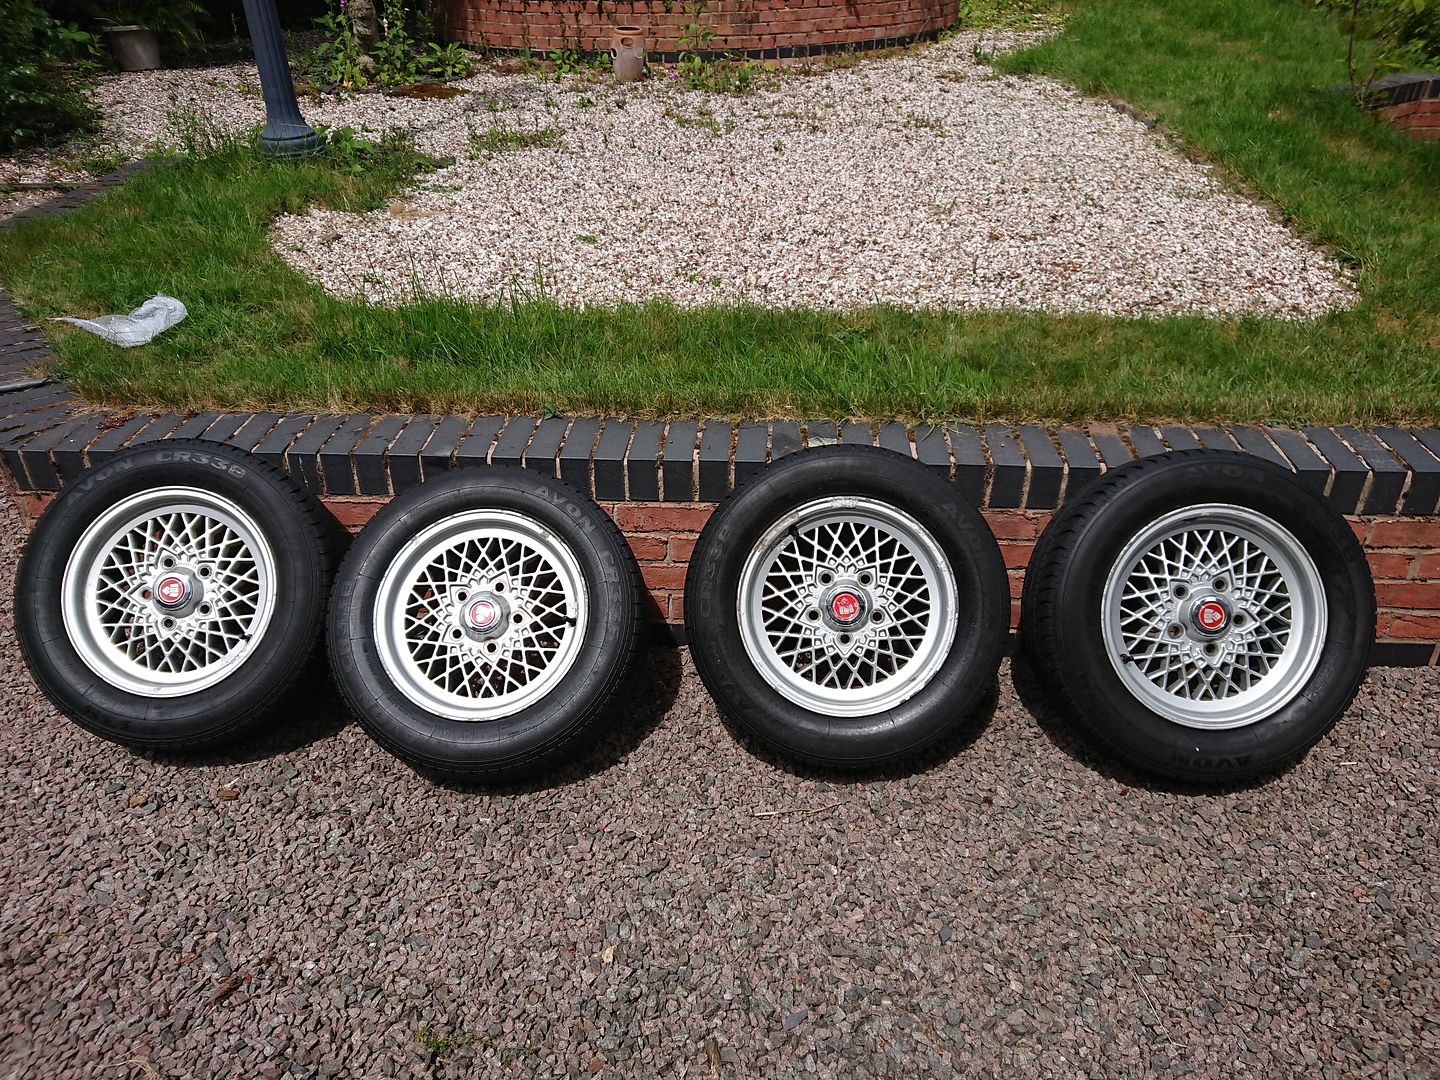
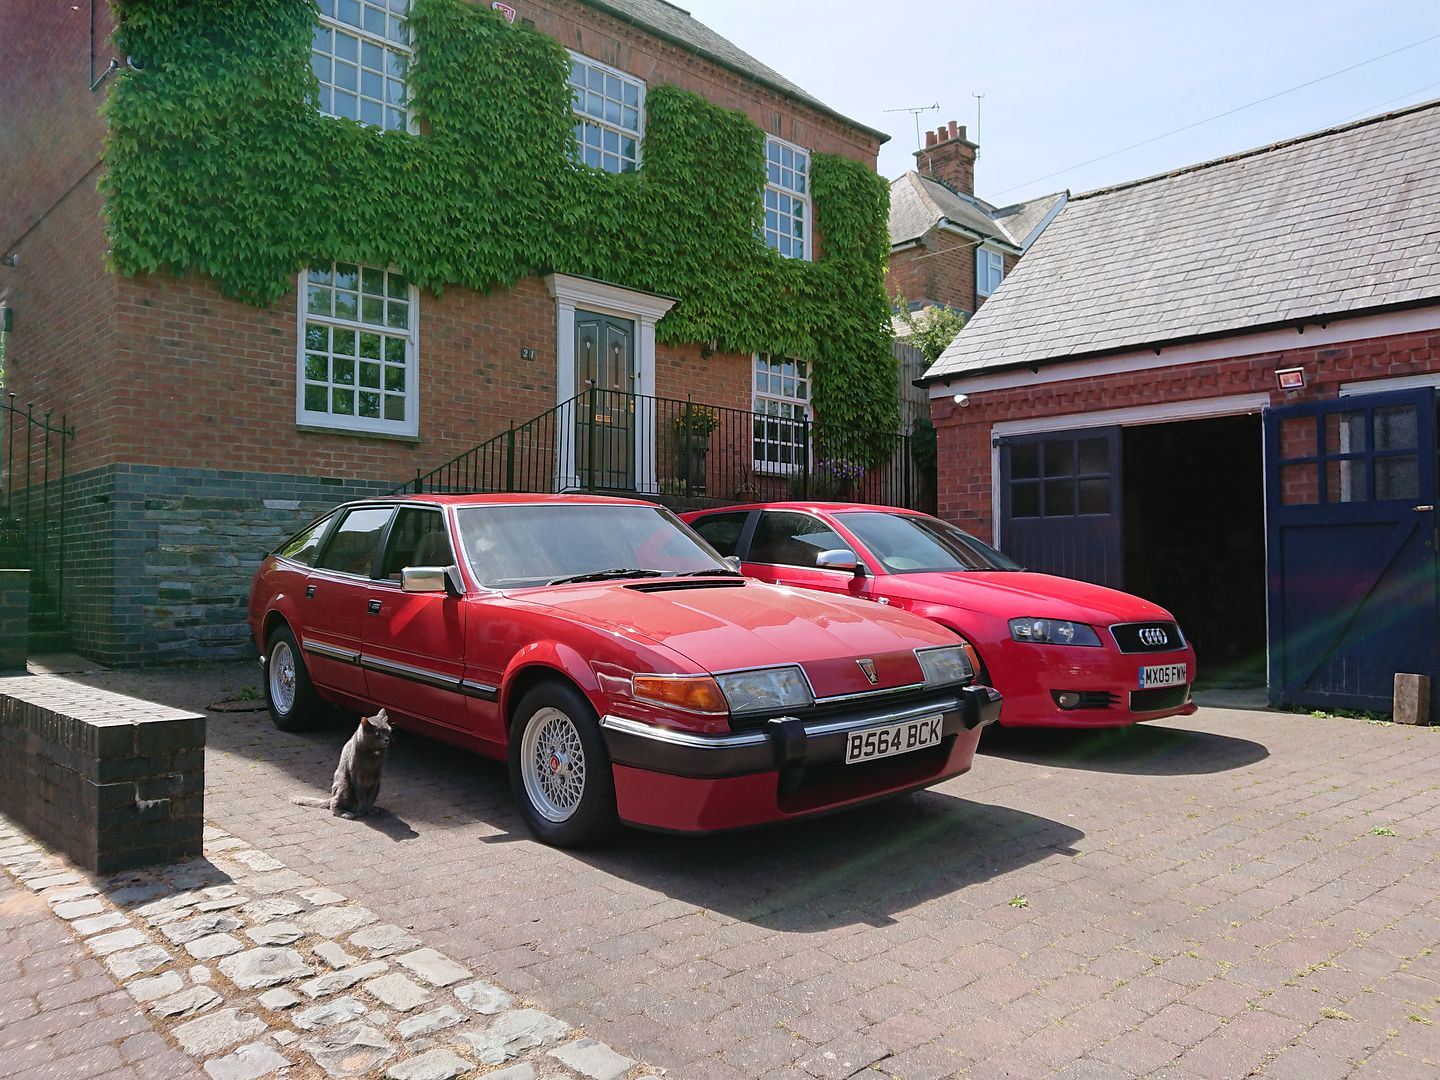
First things first was to swap the Rover onto a spare set of wheels I picked up. The wheels it came with are immaculate, but the tyres were ruined. These wheels are a bit ratty but had good tyres on them, and will serve well while I get new tyres on the nice wheels.
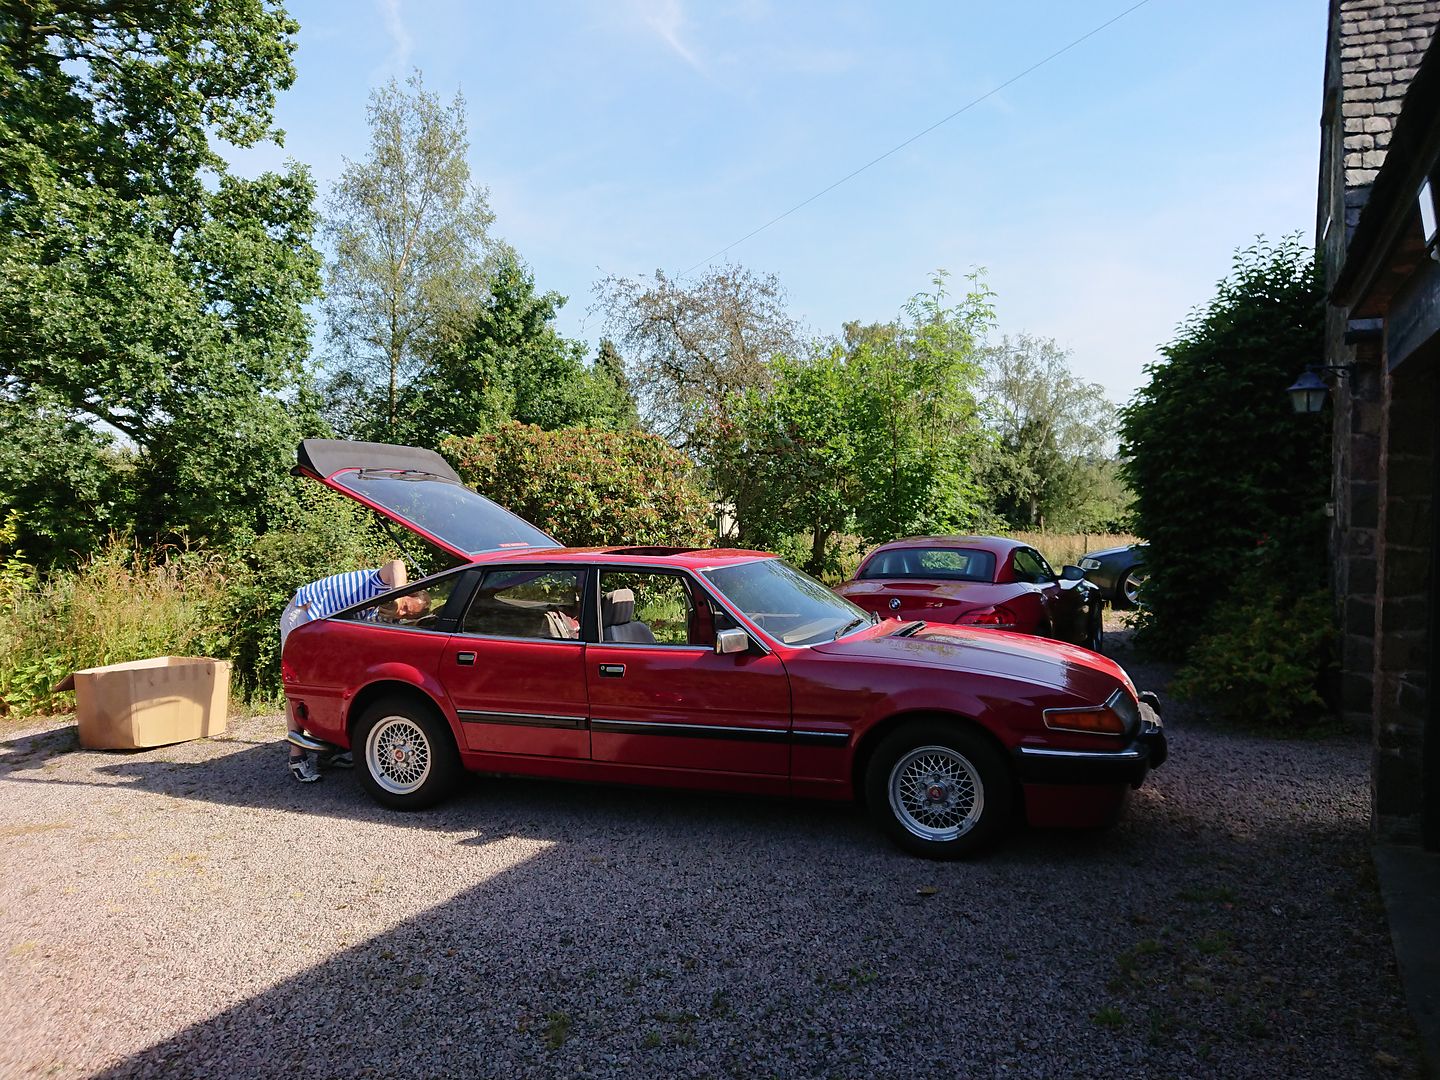
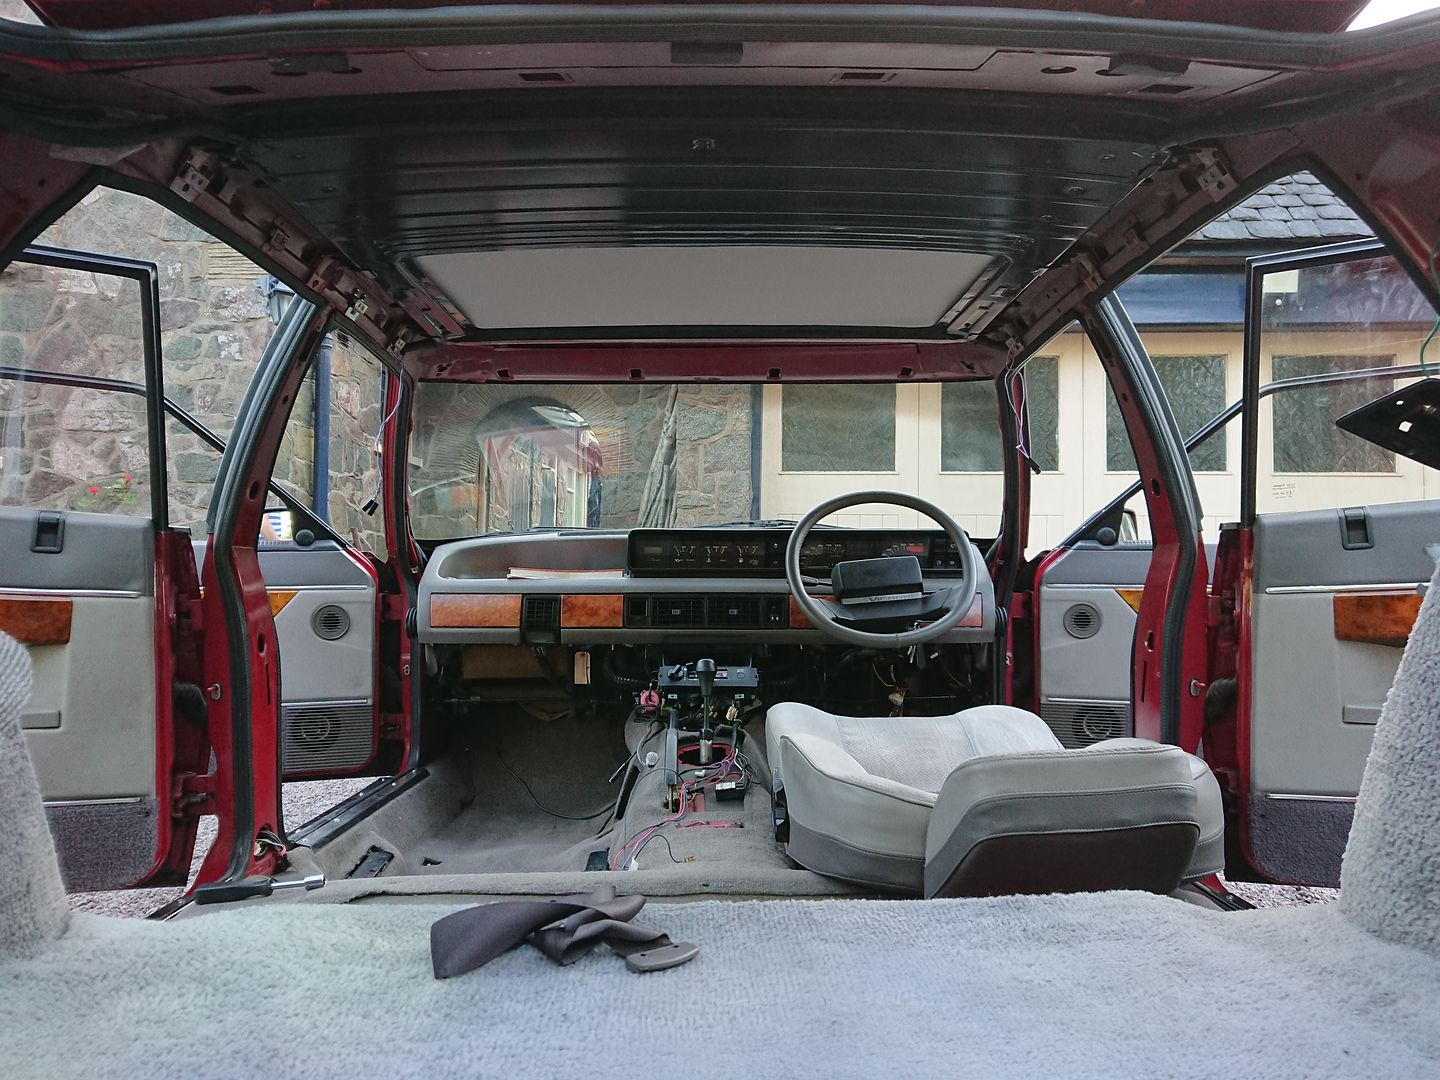
With a drivers seat installed I finally drove the Vitesse out of the garage for the first time in almost 2 years.
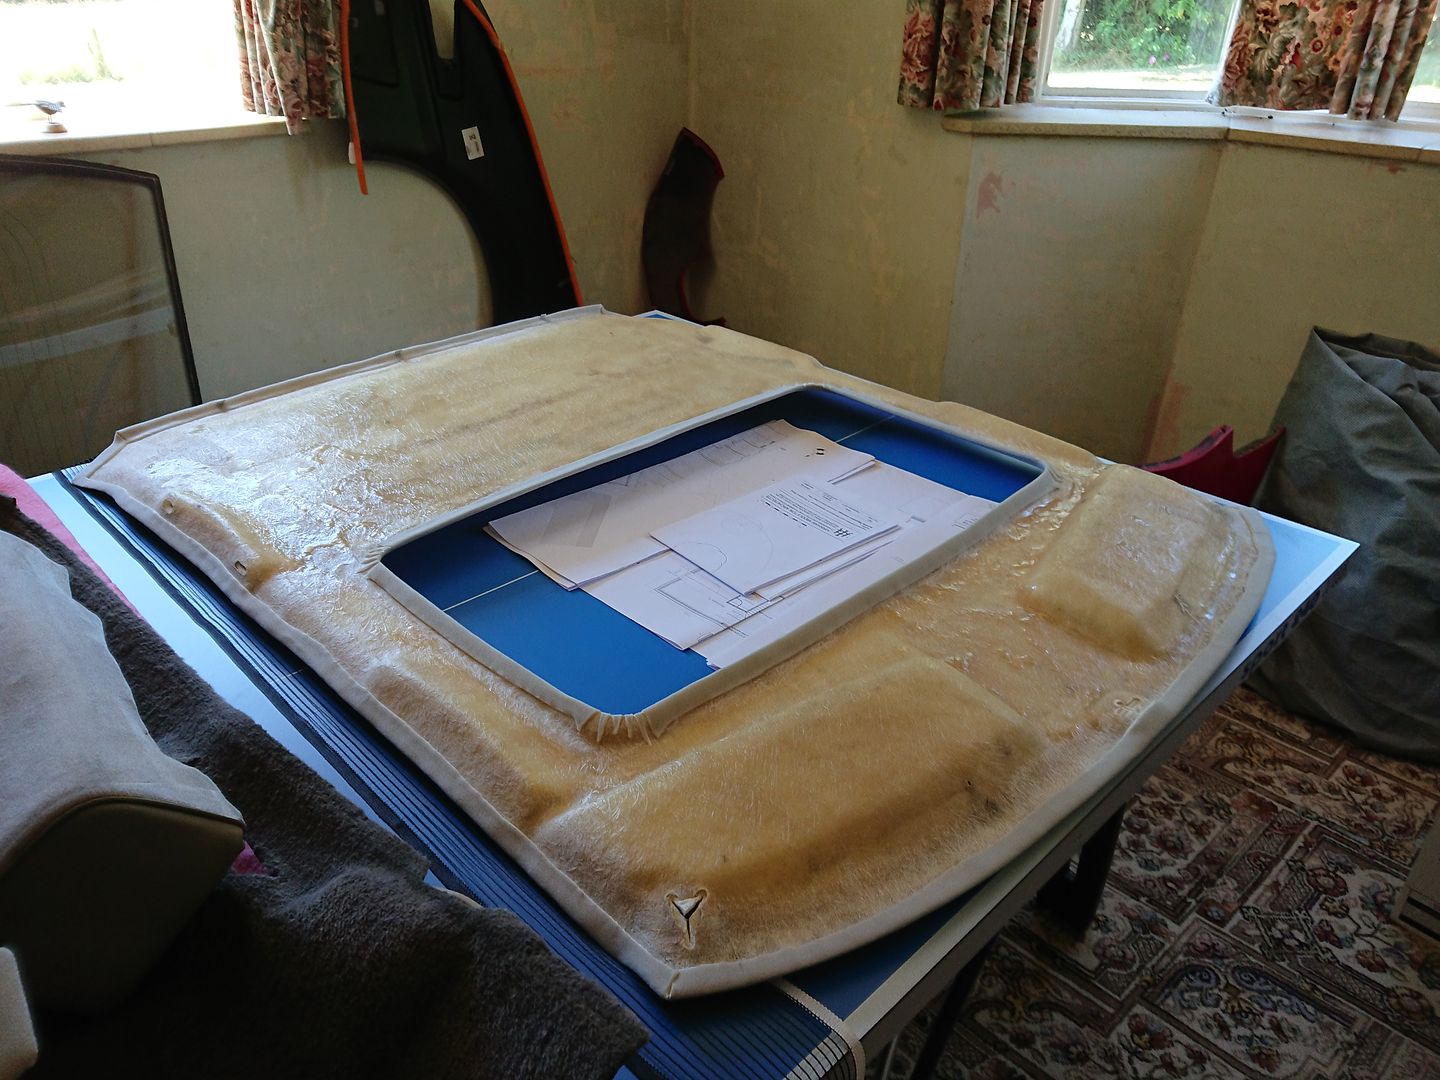
It was then transported to where I'd been trimming the headlining for installation.
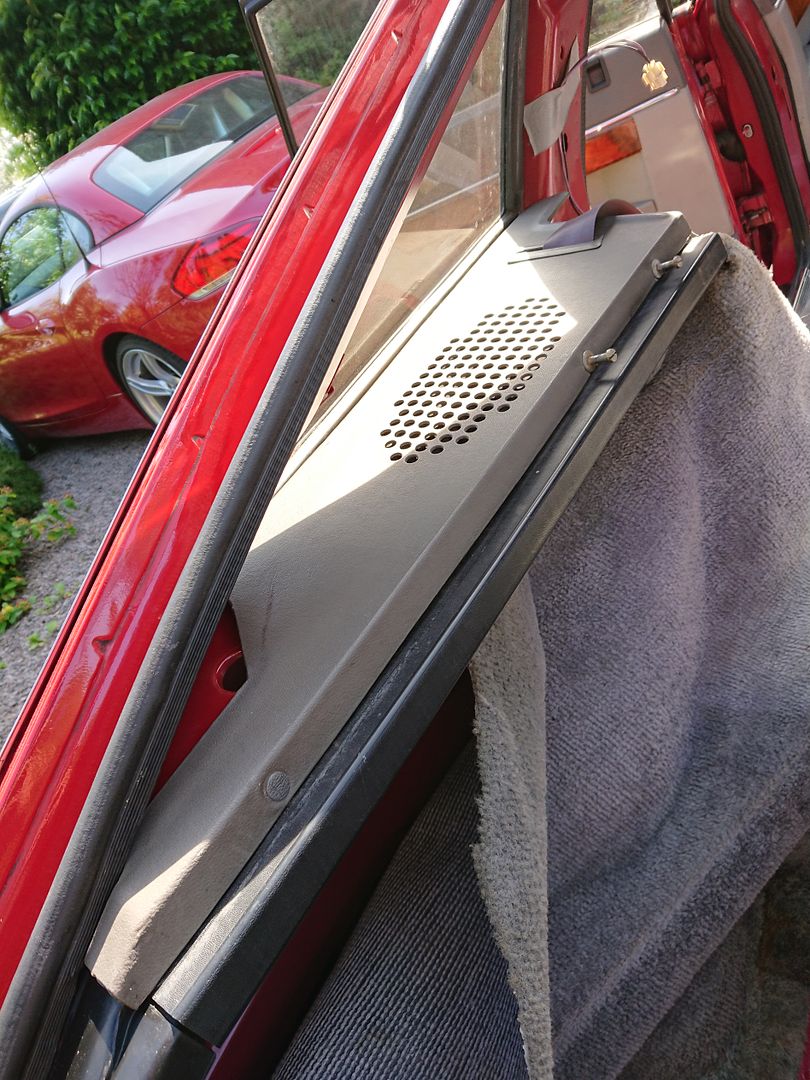
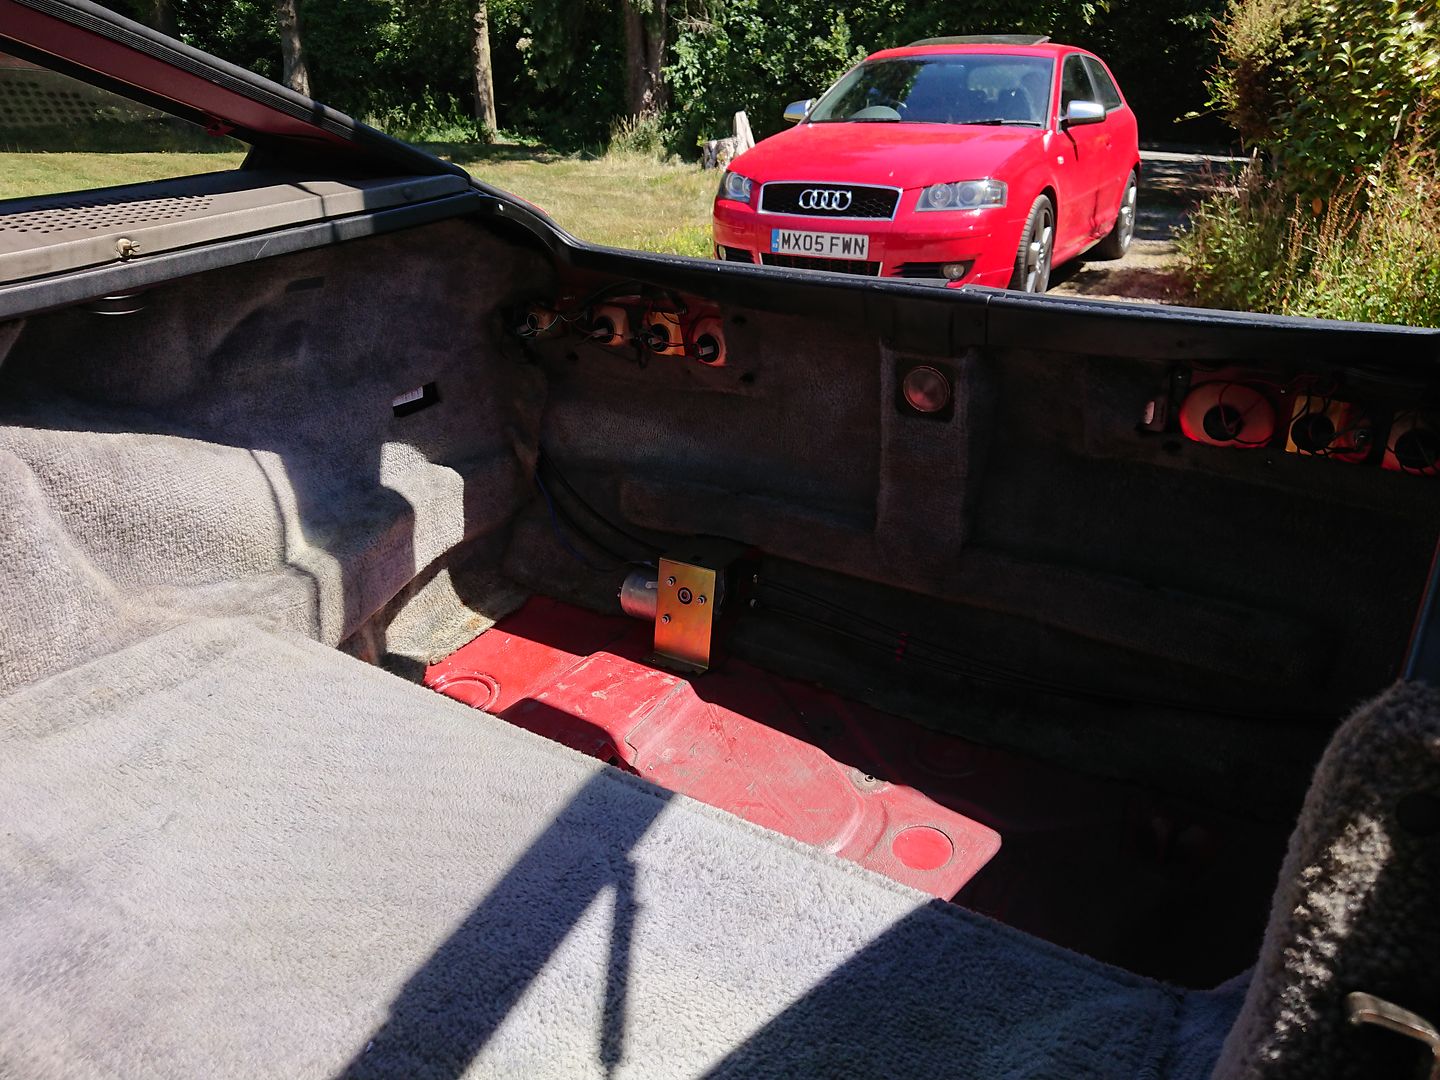
Lots of final prep before the headlining went in everything was given a final clean. The rear speaker covers were screwed in, and the boot carpet was clipped in as well as loads of other little jobs.
Now it was time for the cassette, this actually went quite smoothly, with 2 people the cassette is brought in through the hatch opening, and positioned before bolting it in loosely.
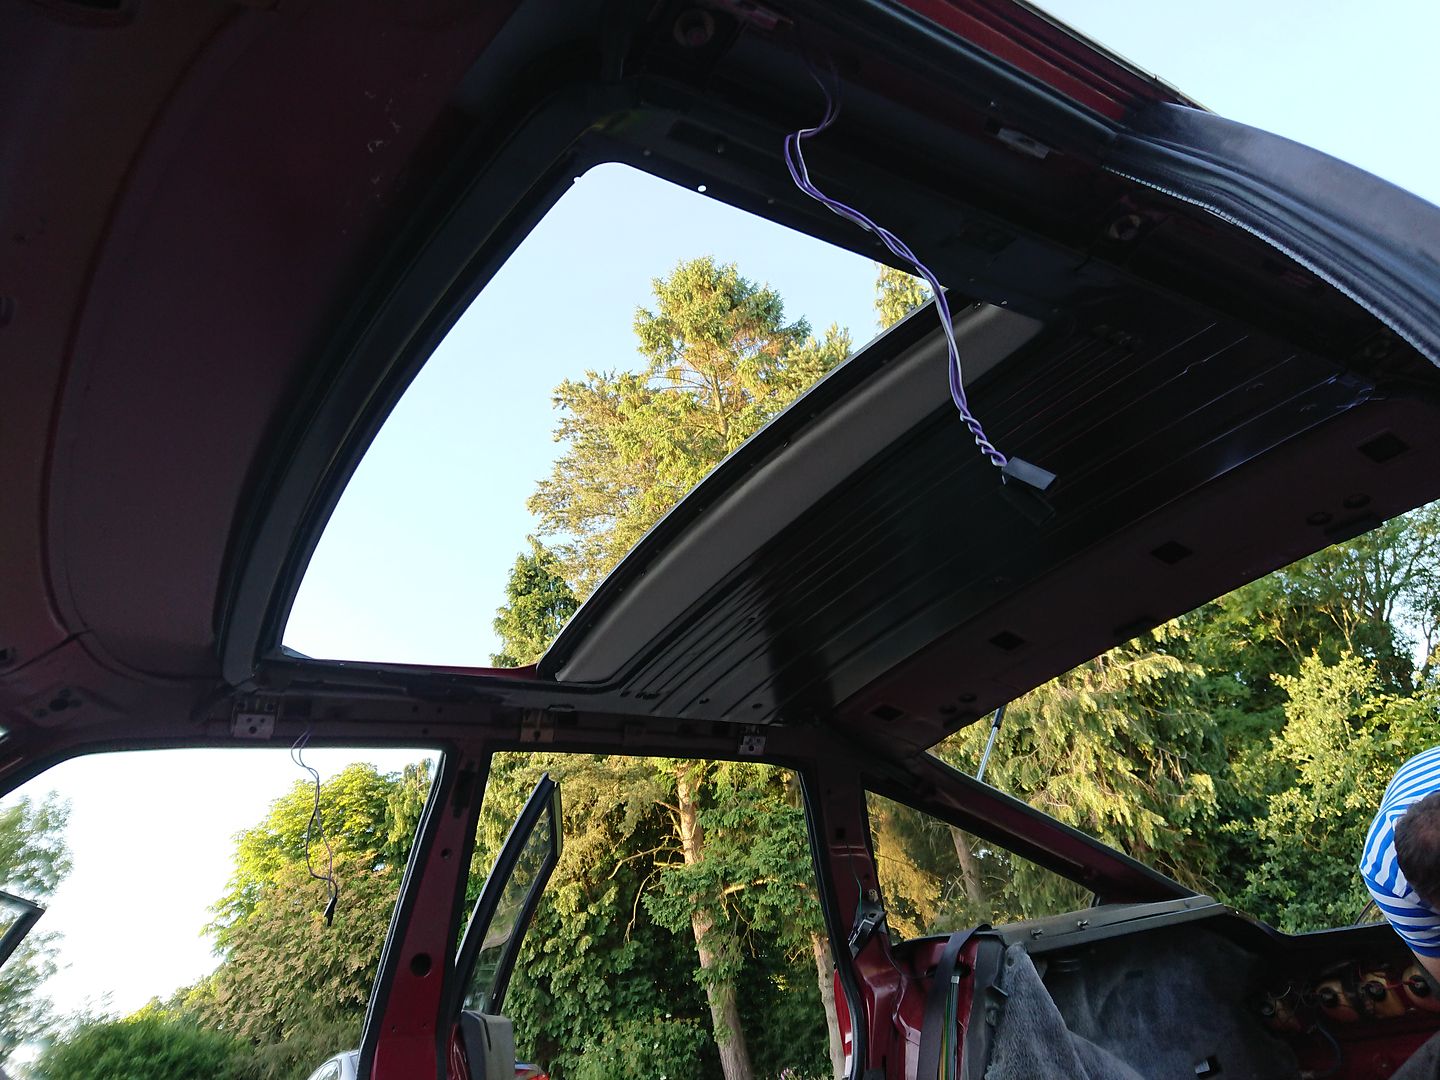
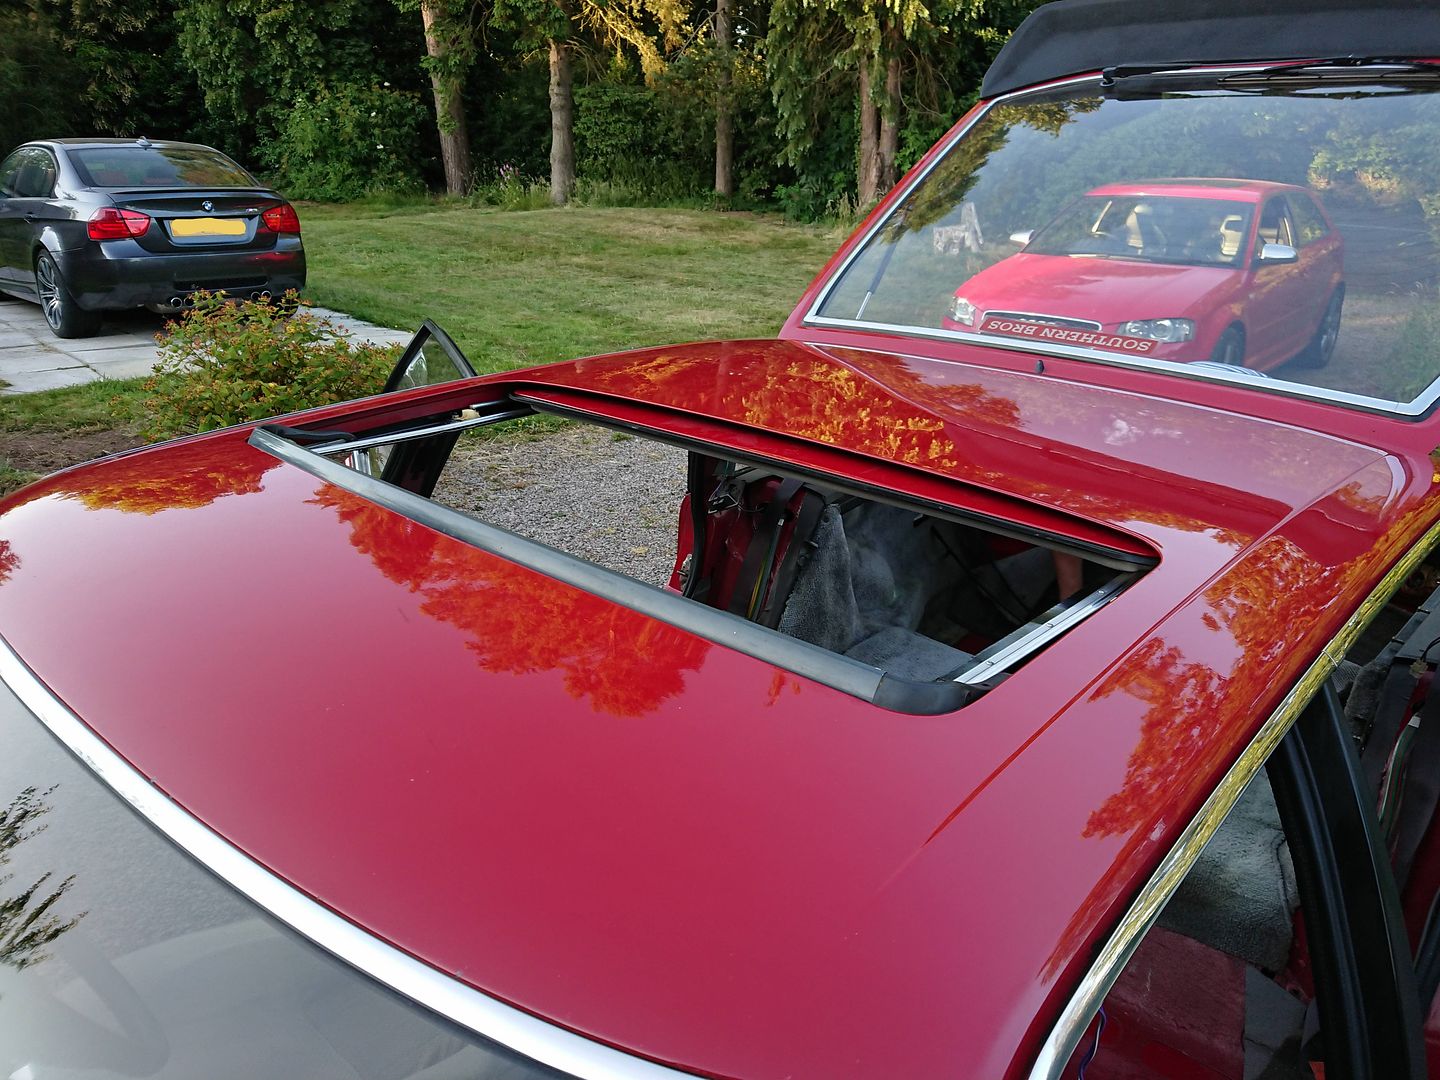
After setting the side to side position I connected the sunroof motor, and began to slowly close it, and set the fore and aft. I'd already checked the operation of the cassette before installation so no surprises here!
Well look at that for a perfect sunroof.
Only half an opening for the video, but you get the idea.
https://www.youtube.com/watch?v=EtQOLxGDLSY
Looks amazing from the other side too.
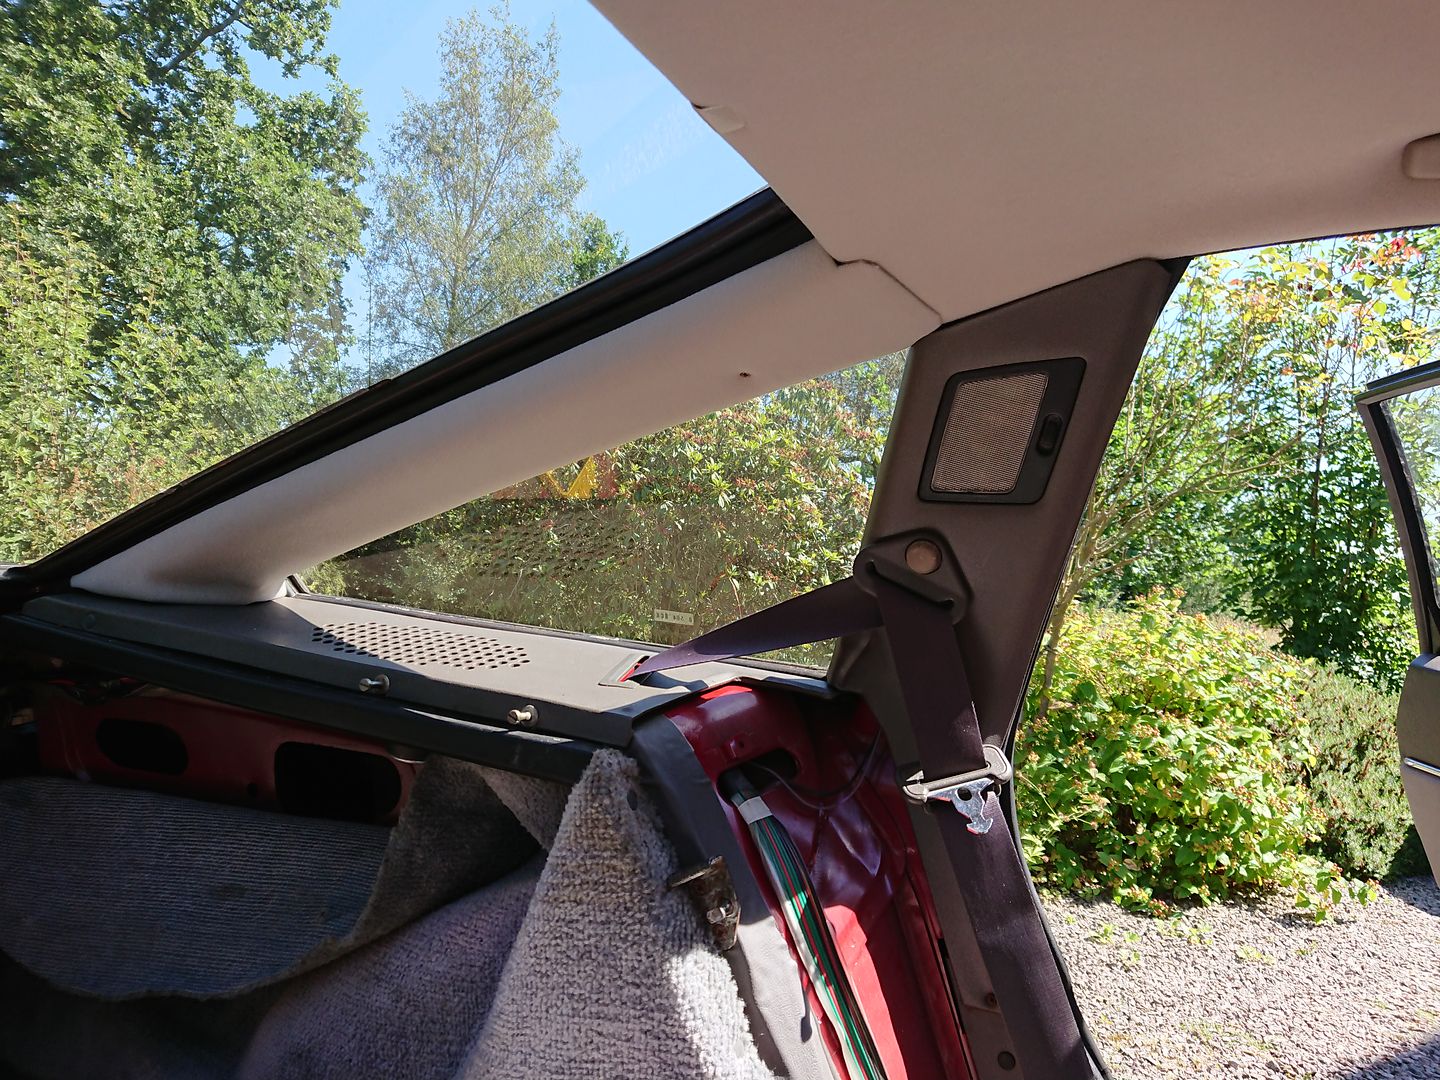
With the drains connected, and electrical connections taped up, it was headlining time.
Same process as the cassette really, through the hatch opening and support while the rear view mirror attachment is screwed in, and the rear hooks are attached. Then the grab handles and sun-visors screw in too.
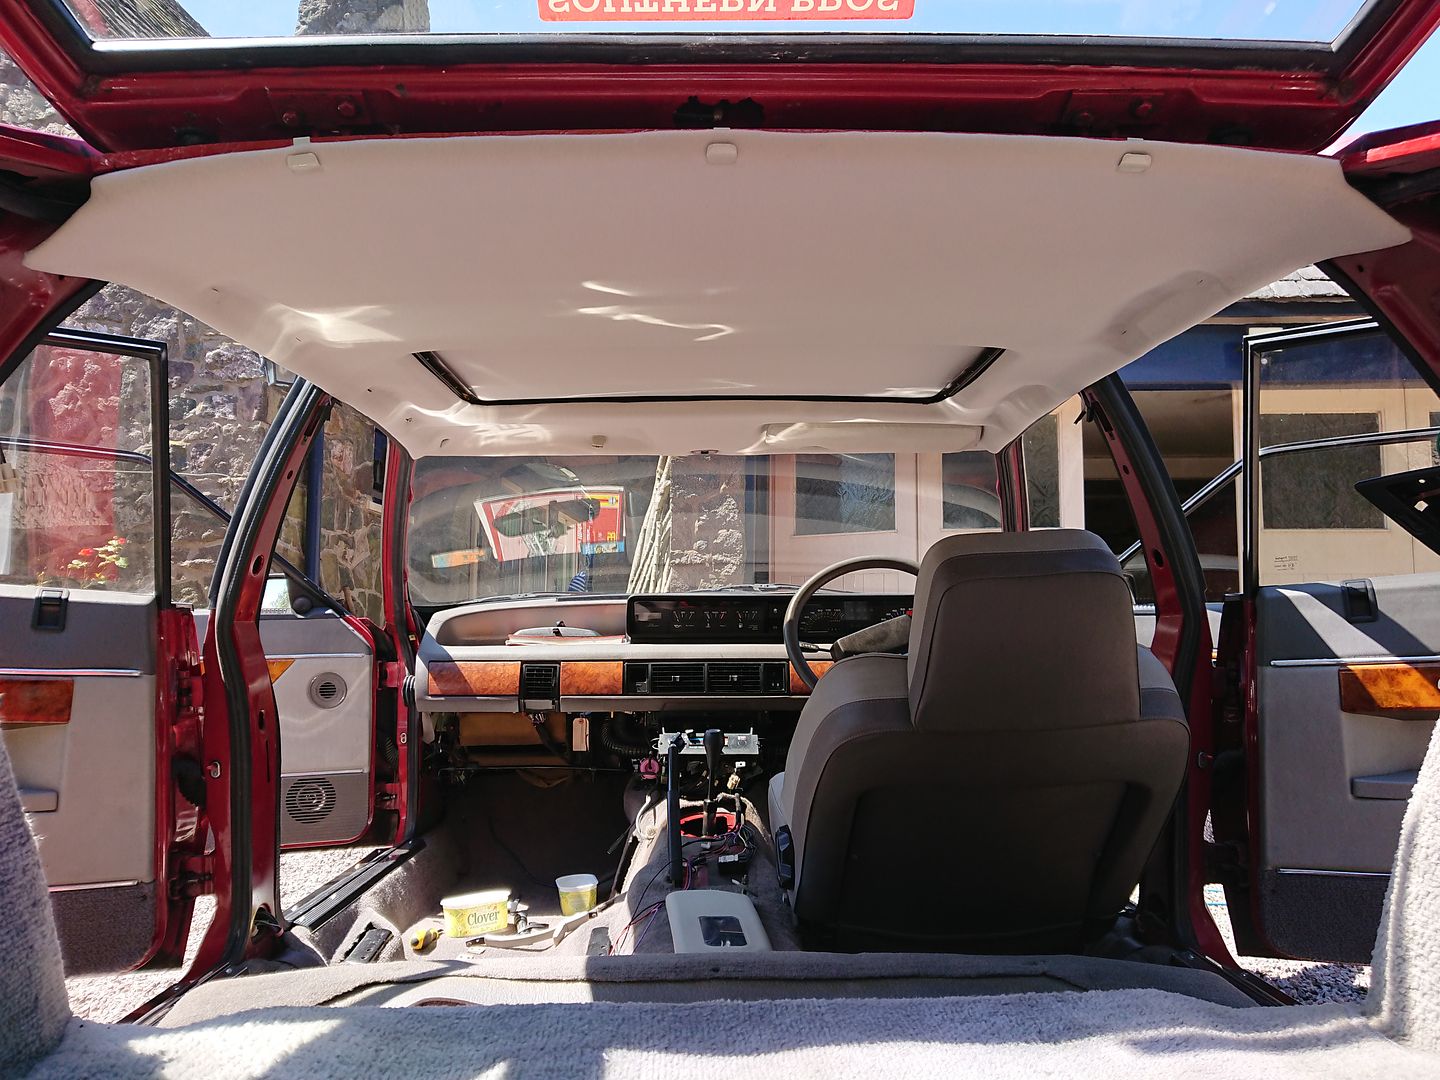
Look at the colour match on those clips
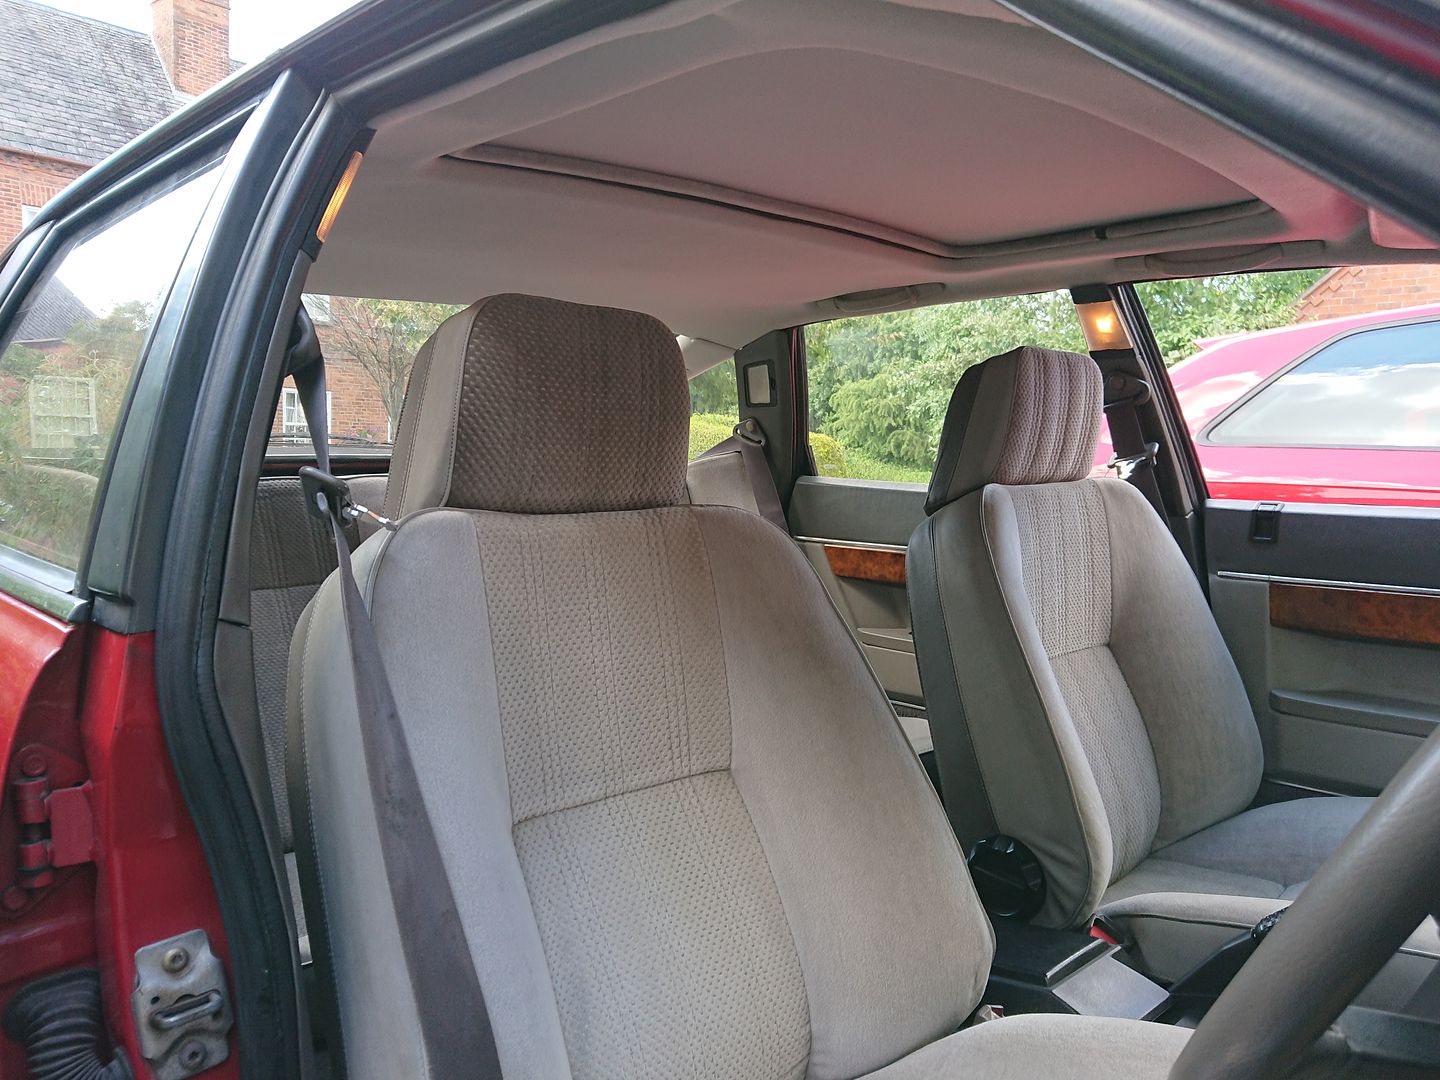
A, B, C, and D-posts next.

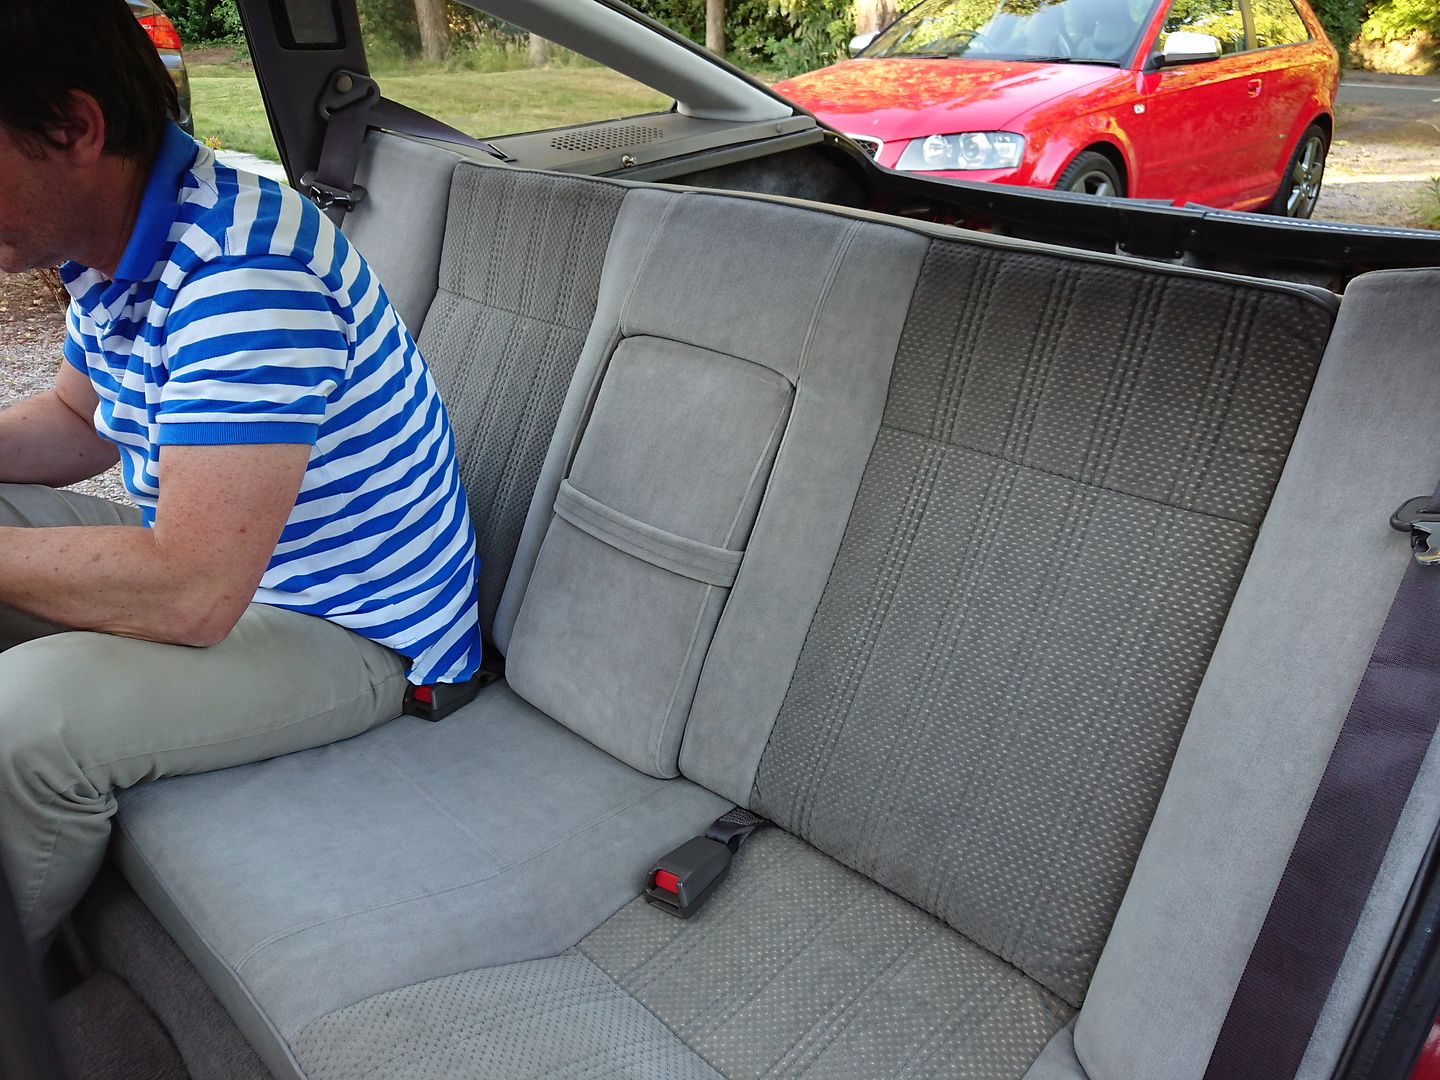
Rear Seat back in.
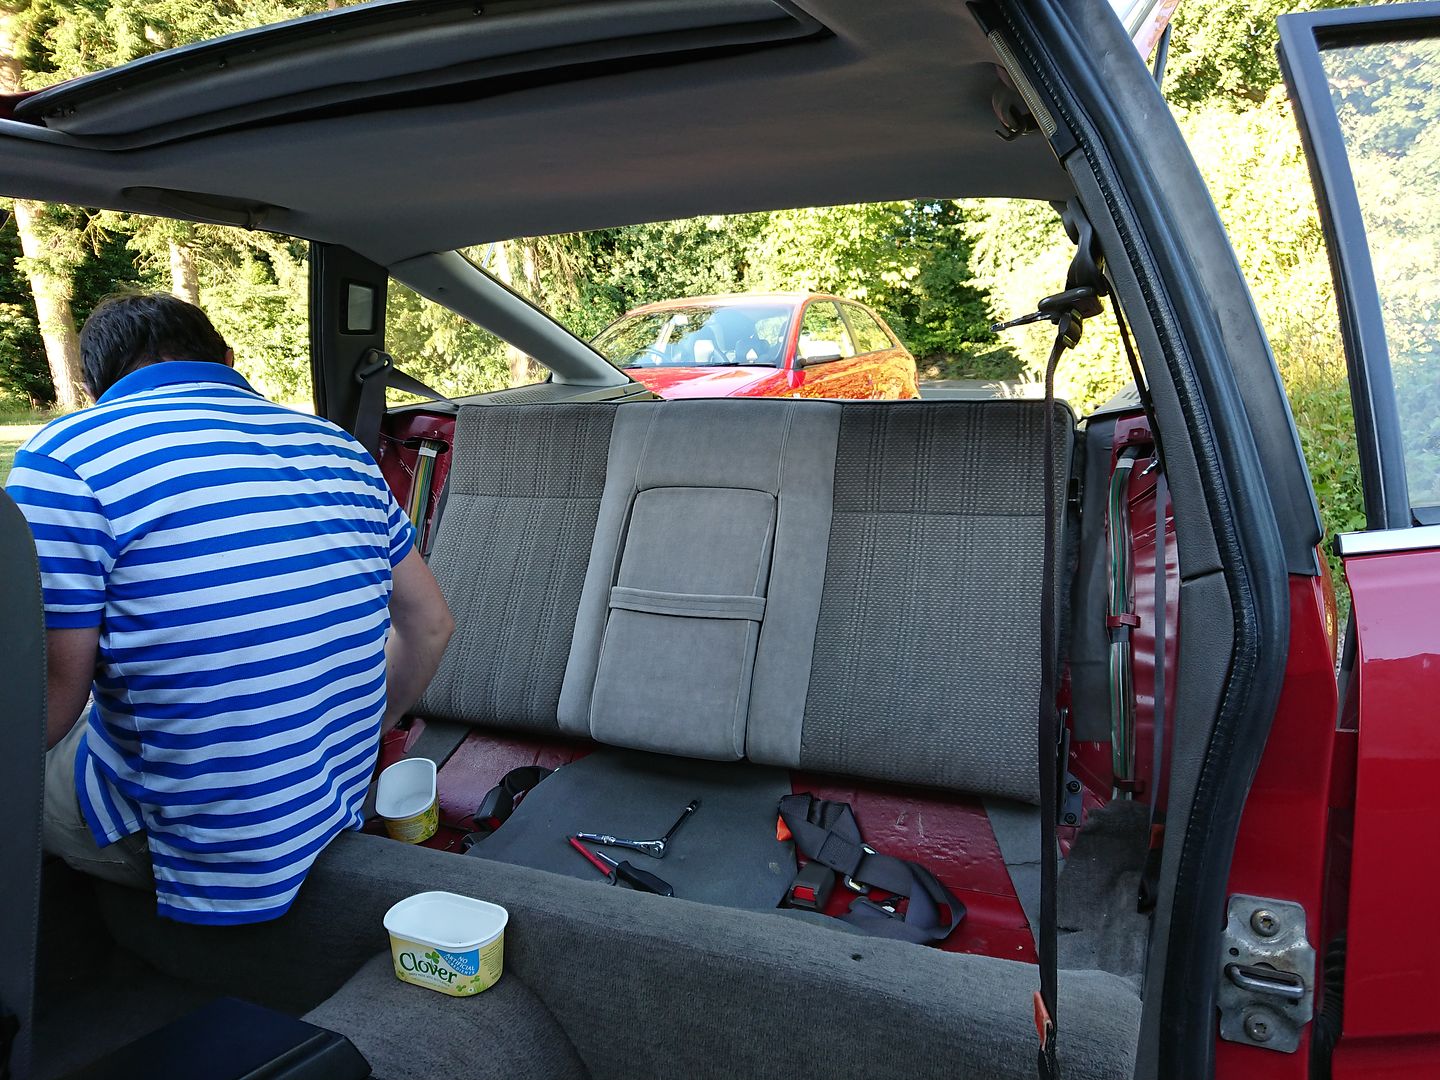
Side squabs and base in too.
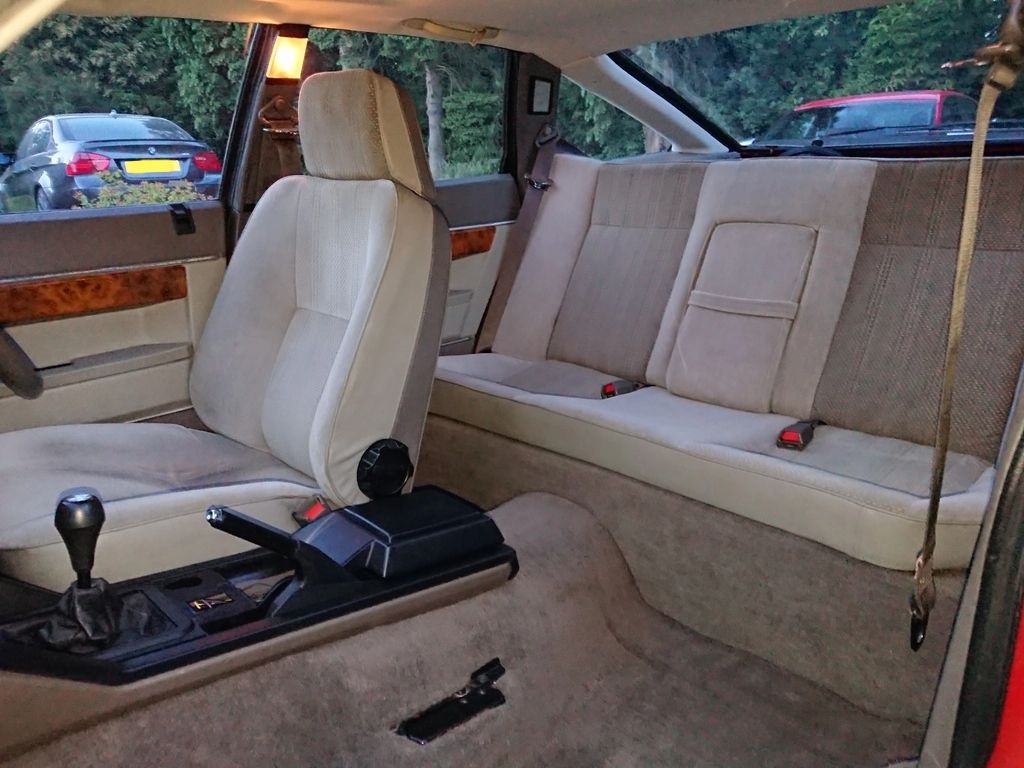
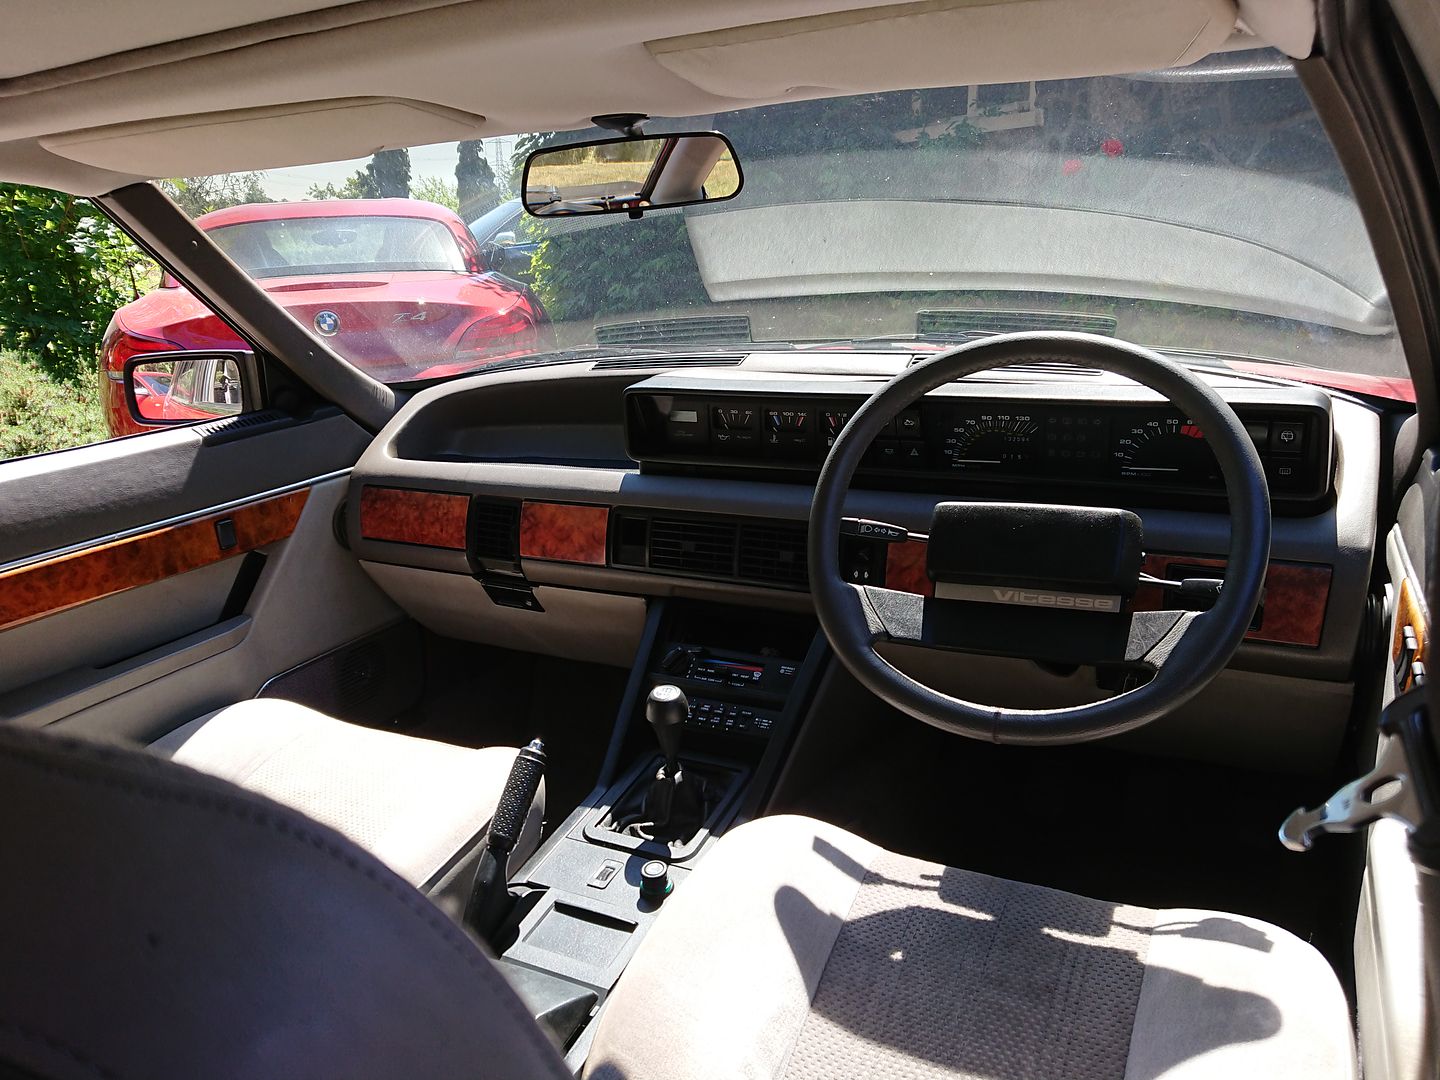
Look at that interior!

Centre console in too!
This was so much work to get to this stage, but looking at the next picture it was really worth it. Apart from the slight trimming error on the board, you can see it in the last picture I'm left with a tiny gap once the finishing strip is installed, but I'm not going to loose sleep over that though. Everything else went smoothly, and hopefully should last. It's now a lovely place to sit.
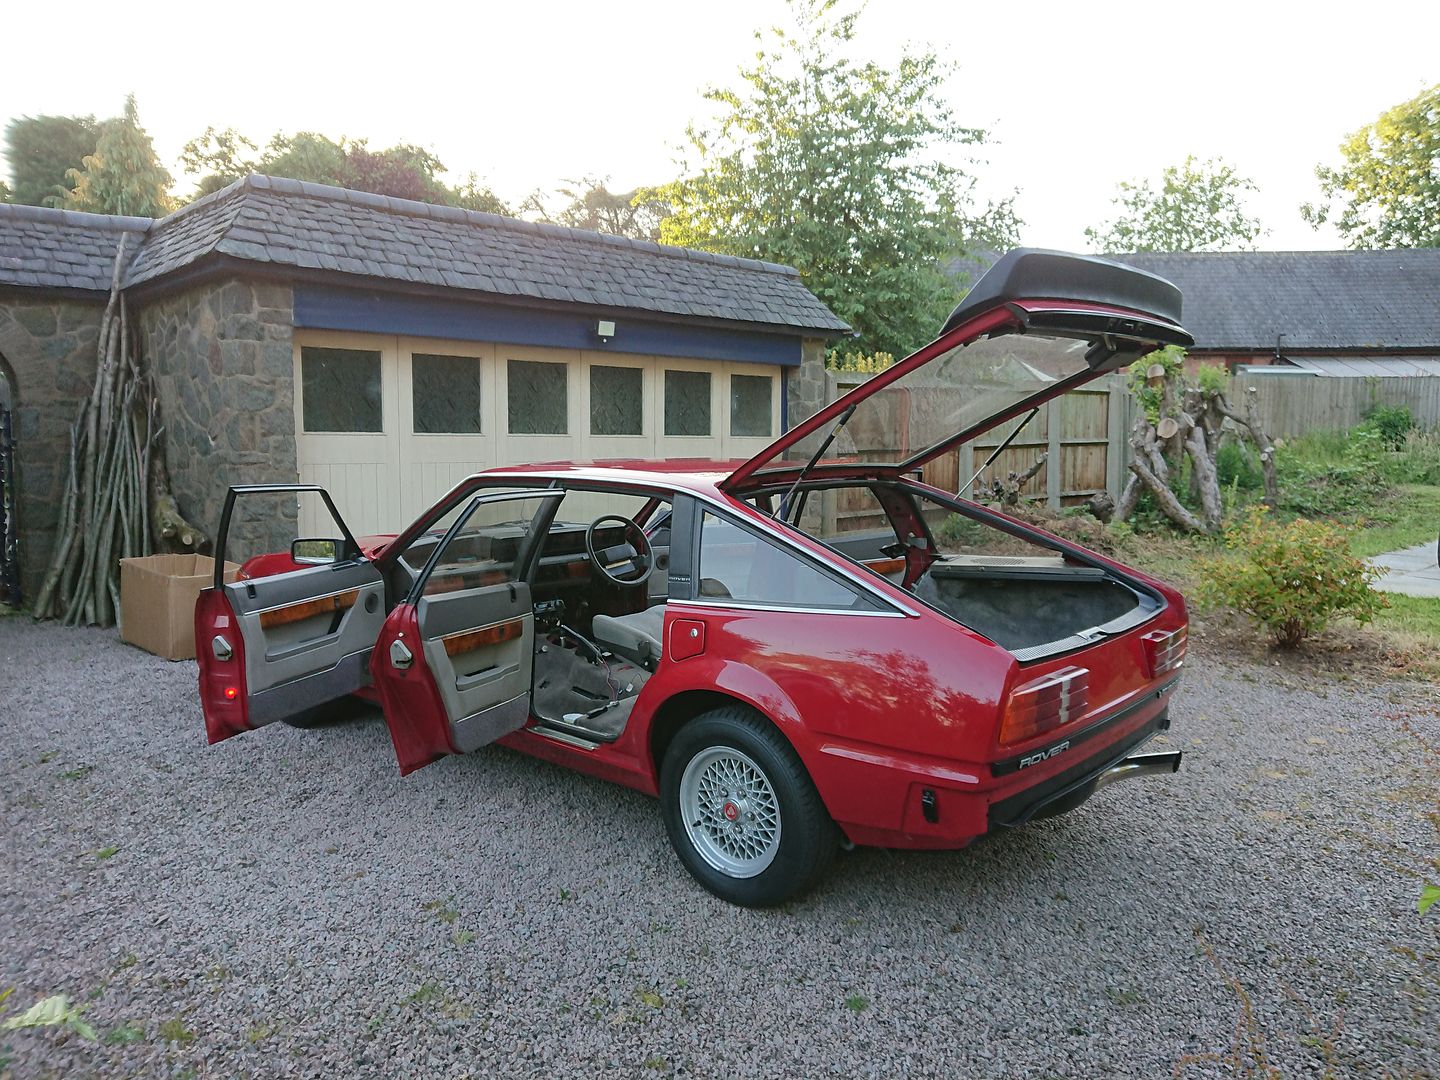
Interior finished.
I also finally got the rear bumper on.
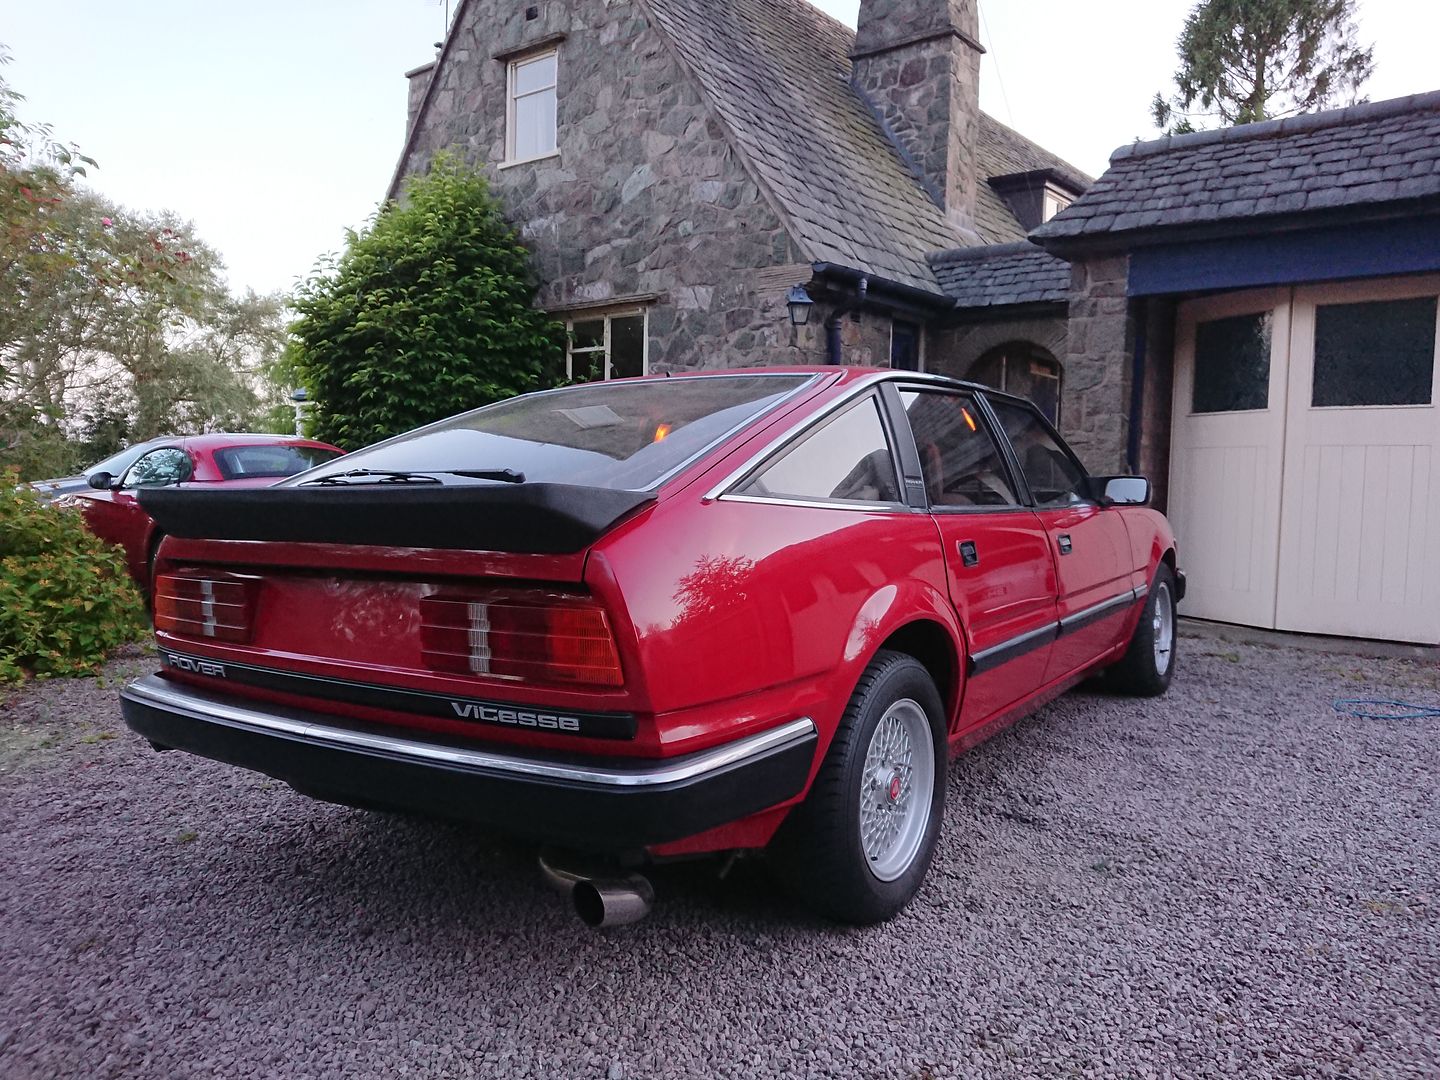
Just need to get it roadworthy now...
Joe
First things first was to swap the Rover onto a spare set of wheels I picked up. The wheels it came with are immaculate, but the tyres were ruined. These wheels are a bit ratty but had good tyres on them, and will serve well while I get new tyres on the nice wheels.


With a drivers seat installed I finally drove the Vitesse out of the garage for the first time in almost 2 years.
It was then transported to where I'd been trimming the headlining for installation.


Lots of final prep before the headlining went in everything was given a final clean. The rear speaker covers were screwed in, and the boot carpet was clipped in as well as loads of other little jobs.
Now it was time for the cassette, this actually went quite smoothly, with 2 people the cassette is brought in through the hatch opening, and positioned before bolting it in loosely.


After setting the side to side position I connected the sunroof motor, and began to slowly close it, and set the fore and aft. I'd already checked the operation of the cassette before installation so no surprises here!

Well look at that for a perfect sunroof.
Only half an opening for the video, but you get the idea.
https://www.youtube.com/watch?v=EtQOLxGDLSY

Looks amazing from the other side too.
With the drains connected, and electrical connections taped up, it was headlining time.

Same process as the cassette really, through the hatch opening and support while the rear view mirror attachment is screwed in, and the rear hooks are attached. Then the grab handles and sun-visors screw in too.

Look at the colour match on those clips
A, B, C, and D-posts next.


Rear Seat back in.

Side squabs and base in too.


Look at that interior!

Centre console in too!
This was so much work to get to this stage, but looking at the next picture it was really worth it. Apart from the slight trimming error on the board, you can see it in the last picture I'm left with a tiny gap once the finishing strip is installed, but I'm not going to loose sleep over that though. Everything else went smoothly, and hopefully should last. It's now a lovely place to sit.
Interior finished.


I also finally got the rear bumper on.

Just need to get it roadworthy now...
Joe
Edited by 1275 GT on Thursday 21st May 17:41

Thank you for all the kind words, I'm really happy with how the interior turned out, and the car looks so much better with the rear bumper finally on, and it does look cool without a rear number plate.
It still wasn't a smooth journey preparing it for the MOT, I'm just uploading the pictures now.
Joe
It still wasn't a smooth journey preparing it for the MOT, I'm just uploading the pictures now.
Joe
Gassing Station | Readers' Cars | Top of Page | What's New | My Stuff