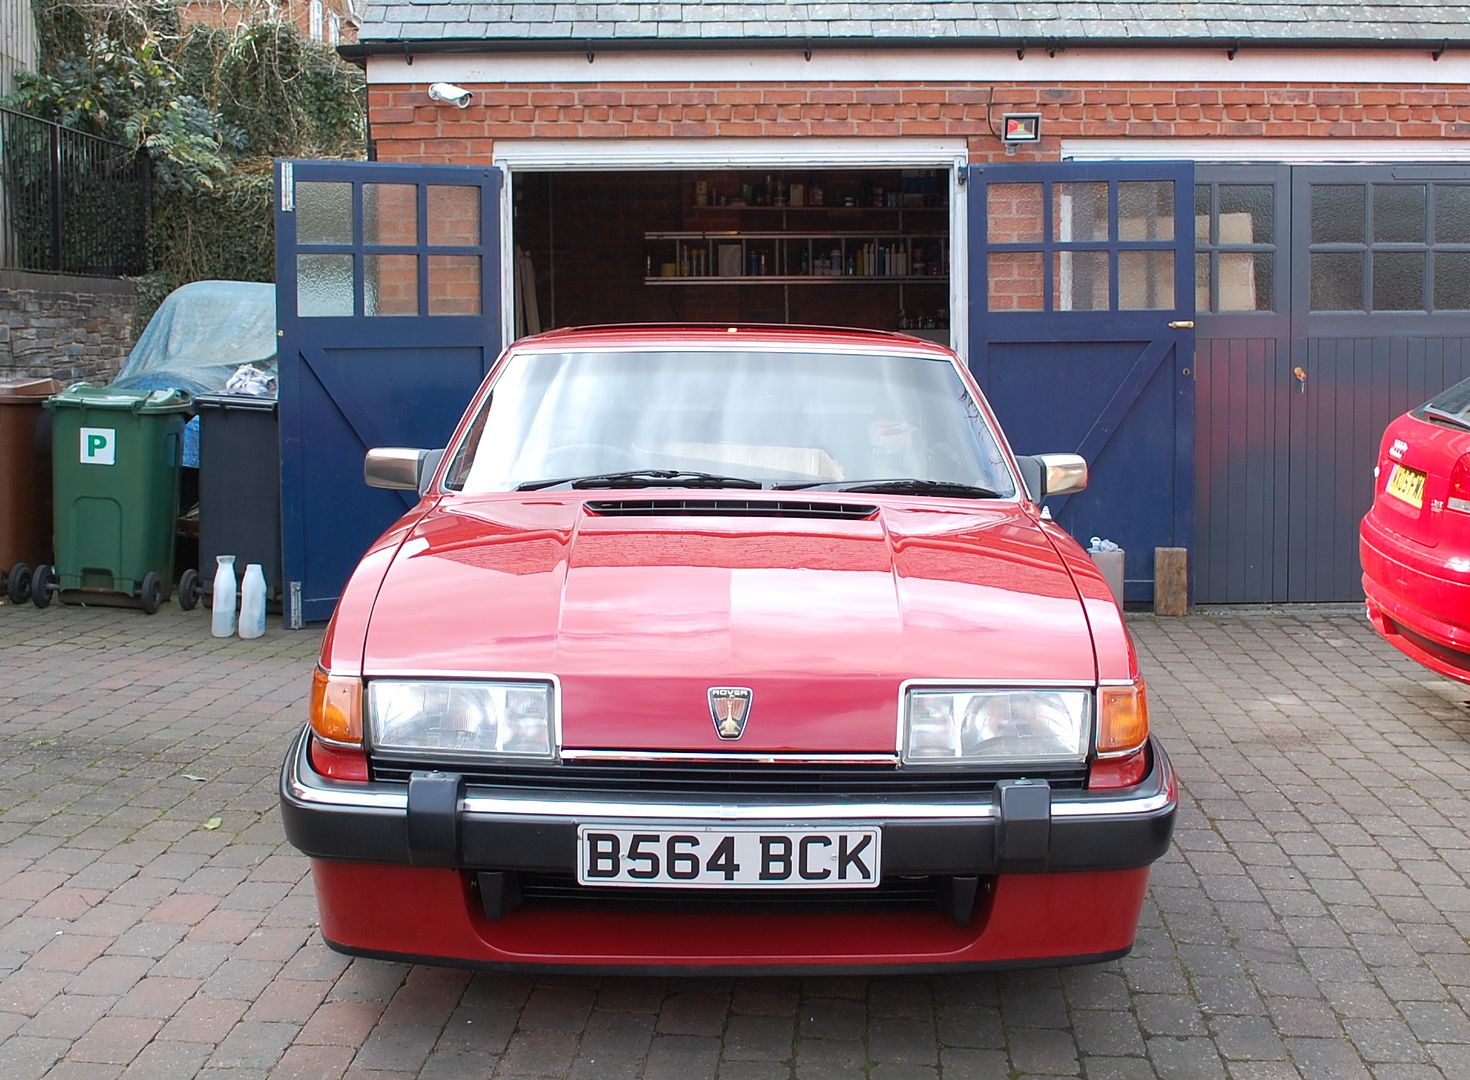
1985 Rover 3500 Vitesse
Discussion


Plenty more paintwork to go!
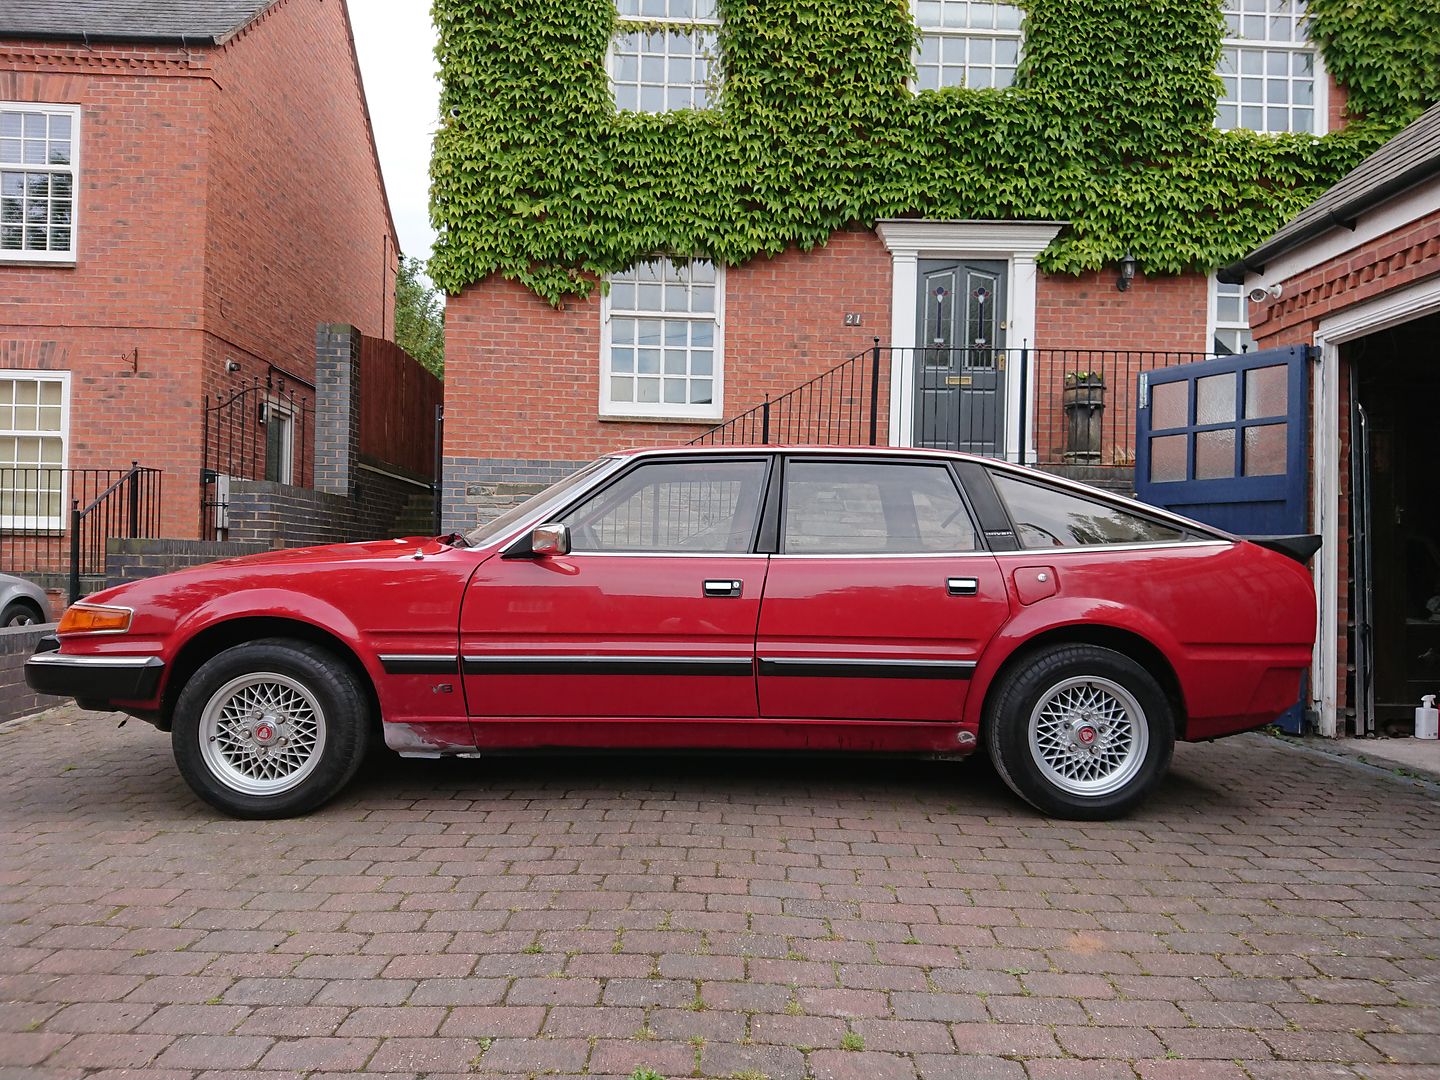
With all the exterior panels repaired, and areas of filler removed to check the quality of the repairs, it was time to return some red to the old girl.
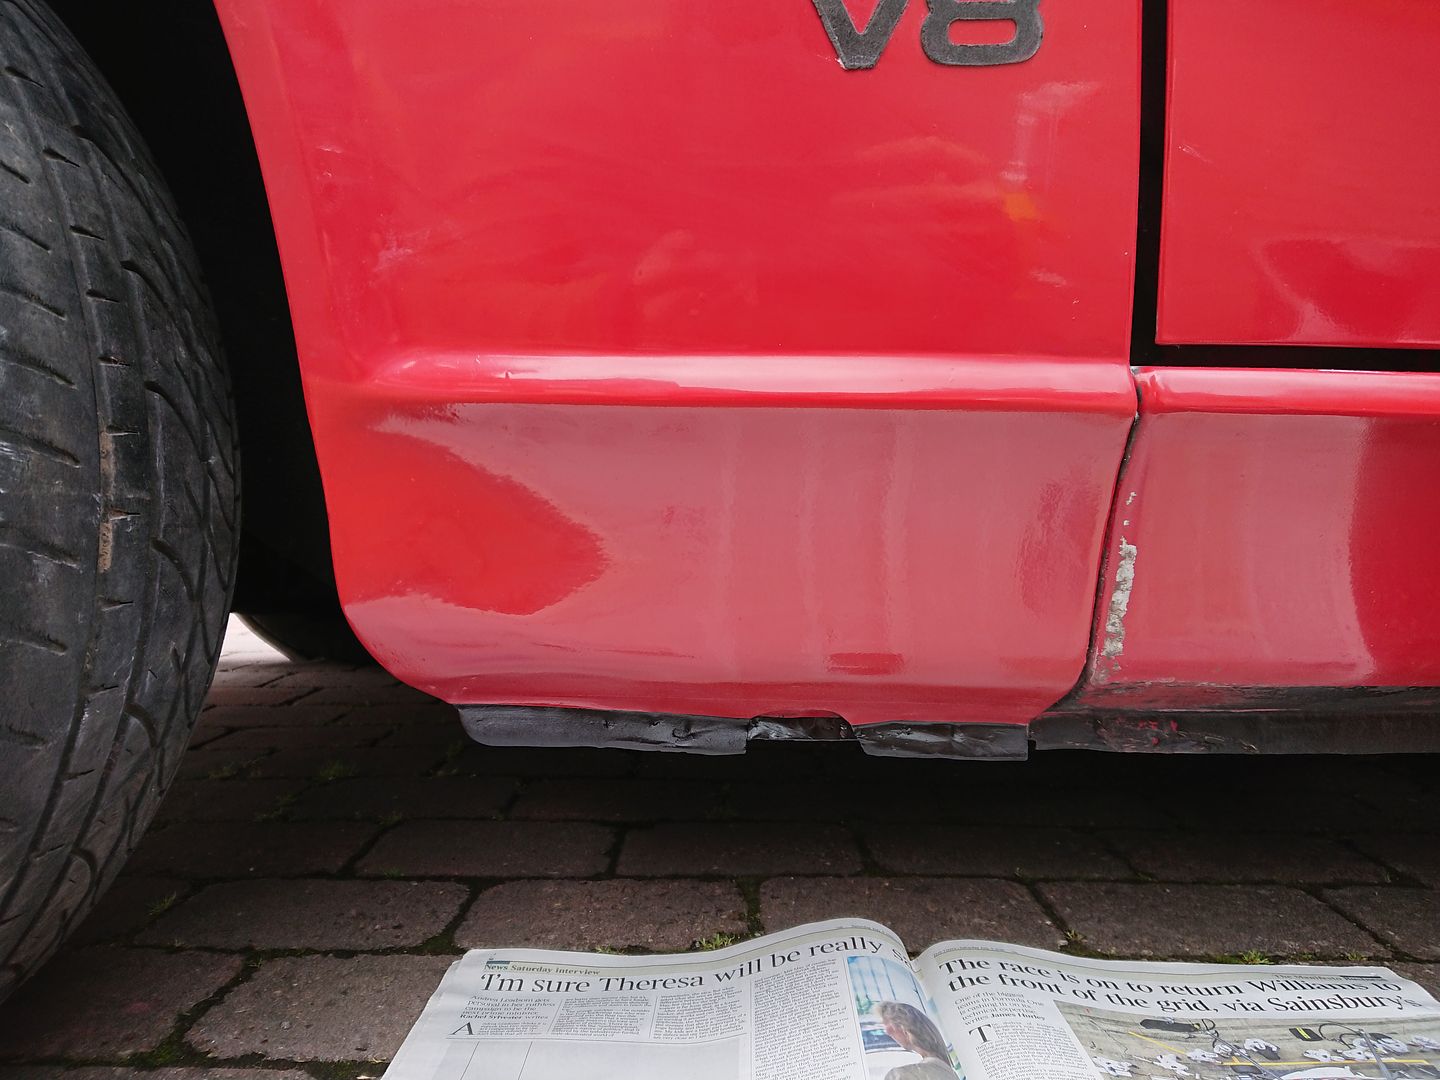
The front wing repair went well.
But the rear quarter I was really pleased with.
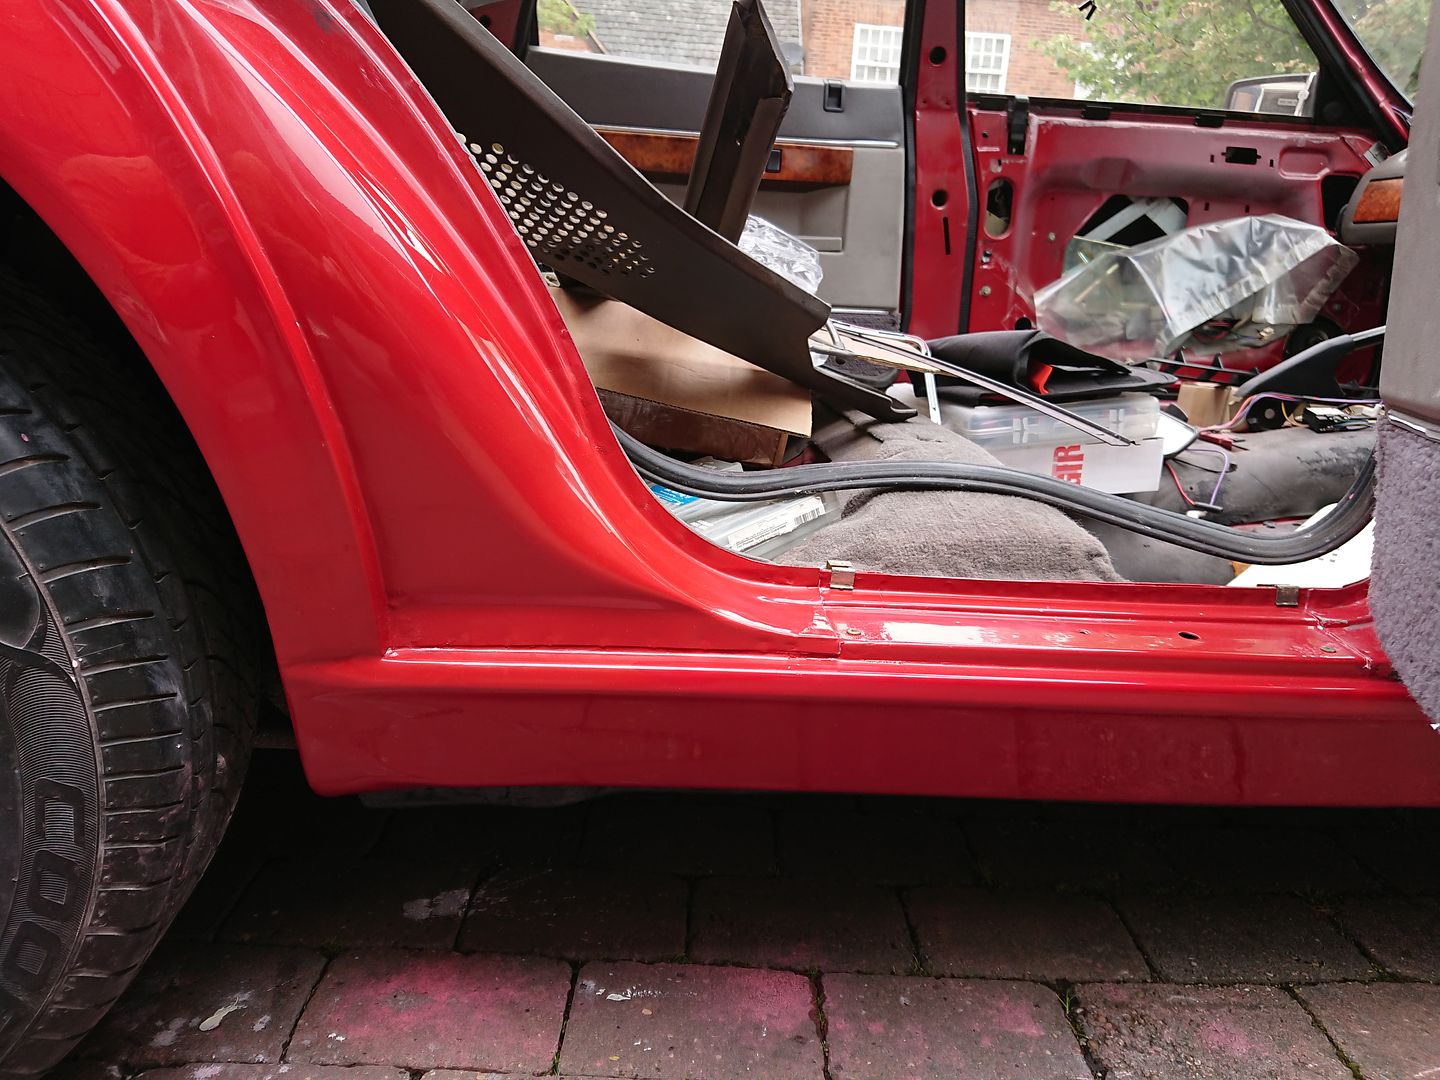
The rear wing into the door step was also blown in, and you cant see any repairs now, just how I wanted it.
Next step was to finish off the wheel arch lips, they'd had all the surface corrosion wire wheeled out, soaked in rust remover, and coated in rust preventative paint. Time for some top coat.

Nice layer of paint for protection now, instead of gunge over surface rust.
Joe


With all the exterior panels repaired, and areas of filler removed to check the quality of the repairs, it was time to return some red to the old girl.

The front wing repair went well.

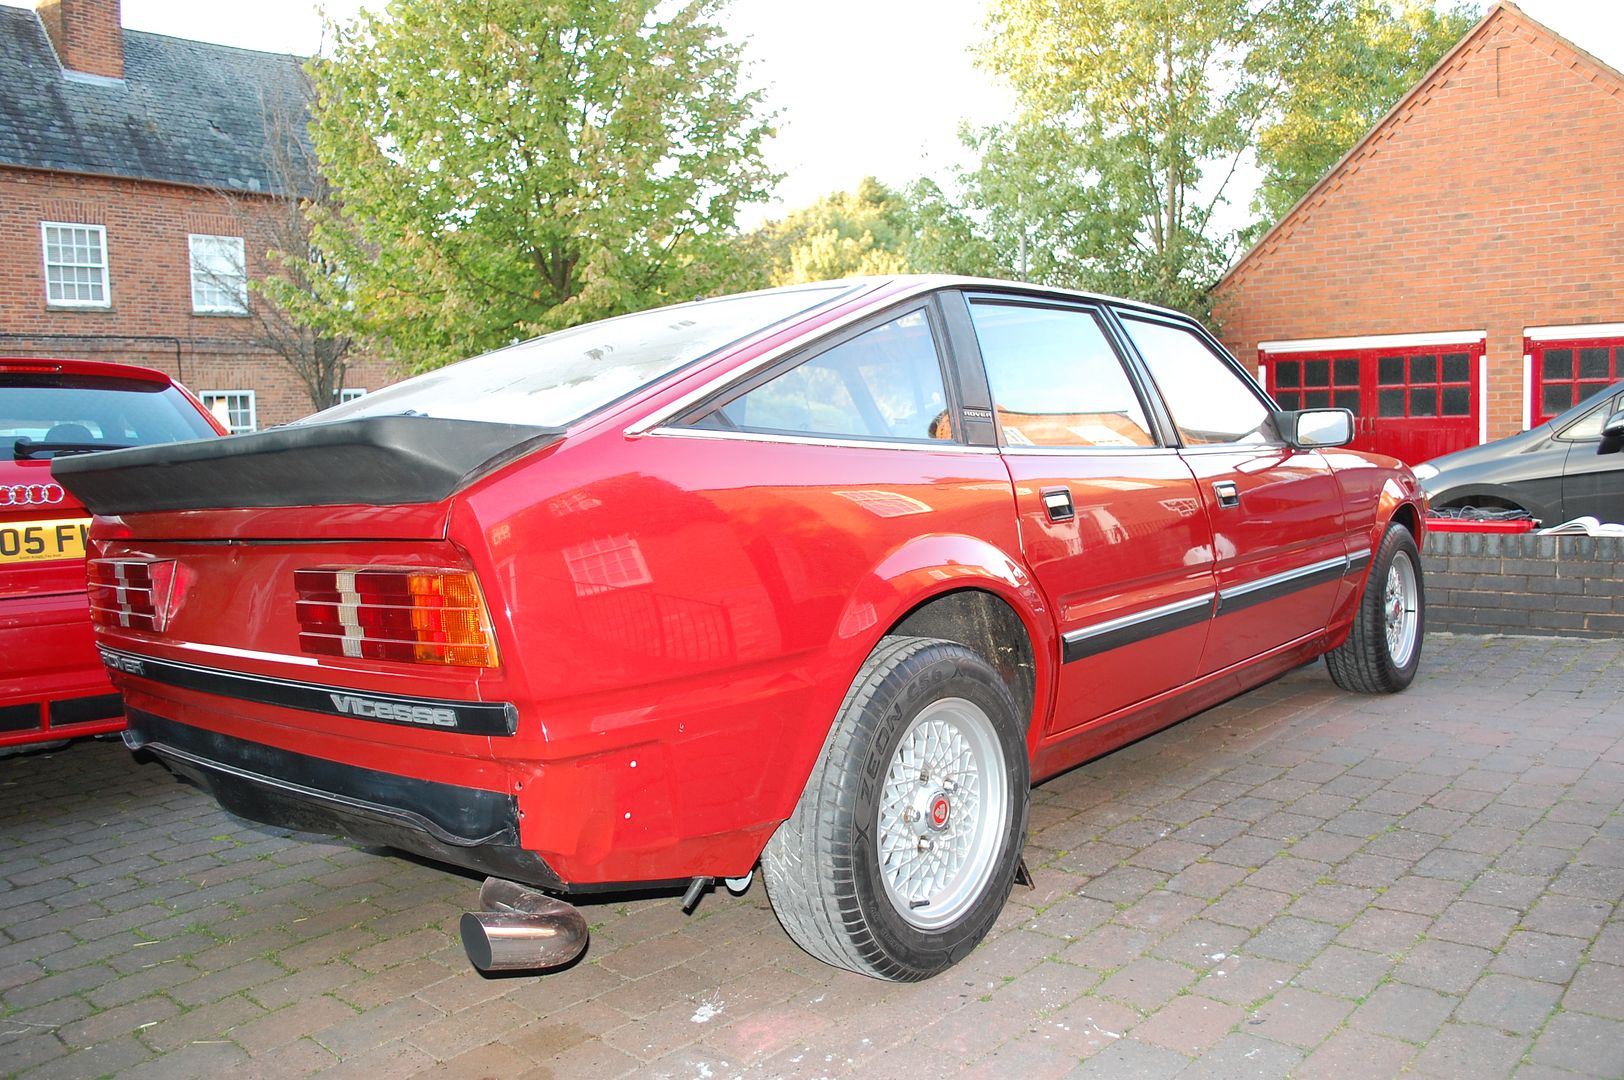
But the rear quarter I was really pleased with.

The rear wing into the door step was also blown in, and you cant see any repairs now, just how I wanted it.
Next step was to finish off the wheel arch lips, they'd had all the surface corrosion wire wheeled out, soaked in rust remover, and coated in rust preventative paint. Time for some top coat.


Nice layer of paint for protection now, instead of gunge over surface rust.
Joe
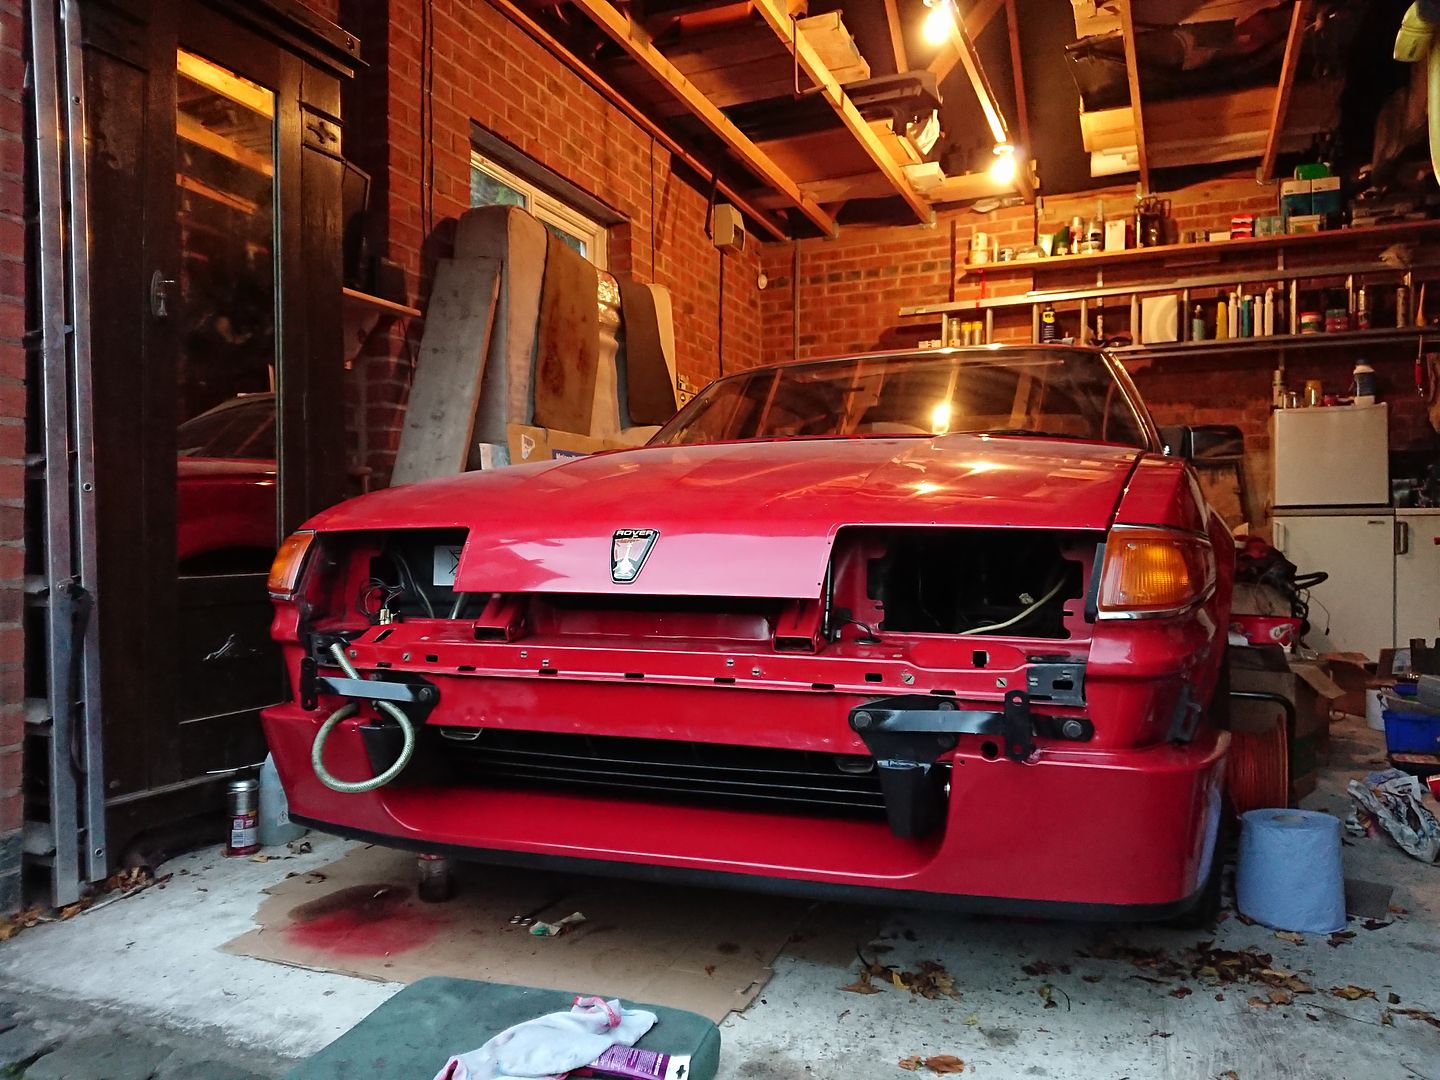
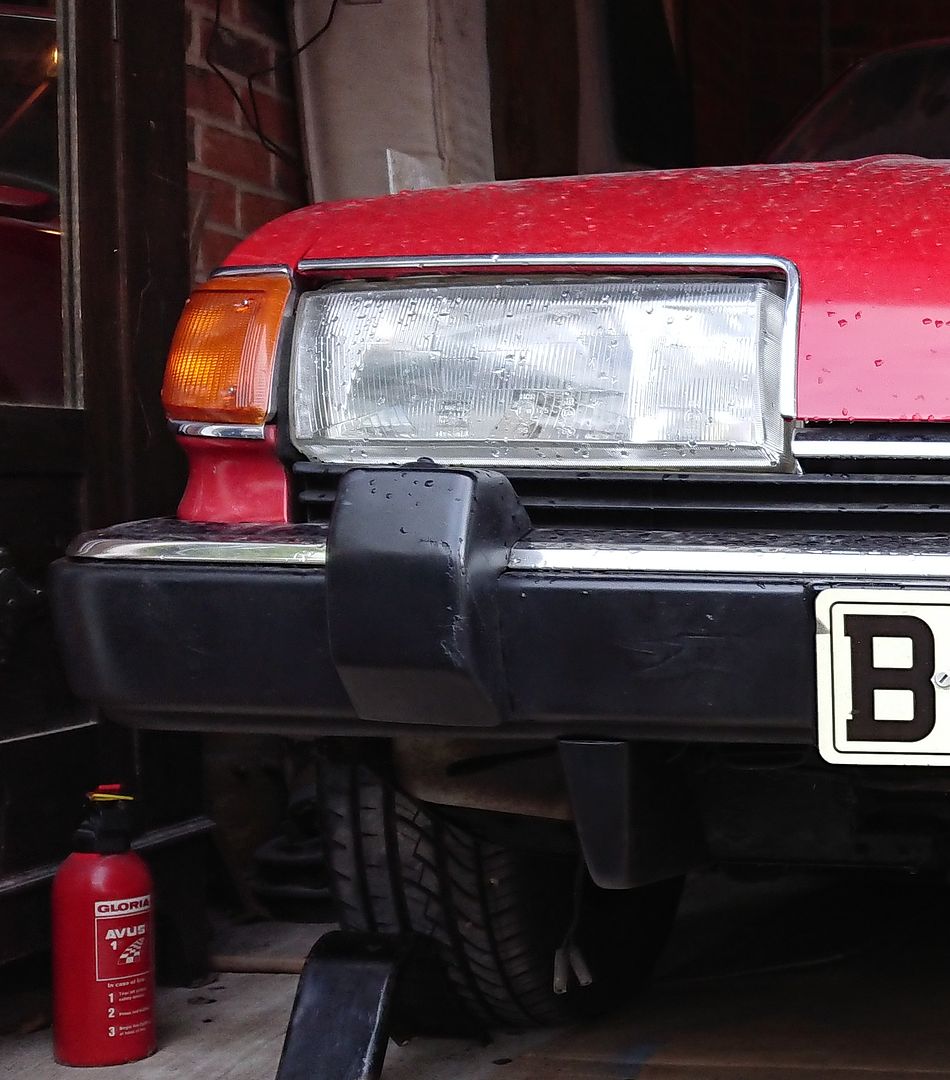
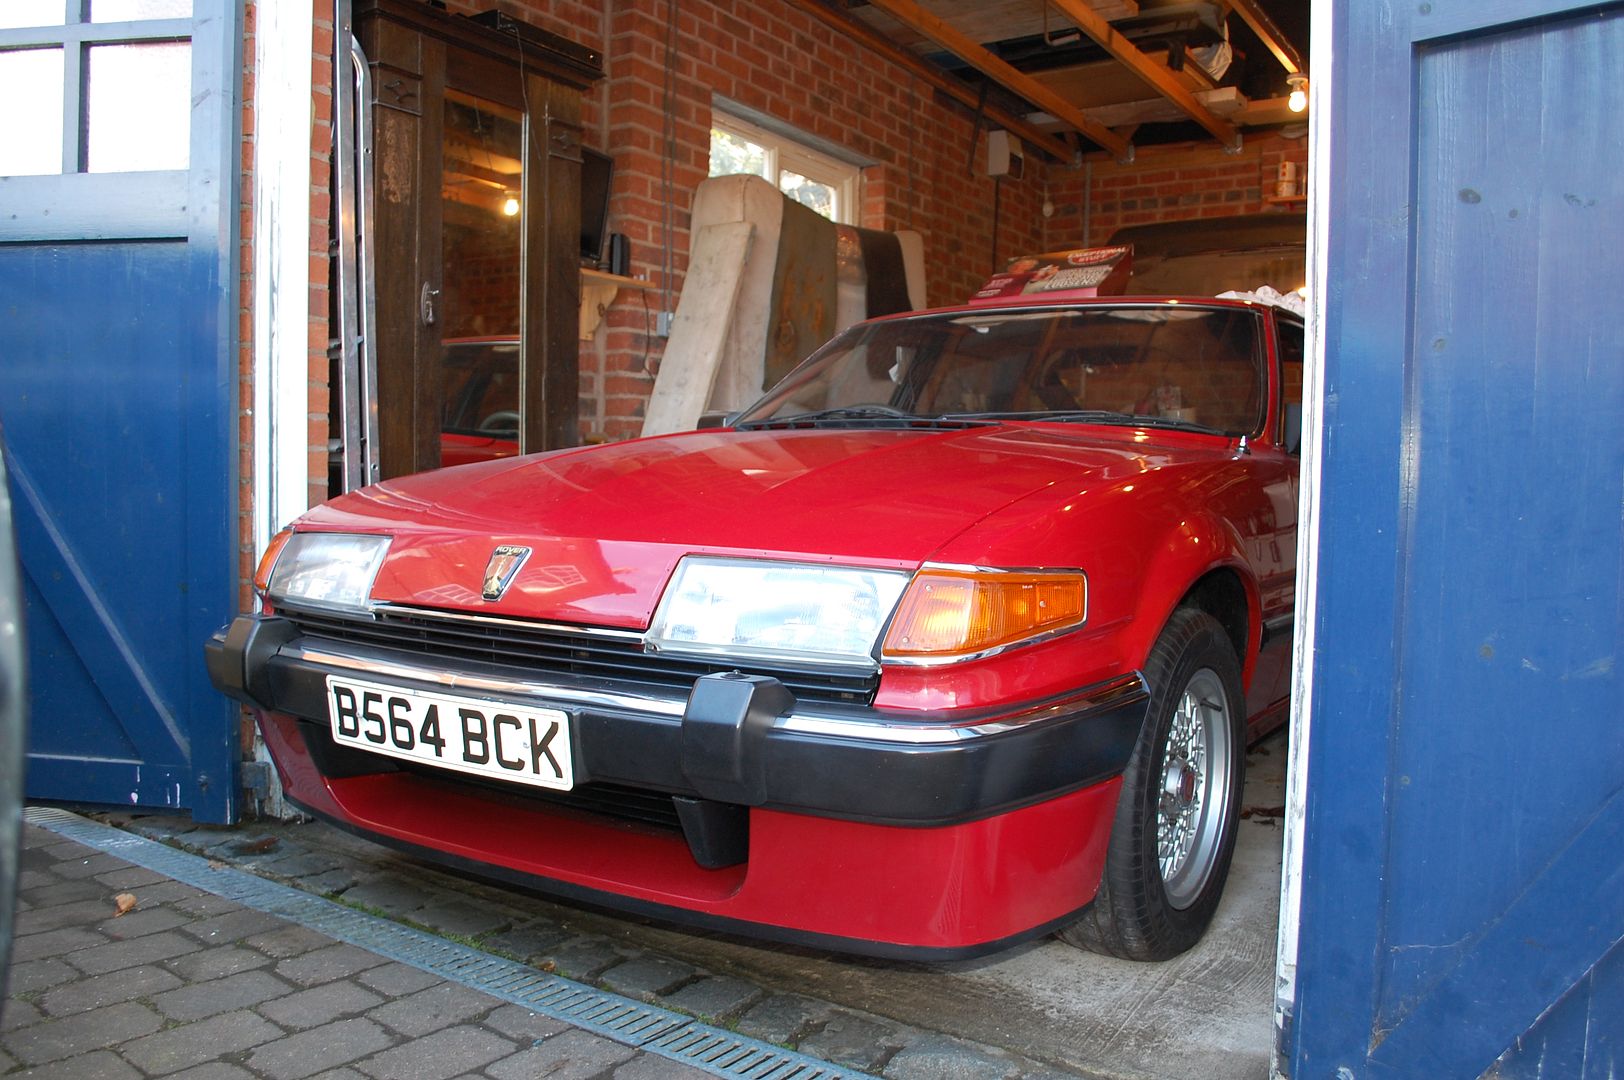
With the rest of the bodywork starting to look nice again, my dad wanted to pull the bumper to investigate what lay behind. I wasn't too keen on this as I knew it'd mean more work for me, but I knew it was the right thing to do.

It was pretty gross. A previous owner had lathered the car in underseal, and although it had done a brilliant job of protecting the car, it did look awful.

It does come off with panel wipe though.
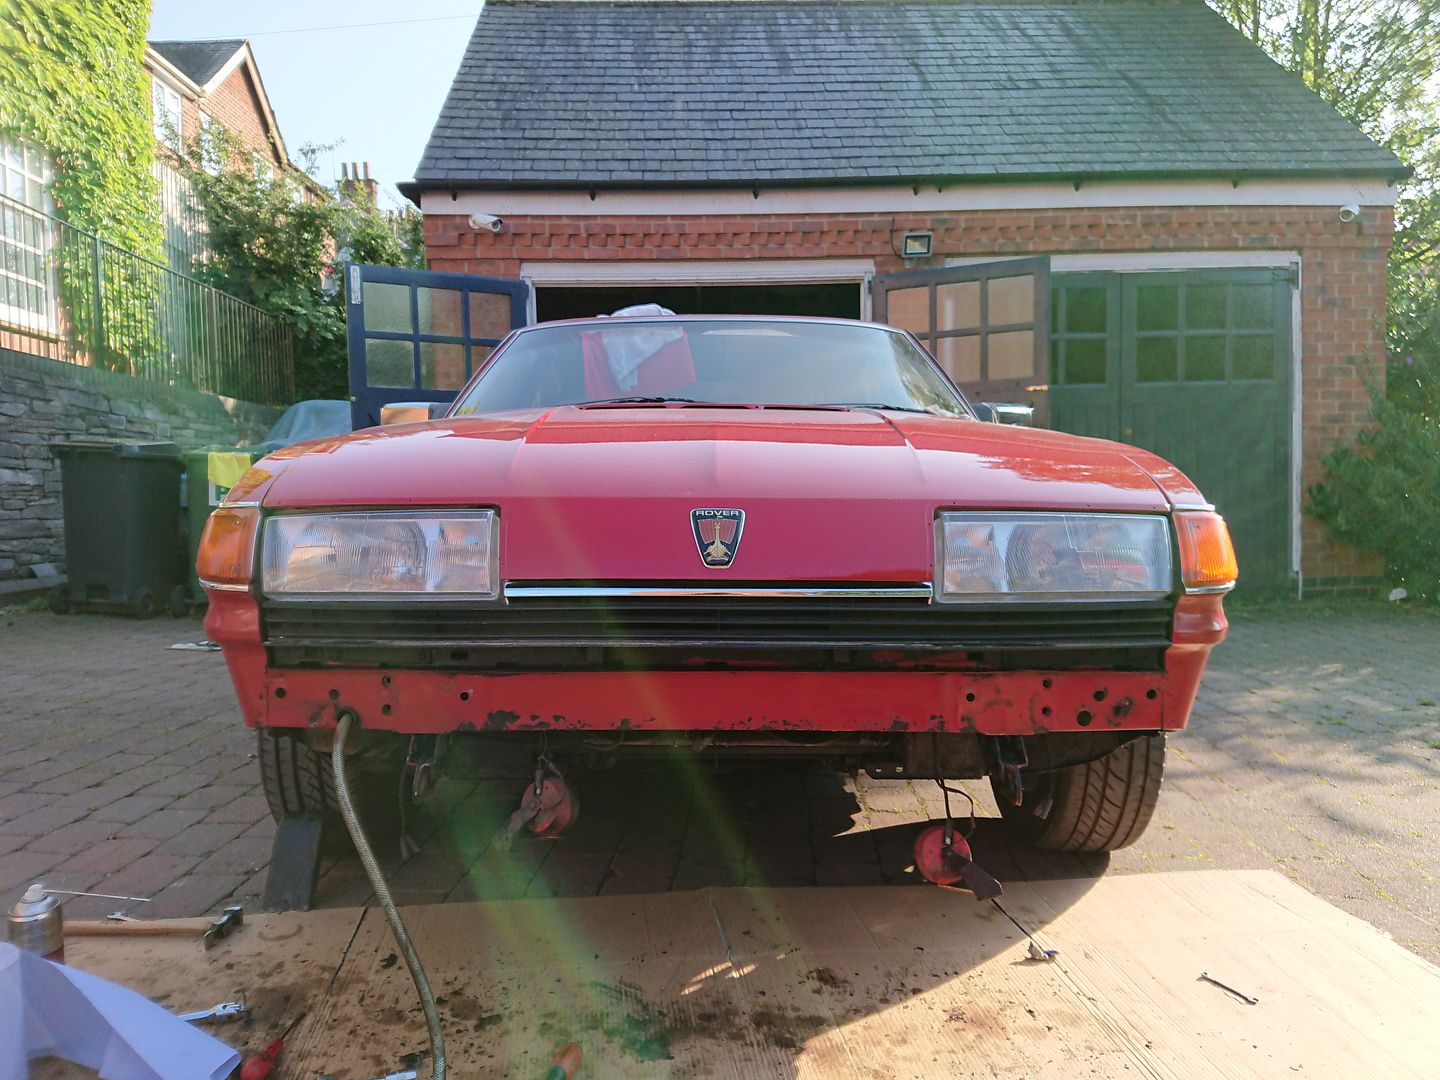
Revealing pretty much factory finish paint.

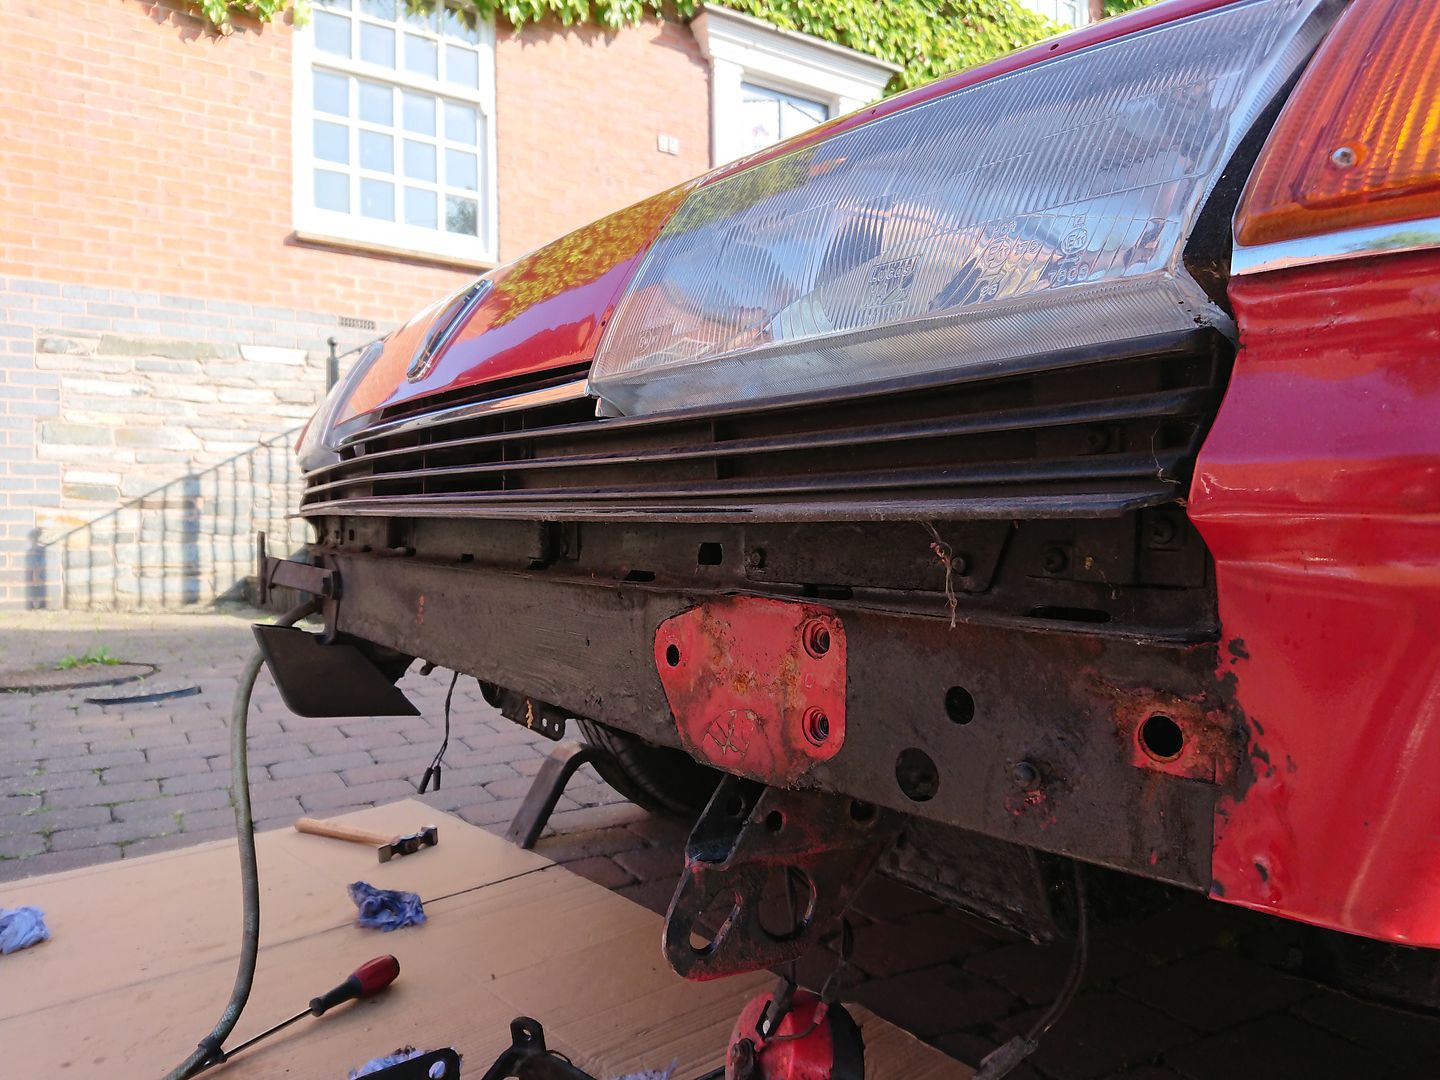
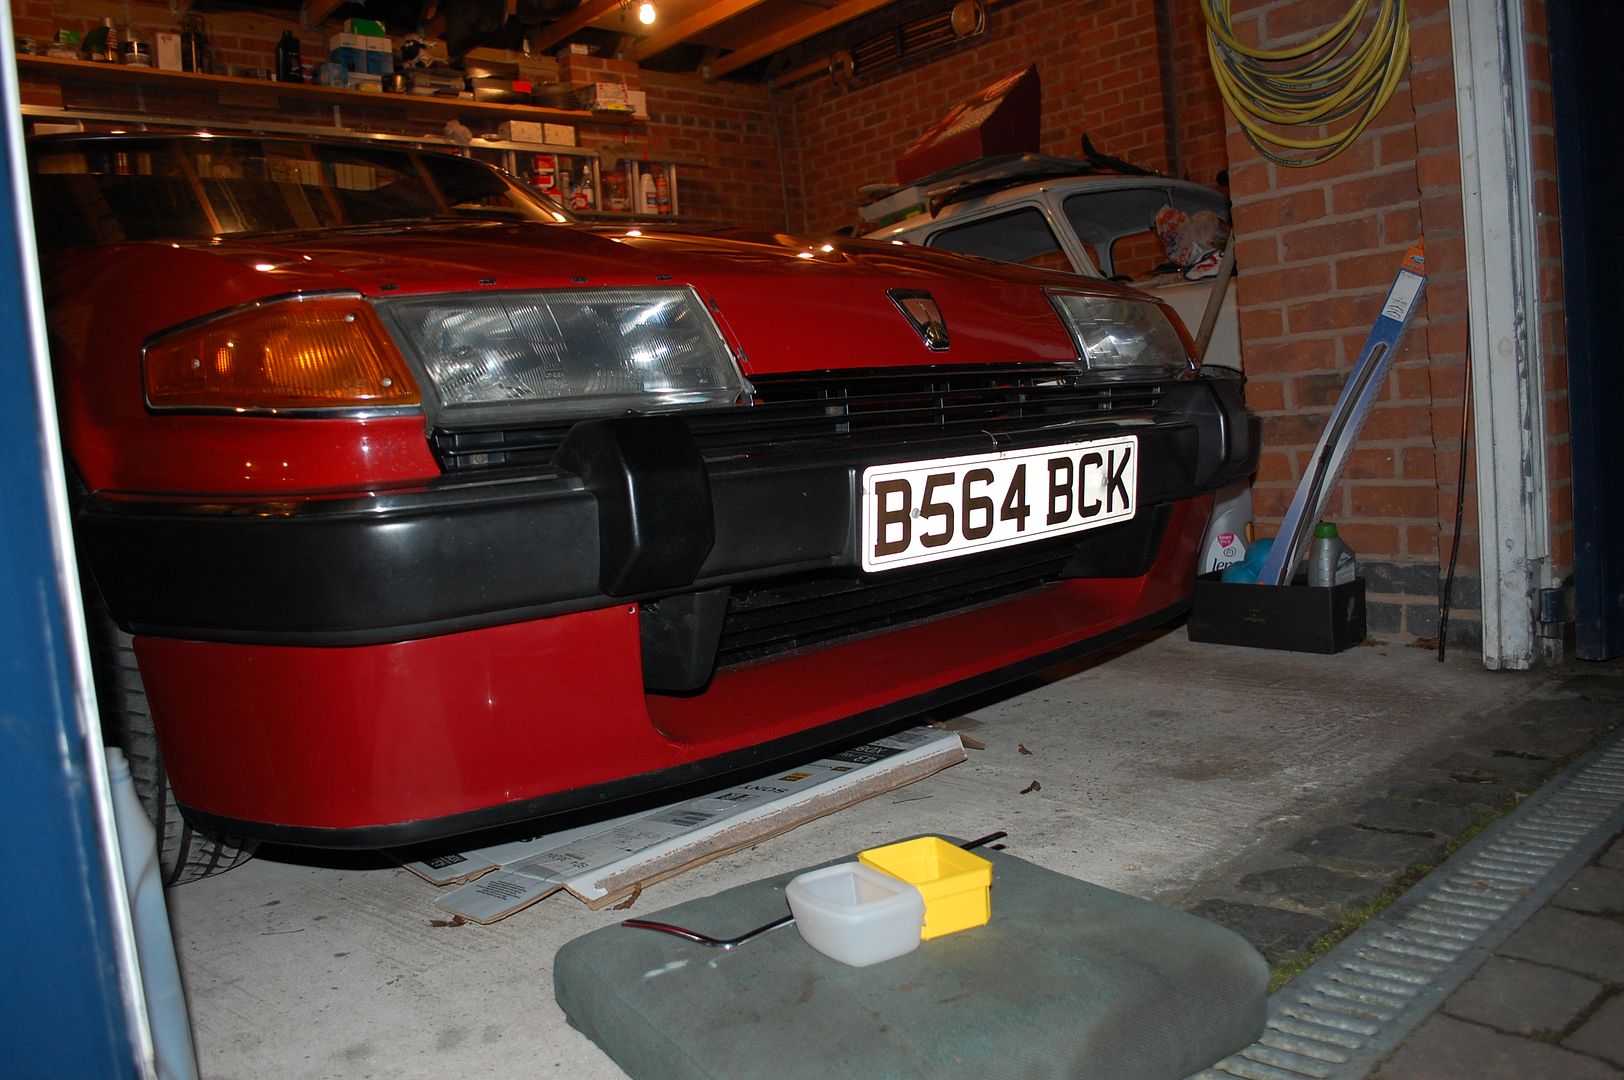
Off came the grill and out came the headlights. Lots more underseal behind those. The headlight brackets were awful!
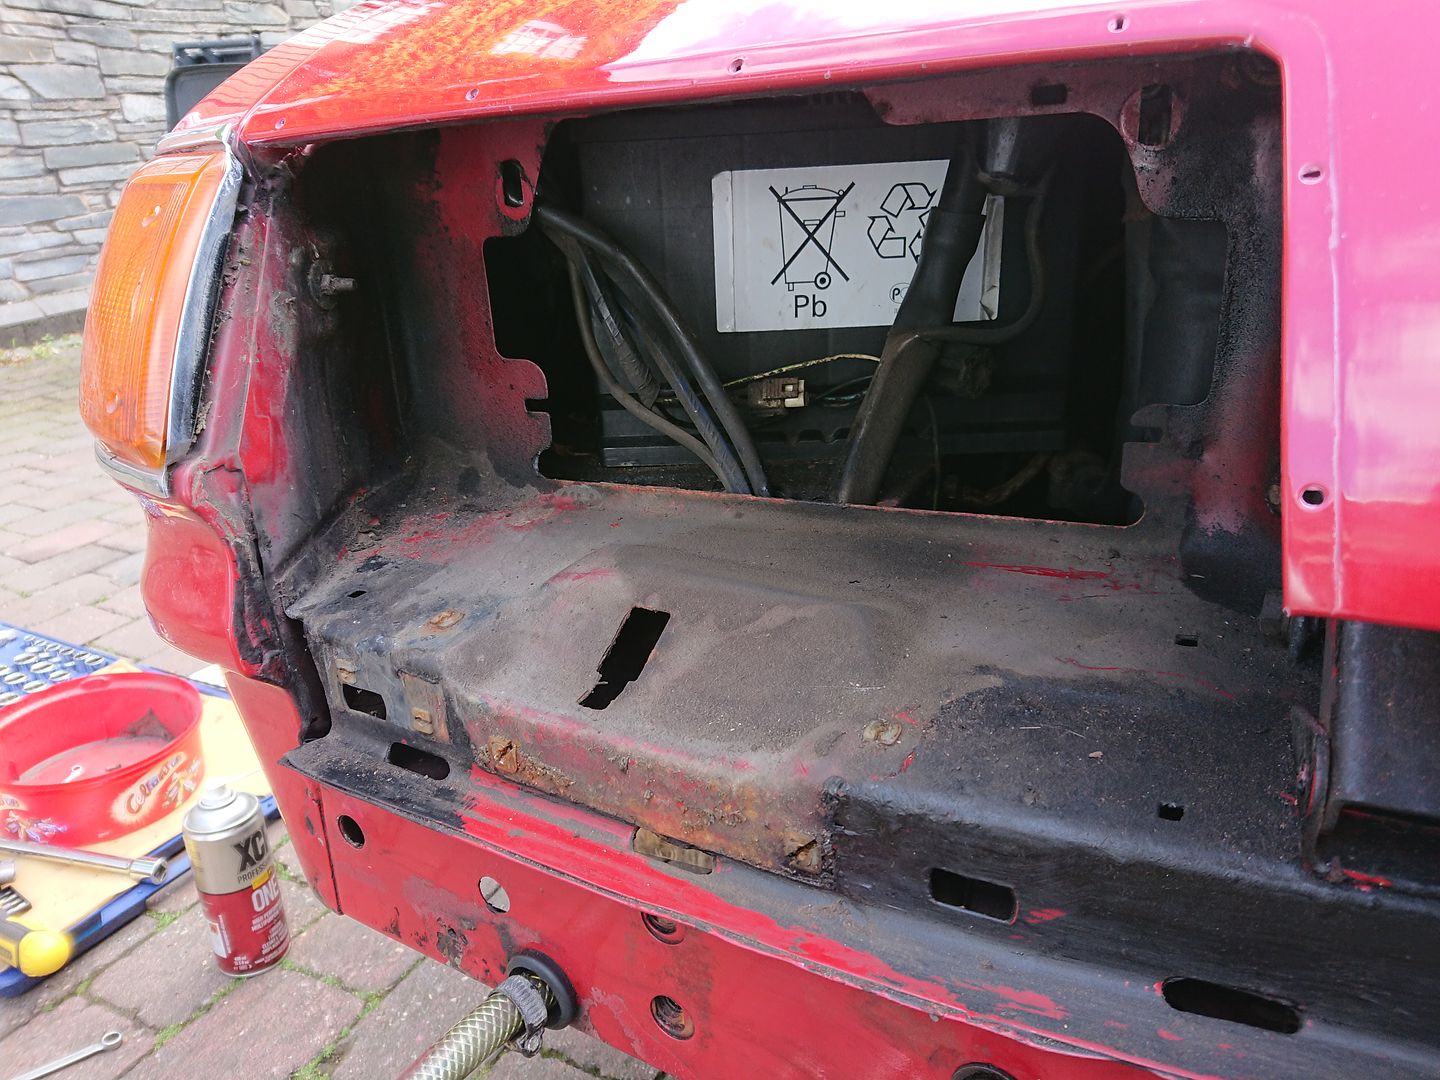
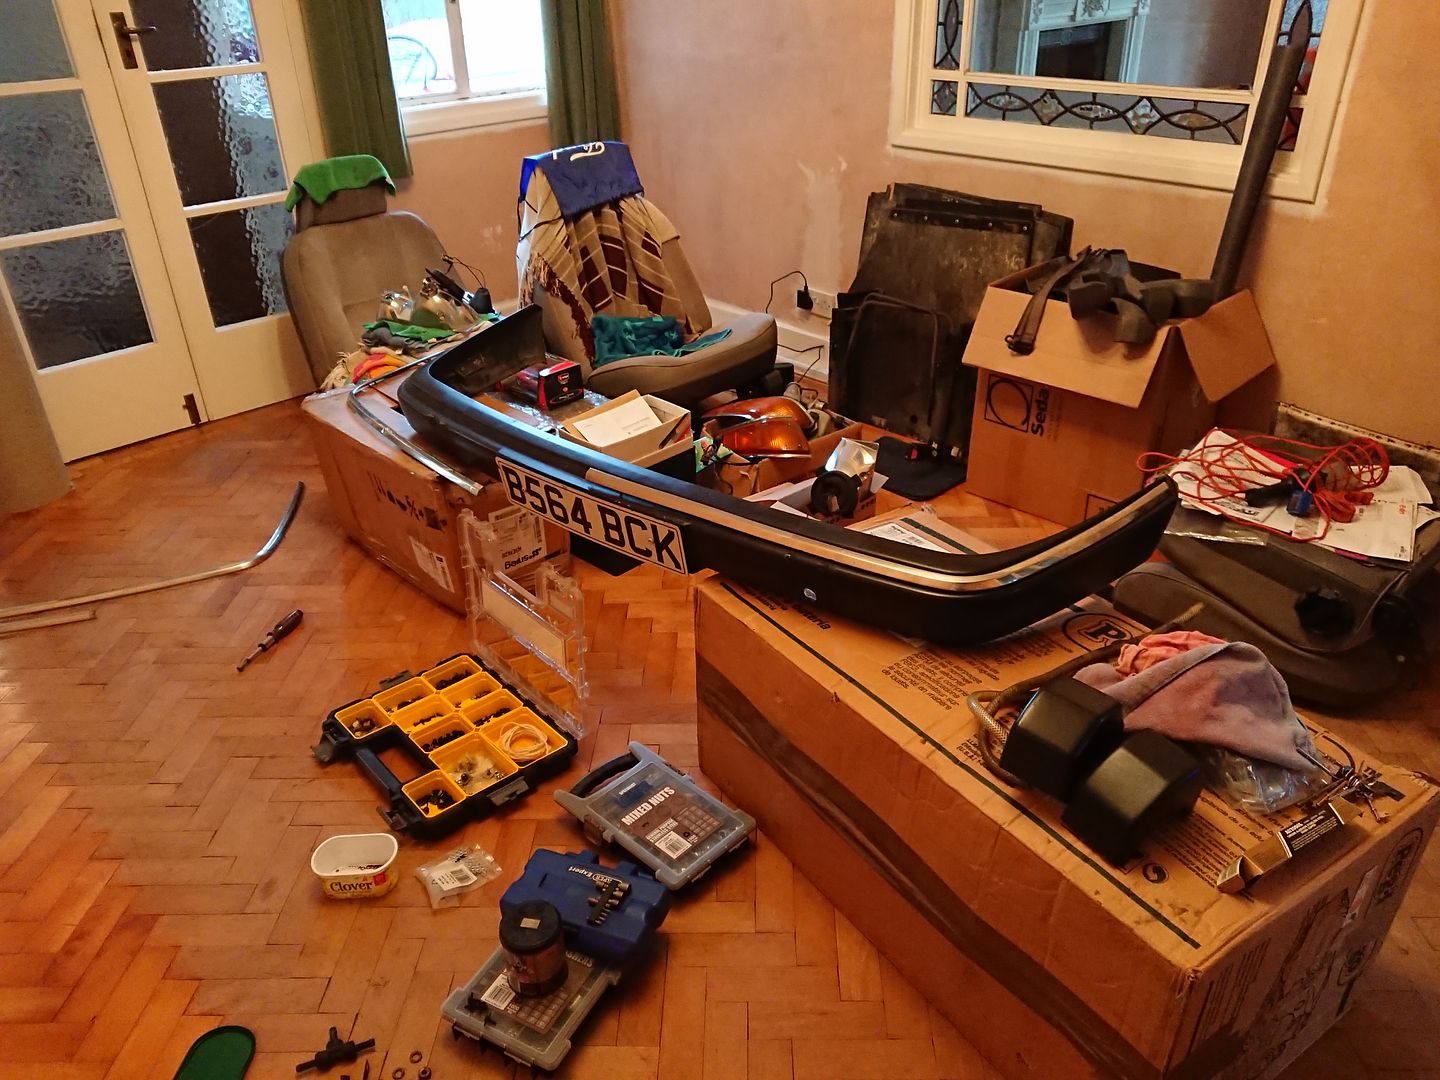
Everything bolted to the front of the car was completely stripped, a lot of time went into this!
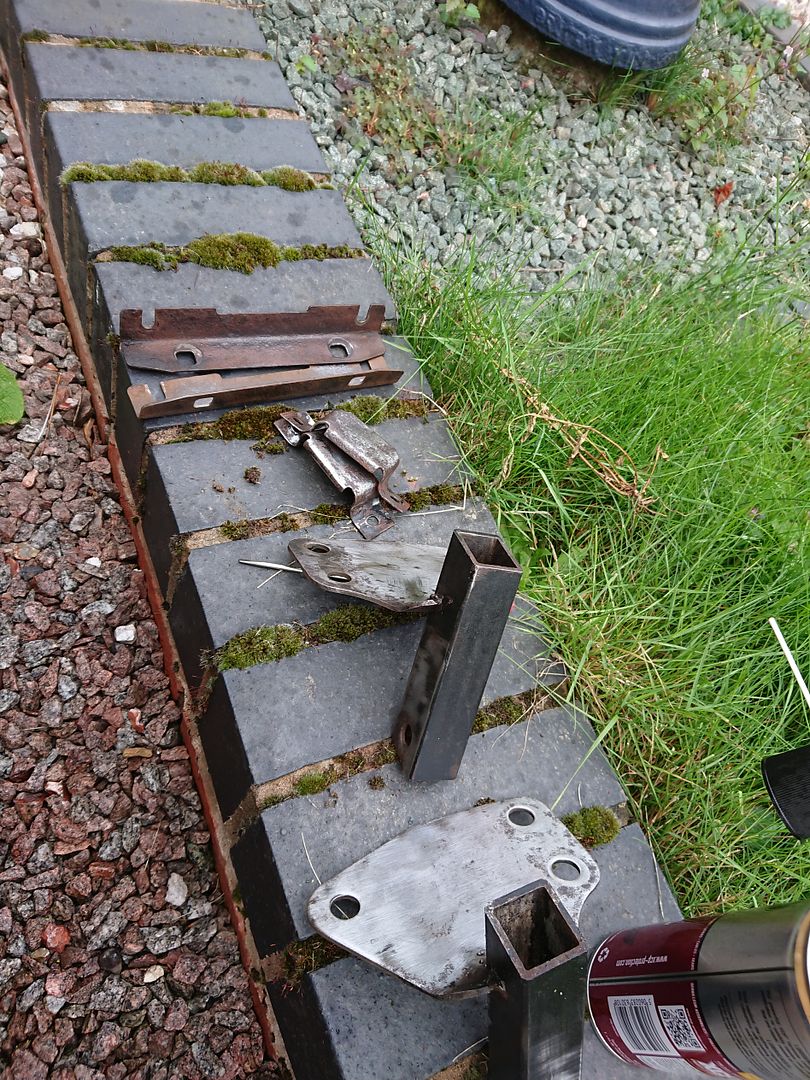
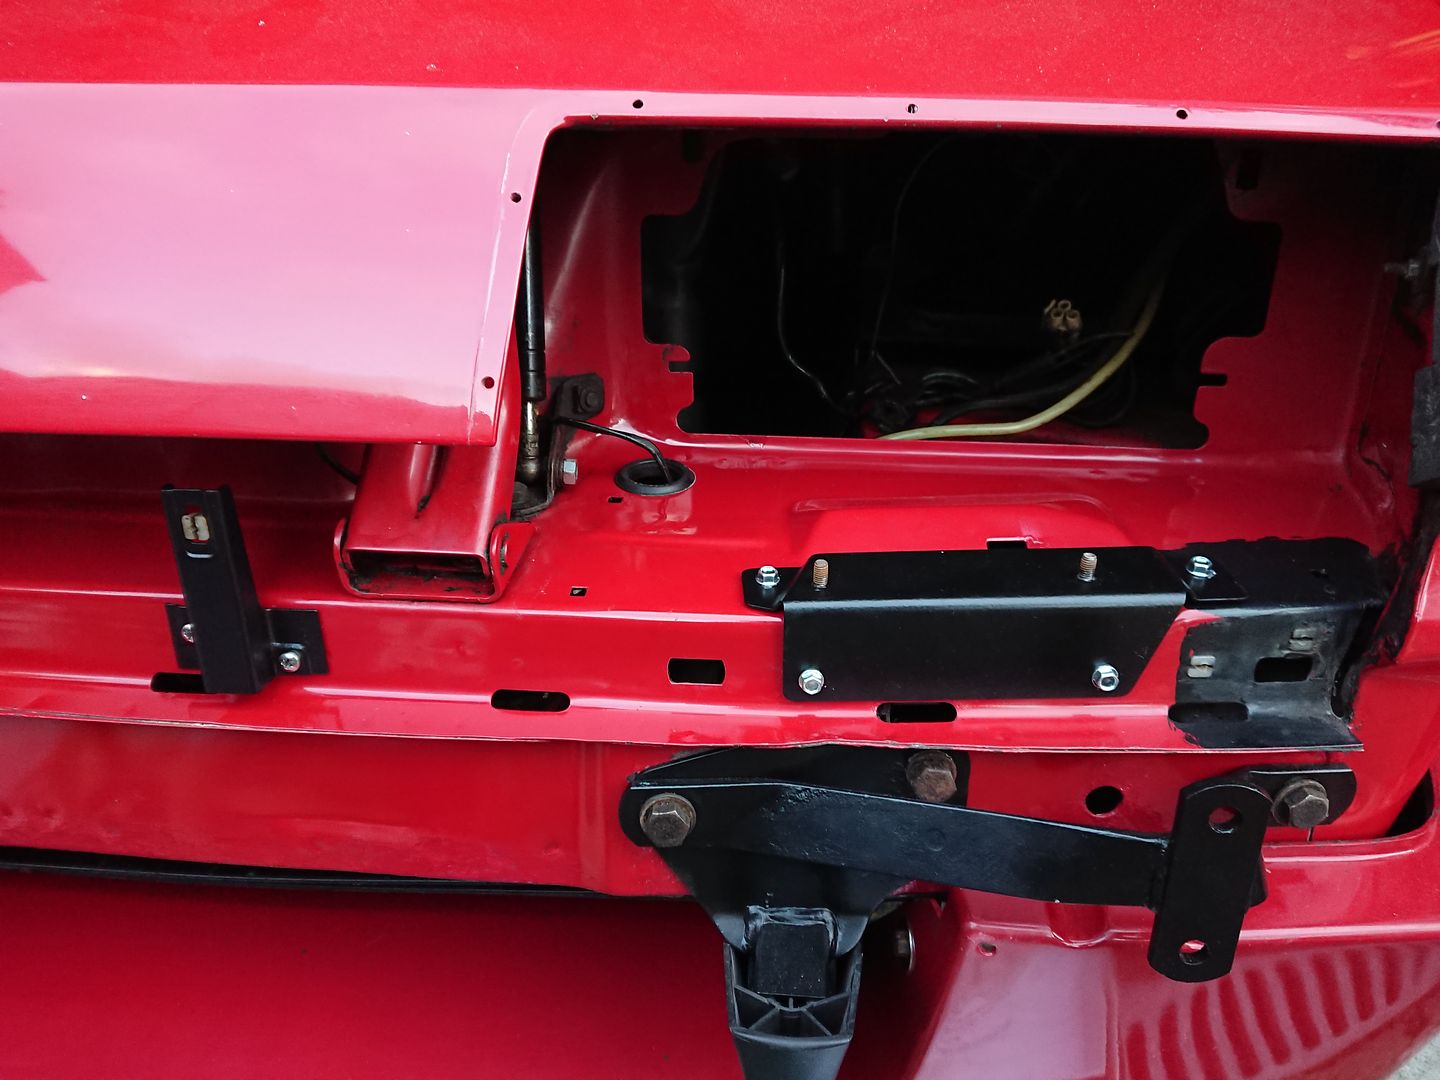
Where paint had come off I used the deox gel to remove any trace of rust before touching it back in.
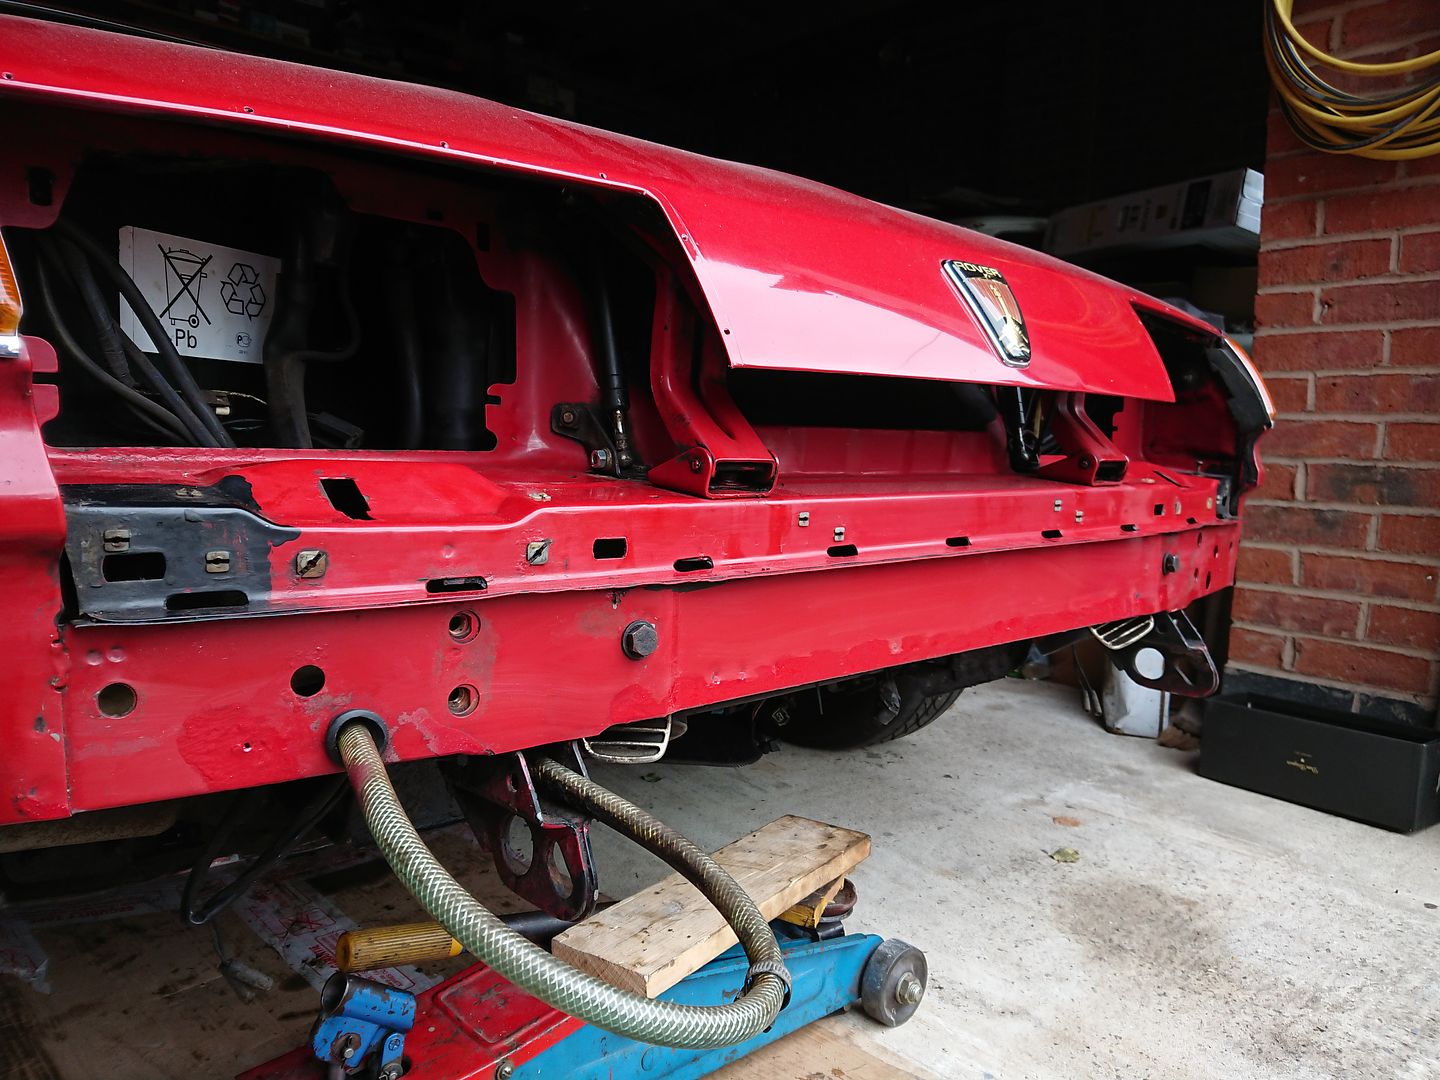
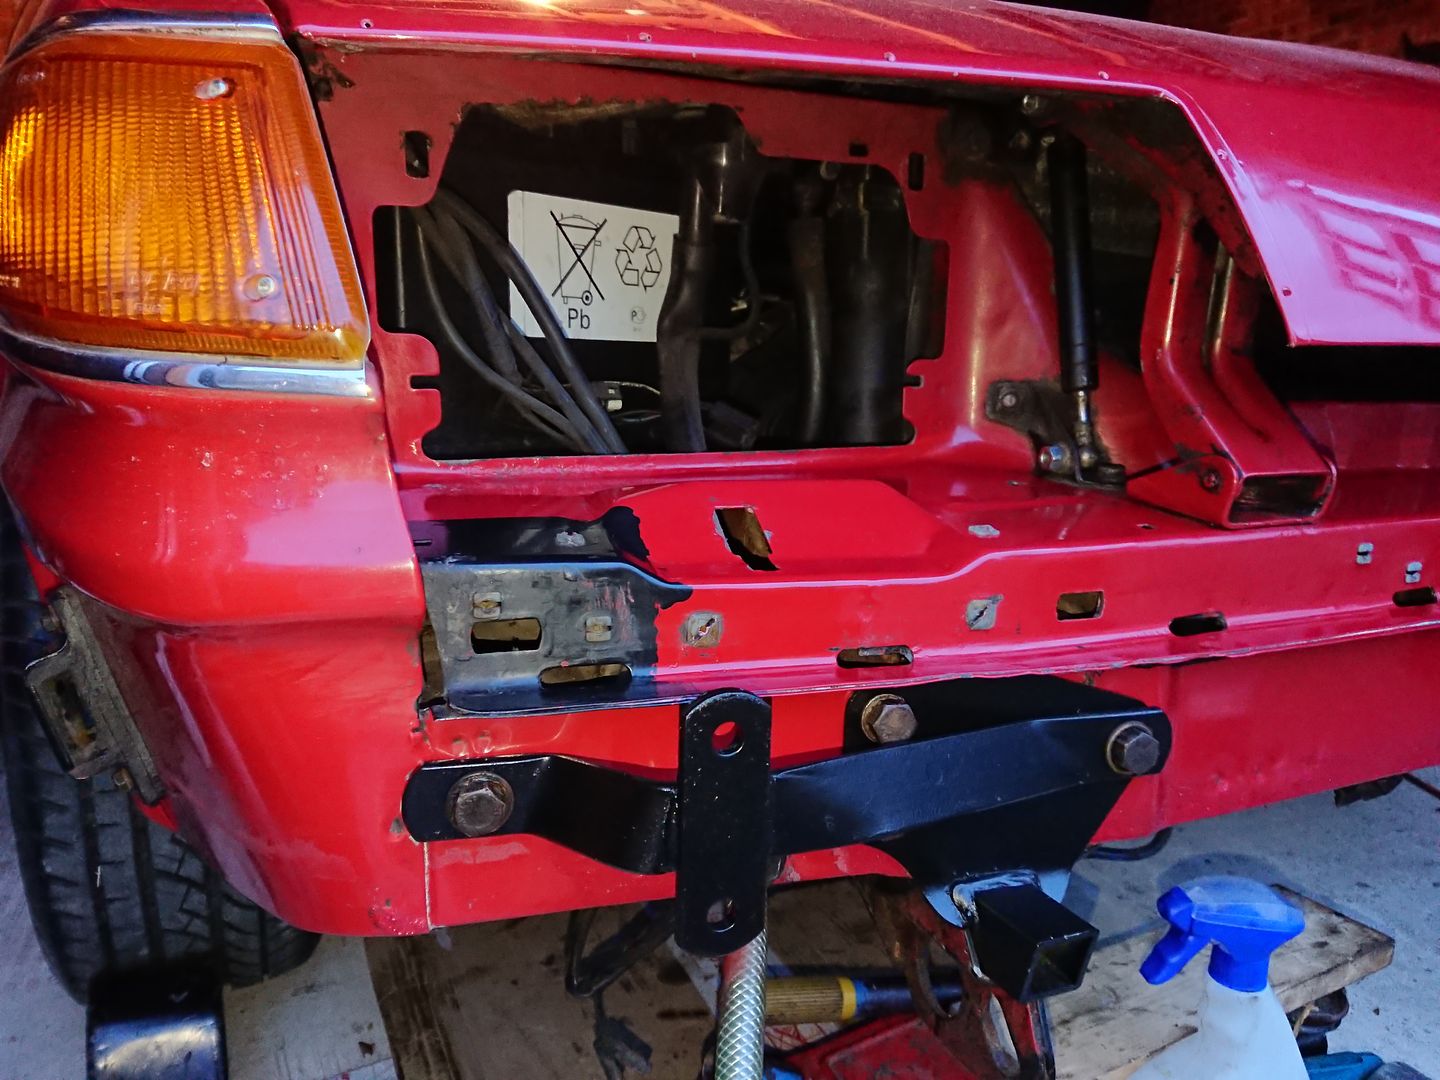
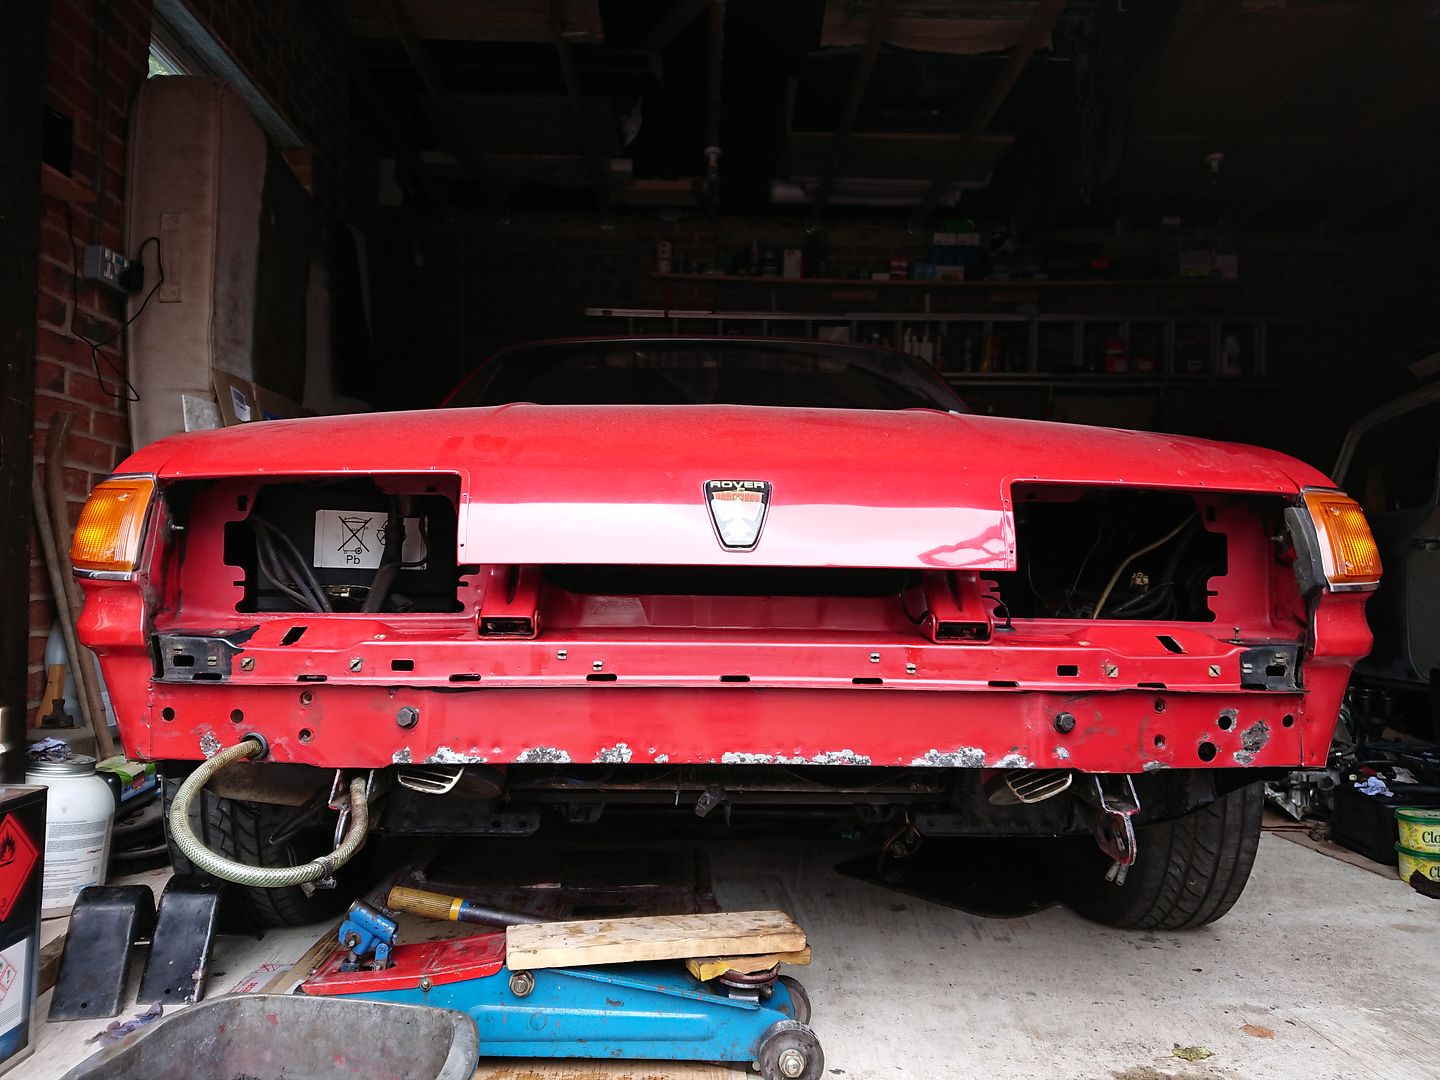
It's amazing how nicely the front panel came up just with cleaning it. I bolted the repainted bumper brackets back on, the other brackets needed a bit more work!
It's always the way with a project, that to move forward you end up making it look worse! Definitely worth doing though.
Joe


It was pretty gross. A previous owner had lathered the car in underseal, and although it had done a brilliant job of protecting the car, it did look awful.

It does come off with panel wipe though.

Revealing pretty much factory finish paint.

Off came the grill and out came the headlights. Lots more underseal behind those. The headlight brackets were awful!

Everything bolted to the front of the car was completely stripped, a lot of time went into this!


Where paint had come off I used the deox gel to remove any trace of rust before touching it back in.


It's amazing how nicely the front panel came up just with cleaning it. I bolted the repainted bumper brackets back on, the other brackets needed a bit more work!

It's always the way with a project, that to move forward you end up making it look worse! Definitely worth doing though.
Joe
Edited by 1275 GT on Thursday 28th June 17:32
tonys said:
Great thread, good to see the progress being made.
I had V8 SD1s back in the day (but not a Vitesse) when they were current and when the Vitesses first came out they certainly attracted attention, especially if in red. I'll confess to fitting a towbar to one of mine; they were great towcars at the time.
IIRC the ride height of the SD1 can be adversely affected by the rear self- levelling units, if the Vitesse actually had them (can't remember now). Personally I prefer the look at standard ride height, it's already reasonably low and were certainly noticeably lower than the other SD1models at the time, including the Vdp EFi.
Best modification I made to mine was to fit a 15" circular MotaLita wheel as I didn't like the standard wheel in either the Series 1 or Series 2. Made a huge difference.
Still sometimes regret not buying a lovely low-mileage red E-Reg one (so one of the last) that was for sale local to me when it was about 2-3 years old.
Keep up the good work.
I can completely understand the towing appeal, just not for me. I had V8 SD1s back in the day (but not a Vitesse) when they were current and when the Vitesses first came out they certainly attracted attention, especially if in red. I'll confess to fitting a towbar to one of mine; they were great towcars at the time.
IIRC the ride height of the SD1 can be adversely affected by the rear self- levelling units, if the Vitesse actually had them (can't remember now). Personally I prefer the look at standard ride height, it's already reasonably low and were certainly noticeably lower than the other SD1models at the time, including the Vdp EFi.
Best modification I made to mine was to fit a 15" circular MotaLita wheel as I didn't like the standard wheel in either the Series 1 or Series 2. Made a huge difference.
Still sometimes regret not buying a lovely low-mileage red E-Reg one (so one of the last) that was for sale local to me when it was about 2-3 years old.
Keep up the good work.
Yes the rear Nivomat self levelling rear suspension can fail high or low, mines currently at standard Vitesse height, and will stay that way.
I've got both the round North America SD1 steering wheel (NAS), and a black 15" Mota-Lita waiting...
Now I bet that would have been an amazing car, there was a black E reg Vitesse on ebay last week with 20k miles on it, I'd have loved to add that to my garage....
_dobbo_ said:
I like this thread a lot!
Thankyou! Usget said:
Especially in this colour, I really struggle to think of too many cars better looking than the SD1. What a fabulous machine.
I've been spending a lot of time looking at it recently, still has some real presence. I have to admit I really wanted a black one! Joe
Engine time!
With the front end disassembled I figured it was the best time to put the engine back together. Before assembly though I had some more cleaning to do.
First was the intake manifold.

With the plenum top removed you get to see the intake trumpets in all their glory.
A common problem with injection SD1s, and early injection Range Rovers is the heater pipe that runs under the plenum corrodes. This causes a coolant leak onto the valley gasket, as seen on my car. The offending pipe is shown below.

Now this design was revised quite early on on the Range Rovers, ducting the coolant pipes around the inlet manifold, but this requires a different intake manifold. So repairing the original gets quite tricky as parts are almost impossible to find. But i found a few...

Refitted back onto the original manifold.
Next up was the tappets.

The replacement engine had had an appalling oil service regiment, and clattered badly. Hydraulic tappets require clean uncontaminated oil to work properly, and required complete disassembly to clean all the oil gunge out of them.


All replaced back onto the camshaft with plenty of assembly lube.

OEM metal head gaskets where used to try and keep what little compression is left in the old motor.

Cylinder heads where thoroughly cleaned, and had new valve stem seals fitted.

Heads on.


Later style composite valley gasket with the new end seals.

Inlet manifold on.

Polished my trumpets...

Plenum top on, and most things buttoned up.

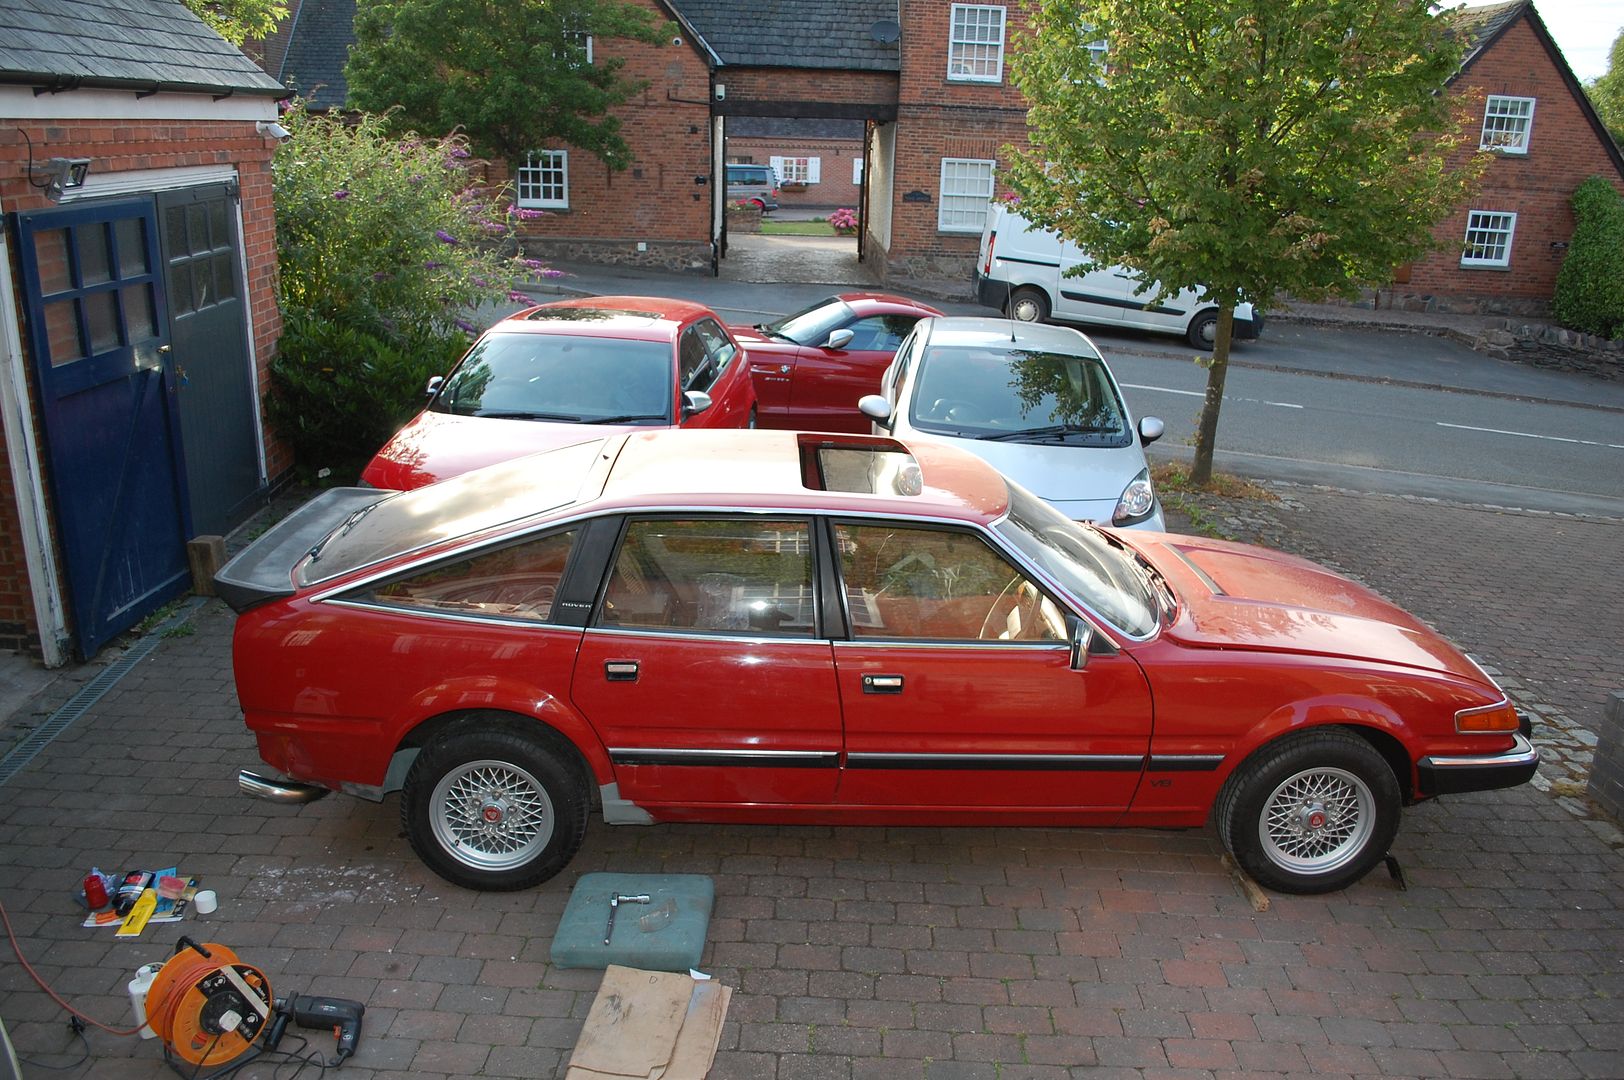
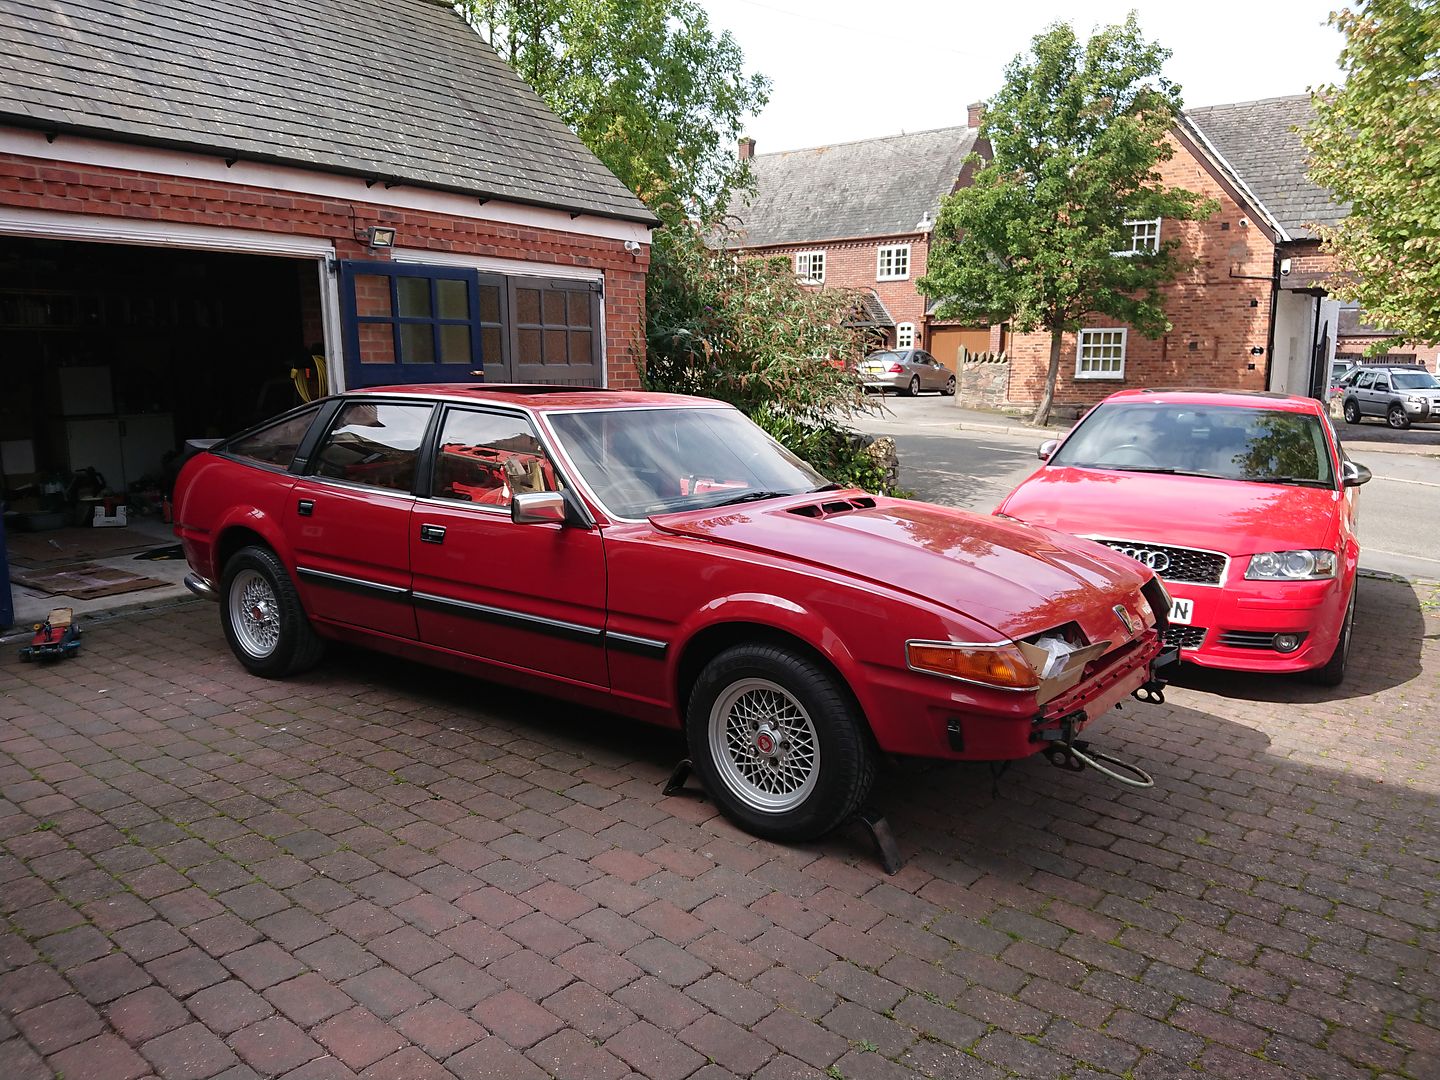
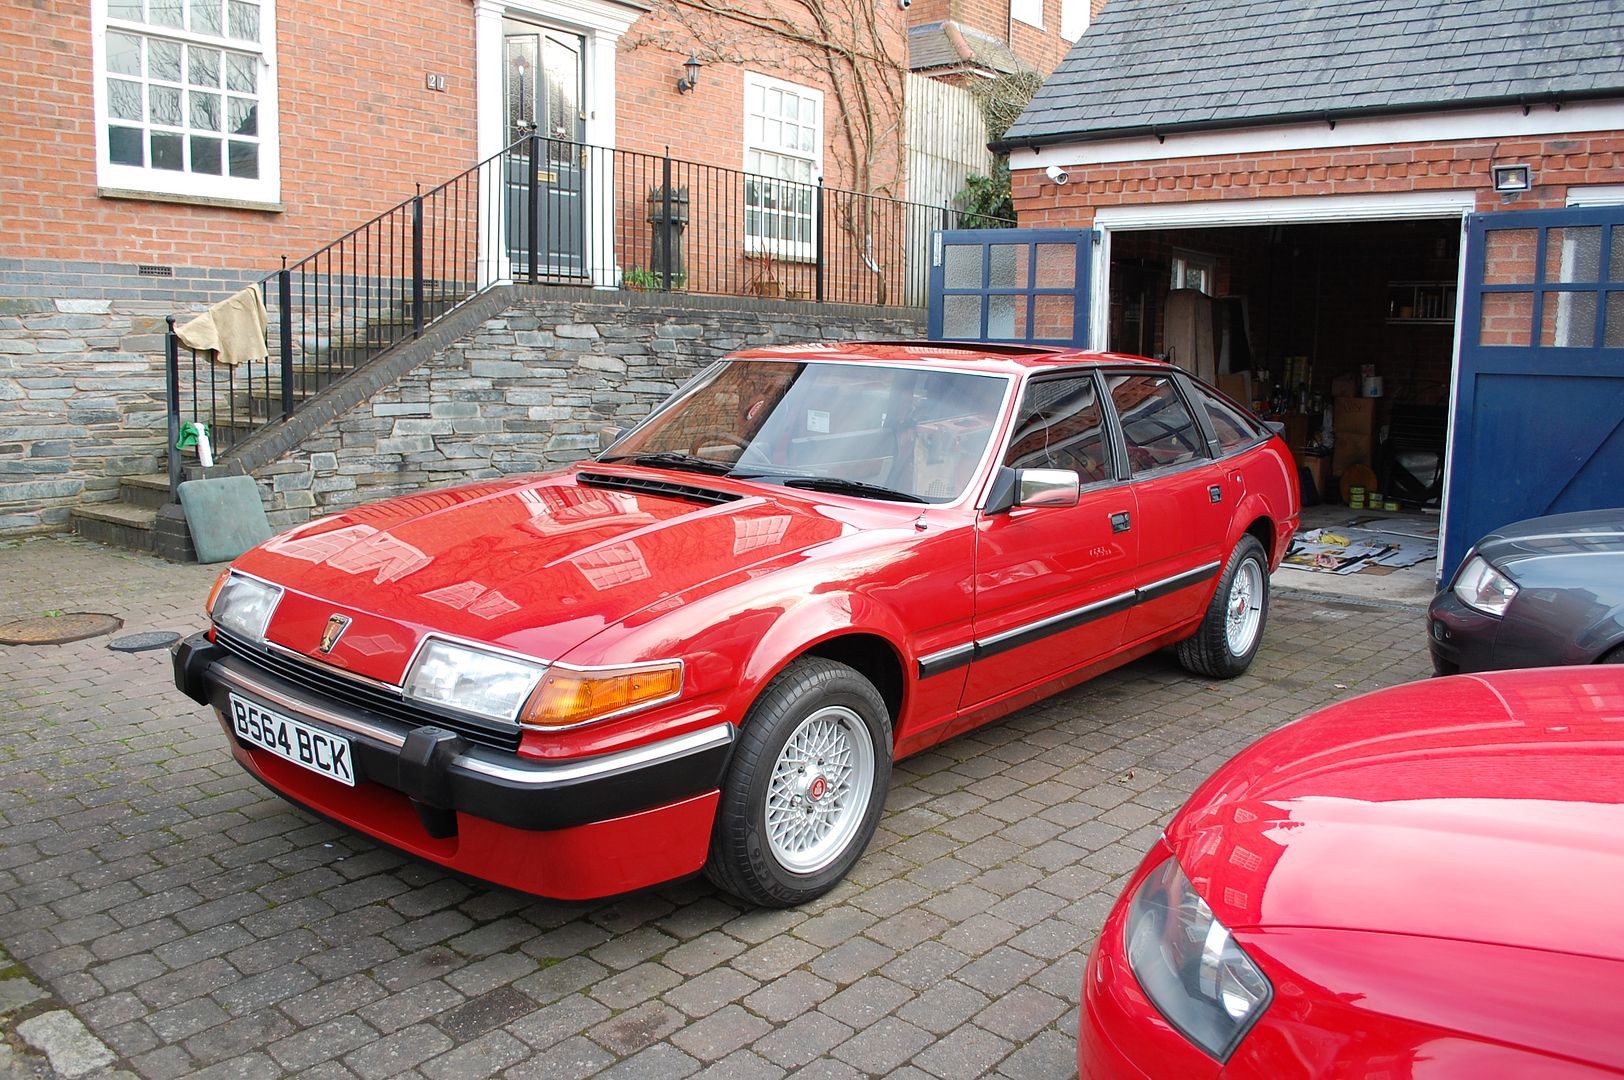
Driveway with lots of red cars and silver mirrors. Really happy with the way the engine went back together, and how the car looks with its repairs. Still lots to do though!
Joe
With the front end disassembled I figured it was the best time to put the engine back together. Before assembly though I had some more cleaning to do.
First was the intake manifold.

With the plenum top removed you get to see the intake trumpets in all their glory.
A common problem with injection SD1s, and early injection Range Rovers is the heater pipe that runs under the plenum corrodes. This causes a coolant leak onto the valley gasket, as seen on my car. The offending pipe is shown below.

Now this design was revised quite early on on the Range Rovers, ducting the coolant pipes around the inlet manifold, but this requires a different intake manifold. So repairing the original gets quite tricky as parts are almost impossible to find. But i found a few...

Refitted back onto the original manifold.
Next up was the tappets.

The replacement engine had had an appalling oil service regiment, and clattered badly. Hydraulic tappets require clean uncontaminated oil to work properly, and required complete disassembly to clean all the oil gunge out of them.


All replaced back onto the camshaft with plenty of assembly lube.

OEM metal head gaskets where used to try and keep what little compression is left in the old motor.

Cylinder heads where thoroughly cleaned, and had new valve stem seals fitted.

Heads on.


Later style composite valley gasket with the new end seals.

Inlet manifold on.

Polished my trumpets...

Plenum top on, and most things buttoned up.

Driveway with lots of red cars and silver mirrors. Really happy with the way the engine went back together, and how the car looks with its repairs. Still lots to do though!
Joe
Northern.N said:
Hit me up on the old book of faces mate. We can sort something I’m sure!
Glad to see you’re keeping well and up to great things as per usual
I will do, hopefully get it mobile very soon. Thanks man, its a bit nicer than my turd of a 1275GT! Glad to see you’re keeping well and up to great things as per usual
Good to see you've still got a scooby, was horrible to see what happened to your last one.
Grahamdub said:
Shame you can't leave it like that 
Good work on an excellent car !
I thought that too, really looks cool when you popped the bonnet. Good work on an excellent car !
Watchman said:
My friend's Vitesse was black and admittedly it did look good in a Darth Vader way but my Dad's 2600 was the same red as yours which I think is the pick of the bunch. It sets it aside from modern dull-coloured cars (like my own - black) and being as yours is so clean and perfect, it'll absolutely shine wherever you take it.
It does add a slightly more menacing look, but I'm sure the red will be too, and I think black cars are the worst to maintain paint wise maybe one day though. I don't think there's a bad Vitesse colour, I'd have a silver or blue in a flash. My dad's old SD1 was in Moonraker Blue, amazing colour. Joe
Like anyone who's just put an engine together I wanted to hear it run!
This post is a bit wordy as I didn't take many pictures!
I'd been reading up on the Rover V8, and saw that if the engine spends a prolonged period of time sat, or drained in the incorrect order the pump doesn't self prime. The workshop manual tells you to pack the pump with vasoline. (Other petroleum jellies are available) Or spin the oil pump using an electric drill through the distributor drive. Since the engine had been sat disassembled for nearly a year I thought it wise to go through this procedure. Spinning with the drill did move oil around, but it wasn't as enthusiastic as I thought it would be. But it showed pressure on the gauge. I was expecting some tappet noise as these were installed dry to allow them to fill with oil to take up the clearances.
https://www.youtube.com/watch?v=qXf-wz_3pp8
This was after I'd got it running well enough to put a timing light on it. So still quite tappet-y. It did smooth out and sounded nice. I let it run for a while and get some heat into it. As it warmed up the tappet noise returned, and I watched the oil pressure gauge started to drop. I killed it immediately. Pulled the ignition and cranked it, the low oil light stayed on...
I tried re-priming it, pulled a rocker shaft off, no where near enough oil getting high in the engine.
I'd spent a lot of time reading up about the RV8s oiling system, a high volume low pressure arrangement that did suffer from low pressure early on in its life. But by the SD1 it shouldn't have any problems. So I had an issue.
I feared a damaged oil pump and pulled it. A few wear marks but nothing out of the ordinary.
I'd heard of people finding holes in the pickup pipe causing similar issues. I tried blowing into the oil feed, and didn't get as much resistance as I'd expect from blowing into oil, so next step off came the sump.

It is possible but tricky with everything still in the car. It sits very closely to the cross member.
What I found was the oil pick-up pipe just dangling there, seemed very odd, and had quite a bit of movement, the gasket for the pick-up pipe was also damaged.
On the baffle plate there was a clean square that definitely looked like there should be something there...

The picture is when i was reassembling hence the stud, it was also missing.
I found a picture online of what it should look like, and had a feeling I'd seen it before. I went to the box of miscellaneous parts when I bought the car.

This is what was missing. I was so angry.
Whoever had installed the engine (and swapped the Range Rover sump and pick-up for the SD1 items) had really done a c**p job.

With a new gasket, the support makes a massive difference to the pick-up.
At least it gave me a chance to clean the sump up and fit a new gasket.


All reassembled new gaskets all round, pump packed with vasoline and primed using the priming tool and a drill. It nearly pulled the drill out of my hand when it started pumping oil. I then pulled the rocker covers to check, I had oil properly coming out of the rockers.
This had dragged on for a month, problem shooting and working out solutions. It also required a few trips to get the required gaskets and parts needed.
What a bloody faff!
Firing it all reassembled and it making good strong oil pressure was very satisfying, I let it warm up and it still made oil pressure.
Very relieving.
Joe
I'm glad people are still enjoying my ramblings, I couldn't believe it when I found all the extra bits, the excuse they gave is the removed the air con bracketry, and put it all in a box.
Luckily they did such a terrible job installing the replacement long block it didn't run for more than a couple of minutes at a time, probably saved the engine.
I don't actually have a good video of it running, as it then spent a lot of time in the garage when the temperature plummeted late last year.
https://www.youtube.com/watch?v=ZzHX1koNuPk
I did get a short interior video though.
I feel like I'm jumping the gun, but people always like a little preview. I'm writing all this after the fact, and I'll continue with the work as I've still got 8 months worth of pictures to go!
But the Rover did go for its MOT today...
Passed with no advisories!
Joe
Luckily they did such a terrible job installing the replacement long block it didn't run for more than a couple of minutes at a time, probably saved the engine.
I don't actually have a good video of it running, as it then spent a lot of time in the garage when the temperature plummeted late last year.
https://www.youtube.com/watch?v=ZzHX1koNuPk
I did get a short interior video though.
I feel like I'm jumping the gun, but people always like a little preview. I'm writing all this after the fact, and I'll continue with the work as I've still got 8 months worth of pictures to go!
But the Rover did go for its MOT today...

Passed with no advisories!
Joe
Edited by 1275 GT on Friday 29th June 00:14
Mr Tidy said:
Great news, but after all that work I never expected anything else!
I wish it was smooth sailing, but it was the first time I'd driven it since doing all the work. Found quite a few running issues and leaks which I had to turn around and sort before taking it back to be tested. But I got there in the end. acme said:
In and amongst all the childish arguing that goes on on PH (& that I try my best to avoid!), occasionally a thread appears that reminds me why I joined this site, and this is it in spades!
Like most I've read it all from the start, absolutely cracking work, fantastic that you can do the work yourself and clearly with the attention such a car deserves.
I remember my father coming home with one as a demo, the dash amazed me as a kid in the 80's, he stuck with his 24v Senators but I still have a fond memory of that Rover! Not forgetting it was my first Matchbox car!
Keep the great work up
I do love PistonHeads, but I agree some of the squabbling can get a bit silly. I tend to leave that side well alone. I like to just stick to the cars.Like most I've read it all from the start, absolutely cracking work, fantastic that you can do the work yourself and clearly with the attention such a car deserves.
I remember my father coming home with one as a demo, the dash amazed me as a kid in the 80's, he stuck with his 24v Senators but I still have a fond memory of that Rover! Not forgetting it was my first Matchbox car!
Keep the great work up
I really enjoy working on stuff myself, that way I can take as much time as it needs and guarantee I'm happy with the work.
I've never been in a senator, would make for an interesting comparison. I still have my corgi SD1 that I've had since I can remember!
Watchman said:
It's incredible how relevant it still looks. Doesn't look out of place amongst modern cars.
Incidentally, I had a 1275GT once too.
It did get quite a few looks when I parked it up and I agree, it has aged well! Incidentally, I had a 1275GT once too.
I love my GT's and they do look good together!

lockhart flawse said:
Cracking job Joe. She looks great!
Much appreciated, I'm so happy with how it turned out. TRIUMPHBULLET said:
Top marks for keeping the old lady on the road chap,loved them years ago and had a few myself.
Turned to the dark side a few years back but its still got the rv8 in it.
Good to hear! I'm actually trying to source a TR7 for a friend at the moment, definitely the SD1's kindred spirit, the construction is so similar. Turned to the dark side a few years back but its still got the rv8 in it.
Joe
lockhart flawse said:
What sort of work do you plan to get into when you graduate (?)?
I actually graduate in 2 weeks time, and start as a Quality Engineer for a major auto manufacturer next week. So it'll be a big change for me. langtounlad said:
There must be a mistake in that photo. 
The mini isn't red and doesn't have chrome door mirrors!
I assume it must be a work in progress.
That did make me laugh, as much as I like to keep a theme going, I'm not painting that mini! The mini isn't red and doesn't have chrome door mirrors!
I assume it must be a work in progress.
So while I'm out enjoying the car I'll carry on with the work.
With the entire front end disassembled it seemed silly not to refresh things.

First up was the anti-roll bar.
I had actually acquired a full polybush kit in the various spares I've been buying up, so why not throw them on. New track rods are a no-brainer, and everything else is freshly painted.


You can also see the original aircon condenser and pusher fans that aircon cars got. It all looks a bit grotty but I'd love to get it working one day.
Next up was the area under the battery.


It cleaned up remarkably well, but I could see some surface rust below. This is hidden behind the headlight washer bottle, with it removed it revealed some more surface corrosion.

There wasn't a lot of paint applied in there!

Usual process applied, with rust removed.

Battery tray was also treated and primed.

A nice dusting of paint, and a bit more on the battery tray!

These jobs are almost unseen, but preventing any further corrosion from coming through is definitely worth the time.
Joe
Edited by 1275 GT on Sunday 8th July 23:14
Thankyou for the kind words, it did end up being quite a bit more work than I was expecting, but then when isn't it!?
DRFC1879, I have to admit I did have to Google your user name, did made my laugh though.
This is a very satisfying post, as I finally get to put stuff back onto the car.
First up was the undertray.
The one I removed was suitably horrible, with overspray and a few broken fixing areas.
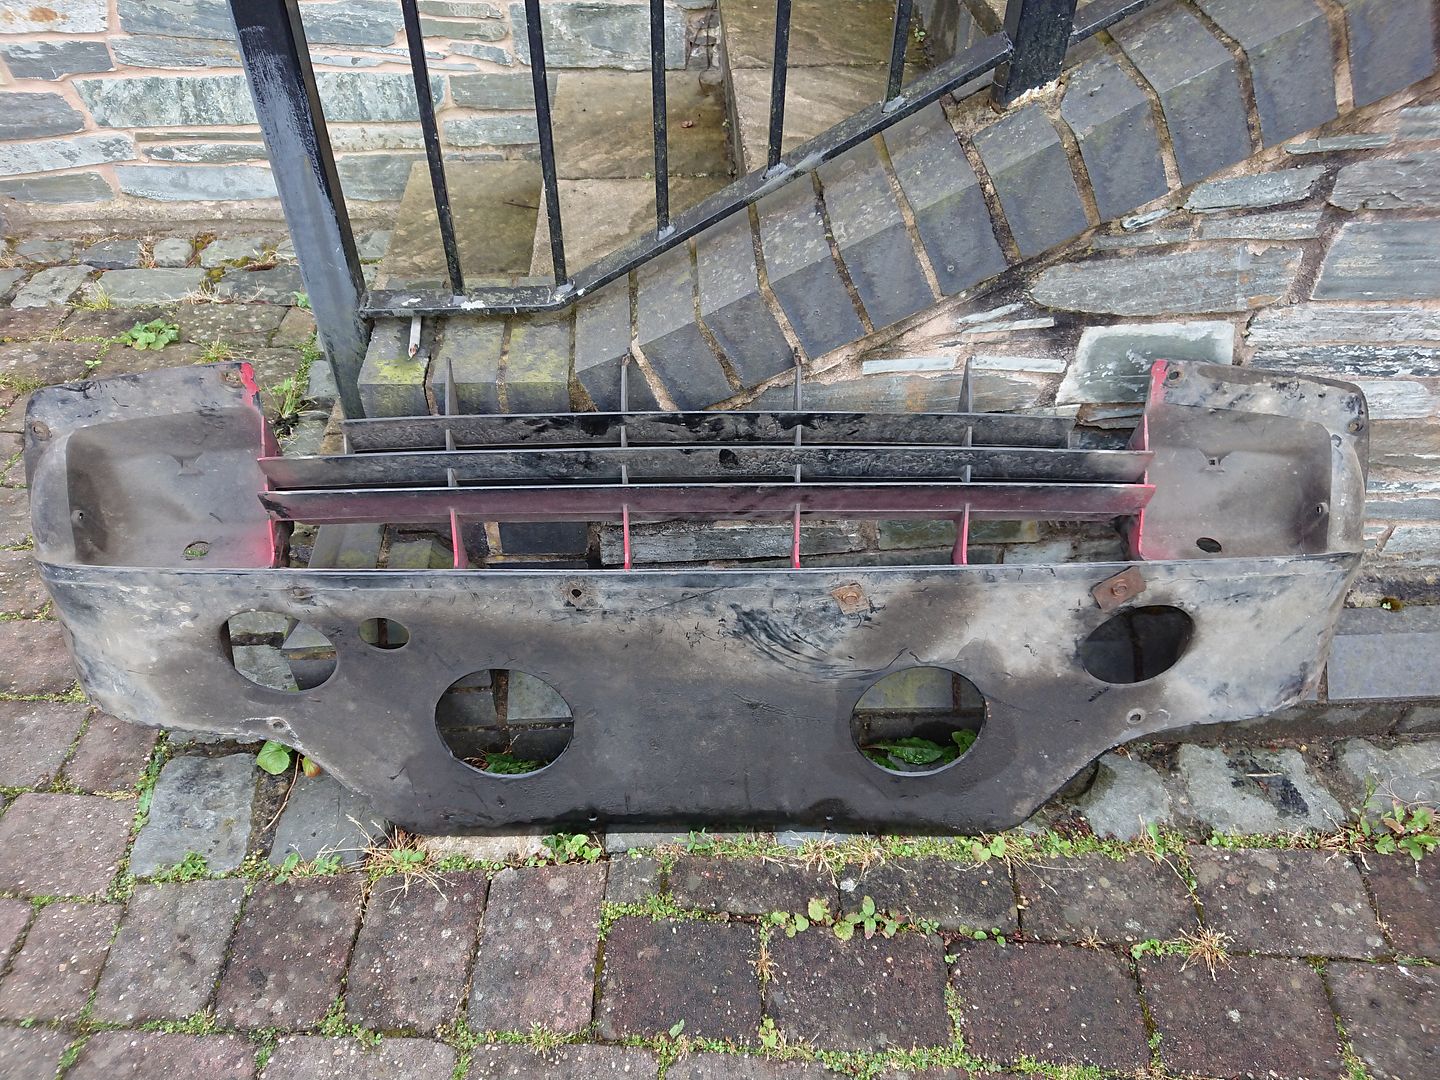
You can actually still buy these new, so I did! I had ordered one to be collected from the Classic Car Show at the NEC, but when I got home one of the tabs had some damage. So on one of my many trips to Rimmer Bros to collect engine gaskets I took it back and they let me swap it for as nicer one from their stock. I also did the same for the new front grill I bought. The guy on the desk got so bored of bringing out what he thought were good ones only to be rejected again, he just let me go and pick my own.
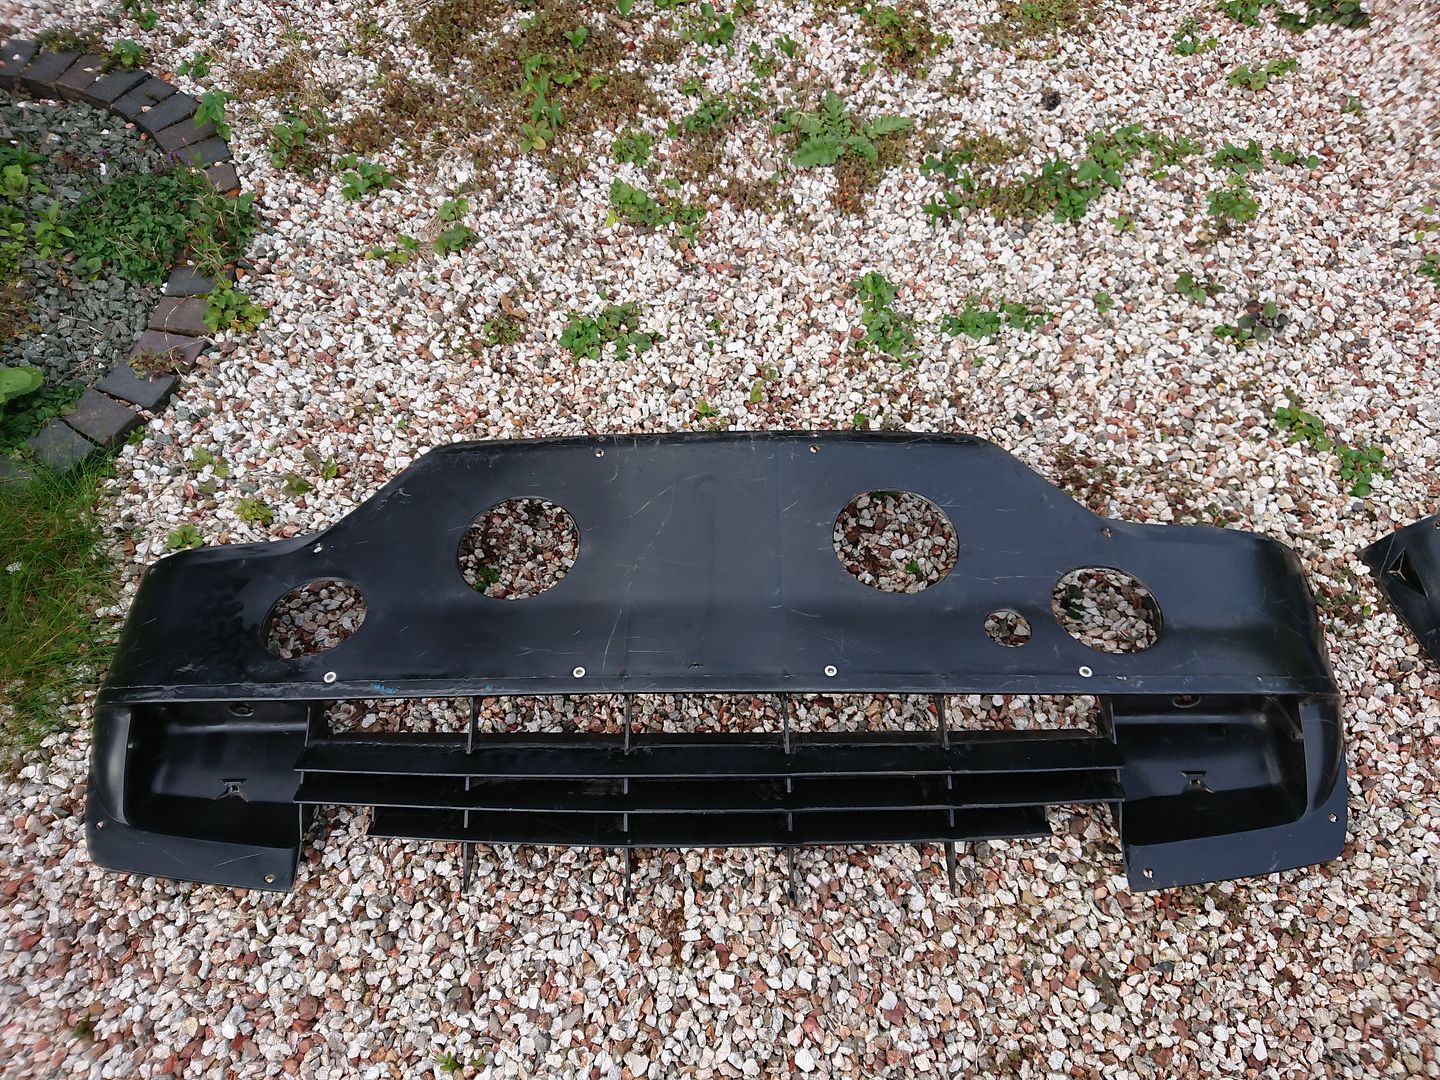
They come absolutely filthy, and require some serious cleaning to get to this stage, it's still got some marks in the plastic, but they're almost unseen and much better than what came off.
Next up was the headlight bracketry. These have captive studs that usually shears, and mine where particularly gross, and I didn't manage to get them off in one piece. Luckily you can buy these NOS, but definitely an emphasis on the old.
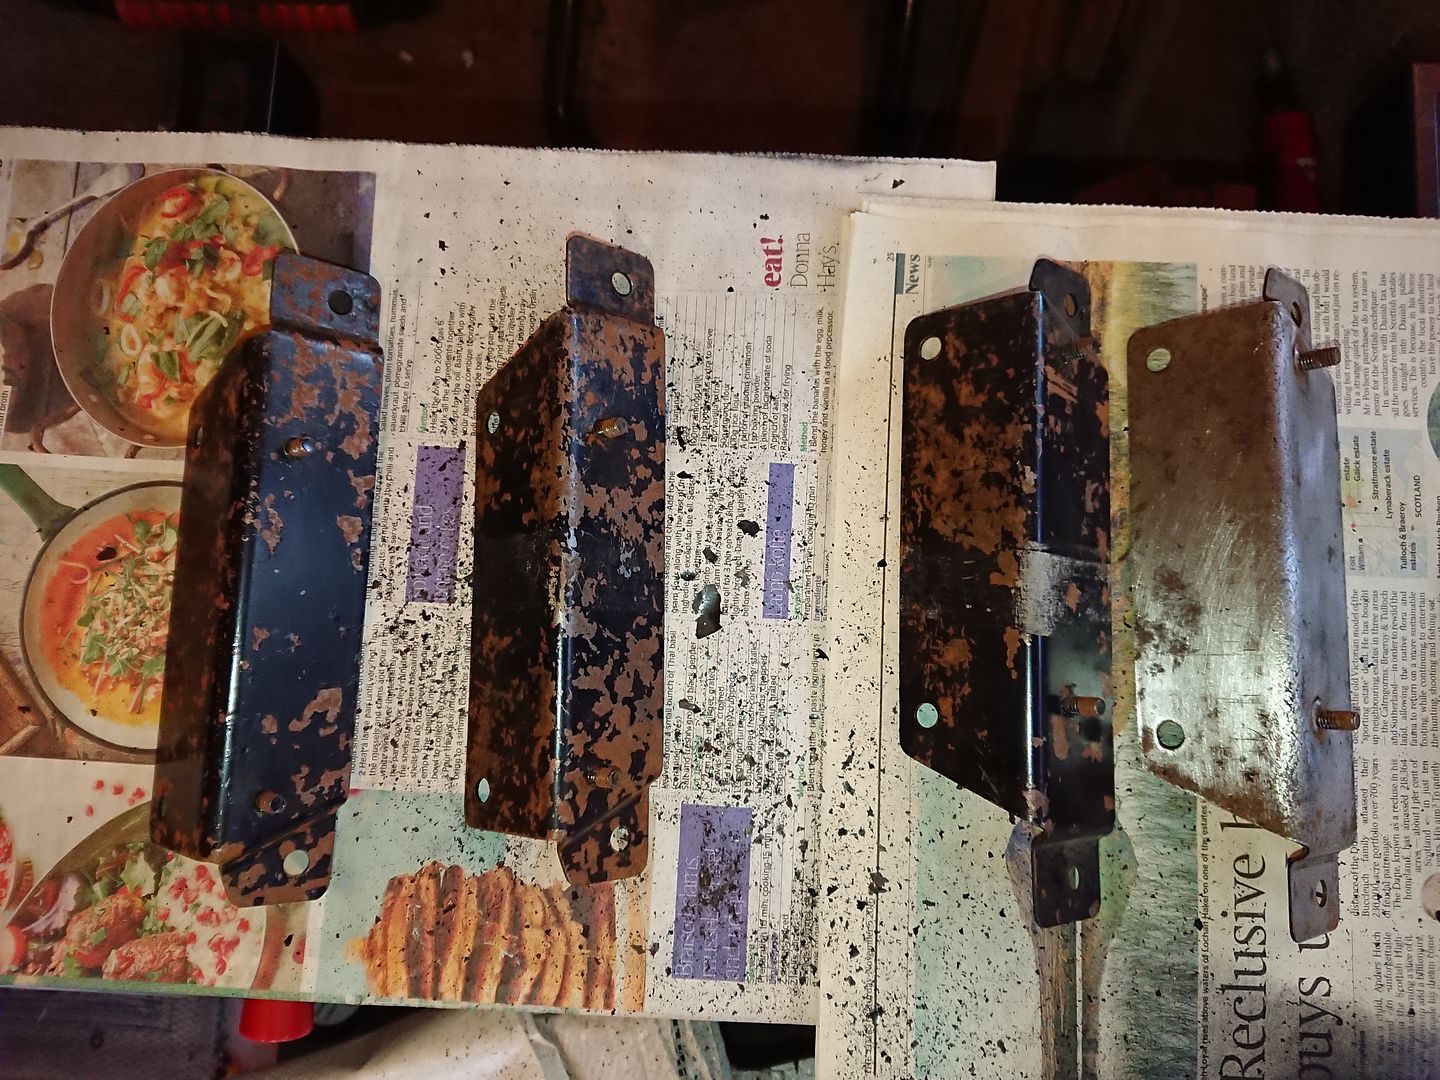
The bracket on the left is as they come. If that's the factory finish it's no wonder they rust to pieces!
As you can see I'd already started to strip them completely ready for a much more durable finish.
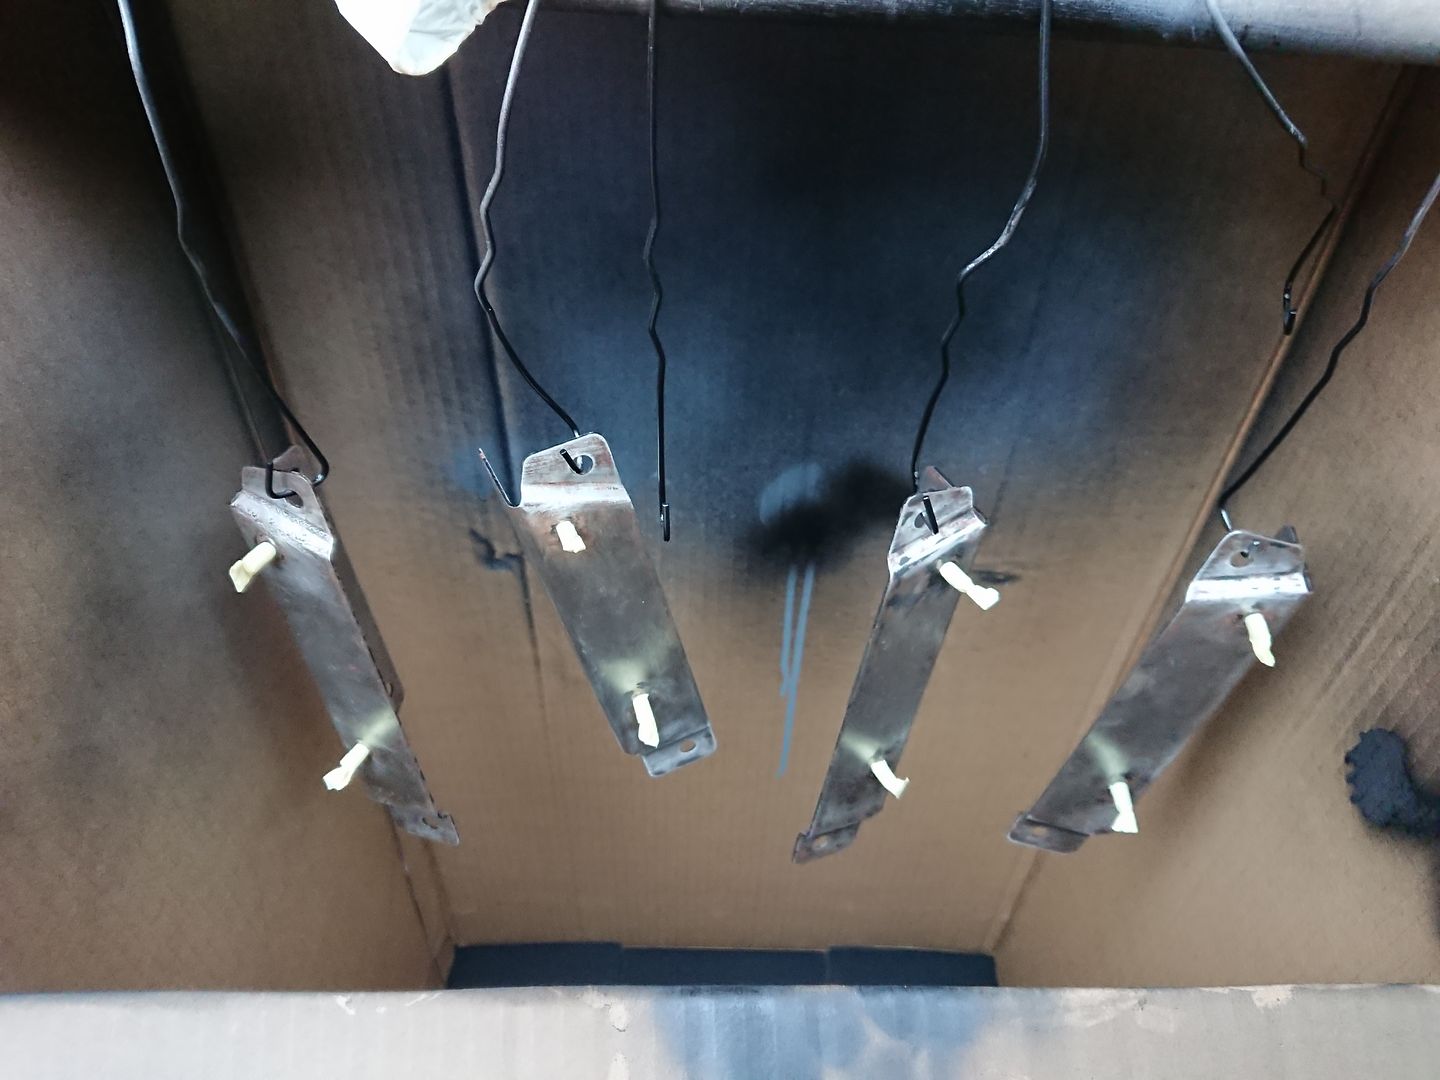
All stripped ready for paint.
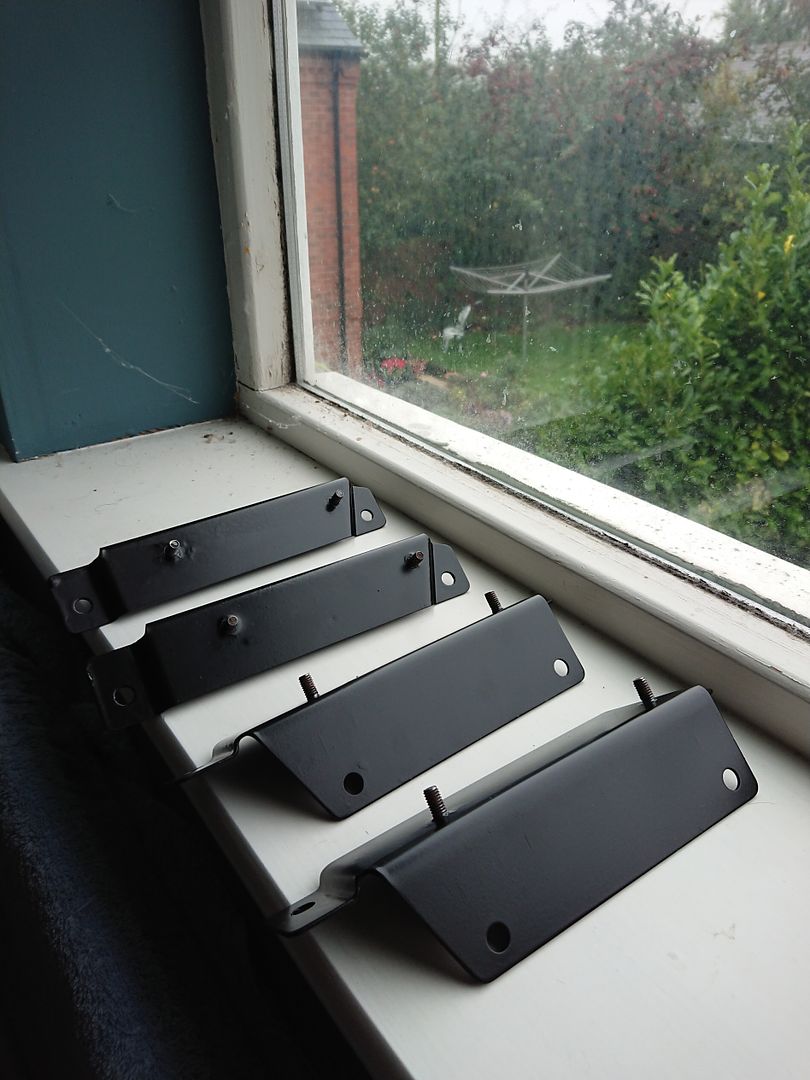
Treated, primed, and top coated in lovely satin black.
The new undertray bolted on very nicely, and actually has riv-nuts ready for the bottom spoiler attachment, makes fitting the spoiler much easier.
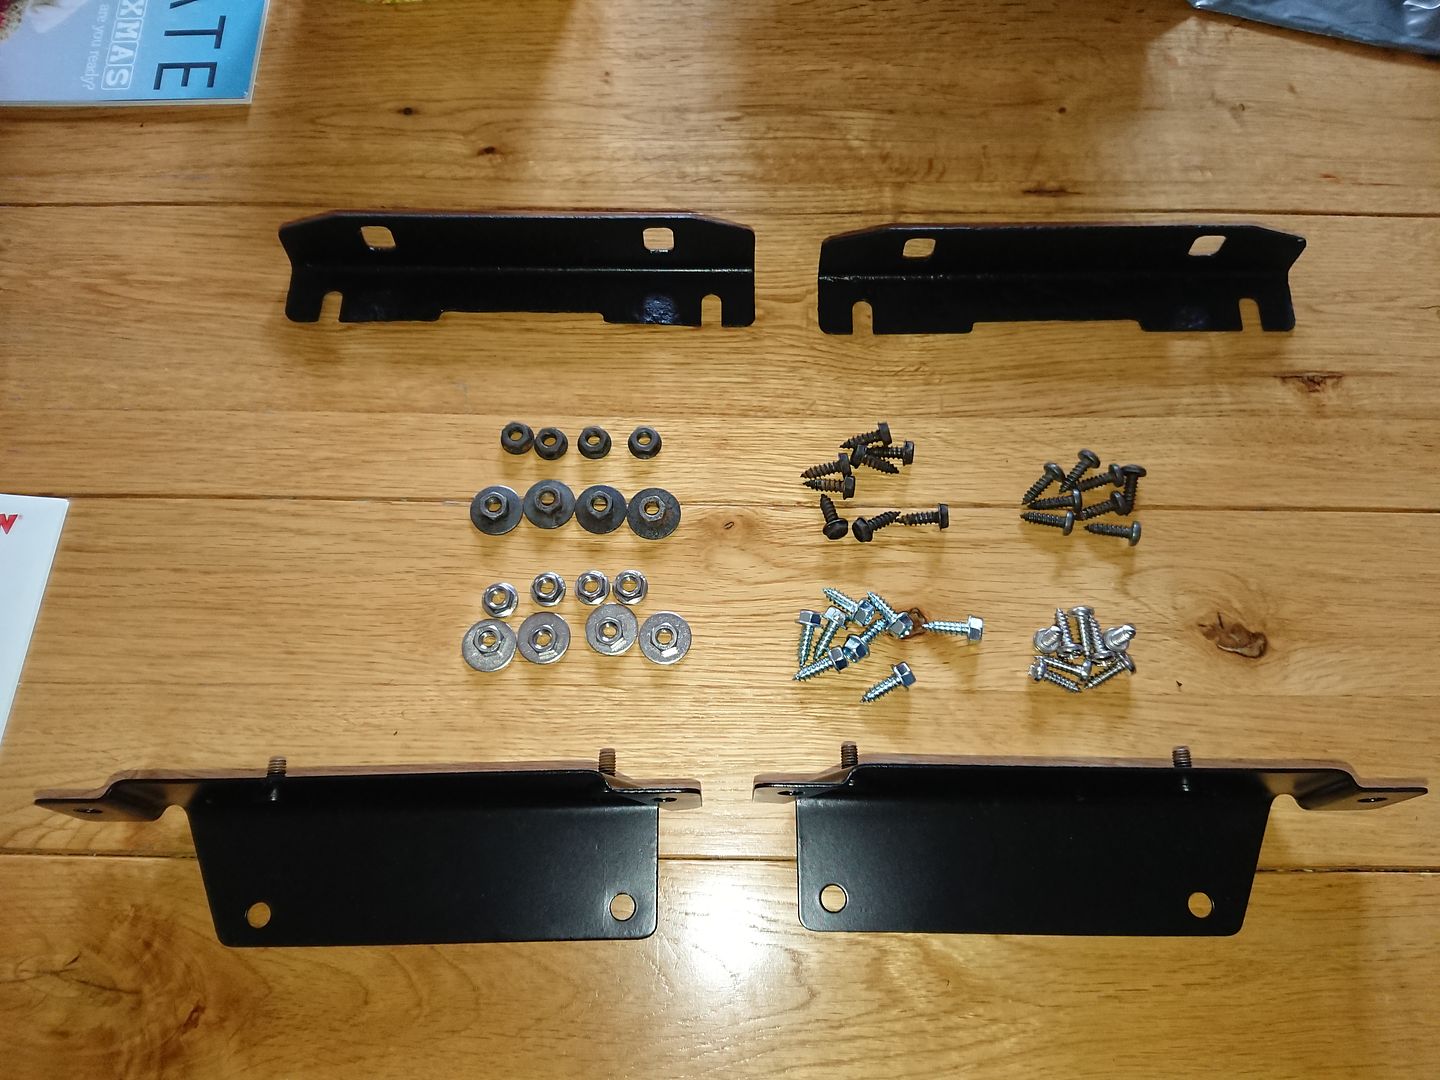
All the other bracketry including the grill posts went through the same process. The other L shaped headlight brackets are long since unavailable, mine weren't great, but saveable. They spent a good few days soaking in deox gel before painting. I debated having the original nuts and bolts re-coated, but in the end I managed to source stainless replacements.
Very satisfying to get to this stage. Especially considering how nice it now looks. I did got back after this picture was taken and painted the heads of the bumper mounting bolts...
Joe
DRFC1879, I have to admit I did have to Google your user name, did made my laugh though.
This is a very satisfying post, as I finally get to put stuff back onto the car.
First up was the undertray.
The one I removed was suitably horrible, with overspray and a few broken fixing areas.

You can actually still buy these new, so I did! I had ordered one to be collected from the Classic Car Show at the NEC, but when I got home one of the tabs had some damage. So on one of my many trips to Rimmer Bros to collect engine gaskets I took it back and they let me swap it for as nicer one from their stock. I also did the same for the new front grill I bought. The guy on the desk got so bored of bringing out what he thought were good ones only to be rejected again, he just let me go and pick my own.

They come absolutely filthy, and require some serious cleaning to get to this stage, it's still got some marks in the plastic, but they're almost unseen and much better than what came off.
Next up was the headlight bracketry. These have captive studs that usually shears, and mine where particularly gross, and I didn't manage to get them off in one piece. Luckily you can buy these NOS, but definitely an emphasis on the old.

The bracket on the left is as they come. If that's the factory finish it's no wonder they rust to pieces!
As you can see I'd already started to strip them completely ready for a much more durable finish.

All stripped ready for paint.

Treated, primed, and top coated in lovely satin black.

The new undertray bolted on very nicely, and actually has riv-nuts ready for the bottom spoiler attachment, makes fitting the spoiler much easier.

All the other bracketry including the grill posts went through the same process. The other L shaped headlight brackets are long since unavailable, mine weren't great, but saveable. They spent a good few days soaking in deox gel before painting. I debated having the original nuts and bolts re-coated, but in the end I managed to source stainless replacements.


Very satisfying to get to this stage. Especially considering how nice it now looks. I did got back after this picture was taken and painted the heads of the bumper mounting bolts...
Joe
Edited by 1275 GT on Sunday 8th July 23:28
J4CKO said:
Always liked the SD1, but the Vitesse is the one, they were a rare sight even back in the eighties, as someone mentioned, really expensive.
They were very cool as well, normal SD1's were a bit bank managerish, but the Vitesse was way way cooler, all that touring car attitude.
I do love a regular SD1, but as you say the Vitesse just has that extra attitude. They were very cool as well, normal SD1's were a bit bank managerish, but the Vitesse was way way cooler, all that touring car attitude.
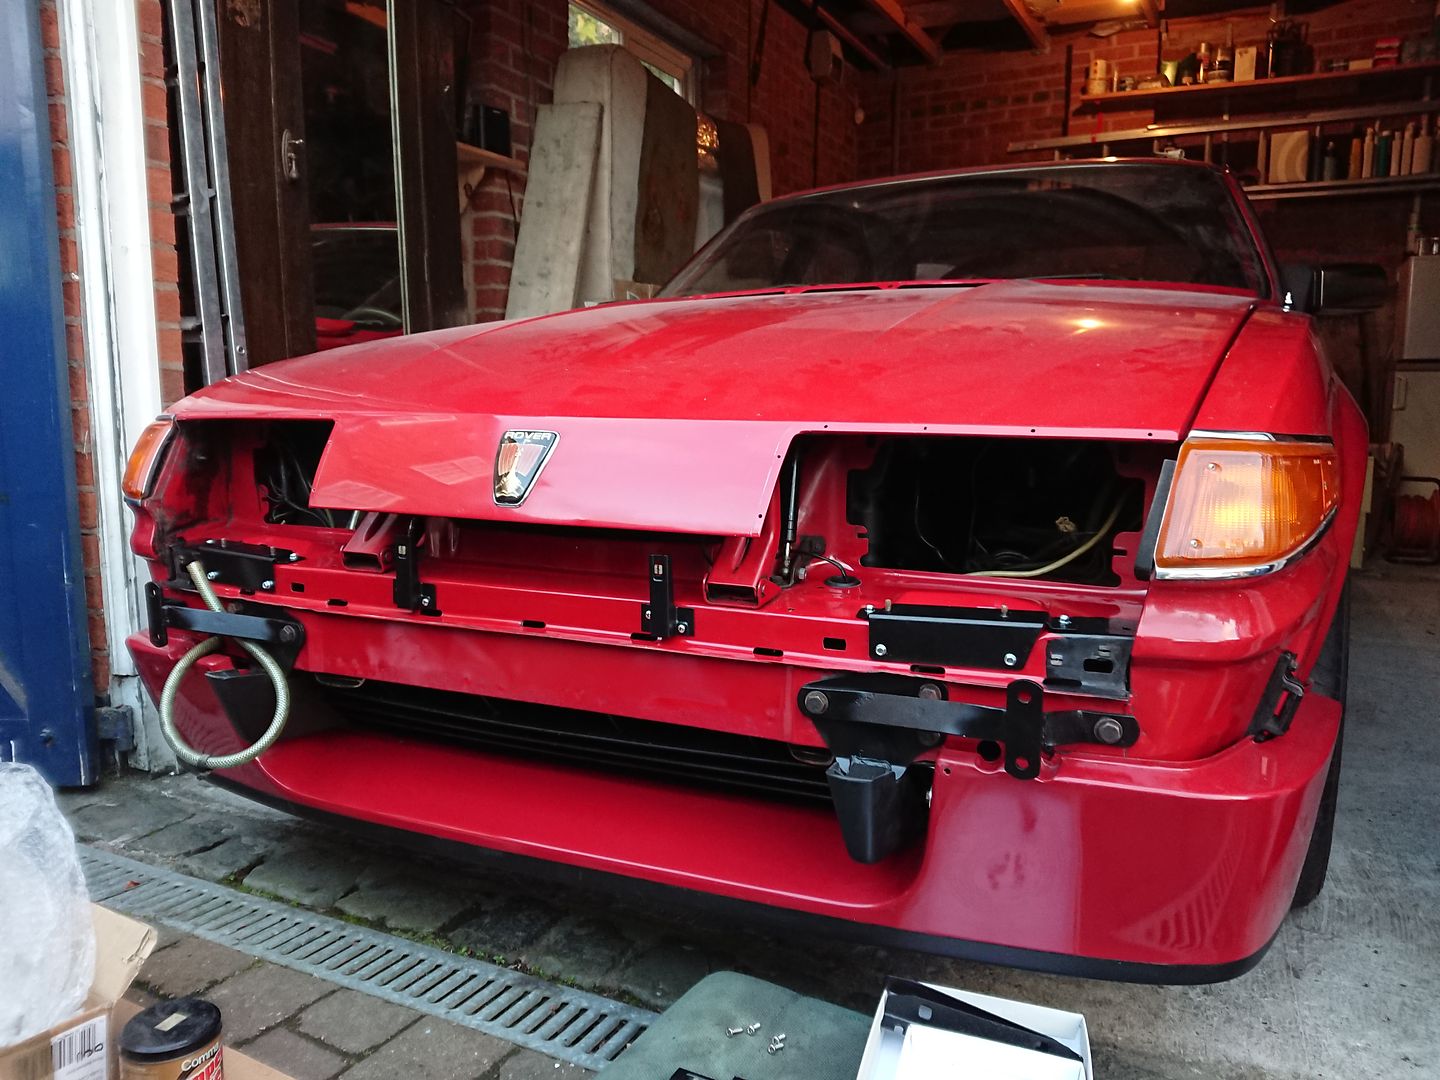
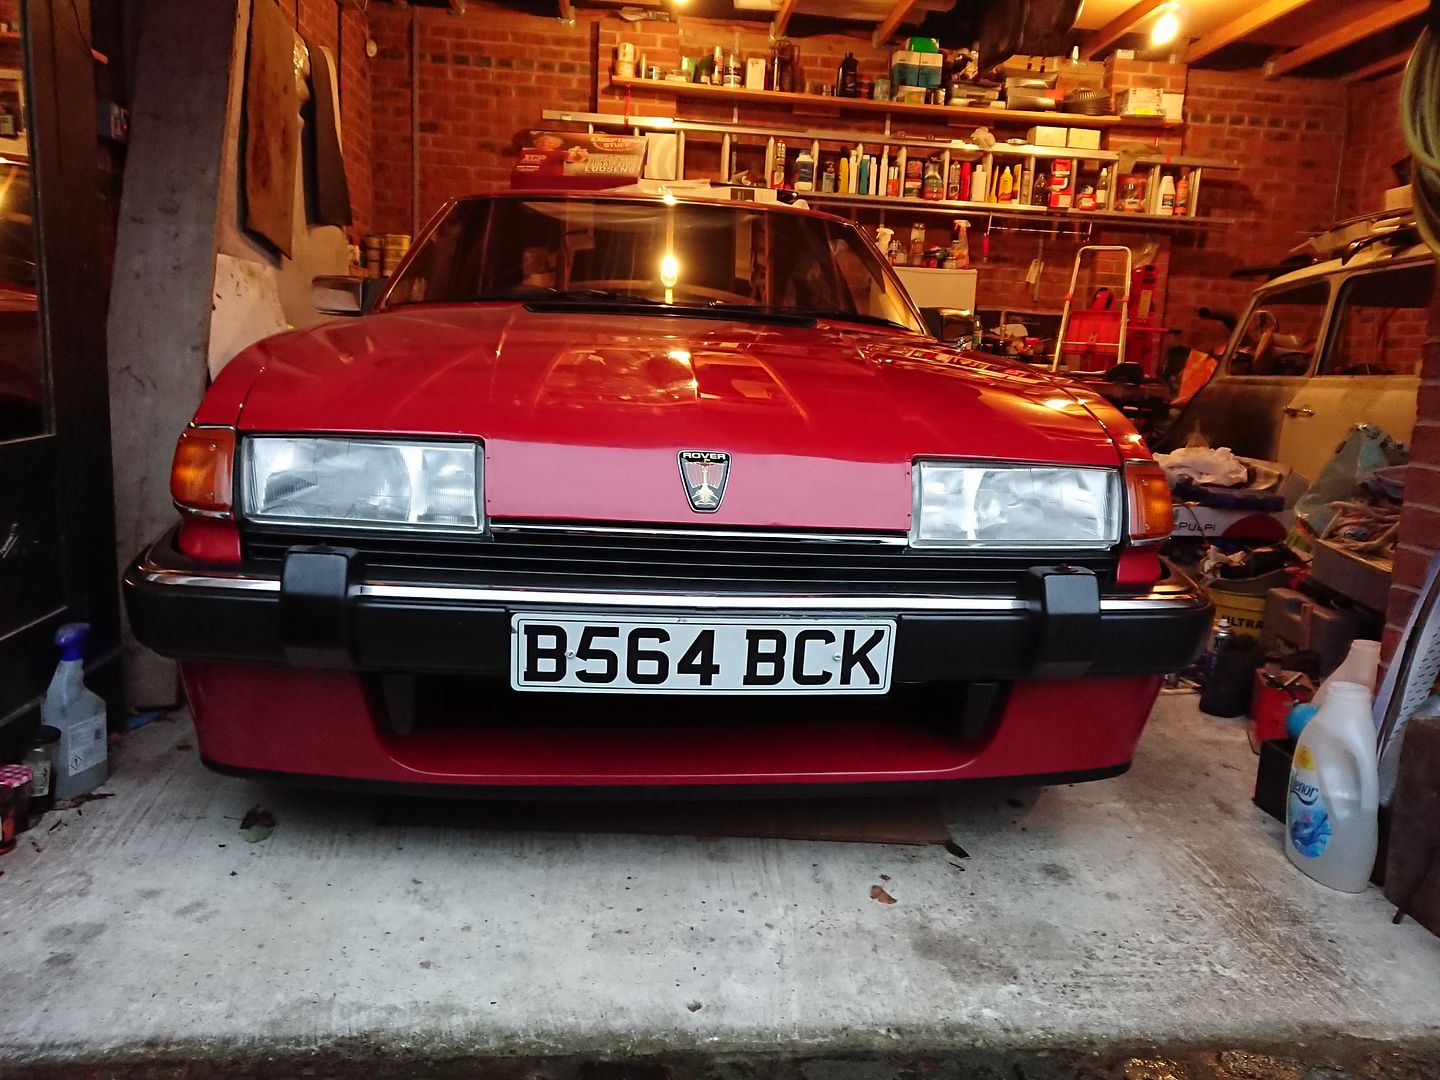
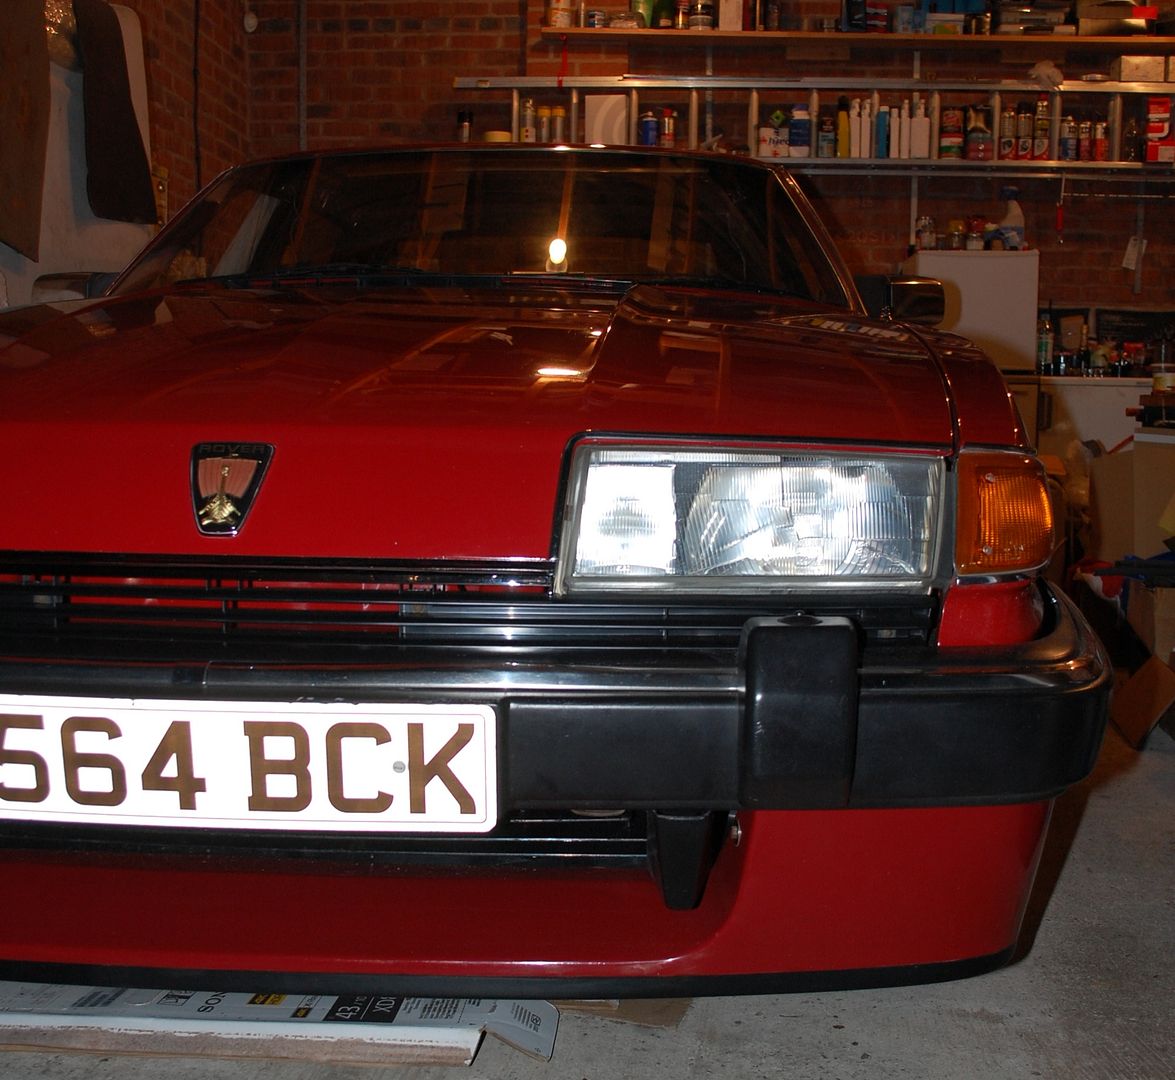
With the hard work on the front end done I really wanted to get it together, so next up was the headlights.

One of my lenses has a very small crack on one of the edges, so a NOS replacement lense was sourced.
Really looks good with the re-done brackets.

First trail turning the lights on. All working as it should.

I spent a good few hours lining the lights up with the bonnet, and eventually I was happy, and could put the grill on. Looks so good with the main beams on.

SD1s do look odd without bumpers, but now I get a flash of body colour through the grill rather than black underseal!
Just needs the bumper and bonnet eyebrows back on now.
Joe
Edited by 1275 GT on Sunday 8th July 23:33
james_tigerwoods said:
helix402 said:
Headlight washers?
I did wonder that, but it looks like a pretty hefty tube....The pipe is massive, and so is the reservoir, I think it has a 6 litre capacity and it's seperate from the windscreen washers too.
Joe
artois7 said:
Great read - took up my morning! Thanks
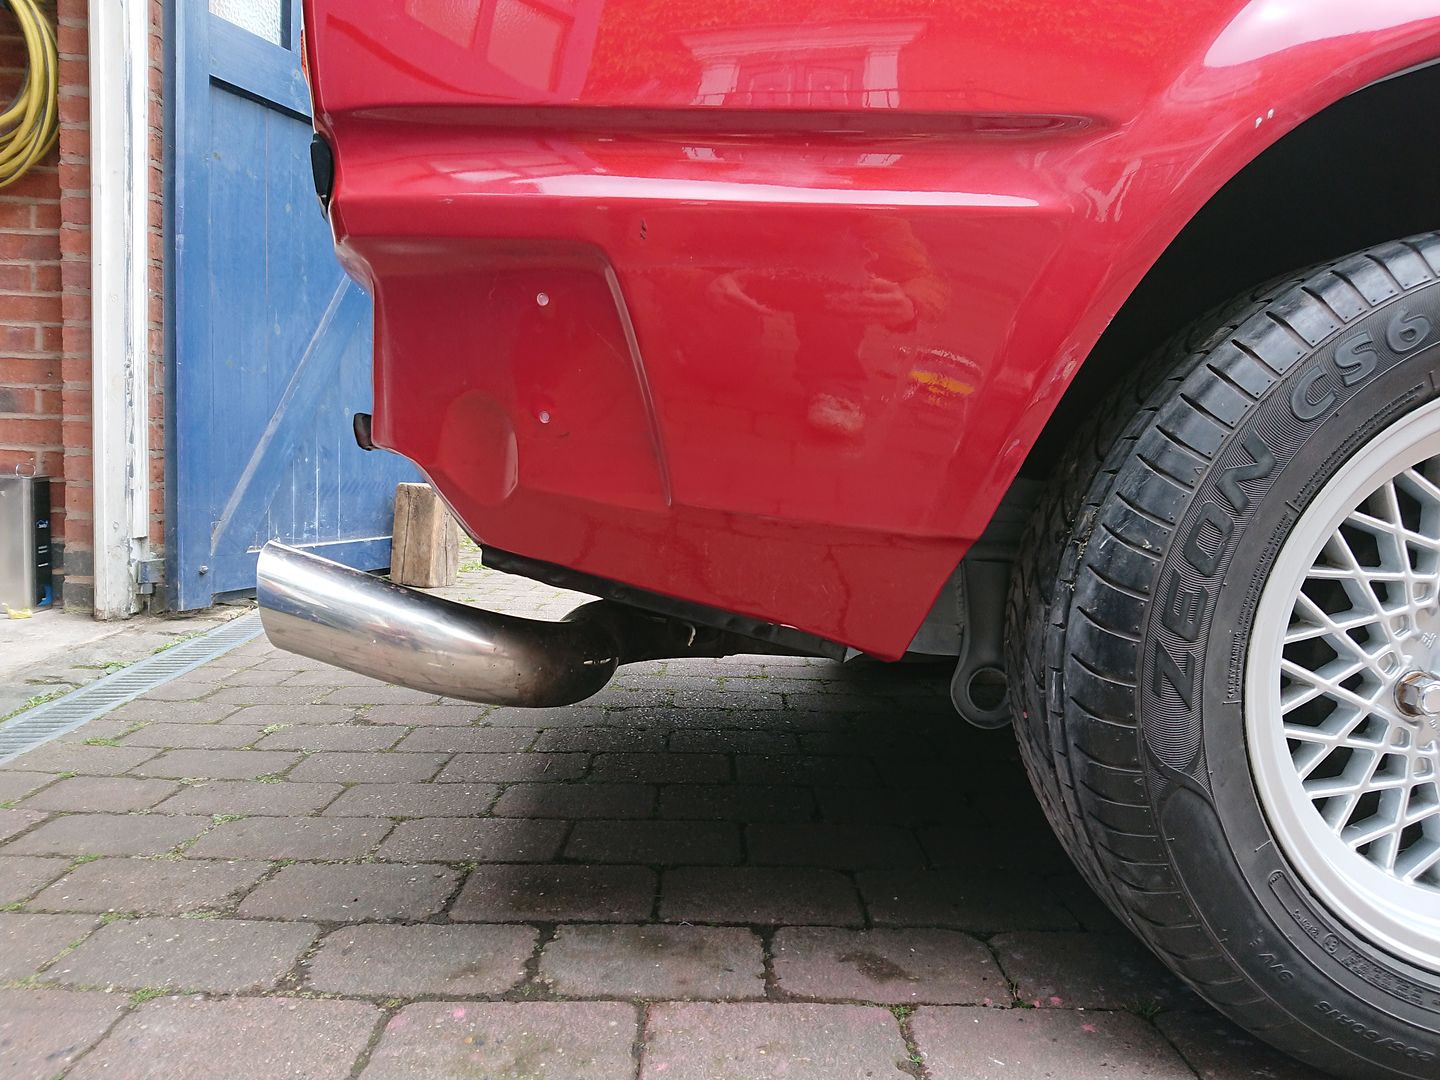
Glad you enjoyed reading it. J4CKO said:
Looks like they do in Japan with external oil coolers.
Exactly, luckily this is hidden behind the bumper so nowhere near as obvious. SD1s have many rusty spots, and the tailgate is another weak point.
Mine is actually remarkably nice, but around the openings behind the slatted trim was looking a bit scabby.

Nothing a clean and touch up couldn't sort.
Don't worry I stripped and repainted the rusty solenoid bracket you can see there...

While we're doing the tailgate I may as well cover the minefield that is the central locking.
This sometimes worked, and I couldn't be having that. There is a lot of different configurations of locking arrangements on SD1s. But I eventually worked out mine is the middle type with the seperate solenoid.

I couldn't buy a new central locking latch for my type, but I could buy a non central locking one and swap all the bits over.
This research and assembly was left to my very capable dad. Made a lovely job of it.
From my spares collection I found a nicer solenoid, and low and behold, working central locking!

Next up was the tailgate trim that goes over everything. It wasn't in bad nick, and I decided to renovate rather than replace
It had a tiny crack that was glued, it was cleaned, and plastic and rubber treatment applied that brought the colour back out.


I also couldn't help but use all new stainless hardware. The original zinc plating had all but come off, and I managed to find the exact spec screws in stainless.

Rear end just needs the bumper now.
Next up was the floor pans, the carpets had long been removed, so I had perfect access.
In the passenger footwell sits the engine ECU.

You can just see in this picture a previous owner had tarred over it to try and stop it rusting further.
But the area around the base was looking pretty grotty, I did my best to unscrew it, but the screws had also rusted, I did eventually manage to get them out though.

There wasn't much of the bottom left, and if the front looked back the back was appalling!

Luckily it hadn't transmitted the rot to the floor which just needed the surface rust treating and repainting.

All the surface rust was removed, and again lathered in Deox Gel.

The ECU plate was beyond saving, and a replacement was sourced.
The paint on it was awful, but completely solid, so I stripped it and began the painting process.


Much better.

Compared to the original.
I didn't get any pictures when I was painting the floors, but the results with the new ECU plate speak for themselves.

Exactly the same process for the drivers floor pan too.


Lovely floor pans that nobody will ever see! But it's nice to know they're solid and painted.
Joe
Edited by 1275 GT on Sunday 8th July 23:58
Watchman said:
If you ever come to sell it, you'll be able to name your price. It's in better nick than my 61-reg Merc.
Thankyou, hopefully it'll last another 33 years! As far as value I really struggled, as I had to say what I thought it was worth for the insurance. It doesn't help that nobody has sold a really tidy single plenum Vitesse yet, but perfect twin plenums have sold for £25k+.
I know my car is far from perfect, but I like to think it's definitely a good example.
It's got to be worth more than the £5k that it sold for 2 years ago though, but how much more I have no idea!
The engine will have an effect, and I'll be more confident in its value with the original engine re-installed.
For now though it's all hypothetical.
Although its nice to see the values increasing, it's a double edged sword. It does mean more cars are being saved and are now out of the breaking and banger racing category, and it increases the standard people work on them too, but it makes people scared to use them, and can price out enthusiasts who really love the cars. But I think this is an argument that's raging across the entire classic market at the moment.
Joe
BigMon said:
You're doing a fabulous job here. It'll end up being better than when it left the factory.
Re value, i think you're creating something not a million miles away from a Singer Porsche. If ever you want to sell it you will have people queued around the block.
Thankyou, that's the aim. Wow that's quite the comparison, I think I'm quite a way off their work though. I did look at doing some subtle upgrades like they do, (alcantara headlining, slightly different wheels) but in the end decided to keep the factory look. The car really deserves it. Re value, i think you're creating something not a million miles away from a Singer Porsche. If ever you want to sell it you will have people queued around the block.
Watchman said:
Features like this thread on PH and blogs help to show prospective buyers what effort has gone into the car too. I bought a Cerbera from a PH owner because I was able to read through his various contributions and I could get an honest feel for the car and him.
I am trying to convince my cousin to post a Reader's Car thread here too. He's just about finished with building a 700wbhp Chevy Nova. It's a great place to both inspire people and show what you've done.
Exactly my thoughts, it gives any work I do some transparency, and as you said gives you a feel of how the car has been cared for. I do love a Cerbera, it's on the list of my to do cars! How did you find it to own? I am trying to convince my cousin to post a Reader's Car thread here too. He's just about finished with building a 700wbhp Chevy Nova. It's a great place to both inspire people and show what you've done.
Definitely do! I'd read that.
Little Pete said:
Just found this thread and read it all. Excellent work OP! I used to look after a twin plenum about 25 years ago but that wasn’t as good then as yours is now!
I love the attention to detail and the paint finish in areas that can’t be seen. I’m going to show these photos to my new apprentice on Monday, they tell all you need to know about having pride in your work.
Keep up the good work and best of luck in your new job. An apt career choice methinks!
They did seem to suffer quite early on in their lives! What did you think of the TP? I'd love to do a comparison between a single and a twin. I love the attention to detail and the paint finish in areas that can’t be seen. I’m going to show these photos to my new apprentice on Monday, they tell all you need to know about having pride in your work.
Keep up the good work and best of luck in your new job. An apt career choice methinks!
Thanks, I know nobody will see them but I like to know its 100%, and it's the best way to preserve the car.
I really appreciate that, and don't worry there's still lots more high quality Rover repairs to come.
Joe
_dobbo_ said:
I was trying to remember the last Vitesse thread I'd liked - I found it in the end, it was from 2009, but lasted several years.
Worth a read if anyone is enjoying the Vitesse in this thread.
https://www.pistonheads.com/gassing/topic.asp?h=0&...
I absolutely loved reading Duke Thrust's thread, I did think it was a shame he didn't show any of the body repairs though. I'd have loved to have seen the work that got it to that gleaming shell.Worth a read if anyone is enjoying the Vitesse in this thread.
https://www.pistonheads.com/gassing/topic.asp?h=0&...
Joe
RS Grant said:
Growing up as a young boy, I was absolutely smitten with the Rover SD1... can only think that it was because my bedroom wall posters was of a Ferrari Daytona and obviously the front ends are loosely similar.
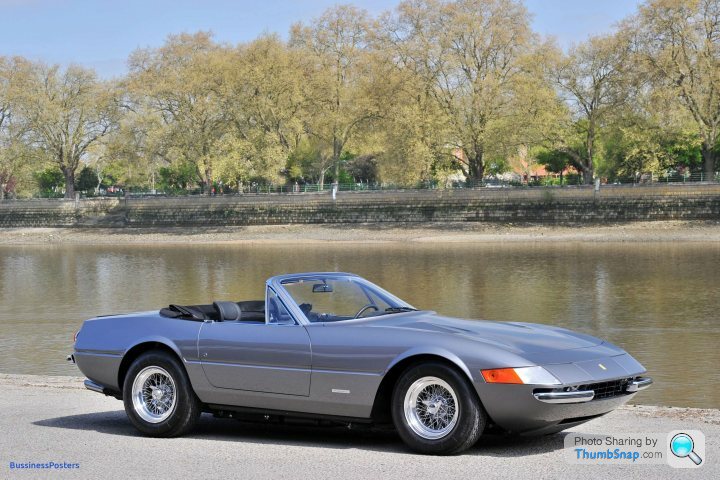
Look forward to seeing this Vitesse progress, you're making a great job so far..
The Daytona is one of the most amazing looking cars, so definitely worth the flattery of having the SD1 based on it. Different price leagues but they make for quite the pair...Look forward to seeing this Vitesse progress, you're making a great job so far..

This picture was taken by Craig Pusey with his early Vitesse which is a stunning example.
All credit for the picture remains with him, and I'll remove the picture if he wishes.
Link to the original post below.
https://www.facebook.com/462095520515873/photos/a....
Watchman said:
The Cerbera came after I had owned a highly upgraded Caterham and toured around Europe with it in the company of a lot of friends in their various small lot cars. I needed a change away from Caterham ownership because I had a young family and, well the honest truth was that I felt that I had “done” the Caterham thing. I fancied a change.
I actually thought I wanted a 4-seater so I could take the kids with me and to that end I tried a Spyder Lotus Elan +2 on a prospective customer track day which was lovely but lacked the NASA-like shove that the Caterham had.
Then I rounded on Cerberus and became aware that the 4.5 (in contrast to the others) was quite an extreme machine. The flywheel was so light you could change gear in a snap, the sheer force of the 410bhp engine was immense and the power built with revs like a Caterham, the brakes were epic, and the steering was fast - about 1.5 turns lock to lock.
It was raw and powerful and quite probably the only car that embodies the sale spirit as the Caterham with being a Caterham.
But it was a project - the chassis needed attention and the colour scheme (mostly the interior) wasn’t anything I could fall in love with, so after about 18 months I sold it on and for a while I thought about buying another. I didn’t though and like with the Caterham, I’ve kind of moved on now (I’m after a Merc G55 next).
I certainly know the feeling with brand over exposure, I over did it with the minis and definitely needed a change. Hence the Rover. I actually thought I wanted a 4-seater so I could take the kids with me and to that end I tried a Spyder Lotus Elan +2 on a prospective customer track day which was lovely but lacked the NASA-like shove that the Caterham had.
Then I rounded on Cerberus and became aware that the 4.5 (in contrast to the others) was quite an extreme machine. The flywheel was so light you could change gear in a snap, the sheer force of the 410bhp engine was immense and the power built with revs like a Caterham, the brakes were epic, and the steering was fast - about 1.5 turns lock to lock.
It was raw and powerful and quite probably the only car that embodies the sale spirit as the Caterham with being a Caterham.
But it was a project - the chassis needed attention and the colour scheme (mostly the interior) wasn’t anything I could fall in love with, so after about 18 months I sold it on and for a while I thought about buying another. I didn’t though and like with the Caterham, I’ve kind of moved on now (I’m after a Merc G55 next).
A Caterham is also definitely a car I'd love to try, I can't imagine a more pure driving experience, and 10/10 for commitment for road-tripping it!
As for the Cerbera, you're experience is everything I'd hoped it would be, I'd heard they were very maintenance heavy so I'd be going into it with my eyes open. The interiors can be a bit marmite so I can see that the right colour combination would be needed. One day.
The theatre of the G55 is immense so I can completely see the appeal, good luck with the search.
Joe
That's exactly how I intend on using mine! A bit more civilised than the minis for longer weekend trips.
As far as the sump I followed the workshop manual to the letter. Supported the engine via the crank pulley on a block of wood on a jack, undid the engine mounts on the passenger (LH) side, and removed the bracket that goes through to the anti-roll bar. I then raised the engine by a few inches again using the jack under the crank pulley, that just allows the sump to come out of the rear without touching the cross-member or power steering lines. As I had quite a bit of work to do with the sump off, I then lowered the engine back onto its mounts as I wanted it off that jack as soon as possible. I had the car on axle stands, rear wheels chocked, and the engine in gear so it wouldn't rotate.
It is a tricky job especially with the car high on axle stands, I had to use a bottle jack to get high enough to raise the engine. I've since bought a more substantial jack with a higher lift range. Sadly I don't have any pictures of the process as I worked quickly to get the car off the jack as soon as possible.
I thought they were pretty open about it too, but I can't find any proof, and what's the saying "imitation is the sincerest form of flattery"
Joe
KelvinatorNZ said:
Looking very good. I was a couple of pages behind. Might have to post my Vitesse thread on here now too.
I love my black Vitesse, and always wanted a black one, but in my eyes red is the best colour by far. Looks stunning.
In regards to what you did a couple of pages back, do you have any tips for removing the sump? I need to do it to mine to renew the gasket. I dont see a jack under the crank pulley, did you lift it from the top to gain clearance?
I don't think any of the Vitesse colours are bad, I'd take one in any of the colours available. I love my black Vitesse, and always wanted a black one, but in my eyes red is the best colour by far. Looks stunning.
In regards to what you did a couple of pages back, do you have any tips for removing the sump? I need to do it to mine to renew the gasket. I dont see a jack under the crank pulley, did you lift it from the top to gain clearance?
As far as the sump I followed the workshop manual to the letter. Supported the engine via the crank pulley on a block of wood on a jack, undid the engine mounts on the passenger (LH) side, and removed the bracket that goes through to the anti-roll bar. I then raised the engine by a few inches again using the jack under the crank pulley, that just allows the sump to come out of the rear without touching the cross-member or power steering lines. As I had quite a bit of work to do with the sump off, I then lowered the engine back onto its mounts as I wanted it off that jack as soon as possible. I had the car on axle stands, rear wheels chocked, and the engine in gear so it wouldn't rotate.
It is a tricky job especially with the car high on axle stands, I had to use a bottle jack to get high enough to raise the engine. I've since bought a more substantial jack with a higher lift range. Sadly I don't have any pictures of the process as I worked quickly to get the car off the jack as soon as possible.
LanceRS said:
TR4man said:
I wonder if it has ever been officially acknowledged that the designers of the SD1 took their inspiration from the front of the Daytona?
If not, it's one heck of a coincidence.
I’m pretty sure that I have read somewhere that they were quite open about it. If not, it's one heck of a coincidence.
Joe
Lets get back to more gratuitous Rover pictures.
With the front end so close to completion I began looking at the front bumper.
Unfortunately one of the front overriders was damaged, and are very tricky to find in decent nick.
I completely disassembled the bumper and began to gently knock out the dents in the chrome trim, and with some autosol came up really nicely.
With the damaged overrider removed I thought I'd have to repair it until my dad produced a Rover box. He'd been digging around and found a new overrider in a box that he'd bought in the 90's for his SD1, and it was the right side (they're handed) to replace my damaged one. That's definitely a result.
I got the rest of the bumper back together, again all new stainless nuts and bolts, and lots of copper slip.
Couldn't help but bolt it on the evening I finished the bumper.
Almost finished but SD1s do look odd without eyebrows.
Again NOS clips were sourced and the trim polished. These have shaped plastic inserts on the rear to buffer them out from the bonnet, again all correct and accounted for!
I love this picture as you can see lovely red paint through the grill.
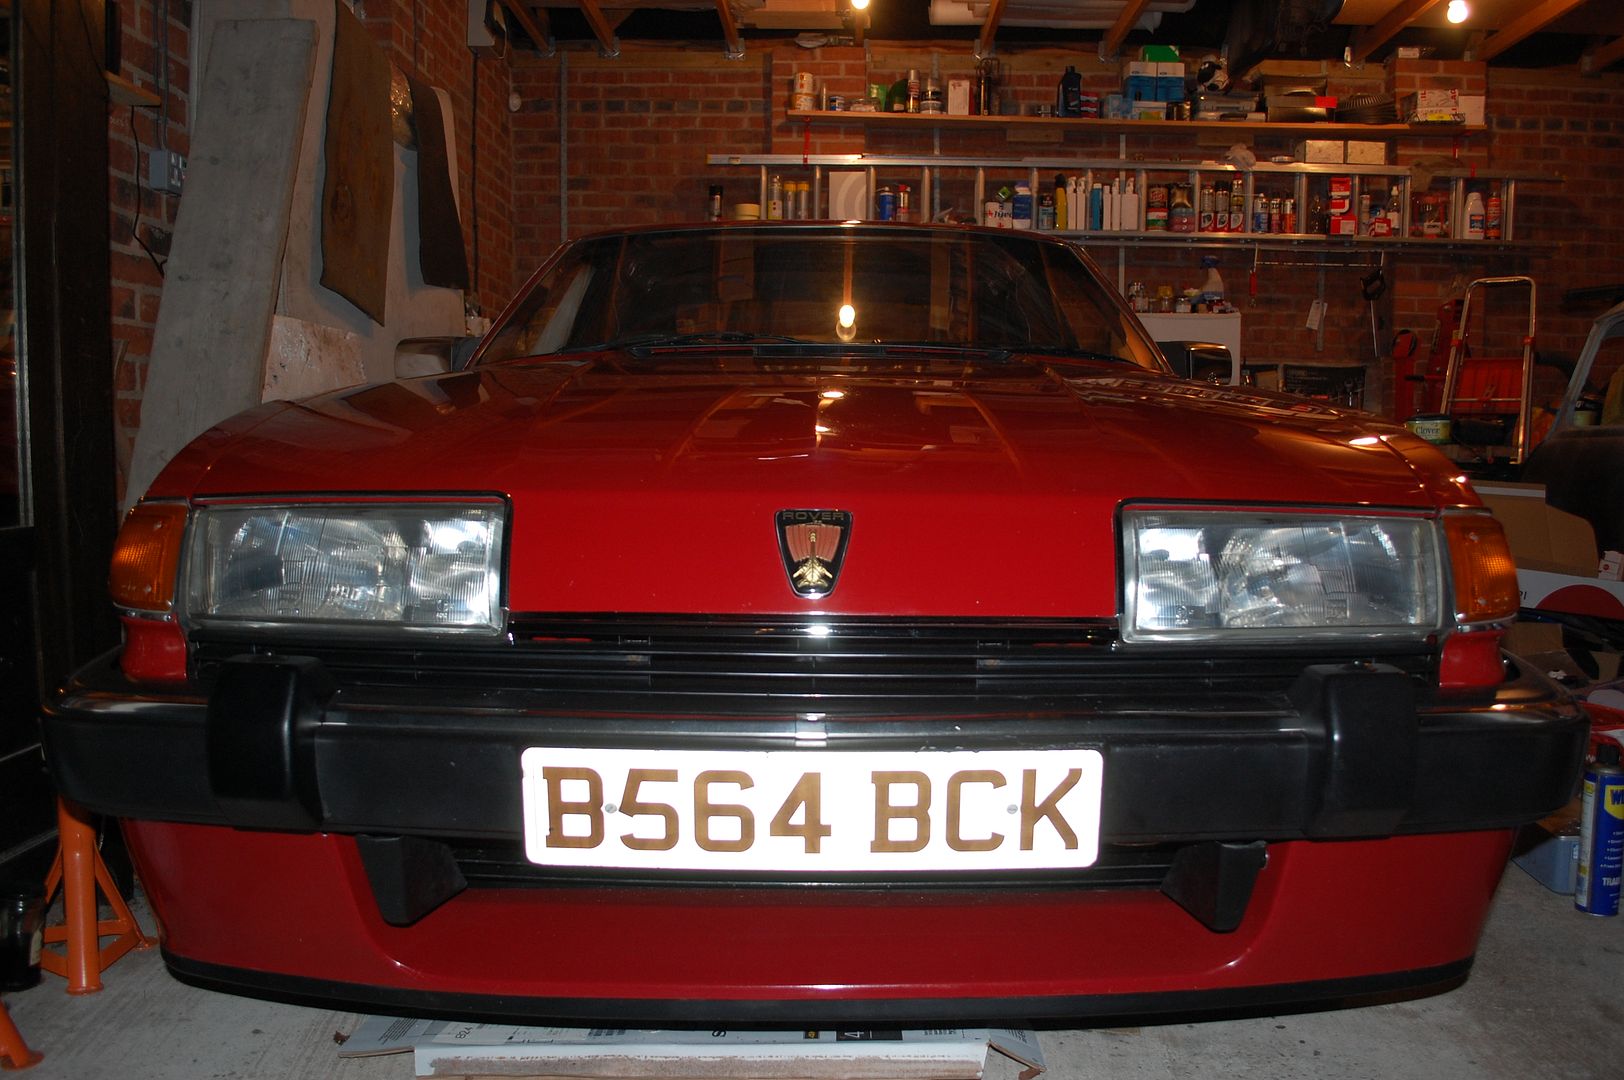
With both fitted.
Next day out in the light!
Few things beat that front end!
Joe
With the front end so close to completion I began looking at the front bumper.
Unfortunately one of the front overriders was damaged, and are very tricky to find in decent nick.


I completely disassembled the bumper and began to gently knock out the dents in the chrome trim, and with some autosol came up really nicely.
With the damaged overrider removed I thought I'd have to repair it until my dad produced a Rover box. He'd been digging around and found a new overrider in a box that he'd bought in the 90's for his SD1, and it was the right side (they're handed) to replace my damaged one. That's definitely a result.
I got the rest of the bumper back together, again all new stainless nuts and bolts, and lots of copper slip.

Couldn't help but bolt it on the evening I finished the bumper.

Almost finished but SD1s do look odd without eyebrows.

Again NOS clips were sourced and the trim polished. These have shaped plastic inserts on the rear to buffer them out from the bonnet, again all correct and accounted for!

I love this picture as you can see lovely red paint through the grill.

With both fitted.
Next day out in the light!

Few things beat that front end!
Joe
Edited by 1275 GT on Wednesday 11th July 22:57
We're now up to approximately March '18, I wasn't able to work on the car much throughout the winter with the awful weather, and work commitments. But I did what I could.
With all the big exterior work done, the fiddly and time consuming interior work carried on.
Another modification done by the previous owner was to fit this very modern looking radio.
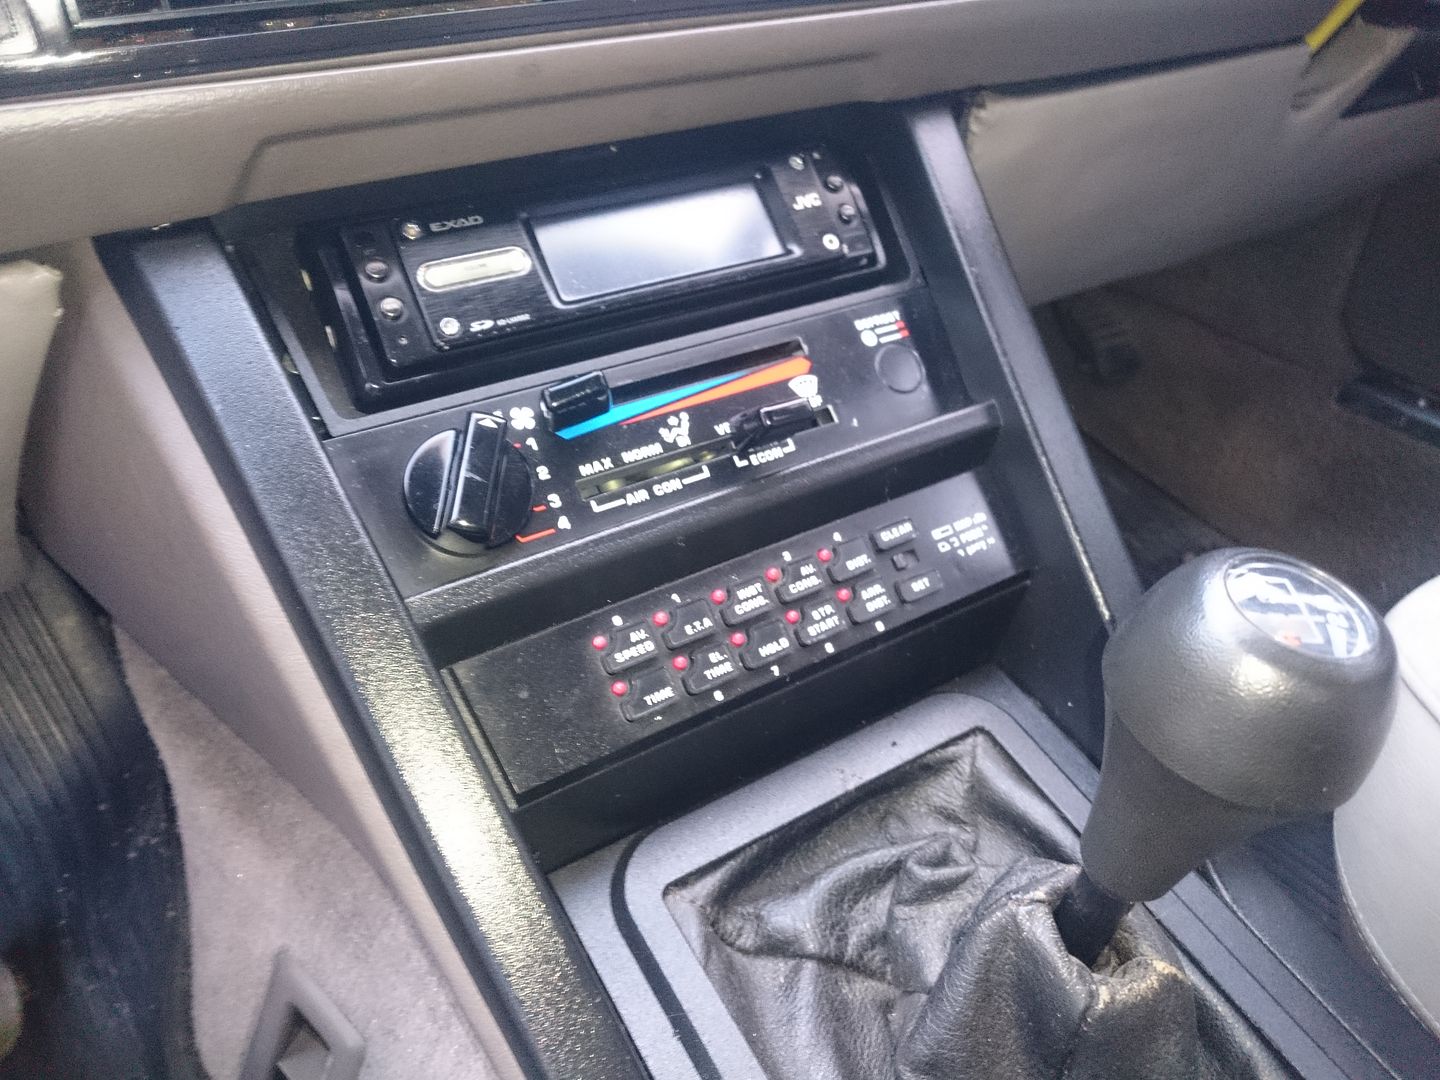
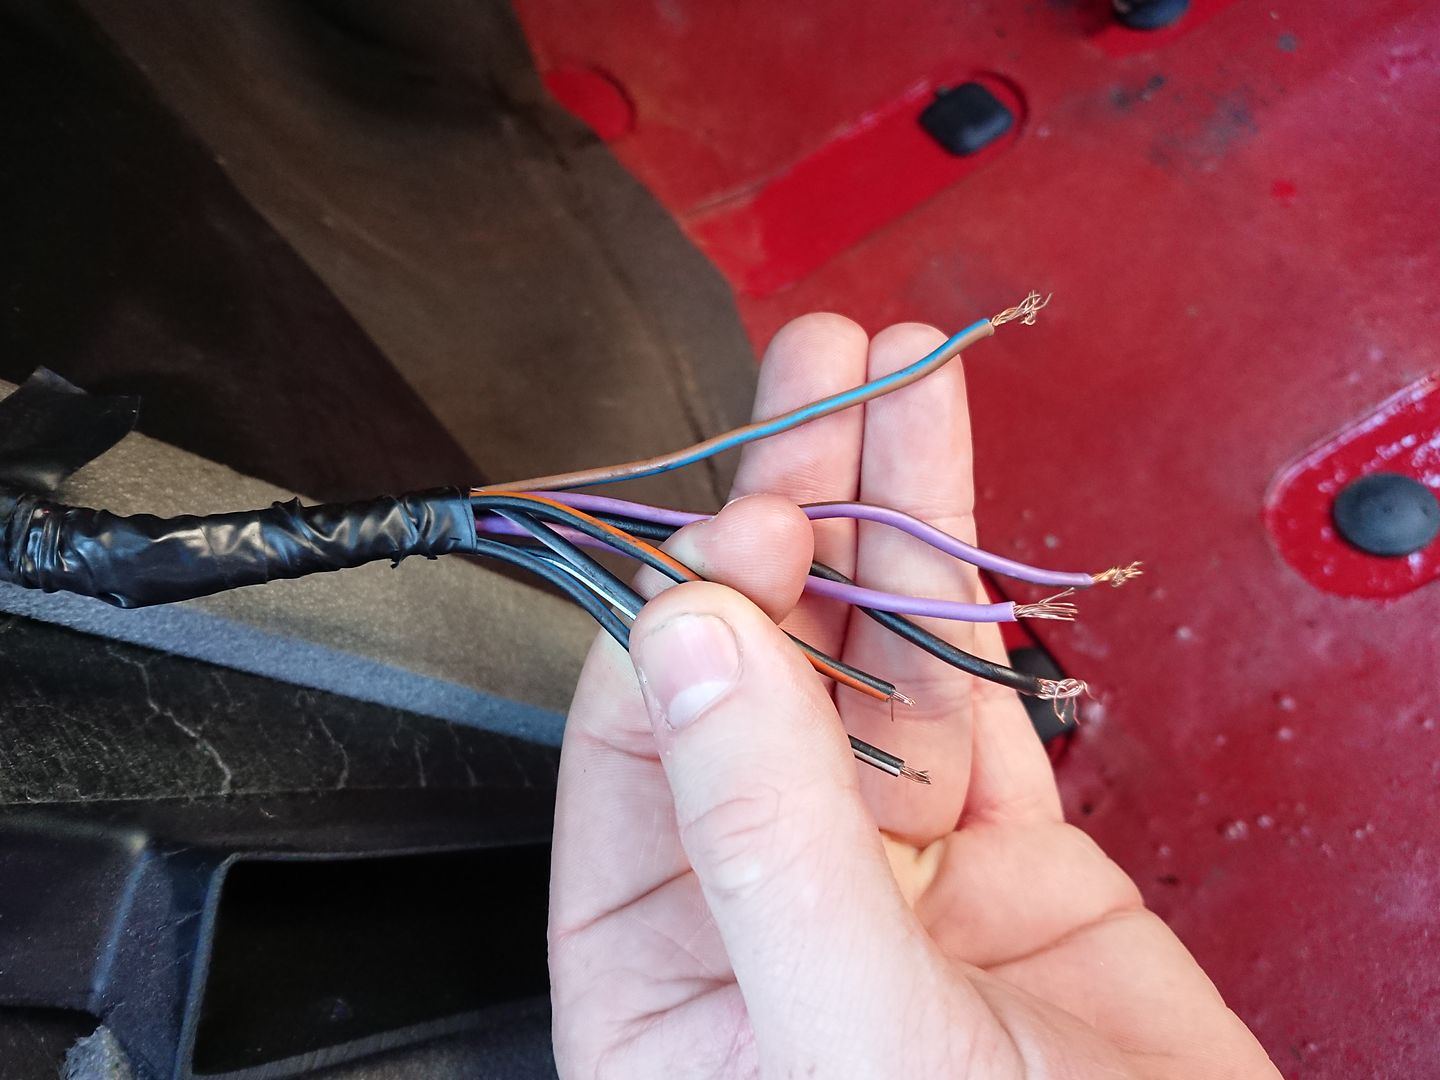
It doesn't fit in with the car at all, and he butchered the wiring to get it to fit. Using new speaker cabling, and cutting the existing wiring.
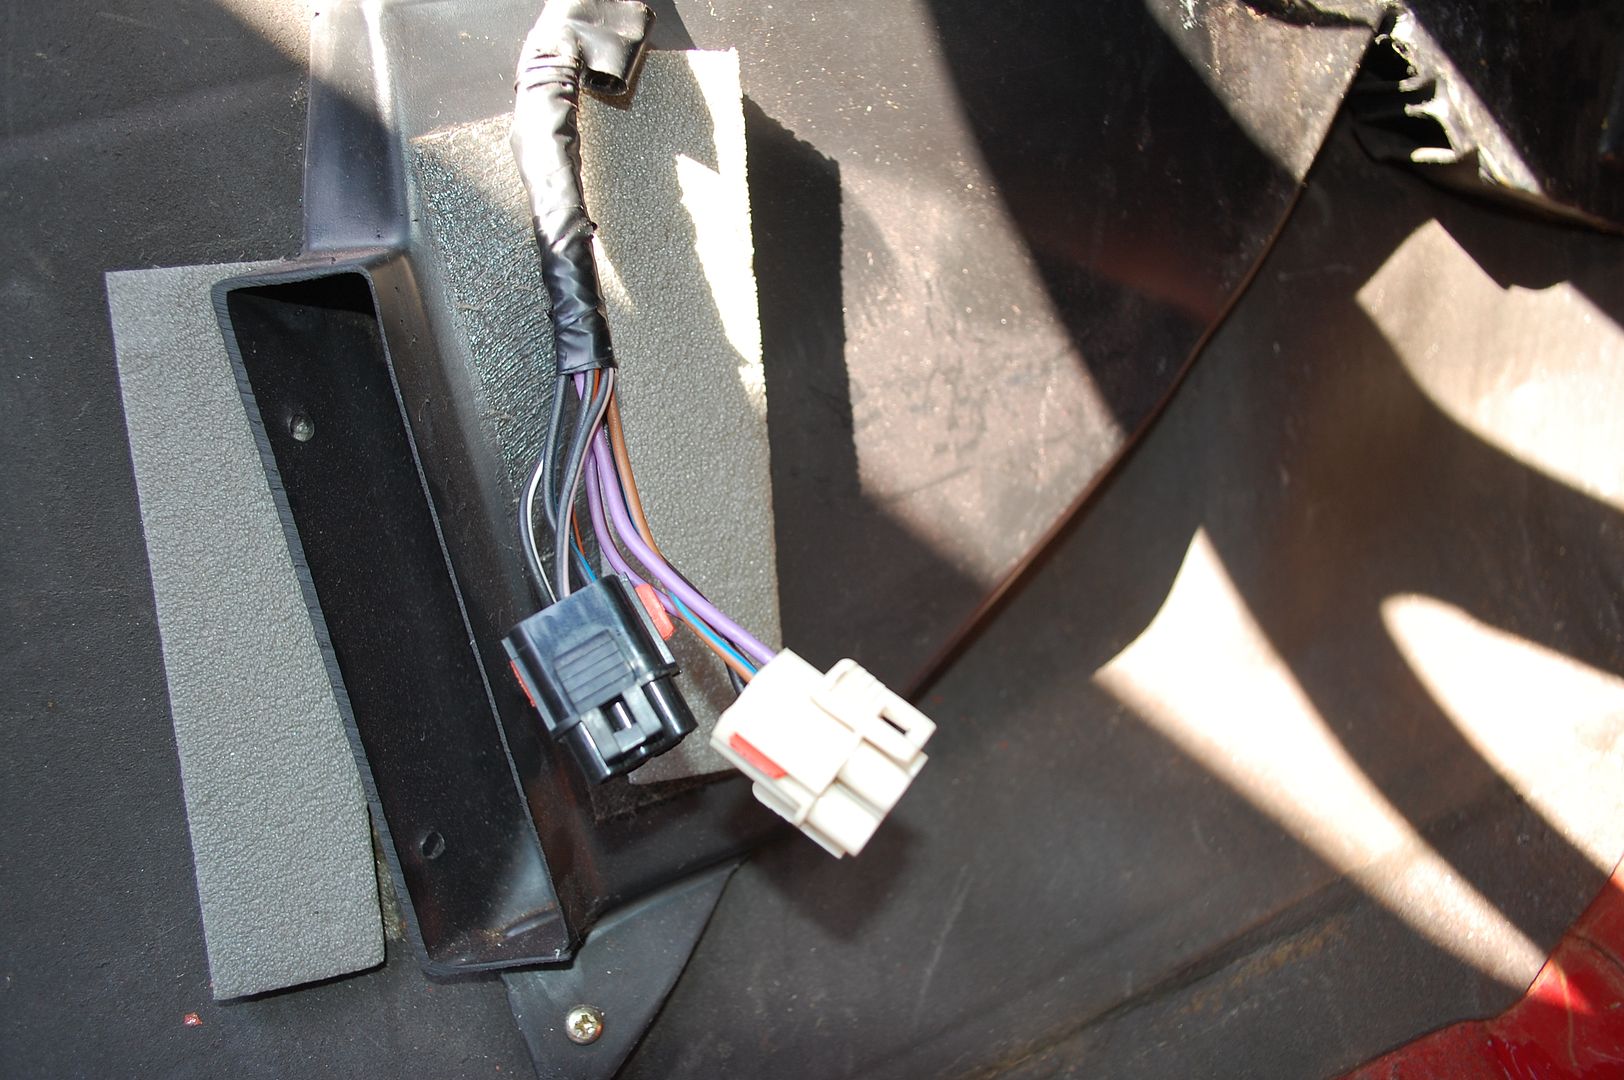
I have no intention of using the radio but I couldn't leave it like that. Again the fiddly task of working out the wiring diagrams and how everything needed to be terminated was left to my Dad. He did an amazing job removing all the new speaker cabling, and re-connnecting the factory wiring and repairing damaged sections. We sourced new correct Rist connectors, and a spare SD1 wiring loom so we had all the correct terminals and connectors. Everything works now as it should, even reconnecting the front rear fader on the centre console. Oh and correctly wiring the electric aerial. Previous owner had powered it from the passenger map light, completely ignoring the correct aerial relay.
The only thing that remained from the previous bodge was the actual speakers, as I wasn't going to find original ones. I did find an original radio though. There were 2 types fitted, earlier cars had a Motorola, and later cars had a Phillips. My car is right on the cusp of when they changed, so I'm not sure what it should have. It has the Motorola for now but that might change.
Went from this
To this.
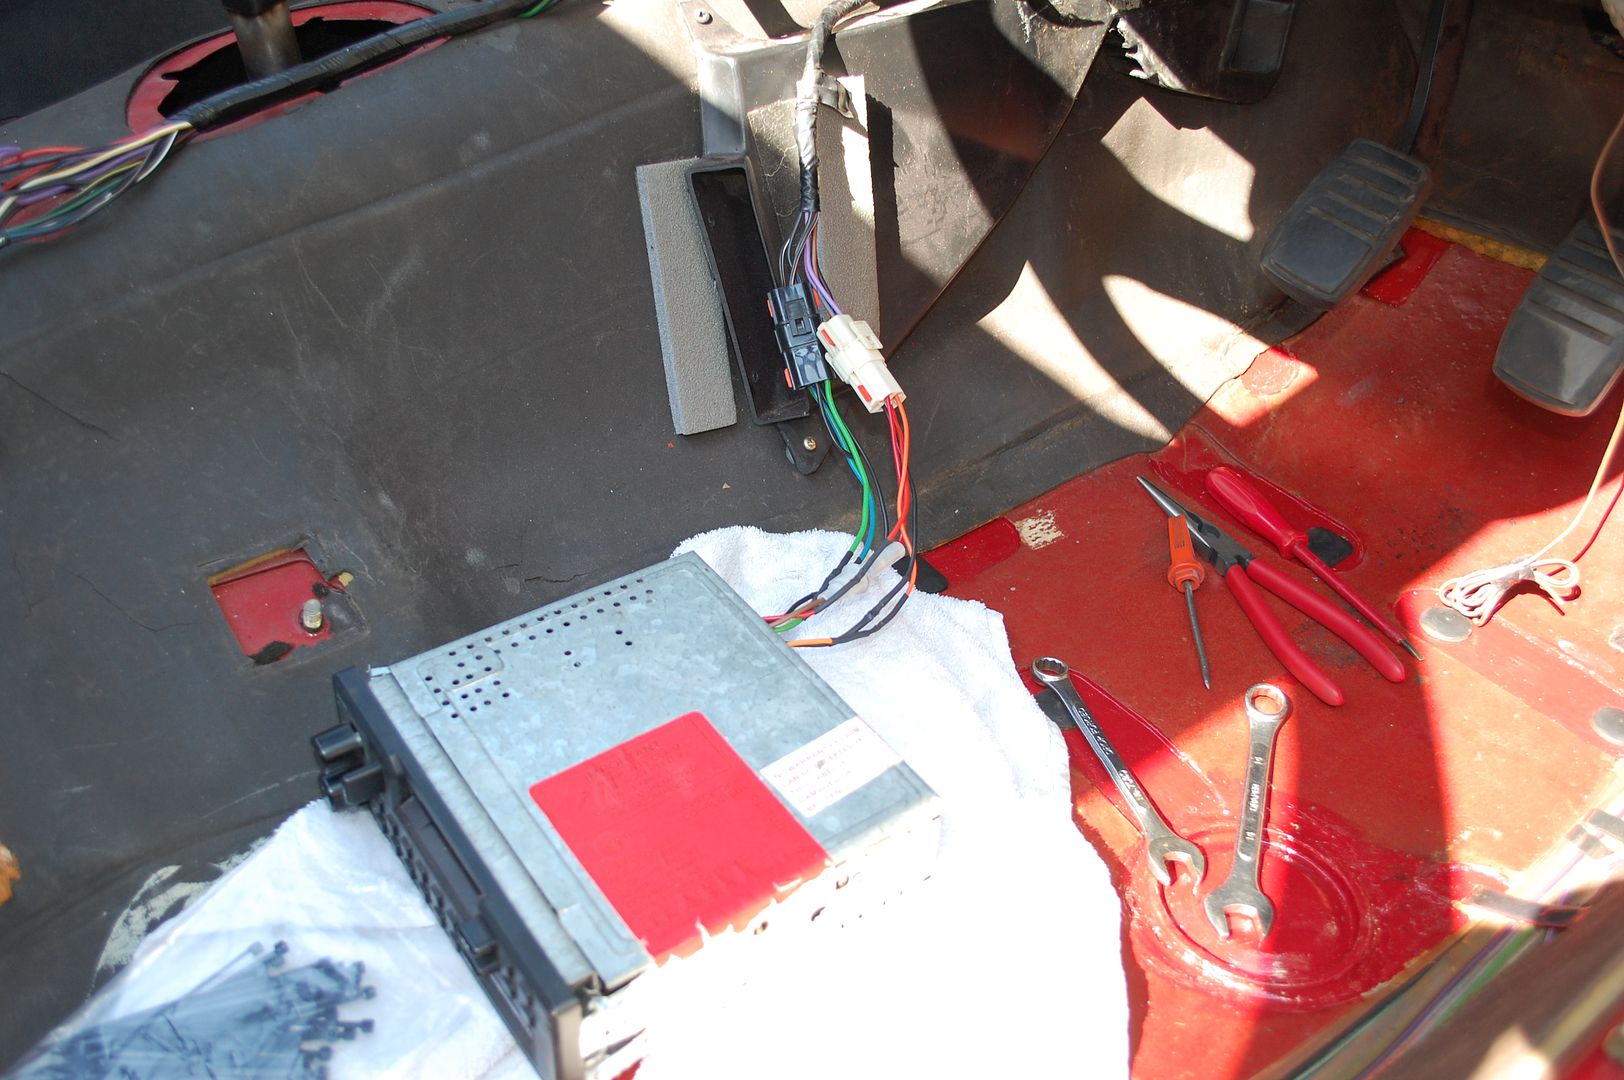
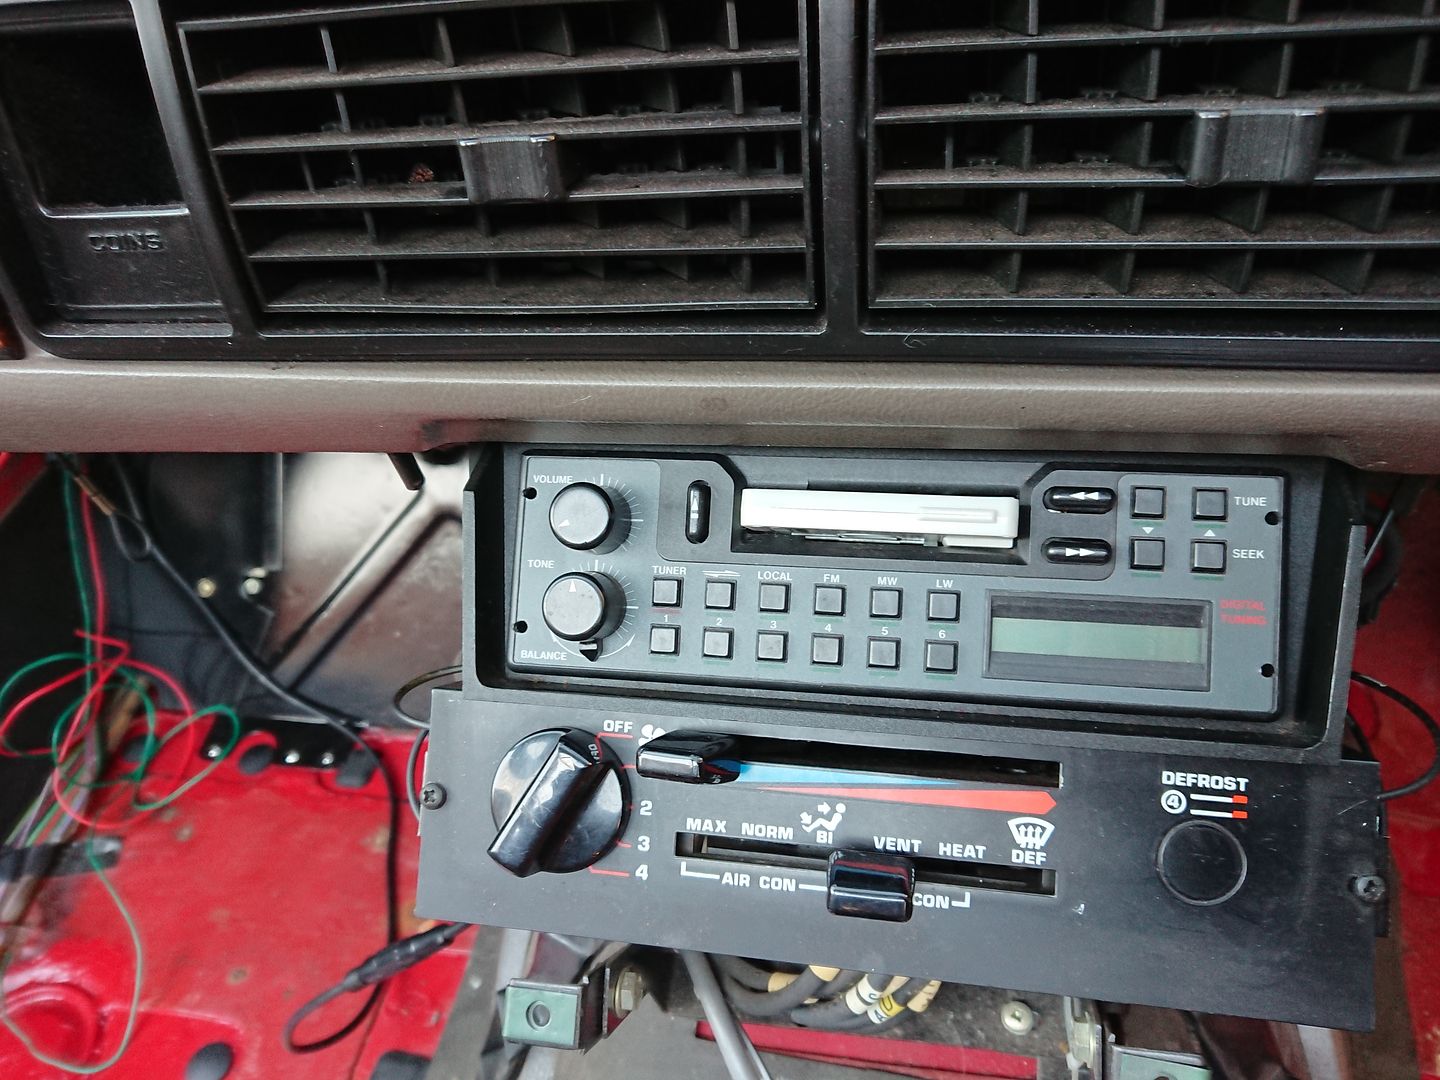
Much better.
Underneath the chrome door steps was the usual affair, and in dire need of a clean.
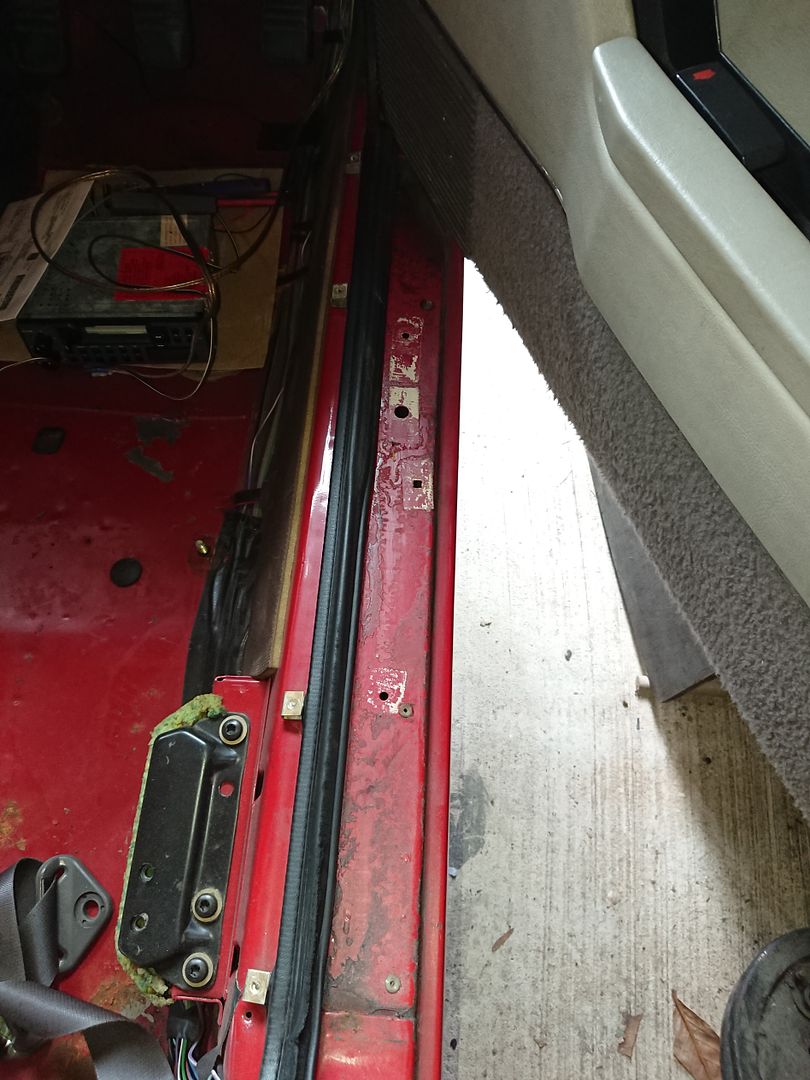
All the old underseal was removed, these cleaned up really nicely, and I then replaced the old tape with fresh stuff, coated it with a light mist of wax, and back on they went.
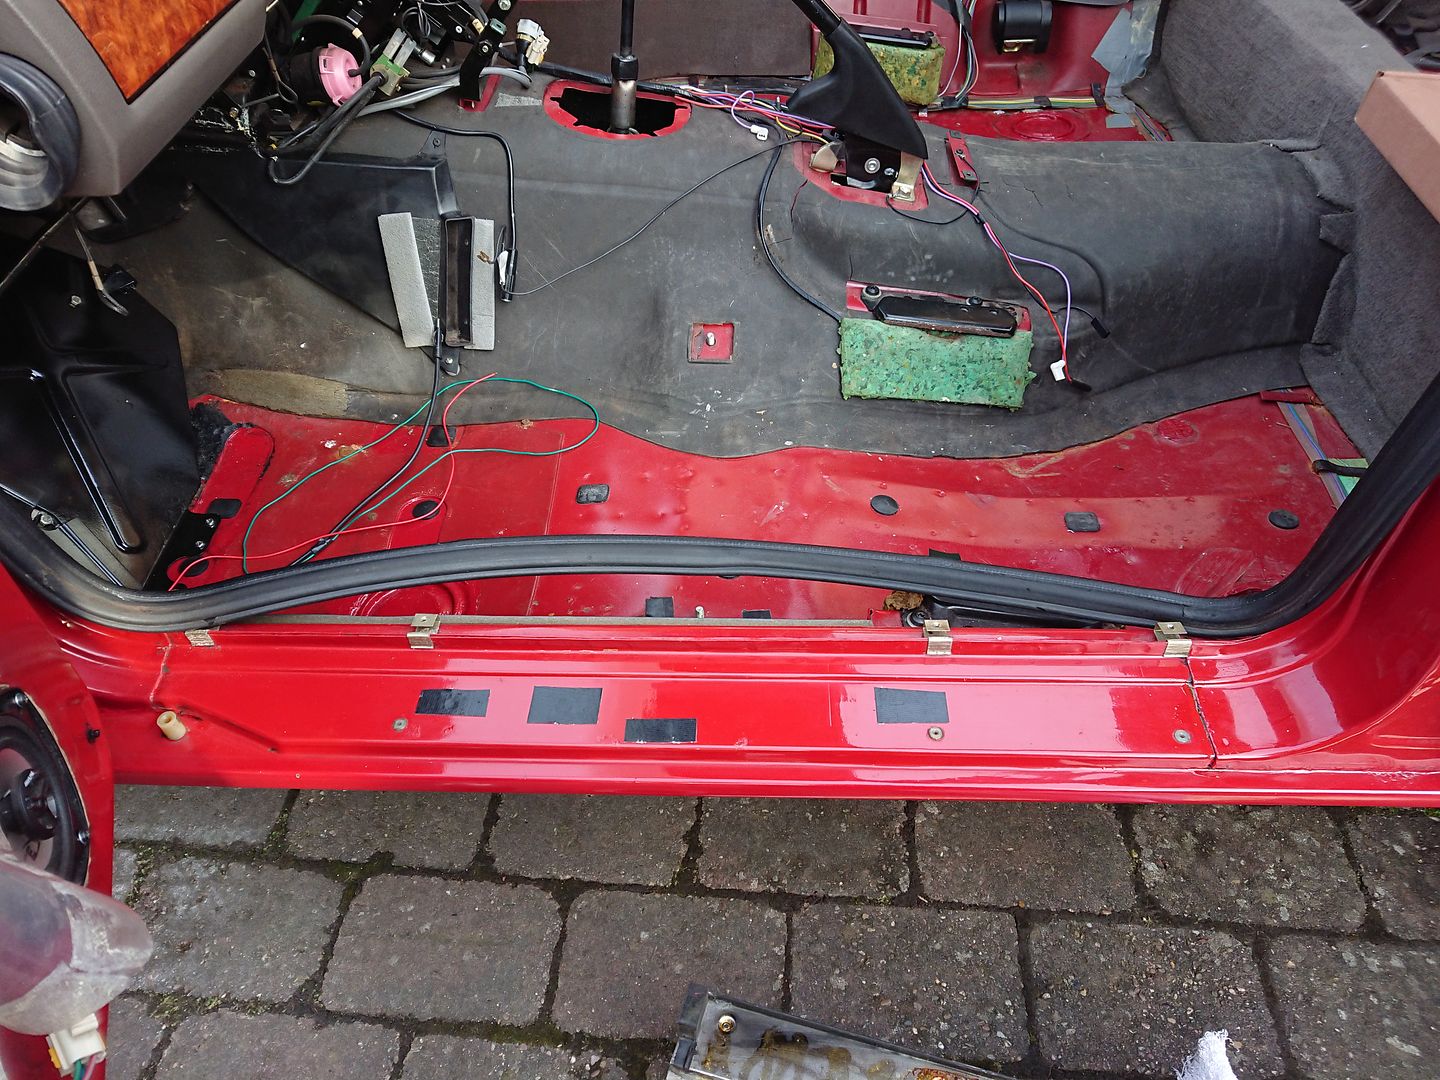
This left the car mechanically sound, exterior almost complete (just the rear bumper and sunroof missing, but interior still gutted.
I had a whole lot of exams and courseworks coming up so had to leave the car alone, and it sat like this for about another 2 months. Very frustrating but worth it in the end. Luckily you lot don't have to wait that long!
Joe
With all the big exterior work done, the fiddly and time consuming interior work carried on.
Another modification done by the previous owner was to fit this very modern looking radio.

It doesn't fit in with the car at all, and he butchered the wiring to get it to fit. Using new speaker cabling, and cutting the existing wiring.
I have no intention of using the radio but I couldn't leave it like that. Again the fiddly task of working out the wiring diagrams and how everything needed to be terminated was left to my Dad. He did an amazing job removing all the new speaker cabling, and re-connnecting the factory wiring and repairing damaged sections. We sourced new correct Rist connectors, and a spare SD1 wiring loom so we had all the correct terminals and connectors. Everything works now as it should, even reconnecting the front rear fader on the centre console. Oh and correctly wiring the electric aerial. Previous owner had powered it from the passenger map light, completely ignoring the correct aerial relay.
The only thing that remained from the previous bodge was the actual speakers, as I wasn't going to find original ones. I did find an original radio though. There were 2 types fitted, earlier cars had a Motorola, and later cars had a Phillips. My car is right on the cusp of when they changed, so I'm not sure what it should have. It has the Motorola for now but that might change.
Went from this

To this.


Much better.
Underneath the chrome door steps was the usual affair, and in dire need of a clean.

All the old underseal was removed, these cleaned up really nicely, and I then replaced the old tape with fresh stuff, coated it with a light mist of wax, and back on they went.


This left the car mechanically sound, exterior almost complete (just the rear bumper and sunroof missing, but interior still gutted.
I had a whole lot of exams and courseworks coming up so had to leave the car alone, and it sat like this for about another 2 months. Very frustrating but worth it in the end. Luckily you lot don't have to wait that long!
Joe
Edited by 1275 GT on Friday 20th July 11:47
Gassing Station | Readers' Cars | Top of Page | What's New | My Stuff