1985 Rover 3500 Vitesse
Discussion


KelvinatorNZ said:
You could do similar to what I did on Lucas, if you wanted a temporary solution. Innovate tailpipe adaptor, and then taped the gauge in a pod to the top steering column shroud. I even wired mine to a 12v plug so i can plug it in the ciggy socket.
That's a really neat solution, if I hadn't already committed I'd have gone with one of those, as I could use it on other projects too... TheDoggingFather said:
What a great read, the 80's is when cars started to get really complicated, and they didn't really have the gear to back up the ideas!
The Vitesse looks fantastic on those BBS' rims, kudos for fitting the Turbofans.
More power, new box, new suspension, must be time for a Quaife LSD now?
It's definitely getting to that switch over point when cars weren't built to last. The Vitesse looks fantastic on those BBS' rims, kudos for fitting the Turbofans.
More power, new box, new suspension, must be time for a Quaife LSD now?
Cheers

It's definitely on the list, the rear end is one of the few things I haven't rebuilt and it does have quite a bit of backlash. So when I get around to that I'll have to chuck an LSD of some sort in there, it would be rude not too!
So another reason for choosing to just pop a lambda boss on the exhaust was I'd noticed a blow from the manifold to the downpipe so I knew I had to re-seal it before it's MOT anyway.
I'd even bought some stainless filler wire so I could have a go at welding it myself. But when I couldn't even see my welder in the back of the garage I had to revert to plan B, have someone at my work TIG it for me.

Did a really nice job,
While it was off, I gave it a clean up.


My positioning was spot on and the sensor came out exactly where I wanted it too. It comes up over the gearbox, into an unused factory cable stay on the body and through the same grommet as the ECU wiring loom into the cabin.
This is where things took a turn for the worse. When I went to remove the downpipe I noticed a little wet patch by one of my wheels, no bother it'll only be water. But then I noticed the back of the tyre was also wet...
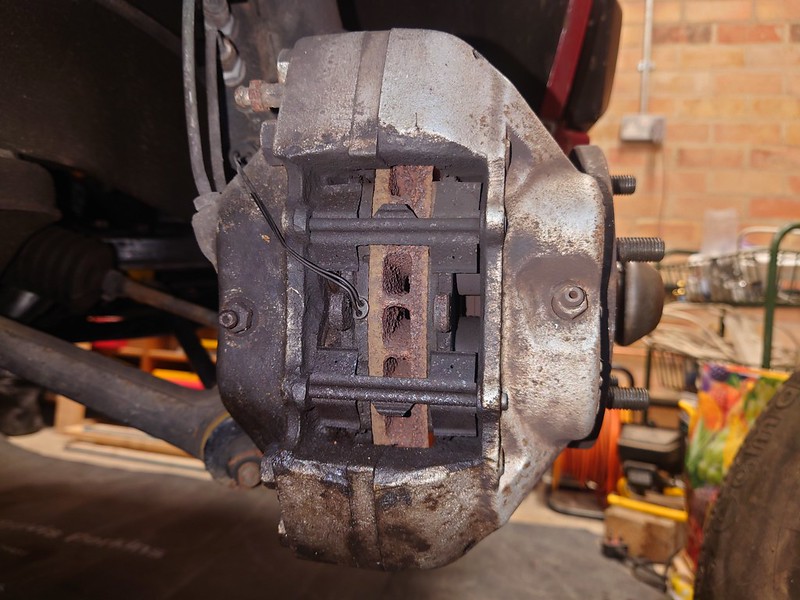
A wheel off quickly confirmed my fears. I'd got a failing brake caliper seal.
Like all projects my timing was tight, MOT was due in a week booked for Friday 4th, and I was displaying on Voodoo Motorsport's Stand at Ultimate Stance in Telford the day after. (I'm aware my car isn't even a little "stanced" but the wheels are cool)

If I'd had the time I'd have just sent both calipers out for refurb.
I'd actually already planned to do this when I change the front struts for the Bilstein's if they ever pull their finger out and finish them off!
But I figured I could turn the calipers around faster so I bought a caliper rebuild kit from Big Redd with 8 new SS pistons.
The kit arrived next day so started to pull the calipers apart.

I'd read my workshop manual, and thought I'd have them done nice and quickly... how wrong I was.
In essence the 4 pot AP Lockheed calipers are the same as most SD1's (although the Vitesse is vented and has twin fluid feeds)
They're also the same as most Land and Range Rovers of the same vintage, and even LDV vans. So nothing exotic by any means.
What I hadn't read up on, and something that a quick internet search reveals what a colossal pain in the arse the lip seal dust covers are to get back in.
The little metal cups bend at the first sign of force, and of course the kit only comes with how many is needed.
The actual fluid seals are lower down and are easily changed. I figured they're only dust covers, so replaced the rubber elements and re-used the original metal covers that reinserted easily.
lubed up the new pistons and refitted everything.
I popped them on the car and soon regretted not painting them, as they looked rubbish. So gave them a quick blowover.

With new bleed screws they really didn't look too bad.
I even found in my stocks some NOS brake pads!


Things took a turn for the worse when I tried to bleed them, and promptly pissed brake fluid all over the floor.
Re-using the original lip seal covers was an obvious mistake, but as 2 of them had been pushed out, it obviously wasn't sealing on the fluid seal either. I figured I just hadn't got the calipers clean enough, or contaminated the fluid seals with the old lip seal covers. Either way I pulled them both back off.

I ordered another seal kit from Big Redd, and the next day spent the day cleaning the calipers making sure all the sealing areas were spotless.

You can see my less than stellar paint job!

While I was at work my Dad proceeded to completely strip the calipers.

After watching a few videos I also finally worked out there is of course a special tool to fit the lip seal covers. There's also a few different DIY solutions.

This video is absolutely brilliant.
https://www.youtube.com/watch?v=MbpcHuVWpkA
He also shows that the fluid seals are handed, but I couldn't tell with the ones I had...
I used my big magnifying glass and really couldn't tell an orientation. There was no instructions either to help with decode the 3 red stripes on the seals either.

Using the threaded rod and large washers worked a treat to get the lip seals in, but 3 still got kinked, they're so hard to get in!
I was really running out of time at this point so I started to look for a landrover parts place within driving distance. A drive to John Craddock came next, they list genuine, AP, and britpart. But sadly only stock britpart instore. At £2.10 I bought 4 sets to avoid a return trip.
Ironically only 1 further kinked seal occured.
At this point they'd gone together really nicely so I was feeling optimistic, and I thought I'd treat them to a proper paint job.


Both came out so nicely.
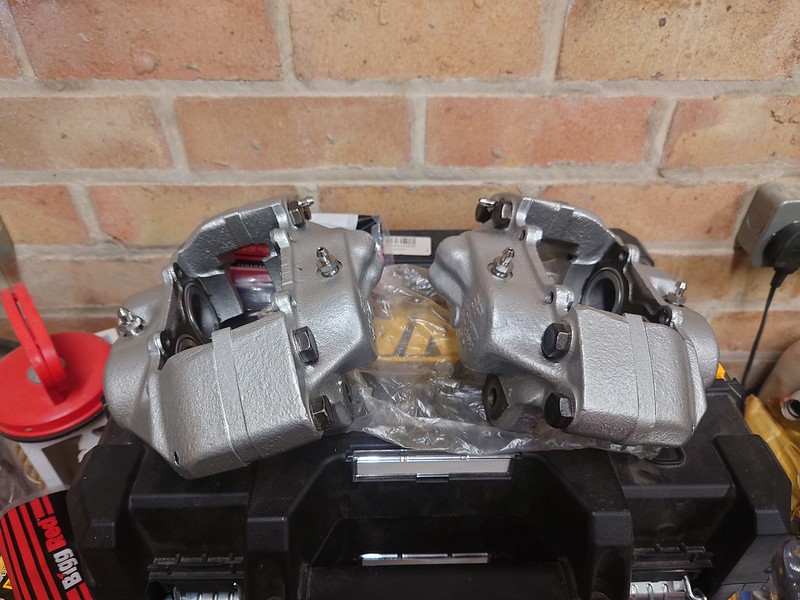
I left them to dry, and on Thursday I got them fitted.

I'd pressure tested them with an compressor to about 50PSI so was feeling confident.
I started to bleed them and heard a pop, and I had fluid coming out of my caliper.

I looked across, and I had a drip coming from the other caliper too...
This was 8pm. MOT booked for 8:50am the next day.
A more sensible person would have called it.
In reality I should have called it, but I had 4 sets of seals...
This I don't have pictures from but unbolting the calipers and flexi lines from their brackets I took the calipers off, pushed the pistons out, changed all the fluid seals for the britpart ones ( those I could see a rounded and square edge, square edge faces outwards) left the lip seals in place, lubed up the pistons with rubber grease and got them back in.
I did this in a drip tray to keep fluid loss to a minimum, and then ended up with this.

I lost a bit of paint, but in general they still looked pretty good.

Now to just try the bleeding again.
This was now 11pm, I needed a win. Thankfully the bas***ds bled, and standing on the pedal didn't leak.
The pedal actually felt really nice. I didn't want the false hope, but I couldn't find a reason not too.
So I carried on making sure everything was nice and clean, chucked the wheels on and went to bed with the MOT looming in the morning.
Joe
bolidemichael said:
Cliffhanger!

KelvinatorNZ said:
Brakes are a pain in the bum, hopefully its all sorted now.
That piston tool looks awfully familiar too
I found this video really helpful for rebuilding my calipers, and it shows the same method I used to get the dust seals in place with no failures. Pushing the seal, retainer and piston down at the same time helps to not bend the retainer
https://youtu.be/9kmaWATUM_c?si=sYqAZgj4ZdLqQqzB&a...
They really are! That tool looks incredibly familiar doesn't it. That piston tool looks awfully familiar too
I found this video really helpful for rebuilding my calipers, and it shows the same method I used to get the dust seals in place with no failures. Pushing the seal, retainer and piston down at the same time helps to not bend the retainer
https://youtu.be/9kmaWATUM_c?si=sYqAZgj4ZdLqQqzB&a...
That's the method I also used, I think the suppliers of different caps also have different thicknesses and designs, and that makes a massive difference too.
Bobberoo said:
Jesus what a PITA!!!
You are not wrong! At 7:30 I rolled it out of the garage.


I had no puddles under the car and I'd checked everything else, so let's go get an MOT.
Gave it a quick run around the block to check the brakes. I genuinely had someone pull out of a junction on me so can confirm that they work.
I'd wanted to do some more indepth tuning, but I just didn't have the time. So the drive to the MOT will have to do.
What the lambda did tell me though was it was running far too rich at cold start, idle, part throttle, and a little lean at WOT.

I'd received some brilliant tips on how to set up the AFM, basically you set it so the spring in the AFM is as tight as possible, but still outputs the 1.595v at 100% load. (generally a 3.5 to a 3.9 is 4-5 teeth tighter)
So I had a base to go off and used the adjustment screw to pull up the AFR to around 14:1.
I checked all lights, washer jets etc, and found the rear washer jet blocked...
A frantic checking activity ensued. The pump was working, the jet clear, and I had fluid to the non return valve under the bonnet. I couldn't clear it just by blowing , so disconnecting the jet and blowing air back through the line with a tyre compressor blew some rubbish out, and we had a clear line. It's a brave move as you can also blow joints or lines doing this... but I got lucky.
Thankfully and very unusually for that time of the morning the roads and M1 was clear.

Back to my favorite MOT garage. It's in enthusiast hands so although always nerve wrecking it's always good fun.
The wheels went down very well, there might have been some stroking...
Now unusually I didn't get any during MOT pictures, so you just get a boring it passed!
I headed home and back to work for the rest of the day feeling pretty smug.
I got off work and spent the drive home dialing in the tune a little more.
I added some more fuel pressure, and ended up with 13.8-14:1 at idle, 14 ish on cruise, and 12.6:1 at WOT full load.
That's with just under 50PSI of fuel pressure, so I can't image my spray pattern is perfect. You can also see that once you get to 6k RPM the AFR start to climb so I think I'm at the max of the standard injectors, but not bad at all. I could always drop some bigger jag ones in...
Gave the old girl a wash ready for the show and called it a day. Cars eh!
No rest for the wicked so up the next morning, and a soaking wet drive up to Telford.
Vitesse behaved beautifully, the new wipers and heater meant it didn't mist up at all. A massive improvement.


Got it cleaned, and just for the laughs chucked the turbofans on.
I really enjoyed being part of Voodoo Motorsport's stand showing off their beautiful work on the E53's.


I had a brilliant weekend, and in the end was worth the incredibly long week and stress to get there.
Having the car inside, prepped and secure for the evening was actually brilliant, meant waking up on Sunday for the show was the least stressful show day I'd ever had!

The drive home was equally as smooth, car really did me proud.
Joe
bolidemichael said:
Nice that you immediately reaped the rewards of your updated air con (and wipers), but where was the suspense for the MOT pass? I demand a refund!
And brakes... D I know I could have built the suspense a little bit couldn't I.
It is the 6th clean MOT it's had though so it surely deserve some credit for that!
witko999 said:
Love a set of gold wheels.
I see there's an Avenger at your Mot garage aswell.
I'm really starting to love the gold, really accents well with the red too I think.I see there's an Avenger at your Mot garage aswell.
Yes that was tucked away, I forgot to ask about it though.
Joe
davey83 said:
Fantastic cars, always loved these
You and me both! So it's been a very quiet winter, and not much has really changed!
Before Christmas a friend was telling me about a new venue venture he's involved with, Great Northern Classics in Derby. They were having a soft launch coffee morning so I thought I'd blow the cobwebs out.
Looks like a little more than cobwebs needed blowing out!
My dad was coming with me, so had started to pull the car out when a scurry of mice came from under the bonnet!
He managed to get a picture of the slower one...

I'd been ill (a covid reoccurance) so hadn't touched the car in a while, it probably had been sat for 6 weeks.
Luckily they'd just been in my already saggy under bonnet insulation, and at the back, so no visible damage.
I gave the under bonnet a really good look over and couldn't see any wiring damage, so I think I got lucky.

A detailed assessment of the damage and just a quick hoover was needed.
I gave it a good blast out to get it nice and hot and try and make it as unappealing to mice as possible!
Due to my earlier discovery I turned up quite late but still managed to coffee and a good look around. As it cleared out I got beckoned to park up front.
It's a really cool venue, and not too far from me, so I can't wait to see what they make of it.

I also visited the old Rolls Royce motor works as it was right around the corner. I work with modern RR engines and I've also got an interest in Derby Bentley's so really cool to see where the later were made.

When I got back home the Vitesse was tucked away but now with a few mouse traps around it!
The next few weeks parked up were less eventful until I of course signed up for the first Sunday scramble of the year.
I figured I'd give a good wash beforehand, and just wanted to have my wheels the shiniest, so gave them a really good wash.


It's still far from perfect, but so much nicer to both look at and work on that when I started.
Also just not touching the car while the weather was bad is not good for me, because I plot...
I've convinced myself that centrecaps makes the wheels look too OEM. You can't see the depth of the centres, and they don't look as "racey".
So I've taken them out...
I have the same opinion on my GKN's on my 1275GT's, and minilites any other minis...

Was a really good day, but god was a grateful of my newly amazing heater it was cold!


I also met up with fellow Vitesse owner Reece, we took pictures, we compared notes on how we've both messed with them, good times.
I also managed to just beat the gritters home so the car wasn't even that dirty.

Not a bad end to 2023 and start of 2024, sadly now the weather is now gross so the Vitesse is back in the garage. Again with lots of mouse traps...
Joe
njw1 said:
As I said in the Granada thread I'd much rather read about this than a million quid supercar. Very good work!
ConnectionError said:
Me too
Mr Tidy said:
And me! 
High praise indeed about a man's obsession and ramblings about an 80's barge. One thing I do have to my advantage is more breaks so I have more to write about!
Speaking of which I'm still plotting my front suspension upgrade.
Front uprights "should" be ready from Bilstein in the next few weeks.
New front arms have arrived, but they'll need stripping and painting properly.
I am struggling to decide what to do about new front discs.
Go standard or some of the nicer EBC ones, I don't think anyone else makes discs for the SD1...
Joe
bolidemichael said:
Sorry to learn that you weren’t well, Joe. What a bummer but glad you’ve bounced back and your Vitesse alongside.
Yeah all good now! Bad news on the brakes front, I finally bit the bullet and ordered EBC discs and pads, only to be informed a few days later that they've discontinued that line and won't be making any more.
I actually can't find any for sale now, so I'm a bit screwed now...
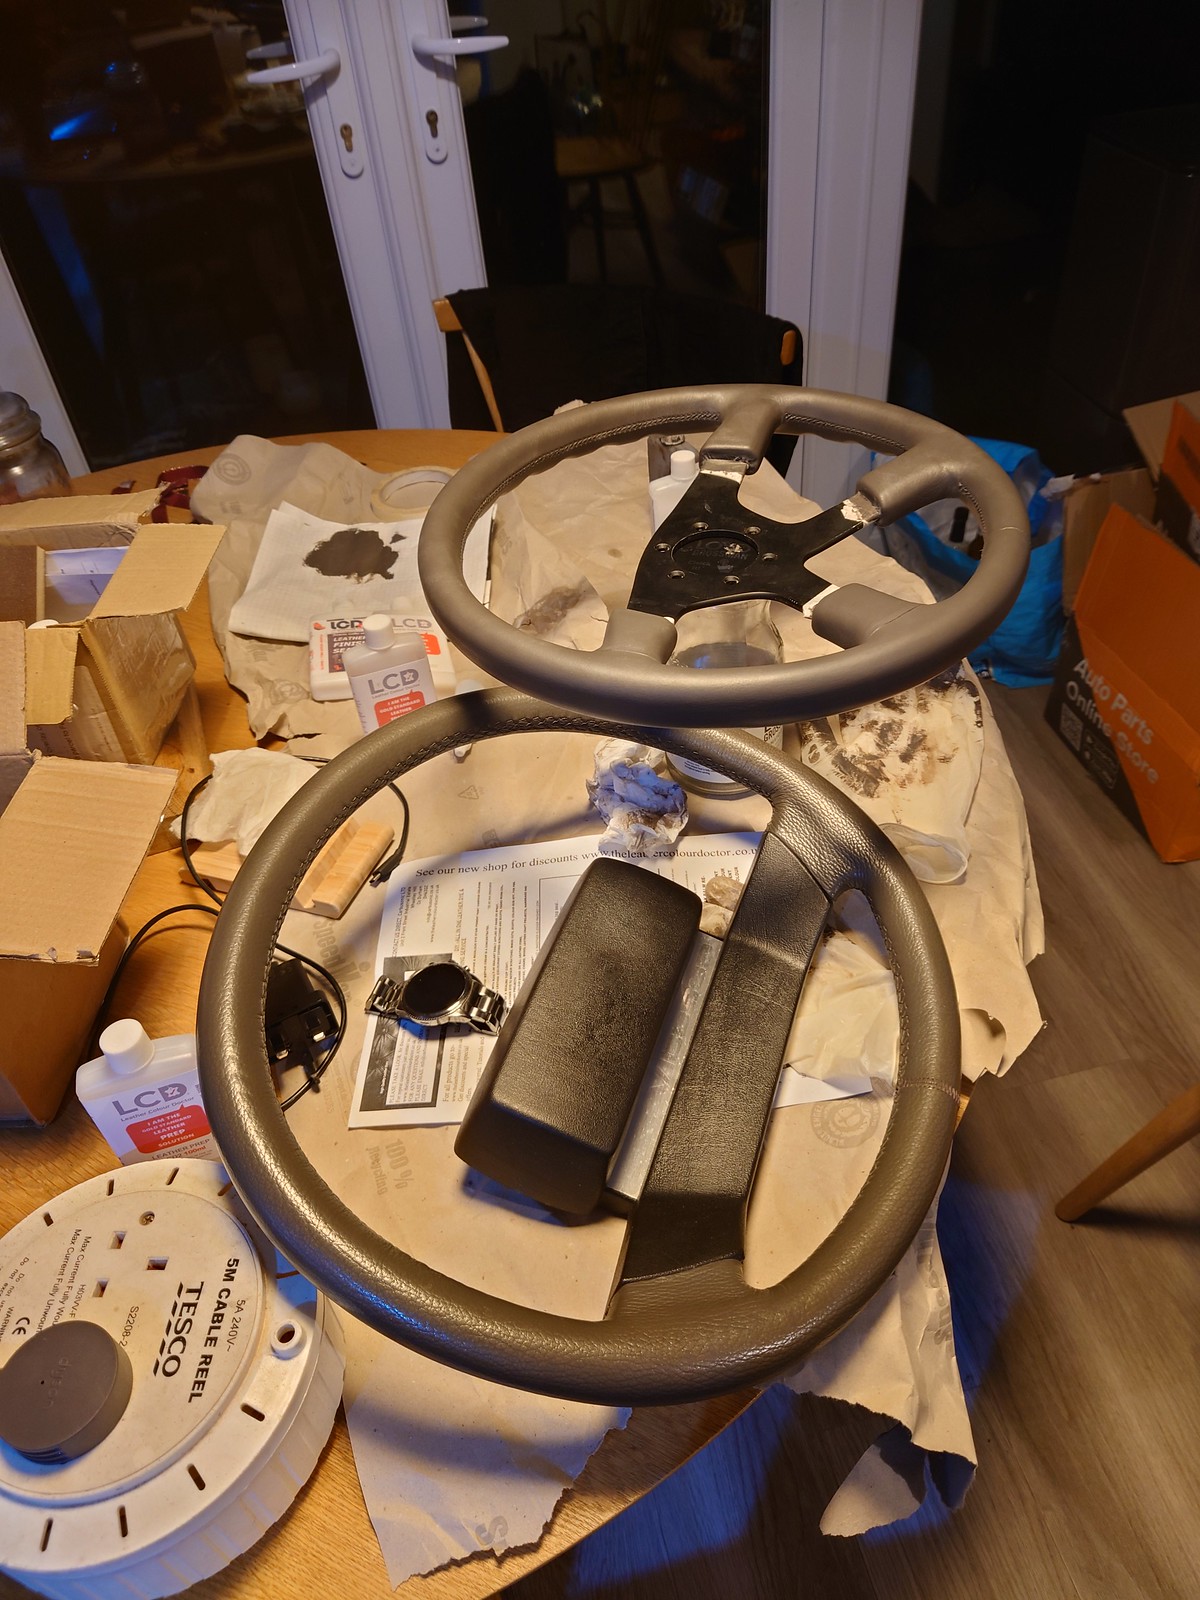
So while the weather has been terrible and I haven't been doing stuff I've been plotting. There was a few pictures from last year that really highlight how much my colour choice of my steering wheel doesn't match the rest of the interior...

The Porsche Slate Grey has a really navy blue undertone, that does not match the brown grey Rover vinyl.

I spoke with the dye company and they offer a matching service, but as I'm trying to match the door cards and dash I can't exactly post them a sample. So I went with the more difficult option and bought a tinting kit.

By adding reds and yellows, then accommodating the shade with black and white I went through quite a few versions before I got to a colour that I was happy with, it also took ages as the wet colour and what it dries too are so different.
It also looks lighter here too...
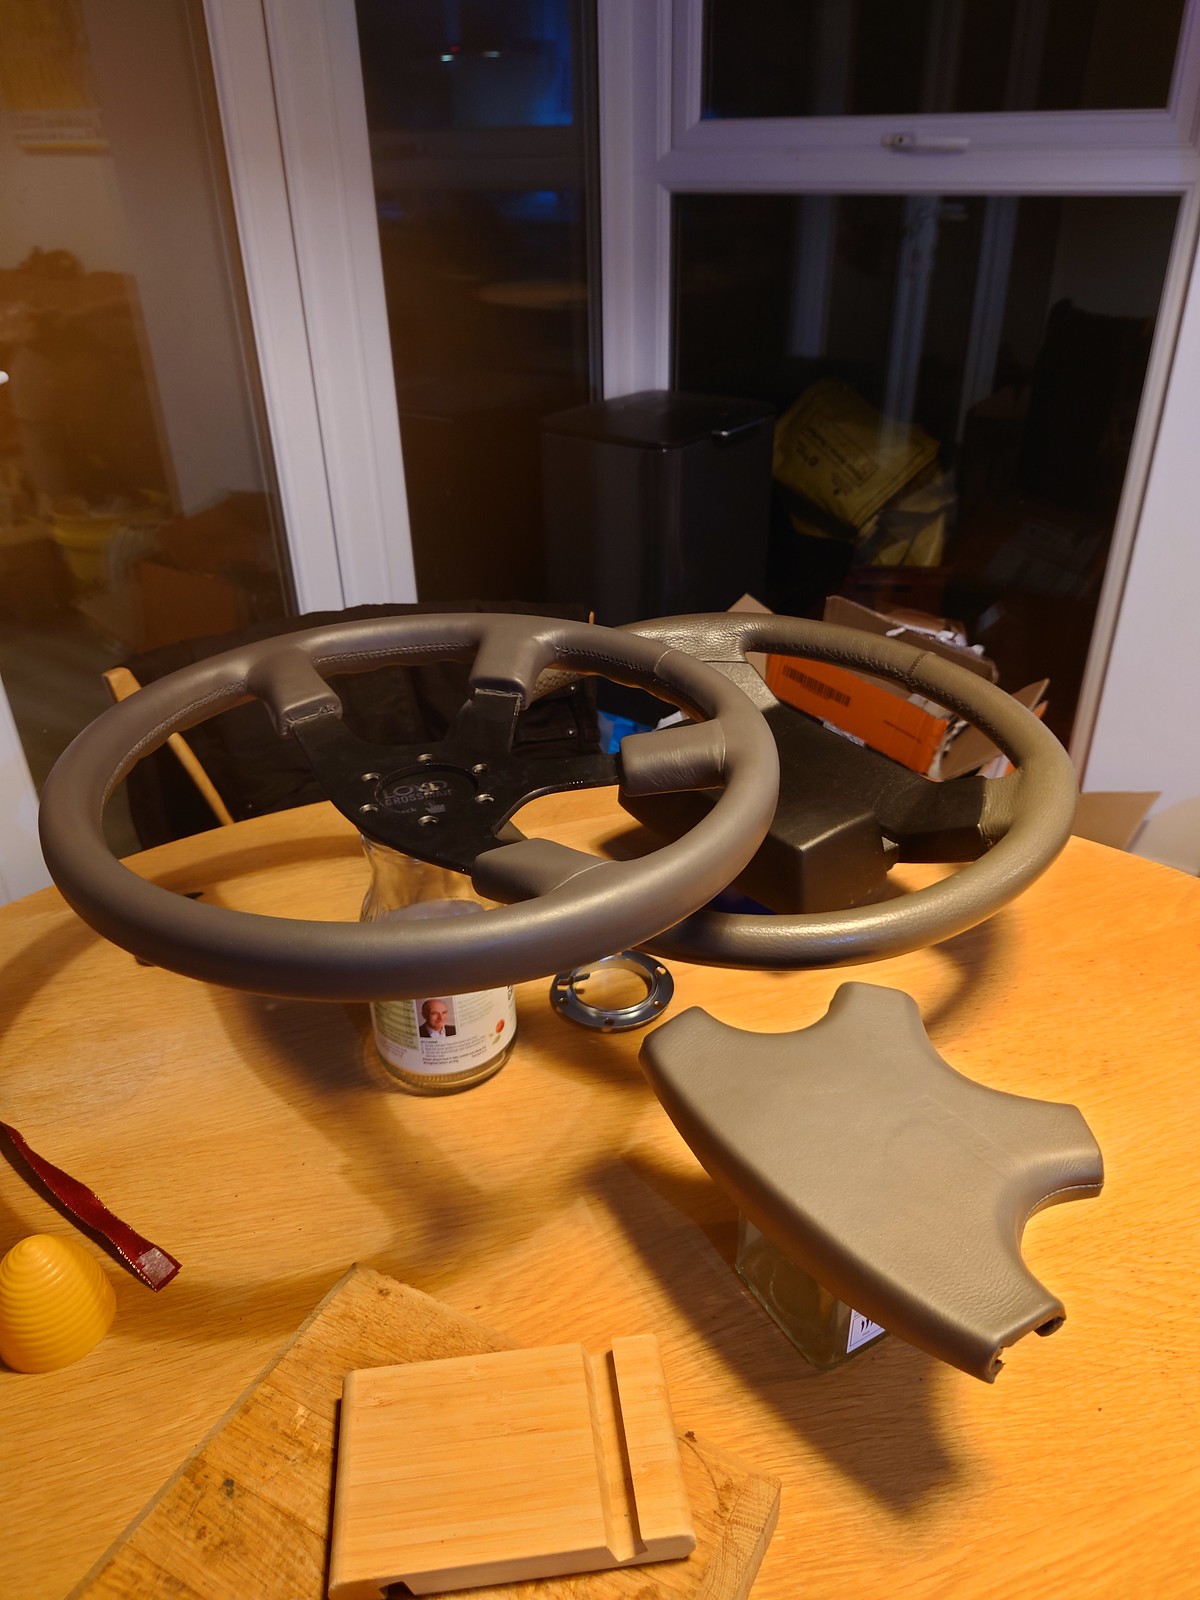
But not in this pic!

Get that thing back on the car! Quite like the no pad look too, might have to order a centre badge...

But for me that's a lot better, I could have gone a lot browner like the original wheel, but I only remembered I had it to hand after I'd started dying...
Joe

miniman said:
Could you make it if there was a space?
I actually don't have anything planned that day so I could! Spinakerr said:
I was just getting used to the blue wheel.
But seriously, great job getting that done - hope to see it in the metal/cowhide soon. Good stuff.
I wasn't, urked me everytime I saw it in that light. Although I will say it was still better than the Jaguar Biscuit it started out as. But seriously, great job getting that done - hope to see it in the metal/cowhide soon. Good stuff.
Definitely, are we doing another walk around at the April Sunday Scramble?
Joe
Strangely Brown said:
Purely personal taste but its original wheel really does look better. It suits the car far more and completes the interior. The replacement looks, well, like a replacement. But that's just my taste.
Great job and all credit to you for saving a gentleman's dragster.
Cheers Great job and all credit to you for saving a gentleman's dragster.
I can completely understand, and from an aesthetic point of view I agree it suits the interior perfectly. But it really detracts from the driving experience, it's so bloody massive that anything other than cruising it feels so wrong, it really makes the handing feel bus like! Whereas the Momo I think suits the interior style, and feels beautiful in comparison. But that's the joy of bolt on mods!
21st Century Man said:
I'll be at Rustival in something suitably rusty and ste and derided (the Century will be staying home for a change), I'm even holding off putting yet another coat of Hammerite onto the arches to hide the rust bleed stains. Perhaps I'll see some of you folks there?
I should probably bring my green 1275GT in it's rusty glory! I love the dedication. te and derided (the Century will be staying home for a change), I'm even holding off putting yet another coat of Hammerite onto the arches to hide the rust bleed stains. Perhaps I'll see some of you folks there?
eskidavies said:
Our spotted thread here in S wales , brought this up today
https://www.pistonheads.com/gassing/topic.asp?h=0&...
Scroll down
I like that, an Oporto Red V8! looks like it's been hidden away for a few years too and only recently back on the road! I like the body coloured spoiler too, and a clean look with no overriders or rubbing strips. https://www.pistonheads.com/gassing/topic.asp?h=0&...
Scroll down
Joe
Sfs34 said:
Just found this, read halfway down page 1 and im hooked. Awesome car. Very excited by 36 pages to go :-)
Up to date. Inspiring levels of dedication right there. I doth my cap, wow. I felt for you with heater gate, looked painful.
I hope you enjoy my waffling! Up to date. Inspiring levels of dedication right there. I doth my cap, wow. I felt for you with heater gate, looked painful.
Yeah the heater was a bit of a slog, but such a nice part of the car now. Blows boiling hot and clears any misting so quickly now!
Rich1973 said:
Was nice to see your car in the flesh today. Didn't see you or I would have said hello but car looked fabulous. 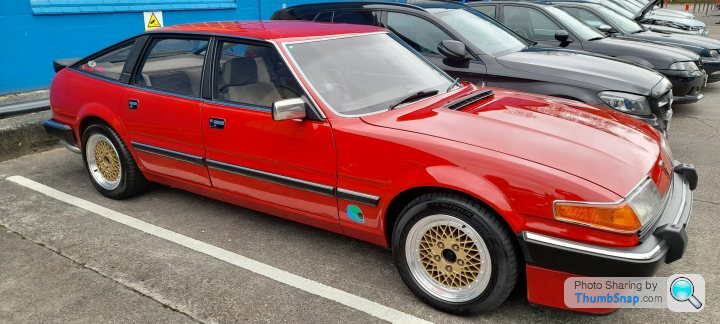
Cheers! Was a good event, I was probably inside looking at other old cars. I didn't get to look around the last time I was there.
So this week after quite the wait I finally got the good news I've been waiting for!


What things of beauty.
I'm a little concerned I might have gone a little short on the springs, but we'll see!

Of course I couldn't wait to unbox everything.
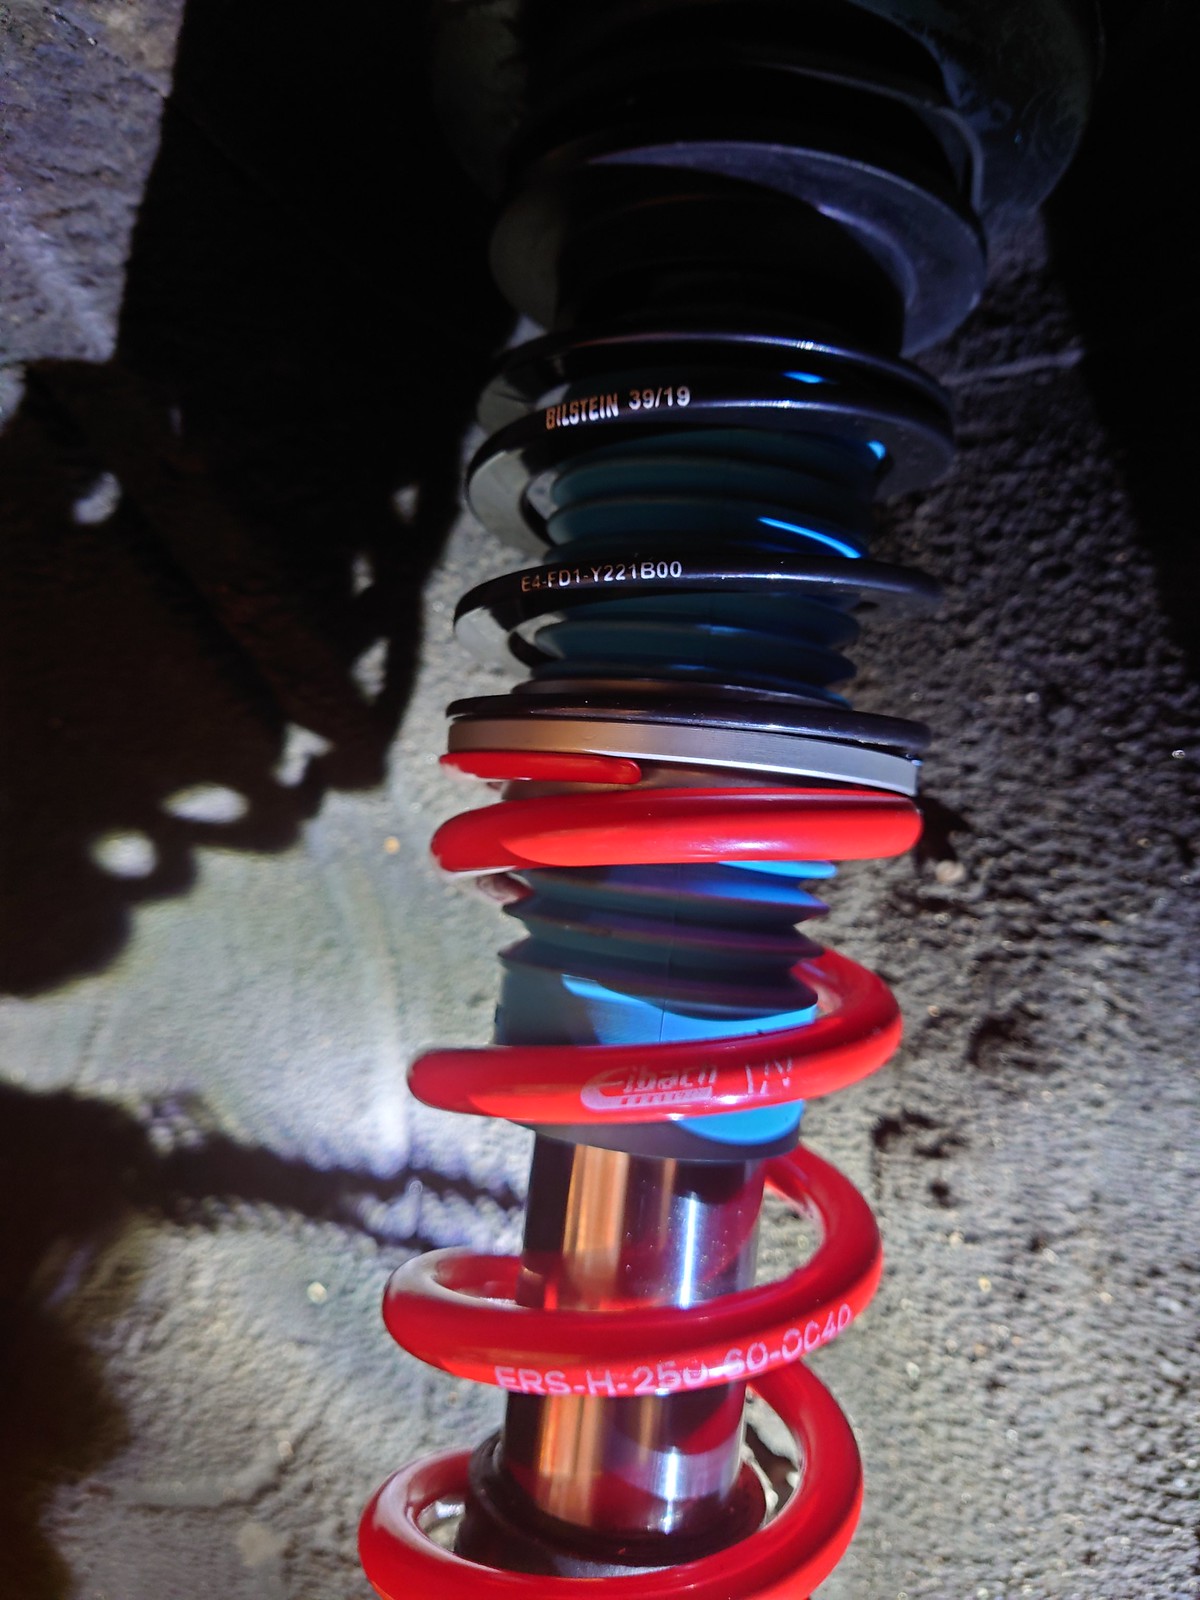
So what I've ended up with is custom inserts welded into the original knuckles, the original brake line brackets welded back on, and custom top spring hats.
Shocks are custom specced somewhere between original road and Group A touring car
with integral bump stops. Springs are 60mm motorsport, and I've gone for 250mm open length, 40N/mm linear rate.

Should go very nicely with my new (and painted by me) front arms.

So a few hours later I couldn't help myself...

A lot easier than my Audi! Play stopped today though as I don't have a 24mm offset spanner to tighten the top mounts on.

I'll pick up again tomorrow, otherwise I'm not going to Bicester on Sunday!
Joe
21st Century Man said:
Love to see the Bicester regulars. I'll be there.
Sorry I missed you! miniman said:
I enjoy a challenge BEAMS 162 said:
Just read through and a great job! The red paint looks brilliant,I also loved that sort of icy metallic blue they came in,think it was mentioned early in the thread as Moonraker.
Amazing how imposing these cars still look too,sort of a bit brutish but in a good way...I do remember the Touring cars when I was very young,epic things.
God knows what it must have been like in the day if you were up to a little automotive mischief,and one of these in Police trim loomed up behind you.You would have known then that the game was up.
But yeah really good work,must be great rumbling around in this and taking it to the shows.
Cheers Amazing how imposing these cars still look too,sort of a bit brutish but in a good way...I do remember the Touring cars when I was very young,epic things.
God knows what it must have been like in the day if you were up to a little automotive mischief,and one of these in Police trim loomed up behind you.You would have known then that the game was up.
But yeah really good work,must be great rumbling around in this and taking it to the shows.
So the icy blue is Zircon Blue, but that was never officially offered on Vitesses just other SD1's.
The only blue offered on Vitesses was a slightly darker metallic blue which is Moonraker.
Yeah I can only imagine being chased down by one!
The touring cars for me is what makes it cooler than any other Rover, something about a racecar version of a road car that just does it for me.
I really do love rumbling around in it.
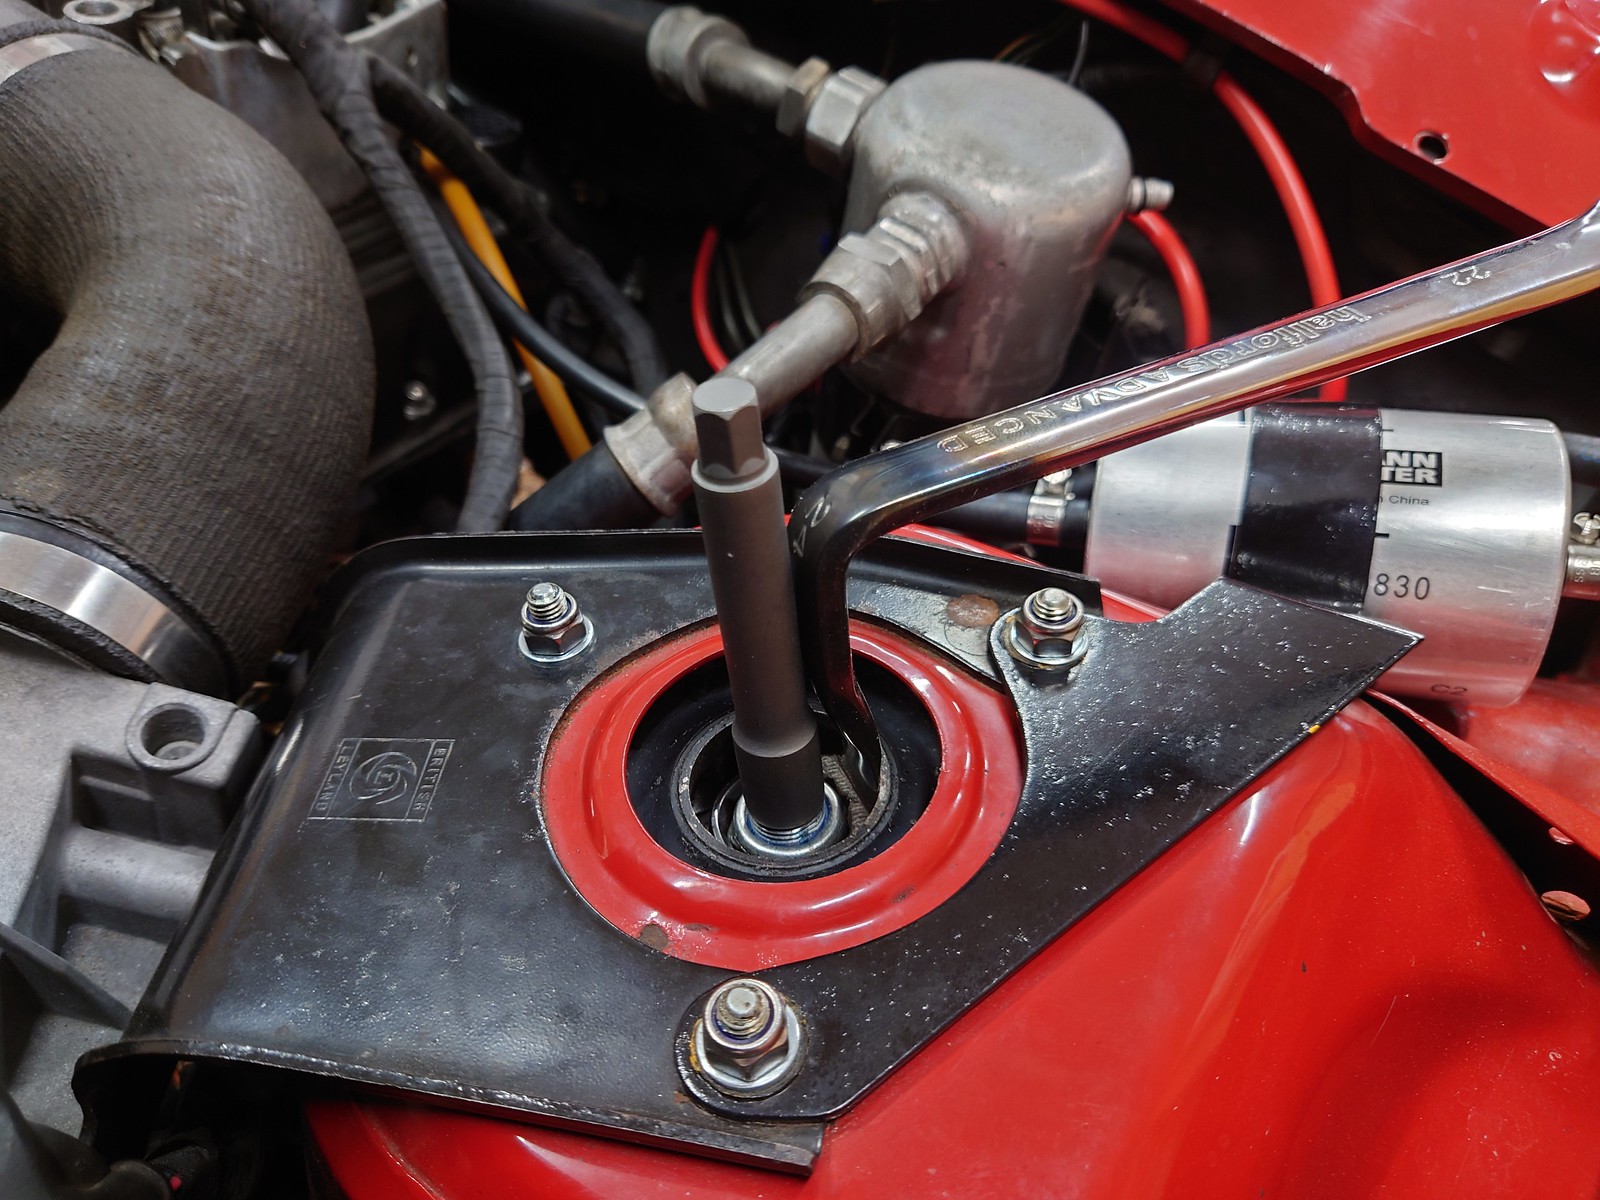
So first task I had was to just tighten the top shock nut!
I had offset spanners but not up to the 24mm I needed so I headed out and bought a 24mm spanner.

Annoyingly it's the only one they had, and it's not even close to being deep enough.

But nothing a blow torch, a vice, and an angle grinder couldn't sort.

The before wasn't bad, but certainly nothing to write home about.


The brake dust shields were actually in really good nick just in need of a good paint job.
A good job as they're the only bit of the strut assembly I planned on reusing.


Building up the new struts was lovely with everything being new.
I did pull the washer out of the original struts that sits between the top nut and the bearing as it's a nice thick one.

There's no removing those inserts!

The new front arms went in first, then the strut.

Disc shields back on.

Then hub assembly and caliper!
I'm still a bit annoyed I can't fit new discs at the same time. That's an issue I need to work out another time.
I also opted to reuse the original bearings. They were silent, unmarked, and etched made in england. So a re-pack with grease should see them going for a good while longer!

New SS hardware for the top mounts too.
The drivers side is an identical process.
New arm in...

Then just with a earth on the brake bracket, and a clip for the pad sensor wire.

I popped an original wheel on to check clearance, as they're incredibly close to the original shock body, and everything still fits.

The BBS's have plenty of room

Not a bad view at all.

I was worried I'd gone too short on the springs so I'd set it quite high to start with.
Turns out I shouldn't have been worried.
I think that's higher than stock!
I did a little road test and was pleasantly surprised.

So I came back and pulled 30mm out of it.

Definitely not front high now!
To get that height though at full droop I've got no pre-load on the springs, so I will need some helper springs.
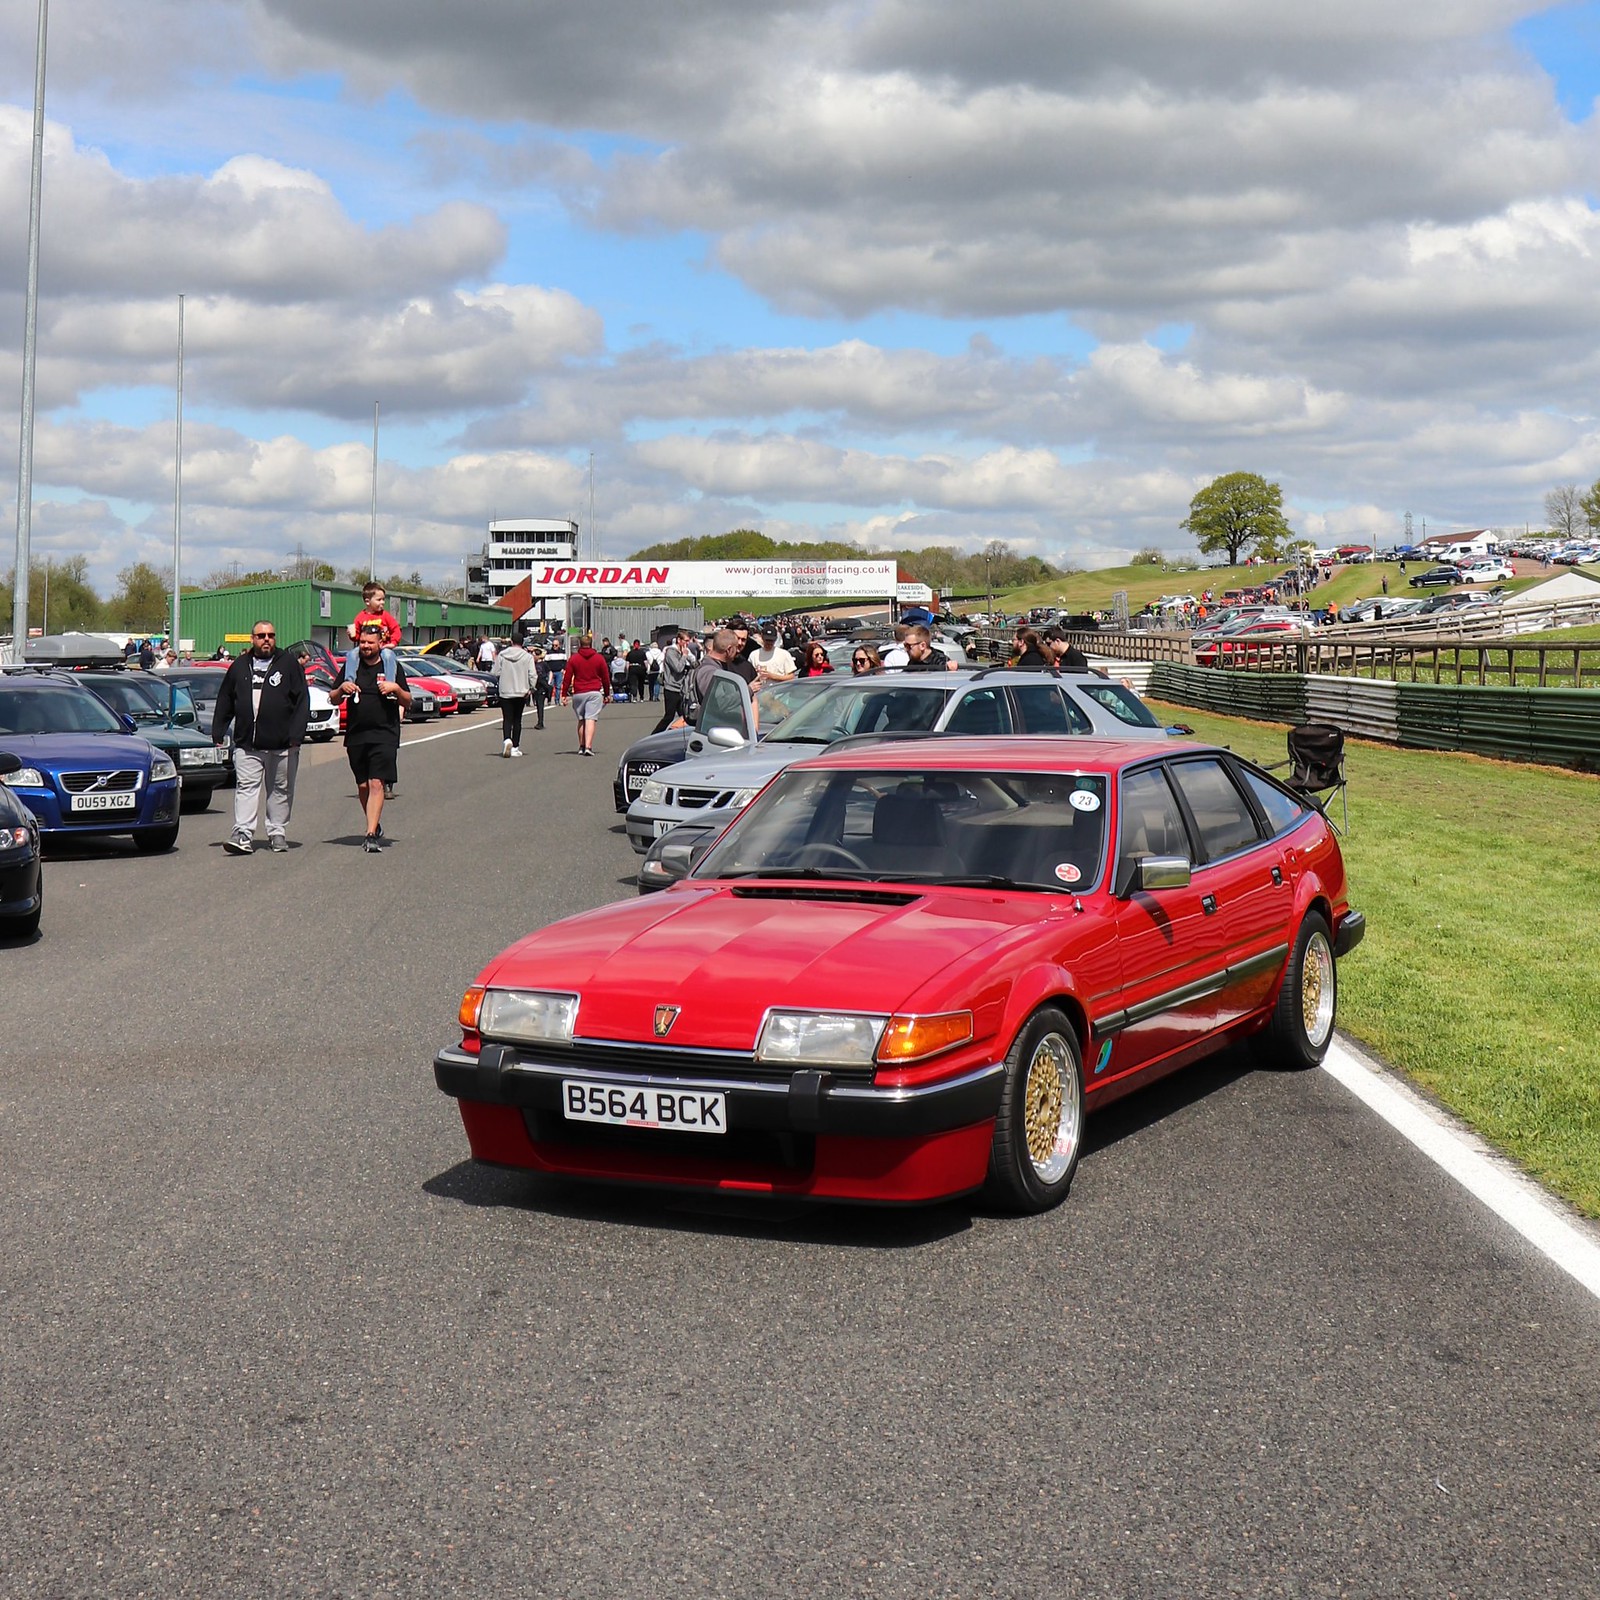
But just in time for a run out to Bicester the next day.

Bright and early at 7am ready to leave.
Joe
finlo said:
Would a socket not fit that top nut?
A socket would fit, but with a new nylock it would start to spin the damper insert which can destroy the seal so you need to hold that still and still turn the nut. I used my modified spanner and a 10mm crows foot which worked, but did marr the top applying the final bit of torque and the crows foot started to slip. 
What you actually need is one of these, a holding insert bit which is thin enough to fit through a socket, and then an oversized socket with an external hex so you can also turn it with a spanner.


Little bit of too little too late, but I'm terribly impatient and didn't know the size of bit I needed before I got the dampers. If I'd been sensible I'd have waited until I had all the correct tools before I started... but I'll still need it to fit the helper springs.
grumpy52 said:
My mate the classic restoration guy phoned me to offer this.
Sadly it's a manual and a 2300.
His 17 year old boy has bought it as his first car even though he hasn't passed his test yet .
He is slowly sorting all the faults. Replacement starter motor already fitted along with squealing fan belts .next is gearbox extension mounts as they have lots of movement.
Dad has a 3.5 VDP twin plenum in met green.
21st Century Man said:
2300 is quite sweet though, compared to the 2600.
I'd love to go through the full SD1 range and try them all! I'm still trying to convince myself I'm happy with the ride height...
It's definitely lower than a standard Vitesse!


Joe
bolidemichael said:
It’s too low, looks good, but too low.
I've done around 200 miles in it so far, haven't caught anything yet, and done quite a few speed bumps! B'stard Child said:
Au Contraire - Could do with a bit more drop - tyre gap to the arch is closer but not quite close enough
I hate you saying that because I'm thinking the same...miniman said:
Looks awesome to me.
Thankyou!
Spinakerr said:
I think it looks about right - your experience for the next few 100 miles on British roads may bring the final height back into question!
Top stuff, as always. I apologise for interfering with your alloys at Bicester.
The peer pressure was just too much for Callum, I expected better from you... Top stuff, as always. I apologise for interfering with your alloys at Bicester.
Mr Tidy said:
And me.
I certainly wouldn't want it any higher.
Yeah I won't be going back up! I certainly wouldn't want it any higher.
The journey to and from Bicester was around 140ish miles, and I've driven it a little more over the last few days and I haven't had any grounding issues.
I had the same revelation when I fitted the rear springs and shocks, I think having knackered shocks means it comes down harder which grounded it out before.
It's never been able to go over the middle hump bumps anyway...
I'll fit the helper springs when they turn up this week and we'll see
Joe
Edited by 1275 GT on Sunday 28th April 22:13
B'stard Child said:
Because that's perfection - not stupid sump scraping low - just "spot on"
Go lower and the wheel arches look like skirts too much bell
The helper springs turn up tomorrow, so I’ll have a play before Shedfest on SaturdayGo lower and the wheel arches look like skirts too much bell
miniman said:
Yeah C303TSO is probably one of the best restored Vitesses around, mine can’t hold a candle to it. But quite scary to see what it was like before, it was an invasive restoration! I really quite like that mine has retained almost all of its original panelling.
bolidemichael said:
Ride height looks good on that one 
You be nice! And it looks like a monster truck 
No I still think the standard ride height combined with the standard wheels look amazing.
TheDoggingFather said:
I saw that advert the other day, I'm old enough to remember when you could pick these up for less than a grand, alas, I'm also young that I didn't have a grand to buy one...
Yeah increasing values are a double edged sword, it’s nice to see them appreciated, but pulls them out of reach of a lot of people who would really love to own them. With pictures of TSO knocking around it brings me nicely onto what will probably be the next step for BCK, I’m thinking that my knackered paintwork down the drivers side, and passenger side sill lets it down. I’ve been speaking to a few body shops, but a friend’s recommendation relatively locally I think will work out nicely.
I took the Vitesse down last week, and we both agreed that to really do it properly I’ll need either to re-skin all the doors, or just replace them.
All my seams at the bottom have blown out, and all the doors have been repaired in the corners before.
I’m a bit torn between the two tbh…
This is just plotting for the winter I will say.
I still want to keep as much of the original car, but also doing it properly.
I still want to rebuild the diff too, it’s quite sloppy and it really needs an LSD.
Joe
B'stard Child said:
APPROVED
So as the car sat the springs sat just above the tyre edge, and were just on the edge of tension at full droop. I reckon it was about 5-10mm lower than vitesse ride height.So let’s ruin that!
The helper springs from Bilstein turned up!

My 10mm shock holding tool worked beautifully.
I thought I was stronger than I am, as I thought I could just push the shock back down pop the new spring and coupler on, and be done, how I under estimated the force in a new shock absorber!
But eventually after strength finding, and getting the whole front end in the air so I wasn’t fighting the anti-roll bar I won.

I now have full flexibility of ride height, but at the expense of the spring being a little lower, so I don’t think the standard wheels will fit now…
Ahh well.
The things we do to get that 1 finger arch gap

This is 635mm from arch lip to the ground, before modification it was 657mm.
I think my suspension was a little saggy before too. I am pushing my luck…
But I do think it looks cool…

Ride is unaffected and I still got over all the speed bumps on the way to Shedfest…
Just need new smaller bump stops at the rear now.
Joe
Stick Legs said:
I wasn’t sure when you started modding but now I think it looks amazing.
Please don’t over do it but it’s just perfect now.
I also wasn't entirely sure, I was in too deep by the time I even put the wheels on, but I think now the lower ride height makes the wheels work. Completes the whole slightly modded look for me, I think that's it for visual mods. Next steps are an LSD and getting the paint right. Please don’t over do it but it’s just perfect now.
I might put silly stickers on for Retro rides this weekend though...
B'stard Child said:
Spot on - that sits lovely - level just the right amount of arch over the tyre and the wheels fill the arches nicely
I agree I knew you were right daqinggregg said:
Surprised by the size of the front discs, guess that’s how it was back in the day. I had 2600 SE as a student, took it on a European road trip, including the Pyrenees, it did have a bit of an appetite for front pads.
One of my absolute favourite cars on PH, your attention to detail is very impressive, the car looks gorgeous.
I'd love to follow in your footsteps with the roadtrip, definitely on the bucket list.One of my absolute favourite cars on PH, your attention to detail is very impressive, the car looks gorgeous.
Yeah they are a little diddy at only 258mm although vented on the Vitesse compared to solid on the 2600's, and naturally drums at the rear! Compared to the size of the car and similar weight to my relatively modern A3 with it's 345mm front/310mm rear vented discs makes for a very pad heavy wear!
Now I'm struggling to even source standard discs I am looking at upgrades. Annoying I would like to be able to retain the ability to fit standard wheels. But it would be a massive compromise as my BBS's have extra clearance barrels and could take humungous rotors!
Cheers
 that means a lot
 TheDoggingFather said:
That stance is perfect to my eye, somewhere between a standard Vitesse and a BTCC racer, superb.
That was always the dream for this car, so to have other people think it too makes me very happy 
I still think the rear should be a tickle lower on it's -60mm springs, I'll have a look to make sure I'm not on the bump stops tomorrow.
I'll be at Retro Rides this weekend if anyone wants a closer look!
Joe
Gassing Station | Readers' Cars | Top of Page | What's New | My Stuff