1985 Rover 3500 Vitesse
Discussion


gforceg said:
I had an exciting moment on the M5 near Exeter an hour ago when a red SD1 gained on me and went past as I took the off ramp. I wondered if I might have spotted you but the reg was B156 xxx. It was driven by a youngish lad (by my standards) with windows down and exhaust making itself known. Very good.
Yes sadly not mine, but I have been out enjoying it so if you're in the midlands you might see it out and about.Brilliant to hear there's more out there though!
May as well continue with the updates.
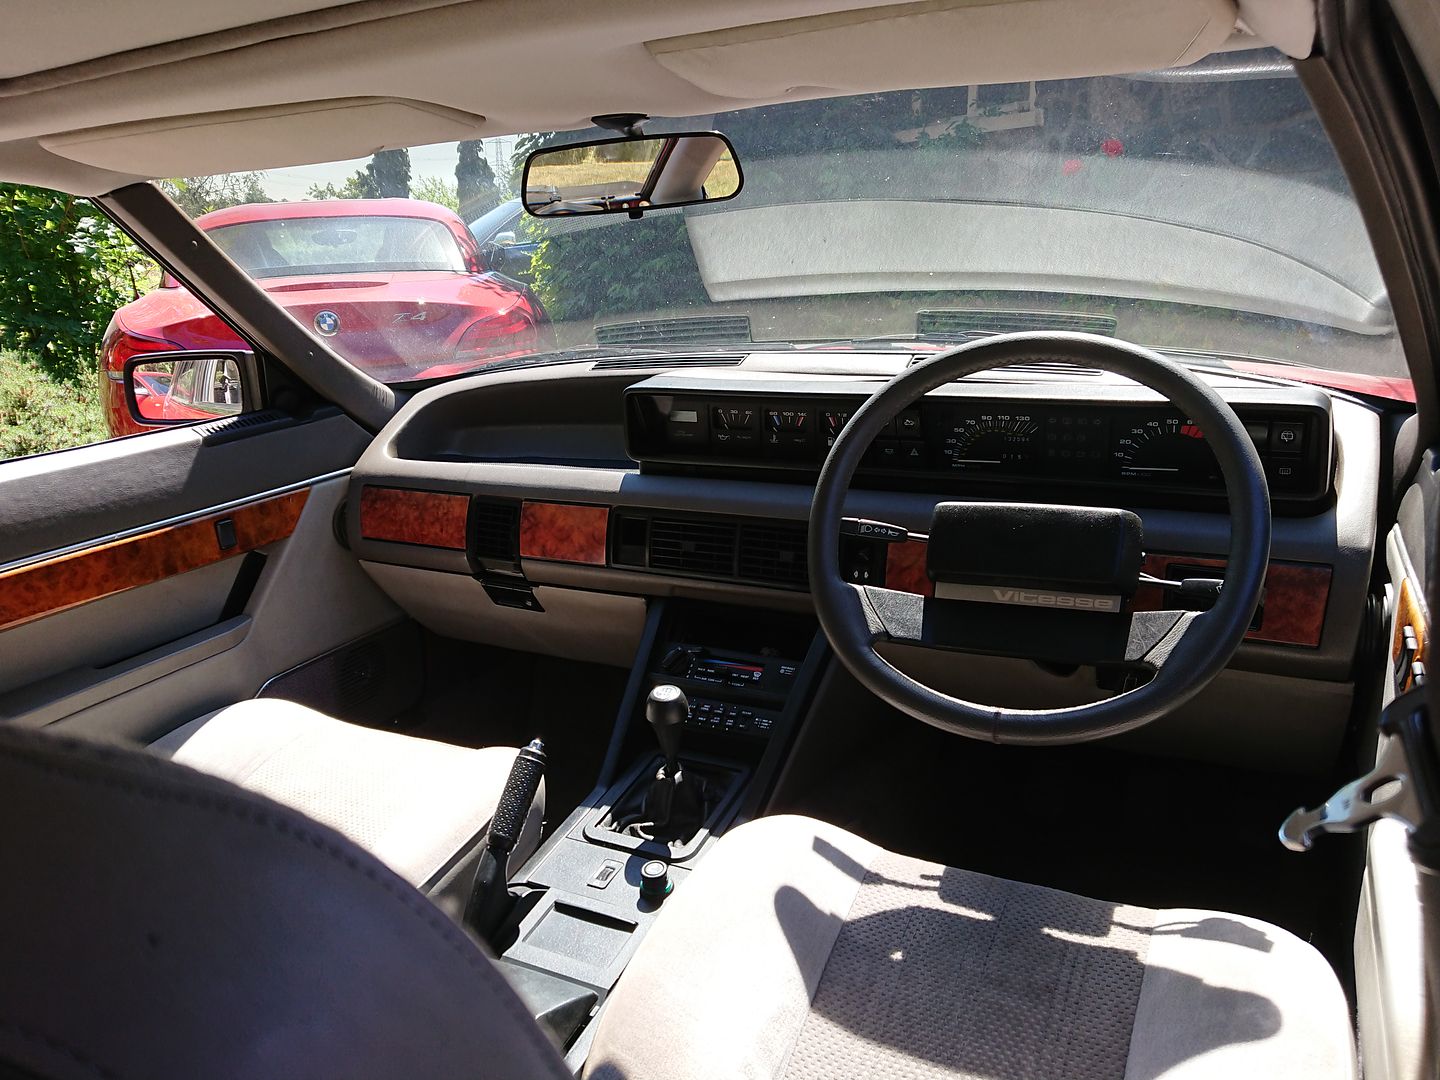
Interior time.
A big mile stone with any project is the interior going back in. SD1s have a massive moulded carpet, and after many hours with a wet vac it was the first piece to go back in.


The boot compartment carpets were a bit nasty, but are original to the car, so again I tried to rescue them.

I couldn't get all the staining out, but I did manage to bring some of the pile back into them.

Fitted them completely cover all my hard work!

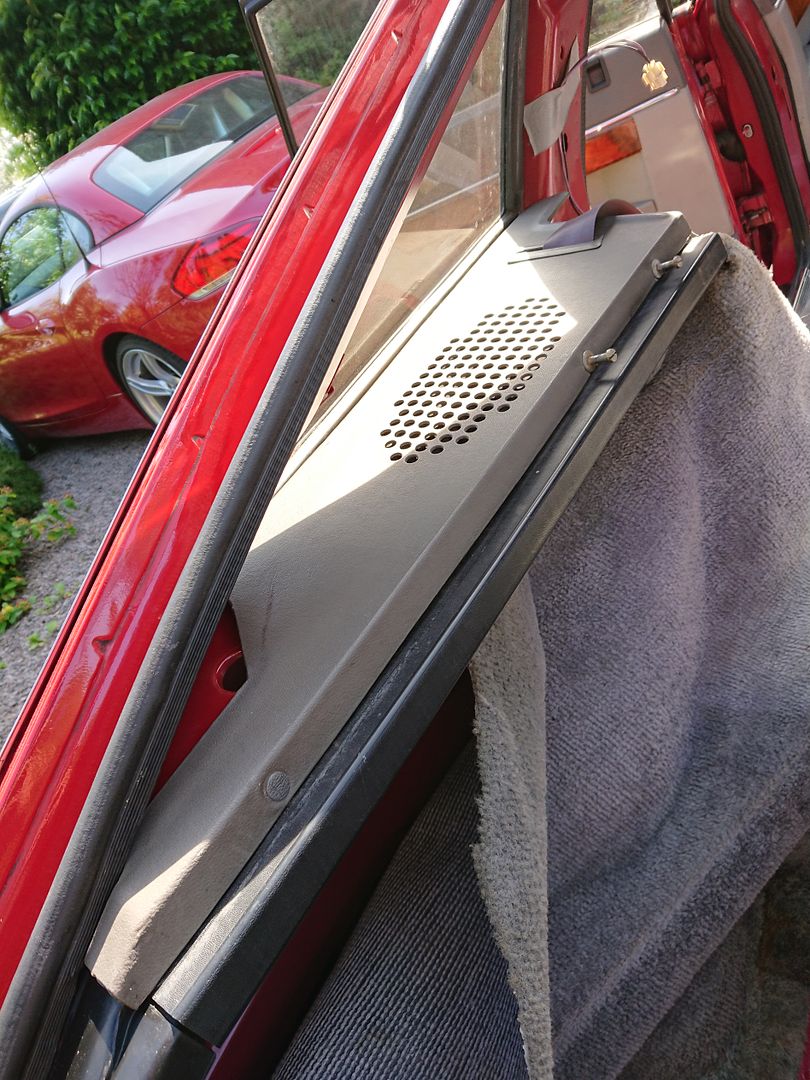
Next up was the rear speaker covers, these are infamous in the SD1 world as they warp and crack, and replacements are like rocking horse poop.

My passenger side one was exactly as described.
It is a shame though, as on the rear side

Original to the car!
But if you can find a perfect pair it'd be silly not to fit them...


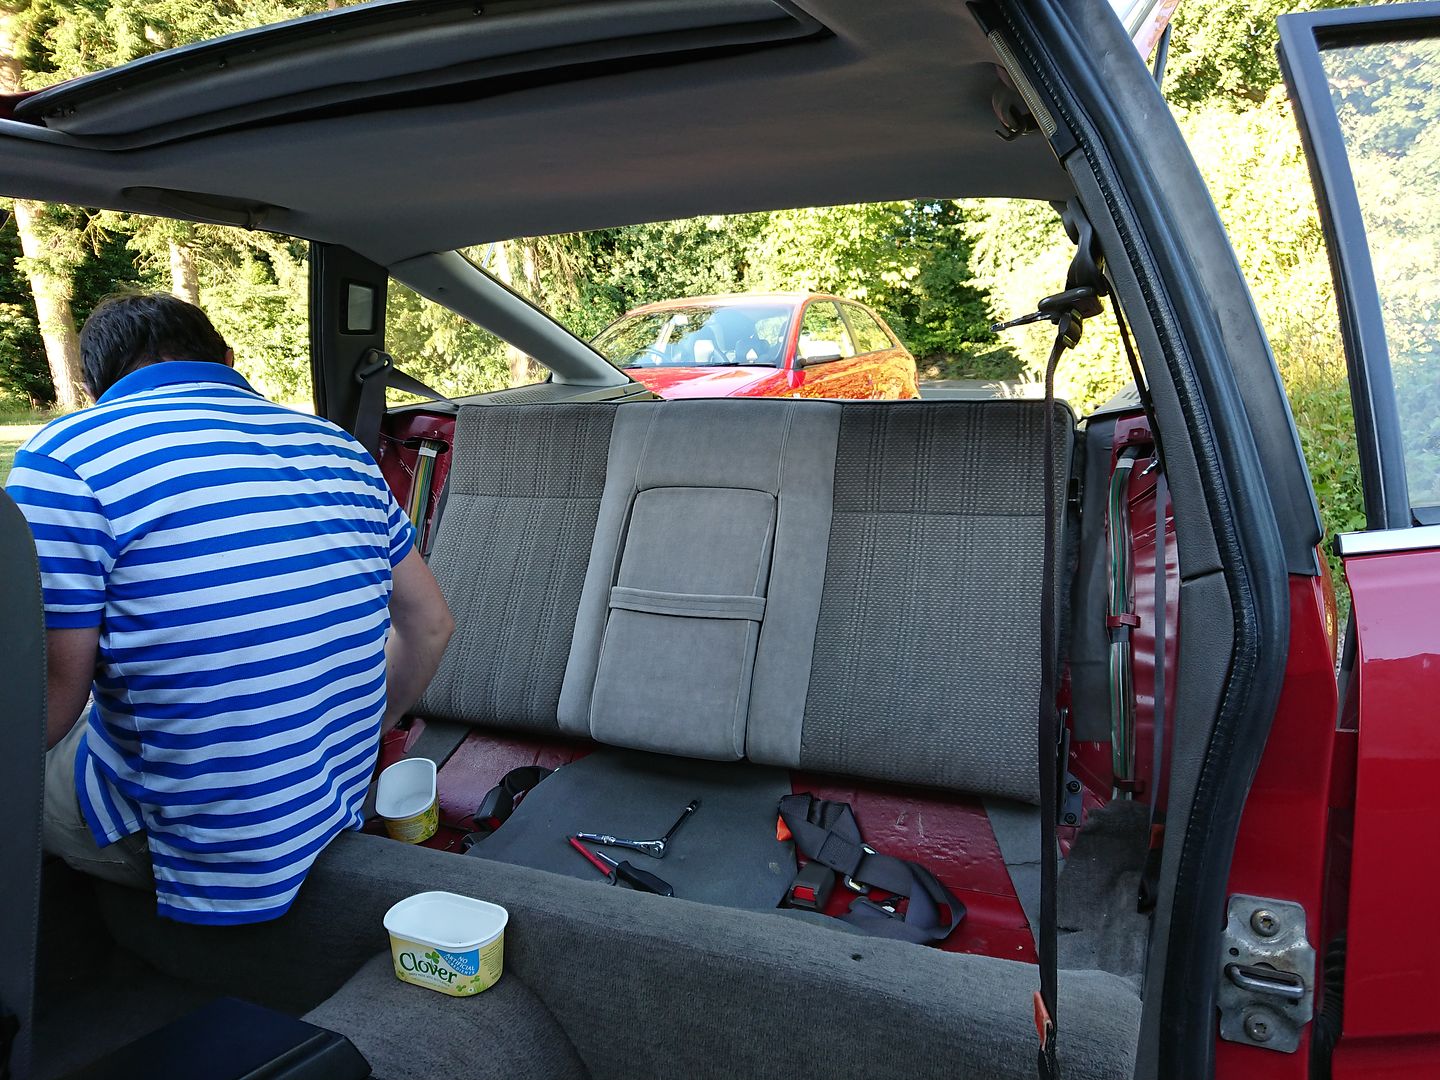
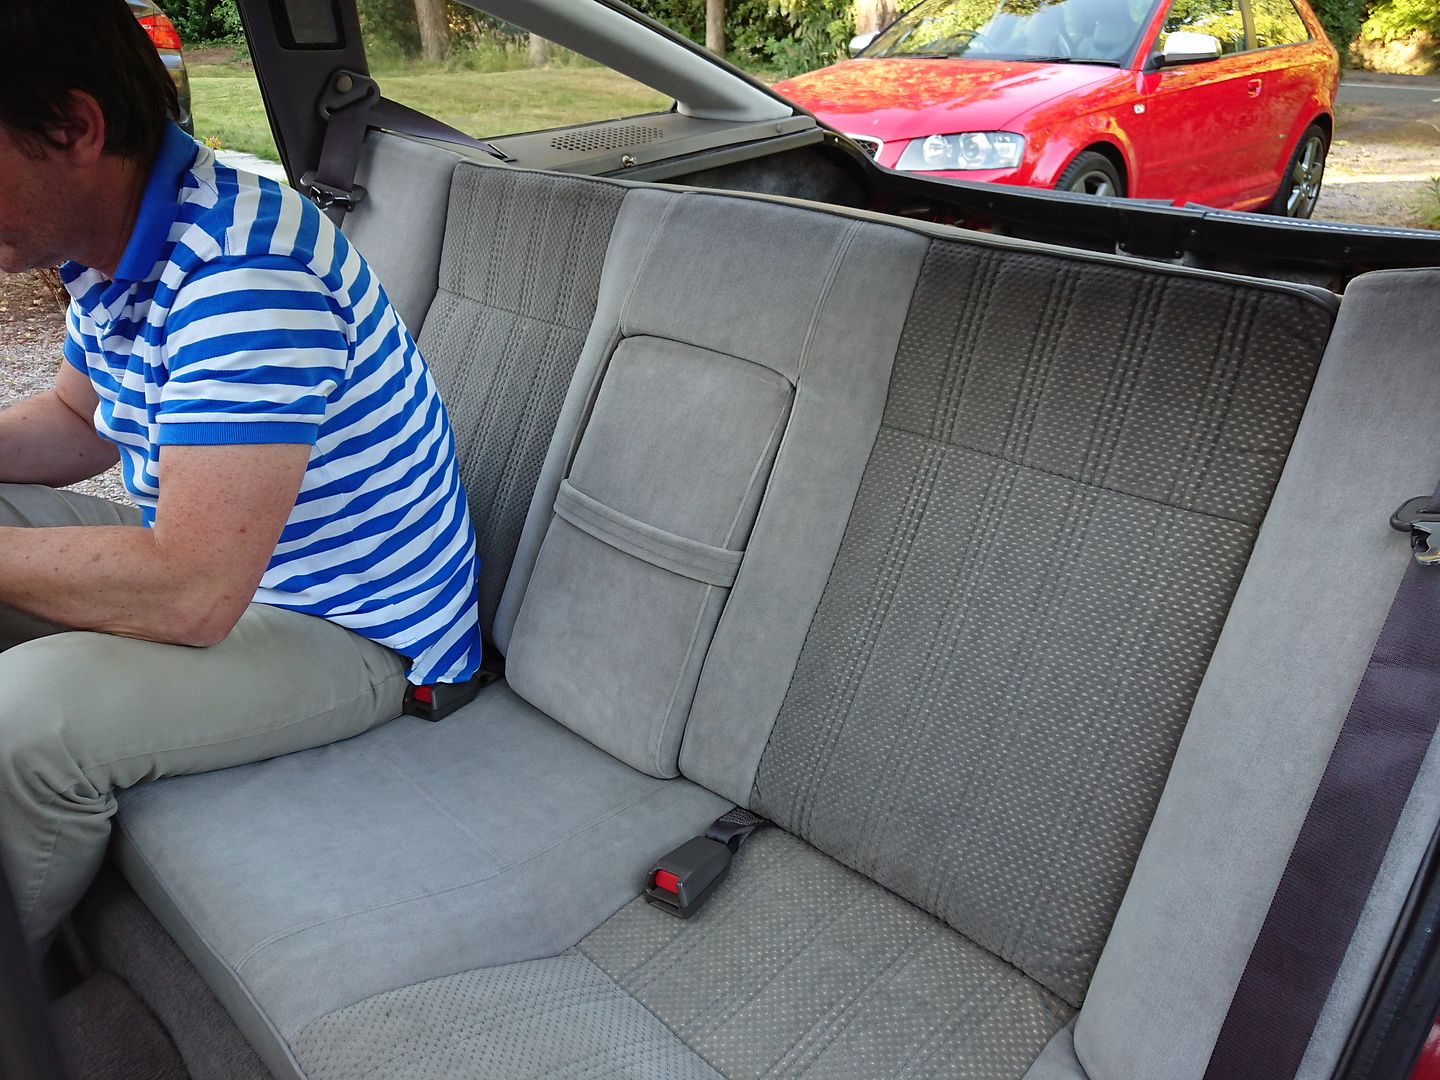
The original rear seats were also thoroughly cleaned awaiting installation.


This was all I was able to do at this point, as next for the interior everything needs to go in...
Joe
LanceRS said:
My Sierra is from 1991 with a tape player and my BMW is from 2002, also with a cassette slot.
My 2005 Audi A3 still has a tape deck... Apart from the look when I put my tape to bluetooth adaptor in it, it makes it much more practical than a CD player.
(It does also have a 6 CD interchanger)
Joe
KelvinatorNZ said:
Your carpet looks fantastic, very nice. Are you also missing the boot floor carpet? Such a pain to get hold of 
Thanks, I'm really happy with how they cleaned up. Yeah I'm also missing the lowest carpet section, such a pain I can't find one anywhere. In the end I bought a Range Rover carpeted wheel cover to cover the spare wheel. Once the boards are in with the main carpet over the top though it doesn't bother me so much. Joe
PorkRind said:
I was up till 3 am last night reading this post / researching about the 3500 - amazing post and some wonderful skills by the OP, hats off to you  .
.
You need to be careful with that, the last time I did that I ended up with one in my garage... .Thankyou though, really enjoyed getting it to its current state.
Usget said:
FFS, this thread led me onto spending an hour (which I didn't have spare) reading KelvinatorNZ's thread!
The Readers' Cars Section is a dangerous place, I've lost so many hours! Sorry it's been a while without any updates, it's been a busy week! But lets get back to some Rover.

With the car awaiting its interior before even considering an MOT I wanted to be sure I hadn't missed anything with the rear suspension or metal work.
I'd had a precautionary look at the rear trailing arm body mounts when I was poking around the boot. I didn't find any holes, but an excess of underseal meant I'd just left it alone. This had been nagging on my mind as it's a known weak spot on SD1s, and I'd rather know if I had problems rather than ignoring it and finding out at MOT time. So I went digging.

Got the car nice and high up and off came the wheels.
(the observant of you will already notice the trailing arm removed by the car, got a little carried away without taking any pictures)

It also shows my rear shocks, they're suppose to be the self levelling Nivomat type, but I've got some weird arrangement with helper springs. I've no idea what they are, but the ride is nice and they don't leak so they can stay for now.
As much as it doesn't look like it, I'm doing my best to not do a full nut and bolt restoration. The aim was always if I did one day though I wouldn't have to redo anything again...


This is under the car looking back at the rear axle, you can see the breaks in the underseal showing a bit of orange, which is why i wanted to go digging.
(Drivers side shown as I'd removed the passenger side before I got any before pics!)
I scraped off as much underseal as I could around the bolts so I could get as much penetrating fluid on them as possible, I did not want these to shear!

Pretty grotty
I was amazed at how well the trailing arms came up with only the ends with damage to the coatings. All the old underseal came off revealing a lovely powder coated finish. All the other brackets didn't fair so well and were stripped, treated, and primed before painting as per usual.


Mmmmmm gloss black.
Before.

After.

So with the easy to replace parts sorted, more importantly how was the car!?

Definitely needed looking at!
With any residual underseal and surface rust removed I was left with this.

Previously I'd said this was was on the brink, and although it was a bit dramatic this highlights what I was talking about. At this stage the this is completely savable with no more than some decent rust removing and treating. But in another year of the car being outside and used I definitely think you'd find much more serious rust. Another thing which made this job so much easier was I was the first person here! No bad previous attempts or repairs.
The Driver's side was better, but still in need of immediate attention.

So lots of deox gel, followed by treatment, zinc primer, and top coat, you get the idea by now!

Once it was all dry this was then covered in XCP Rust Blocker, like waxoil but this actually works.


All components ready for assembly.
All nylocs replaced with stainless counterparts, but original zinc plated bolts reused, as these were near perfect.


Another coat of XCP rust blocker and I was happy. Considering its a 33 year old British car thats done some real mileage i was really happy with how this went!

Wheels back on, done.
Joe
CR6ZZ said:
Superb Joe. Well done.
Thankyou KelvinatorNZ said:
Interesting mods on the trailing arm with the cupped washers. Normally its just standard flat washers either ends of the bushes. LOL at the garden hose on the arm too; the standard inserts are still available if needed.
Also, no fuel tank protection plate?
You must be close to MOT time now, just the interior to go back in?
I did wonder if that was how its suppose to be, but it's been done nicely enough. I Wonder why someone did that? Also, no fuel tank protection plate?
You must be close to MOT time now, just the interior to go back in?
The garden hose did make me laugh too, at some point I'll pull it off again and replace that along with new bushes as I didn't have time to wait for new ones to be delivered.
No, no fuel tank skid plate. It was always rumoured that it was a TP thing, so that puts it past July-August 1985. So mine being a March 85 car might be right, and I can't see any evidence of one ever being on there either. But I've no actual information on when they were brought in. The extra stock certainly went out to India for the Standard 2000 and came back to Rimmer Bros, as you can still buy them NOS. I do have a spare knocking around though too, might be a good idea to put it on, but I'd have to pull the tank and paint that first, and then I'd have to paint the skid plate too.
Yeah this was done at the beginning of June, so almost caught up. Just the interior to go! I've got a lot of pictures for that!
Joe
KelvinatorNZ said:
Im looking forward to your photos of the interior, should look near new if its anything like the care you put into the exterior.
The fuel tank protection plate is interesting. My '84 Vitesse has one, but it does seem a bit hit and miss on which cars do. I thought it might've just been early ones but have seen later cars with them (could be retrofitted though as you say). I need to take mine off and drop the tank too, the exterior of the tank is looking VERY tired.
Hopefully they won't disappoint! The fuel tank protection plate is interesting. My '84 Vitesse has one, but it does seem a bit hit and miss on which cars do. I thought it might've just been early ones but have seen later cars with them (could be retrofitted though as you say). I need to take mine off and drop the tank too, the exterior of the tank is looking VERY tired.
I think I've got most of the changes that they made down through brochure changes, but as far as the tank guards go I've got no idea.
I should probably address mine too, but getting petrol all over you when you're lying on the floor is pretty grim...
Eddieslofart said:
Enjoyable read, thankyou for taking the time to share Sir. 
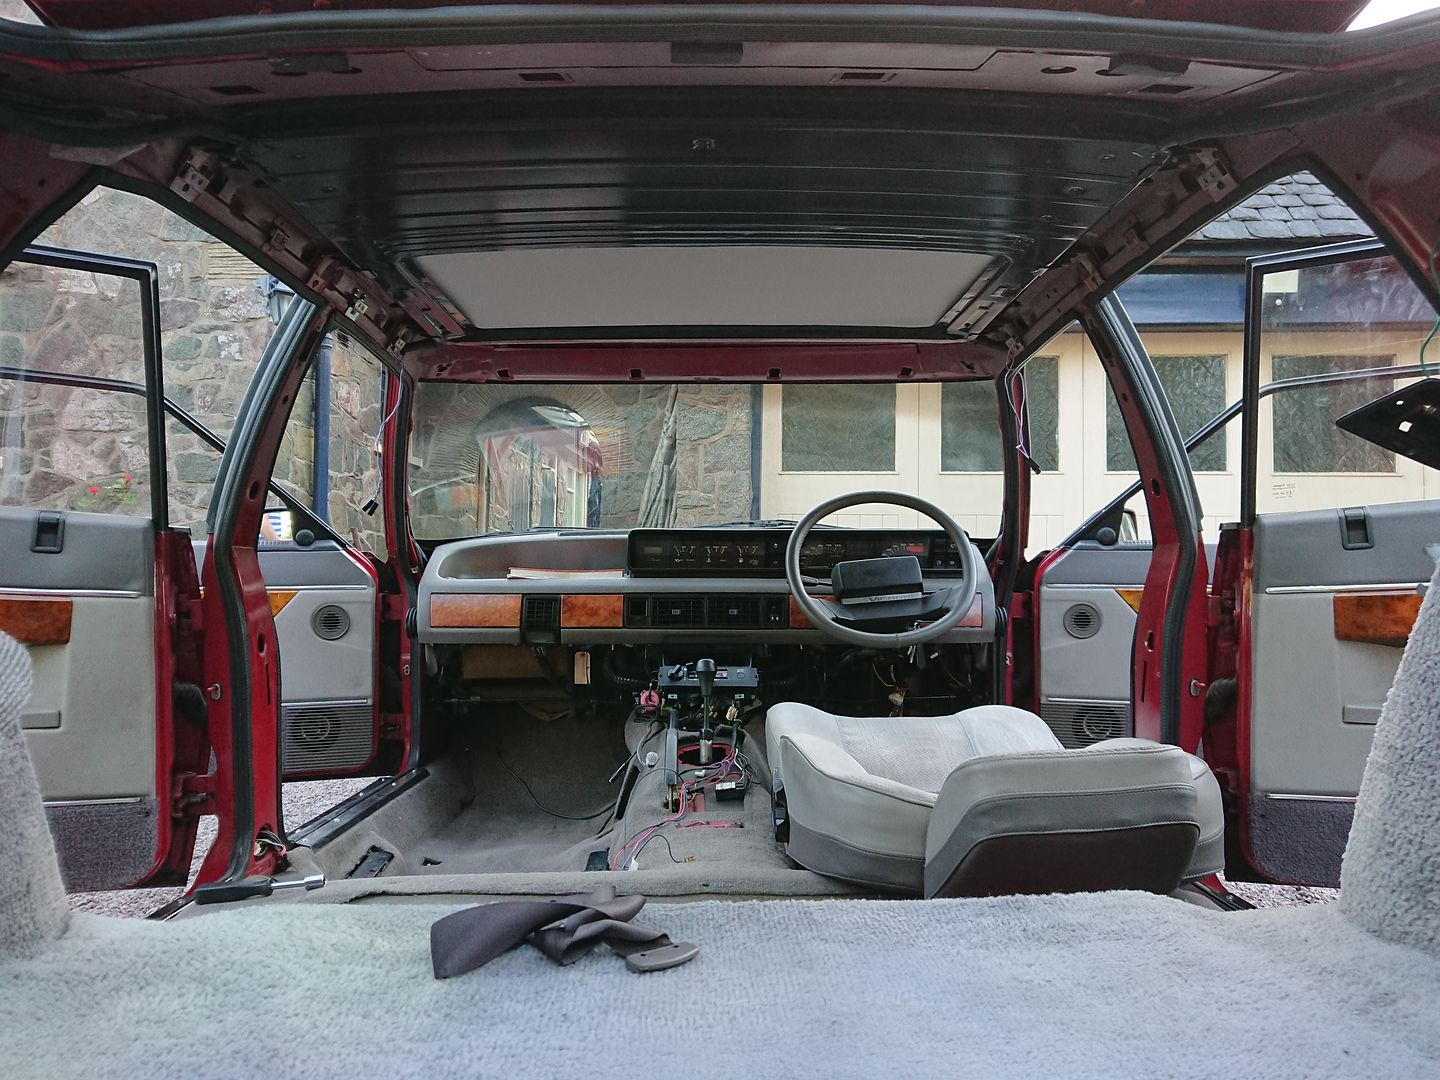
Glad you've enjoyed it. Well lets begin the interior. Like all things we need a decent before.

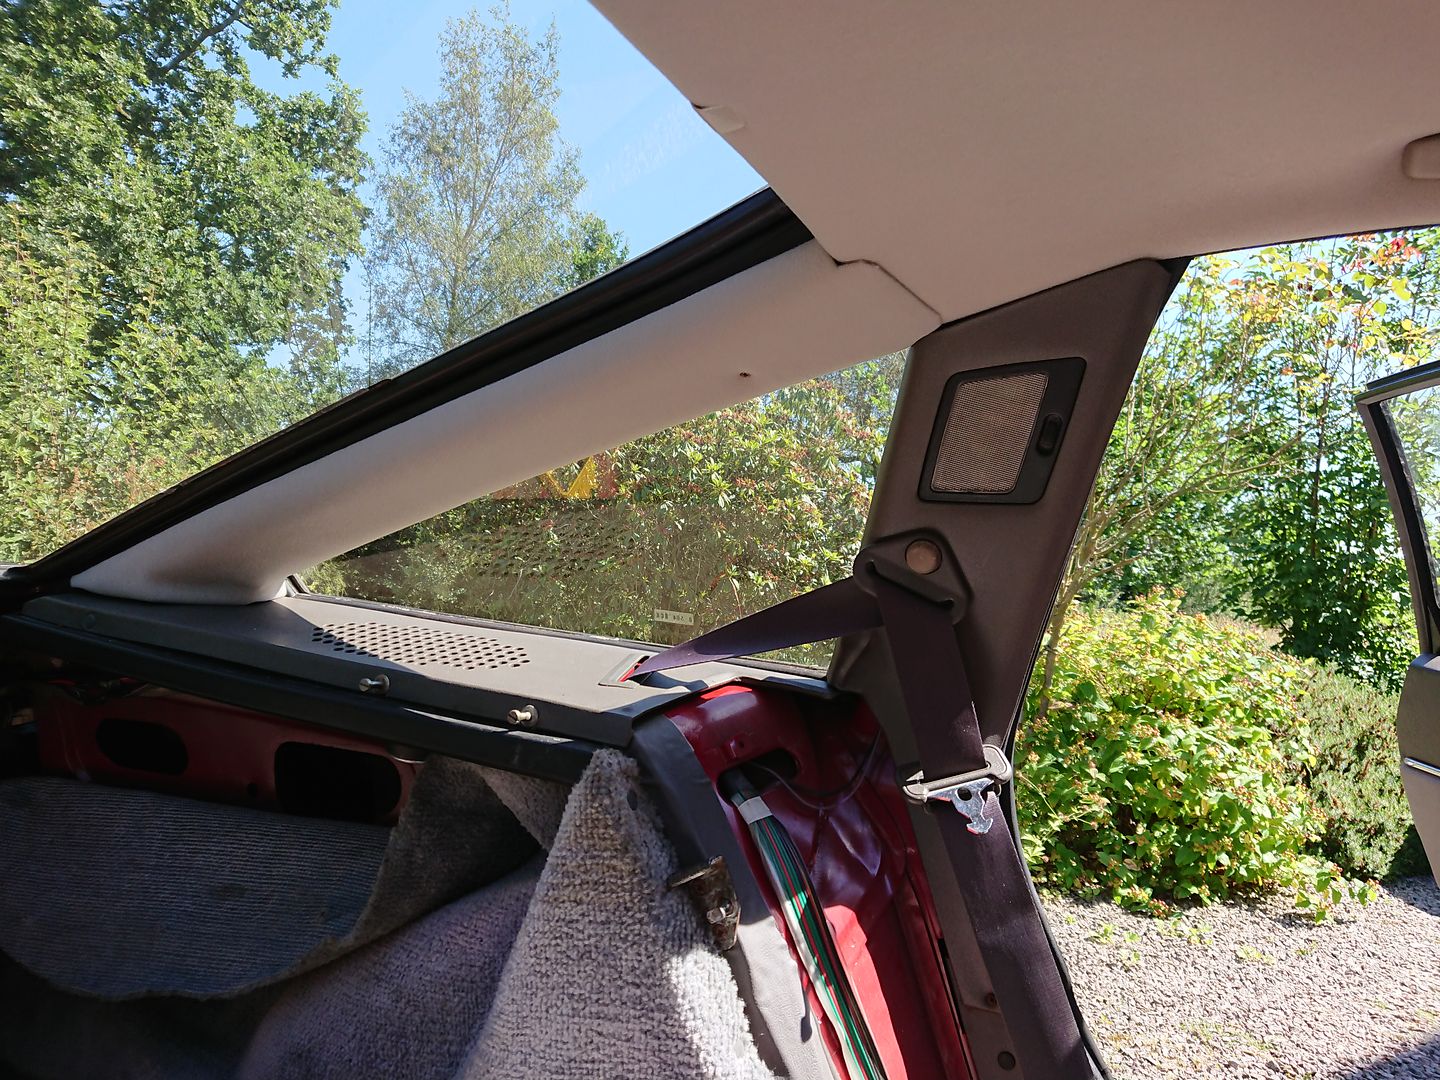
The biggest area up for renovation was the headlining, like so many SD1s it had started to droop. But disappointingly it wasn't for the usual reasons. The car had actually already had a replacement trimmed fibreglass headlining board (usually the original compressed cardboard material droops) and the adhesive holding it to the board had failed. Looking at the rear of it they didn't do a good job with the trimming either. You can also see one of the 3 Very visable clips that hold up the rear of the headlining, these also couldn't go back as they were.

The headlining had also come away around the grab handles, and generally looked tatty, another big problem was the material around the sunroof aperture had began to sag down. Lots of work to do.

You can also see from this picture that the replacement material doesn't match the original lining material on the back of the sun-visors. As this is plastic welded onto the visors, and the only material that I wasn't replacing, this is what I matched the new material too. I did seriously consider trying an OEM+ look and trimming it in alcantara, but in the end I bottled it and decided to go for a factory finish.
This was a whole saga in itself, and went on for almost a year. I've had samples from almost all the automotive trim suppliers I could find. I was told originally it was a colour called empire grey in brushed nylon, but woolies who used to stock it couldn't help, and I wasn't happy with the replacement they offer now. In the end I found a supplier in sussex who had a massive range of colours with the required foam backing, and had a colour that I thought was a better match. To ensure I had enough material I've now got a 10m roll of the stuff!


The rest of the interior was actually in quite good nick, no noticeable damage, just in need of a damn good clean.
There's a little overlap here from when I pulled the headlining, but I think its easiest to pool it all together.

All the grab handles have to come out, rear view mirror, A, B, C, and D-Post trims have to come out too.

That removes the headlining board, exposing the sunroof cassette. This un-bolts and the whole sunroof assembly can be removed (once the cables have been disconnected)

You can remove the lid without dropping the cassette but I needed to address the lining too.
With the lid removed you can really see the lid needed sorting, as it had been hand painted by a previous owner, and was all mat.

The underside is remarkably good though, something that is very hard to find with these panels!

Even the brackets that hold the seal in place were in reasonable condition.
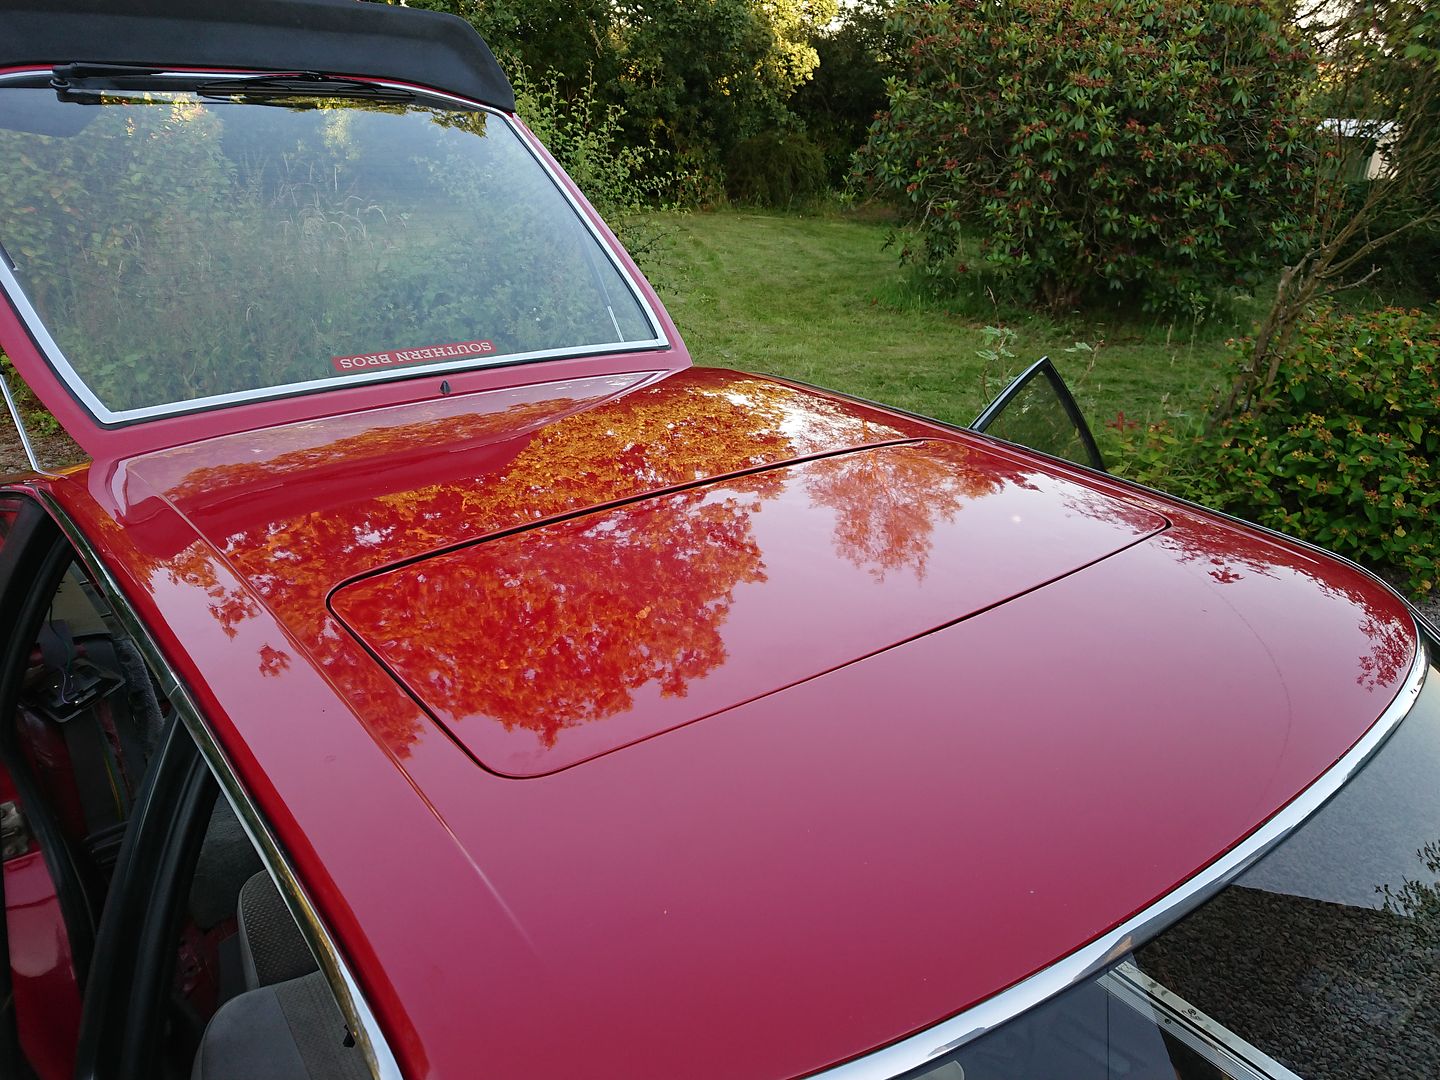
The lid wasn't something that I felt comfortable painting myself, as the Vitesse is so low the rooflline is very visable so it needed to be perfect.
So I consulted a good friend of mine, a professional painter and a very good one at that, who agreed to it. He asked me to do some prep work and deliver it to him in bare metal, as this would ensure the best finsh, and as he was going to do it out of hours at his work.

So off came the paint. Under the red was the original gold, I'd been told by the previous owner that it was already a replacement lid, and the best one he could find.

With the nitromors taking off as much as it would I then sanded down the edges with an orbital sander as instructed, and took the rest of the panel back to bare metal, all brackets on the rear-side where removed (bar the plastic buffers, these are critical in position to the operation of the sunroof. Unfortunately I didn't get any further pictures of it in bare metal, but it was lovely. It was thoroughly treated before paining, and was returned to me looking like this.

Before painting my friend found and brought round his original colour swatch book, and in bright sunlight we compared the colours to the original paint on the roof. There's actually 3 different shades of CNE Targa Red, and the closest match was actually the master shade.
While the lid was away I began stripping the Cassette.

It's a massive assembly that houses the entire sunroof mechanism.

It was filthy, but still functioning fine. The entire sliding mechanism is held in with carefully calibrated runners, these are marked carefully to make reassembly possible!
You can also start to see how the sunroof panel is trimmed. The passenger side is folded over and still attached, the drivers side has rubbed through at this point you can see the remains of the foam and detached causing the sag.

Made by INALFA

With all the runners marked and thoroughly pictured this can then be removed, and the lining pulled off. It is carefully glued around the runners and to the rear edge, with the front edge stitched into a formed plastic bracket, that is clipped over the front edge of the sunroof panel.
Now I'm starting to see why nobody re-trims the aperture!

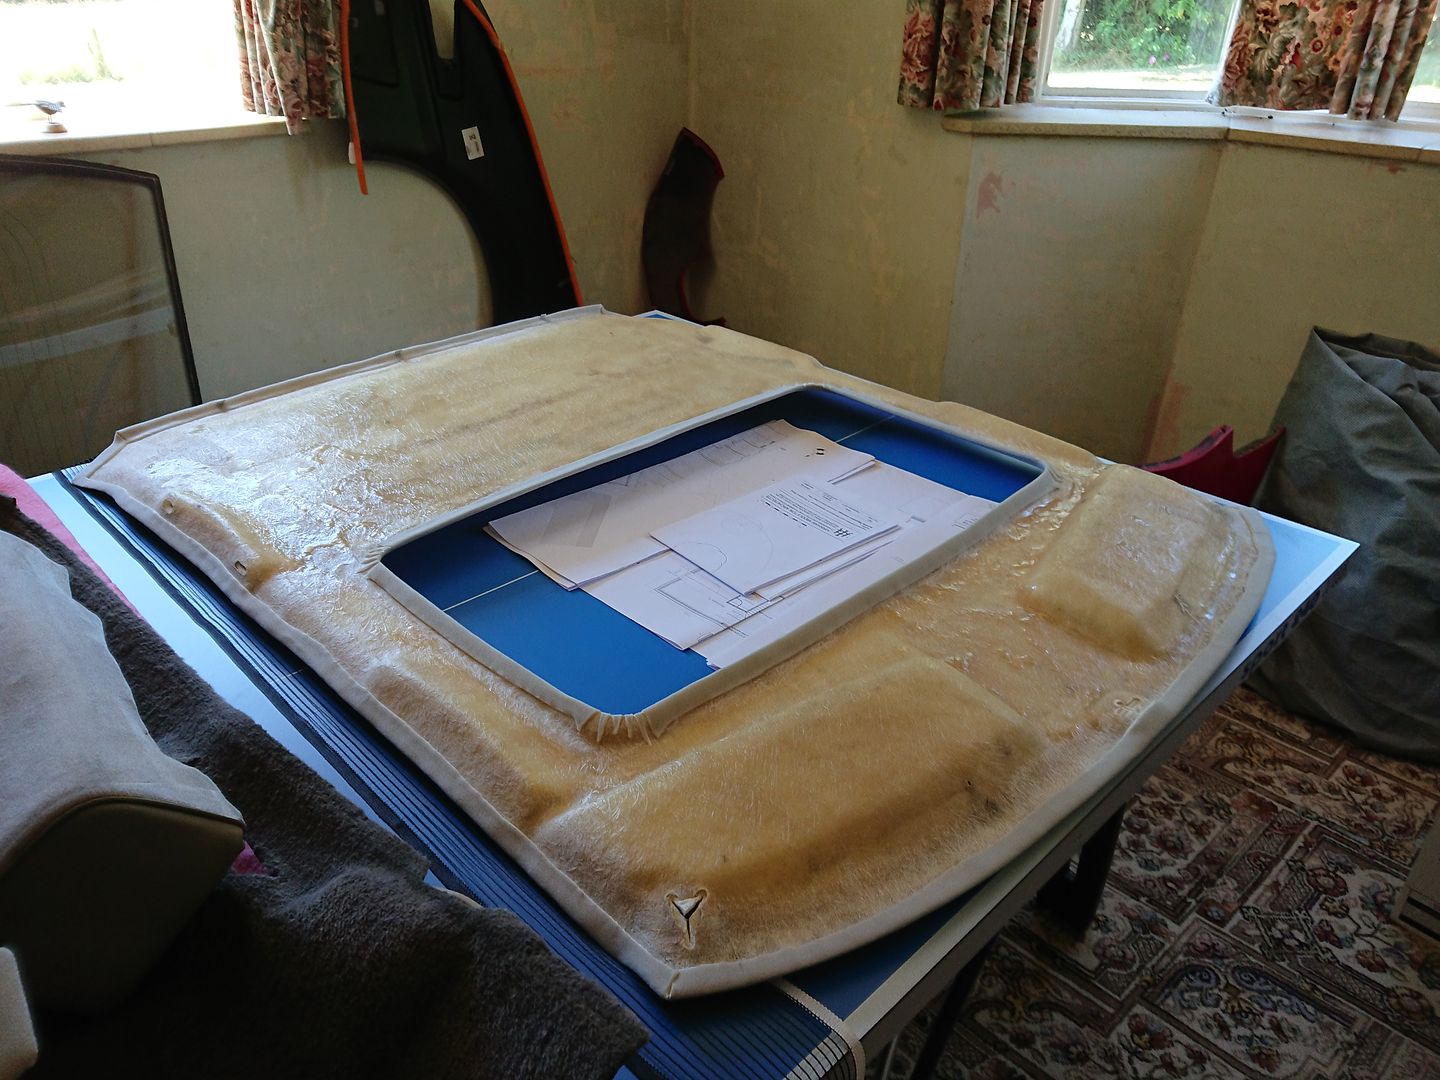
Next up I removed the material from the headlining board.

You can see from the foam remnants how little glue was used!

No wonder it failed.
I also stripped the D-Post trims, as these are also done in the same material. Underneath was some surface rust and I couldn't leave them like that.

I did take careful note of the tape that's applied to prevent the material pulling through the sharp edges before I removed it though .

Usual process but matt black top coat this time.
This covers all the lead up and prep for the sunroof, next up I needed to actually start with the new material!
Joe
Grahamdub said:
Excellent work !
You're not wrong about the different shades of Targa Red. I bought a new MG Metro in that colour and it needed regular trips to the body shop (Dad took it out first day I had it and clipped a parked car, g/f rear ended someone, garage dented the spoiler, I jackknifed a trailer into it). Every time it was painted they used a different shade. It looked like a patchwork quilt under street lights !
I bet you were heart broken to have it damaged so much, and I'd be even more disappointing to get it back like that, I bet it looked good when you received it though. You're not wrong about the different shades of Targa Red. I bought a new MG Metro in that colour and it needed regular trips to the body shop (Dad took it out first day I had it and clipped a parked car, g/f rear ended someone, garage dented the spoiler, I jackknifed a trailer into it). Every time it was painted they used a different shade. It looked like a patchwork quilt under street lights !
J.C... said:
Brilliant thread and such a cool car. I’ve only just discovered it today and done the whole thing in one sitting. I’m absolutely amazed at all the little repairs you’ve colour matched perfectly.
Thankyou I went back and added some more pics so hopefully it still reads well. I'm really happy with how the repairs went too, doesn't look out of place amongst some much more expensive metal when I've taken it out. KelvinatorNZ said:
Im still amazed that BL used pressed steel to form the D pillar trim. Seems way over kill, but its probably the only thing that wont warp or crack as time goes on
I was too! But then again those panels (A post, B post, C post) Are the only ones that don't warp! I'd love a metal dash binnacle cover, and rear speaker covers! M4CK 1 said:
Great to see these cars. Loved them and Range RoverV8's, ever since my uncle would borrow them from work. Boy these would pull like a train, gave me fright of my life when having reached over a 100mph the boot opened and felt like I was in a giant hoover.
It's a shame you don't see more of them, they have become a very rare sight. I bet that was scary.Mine isn't pulling as well as I'd like at the moment, but I have a plan to make sure the fuelling is correct....

oobster said:
Might be of interest:
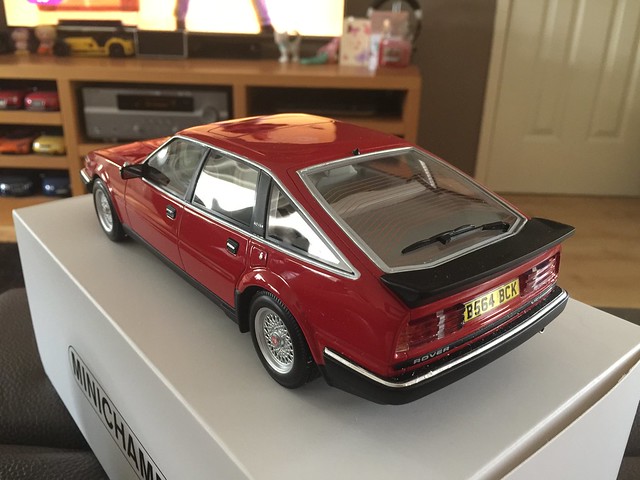
https://www.minichamps.de/artikel_neu/rover-vitess...
Available in the next couple of weeks I believe.
OP: If I purchase one i'll put 1-18th scale reg plates of your car on it!
Now I'd love to see that! https://www.minichamps.de/artikel_neu/rover-vitess...
Available in the next couple of weeks I believe.
OP: If I purchase one i'll put 1-18th scale reg plates of your car on it!
I've got the blue 1:18th one coming in the next few days, the red one on order, and I'll be buying all the racing variants too! I've been waiting for a 1:18th model for ages so I'm making the most of it.
BiTurbo228 said:
Now we're talking. I've wanted an SD1 for ages. Nearly bought one but a manual XJ40 turned up first. Then nearly ended up with a pickup conversion but that went before I could get it :S
Now they're not cheap as chips anymore and I've missed the boat somewhat!
I'll just have to live vicariously with your excellent example
The car that just wasn't meant to be by the sounds of it, I've always liked the shape of the xj40s, and they have the same sunroofs as SD1s apparently... I was so lucky that this one came up at the right time. Now they're not cheap as chips anymore and I've missed the boat somewhat!
I'll just have to live vicariously with your excellent example
They have started to climb a bit value wise haven't they, won't change me using it as much as I can though.
Apologies for the lack of updates, I started a new job last week so everything's been a bit hectic. Hopefully I'll get all the pictures uploaded tonight though.
Joe
Andy Meads said:
Your work on this car is inspiring. Such care and attention to detail is a rare quality. And the design really has aged well.
And it reminds me of a red Vitesse a friend’s dad had back in the 80s. I’ll never forget it. He drove me through Basildon at a totally insane speed when I was about 9.
Well done!
Thank you, that means a lot to me, I'm glad you enjoy reading my ramblings. And it reminds me of a red Vitesse a friend’s dad had back in the 80s. I’ll never forget it. He drove me through Basildon at a totally insane speed when I was about 9.
Well done!
Now that's the kind of memory that stays with you for life, I'm glad reading this made you think of it.

Well we're finally at the trimming stage.
I've never done anything like this before, but I'd done my research.
Everything was impeccably cleaned with all the residual glue removed to give the new material the best chance of staying on the board.
This is definitely a two man job, and you have to work quickly and cleanly. The new material is so light in colour that any marks would show up like you wouldn't believe.
First thing up for trimming was the main board.

I rolled out the right amount of material and roughly cut it oversize.
At this stage I didn't get too many pictures as it all happens quite quickly.
The gluing is done in two stages, with the material laid onto the board, half is folded back onto its self, and the contact adhesive is then sprayed onto both the board and the rear side of the material, and let to go tacky.
It's then worked onto the board, making sure its carefully pushed into the hand grab areas. This is very tricky, as you have to stretch it enough to form it onto the board, but if you overstretch it, it will ruin the material, and mark it.
The same is then done for the otherside. This is even harder as you've got the sun-visor recesses. But I got there in the end.

With the board nicely trimmed it was flipped to cut off any excess, leaving enough to wrap around the edges.

At this stage we made a mistake. Anyone with an SD1 will already see it. We trimmed and edged the sunroof aperture...
This is suppose to be left with excess to tuck around the cassette opening. Of course this realisation didn't happen until it went into the car. It means instead of stretched material around the aperture I have a slight view of the cassette. Annoying, but I can live with it.

The trimming went so well apart from that.

Look at that match!
D-Posts next!

Gorilla tape applied in the factory locations to prevent any future damage before trimming.


Not bad, not bad at all.
Now for the tricky bit, the aperture.

First up was stitching the original plastic former onto new material. This was done with new heavy duty thread matched to the original, and done by my very skilled mother! It's an amazing job, and something that I couldn't have done myself.

Now I could offer it to the sliding panel. This was of course cleaned to an inch of its life before too.
The side profile of the material is very complex, with lots to avoid to ensure correct operation.


A hard task to replicate.


Very happy again with how this turned out.


Again all brackets were cleaned to make sure no stains would happen!

So much work to get to this stage!

Of course the cassette had to be impeccably clean too!

Mounting the panel to the cassette went really well, with all the brackets lining up to their marked positions, and the cutouts clearing the sliding brackets.

Look at that aperture, I can now see why this job is avoided when replacing the headlining. It was some serious effort.
So close to going in the car now though.
Joe
Cupramax said:


Bobberoo99 said:
Absolutely amazing!! Top work sir!!!!
Much appreciated, glad you like the work I've put in. CarlosV8 said:
Fantastic job, really enjoying reading about this. I don't think I'd be brave enough to tackle the headlining though!
This thread is making me think a lot about my SD1s. Wish I'd been able to keep the Vitesse and finish it properly. In fact I've now got an SD1 alert set up on EBay
The headlining was always going to be the trickiest job, I enjoy reading classified adds for SD1's saying "slightly sagging headlining, easy fix" I've also viewed cars that have had their boards replaced, but not the sunroof aperture. This thread is making me think a lot about my SD1s. Wish I'd been able to keep the Vitesse and finish it properly. In fact I've now got an SD1 alert set up on EBay
You know the pain better than most of getting these cars to be nice! I've finally got mine running nicely, and it is lovely.
Ebay alerts are always dangerous...
J.C... said:
It all reads really well Joe
Interior looks really good and I hate to be a doom monger, but what glue did you use for the head lining? I’ve tried a variety of “Extra Strong, Heavy Duty” aerosol contact adhesives over the years and they’ve all failed as soon as the sun comes out I finally found AS Trims contact adhesive and never looked back.
I’m really hoping you have better luck then I did.
I've used specialist headlining adehsive as recommended by woolies, so I'm really hoping for good long term results. I did a few tests and it's held up well so far. Interior looks really good and I hate to be a doom monger, but what glue did you use for the head lining? I’ve tried a variety of “Extra Strong, Heavy Duty” aerosol contact adhesives over the years and they’ve all failed as soon as the sun comes out
I finally found AS Trims contact adhesive and never looked back. I’m really hoping you have better luck then I did.
We've had some scortching days and the cars sat out in the heat with no problems so far...
I'll be monitoring it though.
The material I got from AS-Trim, hopefully I won't regret not getting their adhesive as well.
gforceg said:
There are a few threads on here that leave me shaking my head with admiration. I have about 3% of your ability application and resolve.
It makes the To do list for my Corrado seem comical, although it's good to be inspired and challenged.
If you ever sell the Vitesse this thread should help you get the best possible and deserved price.
That is very much appreciated, it's really nice to have the hardwork I've put in recognised. It makes the To do list for my Corrado seem comical, although it's good to be inspired and challenged.
If you ever sell the Vitesse this thread should help you get the best possible and deserved price.
I know the feeling of the ever expanding to do list, this was a good two years of work! I love a Corrado, my friend just sold his VR6, I tried my best to talk him out of it!
I like to think it adds an air of transparency of all the work I've done, I'm not hiding anything I've done!
Joe
J.C... said:
Nah that should be fine mate. I was just worried you’d grabbed a can of No Nonsense spray glue from Screwfix.
I’m actually a Corrado VR6 owner myself and same as GForce, my to do list is shameful when I look at what people like yourself and Kelvinator achieve
Definitely not, I spent almost as long choosing the adhesive as I did the material! I’m actually a Corrado VR6 owner myself and same as GForce, my to do list is shameful when I look at what people like yourself and Kelvinator achieve
Excellent choice, I've got a real soft spot for the VR6. My dad had a golf VR6 highline, and my daily driver is a A3 with the 3.2 VR6 engine, it's an amazing motor!
Going through my pictures I realise I've still got a bit to cover before the sunroof goes in the car!
First was the sunroof seal and the associated hold down brackets.


These were actually in pretty good nick, the one for the front leading edge was perfect! But I have a spare sunroof cassette so I thought I'd remove the lid and see if it was in better nick.

It was not, it was definitely not better.

The brackets didn't even exist, they'd dissolved!
It did have one saving grace though, the seal was perfect, so I crumbed the brackets off and retrieved the seal.
I then set to refinish my existing brackets.


Of course brand-new stainless fixings and washers replaced the crusty old ones.
With the perfect seal cleaned and prepped, it was carefully placed onto the freshly painted lid, and the refinished brackets screwed down with new stainless fixings again.

Sadly I didn't get any pictures of the other side, major boob on my part, but trust me when i say it looked amazing.
The seal is then glued to the rear edge of the sunroof. You actually see a large part of the seal when the sunroof is closed, so the condition is quite important.
With the lid finished the rear slides under the tabs on the sliding part of the cassette, and bolts into place along the front edge. This is now ready to go into the car.
Next up was the three brackets that hold up the rear of the headlining.
These push through the board and hook onto the rear hatch lip.


Certainly wasn't going to stain my new headlining with these!

First round of rust removing.
This took a few more aggressive passes to get them rust free and smooth.
Then treated, primed, and top coated in the closest shade I could find to the headlining material.

Which turned out to be Ford Dove Grey.
Now it's time for the sunroof to finally go back into the car!
Joe
E24man said:
Can I ask what adhesive you used as I have a headlining that's lost its grip over the summer.
Of course, I used the spray version as supplied by woolies. https://www.woolies-trim.co.uk/product/1554/high-h...
I made sure that both contact surfaces were perfectly clean, with no residual foam, and followed the instructions of alternating the spray direction on each side and it stuck really nicely. You don't really get a second chance once it tacks though. It gripped hard from first contract.
Hopefully it's just your adhesive that's failed and not the foam, as there's nothing you can do with that apart from a full replacement of the material.
Joe
With all the prep done, it was finally headlining and interior fit day.
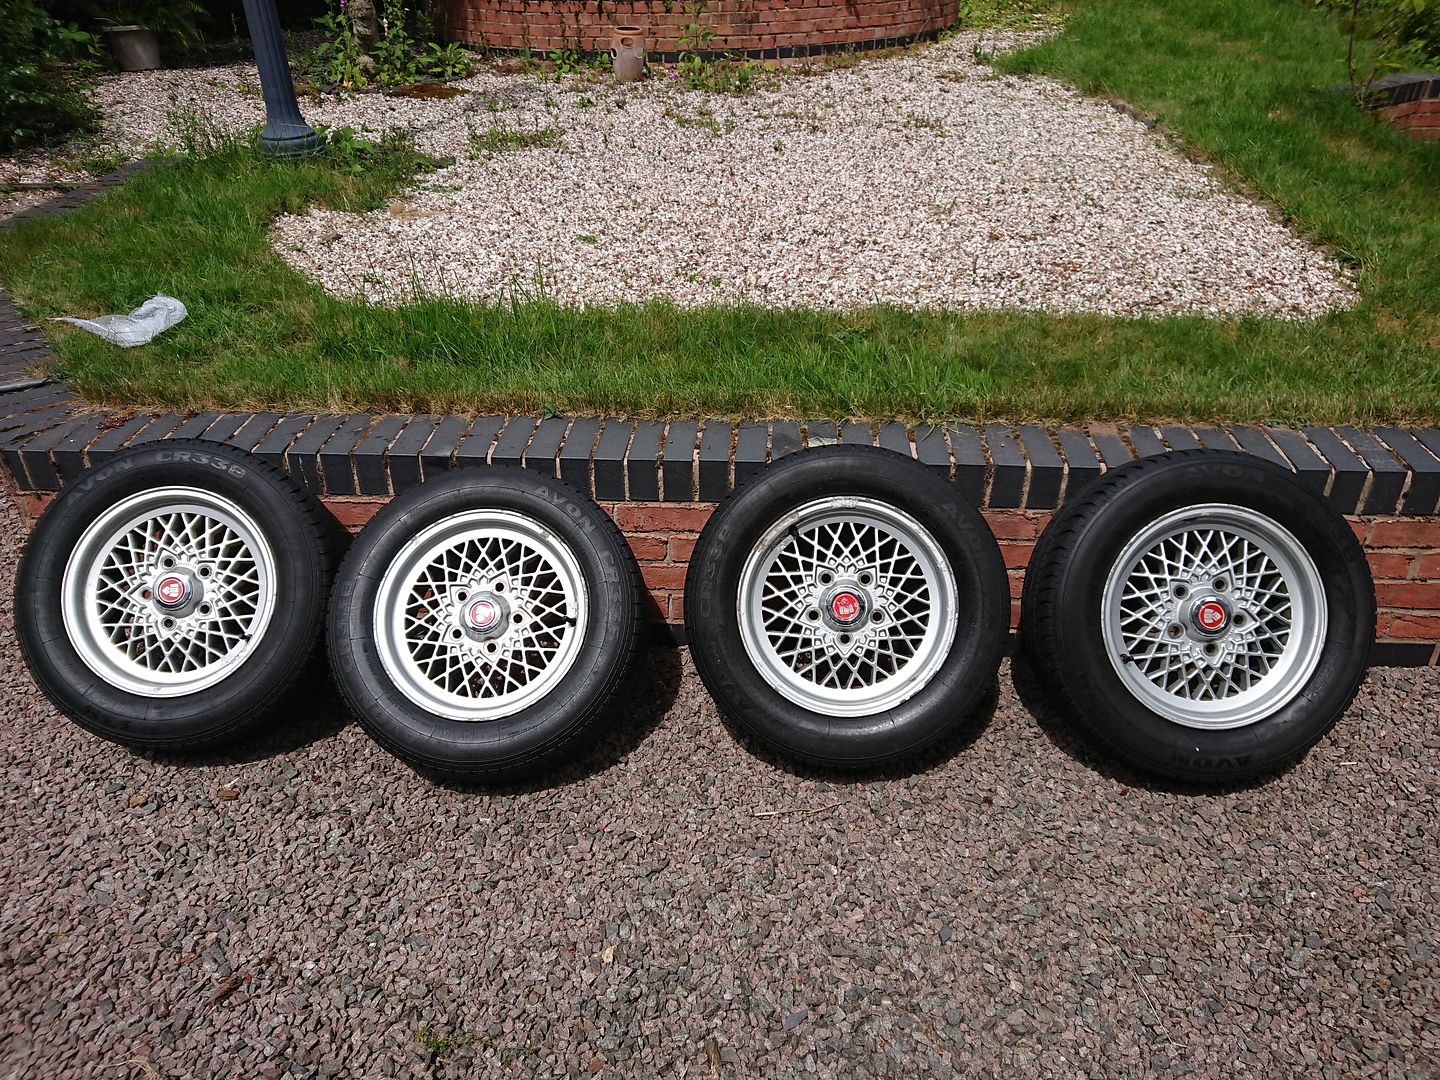
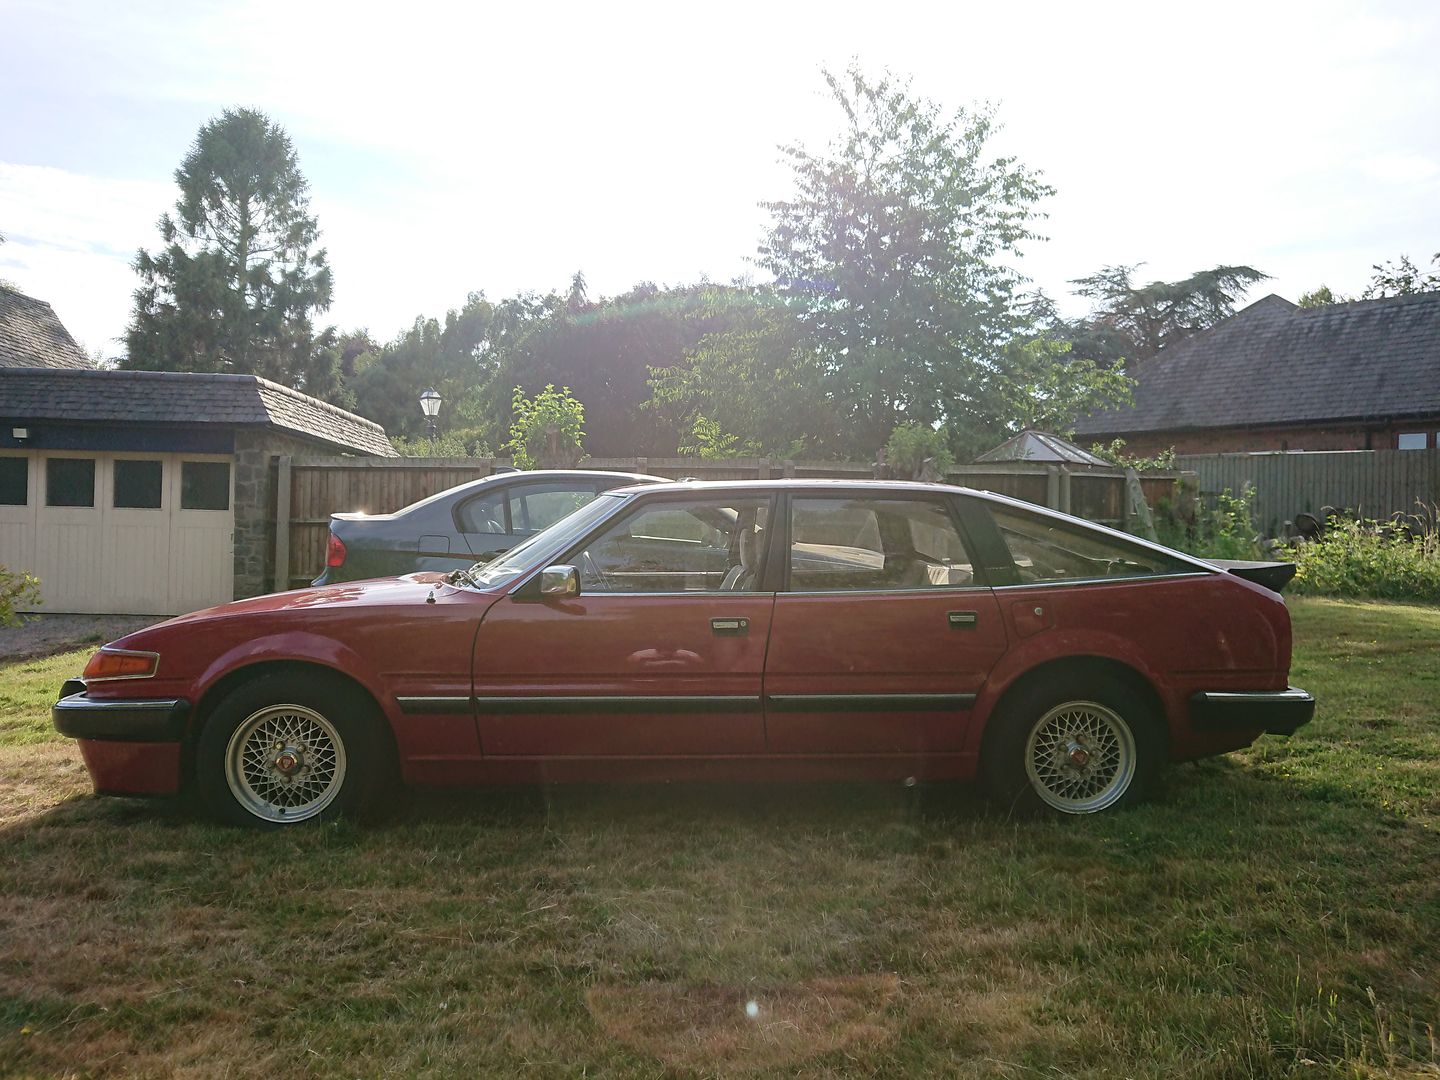
First things first was to swap the Rover onto a spare set of wheels I picked up. The wheels it came with are immaculate, but the tyres were ruined. These wheels are a bit ratty but had good tyres on them, and will serve well while I get new tyres on the nice wheels.
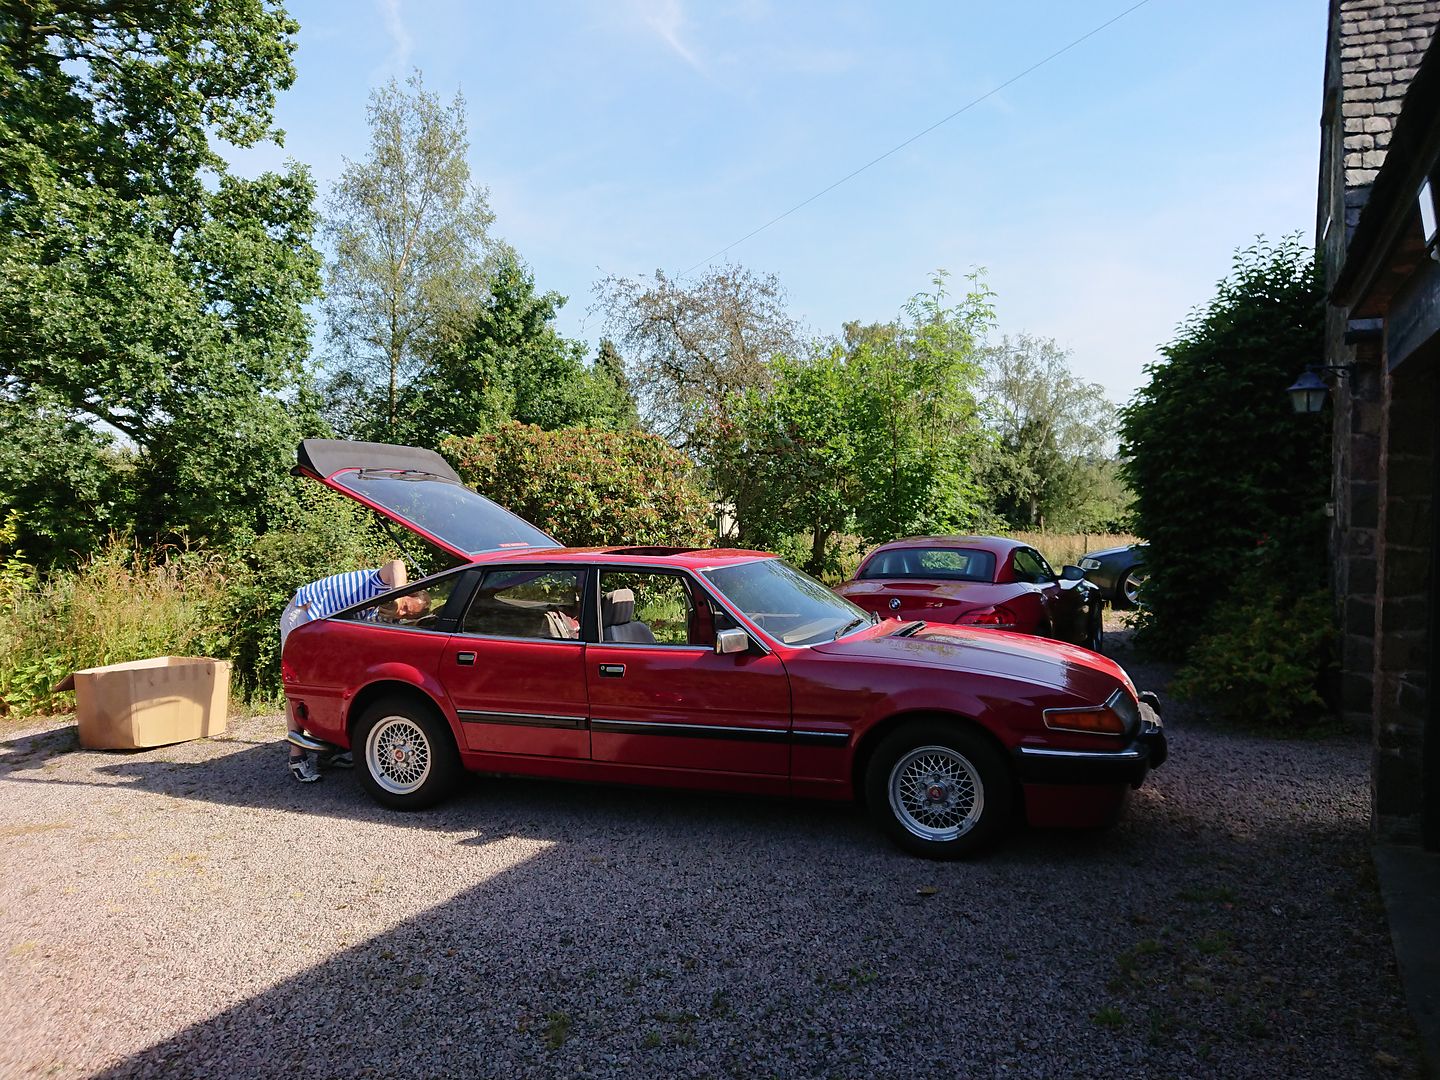
With a drivers seat installed I finally drove the Vitesse out of the garage for the first time in almost 2 years.
It was then transported to where I'd been trimming the headlining for installation.
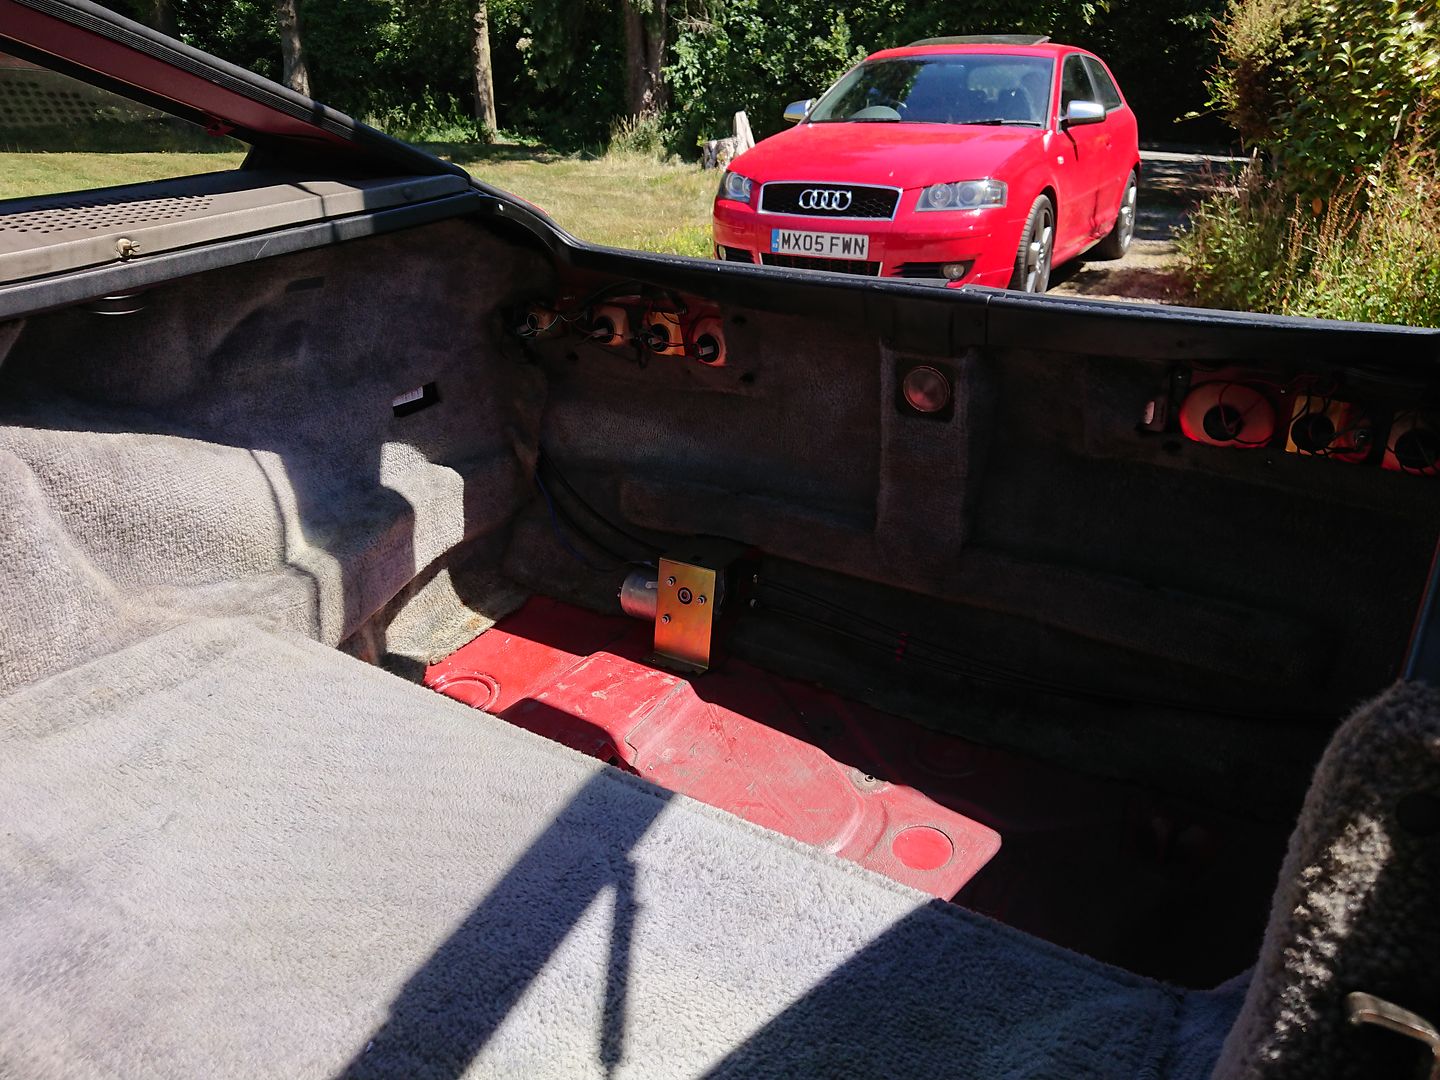
Lots of final prep before the headlining went in everything was given a final clean. The rear speaker covers were screwed in, and the boot carpet was clipped in as well as loads of other little jobs.
Now it was time for the cassette, this actually went quite smoothly, with 2 people the cassette is brought in through the hatch opening, and positioned before bolting it in loosely.
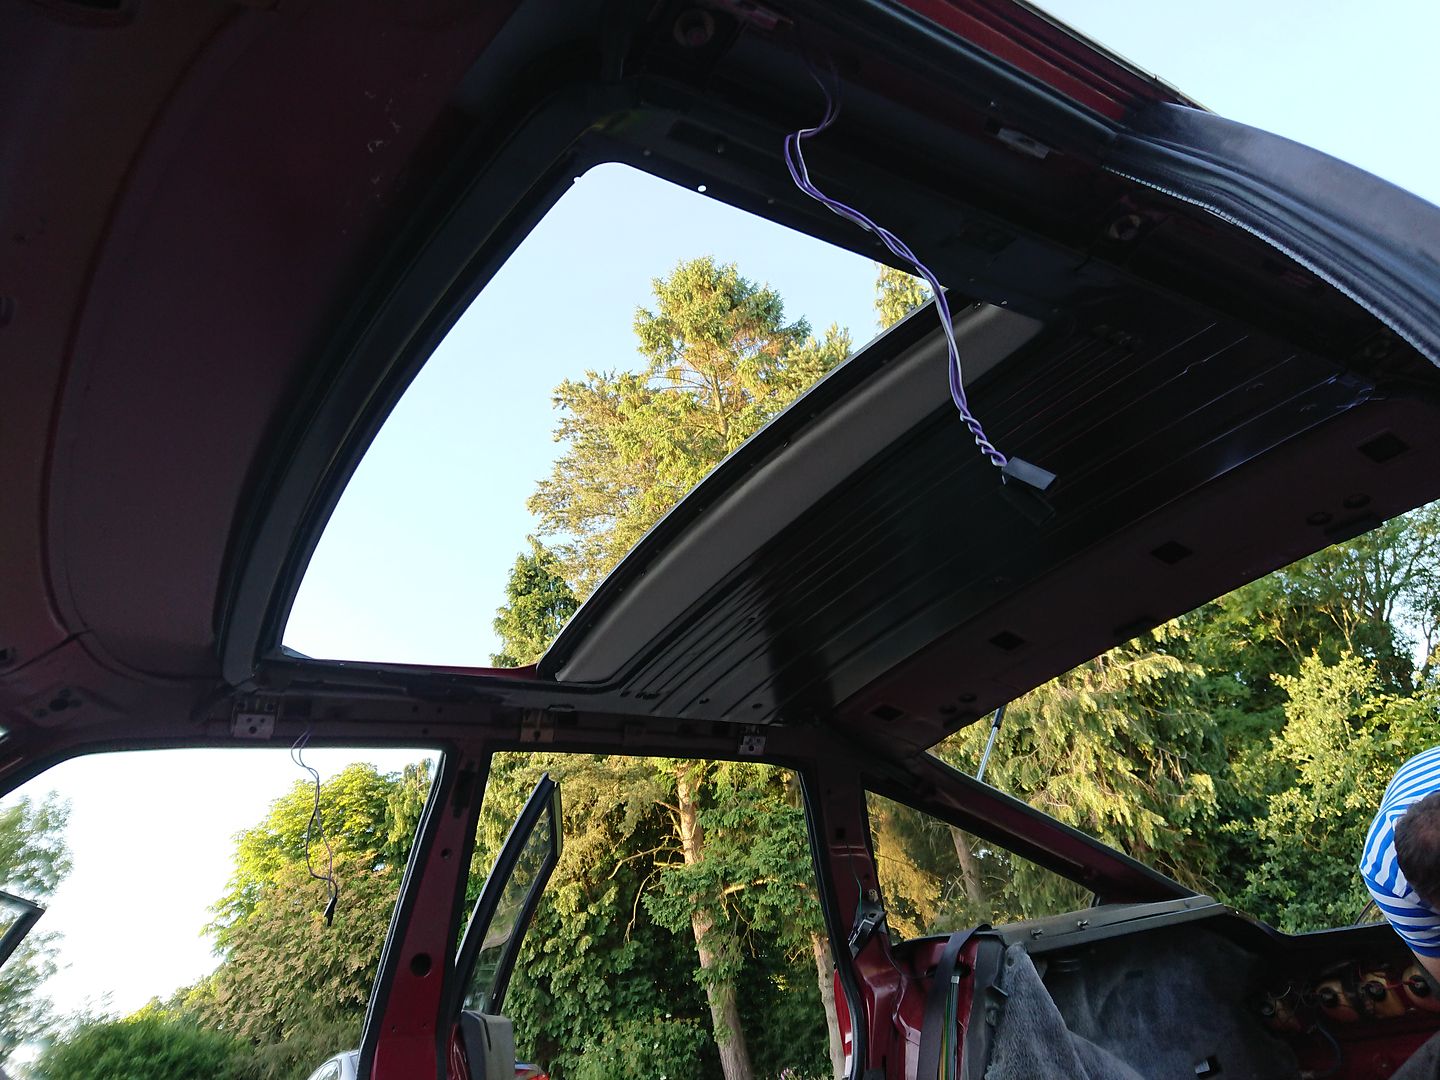
After setting the side to side position I connected the sunroof motor, and began to slowly close it, and set the fore and aft. I'd already checked the operation of the cassette before installation so no surprises here!
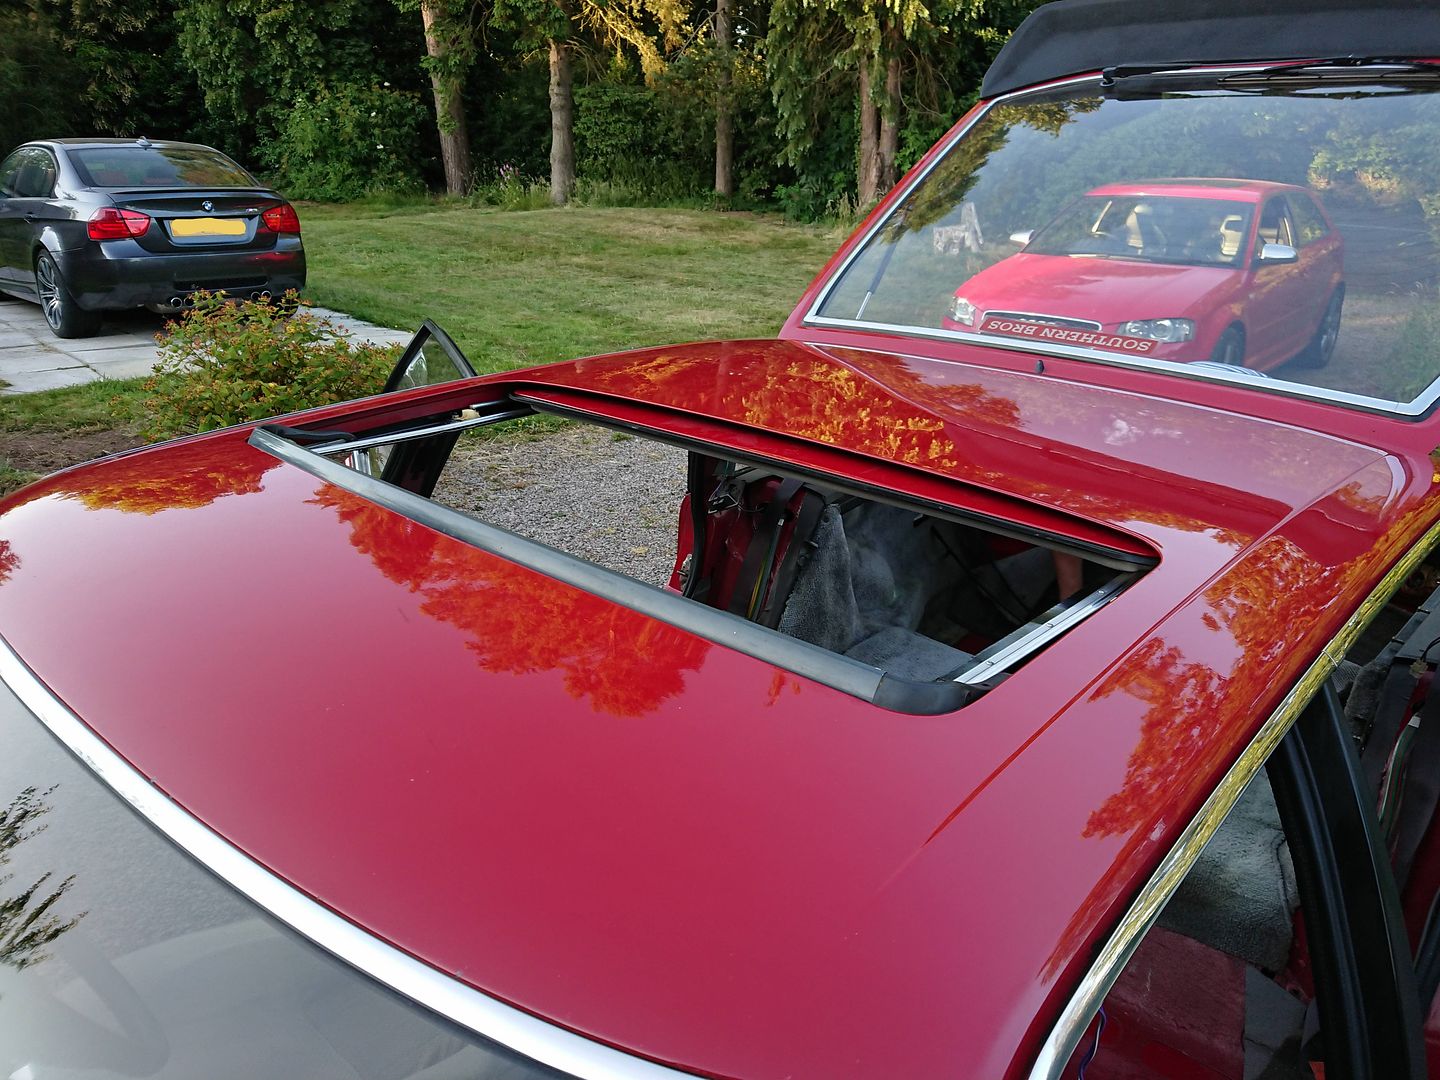
Well look at that for a perfect sunroof.
Only half an opening for the video, but you get the idea.
https://www.youtube.com/watch?v=EtQOLxGDLSY
Looks amazing from the other side too.
With the drains connected, and electrical connections taped up, it was headlining time.
Same process as the cassette really, through the hatch opening and support while the rear view mirror attachment is screwed in, and the rear hooks are attached. Then the grab handles and sun-visors screw in too.
Look at the colour match on those clips
A, B, C, and D-posts next.

Rear Seat back in.
Side squabs and base in too.
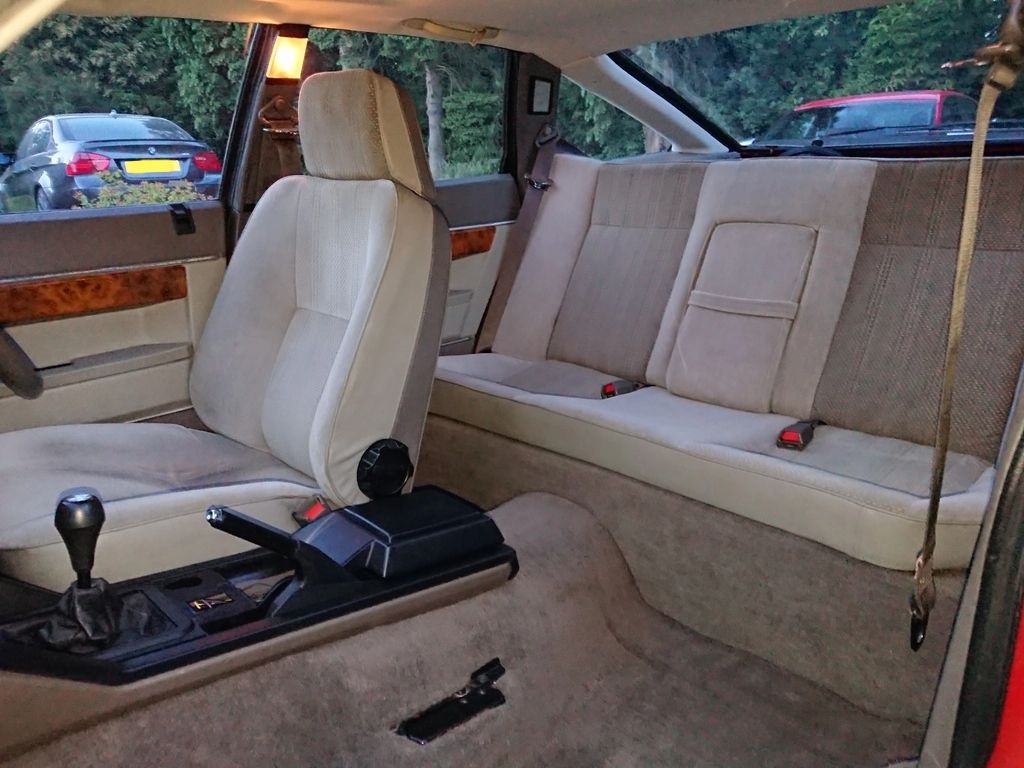
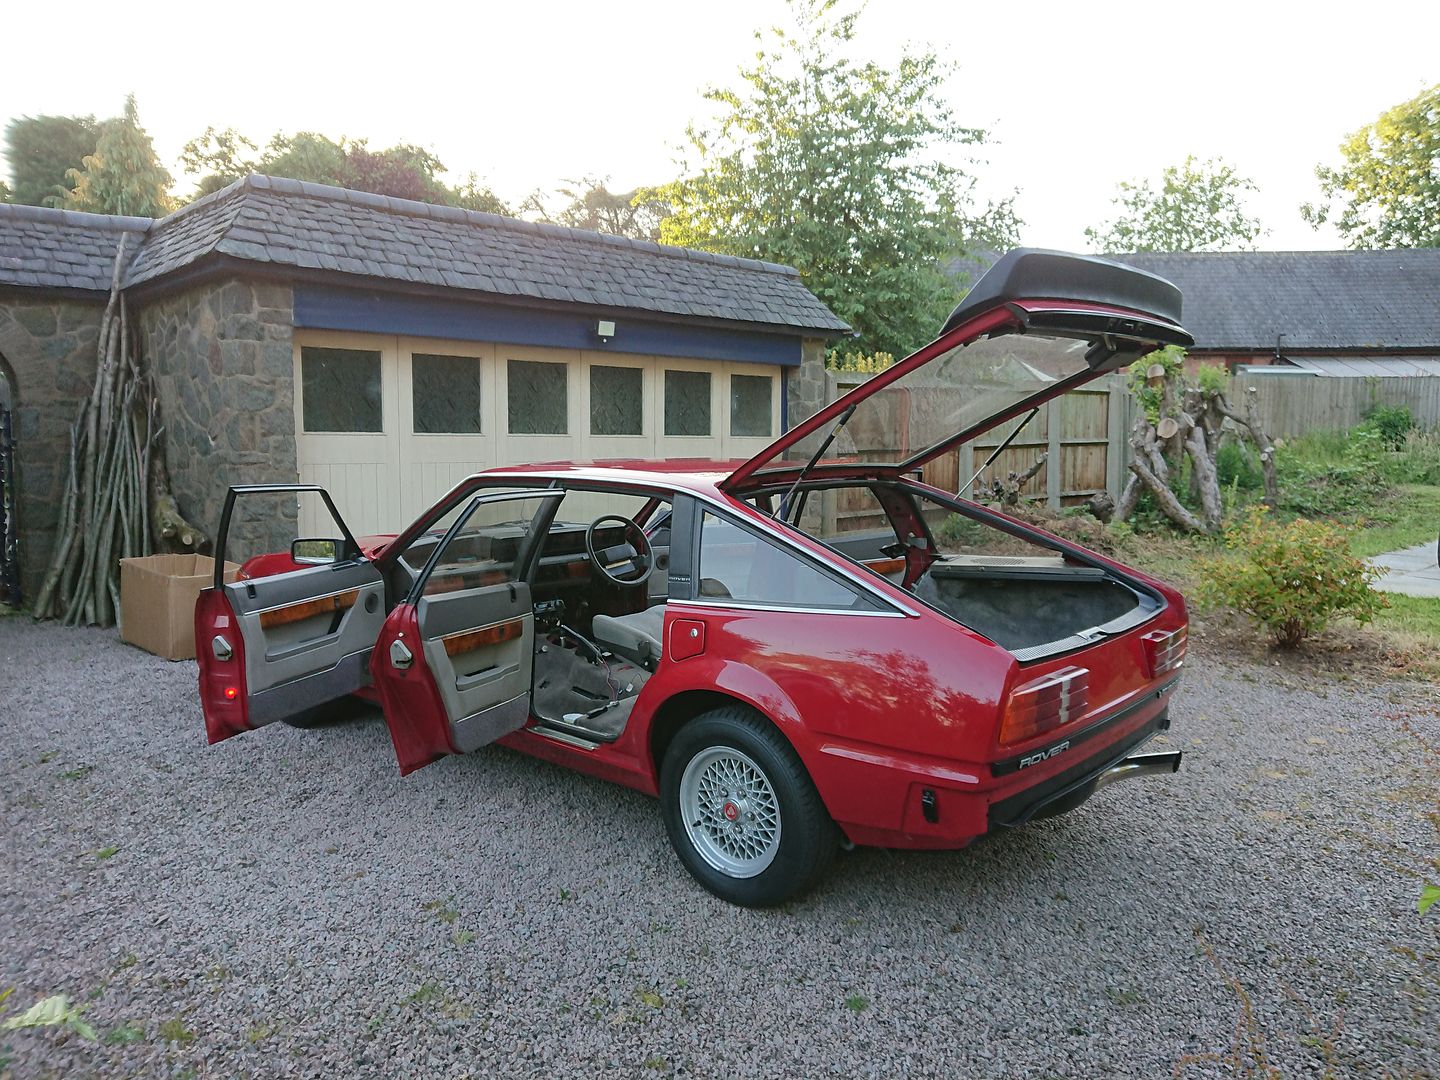
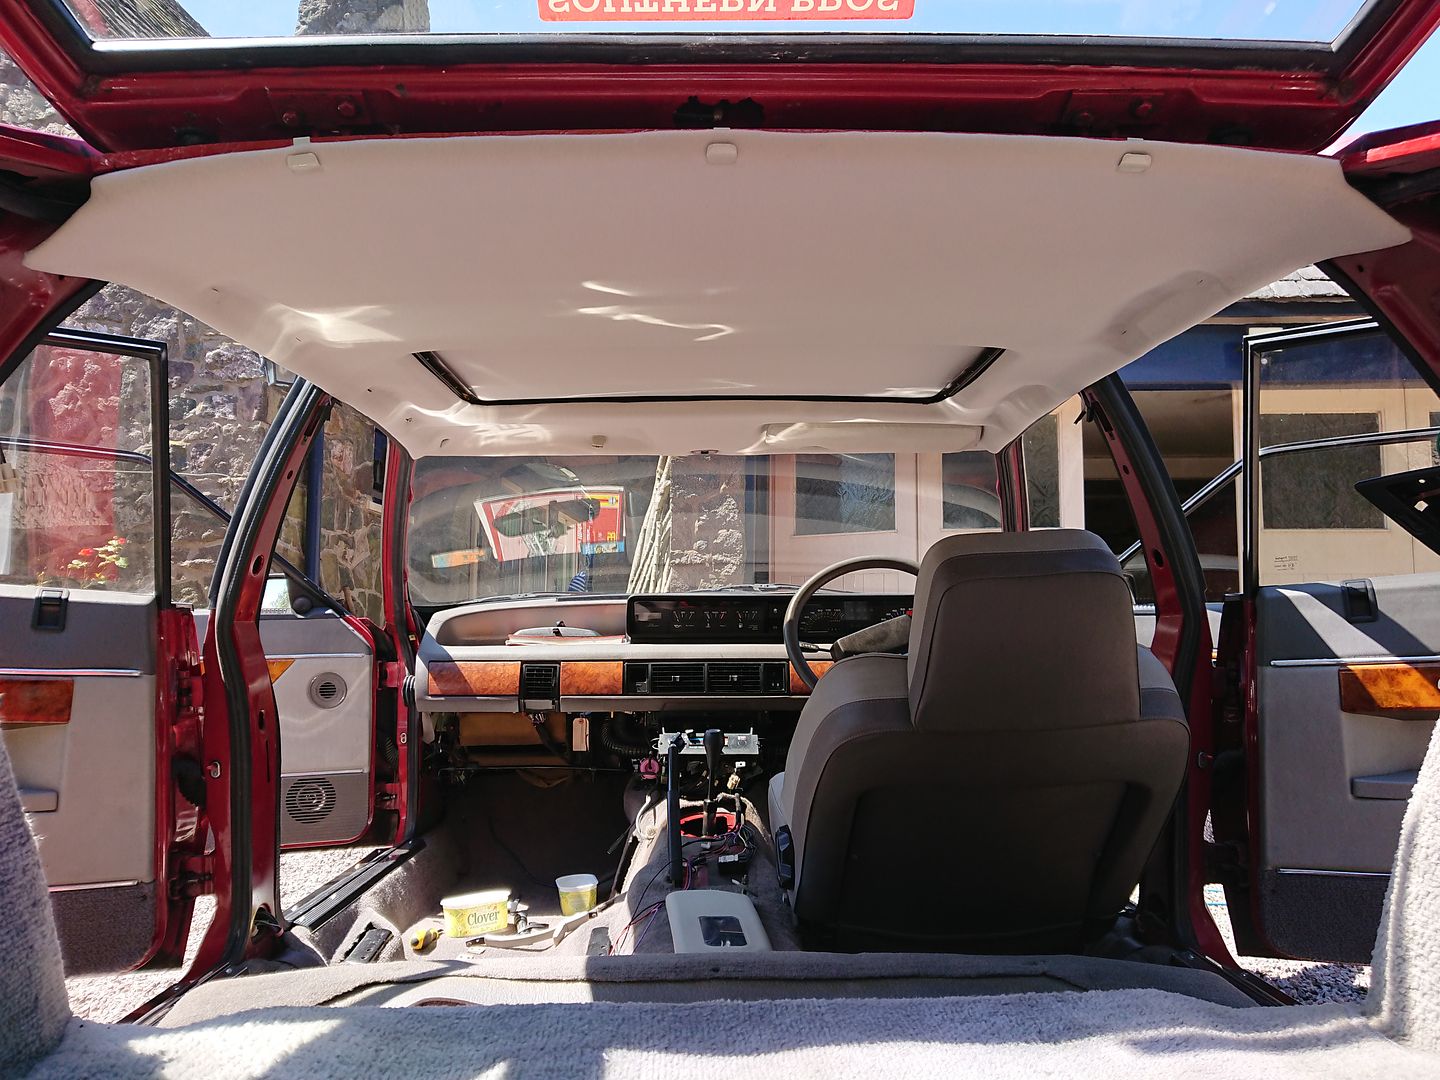
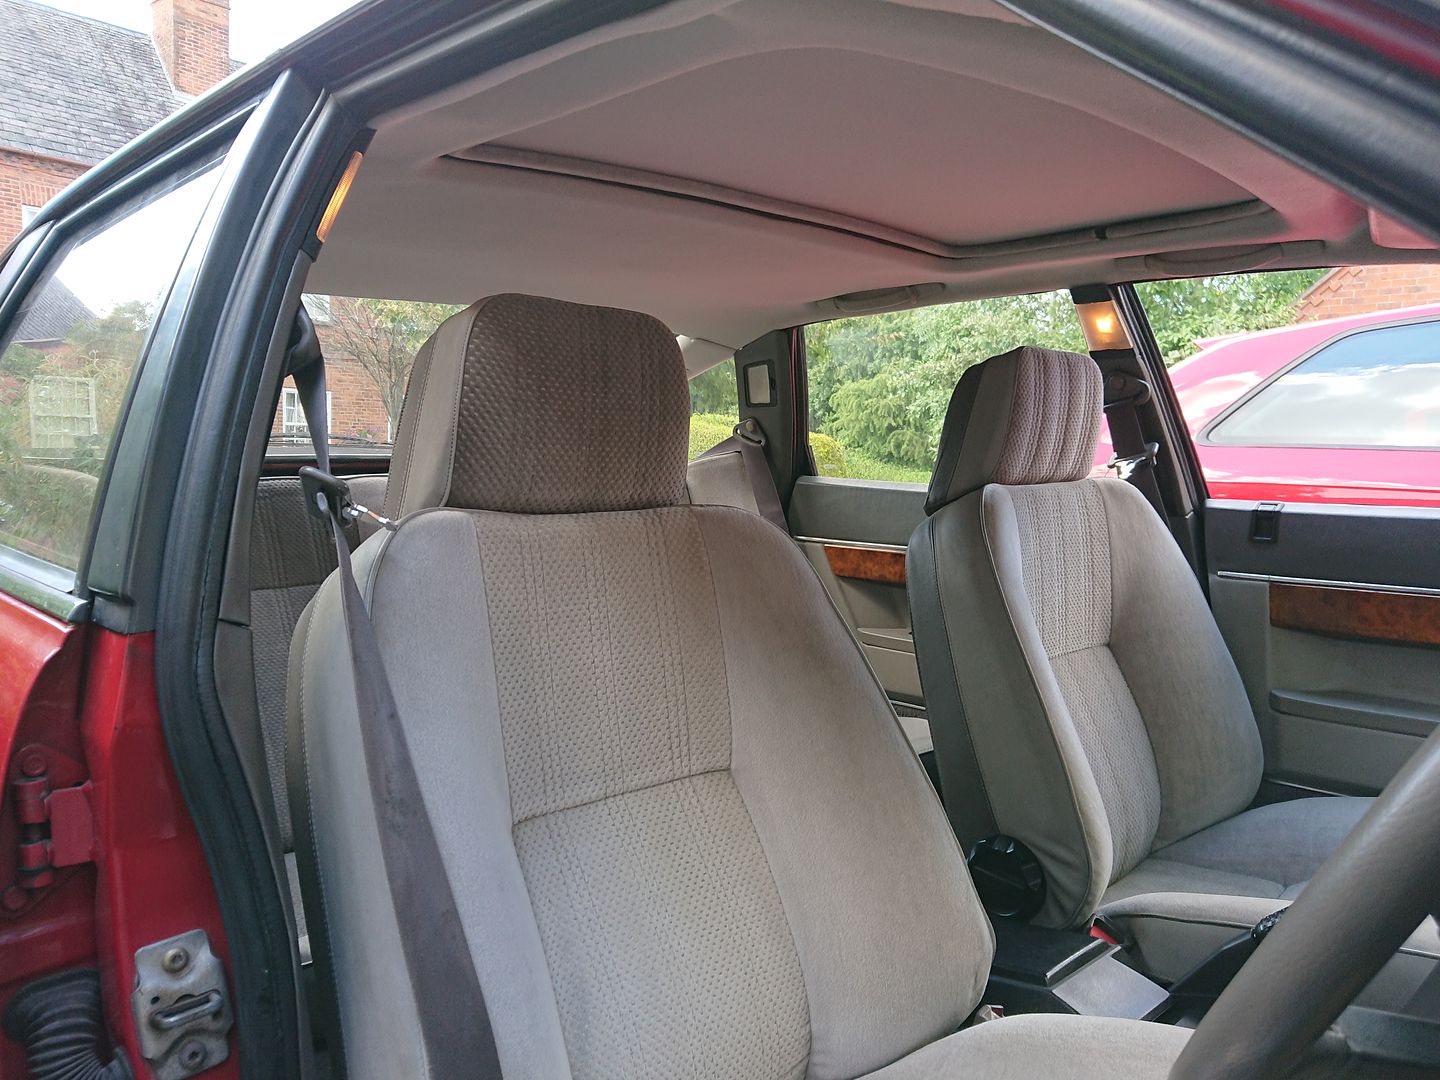
Look at that interior!

Centre console in too!
This was so much work to get to this stage, but looking at the next picture it was really worth it. Apart from the slight trimming error on the board, you can see it in the last picture I'm left with a tiny gap once the finishing strip is installed, but I'm not going to loose sleep over that though. Everything else went smoothly, and hopefully should last. It's now a lovely place to sit.
Interior finished.
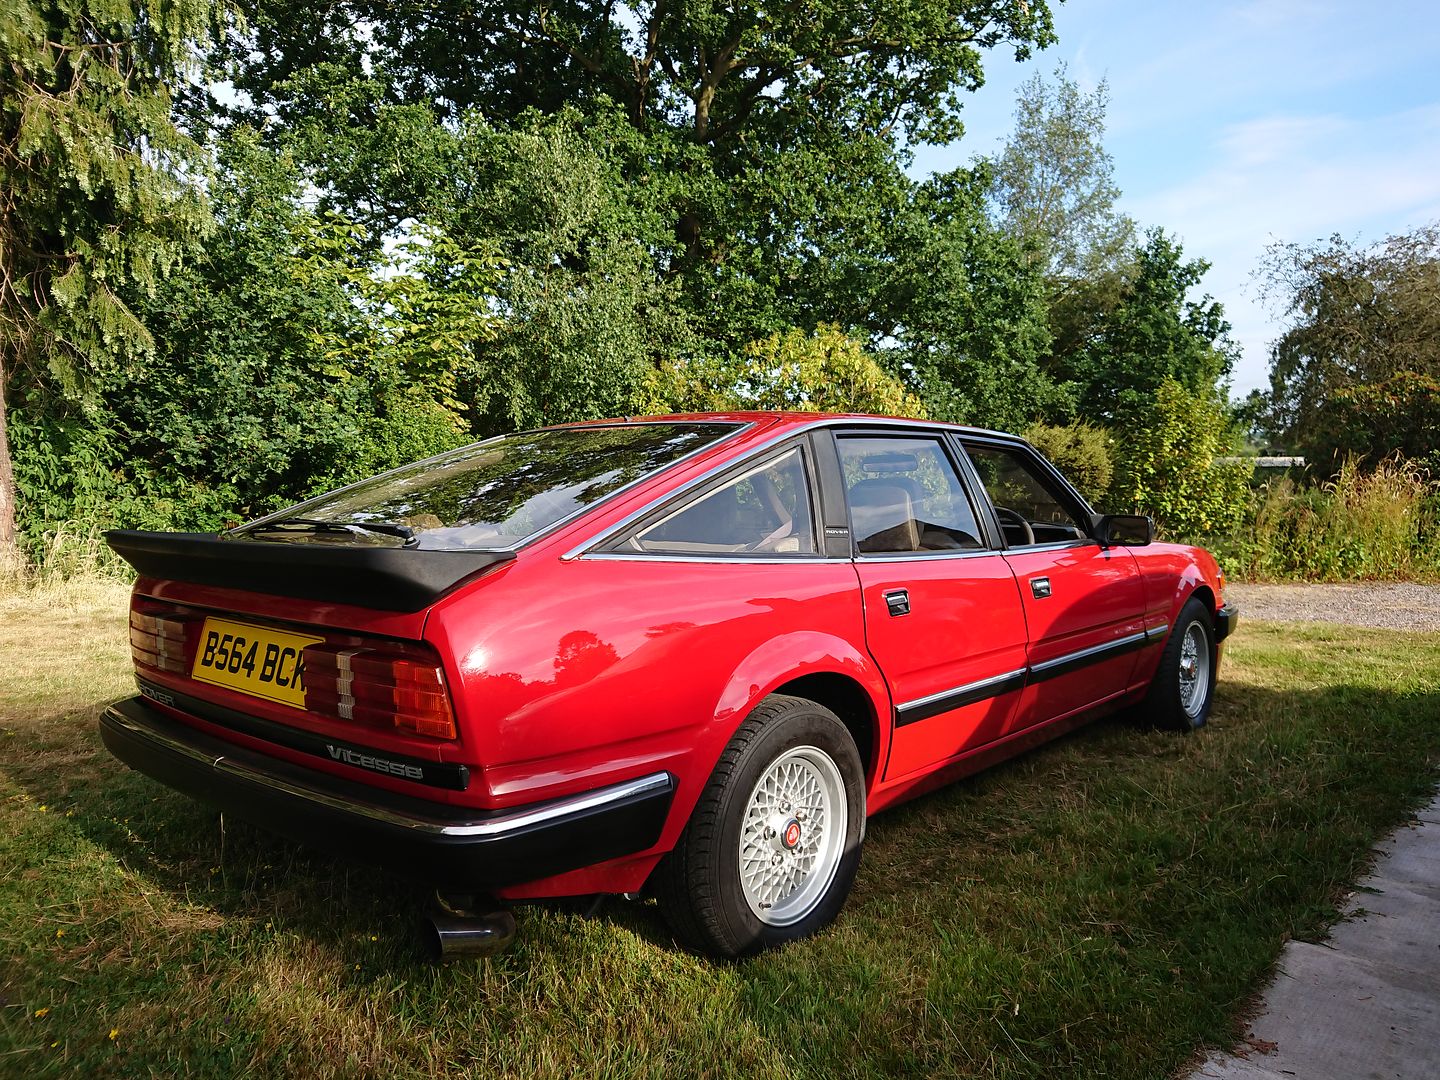
I also finally got the rear bumper on.
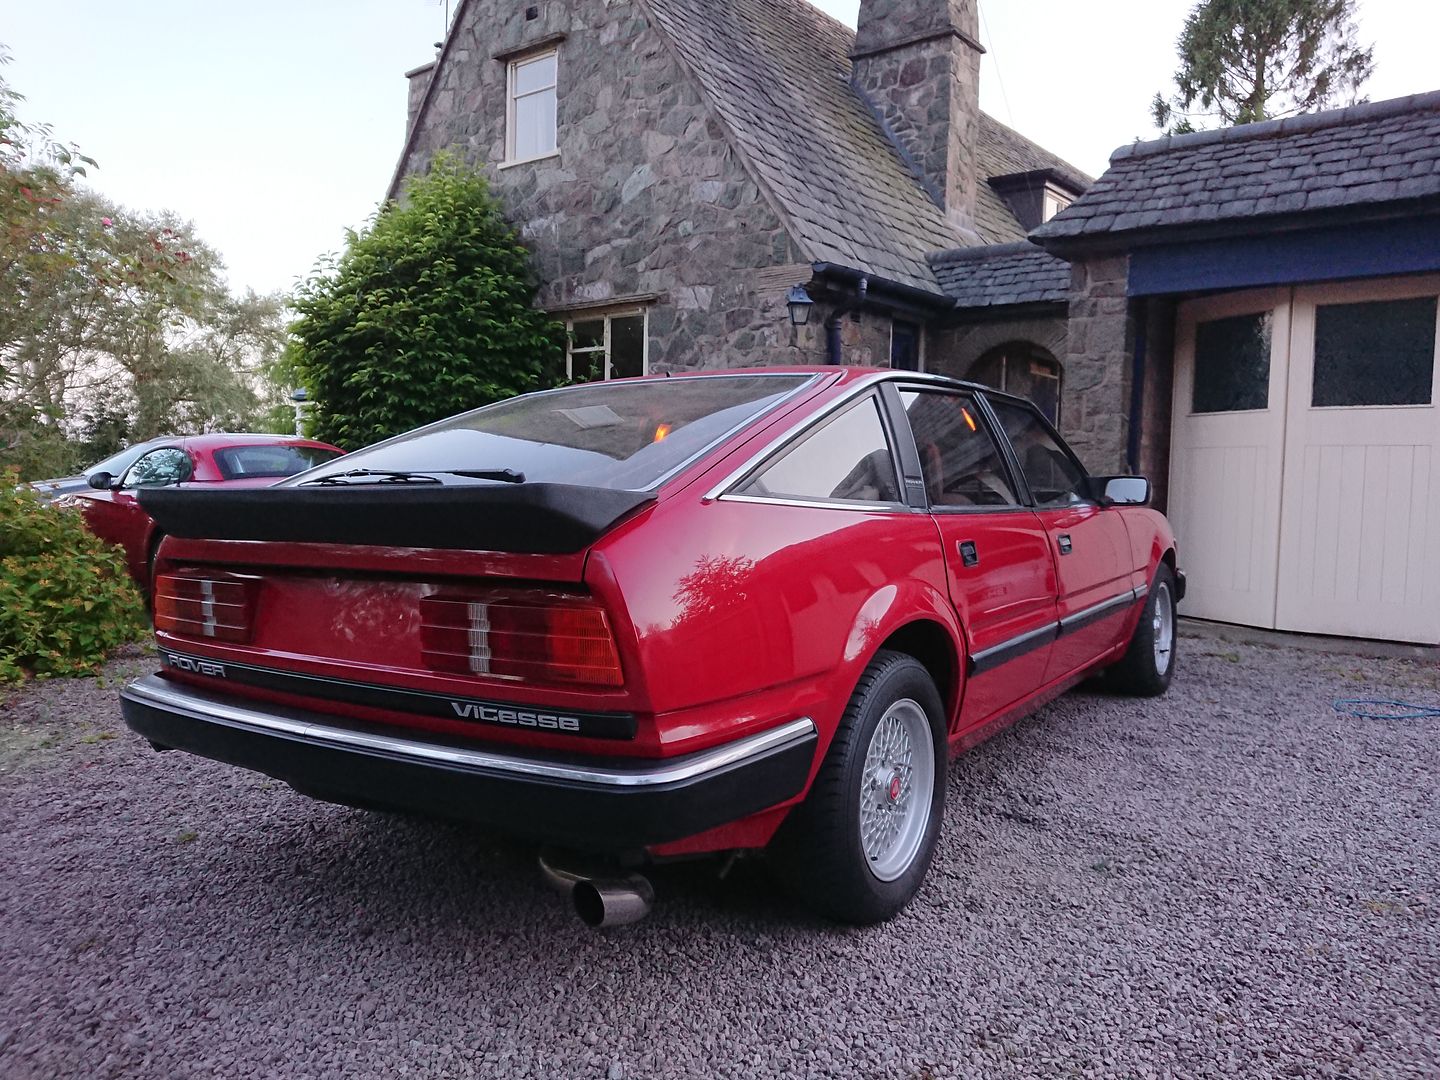
Just need to get it roadworthy now...
Joe
First things first was to swap the Rover onto a spare set of wheels I picked up. The wheels it came with are immaculate, but the tyres were ruined. These wheels are a bit ratty but had good tyres on them, and will serve well while I get new tyres on the nice wheels.


With a drivers seat installed I finally drove the Vitesse out of the garage for the first time in almost 2 years.
It was then transported to where I'd been trimming the headlining for installation.


Lots of final prep before the headlining went in everything was given a final clean. The rear speaker covers were screwed in, and the boot carpet was clipped in as well as loads of other little jobs.
Now it was time for the cassette, this actually went quite smoothly, with 2 people the cassette is brought in through the hatch opening, and positioned before bolting it in loosely.


After setting the side to side position I connected the sunroof motor, and began to slowly close it, and set the fore and aft. I'd already checked the operation of the cassette before installation so no surprises here!

Well look at that for a perfect sunroof.
Only half an opening for the video, but you get the idea.
https://www.youtube.com/watch?v=EtQOLxGDLSY

Looks amazing from the other side too.
With the drains connected, and electrical connections taped up, it was headlining time.

Same process as the cassette really, through the hatch opening and support while the rear view mirror attachment is screwed in, and the rear hooks are attached. Then the grab handles and sun-visors screw in too.

Look at the colour match on those clips
A, B, C, and D-posts next.


Rear Seat back in.

Side squabs and base in too.


Look at that interior!

Centre console in too!
This was so much work to get to this stage, but looking at the next picture it was really worth it. Apart from the slight trimming error on the board, you can see it in the last picture I'm left with a tiny gap once the finishing strip is installed, but I'm not going to loose sleep over that though. Everything else went smoothly, and hopefully should last. It's now a lovely place to sit.
Interior finished.


I also finally got the rear bumper on.

Just need to get it roadworthy now...
Joe
Edited by 1275 GT on Thursday 21st May 17:41
Thank you for all the kind words, I'm really happy with how the interior turned out, and the car looks so much better with the rear bumper finally on, and it does look cool without a rear number plate.
It still wasn't a smooth journey preparing it for the MOT, I'm just uploading the pictures now.
Joe
It still wasn't a smooth journey preparing it for the MOT, I'm just uploading the pictures now.
Joe
KelvinatorNZ said:
Gosh that interior is lovely. Mine isnt bad, but nothing like yours. Very nice.
Thankyou Kevin, It came up well. I'm really enjoying the Vitesse interior, the velour is underrated. bungz said:
Be too good to use soon that!
Definitely not, infact I went for a drive in it this evening!Joe
oobster said:
Joe - look what arrived today:
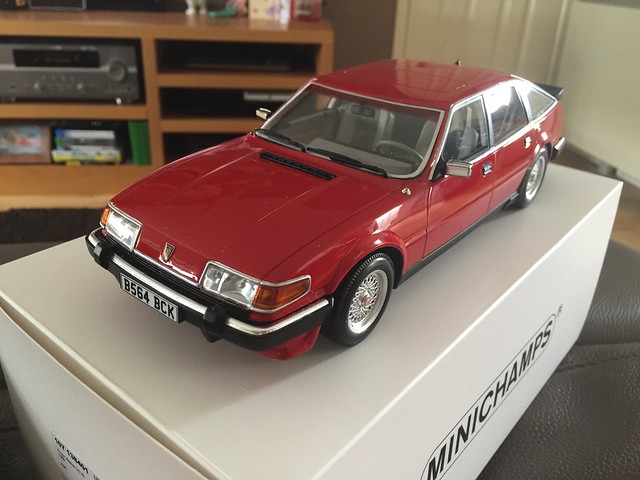 Minichamps 1/18 1986 Rover Vitesse 3.5 V8 by Andy McMillan, on Flickr
 Minichamps 1/18 1986 Rover Vitesse 3.5 V8 by Andy McMillan, on Flickr
Minichamps 1/18 1986 Rover Vitesse 3.5 V8 by Andy McMillan, on FlickrMinichamps 1/18 1986 Rover Vitesse 3.5 V8 by Andy McMillan, on Flickr
Now that is bloody amazing!
Only my blue one has turned up so far!
My red one should be arriving in the next few days. I'm gonna need a set of plates for my own one.
Thankyou for doing that, it looks cool!
Joe
CR6ZZ said:
Fantastic, as always!
MrVert said:
What a fantastic job OP! Lovely car! 
anonymous said:
[redacted]
Thank-you guys! Well with the interior all but finished, it was time to get the car road legal again.

I had a few niggles to sort first, one being a dodgy connection on the trigger wire for the starter motor.
While fixing it though I noticed I'd got bigger problems.

That's one knackered steering coupling.

December 84, so probably original!
This was not what I wanted to find 2 days before the car was booked in for an MOT. Before bombing up to Rimmer Bros, I had a feeling I'd seen one in one of the job lots of SD1 things I'd been buying.
After 20mins of routing through bags of spares, I found it!

I knew hoarding parts would pay off!

Well that put me at the inevitable pre-MOT stage, I'd done as much as I could.

Well apart from setting the headlight aim.
By doing it purely by what looked right when I put the headlights back in, I was worried that they'd be way out. Turned out to be perfect!

MOT morning!
Now I'll warn you all, this was not my usual methodical work, and did not go to plan at all but it does make for some fun reading after the fact so enjoy!
This was not a fun day. This was the first time I'd driven the car properly, and it was not good, it did not run right at all, which was disappointing considering all the work I'd done on the engine. I thought fresh fuel might help, but nothing changed.
I actually aborted trip and came back home. It wasn't going to pass like that. Afer ringing the garage they agreed to test it if I arrived any time before 2.30pm.
Whilst sitting on the drive re-checking the timing, it then proceeded to then dump a whole mixture of fluids on the driveway.
It was the first time it had really got up to running temperature, and unfortunately it leaks.

So I got it up in the air and began spanner checking everything, this managed to stop almost all of the leaks. I'd replaced most of the gaskets, but obviously needed a second torquing after a heat cycle.
Back to the running, timing was fine, I'm still working out the fuelling, but it ran well enough to drive, and I was out of time.

This was also a bit of a fiasco.
After being driven into the testing bay, it was the emmisions test first. Probably what I was most nervous about. It actually passed this easily.
After this it got shut off, and when it needed to be moved onto the ramps for the next part of the inspection it wouldn't restart. These cars were known to vapour lock their fuel system when they got too hot and are left, (down side of a viscous fan) what a time for a first experience of this!
But it didn't need to run to check the rest of the car.


Very nervous waiting for my verdict!
Passed with no advisories, and after leaving it with the bonnet up to cool down, it fired right up. The guy testing it loved it, and was very complimentary of the work that I had done, despite it not starting! Ironic that my car passed despite not being able to start half way through its test.
But regardless it was now road legal, and now I had the opportunity to properly get to grips with the injection system, rather than just listening to it idle on the driveway. I could now tune to my hearts content.
Joe
Edited by 1275 GT on Monday 20th August 22:05
Thank again, glad you've all enjoyed reading my ramblings.
switched relays, a delay unit and a solenoid valve, the fuel pressure was temporarily
increased, when the engine was too hot, thereby purging the fuel system and enabling the
engine to re-start.
I actually have seen cars with this system installed. It was done on a if you complain enough to your dealer they'll do it basis.
But finding all the correct parts after the fact is almost impossible, so other solutions are needed.
Of course solutions have already been formulated.
• Lift the bonnet and wait.
• Give the accelerator some heavy boots-full when re-starting to make the fuel flow
faster and give a richer mixture.
• Run the fuel pump for a few minutes without starting the engine. This can be done
on both auto and manual SD1's. On an auto try to crank the engine in drive, the
pump runs but the engine does not turn. On a manual, disconnect the engine
harness and try to crank the engine, the pump runs but the engine does not turn.
• One can’t very well relocate the fuel rail but it might be possible to lag it - but
thinking about that, it would probably work against the problem when everything
is piping hot!
• Fit thermostatic electric cooling fans that continue to run after the engine has
stopped to try and remove latent heat from the engine whilst the car is stationary.
However, with no circulating coolant this would be a marginal solution.
I tend to go for the first option!
All information taken from Ramon's brilliant website.
http://www.vintagemodelairplane.com/pages/Download...
So why was I rushing to get the car MOT'd after spending so long on it!?
Well I'd gone through so many self imposed deadlines I really wanted to get the car finished and my good friends dad is the Show Manager at the British Motor Museum, so the annual BMC and Leyland show was a perfect debut. (and I knew that I'd still get a good spot even if I was late )
The Vitesse went in for its MOT on the Tuesday before, as I was expecting to find some issues that I would need to sort. With it passing first time this gave me almost a week to play with the running so it was show ready on Sunday (1st of July) .
I got it running better, but still quite lumpy. Once up to speed though it cruised nicely. Good enough to get me there!
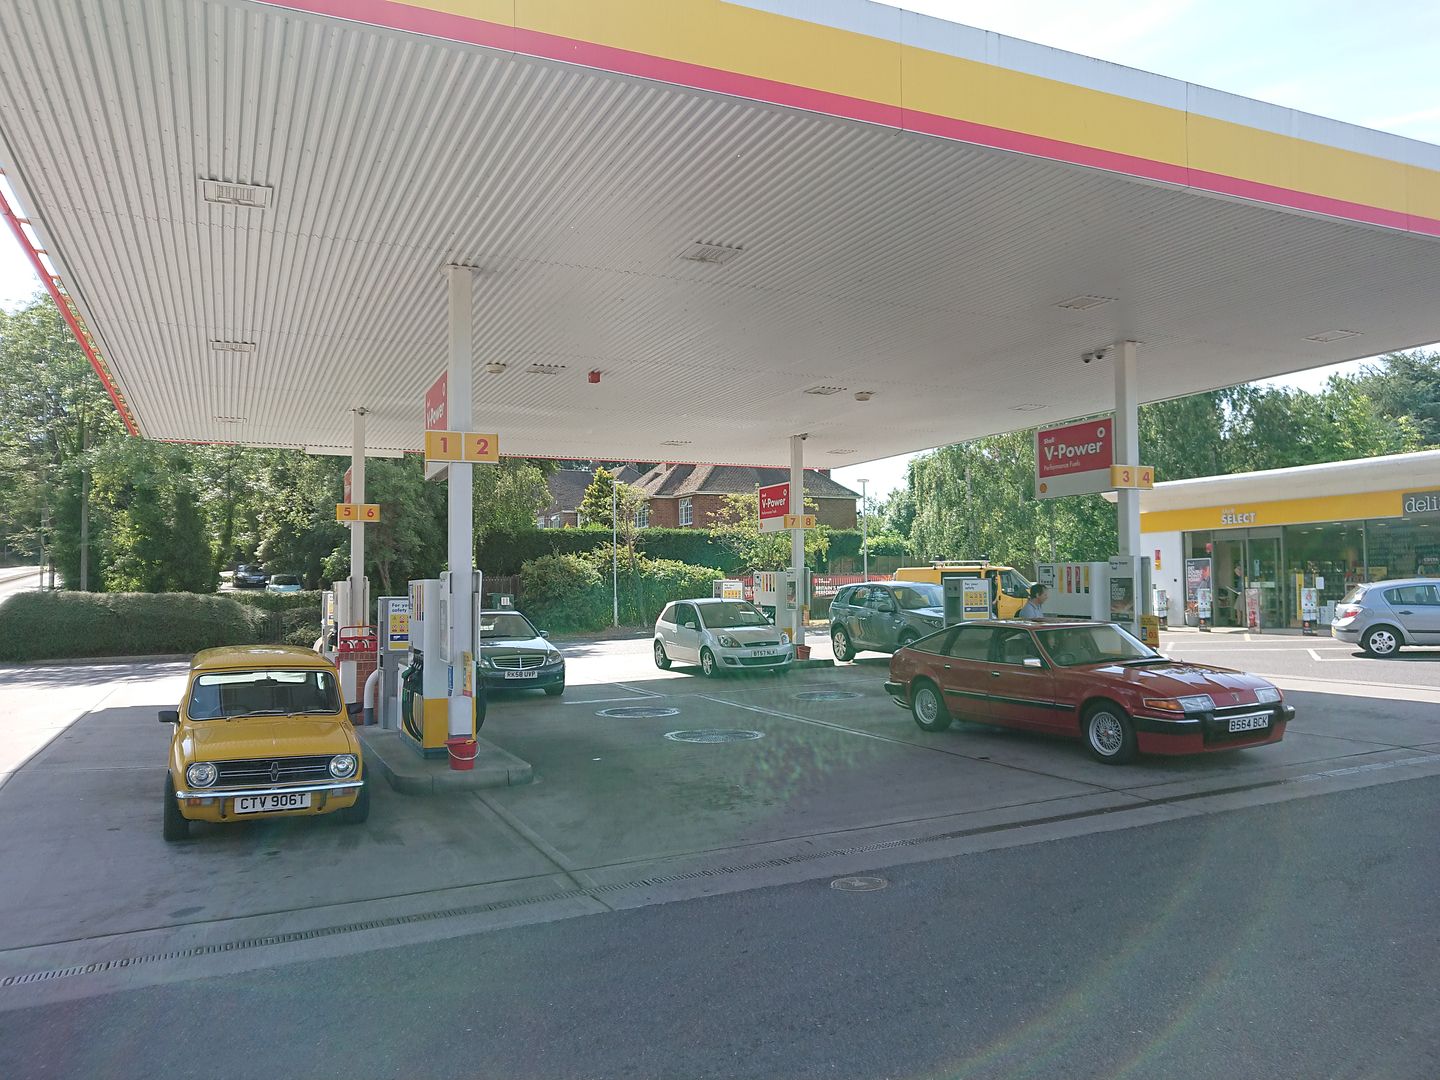
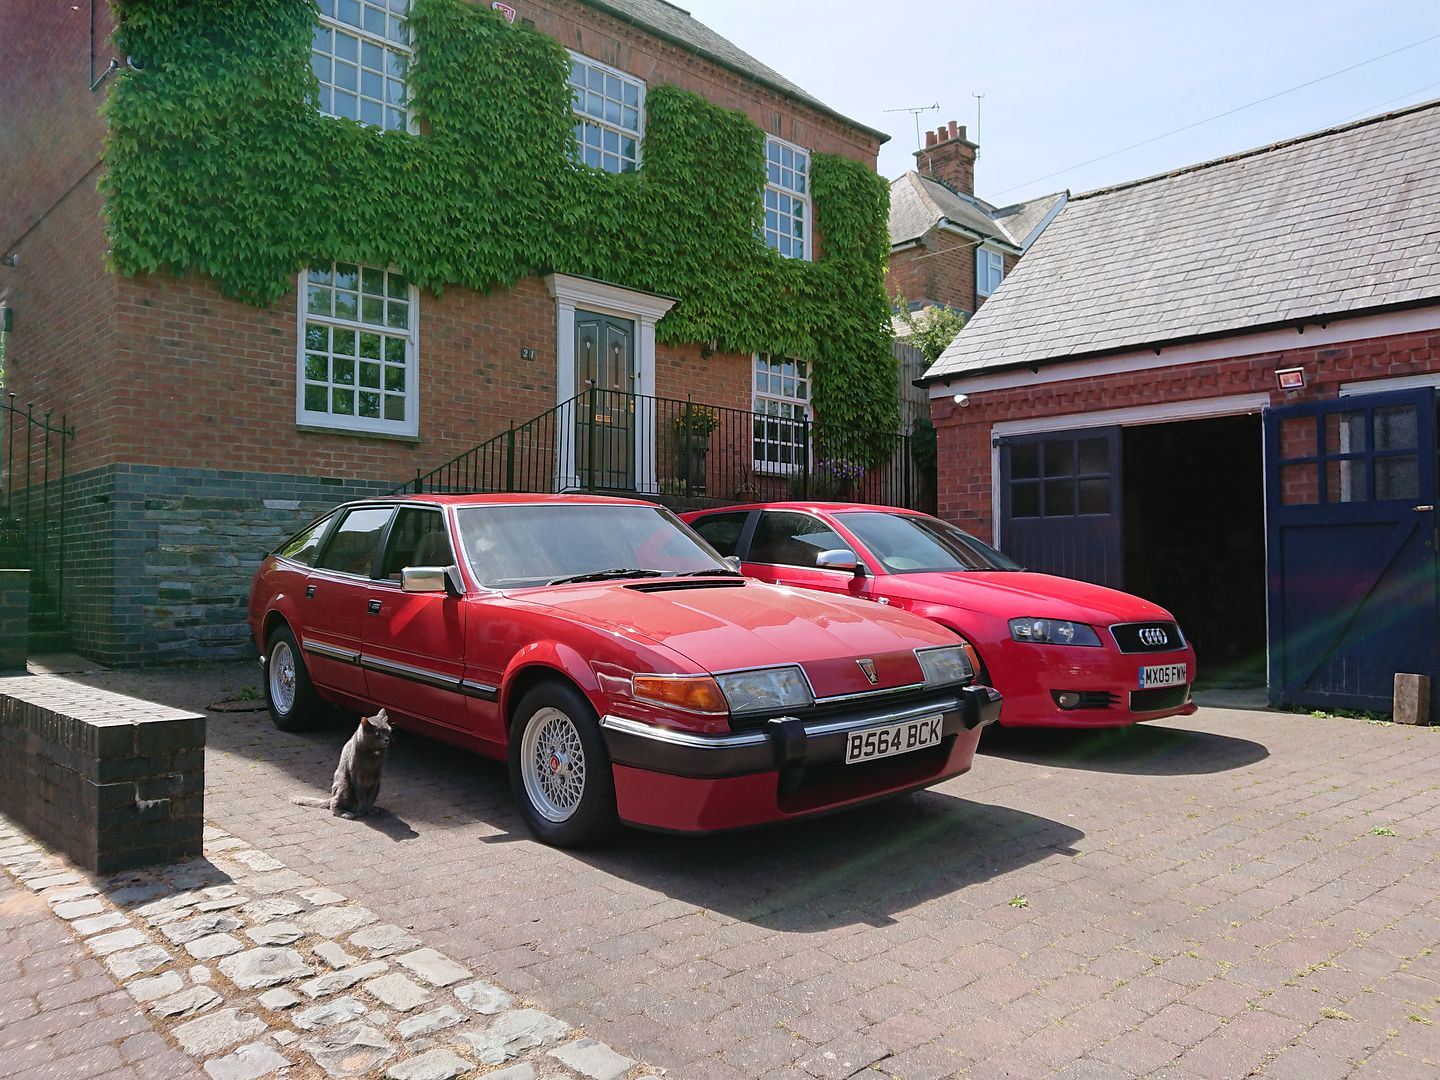
After much arguing I eventually gave in and let my dad drive. I was left with the yellow support vehicle. We swapped half way though so I could drive the Vitesse into the show.

We had people taking pictures of both cars whilst we drove down the motorway which was fun, its always awkward to know where to look though!
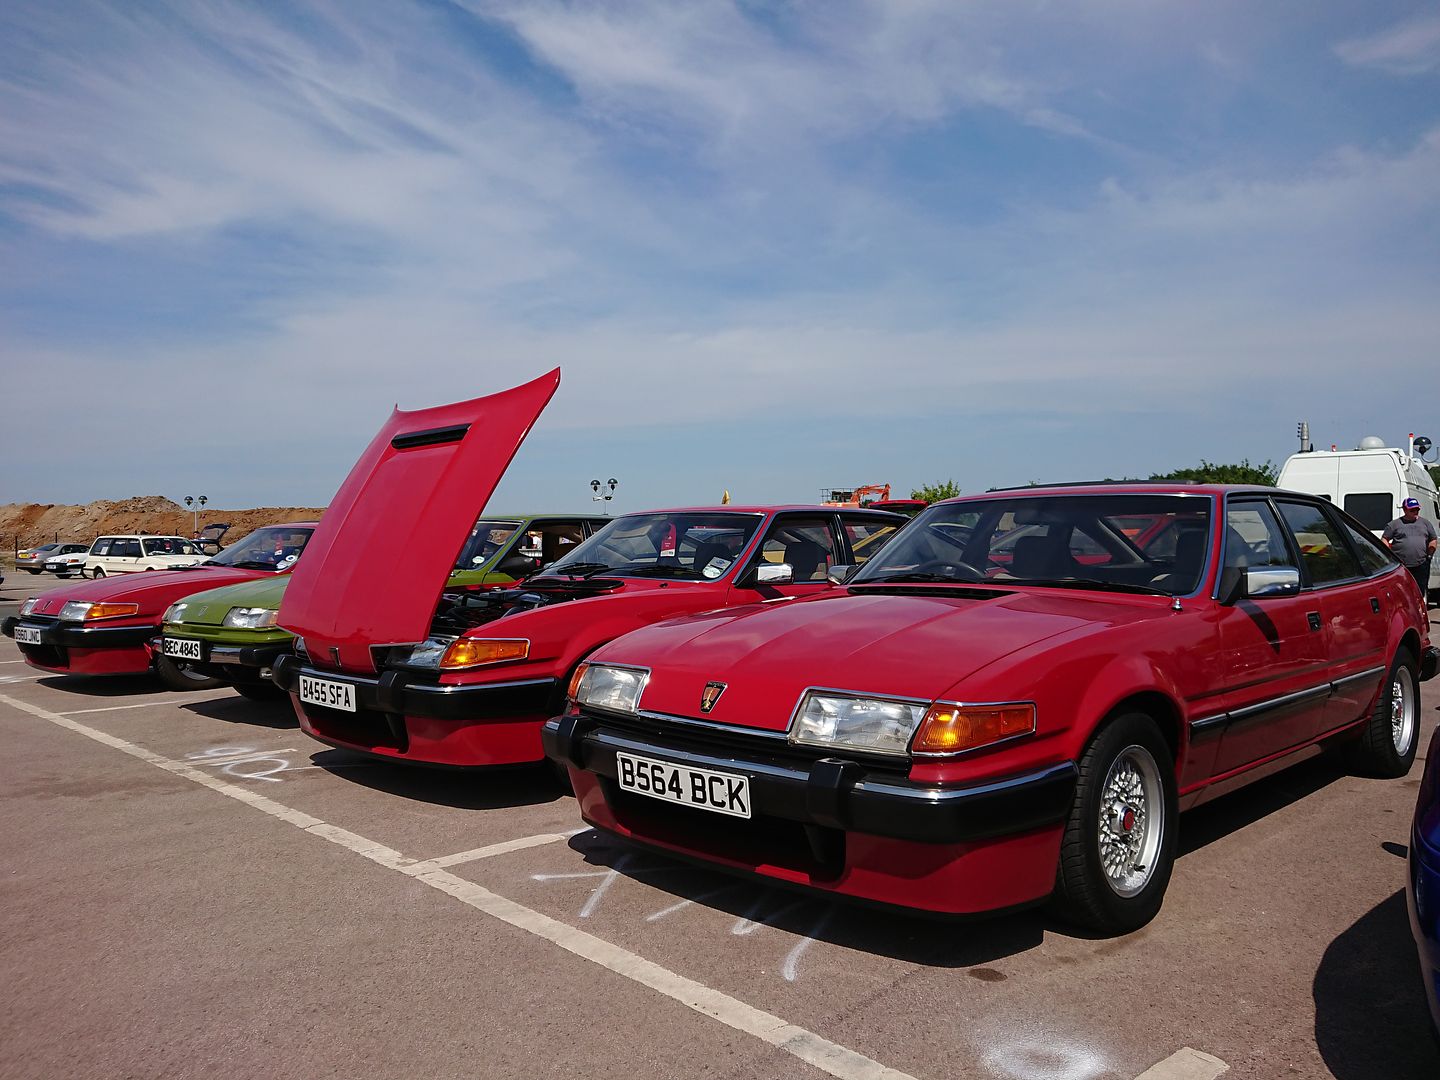
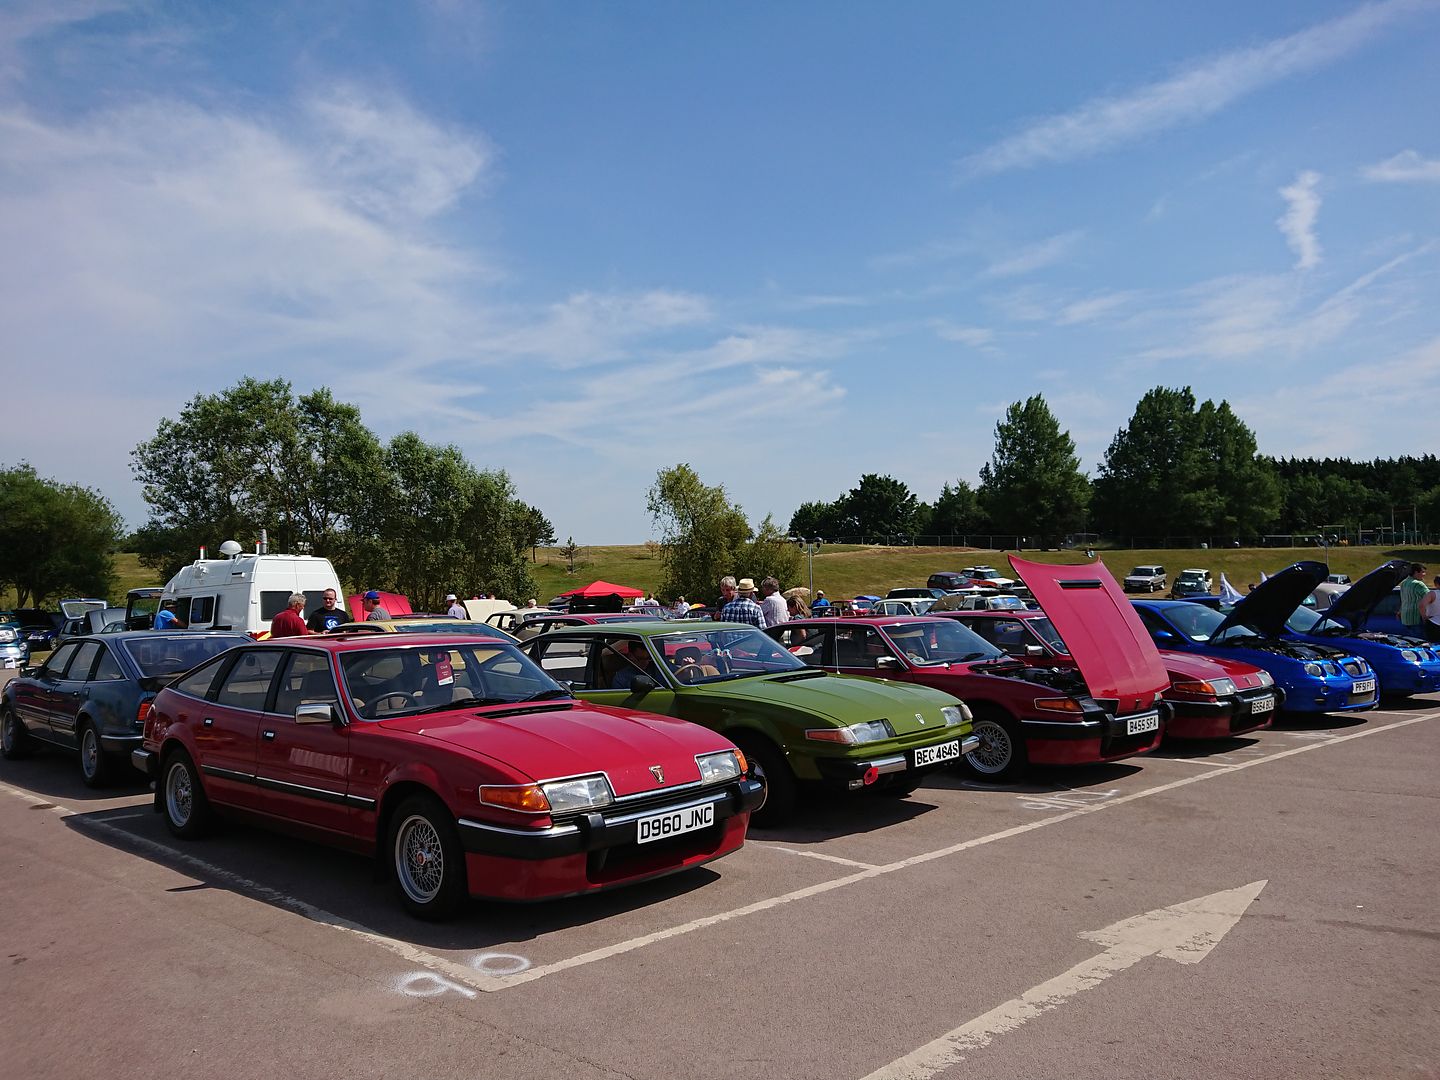
Was a brilliant day with lots of fellow SD1s, and it got such a positive response from people looking over it. I was little apprehensive of how it'd stack up compared to other restored cars, as I know it has some paint defects, but it really stood up well.
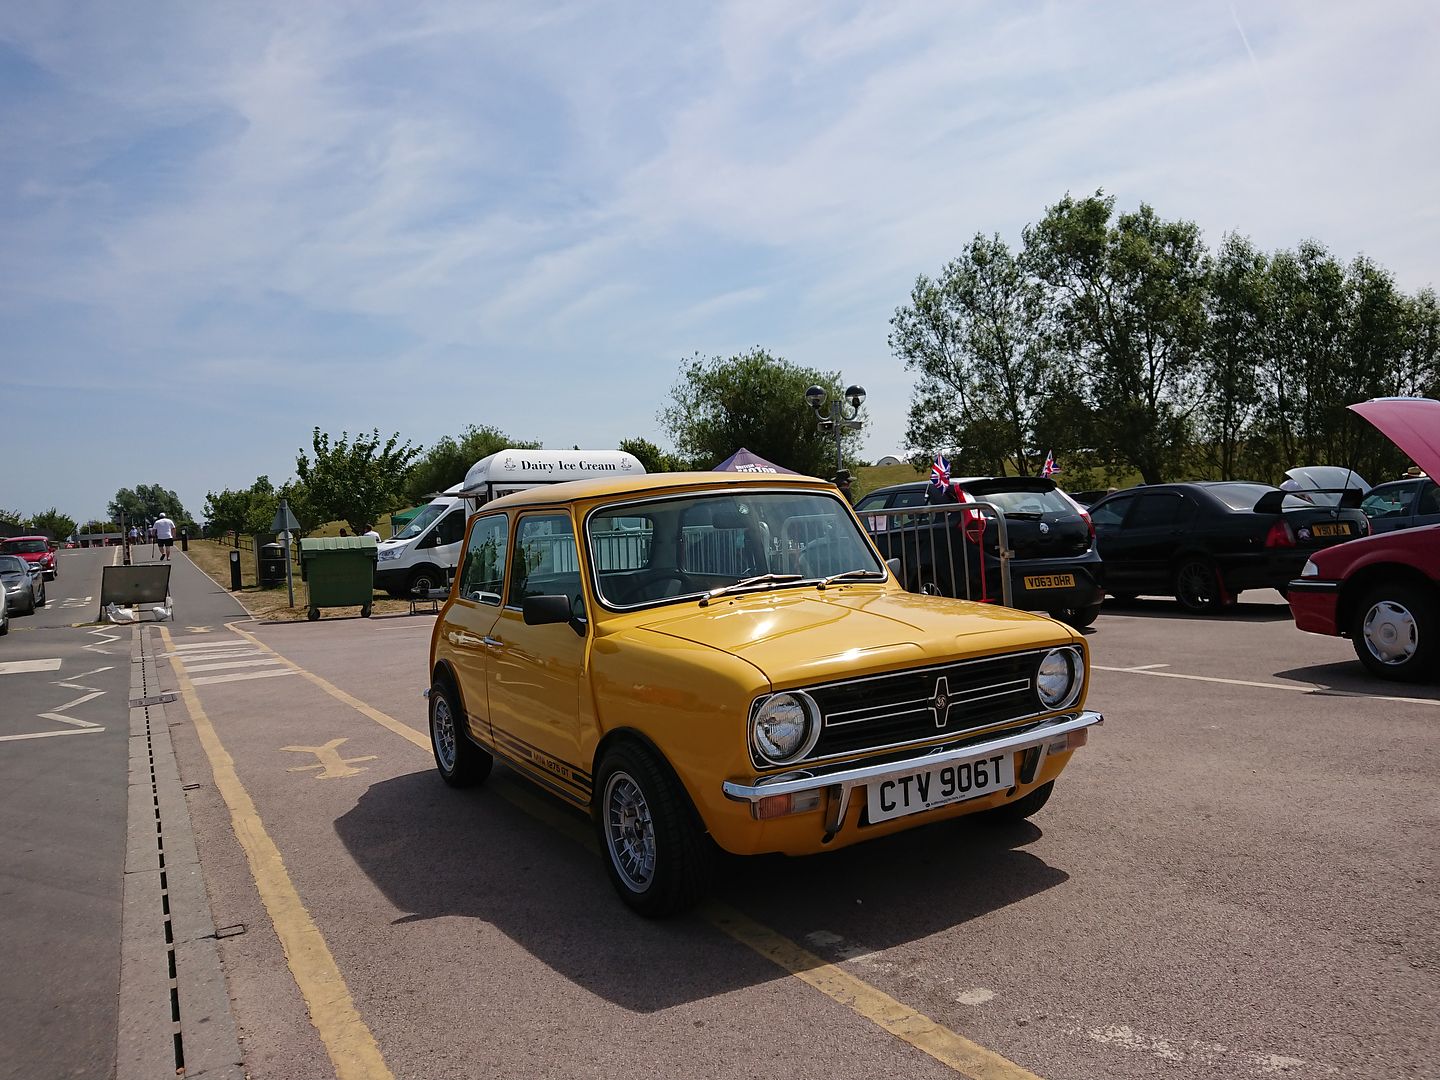
People always love a mini too.

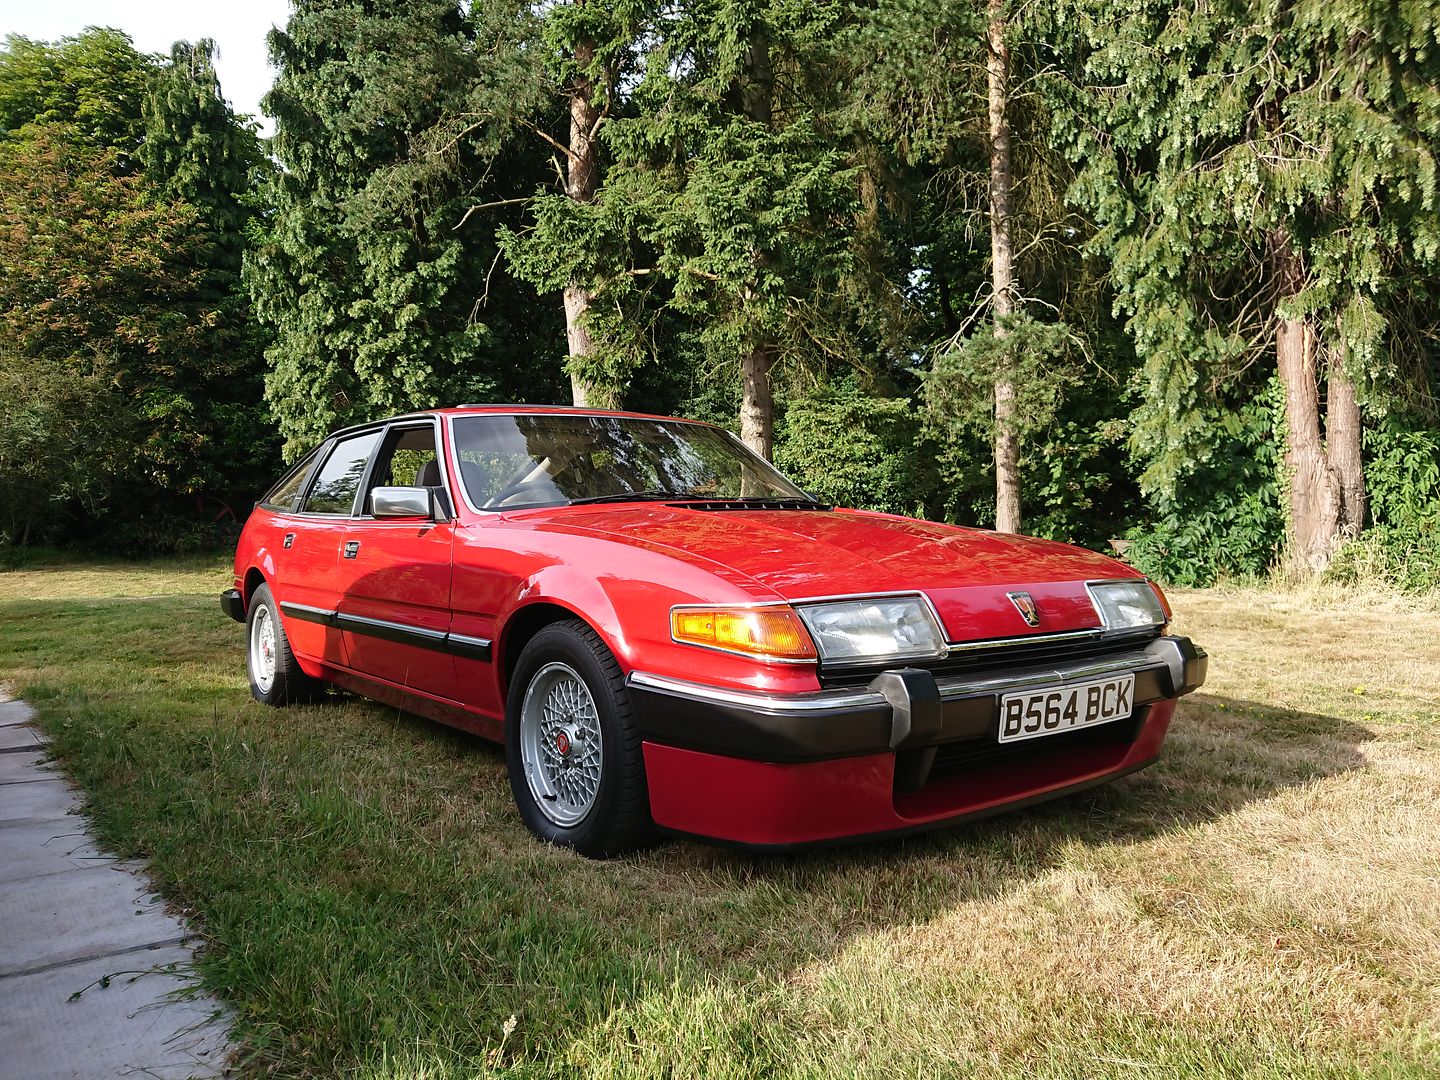
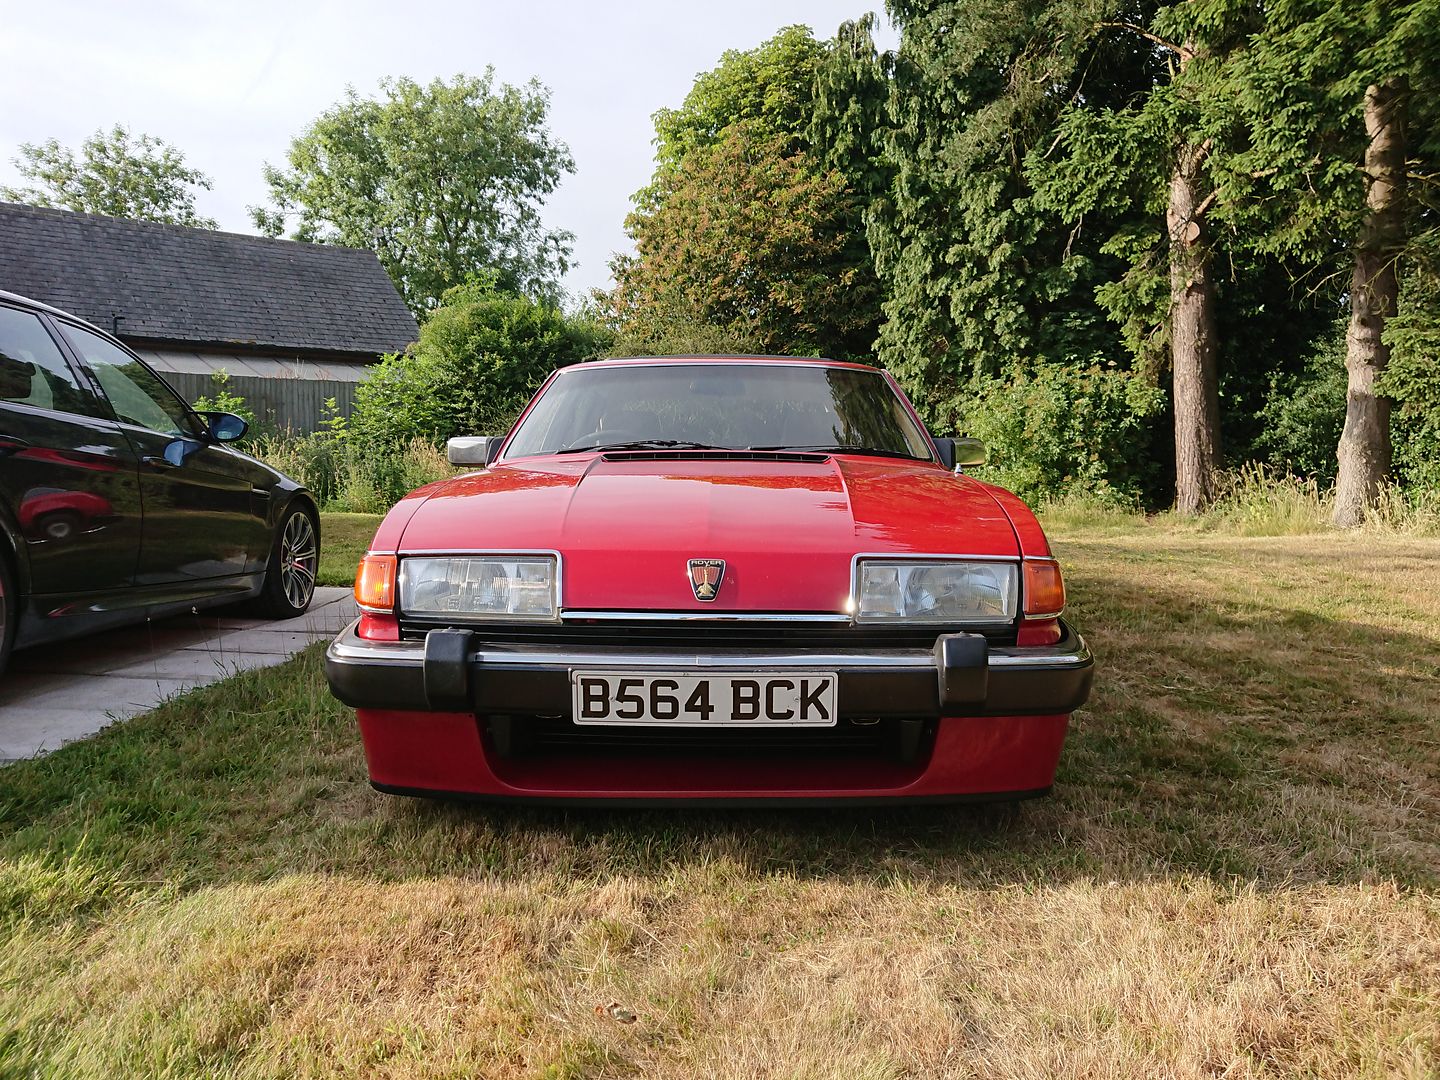
The journey home was uneventful too, and a brilliant way to celebrate the Vitesse's returning to the road. Couldn't help but take lots of gratuitous pictures when I got back too.
Just need to figure out the injection system and sort out the wheels...
Joe
LordGrover said:
Love it. I had a non-vitesse 3.5 way back when - a non-runner as I only wanted the engine to go into my Lotus Elite II of the time.
Wrote off the Elite before I had a chance to do anything with the Rover so moved it on sharpish.
At the time I didn't think it was a patch on my grandfather's P6. 30-odd years later, and I'm warming to them.
Sadly a lot of SD1s met that fate, but I can understand the want to V8 an Elite. Shame you never got to complete that project, it would have been very interesting. The SD1 was a huge step back technically from the P6, but I just love the way they look. Especially in Vitesse form. Wrote off the Elite before I had a chance to do anything with the Rover so moved it on sharpish.
At the time I didn't think it was a patch on my grandfather's P6. 30-odd years later, and I'm warming to them.
james_tigerwoods said:
Nice one - Very impressive...
Idiot question though - How do you fix the warm starting problem (can you fix it)?
Rover actually recognised this problem in 1986 and issued their own kit to fit it. It basically involved by a combination ofIdiot question though - How do you fix the warm starting problem (can you fix it)?
switched relays, a delay unit and a solenoid valve, the fuel pressure was temporarily
increased, when the engine was too hot, thereby purging the fuel system and enabling the
engine to re-start.
I actually have seen cars with this system installed. It was done on a if you complain enough to your dealer they'll do it basis.
But finding all the correct parts after the fact is almost impossible, so other solutions are needed.
Of course solutions have already been formulated.
• Lift the bonnet and wait.
• Give the accelerator some heavy boots-full when re-starting to make the fuel flow
faster and give a richer mixture.
• Run the fuel pump for a few minutes without starting the engine. This can be done
on both auto and manual SD1's. On an auto try to crank the engine in drive, the
pump runs but the engine does not turn. On a manual, disconnect the engine
harness and try to crank the engine, the pump runs but the engine does not turn.
• One can’t very well relocate the fuel rail but it might be possible to lag it - but
thinking about that, it would probably work against the problem when everything
is piping hot!
• Fit thermostatic electric cooling fans that continue to run after the engine has
stopped to try and remove latent heat from the engine whilst the car is stationary.
However, with no circulating coolant this would be a marginal solution.
I tend to go for the first option!
All information taken from Ramon's brilliant website.
http://www.vintagemodelairplane.com/pages/Download...
Maty said:
Fantastic! What a thread.
Great to see it almost finished and back on the road again, hats off to you.
And to whoever said “too good to drive now”... ssshhh! Cars are for driving, not sitting in garages being looked at
I think since it was MOT'd I've done nearly 700 miles in a month! Great to see it almost finished and back on the road again, hats off to you.
And to whoever said “too good to drive now”... ssshhh! Cars are for driving, not sitting in garages being looked at
So why was I rushing to get the car MOT'd after spending so long on it!?
Well I'd gone through so many self imposed deadlines I really wanted to get the car finished and my good friends dad is the Show Manager at the British Motor Museum, so the annual BMC and Leyland show was a perfect debut. (and I knew that I'd still get a good spot even if I was late
)The Vitesse went in for its MOT on the Tuesday before, as I was expecting to find some issues that I would need to sort. With it passing first time this gave me almost a week to play with the running so it was show ready on Sunday (1st of July) .
I got it running better, but still quite lumpy. Once up to speed though it cruised nicely. Good enough to get me there!

After much arguing I eventually gave in and let my dad drive. I was left with the yellow support vehicle. We swapped half way though so I could drive the Vitesse into the show.

We had people taking pictures of both cars whilst we drove down the motorway which was fun, its always awkward to know where to look though!


Was a brilliant day with lots of fellow SD1s, and it got such a positive response from people looking over it. I was little apprehensive of how it'd stack up compared to other restored cars, as I know it has some paint defects, but it really stood up well.

People always love a mini too.


The journey home was uneventful too, and a brilliant way to celebrate the Vitesse's returning to the road. Couldn't help but take lots of gratuitous pictures when I got back too.


Just need to figure out the injection system and sort out the wheels...
Joe
gforceg said:
Great stuff! What a cracker.
Have you considered adding an auxiliary water pump to help the fans out (a la Corrado)?
I haven't actually, but that would work nicely, I'll look into that. First though as my car is an Air-Con car, it has the condenser in-front of the rad, with twin electric pusher fans. I'm going to rewire them to a manual override. So I can leave fans going. Have you considered adding an auxiliary water pump to help the fans out (a la Corrado)?
bgunn said:
Megasquirt or such, fitted in a 4CU box so it looks original. The original injection is very primitive - the cold start and thermo time is pretty basic!
You'll get many more modern features, too. I think done sympathetically, it'd be a nice project..
This is something that I have looked into, but first I want to figure out the original system. You'll get many more modern features, too. I think done sympathetically, it'd be a nice project..
I don't like to be beaten, and even though its primitive it did at least work when it was new!
This and I'm a stickler for originality.
LordGrover said:
Re the hot start issue; isn't it the same as TVR Griffiths and Chimaeras suffer from?
Plenty of DIY fixes in the relevant forums over the years.
Plenty of DIY fixes in the relevant forums over the years.
WinstonWolf said:
I was just going to post the same thing
Trevor450 said:
The hot start problem on TVRs was caused by TVR wiring the immobiliser the wrong way round. They used the fuel pump side of it to (low current) power the starter trigger (high current) and vice verca which caused problems with the immobiliser relays when hot.
I had always wondered if TVRs suffered from similar issues. Interesting to know that the chimera had a different hot start issue! I do like to read up what TVR owners have found and done to improve running and performance.
I know the 350i is basically a Vitesse engine setup.
Joe
andy43 said:
I think SD1 hot starting probs is down to fuel vapourisation in the lines round the plenum - if you could get the pump to pump for 20 seconds instead of the inital five (if it's like a TVR?) it might get colder fuel through?
Only TVR could wire the immobiliser back to front and use clothes line to earth the starter.
It might be worth posting in the TVR forum as the later 14CUX chip has now been cracked - if yours is similar software it could be programmed to prime for longer perhaps?
Lovely looking car OP - a mate of a mate had a gold 3500SE manual well over two decades ago and I remember it very well. Ride was rubbish - probably knackered rear shocks - but sounded so good. Lovely lovely noise, and just so torquey - the Vitesse at the time must have felt quite a rocketship.
I would have picked the Rover...
Yes all related to the fuel vaporisation. Priming the system for longer would probably cure it. Its not something that I've ever looked into though, I was always under the impression that the earlier 4CU was too stupid to redo anything with it. But I'll certainly ask the question. Only TVR could wire the immobiliser back to front and use clothes line to earth the starter.
It might be worth posting in the TVR forum as the later 14CUX chip has now been cracked - if yours is similar software it could be programmed to prime for longer perhaps?
Lovely looking car OP - a mate of a mate had a gold 3500SE manual well over two decades ago and I remember it very well. Ride was rubbish - probably knackered rear shocks - but sounded so good. Lovely lovely noise, and just so torquey - the Vitesse at the time must have felt quite a rocketship.
I would have picked the Rover...
Edited by andy43 on Thursday 23 August 22:28
I was plesently surpised as to how well mine rides, despite being the sporty version, so I always imagined at standard ride height it would be very cushy. With working suspension of course.
The noise really is intoxicating, the V8 howl at higher RPM, the burble at idle, and the pops on the overrun.
I still need to get a good video of mine.
The performance is brilliant, but then my only comparison from that era is a mini!
Should be even better with a fresh motor.
From that article is one of my favourite Vitesse pictures, I'd love to take mine on a runway....

I was following a new Aston Martin Vantage out of a local car show, and the guy on the gate looks at the Vitesse and said " I know which one I'd have"
Did make me smile.
The running issues have slightly tainted my first experiences of the car, but I think I've finally got to the bottom of the issues. Few air leaks, and some electrical gremlins. I'll go into detail once I've got the pictures up.
I got to take it out running nicely in the last few days and it really is lovely. Such a different experience, lovely and torquey but still happy to rev out. The gearing is ridiculously long though!
SamR380 said:
Congrats on the MOT
You can force the fuel pump to run (to prime the rail) by pushing on the air flow flapper with the ignition on. The pump doesn't run unless the ECU sees airflow into the engine (cranking also moves the flap enough). I guess it wouldn't take much to wire up a little 'prime' switch.
edit: This is the manual I've used, it's for a TVR wedge but the engines are identical (I think??) to a Vitesse/VDP EFI.
http://www.gomog.com/allmorgan/flapperEFI.pdf
Thank you, very happy to have it back on the road. You can force the fuel pump to run (to prime the rail) by pushing on the air flow flapper with the ignition on. The pump doesn't run unless the ECU sees airflow into the engine (cranking also moves the flap enough). I guess it wouldn't take much to wire up a little 'prime' switch.
edit: This is the manual I've used, it's for a TVR wedge but the engines are identical (I think??) to a Vitesse/VDP EFI.
http://www.gomog.com/allmorgan/flapperEFI.pdf
Edited by SamR380 on Thursday 23 August 22:32
Now that is a brilliant tip, I could just pull the air filter off and force some fuel through. I'll try that the next time it happens.
Yes the engines I believe are identical, and I think that was originally an SD1 EFI guide written by Ramon Alban. He mentioned when i got in contact with him that someone had republished his guide online.
They've even water marked a wedge on it and removed his name, shame as the guide is brilliant and he spent a lot of time and effort writing it.
I actually bought a hard copy of the original guide a few weeks ago from Ramon. Very useful to have.
http://www.vintagemodelairplane.com/pages/Rover_Te...
Usget said:
I genuinely can't choose. Can I have all three please sir?
I'd love to add an M535i to the garage, I've never even seen a Citroen CX GTi Turbo! Joe
Gassing Station | Readers' Cars | Top of Page | What's New | My Stuff