325TI - Project Mpact
Discussion


therusterman said:
An plans for the s54? Would be an ideal time for some preventative maintenance on the head gasket/rod bearings/vanos...the list goes on!
Yes the S54 will have a good going over, all the rod bearings, vanos etc will be done while the engine is out. It's all on the long list of things to do!I had a little bit of a break from working on the body of the compact, with the axle carrier dropped off the M3 with all the arms, hubs etc still attached to it.... it was one of those things that where ever it was put it was always in the way, and it isn't the easiest thing to move. So i decided to strip it down and clean it all up.
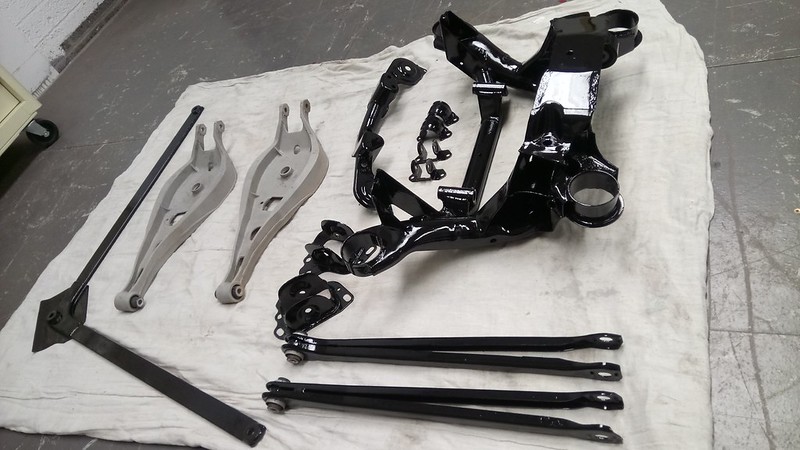
Most things that could fit into the blast cabinet went into it, the aluminium arms, lower arms, anti roll bar mounts, trailing arm carriers... the only parts that didn't fit into the blast cabinet were the Axle Carrier itself but luckily that wasn't in bad condition, managed to clean that up with a wire wheel on the grinder, and the V-Brace... but that is quite badly pitted, i'll probably make a new one.
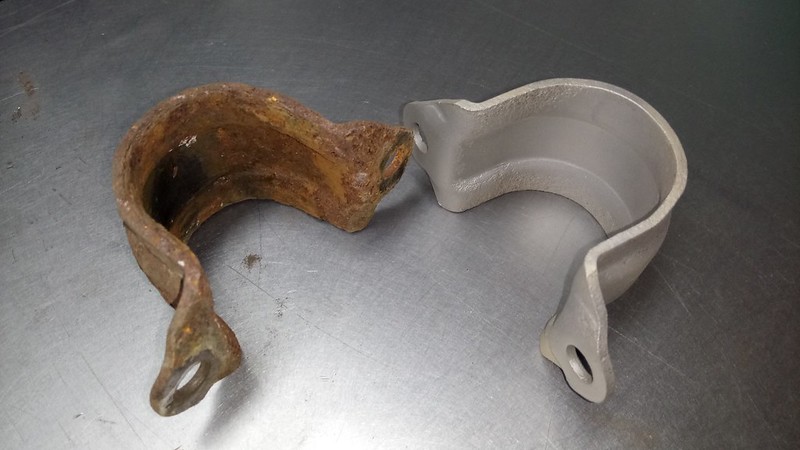
Anti roll bar mounts, before and after
All blasted and painted using the POR15 paint, works quite well.
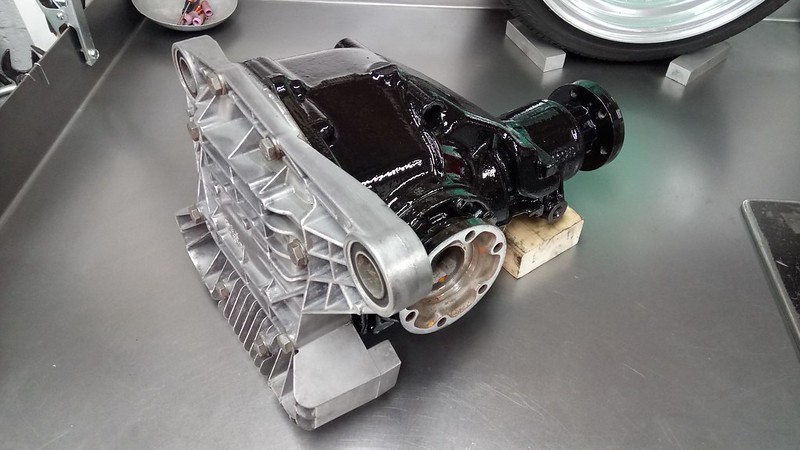
Diff cleaned up and casing painted
All bushings will be replaced with OEM Factory ones, when they eventually turn up.
Most things that could fit into the blast cabinet went into it, the aluminium arms, lower arms, anti roll bar mounts, trailing arm carriers... the only parts that didn't fit into the blast cabinet were the Axle Carrier itself but luckily that wasn't in bad condition, managed to clean that up with a wire wheel on the grinder, and the V-Brace... but that is quite badly pitted, i'll probably make a new one.
Anti roll bar mounts, before and after
All blasted and painted using the POR15 paint, works quite well.
Diff cleaned up and casing painted
All bushings will be replaced with OEM Factory ones, when they eventually turn up.

Andrew Kettle said:
Following this with interest, had a 325ti about two years ago, great little cars as they are, am sure an M3 powered one will be epic! The effort and level of detail / workmanship that you are putting into this is seriously impressive!
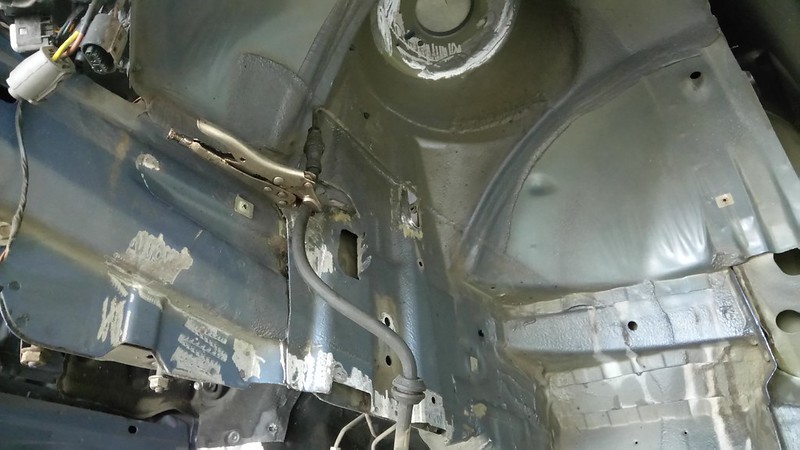
Thank you, many hours of faffing have gone into this.... even more hours of head scratching. I was hoping to have it roadworthy for the warm weather but i think we are past that time now, i miss driving it!Next on the list was to remove the side skirts and front arch liners ready for painting the underside of the vehicle.
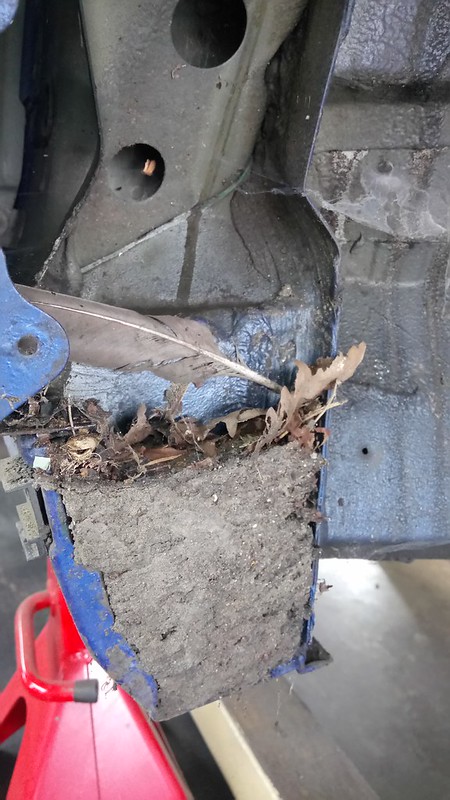
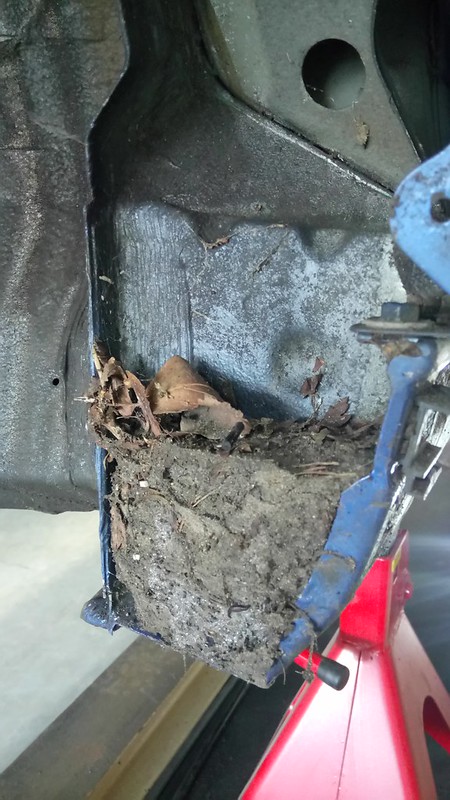
I was surprised by the amount of crap and mud that was built up behind the front arch liners, then realised that the scuttle panel drains are directly above with nowhere for it to all escape,
14 years of crap, looking like a core sample.
Drivers side,
Passenger side,
Making the car a bit lighter,
I was expecting the worst but both sides cleaned up quite well,
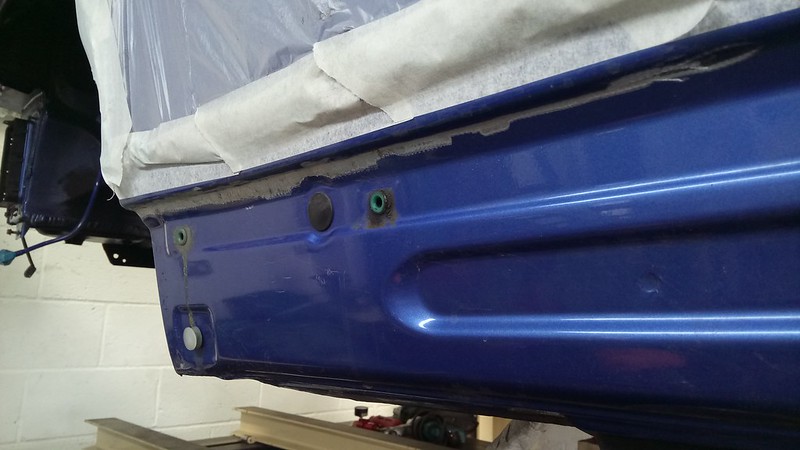
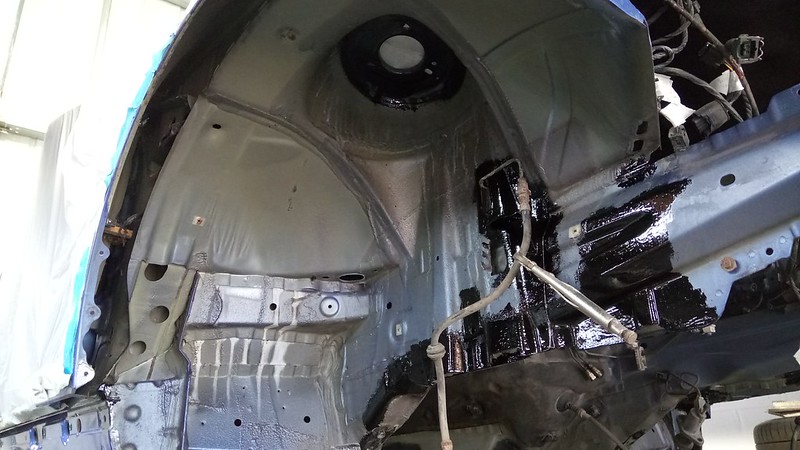
With the side skirts and arch liners out the way and the body work cleaned and degreased i could inspect any areas of corrosion.
No real rust as such, just areas that the side skirts had been rubbing and had warn through the paint leaving a slight surface corrosion, this was the same on both sides. With a power file i cleaned up the areas,
Front inner arches had the usual slight bubbling, again this was ground back to bare metal,
Treated with POR15,
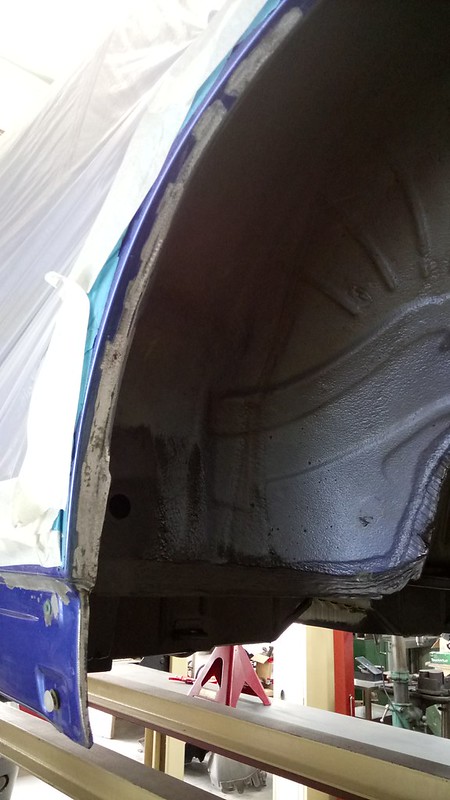
Onto the rear arches, i used to have 19x9.5 et45 on the rear and i had a couple of mm clearance between the tyre and the wheel arch...... it used to rub slightly with a bit of 'spirited driving'. I wanted to roll them slightly just to gain a bit more clearance but seeing as the car was immaculate i didn't dare touch them.
A few years later with stone chips and bubbles appearing now was the perfect time to find a bit more clearance.
The inside lip of the rear wheel arches are a common place for mud to build up and prone to rusting through, with a twisted wire wheel on a grinder and various wire wheels on a drill the inside of the arch lip was taken back to bare metal. To my surprise it was absolutely spotless, not a sign of rust.
Because of the angle and lighting i couldn't get a photo of this.
The under side of the wheel arches were also ground back to bare metal using a power file to remove any rust and bubbling.
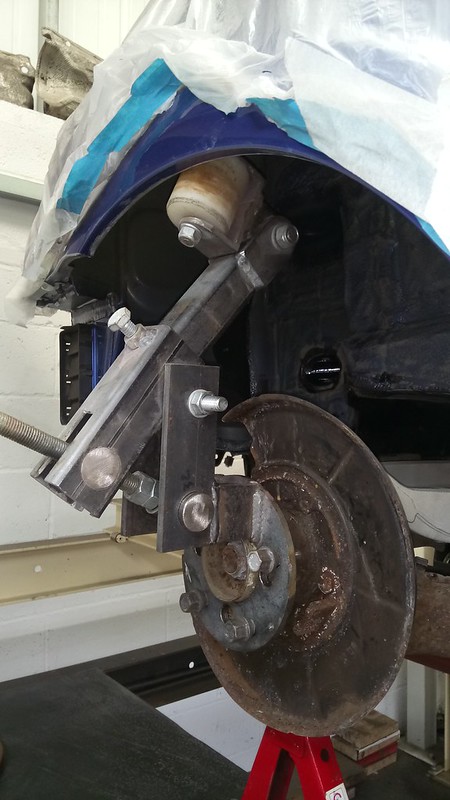
Back in 2012-2013 i built a MK1 Caddy, i made a 'quick' arch roller, it took longer to find it than it would make a new one! As it was made to suit a 4x100 stud pattern i needed to re-drill it to 5x120 to match the bmw stud pattern.
To use the arch roller i had to reinstall the rear axle carrier/arms/hubs etc.... bit of a pain it the ass.
Being very careful the arches were rolled, i only wanted to roll the edges slightly and not 'pull' the arches out or distort the shape of the rear quarters. After a lot of faffing 6mm each side has been gained, it may not seem much but it will certainly stop any rubbing!
A few years later with stone chips and bubbles appearing now was the perfect time to find a bit more clearance.
The inside lip of the rear wheel arches are a common place for mud to build up and prone to rusting through, with a twisted wire wheel on a grinder and various wire wheels on a drill the inside of the arch lip was taken back to bare metal. To my surprise it was absolutely spotless, not a sign of rust.
Because of the angle and lighting i couldn't get a photo of this.
The under side of the wheel arches were also ground back to bare metal using a power file to remove any rust and bubbling.
Back in 2012-2013 i built a MK1 Caddy, i made a 'quick' arch roller, it took longer to find it than it would make a new one! As it was made to suit a 4x100 stud pattern i needed to re-drill it to 5x120 to match the bmw stud pattern.
To use the arch roller i had to reinstall the rear axle carrier/arms/hubs etc.... bit of a pain it the ass.
Being very careful the arches were rolled, i only wanted to roll the edges slightly and not 'pull' the arches out or distort the shape of the rear quarters. After a lot of faffing 6mm each side has been gained, it may not seem much but it will certainly stop any rubbing!
Fast Bug said:
amc_adam said:
therusterman said:
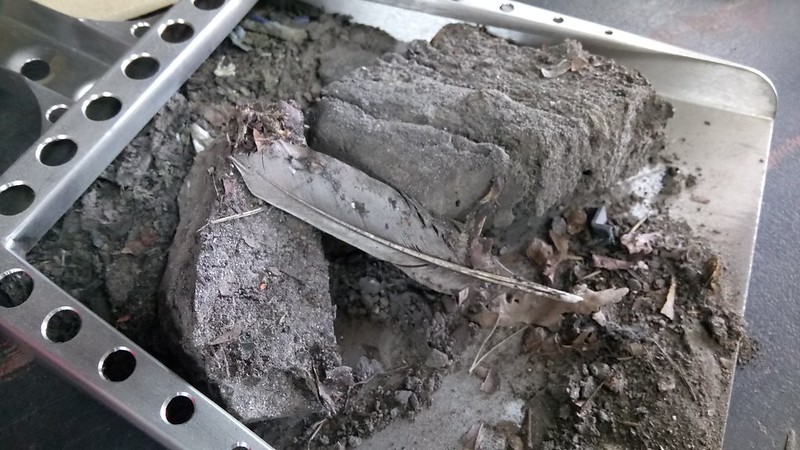
Was that the world's most over engineered dust pan I see?!
Haha, yes that is a stainless dust pan 

Great work though, I wish I had half your skill set!
Thank you, i think it's having lot's of patience rather than skill!
e30m3Mark said:
Any idea how light you'll be able to get it?
Gonna be a cracker of a car when finished.
Depends how much more dirt i find in the car to remove, can't possibly be any more hidden anywhere!Gonna be a cracker of a car when finished.
I do hope so, it's certainly turned out to be more than the engine swap it started off as!


amc_adam said:
The inside lip of the rear wheel arches are a common place for mud to build up and prone to rusting through, with a twisted wire wheel on a grinder and various wire wheels on a drill the inside of the arch lip was taken back to bare metal. To my surprise it was absolutely spotless, not a sign of rust.
Because of the angle and lighting i couldn't get a photo of this.
Apparently, the compact suffers less with rust in the arches than any other E46 variant, something to do with them being manufactured in a different factory (in Mexico IIRC), which used a different corrosion protection process. Because of the angle and lighting i couldn't get a photo of this.
Gassing Station | Readers' Cars | Top of Page | What's New | My Stuff