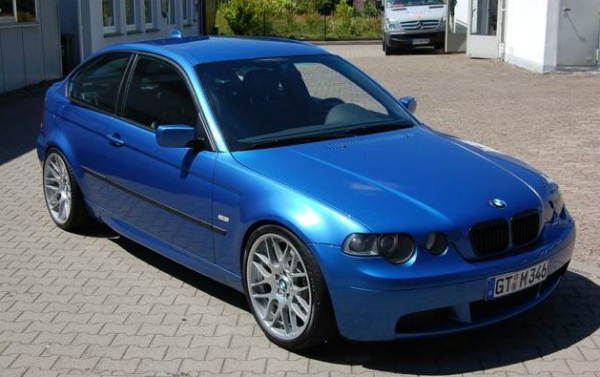
325TI - Project Mpact
Discussion


Andrew Kettle said:
Apparently, the compact suffers less with rust in the arches than any other E46 variant, something to do with them being manufactured in a different factory (in Mexico IIRC), which used a different corrosion protection process.
Well i never knew that, learn something new every day!RoverP6B said:
AWG said:
amc_adam said:
therusterman said:
Was that the world's most over engineered dust pan I see?!
Haha, yes that is a stainless dust pan 

Dust pan aside, Back onto the compact build.
While i was inside the passenger rear arch curiosity got the better of me, i noticed a tiny split in the factory seam sealer about 5mm long. Not wanting to leave it i grabbed a screw driver and gently opened it up, the little 5mm split turned out to be a large blister and the factory sealer/paint had lifted allowing moisture to get under.
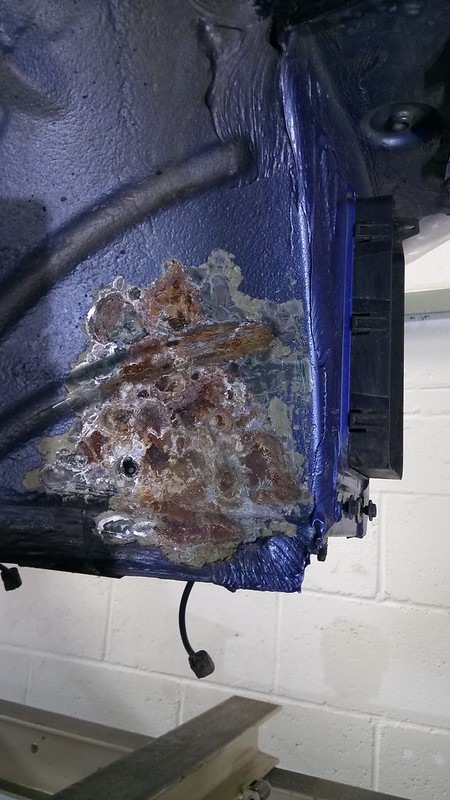
Cleaned up the corrosion
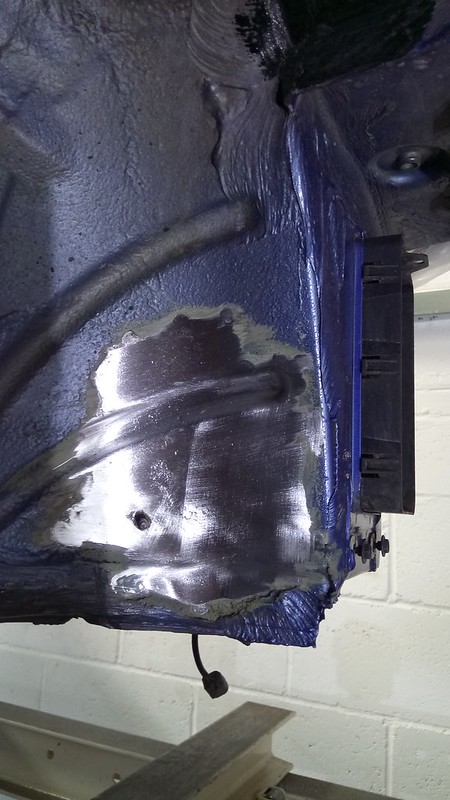
Treated with POR15
While i was inside the passenger rear arch curiosity got the better of me, i noticed a tiny split in the factory seam sealer about 5mm long. Not wanting to leave it i grabbed a screw driver and gently opened it up, the little 5mm split turned out to be a large blister and the factory sealer/paint had lifted allowing moisture to get under.
Cleaned up the corrosion
Treated with POR15
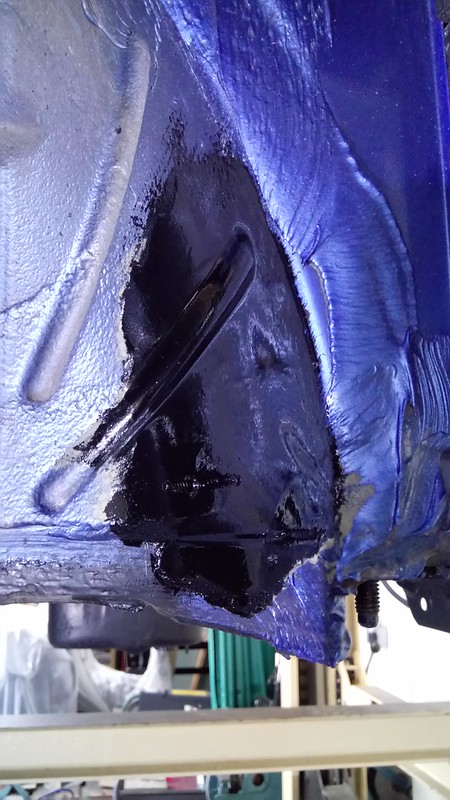
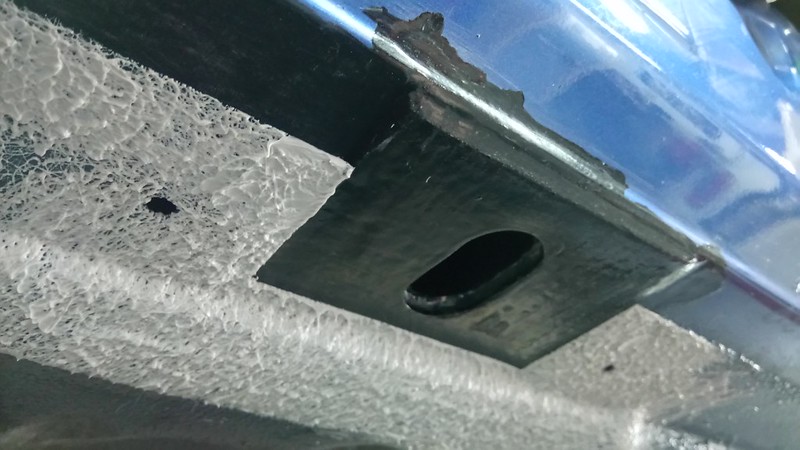
All the jacking points had a little tidy up too, where the plastic jacking point pushes into the sill some paint had rubbed off so they all got cleaned up and rust protected.
The passenger side rear jacking point/floor was the area that the 'BMW Specialist' had damaged previously, the sill/floor seam overlap had split and let moisture ingress inside.I didn't want to just leave it, so out came the grinder.....
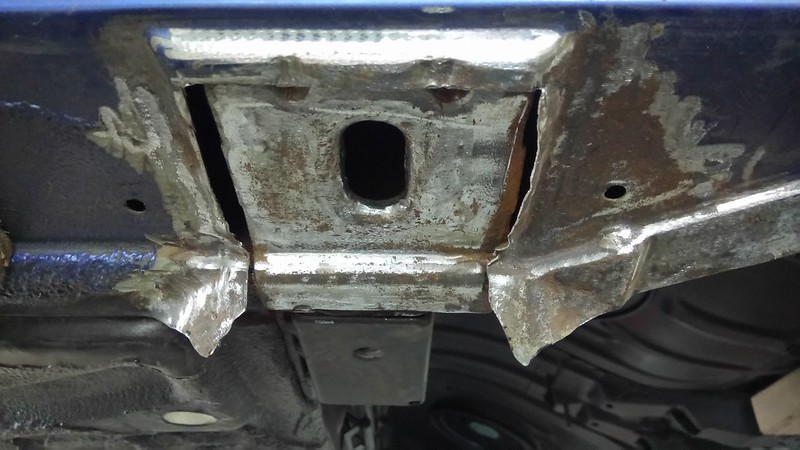
I did eventually cut out more so i could clean up inside the sill and jacking point, but i didn't photo this.... wasn't actually that bad inside. Before it was welded i rust treated everything with POR15 leaving any areas that were to be welded, these i sprayed with a weld through primer.
With it fully TIG welded and cleaned you wouldn't even know it had been opened up.
After many hours researching on how to get the OEM finish of the factory seam sealer i ordered a spray seam seal gun. With some spray seam sealer that i was advised to use by the local body shop just round the corner.
The seam sealer comes in a cartridge that screws onto the spray gun, my first attempt at setting it up while pointing it at a board i pulled the trigger and almost emptied the entire cartridge in one go
Jacking point looking much better and seam sealed,
The passenger side rear jacking point/floor was the area that the 'BMW Specialist' had damaged previously, the sill/floor seam overlap had split and let moisture ingress inside.I didn't want to just leave it, so out came the grinder.....
I did eventually cut out more so i could clean up inside the sill and jacking point, but i didn't photo this.... wasn't actually that bad inside. Before it was welded i rust treated everything with POR15 leaving any areas that were to be welded, these i sprayed with a weld through primer.
With it fully TIG welded and cleaned you wouldn't even know it had been opened up.
After many hours researching on how to get the OEM finish of the factory seam sealer i ordered a spray seam seal gun. With some spray seam sealer that i was advised to use by the local body shop just round the corner.
The seam sealer comes in a cartridge that screws onto the spray gun, my first attempt at setting it up while pointing it at a board i pulled the trigger and almost emptied the entire cartridge in one go
Jacking point looking much better and seam sealed,

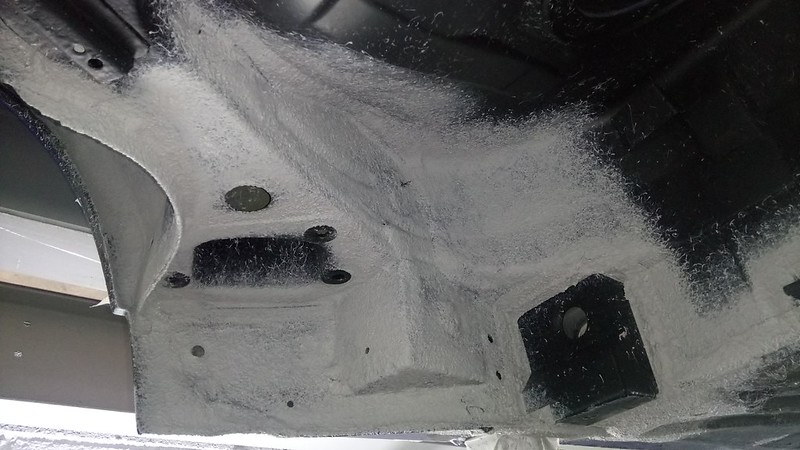
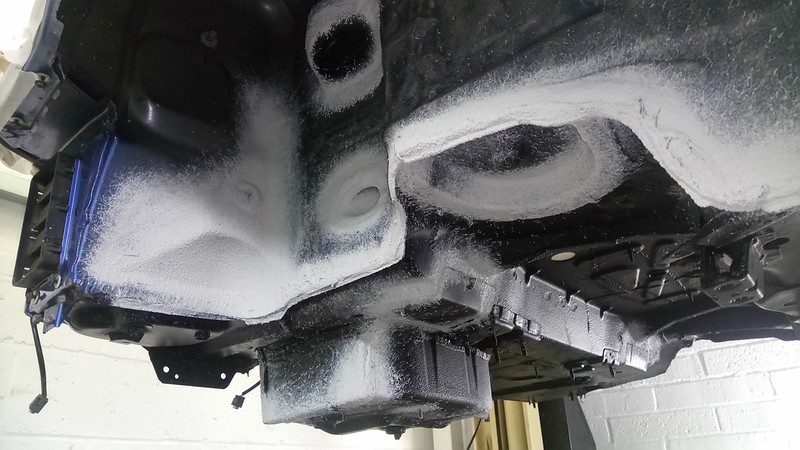
The entire under side, front and back wheel arches, floor pan and boot floor of the car was 'keyed' with scotch bight pads and sand paper to give a rough finish so that when the time comes to paint the under side it has something to stick to.
Any Factory seam seal i had previously removed from either corrosion, the reinforcement plates or just from curiosity was reapplied. I tried to do it in such a way that it would look factory as possible. I masked areas off to build it up in places, then removed the masking tape and blew over everything to blend it in, very time consuming on something that will go unnoticed.
Here you can see the mounts that i previously fitted (and forgot to photo) for where the M3 V-brace bolts onto,
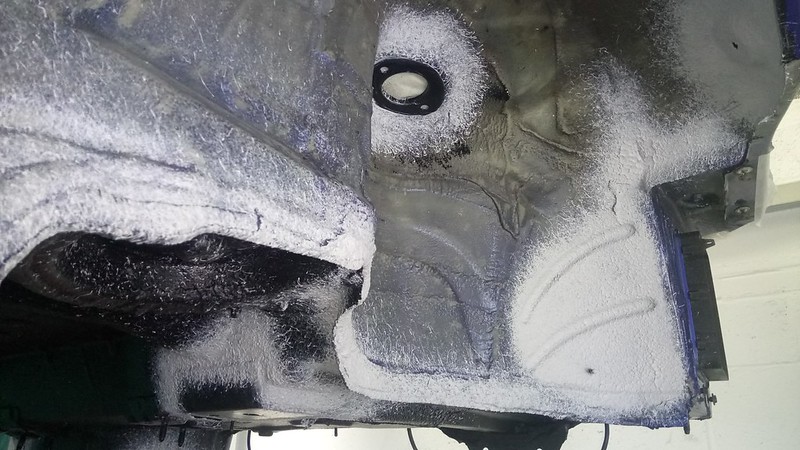
Where i had removed all the factory seam sealer from inside the rear arch lips before rolling them, i reapplied it....but instead of just spraying it over them i filled the entire lip up. So now there is nowhere for mud to build up or water to sit, after it had slightly cured i sprayed over them to blend it in.
Any Factory seam seal i had previously removed from either corrosion, the reinforcement plates or just from curiosity was reapplied. I tried to do it in such a way that it would look factory as possible. I masked areas off to build it up in places, then removed the masking tape and blew over everything to blend it in, very time consuming on something that will go unnoticed.
Here you can see the mounts that i previously fitted (and forgot to photo) for where the M3 V-brace bolts onto,
Where i had removed all the factory seam sealer from inside the rear arch lips before rolling them, i reapplied it....but instead of just spraying it over them i filled the entire lip up. So now there is nowhere for mud to build up or water to sit, after it had slightly cured i sprayed over them to blend it in.


Quhet said:
The detail in this is brilliant. One of my favourite RR threads along with that bloody 500bhp fiesta that has gone too quiet.....
Thanks, think i need to start putting a stop watch next to each item that gets made like on Project Binky I don't think I've seen the fiesta thread? sounds interesting!
amc_adam said:
Quhet said:
The detail in this is brilliant. One of my favourite RR threads along with that bloody 500bhp fiesta that has gone too quiet.....
Thanks, think i need to start putting a stop watch next to each item that gets made like on Project Binky I don't think I've seen the fiesta thread? sounds interesting!
https://www.pistonheads.com/gassing/topic.asp?h=0&...
Glacial actually


So........ to the next point / step / part of the never ending build!
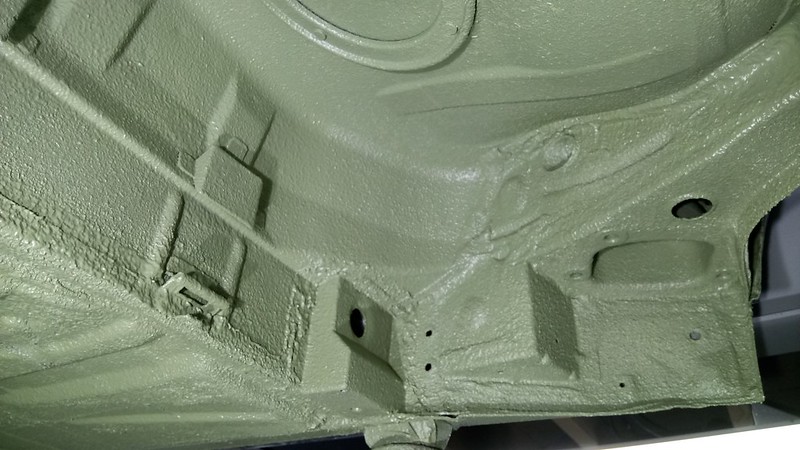
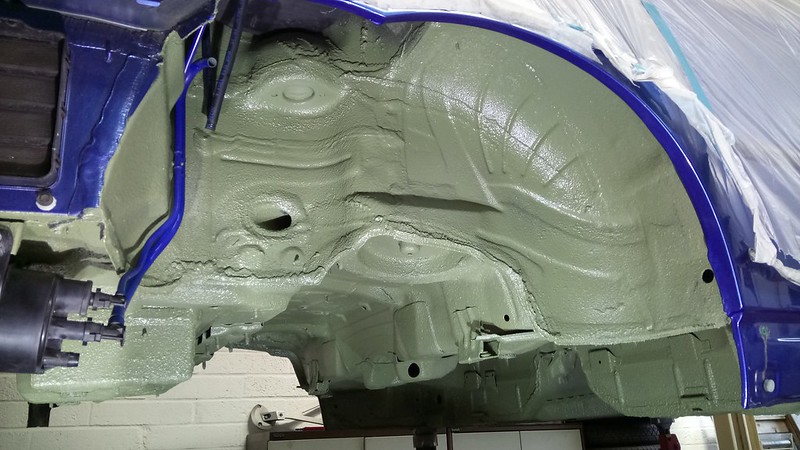
Now after a lot of head scratching and Emailing various companies trying to track down the original colour code for the Factory OEM 'E-coat' used, with no reply's from anyone (maybe a trade secrete to those who know it).
With a RAL chart and the eyes of the girlfriend (i'm colour deficient, i'd choose totally wrong colour) she matched it to the existing 'E-coat' Green of the untouched transmission tunnel. This took a couple of attempts to get right as the first colour ended up being Beige, nothing like the RAL code that was chosen.
I could of gone with colour coding the underside the same colour as the top (Estoril Blue) but for me that wasn't how it came from the Factory. The only reason the inner arches are colour coded from Factory is from the over spray from it being built on the production line.
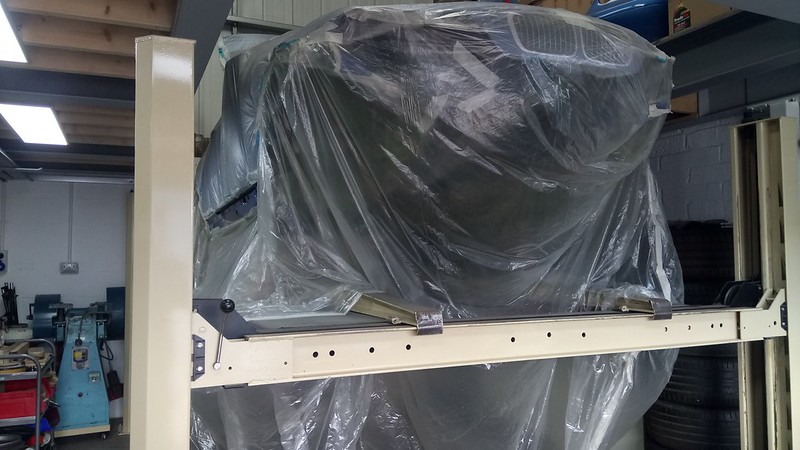
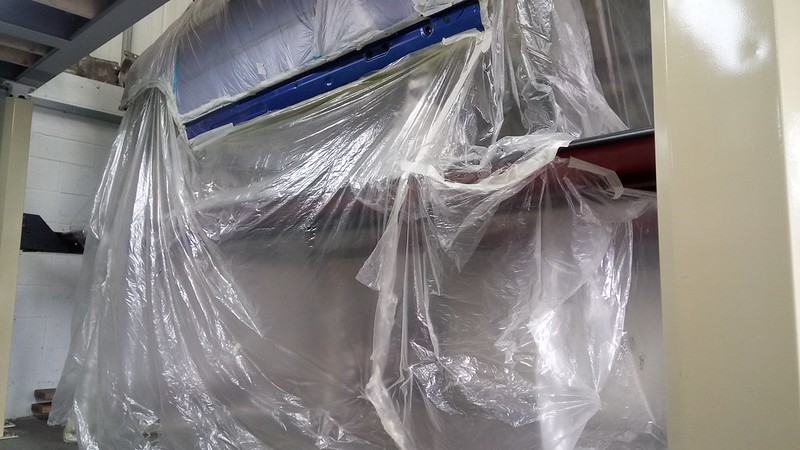
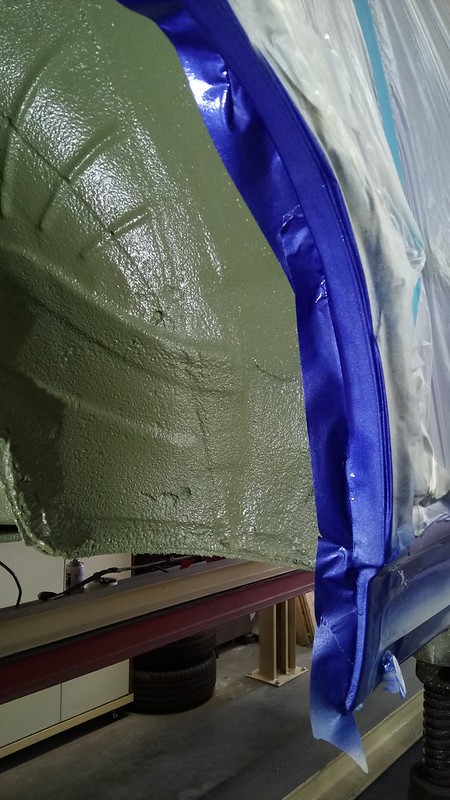
With the entire under side (minus transmission tunnel) and all four wheel arches cleaned and degreased, every inch was prept and keyed using various abrasives.
Turned the ramp into a spray booth,
For the underside coating i used Upol Rapter, this is tintable. Quite simple to use, it comes in 1 liter bottles which screw directly onto a Schutz Gun. All that has to be done is pour some hardener to one mark on the bottle and then add the colour to the next mark...shake and squirt.
It took a bit of fiddling about with air pressures to get the finish i was after but it came out well!
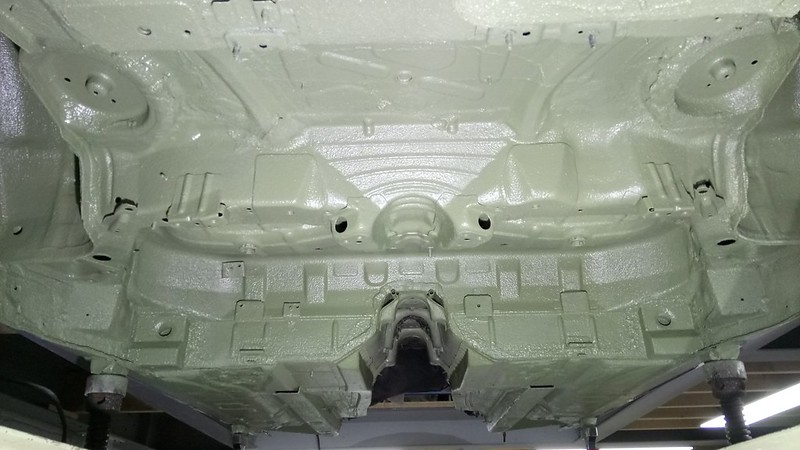
It was quite satisfying to get it to this stage, could almost start putting it back together!
Now after a lot of head scratching and Emailing various companies trying to track down the original colour code for the Factory OEM 'E-coat' used, with no reply's from anyone (maybe a trade secrete to those who know it).
With a RAL chart and the eyes of the girlfriend (i'm colour deficient, i'd choose totally wrong colour
) she matched it to the existing 'E-coat' Green of the untouched transmission tunnel. This took a couple of attempts to get right as the first colour ended up being Beige, nothing like the RAL code that was chosen.I could of gone with colour coding the underside the same colour as the top (Estoril Blue) but for me that wasn't how it came from the Factory. The only reason the inner arches are colour coded from Factory is from the over spray from it being built on the production line.
With the entire under side (minus transmission tunnel) and all four wheel arches cleaned and degreased, every inch was prept and keyed using various abrasives.
Turned the ramp into a spray booth,
For the underside coating i used Upol Rapter, this is tintable. Quite simple to use, it comes in 1 liter bottles which screw directly onto a Schutz Gun. All that has to be done is pour some hardener to one mark on the bottle and then add the colour to the next mark...shake and squirt.
It took a bit of fiddling about with air pressures to get the finish i was after but it came out well!
It was quite satisfying to get it to this stage, could almost start putting it back together!
eezeh said:
E91M3 said:
Some inspiration for you....
Strange battery location?
That would be a 316/318 as only the 325's had the battery in the rear.Strange battery location?
Looks like its coming along nicely, will be brand new by the time you've finished with it


As Eezeh said, 316/318 had there battery under the bonnet for some reason.
With the underside of the vehicle coated, i needed to cavity wax anything that had been exposed to heat from welding or just areas that needed attention, i used an Innotec cavity wax that is temperature stable (doesn't go all runny when it gets hot).
First i started from the inside of the vehicle, spraying into the cavities. I done this until i could see it running out of the bottom of the vehicle, then put the rubber bungs in and sprayed up from the underside making sure each part was coated nicely.
A couple of cans later and i'm confident I've covered/filled areas that needed it. As its transparent and inside cavities i couldn't photo this!
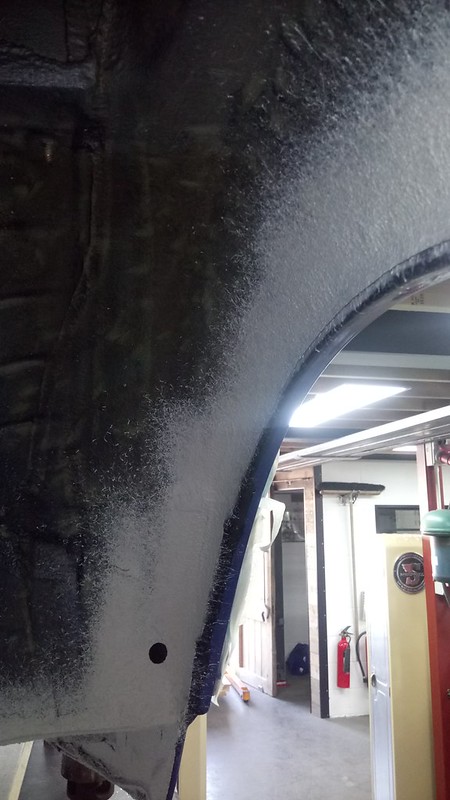
Back onto the rear arches, previously i showed the arches had gotten a bit tatty which was an excuse to grind back any corrosion and roll them. With all that done (previously pictured) it was back on to sort the paint out.
I'm by no means a sprayer/bodyworker but i have a rough idea what too do-ish.
The arches were back to bare metal, i then POR15 treated anything that needed it, that was then keyed. With everything masked off i Zinc primed them. Once that had dried 1/2 days it was flattened off, tack ragged and the blown in with some Estoril Blue i had mixed previously, then lacquered.
Both arches came out surprisingly well, colour is a good match too.
First i started from the inside of the vehicle, spraying into the cavities. I done this until i could see it running out of the bottom of the vehicle, then put the rubber bungs in and sprayed up from the underside making sure each part was coated nicely.
A couple of cans later and i'm confident I've covered/filled areas that needed it. As its transparent and inside cavities i couldn't photo this!
Back onto the rear arches, previously i showed the arches had gotten a bit tatty which was an excuse to grind back any corrosion and roll them. With all that done (previously pictured) it was back on to sort the paint out.
I'm by no means a sprayer/bodyworker but i have a rough idea what too do-ish.
The arches were back to bare metal, i then POR15 treated anything that needed it, that was then keyed. With everything masked off i Zinc primed them. Once that had dried 1/2 days it was flattened off, tack ragged and the blown in with some Estoril Blue i had mixed previously, then lacquered.
Both arches came out surprisingly well, colour is a good match too.
Gassing Station | Readers' Cars | Top of Page | What's New | My Stuff