325TI - Project Mpact
Discussion


Weekendrebuild said:
amc_adam said:
Nope, although I've seen it done a few times....in my opinion it makes the Compact look a bit out of proportion. The future plan is to have the M3 wider arches, and bonnet, but keep the compact headlights/bumper. That's a long way off yet, if it does eventually happen.
. Yeah it does a bit , Ive just done it on mine it’s a hell of a lot of welding to get the original compact lines to flow nicely into the widened front I’ve only ever seen it done by roughly cropping them , which looks s
 t . I’m allso grafting in the rear quarters from my donor car that’s the next job. I was wondering if you had tackled the rear ( no pun intended)
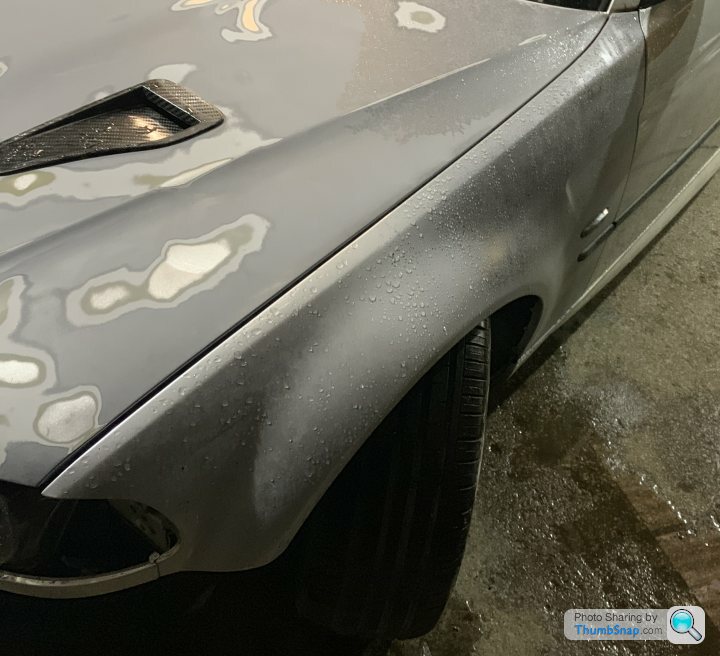
Edited by Weekendrebuild on Friday 20th December 19:43
 , metal work wise it doesn't look too bad.... what to do with the bumper is the tricky bit, I saw one done on Instagram but couldn't work out what was done, maybe part of the M3 bumper was plastic welded into the compact bumper?
Weekendrebuild said:
Yeah I had to many projects on an was offered 6k for her in pieces .. but decided I wanted to finish it off so shes a keeper now . I’m keeping the rear m sport bumper just going to fabricate the m3 splitter into that to finish of the exhausts probably do it in carbon fibre when she’s back from paint . Just swapped diff tranny fluids out the m6 ready for new exhaust tmoro morning .
 .
.
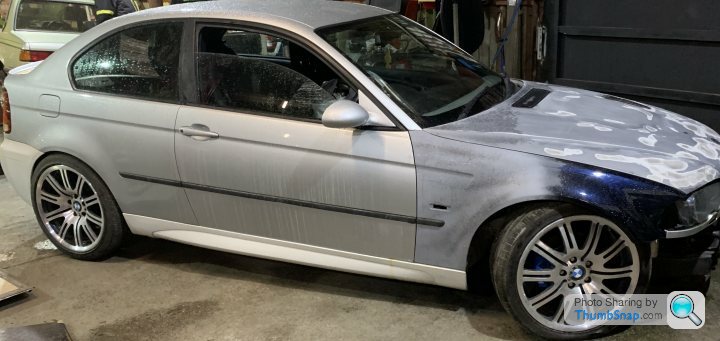
I like the fact you didn't use the wing vents, looks much tidier without them. Have you not got a build thread or anything? would be an interesting to read. Edited by Weekendrebuild on Monday 30th December 22:05
. Edited by Weekendrebuild on Monday 30th December 22:09
The M6 looks smart too, I should think it sounds nice with a new exhaust!
Weekendrebuild said:
Yeah I to prefer it without the vents , I mocked up an old rusty o/s wing I had with the vent in place an I wasn’t sold on it at all. Was way easier to follow the lines of the door without the vent to mess with.
Exhaust in now she’s 4” secondary cats removed , centre resonator delete an back box , mind blowing above 6k rpm lots of mandrel bends
Sorry if I’ve missed it on your thread but what’s your brake set up ? I’m currently attempting to install m5 fronts .
Big Tomm said:
Having just read your whole thread I can not say anything that hasn’t already been said. I have worked in various stages of stainless and ali fabrication for a firm coming up to ten years now and am very impressed with your standard of work, it’s phenomenal and I’m sure you have work coming out of your ears (assuming here you run your own firm).
I look forward to seeing further progress with your compact. Compacts have never really appealed to me, this is the first one I’ve been impressed by! Do you have a build thread for your “S”?
Impressive dustpan as well.
Thank you very much, I've been away from here for a while so I've only just seen these messages!. Yes I have my own Business, and you could say I am somewhat busy I look forward to seeing further progress with your compact. Compacts have never really appealed to me, this is the first one I’ve been impressed by! Do you have a build thread for your “S”?
Impressive dustpan as well.
Unfortunately I don't have a build thread for the Cooper S, if i did it would rather boring as it's just general maintenance, oil changes etc. (I've been told I'm not aloud to tinker with it). But I do think it's one of most run cars to drive! The exhaust is starting to blow on it, so I'll have to sort that soon.
Next build thread will be on my classic mini at some point, that will be an interesting head scratcher.
The dust pan
Time for a long awaited update, I didn't realise how long it had been!
After driving a R53 Cooper S for a couple of years while the Compact was off the road I was used to how direct/twitchy the steering was on it, when I finally got back into the Compact the steering feel was somewhat vague.
After a bit of Googling a solid steering coupler and Powerflex front lower control arm bushes were ordered (and a HEL braided clutch line).

First of all the steering coupler was removed from the car, and the rivets drilled out carefully. There was also a tiny Circlip hidden in the middle which was removed.

The rubber part is under the stainless heat shield, when it's on the car this is right next to the manifold and the heat can cause the rubber to deteriorate over time,
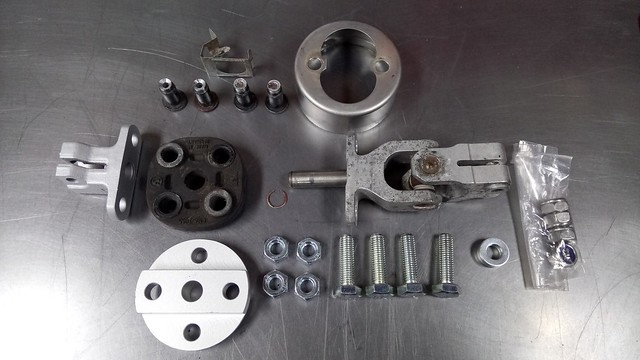
The holes in the original part need to be opened out slightly for the M10 bolts supplied with the coupling kit, upon fitting it all together I didn't like how the bolt head would sit on the casting, so a small part of the M10 bolt head was radiused .


Onto the Powerflex control arm bushes,
The old bushes were pressed out of the aluminium casings, the new bushes had a aluminium outer (very nicely made) that was pressed into the original casings and then fitted to the car following the instructions.

Steering coupler and bushes both fitted,

After a short drive it was instantly noticeable that the steering was much tighter and the majority of the vague feel had gone, no noticeable vibrations were transferred to the steering wheel from adding the solid steering coupler.
More tinkering to follow!
After driving a R53 Cooper S for a couple of years while the Compact was off the road I was used to how direct/twitchy the steering was on it, when I finally got back into the Compact the steering feel was somewhat vague.
After a bit of Googling a solid steering coupler and Powerflex front lower control arm bushes were ordered (and a HEL braided clutch line).
First of all the steering coupler was removed from the car, and the rivets drilled out carefully. There was also a tiny Circlip hidden in the middle which was removed.
The rubber part is under the stainless heat shield, when it's on the car this is right next to the manifold and the heat can cause the rubber to deteriorate over time,
The holes in the original part need to be opened out slightly for the M10 bolts supplied with the coupling kit, upon fitting it all together I didn't like how the bolt head would sit on the casting, so a small part of the M10 bolt head was radiused .
Onto the Powerflex control arm bushes,
The old bushes were pressed out of the aluminium casings, the new bushes had a aluminium outer (very nicely made) that was pressed into the original casings and then fitted to the car following the instructions.
Steering coupler and bushes both fitted,
After a short drive it was instantly noticeable that the steering was much tighter and the majority of the vague feel had gone, no noticeable vibrations were transferred to the steering wheel from adding the solid steering coupler.
More tinkering to follow!
Speedgelb said:
Was intruiged by the title when this popped up on the page 1 yesterday evening, following your latest update.
Ended up reading it from start to finish. Amazing craftsmanship and attention to detail. The chap who made comparisons to something akin to Singer, this side of the pond, was not wrong
Absolutely brilliant.
Well that's very nice of you to say so, I wouldn't say this build is to Singer standards...... but the next build could be! I appreciate the comparison though Ended up reading it from start to finish. Amazing craftsmanship and attention to detail. The chap who made comparisons to something akin to Singer, this side of the pond, was not wrong
Absolutely brilliant.

So, some of you may remember earlier in the build that the section 1 part of the exhaust was a pair of really cheap de-cat pipes (from the donor M3).
I modified these and added a pair of Magnaflow 200 cell cats, but i was never happy with them.
Which brings me to this update,
I've come across a uk supplier of stainless exhaust parts which I've been using on a few customer cars, mandrel bends, silencers and V-bands etc all to a high standard.
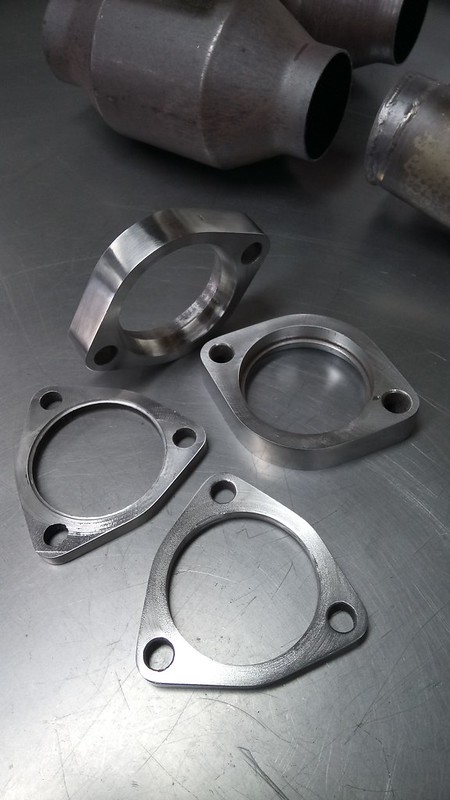
To start with I chopped up the existing pipes as I wanted to keep the cats and flanges... the rest of it went in the bin. First thing I did was clean up the flanges as they looked like they had been chewed from a lump of stainless,
I bored out the inside edges of the flanges slightly, this helps keep the tubes central to the flange and helps with mocking up,

All cleaned up,
Made an order of some tubes,

The exhaust note that the E46 M3 makes is known for being rather raspy, but with the silencer now shortened 600mm this amplified the rasp. Pulling away from a standstill the rasp was almost instant, so a pair of tiny resonators were ordered,

The only real place to fit the tiny silencers/resonators was directly after the cats, this meant moving the cats as far forward as they could be while staying under the heat shield.
After a lot of faffing about and some TIG welding,

Fitted,


I've only driven the car a couple of times since fitting these (because of lock down) but the small silencers seem to have helped, the rasp now only starts at around 4,500 rpm. So I can now pull away from a standstill without sounding like a chav in a Honda.
I'll probably carry on tinkering with the exhaust in the future (when i get chance) as it seems to be a fine art getting the "perfect" tone from an S54, or just make the exhaust as quiet as possible so the induction noise is more prominent.
That's all for now!
I modified these and added a pair of Magnaflow 200 cell cats, but i was never happy with them.
Which brings me to this update,
I've come across a uk supplier of stainless exhaust parts which I've been using on a few customer cars, mandrel bends, silencers and V-bands etc all to a high standard.
To start with I chopped up the existing pipes as I wanted to keep the cats and flanges... the rest of it went in the bin. First thing I did was clean up the flanges as they looked like they had been chewed from a lump of stainless,
I bored out the inside edges of the flanges slightly, this helps keep the tubes central to the flange and helps with mocking up,
All cleaned up,
Made an order of some tubes,
The exhaust note that the E46 M3 makes is known for being rather raspy, but with the silencer now shortened 600mm this amplified the rasp. Pulling away from a standstill the rasp was almost instant, so a pair of tiny resonators were ordered,
The only real place to fit the tiny silencers/resonators was directly after the cats, this meant moving the cats as far forward as they could be while staying under the heat shield.
After a lot of faffing about and some TIG welding,
Fitted,
I've only driven the car a couple of times since fitting these (because of lock down) but the small silencers seem to have helped, the rasp now only starts at around 4,500 rpm. So I can now pull away from a standstill without sounding like a chav in a Honda.
I'll probably carry on tinkering with the exhaust in the future (when i get chance) as it seems to be a fine art getting the "perfect" tone from an S54, or just make the exhaust as quiet as possible so the induction noise is more prominent.
That's all for now!
Huskyman said:
Lovely looking exhaust and with those smooth radius bends it looks like it will flow nicely. Quick question, do you acid wash the welds to remove the discoloration from the tig welding, or do you use another process which you don't want to disclose?
Thank you, Usually I just go over them with a scotch brite but if the weld discolouration is in an awkward area I'll use an acid to clean them up. I tend to do it with most stainless welds, just seems a bit more 'finished' rather than leaving all the weld colours.helix402 said:
stevemcs said:
Nice work, do you build custom exhausts then ?
I know he does custom dustpans!
I do indeed, Exhausts, fuel tanks, sheet metalwork/bead rolling, fabrication/welding, restoration/motorsport work etc. Basically anything Automotive that either needs modifying, adapting, restoring or fully bespoke items from scratch.
R400TVR said:
Hi, this has been a great read, and some very impressive work has been done.
Just wondering if you have thought about adding a CSL style intake to increase the induction noise? Could balance out the exhaust.
Keep it up!
Thank you, I have been looking at those for quite a while! I was going to make an Aluminium version of a CSL intake but I think some of the induction noise is enhanced by the carbon fiber resonating, so I knocked that idea on the head. Maybe one day. Just wondering if you have thought about adding a CSL style intake to increase the induction noise? Could balance out the exhaust.
Keep it up!
Well it's been nearly 5 months since the last update, and just over a year since the car went back on the road (2,500miles now covered).
There isn't much to report since the last update, I've been on a couple more trackdays at Snetterton (which seem to sell out ridiculously quick at the moment) and the handling is slightly better since the Powerflex front control arm bushes and solid steering coupling, but still doesn't fill me with confidence, and judging by the front nearside tyre that has chunks missing from the outer edge it could do with a bit more camber.
But that wasn't my main concern, under closer observation it was the limiting amount of suspension travel it had before the bump-stop came into use. The Compact uses E46 M3 modified top mounts (fixings relocated to replicate the original non-M geometry, previously explained a few pages back) and KW V2 coilovers for an E46 M3.
The Compact wasn't 'low' and still had plenty of gap between the arch and tyre, 13.5" from the arch to the wheel centre. The coilover was almost at the highest setting and had 66mm of thread left to lower it, but only had 12mm of travel before the bumpstop?!.
From what I found after a bit of googling, lowering an E46 M3 and keeping the stock top mounts it seems to be common to have limited travel, this is the same with the E92 M3 and some owners are having to 'shave' 8mm-10mm off the bottom of the top mount to gain more travel.
I understand that bump-stops are there to be used, and did not want to modify/shorten the bumpstop or trim the bottom off the top mount. So I started to look at alternatives, different BMW OEM, converting the KW V2's to narrower front springs to use KW adjustable top mounts, and looking at various aftermarket top mounts i.e Millway, Turner, Ground Control..... these can use the OEM style spring, but I didn't know how much travel I would gain, if any.
So, this is what I ended up ordering.....some lumps of T6 Aluminium,

And machined some little bits of stainless,


A bit of turning and milling to accept a heavy duty spherical bearing on the lower half of the mount,

Top half of the mounts machined,

All the bits bolted together, the stainless inserts pressed in with a bit of Araldite to secure them and help prevent galvanic corrosion,


Picture showing the height difference,

Stock bearing for the spring,

Spring perch,

Perch rubber,

And the collars to take the internal diameter of the spherical bearing (20mm) down to the shock size (16mm) and incorporate the plate for the bump-stop to press against,

I haven't tried them on the Compact yet, fingers crossed they fit! I'm expecting there to be a lot of NVH.... so I've allowed room to add a polybush of sorts at a later date if the NVH is too much for a road car.
So to sum it up, a shallower top mount to gain more shock travel, adjustable camber, adjustable caster (probably never use it) and the top plate is a larger area to help prevent the turret 'mushrooming'.
Just need to decide on if i'm going to paint them or have a go at anodising, if they fit.
And these took b****y ages to make.
Hopefully the next update wont take so long!
There isn't much to report since the last update, I've been on a couple more trackdays at Snetterton (which seem to sell out ridiculously quick at the moment) and the handling is slightly better since the Powerflex front control arm bushes and solid steering coupling, but still doesn't fill me with confidence, and judging by the front nearside tyre that has chunks missing from the outer edge it could do with a bit more camber.
But that wasn't my main concern, under closer observation it was the limiting amount of suspension travel it had before the bump-stop came into use. The Compact uses E46 M3 modified top mounts (fixings relocated to replicate the original non-M geometry, previously explained a few pages back) and KW V2 coilovers for an E46 M3.
The Compact wasn't 'low' and still had plenty of gap between the arch and tyre, 13.5" from the arch to the wheel centre. The coilover was almost at the highest setting and had 66mm of thread left to lower it, but only had 12mm of travel before the bumpstop?!.
From what I found after a bit of googling, lowering an E46 M3 and keeping the stock top mounts it seems to be common to have limited travel, this is the same with the E92 M3 and some owners are having to 'shave' 8mm-10mm off the bottom of the top mount to gain more travel.
I understand that bump-stops are there to be used, and did not want to modify/shorten the bumpstop or trim the bottom off the top mount. So I started to look at alternatives, different BMW OEM, converting the KW V2's to narrower front springs to use KW adjustable top mounts, and looking at various aftermarket top mounts i.e Millway, Turner, Ground Control..... these can use the OEM style spring, but I didn't know how much travel I would gain, if any.
So, this is what I ended up ordering.....some lumps of T6 Aluminium,
And machined some little bits of stainless,
A bit of turning and milling to accept a heavy duty spherical bearing on the lower half of the mount,
Top half of the mounts machined,
All the bits bolted together, the stainless inserts pressed in with a bit of Araldite to secure them and help prevent galvanic corrosion,
Picture showing the height difference,
Stock bearing for the spring,
Spring perch,
Perch rubber,
And the collars to take the internal diameter of the spherical bearing (20mm) down to the shock size (16mm) and incorporate the plate for the bump-stop to press against,
I haven't tried them on the Compact yet, fingers crossed they fit! I'm expecting there to be a lot of NVH.... so I've allowed room to add a polybush of sorts at a later date if the NVH is too much for a road car.
So to sum it up, a shallower top mount to gain more shock travel, adjustable camber, adjustable caster (probably never use it) and the top plate is a larger area to help prevent the turret 'mushrooming'.
Just need to decide on if i'm going to paint them or have a go at anodising, if they fit.
And these took b****y ages to make.
Hopefully the next update wont take so long!
Gassing Station | Readers' Cars | Top of Page | What's New | My Stuff