325TI - Project Mpact
Discussion


mark.c said:
He certainly did! I'm not sure if it sold but I've not stumbled across in any classifieds in a while.
I'm not sure if Dan mentioned but I had an E30 M3 when I bought the 320is which I've still got. I was using the 320is as a daily and as I'm sure you'll agree it was a bit too nice to use everyday and I was feeling guilty about it. That fact plus I had ( and still have) an E12 M535i undergoing a light refresh ( glacial pace!) I wanted a car that I wouldn't be worried about leaving anywhere.
That's where the 325ti came in.
It was an absolute belter but I missed something old and replaced it with a really really lovely E30 325i touring. I'm using it daily but it's as nice as the 320is was.....I never learn!
You have an E30 M3 I'm not sure if Dan mentioned but I had an E30 M3 when I bought the 320is which I've still got. I was using the 320is as a daily and as I'm sure you'll agree it was a bit too nice to use everyday and I was feeling guilty about it. That fact plus I had ( and still have) an E12 M535i undergoing a light refresh ( glacial pace!) I wanted a car that I wouldn't be worried about leaving anywhere.
That's where the 325ti came in.
It was an absolute belter but I missed something old and replaced it with a really really lovely E30 325i touring. I'm using it daily but it's as nice as the 320is was.....I never learn!
 , i take it that ones a keeper! You used the 320is as a daily, hat's off to you for that...... there made to be driven. Any build threads on your cars?
Update on the Exhaust silencer,
With the casing and what not together i needed to work out how i was going to mount it. Once in position i could then work out how long the tips etc needed to be.
As the silencer was going to be heavier than a stock 325ti silencer (although lighter than the original M3 silencer) i wanted to use the M3 rubber hangers. The Stock M3 silencer has two rubber hangers on one side and one rubber hanger on the other, due to the shorter boot floor on the compact there was only room for one rubber hanger each side, and then use the compact rear exhaust rubber hanger.... make sense?
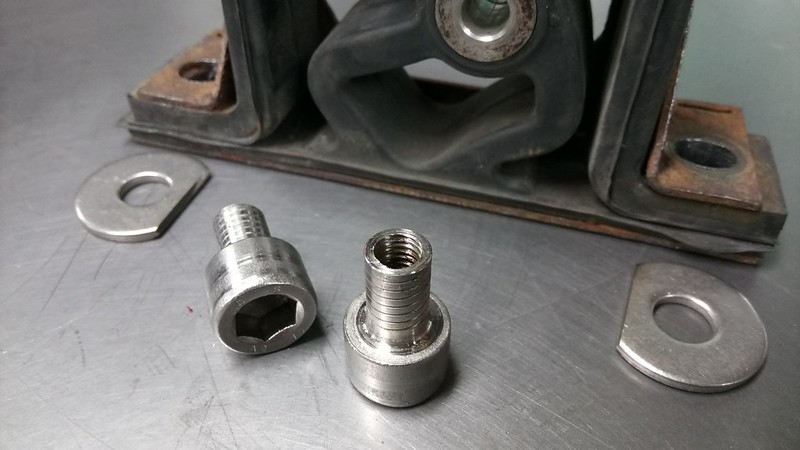
Problem number one.
The studs that poke out the floor on the compact are not long enough to protrude through the thicker M3 rubber hangers. After some head scratching, two stainless M12 cap head bolts had the threads turned down leaving enough material that they could be bored out and tapped to take an M8 thread (which is what the studs are on the compact). The holes in the rubber hangers were opened out to accept the new fittings.
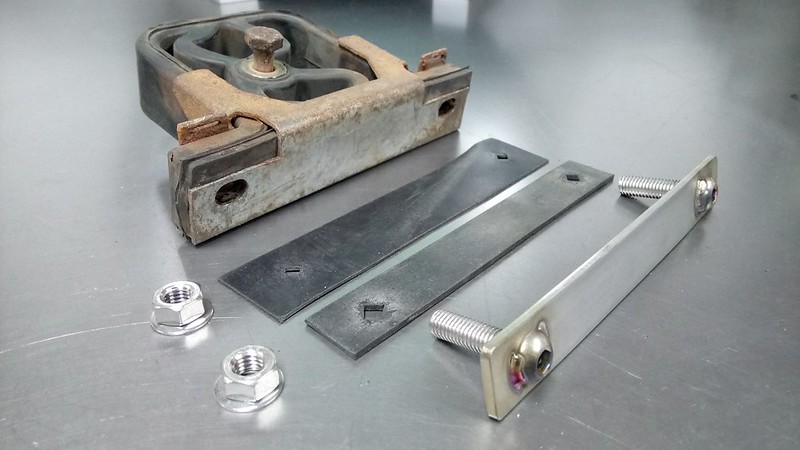
Problem Number two,
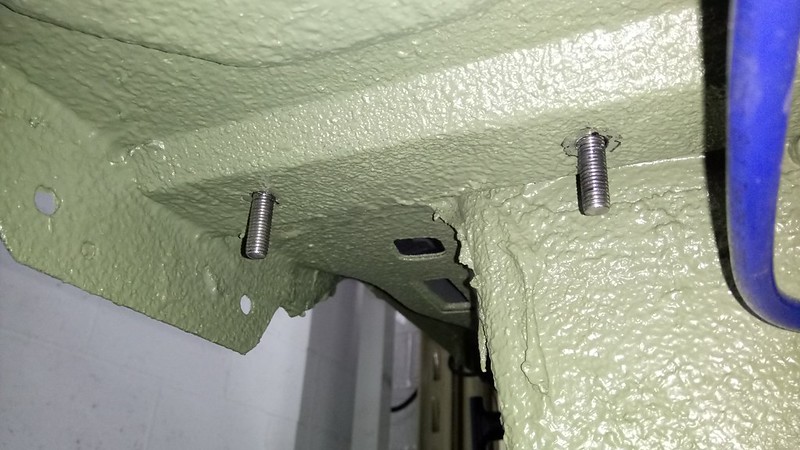
Finding somewhere to put another rubber hanger the opposite side, after more thinking the best way was to remove the bumper (again) and the bumper mount/shock. This allowed access inside the chassis leg, two holes were drilled in the chassis leg, deburred and painted. A strip of stainless had two holes drilled and two stainless M8 bolts TIG'd to it. Rubber gaskets were cut to help prevent any water or damp getting inside the chassis leg cavity.
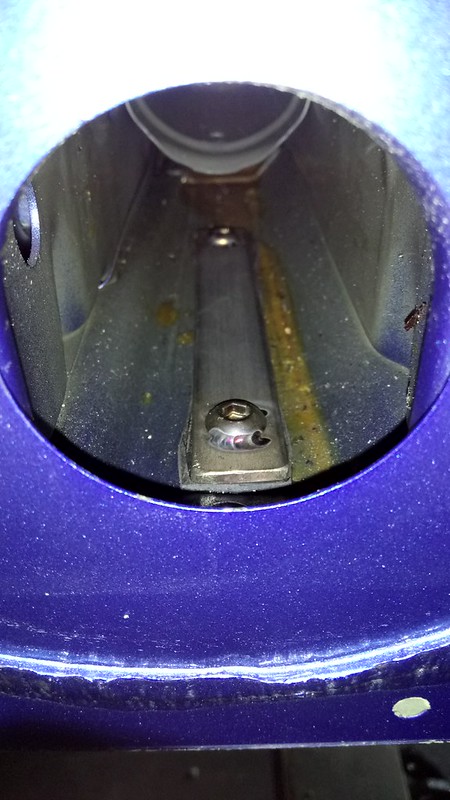
A view looking inside the chassis leg,
With that done it was back on with the silencer itself,
All the packing that came out the silencer was put back into it, when i say 'all' i mean half of it........

TIG welding the top half of the casing back on was an absolute pain in the arse, the packing kept getting into the weld causing it to get contaminated....got there in the end.
The two pipes that come out the side of the silencer had just enough length for some perforated tube and more packing in them, whether or not this will help keep it a bit quieter.....who knows,

With all of the Silencer welded it was on to the tips, the main feature!
The stock M3 tips are 65mm from memory, i didn't want to go too big. I had some 76mm tube left over from a job which i was going to use, rather than just having a straight cut tube the style i wanted was that of a Jaguar F-Type.... The internal bore diameter is smaller, tapers out to a larger diameter and then returns back towards the silencer, quite a subtle way of making a larger exhaust tip look less over the top.
Picture of an F-type tip will explain,
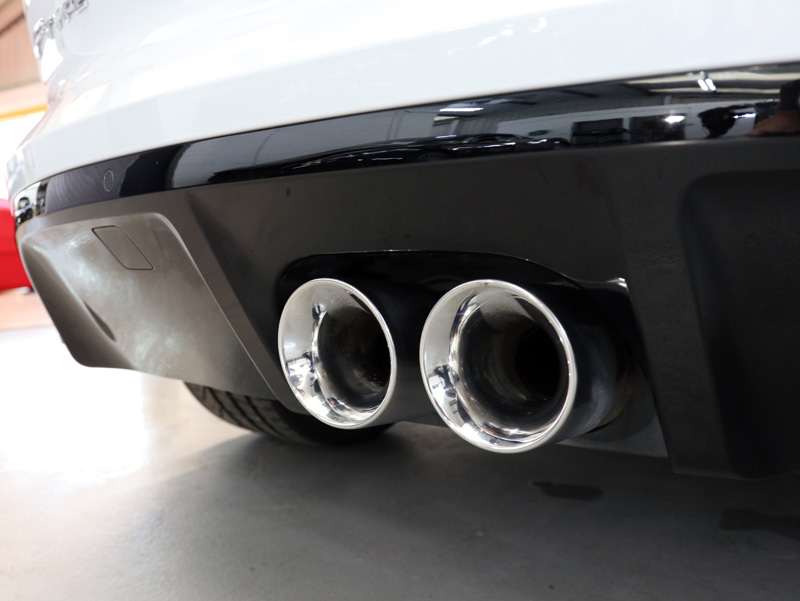
So with that in mind i could have bought four after market tips of a similar design for around £200, but no i decided to spend a ridiculous amount of time making my own from scratch........ So the tips start at 50mm internal diameter cut at 25 degrees, taper out to 76mm at 25 degrees and then return back towards the silencer. The tips are also staggered slightly to match the contour or the bumper
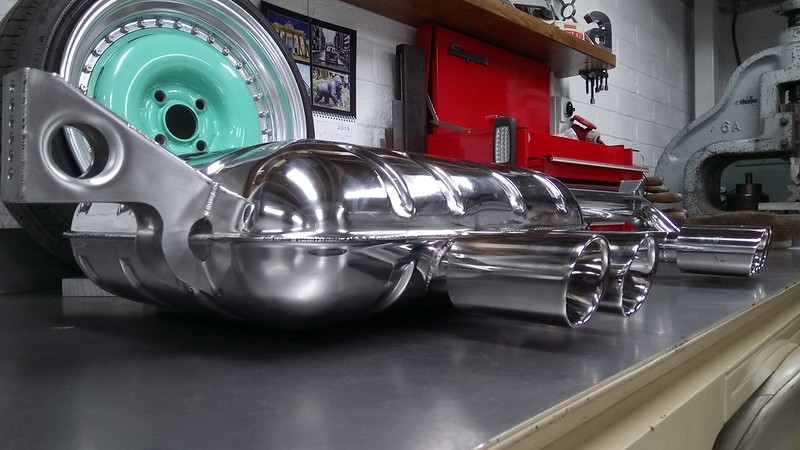
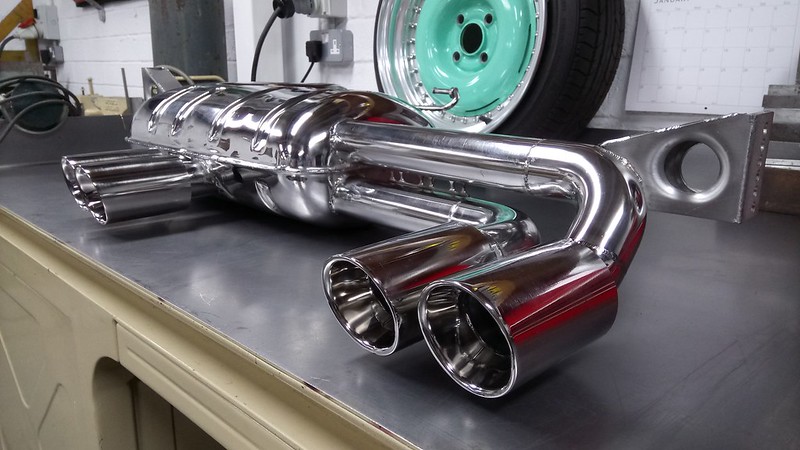
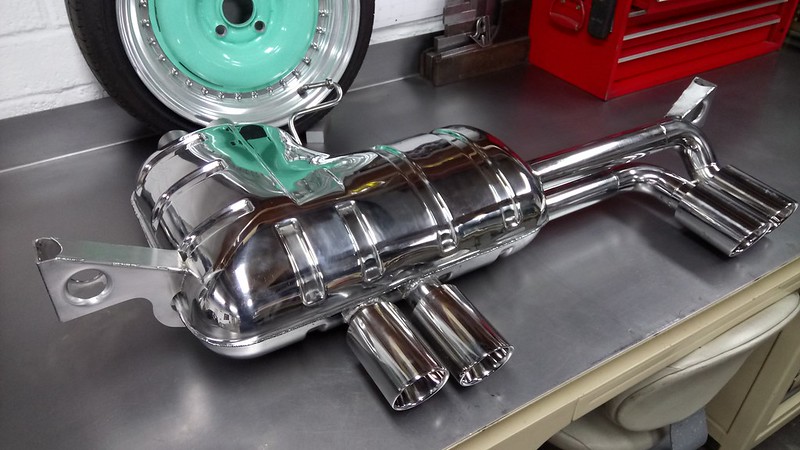
And the finished item, fully polished of course ,
,
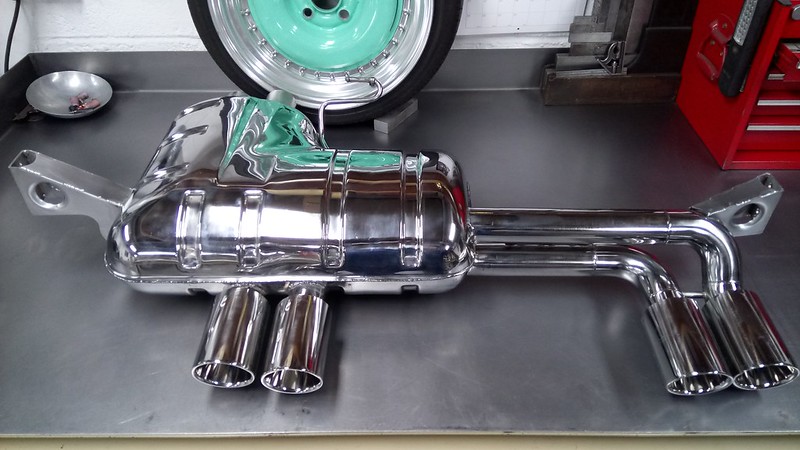
The mounts on the exhaust itself have a series of vertical holes, these allow me plenty of tolerance to move it up and down if needs be and also a bit of adjustment if the rubbers sag.
Pictures of it fitted to the car to follow shortly, That's all for now folks!
With the casing and what not together i needed to work out how i was going to mount it. Once in position i could then work out how long the tips etc needed to be.
As the silencer was going to be heavier than a stock 325ti silencer (although lighter than the original M3 silencer) i wanted to use the M3 rubber hangers. The Stock M3 silencer has two rubber hangers on one side and one rubber hanger on the other, due to the shorter boot floor on the compact there was only room for one rubber hanger each side, and then use the compact rear exhaust rubber hanger.... make sense?
Problem number one.
The studs that poke out the floor on the compact are not long enough to protrude through the thicker M3 rubber hangers. After some head scratching, two stainless M12 cap head bolts had the threads turned down leaving enough material that they could be bored out and tapped to take an M8 thread (which is what the studs are on the compact). The holes in the rubber hangers were opened out to accept the new fittings.
Problem Number two,
Finding somewhere to put another rubber hanger the opposite side, after more thinking the best way was to remove the bumper (again) and the bumper mount/shock. This allowed access inside the chassis leg, two holes were drilled in the chassis leg, deburred and painted. A strip of stainless had two holes drilled and two stainless M8 bolts TIG'd to it. Rubber gaskets were cut to help prevent any water or damp getting inside the chassis leg cavity.
A view looking inside the chassis leg,
With that done it was back on with the silencer itself,
All the packing that came out the silencer was put back into it, when i say 'all' i mean half of it........
TIG welding the top half of the casing back on was an absolute pain in the arse, the packing kept getting into the weld causing it to get contaminated....got there in the end.
The two pipes that come out the side of the silencer had just enough length for some perforated tube and more packing in them, whether or not this will help keep it a bit quieter.....who knows,
With all of the Silencer welded it was on to the tips, the main feature!
The stock M3 tips are 65mm from memory, i didn't want to go too big. I had some 76mm tube left over from a job which i was going to use, rather than just having a straight cut tube the style i wanted was that of a Jaguar F-Type.... The internal bore diameter is smaller, tapers out to a larger diameter and then returns back towards the silencer, quite a subtle way of making a larger exhaust tip look less over the top.
Picture of an F-type tip will explain,
So with that in mind i could have bought four after market tips of a similar design for around £200, but no i decided to spend a ridiculous amount of time making my own from scratch........ So the tips start at 50mm internal diameter cut at 25 degrees, taper out to 76mm at 25 degrees and then return back towards the silencer. The tips are also staggered slightly to match the contour or the bumper
And the finished item, fully polished of course
,The mounts on the exhaust itself have a series of vertical holes, these allow me plenty of tolerance to move it up and down if needs be and also a bit of adjustment if the rubbers sag.
Pictures of it fitted to the car to follow shortly, That's all for now folks!


Escy said:
Looks brilliant. Are you logging the hours that are going into the build? I'd love to know what the labour cost would work out at when all completed.
Thanks, hours wise.....around 800 so far  that doesn't include stripping both cars engines etc. I think it's best i keep the equivalent labour cost to myself
 Gassing Station | Readers' Cars | Top of Page | What's New | My Stuff