325TI - Project Mpact
Discussion


Mr Tidy said:
Fantastic thread OP, and some amazing work on your car! 
I had an Imola Red 325ti Sport for a few years but replaced it in February with an E91 325i (it was supposed to be my vaguely practical car) but I still miss it.
But if Imola is quite rare, Estoril is like rocking horse poo - and that colour with an S54 is surely going to be unique!
I'm really looking forward to your updates!
Thank you, i was thinking off selling this years ago (wanted an Abarth 500) but i'm glad i kept it as i know i would of regretted it too!I had an Imola Red 325ti Sport for a few years but replaced it in February with an E91 325i (it was supposed to be my vaguely practical car) but I still miss it.
But if Imola is quite rare, Estoril is like rocking horse poo - and that colour with an S54 is surely going to be unique!
I'm really looking forward to your updates!
It is rare indeed, if it wasn't for the colour this build may not of happened!
Clivey said:
Having just started learning to weld, I’m in awe. I wish I had your skills! 
Will you be keeping the Compact’s front end, or converting that too? I’m not sure which option would be best.
It's just practice, practice, practice.....you will get the hang of it, if it's MIG welding It's the sound to listern for and the penetration profile, if it's TIG welding it's a nice clean molten puddle than can be contolled.Will you be keeping the Compact’s front end, or converting that too? I’m not sure which option would be best.
It will be keeping the Compact front end, quite like the roundy shape.
Usget said:
In case it's not obvious, continuously mentioning Artisan Metalcraft means that, if anyone searches Google for Artisan Metalcraft, the top result for Artisan Metalcraft will be this thread. So prospective customers can see the great work you've been doing. It's sort of a Pistonheads tradition to reward companies that do good work.
Haha, So you're saying that if Artisan MetalCraft is continuously mentioned people are brought to Pistonheads bringing Pistonheads more views via searches for Artisan MetalCraft? well i never.Well, after spending the last hour trying to reply to your kind comments (mainly due to my computer illiteracy, one key at a time). It's on to the build!
After a little bit of thinking something didn't quite look OEM enough, not that any of it will be seen after the interior is returned back to the vehicle.
So, these rings were made from 1.2mm steel. The inner edge will be fully welded to the inside of the 'tube' and the small holes around the edge are for puddle welds. The back side of the rings were sprayed in weld through primer.


After TIG welding the rings in and a clean up with a power file and grinder, this is how they look.
Almost like a little cup dropped in.

Following each uneven step/fold high or low area.


Much more OEM or Factory or OCD.
After a little bit of thinking something didn't quite look OEM enough, not that any of it will be seen after the interior is returned back to the vehicle.
So, these rings were made from 1.2mm steel. The inner edge will be fully welded to the inside of the 'tube' and the small holes around the edge are for puddle welds. The back side of the rings were sprayed in weld through primer.
After TIG welding the rings in and a clean up with a power file and grinder, this is how they look.
Almost like a little cup dropped in.
Following each uneven step/fold high or low area.
Much more OEM or Factory or OCD.
Edited by amc_adam on Friday 20th December 18:49
I thought this point would never come, the Prime and paint of the inside.
With everything cleaned, vacumed, wiped down, degreased it was time to start preping ready for final finish on the inside. My local Auto Factors mixed up some small aerosol cans of Estoril Blue and advised me on a primer to use (so it doesn't react).
The initial plan was to just blow in the areas that i had worked on and blend it in the existing paint inside the car, prior to spraying the car i done a couple of test sprays on some small metal sheets to check the colour match. This matched the exterior paint very well, but on the inside not so much.
I'm unsure why BMW never had the finish on the inside of there vehicles like the exterior, I only started noticing it on E46's .
With the bare metal areas primed this was left for a day or so to dry. Next step was to 'key' the surfaces, using the a ScotchBrite pad i roughed up any areas that had a shine to them, then panel wiped everthing twice.....or three times.
Onto the Final Finish (of the inside) in the Estoril Blue, this will be left un-lacquered.
RoverP6B said:
Slightly sad that an M3 Coupé shell has presumably bitten the dust (don't suppose you could rebuild it as an E46 325i with an M3 bodykit?), but the workmanship here is seriously good...
I wouldn't say it's bitten the dust, I'm sure it will be a nice project for someone else to take on. I did think about putting the 2.5 engine out the compact into it 
Thank you for the kind words
Future Proofing Part 4
With the inside of the vehicle now painted it was onto making a Subframe/ Diff brace, there seems to be various ways of how people do this. From the off the shelf 'Bolt on' x-braces that pick up on the turret tops down to the subfame mount points, to the "just weld a solid bar in there " home made examples.
With the vehicle going to be a daily driver and the occasional track day i wanted to keep the boot space clear without a climbing frame in the back, ideally keeping a brace under the boot carpet.
So, in my mind i wanted to keep it simple. With a straight bar that runs from one chassis leg to the other picking up on the Subframe/Axle carrier bolts and was removable.
I over engineered a straight bar, it's made from stainless steel.


And how it fits in the vehicle,


With the inside of the vehicle now painted it was onto making a Subframe/ Diff brace, there seems to be various ways of how people do this. From the off the shelf 'Bolt on' x-braces that pick up on the turret tops down to the subfame mount points, to the "just weld a solid bar in there " home made examples.
With the vehicle going to be a daily driver and the occasional track day i wanted to keep the boot space clear without a climbing frame in the back, ideally keeping a brace under the boot carpet.
So, in my mind i wanted to keep it simple. With a straight bar that runs from one chassis leg to the other picking up on the Subframe/Axle carrier bolts and was removable.
I over engineered a straight bar, it's made from stainless steel.
And how it fits in the vehicle,
stuart-b said:
Top quality work sir,
I've recommended your FB page to a few friends of mine who may have a need for your services one day (including me!)
Cheers
Stuart
Thank you very much, I'm a bit slow at keeping the Facebook/Instagram page updated. If you have any questions don't hesitate to ask!I've recommended your FB page to a few friends of mine who may have a need for your services one day (including me!)
Cheers
Stuart
E46gang said:
Dr G said:
E46gang said:
That is absolutely stunning, as mention it would be a real shame to cover that with the interior!
Whilst I know exactly what you mean I also like the idea of it all being tucked away.I love the phrase that goes something like "Real quality is doing things properly when nobody is looking".
e30m3Mark said:
I've had a few E46 325ti and they're great little cars. Sadly I had to sell mine recently, to help fund keeping my E30, but I imagine another will be sat on the drive eventually.
Loving your work but am also amazed at some of the products available nowadays. The underside looked stunning and is a real credit to your skills. I know where I'll be sending my E30 once the lotto win comes along. Artisan Metalcraft!
They are indeed, underrated little cars...... there won't be many left soon if all those ''oiks' keep turning them into so called drift cars and welding the diffs Loving your work but am also amazed at some of the products available nowadays. The underside looked stunning and is a real credit to your skills. I know where I'll be sending my E30 once the lotto win comes along.
Artisan Metalcraft!Thank you! You are right, the variation in products available now is huge.....go back 10/12 years and the market was nothing like it is now .
You don't need to win the lottery to bring me your vehicle

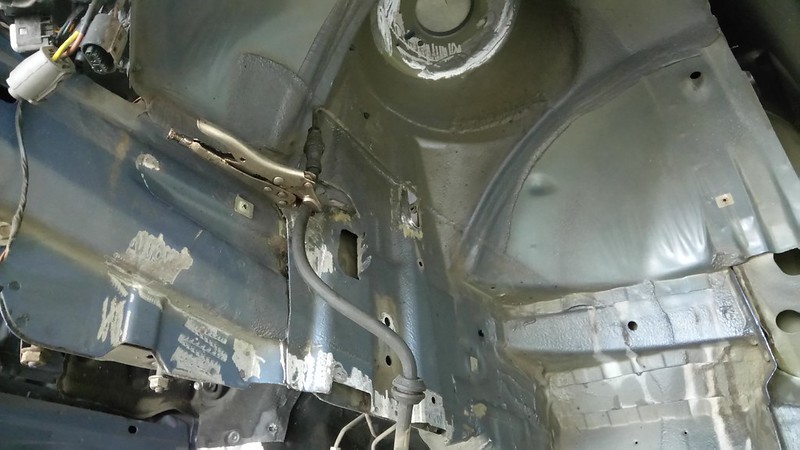
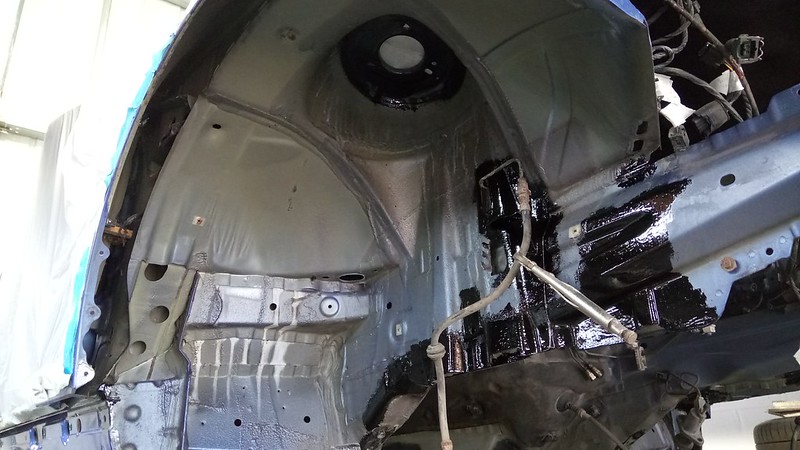
With the inside of the vehicle pretty much done, it was back onto the under side.
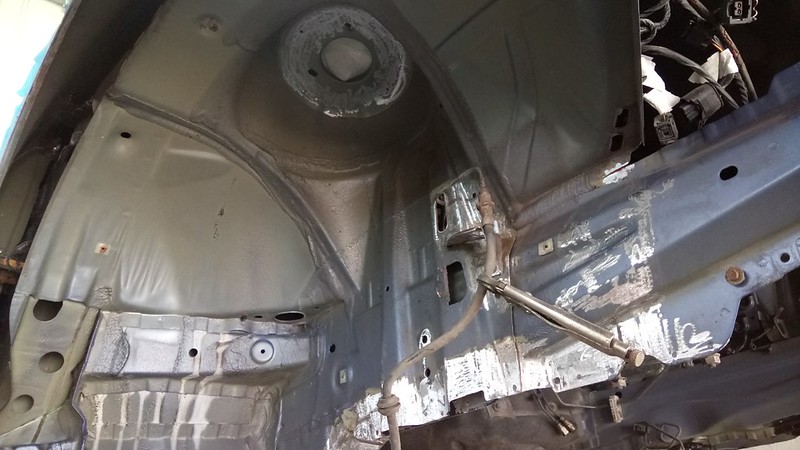
It was time to strip the rear running gear off the M3 donor, after jacking the back of the car up and putting it on axle stands i climbed underneath. At this point i totally forgot that M3's use an extra V-brace from the Axle carrier/Subframe to the heel board of the floor.
With the rear end stripped off the M3 and put to one side, I began to have a head scratch. If the M3's had this brace then the compact should too.....
After some measuring of the original mounts on the M3 i tried to replicate them near as possible, out of 2mm mild steel i folded these and added the swaged hole where the rubber grommet locates, Then TIG welded the corners and nuts.


They were then sprayed with weld through primer and puddle welded into the vehicle, unfortunately this is the only part i had totally forgotten to photograph
It was time to strip the rear running gear off the M3 donor, after jacking the back of the car up and putting it on axle stands i climbed underneath. At this point i totally forgot that M3's use an extra V-brace from the Axle carrier/Subframe to the heel board of the floor.
With the rear end stripped off the M3 and put to one side, I began to have a head scratch. If the M3's had this brace then the compact should too.....
After some measuring of the original mounts on the M3 i tried to replicate them near as possible, out of 2mm mild steel i folded these and added the swaged hole where the rubber grommet locates, Then TIG welded the corners and nuts.
They were then sprayed with weld through primer and puddle welded into the vehicle, unfortunately this is the only part i had totally forgotten to photograph
therusterman said:
An plans for the s54? Would be an ideal time for some preventative maintenance on the head gasket/rod bearings/vanos...the list goes on!
Yes the S54 will have a good going over, all the rod bearings, vanos etc will be done while the engine is out. It's all on the long list of things to do!I had a little bit of a break from working on the body of the compact, with the axle carrier dropped off the M3 with all the arms, hubs etc still attached to it.... it was one of those things that where ever it was put it was always in the way, and it isn't the easiest thing to move. So i decided to strip it down and clean it all up.
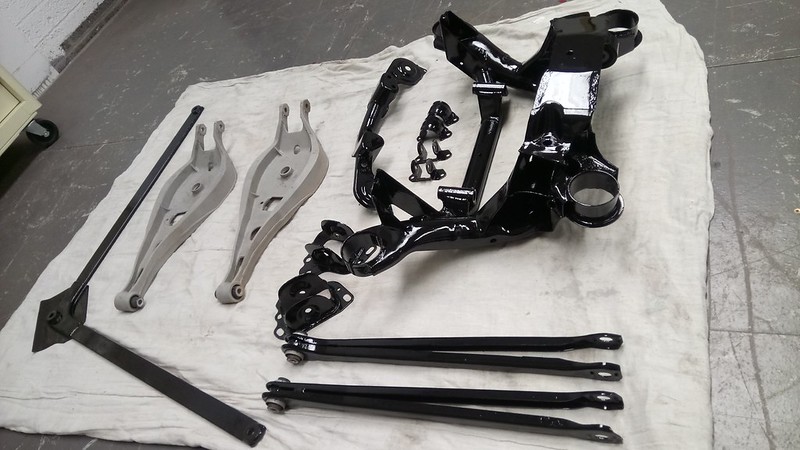
Most things that could fit into the blast cabinet went into it, the aluminium arms, lower arms, anti roll bar mounts, trailing arm carriers... the only parts that didn't fit into the blast cabinet were the Axle Carrier itself but luckily that wasn't in bad condition, managed to clean that up with a wire wheel on the grinder, and the V-Brace... but that is quite badly pitted, i'll probably make a new one.
Anti roll bar mounts, before and after
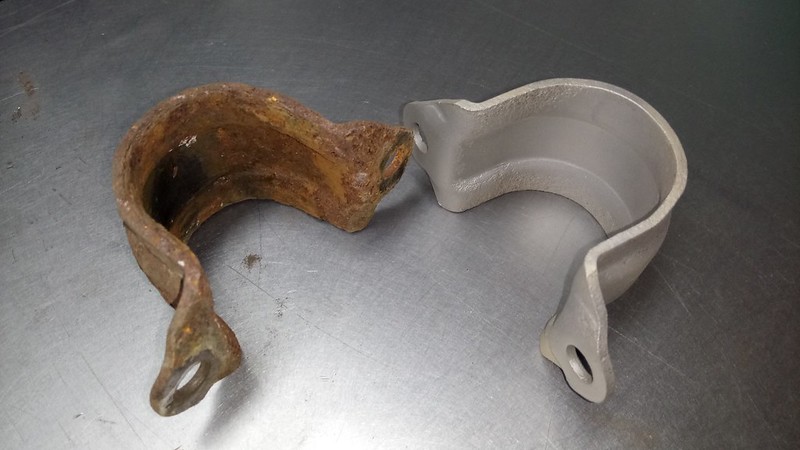
All blasted and painted using the POR15 paint, works quite well.
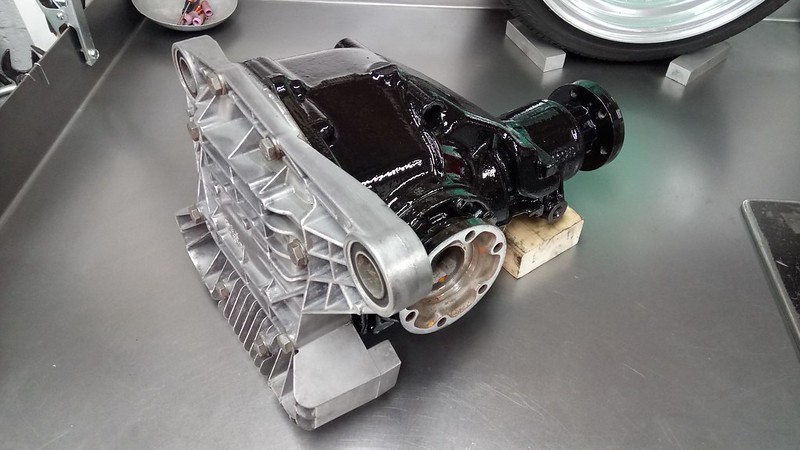
Diff cleaned up and casing painted
All bushings will be replaced with OEM Factory ones, when they eventually turn up.
Most things that could fit into the blast cabinet went into it, the aluminium arms, lower arms, anti roll bar mounts, trailing arm carriers... the only parts that didn't fit into the blast cabinet were the Axle Carrier itself but luckily that wasn't in bad condition, managed to clean that up with a wire wheel on the grinder, and the V-Brace... but that is quite badly pitted, i'll probably make a new one.
Anti roll bar mounts, before and after
All blasted and painted using the POR15 paint, works quite well.
Diff cleaned up and casing painted
All bushings will be replaced with OEM Factory ones, when they eventually turn up.

Andrew Kettle said:
Following this with interest, had a 325ti about two years ago, great little cars as they are, am sure an M3 powered one will be epic! The effort and level of detail / workmanship that you are putting into this is seriously impressive!
Thank you, many hours of faffing have gone into this.... even more hours of head scratching. I was hoping to have it roadworthy for the warm weather but i think we are past that time now, i miss driving it!Next on the list was to remove the side skirts and front arch liners ready for painting the underside of the vehicle.
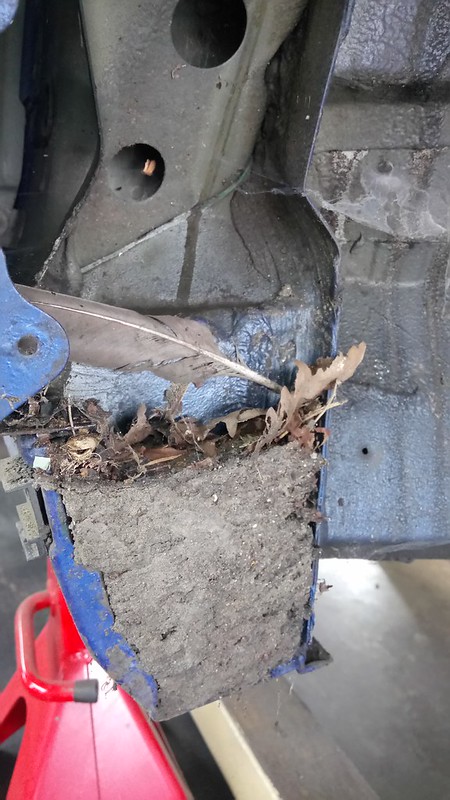
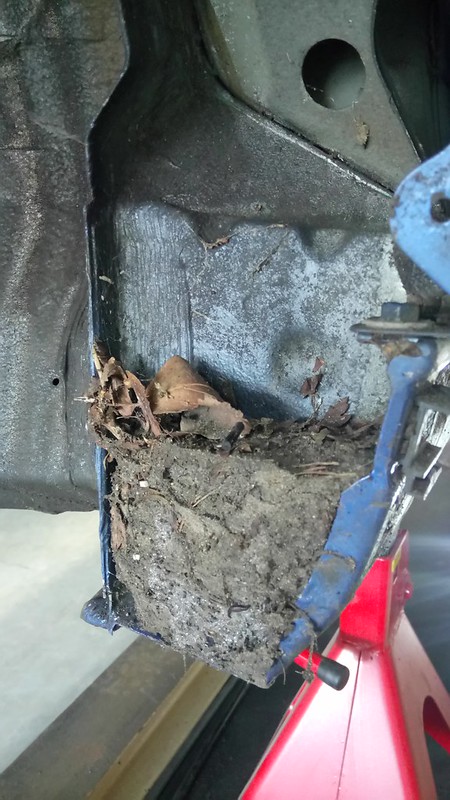
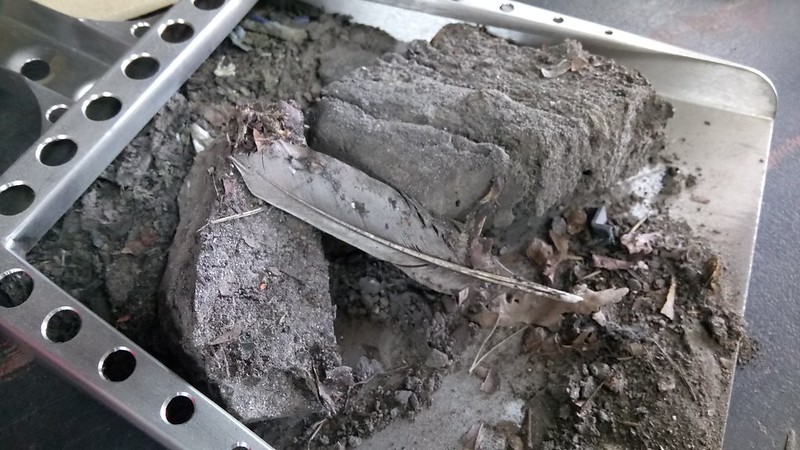
I was surprised by the amount of crap and mud that was built up behind the front arch liners, then realised that the scuttle panel drains are directly above with nowhere for it to all escape,
14 years of crap, looking like a core sample.
Drivers side,
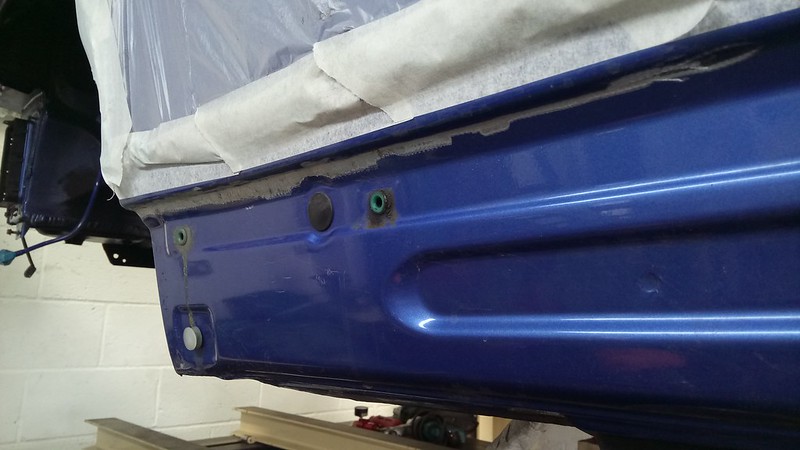
Passenger side,
Making the car a bit lighter,
I was expecting the worst but both sides cleaned up quite well,

I was surprised by the amount of crap and mud that was built up behind the front arch liners, then realised that the scuttle panel drains are directly above with nowhere for it to all escape,
14 years of crap, looking like a core sample.
Drivers side,
Passenger side,
Making the car a bit lighter,
I was expecting the worst but both sides cleaned up quite well,
With the side skirts and arch liners out the way and the body work cleaned and degreased i could inspect any areas of corrosion.
No real rust as such, just areas that the side skirts had been rubbing and had warn through the paint leaving a slight surface corrosion, this was the same on both sides. With a power file i cleaned up the areas,
Front inner arches had the usual slight bubbling, again this was ground back to bare metal,
Treated with POR15,
Gassing Station | Readers' Cars | Top of Page | What's New | My Stuff