BMW 330CI E46 Build thread
Discussion


Another month brings another update.
This time, very little in the way of modifications and actually some use of the car.
Wanted to try and get some miles on the car as it's not been out since the beginning of December. Wanting to find a weekend track day due to the start of the racing season the dates were few and far between, had the option of Oulton Park on the 7th March or Cadwell on the 15th. Decided to go with the local option as it meant I didn't have to drag the car and trailer to the other side of the country being the first test of a few changes as well as the fact Cadwell isn't the best circuit for winter track days.
Before that though I had a couple of jobs I wanted to finish, one being a bit of preventative maintenance, even though this car had a new power steering set of lines and pump in around 2012 from a BMW dealer the lines were looking a little crusty. I had already replaced one of them when I fitted the PAS cooler but the high pressure line from the pump to the rack was looking a bit rusty and would no doubt fail at some point. Replacements from BMW are well over £100 and pushing towards £150 but a new line from a hydraulics place was £35 made with the correct high pressure fittings and lines.
Stuck with the Banjo fitting on the rack which is M14 and fitted a M16 - AN adaptor at the pump end. Nice short and direct hose, hopefully one let thing that can fail in the future.

Saturday 7th March.
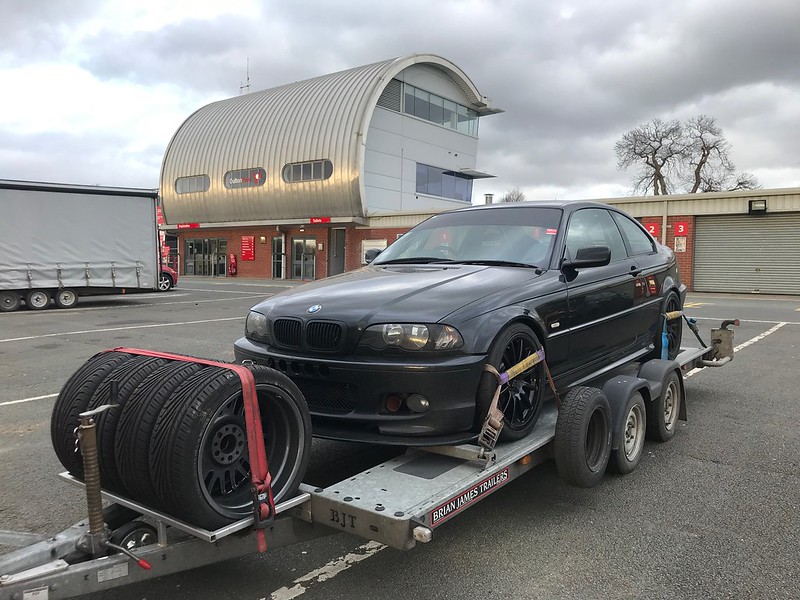
Turned up at Oulton as usual about 7 o'clock and set about unloading the car from the trailer and doing a couple of checks to make sure everything is spot on, coolant, oil, power steering fluid all where I wanted them to be. Suspension settings set to where I left them from Oulton in December with the exception of softening off the rear as since i'd moved to softer springs I could see the rear end skipping and bogging on some bumps from the last track day so brought the damping back to match the spring rate. Tyre pressures set at 28PSI cold and the car was ready to go.
Sadly damp roads and a little bit of rain on the way down there on the trailer meant the car was already dirty before it made it out on circuit.

Sighting laps out of the way, I then got the car noise tested, 5000rpm the car was 99db, slightly louder with the pops but they ignored that. Well under the 105db static but the car gets louder each track day as the silencers get more and more use.
First sessions from the morning took a little bit of getting used to, the car felt great, setup felt really balanced, but the shorter final drive at 3.73 took a little bit of getting used to, car felt much more alive to drive with the shorter gearing but it required more changes to 5th on the straights which obviously meant more shifts back down the box for the corners through heavy braking areas. Took a little getting used to. Stuck to doing 20 minute sessions through the day and clocked up 70 miles on track by 12 oclock. I'd been taking it reasonably easy through the morning getting used to the gearing, making a couple of minor suspension tweaks and adjusting tyre pressures but mainly just enjoying lapping and driving the car.

In the afternoon a couple of friends came down the join me and wanted to do some laps in the car as a passenger. Afternoon sessions were a little longer getting towards 30 minute sessions, was able to find a groove and put together some really good back to back consistent laps as the track was so quiet with so few interruptions from red or yellow flags it was perfect, bone dry and quiet track time.
Here's a video from one of the sessions, put together 3 laps back to back all withing 0.5 of a second of each other. plenty of time to be found and improvements to make to my driving but at least they're consistent. Feel like my driving it improving the more time I spend behind the wheel of a RWD car.
https://youtu.be/S4h3sJqDfwI
Second video from the afternoon sessions, mainly showing the MX5 race car which decided to fly up my backside through the first corner after catching me up only due to the fact I'd got caught up behind the Ferarri on the previous straight. Ended up putting himself into the wall, not sure what happened with the car as it exited stage left rapidly, driver error or badly set up car. You can see for yourself.
Had planned on letting him through after the pit exit bleed line as he was pretty quick in the corners.
https://youtu.be/jgKLOUvjsEs
Other points from the day...
Back in the summer I ran out of fuel at Cadwell with 30L in the tank - Managed to run down to the petrol light coming on now with ~11L in the tank without any loss of fuel pressure to the rail. Massive improvement with the swirl pot fitted - Having a fuel pressure at the rail on the logger is really good for monitoring this. I now know i an use a full tank of fuel without issues.
Opted to stick with the softer compression/rebound suspension setting in the rear to compliment the softer spring I am running now. This removed the hopping and skipping which I was finding happening on corner exits which I thought was down to too slow rebound, appears my thoughts on that were correct.
The car has never felt so good and planted coming out of corners, able to get on the power much sooner with more throttle now without it sliding, the car just squats on the rear now and drives you out of the corners with a slight rotation rather than a slide and any smaller slides are much more controlled as you will see from the videos.
Still feel like the brakes are lacking when trying to balance braking and heal toeing. Back in December I did faster lap time breaking into the 2:03's when I was focusing on braking and not rev matching as I could brake later and harder with my foot solely on the brake pedal. Something I'm continuing to work on before the next track day which is slightly adjust the pivot point on the brake pedal to give slightly more force to the master cylinder with the same pedal effort at the sacrifice of a slightly longer pedal, but I can adjust the bite point to be in the same location anyway.
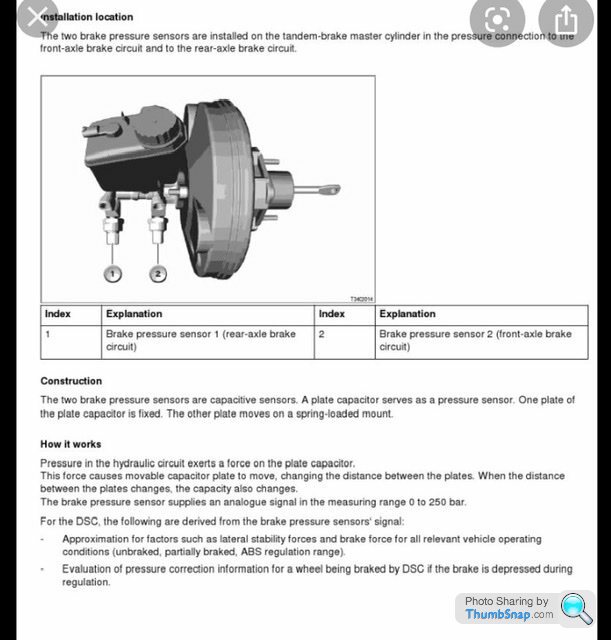
Also planning on fitting pressure sensors to the front and rear circuits of the brakes to be able to log brake pressures front and rear. I'm really interested to see what the line pressures are with the standard MC and brake proportioning valve and see how it's all working. Not too difficult of a job to swap the T pieces over and add a few more lines of code to the Arduino logger.
4:45 - Car all loaded up on the trailer, wet wheels still strapped in the tyre rack thankfully not having to use them this weekend. Really happy with how the car is at the moment, obviously there is more changes in the pipeline. There's no fun in leaving it the same, part of the fun is always looking at new ideas and finding things to develop for next time.
This time, very little in the way of modifications and actually some use of the car.
Wanted to try and get some miles on the car as it's not been out since the beginning of December. Wanting to find a weekend track day due to the start of the racing season the dates were few and far between, had the option of Oulton Park on the 7th March or Cadwell on the 15th. Decided to go with the local option as it meant I didn't have to drag the car and trailer to the other side of the country being the first test of a few changes as well as the fact Cadwell isn't the best circuit for winter track days.
Before that though I had a couple of jobs I wanted to finish, one being a bit of preventative maintenance, even though this car had a new power steering set of lines and pump in around 2012 from a BMW dealer the lines were looking a little crusty. I had already replaced one of them when I fitted the PAS cooler but the high pressure line from the pump to the rack was looking a bit rusty and would no doubt fail at some point. Replacements from BMW are well over £100 and pushing towards £150 but a new line from a hydraulics place was £35 made with the correct high pressure fittings and lines.
Stuck with the Banjo fitting on the rack which is M14 and fitted a M16 - AN adaptor at the pump end. Nice short and direct hose, hopefully one let thing that can fail in the future.
Saturday 7th March.
Turned up at Oulton as usual about 7 o'clock and set about unloading the car from the trailer and doing a couple of checks to make sure everything is spot on, coolant, oil, power steering fluid all where I wanted them to be. Suspension settings set to where I left them from Oulton in December with the exception of softening off the rear as since i'd moved to softer springs I could see the rear end skipping and bogging on some bumps from the last track day so brought the damping back to match the spring rate. Tyre pressures set at 28PSI cold and the car was ready to go.
Sadly damp roads and a little bit of rain on the way down there on the trailer meant the car was already dirty before it made it out on circuit.
Sighting laps out of the way, I then got the car noise tested, 5000rpm the car was 99db, slightly louder with the pops but they ignored that. Well under the 105db static but the car gets louder each track day as the silencers get more and more use.
First sessions from the morning took a little bit of getting used to, the car felt great, setup felt really balanced, but the shorter final drive at 3.73 took a little bit of getting used to, car felt much more alive to drive with the shorter gearing but it required more changes to 5th on the straights which obviously meant more shifts back down the box for the corners through heavy braking areas. Took a little getting used to. Stuck to doing 20 minute sessions through the day and clocked up 70 miles on track by 12 oclock. I'd been taking it reasonably easy through the morning getting used to the gearing, making a couple of minor suspension tweaks and adjusting tyre pressures but mainly just enjoying lapping and driving the car.
In the afternoon a couple of friends came down the join me and wanted to do some laps in the car as a passenger. Afternoon sessions were a little longer getting towards 30 minute sessions, was able to find a groove and put together some really good back to back consistent laps as the track was so quiet with so few interruptions from red or yellow flags it was perfect, bone dry and quiet track time.
Here's a video from one of the sessions, put together 3 laps back to back all withing 0.5 of a second of each other. plenty of time to be found and improvements to make to my driving but at least they're consistent. Feel like my driving it improving the more time I spend behind the wheel of a RWD car.
https://youtu.be/S4h3sJqDfwI
Second video from the afternoon sessions, mainly showing the MX5 race car which decided to fly up my backside through the first corner after catching me up only due to the fact I'd got caught up behind the Ferarri on the previous straight. Ended up putting himself into the wall, not sure what happened with the car as it exited stage left rapidly, driver error or badly set up car. You can see for yourself.
Had planned on letting him through after the pit exit bleed line as he was pretty quick in the corners.
https://youtu.be/jgKLOUvjsEs
Other points from the day...
Back in the summer I ran out of fuel at Cadwell with 30L in the tank - Managed to run down to the petrol light coming on now with ~11L in the tank without any loss of fuel pressure to the rail. Massive improvement with the swirl pot fitted - Having a fuel pressure at the rail on the logger is really good for monitoring this. I now know i an use a full tank of fuel without issues.
Opted to stick with the softer compression/rebound suspension setting in the rear to compliment the softer spring I am running now. This removed the hopping and skipping which I was finding happening on corner exits which I thought was down to too slow rebound, appears my thoughts on that were correct.
The car has never felt so good and planted coming out of corners, able to get on the power much sooner with more throttle now without it sliding, the car just squats on the rear now and drives you out of the corners with a slight rotation rather than a slide and any smaller slides are much more controlled as you will see from the videos.
Still feel like the brakes are lacking when trying to balance braking and heal toeing. Back in December I did faster lap time breaking into the 2:03's when I was focusing on braking and not rev matching as I could brake later and harder with my foot solely on the brake pedal. Something I'm continuing to work on before the next track day which is slightly adjust the pivot point on the brake pedal to give slightly more force to the master cylinder with the same pedal effort at the sacrifice of a slightly longer pedal, but I can adjust the bite point to be in the same location anyway.
Also planning on fitting pressure sensors to the front and rear circuits of the brakes to be able to log brake pressures front and rear. I'm really interested to see what the line pressures are with the standard MC and brake proportioning valve and see how it's all working. Not too difficult of a job to swap the T pieces over and add a few more lines of code to the Arduino logger.
4:45 - Car all loaded up on the trailer, wet wheels still strapped in the tyre rack thankfully not having to use them this weekend. Really happy with how the car is at the moment, obviously there is more changes in the pipeline. There's no fun in leaving it the same, part of the fun is always looking at new ideas and finding things to develop for next time.
helix402 said:
You can read brake pressures from....
Yes, this is correct. However I want to know the line pressure after the proportioning valve so I can see the effects this is having in the system. Should be able to graph the effects of the valve at different settings. I’ve got 2 of the same Bosch brake pressure sensors and plugs i’ve got which are spares so going to put these in the T pieces for the front and rear lines.
Could use the front pressure sensor from the MC to do the front lines at least, i’ve used these sensors before with the logger so already have the scaling for them in the logger code.
Cheers.
tombate911 said:
Yes, this is correct. However I want to know the line pressure after the proportioning valve so I can see the effects this is having in the system. Should be able to graph the effects of the valve at different settings.
I’ve got 2 of the same Bosch brake pressure sensors and plugs i’ve got which are spares so going to put these in the T pieces for the front and rear lines.
Could use the front pressure sensor from the MC to do the front lines at least, i’ve used these sensors before with the logger so already have the scaling for them in the logger code.
Cheers.
One step ahead! Thanks for the thread.I’ve got 2 of the same Bosch brake pressure sensors and plugs i’ve got which are spares so going to put these in the T pieces for the front and rear lines.
Could use the front pressure sensor from the MC to do the front lines at least, i’ve used these sensors before with the logger so already have the scaling for them in the logger code.
Cheers.
tombate911 said:
Second video from the afternoon sessions, mainly showing the MX5 race car which decided to fly up my backside through the first corner after catching me up only due to the fact I'd got caught up behind the Ferarri on the previous straight. Ended up putting himself into the wall, not sure what happened with the car as it exited stage left rapidly, driver error or badly set up car. You can see for yourself.
Had planned on letting him through after the pit exit bleed line as he was pretty quick in the corners.
Looks like a steering arm or strut broke as he dropped the wheel off the inner kerb into the mud, when he landed his LH front wheel wasn't pointing straight ahead and..... well, you see the result. Suspect someone forgot he wasn't racing (I say this as a licence holder who sometimes uses trackdays to test but is fed up of the bad feeling caused by inconsiderate racres among regular road-car trackdayers, there's room on track for all of us but egos need to be left in the pits).Had planned on letting him through after the pit exit bleed line as he was pretty quick in the corners.
Love what you've done with this car, methodical and incremental improvements with clearly a lot of thought put into them. Keep up the good work, might even see you on track somewhere this year as I'm starting to take the GT86 on the odd trackday now.
Limpet said:
I’ve really enjoyed reading this. I’m a big fan of the E46 and it’s great to see you getting stuck in with such well thought out and carefully planned mods. Very impressive fabrication skills, too.
Getting quicker all the time as well
Cheers Limpet. Appreciate the comments! Glad the thread is interesting to others.Getting quicker all the time as well
Mark Benson said:
tombate911 said:
Second video from the afternoon sessions...
Looks like a steering arm or strut broke as he dropped the wheel off the inner kerb into the mud, when he landed his LH front wheel wasn't pointing straight ahead and..... well, you see the result. Suspect someone forgot he wasn't racing (I say this as a licence holder who sometimes uses trackdays to test but is fed up of the bad feeling caused by inconsiderate racres among regular road-car trackdayers, there's room on track for all of us but egos need to be left in the pits).Love what you've done with this car, methodical and incremental improvements with clearly a lot of thought put into them. Keep up the good work, might even see you on track somewhere this year as I'm starting to take the GT86 on the odd trackday now.
Update - March 2020
I was going to wait a little longer and make some more progress on things before posting the next update. But with half of the world being off work I thought I would post up on here and give people something to look at.
First job on the list at the moment was to add in the sensors I've been threatening to add for a while into the Arduino logger so I can monitor what the brakes are actually doing.
Started off with some Bosch sensors from the master cylinder of an E46 i'd taken from a scapped car last year, I'd cut off the plugs so I could make my own wiring loom to them, these are brake pressure sensors rated to over 3000psi, the plan is to add them into the brake circuits using a 4 way T-piece

Added one of them into the rear circuit in the T piece for the rear lines

I was going to tap into the front lines in the engine bay but decided to utilise the two sensors on the master cylinder which gives me the ability to monitor the brake system in 3 places, Front circuit, Rear circuit prior to the proportioning valve and post proportioning valve.
With the sensors fitted I had to add the additional sensor wires into the car, I've done this by running 3 core cables to all the sensors including the fuel pressure sensor I already had running to the logger, I ran all these sensors from various locations to a box under the dash to keep it nice and tidy and ran a multicore cable from the box to the logger with a common power and ground for the sensors and the signal wires keeping it all tidy inside on piece wire. This goes to the breakout board on top of the arduino and canbus shield with the GPS board sitting on top of this

I was then able to log the pressures pre and post the OBP Proportioning valve to see what effect it was having on the brakes... This graph shows 3 pedal applications with the valve set at 3 different positions... Shows no change from the valve despite it being tested at both ends of it's range
Also looking at the gradient of the line it was only giving a pressure drop in the line of 37% across the proportioning valve

Decided to change the valve and do some more testing. Ordered a Tilton Valve which was a bolt in solution for my lines as well as the mounting bracket I have on the exhaust tunnel

You can see a dramatic drop in the rear line pressure on the graph below comparing the cheap OBP item with the Tilton. At this point I was only testing 3 places in the levers travel, Position 1 - Min rear brake, position 3 and position 7.

I also did some logger of all 7 positions of the Tilton Valve, interesting to see here when comparing the pressure drop across the valve it only appears to effect the initial application of the brake and then all positions go to a fixed proportion of 3:1, this is actually different data to how Tilton explain it in their technical information so I've sent them an email with the data. See what they say.

Anyway with this additional reduction of pressure to the rear brakes I can now run some proper rear pads. i'll be refitted the Carbon Lorraine RC5 rear pads i've had for two years in the spares box and never been able to use them. This was something I need to sort as even though the brakes were good at Oulton due to me running a cheap brembo pad I had chewed through them in a full track day,
More to come on this as I keep working through it.
Big news
I've been doing some online shopping and bought something I never thought I would ever consider never even mind buying!
-M54 CNC Ported and polished head
-Schrick 272 10.9mm lift Inlet cam
-Schrick 256 10.4mm lift ext cam
-Vac Motorsport Dual spring kit, spring and retainers
-Single piece valves
-Exhaust side of the head has been opened up to suit the S50 manifolds I run.
-Exhaust side has been drilled and tapped so no longer need adaptor plates to run the S50 manifolds
The head has been rebuilt in 2019 with paperwork for pressure testing, skimming and rebuilding with new seals.


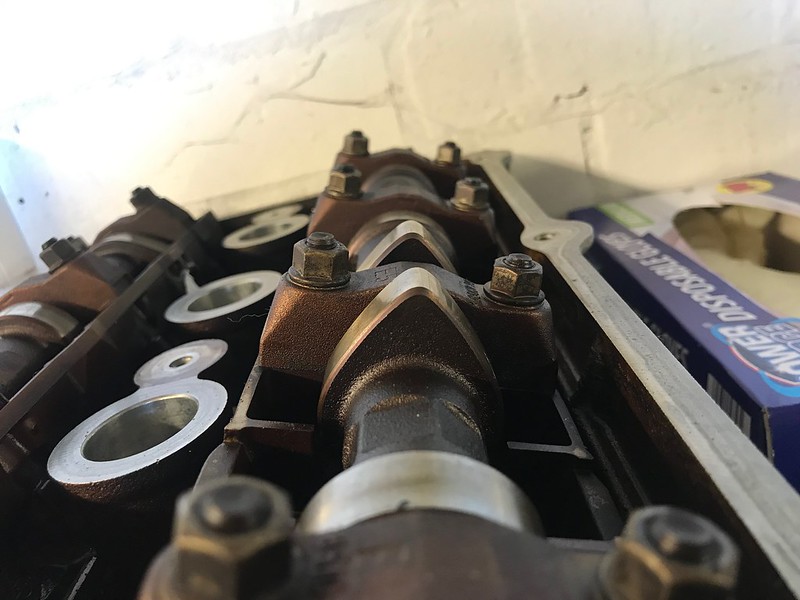
First job was to take the head apart and give it a good checking over, cams and lifters/tappets removed

The Vac springs and retainers

A couple of lifters had stuck down with the head being sat for a while so they have been pulled open and cleaned up. Back to working fully now
Cam trays removed and put through the parts washing with everything else making sure it's all clean ready to go back together

Waiting on a couple of bits then i'll start to put this together, unsure on how quickly this will progress as i have got a few track days booked between now and June but I don't think any of them will be taking place now. Need to remove the engine at some point and get that stripped, cleaned and machined before rebuilding, I already have a lot of the key parts to put this next engine together, Vac Motorsport oil pump, APR rod bolts, a spare set of King Racing Big end bearings. Planning on using a set of head studs rather then the standard BMW head bolts with the block being aluminium. But for now that's us up to date for the moment.
Fishy Dave said:
I enjoyed reading that, excellent welding skills too. The LSD will make a big difference to your enjoyment and ability to get on the power sooner.
Yes the diff has been in the car for over 12 months now, I had a plated diff in the last car but decided to give the Quaife a shot in the E46. Works well, I know how the find the limit of it though every now and then. But it works really well!d_a_n1979 said:
Such a great build; can't wait to see the results
fastbikes76 said:
Bonkers .... absolutely love it. Top work OP , your attention to detail is superb.
Bookmarked !

Glad to know that you're finding it interesting reading, will be keeping the updates coming, maybe a little less at the moment due to the closure of tracks but the car will be ready to go as soon as we can again.Bookmarked !
Update
So at the moment I'm working from home and have two weeks off as well so plenty of time to do a few little jobs and pass some time too.
First job on the list was to try and tidy up the wheels, they were a mess from the last track day in March, mainly the rears where I was running the cheap brembo pads, between each of the spokes and all the the inner dish of the wheel was covered in metal particles from the brake pads.

My usual wheel cleaner wasn't shifting it so invested in some different wheel cleaner as well as from fall out remover.

Spent Saturday afternoon cleaning the wheels, it took a good two hours of soaking, scrubbing and jet washing to get the wheels back to looking like new again, I then gave them a polished and resealed them ready for when they go back on again, hopefully being able to change the pads with the new proportioning valve will cut down on this as the RC6's aren't too heavy on dust and wear

Gave the wet wheels the same treatment.

Took the steering wheel off to give it a good scrub and a tidy up, It has started to fade in the sun so may look at getting some dye to bring it back to black

While the car was on axle stands for the weekend sorting out the wheels it was a perfect chance to do a few more little jobs.
Swapped the rear brembo pads out for the spare set of RC5's. No fun going through half a set of brembos on a track day and the dust from the cheap pads is terrible. Back to the RC5's now I've got the Tilton proportioning valve in

Dropped the diff oil out of the diff, this was the freshly built diff with the 3.73 final drive in. Wanted to check the oil to give an indication everything was ok.

However the main reason for dropping the diff oil was so that I could fit a temperature sensor, this has been a job that i've wanted to do for ages, I know a few people running diff cooling set ups on E36/E46 and a conversion with company that builds race cars especially E46's said they had experienced high diff temps not only with plated diffs but with helical diffs. Only way to find out is to monitor the diff temp myself.
Diff temperature sensor fitted and the wiring ran up along the diff cradle and into the brake line holders on the underside of the boot floor before entering the cabin with the brake lines.

Did a little more wiring, one wire for the rear diff temp sensor above, another for an additional fuel pressure sensor for the swirl pot so I can keep an eye on what that's doing. Another reason for this Is the current fuel system is running about 64psi at the rail which is about 10psi too high. The standard ECU copes with it fine with the fuel trims and the AFR's are solid on the dyno but it's something i'm looking into at the moment... Pressure in the swirl pot is 10PSI so there's no problem there so will swap the fuel pressure regulator this week and see how it goes from there.
Ended up swapping the fuel rail from a 328 fuel rail to the M50 fuel rail as the regulator from the M50 was a slightly different diameter and with the old seals it wouldn't seal correctly. But with the M50 rail on there 50psi. Going to replace the regulator in the 328 rail as that is pointing towards the higher fuel pressure.

Gave the interior a good clean, blowing out any dust with the compressor and giving it a hoover and wipe down

Hasn't moved off the drive since it was washed after the last track day but I thought it wouldn't harm to be washed again this weekend

Gave the car a coat of wax to try and keep it clean between washes, also moved the splitter back a little and to the side to make sure it was central with the car

That is pretty much it now until it goes out in the future, just need to swap the fuel pressure reg over one evening and test the rail pressure

Last job this week has been to adjust the overlay for the Data logger. Added in some more data fields in the bottom right corner. Merged the dial for the RPM to be part of the speedometer and created front and rear brake pressure bars to be the same as the throttle. Not all the data will be visible on video edits but it's there to be shown If i decide to leave them in.

Edited by tombate911 on Monday 6th April 19:05
Top work there.
Can't recall but did you have the floor pan re-enforced when the cage went in? Just about to have the same work performed on my touring so it doesn't have any issues.
Once the virus chrisis is over, it'd be good to get a few of the BMW's from PH together and have a E46 photo reel
Can't recall but did you have the floor pan re-enforced when the cage went in? Just about to have the same work performed on my touring so it doesn't have any issues.
Once the virus chrisis is over, it'd be good to get a few of the BMW's from PH together and have a E46 photo reel
Only just come across this - lockdown procrastination and all that! But what a lovely, well thought out build. Great base car and setting a good pace on track!
Cams will make a big difference. I have some higher lift/duration regrinds in my M52B30 which is enough to take it to 260bhp still on standard ECU, albeit with a live map. It'll just feel so much livelier above 4.5k too.
Hopefully see you round Oulton when this current situation eases up
Cams will make a big difference. I have some higher lift/duration regrinds in my M52B30 which is enough to take it to 260bhp still on standard ECU, albeit with a live map. It'll just feel so much livelier above 4.5k too.
Hopefully see you round Oulton when this current situation eases up
motorhole said:
Only just come across this - lockdown procrastination and all that! But what a lovely, well thought out build. Great base car and setting a good pace on track!
Cams will make a big difference. I have some higher lift/duration regrinds in my M52B30 which is enough to take it to 260bhp still on standard ECU, albeit with a live map. It'll just feel so much livelier above 4.5k too.
Hopefully see you round Oulton when this current situation eases up
Definately agree on cams for the M54B30, Had some from Carpetsoiler, and the profile i have gave me a soild bump of about 17bhp and 20Nm in torque.Cams will make a big difference. I have some higher lift/duration regrinds in my M52B30 which is enough to take it to 260bhp still on standard ECU, albeit with a live map. It'll just feel so much livelier above 4.5k too.
Hopefully see you round Oulton when this current situation eases up
They come on song around 2500 and pull right to 6500 (limter).
Lock down update. Only small things but I thought it was a good chance to sit down on a Friday evening and pass some time writing down a few things i've found and been messing with along the way.
Carrying on from the last update were I was adding in additional sensors, one of the sensors I added in was a pressure sensor into the top of the swirl pot. the idea behind this was to tell me a little more about what was going on in the system. I started this train of thought because ever since I swapped the fuel system to a pot, high pressure pump and return style rail i've had a fuel pressure around 60-65psi with and without vacuum, never really had an issue with it, car ran fine on the dyno with the standard ECU. I thought there might have been some back pressure in the pot potentially but this sensor has told me there is around 8-10psi in the swirl pot which is perfect for feeding the pump for the rail.
Popped out the regulator in the rail for spare i had knocking around and perfect 51psi. Really strange, ordered a new one to replace it with as the history of the spare was unknown. Got to the bottom of that mystery eventually.

With the car going no where soon with the lock down but with a lot of messing with it, the odd start and having the ignition on from time to time i thought it was a good idea to get a trickle charger for it. Nice and simple wiring onto the battery with a plug on it, really easy to get the car on charge now, only takes a minute to plug it into the car.

A week or two into the lock down I found myself stuck at home, nothing to do and facing a couple of weeks off work so decided to play with an idea i've had for a long time but never really started it because I knew it was going to be quite time consuming.
I've already got the Arduino data logger on the exhaust tunnel of the car which collected data from the CANBUS, a handful of analogue sensors as well as GPS data and writes it to an SD card. This is great for looking at information afterwards but real time live data I only really have the coolant temp on the dash and the oil temp gauge which only gives me a rough idea and an alarm set at 120 degrees.
Ordered a couple of bits of Amazon to kick off the ball rolling, starting off with another Arduino Mega and a 3.5" colour and touch screen LCD. Only a cheap one to get me going, can always develop and spend more in the future if it works.

I already had the data available on the logger Arduino so i started off making a couple of screen to display the data on.
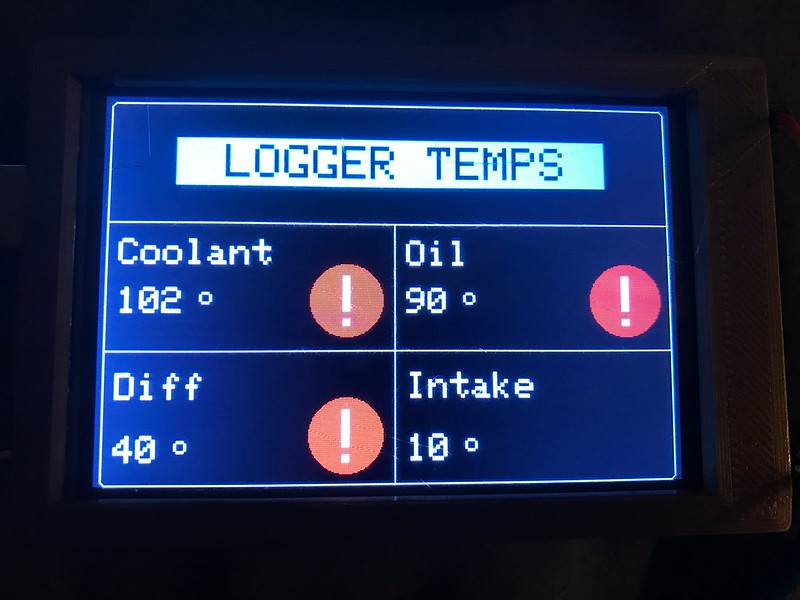
Temps which would be nice to be able to see while driving.

Pressures

Another way of viewing oil and fuel pressure min and max over a session out on track

Added a basic alarm functionality to each of the temps for the Oil, Coolant and Diff. The beauty of making this myself is I can make it do what ever I want. At the moment a basic alarm with a flashing red ! mark.
Spent a bit more time developing the casing and the mount for it to bolt into a hole in the exhaust tunnel, mounted it in a black plastic case and powered it through a USB cable so it's nice and tidy.

The beauty of it is that it's connected to the CANBUS of the car which enables it to receive all the data from the ECU but I have modified the code on the logger to broadcast the analogue sensor values that it's reading onto the cars CANBUS so it can be read by the screen and displayed.
Touching the screen enables you to cycle around the 3 different screens of data. Automatically comes on with the ignition

This will probably be something I continue to develop further in the future with more sensors, data, bigger screens with gauges, I've got a few ideas for using this screen more but that's not too difficult to develop now I've got the basic functionality.
Another large parcel turned up in the post for me this afternoon too, another M54B30 complete engine which i'm going to be stripping down and using as a donor for the new engine build, this enables me to get on with the build while still having the car in one piece and being able to use it should I have the chance to get out on track.

Couldn't help getting it on an engine stand this evening and popping off the cam cover for a look inside checking the part numbers on the cams and the block Will have some more photographs of this as I strip it open this week.

Carrying on from the last update were I was adding in additional sensors, one of the sensors I added in was a pressure sensor into the top of the swirl pot. the idea behind this was to tell me a little more about what was going on in the system. I started this train of thought because ever since I swapped the fuel system to a pot, high pressure pump and return style rail i've had a fuel pressure around 60-65psi with and without vacuum, never really had an issue with it, car ran fine on the dyno with the standard ECU. I thought there might have been some back pressure in the pot potentially but this sensor has told me there is around 8-10psi in the swirl pot which is perfect for feeding the pump for the rail.
Popped out the regulator in the rail for spare i had knocking around and perfect 51psi. Really strange, ordered a new one to replace it with as the history of the spare was unknown. Got to the bottom of that mystery eventually.
With the car going no where soon with the lock down but with a lot of messing with it, the odd start and having the ignition on from time to time i thought it was a good idea to get a trickle charger for it. Nice and simple wiring onto the battery with a plug on it, really easy to get the car on charge now, only takes a minute to plug it into the car.
A week or two into the lock down I found myself stuck at home, nothing to do and facing a couple of weeks off work so decided to play with an idea i've had for a long time but never really started it because I knew it was going to be quite time consuming.
I've already got the Arduino data logger on the exhaust tunnel of the car which collected data from the CANBUS, a handful of analogue sensors as well as GPS data and writes it to an SD card. This is great for looking at information afterwards but real time live data I only really have the coolant temp on the dash and the oil temp gauge which only gives me a rough idea and an alarm set at 120 degrees.
Ordered a couple of bits of Amazon to kick off the ball rolling, starting off with another Arduino Mega and a 3.5" colour and touch screen LCD. Only a cheap one to get me going, can always develop and spend more in the future if it works.
I already had the data available on the logger Arduino so i started off making a couple of screen to display the data on.
Temps which would be nice to be able to see while driving.
Pressures
Another way of viewing oil and fuel pressure min and max over a session out on track
Added a basic alarm functionality to each of the temps for the Oil, Coolant and Diff. The beauty of making this myself is I can make it do what ever I want. At the moment a basic alarm with a flashing red ! mark.
Spent a bit more time developing the casing and the mount for it to bolt into a hole in the exhaust tunnel, mounted it in a black plastic case and powered it through a USB cable so it's nice and tidy.
The beauty of it is that it's connected to the CANBUS of the car which enables it to receive all the data from the ECU but I have modified the code on the logger to broadcast the analogue sensor values that it's reading onto the cars CANBUS so it can be read by the screen and displayed.
Touching the screen enables you to cycle around the 3 different screens of data. Automatically comes on with the ignition
This will probably be something I continue to develop further in the future with more sensors, data, bigger screens with gauges, I've got a few ideas for using this screen more but that's not too difficult to develop now I've got the basic functionality.
Another large parcel turned up in the post for me this afternoon too, another M54B30 complete engine which i'm going to be stripping down and using as a donor for the new engine build, this enables me to get on with the build while still having the car in one piece and being able to use it should I have the chance to get out on track.
Couldn't help getting it on an engine stand this evening and popping off the cam cover for a look inside checking the part numbers on the cams and the block Will have some more photographs of this as I strip it open this week.
I was going to save this for one but update but with the amount of photographs and steps I thought I would break it up a little bit and write down some of the progress so far. This obviously isn't every step I've gone through so far just some of the stages I've taken photos of.
Engine strip down
Started by removing a lot of the parts from the engine to get it back to a bare block. Put all these parts in a plastic box out of the way for now, not a lot of these are going to be used on the car so will just be kept for spares

Plugged up any holes and covered the engine in degreaser, lots of scrubbing with a stiff brush and finally jet washing the engine to get rid of 120,000 miles or dirt and oil.

First job was to take the head off complete, I wont be using any of this so I've removed it with the cams in place and put it on ebay for sale.

Oil drained and the sump and oil pump removed, again not something i'm going to be using as I'll be using the oil pump from the current engine with the Vac motorsport shaft and nut kit.

Engine broken down into it's main components

Lots and lots of cleaning and scrubbing to get to this stage, everything will be disassembled and cleaned in the parts washer before reassembly but it's nice to get rid of all the old oil from everything

Old head and new head sat side by side in the garage.

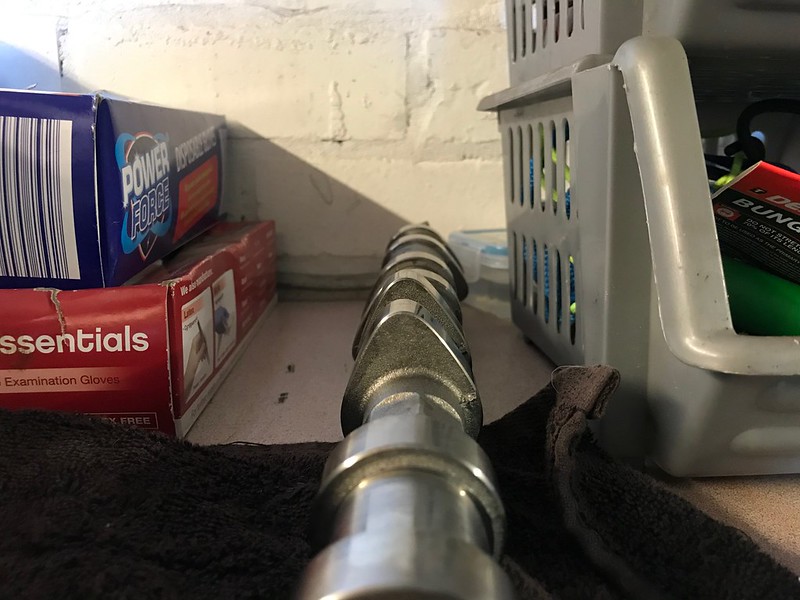
For comeparison here's the different between the intake cam standard vs Shrick 272 with 10.9mm lift
Standard
Schrick
I dropped the block off at the machine shop for machine work doing.
Skimmed the deck and honed the bores to give a nice fresh canvas for the engine build. I know someone will eventually ask what I am doing with the threads in the Aluminium block, I was going to have inserts put into the block but I have since decided to spend the money on ARP headstuds. I've tracked down some ARP studs which are longer than the kit that they sell for the M50 steel blocks which give more thread engagement inside the aluminium block. Main advantage is these can also be reused and transferred to another block should I need to.

Masked up the faces on the block


Painted the block a nice silver, Painted nice and easily after the block had been through the parts washer at the machine shop.

Cleaned out the oil squirters and refitted them back into the block checking the oil galleries in side the block and inside the squirters where cleaned and blown through before refitting

Before refitting the cams to the head or the head to the block I did a quick leak down test with some white spirit to check the valve seats on this head as it if freshly built to make sure everything is as it should be, no issues with leakage just evaporation with the heat yesterday

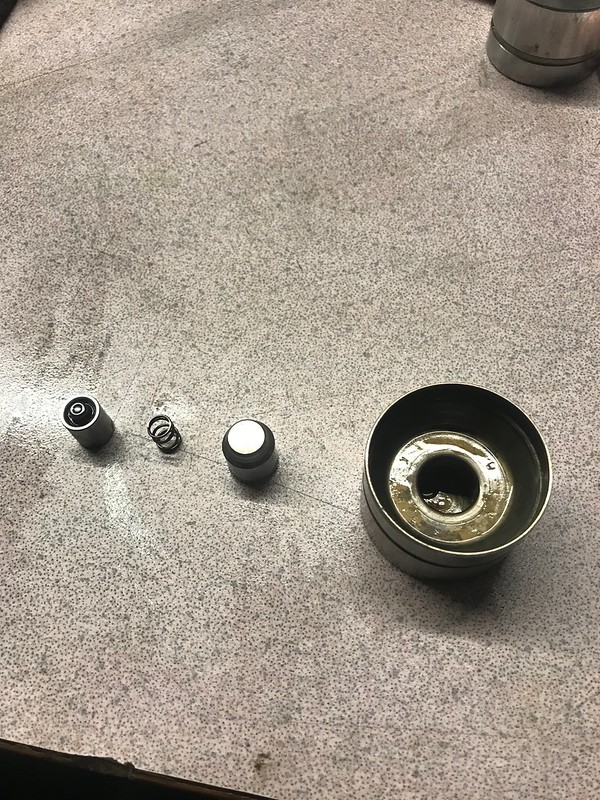
First few parcels with engine parts started to arrive a the end of last week. First ones being the Vanos rebuild kit

Stripped the unit open and pulled out the seals

Cleaned the pistons in the parts washer and refitted the new seals

Time for reassembly

Done...

Bit of paint to tidy up the tired vanos unit too.

Engine building parts arrived yesterday so I was able to crack on with the first bits of putting the engine together.

Checked the ring gaps in the bores, all checked out ok pretty much in the middle of the BMW tolerances

Piston rings fitted to the pistons

Popping the pistons into the bores with the new rings fitted

6 pistons fitted into the block, even though the bores and the rings are new i've kept everything numbered and orientated throughout the cleaning process. Trying to make the process as simple as possible when rebuilding

Set of King Racing bearings for the rod bearings this time,

King Racing rod bearings and brand new mains bearings fitted ready for the crank to be dropped in

To be continued when the remainder of the parts i'm waiting for arrive.
Engine strip down
Started by removing a lot of the parts from the engine to get it back to a bare block. Put all these parts in a plastic box out of the way for now, not a lot of these are going to be used on the car so will just be kept for spares
Plugged up any holes and covered the engine in degreaser, lots of scrubbing with a stiff brush and finally jet washing the engine to get rid of 120,000 miles or dirt and oil.
First job was to take the head off complete, I wont be using any of this so I've removed it with the cams in place and put it on ebay for sale.
Oil drained and the sump and oil pump removed, again not something i'm going to be using as I'll be using the oil pump from the current engine with the Vac motorsport shaft and nut kit.
Engine broken down into it's main components
Lots and lots of cleaning and scrubbing to get to this stage, everything will be disassembled and cleaned in the parts washer before reassembly but it's nice to get rid of all the old oil from everything
Old head and new head sat side by side in the garage.
For comeparison here's the different between the intake cam standard vs Shrick 272 with 10.9mm lift
Standard
Schrick
I dropped the block off at the machine shop for machine work doing.
Skimmed the deck and honed the bores to give a nice fresh canvas for the engine build. I know someone will eventually ask what I am doing with the threads in the Aluminium block, I was going to have inserts put into the block but I have since decided to spend the money on ARP headstuds. I've tracked down some ARP studs which are longer than the kit that they sell for the M50 steel blocks which give more thread engagement inside the aluminium block. Main advantage is these can also be reused and transferred to another block should I need to.
Masked up the faces on the block
Painted the block a nice silver, Painted nice and easily after the block had been through the parts washer at the machine shop.
Cleaned out the oil squirters and refitted them back into the block checking the oil galleries in side the block and inside the squirters where cleaned and blown through before refitting
Before refitting the cams to the head or the head to the block I did a quick leak down test with some white spirit to check the valve seats on this head as it if freshly built to make sure everything is as it should be, no issues with leakage just evaporation with the heat yesterday
First few parcels with engine parts started to arrive a the end of last week. First ones being the Vanos rebuild kit
Stripped the unit open and pulled out the seals
Cleaned the pistons in the parts washer and refitted the new seals
Time for reassembly
Done...
Bit of paint to tidy up the tired vanos unit too.
Engine building parts arrived yesterday so I was able to crack on with the first bits of putting the engine together.
Checked the ring gaps in the bores, all checked out ok pretty much in the middle of the BMW tolerances
Piston rings fitted to the pistons
Popping the pistons into the bores with the new rings fitted
6 pistons fitted into the block, even though the bores and the rings are new i've kept everything numbered and orientated throughout the cleaning process. Trying to make the process as simple as possible when rebuilding
Set of King Racing bearings for the rod bearings this time,
King Racing rod bearings and brand new mains bearings fitted ready for the crank to be dropped in
To be continued when the remainder of the parts i'm waiting for arrive.
Gassing Station | Readers' Cars | Top of Page | What's New | My Stuff