My E30 M3, the story so far......
Discussion


crossie said:

Did you get all the bolts plated or did you buy them like that?
https://refinishsystems.com/product/metal-trim-fas...
also look for u-nuts.
Its been a while since ive updated this as ive had a bit of a break from it to spend some time with my family and as ive bought the Alpina B3 that ive been spending some money on.


 [
[
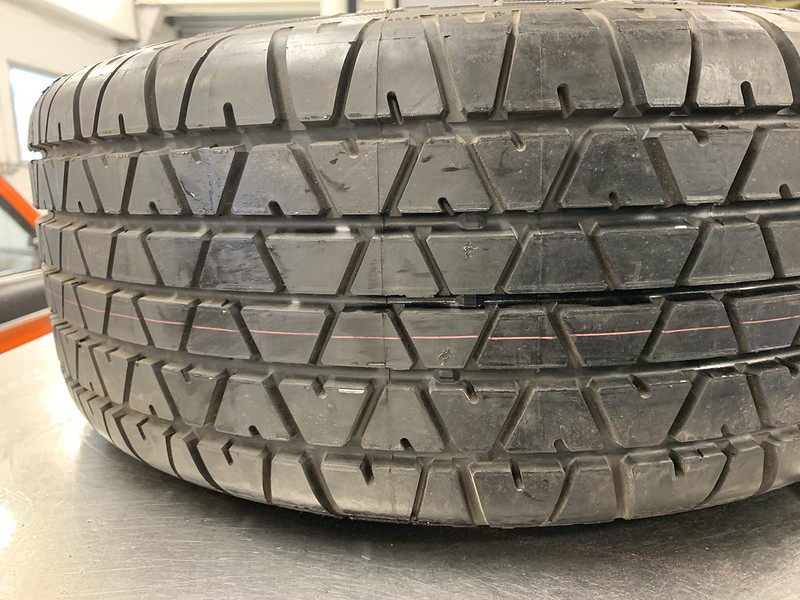
A lucky find was a new old sock Michelin MXX tyre in 225/45/16 to fit for the spare obviously not to be used!

Through some wheeling and dealing i managed to obtain a missing piece boot carpet which is often missing as was the case of my car.


The pic above is the culmination of rebuilding the steering rack with new seals, bushes etc and building up the front subframe with the eibach adjustable roll bar and power flex black series bushes with all hardware electro plated as per OEM. New engine mounts also fitted in preparation for when the engine is mated to the subframe and the complete assembly is installed from underneath.
There will be a few more updates on the cars progress before it goes into storage as i need the space at work and i will be concentrating on the engine build for the time being.
[A lucky find was a new old sock Michelin MXX tyre in 225/45/16 to fit for the spare obviously not to be used!
Through some wheeling and dealing i managed to obtain a missing piece boot carpet which is often missing as was the case of my car.
The pic above is the culmination of rebuilding the steering rack with new seals, bushes etc and building up the front subframe with the eibach adjustable roll bar and power flex black series bushes with all hardware electro plated as per OEM. New engine mounts also fitted in preparation for when the engine is mated to the subframe and the complete assembly is installed from underneath.
There will be a few more updates on the cars progress before it goes into storage as i need the space at work and i will be concentrating on the engine build for the time being.

At the tail end of July the M3 got put into storage as we needed the workshop space plus its near enough complete minus the engine.


Further back in the thread i posted that the engine was striped to a bare block and head. It sat on a stand for some time before the head was stripped and removed. Some pics of the cams coming out using an old BMW dealer tool for M88 and S14 engines.

Cylinder head and cam bearing housing vapour blasted.

Sump sections and timing cover vapour blasted.

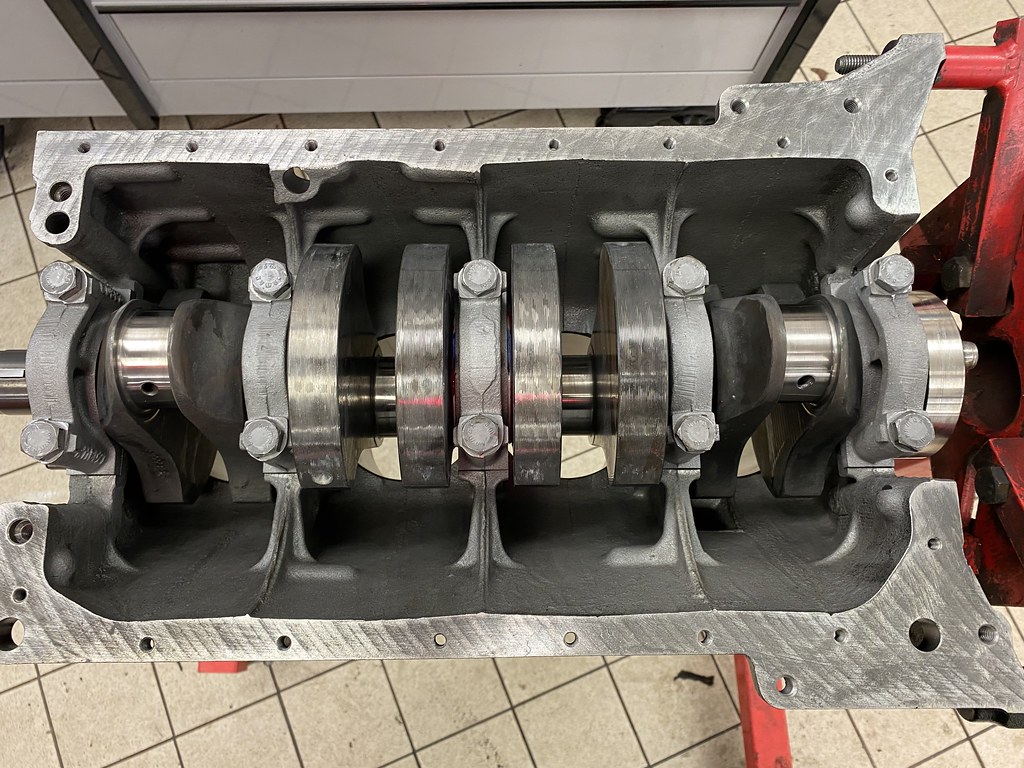
Crankshaft, con rods and pistons removed from the block.
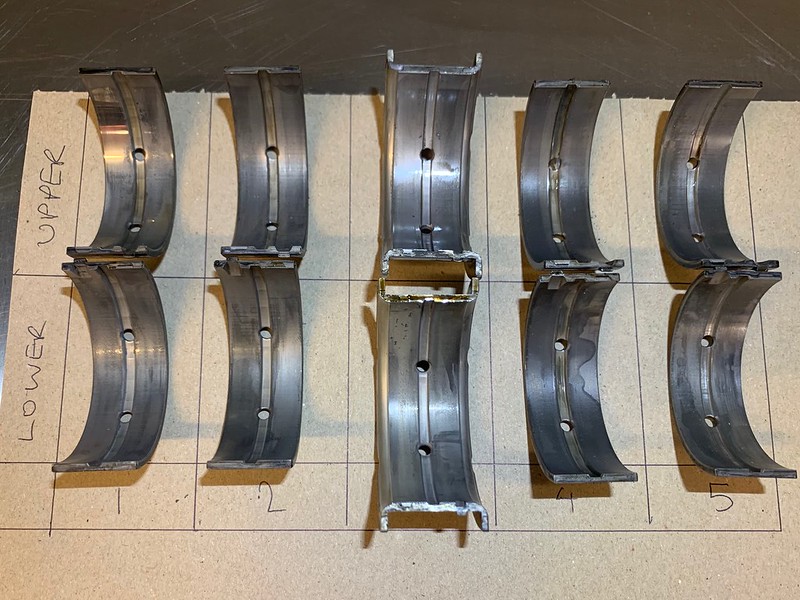
Crank main bearings looked ok.

Con rod bearings not so good.
All main engine parts will be going off to the machine shop to do their thing so any thoughts of a freshen up have turned into a complete rebuild.
Three years have passed without a real update to this. The rolling shell was put into storage to free up some space at work then life, Covid, other projects have all taken up my time and money until now.
Back in January I started on the engine build.
Near on 8 months have passed and I really should have been updating this but better late than never so here goes!


The block along with the bottom end rotating assembly was sent off to the machine shop to be inspected and measured. The cylinders only needed a hone, the block re faced, chemically cleaned, all core and oil plugs replaced with new. The rotating assembly again was measured and all within spec so that was all cleaned, crank journals polished and the whole lot balanced.
That lot was all wrapped up and sat on a shelf for two years until January.


Initial checking of running clearance begun today so a complete set of the correct bearing could be ordered. The running clearance for the main bearings are 0.03mm to 0.07mm and measured with standard size 55.00mm "blue" mains bearing we have a running clearance of 0.05mm so well within spec.

Crankshaft end float checked an in spec.

Pistons and rods all measured and in spec, assembled with new wrist pin clips.

New piston ring sets, new OEM rod bearings an ARP rod bolt set ready to go.

Piston ring gaps checked.

ARP rod bolts torqued to spec measuring stretch.

Bottom end rotating assembly complete.
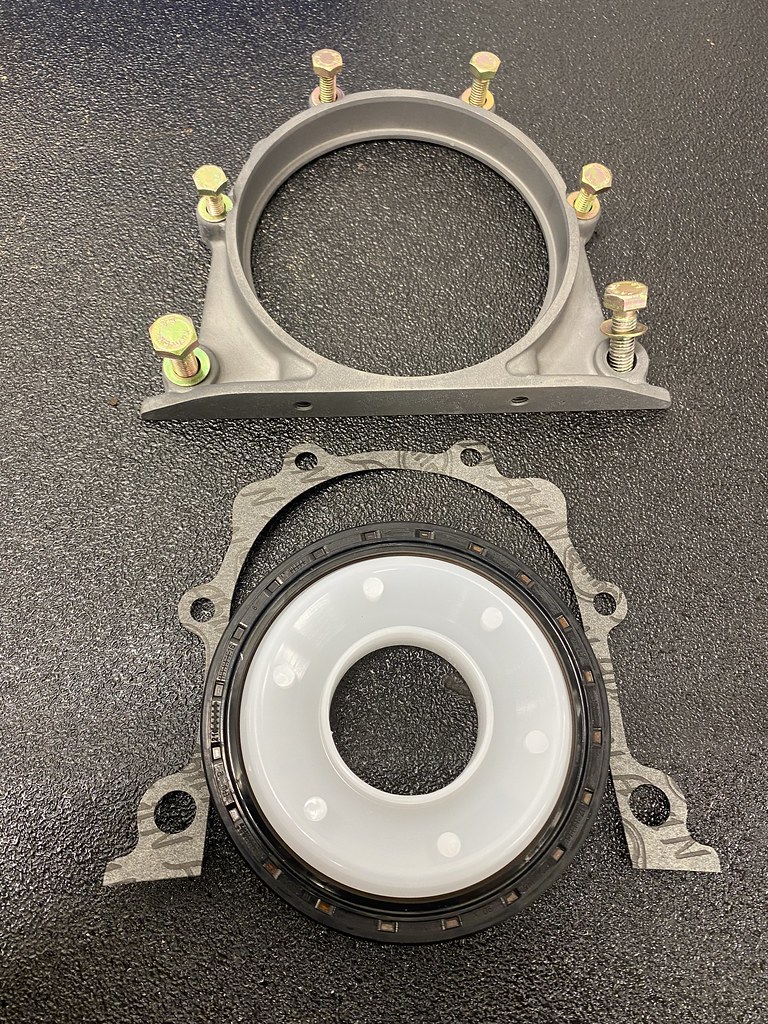
Crankshaft rear main seal assembly laid out.
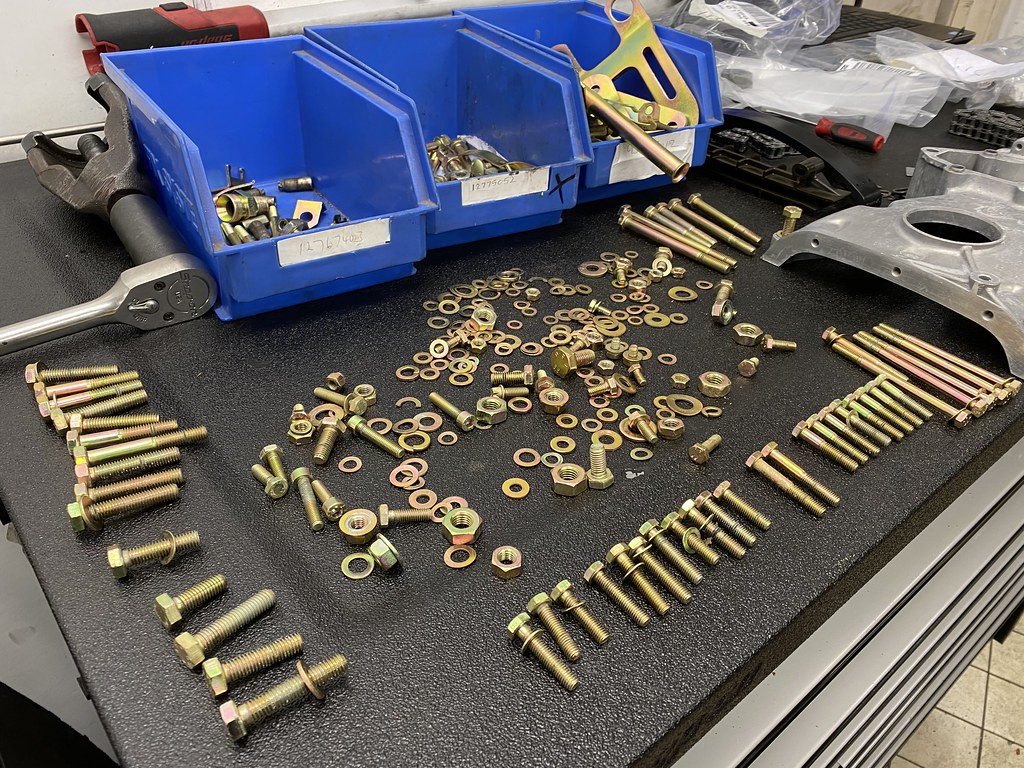
Various fittings electro plated.


The timing chain assembly for the S14 engine laid out and fitted up. Amazingly that little lot cost over £1100! The ///M tax is real with S14's!


Front timing cover and cylinder head bolted down.


Cam bearing housing bolted down and sealed using the correct Würth flange sealant. Buckets and shims fitted and all bearing surfaces coated with engine assembly lube as er the bottom end.
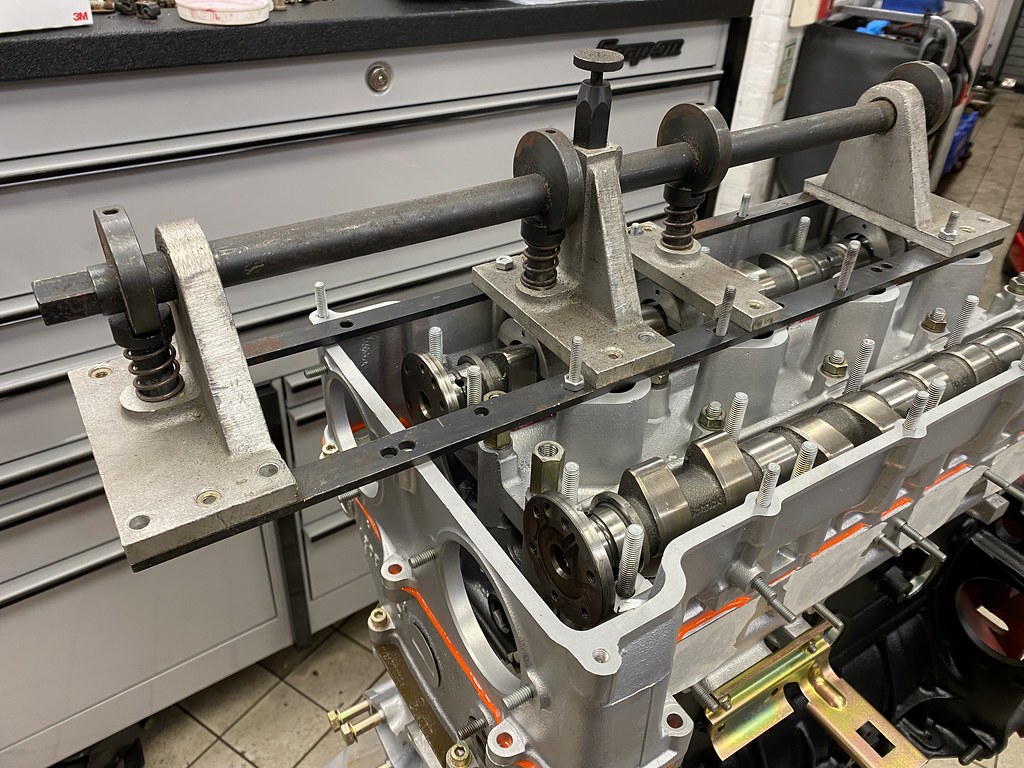

The Shrick cams that were installed over 30 years ago when the engine was rebuilt by Brodie Britain Racing were reused and installed using a 35 year old BMW main dealer special tool for use with M88 and S14 engines that I bought some years ago with a job lot of old dealer tools. All valve clearances set to spec using genuine BMW shims.
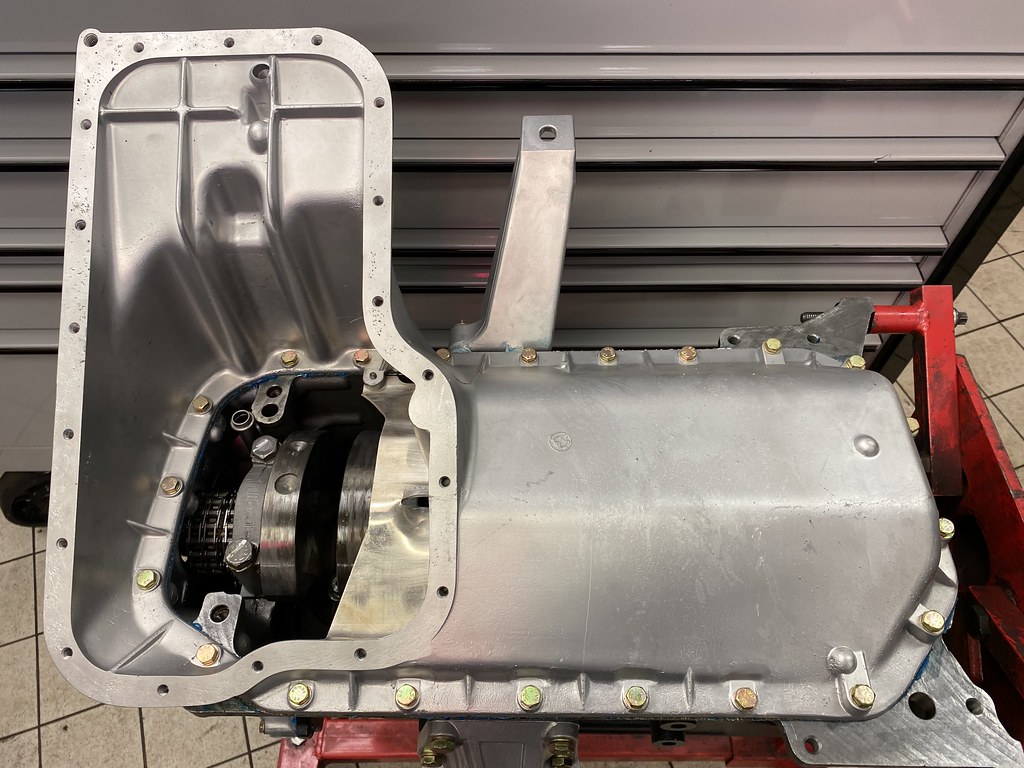
Upper sump section and oil pump fitted after having new a new rotor set installed.

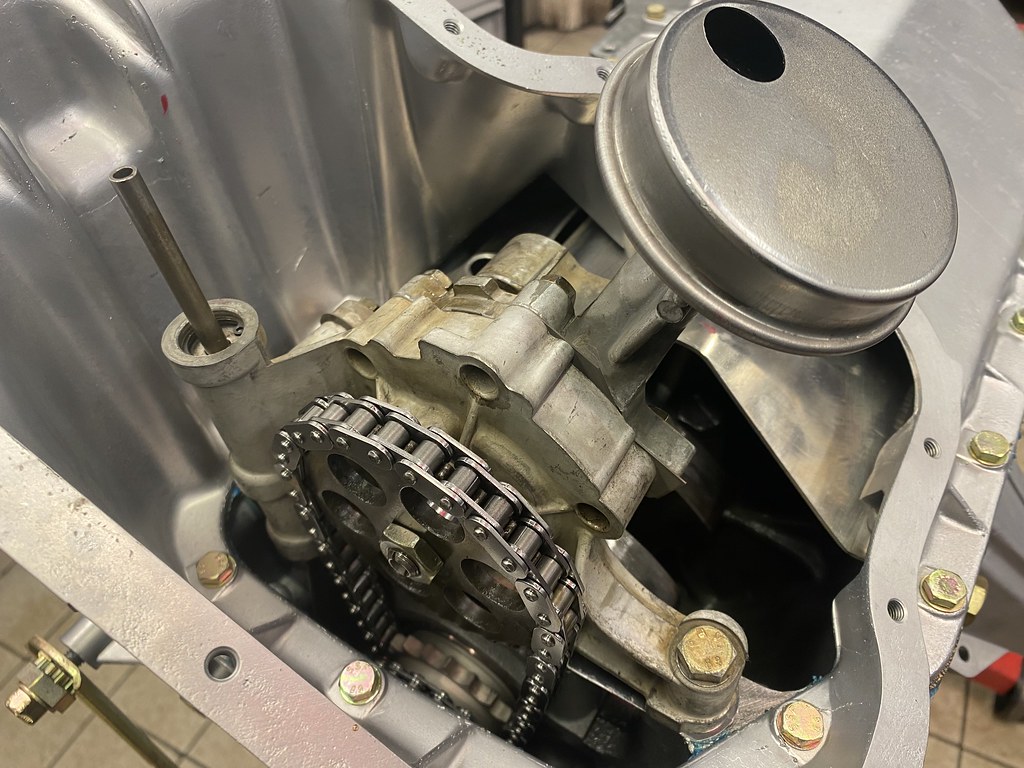
Sprockets and upper guide rail fitted up.


Water pump, coolant rail, various brackets bolted up and cam cover placed on top rounded up the main part of the engine build which took me up to February during my spare time.
Life, a Ring trip and prep for that plus various jobs on my recently sold E46 M3 kept me away from this till June........


Installation time in June saw the engine mated to the already rebuilt Getrag 265/5 dog leg gearbox, vapour blasted bell housing and the billet flywheel and virtually new clutch were reused. Exhaust manifold blasted and painted in high temp paint then bolted up, the engine and box bolted on to the restored front crossmember and rack along with new engine mounts.


Lined up for installation.


The "marriage" is complete. First time the engine and box have been united with the car in nearly four years.
Back in January I started on the engine build.
Near on 8 months have passed and I really should have been updating this but better late than never so here goes!
The block along with the bottom end rotating assembly was sent off to the machine shop to be inspected and measured. The cylinders only needed a hone, the block re faced, chemically cleaned, all core and oil plugs replaced with new. The rotating assembly again was measured and all within spec so that was all cleaned, crank journals polished and the whole lot balanced.
That lot was all wrapped up and sat on a shelf for two years until January.
Initial checking of running clearance begun today so a complete set of the correct bearing could be ordered. The running clearance for the main bearings are 0.03mm to 0.07mm and measured with standard size 55.00mm "blue" mains bearing we have a running clearance of 0.05mm so well within spec.
Crankshaft end float checked an in spec.
Pistons and rods all measured and in spec, assembled with new wrist pin clips.
New piston ring sets, new OEM rod bearings an ARP rod bolt set ready to go.
Piston ring gaps checked.
ARP rod bolts torqued to spec measuring stretch.
Bottom end rotating assembly complete.
Crankshaft rear main seal assembly laid out.
Various fittings electro plated.
The timing chain assembly for the S14 engine laid out and fitted up. Amazingly that little lot cost over £1100! The ///M tax is real with S14's!
Front timing cover and cylinder head bolted down.
Cam bearing housing bolted down and sealed using the correct Würth flange sealant. Buckets and shims fitted and all bearing surfaces coated with engine assembly lube as er the bottom end.
The Shrick cams that were installed over 30 years ago when the engine was rebuilt by Brodie Britain Racing were reused and installed using a 35 year old BMW main dealer special tool for use with M88 and S14 engines that I bought some years ago with a job lot of old dealer tools. All valve clearances set to spec using genuine BMW shims.
Upper sump section and oil pump fitted after having new a new rotor set installed.
Sprockets and upper guide rail fitted up.
Water pump, coolant rail, various brackets bolted up and cam cover placed on top rounded up the main part of the engine build which took me up to February during my spare time.
Life, a Ring trip and prep for that plus various jobs on my recently sold E46 M3 kept me away from this till June........
Installation time in June saw the engine mated to the already rebuilt Getrag 265/5 dog leg gearbox, vapour blasted bell housing and the billet flywheel and virtually new clutch were reused. Exhaust manifold blasted and painted in high temp paint then bolted up, the engine and box bolted on to the restored front crossmember and rack along with new engine mounts.
Lined up for installation.
The "marriage" is complete. First time the engine and box have been united with the car in nearly four years.

BSSBMW said:
Through some wheeling and dealing i managed to obtain a missing piece boot carpet which is often missing as was the case of my car.
That red overspray is a shocking result given the quality of the rest of your work 
I’ve read the whole thread today btw, what a bloody superb car!
Edited by AlmostUseful on Monday 12th September 10:23
Only just stumbled on this and have read through. Wow what a car, really well done for both the level of detail and actually using it to. Love the electroplated fixings. Although the red and grey interior should have been burnt with fire not ebay’d and given further chance of inflicting cruelty on another E30!
More on the 325i Sport please. Absolutely love those, nearly bought one as a 18yo back in the early naughties but couldn’t afford to insure it, now I can insure one but can’t find the current entry price for one, all in the timing aye.
More on the 325i Sport please. Absolutely love those, nearly bought one as a 18yo back in the early naughties but couldn’t afford to insure it, now I can insure one but can’t find the current entry price for one, all in the timing aye.
The summer months have seen steady progress with the M3 in, usually on a Sunday afternoon in the peace and quiet of out storage unit between work, family life, and a trip across the pond to the big apple and to visit family in Ontario.


Throttle bodies assembled, adjusted and refitted back onto the engine. All new power steering hoses, engine oil cooler hoses and engine loom routed. This allowed the engine to be cranked over with the spark plug out to build up oil pressure in the engine before first start.


Intake plenum fitted and the start of the cooling system.


Engine bay complete with all remaining components fitted. The throttle body tamper proof caps left off to allow for any adjustments required during the initial running in period.

A new chrome tipped rear silencer as used on the Cecotto and Ravaglia models.


The end result of the underside.
Throttle bodies assembled, adjusted and refitted back onto the engine. All new power steering hoses, engine oil cooler hoses and engine loom routed. This allowed the engine to be cranked over with the spark plug out to build up oil pressure in the engine before first start.
Intake plenum fitted and the start of the cooling system.
Engine bay complete with all remaining components fitted. The throttle body tamper proof caps left off to allow for any adjustments required during the initial running in period.
A new chrome tipped rear silencer as used on the Cecotto and Ravaglia models.
The end result of the underside.


Gassing Station | Readers' Cars | Top of Page | What's New | My Stuff