Mercedes SL320 R129 - Part 2
Discussion


jke11y said:
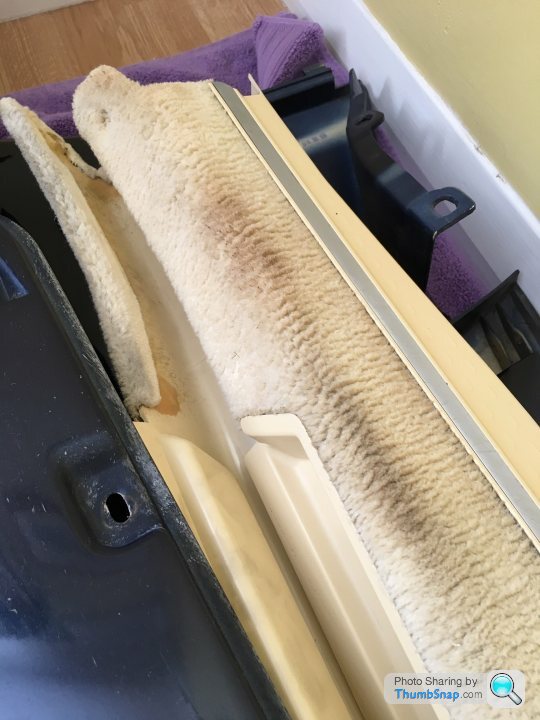
Excellent job; in this picture just right of centre in the pad you can see the indent of the upturned oil filler cap where i caused by some idiot shutting the bonnet with it sitting on top of the rocker cover.
Thank you J for that wee bit of info. It might seem odd to some, but having that little back story appeals to me.It reminds me of the dent I put in the side of my dads Cortina boot, I was rather carelessly transporting and engine for my escort and went round a corner too fast for the unsecured load.
He was not happy about that.
Nor was he happy about the rip in the back of the drivers seat caused by the hired engine crane.
It's no wonder he was very reluctant to lend me his car.
I have been putting off the next job on the list.
Bodywork.
I prefer the mechanical repairs. Bodywork takes a lot of time, patience and skill.
Well, I have the time as lockdown means there are fewer options to be out and about although I should probably have started three weeks ago!
The patience and skill part ....... Questionable.
I don't feel I can justify a professional full respray which I think would be 2 - 3 thousand.
Perhaps if it was a car I planned to keep forever it would make sense but I have never kept a car that long.
I wish I was one of those people that had owned a car for 30 years but it's never happened.
So, I am building up to doing it myself.
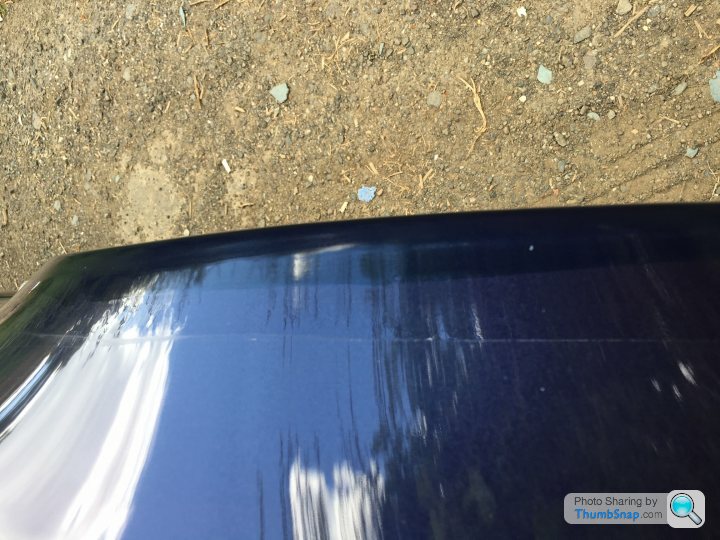
There are some minor scratches in the paintwork but I am not too bothered by them.
It's not too severe, more about preservation and stopping the rot although past experience tells me it will be worse than it looks.
The paintwork is not original as there is evidence of work done in several areas. Certainly the front wings and possibly all the sides as I cannot see any difference in the colour.
I am hoping to keep most of my paintwork under the arches but there are some areas where that will not be possible so it may end up with some poorly blended bits.
The problem areas are .....
Usual spot on the front wing. I have not looked behind this so this may turn out to be full blown hole!
Front edge of the RH front wheel arch
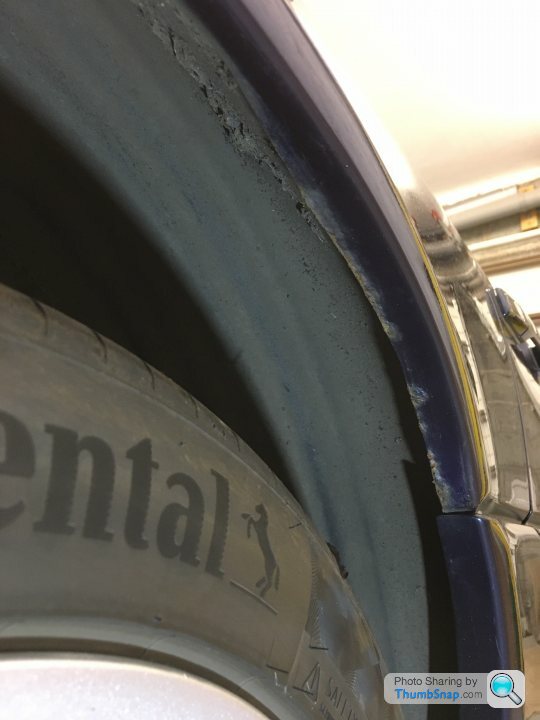
Rear edge of the RH front wheel arch
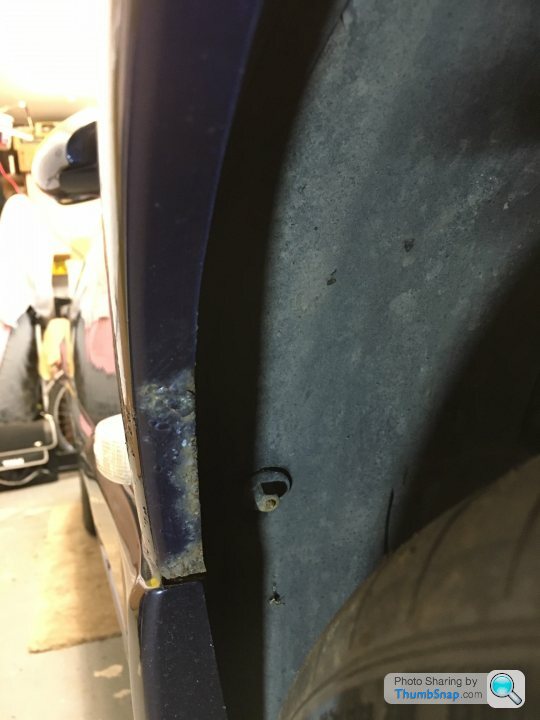
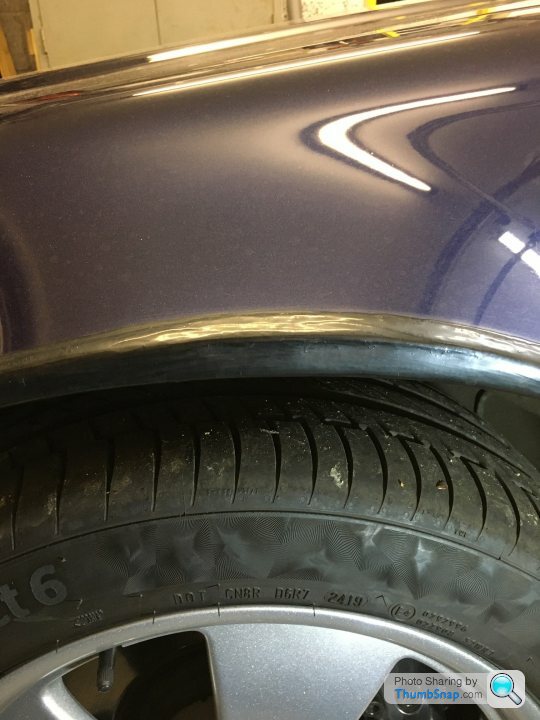
Front edge of the RH rear wheel arch
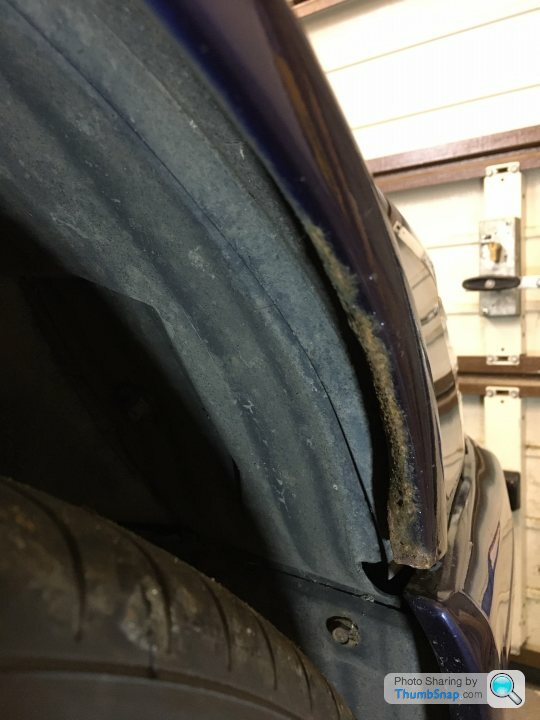
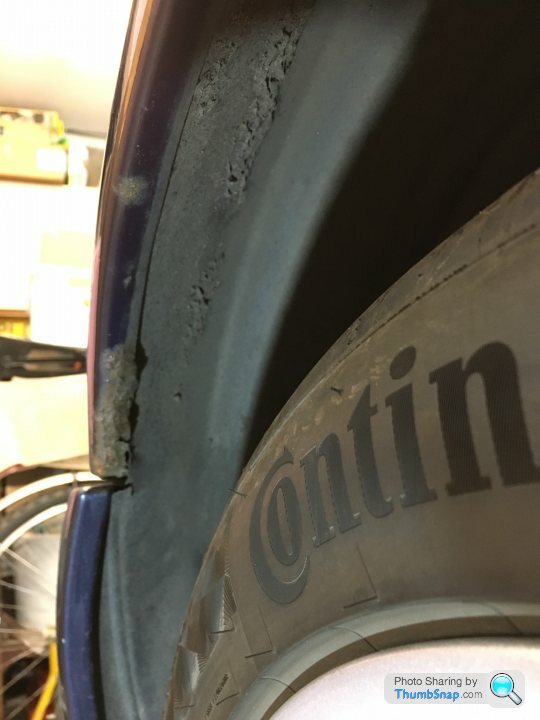
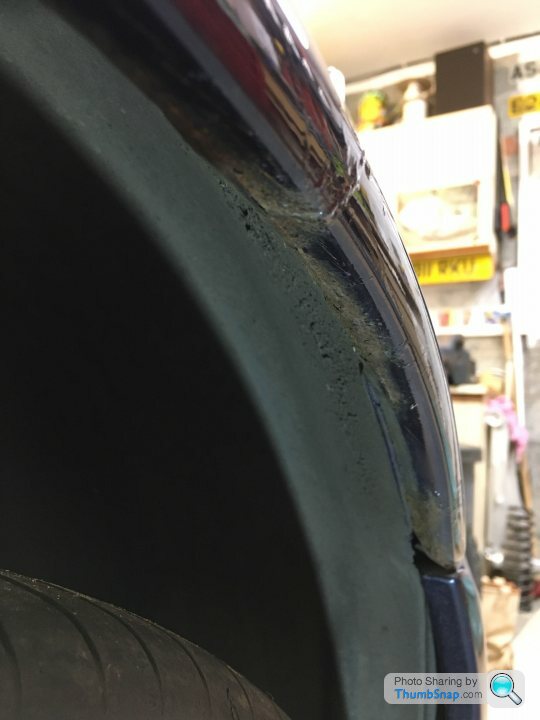
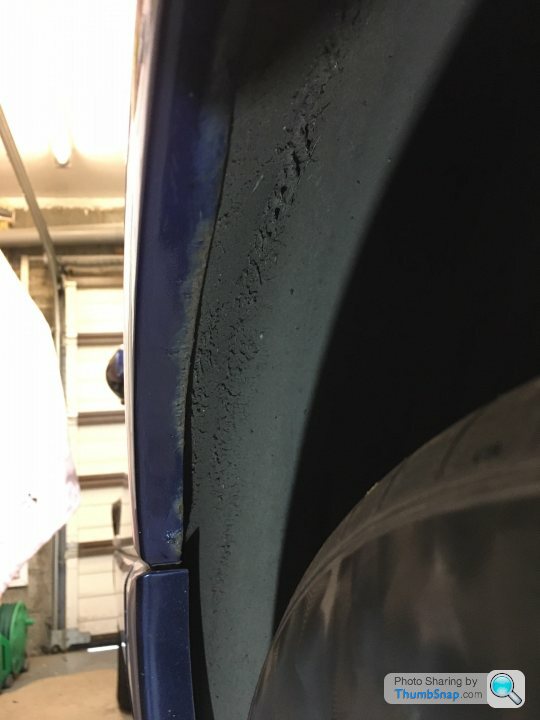
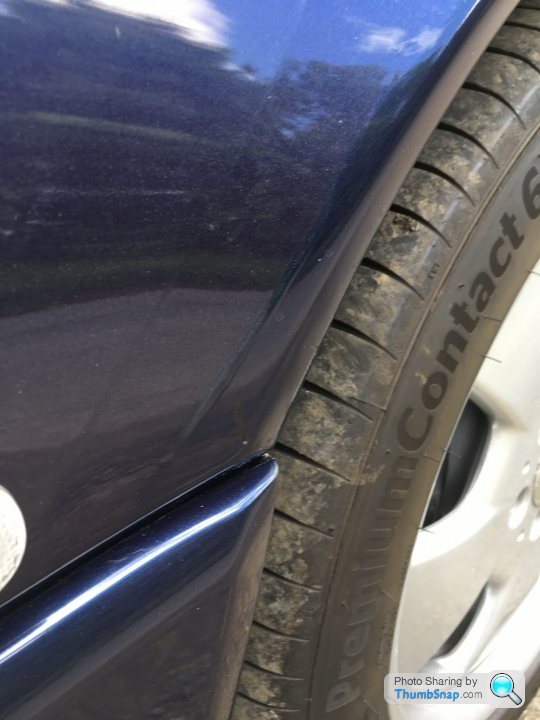
Rear edge of the RH rear wheel arch. This bit looks a wee bit concerning.
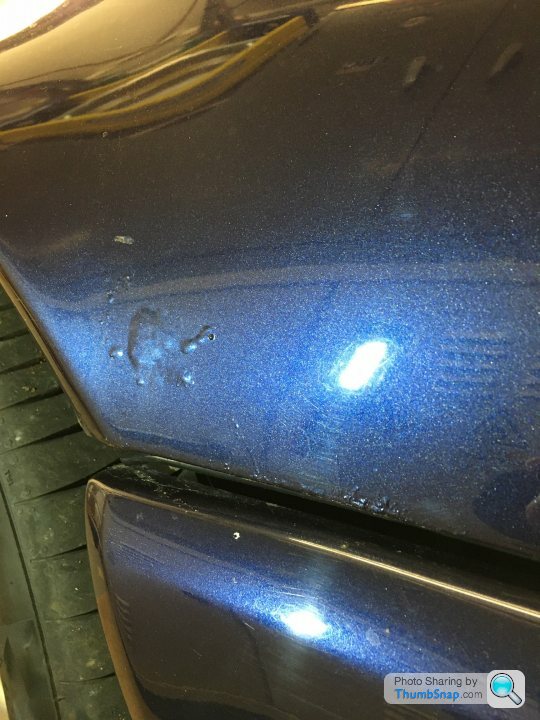
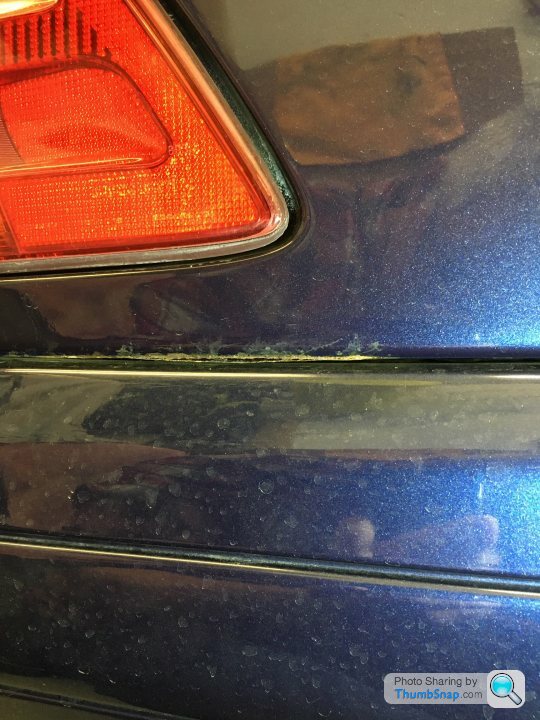
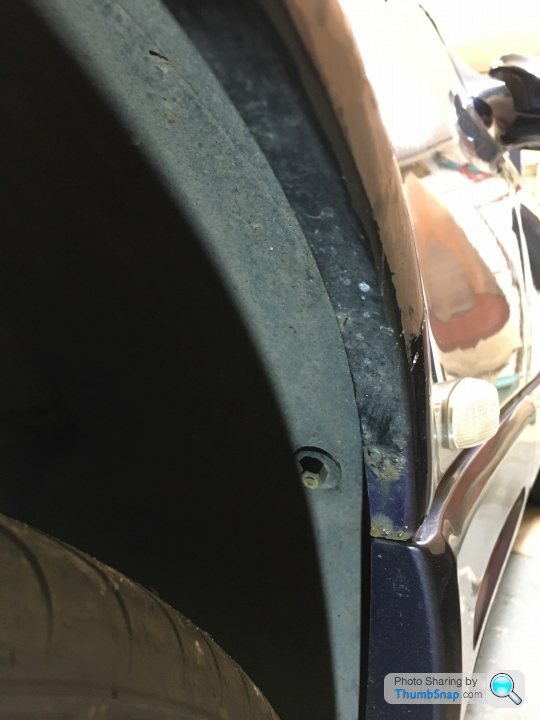
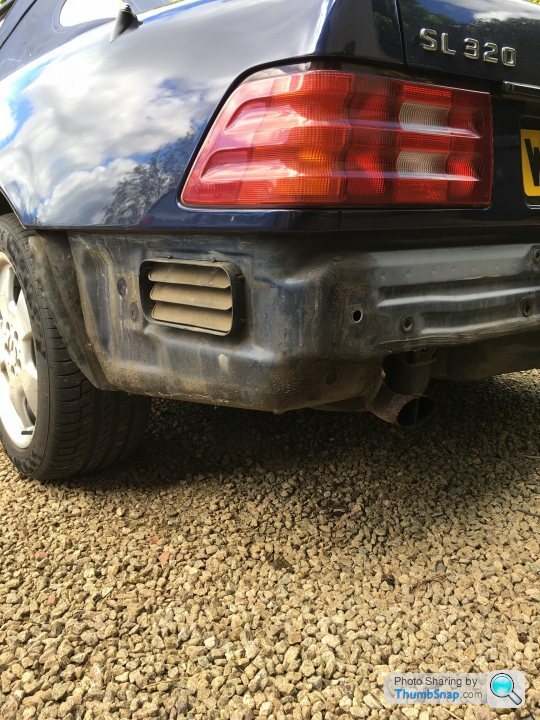
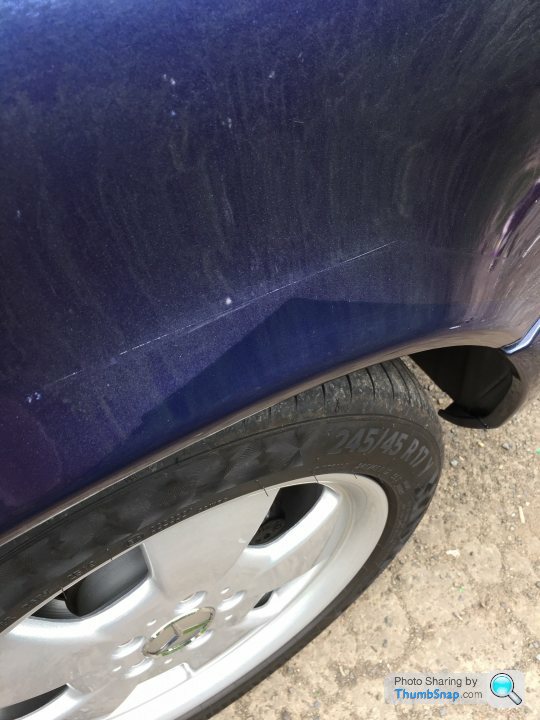
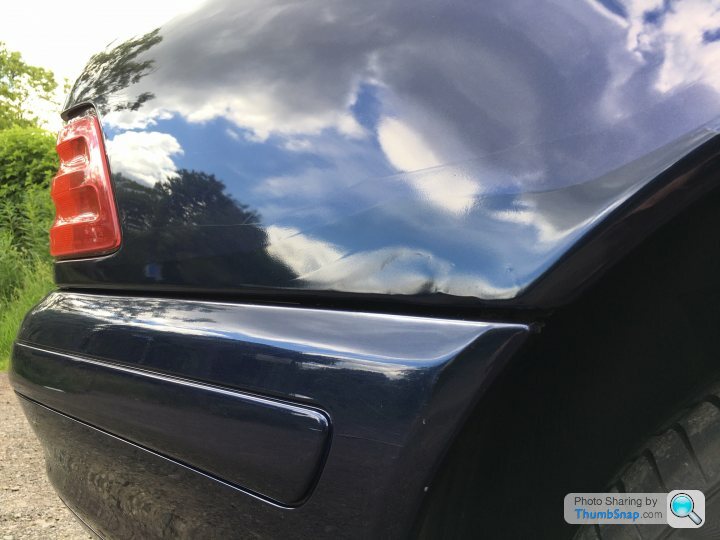
Two areas on the RH rear quarter just above the bumper. The second one looks bad.

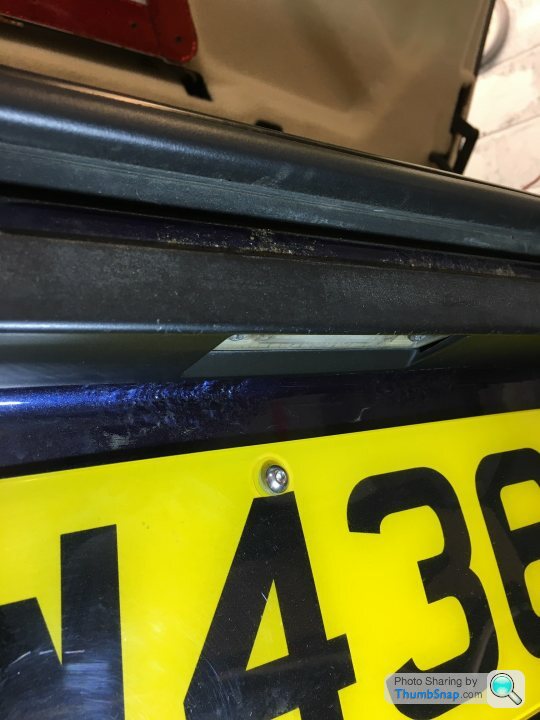
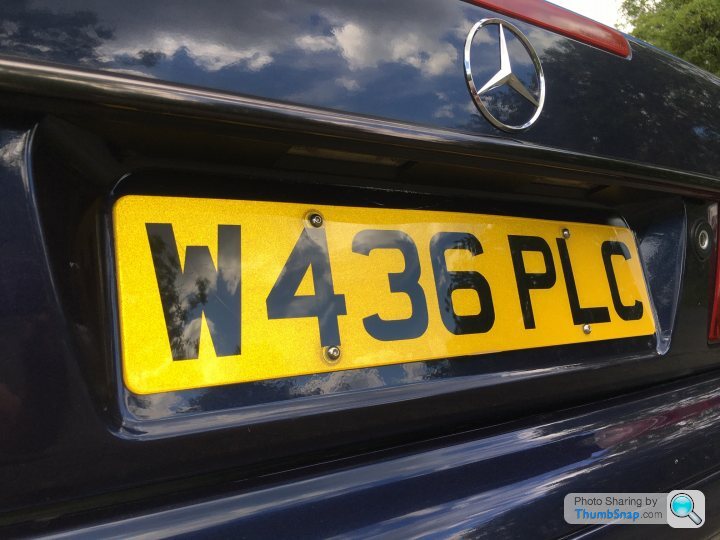
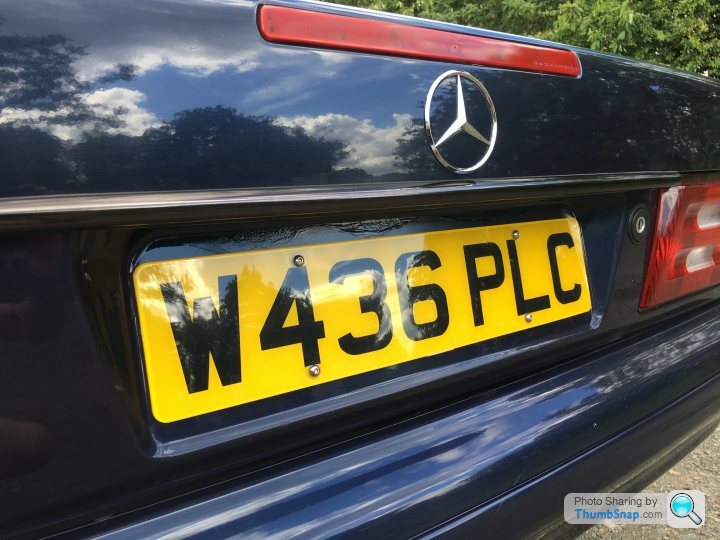
Poor picture but there is a fair bit of bubbling around both the regi plate lights and under the black plastic strip.
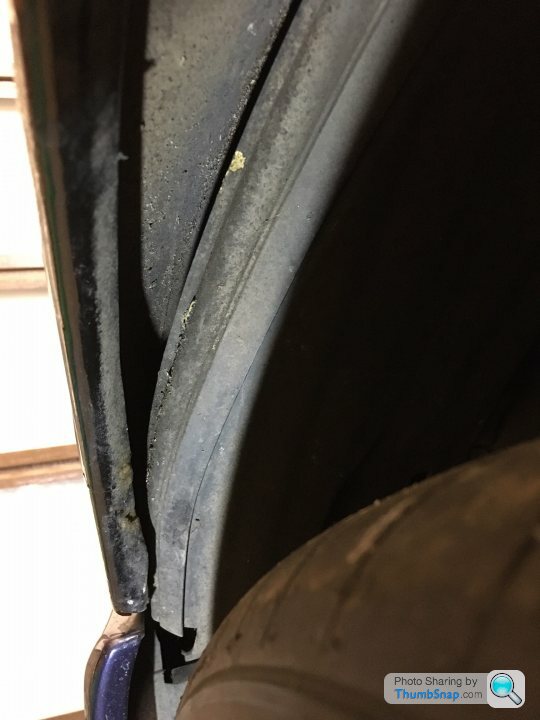
Rear edge of the LH rear arch. This looks like it is not confined just to the inner lip.
Front edge of the LH rear arch. Minor.
Front edge of the LH front arch.
Rear edge of the LH front arch.
When I bought the car it had been bumped on the edge of the LH front arch. It may be visible in some of the pictures earlier in the thread. It was dented and the paint had been removed so it was rusting.
When I was doing the work under the car I buffed the area down treated it with rust treatment and covered it with black smoothrite. Sounds terrible but wasn't actually that noticeable and it bothered me less than the exposed metal.
My plan is to attempt to fill it back out to the correct profile.
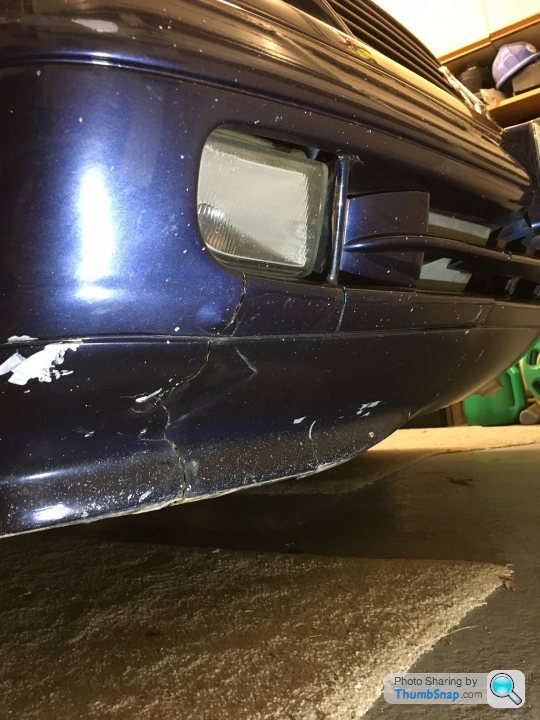
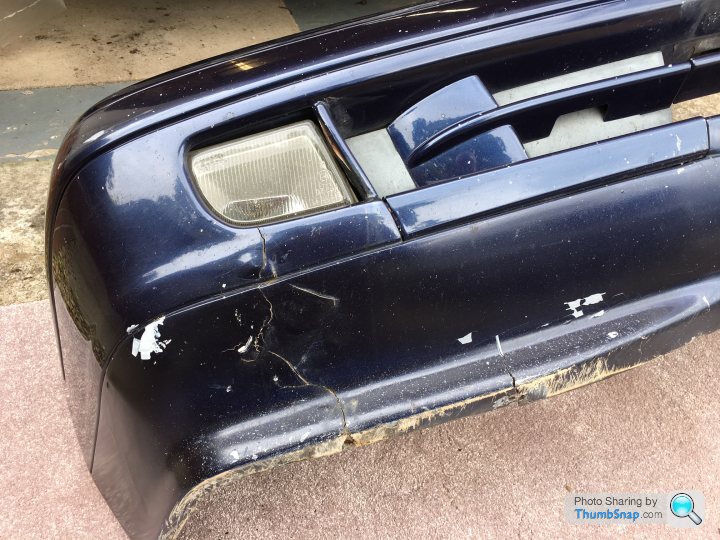
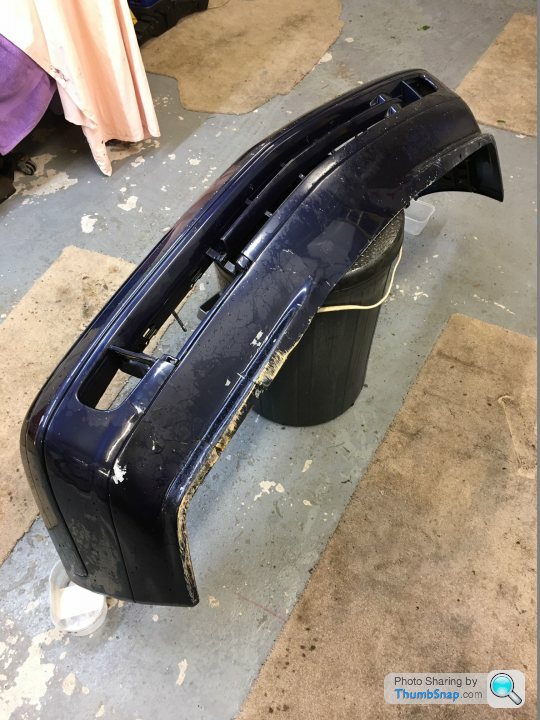
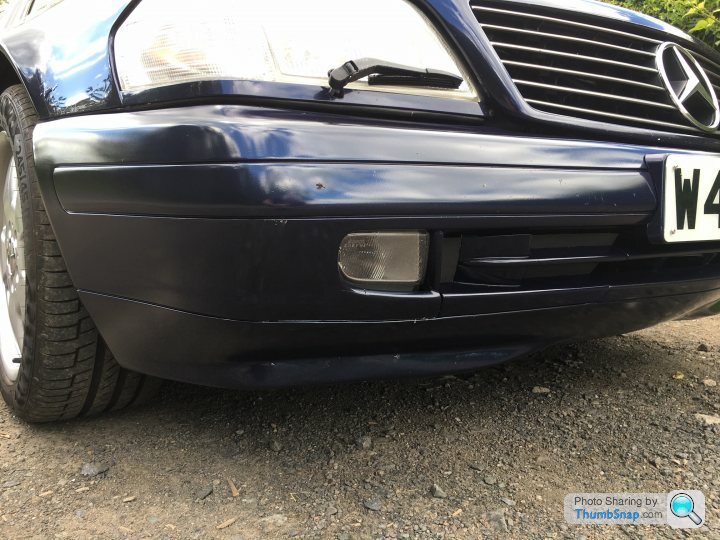
The front bumper is a bit of a mess. It has a thousand minor stone chips and as it appears to be white primer under the blue paint they are very noticeable.
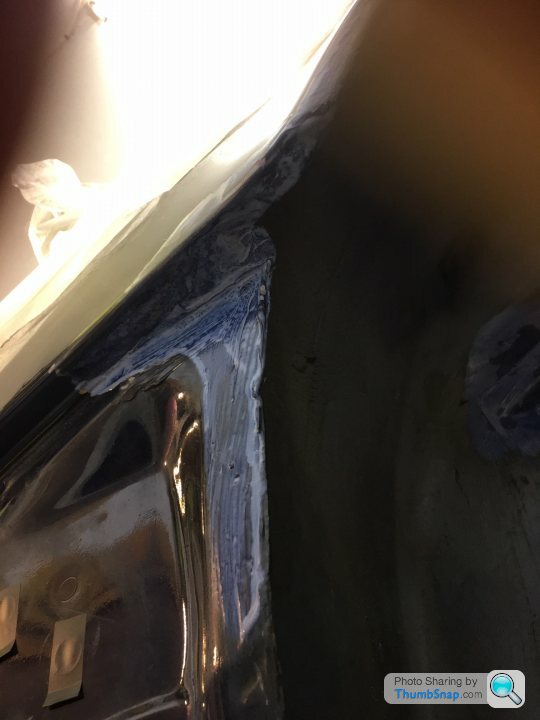
Also, it has been split at some point and repaired with what looks like a metal plate and some fibreglass and filler.
Ideally it would get a new bumper but the 2nd hand ones are expensive so I am planning to have a go at repairing it.
The front of the car is quite low and the damaged area is actually quite hard to see unless you are lying down in front of it.
So, all that is required now is for me to gather together the materials and find a cure for procrastination!
Bodywork.
I prefer the mechanical repairs. Bodywork takes a lot of time, patience and skill.
Well, I have the time as lockdown means there are fewer options to be out and about although I should probably have started three weeks ago!
The patience and skill part ....... Questionable.
I don't feel I can justify a professional full respray which I think would be 2 - 3 thousand.
Perhaps if it was a car I planned to keep forever it would make sense but I have never kept a car that long.
I wish I was one of those people that had owned a car for 30 years but it's never happened.
So, I am building up to doing it myself.
There are some minor scratches in the paintwork but I am not too bothered by them.
It's not too severe, more about preservation and stopping the rot although past experience tells me it will be worse than it looks.
The paintwork is not original as there is evidence of work done in several areas. Certainly the front wings and possibly all the sides as I cannot see any difference in the colour.
I am hoping to keep most of my paintwork under the arches but there are some areas where that will not be possible so it may end up with some poorly blended bits.
The problem areas are .....
Usual spot on the front wing. I have not looked behind this so this may turn out to be full blown hole!
Front edge of the RH front wheel arch
Rear edge of the RH front wheel arch
Front edge of the RH rear wheel arch
Rear edge of the RH rear wheel arch. This bit looks a wee bit concerning.
Two areas on the RH rear quarter just above the bumper. The second one looks bad.
Poor picture but there is a fair bit of bubbling around both the regi plate lights and under the black plastic strip.
Rear edge of the LH rear arch. This looks like it is not confined just to the inner lip.
Front edge of the LH rear arch. Minor.
Front edge of the LH front arch.
Rear edge of the LH front arch.
When I bought the car it had been bumped on the edge of the LH front arch. It may be visible in some of the pictures earlier in the thread. It was dented and the paint had been removed so it was rusting.
When I was doing the work under the car I buffed the area down treated it with rust treatment and covered it with black smoothrite. Sounds terrible but wasn't actually that noticeable and it bothered me less than the exposed metal.
My plan is to attempt to fill it back out to the correct profile.
The front bumper is a bit of a mess. It has a thousand minor stone chips and as it appears to be white primer under the blue paint they are very noticeable.
Also, it has been split at some point and repaired with what looks like a metal plate and some fibreglass and filler.
Ideally it would get a new bumper but the 2nd hand ones are expensive so I am planning to have a go at repairing it.
The front of the car is quite low and the damaged area is actually quite hard to see unless you are lying down in front of it.
So, all that is required now is for me to gather together the materials and find a cure for procrastination!
I've been struggling with enthusiasm for this work.
So I did the easy bit first - buying stuff!
Paint, primer, filler, sand paper and a bumper repair kit.
Mostly on the basis that I like spending money (a nasty disease) and knowing that having the stuff will make me feel obliged to make a start.
It should be the perfect time for this due to lockdown.
I cannot open the doors fully while it's in the garage and they need to be fully open to get to some of the screws so I got it out on the drive and started removing some trim and the plastics.
It's in remarkably good condition for a 20 year old car.
Then it was back into the garage to get it up on axle stands and get the wheels off and the arch liners out.
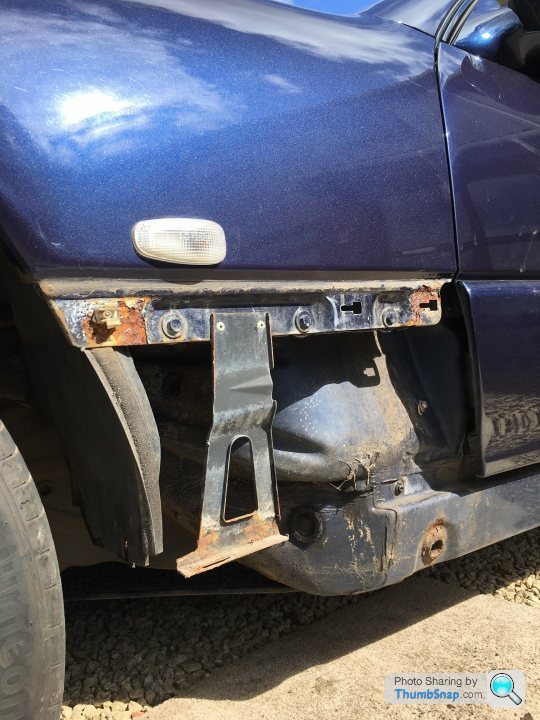
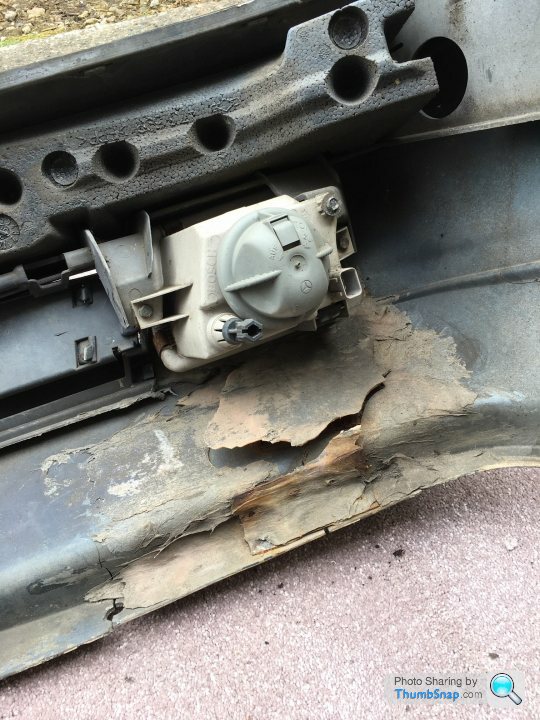
Four of the six rear arch liner studs sheared off and when I removed the liner I discovered that one of them had actually rusted clean off the car.
Fortunately the rust is very localised so I shouldn't have to cut too much away to weld in a plate.
Current plan is to drill out the remains of the old studs and fit rivet nuts.
Mercedes sell these for £16 each ..... so I'll be buying mine elsewhere.
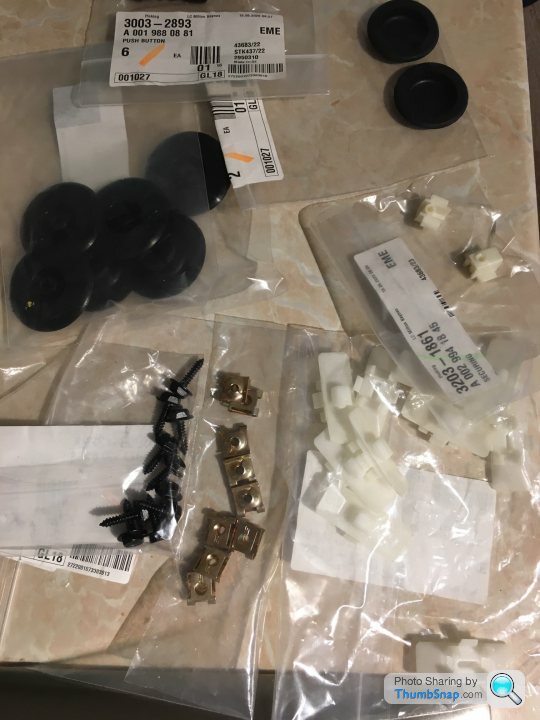
I'm hoping to order assorted other fixings from Mercedes to replace the damaged, broken and rusty parts.

The boot carpets are now behind the couch, the rear bumper and side plastics are in the dining room, the wheels and arch liners are in the shed. There are small labelled bags of screws and clips lying around the garage.
I hope I can find all these bits when the time comes and I hope I can remember how to put it back together.
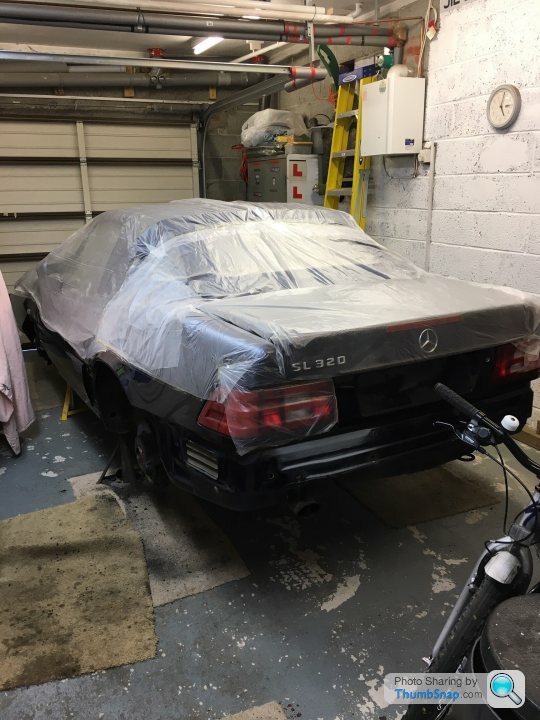
I have covered the car to try and keep the dust out as much as possible.
Next jobs -
Still to remove the front bumper. I'm not overly confident about repairing and repainting it.
Then it's onto rust removal. Most of the areas still feel quite strong so I'm hoping it will go ok.
No surprise with the bubbling paint on the front wing, there appears to be a plate and some filler behind it.
New wings would be great ..... and expensive, so I will have to do some kind of repair or leave that bit for another day.
The front number plate plastic support panel is cracked but as a new one is £110 the old one will have to stay.
Still searching for the cure for procrastination!
So I did the easy bit first - buying stuff!
Paint, primer, filler, sand paper and a bumper repair kit.
Mostly on the basis that I like spending money (a nasty disease) and knowing that having the stuff will make me feel obliged to make a start.
It should be the perfect time for this due to lockdown.
I cannot open the doors fully while it's in the garage and they need to be fully open to get to some of the screws so I got it out on the drive and started removing some trim and the plastics.
It's in remarkably good condition for a 20 year old car.
Then it was back into the garage to get it up on axle stands and get the wheels off and the arch liners out.
Four of the six rear arch liner studs sheared off and when I removed the liner I discovered that one of them had actually rusted clean off the car.
Fortunately the rust is very localised so I shouldn't have to cut too much away to weld in a plate.
Current plan is to drill out the remains of the old studs and fit rivet nuts.
Mercedes sell these for £16 each ..... so I'll be buying mine elsewhere.
I'm hoping to order assorted other fixings from Mercedes to replace the damaged, broken and rusty parts.
The boot carpets are now behind the couch, the rear bumper and side plastics are in the dining room, the wheels and arch liners are in the shed. There are small labelled bags of screws and clips lying around the garage.
I hope I can find all these bits when the time comes and I hope I can remember how to put it back together.
I have covered the car to try and keep the dust out as much as possible.
Next jobs -
Still to remove the front bumper. I'm not overly confident about repairing and repainting it.
Then it's onto rust removal. Most of the areas still feel quite strong so I'm hoping it will go ok.
No surprise with the bubbling paint on the front wing, there appears to be a plate and some filler behind it.
New wings would be great ..... and expensive, so I will have to do some kind of repair or leave that bit for another day.
The front number plate plastic support panel is cracked but as a new one is £110 the old one will have to stay.
Still searching for the cure for procrastination!
jke11y
It looks like it was a good job that was done in 2014. I had to look very closely to see signs of the work and it has a lovely finish to it.
I think they are probably correct about the bumper. I will attempt to tidy it up and keep a look out for a replacement although the second hand ones are pretty pricey.
r129sl
Obviously, I have followed your R129 story and it probably contributed to my wish to buy one.
Knowing that you had previously attempted to repair the existing back panel before getting the replacement section welded in has not filled me with confidence that I can sort mine.
I am disappointed, as I imagine you are, to hear that the replacement section has not cured it. It looked like a good solution and done well.
As an aside, I found your instructions for removing the door sill trims on the MB Owners site as posted in 2011.
If I had followed it properly I wouldn't have broken one of the plastic lugs!
These cars have quite a lot involved when taking anything apart so the first time is always a learning experience as it is not always obvious what sequence to use and when to push, pull or slide.
It's quite a contrast to the Series 3 Land Rover that I used to own where they very few items of trim were at most held on with a few visible self tappers. Admittedly, it was the other end of the comfort and refinement scale.
Also, I like how easy it is to get nearly all the small clips and fixings from the MB dealer by post. I'm using MB of Edinburgh and so far they have been very helpful.
I hate rust!
Horrible nasty stuff.
Well, I'm at the stage of wishing I hadn't started this job. It does need done and it's best to keep on top of the rust but I feel I have overstretched my abilities.
I was hoping to keep my attempts at repairs under the arches so that they would not be seen.
Unfortunately that has not been possible. It may end up physically better than it was but I doubt my skills will leave the outer edges of the arches looking better than they did before.
The work inside the arches has gone well. Small repair plate welded in and the missing rear arch liner studs have been replaced with rivet nuts. What a great invention! I should have got one of these years ago.
Not sure I would want to attach something too substantial but they seem perfect the arch liners.
So, onto lots of pictures
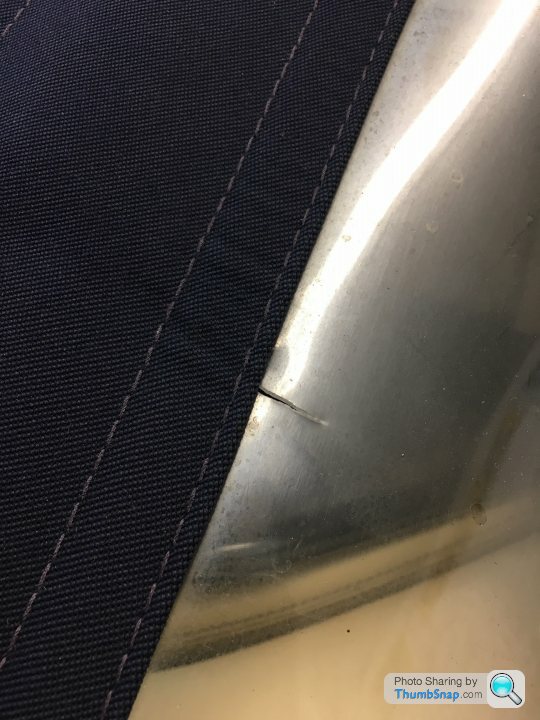
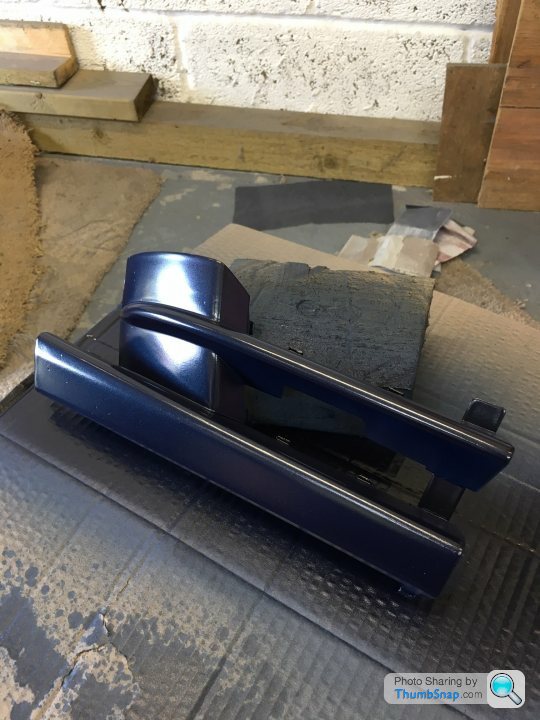
Front bumper removed and you can see the bit I hope to tidy up.
I have decided I need more space to do it so I will get the car mostly back together and out of the garage while I have a go at a tidy up.
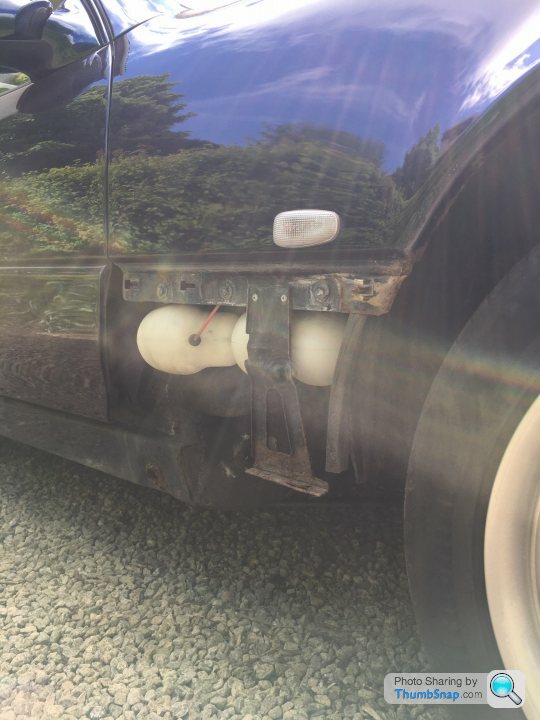
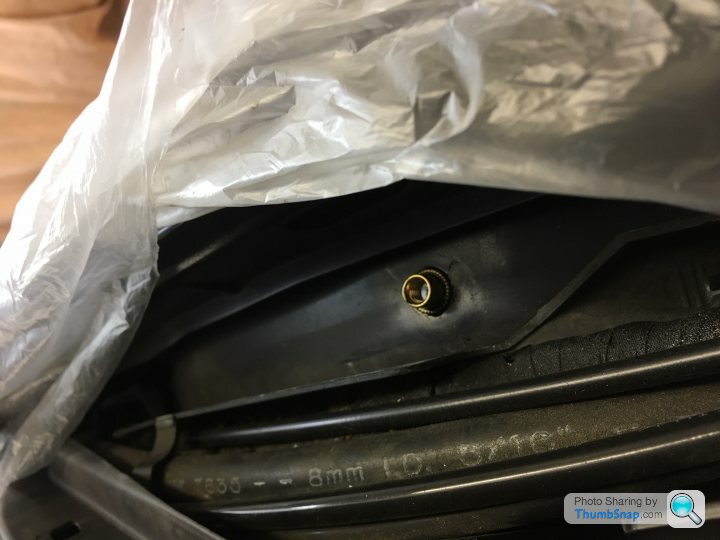
While in the nearside arch I noticed that this pipe is split. It doesn't seem to affect the car and I don't know what it's for.

It connect to a plastic canister behind the front wing.
Unusually, particularly for a car like this, there was enough slack in the pipe to allow me to trim it and reattach it. Seemed sensible while I was there.
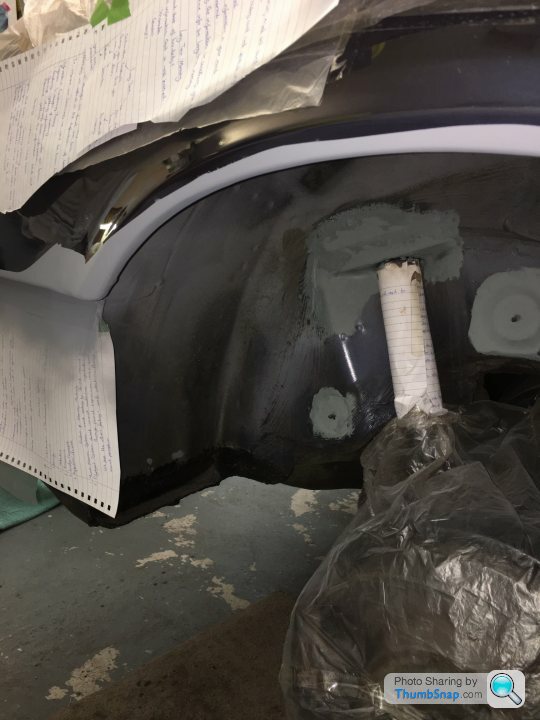
The hole ground out in prep for welding.

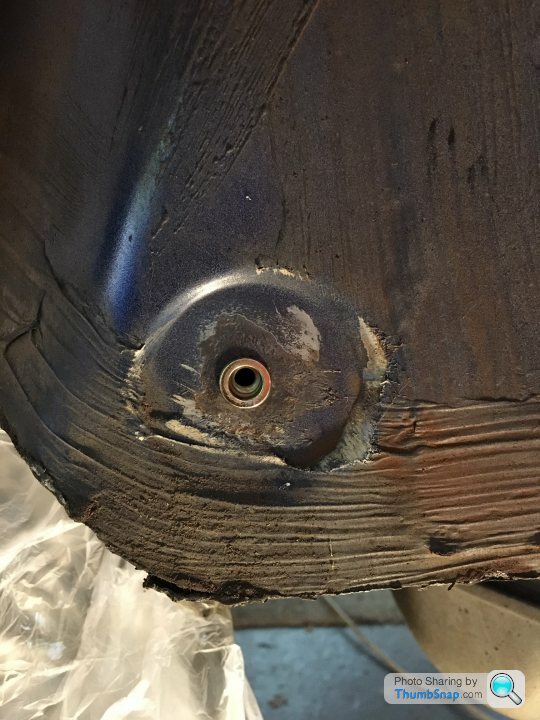
And with the plate with rivet nut welded in
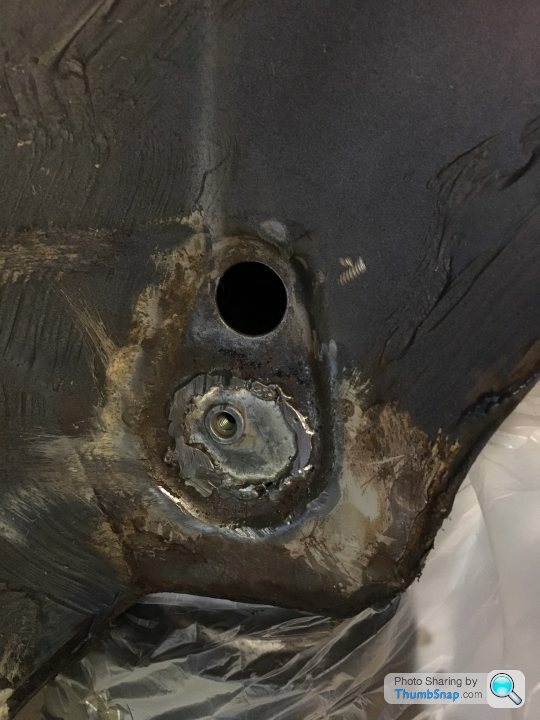
And another one of the rivet nuts.
I had one trial before fitting these and am happy with how they went in.
Rust sanded down and treated with Hydrate 80

My plan was to try filler on the rear panel but now I'm just going to paint over the treated area.

Poor picture, but this is an area that would be better welded. You've seen my welding efforts so I am leaving it for now.
I have watched a lot of car resto TV shows and YouTube videos and they all make it look easy!
This is the front arch which had been grazed on the lip and was slightly dented. I had a go at filling that.
After two layers of filler and a some sanding I was quite pleased with my efforts. It felt very smooth .....
Then I sprayed the primer and could immediately see that it was not that good. It will no doubt look worse when it has shiny blue paint on it.
No pro painter needs to worry about me steeling his work.

The arches have been sprayed with primer and all the bits under the arch and the jacking points have been painted with Electrox.
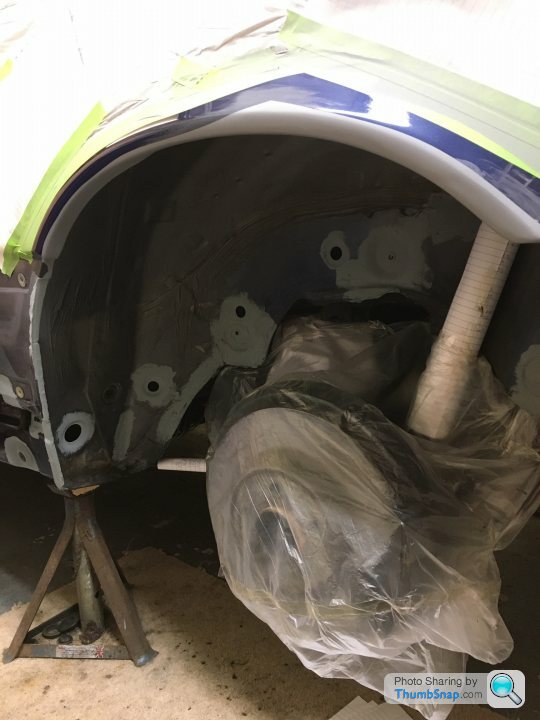
I can no longer get newspapers from my mum for masking so have been using the plastic dust sheets and my daughters old Uni notes.
To lift my mood, the parts package from MB arrived with assorted clips, screws, fixings and bungs.
The two rubber bungs in the front end of the sills were both split roughly half way round. It seemed a bit odd and I did wonder if they were meant to be like that for some kind of ventilation but in the end I decided they were damaged and got new ones.
I like how easy it is to get these parts from the dealer.
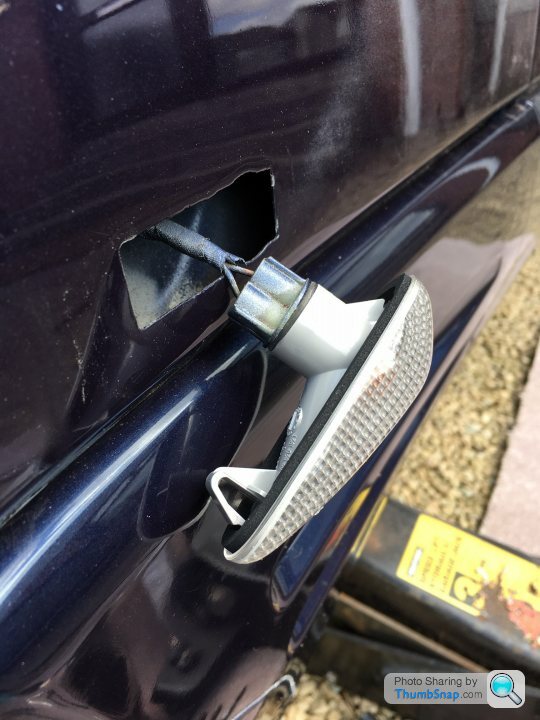
I removed both side repeaters by pushing the clips in from the rear and was surprised when both the clear lenses popped off.
Some Araldite will hopefully keep them in place.
Ginger bulbs in these fittings, or should be. On was ginger and clear, the other was ginger and blue!
New ginger ones collected today ready for the refit.
Next job is to get the blue paint on.
I hate rust. Did I mention that?
I think my next car might be plastic or perhaps one of those very clean Japanese imports...
TBC
Horrible nasty stuff.
Well, I'm at the stage of wishing I hadn't started this job. It does need done and it's best to keep on top of the rust but I feel I have overstretched my abilities.
I was hoping to keep my attempts at repairs under the arches so that they would not be seen.
Unfortunately that has not been possible. It may end up physically better than it was but I doubt my skills will leave the outer edges of the arches looking better than they did before.
The work inside the arches has gone well. Small repair plate welded in and the missing rear arch liner studs have been replaced with rivet nuts. What a great invention! I should have got one of these years ago.
Not sure I would want to attach something too substantial but they seem perfect the arch liners.
So, onto lots of pictures
Front bumper removed and you can see the bit I hope to tidy up.
I have decided I need more space to do it so I will get the car mostly back together and out of the garage while I have a go at a tidy up.
While in the nearside arch I noticed that this pipe is split. It doesn't seem to affect the car and I don't know what it's for.
It connect to a plastic canister behind the front wing.
Unusually, particularly for a car like this, there was enough slack in the pipe to allow me to trim it and reattach it. Seemed sensible while I was there.
The hole ground out in prep for welding.
And with the plate with rivet nut welded in
And another one of the rivet nuts.
I had one trial before fitting these and am happy with how they went in.
Rust sanded down and treated with Hydrate 80
My plan was to try filler on the rear panel but now I'm just going to paint over the treated area.
Poor picture, but this is an area that would be better welded. You've seen my welding efforts so I am leaving it for now.
I have watched a lot of car resto TV shows and YouTube videos and they all make it look easy!
This is the front arch which had been grazed on the lip and was slightly dented. I had a go at filling that.
After two layers of filler and a some sanding I was quite pleased with my efforts. It felt very smooth .....
Then I sprayed the primer and could immediately see that it was not that good. It will no doubt look worse when it has shiny blue paint on it.
No pro painter needs to worry about me steeling his work.
The arches have been sprayed with primer and all the bits under the arch and the jacking points have been painted with Electrox.
I can no longer get newspapers from my mum for masking so have been using the plastic dust sheets and my daughters old Uni notes.
To lift my mood, the parts package from MB arrived with assorted clips, screws, fixings and bungs.
The two rubber bungs in the front end of the sills were both split roughly half way round. It seemed a bit odd and I did wonder if they were meant to be like that for some kind of ventilation but in the end I decided they were damaged and got new ones.
I like how easy it is to get these parts from the dealer.
I removed both side repeaters by pushing the clips in from the rear and was surprised when both the clear lenses popped off.
Some Araldite will hopefully keep them in place.
Ginger bulbs in these fittings, or should be. On was ginger and clear, the other was ginger and blue!
New ginger ones collected today ready for the refit.
Next job is to get the blue paint on.
I hate rust. Did I mention that?
I think my next car might be plastic or perhaps one of those very clean Japanese imports...
TBC
Hi J,
I would suspect most of them need the same repairs if they have been used as intended.
The actual structure of the car is still in excellent condition it's just the front wings that really need sorted and perhaps the back edges of the rear arches. The rest is solid.
The wings could be repaired but I doubt I have the skills or the patience.
I'm interested to hear you are looking for another 129. Is this as well as the 124?
Best wishes with your search and hopefully you will let us know how it progresses.
I have had a go at patching one of the wheel arch liners with fibreglass. This is the section that goes in front of the wheel. It had some cracks in it although I have since found out that a lot of it is missing. It should have a section at 90deg going towards the front of the car.
I'm not sure if the fibreglass will work with this type of plastic but it's holding so far.
The front plate plinth had a split along the top line of where the plate sits so I tried the same repair approach with that.
It seems to be holding and I have sanded the front in prep for painting.
Flushed with the success with the rivet nut tool I decided to repair two of the front arch liner studs that were already missing.
My original plan was to ignore these as they were not there before and it had not been a problem.
However, I had the new toy so it seemed like a good idea to sort these while the liner was off.
I coated the holes and the rivet nuts with Dynax UB before insertion which will hopefully preserve the hole.
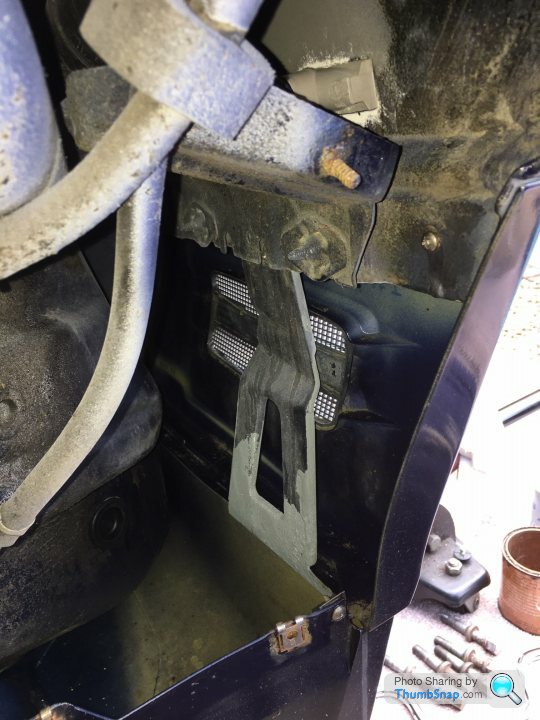
Under the arch -
And from above the inner wing. It's actually under a plastic cover.
First coat of Dynax UB on the under arch repairs

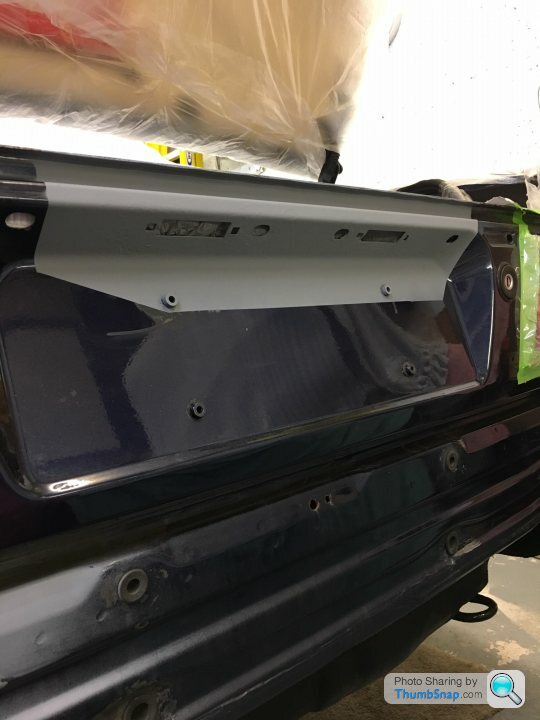
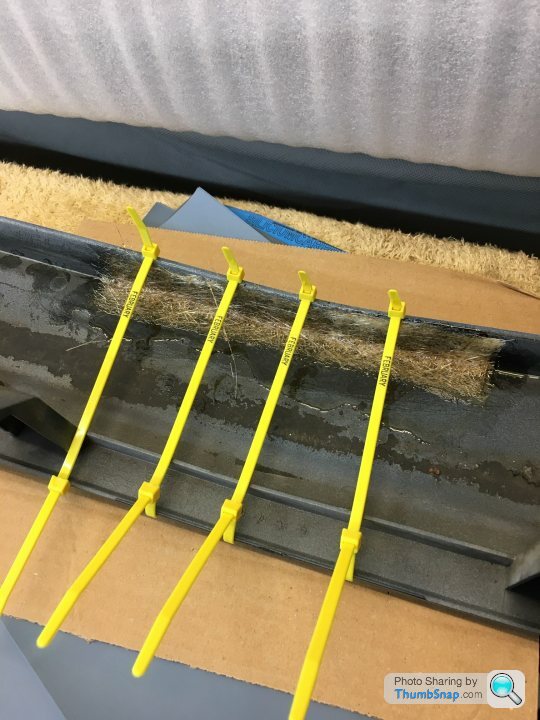
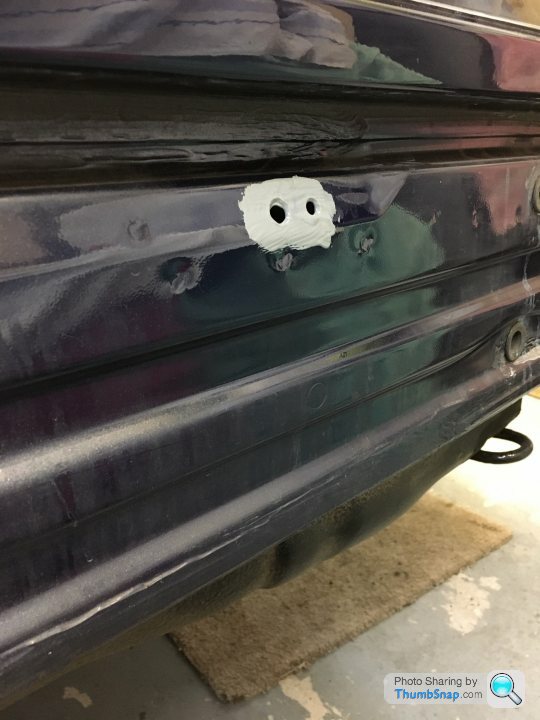
A little curiosity - when I removed the rear bumper I found there was a long tie wrap which appeared to go through these holes in the back panel and through two holes in the bumper. The holes had been roughly drilled, different sizes and were untreated.
As I was manhandling the bumper off I was not sure if the tie wraps were actually pulled tight or not.
I don't know why they were there but I'm thinking I might feed one through in case the previous fitter found it necessary to get the bumper aligned.
Curious?
While watching paint dry I had a go at cleaning up the front tow hook cover. It was a test of my patience and I'm not looking forward to doing the same on the entire front bumper. I wonder if my daughter is bored enough to think that helping with this would be fun..........
I'm not sure if the fibreglass will work with this type of plastic but it's holding so far.
The front plate plinth had a split along the top line of where the plate sits so I tried the same repair approach with that.
It seems to be holding and I have sanded the front in prep for painting.
Flushed with the success with the rivet nut tool I decided to repair two of the front arch liner studs that were already missing.
My original plan was to ignore these as they were not there before and it had not been a problem.
However, I had the new toy so it seemed like a good idea to sort these while the liner was off.
I coated the holes and the rivet nuts with Dynax UB before insertion which will hopefully preserve the hole.
Under the arch -
And from above the inner wing. It's actually under a plastic cover.
First coat of Dynax UB on the under arch repairs
A little curiosity - when I removed the rear bumper I found there was a long tie wrap which appeared to go through these holes in the back panel and through two holes in the bumper. The holes had been roughly drilled, different sizes and were untreated.
As I was manhandling the bumper off I was not sure if the tie wraps were actually pulled tight or not.
I don't know why they were there but I'm thinking I might feed one through in case the previous fitter found it necessary to get the bumper aligned.
Curious?
While watching paint dry I had a go at cleaning up the front tow hook cover. It was a test of my patience and I'm not looking forward to doing the same on the entire front bumper. I wonder if my daughter is bored enough to think that helping with this would be fun..........
Good to know, but I guess in that case mine was an open fuel evaporation system.
Closed now.
Second coat of Dynax UB applied followed by spraying Dynax S50 cavity wax into the box sections and through the rivet nuts that are into closed sections.
Now started on refitting things. This is a lot more enjoyable especially as I have lots of new fixings and clips and I had cleaned a lot of the parts as I removed them.
I decided that rather than just drill a hole through the arch liner plastic washers for a long bolt I would try to remove the plastic nut section.
It took a few attempts on the old plastics but eventually with a combination of drills and a router I was able to sort them out.
Rear arch liner refitted with stainless bolts. The other side has one stainless bolt and two original style fittings.
I know I have mentioned it before, but part of the pleasure of this car is the way it was built.
I'm used to seeing cars with plastic sill trims which look good but the sills are all rotted away behind them.
Not on these. The plastics are installed as protection. Yes, they get scratched and peppered with stone chips but they are plastic so no harm done. The sills are in great condition.
It seems obvious, but most manufacturers put screws through the metal with a little protection. These points soon form the start of rot.
On these cars the trims are all screwed into little plastic inserts which protect the actual holes in the metal.

The plastic windows have obviously reached the end of their life. This split appears to be growing every time a look at it even when the car is not being used.
I had arranged a local repairer to replace them but lockdown happened before they were ready for the car.
I was refitting the front wheel arch liner when I realised it had a fixing hole on the liner and nowhere to attach it.
I have already fitted two rivet nuts to this arch but had missed this one.
Still, another opportunity to use the new rivet nut set.
Closed now.
Second coat of Dynax UB applied followed by spraying Dynax S50 cavity wax into the box sections and through the rivet nuts that are into closed sections.
Now started on refitting things. This is a lot more enjoyable especially as I have lots of new fixings and clips and I had cleaned a lot of the parts as I removed them.
I decided that rather than just drill a hole through the arch liner plastic washers for a long bolt I would try to remove the plastic nut section.
It took a few attempts on the old plastics but eventually with a combination of drills and a router I was able to sort them out.
Rear arch liner refitted with stainless bolts. The other side has one stainless bolt and two original style fittings.
I know I have mentioned it before, but part of the pleasure of this car is the way it was built.
I'm used to seeing cars with plastic sill trims which look good but the sills are all rotted away behind them.
Not on these. The plastics are installed as protection. Yes, they get scratched and peppered with stone chips but they are plastic so no harm done. The sills are in great condition.
It seems obvious, but most manufacturers put screws through the metal with a little protection. These points soon form the start of rot.
On these cars the trims are all screwed into little plastic inserts which protect the actual holes in the metal.
The plastic windows have obviously reached the end of their life. This split appears to be growing every time a look at it even when the car is not being used.
I had arranged a local repairer to replace them but lockdown happened before they were ready for the car.
I was refitting the front wheel arch liner when I realised it had a fixing hole on the liner and nowhere to attach it.
I have already fitted two rivet nuts to this arch but had missed this one.
Still, another opportunity to use the new rivet nut set.
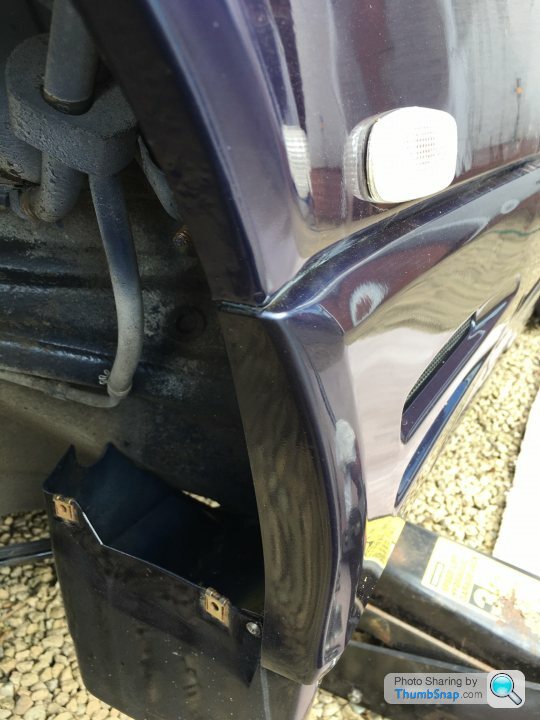
The car now has enough parts back on it to allow me to get it out of the garage. Most of the plastics have still to be refitted.
This allows me to get the bumper into the garage to make a start on it.
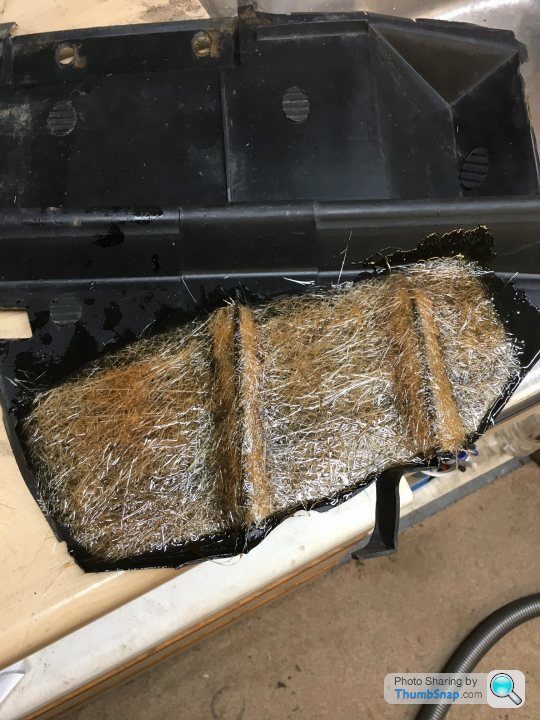
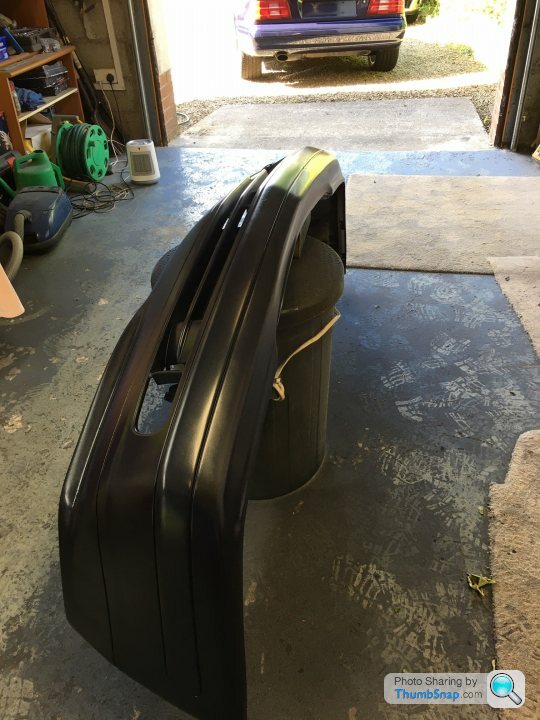
After a lot of sanding and digging off the old repair, this is what I have.
The previous repair had a steel plate riveted to the back but most of it had rusted away.

I was originally just going to use a bumper repair kit but decided I wanted to reinforce that with some physical support.
I have added four aluminium strips (only three in this picture) that have been pop riveted on. Three of them have Araldite under them.
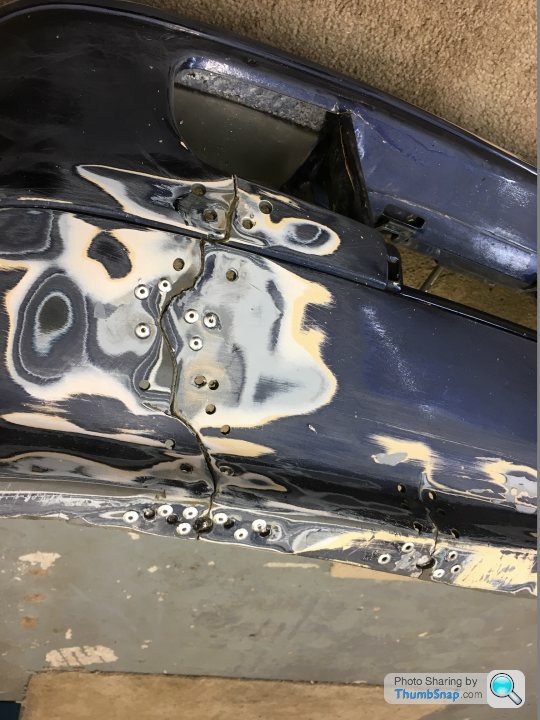
And only two in this picture

I then added the mesh bumper repair kit.
This was supposed to be applied to the front as well, but I had used up all the bonding material on the inside.

So, play has stopped for now.
It will be several days till the new kit gets here and I could do with a rest from this.
The sun is shining after a right miserable weekend so I'm of for a cycle.
If the weather holds I will refit the sill plastics and the door tread trims. I need the doors open wide for this and there is not really enough space in the garage for that. They are long doors!
This allows me to get the bumper into the garage to make a start on it.
After a lot of sanding and digging off the old repair, this is what I have.
The previous repair had a steel plate riveted to the back but most of it had rusted away.
I was originally just going to use a bumper repair kit but decided I wanted to reinforce that with some physical support.
I have added four aluminium strips (only three in this picture) that have been pop riveted on. Three of them have Araldite under them.
And only two in this picture
I then added the mesh bumper repair kit.
This was supposed to be applied to the front as well, but I had used up all the bonding material on the inside.
So, play has stopped for now.
It will be several days till the new kit gets here and I could do with a rest from this.
The sun is shining after a right miserable weekend so I'm of for a cycle.
If the weather holds I will refit the sill plastics and the door tread trims. I need the doors open wide for this and there is not really enough space in the garage for that. They are long doors!
If you have been following this you may recall that the side repeater lenses had fallen off when I removed them. I had repaired them with some Araldite. Sorted.
Or not.
They were quite difficult to refit, needing more force than seemed reasonable to get the "springy" grey clip into place.
Several days later, while looking at the loose side trim, I noticed that the repeater moved back and forward.
I picked it back out of the wing to find that the springy grey clip had broken off.
So, that was a waste of Araldite.
The other side had not broken off completely but was cracked and fell off when pushed.
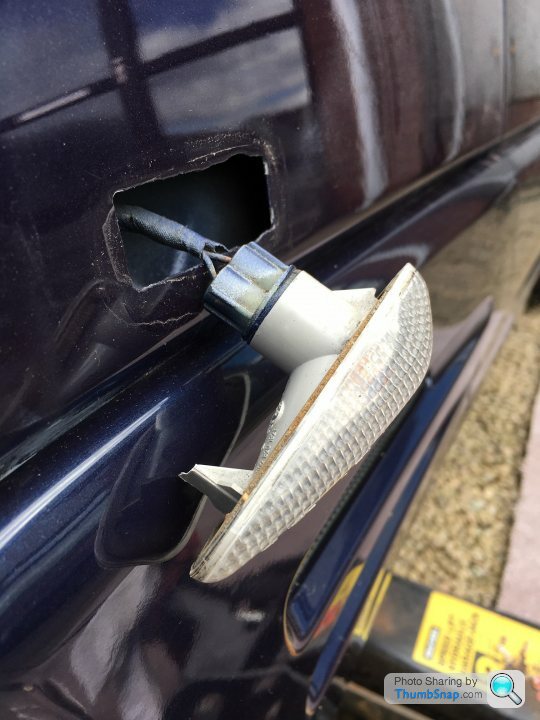
Two new ones were ordered.
These weren't all that springy either and were also quite difficult to get locked into the slot. I think there may have been some filler on the panel from a previous repair making the panel a bit thicker and the lenses difficult to fit.
One thing with these cars is that everything is easier the second time you do it because you have learned the correct approach and sequence.
When I fitted the lower wing trim panel I fitted the clips to the wing and assumed that I would bump the panel onto them.
I now realise this was wrong. It worked for the rear clips but I could not get the front one to attach to the plastic panel.
On the drivers side I attached the slide in clips to the plastic panel first, slid the panel on and managed to bump on the front clip.
I could not do this on the passenger side.

The clip is attached to the wing with a self tapper which is not accessible with the wheel arch liner in place.
Also, when the lower sill trim was removed, there was an L shaped bracket attached which was not connected to anything. It should hook around a small tab on the side panel. Only accessible with the arch liner not fitted.
So the correct sequence should be sill plastic, lower wing trim, Arch liner.
So, arch liner back off again to get access to the screw for the side panel trim.
The screw at the bottom holds the L shaped fixing that hooks round the tab at the bottom of the wing trim panel.
This allowed me to fit the white plastic clip to the lower wing panel and then pull it in with the screw. Much better.
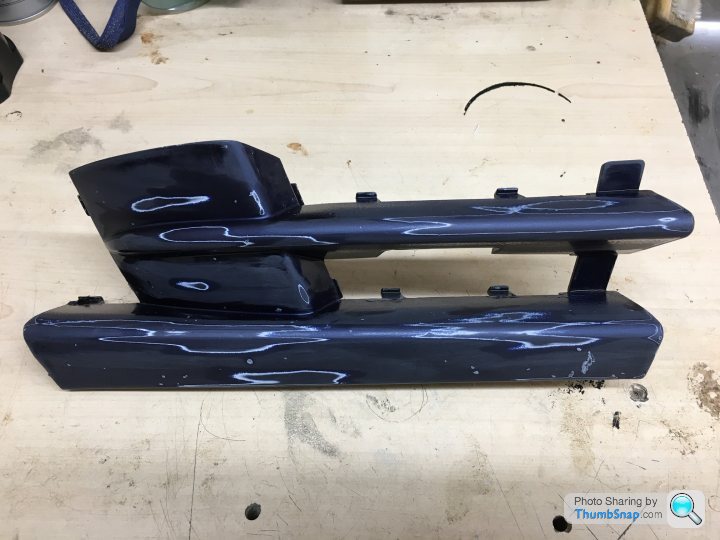
The painting of the bumper has progressed. Here are some of the parts with the blue paint applied. It made quite a mess in the garage.
This is them before more sanding, washing, rinsing, drying in preparation for the lacquer.
It was OK for the small parts but the bumper is a bit much for diy rattle can painting.
This is the bumper with the lacquer on it.
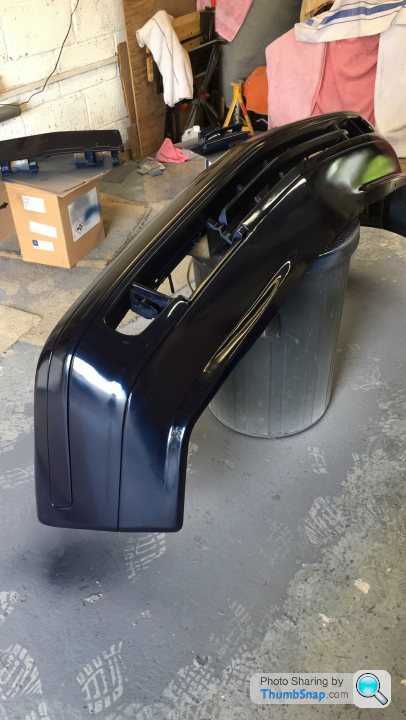
Hopefully I can get it reassembled and back on the car without doing too much damage to the paint.
Or not.
They were quite difficult to refit, needing more force than seemed reasonable to get the "springy" grey clip into place.
Several days later, while looking at the loose side trim, I noticed that the repeater moved back and forward.
I picked it back out of the wing to find that the springy grey clip had broken off.
So, that was a waste of Araldite.
The other side had not broken off completely but was cracked and fell off when pushed.
Two new ones were ordered.
These weren't all that springy either and were also quite difficult to get locked into the slot. I think there may have been some filler on the panel from a previous repair making the panel a bit thicker and the lenses difficult to fit.
One thing with these cars is that everything is easier the second time you do it because you have learned the correct approach and sequence.
When I fitted the lower wing trim panel I fitted the clips to the wing and assumed that I would bump the panel onto them.
I now realise this was wrong. It worked for the rear clips but I could not get the front one to attach to the plastic panel.
On the drivers side I attached the slide in clips to the plastic panel first, slid the panel on and managed to bump on the front clip.
I could not do this on the passenger side.
The clip is attached to the wing with a self tapper which is not accessible with the wheel arch liner in place.
Also, when the lower sill trim was removed, there was an L shaped bracket attached which was not connected to anything. It should hook around a small tab on the side panel. Only accessible with the arch liner not fitted.
So the correct sequence should be sill plastic, lower wing trim, Arch liner.
So, arch liner back off again to get access to the screw for the side panel trim.
The screw at the bottom holds the L shaped fixing that hooks round the tab at the bottom of the wing trim panel.
This allowed me to fit the white plastic clip to the lower wing panel and then pull it in with the screw. Much better.
The painting of the bumper has progressed. Here are some of the parts with the blue paint applied. It made quite a mess in the garage.
This is them before more sanding, washing, rinsing, drying in preparation for the lacquer.
It was OK for the small parts but the bumper is a bit much for diy rattle can painting.
This is the bumper with the lacquer on it.
Hopefully I can get it reassembled and back on the car without doing too much damage to the paint.
Looking back, I see that I have a bit of a continuity error.
Apparently I didn't take any pictures during the multiple filling sanding filling sanding sessions on the bumper repair.
Words will have to do.
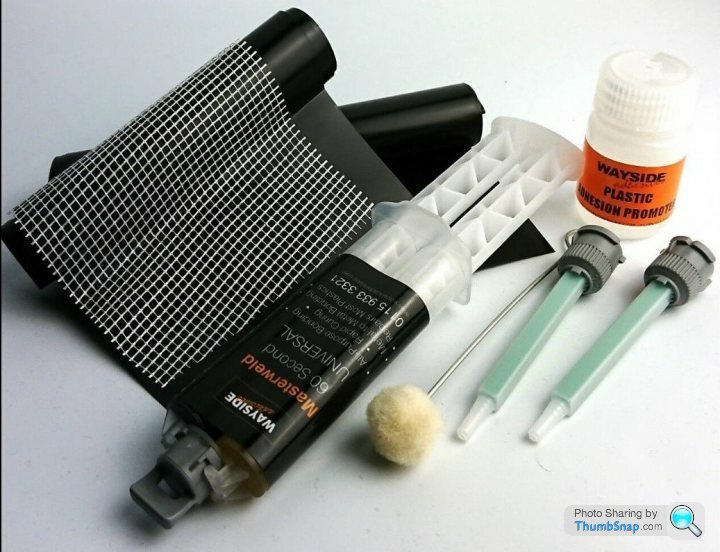
Firstly I used a Wayside Adhesives kit which included a mesh for the inside. It worked well but there was not enough in the kit for the size of repair I had.
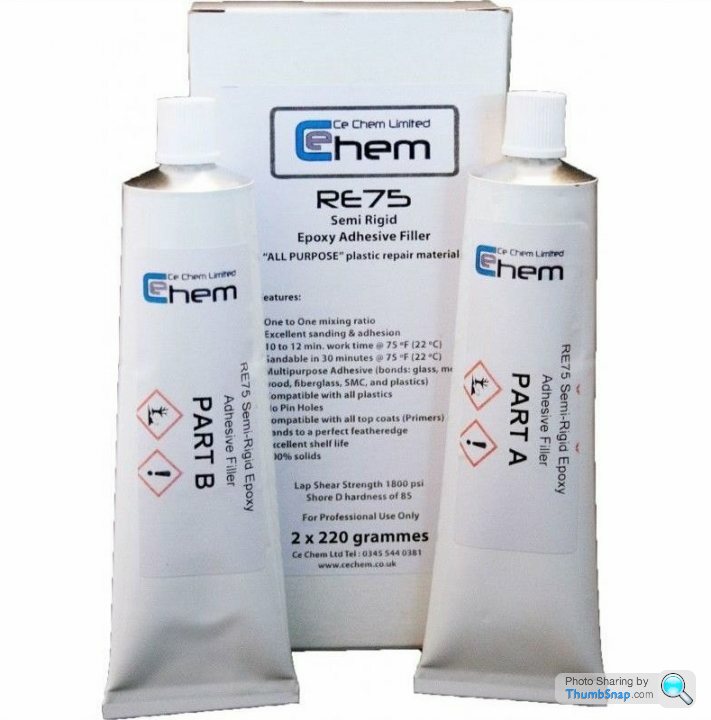
Next I used this kit which also worked well although was very hard to squeeze out of the tubes.
It needs an adhesion promoter but the box only contains the two tubes. Fortunately I had some left over from the wayside kit.
Lots more sanding!
Then onto the finishing kit.
I liked this kit as it conatined everything with 8 small sachets of the filler and a pad of mixing sheets with markings on it for the amount of hardener.
The sachets are small but big enough as it hardens quickly and can be sanded after 30 minutes.

Lots more sanding and filling and sanding.
Eventually I had had enough! Onto prime, paint & lacquer.
Painting the registration plate plinth and the tow hook cover went well but getting the full bumper covered properly was a bit harder.
Not all of it is as shiny as it should be.
So, was it all worth it .......?
Hmmm
It kept me occupied during lockdown.
I need to leave it for two weeks before attempting to polish some of the masking edges but that won't alter the fact that the sprayed areas are a darker shade.
The car is physically tidier but does not look as good as I dreamt it would.
The front bumper does look a lot smarter without the splits, chips and scratches.
I decided not to tackle the driver side front wing which no doubt has a hole in the usual place. Ideally it would be replaced.
On the plus side, it is certainly very usable and is going very well.
The pictures ...........
Bit of lacquer run on the OSF wing
The front bumper

NSF arch. This arch had been scuffed at the lip. I filled and sanded it and thought I had done a really good job ....... until I put the paint on!
Also, I can't blame the camera for the colour match, that's what it looks like.
NSR arch. Some of the rust under the arch had worked up onto the panel so had to be treated and painted.
For the area above the rear plate, I only treated the rust and painted it. if you catch it in the right light you can see it.
Offside rear. Hopefully I can polish off the edge of the lacquer.

Apparently I didn't take any pictures during the multiple filling sanding filling sanding sessions on the bumper repair.
Words will have to do.
Firstly I used a Wayside Adhesives kit which included a mesh for the inside. It worked well but there was not enough in the kit for the size of repair I had.
Next I used this kit which also worked well although was very hard to squeeze out of the tubes.
It needs an adhesion promoter but the box only contains the two tubes. Fortunately I had some left over from the wayside kit.
Lots more sanding!
Then onto the finishing kit.
I liked this kit as it conatined everything with 8 small sachets of the filler and a pad of mixing sheets with markings on it for the amount of hardener.
The sachets are small but big enough as it hardens quickly and can be sanded after 30 minutes.
Lots more sanding and filling and sanding.
Eventually I had had enough! Onto prime, paint & lacquer.
Painting the registration plate plinth and the tow hook cover went well but getting the full bumper covered properly was a bit harder.
Not all of it is as shiny as it should be.
So, was it all worth it .......?
Hmmm
It kept me occupied during lockdown.
I need to leave it for two weeks before attempting to polish some of the masking edges but that won't alter the fact that the sprayed areas are a darker shade.
The car is physically tidier but does not look as good as I dreamt it would.
The front bumper does look a lot smarter without the splits, chips and scratches.
I decided not to tackle the driver side front wing which no doubt has a hole in the usual place. Ideally it would be replaced.
On the plus side, it is certainly very usable and is going very well.
The pictures ...........
Bit of lacquer run on the OSF wing
The front bumper
NSF arch. This arch had been scuffed at the lip. I filled and sanded it and thought I had done a really good job ....... until I put the paint on!
Also, I can't blame the camera for the colour match, that's what it looks like.
NSR arch. Some of the rust under the arch had worked up onto the panel so had to be treated and painted.
For the area above the rear plate, I only treated the rust and painted it. if you catch it in the right light you can see it.
Offside rear. Hopefully I can polish off the edge of the lacquer.
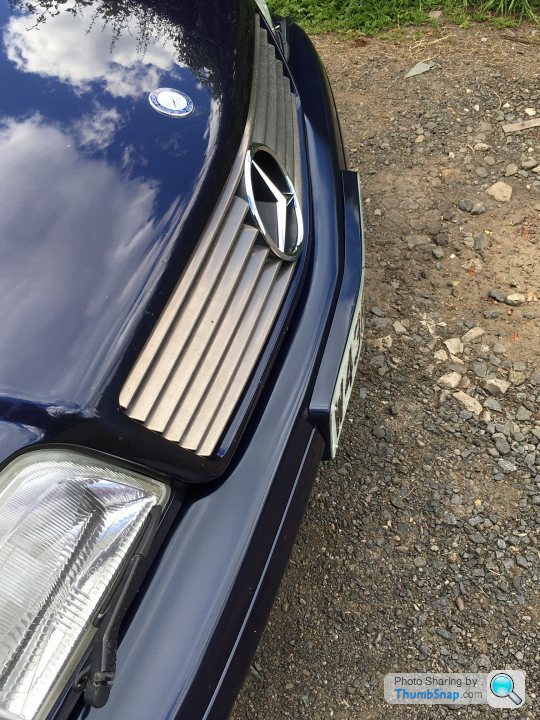
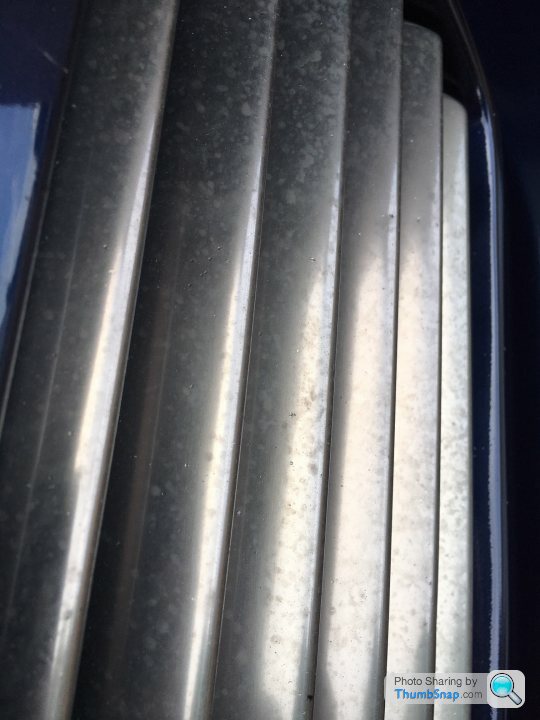
The next job I am contemplating is the grille.
It has not aged well and appears to be a common problem with these cars.
I thought it was only the tarnished appearance that was a problem but zooming into my photo shows a few little stone chips as well.
I have done a little searching for a solution.
A new one is not an option due to cost.
Best option I have seen so far is painting in the original colour although I would need to get that colour made up.
While the sill carpet trims were out when I was doing the paintwork I had a go at cleaning the dirt off the part next to the drivers foot.
Whose idea was it to put cream carpets in a car!
I started with Autoglym interior shampoo then tried some household carpet stain remover and then dish washing liquid and a lot of water.
The first two made little difference.
The dish washing liquid worked in with a nail brush and lots of water did remove lots of dirt but the actual marks on the carpet look much the same as they did when I started.
Hey ho, I tried.
Well, that didn't go entirely to plan!
Today's task was a bit of proactive maintenance albeit a little delayed.
Back in January 2019 I cleaned up the front anti roll bar and fitted new bushes. Smart red poly ones at that.
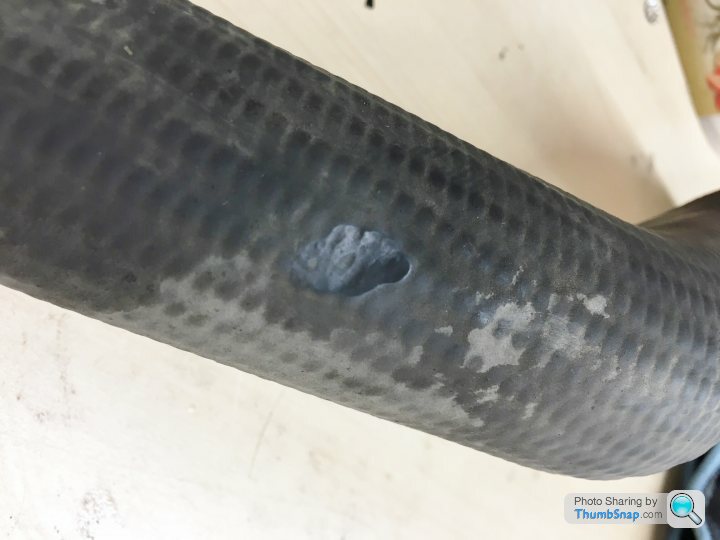
I noticed that the lower radiator hose had been rubbing slightly on the bar and decided that it would be better to change it before it became a problem.
I bought the new pipe and jubilee clips from Mercedes but it's a lot more fun buying parts than crawling under the car to fit them!
This is the old pipe and while it has worn a bit away, I don't think failure was imminent.
Today was the day for this job. It was fairly straight forward although it would have been a lot easier if I had taken the fan shroud off at the start of the job instead of near the end.
The fan shroud is very easy to remove. Two clips at the top and it lifts out.
Filled up the coolant and started the engine to circulate the coolant and check for leaks.
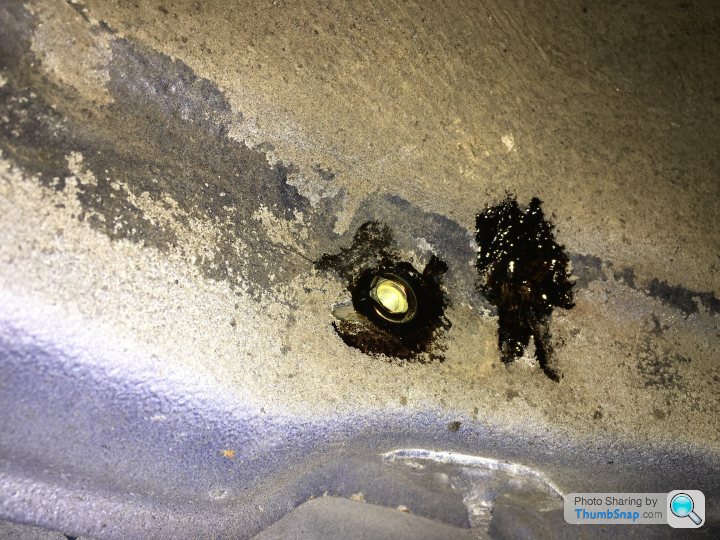
And there was a leak spraying out!
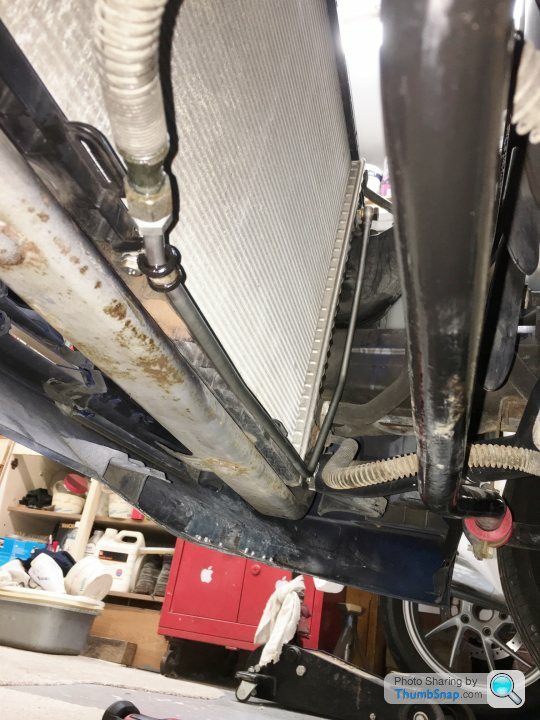
But not coolant, this was transmission fluid spraying out of the hard line that runs across the bottom of the radiator.
A picture of the fluid spraying would have been more dramatic but there was quite a lot spraying so I switched the car off.
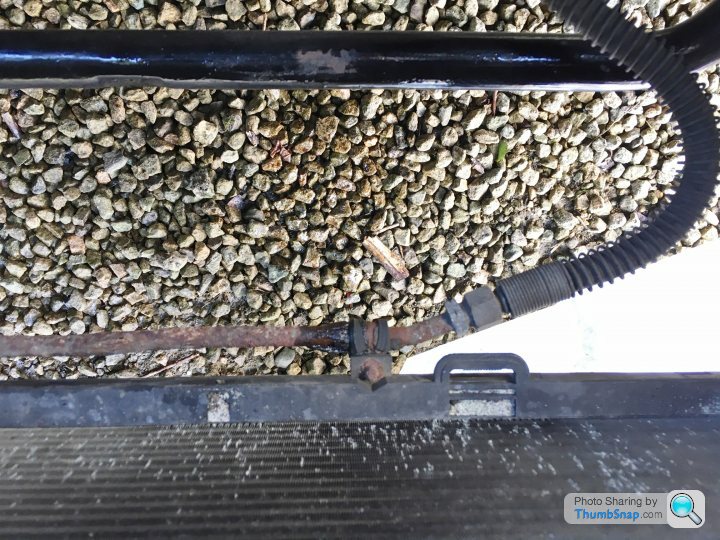
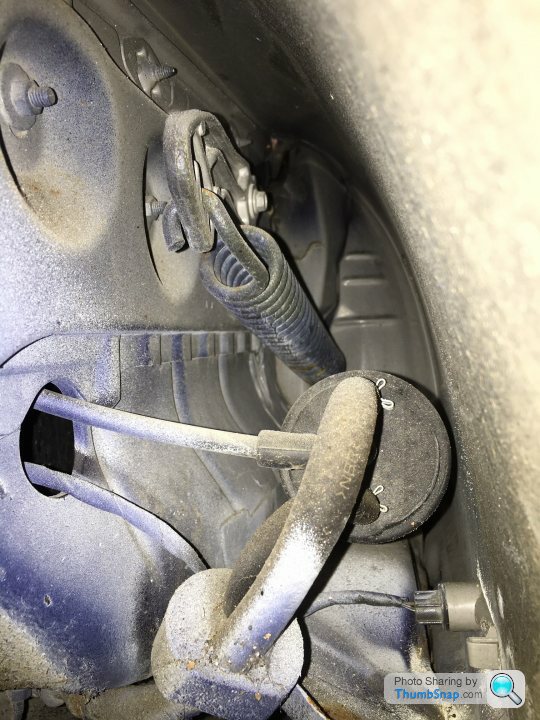
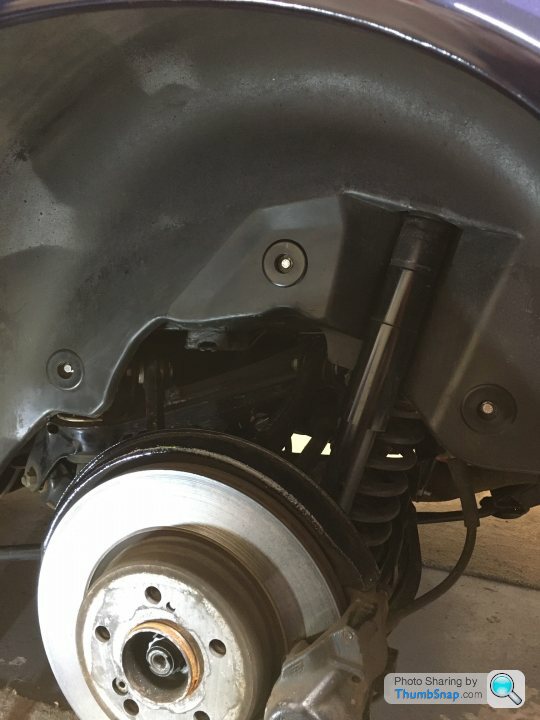
In this picture you can see that the new coolant hose sits comfortably above the anti roll bar.
I must have moved the pipe a bit while wrestling the coolant hose off.
If I hadn't disturbed it, it may have lasted for a while longer but it is better to happen at home than while out driving.
So, finishing the coolant pipe and the oil change that was next on the list were abandoned.
I wrapped a rag around the pipe to contain the leak while putting it back in the garage. That was of little use.
The joy of running an older car ........ although it would be fair to say that if I was really proactive I would have noticed that the pipe was a bit crusty.
Hopefully I can get the pipe from Mercedes and no doubt I'll need some more fluid.
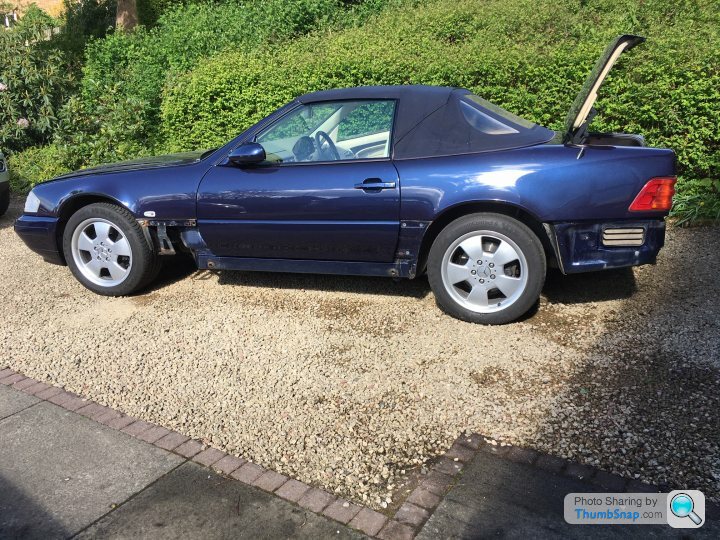
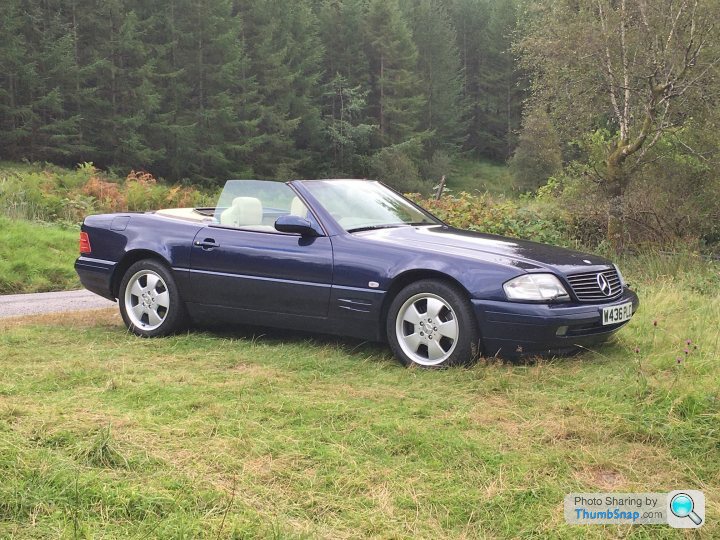
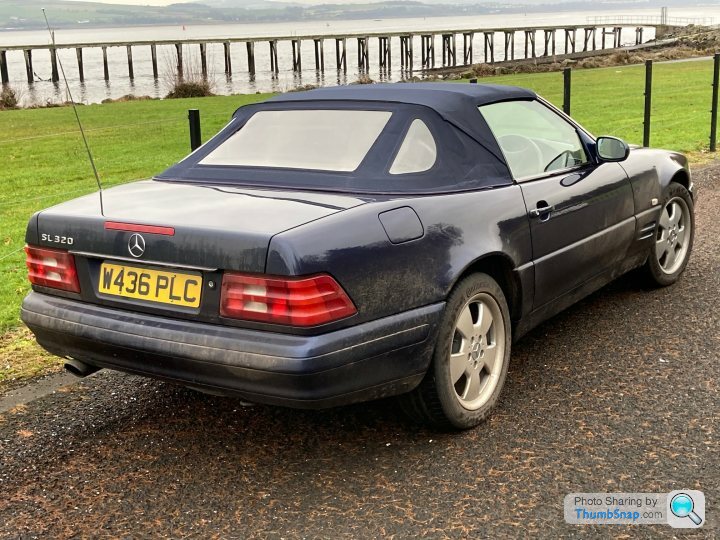
The car has been out and about quite regularly across summer and I keep hoping that it will appear on the "COOL CLASSIC CAR SPOTTERS POST!" someday. I suppose it would be cheating to spot my own car....
Here it is mid August in Glen Fruin
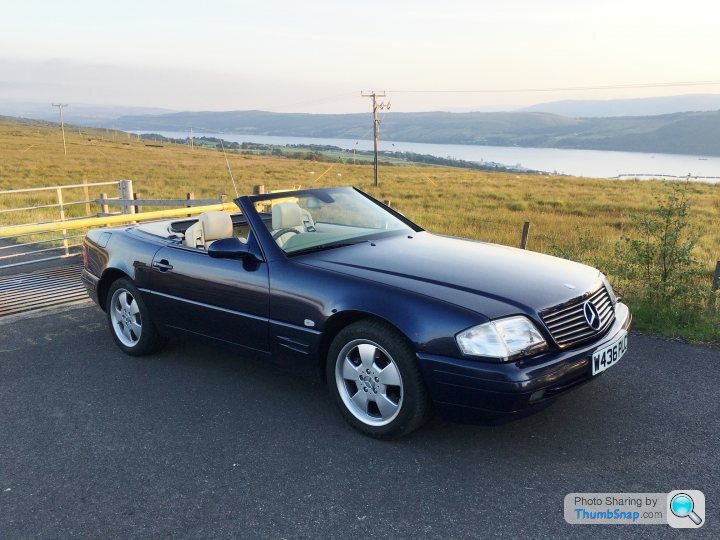
This was in Glen Orchy at the end of August
Today's task was a bit of proactive maintenance albeit a little delayed.
Back in January 2019 I cleaned up the front anti roll bar and fitted new bushes. Smart red poly ones at that.
I noticed that the lower radiator hose had been rubbing slightly on the bar and decided that it would be better to change it before it became a problem.
I bought the new pipe and jubilee clips from Mercedes but it's a lot more fun buying parts than crawling under the car to fit them!
This is the old pipe and while it has worn a bit away, I don't think failure was imminent.
Today was the day for this job. It was fairly straight forward although it would have been a lot easier if I had taken the fan shroud off at the start of the job instead of near the end.
The fan shroud is very easy to remove. Two clips at the top and it lifts out.
Filled up the coolant and started the engine to circulate the coolant and check for leaks.
And there was a leak spraying out!
But not coolant, this was transmission fluid spraying out of the hard line that runs across the bottom of the radiator.
A picture of the fluid spraying would have been more dramatic but there was quite a lot spraying so I switched the car off.
In this picture you can see that the new coolant hose sits comfortably above the anti roll bar.
I must have moved the pipe a bit while wrestling the coolant hose off.
If I hadn't disturbed it, it may have lasted for a while longer but it is better to happen at home than while out driving.
So, finishing the coolant pipe and the oil change that was next on the list were abandoned.
I wrapped a rag around the pipe to contain the leak while putting it back in the garage. That was of little use.
The joy of running an older car ........ although it would be fair to say that if I was really proactive I would have noticed that the pipe was a bit crusty.
Hopefully I can get the pipe from Mercedes and no doubt I'll need some more fluid.
The car has been out and about quite regularly across summer and I keep hoping that it will appear on the "COOL CLASSIC CAR SPOTTERS POST!" someday. I suppose it would be cheating to spot my own car....
Here it is mid August in Glen Fruin
This was in Glen Orchy at the end of August
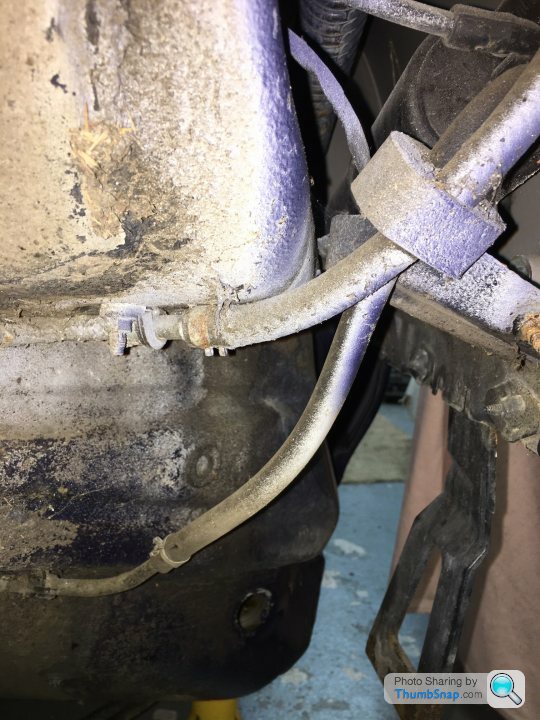
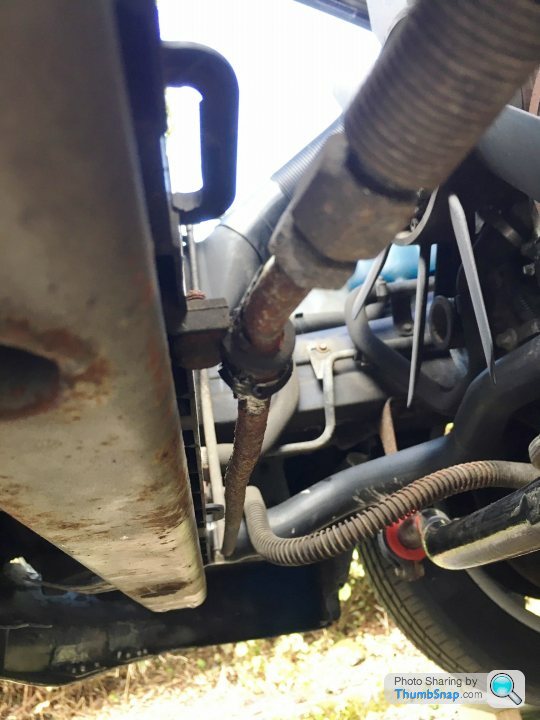
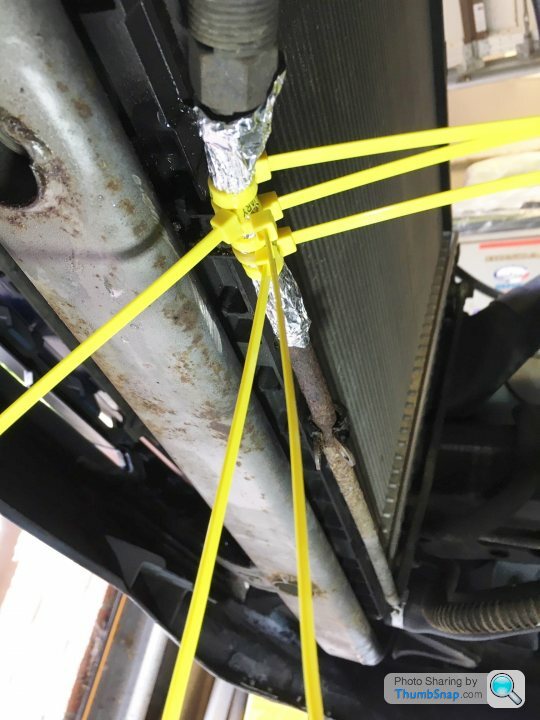
Leaky pipe all sorted and only cost a few pennies.
Just kidding.
This is only a temporary patch to try and stop the oil dribbling out and also to allow me to move the car without it spraying out.
The P Clip bolt started to loosen but there was too much rust on the thread and as the nut is recessed into plastic it just started to spin so I ground the head of the bolt off.
I have no idea of the pressure in these lines but my dodgy patch cover did have me wondering if I could have bodged it with some hose and some proper hose clamps.
New pipe ordered. £133
I have 300ml of transmission fluid left over from the recent filter change which might be enough but I will probably get another litre while I am at the dealer.
£45 !!!
I wish my savings went up like Mercedes parts prices. £133 for mine.
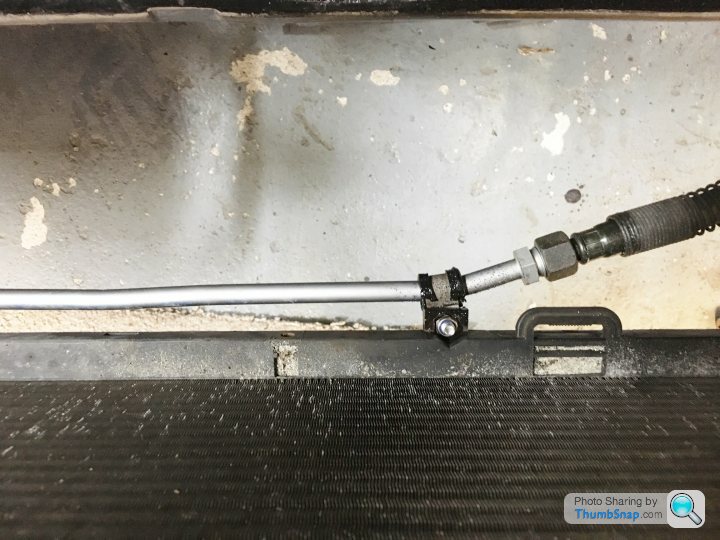
It was one of the easiest jobs I have done on this car. The old joints came apart easily and the refit was straight forward.
The only thing I had to do was tweak the pipe a little to ensure that it sat naturally in line with the P clip.
I added a little trans fluid, ran it up to temperature and checked the level. I probably added about 250ml all in.
The new pipe has a good finish on it so I fitted it as is. Hopefully good for the next twenty years especially as the car has only done 5k miles in the last two years. Currently just short of 117k.
I then did the engine oil change and there is a lot of oil to be changed!
The service indicator on the dash was beeping and telling me I was 13 days overdue.
One year five months and 3,600 miles since it was last changed.
I wish my savings went up like Mercedes parts prices. £133 for mine.
It was one of the easiest jobs I have done on this car. The old joints came apart easily and the refit was straight forward.
The only thing I had to do was tweak the pipe a little to ensure that it sat naturally in line with the P clip.
I added a little trans fluid, ran it up to temperature and checked the level. I probably added about 250ml all in.
The new pipe has a good finish on it so I fitted it as is. Hopefully good for the next twenty years especially as the car has only done 5k miles in the last two years. Currently just short of 117k.
I then did the engine oil change and there is a lot of oil to be changed!
The service indicator on the dash was beeping and telling me I was 13 days overdue.
One year five months and 3,600 miles since it was last changed.
With all that has been going on, or not going on, the car has not had a great deal of use this last year.
It was in for it's MoT in November and that recorded only about 1,700 miles use since the last one.
However, life's too short and all that so this is no garage queen. It has been used less but has still been used regularly.

I have found that I can only go for so long with the roof down and the temperature is a 1 or 2 degrees C.
The splits in the rear windows grow a little every time the roof is lowered.
I nearly had it booked into the local trimmers for new windows back in March ...... Covid Lockdown.
I called today but they still have too much work on the go. Hopefully they will get me fitted in before too long.

I may fit the hardtop to remind myself what it is like and to see if it is surviving storage under it's cover in the corner of the garage.
As always, I am considering changing it for something else.
I think I like the idea of something more mechanically simple.
I like old Land Rovers like a Series 3 but realistically I doubt I would use it that much. They are not great for a long run.
I like the idea of a TVR Chimaera.
The only car show that I could get to this year was at Kames Circuit. I found myself looking at a Jaguar E Type and thinking ...... Perhaps.
A Series 2, 4.2 2+2 Coupe sounds appealing
It's easy to forget the plus sides of the car I have. It's quite subtle and quiet (unlike the TVR), it's very easy and relaxing to drive, it's easy, if sometimes a bit expensive, to get parts for, it has good safety features with ABS, Traction control and Air Bags.
Well, it's only an idea as this has not been a good year for going to look at cars generally.
I might go and try some in the new year.
It was in for it's MoT in November and that recorded only about 1,700 miles use since the last one.
However, life's too short and all that so this is no garage queen. It has been used less but has still been used regularly.
I have found that I can only go for so long with the roof down and the temperature is a 1 or 2 degrees C.
The splits in the rear windows grow a little every time the roof is lowered.
I nearly had it booked into the local trimmers for new windows back in March ...... Covid Lockdown.
I called today but they still have too much work on the go. Hopefully they will get me fitted in before too long.
I may fit the hardtop to remind myself what it is like and to see if it is surviving storage under it's cover in the corner of the garage.
As always, I am considering changing it for something else.
I think I like the idea of something more mechanically simple.
I like old Land Rovers like a Series 3 but realistically I doubt I would use it that much. They are not great for a long run.
I like the idea of a TVR Chimaera.
The only car show that I could get to this year was at Kames Circuit. I found myself looking at a Jaguar E Type and thinking ...... Perhaps.
A Series 2, 4.2 2+2 Coupe sounds appealing
It's easy to forget the plus sides of the car I have. It's quite subtle and quiet (unlike the TVR), it's very easy and relaxing to drive, it's easy, if sometimes a bit expensive, to get parts for, it has good safety features with ABS, Traction control and Air Bags.
Well, it's only an idea as this has not been a good year for going to look at cars generally.
I might go and try some in the new year.
On a second attempt, I put the hardtop back on the car.
It turns out that one daughter is not enough, it needed both of them.
This has had me looking at the options for a hoist to store it above the car and make it easier to fit and remove.
It would also free up some valuable floor space in the garage. A general tidy up and removal of some excess stuff would also help!
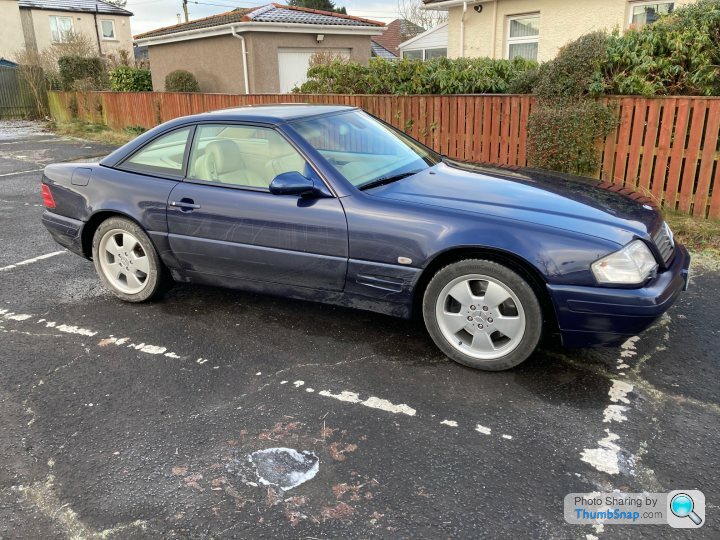
It is quite heavy and awkward to lift on but it is quite pleasant to drive with it in place with better visibility over your shoulder than the soft top. The better visibility is also noticeable as my soft top plastic windows are opaque.
Winter use is not good for keeping it clean though.

While watching assorted YouTube videos I came across one for fitting the centre console lid gas strut.
Well, I didn't even know there was supposed to be one! Mine obviously had failed.
I opted for the cheaper you.s branded replacement from Germany. I should probably have paid the little extra fro the Stabilus version as per the original but as I had managed fine with even knowing it was there, that seemed extravagant.
Apart from having to file a bit off one of the end lugs, it fitted fine and now the lid pops up when the button is pressed.
The mechanisms used in the strut and the hinges are another example of the extravagance of build in these cars.
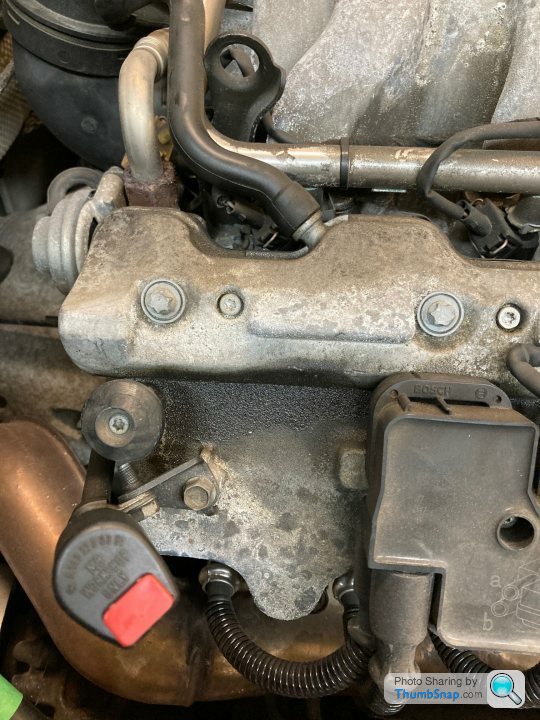
When sitting still after a run with the engine still running I've started to notice a smell of burnt oil inside the car. Strangely, not so noticeable outside the car.
On first inspection it looks like there are some small leaks, or more like weeps, from the cam cover gaskets and the small crankase vent covers that are on top of them.
I'll have a closer look to see if some of the associated hoses at the back also need replaced before ordering the necessary parts.
Changing the gas strut for the centre console had me thinking about the one for the boot lid. It has bumped me on the back of the head a few times. It's fine if I push the boot lid fully up as it will stay there indefinitely. I leave the boot open while the car is in the garage as the battery charger is attached.
I just assumed it was meant to be like this but perhaps they are due for replacement.
And I gave it a wash so it's all clean again for now.
It turns out that one daughter is not enough, it needed both of them.
This has had me looking at the options for a hoist to store it above the car and make it easier to fit and remove.
It would also free up some valuable floor space in the garage. A general tidy up and removal of some excess stuff would also help!
It is quite heavy and awkward to lift on but it is quite pleasant to drive with it in place with better visibility over your shoulder than the soft top. The better visibility is also noticeable as my soft top plastic windows are opaque.
Winter use is not good for keeping it clean though.
While watching assorted YouTube videos I came across one for fitting the centre console lid gas strut.
Well, I didn't even know there was supposed to be one! Mine obviously had failed.
I opted for the cheaper you.s branded replacement from Germany. I should probably have paid the little extra fro the Stabilus version as per the original but as I had managed fine with even knowing it was there, that seemed extravagant.
Apart from having to file a bit off one of the end lugs, it fitted fine and now the lid pops up when the button is pressed.
The mechanisms used in the strut and the hinges are another example of the extravagance of build in these cars.
When sitting still after a run with the engine still running I've started to notice a smell of burnt oil inside the car. Strangely, not so noticeable outside the car.
On first inspection it looks like there are some small leaks, or more like weeps, from the cam cover gaskets and the small crankase vent covers that are on top of them.
I'll have a closer look to see if some of the associated hoses at the back also need replaced before ordering the necessary parts.
Changing the gas strut for the centre console had me thinking about the one for the boot lid. It has bumped me on the back of the head a few times. It's fine if I push the boot lid fully up as it will stay there indefinitely. I leave the boot open while the car is in the garage as the battery charger is attached.
I just assumed it was meant to be like this but perhaps they are due for replacement.
And I gave it a wash so it's all clean again for now.
Edited by Yogioes on Monday 1st February 20:32
Well, I found one slight disadvantage with replacing the centre arm rest gas strut.
The upward pressure of the strut means that the lid is pushed up against the release button.
Every time I lift my elbow off the lid there is a small click.
Minor I know, but mildly irritating.
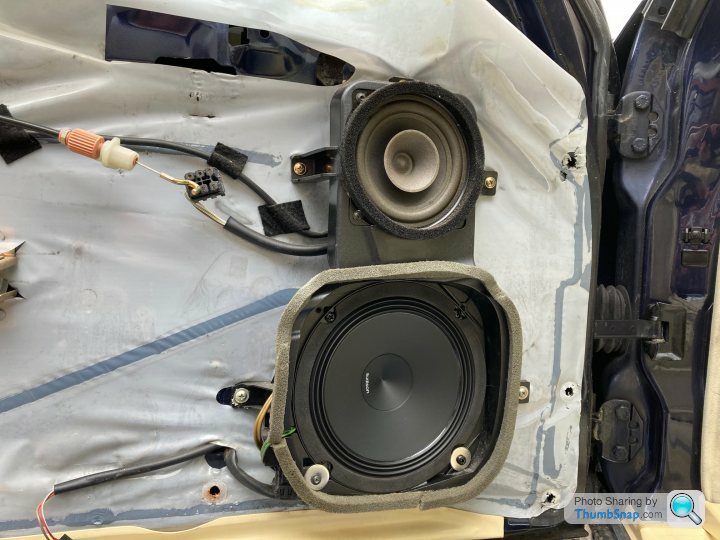
Having read r129sl's thread about replacing the door speaker covers I decided that I would have a go at that.
I also wanted to replace the larger speakers at the same time.
I had previously found that the passenger speaker had no cone in it and I had used an old speaker that I had in the garage. That speaker was certainly older than the car but it worked.
I spent a bit of time reading threads about speakers and ohms but hadn't really found a solution.
The original speakers were 1,2 ohm which seem to be hard to come by. Most of the readily available speakers are 4 ohm.
I eventually bought a pair of Audison 2 ohm speakers although I was a bit surprised that they arrived wrapped in shaped brown cardboard, not in a fancy box.
Anyway, I fitted them.
I suppose they are OK but it does feel as if it is lacking on the bass.
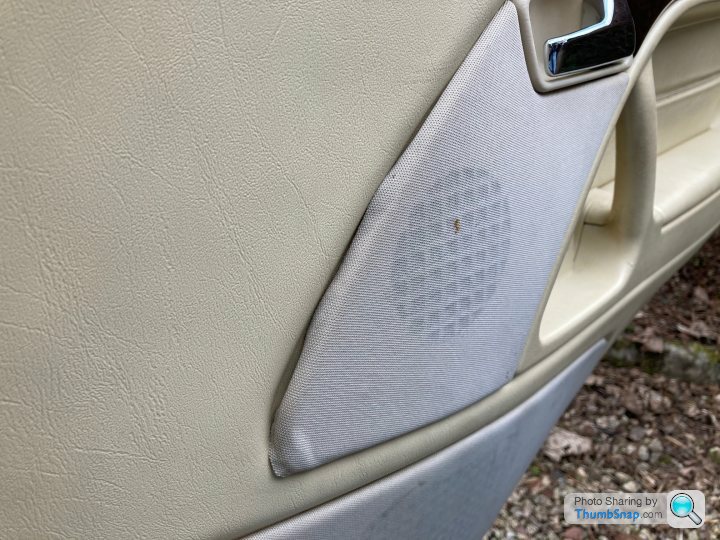
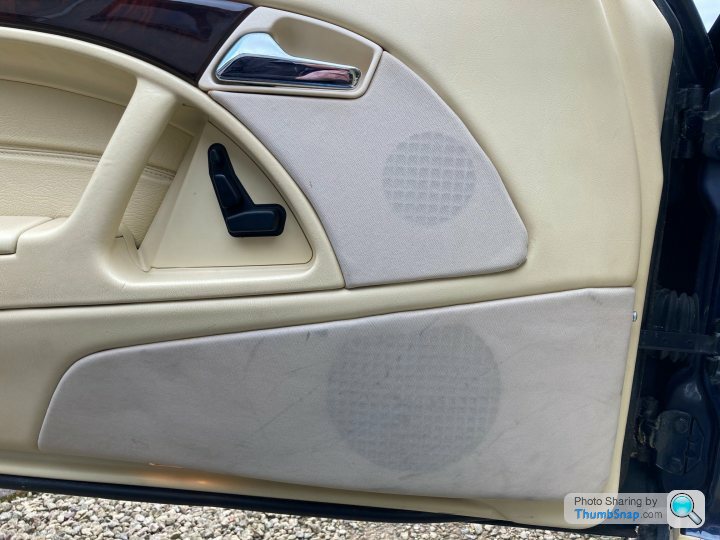
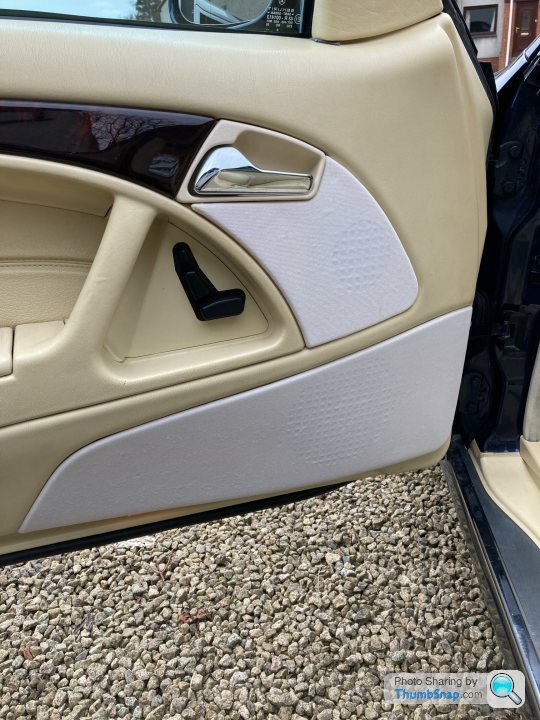
So, the door speaker covers.
I didn't think mine looked too bad in terms of dirt and scuffs. I was more irritated by the poor fitting and loose edges of the covers.
However, when I look at these pictures they seem worse than I thought.

I got the new material from AS Essential Trim and picked Magnolia on the basis that my car has the very light coloured Helios trim.
Well, Magnolia is even lighter.
I went ahead anyway.
The material is a very good match in terms of its construction compared to what I took off although obviously I have no idea if that was original.
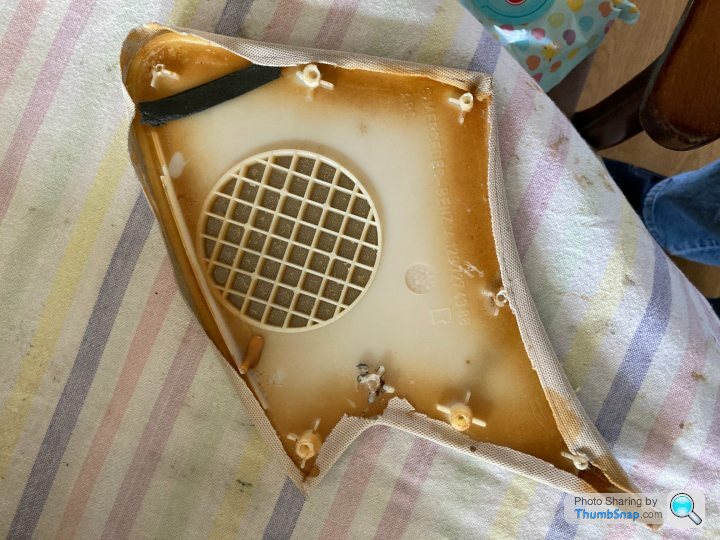
This is one of the small panels as removed.
 |https://thumbsnap.com/jL7vZwxU[/url]
It's a bit nerve wracking trying to get the cloth stuck on allthe way round without getting glue all over the front of it.
I used some spray contact on the front of the hard panels to keep the cloth in place but this left small lumps that are visible.
Bostik brush on glue was used on the back to actually hold the cloth on.
The smaller panel is held onto the door card by melting over the ends of the plastic location posts and two screws.
These had obviously been off before as most were already broken and there was some double sided sticky foam tape in a few places.
I used B&Q's version of Araldite to fix them back on.
I also discovered that the location posts for the drivers seat adjustment switch panel were broken. Some araldite secured that.
I tightened all the screws and the three nuts that are accessible on the back of the door cards.
The bottom of the door box should be attached by screws with large washer. These are only half holes if you know what I mean.
All four of mine had come adrift.
I also re-attached four of the plastic backings for the trim clips.
The combined effort of that has taken away some of the annoying little rattles and vibrations that could occasionally be heard.
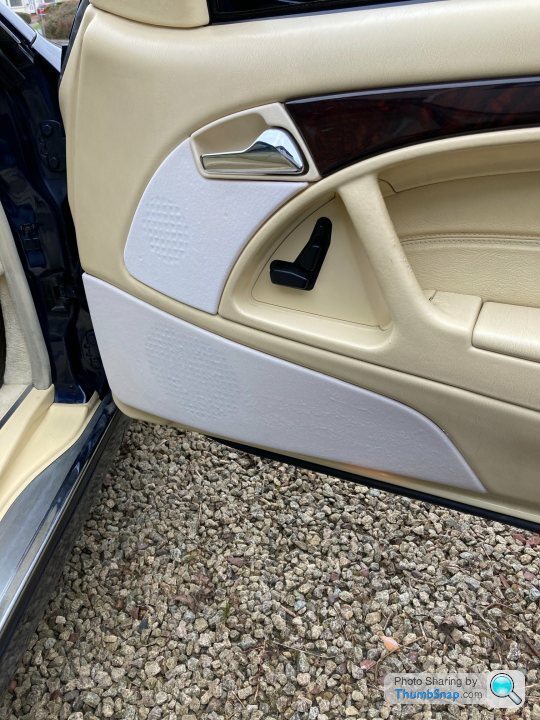
So, after all that, does it look any better?
Well, it is cleaner but as for the colour ......
It seems like a poor design to me. If I only have the door open to the first click I have to be careful not to catch my foot on the cloth panel. Plastic or carpet would be easier to clean.
The finished article
 [url]
[url]
The upward pressure of the strut means that the lid is pushed up against the release button.
Every time I lift my elbow off the lid there is a small click.
Minor I know, but mildly irritating.
Having read r129sl's thread about replacing the door speaker covers I decided that I would have a go at that.
I also wanted to replace the larger speakers at the same time.
I had previously found that the passenger speaker had no cone in it and I had used an old speaker that I had in the garage. That speaker was certainly older than the car but it worked.
I spent a bit of time reading threads about speakers and ohms but hadn't really found a solution.
The original speakers were 1,2 ohm which seem to be hard to come by. Most of the readily available speakers are 4 ohm.
I eventually bought a pair of Audison 2 ohm speakers although I was a bit surprised that they arrived wrapped in shaped brown cardboard, not in a fancy box.
Anyway, I fitted them.
I suppose they are OK but it does feel as if it is lacking on the bass.
So, the door speaker covers.
I didn't think mine looked too bad in terms of dirt and scuffs. I was more irritated by the poor fitting and loose edges of the covers.
However, when I look at these pictures they seem worse than I thought.
I got the new material from AS Essential Trim and picked Magnolia on the basis that my car has the very light coloured Helios trim.
Well, Magnolia is even lighter.
I went ahead anyway.
The material is a very good match in terms of its construction compared to what I took off although obviously I have no idea if that was original.
This is one of the small panels as removed.
|https://thumbsnap.com/jL7vZwxU[/url]It's a bit nerve wracking trying to get the cloth stuck on allthe way round without getting glue all over the front of it.
I used some spray contact on the front of the hard panels to keep the cloth in place but this left small lumps that are visible.
Bostik brush on glue was used on the back to actually hold the cloth on.
The smaller panel is held onto the door card by melting over the ends of the plastic location posts and two screws.
These had obviously been off before as most were already broken and there was some double sided sticky foam tape in a few places.
I used B&Q's version of Araldite to fix them back on.
I also discovered that the location posts for the drivers seat adjustment switch panel were broken. Some araldite secured that.
I tightened all the screws and the three nuts that are accessible on the back of the door cards.
The bottom of the door box should be attached by screws with large washer. These are only half holes if you know what I mean.
All four of mine had come adrift.
I also re-attached four of the plastic backings for the trim clips.
The combined effort of that has taken away some of the annoying little rattles and vibrations that could occasionally be heard.
So, after all that, does it look any better?
Well, it is cleaner but as for the colour ......
It seems like a poor design to me. If I only have the door open to the first click I have to be careful not to catch my foot on the cloth panel. Plastic or carpet would be easier to clean.
The finished article
[url]I am wondering if this car is at the wind up!
Around Oct 2019, the BAS/ESP light was coming on at some point during every journey over a 6 week period.
After several weeks trying various solutions I admitted defeat and booked it into the local indy specialist.
On the way there, the light did not come on. They took it for a run and the light never came on.
It has never come on since.
Something similar has happened.
At the end of 2020 I started noticing an occasional smell of burning oil when stopped at traffic lights. I couldn't smell it outside the car.
A bit of internet searching and investigation led me to the cam cover crankcase ventilation covers. It seemed to be more of a weep than a running leak but it was the only thing I could see.


I gathered together the necessary parts.
Internet wisdom advised that the hoses would be hard and liable to split when removed so I ordered them along with the cam cover gaskets from MB.
I had the correct Loctite number for the sealant for the breather covers but when I tried to order them from MB the parts guy asked me if that was just the black engine sealant. That did not fill me with confidence so I actually got that from a BMW/Mini dealer.
I got two tubes as I did not want to run out mid job. One was plenty.

The engine internals look pleasingly clean.


Cleaning up the cam covers and breather covers took ages, a horrible messy job, particularly removing the old sealant.
Typical MB, the fit and finish of the parts and the new gasket were excellent. The gasket is pushed into a groove in the cam covers and stays in place while the cover is refitted to the engine.
I'm probably losing my grip, but found the sealant quite hard to force out of the tube.
Covers refitted with new bolts in the breather covers.


The only other problem I came across was when refitting the bolts retaining the coil packs.
I nipped them up by hand using only the socket extension and when I tried to tighten the 1st one with the torque wrench I didn't feel any resistance. I'm pretty sure it must have already been stripped.
For now, I cleaned out the hole and the bolt and refitted it with some epoxy adhesive.
I have never used a helicoil and I'm not sure if there is enough material in the casting to allow that but it is probably the best option.
Going back to the car being at the wind up - it's about a 30 mile round trip to the dealer and after I had been there to get the parts I realised that at no point on the journey had I noticed the smell of oil .......... and I didn't notice it on any subsequent trips before I did the work ..... spooky!
However, as you can see from the pictures, it needed done.
After a few more runs I'll take of the air filter and check that it's all good. At that point I might have a closer look at the coil pack fixing holes to see if there is room for a helicoil.
Around Oct 2019, the BAS/ESP light was coming on at some point during every journey over a 6 week period.
After several weeks trying various solutions I admitted defeat and booked it into the local indy specialist.
On the way there, the light did not come on. They took it for a run and the light never came on.
It has never come on since.
Something similar has happened.
At the end of 2020 I started noticing an occasional smell of burning oil when stopped at traffic lights. I couldn't smell it outside the car.
A bit of internet searching and investigation led me to the cam cover crankcase ventilation covers. It seemed to be more of a weep than a running leak but it was the only thing I could see.
I gathered together the necessary parts.
Internet wisdom advised that the hoses would be hard and liable to split when removed so I ordered them along with the cam cover gaskets from MB.
I had the correct Loctite number for the sealant for the breather covers but when I tried to order them from MB the parts guy asked me if that was just the black engine sealant. That did not fill me with confidence so I actually got that from a BMW/Mini dealer.
I got two tubes as I did not want to run out mid job. One was plenty.
The engine internals look pleasingly clean.
Cleaning up the cam covers and breather covers took ages, a horrible messy job, particularly removing the old sealant.
Typical MB, the fit and finish of the parts and the new gasket were excellent. The gasket is pushed into a groove in the cam covers and stays in place while the cover is refitted to the engine.
I'm probably losing my grip, but found the sealant quite hard to force out of the tube.
Covers refitted with new bolts in the breather covers.
The only other problem I came across was when refitting the bolts retaining the coil packs.
I nipped them up by hand using only the socket extension and when I tried to tighten the 1st one with the torque wrench I didn't feel any resistance. I'm pretty sure it must have already been stripped.
For now, I cleaned out the hole and the bolt and refitted it with some epoxy adhesive.
I have never used a helicoil and I'm not sure if there is enough material in the casting to allow that but it is probably the best option.
Going back to the car being at the wind up - it's about a 30 mile round trip to the dealer and after I had been there to get the parts I realised that at no point on the journey had I noticed the smell of oil .......... and I didn't notice it on any subsequent trips before I did the work ..... spooky!
However, as you can see from the pictures, it needed done.
After a few more runs I'll take of the air filter and check that it's all good. At that point I might have a closer look at the coil pack fixing holes to see if there is room for a helicoil.
Gassing Station | Readers' Cars | Top of Page | What's New | My Stuff