Hold(en) my beer - Monaro, Ute and Commodore content
Discussion


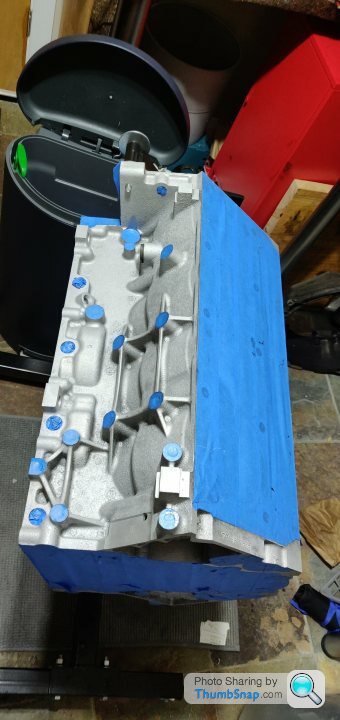
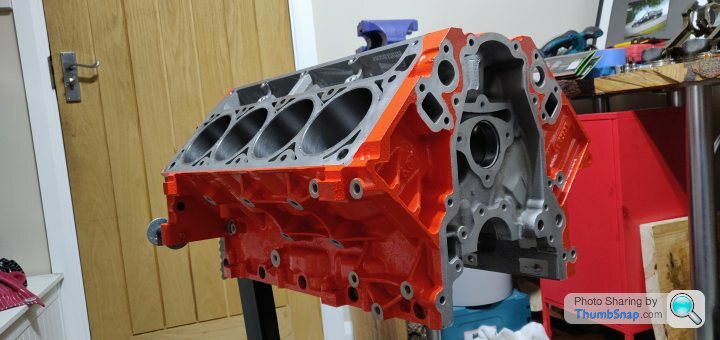
Engine block is back cleaned up and honed with new cam bearings in 
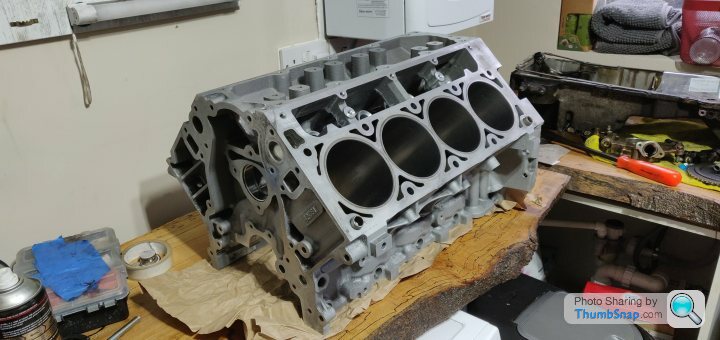
Great job by Knight Engine Services
No sunroof progress, hasn't arrived from Germany. I'm sure the closed borders will only help expedite the process
Crate from the US is meant to be arriving on the 9th January, although that'll presumably be locked down so who knows when those bits will actually be retrievable!
Have been starting the masking up, bit of a practice using the rubber hammer technique on the head surfaces, today thought I'd get on with the front timing cover and water pump etc.
Started off going for a simpler job and thought I'd leave the edges ally around the cover and so on.
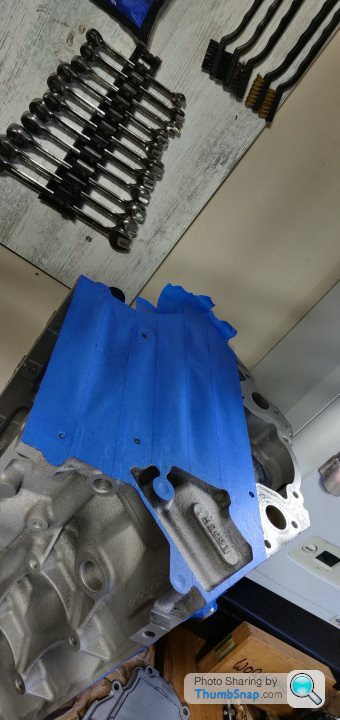
But as that all seemed fairly easy, I ultimately bolted the timing cover and water pump gaskets on and cut around them, so it'll be all orange but leave the mating surfaces clean.
Also put the old head gaskets on the dowels and cut around them so should mean minimal exposed ally to corrode over time.
Just need to cover up the threaded holes and associated surfaces on the sides (some of them provide additional grounds so should be clean) and then ready to apply the cleaner/metal prep and then slosh some paint on there!
Started off going for a simpler job and thought I'd leave the edges ally around the cover and so on.
But as that all seemed fairly easy, I ultimately bolted the timing cover and water pump gaskets on and cut around them, so it'll be all orange but leave the mating surfaces clean.
Also put the old head gaskets on the dowels and cut around them so should mean minimal exposed ally to corrode over time.
Just need to cover up the threaded holes and associated surfaces on the sides (some of them provide additional grounds so should be clean) and then ready to apply the cleaner/metal prep and then slosh some paint on there!
As "it's all about the prep" is a statement trotted out in every "how to paint" video I thought I might as well take my time.
Nice relaxed few hours in the workshop

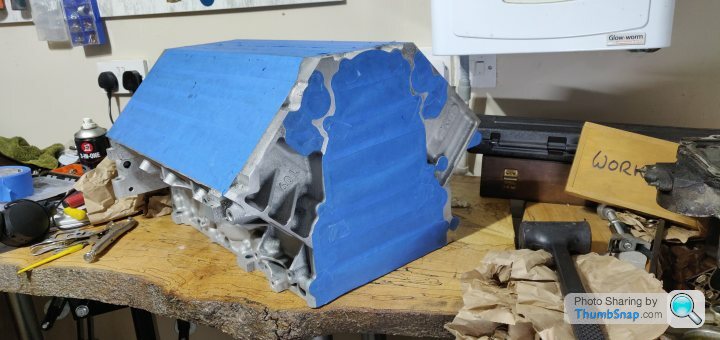
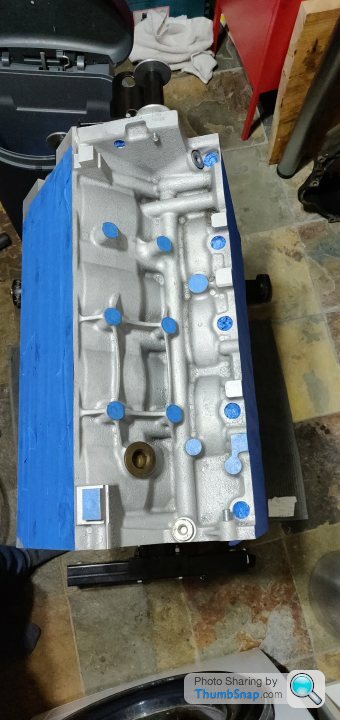
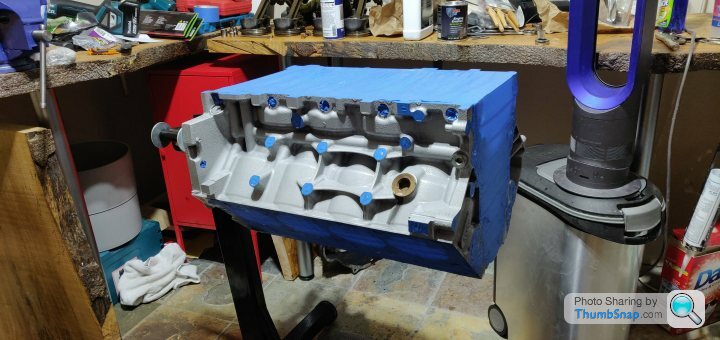
Have masked everything up, have put the various drain plugs back in as for £10 I'll just get a new set that come with the thread sealant already on.

The level of masking is wildly overkill once I tell you.... I'm not spraying it, I'm going to paint it on... But I wanted it to be fairly simple to paint it on and not worry too much about mating surfaces etc.
Have given it a brush over with soapy water and then brushed that off, will go over it with some degreaser / brake cleaner tomorrow to really make sure it's clean, then the POR15 metal prep, another rinse, and then paint time.
Painting will probably be a weekend job hence the lack of urgency and over the top masking etc.
Nice and shiny anyway, has been nice chipping away at it without any time constraints
Nice relaxed few hours in the workshop
Have masked everything up, have put the various drain plugs back in as for £10 I'll just get a new set that come with the thread sealant already on.
The level of masking is wildly overkill once I tell you.... I'm not spraying it, I'm going to paint it on... But I wanted it to be fairly simple to paint it on and not worry too much about mating surfaces etc.
Have given it a brush over with soapy water and then brushed that off, will go over it with some degreaser / brake cleaner tomorrow to really make sure it's clean, then the POR15 metal prep, another rinse, and then paint time.
Painting will probably be a weekend job hence the lack of urgency and over the top masking etc.
Nice and shiny anyway, has been nice chipping away at it without any time constraints
fastbikes76 said:
Great prep going on there, do it once .. do it properly
Any reason you are using brush over spray ?
Cheers Any reason you are using brush over spray ?
I'm using POR15 which by most accounts is very thick and is self levelling, so brush marks aren't a problem... I've got some decent brushes and also some foam brushes which I think will be better for the smoother spots to dabble on some texture to help the first coat stick.
Not using spray as although I have a compressor which happens to have a spray attachment, I've not done any spraying before, and also don't fancy painting the room orange

In immediate contrast to that, for the timing cover which is obviously smooth I have a textured matte silver spray can which I'll also use for the water pump housing, accessory brackets, engine mounts and things, so I suppose I'll be making a mess either way!
The scrub over with water has exposed two tiny spots where the tape hasn't stuck too well or I've ripped it slightly at the edge so I shall be tidying those spots up tonight with a fresh scalpel and gloves, having the old gaskets to trace around makes it pretty easy at least

Realised I didn't update after the metal prep went on, simple stuff, spray it on, keep it wet for 20 minutes, rinse with water.
Not much to show as it still just looked shiny silver!
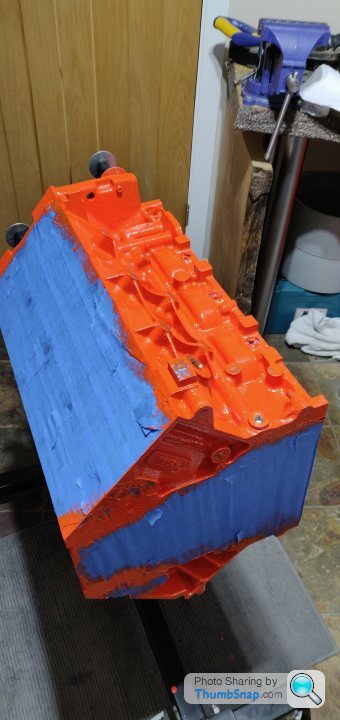
So now the second coat of paint is on and drying, I think it's better to lay it on pretty thick as opposed to doing a thinner 'base' coat and then going over it, the paint is thick and self levels so it tends to settle nicely around the texture of the block without needing to worry about it too much.
The fact there's always part of it at an angle means runs need to be kept an eye out for but otherwise it's going pretty well.
Have used some decent brushes mostly, and some little foam brushes for dabbing out runs and such.
The pictures exaggerate the finish, it isn't quite as retina searing in real life, but it looked bloody good after 1 (thicker) coat, one side the first coat was a little thin and that seems to have persisted through to making the second coat harder to get right.
Will leave it overnight and see what's left to do tomorrow.
It's a tiny pot of paint but it goes bloody far, I've done 2 coats and not even used a quarter of it.

Not much to show as it still just looked shiny silver!
So now the second coat of paint is on and drying, I think it's better to lay it on pretty thick as opposed to doing a thinner 'base' coat and then going over it, the paint is thick and self levels so it tends to settle nicely around the texture of the block without needing to worry about it too much.
The fact there's always part of it at an angle means runs need to be kept an eye out for but otherwise it's going pretty well.
Have used some decent brushes mostly, and some little foam brushes for dabbing out runs and such.
The pictures exaggerate the finish, it isn't quite as retina searing in real life, but it looked bloody good after 1 (thicker) coat, one side the first coat was a little thin and that seems to have persisted through to making the second coat harder to get right.
Will leave it overnight and see what's left to do tomorrow.
It's a tiny pot of paint but it goes bloody far, I've done 2 coats and not even used a quarter of it.
Edited by SturdyHSV on Saturday 2nd January 20:22
I suspect the third and final coat has begun, probably isn't needed on the side that went on thick but it's definitely put my mind at ease on the 'thin' side as we put it on thick and it's covered the metallic high points of the casting texture.
Realistically, I think if you kept on top of any runs, you could get a perfect finish in one coat, as when on thick it really does set like a thick glossy coating.
These little foam brushes are excellent for sorting runs and dabbling some texture on when sorting out little pits and so on, definitely made this top coat better.
Peeled the masking off last night

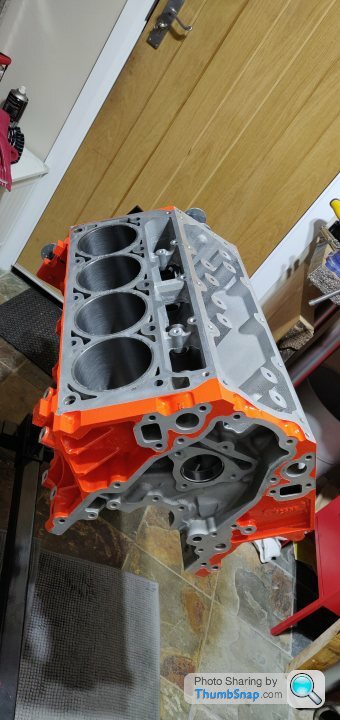
I'm pleased with how it's turned out. The fine lines between timing cover and water pump aren't exactly perfect, once it's dried hard I may try to tidy up the edges but really I don't expect it'll be seen and it was mostly just to see if it was doable.
There are no obvious brush marks even on the smooth surfaces, I'd imagine with the right light at the right angle you could maybe see some but overall very impressed.
Pit Pony said:
Why that colour?
I think if I was ever to go to that sort of effort, I'd probably go for an off white cream.
It's called Chevy Orange, it's a chevy engine, thus... I think if I was ever to go to that sort of effort, I'd probably go for an off white cream.
Plus it's the same colour GM do their fancy LS blocks.To be honest, the real reason is when I was a kid, I thought engines in muscle cars and hot rods were red / orange, so when I made airfix type models or whatever, I'd always do the engine red / orange because that was what a cool engine looked like... nothing more complex than that
The whole car is basically just a realisation of my childlike enthusiasm for 60s/70s muscle cars
Fishy Dave said:
Top job sir, very nice indeed. Is that orange colour as sticky as the black POR15? That stuff stays on your skin for days!
I've worn gloves the whole time, but did move the stirrer after I'd taken them off and I can confirm the little bit of it that got in to the side of a finger nail was there for some time! It's properly thick stuff, have done 3 coats and it's about half the tin I'd say.So I couldn't live with the tiny little gap between the timing cover and water pump gasket on the right (as you look at it) so I touched that in with a foam brush I cut down into a narrow tip, worked very well

A friend was buying one of these Improved Racing sump baffles from the states which I'd been looking at as they come recommended from an Aussie tuner and naturally "whilst I'm in there...." (can click on the image to go to the website for a nose)

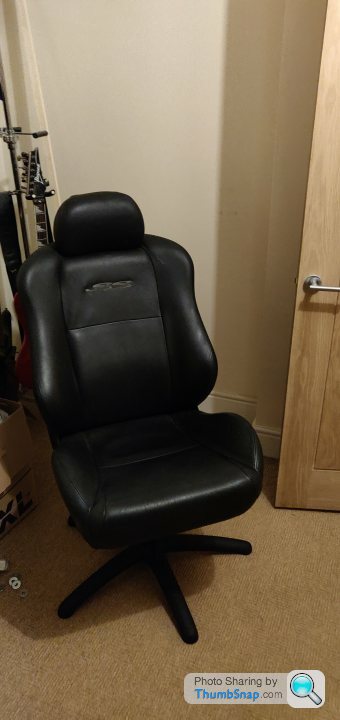
In only marginally related news I also bolted a seat base to the old Ute passenger seat, the girlfriend likes to tuck her legs up whilst gaming so the width and lack of arms make it ideal

A friend was buying one of these Improved Racing sump baffles from the states which I'd been looking at as they come recommended from an Aussie tuner and naturally "whilst I'm in there...." (can click on the image to go to the website for a nose)
In only marginally related news I also bolted a seat base to the old Ute passenger seat, the girlfriend likes to tuck her legs up whilst gaming so the width and lack of arms make it ideal

bonesxu1 said:
I have one of those Improved racing sump baffles fitted to my LS1, they look like a good quality item and are a lot cheaper than a complete new baffled sumps as they are pretty expensive. What seats are you running in the Ute since the original one is now an office chair?
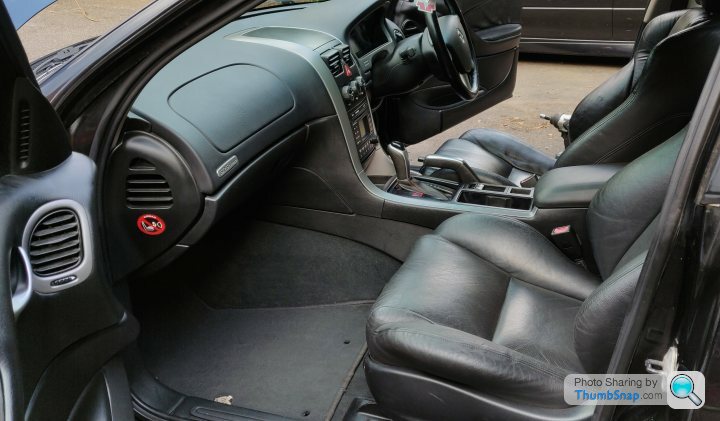
Yeah they look like a good piece and for roughly £200 not too expensive either.The seats in the Ute are from a VX SS, Aussie chap over here was breaking one and they were in much better shape so swapped them over

So having tidied up the workshop as further procrastination, I actually got on with something last night...
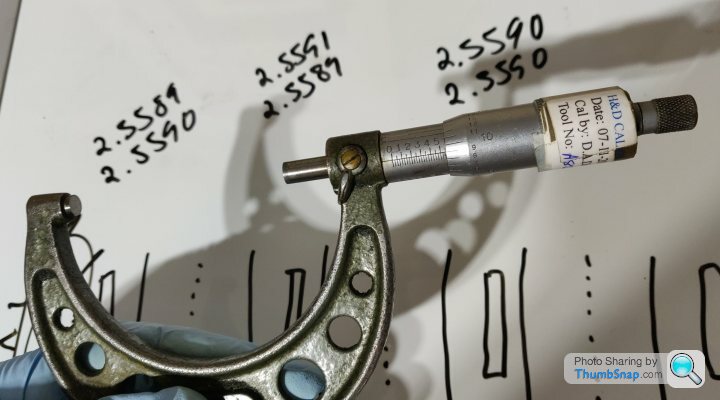
Had a bit of a practice using the bore gauge on an old piston, was actually simpler than expected so I got on with measuring the crank journals.

At this sort of precision I'm really skeptical of how good I really am at this, it's so hard to be consistent with the measuring as it's entirely just feel, we shall see I suppose.
Bit of new forged crank porn. Old crank with timing chain sprocket and harmonic balancer bolt in the end weighed 23.5kg, new one with same bits weighed 25.0kg. No reason to measure really, was just curious. Will weigh pistons and rods etc as I go, easier to do it now eh?!
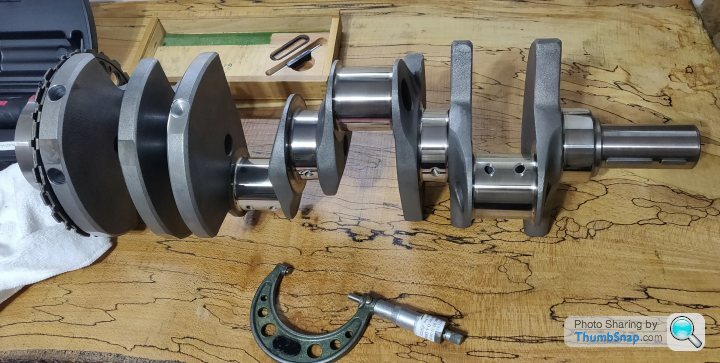
Didn't take too long, before doing the rod / main bearing measurement I'll probably double check a few of these just to see, as I say I'm a bit skeptical of my own skill level with using the mic, although we're talking pretty small amounts, but given the clearance I'm shooting for will be around 0.0021" - 0.0026" ish for the rods and 0.0025" to 0.0030" for the mains it would help if my numbers were vaguely close...

I'll do a bit more research on clearances above, those are just my rule of thumb ranges to keep in mind from some brief reading.
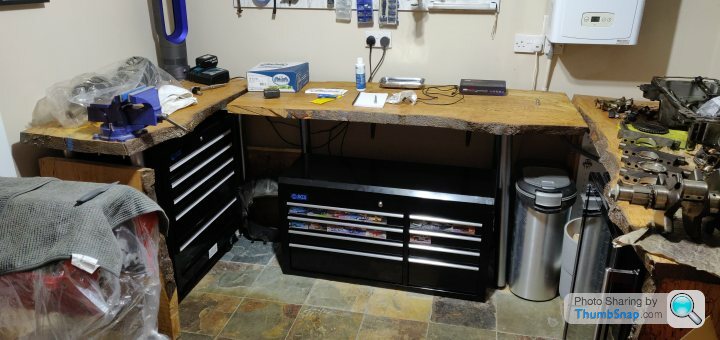
Tidy workshop, used to be utility room hence shockingly clean floor under where the tumble dryer was because no dog access there... Naturally the washing machine has been replaced with beer and wine fridges... Going to pop some roller cabinets under the other worktops I think as more storage is always helpful.

Had a bit of a practice using the bore gauge on an old piston, was actually simpler than expected so I got on with measuring the crank journals.
At this sort of precision I'm really skeptical of how good I really am at this, it's so hard to be consistent with the measuring as it's entirely just feel, we shall see I suppose.
Bit of new forged crank porn. Old crank with timing chain sprocket and harmonic balancer bolt in the end weighed 23.5kg, new one with same bits weighed 25.0kg. No reason to measure really, was just curious. Will weigh pistons and rods etc as I go, easier to do it now eh?!
Didn't take too long, before doing the rod / main bearing measurement I'll probably double check a few of these just to see, as I say I'm a bit skeptical of my own skill level with using the mic, although we're talking pretty small amounts, but given the clearance I'm shooting for will be around 0.0021" - 0.0026" ish for the rods and 0.0025" to 0.0030" for the mains it would help if my numbers were vaguely close...
I'll do a bit more research on clearances above, those are just my rule of thumb ranges to keep in mind from some brief reading.
Tidy workshop, used to be utility room hence shockingly clean floor under where the tumble dryer was because no dog access there... Naturally the washing machine has been replaced with beer and wine fridges...
Going to pop some roller cabinets under the other worktops I think as more storage is always helpful.FelixP said:
Great job painting that block!
Good effort with the dial gauges too, I was going to settle for plastigauge!
Cheers, it was really nice paint to work with and masking everything made it pretty worry free, definitely something I'd happily do again when I next build an engine Good effort with the dial gauges too, I was going to settle for plastigauge!
Funny you mention dial gauges...had my first punt at measuring the rod bearing clearances last night, although clearances plural is a bit of an exaggeration
As above, my concern is really how good my mic work is of the crank journal itself, as that's my starting point then really the 'clearance' is only going to be as accurate as that initial reading really, even assuming I get the dial bore gauge bang on, although that did at least seem pretty easy to do and repeatable.
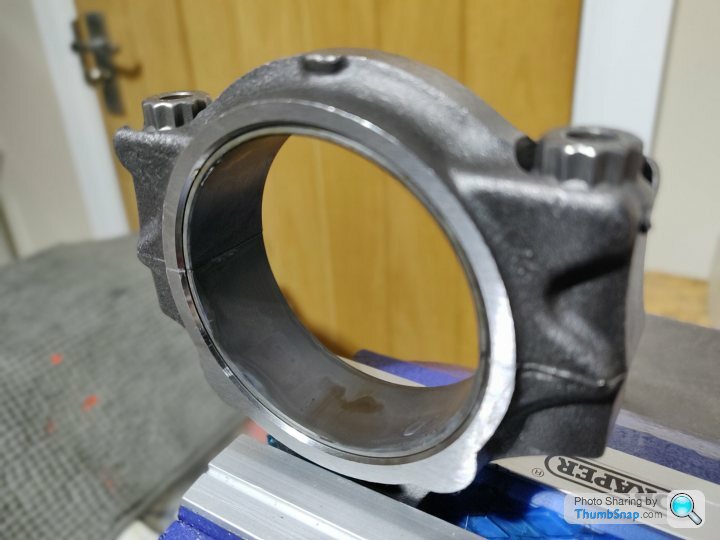
So, rods, numbered the box first just for the sake of keeping them all consistent. I couldn't being myself to draw on the lovely shiny rods yet
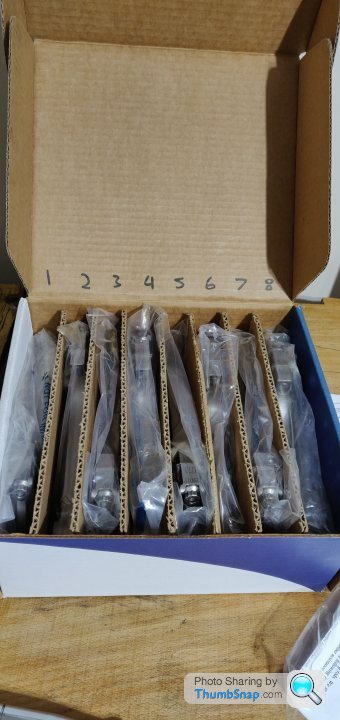
Noticed on the packing each rod said not for individual resale, weight matched set, so I got the scales out out of curiosity. This is the weight with the rod bolts still in for convenience.

f
 k you number 5
 So time to get the rod caps off. Undid the bolts, which were torqued to spec and then spent a silly amount of time with a soft blow hammer tapping the cap off the dowels.

It was just a case of a hard tap on each side, turn rod over, repeat.
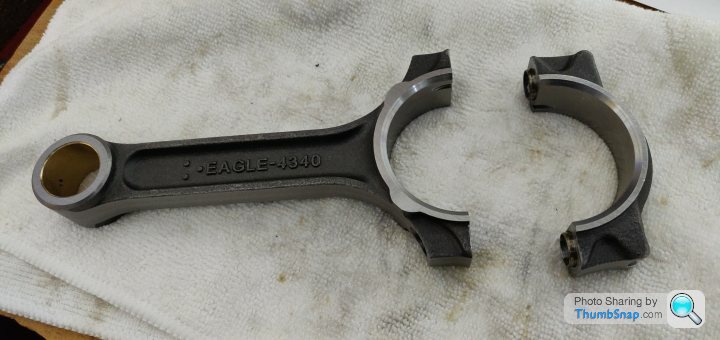
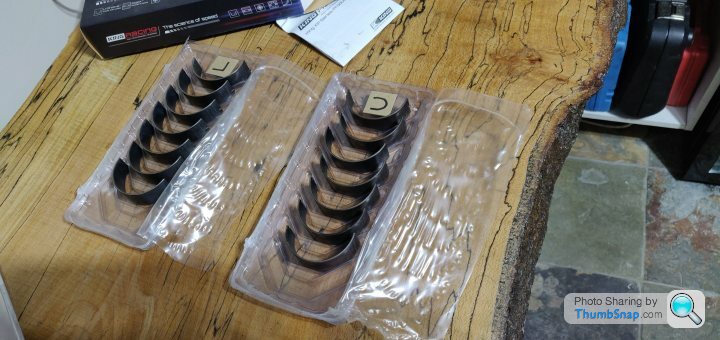
King XP bearings have a lower / upper, so slipped those in nicely and torqued the caps up to spec.
Rods went into the vice with aluminium jaws (with a rubber face) to prevent damaging them whilst gripped. Bit of ARP assembly lube on the threads and underside of the bolt cap to ensure proper torque, as instructed by the paperwork
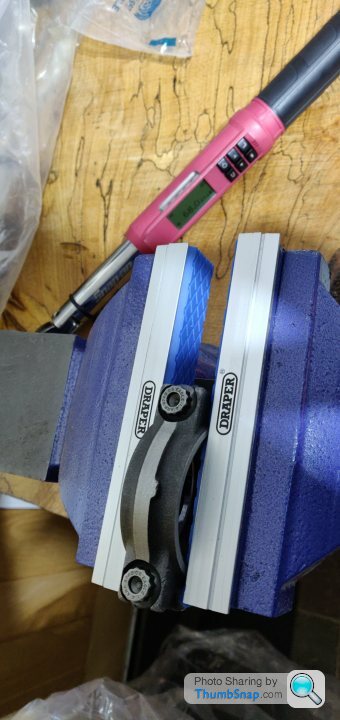
Then held the rods in the vice, zeroed the bore gauge and put a tiny hint of assembly lube on the contact points of the bore gauge just to try and minimise marking the bearing surface.
So this first one, I'd mic'd the journal at 2.0998", and got 0.0027" clearance on the dial. That's a little looser than my engine builder recommends, by no means bad and given what's got to be +/- 0.0005" in my own measurement ability probably comfortable to be getting on with, but...
I'm going to give everything another measure this evening (re mic the journal and then redo the bearing measurement) and see how it goes, to that end I've also had the heater on in that room keeping it at 21* overnight to ensure everything is at the same temperature etc.
It's the first time I've done any of this stuff so I don't think I can be too thorough with trying to get my measurements right, especially given the kind of precision I'm attempting to measure with.
We shall see!
Edited by SturdyHSV on Thursday 14th January 13:44
Yeah. British Standard room temperature for accurate measurement in metrology labs is 20 plus or minus 0.5 deg C
I remember once having to make a snap gauge at Polytechnic, and mine came out a bit loose. So I put one peice in ice and the other in a cup of coffee, just before handing it in for inspection. The lecturer marked me down on the sloppy filling. But added extra marks for demonstrating the impact temperature has on size.
I remember once having to make a snap gauge at Polytechnic, and mine came out a bit loose. So I put one peice in ice and the other in a cup of coffee, just before handing it in for inspection. The lecturer marked me down on the sloppy filling. But added extra marks for demonstrating the impact temperature has on size.
Yeah I'd also obviously mic'd the journals one day and then a few days later done the bearing above by setting the mic back to what it read before, which isn't exactly good form at these levels!
Redid the measurements last night for rod one, had taken some more advice from a machinist mate about using the mic (it's one of their shop mics), I think I was going a touch too tight before (a touch as in maybe have a thou) but anyway, did it again and got 2.1003" (previously was 2.0098) for the journal, then straight in to the vice, set the dial gauge off it, then rod in the vice and measured the clearance and got 0.0020", which is right around where the engine guy wants it.
Whole process only took 15 minutes too from start to finish (so getting bits out and then putting them away again) so was a much slicker operation this time!
Tonight I plan to get at least one more rod bolted up with the bearings in, then will repeat the above process for that one.
Tool cabinets arrived from SGS too, nice looking bits, the outer shells feel solid and they're certainly heavy enough, the drawer sliders feel very solid and smooth, the drawers themselves perhaps feel a little 'thin' somehow, but they're absolutely perfect for what I need, i.e. just somewhere to store tools that's accessible.
The drawers are decent sizes so for example I can put socket carry cases open in the drawers to basically make them like a tray, otherwise they're mosty to be used for storing all the 'other stuff' that doesn't perhaps need to be as immediately accessible as the stuff I'll put on the walls. They obviously also match nicely with the beer fridge...
I also need a LOT more rockauto magnets
Redid the measurements last night for rod one, had taken some more advice from a machinist mate about using the mic (it's one of their shop mics), I think I was going a touch too tight before (a touch as in maybe have a thou
) but anyway, did it again and got 2.1003" (previously was 2.0098) for the journal, then straight in to the vice, set the dial gauge off it, then rod in the vice and measured the clearance and got 0.0020", which is right around where the engine guy wants it.Whole process only took 15 minutes too from start to finish (so getting bits out and then putting them away again) so was a much slicker operation this time!
Tonight I plan to get at least one more rod bolted up with the bearings in, then will repeat the above process for that one.
Tool cabinets arrived from SGS too, nice looking bits, the outer shells feel solid and they're certainly heavy enough, the drawer sliders feel very solid and smooth, the drawers themselves perhaps feel a little 'thin' somehow, but they're absolutely perfect for what I need, i.e. just somewhere to store tools that's accessible.
The drawers are decent sizes so for example I can put socket carry cases open in the drawers to basically make them like a tray, otherwise they're mosty to be used for storing all the 'other stuff' that doesn't perhaps need to be as immediately accessible as the stuff I'll put on the walls. They obviously also match nicely with the beer fridge...
I also need a LOT more rockauto magnets
Gassing Station | Readers' Cars | Top of Page | What's New | My Stuff