Hold(en) my beer - Monaro, Ute and Commodore content
Discussion


SturdyHSV said:
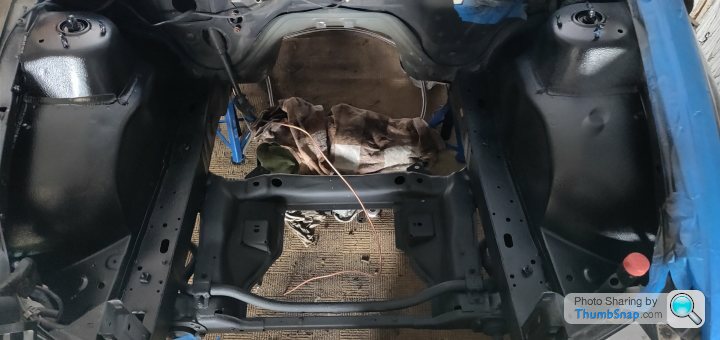
So I tested where the loom was going to run and generally verified things would probably work...
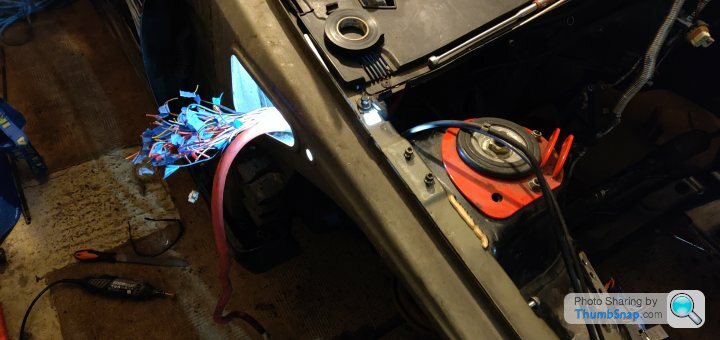
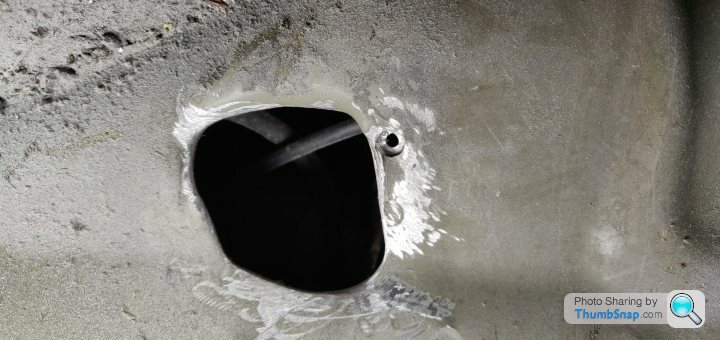
I spent so long smoothing out this hole with the dremel, it looks like a flowed cylinder head port no sharp edges or corners basically, even though the loom will be sheathed I didn't want to worry about it wearing through in future
Loads of insulating tape and then the plastic sheath just to ensure it won't rub through anything (right? Seems pretty alright to me?)

I then verified the opening under the fuse box would fit the loom, obviously a bit awkward to shove all the labels in there (and didn't want the coming off ) but was able to bolt it back down to the wing so I'm happy that it'll work.
I also cut and filed down the plastic edges of the fuse box cover where it no longer kicks out at 90* to meet the trunking around the strut tower, just to keep it looking as tidy as possible.

Getting better with the spot weld drilling too, did 6 of the awkward b ds without going through the wheel arch metal
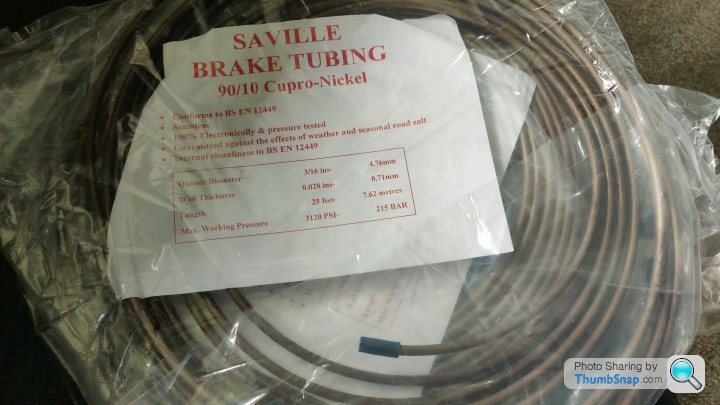
New brake line turned up in far more reassuring packaging, so I shall be ripping out the new brake lines to fit new brake lines at some point soon, because I'm mental.
Need to order a lot of various colours of wire, mostly seems to be a mix of 14awg, 10awg, 7awg and 4awg, I'm hoping to avoid buying 10 metre reels of the stuff
Can I give you an idea for to prevent chafing of those wires.? I spent so long smoothing out this hole with the dremel, it looks like a flowed cylinder head port
no sharp edges or corners basically, even though the loom will be sheathed I didn't want to worry about it wearing through in futureLoads of insulating tape and then the plastic sheath just to ensure it won't rub through anything (right? Seems pretty alright to me?)
I then verified the opening under the fuse box would fit the loom, obviously a bit awkward to shove all the labels in there (and didn't want the coming off
) but was able to bolt it back down to the wing so I'm happy that it'll work. I also cut and filed down the plastic edges of the fuse box cover where it no longer kicks out at 90* to meet the trunking around the strut tower, just to keep it looking as tidy as possible.
Getting better with the spot weld drilling too, did 6 of the awkward b
ds without going through the wheel arch metal New brake line turned up in far more reassuring packaging, so I shall be ripping out the new brake lines to fit new brake lines at some point soon, because I'm mental.
Need to order a lot of various colours of wire, mostly seems to be a mix of 14awg, 10awg, 7awg and 4awg, I'm hoping to avoid buying 10 metre reels of the stuff
https://www.hosequip.co.uk/rubber-edge-trim--seal-...
Pit Pony said:
Can I give you an idea for to prevent chafing of those wires.?
https://www.hosequip.co.uk/rubber-edge-trim--seal-...
Yep, already got some (admittedly from ebay) to go on the sharper edges that I snipped down to test fit last night. Once painted etc. will line things with it properly https://www.hosequip.co.uk/rubber-edge-trim--seal-...

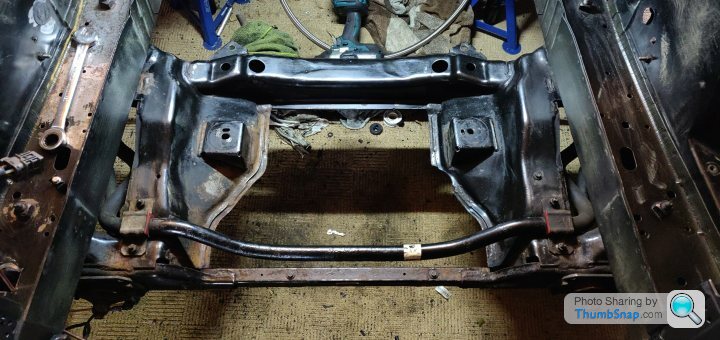
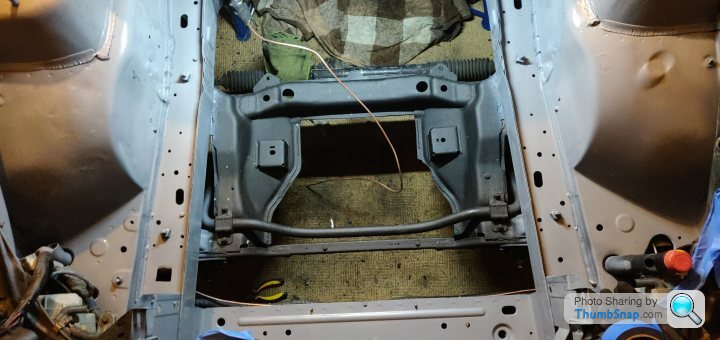
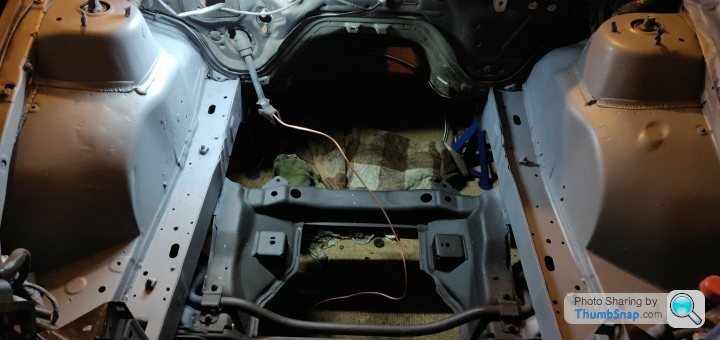
Cleaned up the subframe (wire wheel, degreaser, brake clean) and hit it with a coat of waxoyl
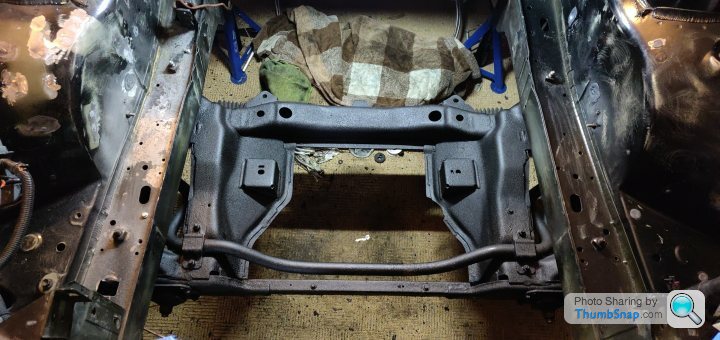
Really like how it looks, it's (unintentionally) exactly the finish I'm hoping the Raptor bed liner will achieve for the engine bay, so looking forward to giving it all a coat in the next few days to see how it goes.

I also filled in some of the many holes either that I've made, or rendered unnecessary with rerouting. Just went with the JB Weld, other than the f
king awful smell it's nice stuff, filled bits in, a quick grind smooth and I'm happy it'll look fine under a coat of 'paint'. Better than a hole anyway. 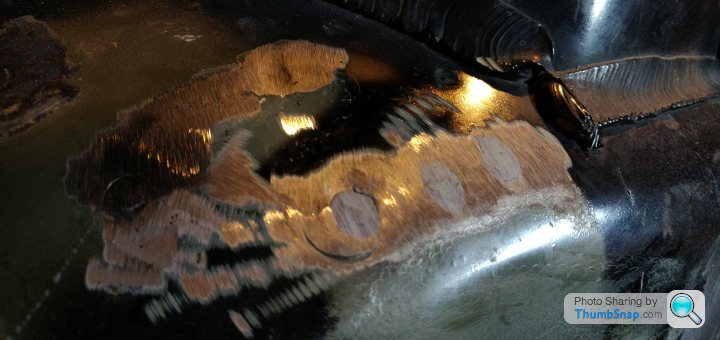
Also found I could run the ABS sensor lines for the front brakes along by the brake lines instead of them passing into the engine bay etc, so pleased to have had an easy win in terms of wire tidying. I'm planning to clip them in with the brake lines, and use a large washer to sort of cap them in place.
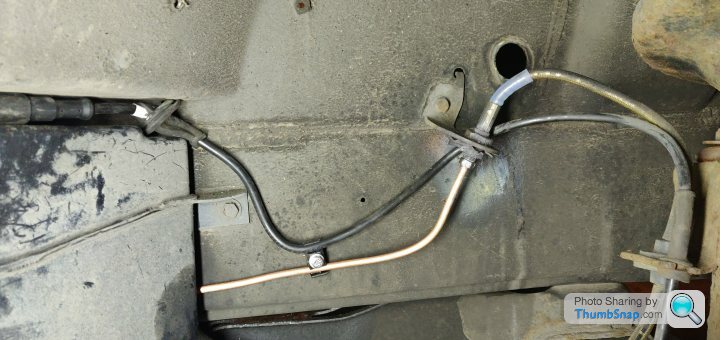
That's a rough test fit, will ensure there's plenty of slack for full lock etc but it looks workable, and meant even more wheel arch holes to fill in.
Once the bay is painted I'll feel a lot more motivated to start putting bits back in (brake booster for example). I'm going to get the engine mounts, sump, alternator bracket etc. blasted and then I'll paint them, then I think for the power steering lines and so on I'll drop the engine in place so I can ensure the headers etc don't sit too close and so on.
I really need to make a list of what I need to do so that I can figure out a good order to do things in, thinking of it all at once is too much to plan out just in my head
Mildly unrelated, but although I've not watched any of the others, I'm looking forward to the Top Gear episode with the Monaro in. The one tbey bought was blue originally, so they've resprayed it oddly, they've also changed the wheels to original and bought a set of original badges for it (although didn't update the V5 of the colour change
). I shall be cheering it on 
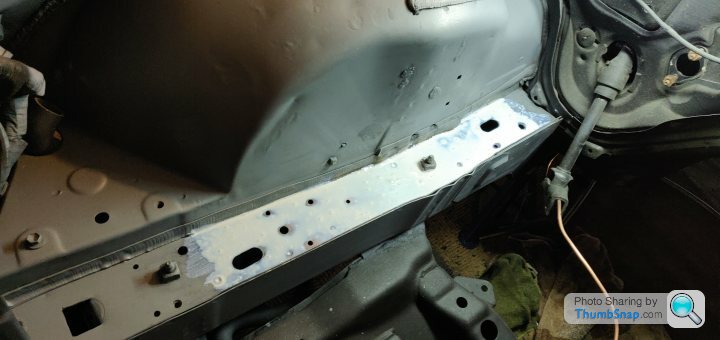
Sanded down the arches / rails and cleaned them off
Shot a coat of etch primer over everything, I've a couple of bits of the JB Weld that I need to sand down after this cost as I'd sanded them too much before so just filled them in again, also going to take back the driver's side rail to bare metal again to rust treat it.
Silly order to do things but the Kurust wants 3 hours to cure before a coat is applied, but then wants the coat applied ASAP, so I didn't really have time to do that last night and wanted to get a whole coat of primer on just to see how it took.
Where the various holes are filled in / spot welds have been drilled out etc isn't perfect, but once the textured matte paint is over it I think the imperfections will be easy enough to ignore.
Filled a few holes in this side and they came out nicely
Plan is to sand and rust treat the rail during a lunch break (joy of working from home) so it's ready for a coat of primer in the evening.
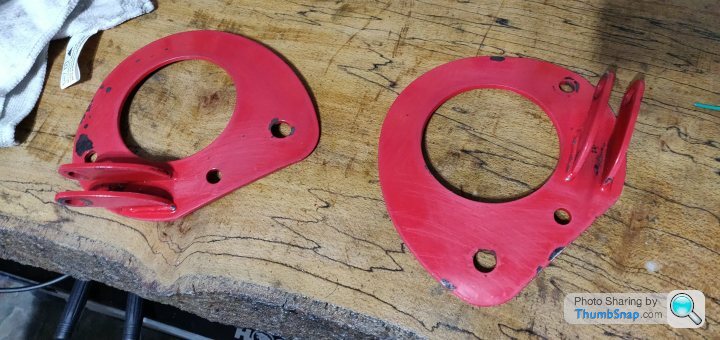
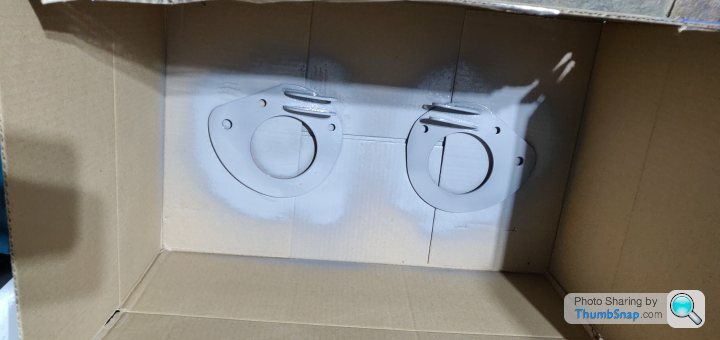
I also sanded and primered the mounts for the strut brace, the red would be a bit... clashy with the block, I'll probably just do these silver.
Shot a coat of etch primer over everything, I've a couple of bits of the JB Weld that I need to sand down after this cost as I'd sanded them too much before so just filled them in again, also going to take back the driver's side rail to bare metal again to rust treat it.
Silly order to do things but the Kurust wants 3 hours to cure before a coat is applied, but then wants the coat applied ASAP, so I didn't really have time to do that last night and wanted to get a whole coat of primer on just to see how it took.
Where the various holes are filled in / spot welds have been drilled out etc isn't perfect, but once the textured matte paint is over it I think the imperfections will be easy enough to ignore.
Filled a few holes in this side and they came out nicely
Plan is to sand and rust treat the rail during a lunch break (joy of working from home) so it's ready for a coat of primer in the evening.
I also sanded and primered the mounts for the strut brace, the red would be a bit... clashy with the block, I'll probably just do these silver.
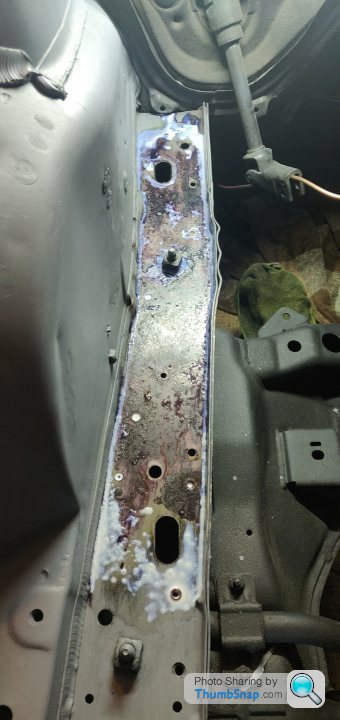
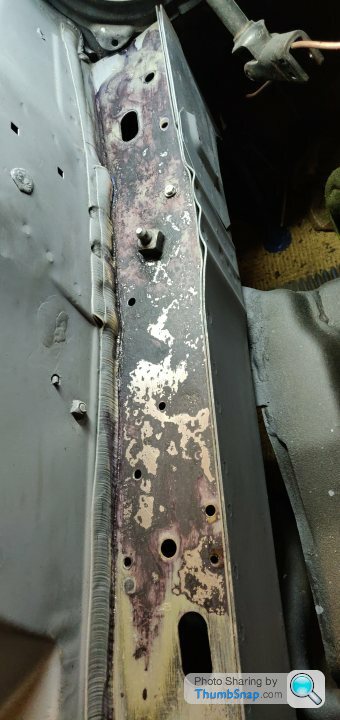
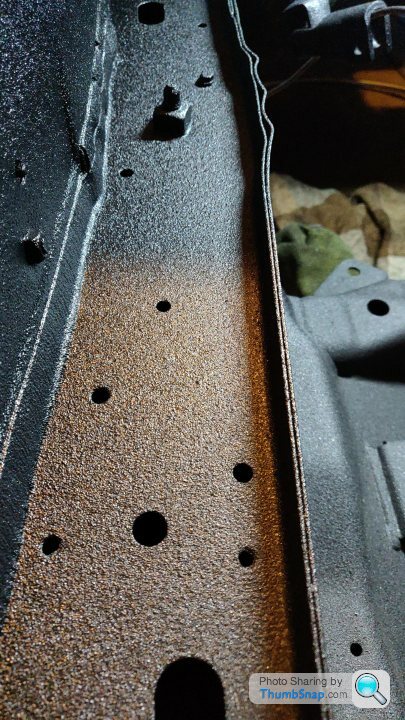
The Kurust needs 3 hours to cure before painting over, so during lunch I've sanded back the rail to bare metal
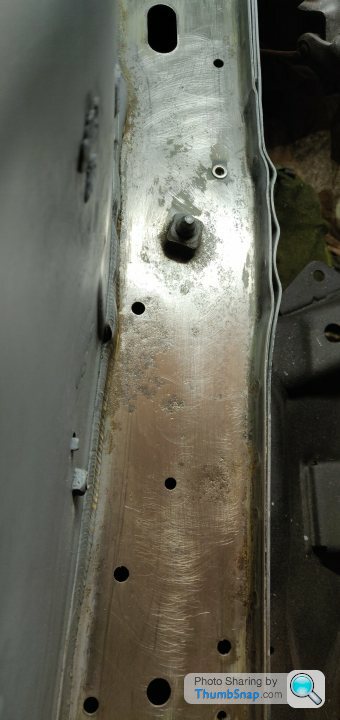
As you can see, just a bit of pitting really, hardly a significant rust problem but, you know, while I'm in there...
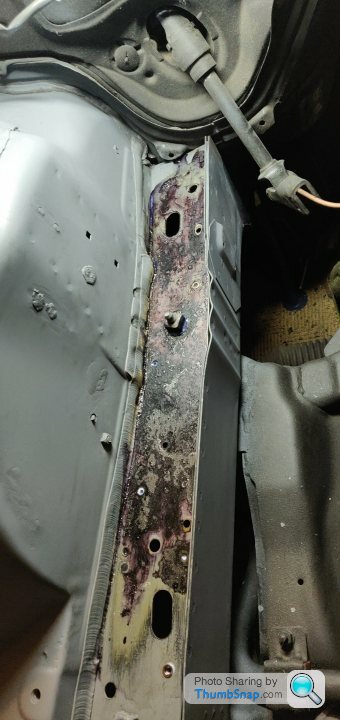
Have layered it in plenty of milky Kurust goodness
10 minutes in and already bits turning blue/black so have now left it to soak and will primer it this evening.
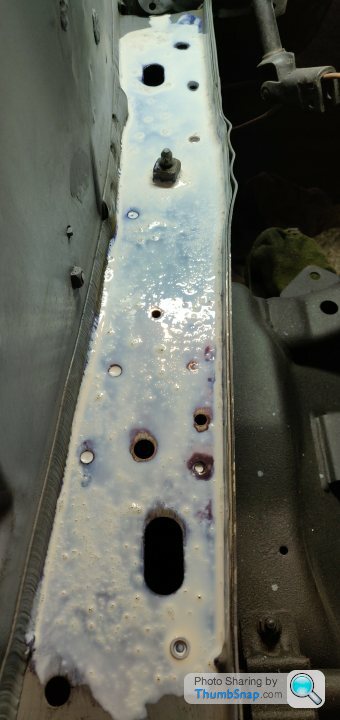
The etch primer seemed to have taken well, it required a bit of elbow grease to sand off, so hopefully will be a decent enough end result that doesn't evaporate off in 3 months
As you can see, just a bit of pitting really, hardly a significant rust problem but, you know, while I'm in there...
Have layered it in plenty of milky Kurust goodness
10 minutes in and already bits turning blue/black so have now left it to soak and will primer it this evening.
The etch primer seemed to have taken well, it required a bit of elbow grease to sand off, so hopefully will be a decent enough end result that doesn't evaporate off in 3 months
Decently dry by the end of the day
Gave it the lightest of brushes with a fine scotch brite pad and blew off all the dust with the air compressor
And then a coat of primer, leaving it looking far scabbier than before i bothered with the Kurust
Will let that dry a bit and give it a bit of a buff, then another coat of primer, again, not fussed about the finish as the final coat will mask all this mess I expect, but can't hurt.

Gave the whole bay a quick dusting just to use up the first can of primer.
Primer wants 24 hours before top coat, so will try and get things to a tidy finish tonight / tomorrow to then top coat on Friday.
Gave it the lightest of brushes with a fine scotch brite pad and blew off all the dust with the air compressor
And then a coat of primer, leaving it looking far scabbier than before i bothered with the Kurust
Will let that dry a bit and give it a bit of a buff, then another coat of primer, again, not fussed about the finish as the final coat will mask all this mess I expect, but can't hurt.
Gave the whole bay a quick dusting just to use up the first can of primer.
Primer wants 24 hours before top coat, so will try and get things to a tidy finish tonight / tomorrow to then top coat on Friday.
So, one 400ml can doesn't go anywhere near as far as I expected
It's really easy stuff to use, spray distance dictates the surface finish so I'll be much better prepared for the second coat when the next can arrives from the bay of e.

It'll dry much more matte I expect (hope), can see above where I was a bit too close to the strut tower so it's a chunkier blob texture, the arch finish is more like I am after. Have learnt my lesson anyway and am fairly confident I'll be able to do a reasonable job with the second can
It's really easy stuff to use, spray distance dictates the surface finish so I'll be much better prepared for the second coat when the next can arrives from the bay of e.
It'll dry much more matte I expect (hope), can see above where I was a bit too close to the strut tower so it's a chunkier blob texture, the arch finish is more like I am after. Have learnt my lesson anyway and am fairly confident I'll be able to do a reasonable job with the second can
Chanced on this topic wasting away some lock-down time
Bit late to be posting some help here but perhaps not too late
The cable to that relay/fuse plate will be thin-wall and it can be bought by the meter from here https://www.autoelectricsupplies.co.uk/product/70/...
When you are extending the wiring harness cables it will help if you stagger the joints, if the joints aren't staggered the harness will be too bulky at the joints and the joints might short out against one another
Taking it that you're going to be soldering the joints and using adhesive type heat-shrink sleeving to insulate them
See these pics
Joints together - Not good
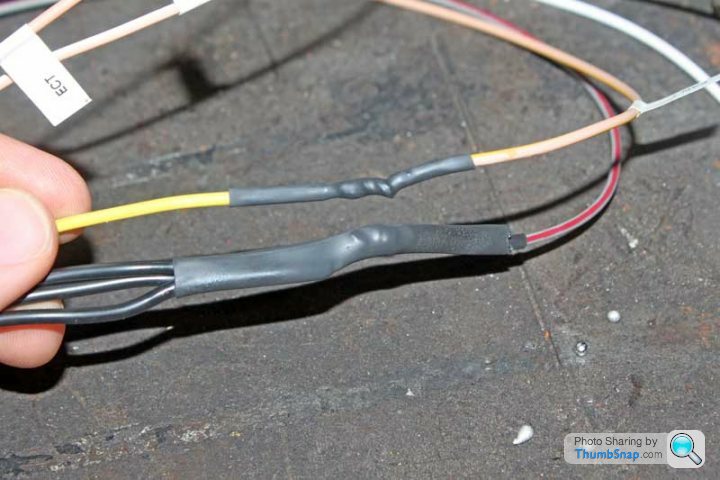
Joints staggered - Very good
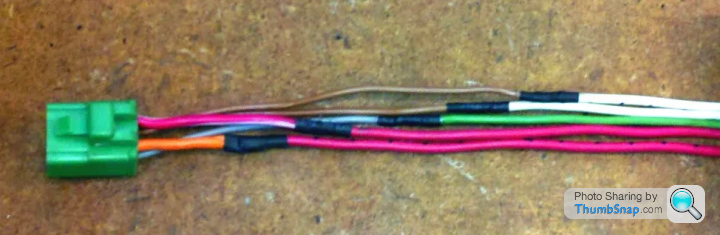
There won't be any problems with having let's say 5 joints together if it's a must due to running out of wiring harness length for single staggered joints, but............................
................................ Be sure to have 4 joints 90 degrees apart from one another and the 5th joint in the middle of the harness away from any of the other 4, the 4 joints can be at the outer of the harness and taped into that position, tape all the harness and then protect with outer sleeving, no chance of rubbing
Best way of doing the job would be to extend all the harness cables and crimp the correct new relay/fusebox terminals to the ends of them, remove all terminals with short cables from the box and insert the extended cables into the correct apertures
Should be plenty of GM/Bosch etc terminals to be had online
No, am not telling you how to do your job, simply suggesting a method that may help make life easier for you
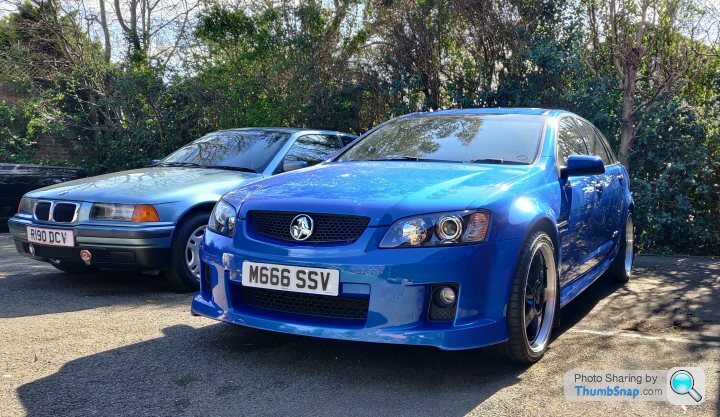
Nice motor by the way
Bit late to be posting some help here but perhaps not too late
The cable to that relay/fuse plate will be thin-wall and it can be bought by the meter from here https://www.autoelectricsupplies.co.uk/product/70/...
When you are extending the wiring harness cables it will help if you stagger the joints, if the joints aren't staggered the harness will be too bulky at the joints and the joints might short out against one another
Taking it that you're going to be soldering the joints and using adhesive type heat-shrink sleeving to insulate them
See these pics
Joints together - Not good
Joints staggered - Very good
There won't be any problems with having let's say 5 joints together if it's a must due to running out of wiring harness length for single staggered joints, but............................
................................ Be sure to have 4 joints 90 degrees apart from one another and the 5th joint in the middle of the harness away from any of the other 4, the 4 joints can be at the outer of the harness and taped into that position, tape all the harness and then protect with outer sleeving, no chance of rubbing
Best way of doing the job would be to extend all the harness cables and crimp the correct new relay/fusebox terminals to the ends of them, remove all terminals with short cables from the box and insert the extended cables into the correct apertures
Should be plenty of GM/Bosch etc terminals to be had online
No, am not telling you how to do your job, simply suggesting a method that may help make life easier for you
Nice motor by the way
Penelope Stopit said:
Chanced on this topic wasting away some lock-down time
Bit late to be posting some help here but perhaps not too late
...lots of helpful stuff...
No, am not telling you how to do your job, simply suggesting a method that may help make life easier for you
Nice motor by the way
Really appreciate the post, will definitely be staggering the solder joins as much as possible, there's a good amount of space in the quarter panel at least but yes it's going to be snug getting bits in by the fuse box. Bit late to be posting some help here but perhaps not too late
...lots of helpful stuff...
No, am not telling you how to do your job, simply suggesting a method that may help make life easier for you
Nice motor by the way
I hadn't considered crimping on the correct pins to plug straight into the fusebox, I will bear that in mind, as you say, that'd be the proper way to do it

bonesxu1 said:
Well you have been busy, keep up the good work. 

Not having enough to paint the engine bay somewhat stalled my progress, was planning to get the paint done in the morning, then once it was dry I could get on with the wiring, doing the brake lines, putting the brake booster and such back in and starting to basically put things back together instead of taking them apart constantly
Still, at least I can't be accused of rushing things


Quinten said:
Seeing as I'm currently serving my 14 days of UK government issue quarantine, you've got some time still to fix it  But yes, would be great to meet up again and catch up. I'll be in touch!
Quinten, is that you, the tall dutchman of old that used to have the Octavia VRS? Its Andre who used to have the very shiny black VRS with the genuine WRC rear wing...assuming it's you of course But yes, would be great to meet up again and catch up. I'll be in touch! (Sorry OP for hijacking your thread...but it seems like too much of a coincidence...)
99PBATR said:
Quinten said:
Seeing as I'm currently serving my 14 days of UK government issue quarantine, you've got some time still to fix it But yes, would be great to meet up again and catch up. I'll be in touch!
Quinten, is that you, the tall dutchman of old that used to have the Octavia VRS? Its Andre who used to have the very shiny black VRS with the genuine WRC rear wing...assuming it's you of course But yes, would be great to meet up again and catch up. I'll be in touch! (Sorry OP for hijacking your thread...but it seems like too much of a coincidence...)I had a feeling it might be you my friend....blimey it's been a few years...in fact the last time I saw you, I didn't have kids I don't think  plus I had almost black hair !! Good to hear from you fella. If you are ever over at Caffeine and Machine, let me know as it's just down the road from me!!
plus I had almost black hair !! Good to hear from you fella. If you are ever over at Caffeine and Machine, let me know as it's just down the road from me!! SturdyHSV said:
Penelope Stopit said:
Chanced on this topic wasting away some lock-down time
Bit late to be posting some help here but perhaps not too late............................................................................................................
Really appreciate the post, will definitely be staggering the solder joins as much as possible, there's a good amount of space in the quarter panel at least but yes it's going to be snug getting bits in by the fuse box. Bit late to be posting some help here but perhaps not too late............................................................................................................
I hadn't considered crimping on the correct pins to plug straight into the fusebox, I will bear that in mind, as you say, that'd be the proper way to do it
Glad to possibly be of some help
Nice job when it's completed, admire your attitude
SturdyHSV said:
Despite now being really quite deep down the rabbit hole, I feel more confident of getting it all done than before, the fact I spent 90 minutes labelling wires has inspired a sort of relaxed determination that I'll just keep chipping away at it without getting discouraged and thus I will get there eventually, nothing to it but to do it.

Quinten said:
Not many crazy tall Dutch men called Quinten 
I can hopefully still play the cool card though with my Westfield SEiGHT

I can hopefully still play the cool card though with my Westfield SEiGHT

Penelope Stopit said:
Topic is bookmarked
Glad to possibly be of some help
Nice job when it's completed, admire your attitude
Glad to possibly be of some help
Nice job when it's completed, admire your attitude
Next can of paint should be arriving today, so with these lovely bright evenings we now have I shall no doubt be in the garage with a face mask on, but at least the doors will be open!
If I'm happy with the paint finish then it's time for finishing the wiring. Once that is done and tested then I'll arrange for the sump / engine mounts etc. to be blasted clean so I can paint them, I know I'll get distracted by the more 'fun' stuff and keep putting the wiring off if I don't set some sort of rule
Although realistically I'd be far better off slinging the engine in and out for mock up before that stuff is painted (and frankly before I'd painted the rest of the bay
). It really is the running order of all the jobs that's the hardest thing to keep on top of!Next round with the Raptor bed liner tonight.

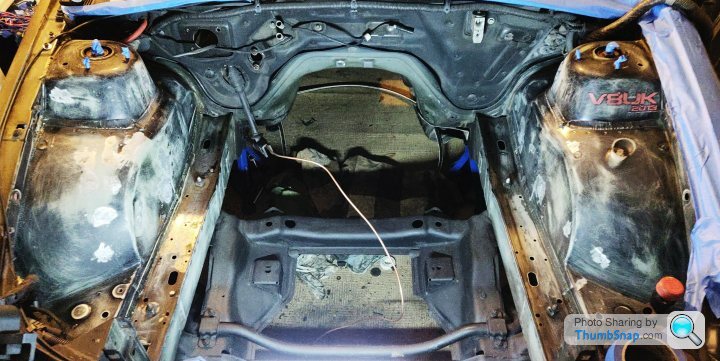
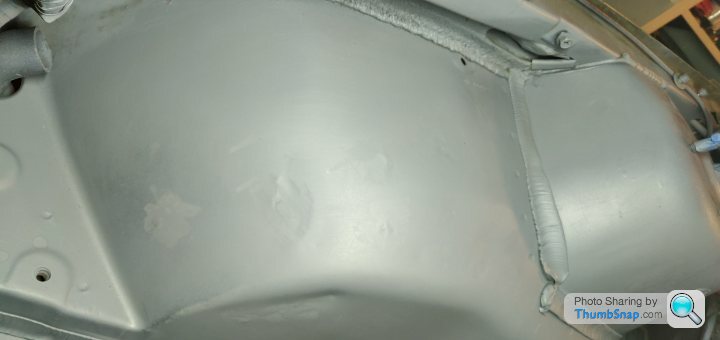
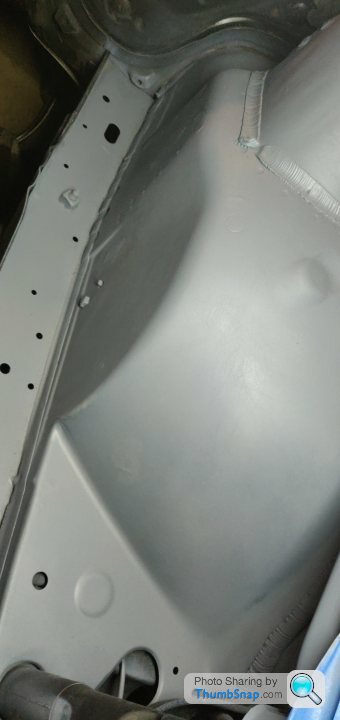
Second coat is on, got a much better feel for it, although the start of each spray is still a bit of a lottery, you get the best finish by spraying from about a metre back, which makes the aim... exciting.
You also want to keep the spray moving quickly to avoid it clumping up, which in an engine bay presents its own challenges.
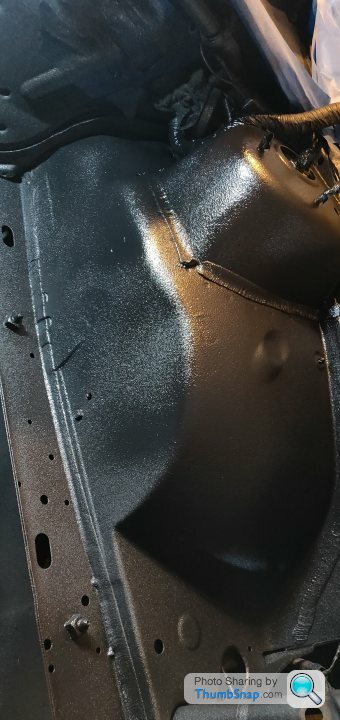
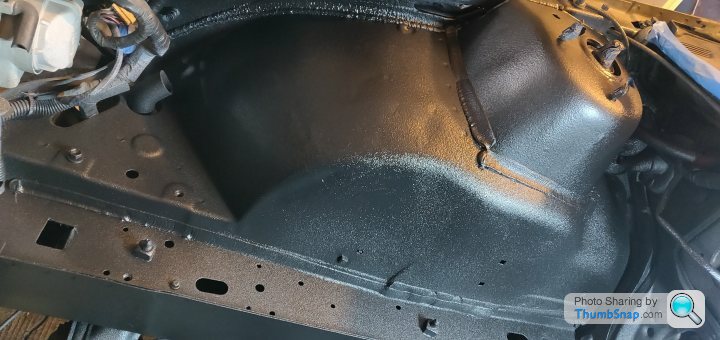
Considering the amount of holes I've filled in / spot welds I've cut out / ground down, I'm satisfied with the finish on the driver's side arch.
Waiting 20 minutes for that coat to dry and then going to review to see if I've missed anywhere or want to improve the texture a bit with another spray, have about a 1/3 of the can left.
I'm happy with the results anyway, the light exaggerates the sheen / texture a bit so hard to photograph.
Second coat is on, got a much better feel for it, although the start of each spray is still a bit of a lottery, you get the best finish by spraying from about a metre back, which makes the aim... exciting.
You also want to keep the spray moving quickly to avoid it clumping up, which in an engine bay presents its own challenges.
Considering the amount of holes I've filled in / spot welds I've cut out / ground down, I'm satisfied with the finish on the driver's side arch.
Waiting 20 minutes for that coat to dry and then going to review to see if I've missed anywhere or want to improve the texture a bit with another spray, have about a 1/3 of the can left.
I'm happy with the results anyway, the light exaggerates the sheen / texture a bit so hard to photograph.
Looking good. Painting properly even from a can is an art....as from a gun  I tried and failed miserably. I like that finish, it reminds me of a matt version of the Rustbullet treatment I gave my ATR...now that stuff was epic but it was that potent that I almost got high every time I used it
What paint is that? Rustoleum?
I tried and failed miserably. I like that finish, it reminds me of a matt version of the Rustbullet treatment I gave my ATR...now that stuff was epic but it was that potent that I almost got high every time I used it What paint is that? Rustoleum?
Gassing Station | Readers' Cars | Top of Page | What's New | My Stuff