Hold(en) my beer - Monaro, Ute and Commodore content
Discussion


djgritt said:
That Magic Gel looks awesome!
Looks like a great solution to the possible issue mentioned above.
Looks like a great solution to the possible issue mentioned above.
Penelope Stopit said:
Cracked it
Never heard of the stuff
Have a big problem with an outside underground joint.......Ordering some soon
Nice find
Looks good doesn't it? I particularly liked that it didn't set hard so it wouldn't totally obliterate the connector if something needed to be done to it in the future.Never heard of the stuff
Have a big problem with an outside underground joint.......Ordering some soon
Nice find
Last night I made a little progress, routed the driver's front ABS sensor wire over the washer fluid tank out the way
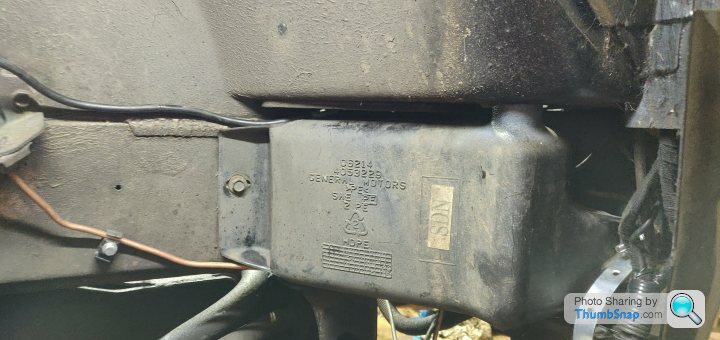
Popped the headlight out and set about covering the +ve terminal bits
If anyone is in to bondage I imagine you'll quite like this

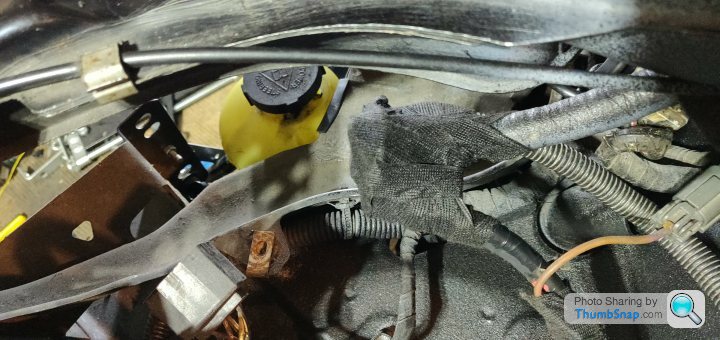
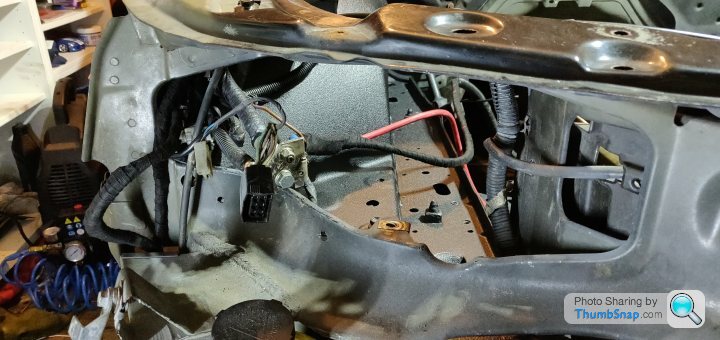
Put the main ground in place, this goes to the little ground point I'd reused (it previously went to the ABS bracket as mentioned earlier) and a second run to a ring terminal that bolts to the air con bracket on the block.

Getting to be quite the mess of cables down in there, but not too fussed at this point as they're out of sight.

I then realised I needed power and ground for the power steering pump, and that with an inline fuse and a ring terminal I could connect straight to the +ve and main ground.
Except I've mummified the +ve haven't I? Cock. So that'll be coming apart again once said fuse/terminal turn up. Drat.
Then also need to run the wire pair to actually turn the pump on in to the dash as I'd like a switch for it, so I can optionally not have it on for engine crank if the battery is struggling, and also if the battery is in good shape, I can have power steering without the engine on, in case I need to move it around quietly
Naturally this wire pair would have been better run through with one of the other many little trunks of cable... Must plan better.Edited by SturdyHSV on Friday 9th April 11:20
SturdyHSV said:
Looks good doesn't it? I particularly liked that it didn't set hard so it wouldn't totally obliterate the connector if something needed to be done to it in the future
Another good updateAm well impressed with the gel, the video shows how good it is, no harm in filling the connector if needing to, could even space the wires out with small split rubber tubes (split to go over the wires) and cover that area with it having placed an oversize hose around the whole lot to keep the gel in (options are endless....)
Have you got room for an exhaust bobbin that those positives could be bolted to? Bobbins do tidy the job up
A power steering pump relay can be driven by the alternator warning light circuit (alternator W/Lt terminal will be labelled D+ or 61), meaning that the PAS pump will only run when the engine is running and the alternator has cut-in, obviously a switch can be added to the circuit to override the alternator if needing PAS when engine is stationary
Thinking out loud...that's all
Penelope Stopit said:
Thinking out loud...that's all
I think the pour and fill option is the simplest for the ABS plug, and should be pretty fool proof without requiring too much manual skill, which is ideal Bobbin wise, I'm quite limited on flexibility / reach of all the positives, so where they are currently is about as far 'hidden' as I could get them without more cutting / extending, which for whatever reason I'm not too keen on doing with the big chunky lines, so the bobbin wouldn't offer much given my limited options for positioning.
Interesting thought with regards to triggering the pump off the alternator warning light, it's straying outside of my comfort zone in terms of electrickery though, and (call me silly but) I like the idea of the PS being on a toggle switch

To be honest if I was really keen on making an electrical mess, I'd enjoy having ignition / fuel pump on switches too, as it's a stupid weekend car then the 'startup sequence' novelty holds a certain appeal

Mmm, you're probably doing enough by filling the plug with some magic, waters always been a big problem for me hence the possible over kill in attempting to seal things up good and proper
Shame there's no space for a bobbin
Earlier today was looking at a diagram I had drawn for an Astra PAS pump circuit and realised that there must be an electronic unit or relay built into the pump, I thought that the main pos and neg cables that come out of the pump body were connected directly to the motor
Have you any information about what's inside the pump housing or dismantled one and seen what's what?
I've just been involved in a project at TRL5 for the MOD which demonstrated a UGV underwater.
We didn't have the time or the budget for IP68 connectors, and used sealant with IP65 connectors, and as such had some water ingress where we didn't really need it. We lost some functionality in our 2 day demonstration to but have made promises to the MOD about the next phase, about using higher spec connectors. For a cost you can obtain subsea connectors suitable down to 200 m of seawater. The advantage ? They look brilliant. In a form follows function kind of way. I'll have a look on Monday and see if I can find the suppliers name for you.
We didn't have the time or the budget for IP68 connectors, and used sealant with IP65 connectors, and as such had some water ingress where we didn't really need it. We lost some functionality in our 2 day demonstration to but have made promises to the MOD about the next phase, about using higher spec connectors. For a cost you can obtain subsea connectors suitable down to 200 m of seawater. The advantage ? They look brilliant. In a form follows function kind of way. I'll have a look on Monday and see if I can find the suppliers name for you.
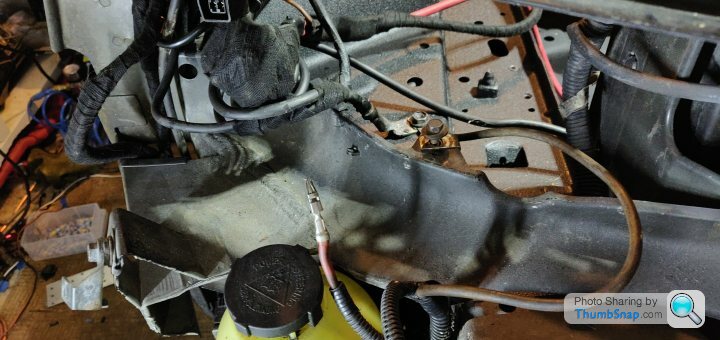
Well I got a little done over the weekend, but took far fewer pictures than I remembered.

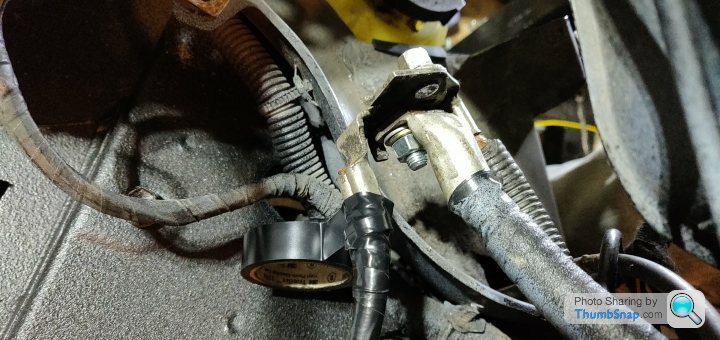
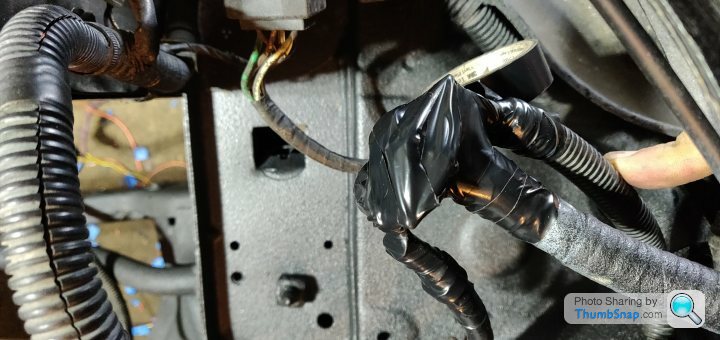
Inline fuse for the power steering pump joined up, positive cables untaped and retaped with the new line attached, and after some snipping and thought (about 3 rounds) the grounds are much better arranged than before, although it still looks a mess.
The headlight still fits though so that's a bonus.
I also sheathed up and ran the alternator +ve and the block ground to roughly where they'll be going, should be pretty tidy (they're just propped under the roll bar and such so they don't move)

At this point it was fairly obvious that I really need to put the motor back in so that I can get an idea of where the exhaust manifolds (I'm itching to say headers as I've read so much American stuff over the years) will be, and where I can thus run power steering lines and sorts.
To this end I have cleaned up the sump (internally at least, the outside needs some more elbow grease) and the engine mounts, and set about roughly bolting bits on to sort of 'seal' the engine from filth whilst it's sat in the engine bay. This at least makes for a better picture
This also reinforced the need to paint said sump / engine mounts, but I think I shall wait until final assembly before doing that. Need to clean the rocker covers too.
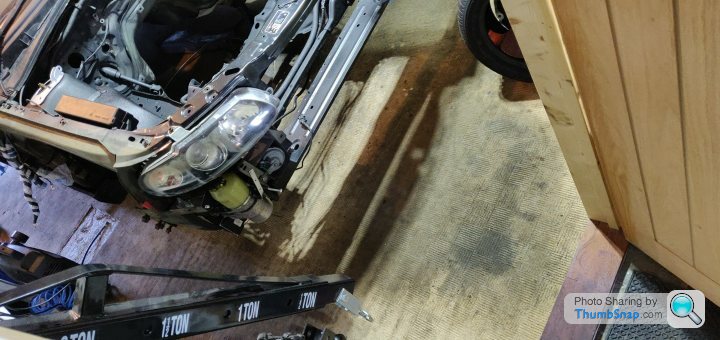
As I have to push the car back out of the garage a bit to get the crane in front of it I'm going to have to wait for a decent weather weekend day to drop the engine in, I've got the small but fun matter of physically getting it through the doorway on the stand to then attach to the crane too Quite feasibly a heads off job that, but good to know in advance.
This also means I need to have a tidy up of the garage floor as it's covered in wire ends, tools, tape, etc etc, and it was at this point I decided I'd had enough. The wiring? Yes, I'm procrastinating.
Inline fuse for the power steering pump joined up, positive cables untaped and retaped with the new line attached, and after some snipping and thought (about 3 rounds) the grounds are much better arranged than before, although it still looks a mess.
The headlight still fits though so that's a bonus.
I also sheathed up and ran the alternator +ve and the block ground to roughly where they'll be going, should be pretty tidy (they're just propped under the roll bar and such so they don't move)
At this point it was fairly obvious that I really need to put the motor back in so that I can get an idea of where the exhaust manifolds (I'm itching to say headers as I've read so much American stuff over the years) will be, and where I can thus run power steering lines and sorts.
To this end I have cleaned up the sump (internally at least, the outside needs some more elbow grease) and the engine mounts, and set about roughly bolting bits on to sort of 'seal' the engine from filth whilst it's sat in the engine bay. This at least makes for a better picture
This also reinforced the need to paint said sump / engine mounts, but I think I shall wait until final assembly before doing that. Need to clean the rocker covers too.
As I have to push the car back out of the garage a bit to get the crane in front of it I'm going to have to wait for a decent weather weekend day to drop the engine in, I've got the small but fun matter of physically getting it through the doorway on the stand to then attach to the crane too
Quite feasibly a heads off job that, but good to know in advance.This also means I need to have a tidy up of the garage floor as it's covered in wire ends, tools, tape, etc etc, and it was at this point I decided I'd had enough. The wiring? Yes, I'm procrastinating.
So we all know as men that sometimes you have to be realistic, take stock of the situation, and accept the unavoidable time when you can't carry on as things are and you have to down tools. And get the hoover out.
So ignoring my comically optimistic "I need to roll the car out" comment earlier, whereby I forgot it's on axle stands with no wheels, if I was going to be rolling the engine crane around I needed to have a tidy up of all the tools, labels, wires, cut off bits of bolt, and general filth around the front of the car.
So peak excitement for you... It's a slightly cleaner floor. You'll have to take my word that that is the carpet looking 'cleaner'.
So, whilst on a roll, why not try and make this happen:
You'll notice several things, firstly the step up to the threshold, then the drop to the carpet, then the leg of the crane, oh and despite the perspective, the rear 'axle' of the stand does not fit through the door anywhere close to straight
If you're of an anxious disposition, you won't enjoy these pictures of horrendous bodgery and general precariousness.
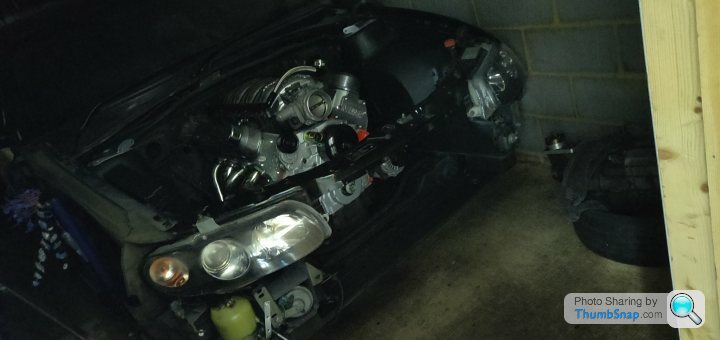
That bit was simple, then it was a case of lifting the wheels on to and then over the crane leg, and then having it just balanced and very eager to slide on the middle frame of the engine stand. You'll understand why I didn't take many pictures during the swearing and sharp intakes of breath that ensued to get to this point:
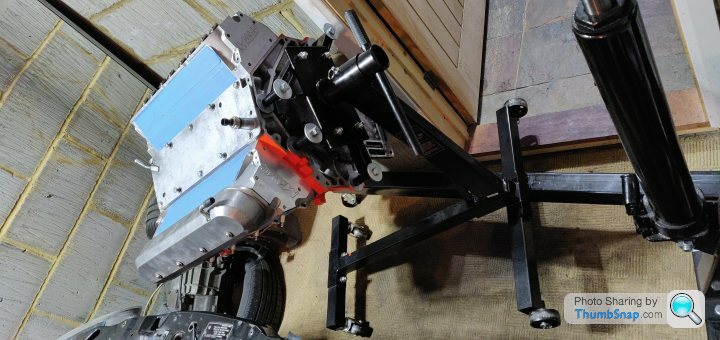
At one point it slid merrily forwards and stopped 1cm from the headlight, the wheels have made all sorts of marks in the door / door frame, but it eventually got in there and there aren't lines of orange paint up the architrave so job done...
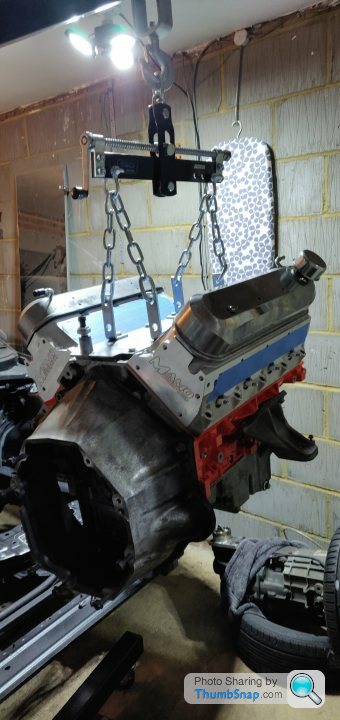
Hefted it down, attached to the crane, fitted the bellhousing so I have something to support the rear of the motor on.
Up, over and round, I now know not to use the full extended length of the crane as it was up against the wall and I had to pull the lump away from the firewall to lower it enough, it was only during this I realised it was on stands with no wheels so I couldn't 'roll it back' even if I wanted to
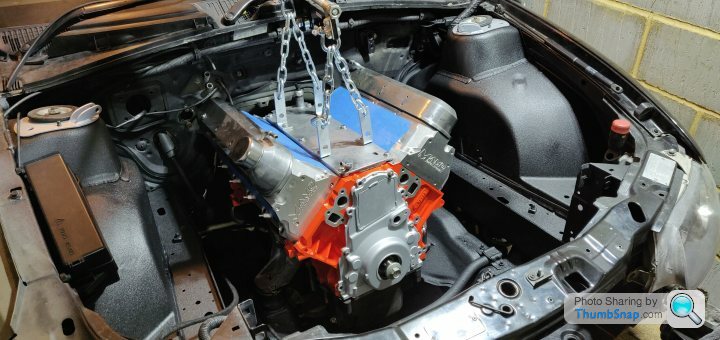
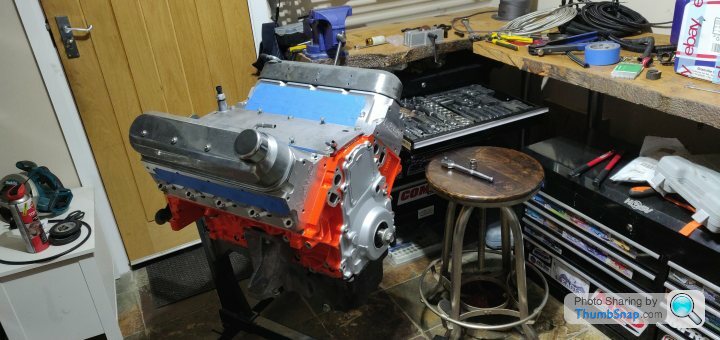
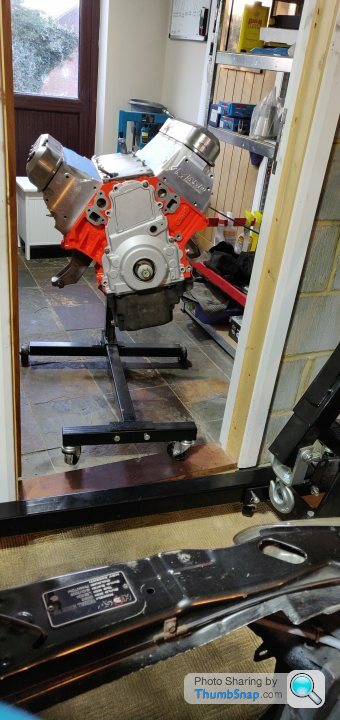
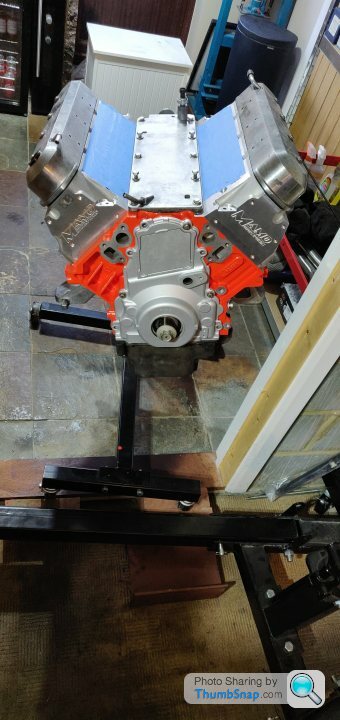
And without further ado, the money shot (shots)


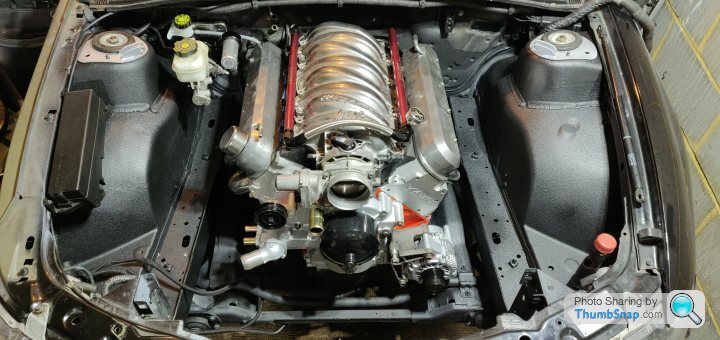
Sat the intake manifold on to confirm how much I didn't like the red...
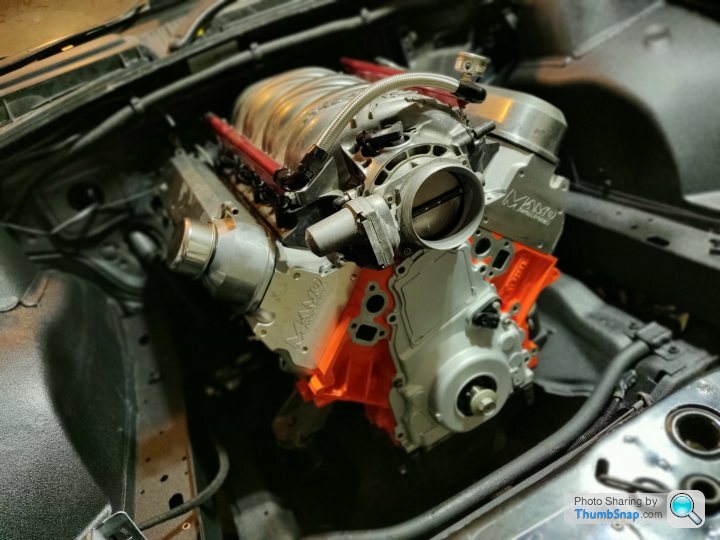
So yeah I'll need to paint those fuel rails black. Or a cooler idea... Orange... How much is it to get something re-anodised
Oh, the wiring? Yeaaaah, I'm at my most productive whilst procrastinating
So ignoring my comically optimistic "I need to roll the car out" comment earlier, whereby I forgot it's on axle stands with no wheels, if I was going to be rolling the engine crane around I needed to have a tidy up of all the tools, labels, wires, cut off bits of bolt, and general filth around the front of the car.
So peak excitement for you... It's a slightly cleaner floor. You'll have to take my word that that is the carpet looking 'cleaner'.
So, whilst on a roll, why not try and make this happen:
You'll notice several things, firstly the step up to the threshold, then the drop to the carpet, then the leg of the crane, oh and despite the perspective, the rear 'axle' of the stand does not fit through the door anywhere close to straight
If you're of an anxious disposition, you won't enjoy these pictures of horrendous bodgery and general precariousness.
That bit was simple, then it was a case of lifting the wheels on to and then over the crane leg, and then having it just balanced and very eager to slide on the middle frame of the engine stand. You'll understand why I didn't take many pictures during the swearing and sharp intakes of breath that ensued to get to this point:
At one point it slid merrily forwards and stopped 1cm from the headlight, the wheels have made all sorts of marks in the door / door frame, but it eventually got in there and there aren't lines of orange paint up the architrave so job done...
Hefted it down, attached to the crane, fitted the bellhousing so I have something to support the rear of the motor on.
Up, over and round, I now know not to use the full extended length of the crane as it was up against the wall and I had to pull the lump away from the firewall to lower it enough, it was only during this I realised it was on stands with no wheels so I couldn't 'roll it back' even if I wanted to
And without further ado, the money shot (shots)
Sat the intake manifold on to confirm how much I didn't like the red...
So yeah I'll need to paint those fuel rails black. Or a cooler idea... Orange...
How much is it to get something re-anodised Oh, the wiring? Yeaaaah, I'm at my most productive whilst procrastinating
Stuck some more bits on to check things...
Had to lower the rear of the motor down a bit as I'd propped it up too high and the headers hit the underside of the chassis. Headers appear to fit although they're very snug with the driver's side chassis rail and the steering rack, there's a bit of wiggle room with the engine mounts and how the rack is bolted in so likely a case of supporting the weight with the crane and seeing if I can wiggle it a little, it'd be nice not to have to 'clearance' the headers with a hammer...
Wiring for the starter, block ground and alternator all reach fine so that's good.
Also there's so much room to feed the headers in from the top which is great, just have to drop the rack on the driver's side which is two bolts.
Also checked the new belt routing will work and it looks alright
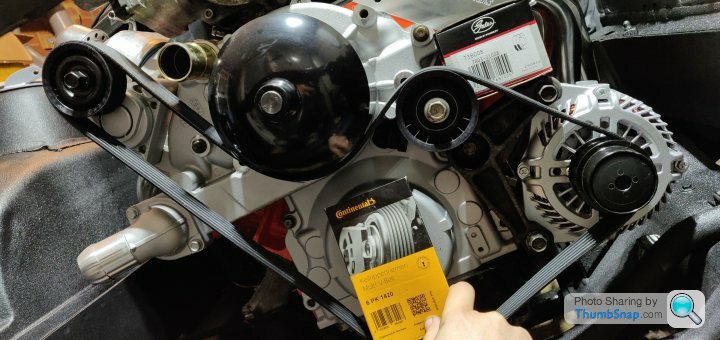
Belt is a little close to the top bolt of the alternator bracket but once under tension it's got some clearance, it'll be something to inspect for wear after the first run and keep a bit of an eye on after some abuse.
Spent a while working out where I'd run various lines and am fairly happy I've got a decent solution, although I've just thought I should put the heater hoses back in situ as they'll be in a similar area.
It's basically going to end up with a lot of brake lines and hose running along the driver's side chassis rail.
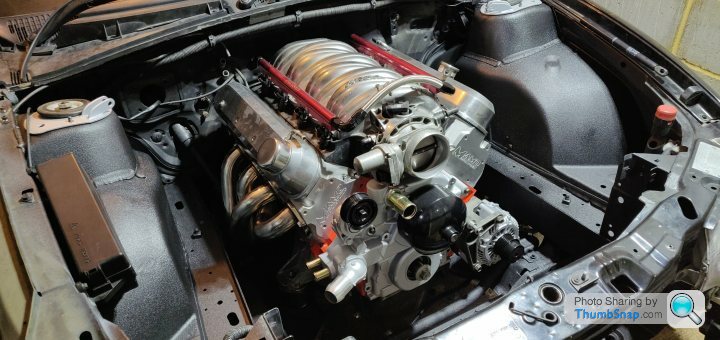
There is an enormous amount of room on the passenger side!
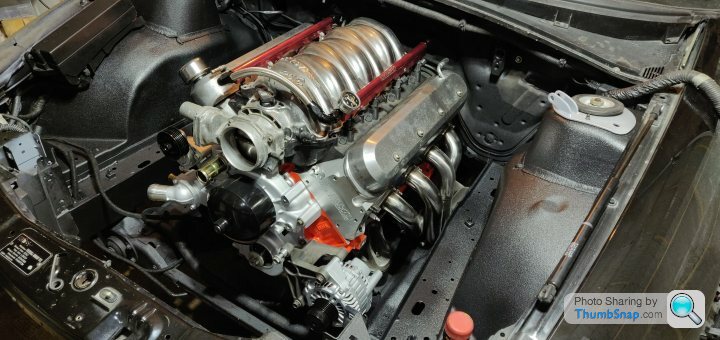
Slowly growing bigger in there and really not a lot of orange on display!

Had to lower the rear of the motor down a bit as I'd propped it up too high and the headers hit the underside of the chassis. Headers appear to fit although they're very snug with the driver's side chassis rail and the steering rack, there's a bit of wiggle room with the engine mounts and how the rack is bolted in so likely a case of supporting the weight with the crane and seeing if I can wiggle it a little, it'd be nice not to have to 'clearance' the headers with a hammer...
Wiring for the starter, block ground and alternator all reach fine so that's good.
Also there's so much room to feed the headers in from the top which is great, just have to drop the rack on the driver's side which is two bolts.
Also checked the new belt routing will work and it looks alright
Belt is a little close to the top bolt of the alternator bracket but once under tension it's got some clearance, it'll be something to inspect for wear after the first run and keep a bit of an eye on after some abuse.
Spent a while working out where I'd run various lines and am fairly happy I've got a decent solution, although I've just thought I should put the heater hoses back in situ as they'll be in a similar area.
It's basically going to end up with a lot of brake lines and hose running along the driver's side chassis rail.
There is an enormous amount of room on the passenger side!
Slowly growing bigger in there and really not a lot of orange on display!
Huskyman said:
The engine is looking jewel like in the engine bay! Did you ever consider painting the heads and rocker covers the same as the block? It looks good as it is though.
Automotive wiring. I hate it and I’m an Electrical Engineer
Oh you're too kind Automotive wiring. I hate it and I’m an Electrical Engineer
That's literally the phrase I had in mind, for it to look like a jewel in a box sort of thing, hence wanting to have the surrounding area a dull black. The finish is still perhaps a little glossier than I had hoped but it looks good anyway.I did consider painting the heads yes, and then leave the rocker covers shiny, but I think historically aluminium heads would often be left shiny as they'd often be an aftermarket upgrade back when blocks / heads were all iron, so the shiny top end look is fine. It is a bit of a shame how little orange is actually visible with the accessories on but I did sort of know that going in.
It looks like orange is available on a few anodising places so I think that'll be a nice addition, I'm sort of assuming it isn't stupid money for just a couple of fuel rails.
Camaro said:
Make the most of this point, enjoy how empty and nice the bay looks... once stuff starts going in, it sucks.
Oh believe me, I'm sneaking looks at it all the time and have taken SO MANY photos It's encouraging me to try and keep the clutter as tidy as possible though to maintain this cleanliness.
A peak before bed last night
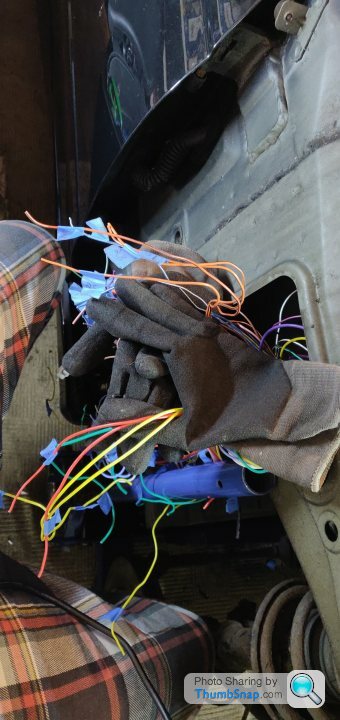
Finally made a start on the wiring, have done 28 out of 65, so didn't quite make it to halfway, but a good start!
I enlisted the help of the invisible man to hold wires and generally keep them out of the way of the heat gun etc.
Loosely put the new clutch master and the brake booster in place, the bolts for the brake booster are fouling the braces and such on the inside under the dash which is really annoying, as it's an American part I assume it fits OK on the Pontiac.
Will likely just have to drill through a couple of the holes to enlarge them a touch.
SturdyHSV said:
Finally made a start on the wiring, have done 28 out of 65, so didn't quite make it to halfway, but a good start!
I enlisted the help of the invisible man to hold wires and generally keep them out of the way of the heat gun etc.
Loosely put the new clutch master and the brake booster in place, the bolts for the brake booster are fouling the braces and such on the inside under the dash which is really annoying, as it's an American part I assume it fits OK on the Pontiac.
Will likely just have to drill through a couple of the holes to enlarge them a touch.
Play the game......................you have up to nowI enlisted the help of the invisible man to hold wires and generally keep them out of the way of the heat gun etc.
Loosely put the new clutch master and the brake booster in place, the bolts for the brake booster are fouling the braces and such on the inside under the dash which is really annoying, as it's an American part I assume it fits OK on the Pontiac.
Will likely just have to drill through a couple of the holes to enlarge them a touch.
Pics of the job without the gloves please
Done it all my life, it's good to see others giving it their best shot
Cheers
Penelope Stopit said:
Oh well, will look elsewhere
Sorry missed this part, yeah the relay is built in to the pump presumably as it takes +ve / -ve and then there's a separate little plug with the trigger wires, 2 of the 3 (I forget which 2) need to be continuous and it activates the pump.I haven't taken it apart no, I've made enough work for myself with all the other bits to start taking more (presumed) working stuff apart!
Penelope Stopit said:
Play the game......................you have up to now
Pics of the job without the gloves please
Done it all my life, it's good to see others giving it their best shot
Cheers
I shall get some more pics, it's a proper mess in there though, so hearing you've done it all your life has certainly added to the stage fright Pics of the job without the gloves please
Done it all my life, it's good to see others giving it their best shot
Cheers

As there's a) so much space and b) so many wires, I've made most of the main bunch longer than necessary so I can loop it up into the recess out of the way. Perhaps with hindsight not the best way to go about it, certainly not in terms of being photogenic... but it's helped with working through it.
Also, the hydraulic brake booster, bolts definitely don't quite line up, they ever so slightly foul the bracing under the dash around the brake pedal / steering column etc. I will have to put on my brave trousers and drill a couple of the holes fractionally bigger. I'll get some pics when I get around to that, here it is wonkily hanging with two nuts on one side holding it in place, it'll clear everything comfortably at least!
Oh and the clutch master is loosely in place, the reservoir just resting on top of the brake booster as it wouldn't reach the bracket with the booster not fitting properly.
Edited by SturdyHSV on Tuesday 20th April 08:44
Gassing Station | Readers' Cars | Top of Page | What's New | My Stuff