Hold(en) my beer - Monaro, Ute and Commodore content
Discussion


djgritt said:
RE: your thoughts on covering the braided line and brake lines to stop them standing out - you could consider using heatshrink?
Yeah, I was thinking with the brake lines I could just tuck some paper under them and spray them black easily enough, but yes heatshrink would work well for the braided line, I'll probably hop on ebay and get some to try.Might be good for the PS line that runs down near the headers too, bit more insulation from the header heat.
Pit Pony said:
Now personally I think I should avoid. ?
Engine/ trans/ ecu are worth a good £5000 easily. It will need work, sure, depends what you want from it. Its probably got rust, probably in places you cant see. Check front strut towers, and if possible the sills under the side skirts.
fred bloggs said:
Heat shrink wont insulate heat !! Dont put it near headers !
Yes this did dawn on me later, they do heat resistant sheathing which I may look in to, also think I will route the PS line slightly differently to keep it further from the headers.I have finished off the fuel line, clamped in line with the brake lines, there's a heat shield that bolts over this lot to keep the header heat away, not fitted currently
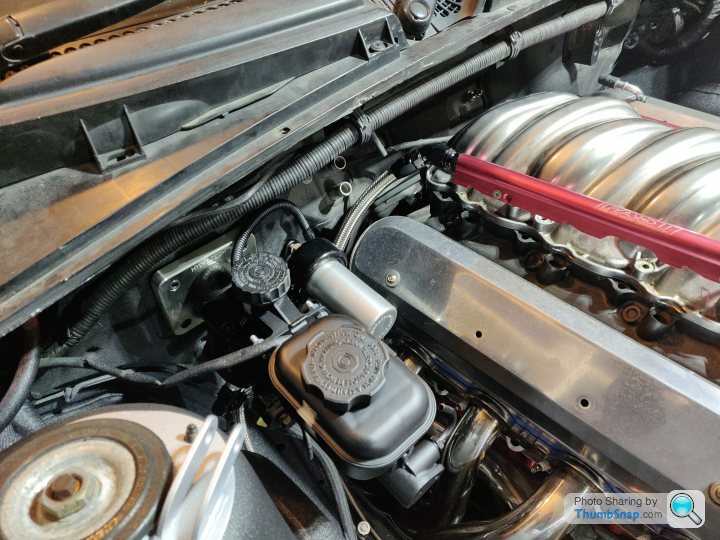
I prefer the black reservoir I think. Keeping all the hose tidy back there will take a bit of thought but I think I've got it pretty well arranged.
Also, I thought this looked great, but a mate insists engraved would be better... Thoughts?
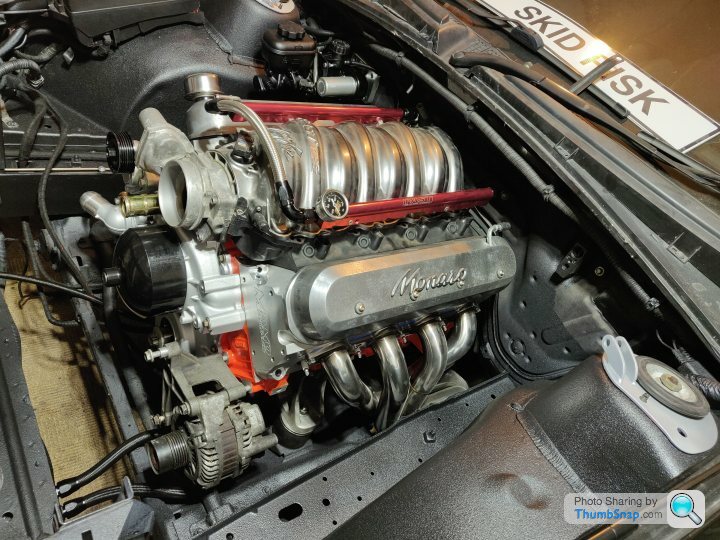
General overview picture because we all like pictures

So there was no reason to keep the engine in the car any more, I'd made the bits up that went near / around the engine, so time to take it back out to finish building.
Went a lot smoother as I now know to have the crane much shorter to give me more room to roll it back out of the way.
Unbolted the headers and any bits connected to the engine.
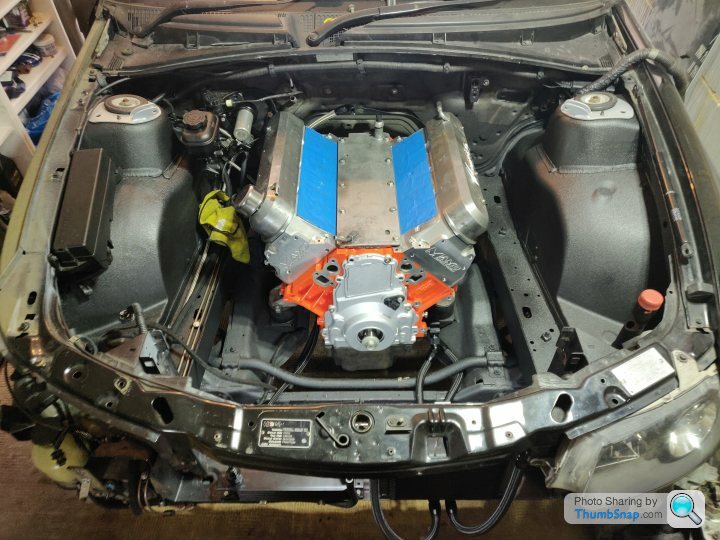
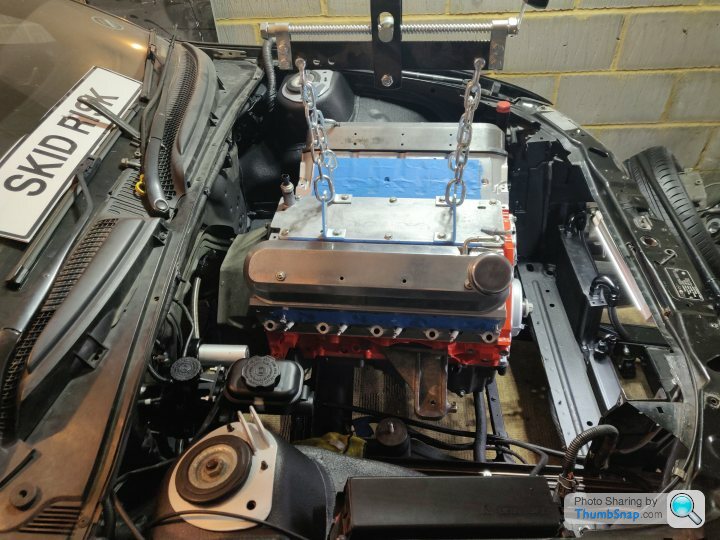
Loads of room without a gearbox to worry about, out it came, bolted to the engine stand again and then manhandled it back into the workshop.
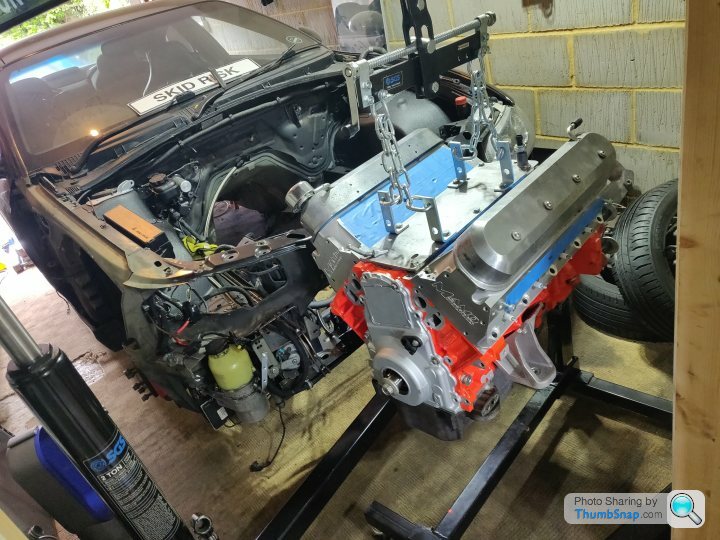

I took the heads off before lugging it up the step through the door, oiled the bores again and turned it over a few times just to check it hadn't somehow seized
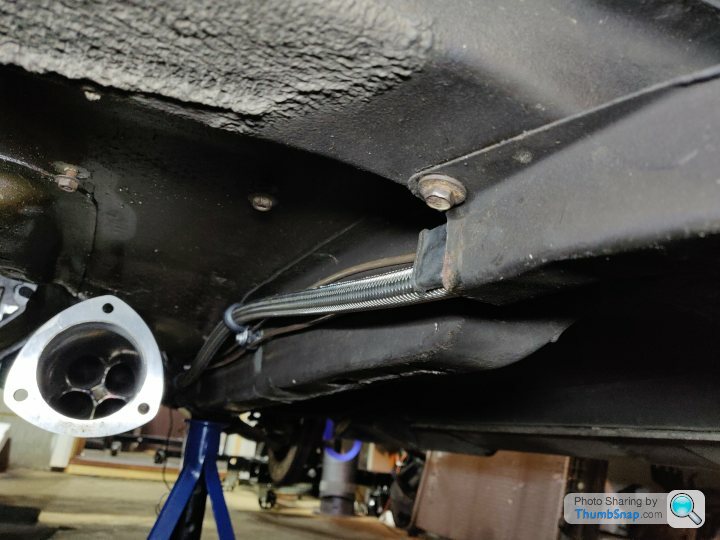
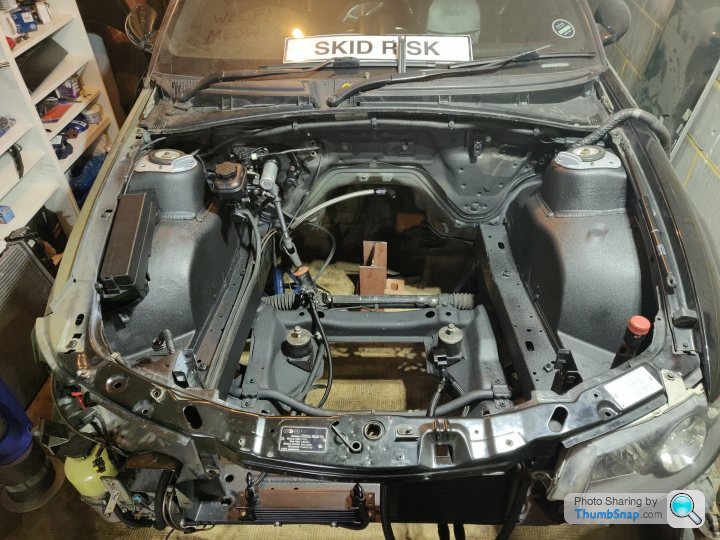
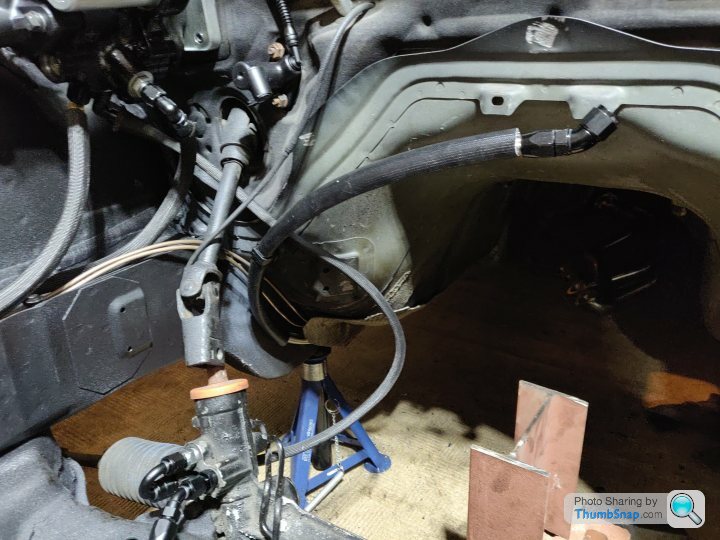
Big hole left, I took this opportunity to cover the power steering lines in 500*C resistant sleeving that helpfully meant they all look the same (and much neater). I have ordered some hose spacers and ultimately the plan is to run a bolt through the hose spacers, then the master cylinder spacers / grips and then the 2 brake line clips, have them all stacked on top of each other and thus helpfully the sleeved PS lines will hide all the brake lines, as you can see they are already well hidden underneath.
I bent up some of the old copper 3/16" pipe to get a length for the master cylinder lines, then cut some 1/4" pipe (Kunifer, naturally), stuck the fittings on and flared them. They're ready to go on, but I'm going to wait for the clips to arrive so I can make sure they bend nice and cleanly etc.
Also bolted the heatshield back on that protects the fuel line / brake lines from the driver's side header.
I have some larger sleeving coming just for the sake of covering the fuel line between the heat shield and the intake manifold, partially for some heat protection but also just so it's also black like everything else.
Not really much left to procrastinate over beyond finishing the engine now, so next will be checking rocker arm sweep pattern, if necessary shimmimg the shaft mount rocker arms and then once that's settled, measuring for pushrod length and getting those (and the clutch!) ordered.
Went a lot smoother as I now know to have the crane much shorter to give me more room to roll it back out of the way.
Unbolted the headers and any bits connected to the engine.
Loads of room without a gearbox to worry about, out it came, bolted to the engine stand again and then manhandled it back into the workshop.
I took the heads off before lugging it up the step through the door, oiled the bores again and turned it over a few times just to check it hadn't somehow seized
Big hole left, I took this opportunity to cover the power steering lines in 500*C resistant sleeving that helpfully meant they all look the same (and much neater). I have ordered some hose spacers and ultimately the plan is to run a bolt through the hose spacers, then the master cylinder spacers / grips and then the 2 brake line clips, have them all stacked on top of each other and thus helpfully the sleeved PS lines will hide all the brake lines, as you can see they are already well hidden underneath.
I bent up some of the old copper 3/16" pipe to get a length for the master cylinder lines, then cut some 1/4" pipe (Kunifer, naturally
), stuck the fittings on and flared them. They're ready to go on, but I'm going to wait for the clips to arrive so I can make sure they bend nice and cleanly etc.Also bolted the heatshield back on that protects the fuel line / brake lines from the driver's side header.
I have some larger sleeving coming just for the sake of covering the fuel line between the heat shield and the intake manifold, partially for some heat protection but also just so it's also black like everything else.
Not really much left to procrastinate over beyond finishing the engine now, so next will be checking rocker arm sweep pattern, if necessary shimmimg the shaft mount rocker arms and then once that's settled, measuring for pushrod length and getting those (and the clutch!) ordered.
Penelope Stopit said:
Looking good, a proper tidy job
Cheers 
Popped the heat resistant sleeving over the fuel line
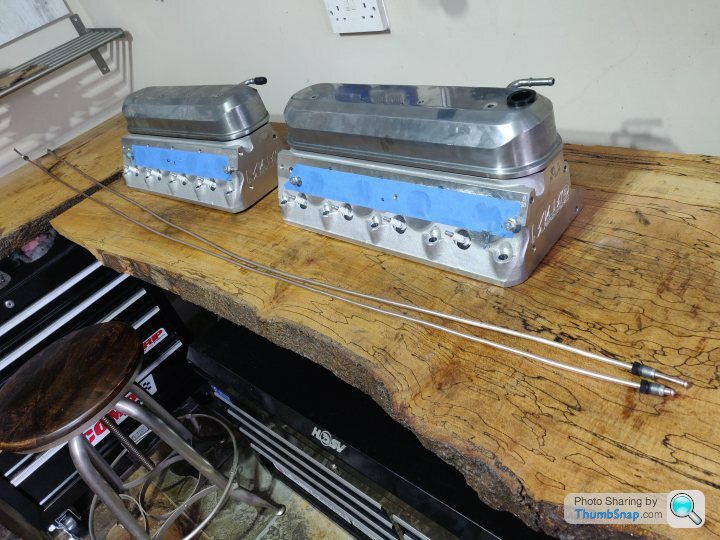
Then was time to get on with the engine again. Need to sort out rocker sweep first, then measure for pushrods.
The lifters have been swimming in oil for months
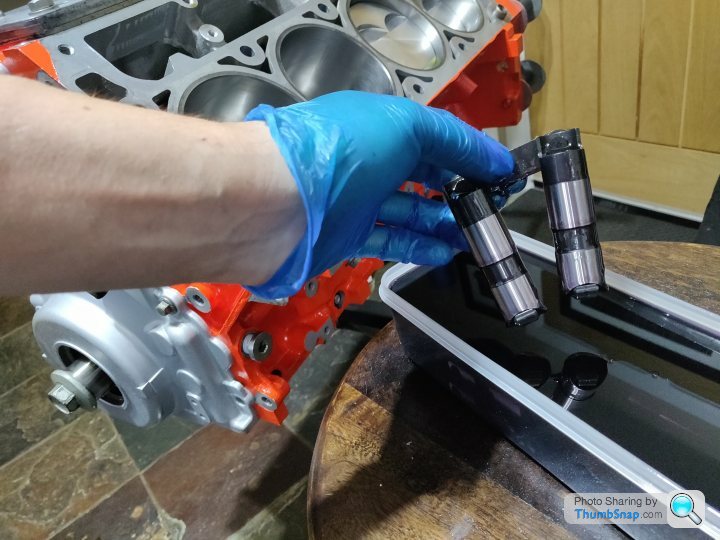
Popped those into the block
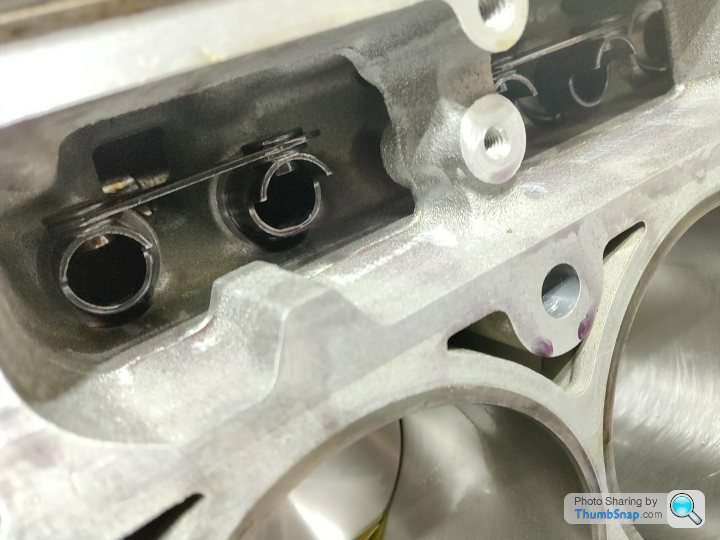

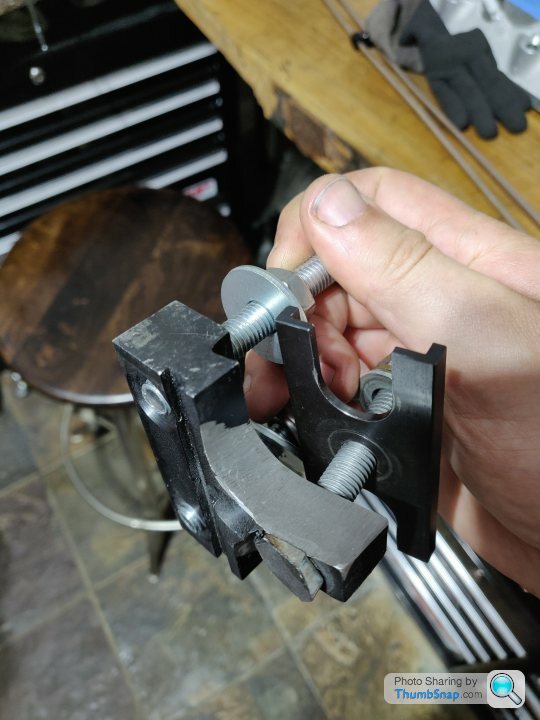
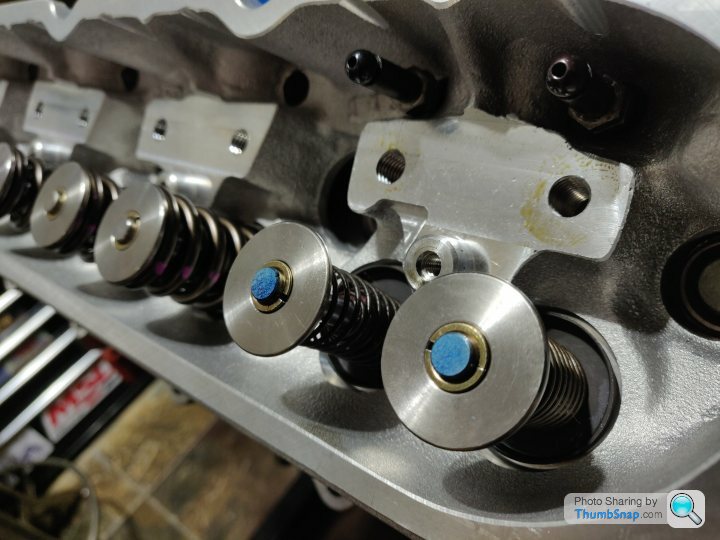
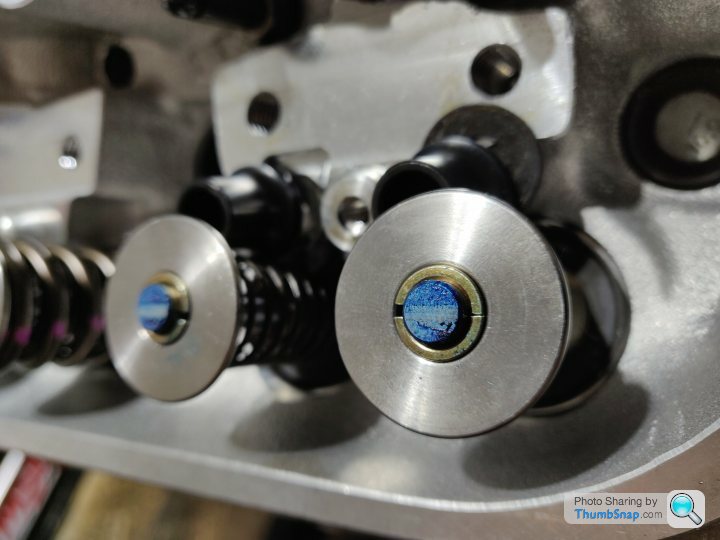
Need to install checker springs so the adjustable pushrod doesn't buckle under the spring pressure, so that meant removing the valve springs. The tool for this was pre-modified by the previous owner with an angle grinder to actually fit, and I had to go even further for these heads / springs
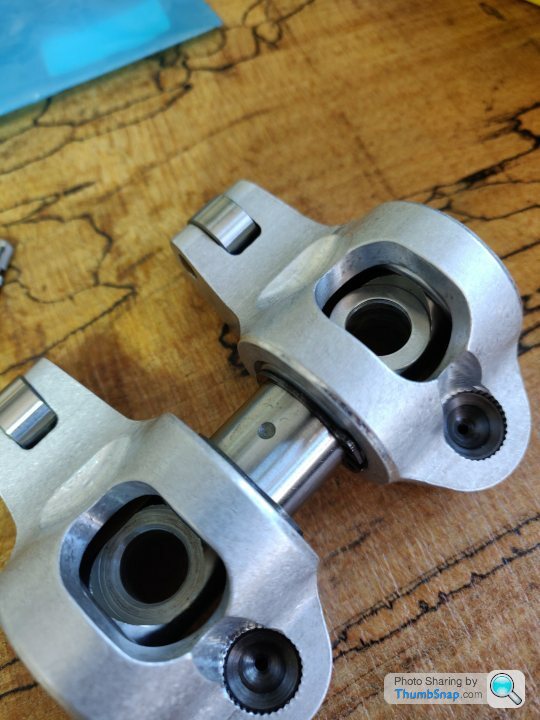
The rocker arms are secured with M10 bolts (less deflection than the standard M8) but didn't want to be banging the proper bolts in and out so used some (too long) m10s I had around with washers etc.
Tightened down, valve locks taken out, loosened back up and was getting a little tense as the nut approached the end of the thread still under spring pressure
fortunately was tall enough though. 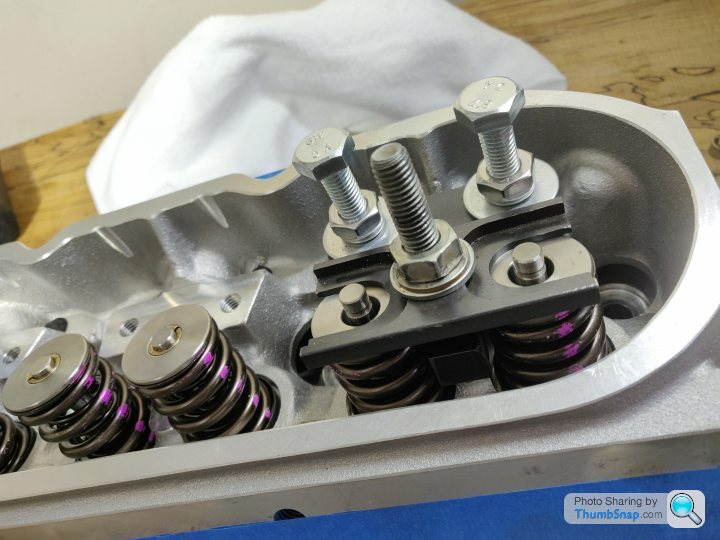
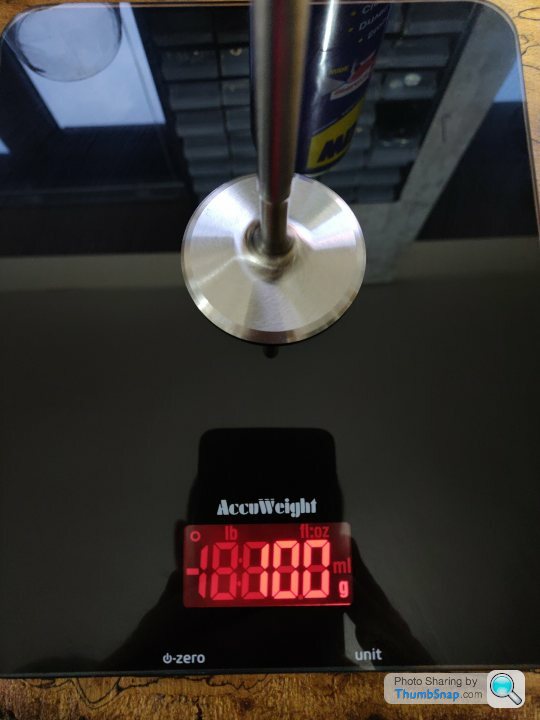
Took the opportunity to weigh bits, intake valve is 100g, exhaust 98g, massive Ti retainer 10g (stock little beehive one was 10.5g), valve locks are about 3g a pair.
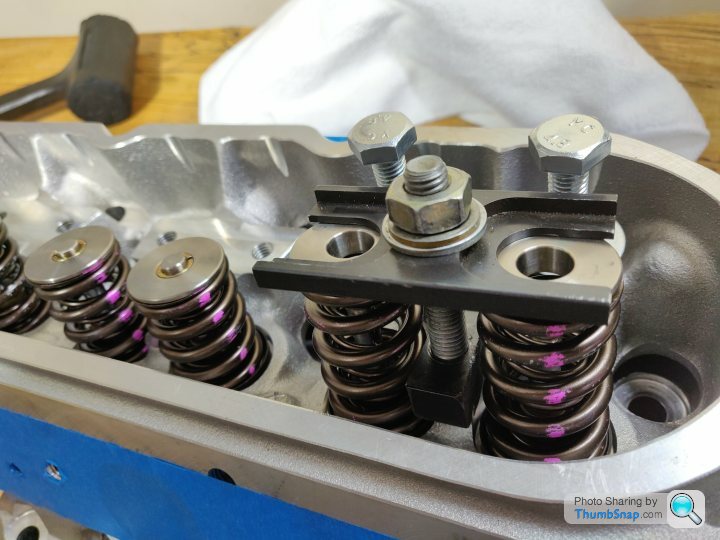
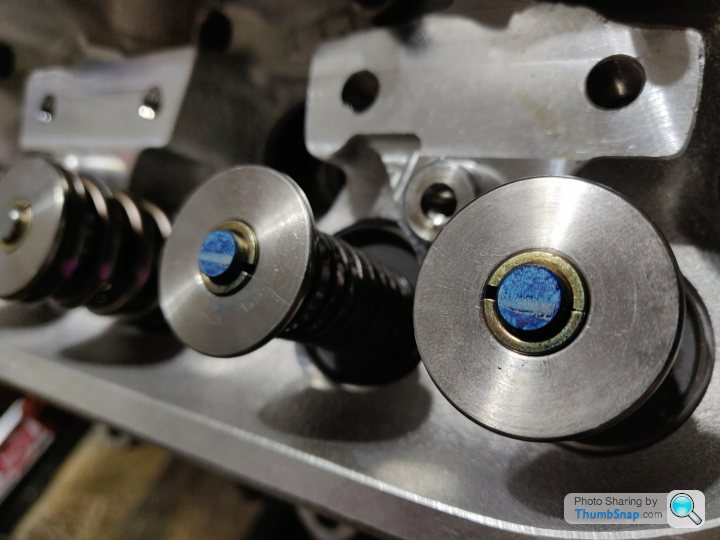
Check springs and retainers on, tightened back down and valve locks back in.
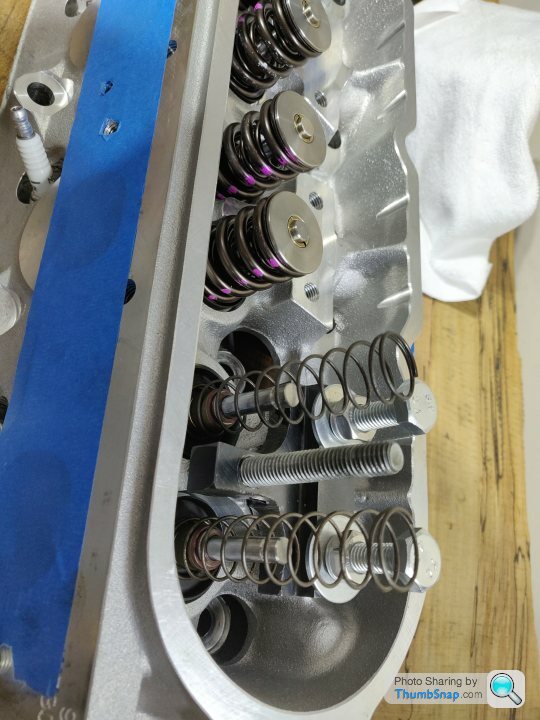
Min length of pushrod checker was just short enough to put the rockers at basically zero lash with no shims under, then take rockers back off, engineer's blue the valve tips, reinstall rockers (hand tighten the bolts) with a shim under each pedestal (shims are M10*20mm*1.5mm) keeping the rocker off the valve tip, then let them drop onto the valve.
Rotate engine over a few times, then hold rockers back off the valve tips and unbolt them (without letting them retouch the valve tips, to avoid smudging the engineer's blue)

I'm running a lot of lift so I think the width of the sweep isn't too bad, but it's a little to the exhaust / header side which would mean I need less shim to move the sweep more towards the intake to get it more central.
I thought I'd sanity check just by running 2 shims under each rocker (which should push the sweep further towards the exhaust) which fortunately it did, although it looks a little tighter.
Alas, nowhere readily does M10*20*1mm washers / shims, but I've ordered 10 0.25mm shims so I can basically try a whole range from 0.25 - 1.25mm to get the sweep as good as possible before then finally moving on to pushrod length measuring.
bonesxu1 said:
Did you get the email I sent you about the Edelbrock timing cover I have?
Hey no I didn't see that, I've not been getting email notifications on my phone for some reason.Appreciate the offer, I don't have adjustable cam gear though so the 2 piece wouldn't be any use to me, although I suppose you could change the cam without taking the balancer off too!
But I'm just about to buy the clutch and things so will keep the money spare for that!
Shims have arrived, so will be shooting for a better rocker sweep tonight, have a digital 12" caliper arriving tomorrow ready to measure for pushrods and I have placed a deposit for the clutch 
I'm going stupid and getting an RPS BC2 that Tony then machines weight out of the flywheel to bring the total weight down to about 14kg.
The 'BC2' stands for Billet, Carbon and Twin plate. Here's a pic of one in bits shamelessly stolen from this thread:
https://ls1tech.com/forums/manual-transmission/187...

General gist, machined steel flywheel (machined holes to remove weight from the outer edge, apparently going full ally flywheel takes it a bit too far in terms of street driveability with a big cam), everything else is either billet aluminium or carbon, ridiculously lightweight friction discs so nice and easy to shift, basically doesn't wear at all, shouldn't chatter, will hold 900rwhp (so not a concern with the 500 I might achieve!), not stupid to drive on the street. It's spendy but I've only heard rave reviews from anyone who has one (let's hope it's not just justifying the outlay to themselves!) and f k it, I'm going balls deep on the build anyway at this point, might as well go for it!
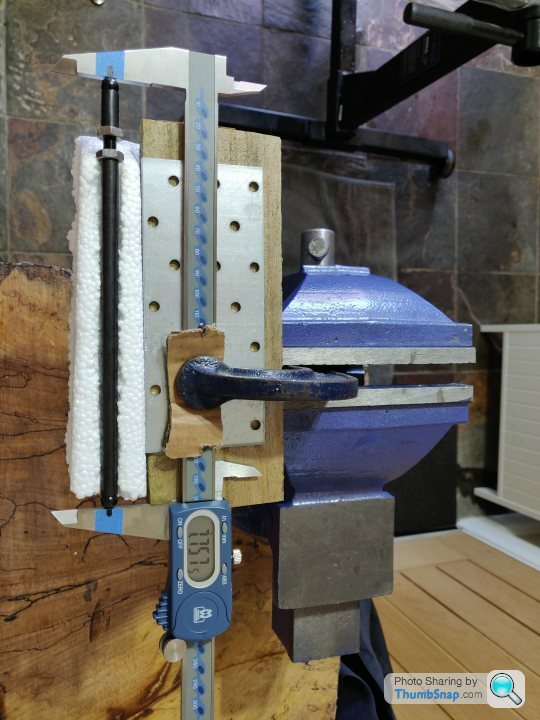
Tony's going to hold my hand over the phone to talk through measuring pushrod length, the lifter preload is a very narrow margin with the short travel lifters so he wants to talk me through it to make sure it's measured, will be measuring all 16 pushrods and ordering up whatever combination of lengths necessary to get it right
I'm going stupid and getting an RPS BC2 that Tony then machines weight out of the flywheel to bring the total weight down to about 14kg.
The 'BC2' stands for Billet, Carbon and Twin plate. Here's a pic of one in bits shamelessly stolen from this thread:
https://ls1tech.com/forums/manual-transmission/187...
General gist, machined steel flywheel (machined holes to remove weight from the outer edge, apparently going full ally flywheel takes it a bit too far in terms of street driveability with a big cam), everything else is either billet aluminium or carbon, ridiculously lightweight friction discs so nice and easy to shift, basically doesn't wear at all, shouldn't chatter, will hold 900rwhp (so not a concern with the 500 I might achieve!), not stupid to drive on the street. It's spendy but I've only heard rave reviews from anyone who has one (let's hope it's not just justifying the outlay to themselves!) and f
k it, I'm going balls deep on the build anyway at this point, might as well go for it!Tony's going to hold my hand over the phone to talk through measuring pushrod length, the lifter preload is a very narrow margin with the short travel lifters so he wants to talk me through it to make sure it's measured, will be measuring all 16 pushrods and ordering up whatever combination of lengths necessary to get it right
bonesxu1 said:
Just thought I would mention it since I have one and thought it would finish off the look of your nice looking engine. It is one of my in the atic not doing anything parts that needs a good home and extremely reasonably thingy too..
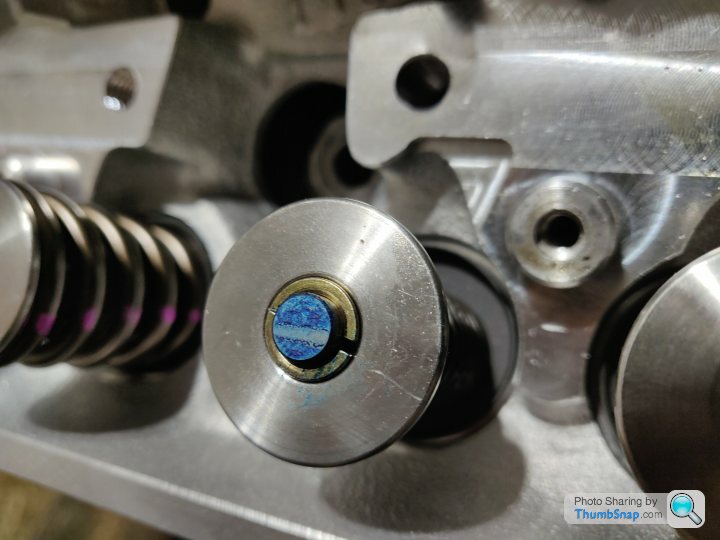
Yep got it now, it's a nice piece but I'm not going to change my cam out really as this one was specced to the heads and my build / goals, so wouldn't end up being used either Last night got on with checking rocker sweep, supplied shims are 1.5mm, so I tried 1mm first (likely slightly over 1 as 6 of the 0.25mm shims mic'd as. 1.6mm even trying to squash them flat)
So ~1mm got me here:

Moving towards the intake side, but wider sweep and still off centre.
So jumped down to 0.5mm, got me here:

Big wide sweep, but it's over the centre comfortably, so time for 0.75mm (mic'd to 0.8mm in reality), which got me to this:
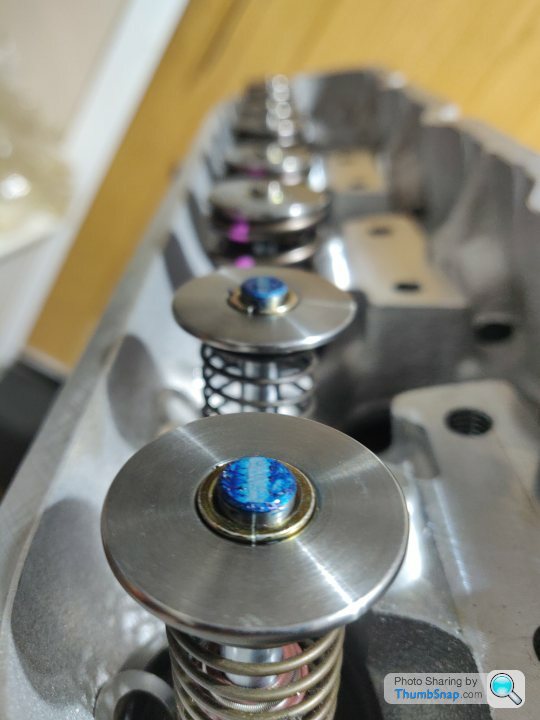

Possibly a bit too much blue on there but the actual rubbed off section is decently tight, and nicely central. Rough attempts to gauge the thickness of the rub pattern put it around 1.5mm, which for the amount of lift is fairly alright from what I've read, although will read a bit more into it.
Was trying to keep an eye on where it's contacting at full lift (as ideally want it central at highest spring pressure) but it's very hard to actually see the contact point as you can't get a decent viewing angle on it!

So turns out instead of needing to fuss about getting a 20mm M10 shim, of which there are none unless custom made, you can use the standard 16mm OD m10 shims and put them on top of the rocker pedestal instead. They fit perfectly inside the recess in the rocker shaft, and they're available off the shelf if all sorts of sizes
Penelope Stopit said:
Setting up the valves looks extremely complicated, will need to find plenty of free time to study your methods and try to understand it all or say **************** to it and pretend I never read any of it
It depends on the type of rocker arm, these are pedestal mount, so the height of the pedestal dictates which part of the rocker arm arc actuate the valve, and to be really fussy, you want it mostly riding over the centre of the valve tip.This is for maximum lift of course, and also to minimise lateral load which will wear the bronze valve guides. On OEM heads, the valve guides are powdered metal instead of bronze, so much harder wearing and it's less of an issue.
You could just slap them on and it'd run fine, but I'm trying to dot all of the is and cross all the ts...!
My cam swap in 2019,just slung the cam in, replaced the lifters and pushrods etc, torqued the stock rockers down and they number of turns was within acceptable tolerances, so job done. Much simpler!
Various shims arrived from Accu.co.uk, am I going a bit OTT here...?
I'm glad I did though, as 2 pairs of the 0.1mm shims were stuck together and didn't come apart with a simple rub, and it wasn't until they both measured at 0.2mm that I noticed.
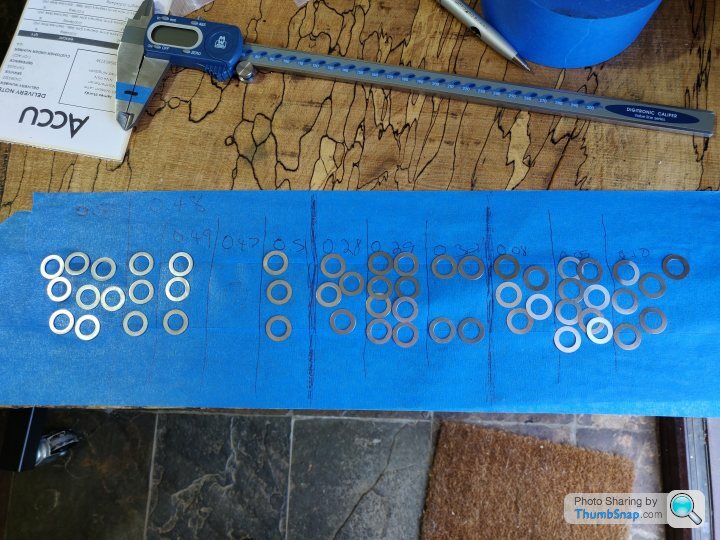
I don't suspect I need to be going this precise at all, but will at least ensure they all end up with basically the same amount of shim under them.
I'm glad I did though, as 2 pairs of the 0.1mm shims were stuck together and didn't come apart with a simple rub, and it wasn't until they both measured at 0.2mm that I noticed.
I don't suspect I need to be going this precise at all, but will at least ensure they all end up with basically the same amount of shim under them.
Gassing Station | Readers' Cars | Top of Page | What's New | My Stuff