Hold(en) my beer - Monaro, Ute and Commodore content
Discussion


Penelope Stopit said:
Great images and explanation of what's involved
Cheers  As most of the stuff takes me a while anyway then it's not like taking the odd photo slows me down
Camaro said:
You looking at making 'bout 600hp mate?
That phrase and the less significant than I expected performance difference on the road may have inspired me, yes 
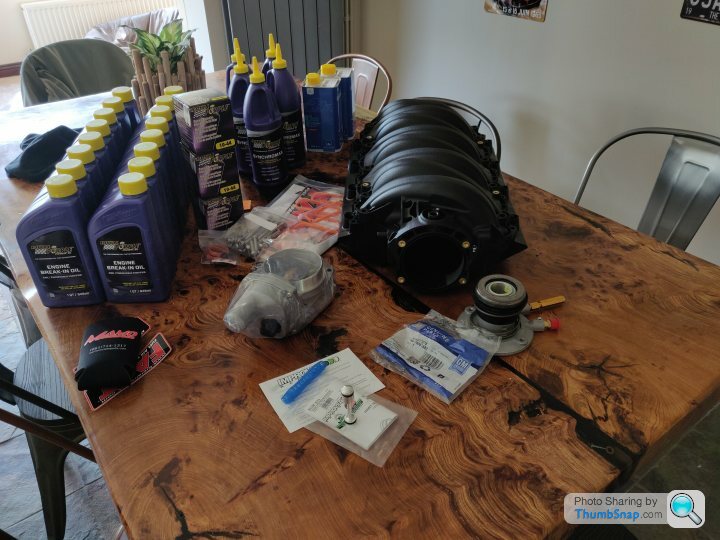
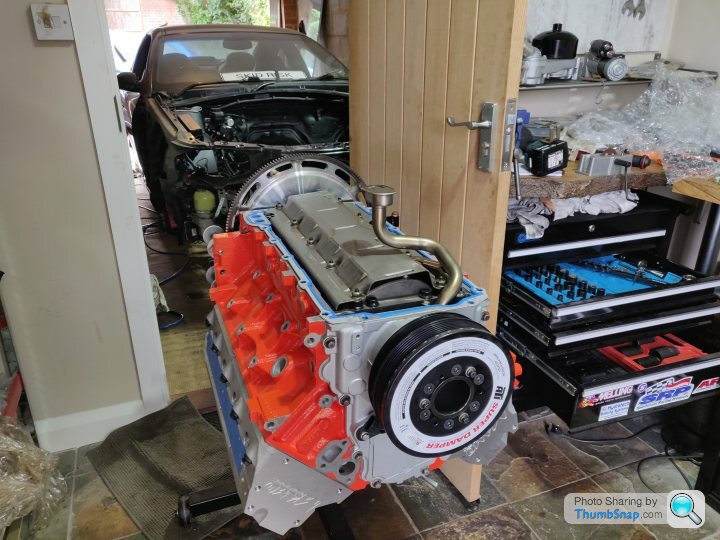
So as I'm off work for 2 weeks (summer closure and all) I thought I should set some 'goals' to ensure I make an acceptable amount of progress... So Monday to Friday I've decided I have to cross 3 or 4 things off 'the list' each day.
I also made a bit of effort to order whatever stuff I thought I might need in advance to try and limit delays, so we'll see how that goes...
So, needed to bolt down the clutch master and brake booster. Easy for the clutch as the nuts are in the engine bay. Sickening mess for the brake booster as the nuts are under the dash, buried up where human arms and tools can't really reach.
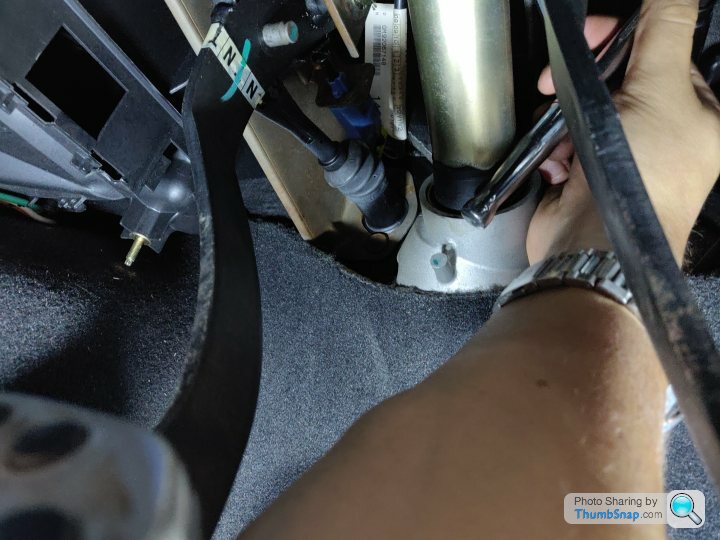
Yeah, just up there.
So after a couple of breaks where I felt remarkably ill from being upside but concentrating upwards contorted into a confined space, it is bolted down. Now, to attach the plunger (for want of a better word) to the brake pedal...
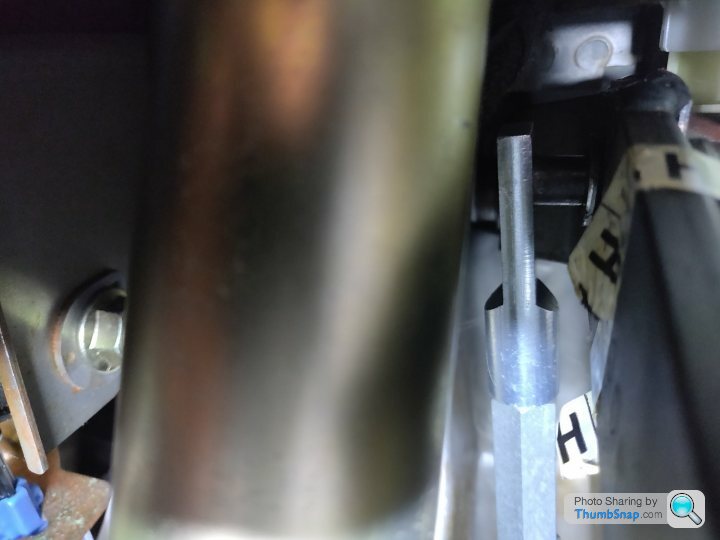
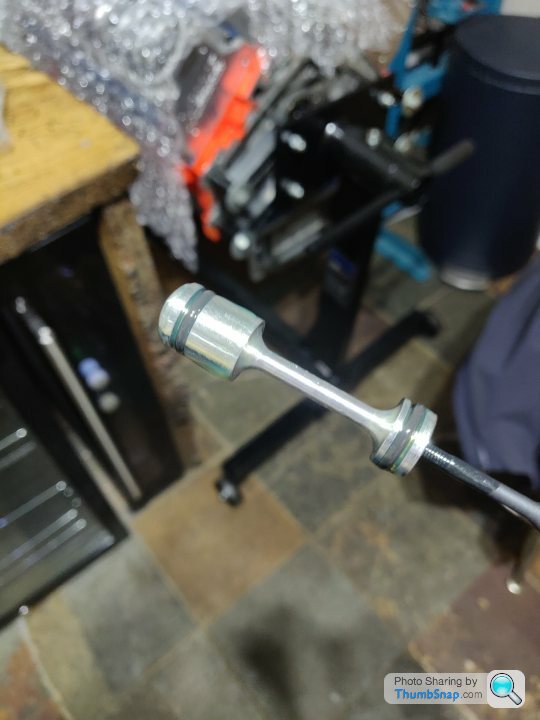
Ignoring the steering column, the silver bit is the 'plunger' that goes into the booster, and at the top there is barely visible a column at 90* which needs to go through a hole in the plunger. The black metal is the brake pedal.
This just won't go in. It's plenty big enough, but because it's at an angle (as it has to be to get it on, it'd be straight once on properly) it just binds up when trying to lever it on. I have it almost through the hole, but no amount of violent levering was getting it further on.
By this point I felt so ill I gave up to try again another day.
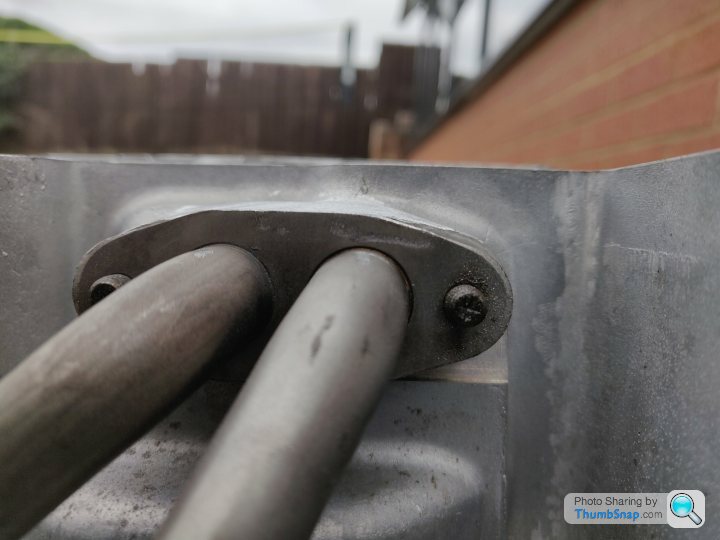
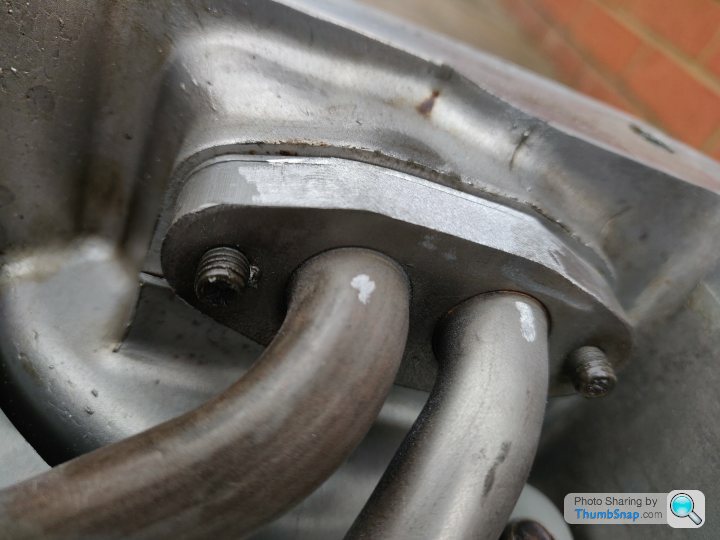
The standard master to slave clutch line is hard line for a bit, then a flexible rubber line for a bit, then hard line again around the gearbox. I opted to leave the gearbox hard line in place, but replace the rest with -3AN braided line instead.
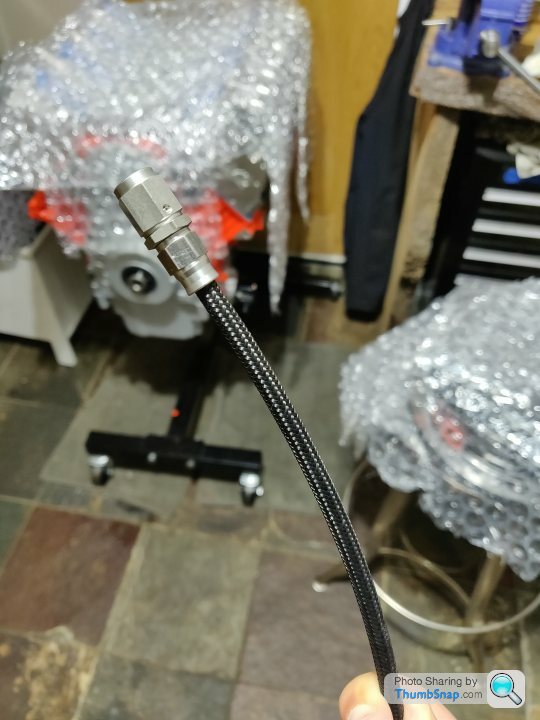
The existing hard line will screw in there, and then this runs to the master and an AN to M10x1.0 brake line type male fitting goes into the master cylinder.
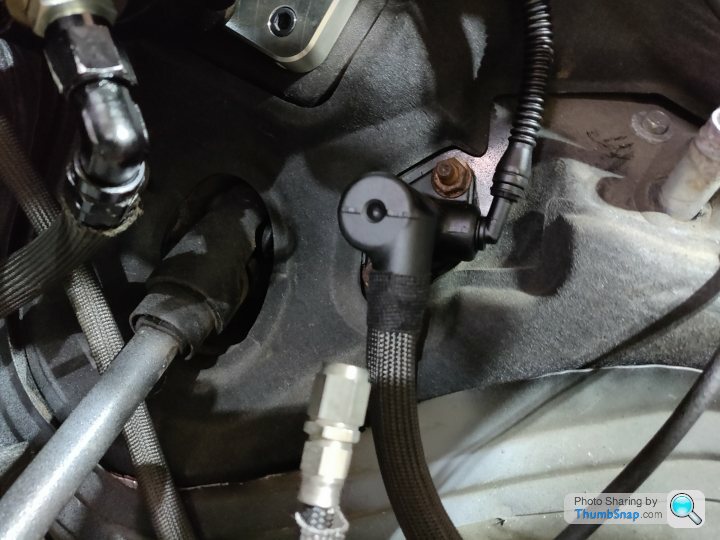
I had some heat shielding left so covered the line in that and taped it in place with a slither of wiring wrap.
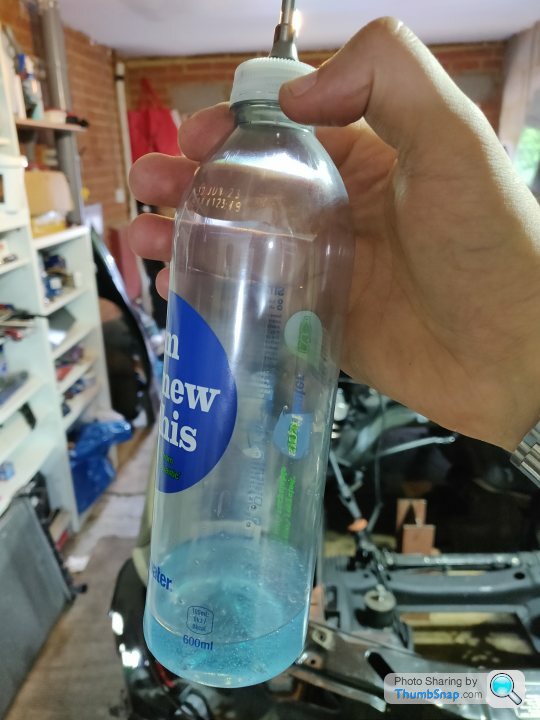
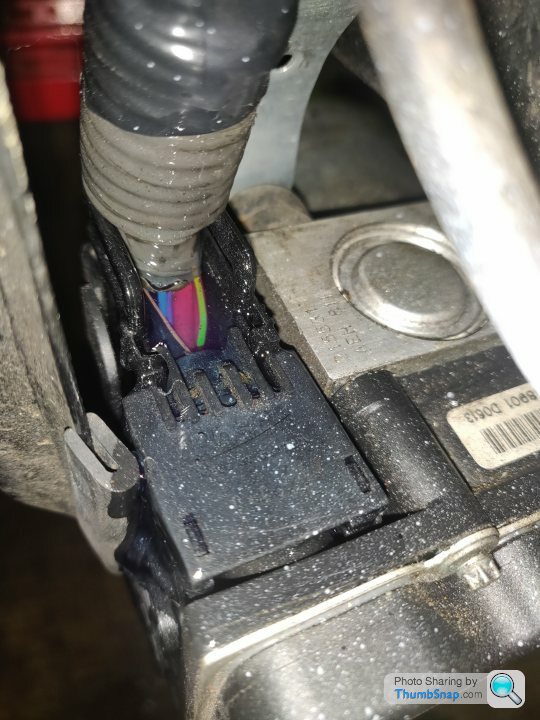
Time for the Magic Gel!
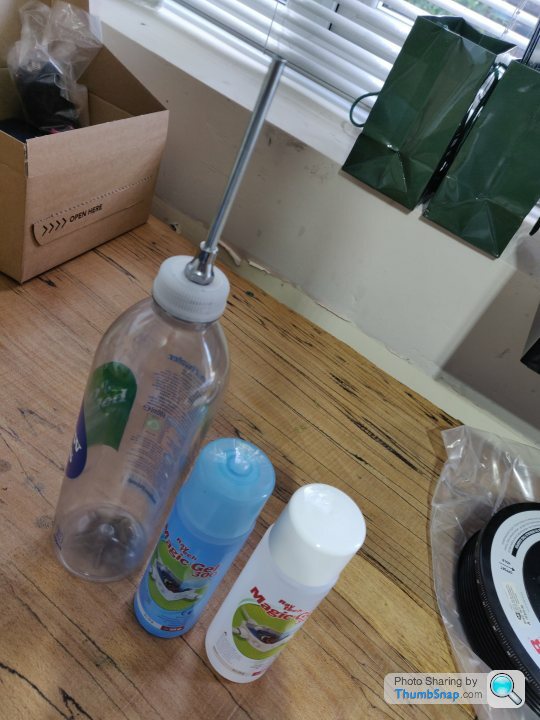
Hastily made a pourer, mixed some together, and poured away
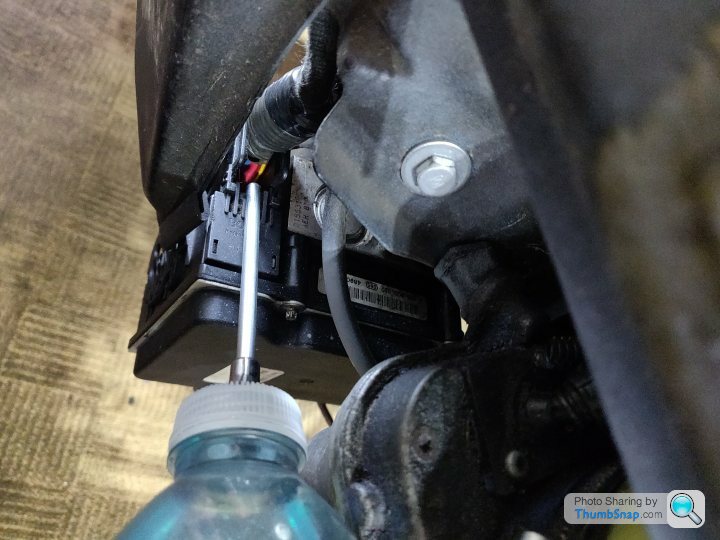
This then mostly just leaked out the bottom of the connector
So it may well have been fine to leave water to just drain out, but obviously I've started now so... I just left that to set, then a while later, mixed up a tiny bit more, and poured it in. That leaked out a tiny bit, but not much. Progress, I'm sealing it up!
So later on, another little bit mixed up, poured in, and this didn't leak out! Left it there and am going to go back today, mix up a little more and just keep topping it up until it's flush with the top of the connector so no water can get in.
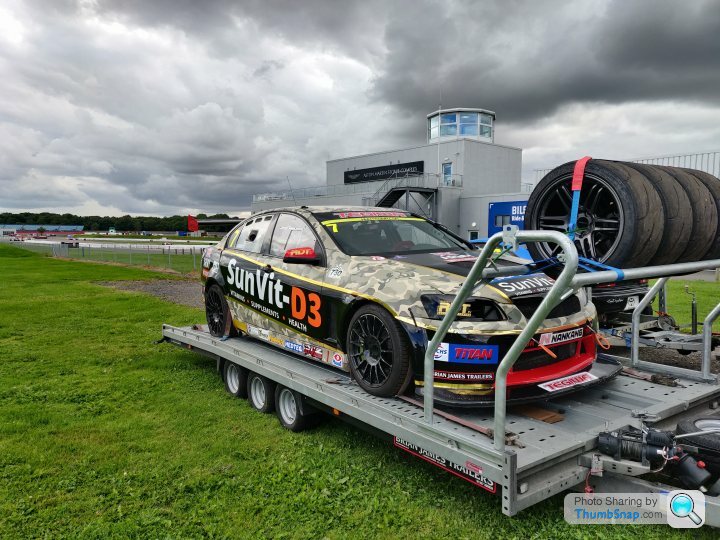
In fairly unrelated news, also popped to Silverstone to say hello to and have a nose at this Commodore that's running in the 750 Motor Club series. I sold some of my little used valvesprings to them so naturally wanted to see how it was going!
Alas, I got the days wrong so they weren't actually running on the Saturday, hence the trailer picture, but said hello anyway and caught up with the actual race on YouTube
I also made a bit of effort to order whatever stuff I thought I might need in advance to try and limit delays, so we'll see how that goes...
So, needed to bolt down the clutch master and brake booster. Easy for the clutch as the nuts are in the engine bay. Sickening mess for the brake booster as the nuts are under the dash, buried up where human arms and tools can't really reach.
Yeah, just up there.
So after a couple of breaks where I felt remarkably ill from being upside but concentrating upwards contorted into a confined space, it is bolted down. Now, to attach the plunger (for want of a better word) to the brake pedal...
Ignoring the steering column, the silver bit is the 'plunger' that goes into the booster, and at the top there is barely visible a column at 90* which needs to go through a hole in the plunger. The black metal is the brake pedal.
This just won't go in. It's plenty big enough, but because it's at an angle (as it has to be to get it on, it'd be straight once on properly) it just binds up when trying to lever it on. I have it almost through the hole, but no amount of violent levering was getting it further on.
By this point I felt so ill I gave up to try again another day.
The standard master to slave clutch line is hard line for a bit, then a flexible rubber line for a bit, then hard line again around the gearbox. I opted to leave the gearbox hard line in place, but replace the rest with -3AN braided line instead.
The existing hard line will screw in there, and then this runs to the master and an AN to M10x1.0 brake line type male fitting goes into the master cylinder.
I had some heat shielding left so covered the line in that and taped it in place with a slither of wiring wrap.
Time for the Magic Gel!
Hastily made a pourer, mixed some together, and poured away
This then mostly just leaked out the bottom of the connector
So it may well have been fine to leave water to just drain out, but obviously I've started now so... I just left that to set, then a while later, mixed up a tiny bit more, and poured it in. That leaked out a tiny bit, but not much. Progress, I'm sealing it up!
So later on, another little bit mixed up, poured in, and this didn't leak out! Left it there and am going to go back today, mix up a little more and just keep topping it up until it's flush with the top of the connector so no water can get in.
In fairly unrelated news, also popped to Silverstone to say hello to and have a nose at this Commodore that's running in the 750 Motor Club series. I sold some of my little used valvesprings to them so naturally wanted to see how it was going!
Alas, I got the days wrong so they weren't actually running on the Saturday, hence the trailer picture, but said hello anyway and caught up with the actual race on YouTube
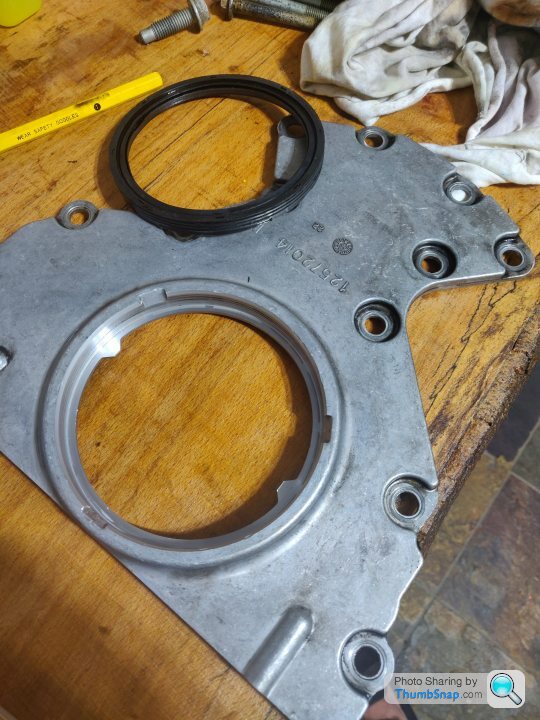
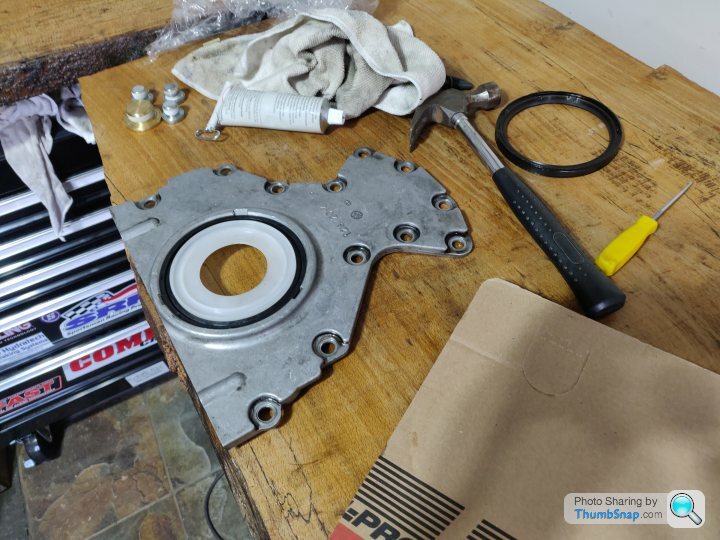
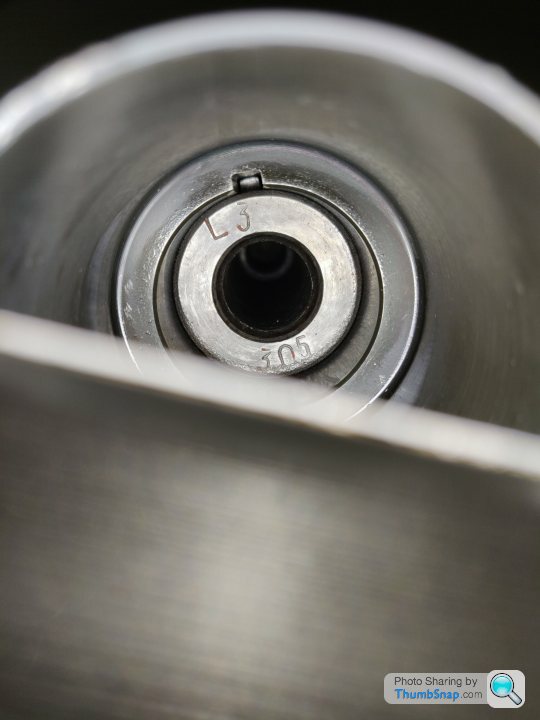
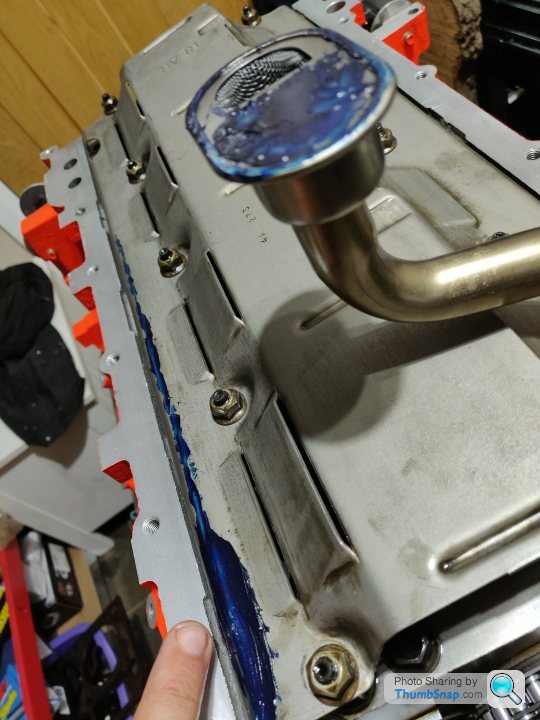
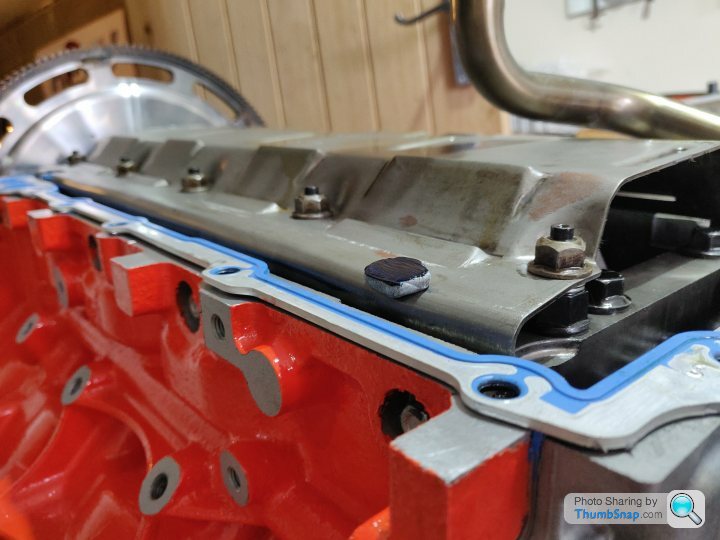
So this little 'barbell' is very important, it seals off the oil passageway as it enters the block at the rear and also seals inside where used oil returns back to the sump.
There's a couple of aftermarket options, this Improved Racing one includes an o-ring at the front to completely seal off the dirty oil from the clean, and also standard narrower 'bar' for less restriction and smoother edges and so on.
The OEM equivalent is plastic with just the rear o-ring, and just uses a snug fit to keep out the dirty oil.
It's just lubed with oil and inserted here under the rear cover
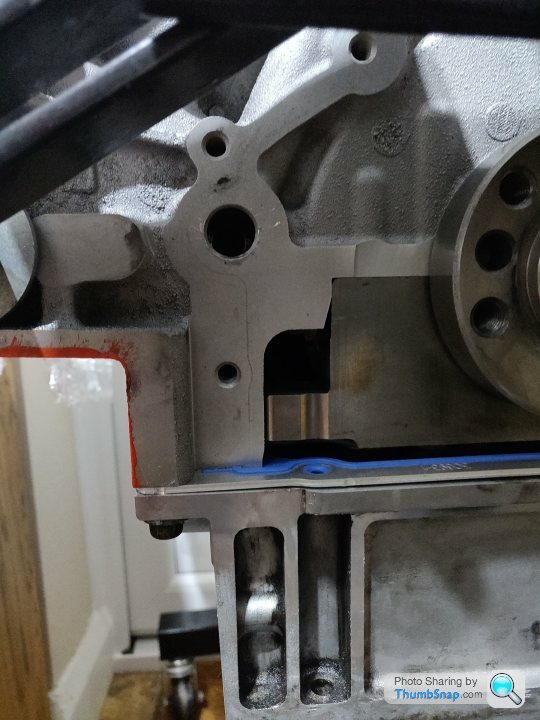
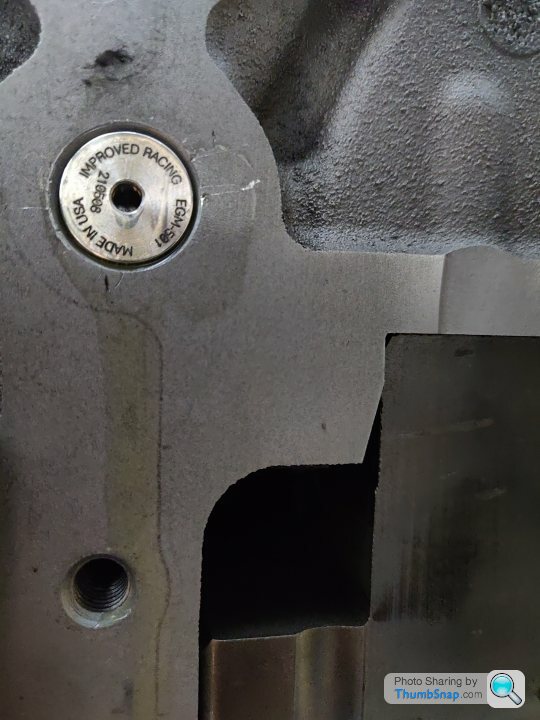
It also includes that handy M4 threaded hole to allow you to remove it easily.
I also finally finished filling the ABS. connector with the magic gel, although hard to capture on camera
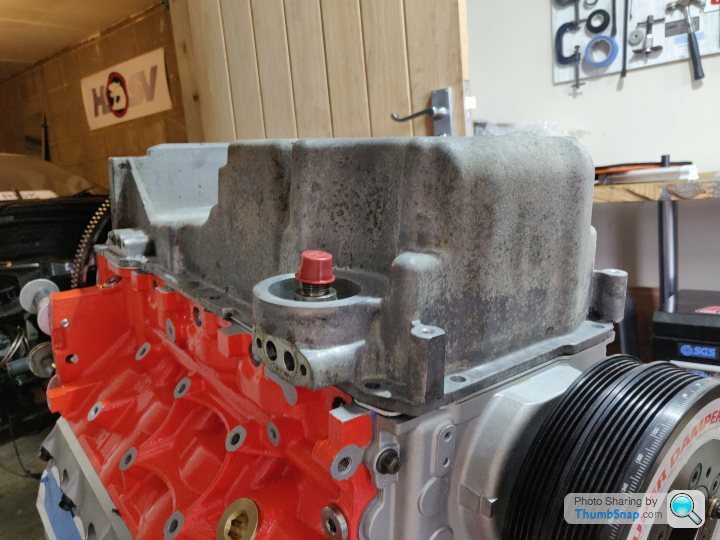
I also cleaned up the rear main cover and took the old rear main seal out. I'm going to take the engine off the stand for the next bits, namely the rear timing cover, pilot bearing and flywheel.
I top coated the few little bits of exposed metal I'd primered yesterday but not much to show there, also the negative for the battery I tided up which was simply a case of redoing the insulation, I then covered this in the heat resistant cable wrap just because it looks nicer
TheAngryDog said:
A small / large fortune going into this! Money well spent!
How many revs will the engine mad out at?
Yep, it's definitely escalated, by the time you include shipping and VAT and so on, I know I'm in to 5 figures, or realistically, more than I spent buying the car anyway How many revs will the engine mad out at?
I'm revving it to 7,000rpm. The top / bottom end could easily handle more, but with no variable valve timing, I'm not willing to sacrifice more low end torque to extend the useable rev range higher
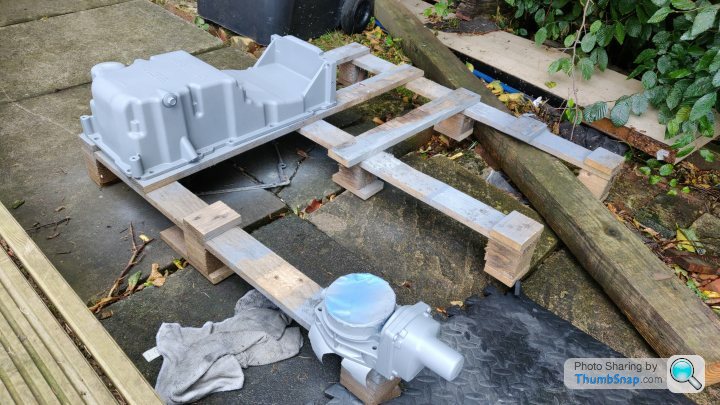
Bit more progress today, just stopped for a beer

After much faffing about, crane is in the workshop and motor lifted off stand.
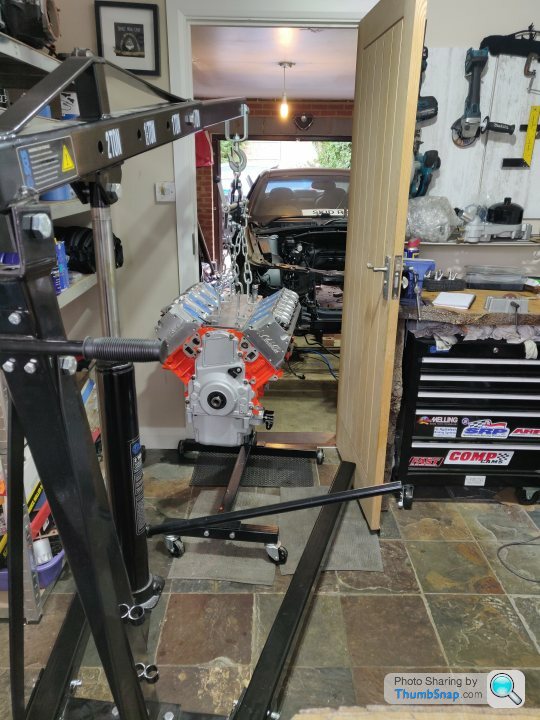
Lowered it down onto a tyre for support so I have access to the rear.
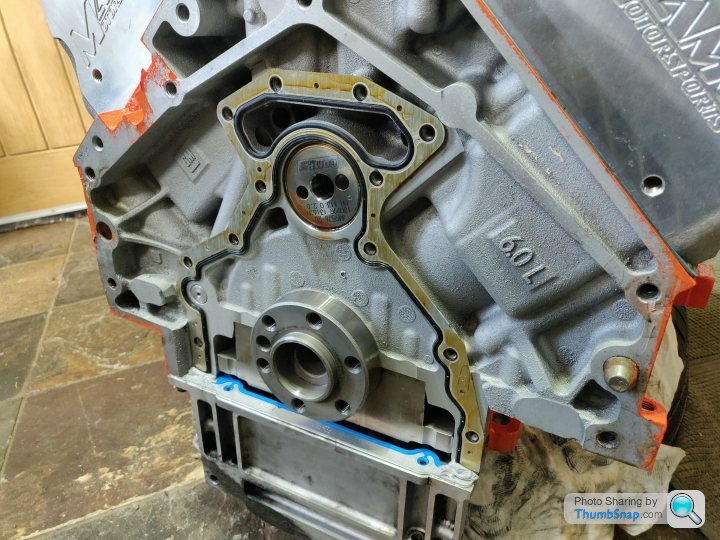
Some silicone in the corners just for the sake of it and the new gasket in place.
Also put the new rear main seal into the cover with the install/alignment tool.
Rear cover on and torqued down, this is when I realised I needed to unfold the crane again to lift the engine up to get the bottom two long bolts in that go through the oil pan. There may have been some mild profanity.
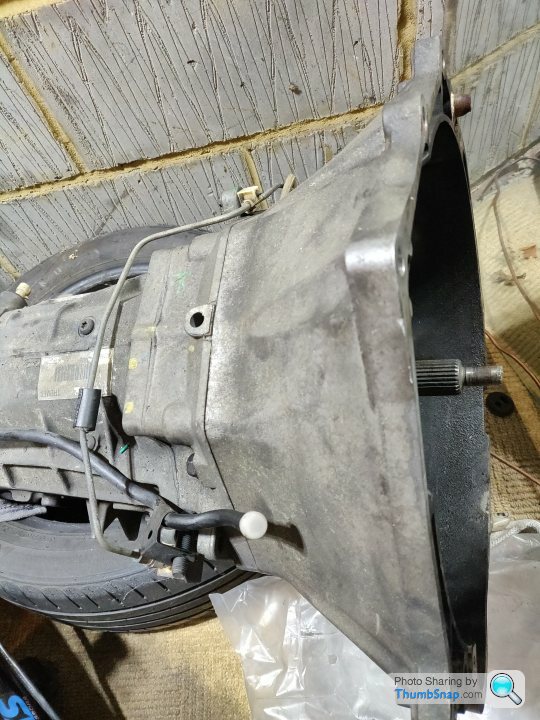
Next up was the pilot bearing, which led to a brief panic as I found out there are 3 types of bearing and it dawned on me this is an aftermarket crankshaft...
Found this spot on website that explained it all and what to measure etc.
https://americanpowertrain.com/gm-ls-pilot-bearing...
So stuck the bellhousing back on the trans and measured, which confirmed what I knew, I needed the small pilot bearing that sits deeper in the crank, and turns out the cranks can take either the small one or one of the two larger ones, so it was all fine.
So sat that in there flush using a hammer and a socket
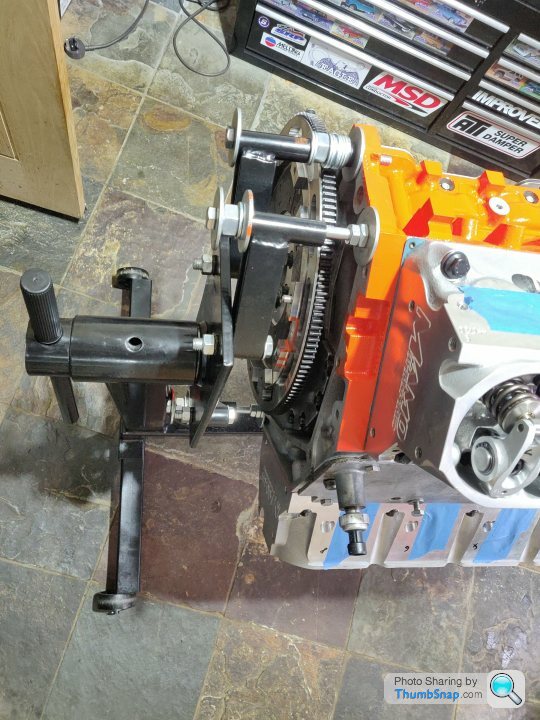
Going to pop the flywheel on next, there'll be some measuring required for that too to verify the slave is within specs and such, hence stopping for a beer and a digest of the instructions
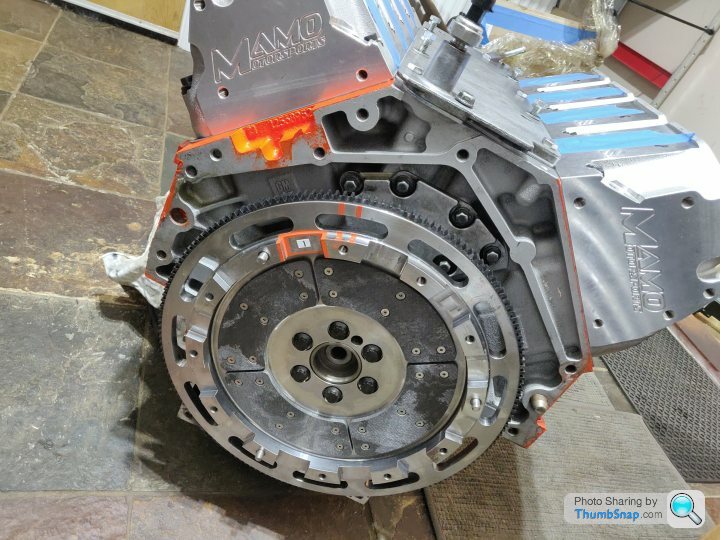
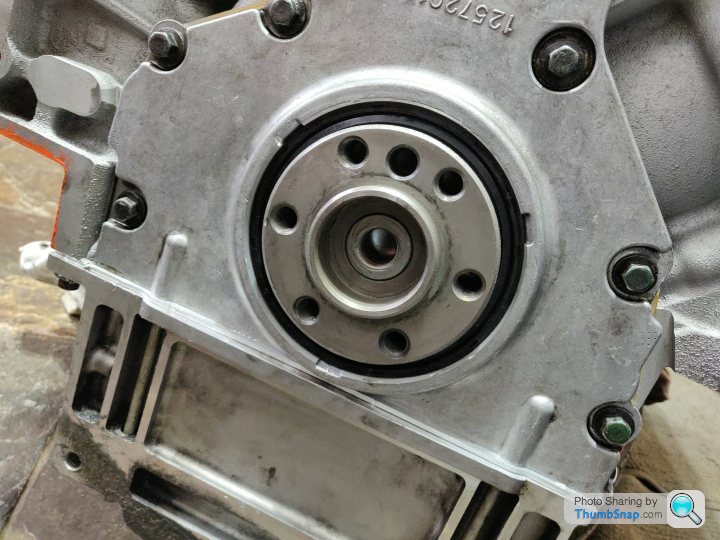
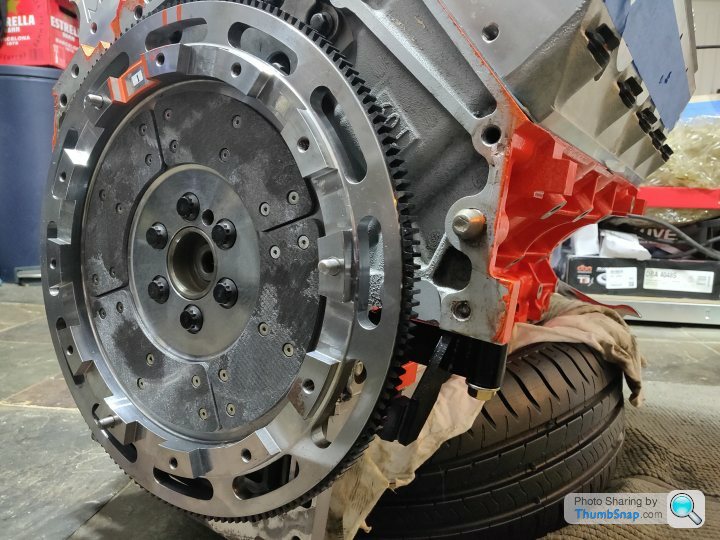
Flywheel on fine, this little chappy stopping the engine turning over when torqueing the bolts down
In the meantime, the snout of the damper is in the oven warming to 100* or so, the intention being it expands a bit and allows it to slide on easily... Which is seemingly b
 ks in my case

Straight to the home made balancer install tool (long threaded rod, lots of washers and a bolt)
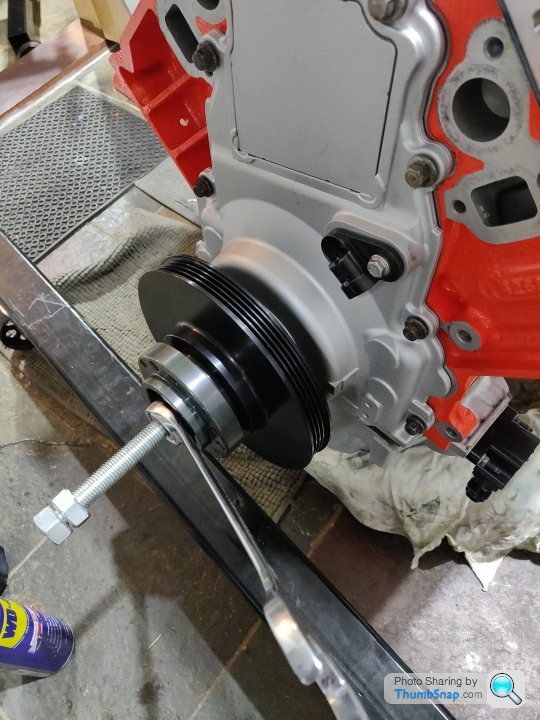
And this is about as far on as it seems to want to go, it's meeting some serious resistance and I really don't want to destroy the threads in the snout of the crank...
The keyway looks to be lined up fine which was my first assumption...
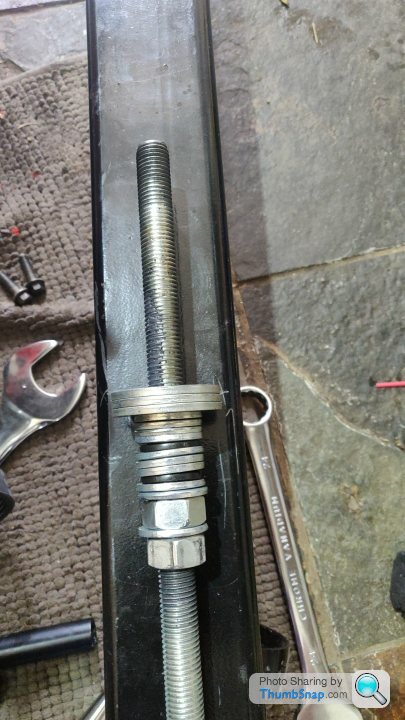
So at this point I've given up for the evening. It's so late because I obviously had n-4 amount of washers needed as the snout of the damper is so deep, so I spent about 30 minutes hand filing the threads out of a bolt so it would slide along the threaded rod like a thick washer.
What a ballache, the factory damper slid on easily with the homemade installer, so I wasn't expecting this to be such a pain.
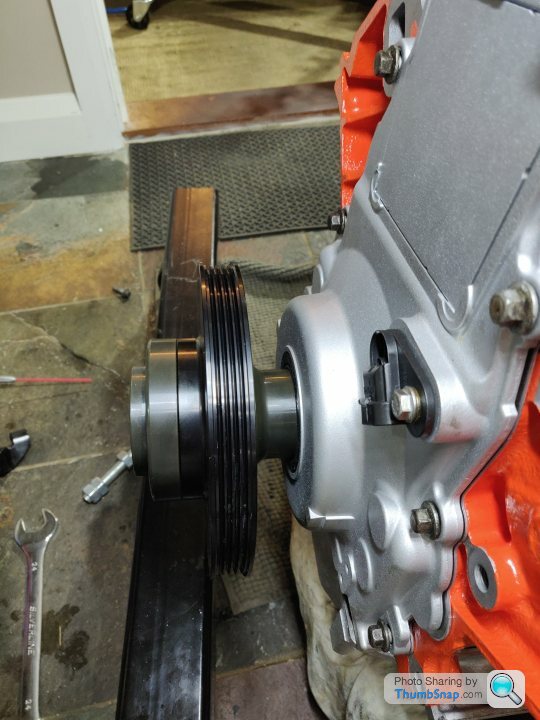
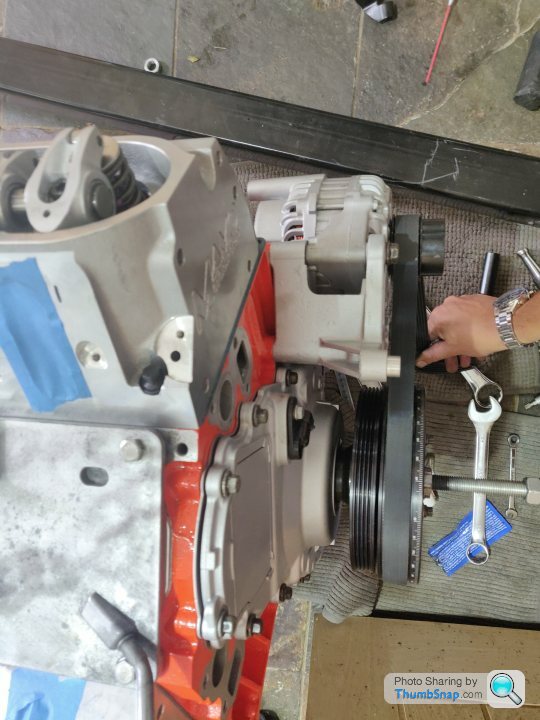
Ensured the end of the threaded rod was flat to ensure it bottomed out properly, and covered the threads in the ARP moly lube, and managed to get it on. Popped the alternator on just to verify it was indeed in the right place...
This is the amount of washers and such I had to use to be able to access the bolt to tighten it on
So that was pleasing, cracked on with tightening the front cover down now that it's aligned properly (the balancer sort of aligns it via the seal as it goes on), tightened the 8 front bolts to 18 lbft, then started the one off from the bottom, was taking a bit more rotation than expected to get to 18lbft and then *crack*
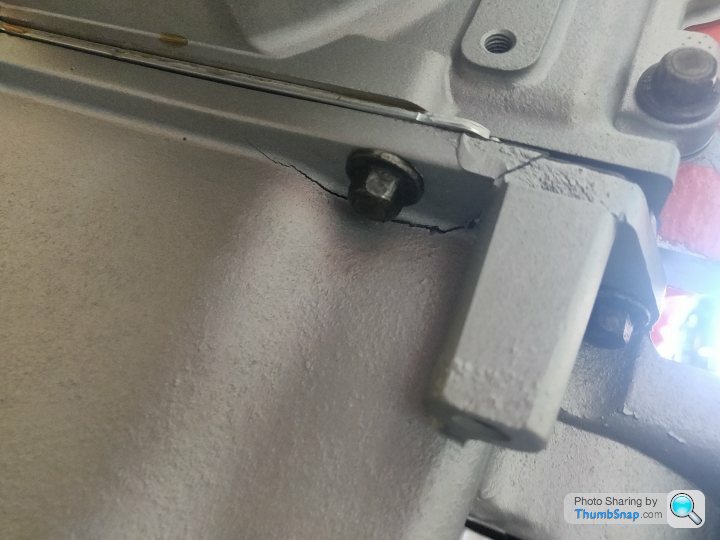
ste. New ones are looking like $500+ from the US so I'm currently pestering everyone in the country if they have a sump
Although I checked the clearance between the oil filter area and the windage tray, clearly it wasn't enough once it was torqued down..
Live and learn, the weird behaviour when torqueing it should have been more of an alarm bell.
This is the amount of washers and such I had to use to be able to access the bolt to tighten it on
So that was pleasing, cracked on with tightening the front cover down now that it's aligned properly (the balancer sort of aligns it via the seal as it goes on), tightened the 8 front bolts to 18 lbft, then started the one off from the bottom, was taking a bit more rotation than expected to get to 18lbft and then *crack*
s
te. New ones are looking like $500+ from the US so I'm currently pestering everyone in the country if they have a sump Although I checked the clearance between the oil filter area and the windage tray, clearly it wasn't enough once it was torqued down..
Live and learn, the weird behaviour when torqueing it should have been more of an alarm bell.
Popped over to Craig at DynoTorque and picked up a replacement sump which was bloody lucky, work shall continue tomorrow 
Want to get the 'new' sump cleaned and painted, will enlist the good lady to handle cleaning and painting duties, going to paint the new throttle body black too to match the new intake.
The fuel rails are with the anodisers (I think... chasing tomorrow) realistically once the sump is on, I just need to bolt up the clutch with some checking measurements and then bolt up the gearbox and chuck the thing back in the car...
It's getting sort of close to being a car! I still need to sort that poxy brake pedal plunger mess, and have contacted my tuner about a little updated tune with the new injector figures in, although can do this myself if necessary.
seefarr said:
Do you know why your sump cracked then Sturdy? A quick google seems to show it's not an uncommon incident when re-assembling an LS and can often be alignment between the front cover and the sump?
Yeah, as I had to space the windage tray up a touch to gain clearance for the rods with the extra stroke, the windage tray was then hitting the sump where the oil filter mounts, there's some pictures earlier where I was testing the clearance and it was hitting without the gasket, but was OK with, and I somewhat underestimated how much the gasket would compress when torqued...So that spot there by my finger where there's a tiny smidge in the blue
Was squashed up against the dark spot on the sump in this pic:
Silly on my part, I should have made more clearance instead of assuming the gasket gave it enough... And also when torqueing something was clearly 'up'. £200 lesson there!
The wagon passed its MOT which is nice, I spoke to the anodisers and the rails may be ready by Wednesday next week, which is cutting things a bit fine for the 'get it running during the closure' dream, so I'll phone them Tuesday and see how it's looking, maybe I can annoy them in to making progress
Progress was delayed as I just did some other things for a couple of days, although I did get the engine on the stand spaced out far enough that it could be turned over without the flywheel hitting the stand.
This involved getting the crane out, again, putting longer bolts and a billion washers etc in to space it out and generally cock about, only to then find how I'd spaced it out meant I couldn't actually roll it over upside down, as the spacers hit the frame
There was much swearing, and it took another hour (somehow) of cocking about to actually get it spaced out well enough without it also just slumping at a terrifying angle (the top holes in the block are blind and not that deep which made it 'complicated')
Anyway, it got there eventually but I was so annoyed by it I just left it
Today I got back to it, firstly checked the clearance to the windage tray (I'd given it a few love taps to put an indent where it was hitting the sump before) and it had slightly bent down at the edge possibly from the sump tightening... Anyway, clearance to the rods was fine, so I set about cleaning up the replacement sump and clearancing it.
This is what I ended up doing, basically taking a load of material off here.
You can see how much I took off as I put the clearanced pipes / gasket (which sits flush on the new sump) onto the cracked sump for comparison.
That's a nice couple of mm extra easily
Then it was time to give it another blast out just to make sure no metal dust was left in it and test fit!
I put a little over 4mm of blu-tack and a dollop of engineer's blue on the windage tray where it fouls, and then laid the sump on top
Not a mark on it, so I'm satisfied I've got plenty of clearance now. So time to paint the sump and new throttle body (I really was intending to do this fri/sat as the primer wants 24 hours before top coating which will delay things a bit...)
Either way, progress is progress, I imagine the fuel rails are going to hold me up from actually starting it this week so will just keep chipping away and keeping it enjoyable
This involved getting the crane out, again, putting longer bolts and a billion washers etc in to space it out and generally cock about, only to then find how I'd spaced it out meant I couldn't actually roll it over upside down, as the spacers hit the frame
There was much swearing, and it took another hour (somehow) of cocking about to actually get it spaced out well enough without it also just slumping at a terrifying angle (the top holes in the block are blind and not that deep which made it 'complicated')
Anyway, it got there eventually but I was so annoyed by it I just left it
Today I got back to it, firstly checked the clearance to the windage tray (I'd given it a few love taps to put an indent where it was hitting the sump before) and it had slightly bent down at the edge possibly from the sump tightening... Anyway, clearance to the rods was fine, so I set about cleaning up the replacement sump and clearancing it.
This is what I ended up doing, basically taking a load of material off here.
You can see how much I took off as I put the clearanced pipes / gasket (which sits flush on the new sump) onto the cracked sump for comparison.
That's a nice couple of mm extra easily
Then it was time to give it another blast out just to make sure no metal dust was left in it and test fit!
I put a little over 4mm of blu-tack and a dollop of engineer's blue on the windage tray where it fouls, and then laid the sump on top
Not a mark on it, so I'm satisfied I've got plenty of clearance now. So time to paint the sump and new throttle body (I really was intending to do this fri/sat as the primer wants 24 hours before top coating which will delay things a bit...
)Either way, progress is progress, I imagine the fuel rails are going to hold me up from actually starting it this week so will just keep chipping away and keeping it enjoyable
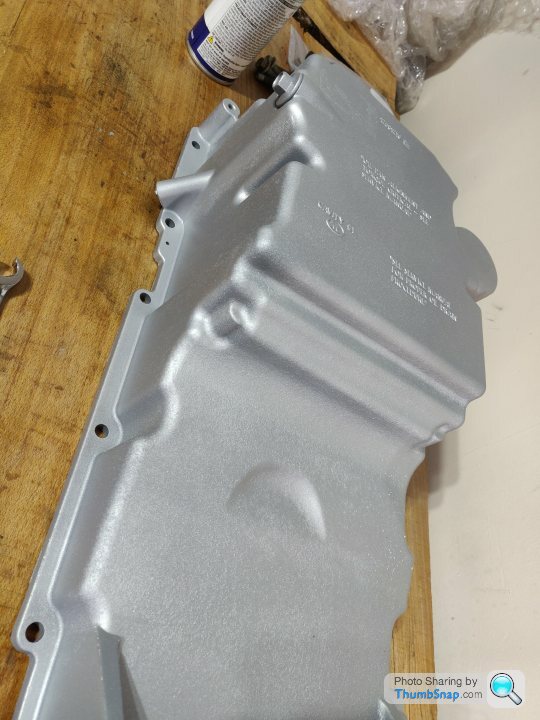
Finish came out nicely after one decent top coat.
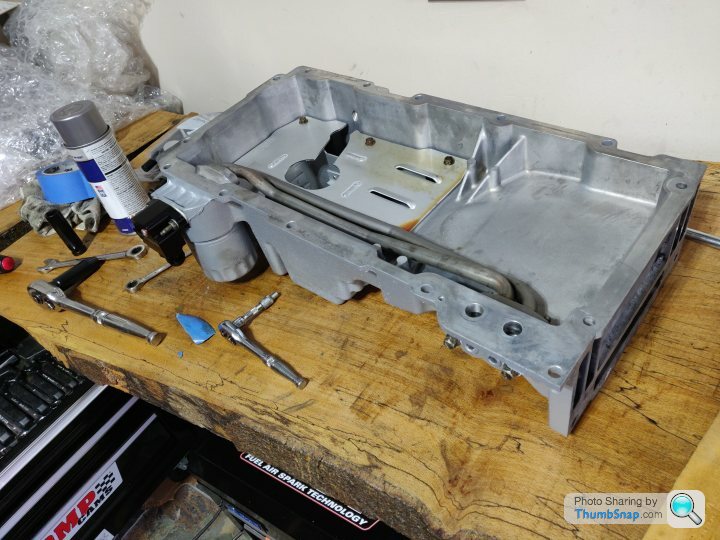
Put the innards into the new sump
The sump is bolted down at last! It turned out my front timing cover was sat a little high (or low when upside down...) which is what cracked the sump. When torqueing the 'new' sump down, the front 2 bolts were doing the same torque reading slip I saw before, so lesson learned I stopped and rechecked things.
Checked back with some of the books, and they suggest doing the two sump bolts of the timing cover first to pull it into position, then torque the other 8 down... So I loosened them off and then torqued the sump, sure enough it pulled the timing cover tighter into the sump in one clean motion. Fool me once and all that
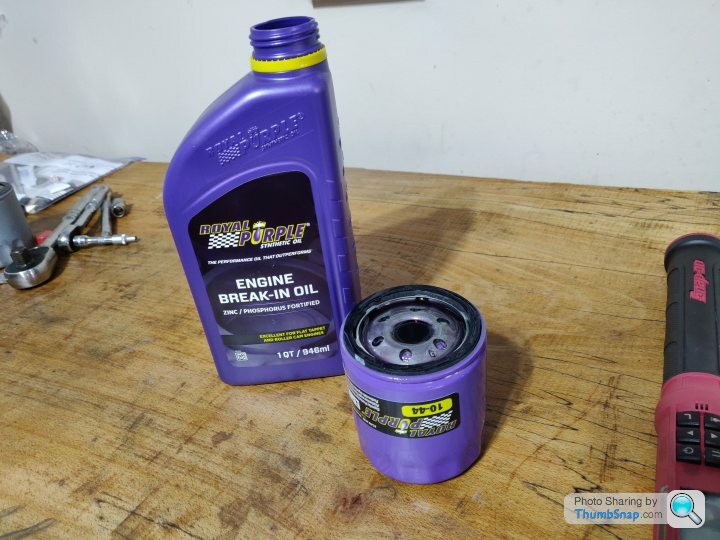
Engine won't be going upside down again (unless I crash spectacularly!) so I thought I'd put the filter on, felt good to be putting break in oil into something for legitimate reasons.
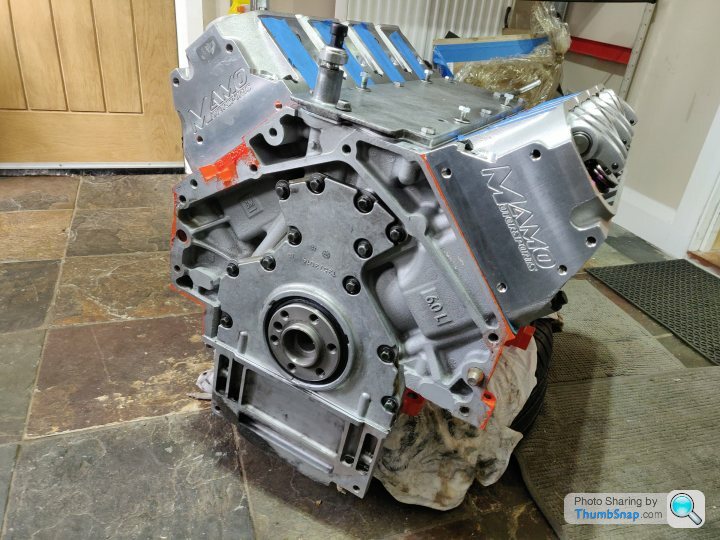
At this point I couldn't help but do some mocking up again, not least because I wanted to get some pictures for the old memory bank of the 'finished' motor all clean on the stand etc, as it's close to going in now and is unlikely to ever look this good again!
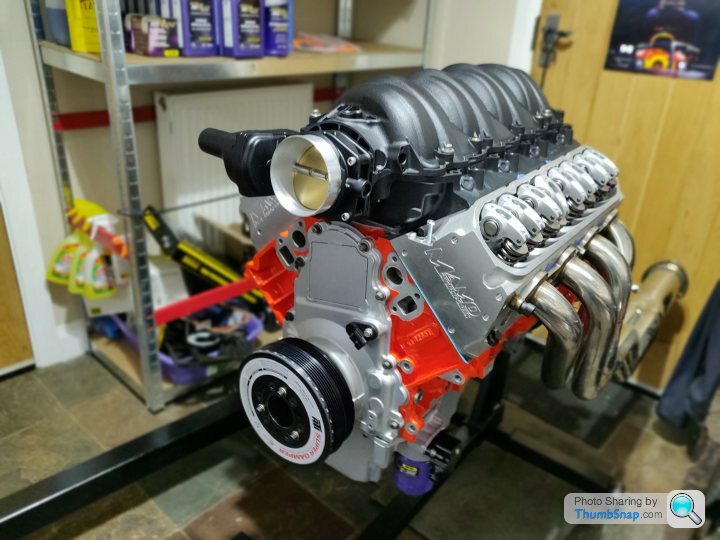
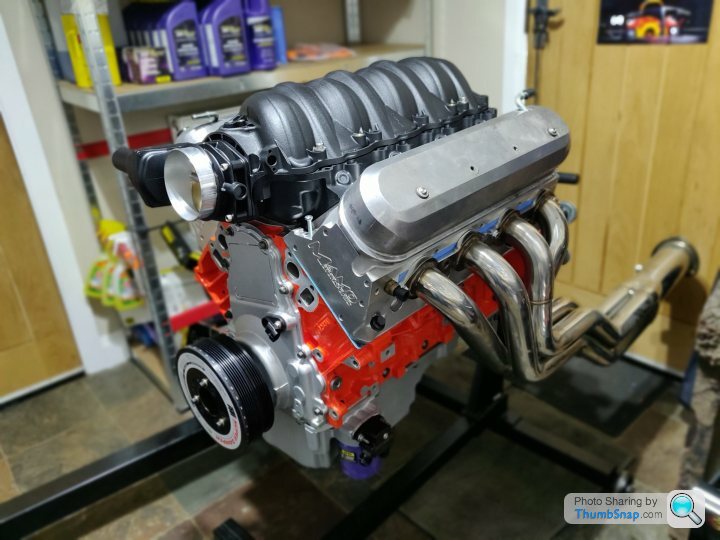
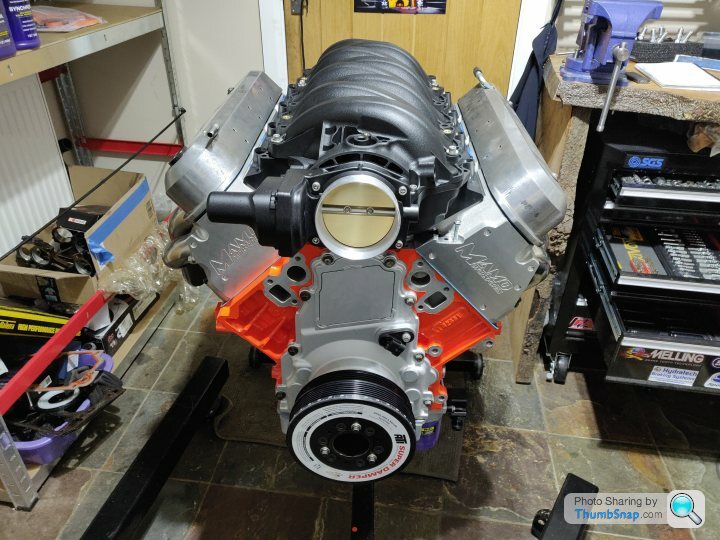
I think the orange anodised fuel rails will really nicely finish it off. I've also primered up the steam vent lines and they'll be going black, will take pictures once they're done.
Next day or two and it's going in the car
Put the innards into the new sump
The sump is bolted down at last! It turned out my front timing cover was sat a little high (or low when upside down...) which is what cracked the sump. When torqueing the 'new' sump down, the front 2 bolts were doing the same torque reading slip I saw before, so lesson learned I stopped and rechecked things.
Checked back with some of the books, and they suggest doing the two sump bolts of the timing cover first to pull it into position, then torque the other 8 down... So I loosened them off and then torqued the sump, sure enough it pulled the timing cover tighter into the sump in one clean motion. Fool me once and all that
Engine won't be going upside down again (unless I crash spectacularly!) so I thought I'd put the filter on, felt good to be putting break in oil into something for legitimate reasons.
At this point I couldn't help but do some mocking up again, not least because I wanted to get some pictures for the old memory bank of the 'finished' motor all clean on the stand etc, as it's close to going in now and is unlikely to ever look this good again!
I think the orange anodised fuel rails will really nicely finish it off. I've also primered up the steam vent lines and they'll be going black, will take pictures once they're done.
Next day or two and it's going in the car
Gassing Station | Readers' Cars | Top of Page | What's New | My Stuff