Hold(en) my beer - Monaro, Ute and Commodore content
Discussion


hemidom said:
Those plastic ends on the radiators really are crap, remember mine going after finding a puddle on the driveway! For my sins I did replace like for like though so that's probably due for replacement in the near future for the new owner as it was about 2014/15 when it went.
I still have my original and it looks to be fine at 69,000 miles, but it'll just be there as a backup now. I assume it was a budget thing, probably find they could use the same core across many models and just tweak the plastic ends to fit comparatively cheaply compared to tooling up costs for a new all ally rad maybe 
Oneball said:
Have you got a towbar on the Commodore? Has it got a plated towing capacity?
Yep there's a towbar, no idea on towing capacity, going by this:https://www.autotrader.com.au/holden/commodore/tow...
It looks like 1000kg unbraked, 1600kg braked for the majority of models for what that's worth.
Krikkit said:
I didn't even know they did a wagon Commodore, I'm insanely jealous.
It's a fine looking and capacious beasty  Although in Aus they complained it was too small compared to the VZ, which was truly enormous inside...:
"The wagon sits on a slightly shorter wheelbase than its VZ predecessor (down 24mm) and is shorter overall by 36mm, cutting load space from 1402 litres to 895 litres with the seats up. Fold them flat and the VE takes 2000 litres, still less than the VZ's 2752 litres."
For reference, the Volvo V70 I had before which seemed huge is only 1600 litres seats down

SturdyHSV said:
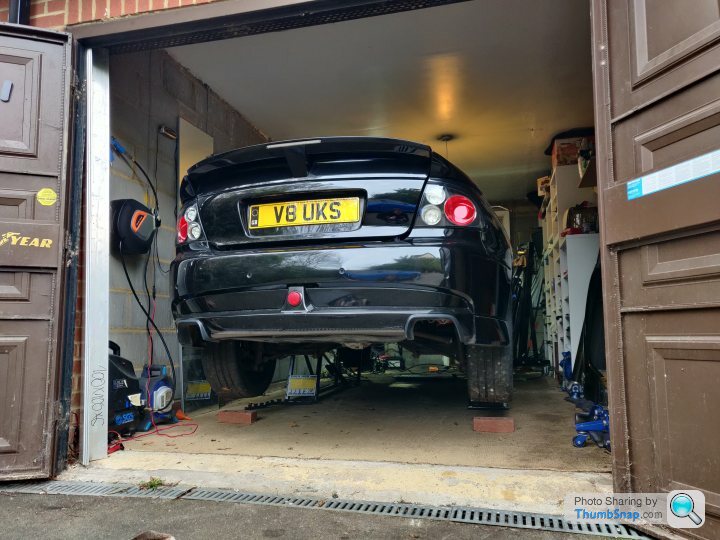
Using the wagon as a wagon...
20sqm of flooring, underlay and 6 2.4m lengths of skirting board. Oh and an ironing board
The skirting board went between the seats and sat on top of the armrest, but wasn't in the way of the gear selector so fairly comfortable load lugging.
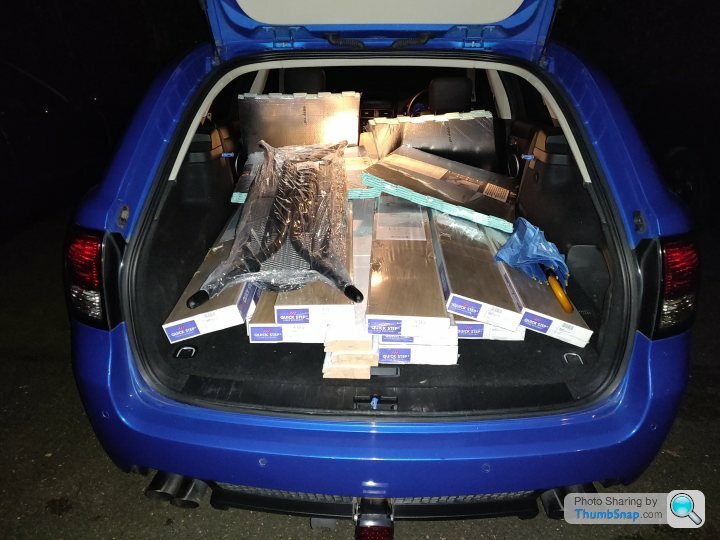
Yes, I waited until we got home to take a picture of my boot
Yep, they’re big wagons, though as you’ve already said, smaller than the VZ - often amazed at how much will fit in there! If anyone wants another view of one…20sqm of flooring, underlay and 6 2.4m lengths of skirting board. Oh and an ironing board
The skirting board went between the seats and sat on top of the armrest, but wasn't in the way of the gear selector so fairly comfortable load lugging.
Yes, I waited until we got home to take a picture of my boot
https://www.pistonheads.com/gassing/topic.asp?h=0&...
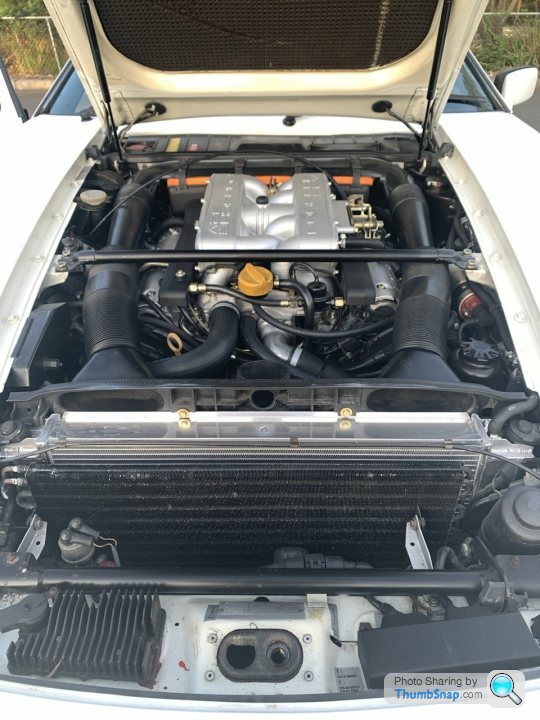
As for the rad - look ace - had the same look in my 928, with a nice bit of kit from PWR in Qld, which was considerably cheaper than a replacement from Porsche…
https://www.pwr.com.au/
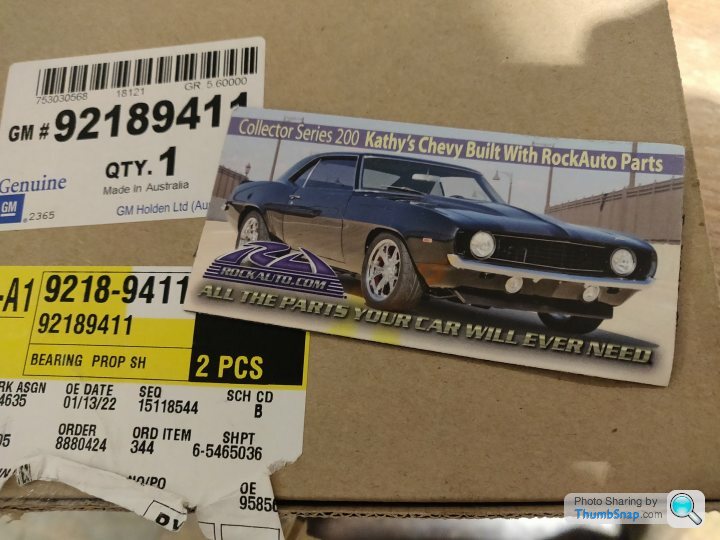
New carrier bearing for the wagon's driveshaft arrived from RockAuto, have booked the Ute for an MOT for Valentine's day and the plan is to use the Ute and then sort the driveshaft and exhaust on the wagon in the mean time.
Sadly caught a pot hole yesterday evening which I noticed this morning has put a nice little bend in the lip of the front right on the wagon, it's not losing air and is fairly mild so I'm hopeful it can be tapped out
Quickjacks should be arriving on Friday
and the plan is to use the Ute and then sort the driveshaft and exhaust on the wagon in the mean time.Sadly caught a pot hole yesterday evening which I noticed this morning has put a nice little bend in the lip of the front right on the wagon, it's not losing air and is fairly mild so I'm hopeful it can be tapped out
Quickjacks should be arriving on Friday
Quickjacks arrived as expected, turns out we can only get the DC versions over here (allegedly?), which was unexpected, set up went alright, they supply some crap thread sealant that wasn't really up to the task, so ended up redoing a few of the connections with PTFE tape instead.
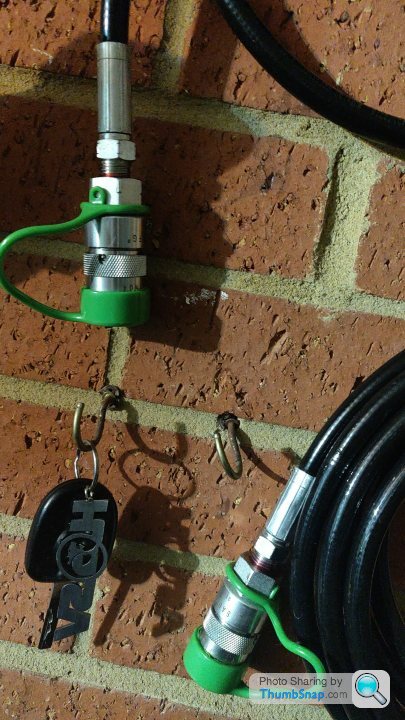
The quick release hydraulic connectors are a thing of beauty though and work flawlessly with no leaks.
Also it was a bit of a faff bleeding the system because the "5mm" Allen head bleed screw is seemingly 4.8mm, so a pair of mole grips did the trick instead.
In terms of actual usage, they're a little heavy but easy enough to roll about and then slide about under the car, took a little while to line things up so I was confident they'd hit the jacking points, this was only really a faff because I'm inside a garage so there's not much space on one side.
Far easier than moving a jack around though...
The pump is surprisingly quiet and runs fine off a car battery, lifts the car to full height in about 30 seconds or so. The first latching height comfortably has the wheels off the floor, the top height is a great height to work under the car.
Comically enough, I'll need to pick up their frame extension to lift the wagon, I stupidly didn't actually think to measure it as I assumed the jacking points would be similarly spaced but nope, the wagon is too long for the quickjack
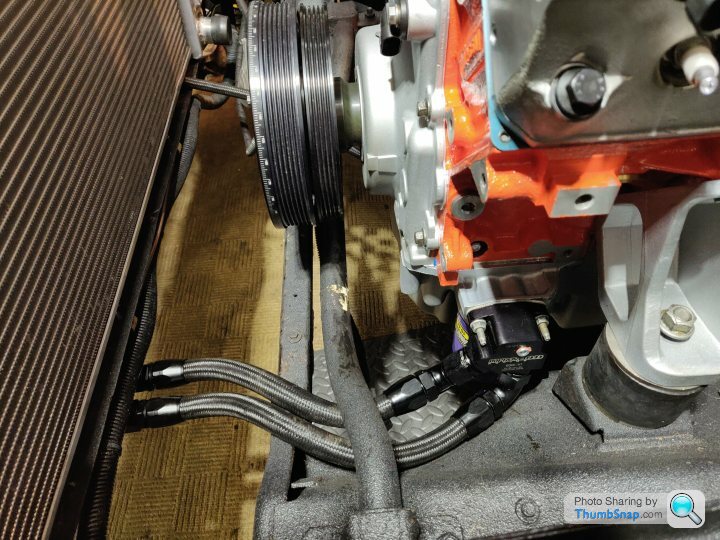
So by means of some celebration, I got on with a few bits now that I could get under the car comfortably... Firstly, connected up the oil cooler lines
I then put on the easier of the two plastic bellhousing covers I'd missed...
Before
After
The driver's side has the starter motor which needs to be removed as the cover goes on first... I'll get to this soon, didn't feel like looking up the torque spec and such again for the starter... I know...
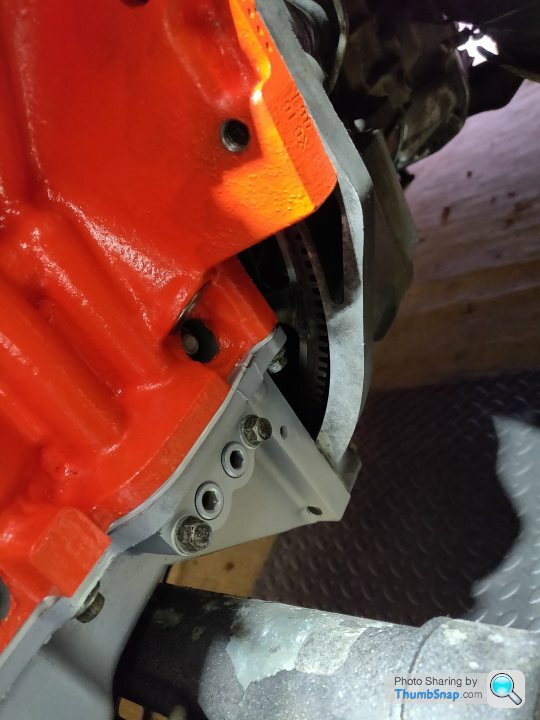
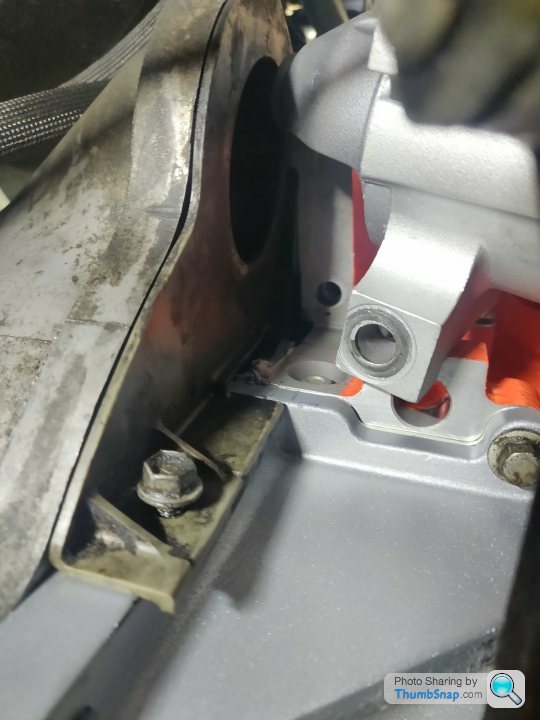
From below

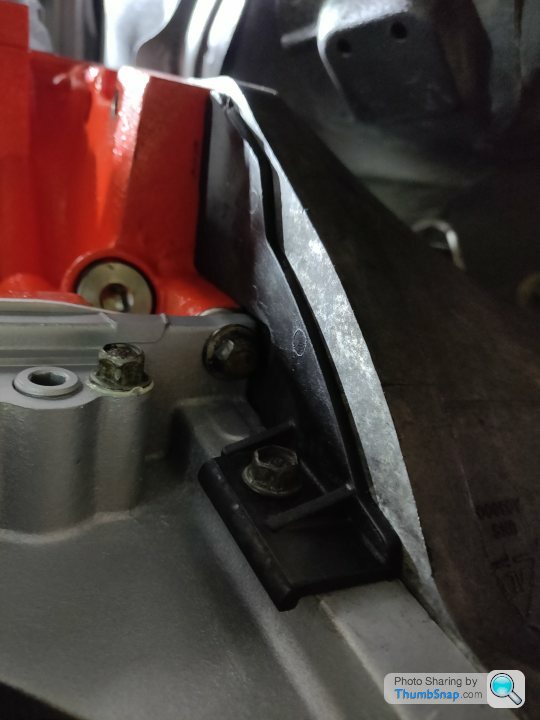
From the side

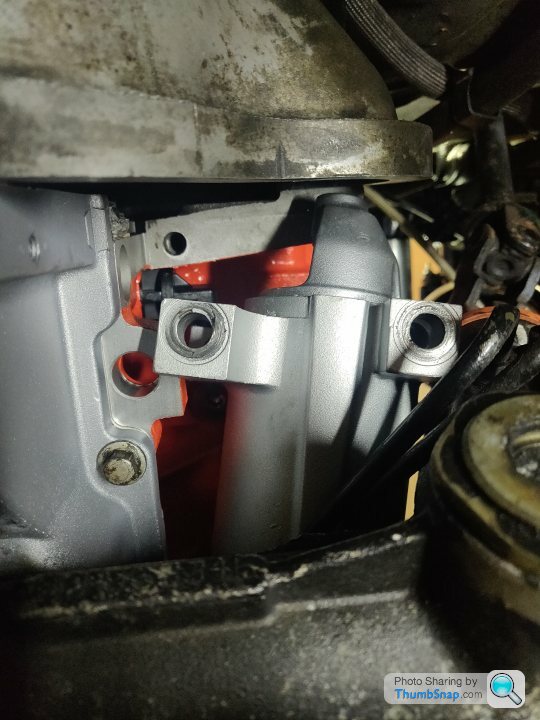
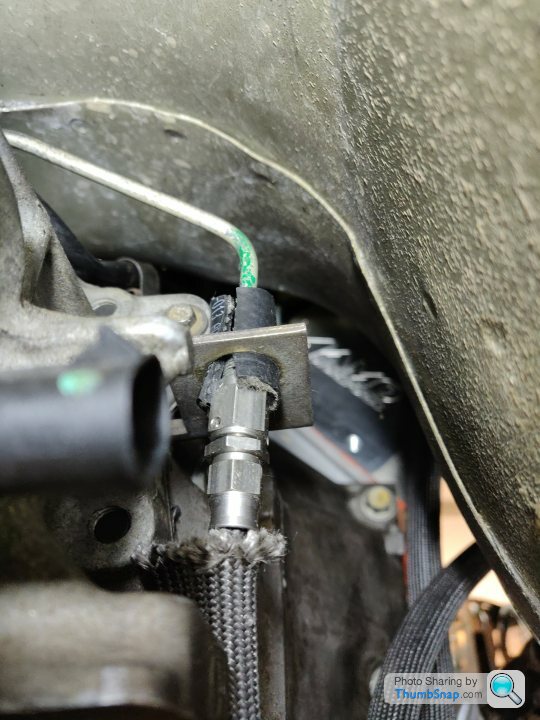
Whilst under here I remembered I needed to connect the clutch line. Originally this was a rubber line from the clutch master which then ran down to a hard line that runs over the gearbox and to the slave cylinder.
I've replaced the rubber line with a braided line, and stuck some of the thermal sheathing over it
That's where the two meet, I have currently got some rubber hose wedged around the connection where it passes through the old bracket that held the original join. This stops it from being able to move, but I will sort a nicer solution to this, any ideas welcome! Even if I wedge the hose in through the top instead that'd be an improvement...
With things connected up I look to still have plenty of room and clearance for the headers when they poke through here.
The lines near the headers have heat shielding around them (fuel line, clutch line, power steering line) and a decent gap, it certainly seems like there'll be more clearance than the factory rubber clutch line had and original metal fuel line (now a braided hose)
I also took the sensible precaution of hanging the loom up out of the way, as I could well see me lowering the car down onto the loom or something equally frustrating
So, what of the Ute MOT? Well... Brake lines needed some attention, as did the rear pads, the wipers, oh, and the driver's door stopped working...
So that took some cocking about, with the help of an automotive locksmith, we had to pull some of the door trim off and then ram an arm far enough into the door to operate the latch from inside...
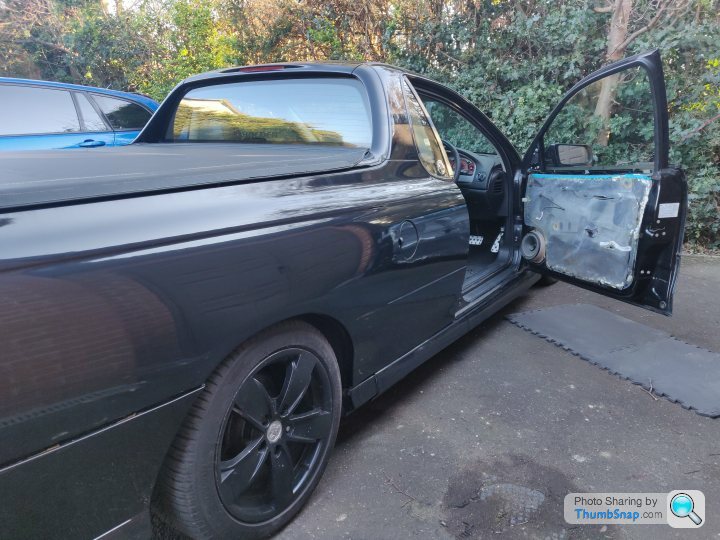
Fortunately got there in the end, I swapped the rear pads over, and the wipers, and a parking light bulb that'd gone, and it's back with the garage now to have the brake lines done, they're steel lines like the Monaro's were and my flare tools just don't work on them.
Hopefully that'll see it MOT'd and falling into daily usage so I can get the prop sorted on the wagon, and then finally fit the exhaust to it
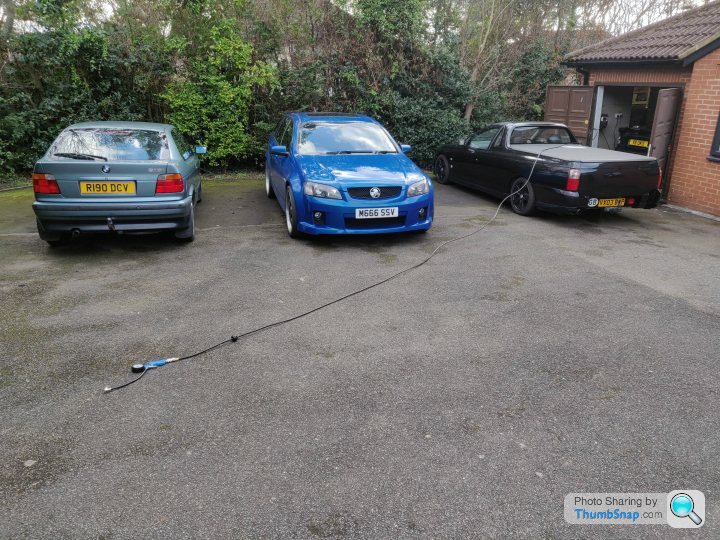
I also picked up a Giraffe Tools (really...) 15m air hose reel from Amazon, and have been most satisfied with it for the money. Mounted it to the wall and can now reach whatever is on the drive without having an annoying load of air hose laying around all the time.
Looking forward to the lighter nights and warmer weather, today was a lovely day so was really nice to be getting on with stuff again, at last...
The quick release hydraulic connectors are a thing of beauty though and work flawlessly with no leaks.
Also it was a bit of a faff bleeding the system because the "5mm" Allen head bleed screw is seemingly 4.8mm, so a pair of mole grips did the trick instead.
In terms of actual usage, they're a little heavy but easy enough to roll about and then slide about under the car, took a little while to line things up so I was confident they'd hit the jacking points, this was only really a faff because I'm inside a garage so there's not much space on one side.
Far easier than moving a jack around though...
The pump is surprisingly quiet and runs fine off a car battery, lifts the car to full height in about 30 seconds or so. The first latching height comfortably has the wheels off the floor, the top height is a great height to work under the car.
Comically enough, I'll need to pick up their frame extension to lift the wagon, I stupidly didn't actually think to measure it as I assumed the jacking points would be similarly spaced but nope, the wagon is too long for the quickjack
So by means of some celebration, I got on with a few bits now that I could get under the car comfortably... Firstly, connected up the oil cooler lines
I then put on the easier of the two plastic bellhousing covers I'd missed...
Before
After
The driver's side has the starter motor which needs to be removed as the cover goes on first... I'll get to this soon, didn't feel like looking up the torque spec and such again for the starter... I know...
From below
From the side
Whilst under here I remembered I needed to connect the clutch line. Originally this was a rubber line from the clutch master which then ran down to a hard line that runs over the gearbox and to the slave cylinder.
I've replaced the rubber line with a braided line, and stuck some of the thermal sheathing over it
That's where the two meet, I have currently got some rubber hose wedged around the connection where it passes through the old bracket that held the original join. This stops it from being able to move, but I will sort a nicer solution to this, any ideas welcome! Even if I wedge the hose in through the top instead that'd be an improvement...
With things connected up I look to still have plenty of room and clearance for the headers when they poke through here.
The lines near the headers have heat shielding around them (fuel line, clutch line, power steering line) and a decent gap, it certainly seems like there'll be more clearance than the factory rubber clutch line had and original metal fuel line (now a braided hose)
I also took the sensible precaution of hanging the loom up out of the way, as I could well see me lowering the car down onto the loom or something equally frustrating
So, what of the Ute MOT? Well... Brake lines needed some attention, as did the rear pads, the wipers, oh, and the driver's door stopped working...
So that took some cocking about, with the help of an automotive locksmith, we had to pull some of the door trim off and then ram an arm far enough into the door to operate the latch from inside...
Fortunately got there in the end, I swapped the rear pads over, and the wipers, and a parking light bulb that'd gone, and it's back with the garage now to have the brake lines done, they're steel lines like the Monaro's were and my flare tools just don't work on them.
Hopefully that'll see it MOT'd and falling into daily usage so I can get the prop sorted on the wagon, and then finally fit the exhaust to it
I also picked up a Giraffe Tools (really...) 15m air hose reel from Amazon, and have been most satisfied with it for the money. Mounted it to the wall and can now reach whatever is on the drive without having an annoying load of air hose laying around all the time.
Looking forward to the lighter nights and warmer weather, today was a lovely day so was really nice to be getting on with stuff again, at last...
you've probably seen in some of my pics i've used Quickjacks now for a couple of years, part of me does regret not just getting a lift in my little unit but I didn't think I'd still be there 2 years on!
but they do the trick and they've served me well, get the car high enough to roll under on a creeper. I keep a spare old battery arround to use them although i've never serviced them and they are getting a bit sluggish on me, not fully deflating or one side going up a bit quicker than the other, I should probably look in to that!
Oh, i'm sure it goes without saying but never rely purely on the hydraulics to hold it up, I once propped up my 86 just a bit to get the wheels off without going all the way to the first deadlock and a couple of minutes later I was left with an 86 laying on its belly and brake disks and the quickjacks weren't able to build up enough pressure to lift it, had to get a jack under there somehow to jimmy it up enough.
Where did you pick up the bellhousing covers from? I'll probably need something similar myself!
Samjeev said:
you've probably seen in some of my pics i've used Quickjacks now for a couple of years, part of me does regret not just getting a lift in my little unit but I didn't think I'd still be there 2 years on!
but they do the trick and they've served me well, get the car high enough to roll under on a creeper. I keep a spare old battery arround to use them although i've never serviced them and they are getting a bit sluggish on me, not fully deflating or one side going up a bit quicker than the other, I should probably look in to that!
Oh, i'm sure it goes without saying but never rely purely on the hydraulics to hold it up, I once propped up my 86 just a bit to get the wheels off without going all the way to the first deadlock and a couple of minutes later I was left with an 86 laying on its belly and brake disks and the quickjacks weren't able to build up enough pressure to lift it, had to get a jack under there somehow to jimmy it up enough.
Where did you pick up the bellhousing covers from? I'll probably need something similar myself!
They might just need a bleed or the fluid topping up perhaps, not sure what the seals are like long term etc.?but they do the trick and they've served me well, get the car high enough to roll under on a creeper. I keep a spare old battery arround to use them although i've never serviced them and they are getting a bit sluggish on me, not fully deflating or one side going up a bit quicker than the other, I should probably look in to that!
Oh, i'm sure it goes without saying but never rely purely on the hydraulics to hold it up, I once propped up my 86 just a bit to get the wheels off without going all the way to the first deadlock and a couple of minutes later I was left with an 86 laying on its belly and brake disks and the quickjacks weren't able to build up enough pressure to lift it, had to get a jack under there somehow to jimmy it up enough.
Where did you pick up the bellhousing covers from? I'll probably need something similar myself!
Yeah I'll only ever leave them latched on the deadlocks, I've actually disconnected the hoses / pump and tidied them away as it's going to be up in the air for a while I imagine.
The bellhousing covers are just standard on the car, so I suppose I got them from GM
Example below, they look to be fairly readily available, the yanks call them flywheel dust covers or similar to help your googling. They are oil pan specific though, so these below won't fit your fancy ass LS3
https://www.ebay.com/itm/382706707468
SturdyHSV said:
They might just need a bleed or the fluid topping up perhaps, not sure what the seals are like long term etc.?
Yeah I'll only ever leave them latched on the deadlocks, I've actually disconnected the hoses / pump and tidied them away as it's going to be up in the air for a while I imagine.
The bellhousing covers are just standard on the car, so I suppose I got them from GM
Example below, they look to be fairly readily available, the yanks call them flywheel dust covers or similar to help your googling. They are oil pan specific though, so these below won't fit your fancy ass LS3
https://www.ebay.com/itm/382706707468
Yeah they likely just need a bleed, i've just been a bit lazy to actually do it each time i'm at the shed.Yeah I'll only ever leave them latched on the deadlocks, I've actually disconnected the hoses / pump and tidied them away as it's going to be up in the air for a while I imagine.
The bellhousing covers are just standard on the car, so I suppose I got them from GM
Example below, they look to be fairly readily available, the yanks call them flywheel dust covers or similar to help your googling. They are oil pan specific though, so these below won't fit your fancy ass LS3
https://www.ebay.com/itm/382706707468
Oh right hadn't assumed they were simply OEM! i'll take a look to see if there's any LS3 versions or ones that can fit with my pan
Hope the MOT goes smoothly!
Samjeev said:
Yeah they likely just need a bleed, i've just been a bit lazy to actually do it each time i'm at the shed.
Oh right hadn't assumed they were simply OEM! i'll take a look to see if there's any LS3 versions or ones that can fit with my pan
Hope the MOT goes smoothly!
What pan is it, f-body? (oil pickup at the rear)Oh right hadn't assumed they were simply OEM! i'll take a look to see if there's any LS3 versions or ones that can fit with my pan
Hope the MOT goes smoothly!
Not actually sure when the Ute'll be MOT'd but hopefully soon, haven't heard from them for a couple of days.
So this evening I put the other dust cover on, so 2 13mm bolts out
Cover on and tightened most of the way down
And bolted back up to 35lb ft.
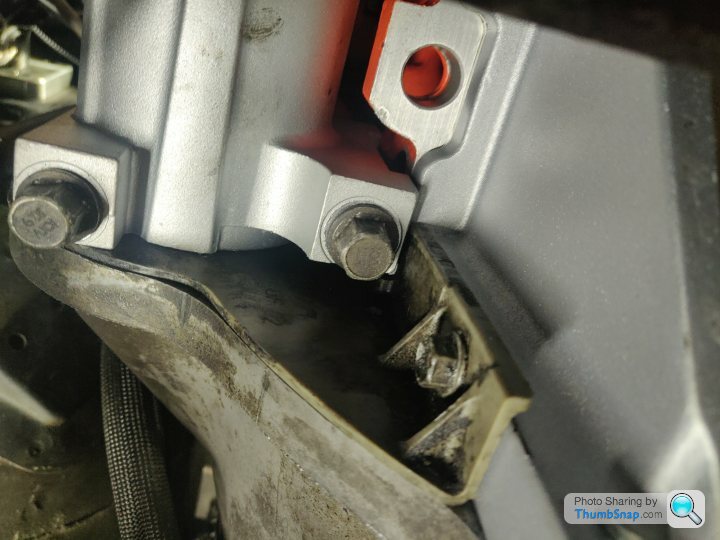
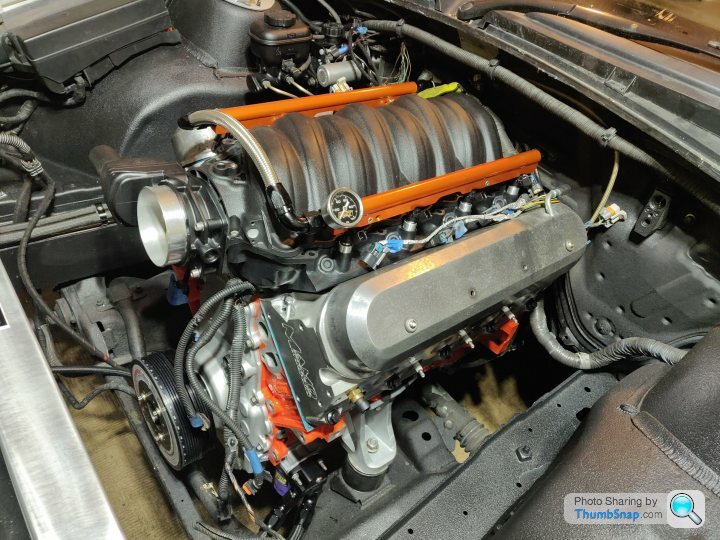
Whilst staring blankly at the front of the car I couldn't help but feel the throttle body looked like it was pointed off to one side. I hopped in the car with the intention of bolting the gearstick back on, and thought the transmission looked a bit askew as well...
Compared it to pictures I took when I took it off and it's hard to tell, but having then looked at the harmonic balancer compared to the subframe, it's definitely skewed off a bit, if looking ahead from the driver's seat is 0*, I'd say it's about 5* anti clockwise.
I'm not overly surprised, I'd assumed the transmission mount would locate the whole thing but obviously there's a bit of play in there.
I shall get back under the car once I have a helper to hand, loosen up the transmission mount, and basically use the tail housing of the box to hopefully leverage the whole lot around a bit to line up the balancer with the subframe. Hopefully it won't need the engine crane to take some weight off the engine, but will sort it out one way or another!

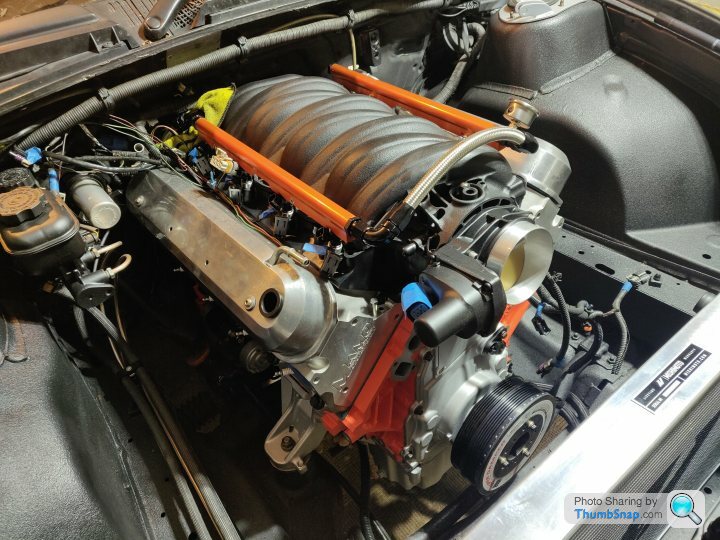
So this was the mildly wonky gearbox that I attempted to resolve last night.

Trolley jack under the gearbox, loosened the mount, and then engine crane lifting the front of the engine a touch to give me some wiggle room.
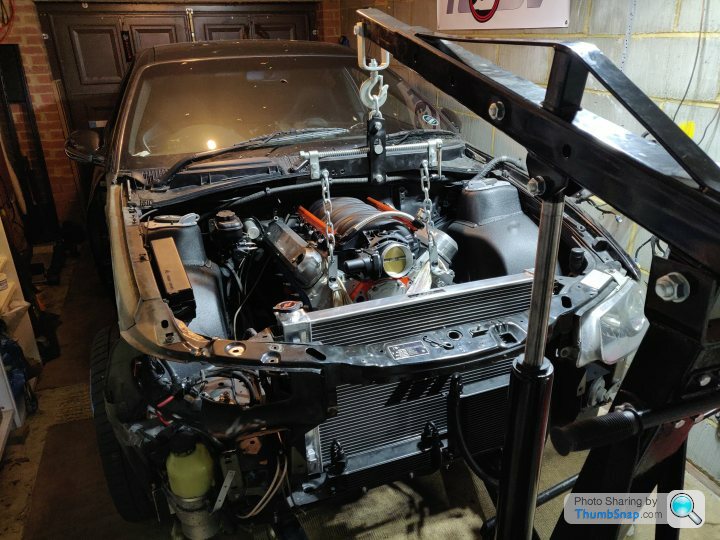
Wiggle room was wiggled, seemed to be more central, dropped engine back down, put crane away, tightened up mount, looked wonky again
Repeated steps 1 to 3, this time wedged a piece of wood in to keep things a little straighter, and tightened the trans mount mostly up first, then lowered engine with some guidance, rechecked again, and then eventually tightened everything down.
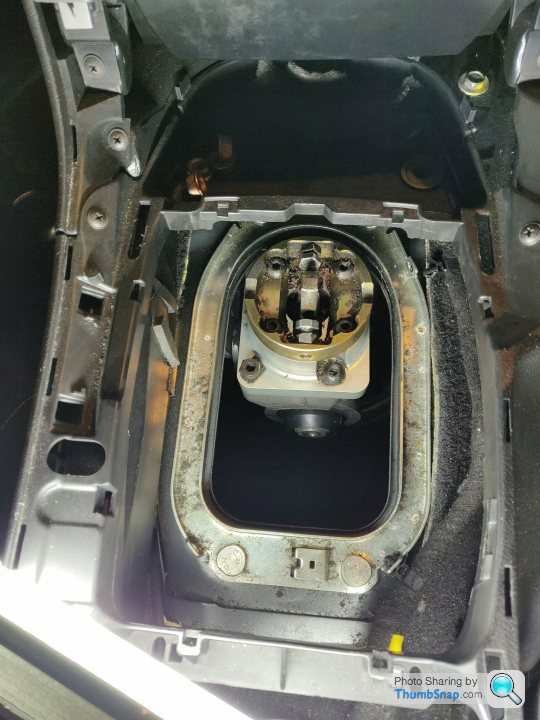
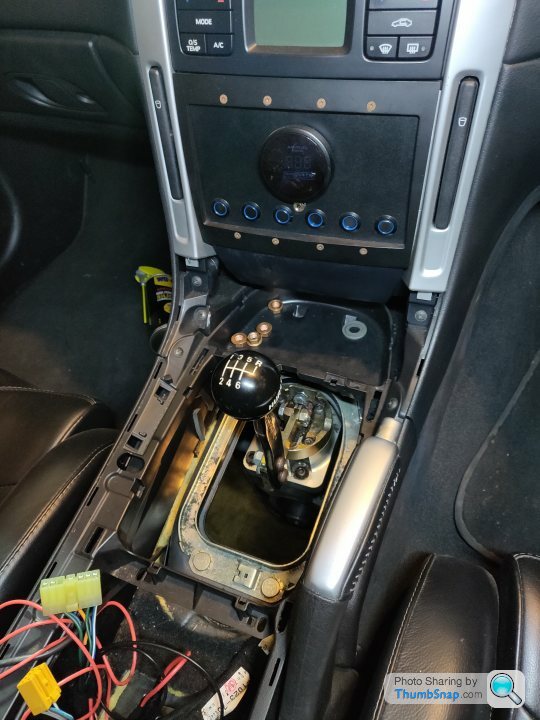
Is it straighter, is it a different camera angle? Who knows but I'm happy that it's as straight as GM probably intended so I moved on to trying to bolt the gearstick back on.
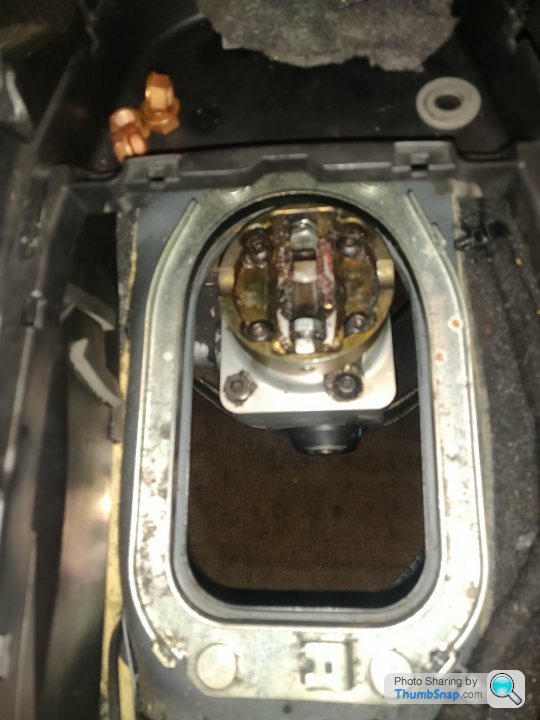
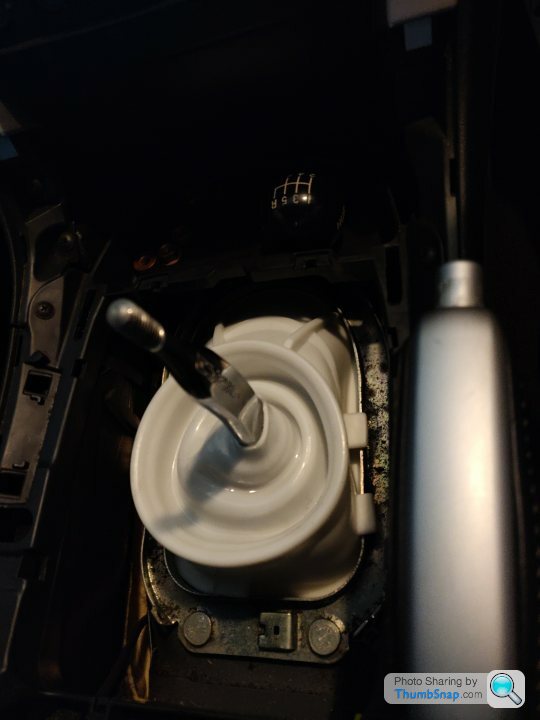
This was fiddly to say the least, in the end I've decided to get some new bolts (the old two are well past their best) and replace the rubber shift boot as it's full of holes which lets in annoying high pitched road noise (I'd previously packed foam and a cloth around under the leather gaiter )
)
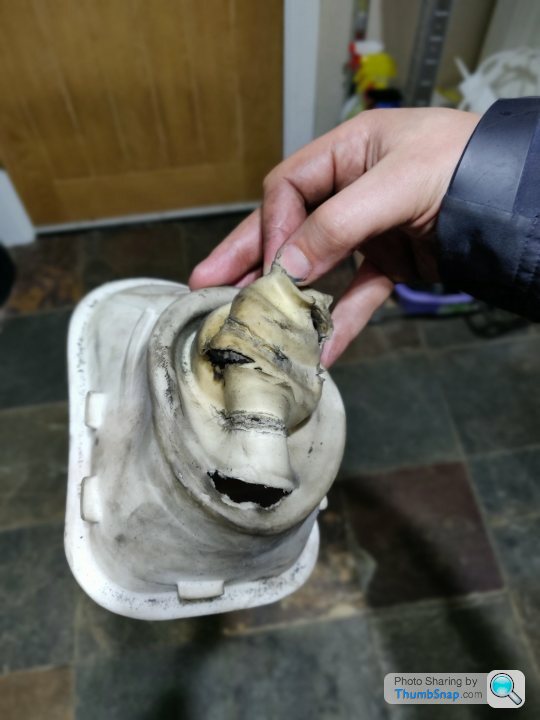
Not exactly in great shape... I also took this opportunity to, ahem, clean my knob. Mid wash below:
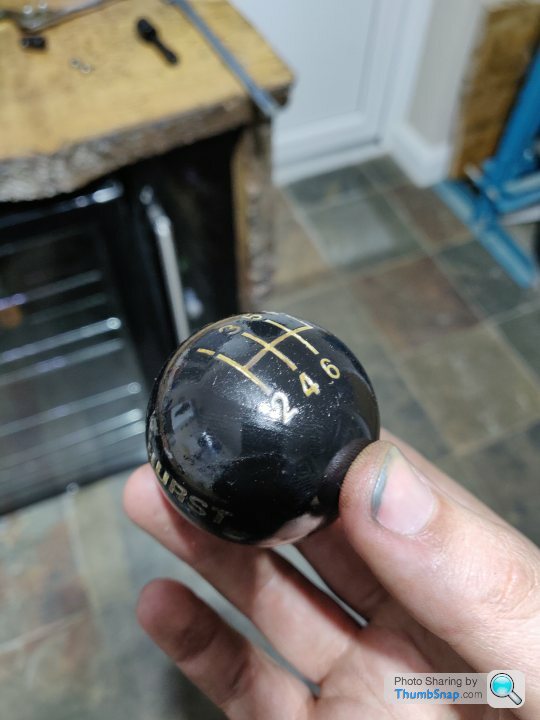
Much nicer:
I had been using a valve cover grommet around the base (not ideal) to secure the leather gaiter too, so I thought why not get the proper one... 1140015 is the part number, annnd nowhere will ship it to the UK. Fortunately I have a MyUS account, so got the $10 part shipped there, and they'll ship it on. It'll no doubt cost about £40 by the time I get it but there you go, if you own and modify stupid cars, that's the price you pay!
Picked Sheila up from the garage and all is well, going to tax her from the 1st April because paying the fuel month for a week just annoys me, for all the £22 or so that'd save me...
Trolley jack under the gearbox, loosened the mount, and then engine crane lifting the front of the engine a touch to give me some wiggle room.
Wiggle room was wiggled, seemed to be more central, dropped engine back down, put crane away, tightened up mount, looked wonky again
Repeated steps 1 to 3, this time wedged a piece of wood in to keep things a little straighter, and tightened the trans mount mostly up first, then lowered engine with some guidance, rechecked again, and then eventually tightened everything down.
Is it straighter, is it a different camera angle? Who knows
but I'm happy that it's as straight as GM probably intended so I moved on to trying to bolt the gearstick back on.This was fiddly to say the least, in the end I've decided to get some new bolts (the old two are well past their best) and replace the rubber shift boot as it's full of holes which lets in annoying high pitched road noise (I'd previously packed foam and a cloth around under the leather gaiter
)Not exactly in great shape... I also took this opportunity to, ahem, clean my knob. Mid wash below:
Much nicer:
I had been using a valve cover grommet around the base (not ideal) to secure the leather gaiter too, so I thought why not get the proper one... 1140015 is the part number, annnd nowhere will ship it to the UK. Fortunately I have a MyUS account, so got the $10 part shipped there, and they'll ship it on. It'll no doubt cost about £40 by the time I get it but there you go, if you own and modify stupid cars, that's the price you pay!
Picked Sheila up from the garage and all is well, going to tax her from the 1st April because paying the fuel month for a week just annoys me, for all the £22 or so that'd save me...
The whole engine and box assy is offset 1" on my commodore, as from factory, so Id assume the monaro is as well.
I found this out after cutting the hole in my bonnet my measuring the centre of the bonnet, and upon re-fitting the bonnet, the trumpets fouled the bonnet. I was seriously confused until I found out holden fitted the engine offset to clear the steering linkage !!
I found this out after cutting the hole in my bonnet my measuring the centre of the bonnet, and upon re-fitting the bonnet, the trumpets fouled the bonnet. I was seriously confused until I found out holden fitted the engine offset to clear the steering linkage !!
fred bloggs said:
The whole engine and box assy is offset 1" on my commodore, as from factory, so Id assume the monaro is as well.
I found this out after cutting the hole in my bonnet my measuring the centre of the bonnet, and upon re-fitting the bonnet, the trumpets fouled the bonnet. I was seriously confused until I found out holden fitted the engine offset to clear the steering linkage !!
You'd be surprised how many rear wheel drive cars engines are not central, I thought my mate was pulling my leg when he first told me. I found this out after cutting the hole in my bonnet my measuring the centre of the bonnet, and upon re-fitting the bonnet, the trumpets fouled the bonnet. I was seriously confused until I found out holden fitted the engine offset to clear the steering linkage !!
bonesxu1 said:
fred bloggs said:
The whole engine and box assy is offset 1" on my commodore, as from factory, so Id assume the monaro is as well.
I found this out after cutting the hole in my bonnet my measuring the centre of the bonnet, and upon re-fitting the bonnet, the trumpets fouled the bonnet. I was seriously confused until I found out holden fitted the engine offset to clear the steering linkage !!
You'd be surprised how many rear wheel drive cars engines are not central, I thought my mate was pulling my leg when he first told me. I found this out after cutting the hole in my bonnet my measuring the centre of the bonnet, and upon re-fitting the bonnet, the trumpets fouled the bonnet. I was seriously confused until I found out holden fitted the engine offset to clear the steering linkage !!
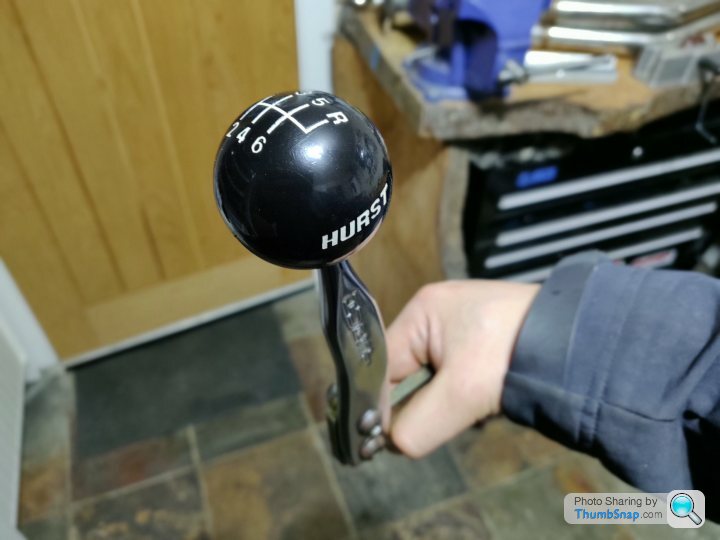
Got my gearstick bolted on at last anyway, using hex headed bolts as I hate Allen heads for applying any torque, and the originals years ago would slowly back out over 10,000 miles or so. Got some nyloc nuts on there too.
Might see about getting some fluids in this weekend and see if things leak, power steering, fuel line, clutch line and so on.
Cobbling together some fittings and things to prime the oil system properly when the time comes, and also pop a mechanical gauge on there for a reference.
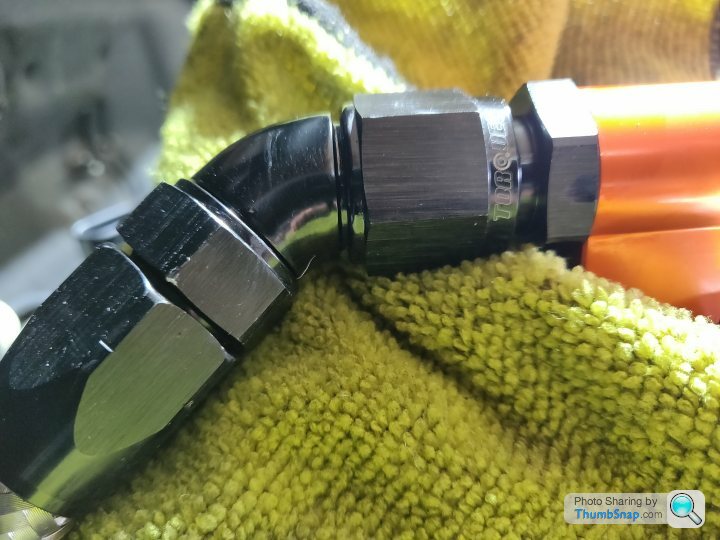
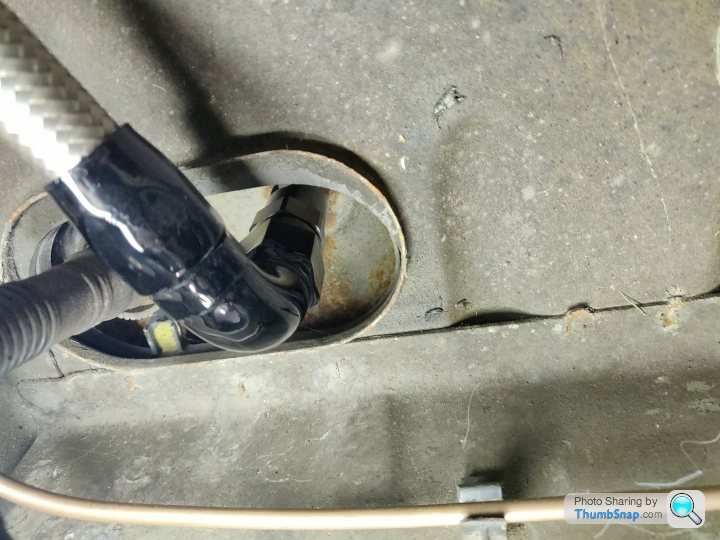
So a bit of work today, tested the fuel line / rails to see if it holds pressure...
Of the 4 fittings, 2 of them leaked out around the swivel part of the fitting. I've used this brand of fittings a fair bit before without any problems but yeah, was a bit disappointed with that performance.
May contact them about it via ebay as it's a bit piss poor really leaks out where it joins the fuel rail and where it leaves the tank. There were two other leaks that were my own fault for not putting either an o-ring or ptfe on the fittings that go into the rails, schoolboy error that.
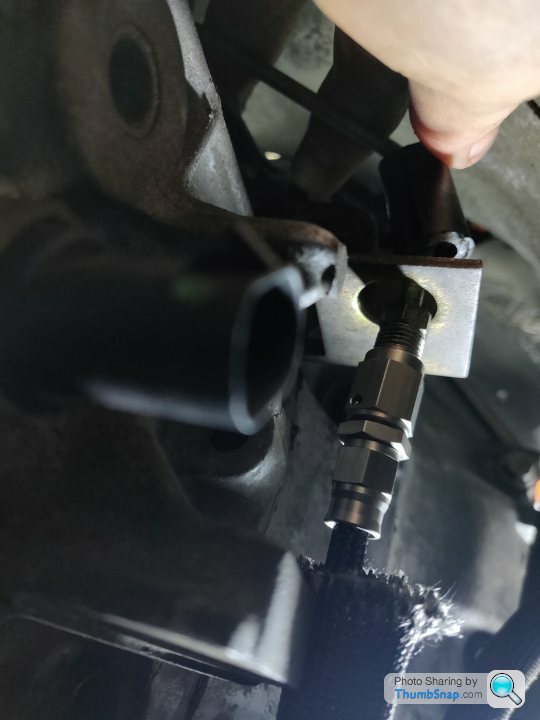
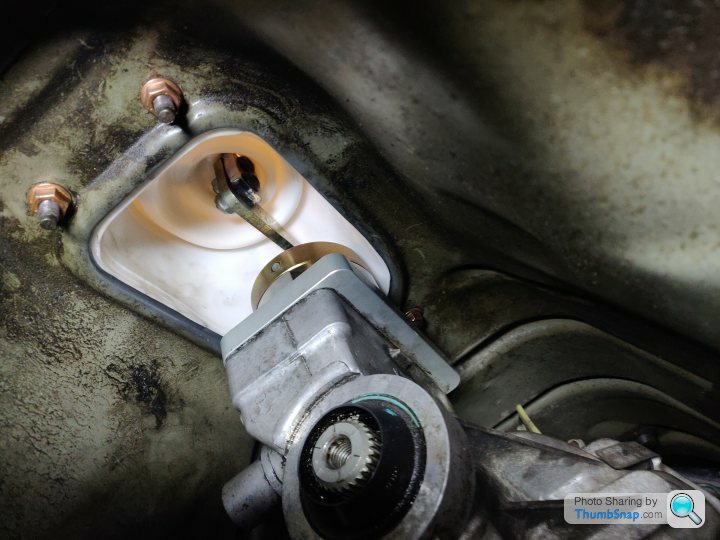
So that was... Less than successful. Next I thought I'd fill the clutch reservoir / lines. It has a remote bleed line on so it was simplicity itself really to bleed:
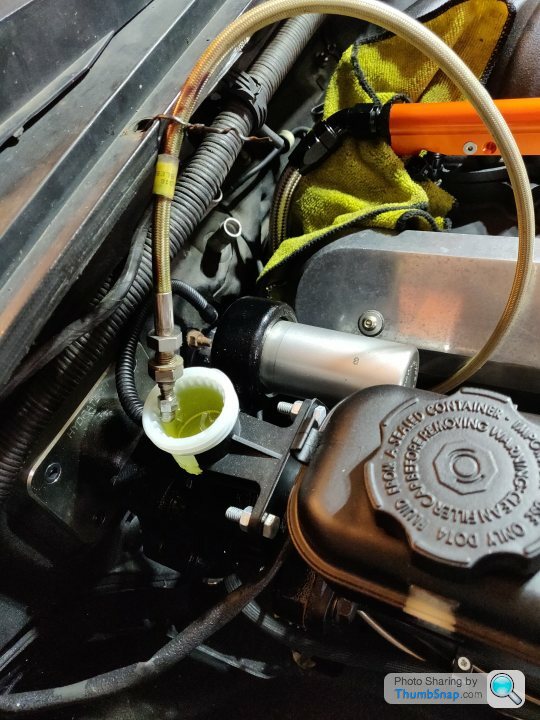
And no leaks from the only join I can see visually, operated the pedal a lot and the level didn't drop so hopefully OK
The pedal feels a little firm but not heavy, and the actual clutch actuation feels pretty short, so I imagine it'll be a delight to not stall with the choppy cam
I also sorted out the comedy camber on the wagon, although didn't take any pictures as Camaro dropped by and thus I was generally giggling too much to use my phone
It was fairly positive on both fronts beforehand and now has a touch of negative camber, completely just eyeballed for the sake of improving it, it'll be new tyres time soon so will get it properly aligned then.
Of the 4 fittings, 2 of them leaked out around the swivel part of the fitting. I've used this brand of fittings a fair bit before without any problems but yeah, was a bit disappointed with that performance.
May contact them about it via ebay as it's a bit piss poor really leaks out where it joins the fuel rail and where it leaves the tank. There were two other leaks that were my own fault for not putting either an o-ring or ptfe on the fittings that go into the rails, schoolboy error that.
So that was... Less than successful. Next I thought I'd fill the clutch reservoir / lines. It has a remote bleed line on so it was simplicity itself really to bleed:
And no leaks from the only join I can see visually, operated the pedal a lot and the level didn't drop so hopefully OK
The pedal feels a little firm but not heavy, and the actual clutch actuation feels pretty short, so I imagine it'll be a delight to not stall with the choppy cam
I also sorted out the comedy camber on the wagon, although didn't take any pictures as Camaro dropped by and thus I was generally giggling too much to use my phone
It was fairly positive on both fronts beforehand and now has a touch of negative camber, completely just eyeballed for the sake of improving it, it'll be new tyres time soon so will get it properly aligned then.
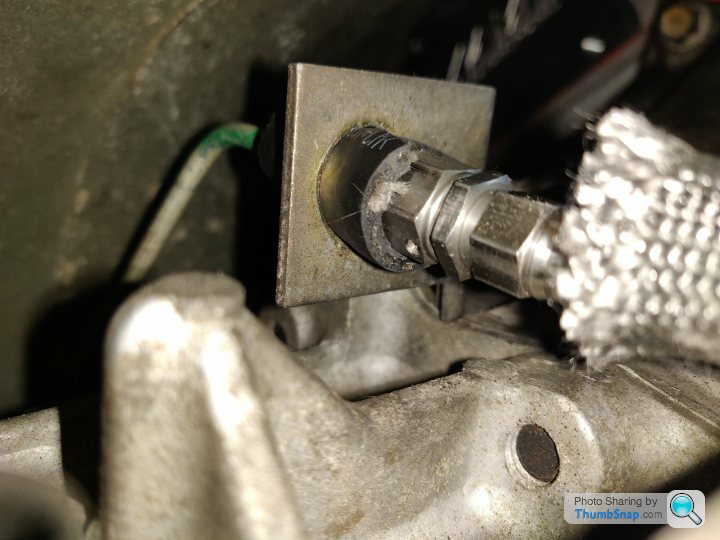
So the gearstick johnny turned up, as the shaft is slightly wider than stock I sprayed a bit of lube on the opening, slid in a treat. Ahem.
And from behind, can just see how awkward 2 of the nuts are, the 2 exposed ones are appreciably easier without the driveshaft and exhaust in the way...
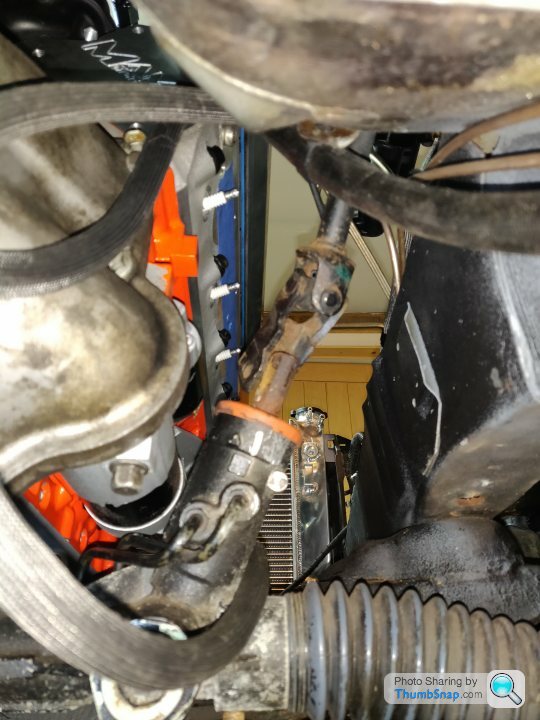
No real excuse not to put this 4inch carbon fibre and billet aluminium beauty back in meow
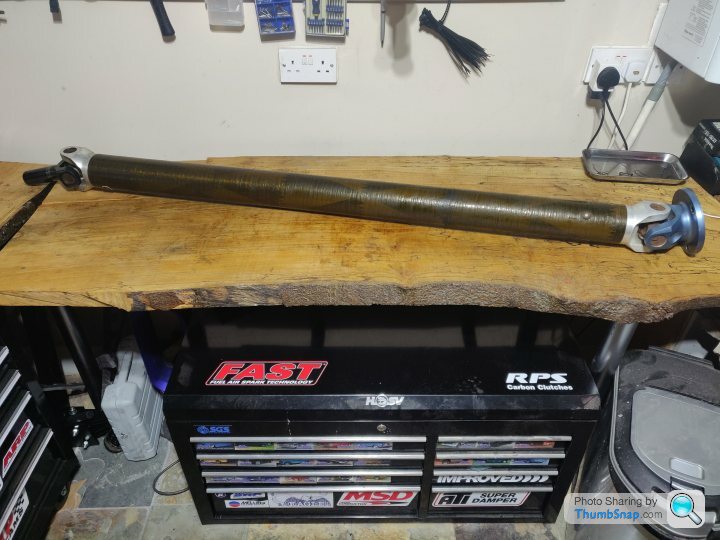
Yoke goes into the back of the gearbox then just 3 bolts to hold it to the diff. I put some red loctite on as these have all backed themselves out previously (and been spotted just in time fortunately).

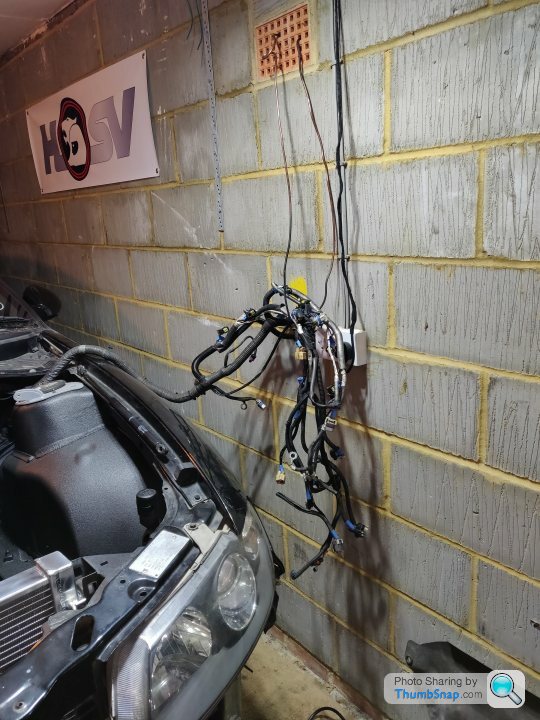
I also started stripping back the engine harness, separating bits out and rewrapping them.
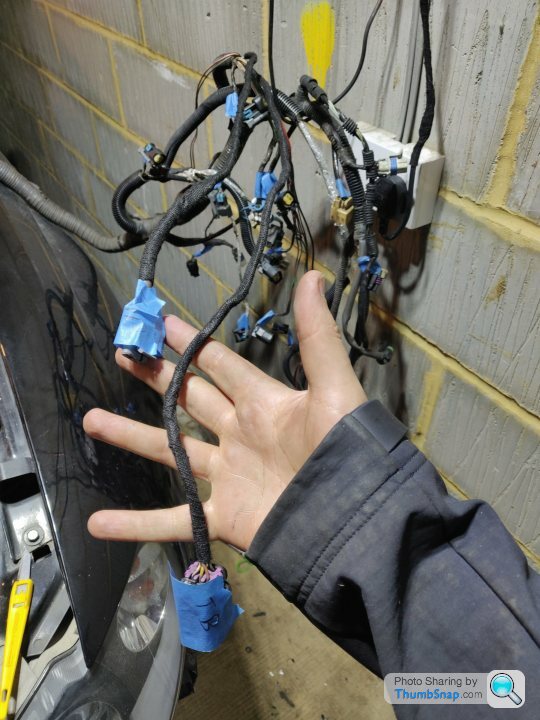
Main reason being I plan to reroute / hide as many of the wires that run to the front as possible, a fair few (throttle, cam position sensor, alternator, MAF) I can route under the intake manifold, and a few others (ECT, MAP, driver's side head ground) I am relocating to the rear instead (the left/right heads are identical, so instead of ECT being at the front passenger side, put it rear driver side for example) so am optimistic it can end up relatively clean looking without having to go silly.
Little test 'lay' of roughly what will go where to give myself an idea
Sheila will be taxed on Friday and heading in to work, will be the first time she's been out for a while, I think possibly since the wagon arrived, so August 2020?!
And from behind, can just see how awkward 2 of the nuts are, the 2 exposed ones are appreciably easier without the driveshaft and exhaust in the way...
No real excuse not to put this 4inch carbon fibre and billet aluminium beauty back in meow
Yoke goes into the back of the gearbox then just 3 bolts to hold it to the diff. I put some red loctite on as these have all backed themselves out previously (and been spotted just in time fortunately).
I also started stripping back the engine harness, separating bits out and rewrapping them.
Main reason being I plan to reroute / hide as many of the wires that run to the front as possible, a fair few (throttle, cam position sensor, alternator, MAF) I can route under the intake manifold, and a few others (ECT, MAP, driver's side head ground) I am relocating to the rear instead (the left/right heads are identical, so instead of ECT being at the front passenger side, put it rear driver side for example) so am optimistic it can end up relatively clean looking without having to go silly.
Little test 'lay' of roughly what will go where to give myself an idea
Sheila will be taxed on Friday and heading in to work, will be the first time she's been out for a while, I think possibly since the wagon arrived, so August 2020?!
Edited by SturdyHSV on Wednesday 30th March 08:46
Huskyman said:
Great work so far! How much longer before the first fire up?
I've booked a few days off end of April, so will try and maintain some consistent progress with the intention of getting it fired up then.There, I've said it now, so I'm accountable. b
 ks
ks Realistically there isn't a huge amount to do before it would run (assuming my wiring isn't a complete s
t show, which is possible) so I think there's an element of me being a bit of a wimp about getting it to the point where there's no excuses left not to try and fire it...Gassing Station | Readers' Cars | Top of Page | What's New | My Stuff