Hold(en) my beer - Monaro, Ute and Commodore content
Discussion


Another important aspect when you're heating crusty bolts is to let it all completely cool before you try undoing it - get it as hot as possible (obviously bearings or seals etc in carriers are always a concern if they're not being replaced), then let it all cool back down and hit it.
Krikkit said:
Another important aspect when you're heating crusty bolts is to let it all completely cool before you try undoing it - get it as hot as possible (obviously bearings or seals etc in carriers are always a concern if they're not being replaced), then let it all cool back down and hit it.
Why would you let it all contract again ? The heat is to expand the metal around the bolt. fred bloggs said:
Why would you let it all contract again ? The heat is to expand the metal around the bolt.
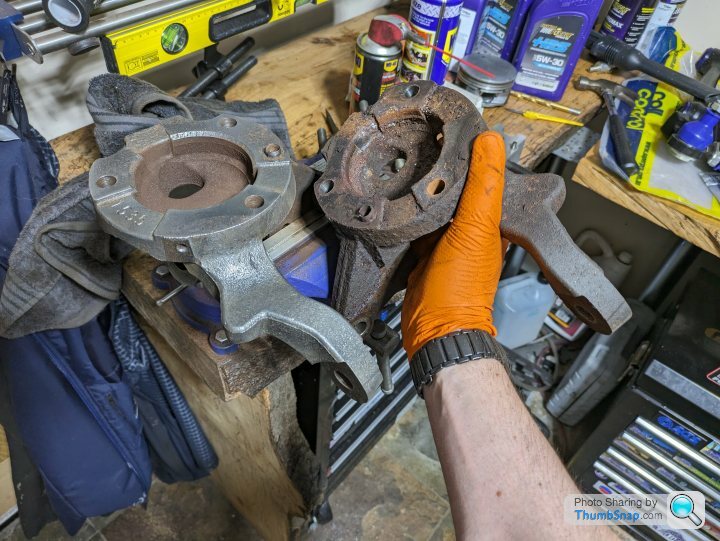
If you're heating the bolt then you're trying to expand it enough to crush the corrosion to loosen it, yes if you could heat the fixing then heat that and try and undo it, but ime that's much harder work, especially with a plumber's torch on something like a hubGot around to making a start on cleaning up the steering knuckles, not used a proper wire wheel before, it's very satisfying 
Some comparisons during the process.
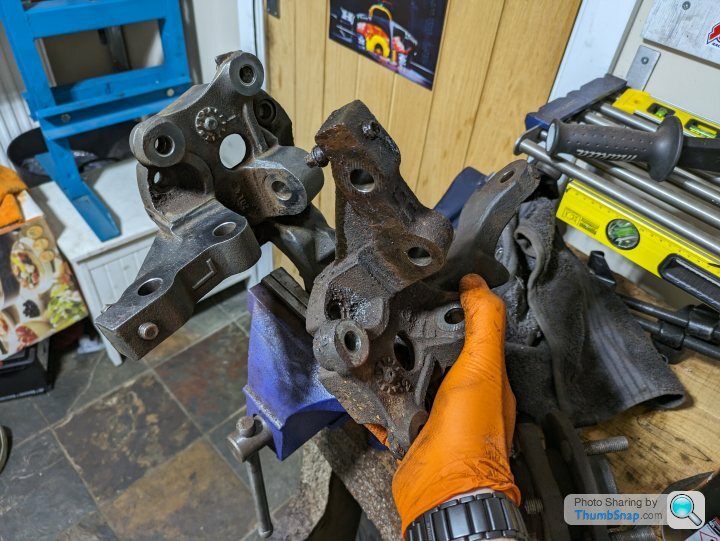
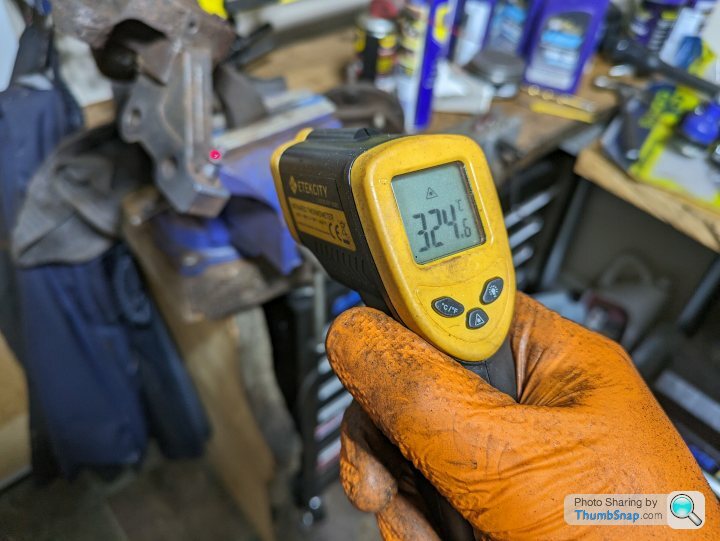
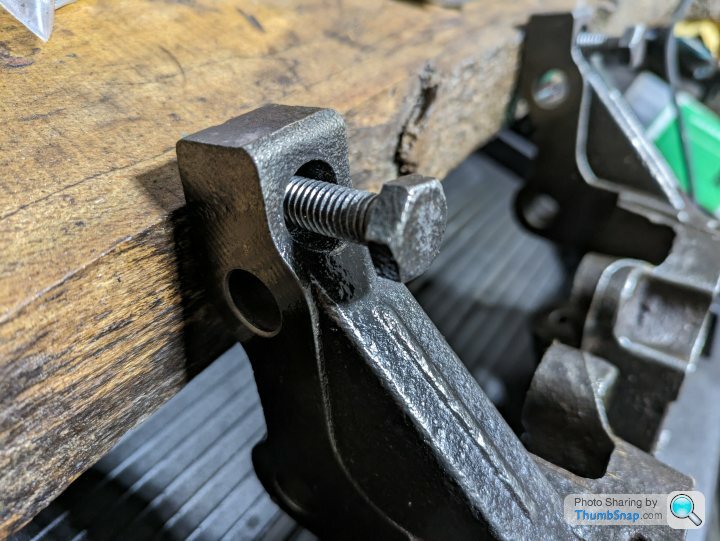
I also managed to get the camber bolts out. These have been soaking in penetrant for weeks which made little difference, so I cooked them until the bolt was glowing, my first 'Hi' reading on the thermometer. It was 500* plus but by the time I had the idea of taking a picture and got it focused it had dropped to a positively tepid 350ish.
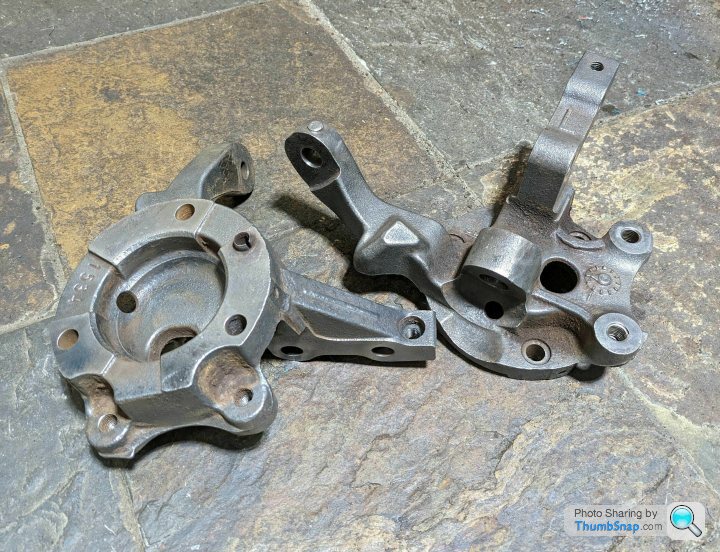
Overall, satisfying but dusty work. I'm probably going to use a wire wheel attachment on the dremel to try and tidy up some of the smaller areas and where the bearing hub bolts seat etc.
Some comparisons during the process.
I also managed to get the camber bolts out. These have been soaking in penetrant for weeks which made little difference, so I cooked them until the bolt was glowing, my first 'Hi' reading on the thermometer. It was 500* plus but by the time I had the idea of taking a picture and got it focused it had dropped to a positively tepid 350ish.
Overall, satisfying but dusty work. I'm probably going to use a wire wheel attachment on the dremel to try and tidy up some of the smaller areas and where the bearing hub bolts seat etc.
If you want them really clean (for cheap) then home electrolysis is worth a look: https://www.instructables.com/Electrolytic-Rust-Re...
All you need is:
All you need is:
- Sodium carbonate (£8 on Amazon: https://www.amazon.co.uk/Intralabs-Sodium-Carbonat...
- Big bucket
- 20A+ Battery charger
- Copper wire and sacrificial steel lump
Krikkit said:
If you want them really clean (for cheap) then home electrolysis is worth a look: https://www.instructables.com/Electrolytic-Rust-Re...
All you need is:
That's an interesting idea actually... All you need is:
- Sodium carbonate (£8 on Amazon: https://www.amazon.co.uk/Intralabs-Sodium-Carbonat...
- Big bucket
- 20A+ Battery charger
- Copper wire and sacrificial steel lump

As a bit of tinkering last night I thought I'd tidy up the not quite 8mm not quite 5/16 headed camber bolts.

These cleaned up OK, but given they're just M10 bolts I hunted around and found some crusty old exhaust bolts, cleaned those up and ran them through the threads with some Autosol and now at least when these seize in I've got a 17mm head to abuse to get them out!
Shall liberally copper grease them when it comes to assembly, they turn effortlessly by hand now, a pleasing little change.
Nice work, I've fought a few rusty bolts on the Monaro recently so I know what a pain they can be!
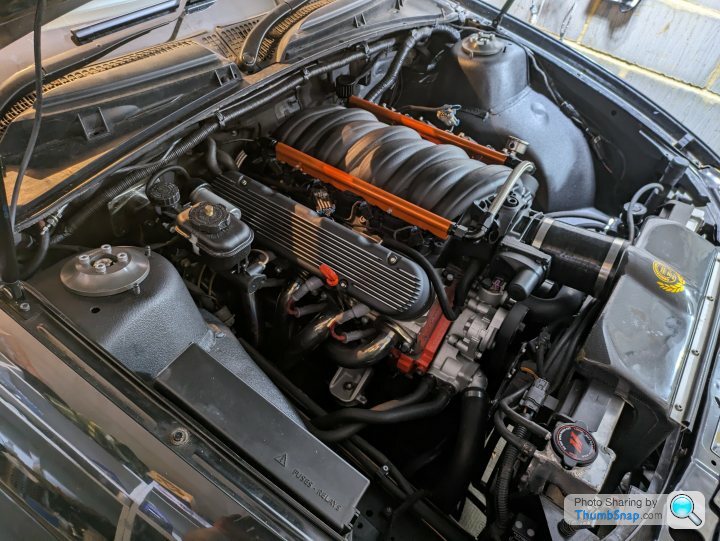
I bought a cheap 1500w induction heater from China and I'm really impressed so far - the ability to heat just the fixing has really helped in a few cases - e.g. the LS1 harmonic damper bolt which my "big" impact wouldn't move when cold (and that is rarely beaten!). Time will tell what its durability is like.
Doesn't sound as though you are about to do so, but just a word of caution on reusing any fasteners that have been heated until glowing cherry red - they may no longer be the same grade that they were previously...
99t said:
Nice work, I've fought a few rusty bolts on the Monaro recently so I know what a pain they can be!
I bought a cheap 1500w induction heater from China and I'm really impressed so far - the ability to heat just the fixing has really helped in a few cases - e.g. the LS1 harmonic damper bolt which my "big" impact wouldn't move when cold (and that is rarely beaten!). Time will tell what its durability is like.
Doesn't sound as though you are about to do so, but just a word of caution on reusing any fasteners that have been heated until glowing cherry red - they may no longer be the same grade that they were previously...
Oh yeah that harmonic damper bolt has a heat activated compound underneath the head, it is basically impossible to undo without heating it up first, then it comes off easily. My 1000Nm Makita was also defeated by it, but a bit of blow torch on it and it popped out no problem!I bought a cheap 1500w induction heater from China and I'm really impressed so far - the ability to heat just the fixing has really helped in a few cases - e.g. the LS1 harmonic damper bolt which my "big" impact wouldn't move when cold (and that is rarely beaten!). Time will tell what its durability is like.
Doesn't sound as though you are about to do so, but just a word of caution on reusing any fasteners that have been heated until glowing cherry red - they may no longer be the same grade that they were previously...
Yep fair point on the heat treating of the bolts, will keep it in mind

My plan is mostly to just clean things up a little and the associated threads in the hope of keeping things a little less seized now that it's all apart. To be fair with the wagon and the Ute also available, and putting 600hp through 255 rears, the Ro will probably see less wintery condtions than the previous 70,000 miles, so maybe it won't be that bad anyway!
SturdyHSV said:
Krikkit said:
If you want them really clean (for cheap) then home electrolysis is worth a look: https://www.instructables.com/Electrolytic-Rust-Re...
All you need is:
That's an interesting idea actually... All you need is:
- Sodium carbonate (£8 on Amazon: https://www.amazon.co.uk/Intralabs-Sodium-Carbonat...
- Big bucket
- 20A+ Battery charger
- Copper wire and sacrificial steel lump
Before:

After the electrolysis:

After:

They look rusty in the last pic, but it's just a little surface rust from being damp, all you do when you fetch them out is wire brush the oxide layer off, but it only takes a couple of minutes.
I bought an old 1630 John Deere tractor and inside the fuel tank was rusty as hell, scabby bits of rust in the bottom. I left it soaking with brick acid for 24hrs and the metal on the inside was like I had just bought a brand new tank. Only disappointing thing was when I rinsed it out with water it had that instant rust coating.
Been a while, not done much with the cars over the winter but things are finally going back together again.
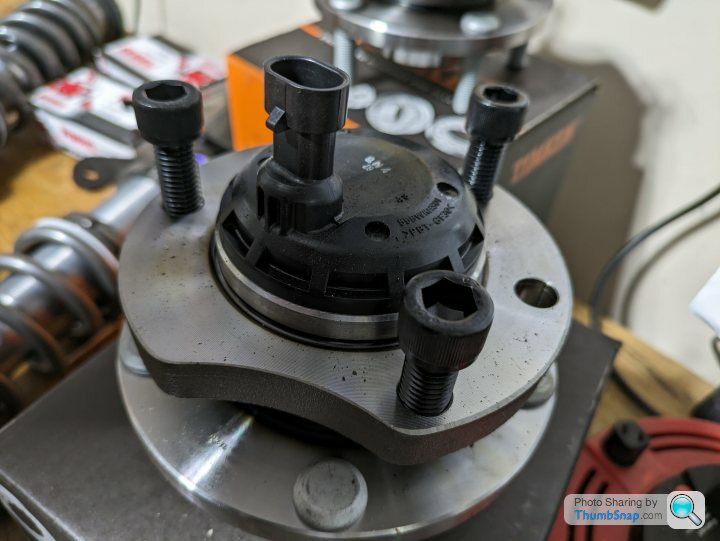
Replaced some of the rather more used bolts on the front end, not least because throwing 20 year old crusty bolts back in to all these nice clean parts just felt wrong
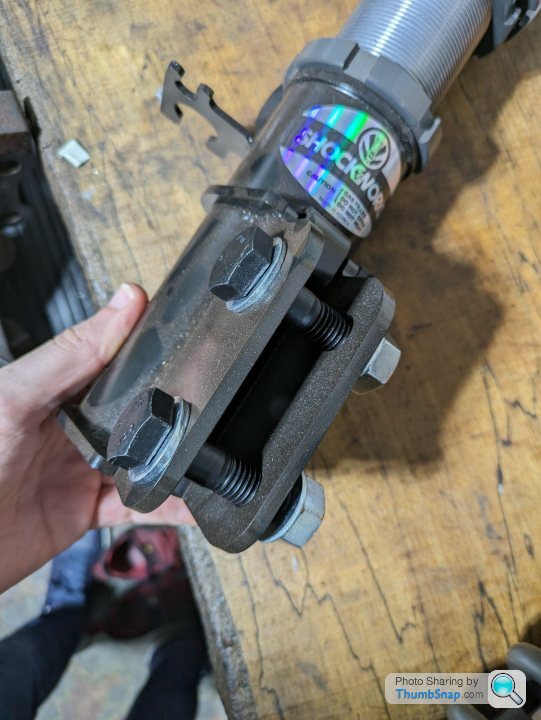
A friend and I put the rear springs / dampers in (spring isn't captive as the damper isn't attached in this pic)
I gave Shockworks the ride height measurements so it should be able to sit back where it was but my word it all looks / feels a bit firmer back there!
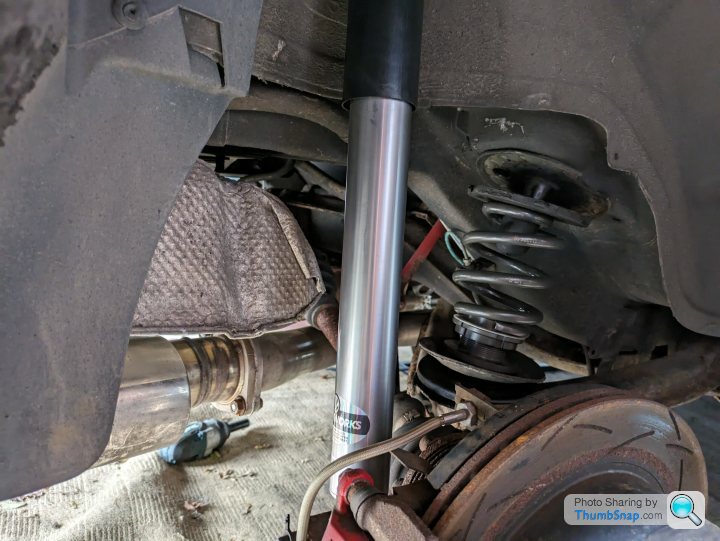
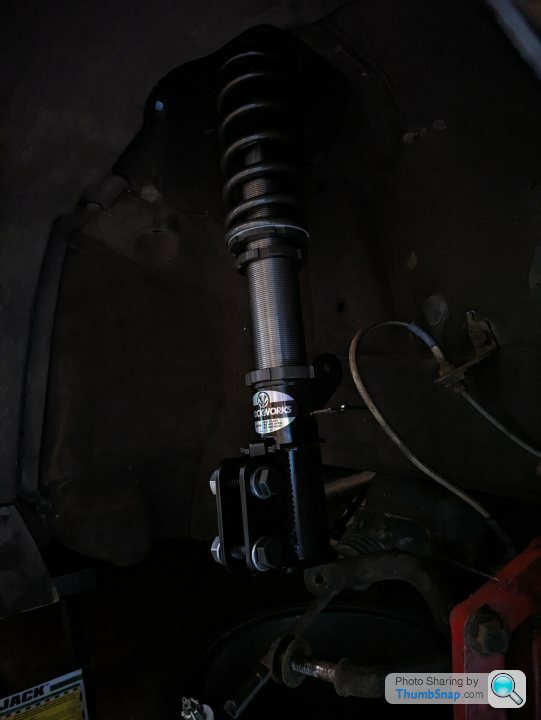
As I couldn't resist I hung a front coilover just to see how it looked, will likely chip away at the front over the next few days
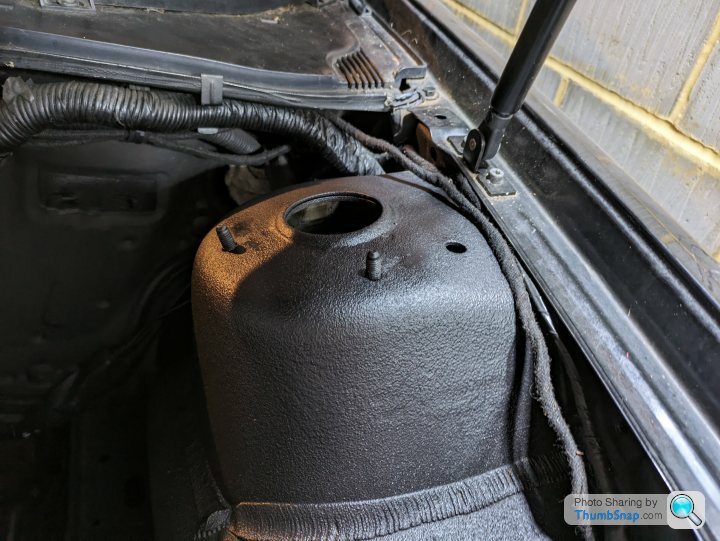
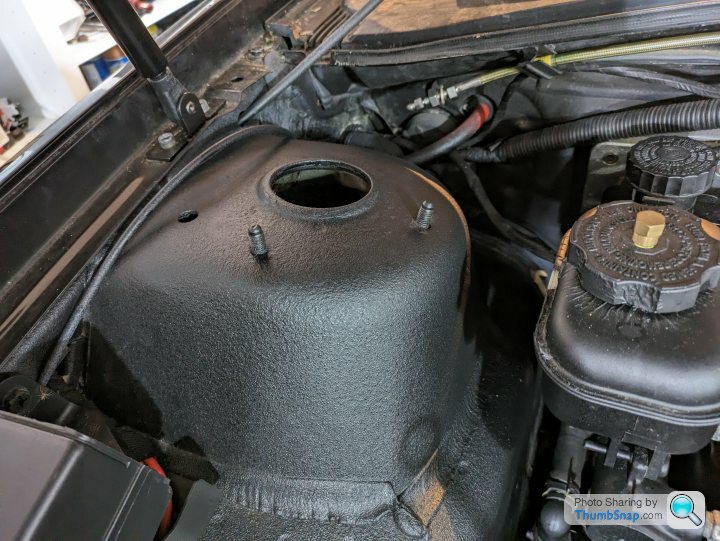
Strut brace won't fit with these top caps, the factory original one may do, but I don't have one to hand to find out, will see if I can swap mine with someone!

In other news, picked up a BRZ for the girlfriend. It already has coilovers and unequal length headers / exhaust, so it sounds great, drives great, genuinely wish I'd got one 10 years ago, it's a lot of fun and a great contrast to the big V8s.
This was prompted by the E36 water pump going. I have a replacement (from the original engine) but it's too cold to bother with changing it to be honest. If anyone wants a very cheap little project (minty clean underneath) shoot me a PM
Replaced some of the rather more used bolts on the front end, not least because throwing 20 year old crusty bolts back in to all these nice clean parts just felt wrong
A friend and I put the rear springs / dampers in (spring isn't captive as the damper isn't attached in this pic)
I gave Shockworks the ride height measurements so it should be able to sit back where it was but my word it all looks / feels a bit firmer back there!
As I couldn't resist I hung a front coilover just to see how it looked, will likely chip away at the front over the next few days
Strut brace won't fit with these top caps, the factory original one may do, but I don't have one to hand to find out, will see if I can swap mine with someone!
In other news, picked up a BRZ for the girlfriend. It already has coilovers and unequal length headers / exhaust, so it sounds great, drives great, genuinely wish I'd got one 10 years ago, it's a lot of fun and a great contrast to the big V8s.
This was prompted by the E36 water pump going. I have a replacement (from the original engine) but it's too cold to bother with changing it to be honest. If anyone wants a very cheap little project (minty clean underneath) shoot me a PM
Silly things but a quick dusting of paint over the strut towers where the old strut brace mounts had rubbed and left some paint / filth etc.
Again more to check fit etc, popped one of the lower control arms in. Cleaned up the threads on the forward arm (this has a name I can't remember) so it all goes together pretty cleanly now.

In terms of where to apply the supplied grease, only the bushing that goes into the subframe will be contacting any metal so I'm assuming that's where it should go, zero instructions :shrug:
Again more to check fit etc, popped one of the lower control arms in. Cleaned up the threads on the forward arm (this has a name I can't remember) so it all goes together pretty cleanly now.
In terms of where to apply the supplied grease, only the bushing that goes into the subframe will be contacting any metal so I'm assuming that's where it should go, zero instructions :shrug:
Got on with it this evening for a couple of hours, all went together really nicely (benefit of new / clean parts!) and was pretty enjoyable.
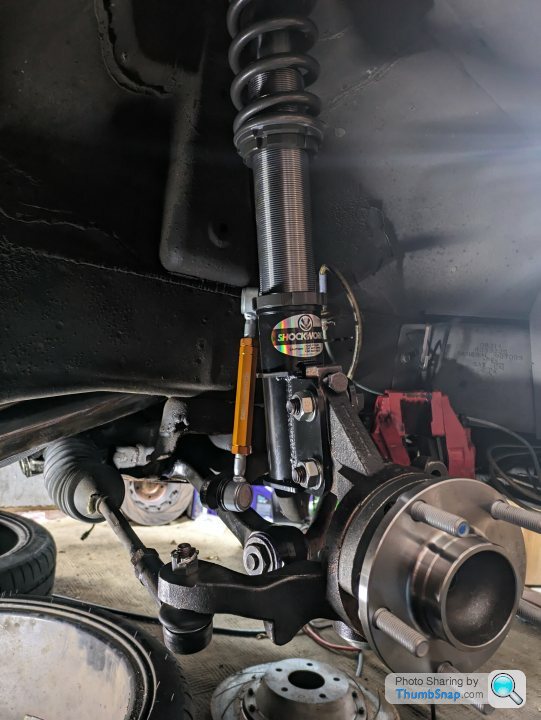
Things are copper slipped where possible and generally everything is pretty damn clean, so maybe it won't be such a nuisance to do bits in the future, we shall see!
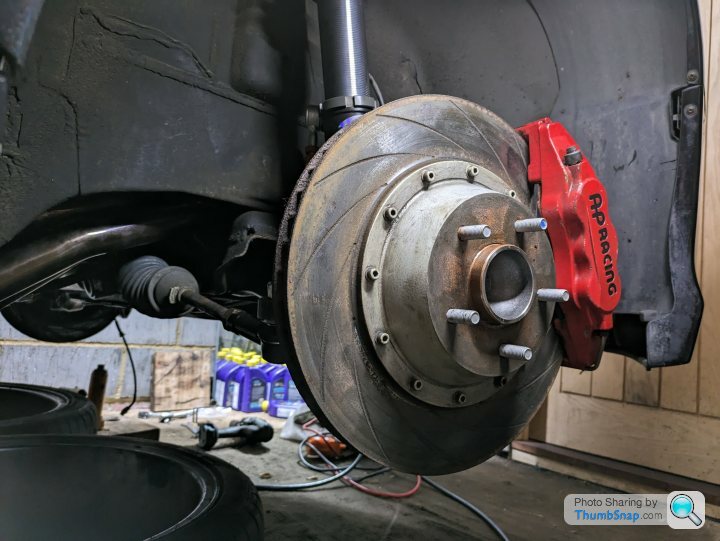
All concealed by the enormous APs of course.
Top mounts look tidy, I may be able to fit an original strut brace around them, I'll have to have a look at one at a meet and see if it looks like it'll clear.
Going to investigate the ABS fault as best I can, I may pop it down in its wheels to get an idea of height etc as there's going to be a lot of adjustment to do I suspect...
Things are copper slipped where possible and generally everything is pretty damn clean, so maybe it won't be such a nuisance to do bits in the future, we shall see!
All concealed by the enormous APs of course.
Top mounts look tidy, I may be able to fit an original strut brace around them, I'll have to have a look at one at a meet and see if it looks like it'll clear.
Going to investigate the ABS fault as best I can, I may pop it down in its wheels to get an idea of height etc as there's going to be a lot of adjustment to do I suspect...
Popped it back down on the wheels. I clearly went a bit cautious on front ride height

67.5cm currently, vs 59.5cm before
This is with the coilover set up physically about 25mm shorter than the previous spring / damper.
Out of curiosity I weighed things as I normally do, Shockworks front coilover and drop link was 8kg, vs Pedders spring / damper / drop link 12kg (with a lot of rust...!)
Not a bad drop in unspring weight at the front that, and combined with the fact the AP caliper was 0.6kg lighter than stock and the disc was 2.7kg lighter, talking over 7kg a corner!
SturdyHSV said:
That's an interesting idea actually...
As a bit of tinkering last night I thought I'd tidy up the not quite 8mm not quite 5/16 headed camber bolts.
Shall liberally copper grease them when it comes to assembly, they turn effortlessly by hand now, a pleasing little change.
I feel your pain. I recently took 12 of those bolts off the SBC in my Impala - it must have taken at least a couple of hours as I had to take some them out 1/16 of a turn at a time, flipping the spanner over each movement.. There was no room for a socket to fit on, and I had to heat 3 of them red to get them to undo. As a bit of tinkering last night I thought I'd tidy up the not quite 8mm not quite 5/16 headed camber bolts.
Shall liberally copper grease them when it comes to assembly, they turn effortlessly by hand now, a pleasing little change.
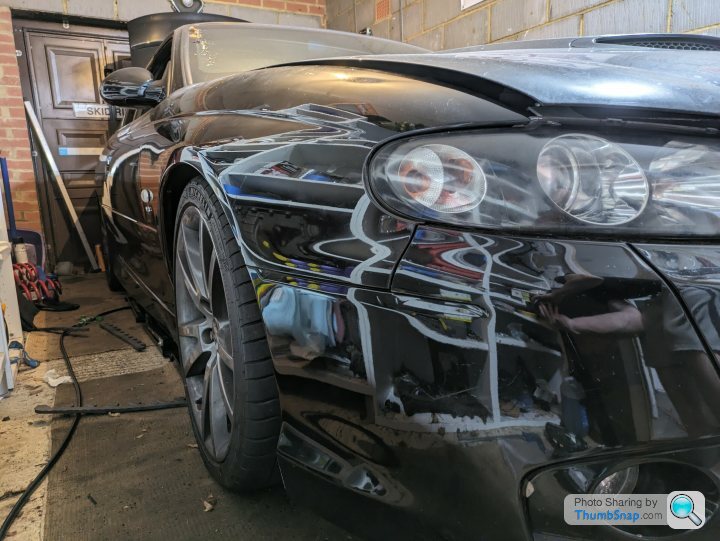
Can't remember if I mentioned it in here, I suspect not, we picked up a Subaru BRZ for my partner a couple of months ago.
The E36 water pump went and although we still have the fine looking original pump, we're a bit sick of the car now to be honest, so took the 'opportunity' to actually just get something really nice to use daily and that she'll enjoy driving and that can at least make threatening gestures at a rice pudding skin.
I may fix the compact, have just been offering it to some friends as a good condition shell for £500 but it may just end up getting scrapped to be honest.
Anyway, the BRZ is amazing fun, I wish I'd bought one years ago!
With the Monaro back on wheels, the quickjacks were free, and as the brake pedal on the Scoob was a little squishy decided to replace the brake fluid at the weekend and it's much nicer now. One of the hydraulic fittings on the quickjack started to leak, so took this apart and sorted it with some PTFE tape.
I then had a significant dumbass moment of figuring that using a car battery for the quickjack was inconvenient when in the garage, so why not just wire it up to a mains plug. batteries famously being DC and mains supply famously not being.
Unsurprisingly, this lasted however long it took to trip the circuit breaker, during which time the relay managed to weld itself closed I managed to take it apart, free it up and put it back together, so crisis averted and the Monaro is back up in the air where it belongs so I can finally bite the bullet and try and test this ABS sensor wiring.
I unplugged the big ABS connector (the one that I filled with the magic water proof gel goop about 300 posts ago) and it seems to have been relatively unintrusive.
I checked the various bits of loom, the wheel well bits and then the actual wheel well to ABS connector bits. All seemed to report negligible resistance.
For reference, the meter leads just by themselves read ~0.3 / 0.4Ohm.
The wheel well sections measured 0.4Ohm both sides, the wheel well to ABS module loom on the driver's side (the short run) measured 0.5 Ohm, and over to the passenger side (the long run, and the one I'm most suspicious of) read 0.5 and 0.6 Ohm for each pin. This difference of 0.1 seems incredibly small but it is consistently there.
I do not know if that is of a significant scale to cause grumpy readings from the (hall effect) sensor.
I understand how the sensors work in terms of an induced current from the ring gear teeth producing a sinusoidal wave, but have no experience of how that sort of tiny difference in wire resistance would impact the signal that the ABS module would see.
What it wasn't was some sort of obvious vast difference that would have more confidently pointed towards a wiring SNAFU on my part. Realistically, I'm not sure I'm going to learn much more without a Tech2 plugged in and a live display of the data.
I gave everything a spray with contact cleaner and will have a good inspection around the pins / ABS connector etc. but beyond that it's borrow a Tech2 time, unless I can get the laptop based one working again!
The E36 water pump went and although we still have the fine looking original pump, we're a bit sick of the car now to be honest, so took the 'opportunity' to actually just get something really nice to use daily and that she'll enjoy driving and that can at least make threatening gestures at a rice pudding skin.
I may fix the compact, have just been offering it to some friends as a good condition shell for £500 but it may just end up getting scrapped to be honest.
Anyway, the BRZ is amazing fun, I wish I'd bought one years ago!
With the Monaro back on wheels, the quickjacks were free, and as the brake pedal on the Scoob was a little squishy decided to replace the brake fluid at the weekend and it's much nicer now. One of the hydraulic fittings on the quickjack started to leak, so took this apart and sorted it with some PTFE tape.
I then had a significant dumbass moment of figuring that using a car battery for the quickjack was inconvenient when in the garage, so why not just wire it up to a mains plug. batteries famously being DC and mains supply famously not being.
Unsurprisingly, this lasted however long it took to trip the circuit breaker, during which time the relay managed to weld itself closed
I managed to take it apart, free it up and put it back together, so crisis averted and the Monaro is back up in the air where it belongs so I can finally bite the bullet and try and test this ABS sensor wiring.I unplugged the big ABS connector (the one that I filled with the magic water proof gel goop about 300 posts ago
) and it seems to have been relatively unintrusive. I checked the various bits of loom, the wheel well bits and then the actual wheel well to ABS connector bits. All seemed to report negligible resistance.
For reference, the meter leads just by themselves read ~0.3 / 0.4Ohm.
The wheel well sections measured 0.4Ohm both sides, the wheel well to ABS module loom on the driver's side (the short run) measured 0.5 Ohm, and over to the passenger side (the long run, and the one I'm most suspicious of) read 0.5 and 0.6 Ohm for each pin. This difference of 0.1 seems incredibly small but it is consistently there.
I do not know if that is of a significant scale to cause grumpy readings from the (hall effect) sensor.
I understand how the sensors work in terms of an induced current from the ring gear teeth producing a sinusoidal wave, but have no experience of how that sort of tiny difference in wire resistance would impact the signal that the ABS module would see.
What it wasn't was some sort of obvious vast difference that would have more confidently pointed towards a wiring SNAFU on my part. Realistically, I'm not sure I'm going to learn much more without a Tech2 plugged in and a live display of the data.
I gave everything a spray with contact cleaner and will have a good inspection around the pins / ABS connector etc. but beyond that it's borrow a Tech2 time, unless I can get the laptop based one working again!
Many, many moons ago while my '05 was under warranty, I had an ABS issue resolved at the factory Monaro dealer in Edinburgh (long gone).
The o/s/f wheel connector at the inner wing position was found to be not conducting properly.
Gloop was applied to improve the connectivity and has been trouble free 🤞 since.
It sounds like you've covered this already but if it's of any help
The o/s/f wheel connector at the inner wing position was found to be not conducting properly.
Gloop was applied to improve the connectivity and has been trouble free 🤞 since.
It sounds like you've covered this already but if it's of any help
bigwheel said:
Many, many moons ago while my '05 was under warranty, I had an ABS issue resolved at the factory Monaro dealer in Edinburgh (long gone).
The o/s/f wheel connector at the inner wing position was found to be not conducting properly.
Gloop was applied to improve the connectivity and has been trouble free ?? since.
It sounds like you've covered this already but if it's of any help
Regular problem that one!The o/s/f wheel connector at the inner wing position was found to be not conducting properly.
Gloop was applied to improve the connectivity and has been trouble free ?? since.
It sounds like you've covered this already but if it's of any help
Gassing Station | Readers' Cars | Top of Page | What's New | My Stuff