VW shedding 2001 Golf and 2003 Passat
Discussion


This is a story about shedding some old VW's except I completely miss the point and spend far too much time effort and cash in doing so.
I have another thread running which sadly due to photobucket going tits up a few years back is full of dead photo links, literally 100's of photos which I don't think i'll ever be able to restore along with the narrative that goes with them. For reference the thread is here;
https://www.pistonheads.com/gassing/topic.asp?h=0&...
As it has been about three years since I did the main bulk of work on both cars, it is time to sort out some niggles. I'll try and back fill some of the previous work done as and when I have time.
To start off, the cars;
Car One, the Wifies car is a 2001 Golf GT TDI with the 130hp PD engine owned since Jan 2016. Currently with about 102k on the clock.
Car Two, mine is a 2003 (but registered in the first week of 2004) Passat Highline Estate again with the 130hp PD engine owned since Jul 2011. Currently with about 153k on the clock.
Current work is on the Passat, posts copied from the other thread.
Below posted 04/07/19 and 05/07/19
It has been a long time.
And now I've got the ability to post pictures again, it'd be silly not to. (I'll have a go at filling in some blanks up thread when I have time).
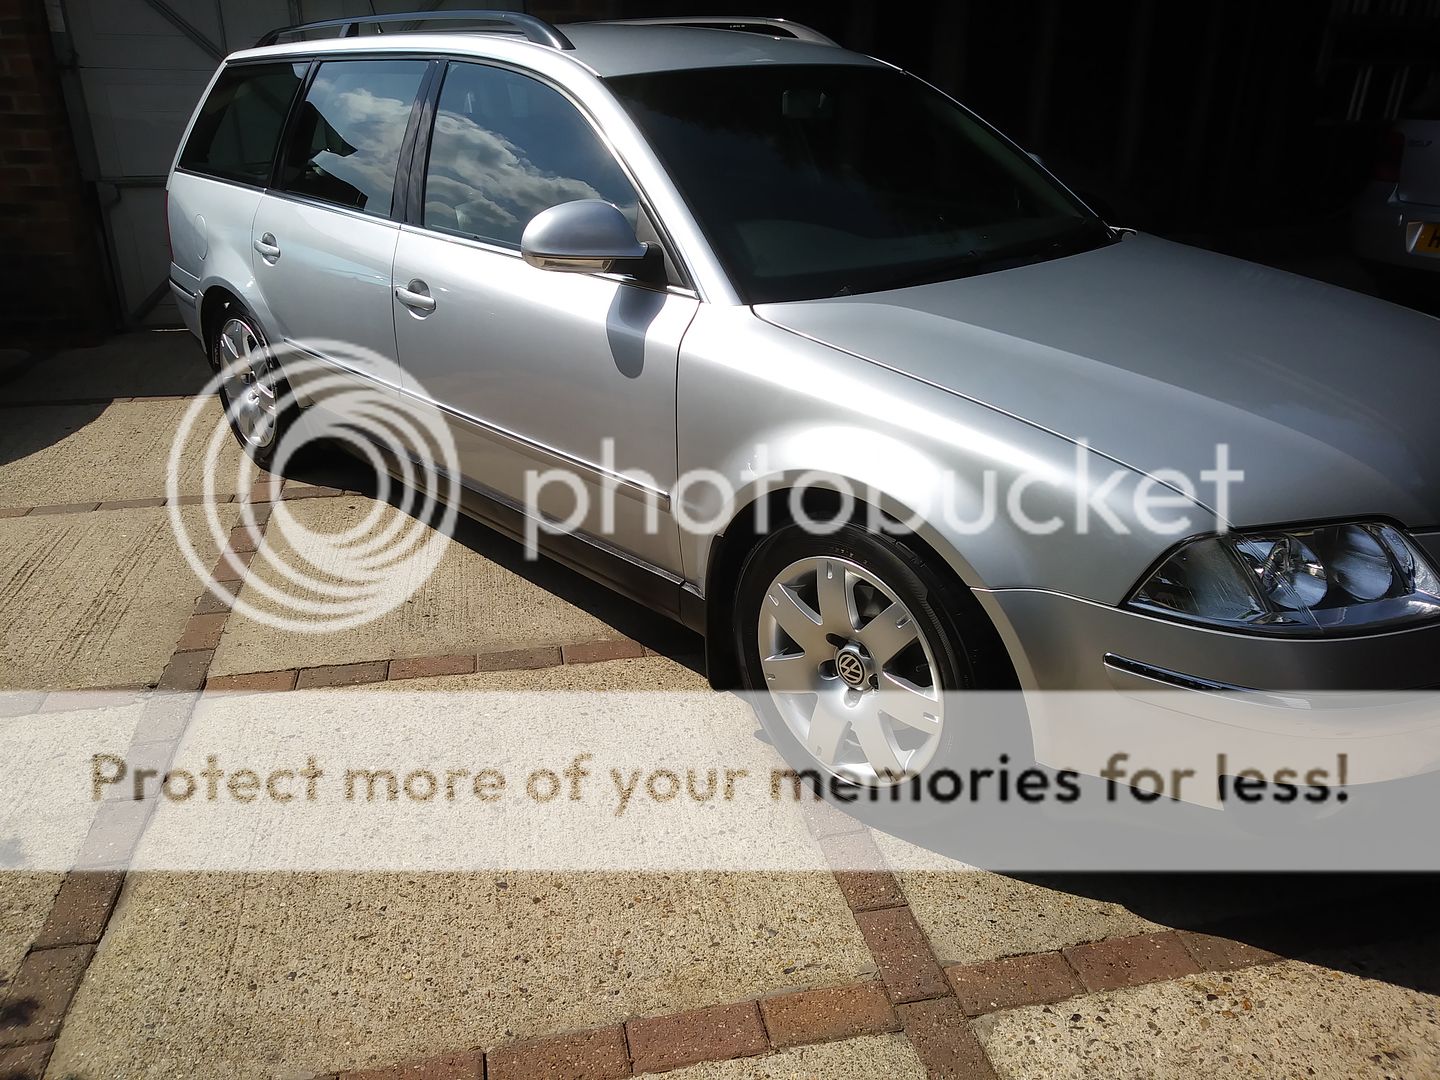
A few of the car in general first, it is still clean and still good.
The old hector itself
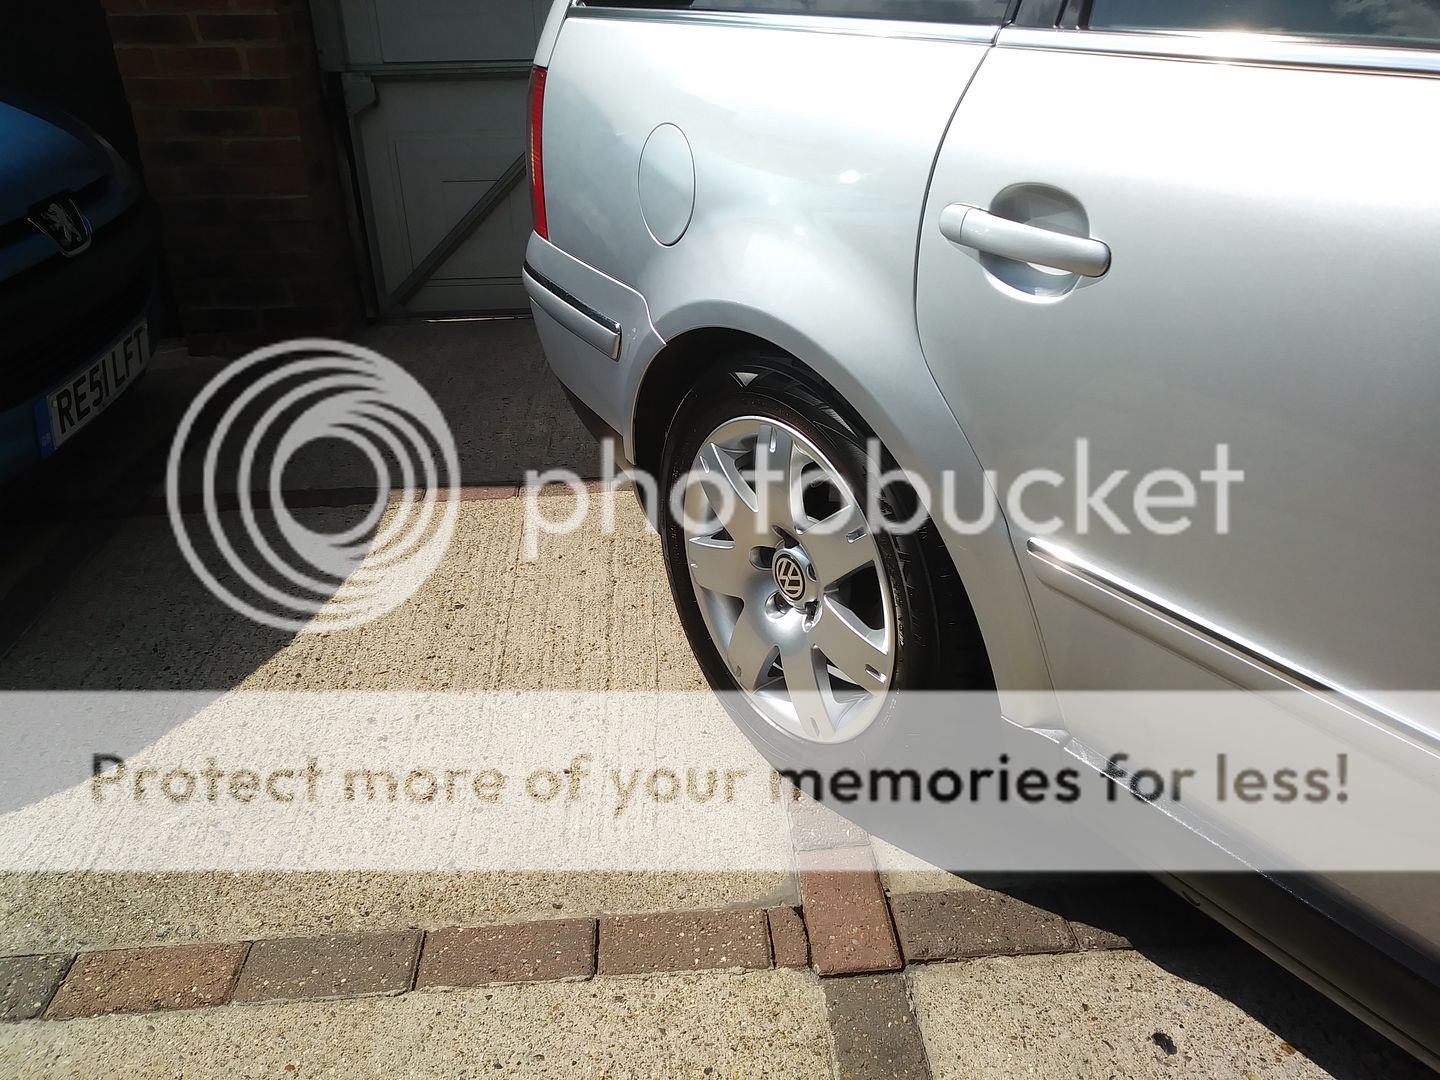
Immaculate rear wheel
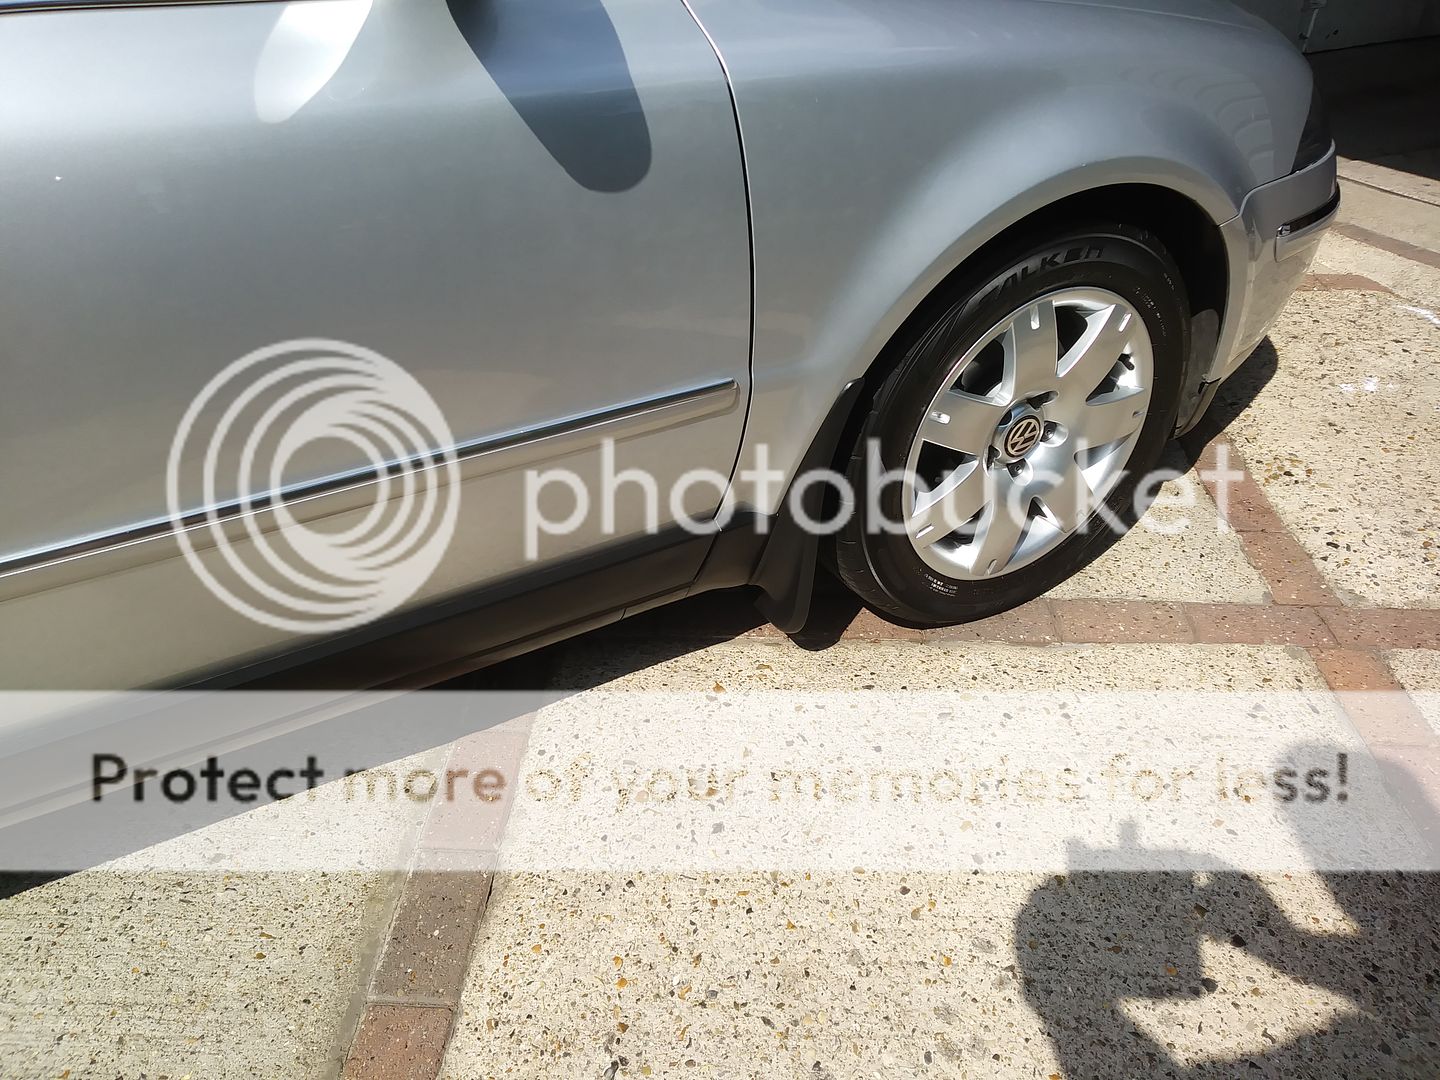
Immaculate front wheel
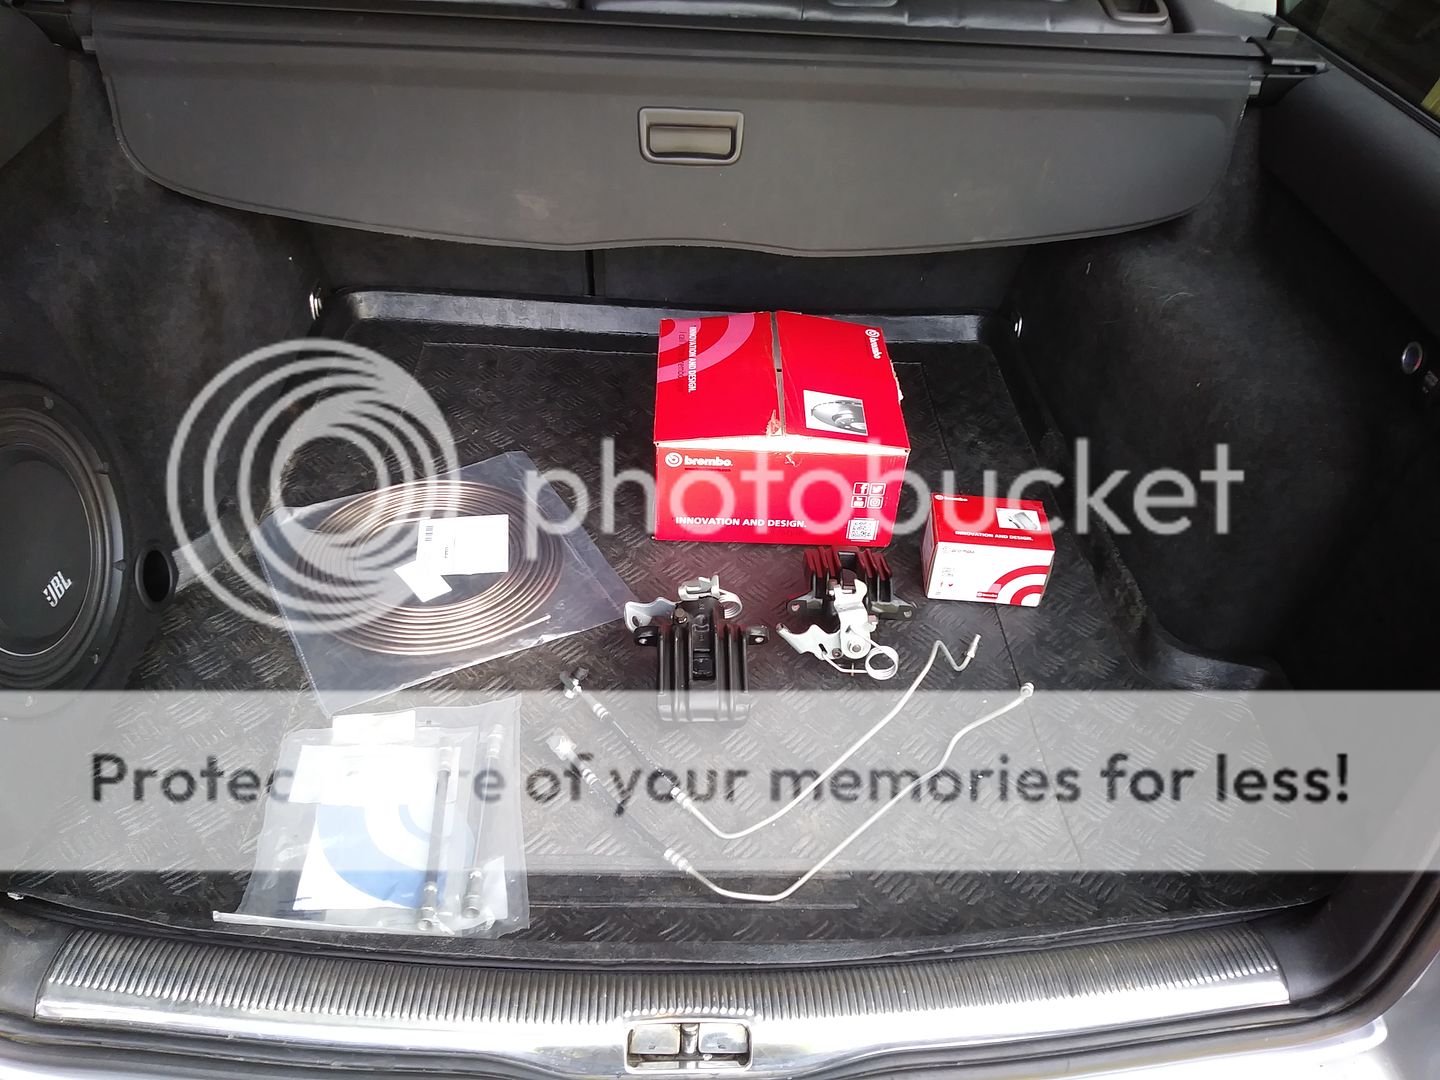
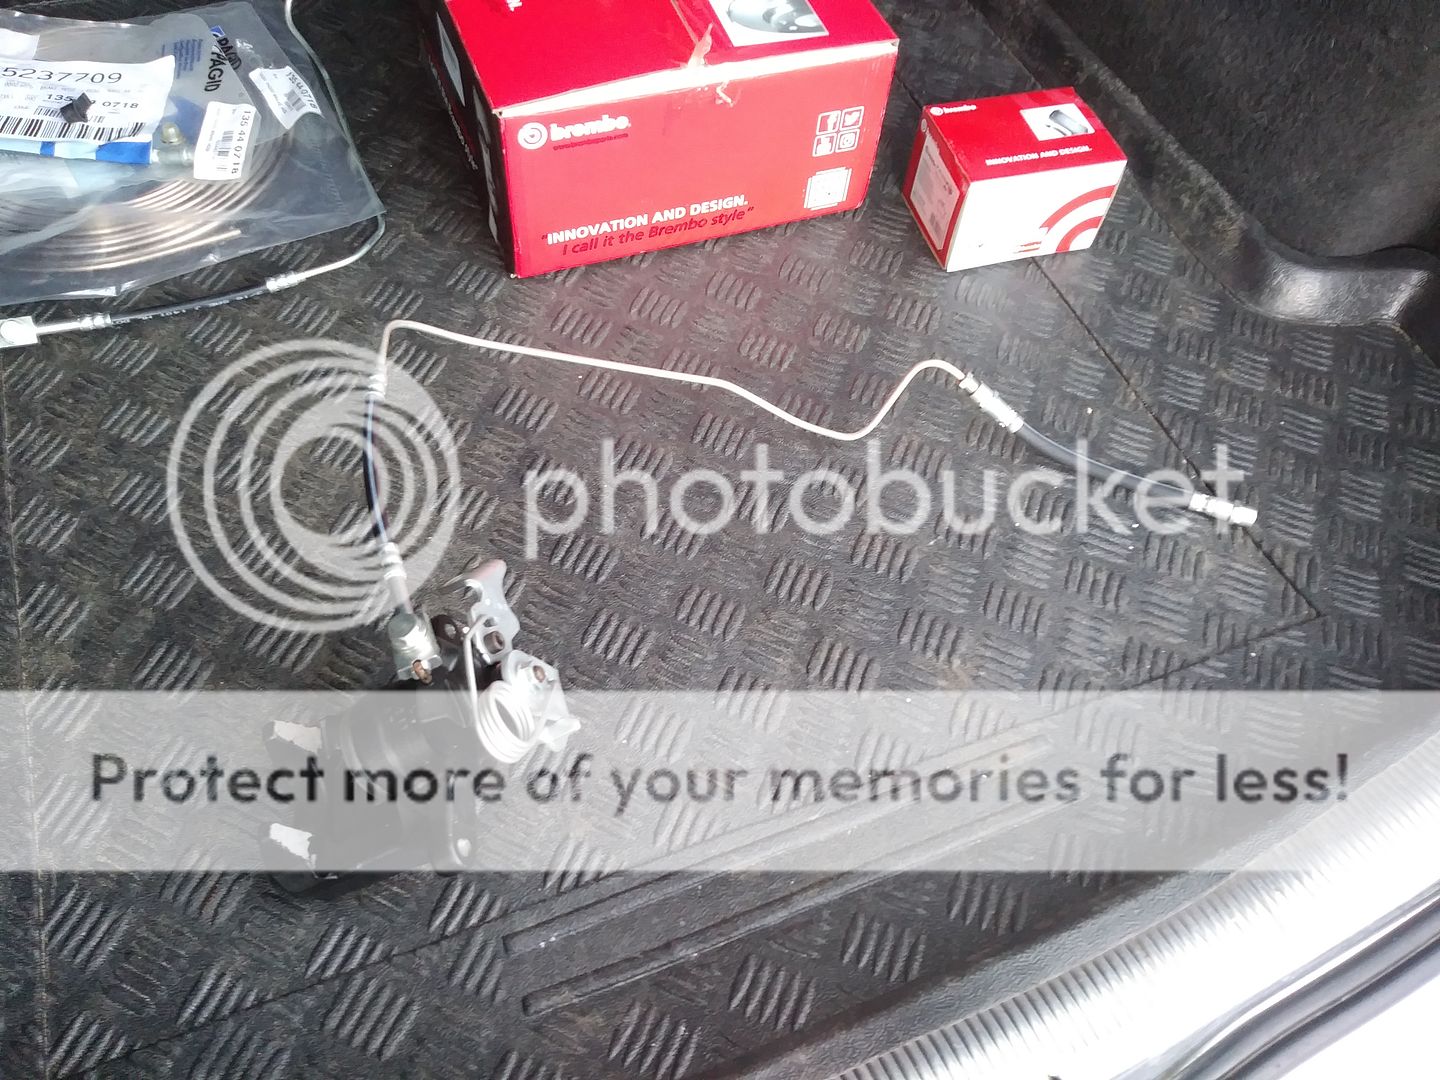
Onto the current project which is rear brakes. Here we have a pair of new calipers, pre painted satin black by me, discs, pads, brake pipes and hoses and a roll of Cupro / Kunnifer / Copper Nickle brake pipe just in case things get nasty.
Since I last updated this thread, I acquired a stealth sub set up second hand, which was nice.
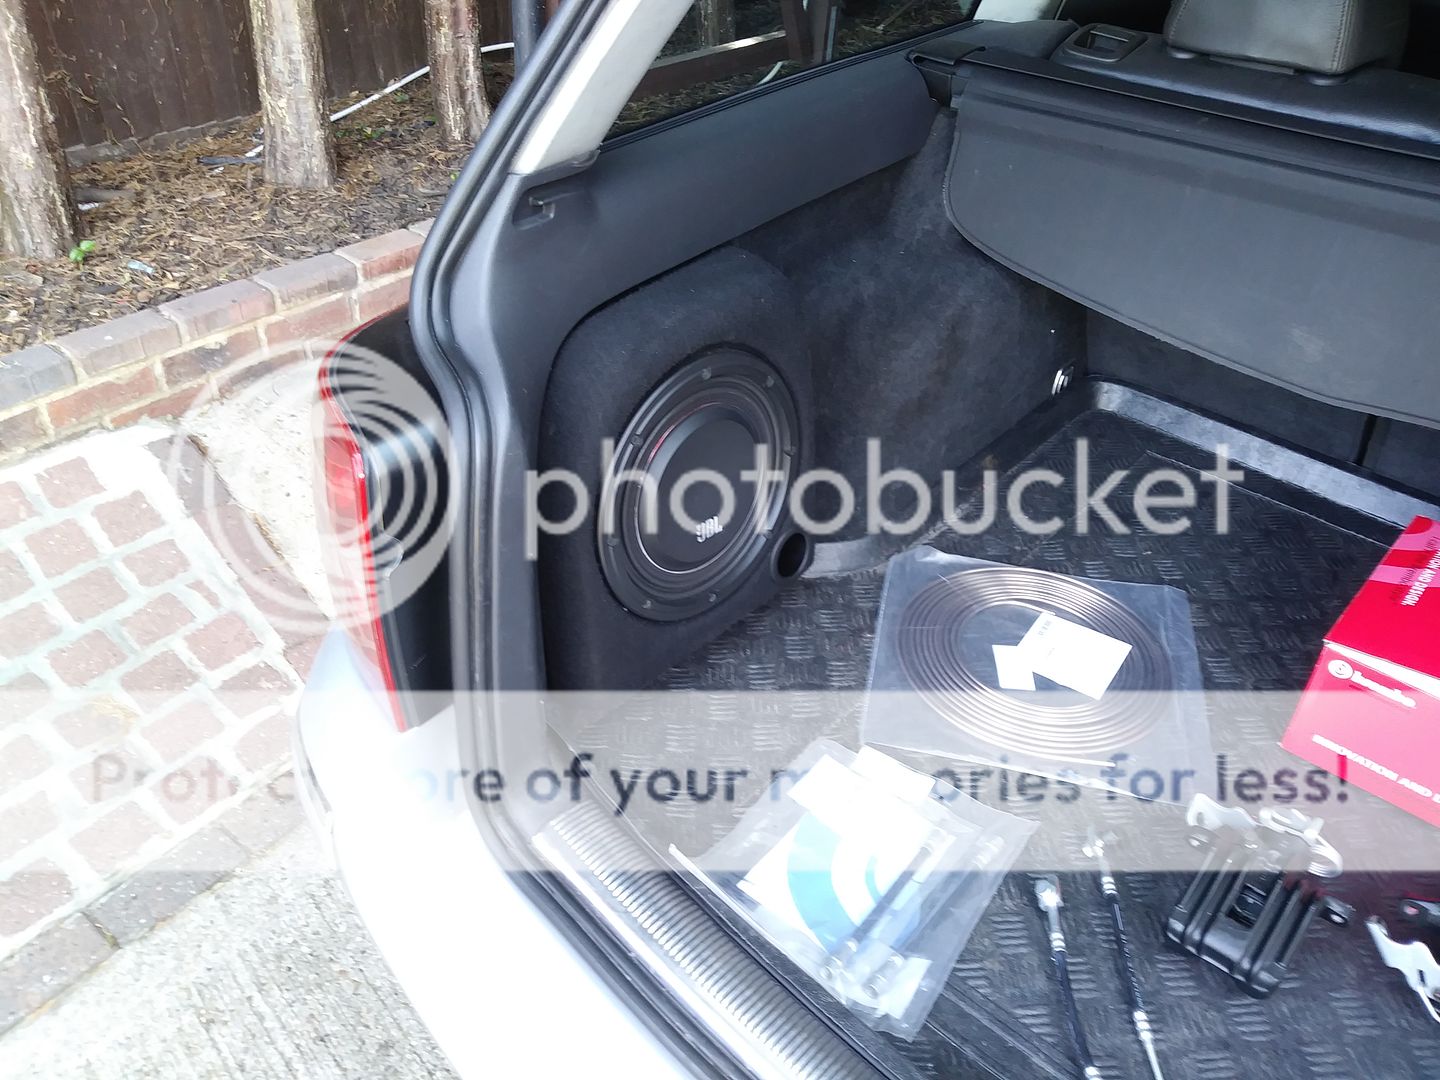
And of course the amplifier

More to follow when I get stuck into the work. Fingers crossed that things that need to come undone, come undone without drama and I don't need to make any brake pipes.
Not rushing, in fact copious squirts of plusgas and waiting for "the pans to soak".
Got the old caliper, main hose/axle brakepipe and flexi hose off.
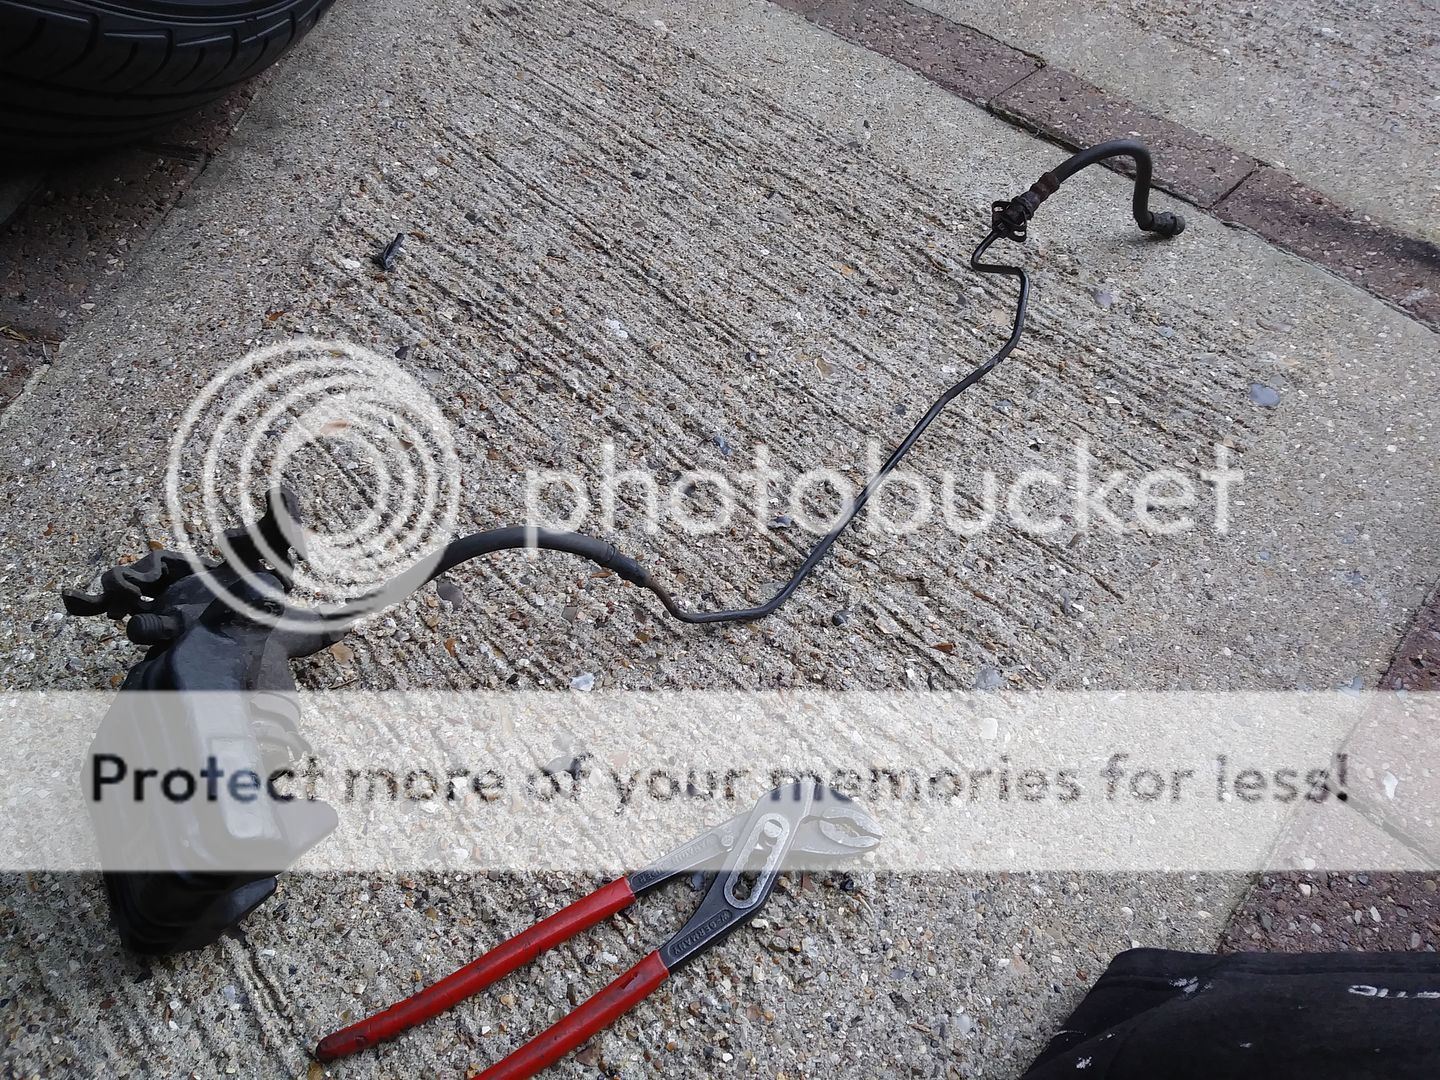
And there is the problem, I'm not sure how but the seal was ripped and water obviously got in and seized it.

New stuff mocked up
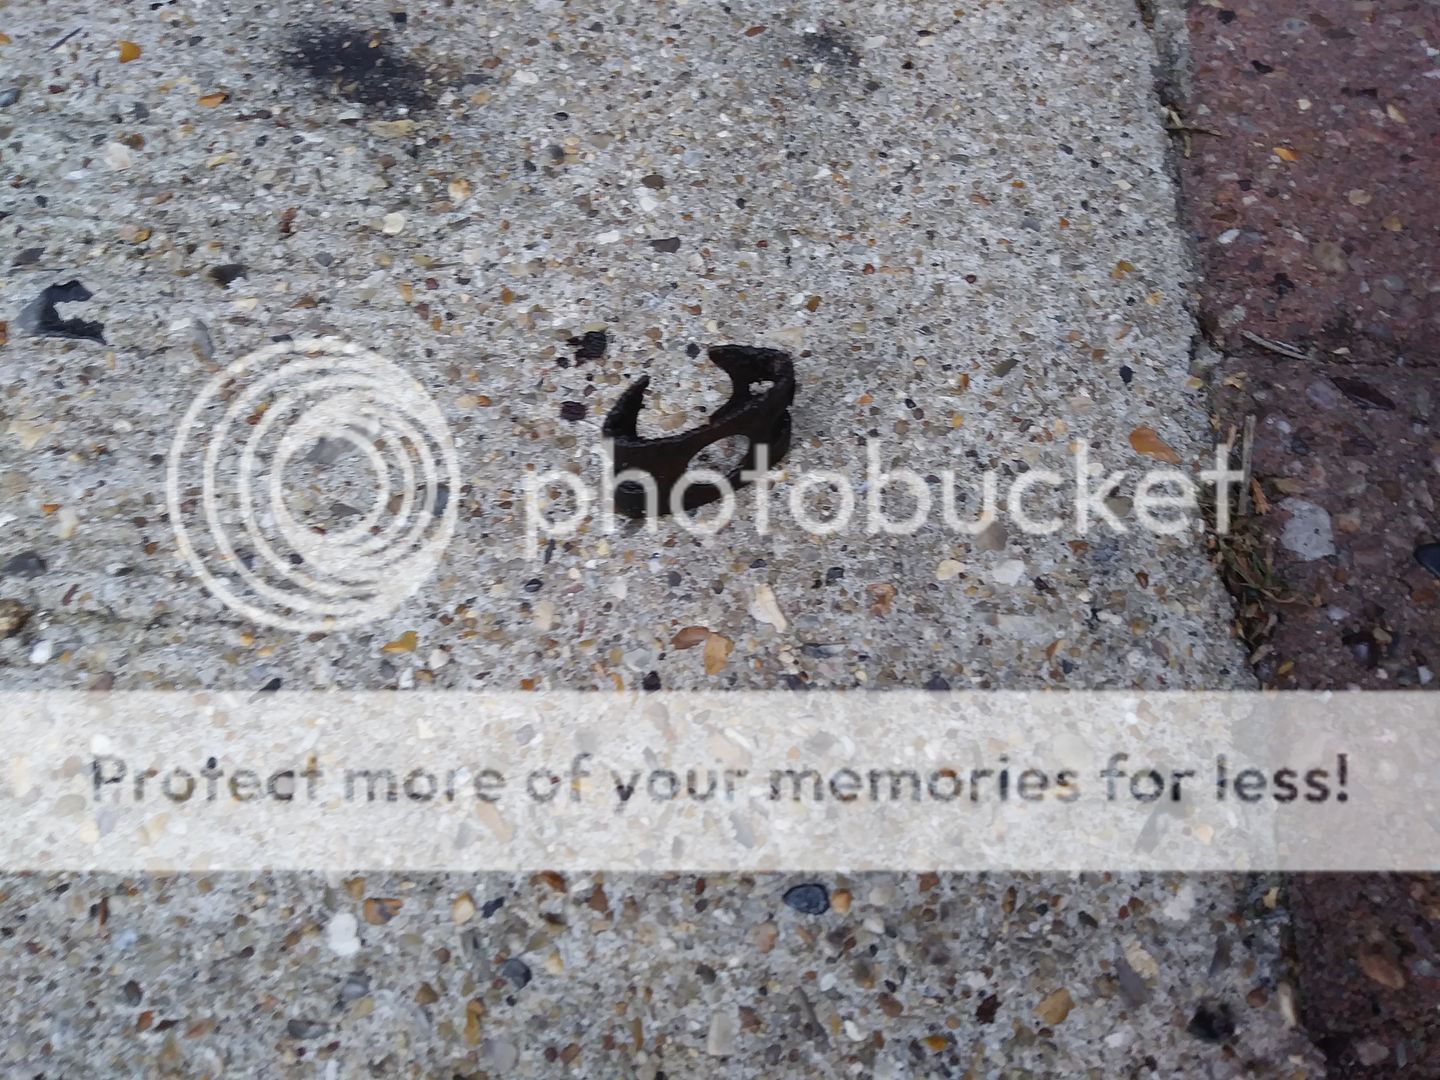
Schoolboy error in piss poor planning. I need four of these clips. I could go full bandit and refit the old rusty ones but that would be a bodge. Hope to get some tomorrow.
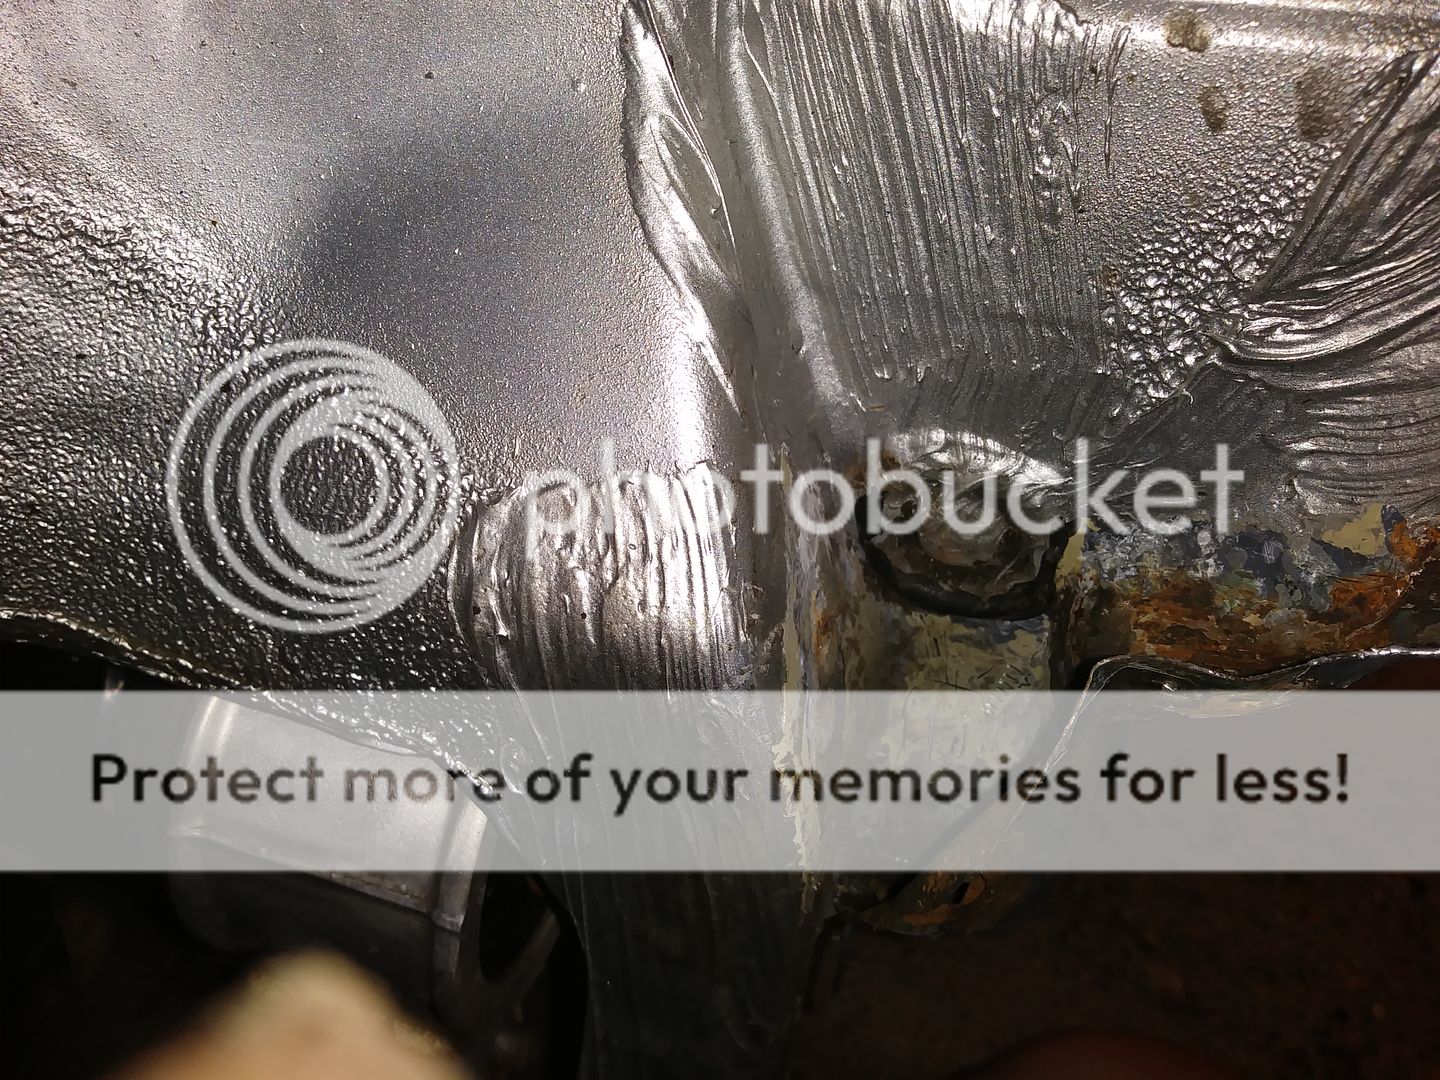
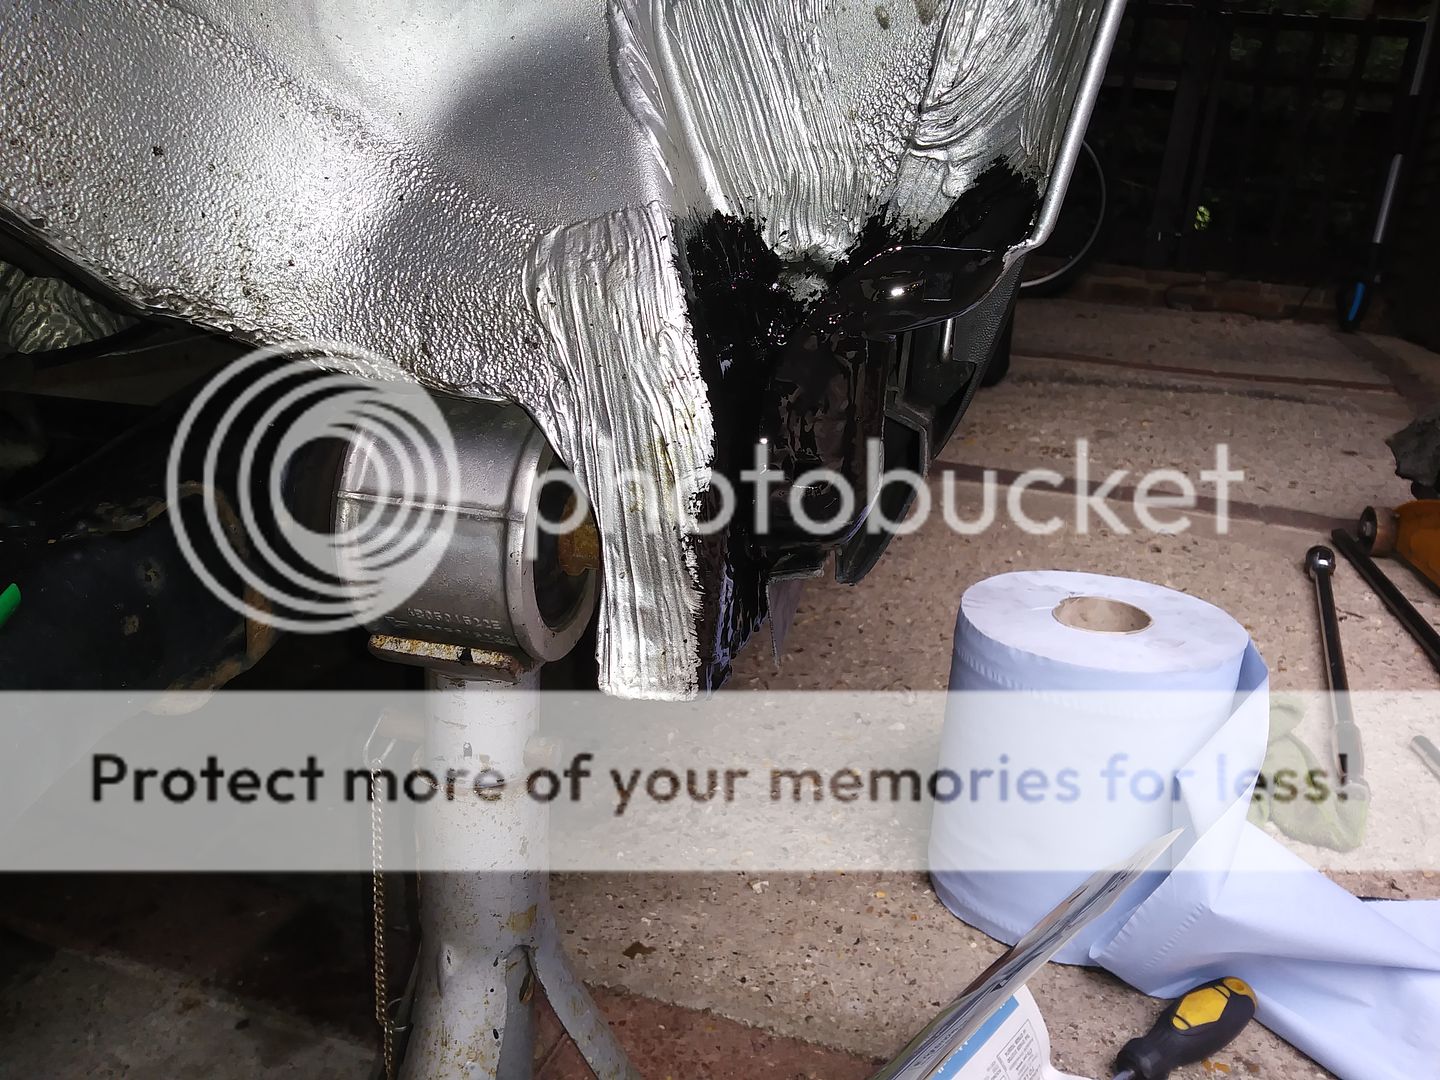
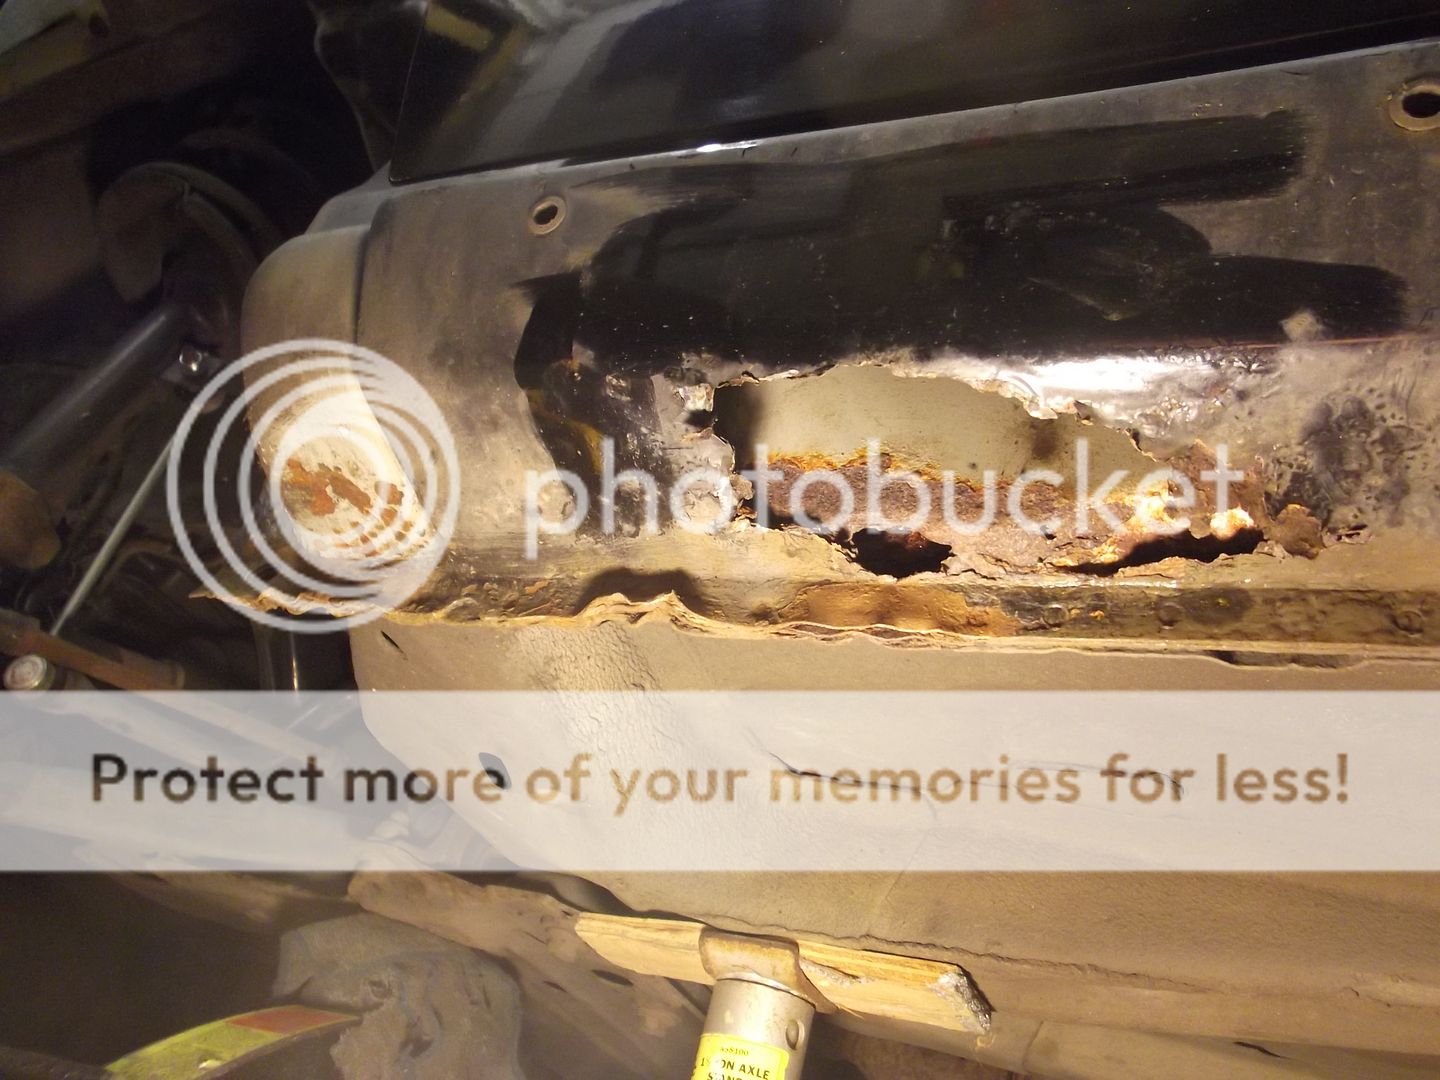
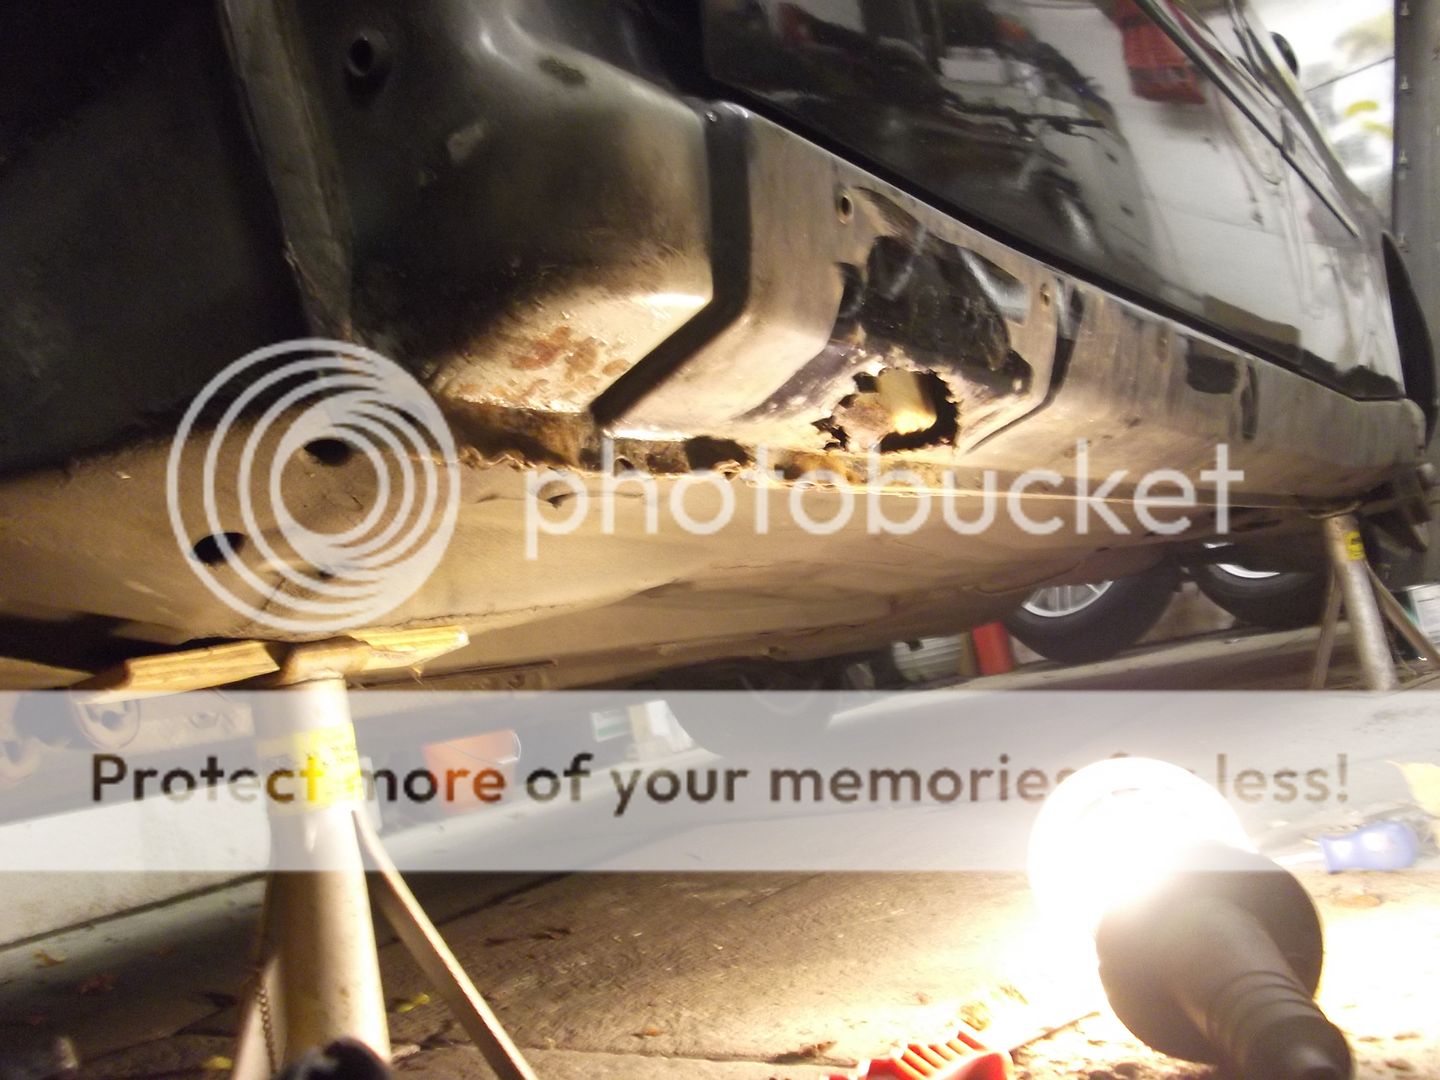
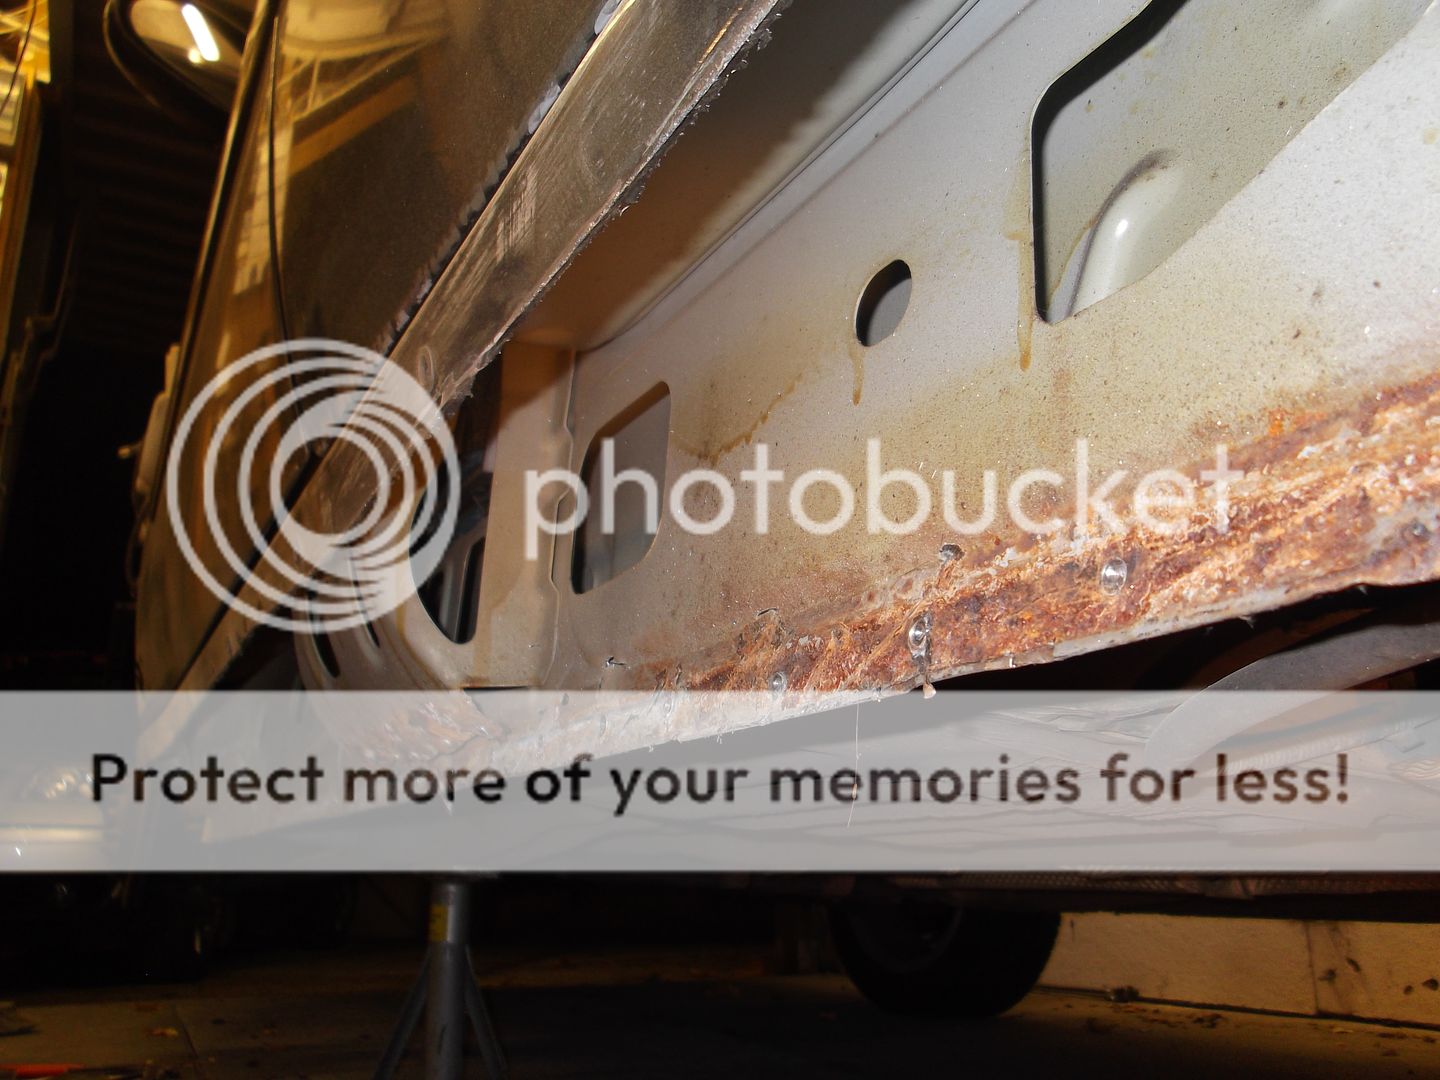
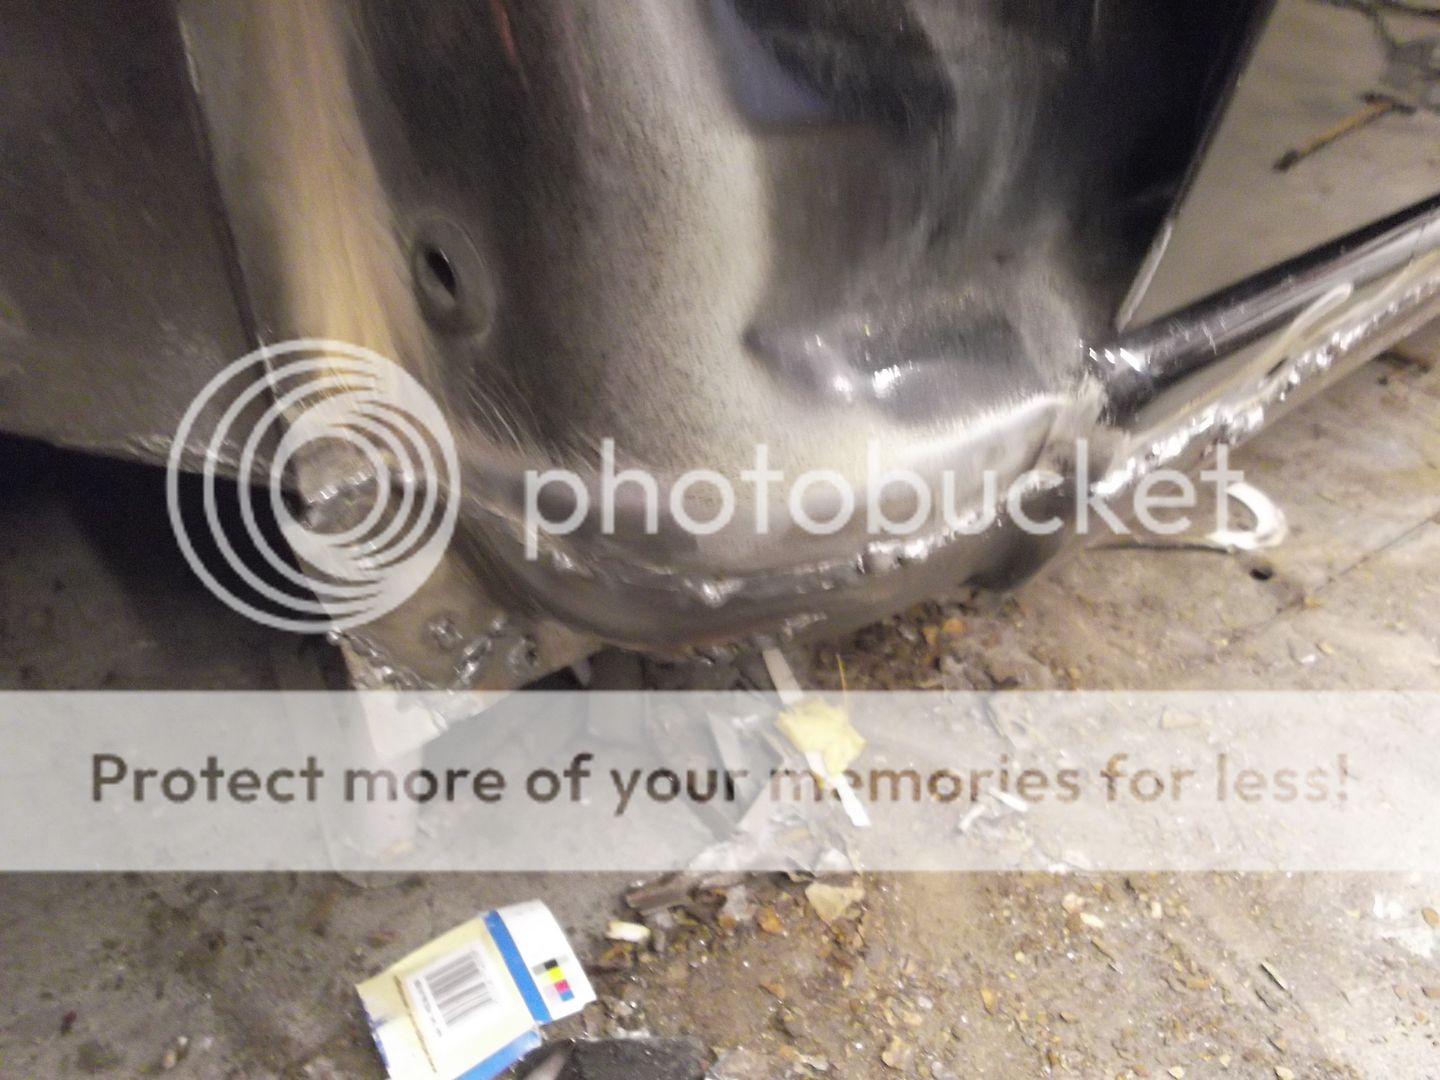
And there is the problem owning an old car that you care about a bit too much. That quick rust job is turning into a bigger one. I've just spent the best part of an hour and a half digging out a block of seam sealer which must have been 40x60x60mm to establish the extent of the rust.
Whilst doing so I've come to the conclusion that sometime in it's life the car been accident damage repaired at that exact point on both sides of the car with the drivers side (this rusty bit) taking the main brunt. I reckon the car had been reversed back too far over a drop and once the back wheels cleared it grounded at this point. When I bought the car there was no visible evidence on this (now rusty) side of any damage but some on the other side, some cracked plastic.
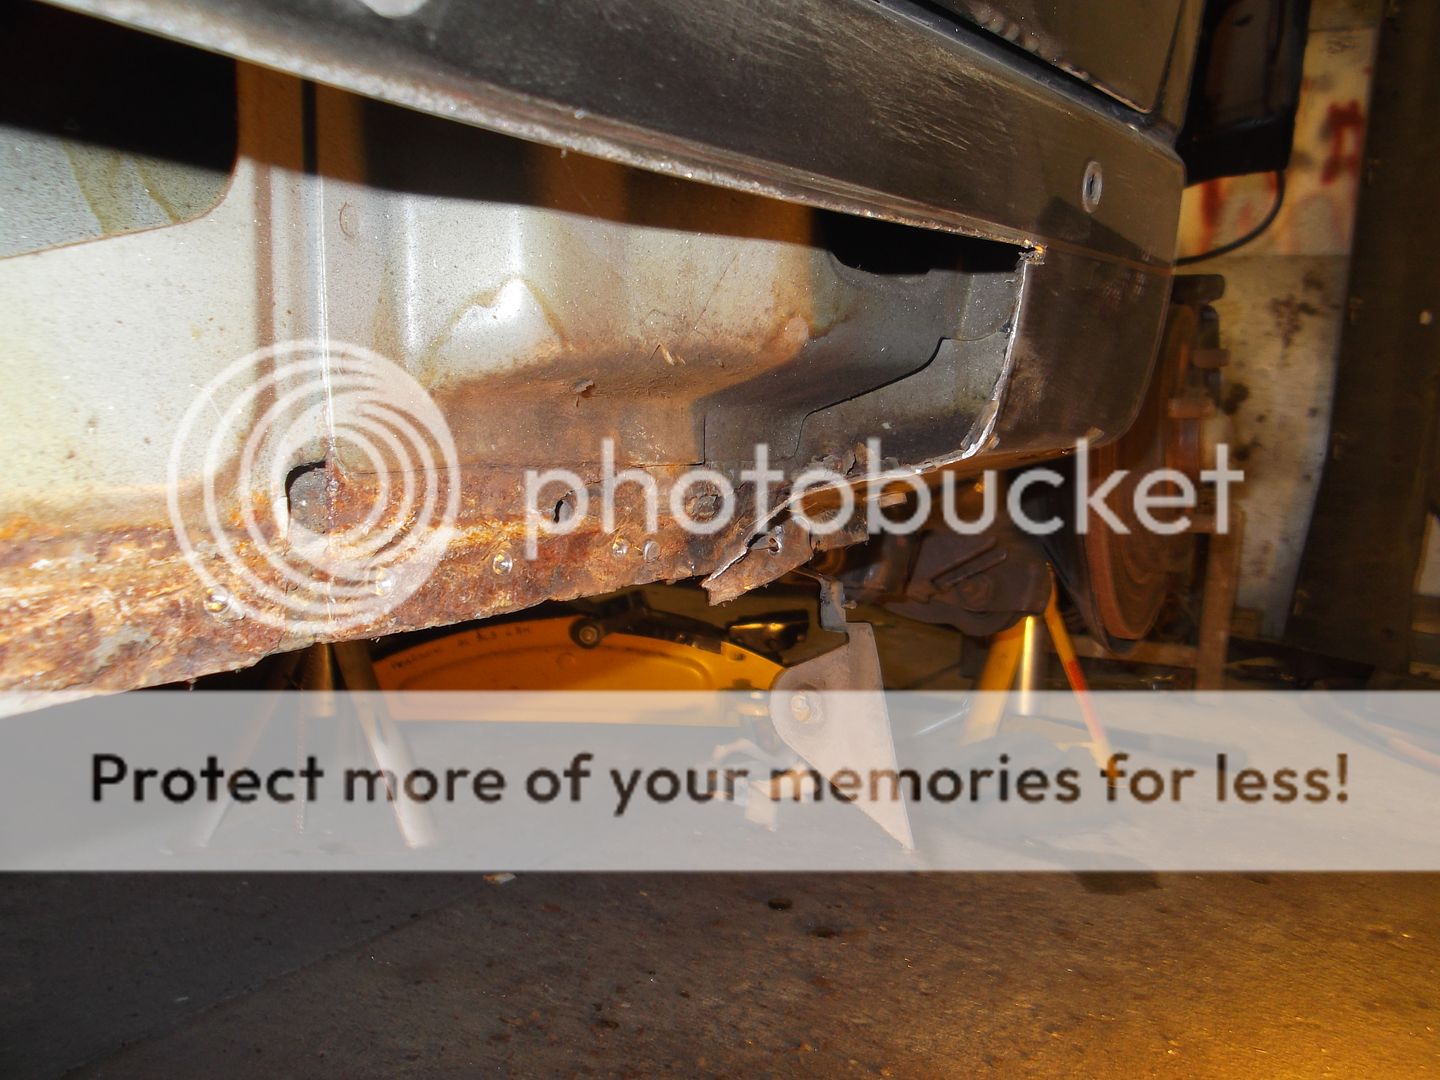
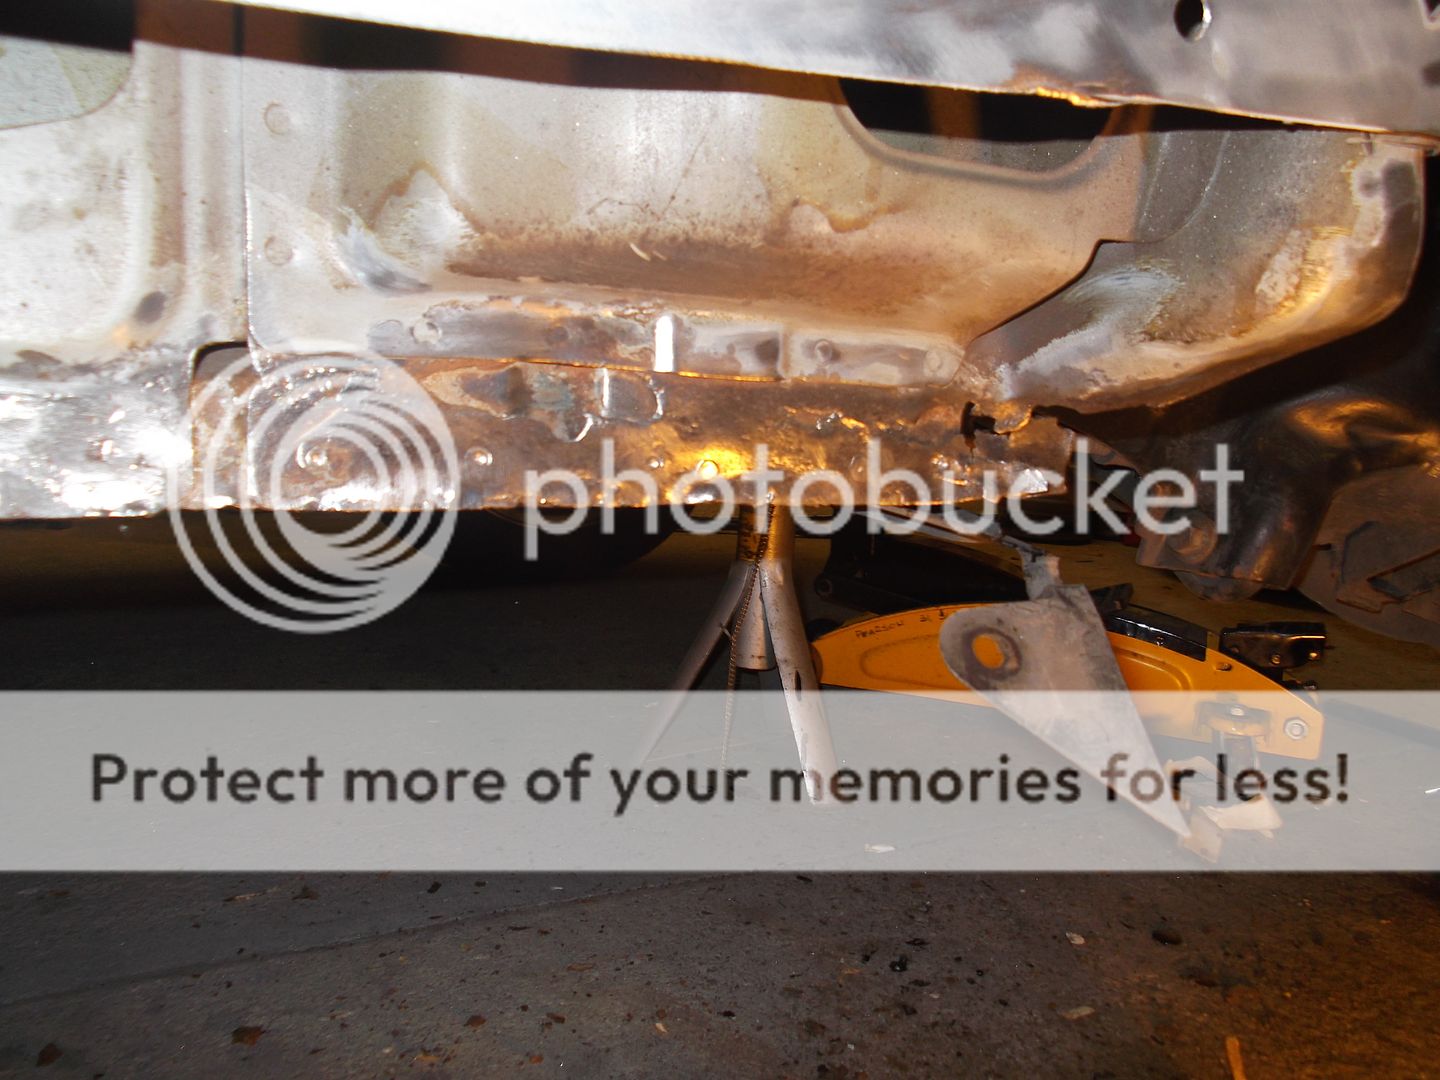
Pictures can say more than words, these are after I'd dug out the seam sealer.
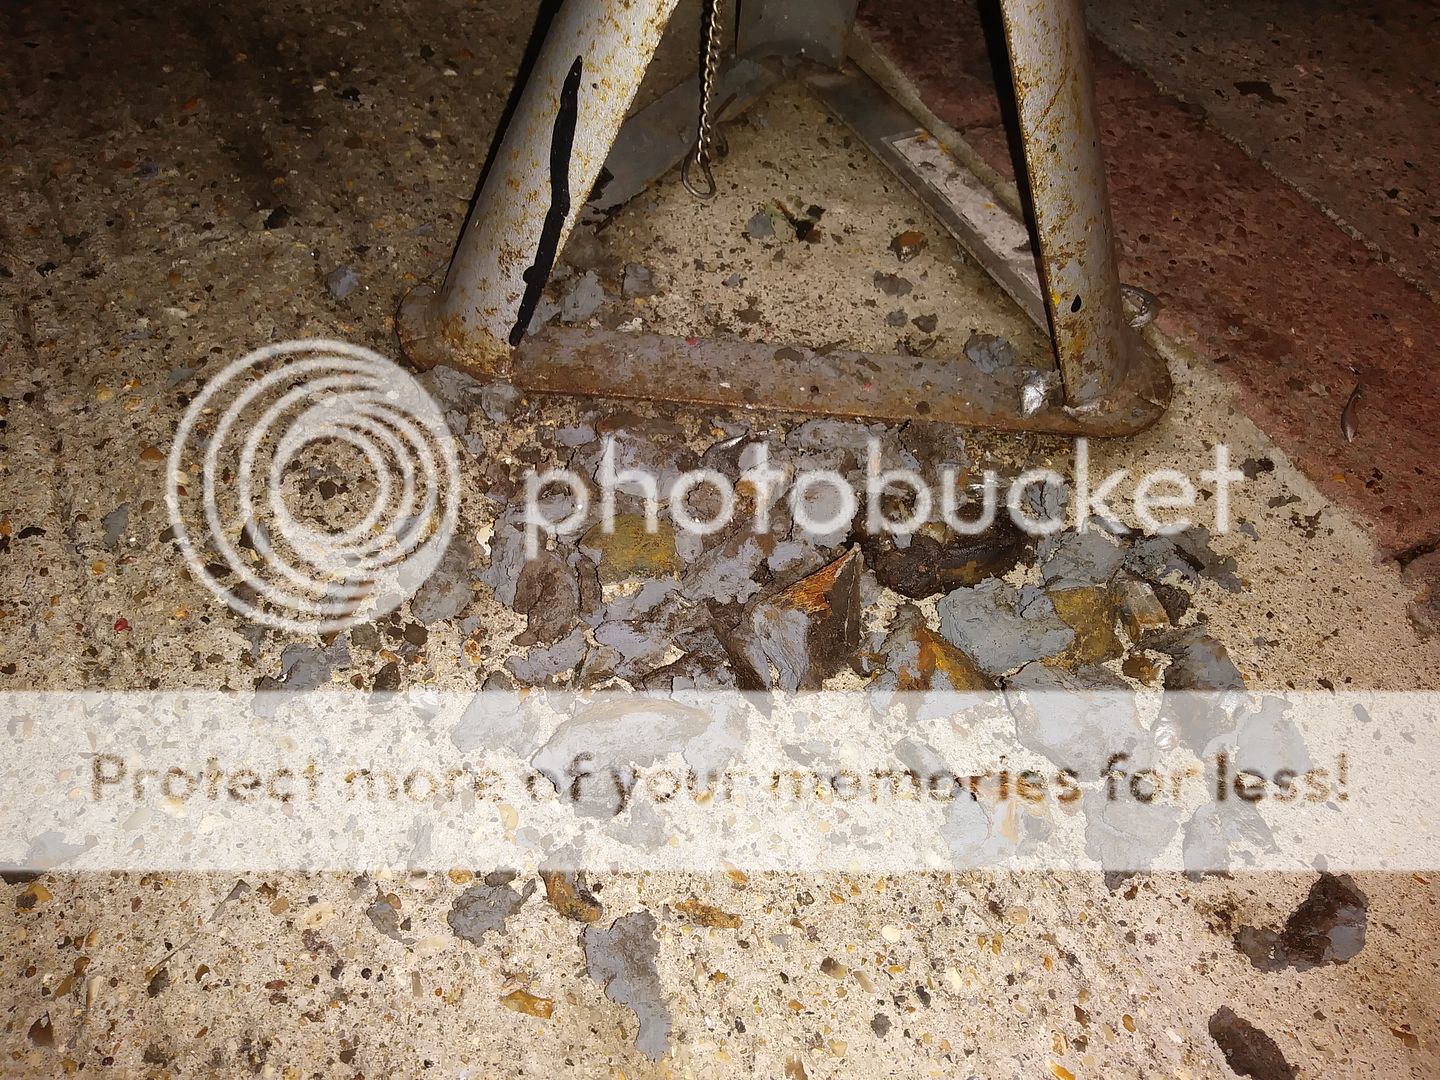
And there is the pile of it painstakingly removed
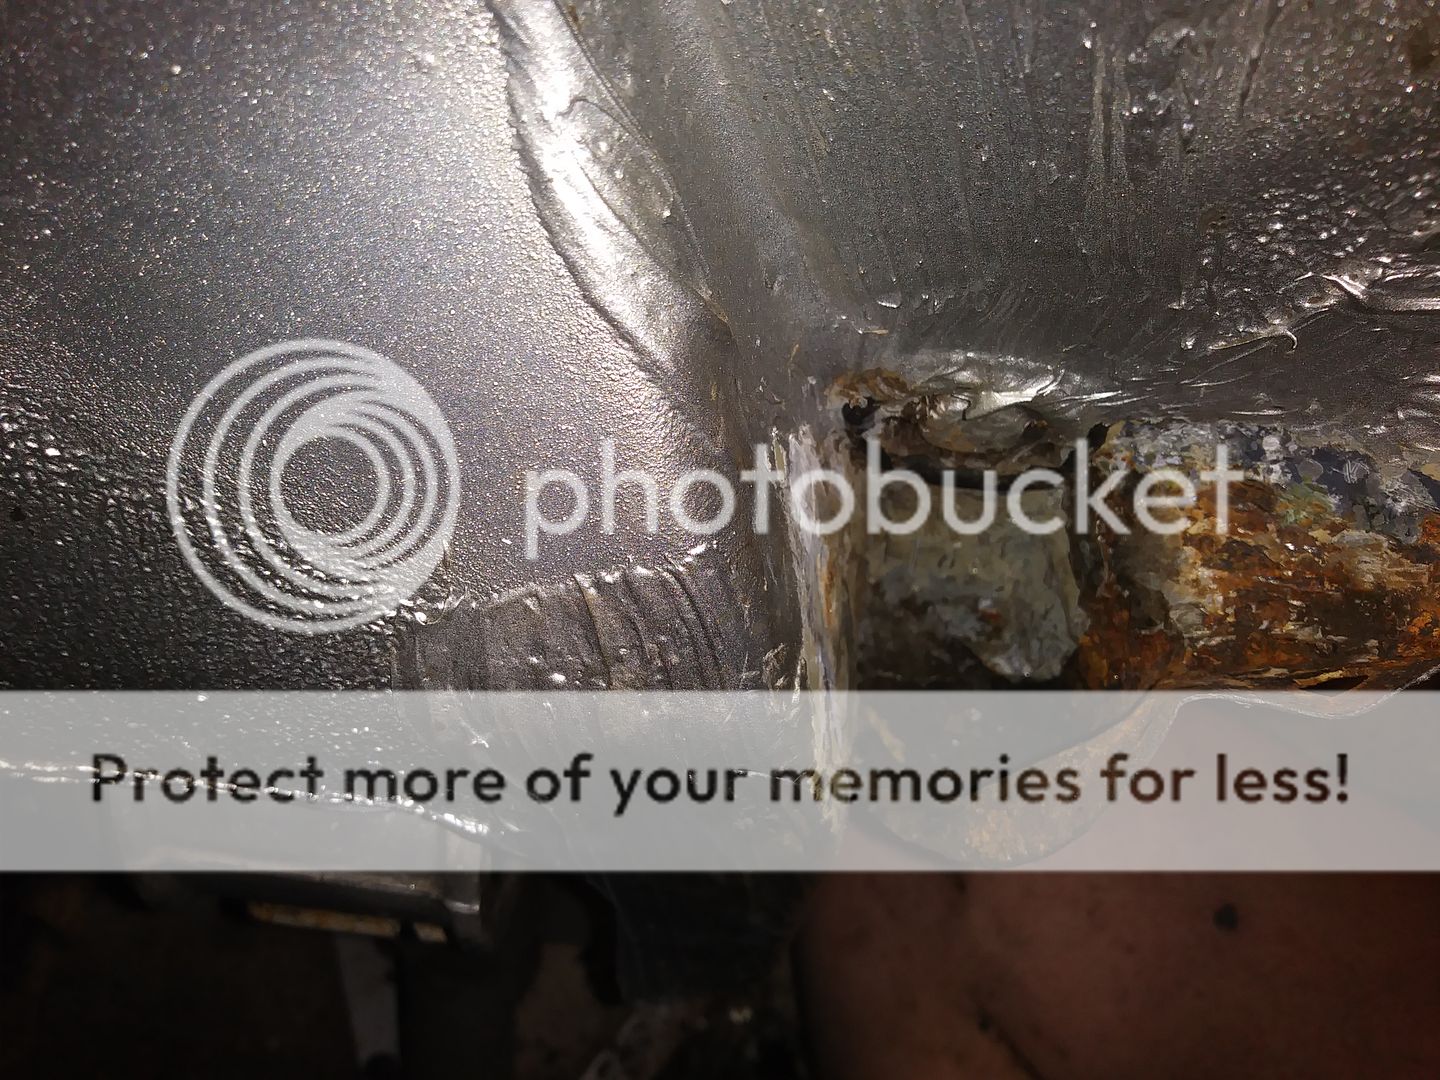
In this picture you can see where I believe to be the extent of an accident repair with the difference in paint colour. I looked at it from various angles to eliminate "the light" causing it but it is there and the camera picks it up well.
I have another thread running which sadly due to photobucket going tits up a few years back is full of dead photo links, literally 100's of photos which I don't think i'll ever be able to restore along with the narrative that goes with them. For reference the thread is here;
https://www.pistonheads.com/gassing/topic.asp?h=0&...
As it has been about three years since I did the main bulk of work on both cars, it is time to sort out some niggles. I'll try and back fill some of the previous work done as and when I have time.
To start off, the cars;
Car One, the Wifies car is a 2001 Golf GT TDI with the 130hp PD engine owned since Jan 2016. Currently with about 102k on the clock.
Car Two, mine is a 2003 (but registered in the first week of 2004) Passat Highline Estate again with the 130hp PD engine owned since Jul 2011. Currently with about 153k on the clock.
Current work is on the Passat, posts copied from the other thread.
Below posted 04/07/19 and 05/07/19
It has been a long time.
And now I've got the ability to post pictures again, it'd be silly not to. (I'll have a go at filling in some blanks up thread when I have time).
A few of the car in general first, it is still clean and still good.
The old hector itself
Immaculate rear wheel
Immaculate front wheel
Onto the current project which is rear brakes. Here we have a pair of new calipers, pre painted satin black by me, discs, pads, brake pipes and hoses and a roll of Cupro / Kunnifer / Copper Nickle brake pipe just in case things get nasty.
Since I last updated this thread, I acquired a stealth sub set up second hand, which was nice.
And of course the amplifier
More to follow when I get stuck into the work. Fingers crossed that things that need to come undone, come undone without drama and I don't need to make any brake pipes.
Not rushing, in fact copious squirts of plusgas and waiting for "the pans to soak".
Got the old caliper, main hose/axle brakepipe and flexi hose off.
And there is the problem, I'm not sure how but the seal was ripped and water obviously got in and seized it.
New stuff mocked up
Schoolboy error in piss poor planning. I need four of these clips. I could go full bandit and refit the old rusty ones but that would be a bodge. Hope to get some tomorrow.
And there is the problem owning an old car that you care about a bit too much. That quick rust job is turning into a bigger one. I've just spent the best part of an hour and a half digging out a block of seam sealer which must have been 40x60x60mm to establish the extent of the rust.
Whilst doing so I've come to the conclusion that sometime in it's life the car been accident damage repaired at that exact point on both sides of the car with the drivers side (this rusty bit) taking the main brunt. I reckon the car had been reversed back too far over a drop and once the back wheels cleared it grounded at this point. When I bought the car there was no visible evidence on this (now rusty) side of any damage but some on the other side, some cracked plastic.
Pictures can say more than words, these are after I'd dug out the seam sealer.
And there is the pile of it painstakingly removed
In this picture you can see where I believe to be the extent of an accident repair with the difference in paint colour. I looked at it from various angles to eliminate "the light" causing it but it is there and the camera picks it up well.
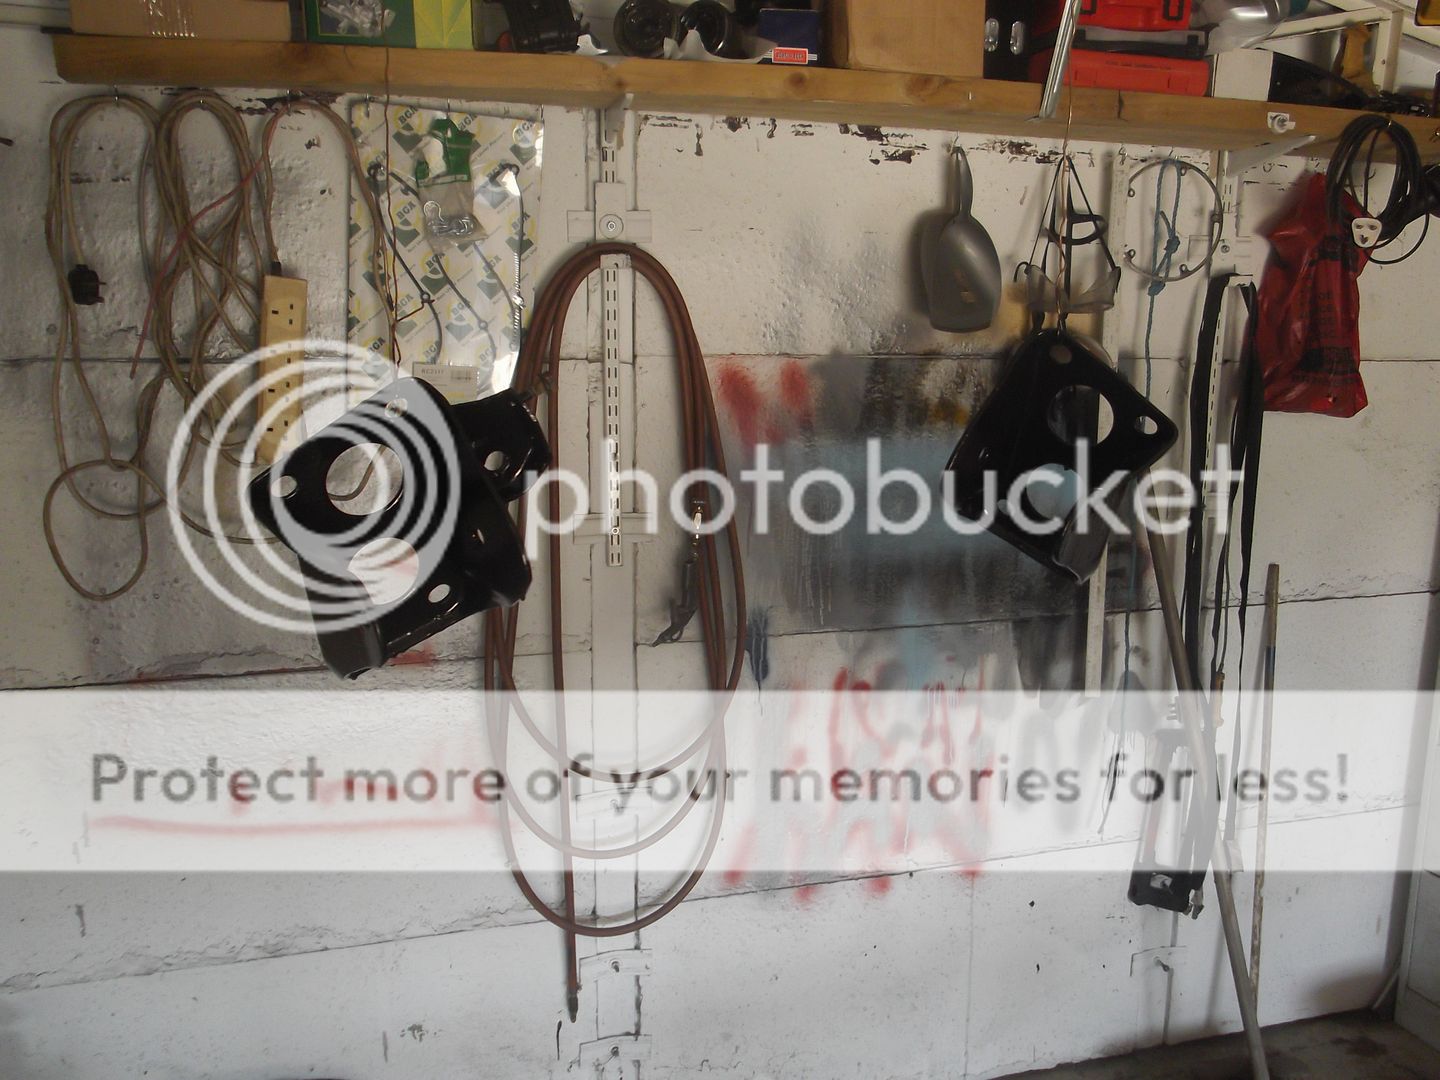
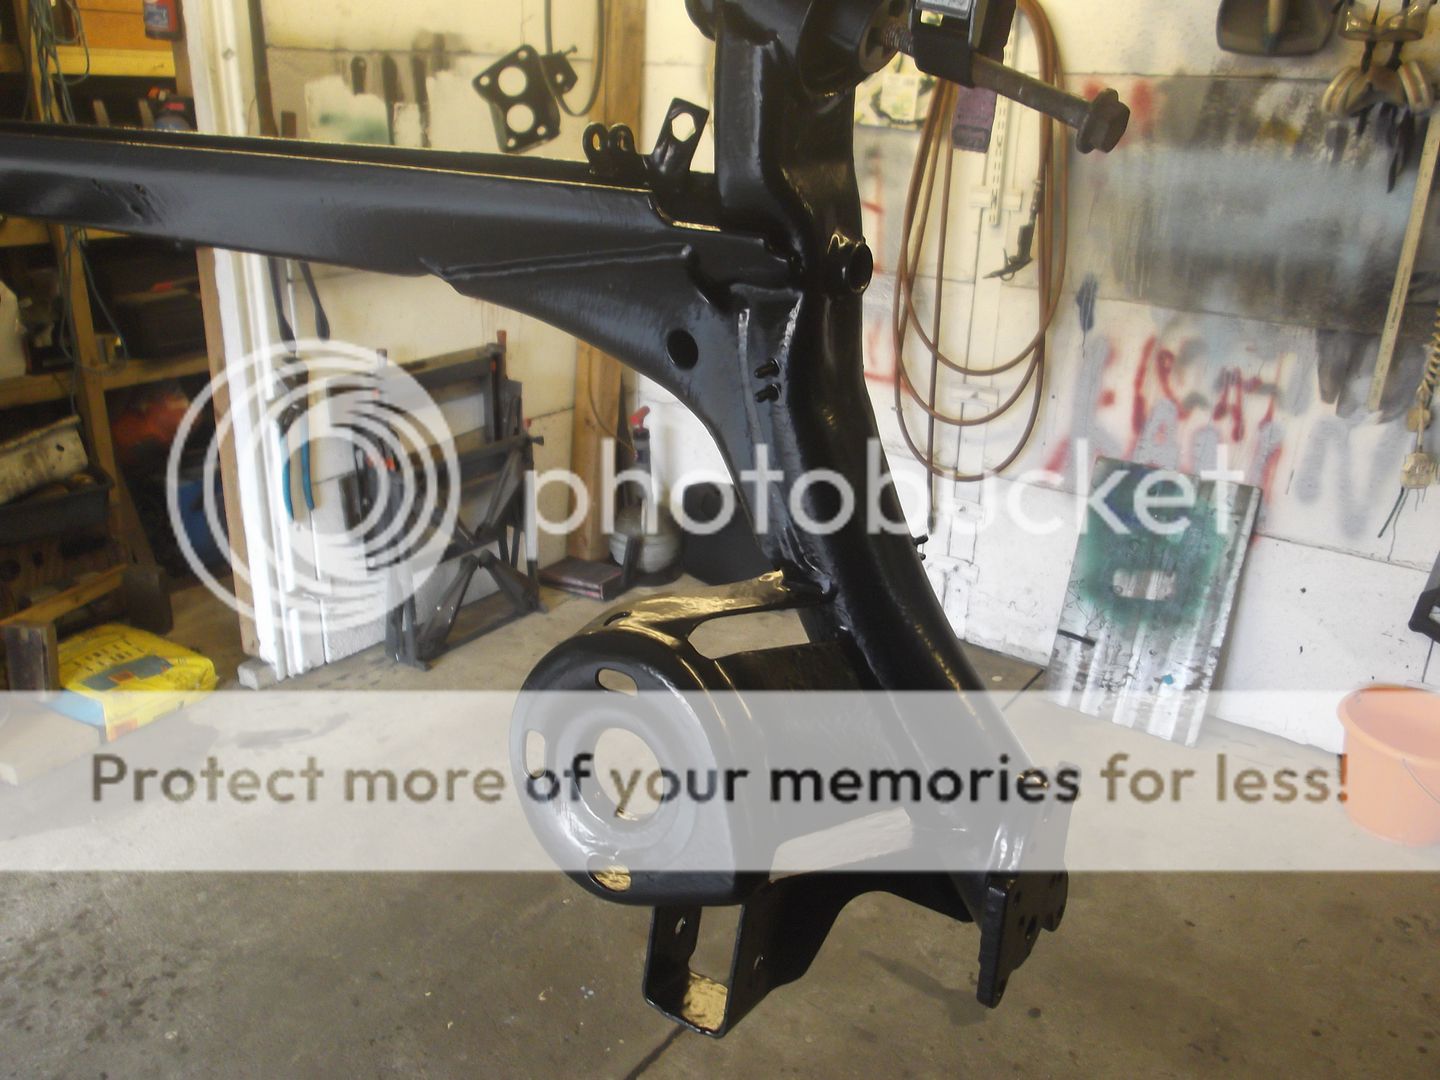
A bit of a flashback on the Golf, some rear suspension work done in 2016...
Scabby rear suspension beam just after I brutally extracted the main bushes from it!

Mullered I think is the term.

Disc shields painted and drying in the sun

Rear beam mounting brackets painted and hanging up to dry
New rear beam bushes ready to be fitted.
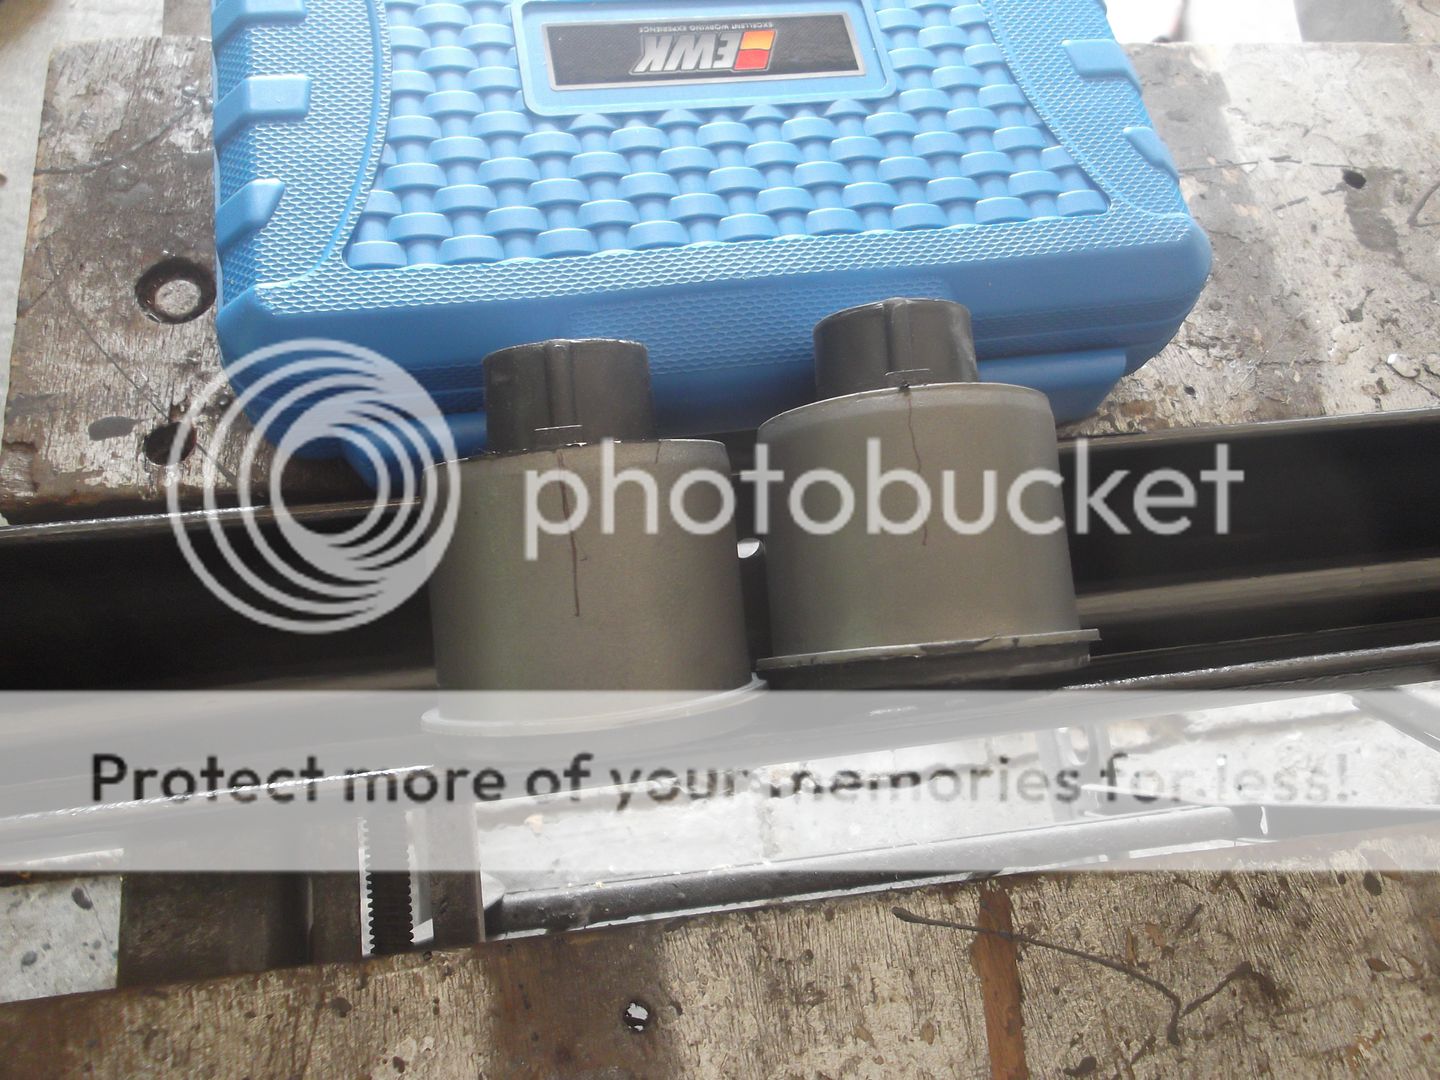
Using the "special" tool to install the new bushes.
A bush in the bush is not the same as a bush in the moosh.
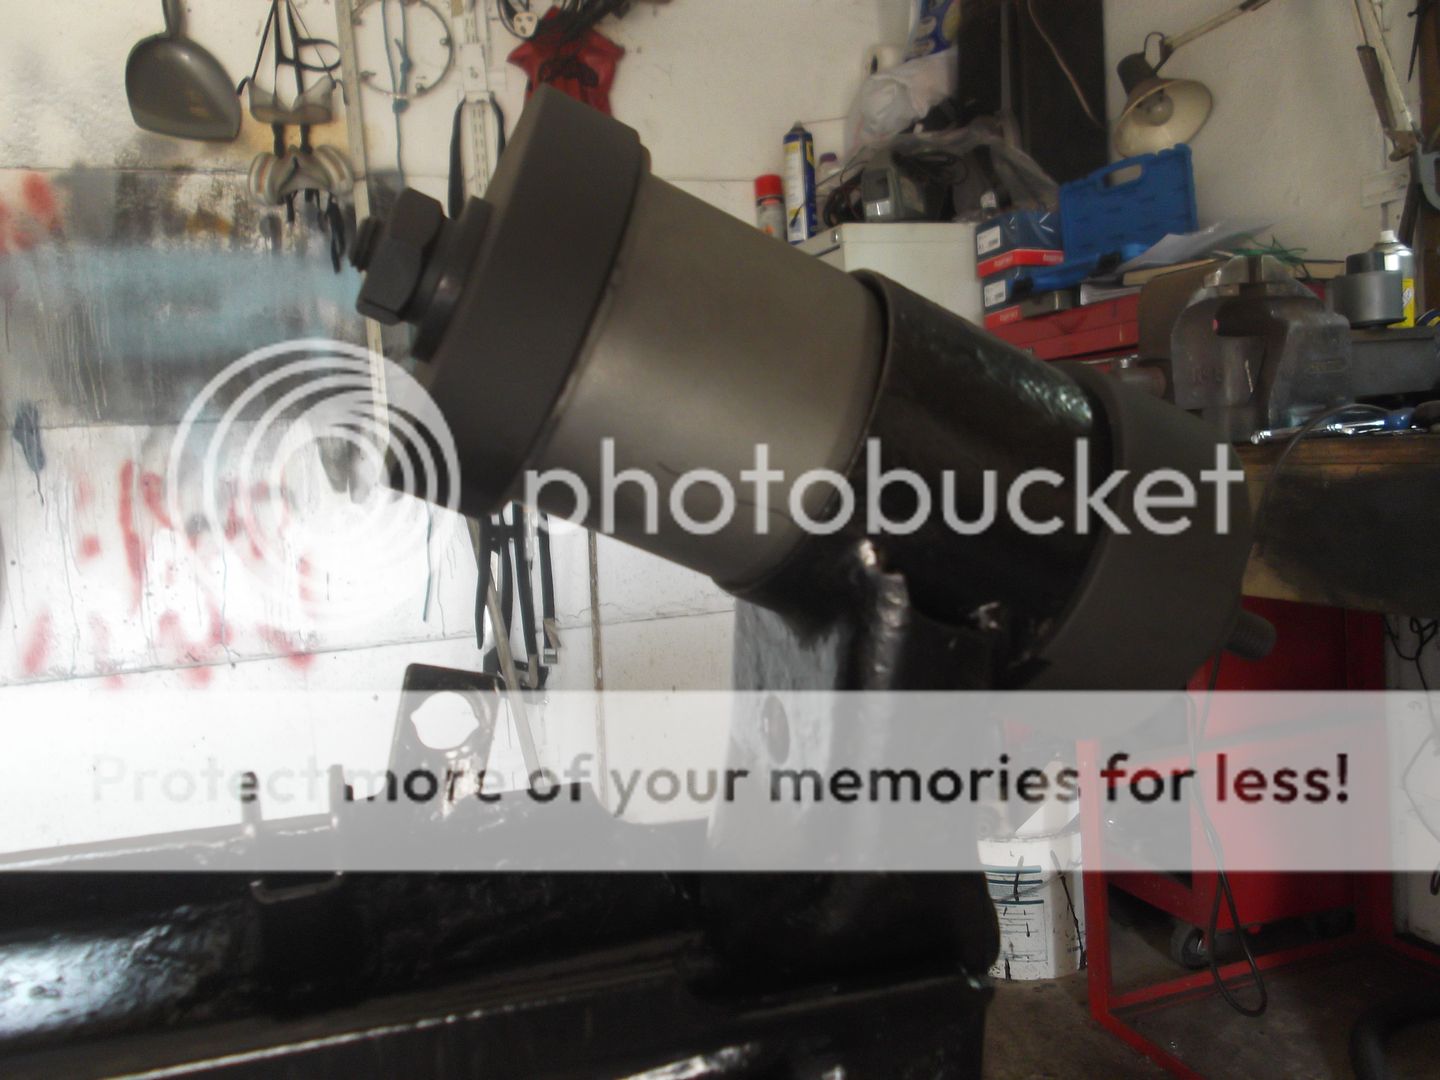
Beaming at the the newly bushed and painted beam
Rear caliper carrier de-rusted ready for paint

New stub axles, bearings and hubs, why not.

Painted to avoid everything turning into a rusty mess
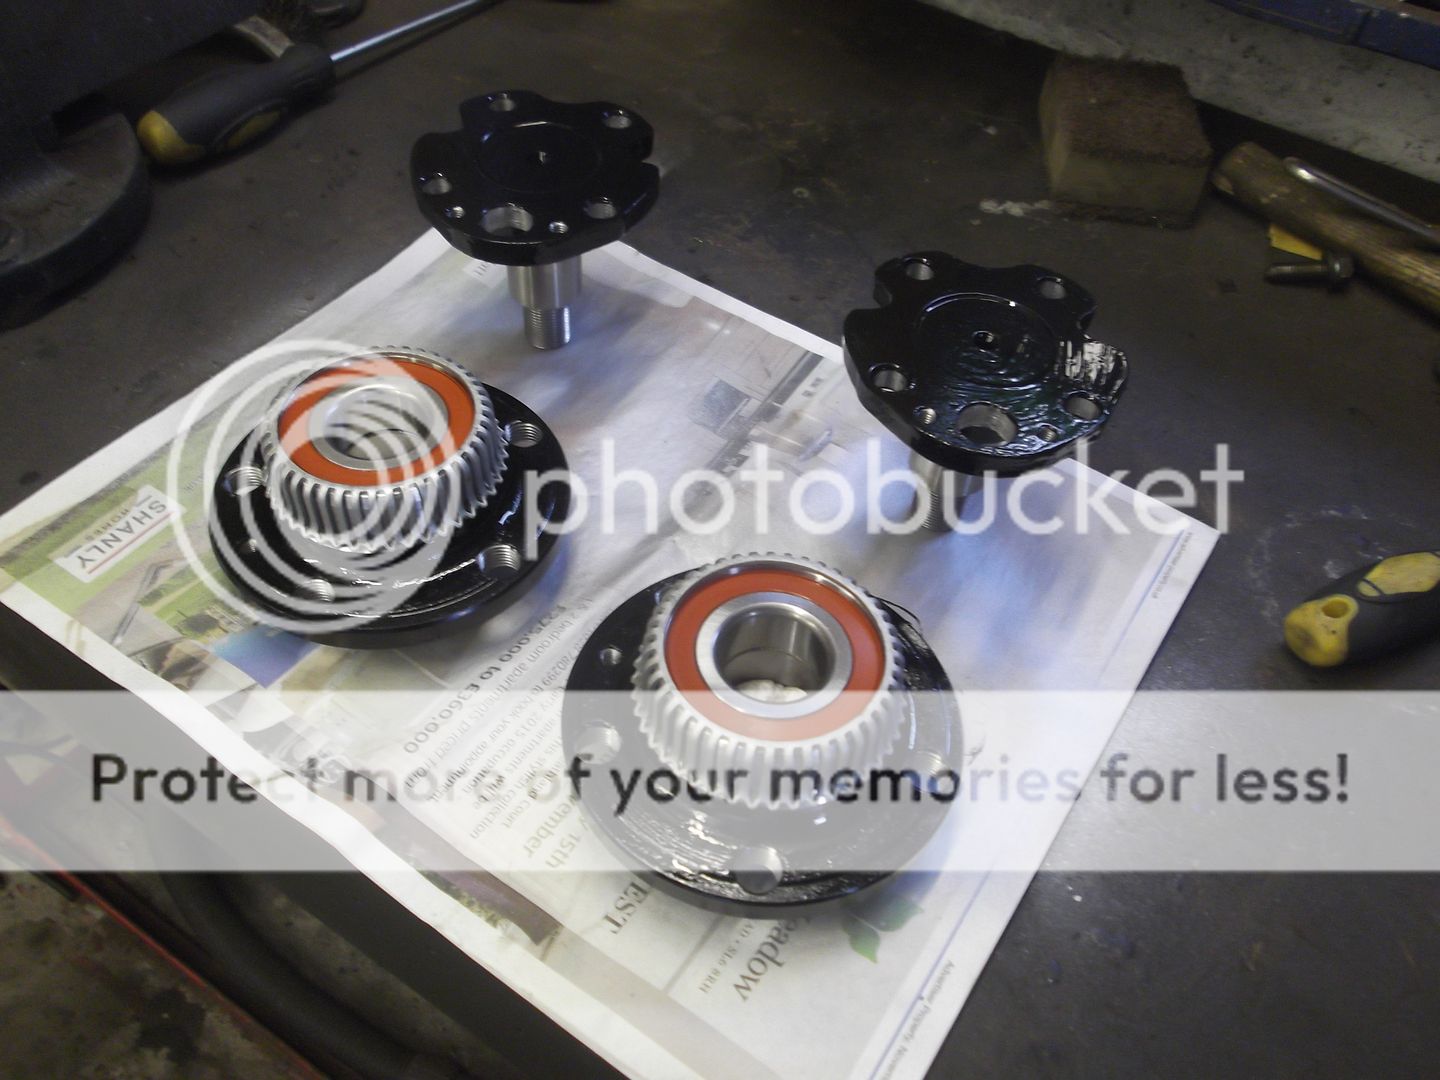
Carriers painted

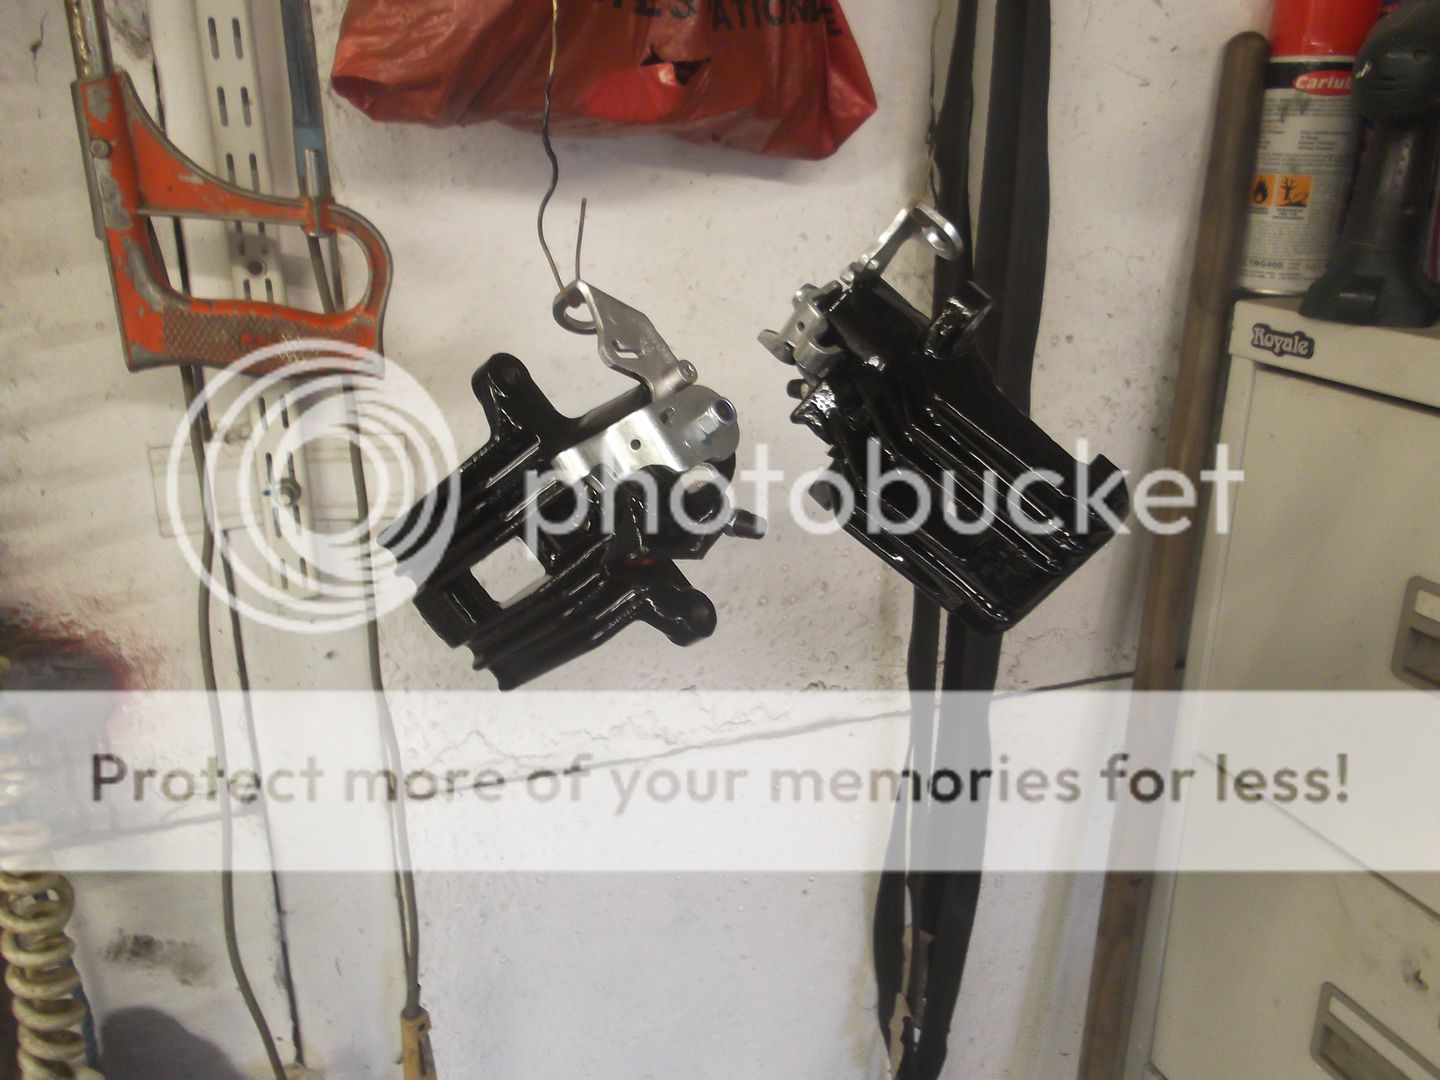
New rear calipers

Which obviously had to be painted
Beam back on and building up the bits that go round and round


Scabby rear suspension beam just after I brutally extracted the main bushes from it!
Mullered I think is the term.
Disc shields painted and drying in the sun
Rear beam mounting brackets painted and hanging up to dry
New rear beam bushes ready to be fitted.
Using the "special" tool to install the new bushes.
A bush in the bush is not the same as a bush in the moosh.
Beaming at the the newly bushed and painted beam
Rear caliper carrier de-rusted ready for paint
New stub axles, bearings and hubs, why not.
Painted to avoid everything turning into a rusty mess
Carriers painted
New rear calipers
Which obviously had to be painted
Beam back on and building up the bits that go round and round
Back to the Passat.
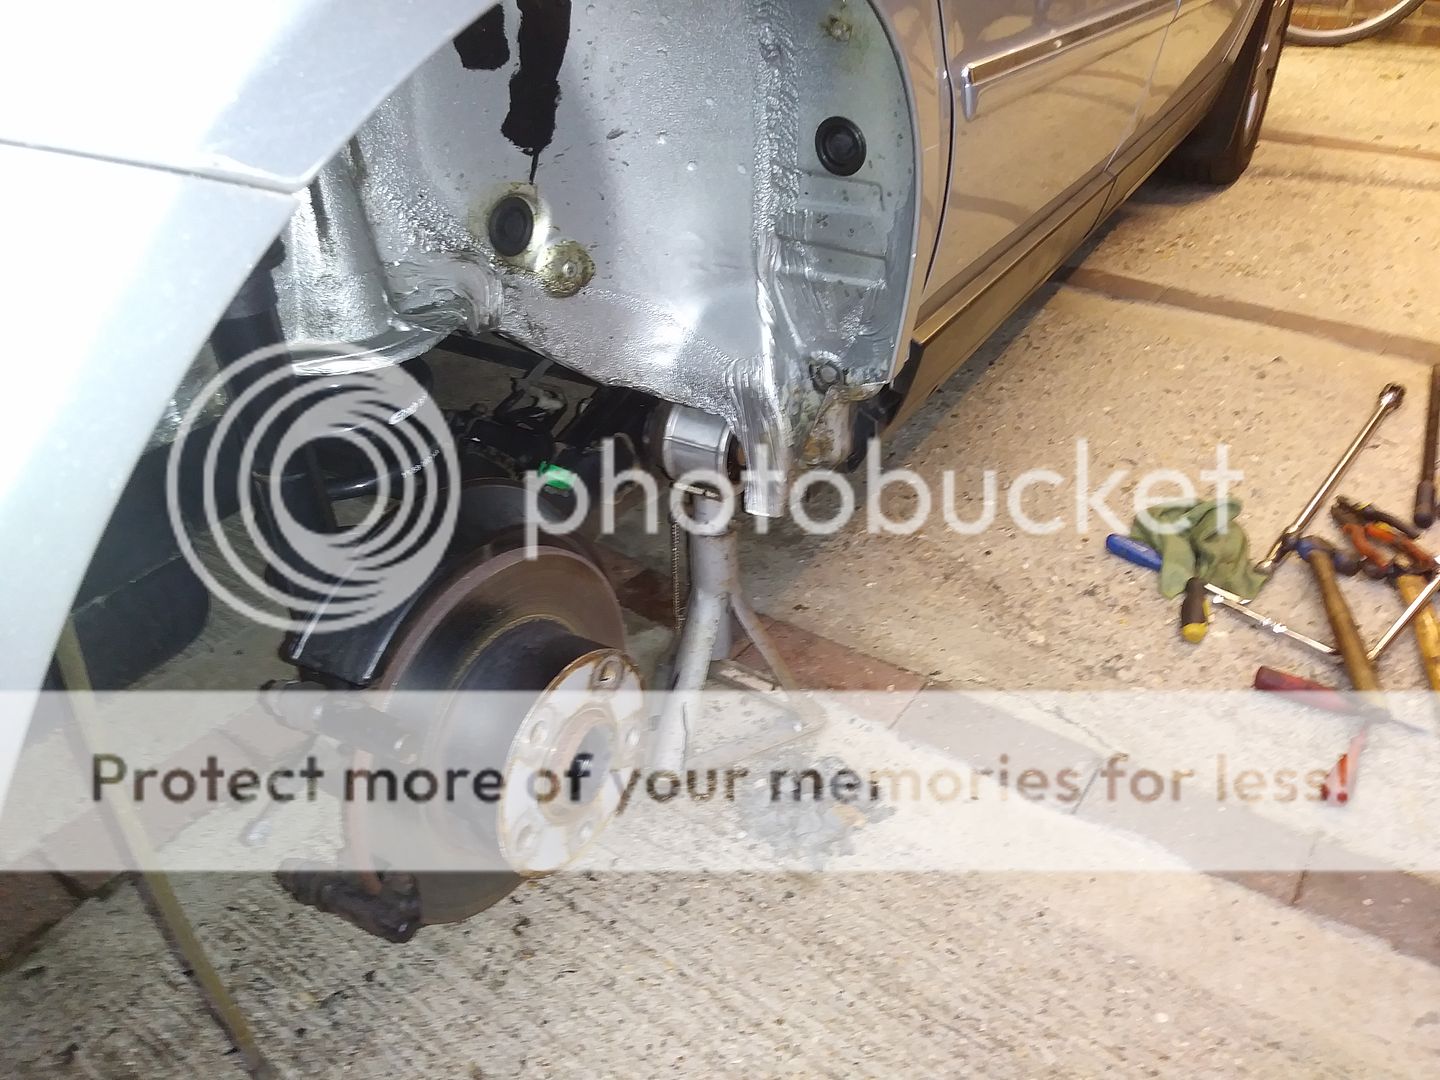
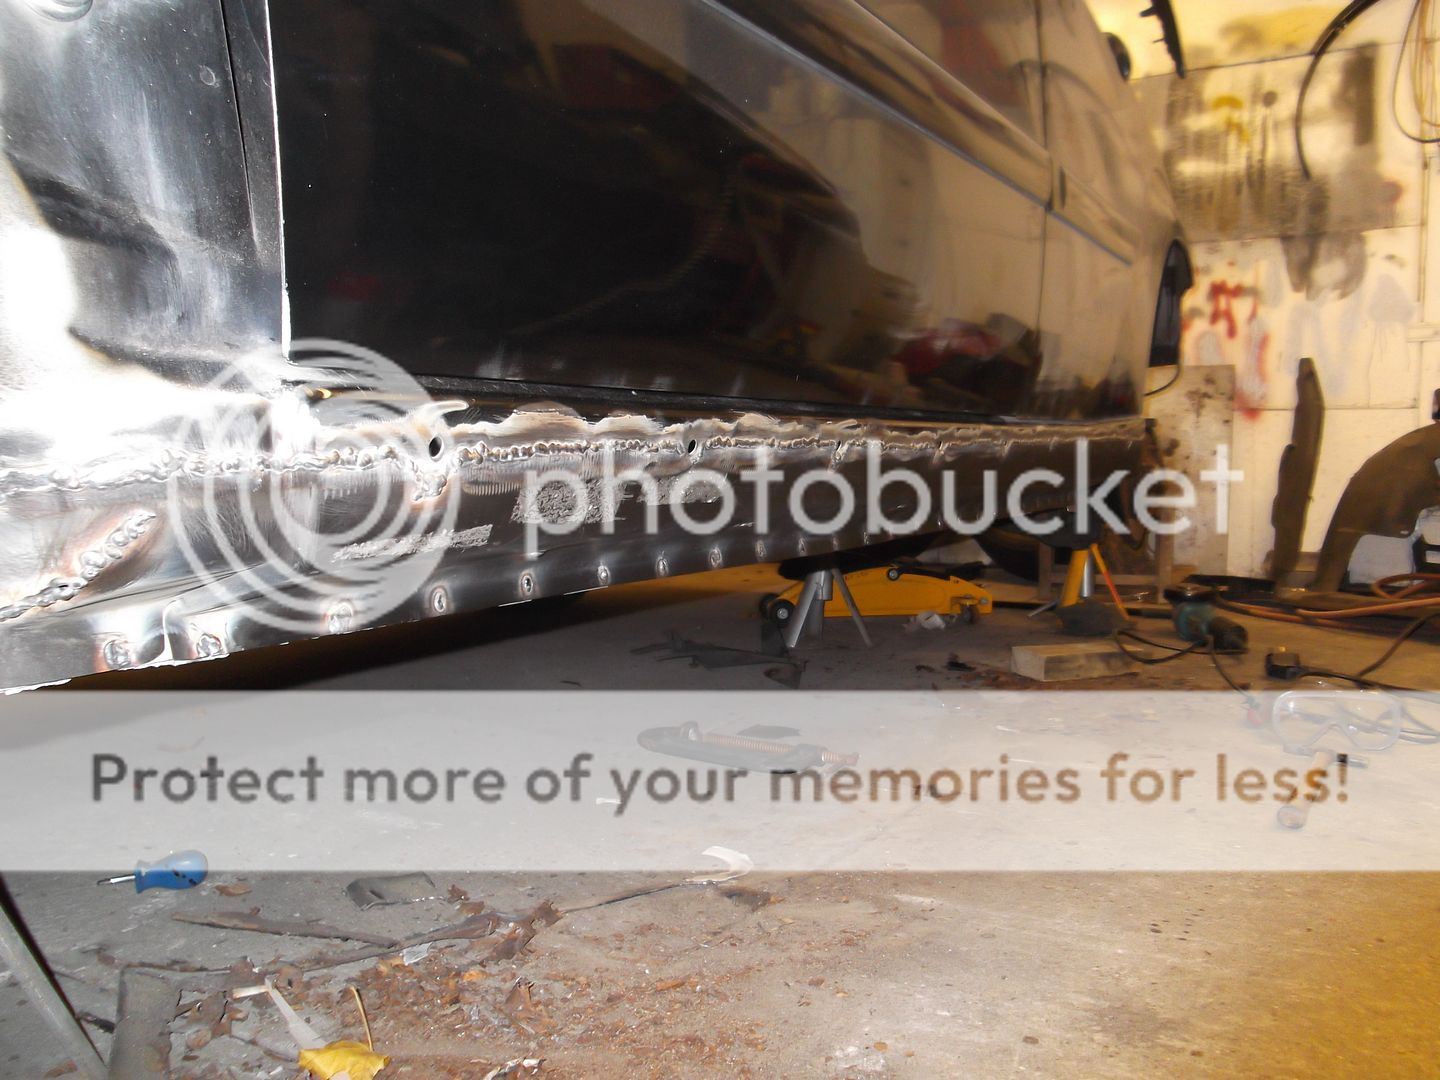
The rust, not as bad as I thought yesterday having cleaned it and prepped it. Nothing structural and surface rust only, which is nice.

POR 15 slapped on and drying. This stuff is runny so be careful and also don't get any on your hands as it does NOT come off! (don't ask me how I know). I'll give it another coat in an hour or so.
The rust, not as bad as I thought yesterday having cleaned it and prepped it. Nothing structural and surface rust only, which is nice.
POR 15 slapped on and drying. This stuff is runny so be careful and also don't get any on your hands as it does NOT come off! (don't ask me how I know). I'll give it another coat in an hour or so.
Edited by colin_p on Saturday 6th July 17:01
And now for a tale of shedding in a tale of shedding, a bit like Itchy and Scratchy is to the Simpsons.
The shed before the current Golf the Mrs drives was a MK1 Ford Focus. The Focus was a fantastic car but one day I thought I'd have a look at the undercrackers....
This is a comparison between between Ford and VW rustproofing. The Focus at the time was eleven years old, some five years younger than the Passat is now and eight years younger than the Golf.
Wheelarch liner off, these things are made of fuzzy felt on the Focus, not the best idea. Scabby as a scabby thing.
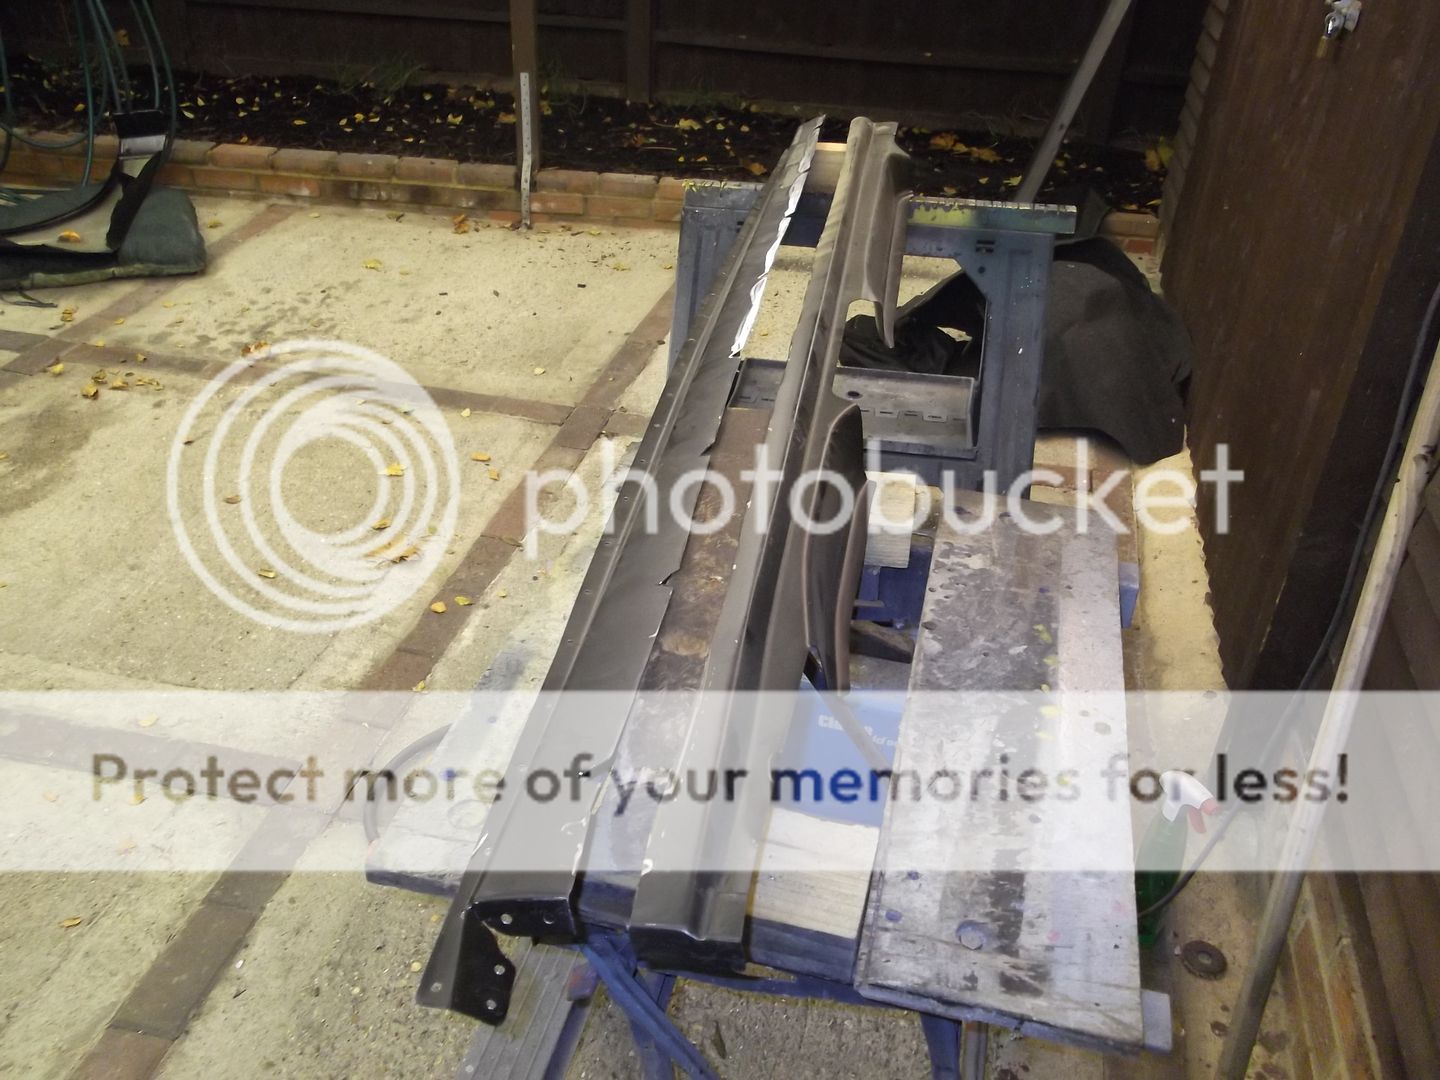
And then I took the sill cover off.... all good until the last screw which turned round and round and round, this is why...


Lots of cutting, cleaning and prep later I was ready to start making the repairs...


CAD (cardboard aided design, Thanks Bad Obsession and project Binky for the term).

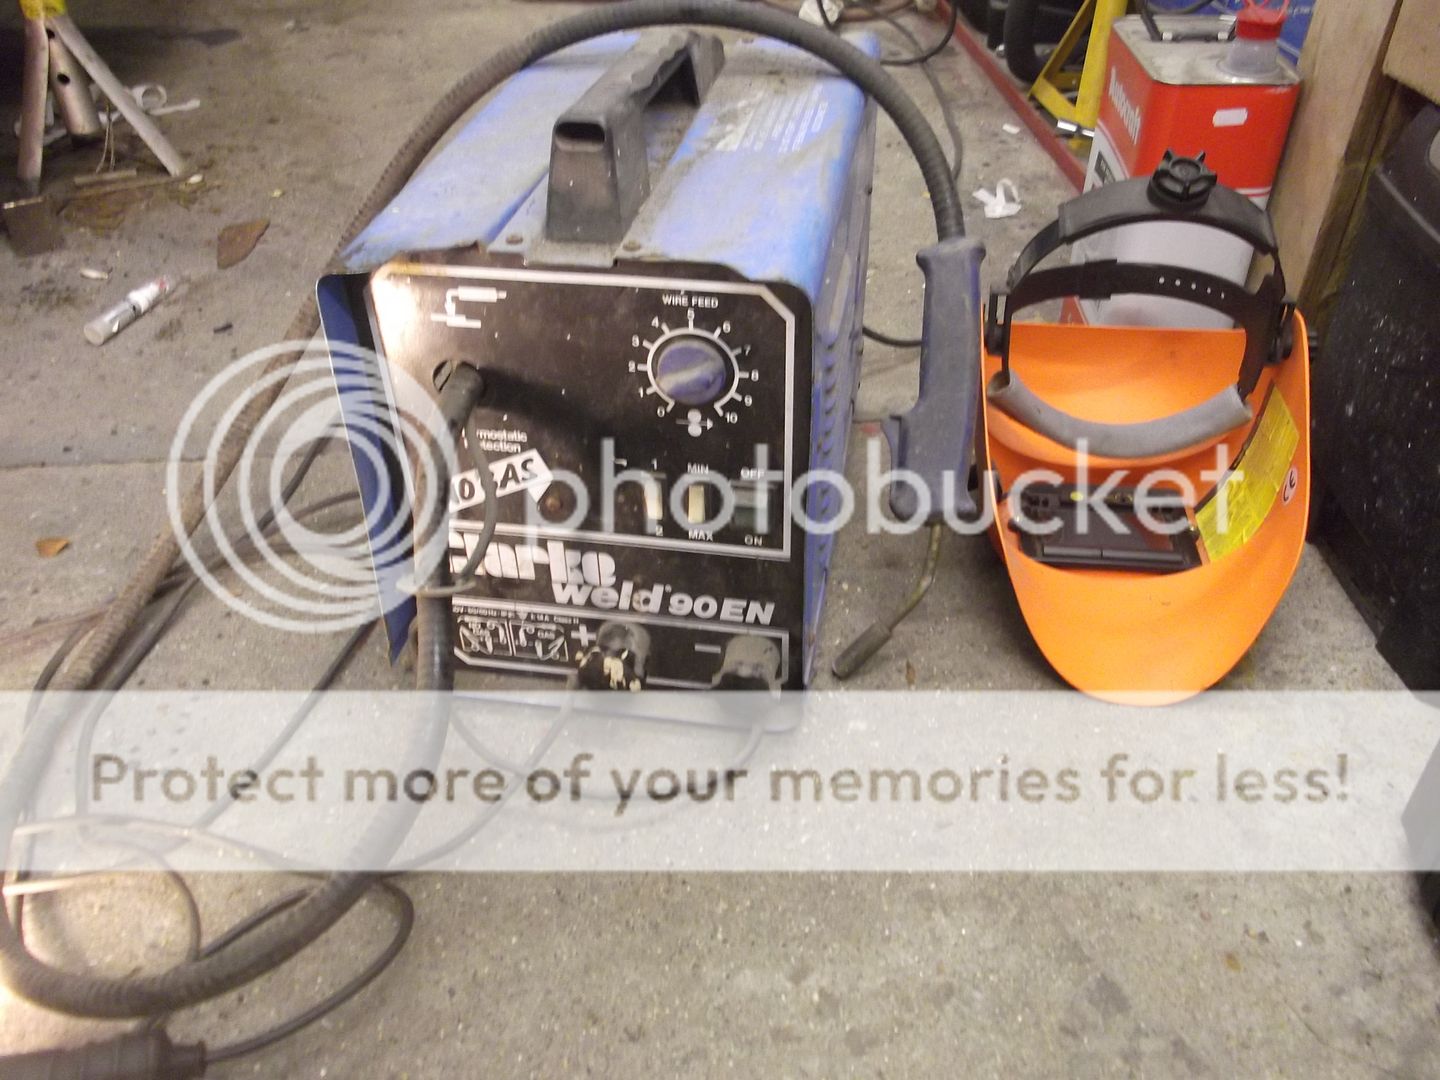
My ancient gasless mig, even older now. I got this in about 1991 when they first came out. Although not as good as an argon gas setup it is capable of welding outside in the wind which you cannot do with a gas setup as any wind blows the shield gas away.
Tacked

Seam welded

More CAD and hammerage, offering up

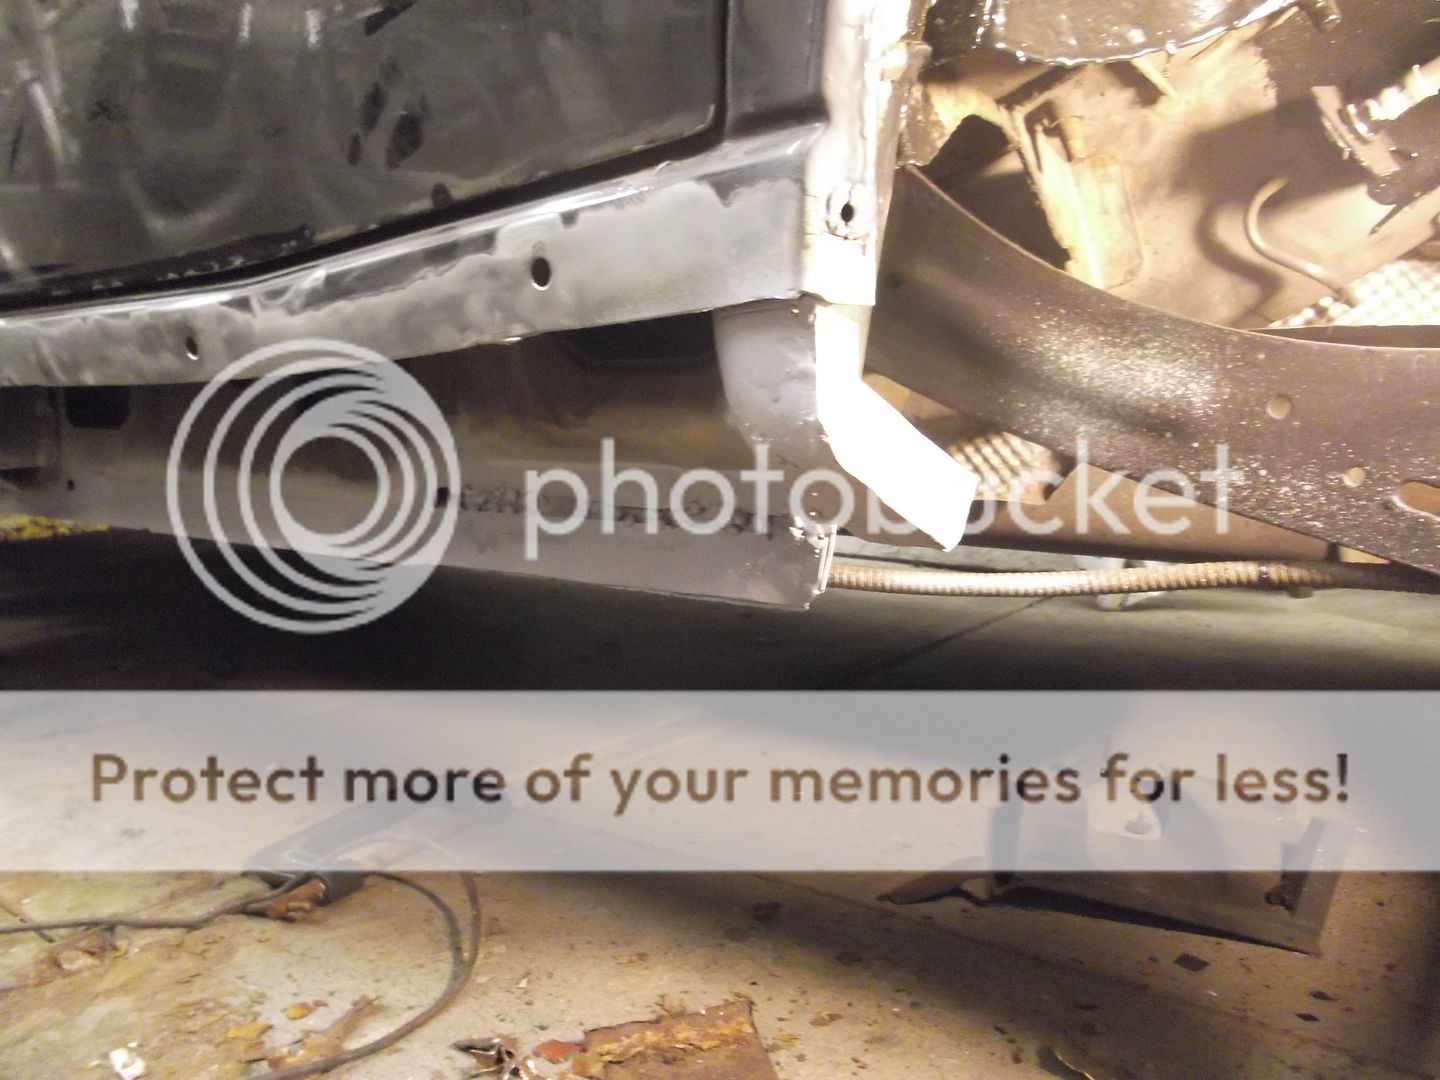
At this point I decided to pull the rest of the sill off rather than patch repair. At the front there is an inner sill, a middle sill and of course the outer sill.


Glad I did as it was quite rotty in there. Eagle eyed viewers may be able to see Fords pathetic attempts at rust proofing
Rustamaggedon

Nasty

Cleany cleany
Cleany cleany more choppy choppy

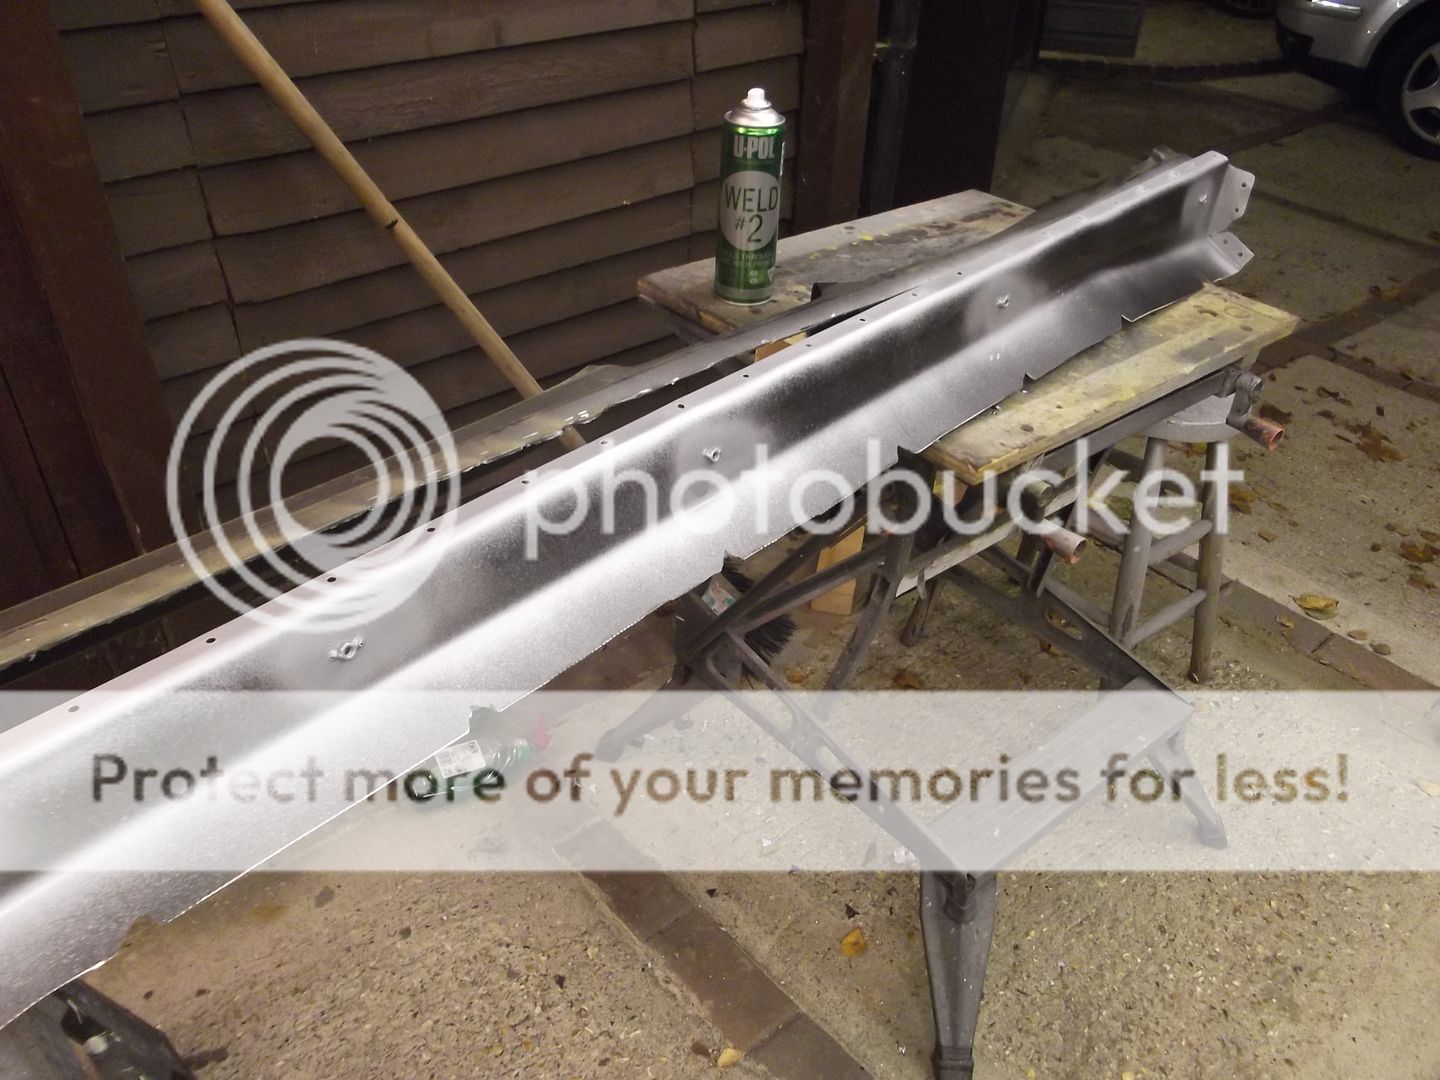
Cunningly as this was a MK1 and had sill covers and that the sill was good aove the chop line I decided to massively cut down the work and fit a half sill section. As I'm not a pro some mistakes were made, namely having to notch round fixings.
New MK1.5 (no sill cover on them) cut in half length wise.
As the the MK1.5 Focus doesn't have sill covers and this was a MK1.5 sill, I had to trial fit and line everything up to form the fixing points for the sill covers. Drilly drilly, weldy on captive nuts.

Prepped
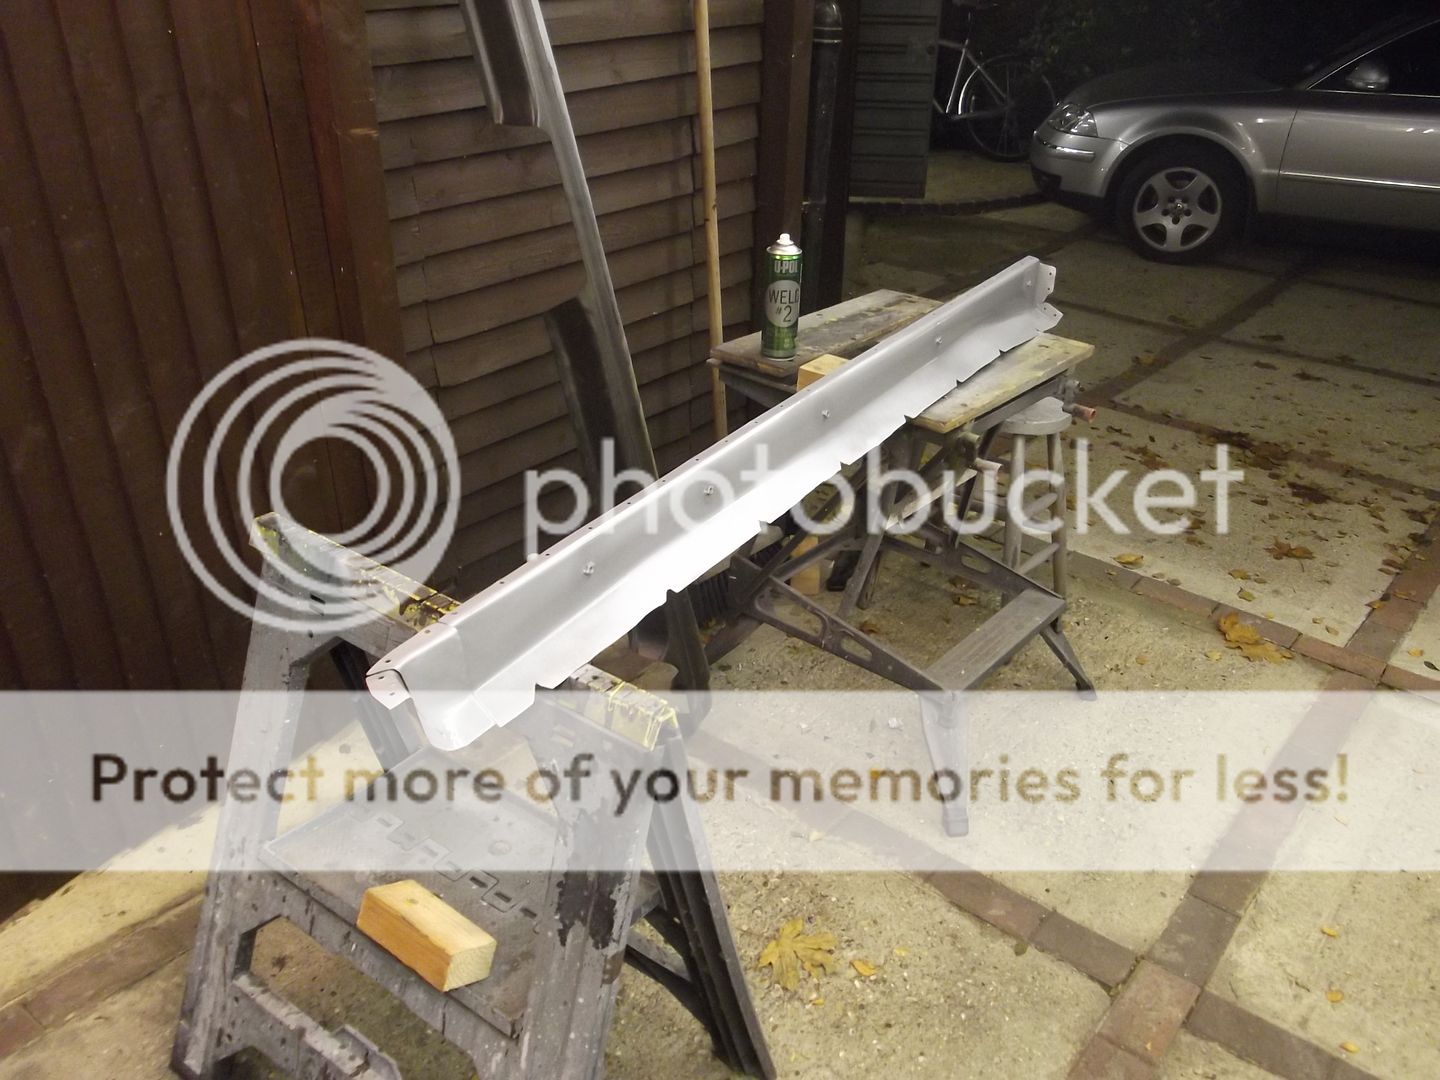
More CAD later
Weldy weldy

All done

So there we go, Ford vs VW in rust proofing. The newer VW stuff is not as good as the stuff made between the late 90's and mid 00's.
The shed before the current Golf the Mrs drives was a MK1 Ford Focus. The Focus was a fantastic car but one day I thought I'd have a look at the undercrackers....
This is a comparison between between Ford and VW rustproofing. The Focus at the time was eleven years old, some five years younger than the Passat is now and eight years younger than the Golf.
Wheelarch liner off, these things are made of fuzzy felt on the Focus, not the best idea. Scabby as a scabby thing.
And then I took the sill cover off.... all good until the last screw which turned round and round and round, this is why...
Lots of cutting, cleaning and prep later I was ready to start making the repairs...
CAD (cardboard aided design, Thanks Bad Obsession and project Binky for the term).
My ancient gasless mig, even older now. I got this in about 1991 when they first came out. Although not as good as an argon gas setup it is capable of welding outside in the wind which you cannot do with a gas setup as any wind blows the shield gas away.
Tacked
Seam welded
More CAD and hammerage, offering up
At this point I decided to pull the rest of the sill off rather than patch repair. At the front there is an inner sill, a middle sill and of course the outer sill.
Glad I did as it was quite rotty in there. Eagle eyed viewers may be able to see Fords pathetic attempts at rust proofing
Rustamaggedon
Nasty
Cleany cleany
Cleany cleany more choppy choppy
Cunningly as this was a MK1 and had sill covers and that the sill was good aove the chop line I decided to massively cut down the work and fit a half sill section. As I'm not a pro some mistakes were made, namely having to notch round fixings.
New MK1.5 (no sill cover on them) cut in half length wise.
As the the MK1.5 Focus doesn't have sill covers and this was a MK1.5 sill, I had to trial fit and line everything up to form the fixing points for the sill covers. Drilly drilly, weldy on captive nuts.
Prepped
More CAD later
Weldy weldy
All done
So there we go, Ford vs VW in rust proofing. The newer VW stuff is not as good as the stuff made between the late 90's and mid 00's.
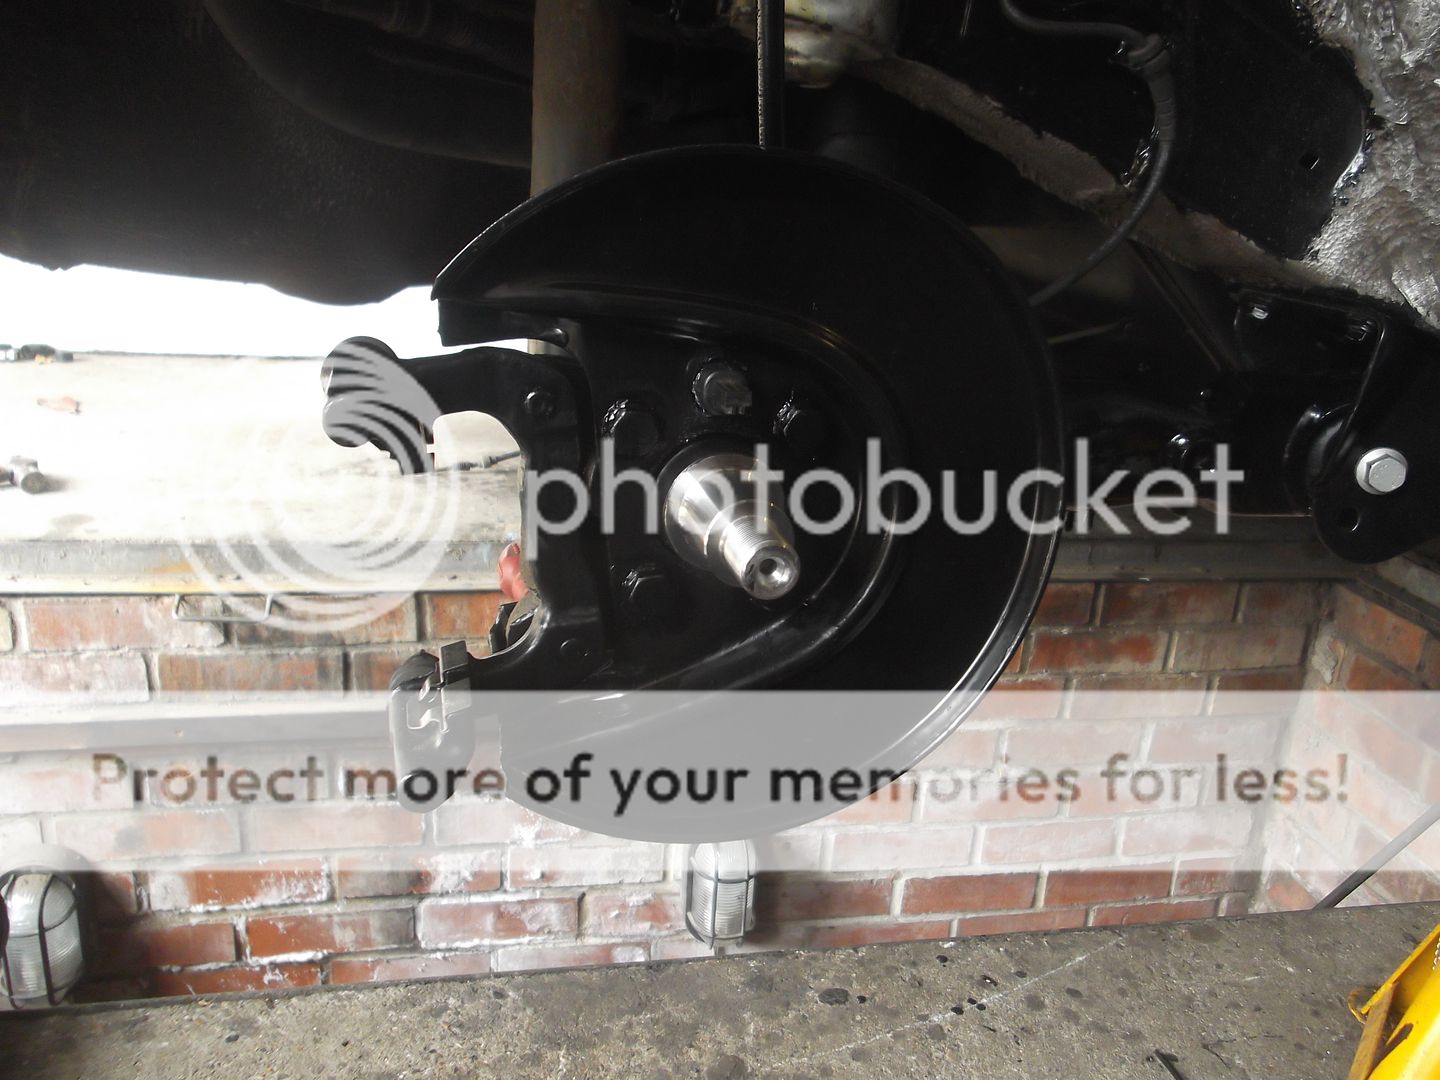
Fitting up the Passat rear brakes. New calipers, discs and pads.
Hub flange with some surface rust

That's better

Although these are NOT performance related at all, just OE equivalent, I really like the quality of the Brembo stuff. The bits that go rusty and look s te through your wheels are enameled, lovely pieces of kit.


And there we have it, both sides all built up and time for tea. I'll hopefully plumb them in after feeding my fat face.

Hub flange with some surface rust
That's better
Although these are NOT performance related at all, just OE equivalent, I really like the quality of the Brembo stuff. The bits that go rusty and look s
te through your wheels are enameled, lovely pieces of kit.And there we have it, both sides all built up and time for tea. I'll hopefully plumb them in after feeding my fat face.
Great to see an update, the Highline really inspired me to start posting here and it's great to see it munching through the miles. Hope the patio is down and you are back to good health!
P.S. - I think the expression is 'A pad in a caliper is better than a turd in a bush'. Or something.
Good stuff.
P.S. - I think the expression is 'A pad in a caliper is better than a turd in a bush'. Or something.
Good stuff.

Over the past few days I’ve read the entirety of your old thread and the new one. A real shame about the Photofket fail, as so much about the thread was detailed in the pictures!
I’ve got the cousin of your car, a 2003 A6 1.9 TDI PD130, on 164k. I’ve known the car since 2007 (Dad bought it then and had it for 9 years) and I’ve owned it since 2016. It needs a little work cosmetically (both front wings have rusted from inside out, and the driver seat bolster is worn) but mechanically is tip-top. Even treated it to an air con regas and 4 wheel alignment last week, which comes highly recommended! It feels like driving on new tyres again despite them having covered 10k.
Glad to read that you’re in good health and I look forward to hearing how a like-minded soul such as yourself keeps a PD130 on the road. Feels like it will go on forever...
ket fail, as so much about the thread was detailed in the pictures!I’ve got the cousin of your car, a 2003 A6 1.9 TDI PD130, on 164k. I’ve known the car since 2007 (Dad bought it then and had it for 9 years) and I’ve owned it since 2016. It needs a little work cosmetically (both front wings have rusted from inside out, and the driver seat bolster is worn) but mechanically is tip-top. Even treated it to an air con regas and 4 wheel alignment last week, which comes highly recommended! It feels like driving on new tyres again despite them having covered 10k.
Glad to read that you’re in good health and I look forward to hearing how a like-minded soul such as yourself keeps a PD130 on the road. Feels like it will go on forever...
A minor update on the Passat.
I bled the brakes with the help of my eldest Son, only fair I helped him do his a while back and have just returned from a test drive. More than happy with the results.
As this was a full system bleed with half of it being completely empty, I let the rears drip out when I changed the calipers and hoses, and as I read a few instances where people have had difficulty getting a decent pedal, here is how I did it.
1, Jacked up and all four corners on axle stands and wheels off. This may sound like a lot of faff but it saves a lot of time overall.
2, Good old Gunsons Easi-bleed. I have an air compressor which makes this a lot easier to use. I regulate the pressure to about 25psi which is a lot higher than the Easi-bleed instructions (which I lost many years ago). Reason being in my opinion is that you need that extra pressure to push through the ABS pump. Five litres of DOT4 fluid (I used probably about 3 litres).
3, Bleeding order. I always like to do the furthest away first and work back to the nearest. And this is where you have to look beyond the simple. Most people think from the master cylinder but it should be from the ABS pump, which on the Passat is on the opposite side to the master cyl.
Bleeding order therefore, furthest to nearest is;
Drivers Rear
Passenger Rear
Drivers Front
Passenger Front.
4, Fill up the master cyl reservoir with clean fluid, fill up the easi-bleed and connect everything up. When pouring and decanting brake fluid, do it slowly and gently, the name of the game is to prevent it sloshing about and bubbles forming within it.
5, Off to the first caliper, connect the drain off tube, I like to use a long'ish length about 1m and loop it into my drain pot which just happens to be a very old Chicken and Mushroom pot noodle pot which I have used for bleeding brakes for many years. Crack that nipple! Wait.... wait and then the fluid will flow. Lots of fluid, lots of bubbles as this was an empty line from the ABS pump. The bubbles they kept on coming and coming and coming the little sods. Had to disconnect the air and refill the easi-bleed bottle three times and there were still bubbles. At this point I decided to let that settle and move onto the passenger rear.
6, Passenger rear, same as the drivers bubbles bubbles and yet more bubbles. Decided to move onto the fronts.
7, Fronts, both sides no issues, I was pushing old fluid through with fresh with a noticeable change in fluid colour, NO bubbles.
8, Back to the rears. I decided to employ my Son in the car (who had been in charge of filling the pressure bleeder up) to do some work with the brake pedal. With the pressure bleeder STILL connected up we then re-did the rears the old fashioned way i.e. ;
8a, Bleed nip closed, press and hold pedal.
8b, Undo nip, pedal goes to floor, HOLD pedal on floor, CLOSE nip.
8c, Repeat 8a and 8b until no more bubbles. This took about another 200ml of fluid to be pushed through on each rear until I was happy.
9, DO NOT forget to put the bleed nip covers on.
10, Wheels on, down off axle stands tighten wheel bolts.
11, Test drive. Things felt ok initially and then razor sharp as they should be after a few 40-50mph to 0mph emergency stops to activate the ABS pump.
I'm never complacent and will take it easy in traffic until the new rear pads and discs have bedded into each other but fingers crossed it is all good.
Again I cannot emphasize enough how much air came out of the 'dry' rears. In all I think about one litre was pushed through each rear caliper until I was happy with the fronts about 500ml, so about three litres in total. I have two litres left which is better than running out.
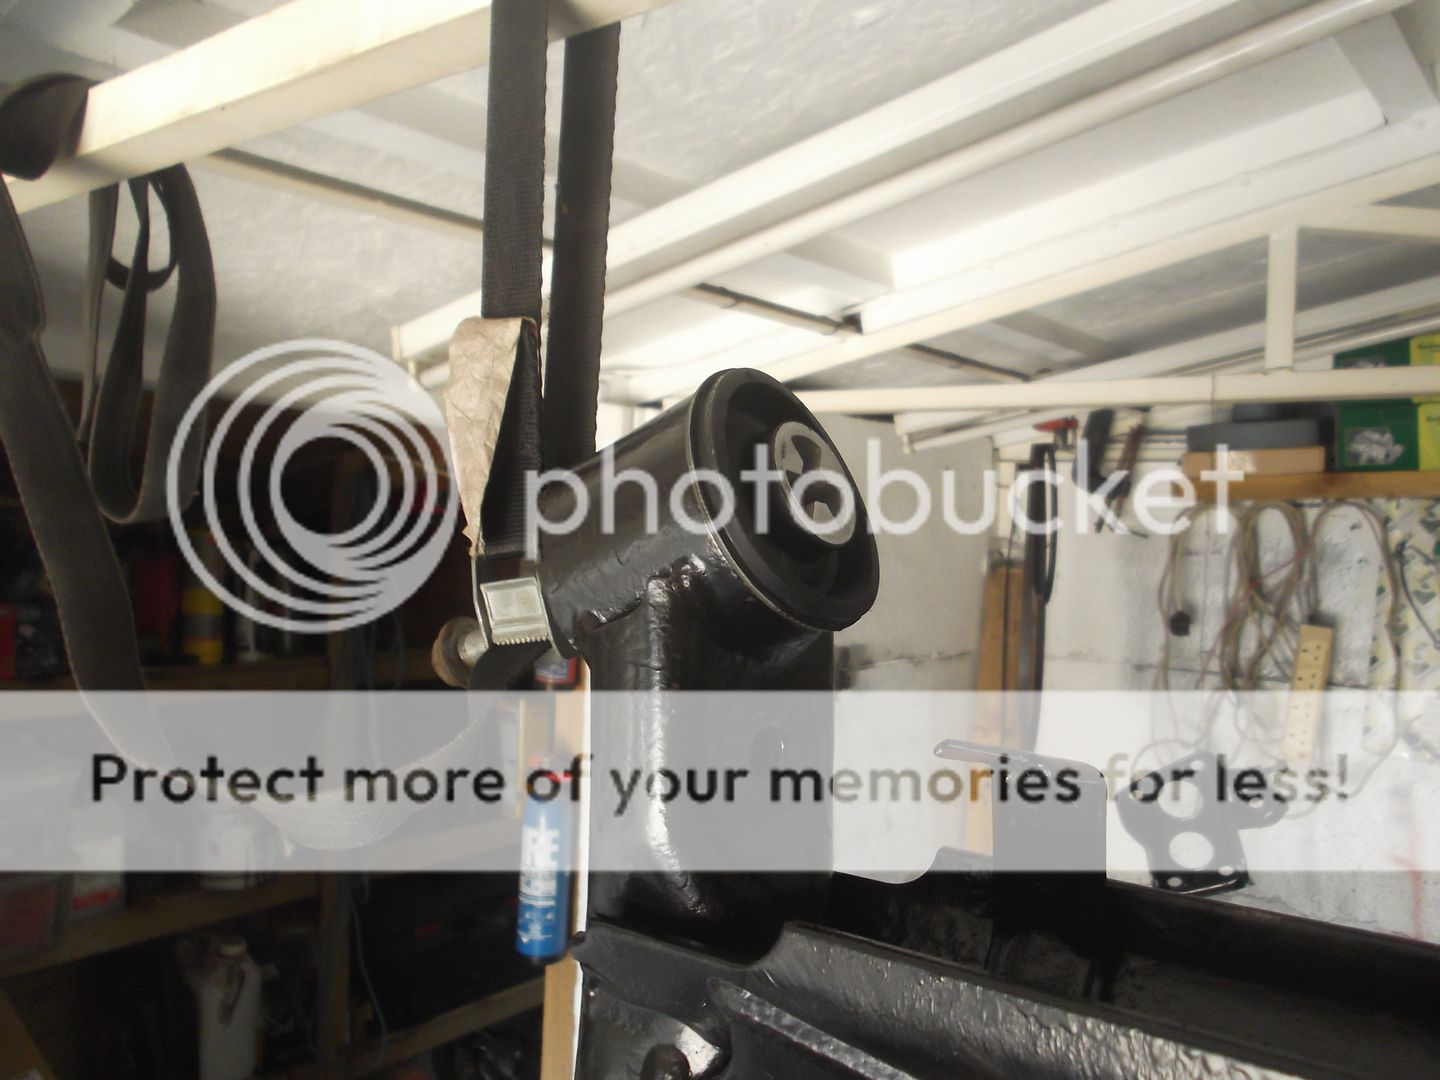
Random flashback to March 2016.
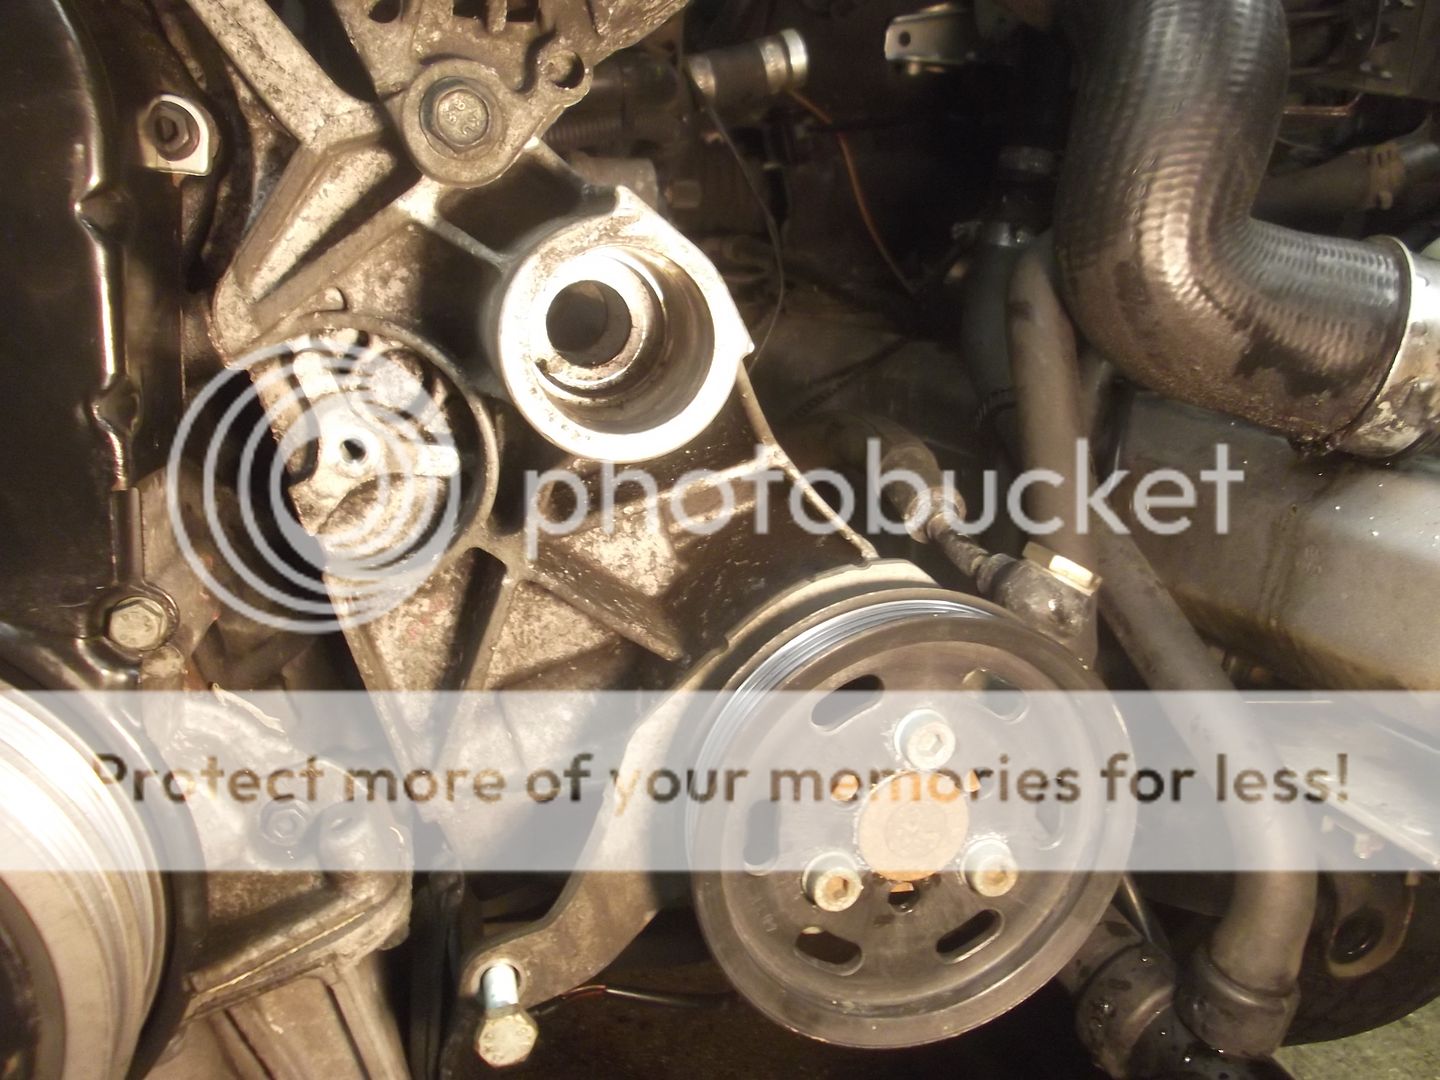
Passat Viscose Fan bearing.
An often neglected item in the auxiliary drive belt group of spinney bits. Quite simply you draw the old one out using some threaded bar and large sockets as spacers and then the same to draw the new one in. Top tip, make sure you have big enough sockets to do this before you get stuck in and find yourself stranded with your car in bits on a Sunday afternoon with work on Monday.
Pictures are better than words for this sort of thing.
The bearing, obviously with the fan removed and other gubbins out of the way.

Big mo-fo socket used as a 'cup' to draw the bearing into

And it is out
30mm socket which just so happened to have the exact and perfect outside diameter for drawing the new bearing in
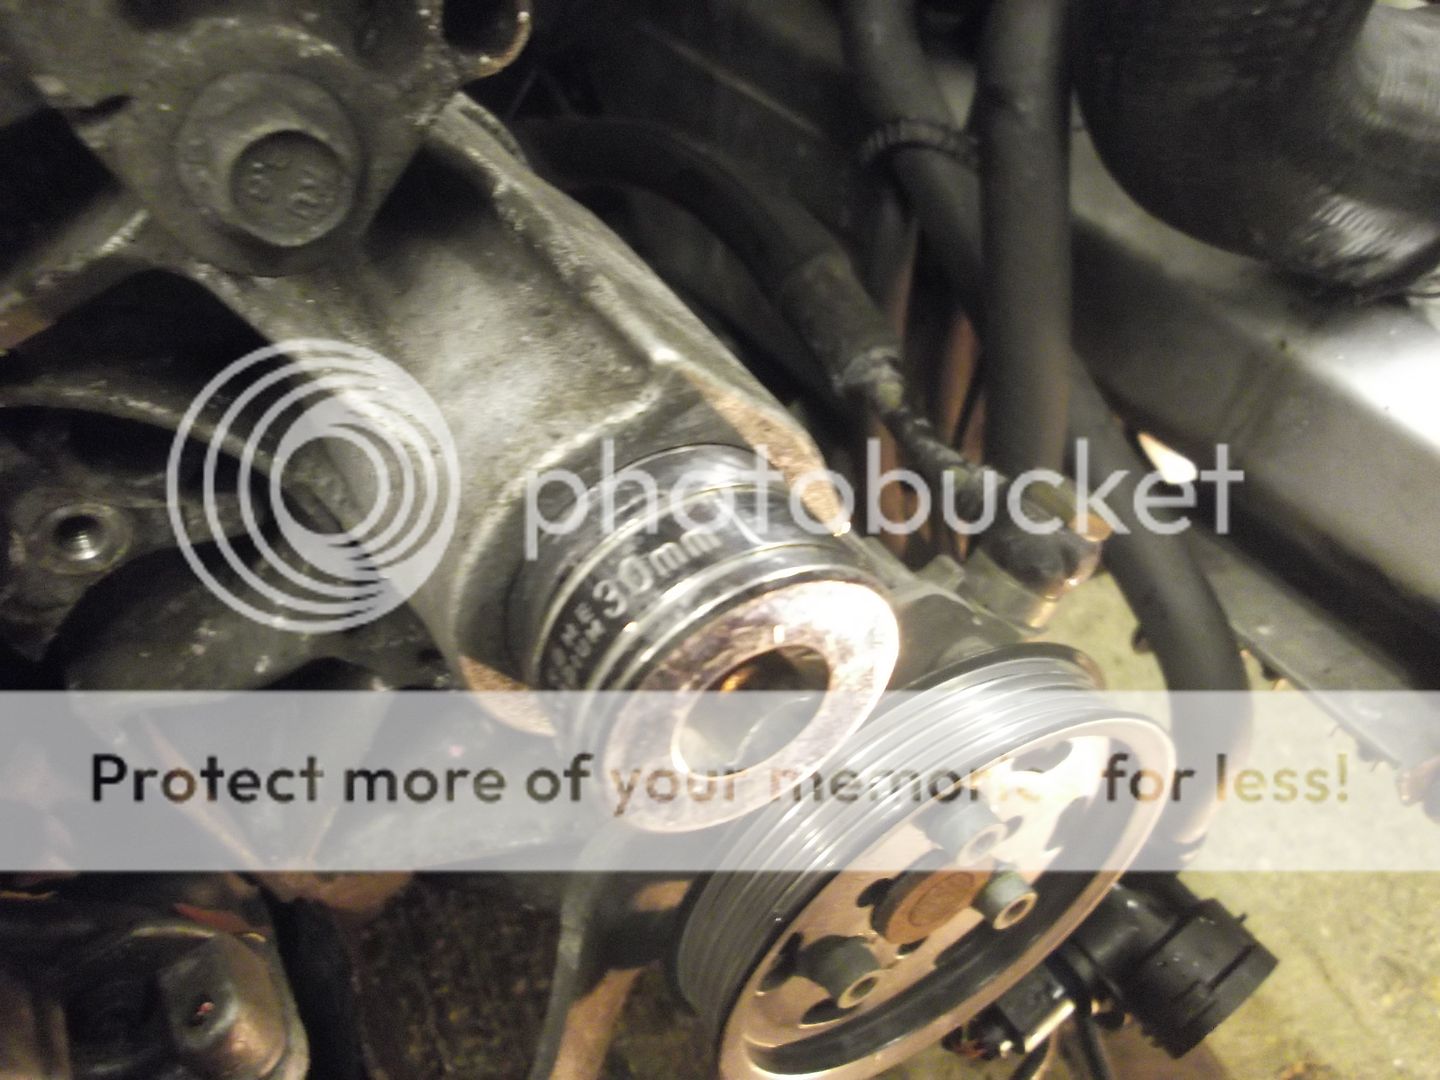
Set up, new bearing in position with that perfectly sized socket behind. Make sure everything is perfectly aligned and do it slowly slowly
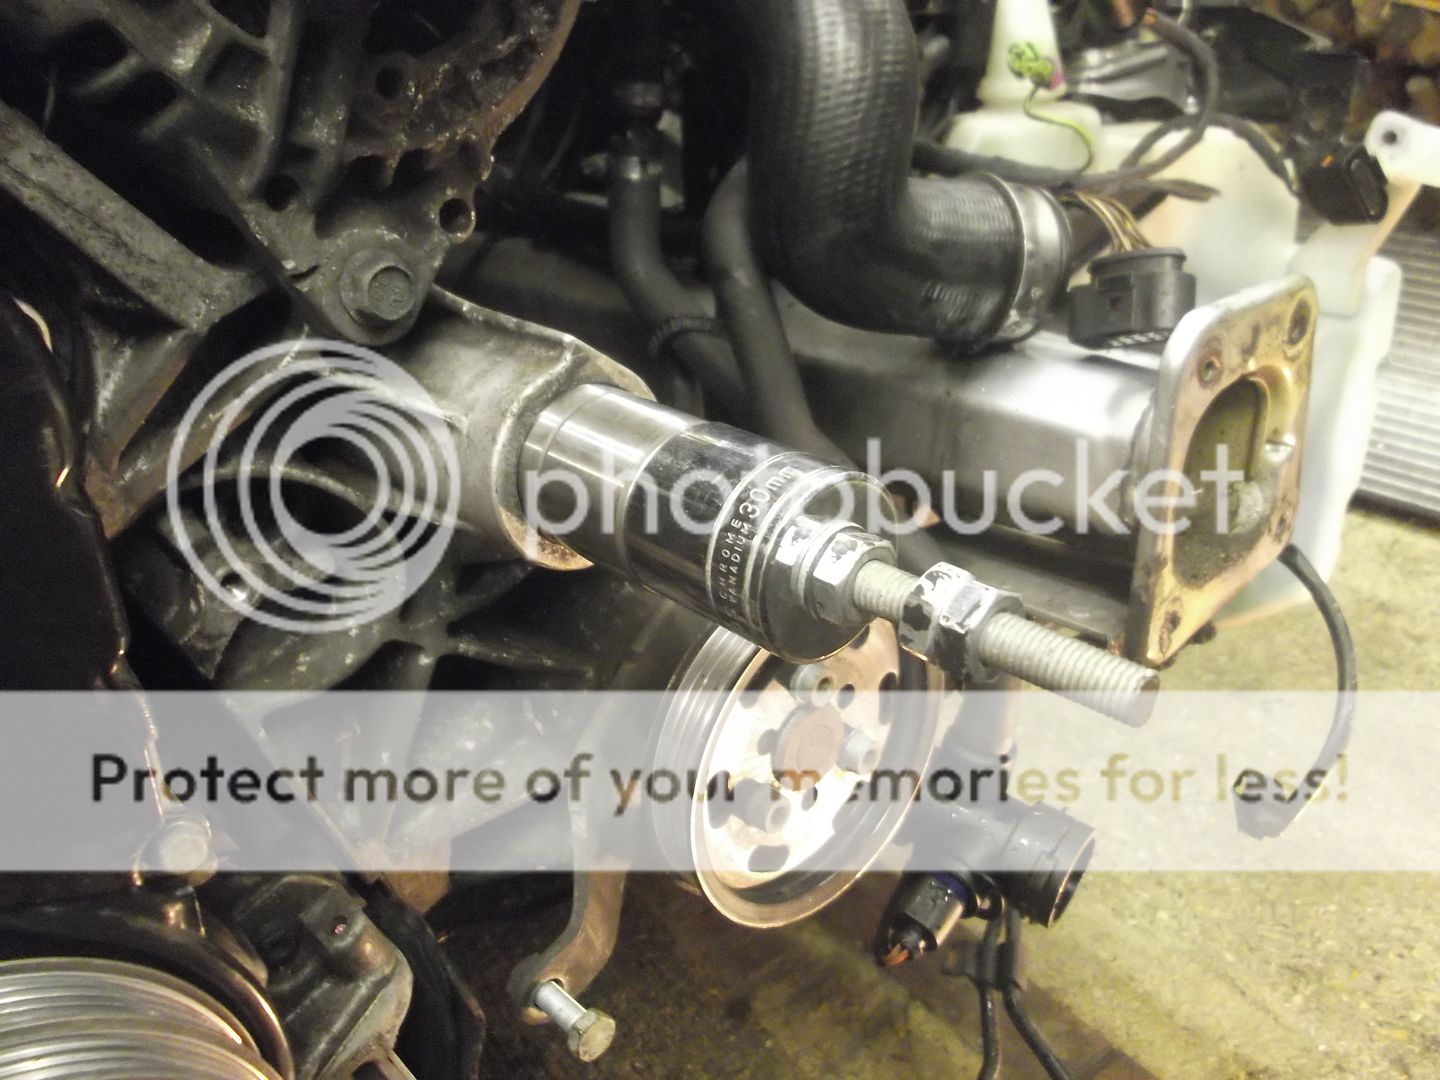
Side view of the same just before the bearing is drawn into its 'ole.
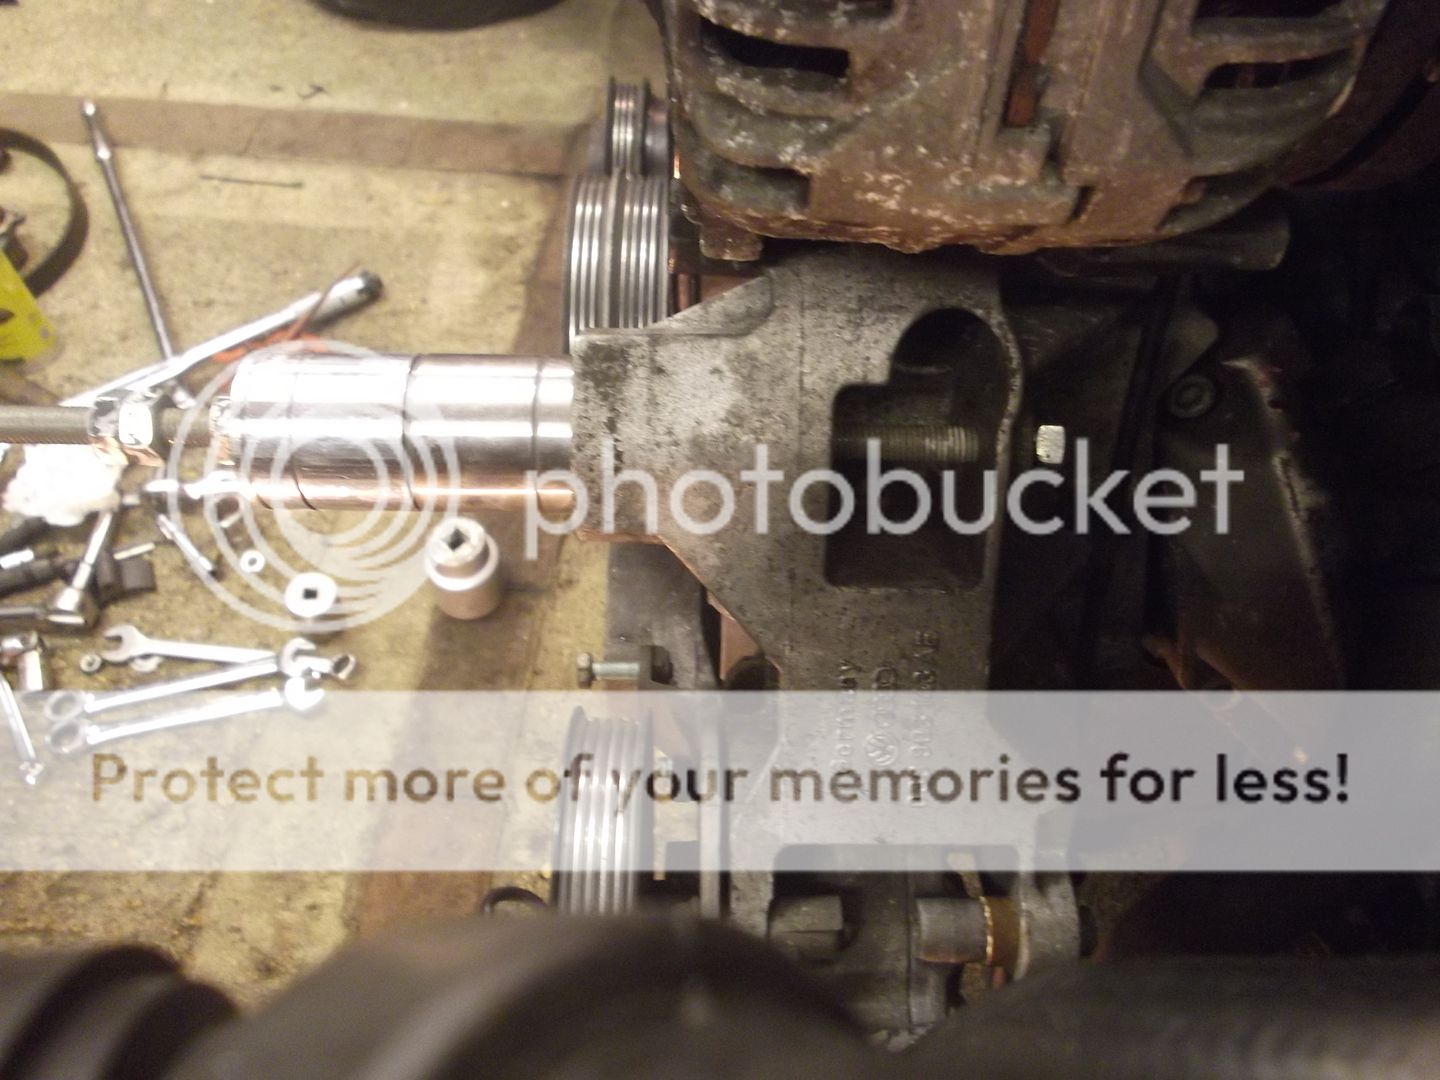
About halfway in... you get the idea now

The tools, note that the smaller of the two sockets is a 30mm one, the larger one is kin-ooge (can't remember the size but do remember it is an old AF one).

Passat Viscose Fan bearing.
An often neglected item in the auxiliary drive belt group of spinney bits. Quite simply you draw the old one out using some threaded bar and large sockets as spacers and then the same to draw the new one in. Top tip, make sure you have big enough sockets to do this before you get stuck in and find yourself stranded with your car in bits on a Sunday afternoon with work on Monday.
Pictures are better than words for this sort of thing.
The bearing, obviously with the fan removed and other gubbins out of the way.
Big mo-fo socket used as a 'cup' to draw the bearing into
And it is out
30mm socket which just so happened to have the exact and perfect outside diameter for drawing the new bearing in
Set up, new bearing in position with that perfectly sized socket behind. Make sure everything is perfectly aligned and do it slowly slowly
Side view of the same just before the bearing is drawn into its 'ole.
About halfway in... you get the idea now
The tools, note that the smaller of the two sockets is a 30mm one, the larger one is kin-ooge (can't remember the size but do remember it is an old AF one).
Gallons Per Mile said:
Excellent work as always! I've got to remember to keep watching this thread now, not the 'shedding properly' one 
The shedding properly one is now defunct, too many dead picture links.I'll hopefully get as many back as I can in this thread though, like the flashback above.
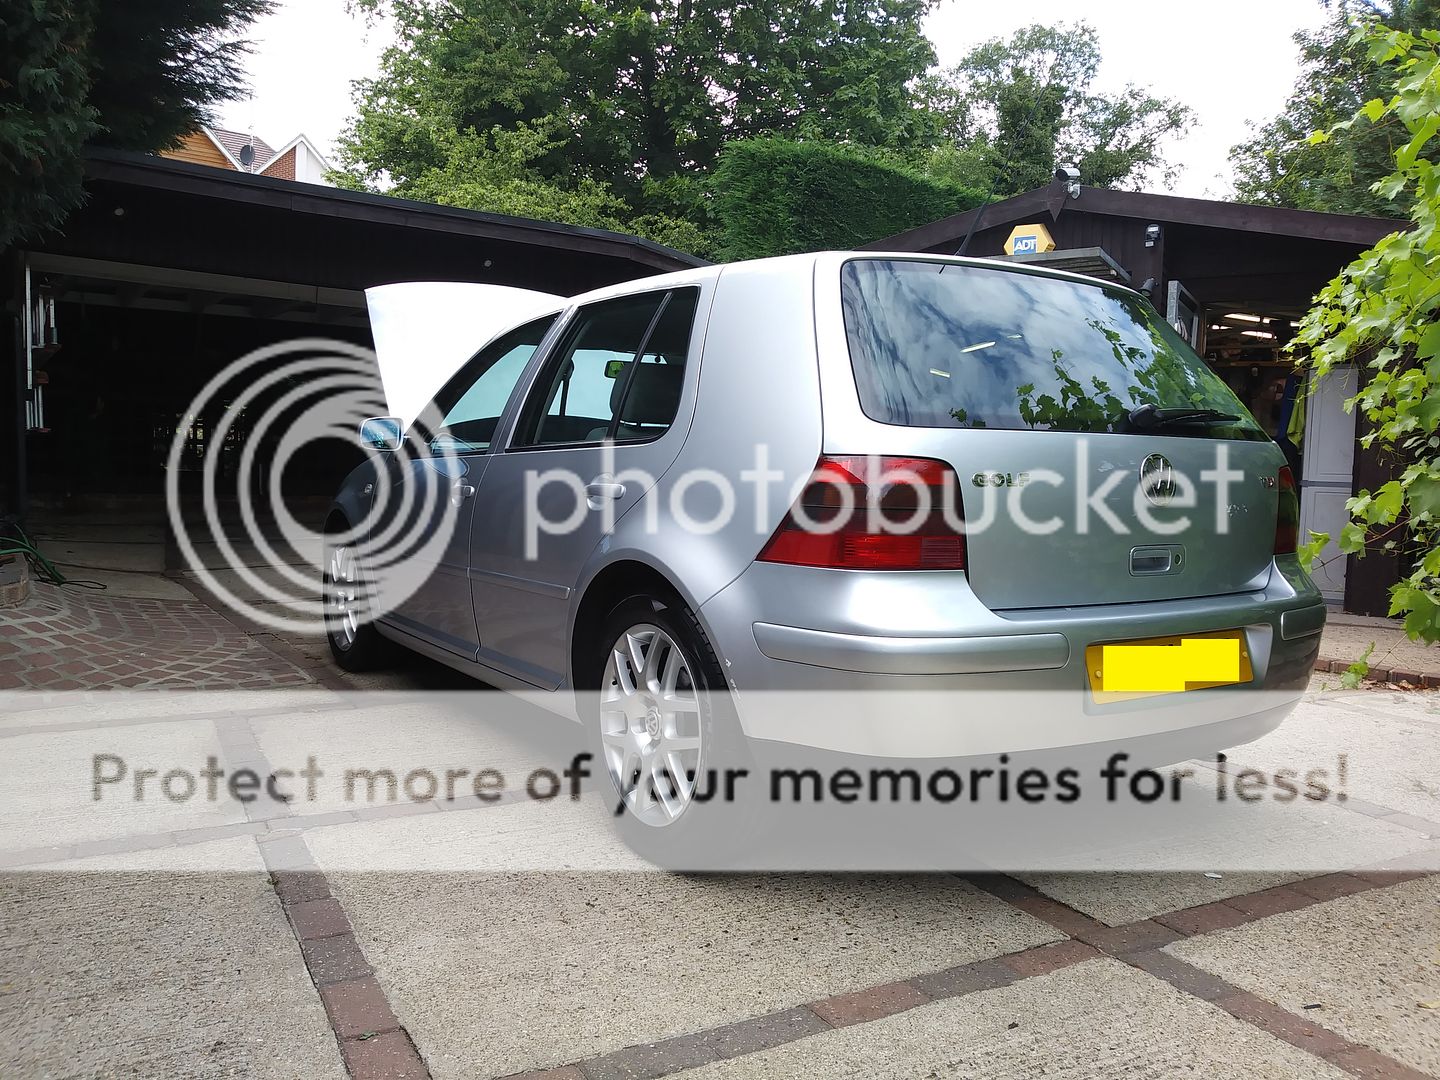
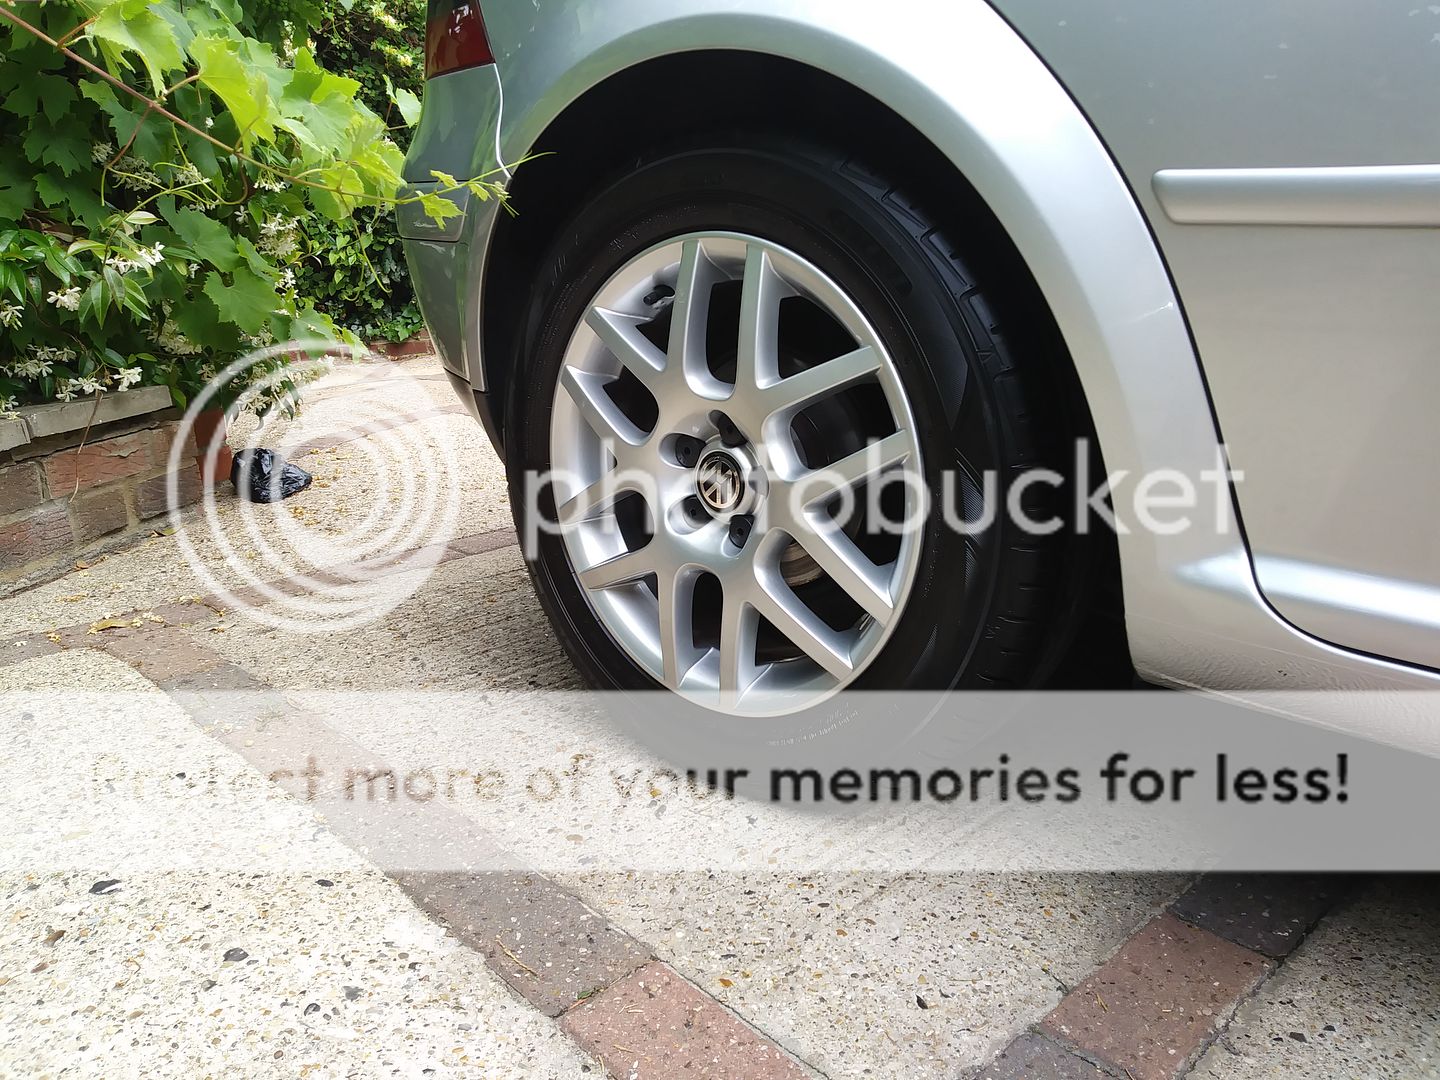
A day of Golfing.
Gave the Golf a much needed clean and spruce up today. Nothing more to report on that other than to say I love how well it looks once scrubbed up.
More ominously when checking the fluids I noticed some coolant sat on the top of the gearbox. I'll investigate but it is probably the plastic flange / coolant manifold that sits underneath the tandem fuel pump.

Couldn't be bothered to hoover it though.

A completely useless picture not showing the coolant on the gearbox

Gave the Golf a much needed clean and spruce up today. Nothing more to report on that other than to say I love how well it looks once scrubbed up.
More ominously when checking the fluids I noticed some coolant sat on the top of the gearbox. I'll investigate but it is probably the plastic flange / coolant manifold that sits underneath the tandem fuel pump.
Couldn't be bothered to hoover it though.
A completely useless picture not showing the coolant on the gearbox
vikingaero said:
You OCD weirdo! A rubber mat on top of the carpet mat. 
I do that. Mrs V. says that I would have a mat on top of a mat on top of another mat if I could.
I've always done it, as you can never be too careful.I do that. Mrs V. says that I would have a mat on top of a mat on top of another mat if I could.
In my car, the Passat, I've got proper VW factory rubber mats and have another mat on top on the drivers side.... just in case.

Gassing Station | Readers' Cars | Top of Page | What's New | My Stuff