Kelvinators TVR Tasmin
Discussion
bolidemichael said:
You may as well continue to update this thread in that case and close the circle!
As requested.Well, it's been a little while in the making but the BMW is finally ready for its time in the spotlight.
I alluded to the BMW not being all roses in my TVR Finale post, and I wasn't kidding. Before getting to the issues, what is the car?
Its a 2007 BMW 650i, of the E63 chassis range. It has a 360HP 4.8L V8 engine, a 6-speed tip-tronic auto and puts that power to the rear wheels.
It's pretty well equipped, as you expect a top-spec 6 Series to be. They were expensive cars in their day.
Cruise Control
Adaptive xenon headlights (turn with the steering wheel to follow corners)
Dynamic Drive (hydraulic anti-roll bars to keep the car flat when cornering)
Active Steering (Light and quick when parking, but weighs up at speed or at the press of a button)
Panoramic Glass Roof
Electric Memory Seats
Park Distance Control (front and rear)
Automatic lights and wipers
AUX and CD changer
This one is painted in Mineral Silver, and has a "creambeige" Dakota leather interior.
From the moment I got the car home, I started to make a list of issues. The first, and biggest, was the fact that the front and rear tyres had been swapped around. On a normal car like the Corolla or Fit, this wouldn't really matter, but on the BMW it has staggered wheels and tyres.
The front wheels are 8.5" wide and run 245 width tyres, whilst the rears are half an inch wider at 9" and run much wider 275 width tyres. This meant the front suddenly had all the grip, and the rear was a bit on the slippery side. The poor traction/stability control was working hard to keep it all under control.
The previous owner didn't even notice until it was mentioned at the WOF just before he drove the car down to meet with me. I'm guessing someone tried to rotate the tyres at some point and didn't realise they were staggered.
Swapping them over was easy enough. Up on the Quickjacks, remove the center caps, and remove and swap the wheels over. Done.
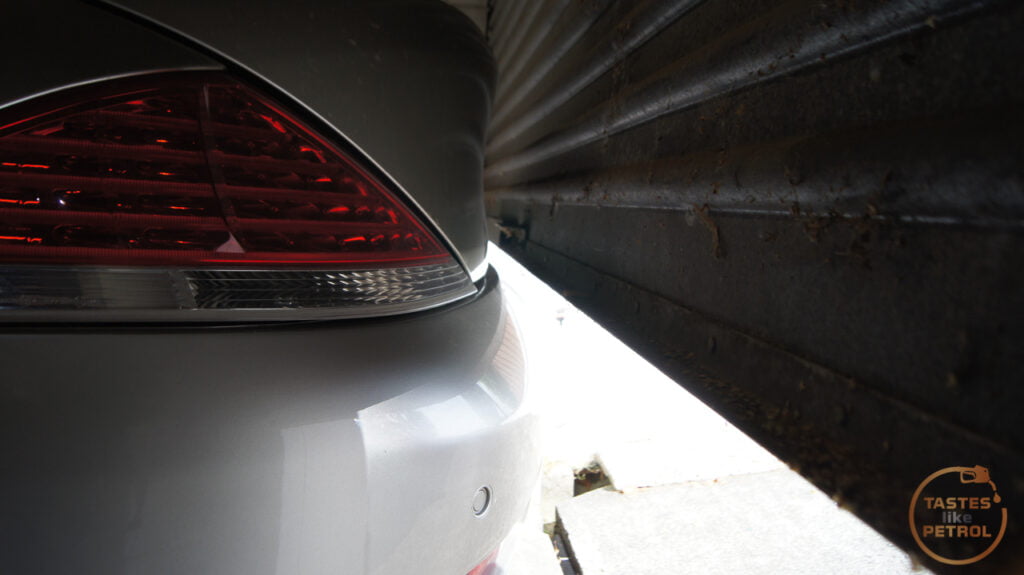
She's a big girl though, since the Quickjacks move the car backwards when lifting it only just cleared the garage door. It's hard to tell in this photo but the bumper is outside the garage.
The front brakes are the biggest of any cars I've owned. They are simply HUGE. Hand for scale.

And old TVR front rotor for a laugh. Its slightly bigger than the center hat of the BMW rotor
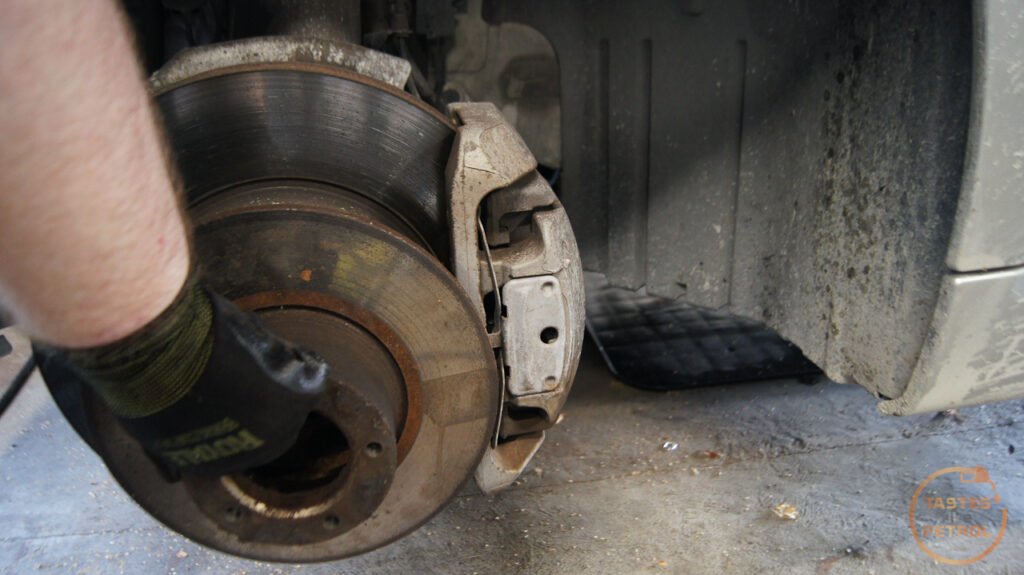
Guess you need big rotors to slow this Autobahn stormer down from maximum velocity.
With the wheels around the right way, it finally made a bit more sense. The car was controllable when accelerating, especially if you threw cornering into the mix.
It also looked a bit less weird as the rear wheels were too wide for the front guards

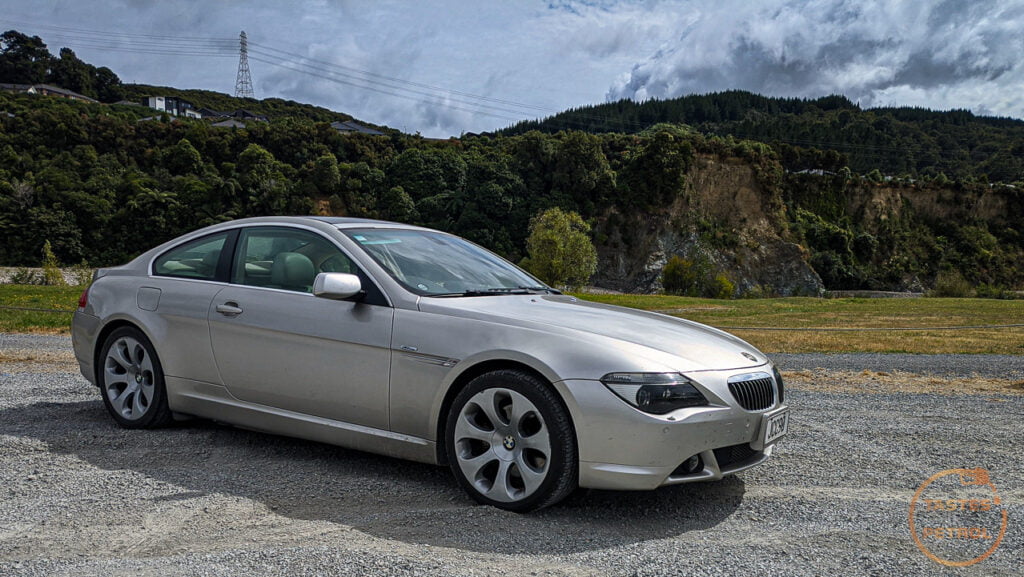
It's lower than it looks. Scrapes a little at the breakover of my driveway

The long wheelbase won't help. The 650i is 30cm longer overall than my old E91 wagon, and the wheelbase is 2cm longer in the 650i.
So what else is wrong with it?
Well,
It needs an oil change (overdue based on the OBC and black on the dipstick). Thankfully so far during testing, it hasn't shown any signs of the N62 valve stem seal issue though; no smoking.
The rest is cosmetic;
The front and rear roundels are aftermarket and have some sort of growth going on

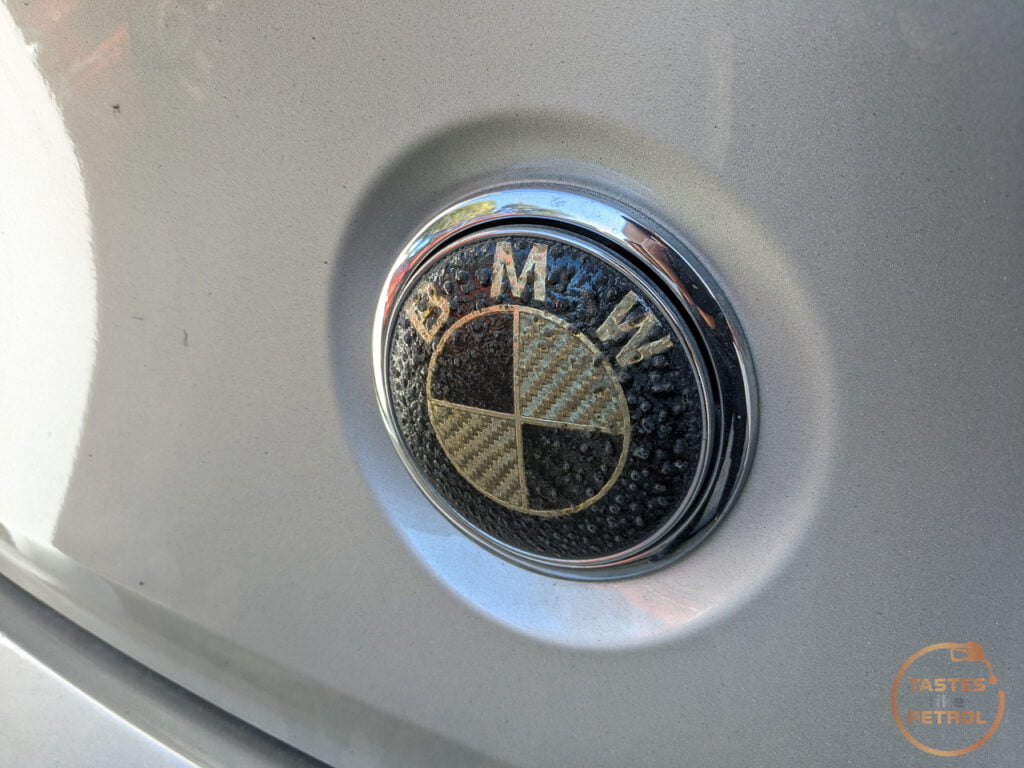
The fake ///M badge on the boot is doing the same

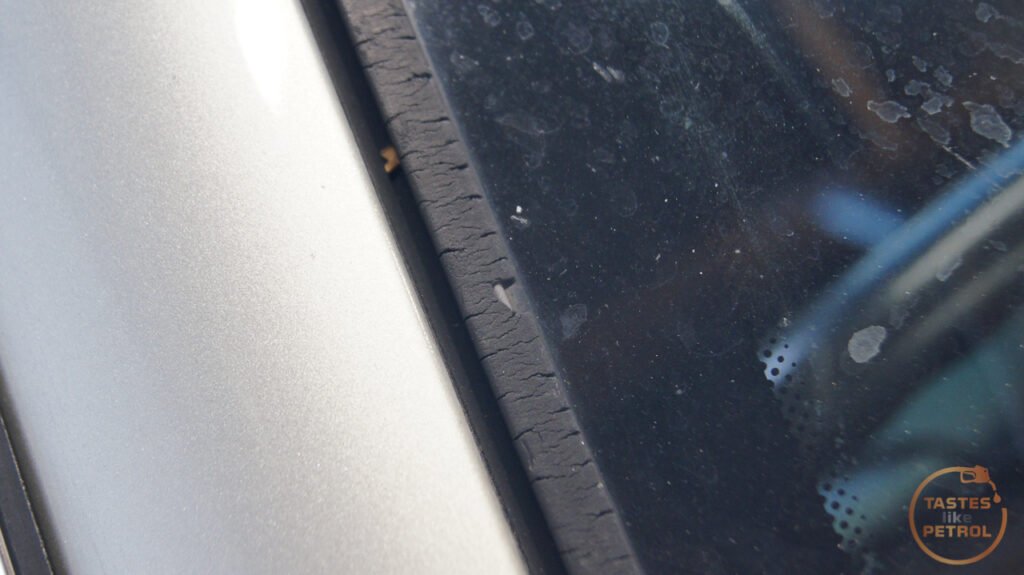
The trim around the windscreen is perished and falling to bits

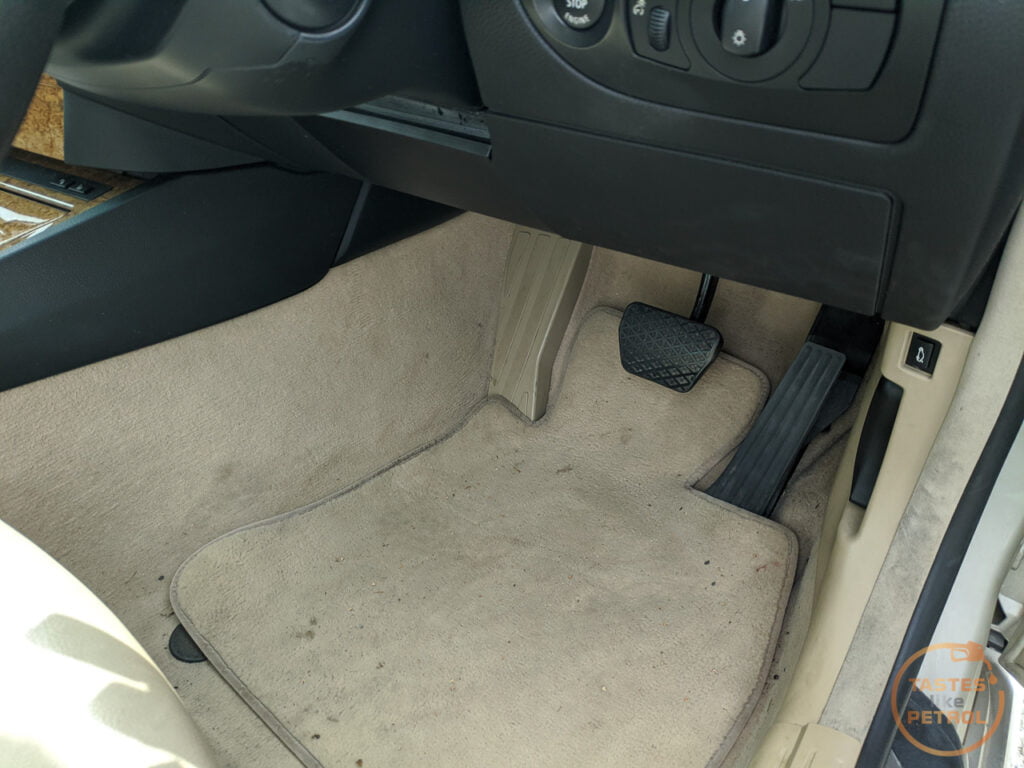
And it generally just needs a damn good clean because the light interior leaves nowhere to hide

That's from this stupid junk idea of a cup holder. Yes, this thing is factory, and it was a very expensive option at that. It holds cups really well but has no way to stop any leaks/dribbles from going all over the carpet.



The exterior was covered in a thick coating of bugs from its travels south.
One of the first fixes to the interior was a free and easy one. Remove the roundel that someone has stuck onto the top of the i-Drive knob.

This came off easily with no damage, and little did I know that, unlike the E91 which has a similar knob, the E63 has leather on top of the button, but just silver plastic. Luxury!

Why anyone would cover that, who knows.
At this point, I took some photos of the car. Still filthy. I won't lie, there was something sadistically pleasing about driving around in such a big, imposing and expensive-looking BMW that was covered in dead bugs, bird poo, and mud.


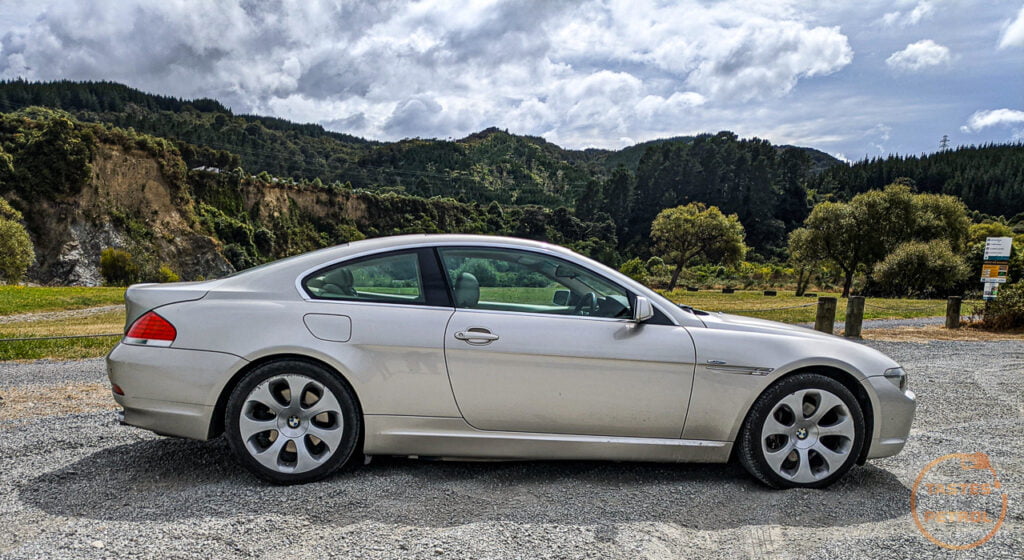

It's a cool looking car. I know the Bangle Butt isn't everyone's cup of tea (and its not really mine, if I'm honest), but the front and side profiles are very good (until you get to the back). Nice sweeping curves, and a big angry front. Make no mistake, this isn't a small car.
I needed some parts to do anything else to the car, so I ordered up what I needed. The last thing I could really do in the meantime was to convert the i-Drive radio frequency from the useless JDM setting to the NZ frequency. I don't listen to the radio much, because it's usually rubbish and Spotify is better, but since the AUX in this car is all done via cable it's easier to sometimes not plug in and just have the radio as background noise.
Being that I've had a few BMWs now I still have all the software set up on a spare laptop, so I hooked that up and following this guide, I hax0rd my way in and coded the radio. It's pretty easy to do, but also very easy to mess up and brick a module.

After a couple of weeks of waiting patiently (and not watching the tracking, which took a couple of days from Dubai to NZ and then almost two weeks of sitting in AKL before finally being left on my front doorstep in full view of a busy street, beneath a "do not leave parcels here" sign. Sigh) the parts arrived.
First up was to change the oil. This was harder than expected. Both because the engine is set so far back that if the car is on ramps you need to reach waaaay back, and secondly, because some monkey before me had over tightened everything.
Slowly eased the big girl up the ramps

This is the small panel you remove to access the drain plug and filter housing.

You don't think about it, but the drain plug and filter are at the very back of the engine, so they are almost behind the front wheel line, which makes it miles away from the front of the car. In hindsight, I would use the Quickjack next time.
No photos of this process because it was messy. Usually, you can remove a drain plug on the bottom of the filter housing and drain that before removal, but someone had over tightened and stripped that, so I had to remove the filter housing with it full of oil.
This guide is pretty good at showing how the job is done
https://youtu.be/woTGvS8eyiY
Strangely despite having the i-Drive oil level check, my engine also has a dip stick.


Next was to clean the cabin filter drains. I had previously cleaned the top drains when I got the car, since I knew it would be living outside, and they had quite a few leaves in them
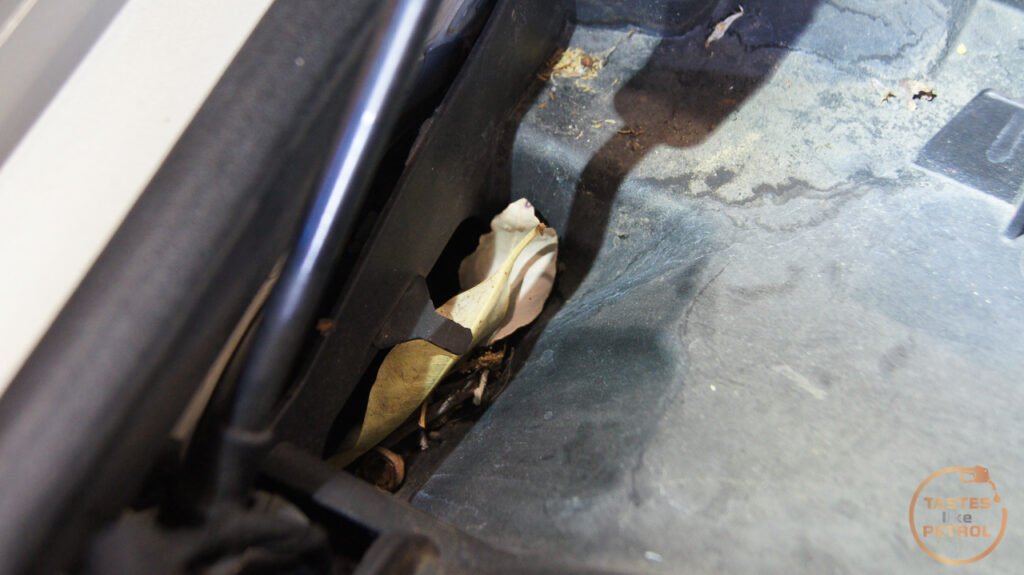
I didn't remove the trays under the filters though, and I had read that the drain under the brake master cylinder can block and cause water to back up and eventually flow into the cabin. Thankfully I haven't seen any leaks, but I wanted to check anyway.
The cabin filter housings are held in with a 13mm plastic nut and a metal clip. Undo the clip and turn the plastic nut about 90 degrees counterclockwise to free the housing.
Remove the housing (or place the RH side one with the sensors on it carefully on top of the engine) and you will have the trays and top drains

There is a small plastic cover over the drains. This just lifts out
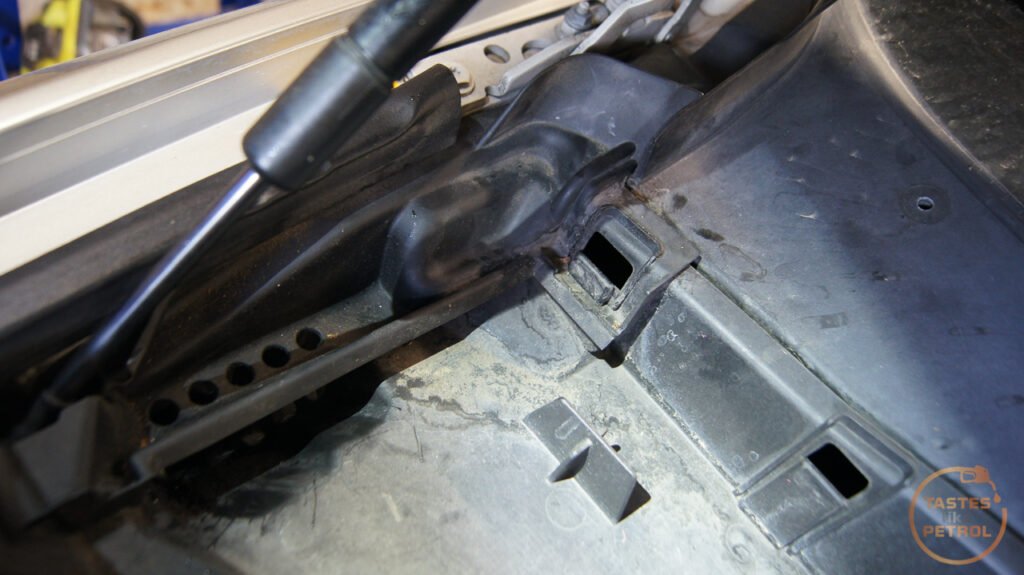
The trays are held in more of those 13mm plastic nuts, as well as a torx screw each. Torx screw is removed in the photo below.
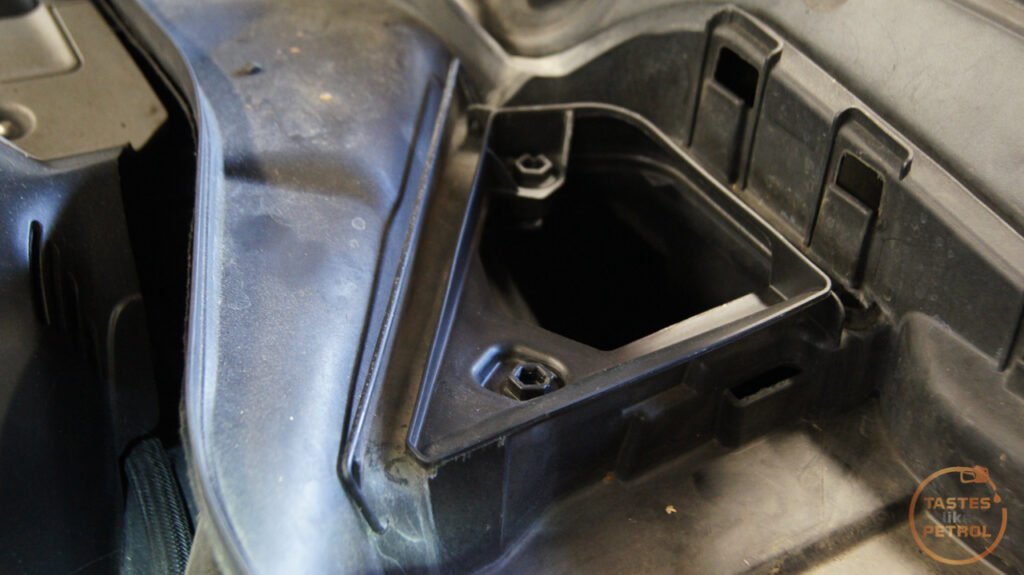
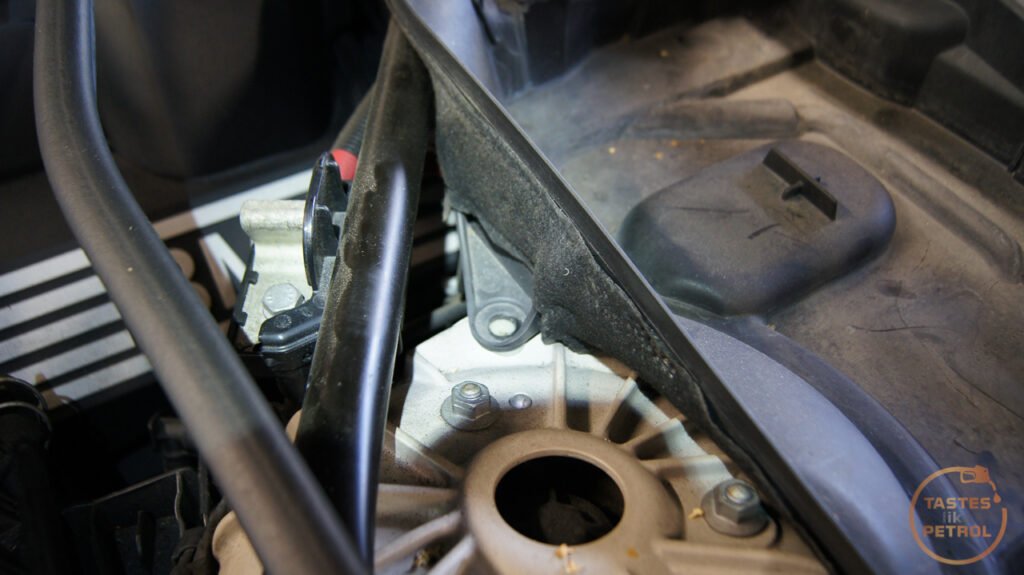
You also need to remove the rubber seal from the front, which just pulls off, and then this weird joiner which has a tab on the top you lift whilst sliding the contraption to the LH side of the car


There is another 13mm plastic nut under that thing, and then the trays lift out to expose the DME box, and the brake master cylinder.
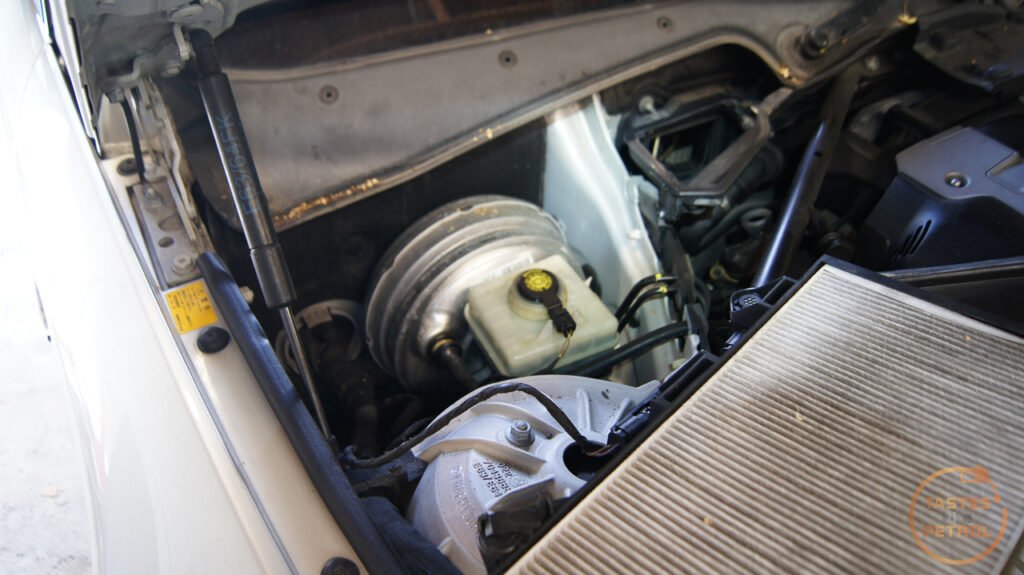
Its hard to see, but there was a couple of mm water sitting in the bottom of this compartment. The drain, which is under the brake master, was blocked and not flowing water.

I tried a few things to clear the drain, but nothing worked, so in the end, I shoved a big flatblade screwdriver into the drain and pushed until the rubber tube pushed through, and suddenly all the water drained out. It drains out into the space behind the arch liner, so if I took that off I could retrieve the tube, but it'll be fine for now. The water can just freely bugger off like its meant to.

With all the drains cleared I reassembled and moved onto the next job, which was to replace the windscreen trim/seal.
I watched a few videos on how to do this, but really it's as simple as pulling the old one out and pressing the new one in. The old seal will have a metal section inside it, so pliers can help remove it. Be super careful using any metal tools around the glass as the exposed edges of the glass are the weakest part.
A lot of people started at the top corners, but I started at the bottom, grabbing the strip and pulling it up. Once you get to the top corners it will tear away since there is no metal backing there. The thing to know is that the metal in the trim clips around and under the windscreen glass.
The top strip was a little harder to get started but with needle nose pliers and using the trim tool as leverage, I pried the trim out.

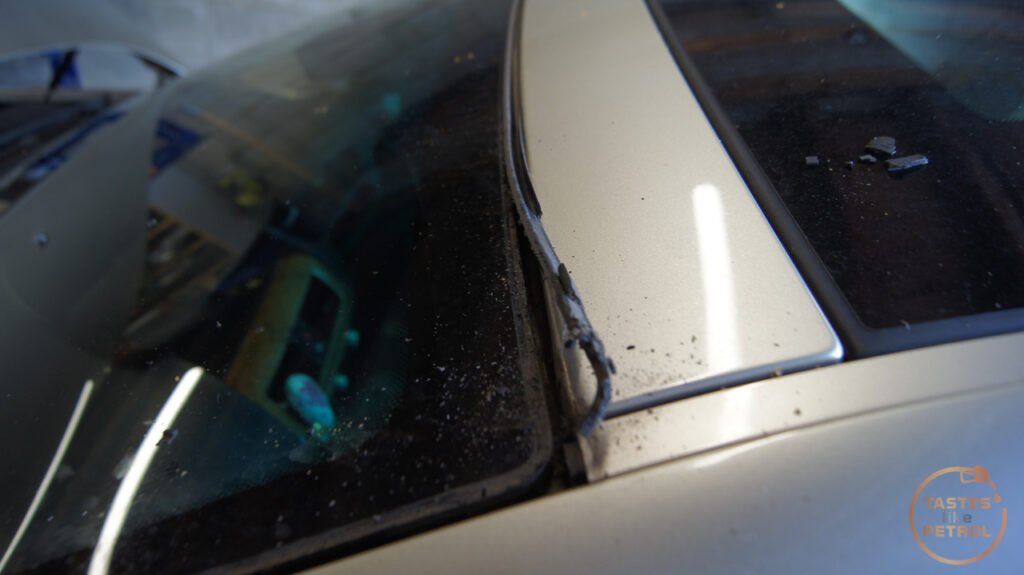
Vacuum up all the broken rubber that will be everywhere, and then carefully clean the dirt out of the channel the trim sits in. With it clean, you want to lubricate the trim and body/glass with lots of window cleaner and press the seal in by hand.
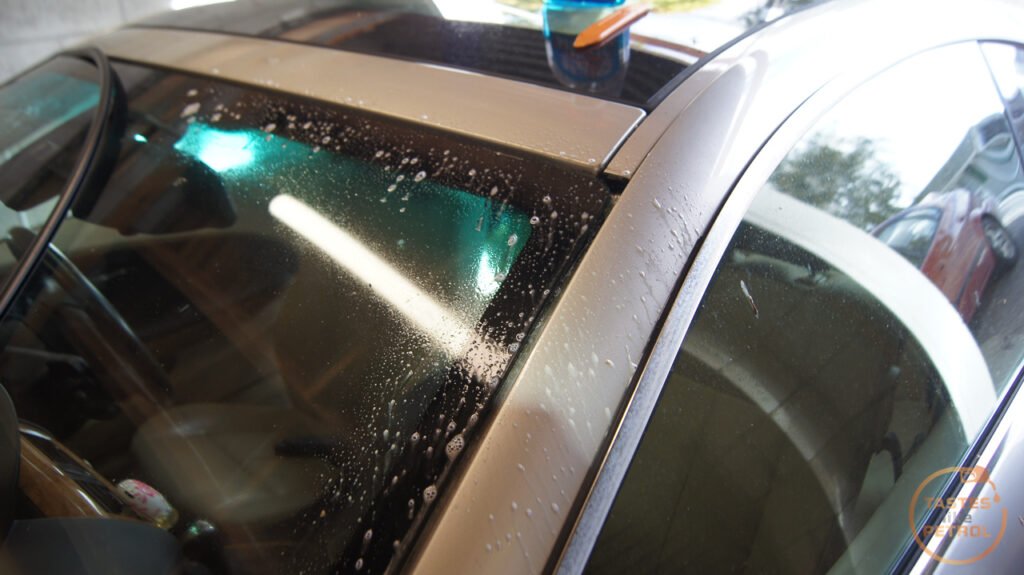
Remember there is a C shape to it that needs to hook under the glass. I started at one top corner, worked my way down that pillar, and then loosely went across the top (just to make both corners reach without having the trim arching in the middle) to the other corner and pressed that and that A-pillar into place before pressing the top section in properly. Its a bit fiddly, but not hard to do. It is hard on your fingers though!
Down the A pillars there needs to be a gap down the middle of the trim, and it needs to seat under the glass properly. I found using a flat trim tool worked well just by inserting it into the gap and pushing and pulling the tool back and forward a bit, moving up and down the pillar until the trim is in place.

The difference the new trim makes though, phew, its good.


Better than the old ruined one

With the new trim in place, everything got a clean. Starting with under the bonnet. I used some 303 Aerospace Protectant here, which gives the trim a nice look without being too glossy and wet like silicone does.

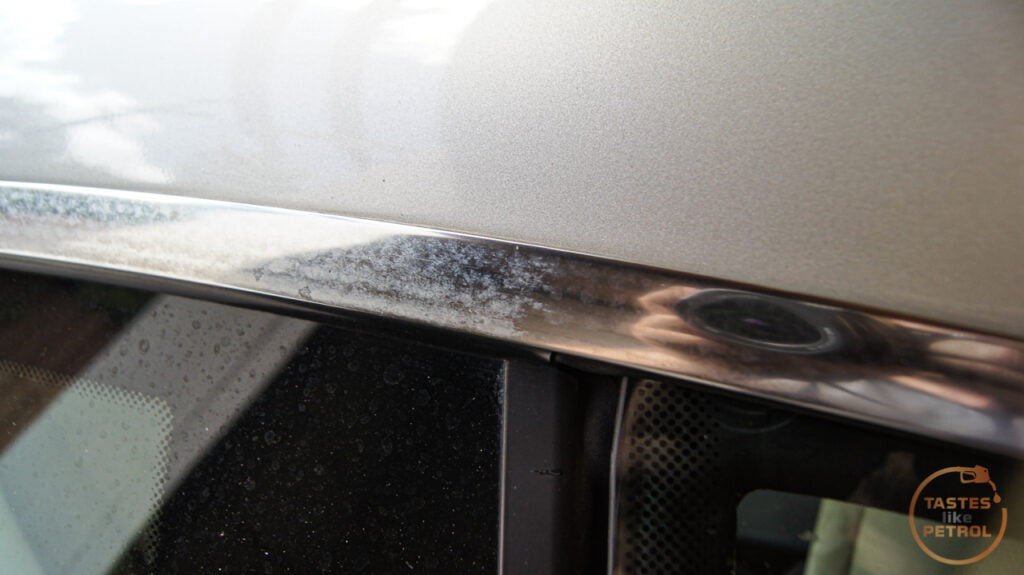
The stainless trim around the side windows is tarnished, So I gave that a quick buff using PlastX and a foam ball on the drill. I didn't want to go too hard here as I didn't want to risk damage to the trim. This took the top layer of oxidisation off. Left is before, right is after.
Surprisingly, the grilles were really tarnished too, so they got a good buff by hand. RH side done.

Half/half.

Whats the point in giant chrome grilles if you cant blind everyone?

And finally, the front roundel. The old one was held on with some weak as tape and pulled off easily. I cleaned it up and inserted the new grommets to hold the new badge in.

And a new badge. You have no idea how much of a difference this made as soon as I clipped that badge in place. My brain suddenly clicked and I felt a lot different about how the car looked from the front. That old badge really ruined the look. I think a big part of it was that the old badge had no gloss.

New and old. Ugh.

Oh yeah, one last bit before I backed the car out to clean it. The shifter knob. The old one has an exclusive chrome finish, which was peeling and letting the team down. I had a rare moment of wisdom, that since the chrome ones were rare and expensive, I'd go to Pick A Part and grab one from the E90 they had there. Sure, it's silver, not chrome, but its also not peeling.
Other than the finish, they are identical. To remove them, you just press the shifter button and pull up on the knob with force.


Now the car got a wash and moved back into the garage so I could clean the interior. As shown above, there was mostly just some localised grot in the footwells, and the seats had some human filth in places. The drivers door card had also had some abuse and taken a few shoes to the trim.
A good vacuum made a decent start in the foot wells

The door trim needed some hard core scrubbing with APC and a rag

It came up well though

The drivers seat was pretty grotty. I used the same cleaner and brush as I did on my old MX5 seats. The dirt was mostly in the texture of the leather.

The back is a slightly lighter colour afterwards

And you can see the two different shades on the base as a before/after

I could've worked the seat a bit more and got it a bit cleaner, but there is a fair bit of damage to the leather as it is and I didn't want to make it worse. The seat really needs a re-dye to fix it.
The floor mats got a much needed clean too. I sprayed a bunch of stain remover on these and then blasted them with the hose before using the Little Green Machine to pull the water back out. They turned out really well, even with some of that pro-detailer stripe going on.

They needed a good overnight dry near the dehumidifier to fully dry out.

The footwell carpets got a go over with the vacuum and Little Green too, especially the passengers side where coffee had been spilt on the carpet from the cup holder.
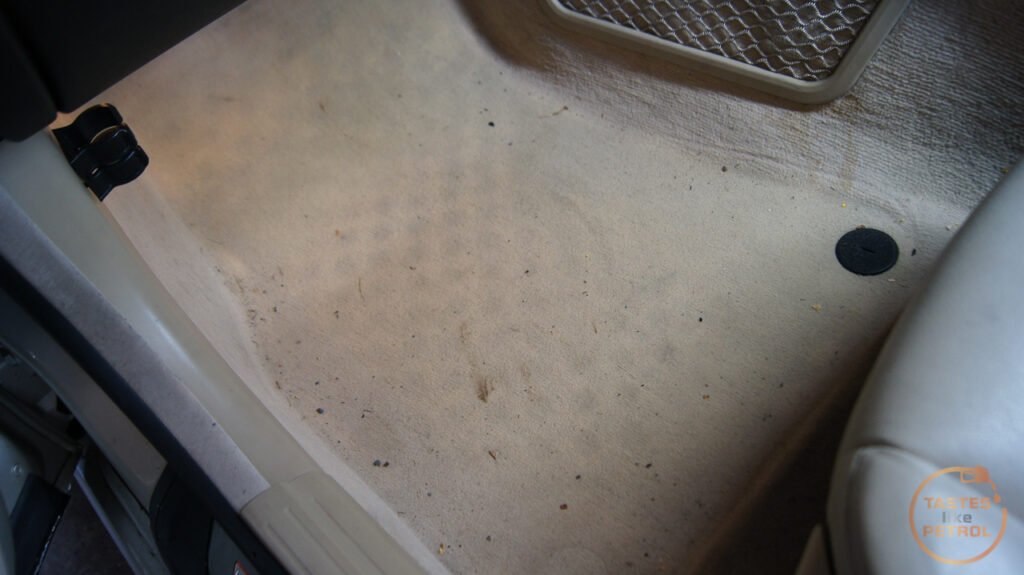

Such filth. Much clean.


Mmm, human filth juice.

That was the big bits of the carpet done. I waited until the next day to finish cleaning the interior trim, and condition the seats. The last thing for the day was to fit the new roundel sticker to the center cap ($20 for a damn sticker!). This went awol during a drive a couple of days after I got the car.

The next day (today) I gave the whole interior a good wipe down with APC, and used the brush attachment on the Dyson to get all the dirt out of the crevices, and then conditioned the seats with leather conditioner. I left this to soak into the leather whilst I worked on the exterior and then buffed it off.

One note is that the door seals have a felt sort of texture to them. Obviously this catches a bit of dust and fibres over time and discolours them. They aren't really that dirty though, they just need the fibres and dust removed. I found the easiest way to do this was to rub the trim with the palm of your hand to ball the fibres up and then pull them off. Made a big difference in a short period of time.

Since the exterior was nice and clean, but I didn't want to go the full hog and machine polish and wax it, I decided to give the Carpro Ech2o a shot. This is the waterless wash that I was using on the TVR, and I was impressed with that. I figured that since it leaves a fine ceramic coating on the surface it should help protect the paint while it lives outside until it sells. I went over the whole car; spray on, wipe off, buff off.
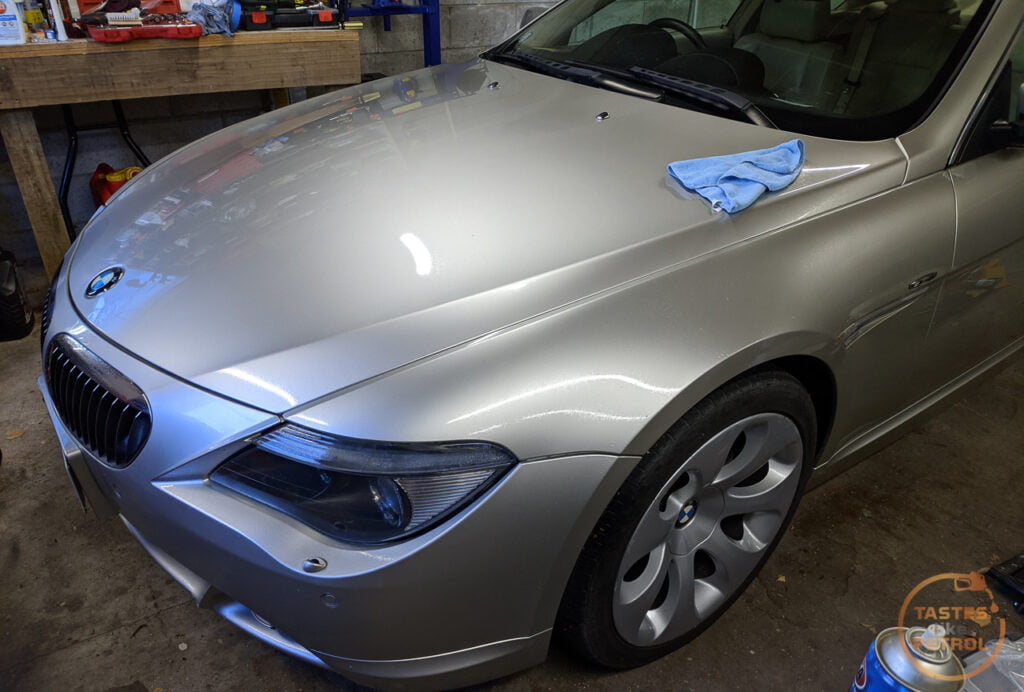
This left one last thing to do to the exterior; remove the ///M badge. It turns out this was easier than expected. I had the car parked in such a way that the sun was heating the badge up, and a quick prod with a trim tool soon had the s
 tty badge off, just leaving the adhesive behind. The metal badge was barely attached to the adhesive.
A couple more minutes of peeling and all the adhesive came off too. A wipe with Ech2o, and you'd never know that atrocity had been committed.

I still need to replace the rear roundel, but unfortunately it hasn't arrived yet.
The leather got a buff, and the mats went back in. Looking much better already.

All that was left to do was to take the car out, and grab some glamour shots. So thats what I did.


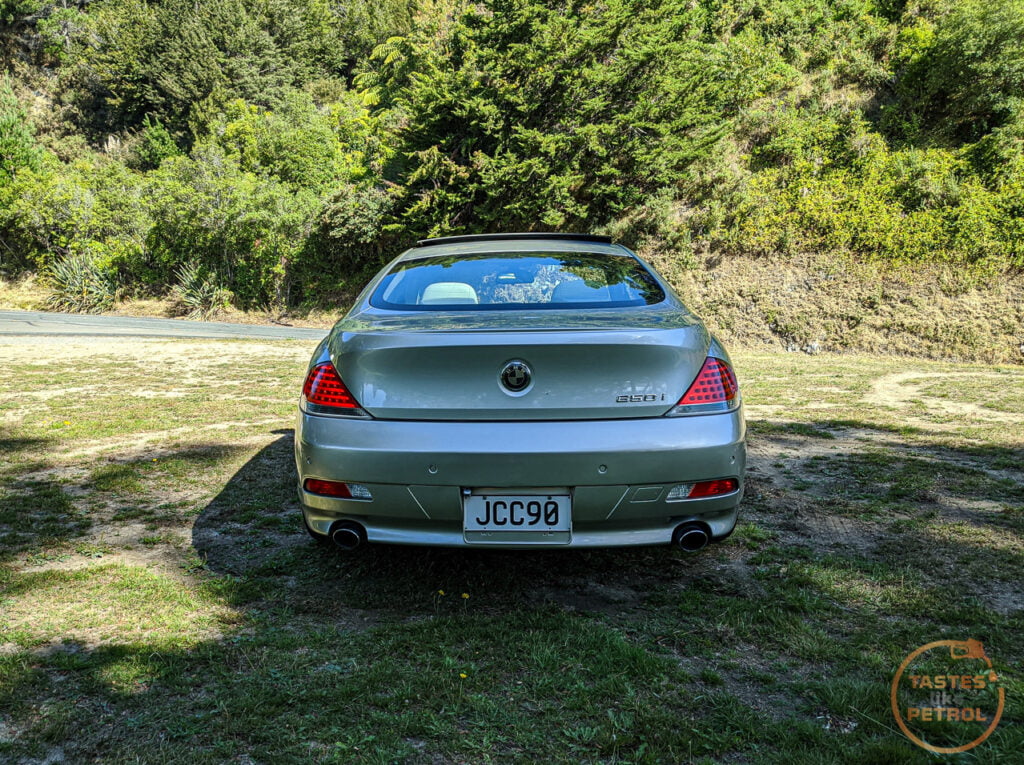


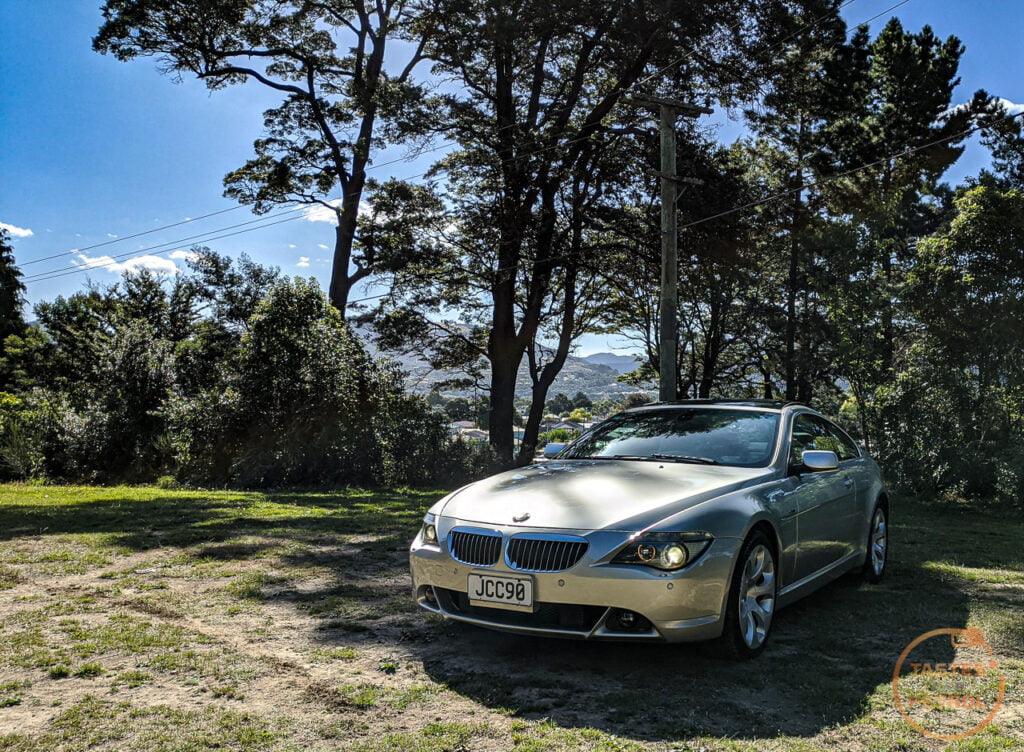


I'm very impressed with the gloss and shine from the Ech2o. I'll be using that on the Honda next for sure, that poor thing is well overdue for some love.
I've advertised the car on Facebook first, and will see what happens there (nothing, I'm sure), and then will go to Trademe soon. Someone will fall in love with it, it's a properly nice car. With any luck, this will be the one and only post on this car.
Thanks for the update; it is a nice car and so much better for the new roundels and glass rubbers. It's incredible that some buffoon switched the alloys around.
I loved to polish the exhaust tips on mine and then protect them with something like FinishKare 1000p Hi-Temp paste wax. You'll never believe how much it sets off the rear end - someone will definitely fall in love with it then, as the oval tips that are specific to the 645Ci and 650i look so good.
I loved to polish the exhaust tips on mine and then protect them with something like FinishKare 1000p Hi-Temp paste wax. You'll never believe how much it sets off the rear end - someone will definitely fall in love with it then, as the oval tips that are specific to the 645Ci and 650i look so good.
bolidemichael said:
Thanks for the update; it is a nice car and so much better for the new roundels and glass rubbers. It's incredible that some buffoon switched the alloys around.
I loved to polish the exhaust tips on mine and then protect them with something like FinishKare 1000p Hi-Temp paste wax. You'll never believe how much it sets off the rear end - someone will definitely fall in love with it then, as the oval tips that are specific to the 645Ci and 650i look so good.
I did have a quick go at polishing the tips but unfortunately they seem to be tarnished or something and Autosol metal polish didn't really do much. I'm sure with some more effort they would come up better, but my supplies of effort had run out.I loved to polish the exhaust tips on mine and then protect them with something like FinishKare 1000p Hi-Temp paste wax. You'll never believe how much it sets off the rear end - someone will definitely fall in love with it then, as the oval tips that are specific to the 645Ci and 650i look so good.
KelvinatorNZ said:
bolidemichael said:
Thanks for the update; it is a nice car and so much better for the new roundels and glass rubbers. It's incredible that some buffoon switched the alloys around.
I loved to polish the exhaust tips on mine and then protect them with something like FinishKare 1000p Hi-Temp paste wax. You'll never believe how much it sets off the rear end - someone will definitely fall in love with it then, as the oval tips that are specific to the 645Ci and 650i look so good.
I did have a quick go at polishing the tips but unfortunately they seem to be tarnished or something and Autosol metal polish didn't really do much. I'm sure with some more effort they would come up better, but my supplies of effort had run out.I loved to polish the exhaust tips on mine and then protect them with something like FinishKare 1000p Hi-Temp paste wax. You'll never believe how much it sets off the rear end - someone will definitely fall in love with it then, as the oval tips that are specific to the 645Ci and 650i look so good.
I'm totally buying a Bissell after your threads. However, the Little Green Machine has now been superseded. They also offer a hand held steam jet, which seems quite handy.
Did you use Aerospace 303 to both clean and polish the plastics in the engine bay?
bolidemichael said:
They may well be tarnished in places, particularly the inner lip, which is a pain. I did mine with a dremel (or some attachment to a drill that had the same effect). It was good enough from a few pages, which is all you need.
I'm totally buying a Bissell after your threads. However, the Little Green Machine has now been superseded. They also offer a hand held steam jet, which seems quite handy.
Did you use Aerospace 303 to both clean and polish the plastics in the engine bay?
I think the Little Green has been replaced with the SpotClean. I have a steam cleaner, but haven't actually bothered to use it for anything. I can't rave about the little green enough; anything that can save the light coloured carpet in our house from staining after my Wife spills cranberry juice on it, twice, is a win in my books.I'm totally buying a Bissell after your threads. However, the Little Green Machine has now been superseded. They also offer a hand held steam jet, which seems quite handy.
Did you use Aerospace 303 to both clean and polish the plastics in the engine bay?
I did nothing to the engine bay but spray on the 303 and wipe it around a bit. It was fairly clean to start with, just with a coating of dust. It leaves a much nicer finish than silicone and is meant to protect and treat the plastics.
Gassing Station | Readers' Cars | Top of Page | What's New | My Stuff


