540HP NA 7L V12 3 seater
Discussion


ColdoRS said:
I don't think I've commented on this thread but I have been following for years and wanted to chip in and commend you for the effort and skill you're showing. Remarkable stuff.
All the best, look forward to seeing more.
Seconded. It’s a colossal amount of work. Awesome effort. All the best, look forward to seeing more.
F1natic said:
I designed this roll cage, used on the 97 longtail GTR when we did a further more hard core weight saving programme than we did on the original 95 GTR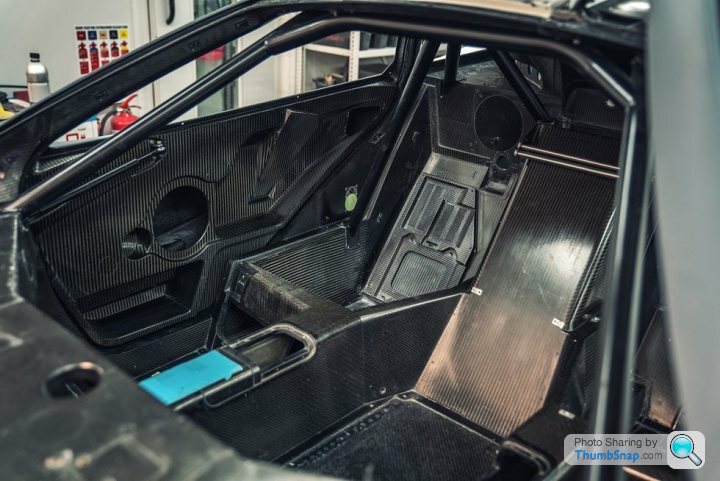
I had some of the less loaded tubes centreless ground down to a thickness of 0.9mm. Also designed a neat joint with an integral shear web where the front and rear leg joined the main hoop. Fun times!
May I be one of many to say what a mega job you're doing and how enjoyable it is to see the progress you're making
Thank you guys, the project is starting to get a head of steam and your words of encouragement really boost my enthusiasm.
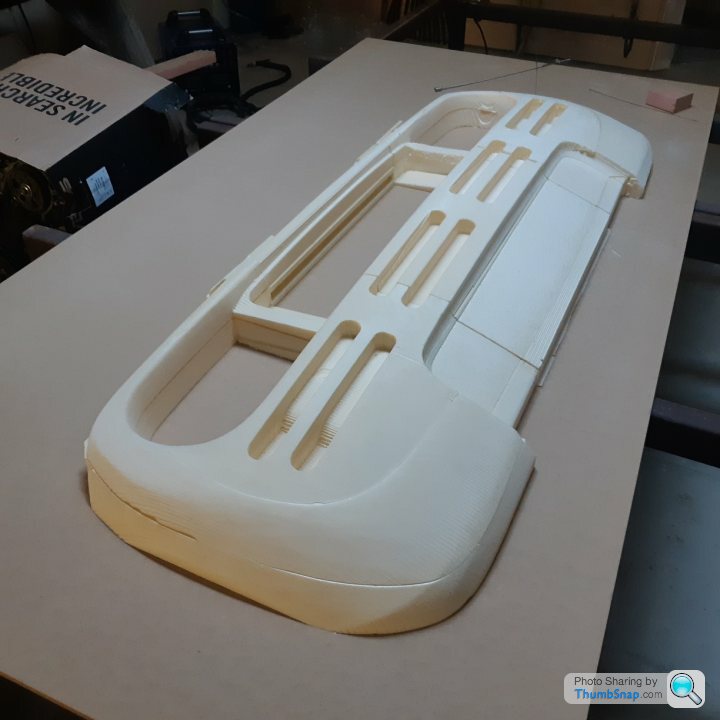
There is a car body trapped in polystyrene that I am trying to set free, have the next few project days booked out for gluing, sanding, bogging, sanding, glass and epoxy laminating, bogging, sanding and more sanding before applying the final epoxy seal coat. Then more sanding and priming, then sanding and priming again. At that point I will be thoroughly sick of sanding but ready to apply release to the plug and make a tool from it. The plug is in 3 main sections to allow adjustment for the build up of the outer skin thickness and the opposing polyester shrinkage factor (1mm/m), which I have no experience with, however I have found the most practical way to get something right first time is to do it a couple of times beforehand.
There is a car body trapped in polystyrene that I am trying to set free, have the next few project days booked out for gluing, sanding, bogging, sanding, glass and epoxy laminating, bogging, sanding and more sanding before applying the final epoxy seal coat. Then more sanding and priming, then sanding and priming again. At that point I will be thoroughly sick of sanding but ready to apply release to the plug and make a tool from it. The plug is in 3 main sections to allow adjustment for the build up of the outer skin thickness and the opposing polyester shrinkage factor (1mm/m), which I have no experience with, however I have found the most practical way to get something right first time is to do it a couple of times beforehand.
After a few hours of assessing various alternatives decided my favourite tune to sand the plug to is "smack my b h up" by The Prodigy - RIP Keith.
Glued the patterns to an MDF backboard with the raw epoxy resin, it gave plenty of working time to position the parts carefully. 24hrs later applied a thin layer of epoxy & West System 410 filler mixed to a peanut butter consistency, however its a bit like putting the crumb coat of icing on a cake, the thick sticky paste peels off the foam underneath all too easily, very frustrating but overcome by applying lots of patience. The epoxy is really good to work with though as there is no time pressure forced by a short cure window. 24hrs later sand back, blow down and repeat. 24hrs later, sand back, blow down and add the fairing layer. Once the fairing layer is cured will be adding all the little corner details and both side panels. Then it will be ready for epoxy and 200g glass cloth.
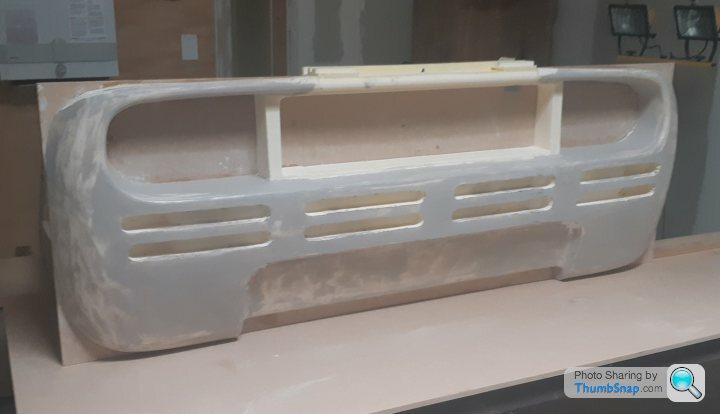
h up" by The Prodigy - RIP Keith. Glued the patterns to an MDF backboard with the raw epoxy resin, it gave plenty of working time to position the parts carefully. 24hrs later applied a thin layer of epoxy & West System 410 filler mixed to a peanut butter consistency, however its a bit like putting the crumb coat of icing on a cake, the thick sticky paste peels off the foam underneath all too easily, very frustrating but overcome by applying lots of patience. The epoxy is really good to work with though as there is no time pressure forced by a short cure window. 24hrs later sand back, blow down and repeat. 24hrs later, sand back, blow down and add the fairing layer. Once the fairing layer is cured will be adding all the little corner details and both side panels. Then it will be ready for epoxy and 200g glass cloth.
stuthe said:
said: Would a high filler spray primer not be an easier easier starting point in the foam?
I've used before to good effect before moving to epoxy /glass when making moulds
Seriously love this.
Make sure you make a strong frame behind the mould and Good luck with the mould release!
Stu
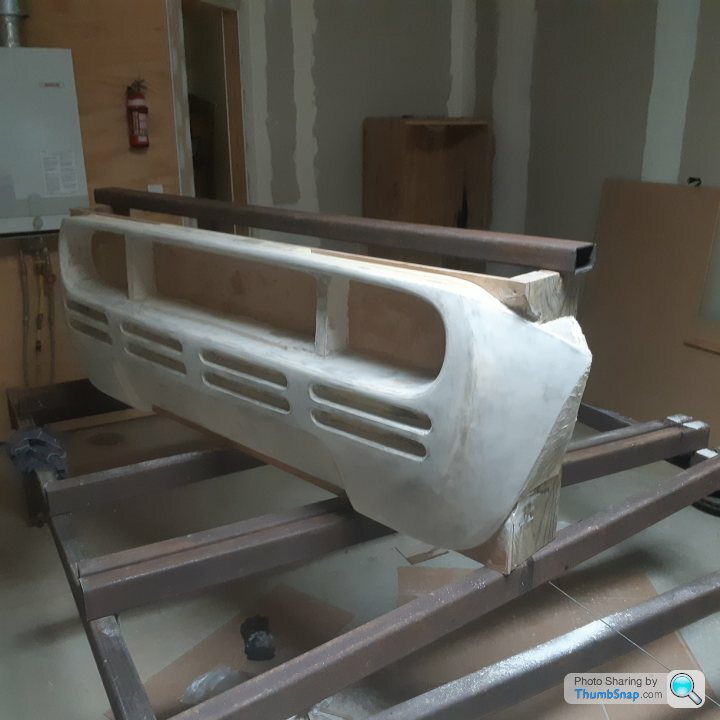
Thanks for the info Stu, much appreciated. I made a few blunders during cutting so had some big holes to patch in the foam, but wanted the practice of repairing them anyway. Have added a stout wooden frame since the plug needs to be transportable in a trailer so that I can get it painted in a spray booth. Will brace it with flat bar once all the glue has cured.I've used before to good effect before moving to epoxy /glass when making moulds
Seriously love this.
Make sure you make a strong frame behind the mould and Good luck with the mould release!
Stu
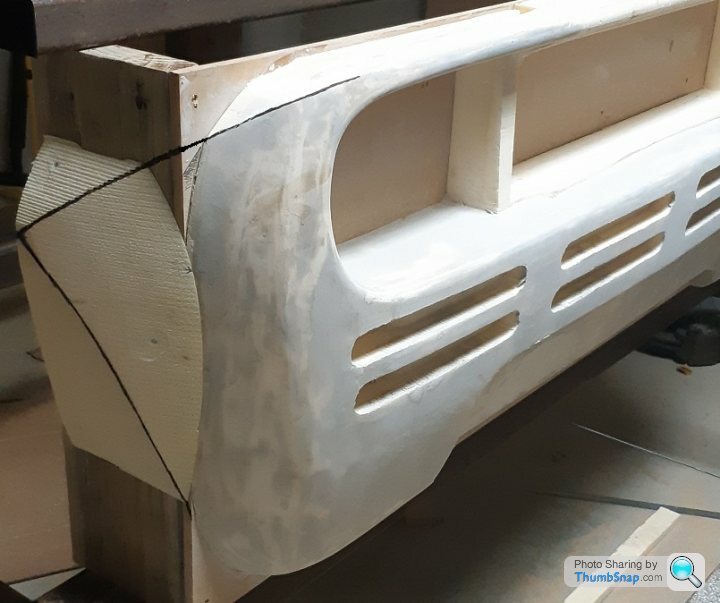
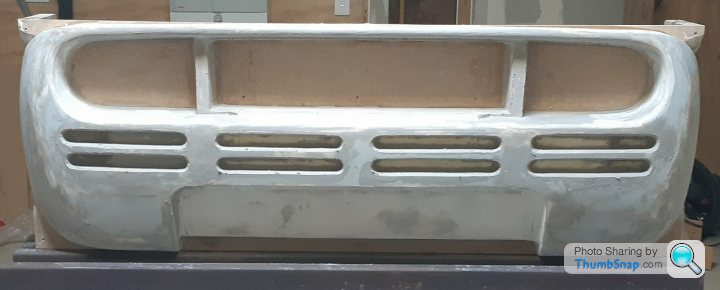
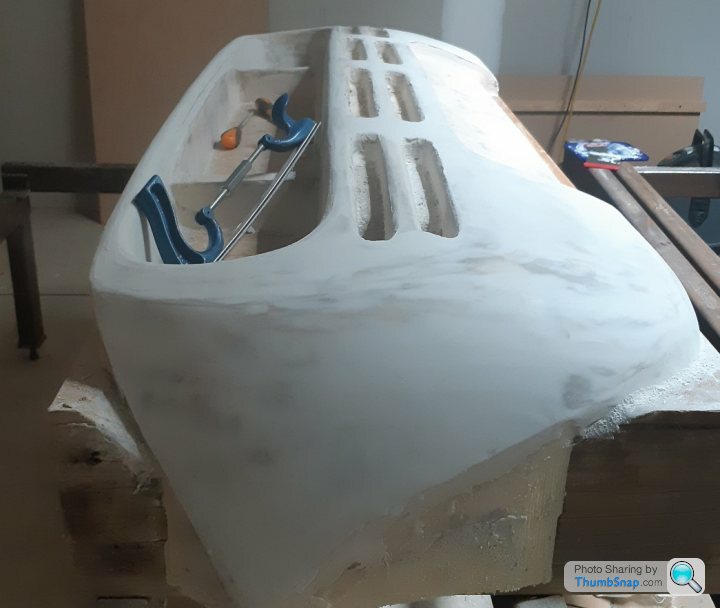
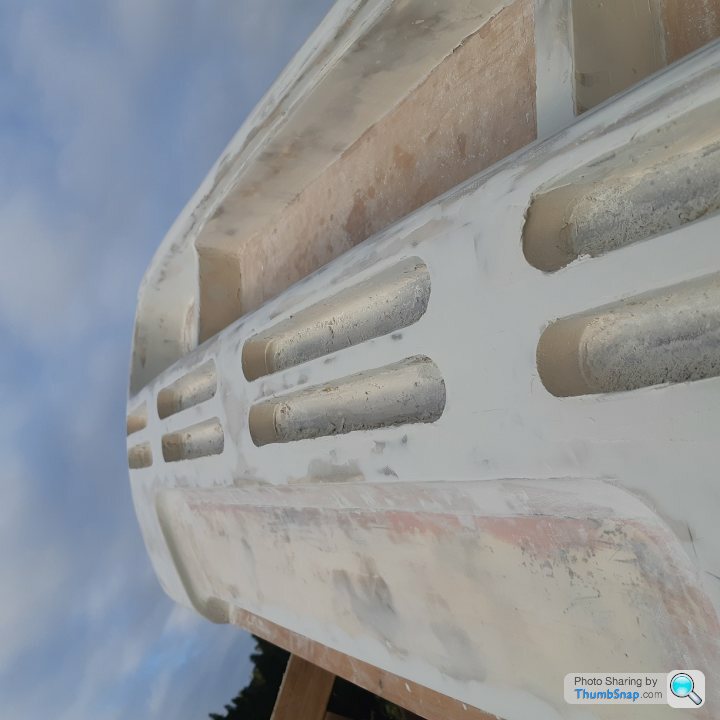
Surfaces are ready for glassing once the side panels are blended in. Overall the faces have enough draft to release, but the rear vent slots still need a lot of work to ensure they don't key the mould in place.
Surprised at how exothermic epoxy is even only 25mm deep, wasted a small pot due to taking too long on the alignment of the sides panels, by the time I got back to the pot to mix in some filler it was almost fully cured and REALLY hot. Cheap lesson that I do not want to repeat.
Edited by F1natic on Saturday 30th October 06:28
Thanks Driver.
Used the Kutzall ball in the drill to blend the corners, holy crap it was like trying to strangle a rabid beaver that is jacked up on methamphetamine! Does the business on anything it touches, chews through the wood very quickly and given the chance would eat a big hole in flesh instantly. Was leaving rooster tails of sawdust while cutting, great fun.
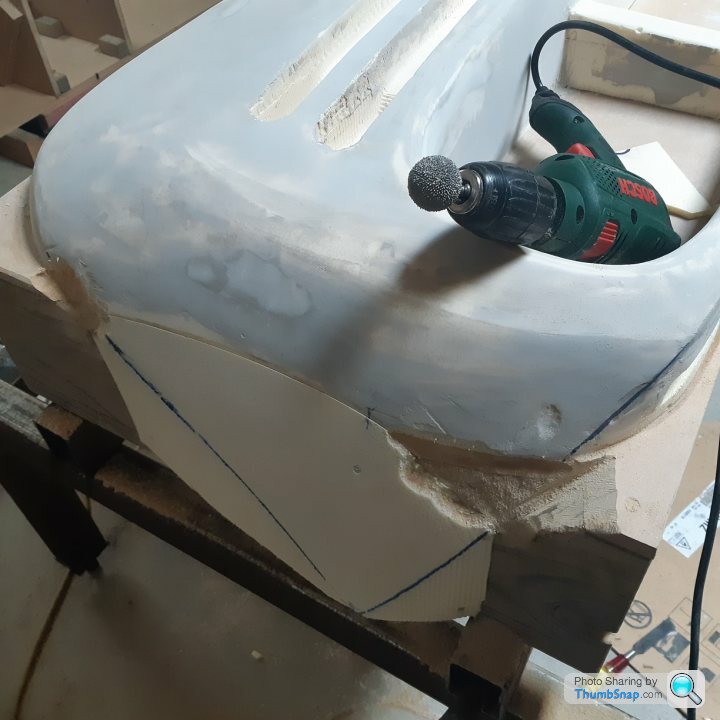
Used the Kutzall ball in the drill to blend the corners, holy crap it was like trying to strangle a rabid beaver that is jacked up on methamphetamine! Does the business on anything it touches, chews through the wood very quickly and given the chance would eat a big hole in flesh instantly. Was leaving rooster tails of sawdust while cutting, great fun.
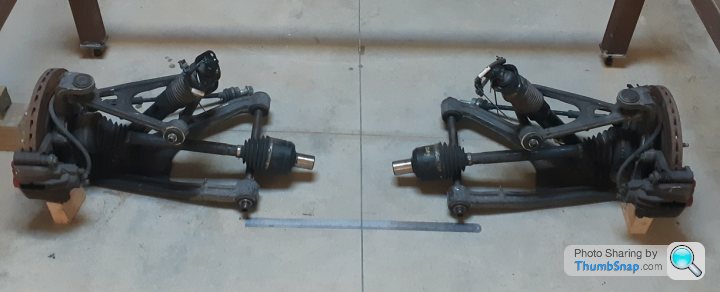
While waiting for epoxy to cure cut down some cap heads screws and barstock on the lathe to create the pivot axes for the rear suspension control arms, once positioned on the build table will be measuring the bump steer characteristics and adjusting positions of everything so that it is minimised. Each knee as shown weighs 40kg.
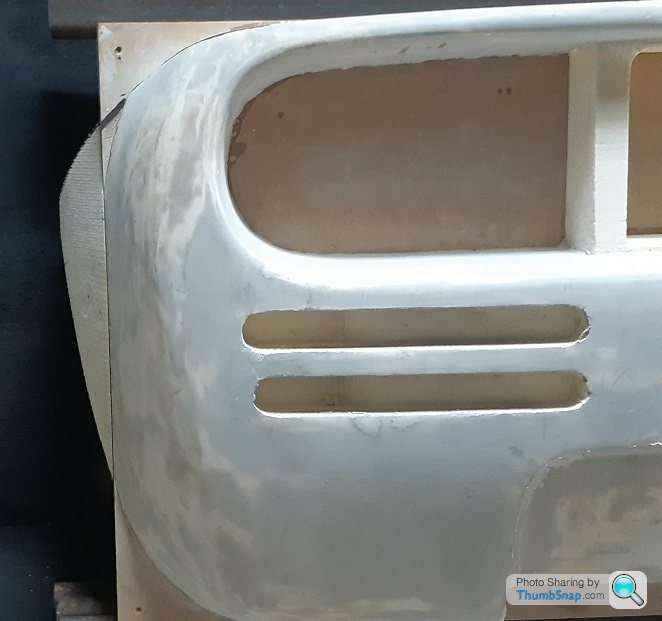
The devil is in the detailing, was concerned with the glass cloth not conforming to the sharp edges so have stepped back the edges of the 8 vent slots and will form the small radii with filler instead. Risk is the edge might come away with the mold when it is pulled but will be easy to sand out if required.
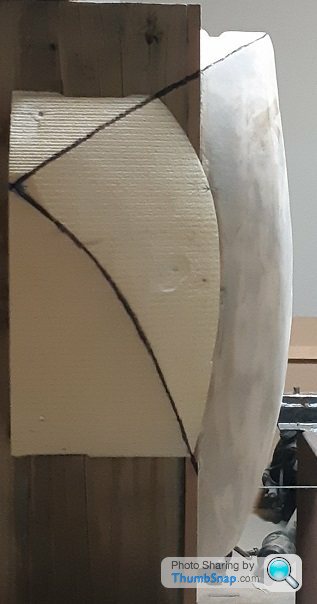
To achieve a 3 degree draft angle on all internal faces I ground the edge of my bog spreader and radiused the corner, with the left edge flat against the backplane the tool formed the correct draft when held perpendicular to the wall. Will soon find out if this is enough to release the mould from the plug.
The devil is in the detailing, was concerned with the glass cloth not conforming to the sharp edges so have stepped back the edges of the 8 vent slots and will form the small radii with filler instead. Risk is the edge might come away with the mold when it is pulled but will be easy to sand out if required.
To achieve a 3 degree draft angle on all internal faces I ground the edge of my bog spreader and radiused the corner, with the left edge flat against the backplane the tool formed the correct draft when held perpendicular to the wall. Will soon find out if this is enough to release the mould from the plug.
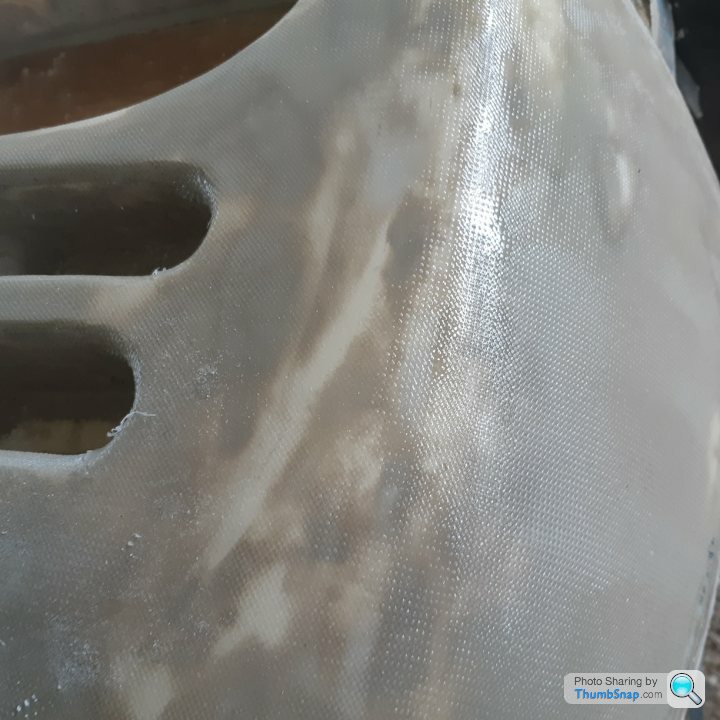
The 200gm plain weave glass cloth conformed to the curvature easily once orientated 45 degrees to the horizontal axis. The plug was quite vulnerable to bumps and knocks with just fairing compound over the polystyrene foam. With the layer of glass and epoxy I can now lean on the plug without denting it with a misplaced elbow. Basically following Mike Arnolds' tutorials - RIP Mike, thanks to his family for sharing these;
https://www.youtube.com/channel/UCVDILmX2ylWP1YLQm...
Once the epoxy cures have to remove the amine blush and make the plug dull with sanding;
One last thin coat of epoxy resin and microballoons to seal all the polystyrene from contact with the polyester body filler and paint;
Used a super fine finishing filler (Mipa P85), it must be 75% talc because it comes off a little too easily.
One more big day of work will have it ready for painting, then add flanges for tooling layup. Have bought all new gelcoat and resin, owe thanks to Curtis at NZ Fibreglass for all his advice.
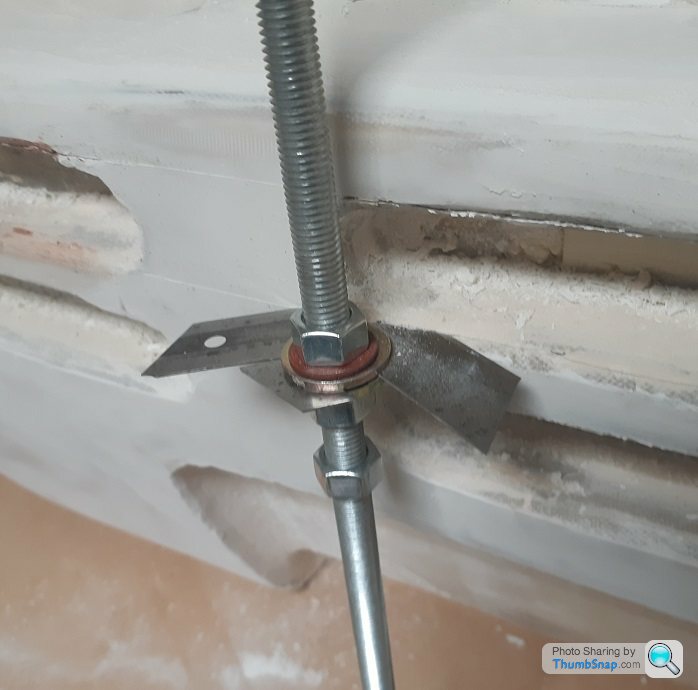
Measured up the vent slots and somehow the accurately cut foam has ended up mispositioned wrt the centerline, will chalk that one up to "learning experiences". To recover the correct dimensions I hacked together a height gauge from threaded rod and a bit of scrap steel. A pair of boxcutter blades held in place with washers and nuts gives an accurate tool for slicing through the glass cloth along the horizontal plane at the correct heights.

Easy to slide to block into position and hammer the back of it to make it cut deeply into the plug.
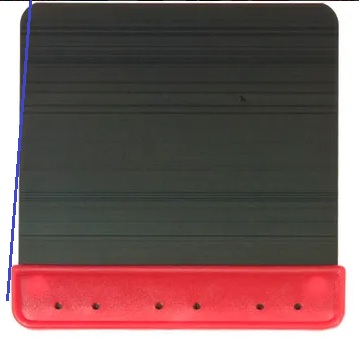
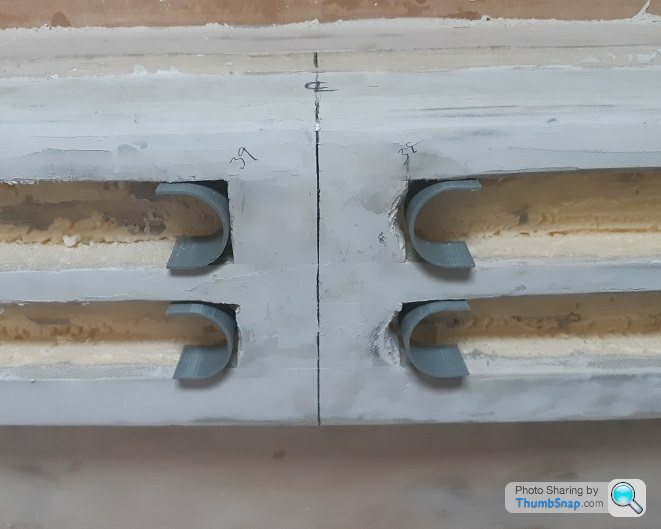
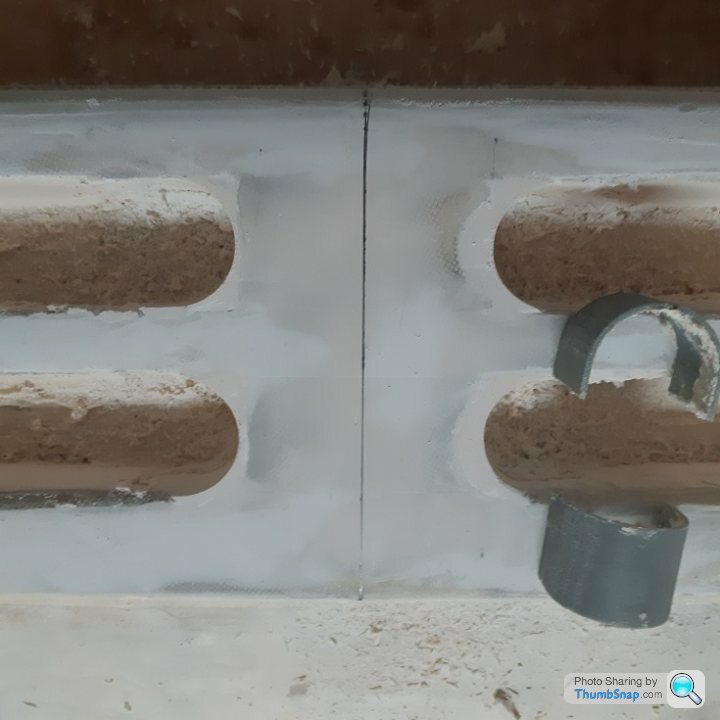
3D Printed some end caps to get the correct slot radius, these corners will be backfilled with epoxy bog to hopefully get an accurate result the second time.
Easy to slide to block into position and hammer the back of it to make it cut deeply into the plug.
3D Printed some end caps to get the correct slot radius, these corners will be backfilled with epoxy bog to hopefully get an accurate result the second time.
Thanks Rob, the weekend is too short but at least the long daylight hours here in the southern hemisphere help.
Good advice Warren, I would have had to know that first before I can forget it! Only going to do one layer on the tool per day to reduce shrinkage and see where the final sizing comes out, can adjust the matching parts accordingly.
Can recommend using 3D printed PLA forms to mould the epoxy bog against. One coat of Meguiars max mold release wax and they popped right out no issues, and features are now within 1 mm of where they should have been - by the time tooling is done no one will ever know I mucked up.....now to add the remaining horizontal straight edges and the 3mm blend radii that is around each vent slot. The GTR's/LM's didn't have mesh inserts but the road cars do so will be putting the old flypress to good use when that time comes.
3d printing is a great way to get accurate patterns. If your print is accurate, light sanding and a Coat of epoxy should be all thats needed to get a smooth usable finish to take a mould off. You can actually 3d print a one off mould too.
Polyester resins are known for shrinkage. You can get some low shrink polyesters and vinylester resins for such work. Usually they are heavily filled which is what stops the shrinkage. You can use epoxy but it is a fair bit more expensive. For performance you probably want epoxy for the finished part.
Polyester resins are known for shrinkage. You can get some low shrink polyesters and vinylester resins for such work. Usually they are heavily filled which is what stops the shrinkage. You can use epoxy but it is a fair bit more expensive. For performance you probably want epoxy for the finished part.
Thanks Warren, I think I will try that with a few of the smaller components, i.e. air inlet ducting.
The last 20% of progress has taken 80% of the time, so that is a good lesson to take forward. Plug is booked into the spray booth next week for high build primer. Took it out into the late evening sunlight, it is a big improvement inspecting under natural light.
The last 20% of progress has taken 80% of the time, so that is a good lesson to take forward. Plug is booked into the spray booth next week for high build primer. Took it out into the late evening sunlight, it is a big improvement inspecting under natural light.
Gassing Station | Readers' Cars | Top of Page | What's New | My Stuff