540HP NA 7L V12 3 seater
Discussion


There is a good schematic illustration of the bare chassis in the book Driving Ambition
The chassis was built up from the following parts which were all bonded together using 3M 9323 paste adhesive
Floor, 10mm thick panel
Central Chassis, this part comprised of the central tunnels, central seat back area, outer seat back areas
Front Bulkhead, cast magnesium, steering rack was cast into this part
Lower Outrigger LH/RH, panel in front of passengers feet
Upper Front Outrigger LH/RH, made up the rear of the front upr wheel well
Upper Rear Outrigger LH/RH, panel above the passengers feet
Dash Upper, panel above the drivers feet
Dash Inner, as above
Spider Outer, internal roof panel including A, B and C posts
Outer Spider, external panel, including all door openings, roof, windscreen surround and rear quarter panels
Luggage Boxes LH/RH, behind central chassis
Fuel Cell Bulkhead, closed of the rear of the chassis behind the fuel cell
All panels were carbon skinned aluminium honeycomb construction with the exception of the inner/outer spiders
Front crash structure assemble was LH/RH impact structures and front floor
All coolant runs and wiring were routed through the central chassis tunnels
Hope this helps!
Superb insight, thanks again.
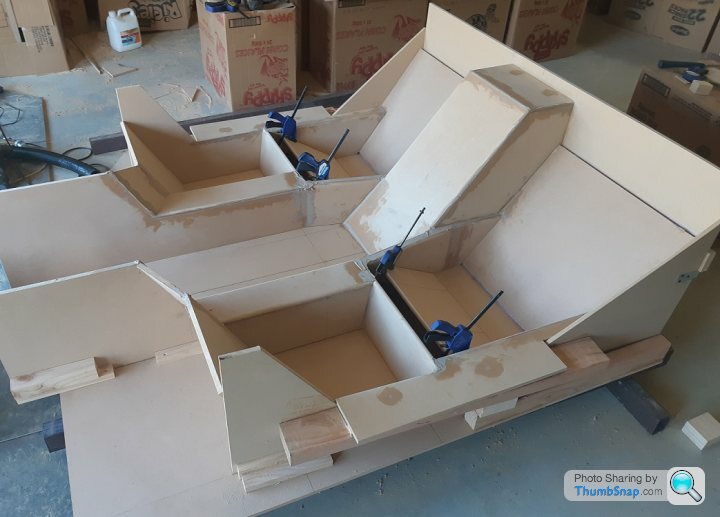
Radii have been added to edges and epoxy bog fills the gaps. Once the bog cures sanding will flat off all surfaces then primer will be sprayed on. Flat sand the primer then release wax will be slowly and carefully applied in multiple coats over a few days. Filleting wax will finish off the internal corners before spraying with a good film of PVA release agent.
Radii have been added to edges and epoxy bog fills the gaps. Once the bog cures sanding will flat off all surfaces then primer will be sprayed on. Flat sand the primer then release wax will be slowly and carefully applied in multiple coats over a few days. Filleting wax will finish off the internal corners before spraying with a good film of PVA release agent.
marine boy said:
Pretty sure the seller is on here, he contacted me a while ago about the feasibility of making his own F1 copy with limited production run
When you get to the stage if laminating parts shout and I'll let you know what I can remember of the laminate construction as the real F1
First, happy new year!When you get to the stage if laminating parts shout and I'll let you know what I can remember of the laminate construction as the real F1
And will do. He's letting me get them scanned. Out of all things, I'm trying to figure out how to pay the scanning company as they're UK based and I'm US. Will hopefully get settled up tomorrow.
Happy new year to all. It seems like the last 12 months went by rather faster than usual. Really going to have to focus on increasing my output in 2023 or this thing is not going to get completed.
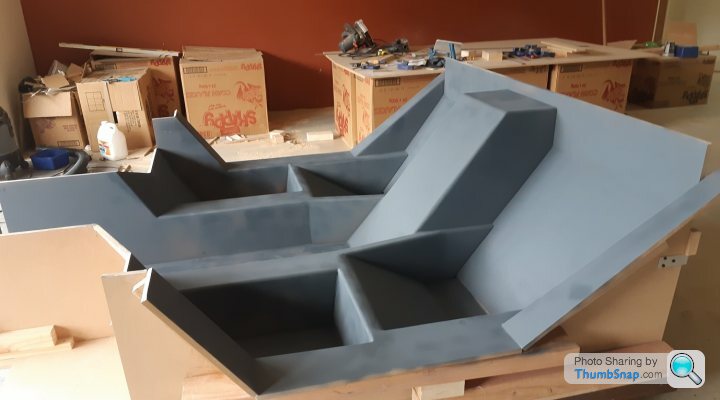
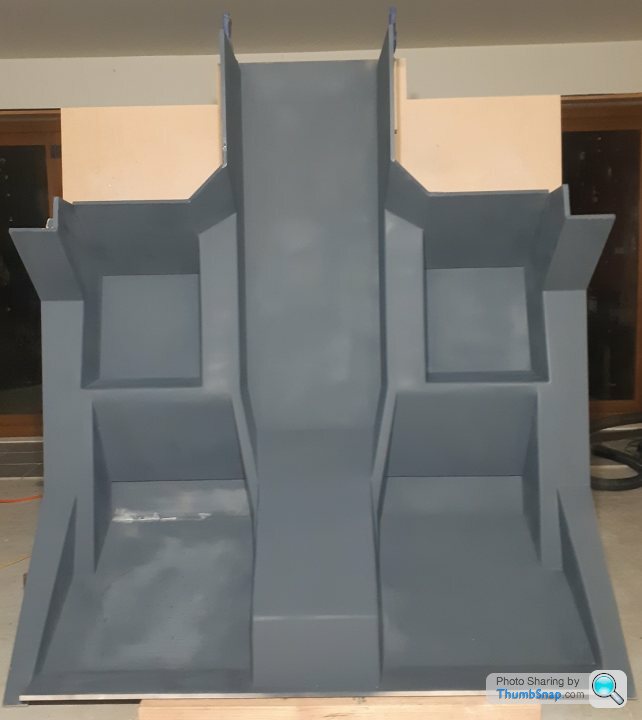
Interior plug has first patchy coat of primer on it, very proud of the overall accuracy and alignment of both sides, it is within a few mm of the latest CAD model. The passenger seats are really comfortable with a bit of padding in place, so all the fussing and delay was worth it. If this plug survives the polyester tooling being removed (and I will be doing a lot of waxing to ensure it does) then it will be kept aside for the final carbon/epoxy tooling in a few years time. Polyester/glass is fine for the test mule.
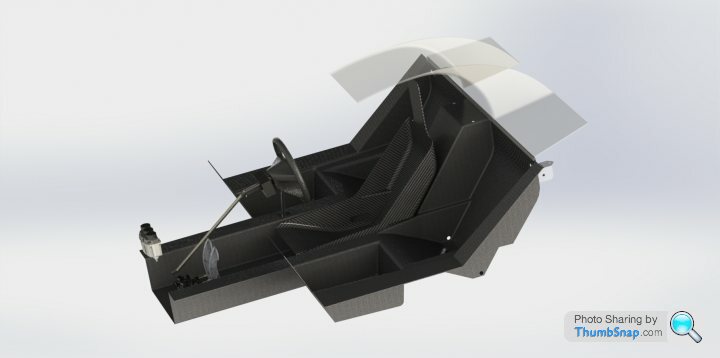
Now that the bottom of the door aperture is tooled the door design and final hinge detailing can progress - using dummy doors initially. Doors really force a decision on windscreen selection - a problem that has been put off for as long as possible as there is no good "off the shelf" option currently.
 [url]
[url]
It was interesting to reflect on the very subtle changes compared to the original CAD model from early 2021. Biggest improvements are fuel tank cover size and position and all footwells being properly sized.
Interior plug has first patchy coat of primer on it, very proud of the overall accuracy and alignment of both sides, it is within a few mm of the latest CAD model. The passenger seats are really comfortable with a bit of padding in place, so all the fussing and delay was worth it. If this plug survives the polyester tooling being removed (and I will be doing a lot of waxing to ensure it does) then it will be kept aside for the final carbon/epoxy tooling in a few years time. Polyester/glass is fine for the test mule.
Now that the bottom of the door aperture is tooled the door design and final hinge detailing can progress - using dummy doors initially. Doors really force a decision on windscreen selection - a problem that has been put off for as long as possible as there is no good "off the shelf" option currently.
[url]It was interesting to reflect on the very subtle changes compared to the original CAD model from early 2021. Biggest improvements are fuel tank cover size and position and all footwells being properly sized.
Edited by F1natic on Tuesday 3rd January 06:47

skwdenyer said:
F1natic said:
Doors really force a decision on windscreen selection - a problem that has been put off for as long as possible as there is no good "off the shelf" option currently.
Can you not use the M100 Elan windscreen like the F1 did?The top view shows the most obvious differences, so am fairly confident the original screen is not repurposed from existing stock.
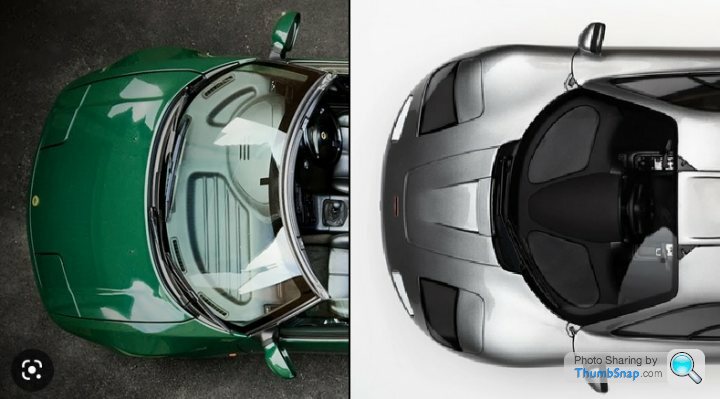
Interesting link for some of the small parts from the M100 that were used on the F1 though - https://www.youtube.com/watch?v=_rYSWyNY9ys
Interesting link for some of the small parts from the M100 that were used on the F1 though - https://www.youtube.com/watch?v=_rYSWyNY9ys
Edited by F1natic on Thursday 5th January 21:54
Phunk said:
skwdenyer said:
F1natic said:
Doors really force a decision on windscreen selection - a problem that has been put off for as long as possible as there is no good "off the shelf" option currently.
Can you not use the M100 Elan windscreen like the F1 did?I have seen youtube clips of hotrod screens being chopped with waterjet cutters, however the success rate is not 100% as far as my research shows as the stress distribution in each screen varies (polarised light shows this residual stress very clearly). LVVTA would accept scratch resistant polycarbonate if the glazing option cannot be solved practically, PC would be cheaper and quicker to fabricate option, however I need to pursue all glass options before making the screen frames and doors. The test mule will certainly use a polycarbonate screen, however goal is to have a glass unit ready to fit for certifying stage - a long way off yet.
Making big molds stable in multiple orientations is definitely an advantage. Finding and repairing all the little surface defects is certainly easier once the first primer layer was applied. Second primer layer went on much easier in the vertical position, last primer layer today then sand flat with 240 grit then 400 grit.
Due to the gap caused by the removable passenger seat panel a pile of bog shavings was able to fall out when disturbed by the spraygun blast, out onto the freshly painted left passenger seat. I hate it when that happens - sanding will rectify that.
Due to the gap caused by the removable passenger seat panel a pile of bog shavings was able to fall out when disturbed by the spraygun blast, out onto the freshly painted left passenger seat. I hate it when that happens - sanding will rectify that.
Something I haven't put -much- attention to. It really depends on price and what I want to do with the car (cruiser or if I plan some track time). Through a friend, I've hung out w/ Jim Glickenhaus a couple of times. His P4/5 uses a plexi windshield. Normally I would shrink at the idea but he drives his car regularly and it seems to be holding up fairly well. Cheaper than glass and easier to fit.
Gassing Station | Readers' Cars | Top of Page | What's New | My Stuff