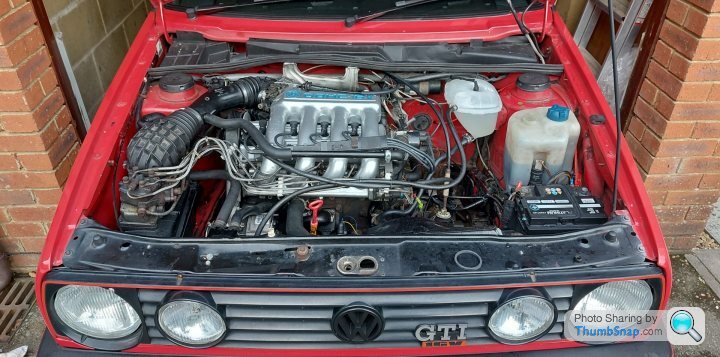
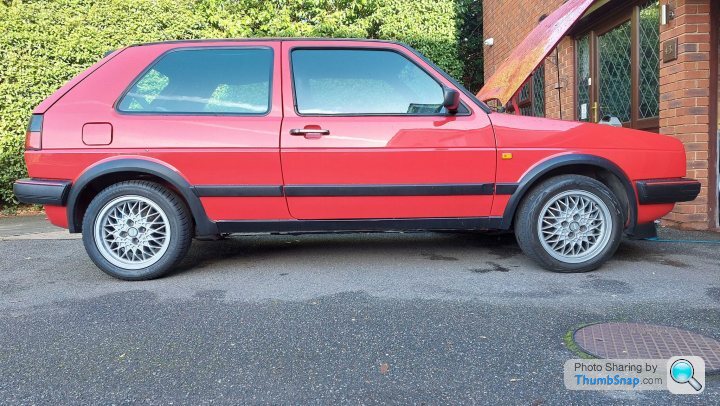
Another VW Golf Mk2 16v
Discussion


A bit more progress made today. The awkward metal coolant pipe has been replaced!
This required removal of the oil filter...
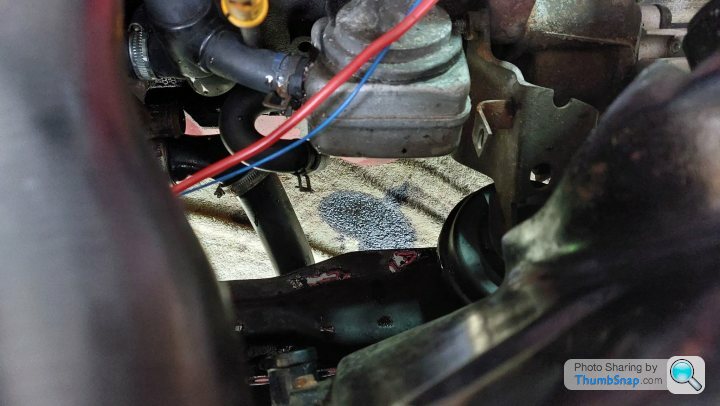
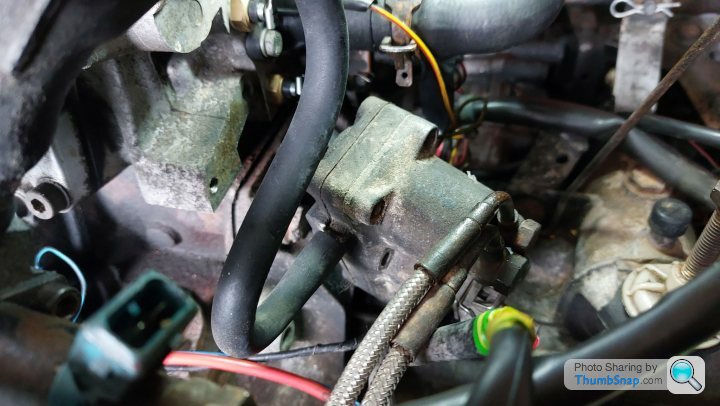
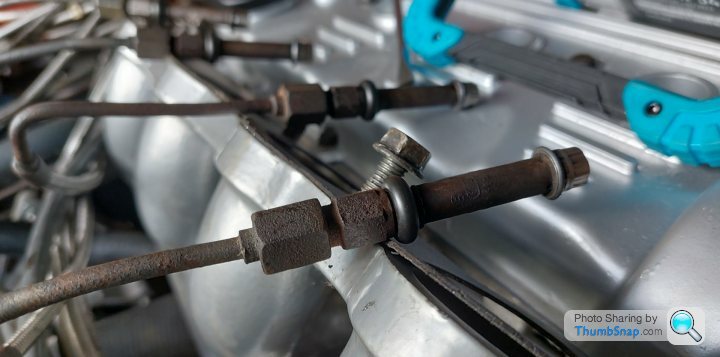
And this little box on the side of the head (fuel accumulator?)
Then, with a liberal dose of swearing, wiggling and strenuous negotiation it came free. It's not quite a match with the replacement one, as the take off to the expansion tank is in a different place, but I can run a longer hose to cater for that.
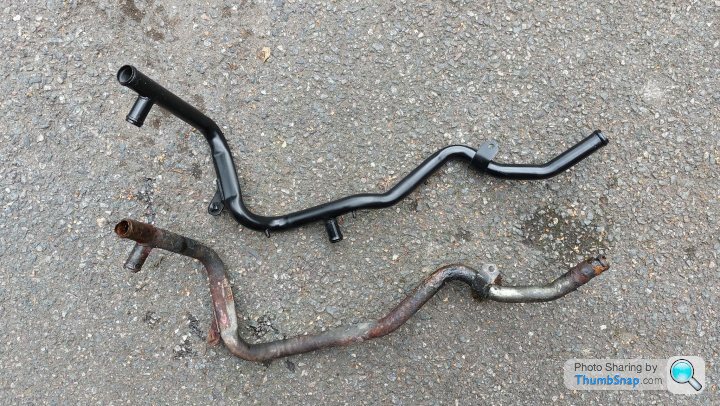
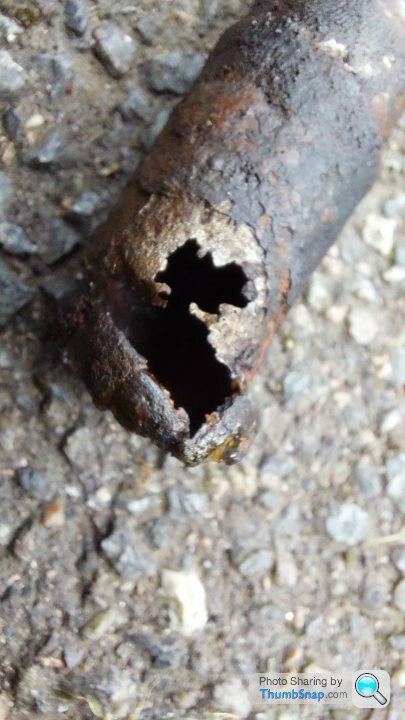
Old pipe was in a pretty shocking state, quite likely the original item from 1988! Absolute accident waiting to happen. Will give the cooling system a thorough flush through before filling it back up.
Still, progress is progress!
Cheers,
Drew.
This required removal of the oil filter...
And this little box on the side of the head (fuel accumulator?)
Then, with a liberal dose of swearing, wiggling and strenuous negotiation it came free. It's not quite a match with the replacement one, as the take off to the expansion tank is in a different place, but I can run a longer hose to cater for that.
Old pipe was in a pretty shocking state, quite likely the original item from 1988! Absolute accident waiting to happen. Will give the cooling system a thorough flush through before filling it back up.
Still, progress is progress!
Cheers,
Drew.
Great read 👍
I had a J reg 8V in Tornado Red, it had the rainbow interior and I absolutely loved it. I was a young man in those days and I utterly ruined it with 17 inch wheels, buckets seats etc.
I would go down a much more subtle route these days if the opportunity presented itself.
I had a J reg 8V in Tornado Red, it had the rainbow interior and I absolutely loved it. I was a young man in those days and I utterly ruined it with 17 inch wheels, buckets seats etc.
I would go down a much more subtle route these days if the opportunity presented itself.
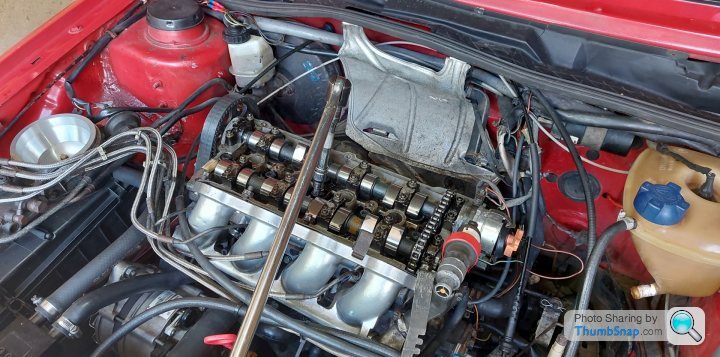
Today's little job was to replace the headbolts. With the aide of a torque wrench and the right information it was a doddle. 
Torque to 40nm to start with, then 60mn, then 90 degrees... then another 90 degrees. Job done.
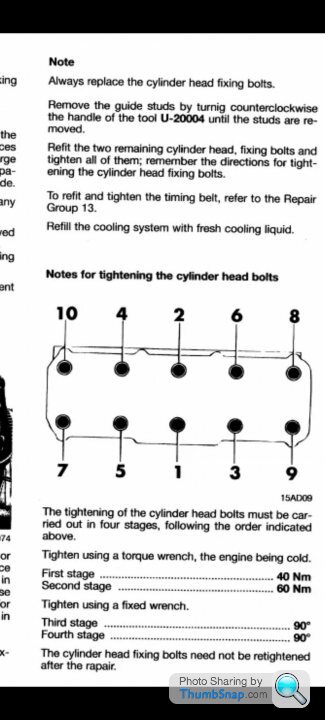
Torque wrench for the first bit obviously, then the fixed one.
Might not have been necessary, but they always say not to re-use head-bolts, so the peace of mind is nice!
Cheers,
Drew.
Torque to 40nm to start with, then 60mn, then 90 degrees... then another 90 degrees. Job done.
Torque wrench for the first bit obviously, then the fixed one.
Might not have been necessary, but they always say not to re-use head-bolts, so the peace of mind is nice!
Cheers,
Drew.
Gallons Per Mile said:
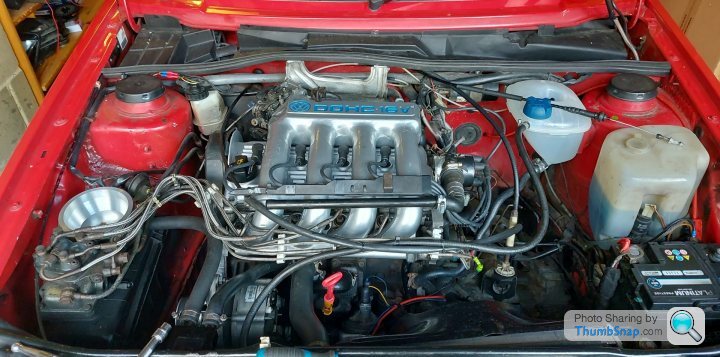
That looks a nice clean engine bay. Tidy even, for MK2 Golf standards. Their engine bays always look a bit messy with the amount of wires etc hanging around the place!
Probably because quite a lot of the bits and wires are in the boot at the moment! Cheers,
Drew.
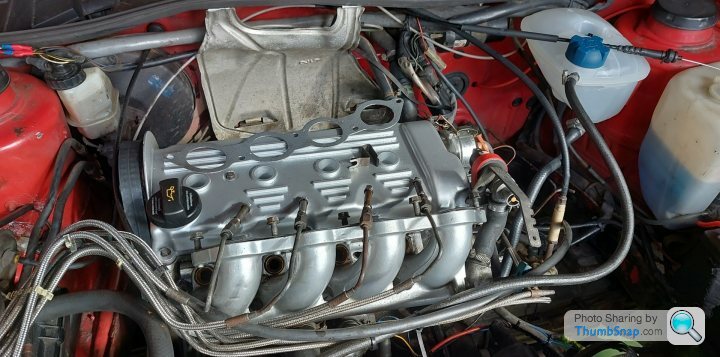
Reassembly continues!
First the rocker cover went back into place. The manual says 7 nm for these little bolts, and my torque wrench only goes down to 28. So I did "finger tight and a bit."
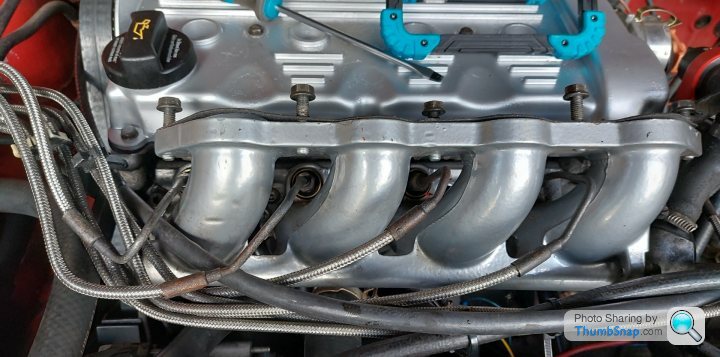
Then I replaced the injector seals. These were also well past their best!
But they look vastly better than the old ones! Injectors themselves are old, but still seem serviceable for now.
They are a push fit, which seems bizarre to me, but apparently that's how it is on old school k-jetronic fuel injection! Back into place they go! As you can see in this pic, I caught the clutch cable in the wrong place, so had to pull them out and re-route it.
 [url]
[url]
But a couple of hours of labour and we're not far from reassembly. Hopefully my gamble with the headbolts will pay off.
Cheers,
Drew.
First the rocker cover went back into place. The manual says 7 nm for these little bolts, and my torque wrench only goes down to 28. So I did "finger tight and a bit."
Then I replaced the injector seals. These were also well past their best!
But they look vastly better than the old ones! Injectors themselves are old, but still seem serviceable for now.
They are a push fit, which seems bizarre to me, but apparently that's how it is on old school k-jetronic fuel injection! Back into place they go! As you can see in this pic, I caught the clutch cable in the wrong place, so had to pull them out and re-route it.
[url]But a couple of hours of labour and we're not far from reassembly. Hopefully my gamble with the headbolts will pay off.
Cheers,
Drew.
Yesterday was the day of reckoning... put everything back together, filled the coolant up with a bit of water (I will top up with proper coolant once happy with it) and fired it up.
Started on first try!
Gave it a quick run around the block and it seemed to be ok. I left it on the driveway overnight and it seems that one pipe is leaking from down near the water pump, so that will need some investigation.
Otherwise it seems to be in good health.
Cheers,
Drew.
Started on first try!
Gave it a quick run around the block and it seemed to be ok. I left it on the driveway overnight and it seems that one pipe is leaking from down near the water pump, so that will need some investigation.
Otherwise it seems to be in good health.
Cheers,
Drew.
Another update on the old 16v. Some new springs.
We had originally aimed at trying to keep the car as standard as possible, but it turned out that the "standard GTI 16v" springs we had bought weren't for the 16v. They weren't even for a GTI as it happened, but an ordinary Golf... which led to a rather daft looking ride height and sloppy handling.
Trying to find a set of OEM 16v spring proved fruitless, so we decided to go for a mild OEM+ option, some Eibachs which are a -20mm for a standard GTI... which isn't far off what a 16v should be as standard. We already had Bilstein dampers fitted. I specifically didn't want to use aftermarket coilovers.
Turned out it was much much cheaper (like £50 cheaper!) to buy the Eibachs in the EU and import them than buy them in the UK - thanks Brexit - though it took a little longer for them to arrive.
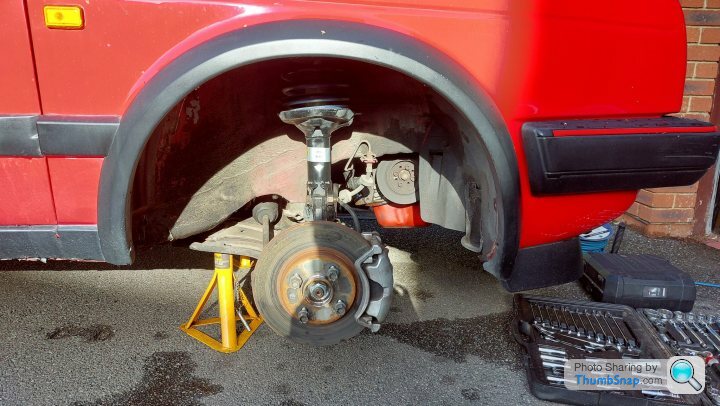
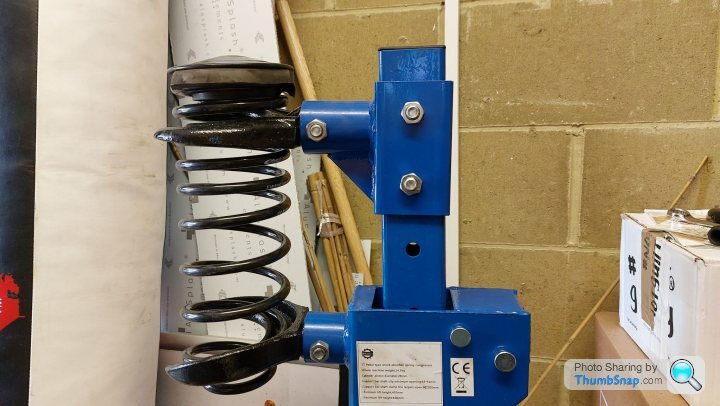
Rather than use a local garage (none seem to want to work on old cars nowadays anyway) or risk my life with some cheap spring compressors, I bought a proper hydraulic jobbie. Made the job very straightforward.
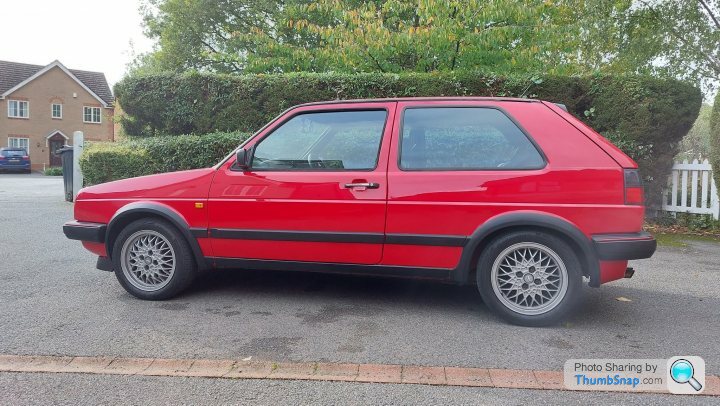
The car looked like this at the start.
Off with the old...
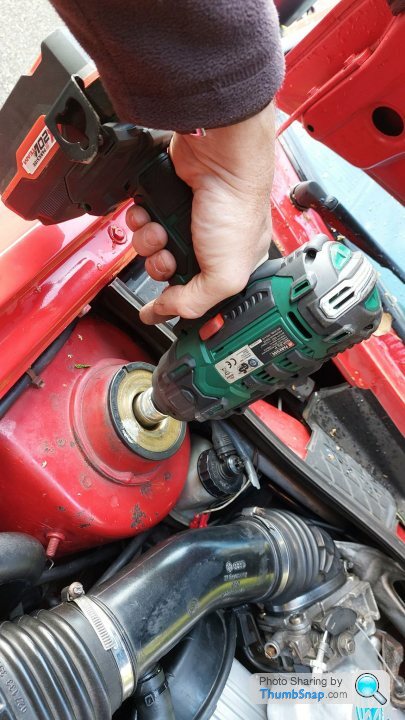
Having an Ugga-Dugga gun makes this much easier - just a few seconds. Otherwise you're faffing around with a circular spanner and a large allen key unless you have a "special tool"
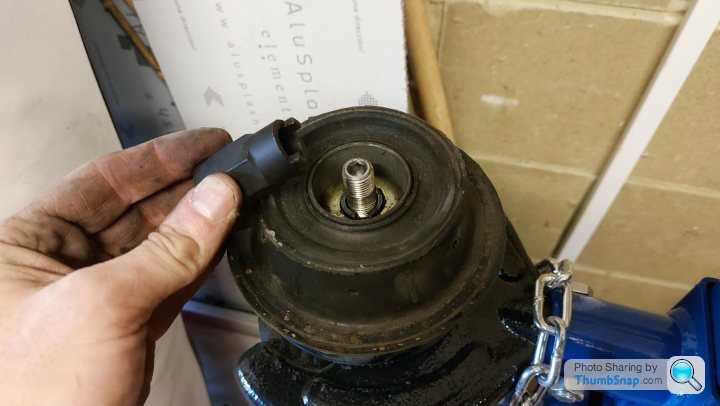
Once the assembly is out of the car you do need another special tool to take the front ones apart. It's a small key which allows you to unlock a nut on the top. You can make these by butchering an old socket if necessary.
The spring compressor I got made this very easy and safe!
Here's the Eibach compared to the standard Golf springs side by side. Quite a difference!

Then to whack it all back on the car.

All lowered back down the car looked like this.
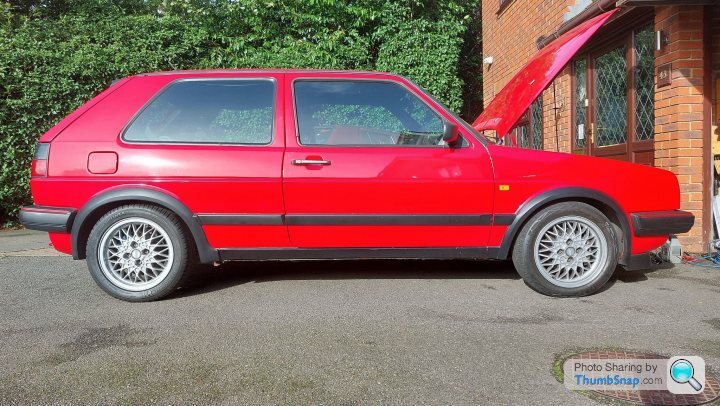
Not drastically lower, but poised rather than on stilts. I was looking for something that wouldn't really get noticed, but made the car have a sensible stance. Pretty happy with the results.
Went for a drive to settle everything in and was pleasantly surprised to find that the ride quality was hardly affected at all - just slightly firmer than before when cruising - soaks up bumps and undulations very competently.. Under braking and cornering the car is much more composed. There's still a fair amount of roll, but the car rolls over initially and then stiffens up noticeably when you push further, definitely an improvement!
Pretty pleased with the outcome. Looks better and drives better.
Cheers,
Drew.
Some new springs.We had originally aimed at trying to keep the car as standard as possible, but it turned out that the "standard GTI 16v" springs we had bought weren't for the 16v. They weren't even for a GTI as it happened, but an ordinary Golf... which led to a rather daft looking ride height and sloppy handling.
Trying to find a set of OEM 16v spring proved fruitless, so we decided to go for a mild OEM+ option, some Eibachs which are a -20mm for a standard GTI... which isn't far off what a 16v should be as standard. We already had Bilstein dampers fitted. I specifically didn't want to use aftermarket coilovers.
Turned out it was much much cheaper (like £50 cheaper!) to buy the Eibachs in the EU and import them than buy them in the UK - thanks Brexit - though it took a little longer for them to arrive.
Rather than use a local garage (none seem to want to work on old cars nowadays anyway) or risk my life with some cheap spring compressors, I bought a proper hydraulic jobbie. Made the job very straightforward.
The car looked like this at the start.
Off with the old...
Having an Ugga-Dugga gun makes this much easier - just a few seconds. Otherwise you're faffing around with a circular spanner and a large allen key unless you have a "special tool"
Once the assembly is out of the car you do need another special tool to take the front ones apart. It's a small key which allows you to unlock a nut on the top. You can make these by butchering an old socket if necessary.
The spring compressor I got made this very easy and safe!
Here's the Eibach compared to the standard Golf springs side by side. Quite a difference!
Then to whack it all back on the car.
All lowered back down the car looked like this.
Not drastically lower, but poised rather than on stilts. I was looking for something that wouldn't really get noticed, but made the car have a sensible stance. Pretty happy with the results.
Went for a drive to settle everything in and was pleasantly surprised to find that the ride quality was hardly affected at all - just slightly firmer than before when cruising - soaks up bumps and undulations very competently.. Under braking and cornering the car is much more composed. There's still a fair amount of roll, but the car rolls over initially and then stiffens up noticeably when you push further, definitely an improvement!
Pretty pleased with the outcome. Looks better and drives better.
Cheers,
Drew.
Nice touch the Eibachs! I don't think you can be too upset with a tiny bit lower but much better spring..
Lovely project btw..
It's funny the 8v vs. 16v thing still comes up 30yrs later.. It's a myth born from the fact an 8v can't match the top end of a 16v (like for like) so seat of the pants tells you it is more torquey than a 16v low down, when the reality is, it isn't!
Lovely project btw..
It's funny the 8v vs. 16v thing still comes up 30yrs later.. It's a myth born from the fact an 8v can't match the top end of a 16v (like for like) so seat of the pants tells you it is more torquey than a 16v low down, when the reality is, it isn't!
drewwa said:
Dr G said:
The "little box" on the side of the head is your warmup regulator, or WUR in Golf nerd speak
Ah... the infamous WUR! I wondered where it was. This is the thing you can drill and modify for more fuel at the top end as I understand it.Cheers,
Drew.
Sigh, good times.
Yep seconded on Vince at Stealth or alternatively there is a chap called Martin Challice who now does private work for customers and also has a youtube channel. Very knowledgeable and documented his nut and bolt build too.
WUR explained in this one on his channel:
https://www.youtube.com/watch?v=83i2Tq5PlrY
WUR explained in this one on his channel:
https://www.youtube.com/watch?v=83i2Tq5PlrY
I've had a few MK2's over the years but probably the best driving combo was standard dampers on either Bilstein or Eibach springs (can't remember now). Just a nice balance between comfort and handling. Did the 100mm drop stuff, but was rock hard and felt like it got bounced off course by potholes etc.
Great project, keep it up.
Great project, keep it up.

And she's back on the road after the winter, freshly taxed and MOT'd ready for another few months of cruising about and going to shows. A gentle retirement for this old girl.
Emissions seems healthy, CO = 0.15 (max 3.5) and HC = 86 (max 1200)
I hope in the next few years to completely restore her from the ground up as, whilst she looks good on the surface, there's a bunch of stuff that needs rejuvenating. All for future years though.
For now, nothing like a mildly tweaked valver to tool around in. Bring on the summer sun!
Cheers,
Drew.
Edited by drewwa on Saturday 1st April 17:44
Well, the old girl came out of mothballs for another MOT and a little cruise around Essex.
Passed MOT with flying colours - just as well as she only did a few miles last year!
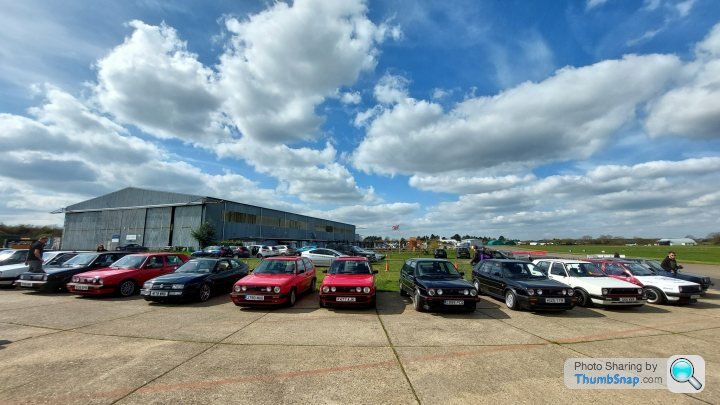
My son and I did a 300 mile trip around with the "South East Mk2s" group. Weather was glorious and all the cars behaved themselves. Me in my 16v and him in his his stripped out track prepped car.
Early start, but the weather came good.

Brilliant day out, and great to see a bunch of other mk2s on the road, ranging from standard stuff to big engine transplants and everything in between. Had about 20 cars in the convoy in total.
Cheers,
Drew.
Passed MOT with flying colours - just as well as she only did a few miles last year!
My son and I did a 300 mile trip around with the "South East Mk2s" group. Weather was glorious and all the cars behaved themselves. Me in my 16v and him in his his stripped out track prepped car.
Early start, but the weather came good.
Brilliant day out, and great to see a bunch of other mk2s on the road, ranging from standard stuff to big engine transplants and everything in between. Had about 20 cars in the convoy in total.
Cheers,
Drew.
Gassing Station | Readers' Cars | Top of Page | What's New | My Stuff