Vauxhall Cavalier GSI RestoMod Track Car
Discussion


Cambs_Stuart said:
Fantastic progress. Really enjoying seeing it come together.
When do you think it'll be out on the road?
Thanks Stuart, appreciate that. When do you think it'll be out on the road?
I'm not sure really, I hope to be out by the end of the summer but I'm waiting on a manifold and once I get that I can get it booked in for the rest of the system, and once that's done I can book it in for rolling road and MOT... a lot of plates to spin but I'm trying to keep it going. Not helped by working away half the year though.
Davie said:
Agreed.
I've been quietly reading this from the beginning and with each update, my jealousy grows stronger!
It's going to be something rather cool and special once it's all finished - love the way it's going, wheels are a great choice.
Well played.
Well I am glad you like the updates, I think I've been quietly reading this from the beginning and with each update, my jealousy grows stronger!
It's going to be something rather cool and special once it's all finished - love the way it's going, wheels are a great choice.
Well played.

It is coming on well, it's getting there slowly and the wheels go with the overall theme and direction I had in mind. I wasn't sure but the more I look at them, the cooler it seems to be. Not that I'm biased!
Well, being summer holidays it wasn't a great time off for getting stuff done with the Cavalier. I'm kind of pissed off about it, because the year is creeping away from me and so is the good weather. Spending half my year in the North Sea is starting to look like a bad choice for getting project cars over the line.
Had a magic holiday with the kids though and I wouldn't change that for the world, so I guess the car can wait.
Anyhoo, as I previously mentioned there is another Cav GSI owner who was having an exhaust system made for his car. The chap making his system, offered to make a manifold for mine and use the other Cav as a template. The bonus being that it would bring costs down a touch, too.
Here it is completed and fitted;
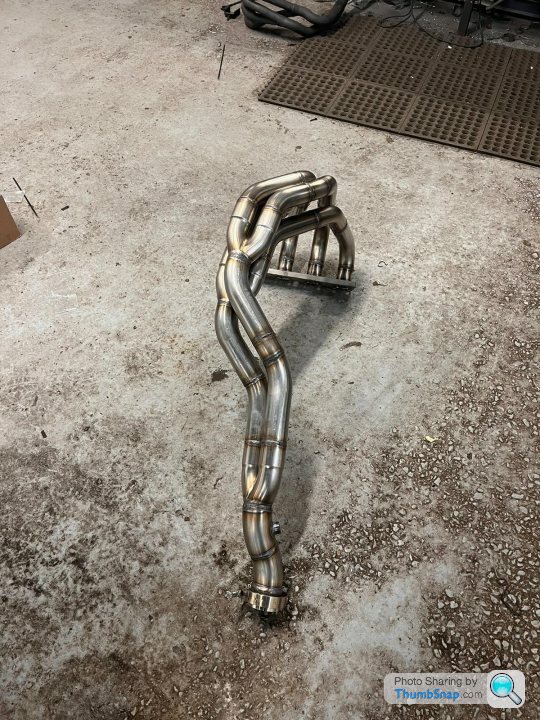
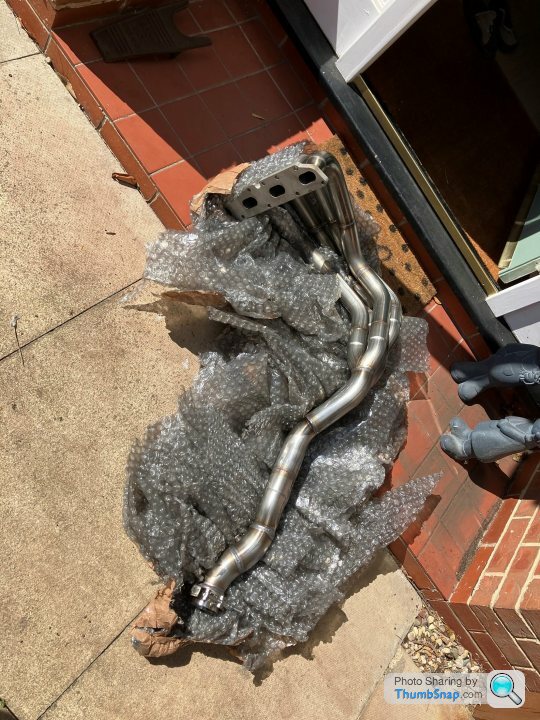

Pretty blown away with it, made to SBD/BTB spec as well so should make good power.
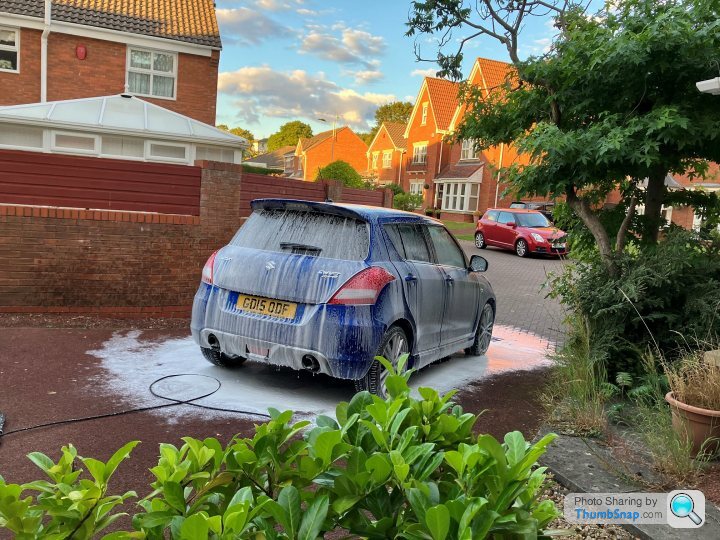
Picked up a new runabout for the wife while I was on holiday, too;
Had a magic holiday with the kids though and I wouldn't change that for the world, so I guess the car can wait.
Anyhoo, as I previously mentioned there is another Cav GSI owner who was having an exhaust system made for his car. The chap making his system, offered to make a manifold for mine and use the other Cav as a template. The bonus being that it would bring costs down a touch, too.
Here it is completed and fitted;
Pretty blown away with it, made to SBD/BTB spec as well so should make good power.
Picked up a new runabout for the wife while I was on holiday, too;
Mr Tidy said:
Your exhaust looks like a work of art. 
Thanks mate, it looks s t hot to me
Polly Grigora said:
Thank you for the update
As above, the exhaust is fantastic
No worries, I'm hoping the next one is better. A timed up engine, with complete wiring loom and ready for start up would be good! As above, the exhaust is fantastic
CouncilFerrari said:
Mr Tidy said:
Your exhaust looks like a work of art.
Thanks mate, it looks st hot to me Polly Grigora said:
Thank you for the update
As above, the exhaust is fantastic
No worries, I'm hoping the next one is better. A timed up engine, with complete wiring loom and ready for start up would be good! As above, the exhaust is fantastic
Looking forward to the next update
DuncanM said:
Everything is just so good, the exhaust is a work of art for sure 
It is looking smart now, I must admit. It's just doing my tits in that it's still not running and loose on the roads!Polly Grigora said:
Cheers
Looking forward to the next update
Me too matey, I can't wait to have it done now!Looking forward to the next update
CouncilFerrari said:
DuncanM said:
Everything is just so good, the exhaust is a work of art for sure
It is looking smart now, I must admit. It's just doing my tits in that it's still not running and loose on the roads!Polly Grigora said:
Cheers
Looking forward to the next update
Me too matey, I can't wait to have it done now!Looking forward to the next update
Pull your finger out, the car is far more important than holidays
Time for an update on the last few months of activity.
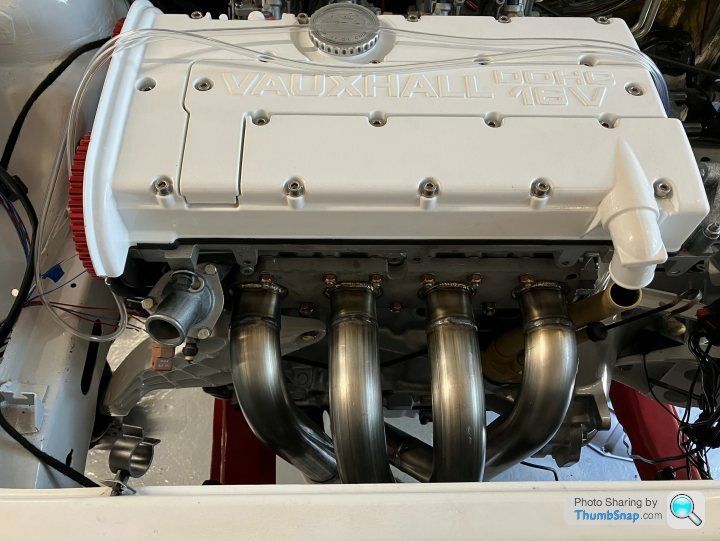
Following the delivery of the manifold, I tried to fit it and one of the exhaust studs unwound - the thread was fked. Anyway, a quick helicoil later and it was fitted. While the car was up in the air, I whipped the front wheels off and painted the front wheel arches with POR15, a job that had been on my to do list for a while.
Done;
 IMG_0399 by Chris Cav, on Flickr
That's now every body bit metal under the car protected from the elements.
What followed was a few months of not much at all owing to work schedules and travelling overseas.
I did managed to get the alternator and PAS pump bushes stripped and painted though. Before;
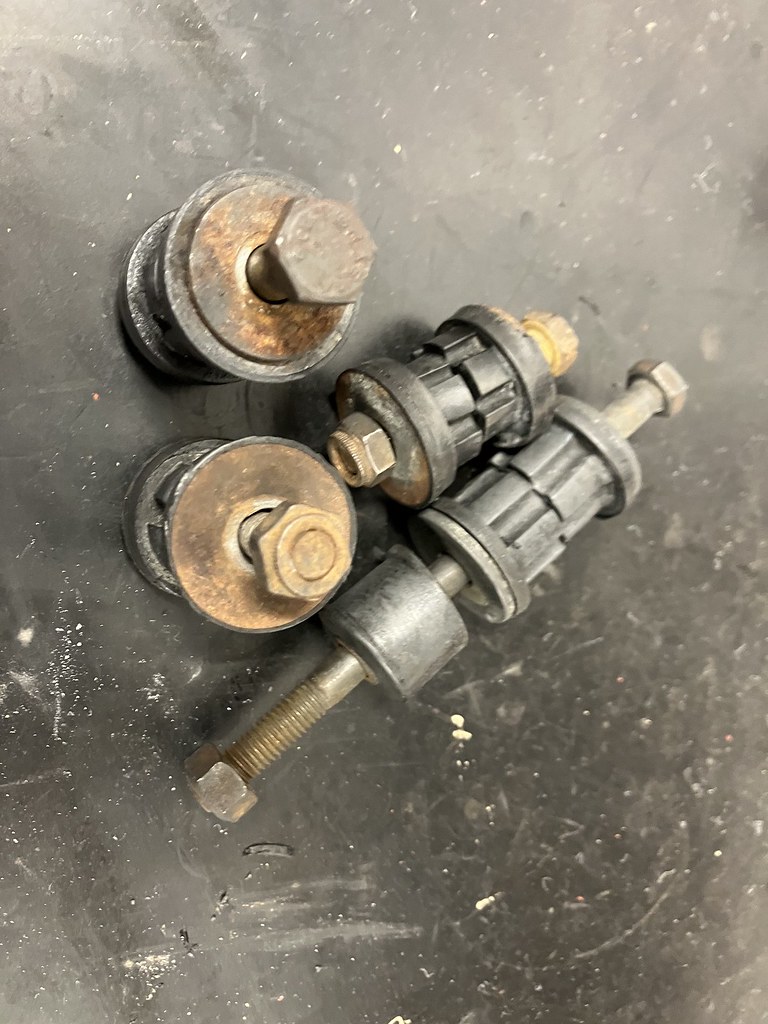 IMG_0692 by Chris Cav, on Flickr
A bit of etch and some satin black;
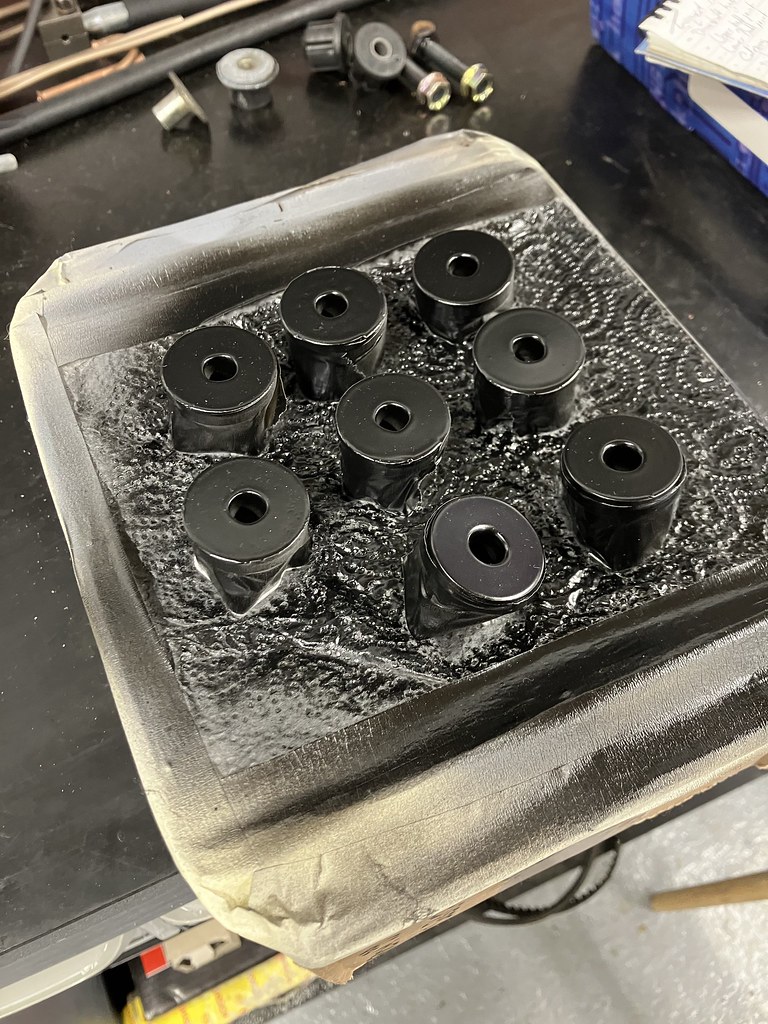 IMG_0828 by Chris Cav, on Flickr
And some new zinc plated bolts and nyloc nuts;
 IMG_0829 by Chris Cav, on Flickr
Brackets refitted to the car;
 IMG_0830 by Chris Cav, on Flickr
Next up the PAS pump was flushed out, degreased and painted;
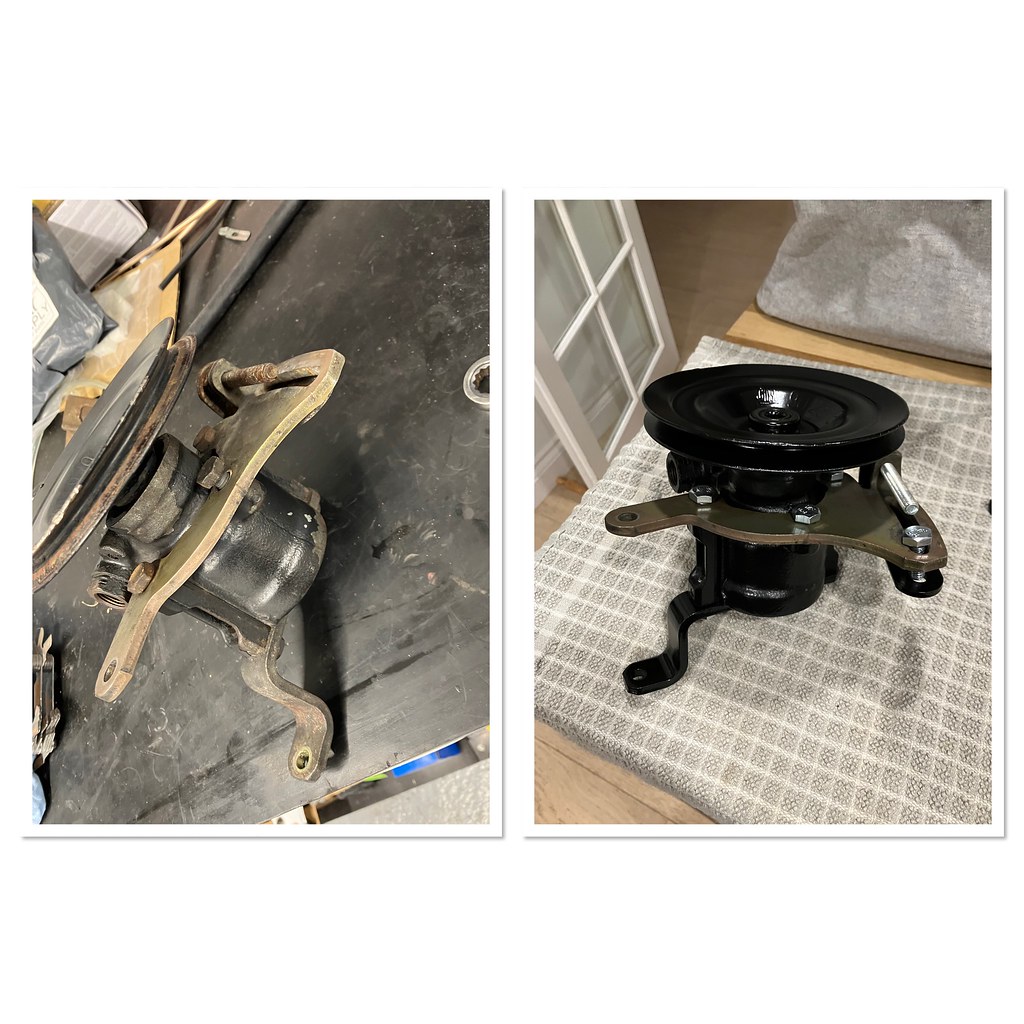 IMG_0877 by Chris Cav, on Flickr
 IMG_0876 by Chris Cav, on Flickr
 IMG_0875 by Chris Cav, on Flickr
Got a couple of new auxiliary belts;
 IMG_0884 by Chris Cav, on Flickr
The old one looked a bit worn when compared to the replacement belt;
 IMG_0886 by Chris Cav, on Flickr
Following the delivery of the manifold, I tried to fit it and one of the exhaust studs unwound - the thread was f
ked. Anyway, a quick helicoil later and it was fitted. While the car was up in the air, I whipped the front wheels off and painted the front wheel arches with POR15, a job that had been on my to do list for a while. Done;
IMG_0399 by Chris Cav, on FlickrThat's now every body bit metal under the car protected from the elements.
What followed was a few months of not much at all owing to work schedules and travelling overseas.
I did managed to get the alternator and PAS pump bushes stripped and painted though. Before;
IMG_0692 by Chris Cav, on FlickrA bit of etch and some satin black;
IMG_0828 by Chris Cav, on FlickrAnd some new zinc plated bolts and nyloc nuts;
IMG_0829 by Chris Cav, on FlickrBrackets refitted to the car;
IMG_0830 by Chris Cav, on FlickrNext up the PAS pump was flushed out, degreased and painted;
IMG_0877 by Chris Cav, on FlickrIMG_0876 by Chris Cav, on FlickrIMG_0875 by Chris Cav, on FlickrGot a couple of new auxiliary belts;
IMG_0884 by Chris Cav, on FlickrThe old one looked a bit worn when compared to the replacement belt;
IMG_0886 by Chris Cav, on FlickrNext job on the list - I had to make up a new brake servo vacuum hose. The fittings were different because when running the ITB's the threaded connection that's on the standard inlet manifold is missing.
The old pipe;
 IMG_0879 by Chris Cav, on Flickr
And some snazzy red silicone vacuum hose. With fittings transferred over and installed into the car. Not necessarily it's final placement, I'll tie it into the loom tie off points once the wiring is finalised;
 IMG_0881 by Chris Cav, on Flickr
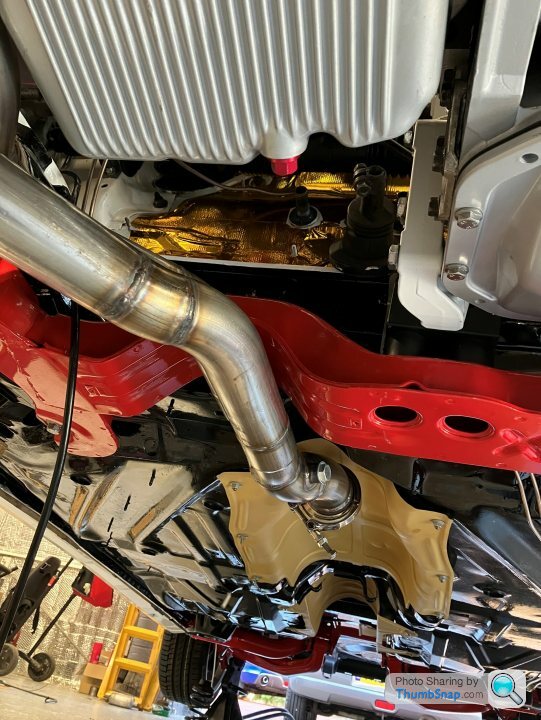
I then fitted the radiator and fan/fan shroud assembly and coolant pipes. I was a bit nervous about this, as I was told the exhaust manifold was likely to foul the fan shroud. Thankfully, no such dramas and there's a good bit of clearance, well enough anyway. It's not touching is what matters!
 IMG_0871 by Chris Cav, on Flickr
 IMG_0872 by Chris Cav, on Flickr
The old pipe;
IMG_0879 by Chris Cav, on FlickrAnd some snazzy red silicone vacuum hose. With fittings transferred over and installed into the car. Not necessarily it's final placement, I'll tie it into the loom tie off points once the wiring is finalised;
IMG_0881 by Chris Cav, on FlickrI then fitted the radiator and fan/fan shroud assembly and coolant pipes. I was a bit nervous about this, as I was told the exhaust manifold was likely to foul the fan shroud. Thankfully, no such dramas and there's a good bit of clearance, well enough anyway. It's not touching is what matters!
IMG_0871 by Chris Cav, on FlickrIMG_0872 by Chris Cav, on FlickrAnd the last month or so has all been about fluids. I finished off the routing of the brake lines, installed the unions and flared the lines. Made up some little L shaped brackets to secure the braided line to copper joint to. Looks pretty smart I think;
 IMG_0899 by Chris Cav, on Flickr
Ordered some brake fluid - ATE Type 200 - and then filled up the master cylinder and bled the brakes.
 IMG_0901 by Chris Cav, on Flickr
I had one leaking flare, which I remade off and bled the brakes successfully until the pedal was solid. A decent achievement given that's a 100% brand new brake system. It's sat with the wheels off for a couple of weeks, hopefully when I get home there'll be no drips or seeps still.
IMG_0899 by Chris Cav, on FlickrOrdered some brake fluid - ATE Type 200 - and then filled up the master cylinder and bled the brakes.
IMG_0901 by Chris Cav, on FlickrI had one leaking flare, which I remade off and bled the brakes successfully until the pedal was solid. A decent achievement given that's a 100% brand new brake system. It's sat with the wheels off for a couple of weeks, hopefully when I get home there'll be no drips or seeps still.
Gassing Station | Readers' Cars | Top of Page | What's New | My Stuff