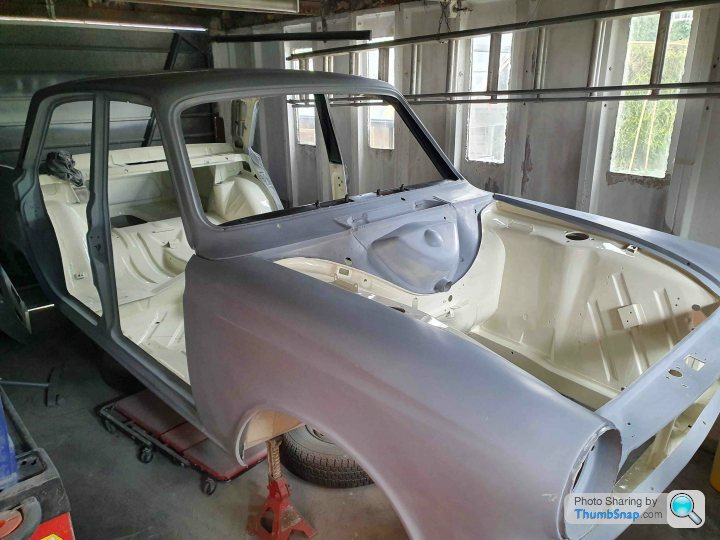
1966 Mk1 Cortina GT
Discussion


PS Hats off to you for doing all that bodywork preparation on your Cortina....and IMO white is good for the underside of the car, it looks so much better than the ubiquitous black.
It makes the car much easier to work on as any oil leaks ( hopefully none ) can be seen, and it's much easier to illuminate when the car is on axle stands in a home garage ( ask me how I know that !!)
Keep the updates flowing, it is a great project and bring back memories of my Elan.....( hence the post above !!)
Paul, your Uncle did an amazing job. The Jade suits the S4. I like the fact you used it too, having been to a few car shows I'd rather be out driving the car rather than having to deal with rivet counters and justify my actions to someone!
Thank you but the reason I took the paint prep on was mainly because the money I had at the time was being used to renovate our house which apparently is more important than car parts! I still don't understand the logic but I know my place!
I hadn't considered the leaking showing up, I know it'll leak just because of the sump crank seal design but it can be reduced.
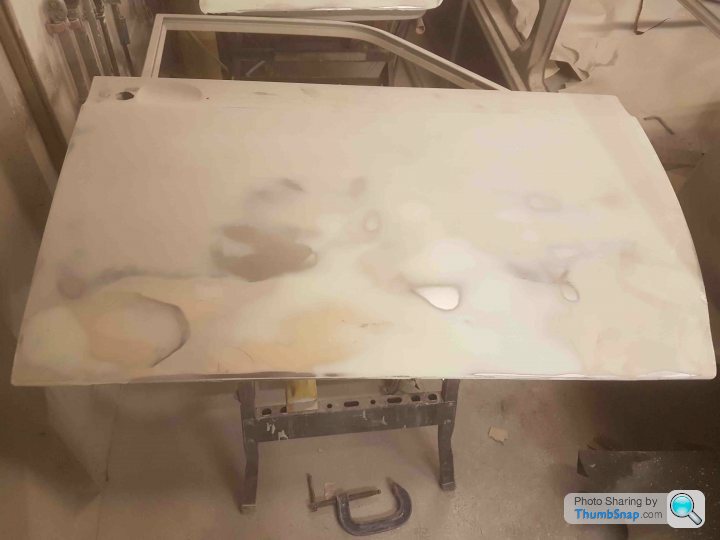
With the doors stored in the house I figured that Mrs. Jim can't get any more upset so I prepped the bonnet and boot to join them.
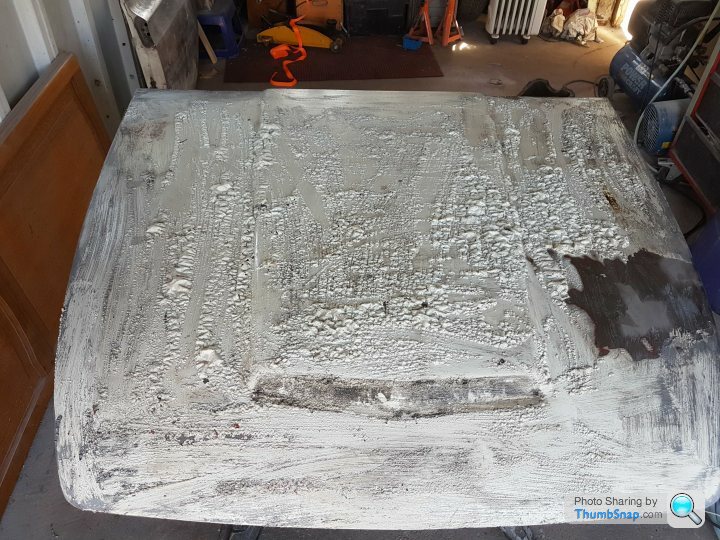
I remember that it was a hot day when I applied that paint stripper, it must have gee'd it up because I could hear the reaction - it was like listening to rice crispies!
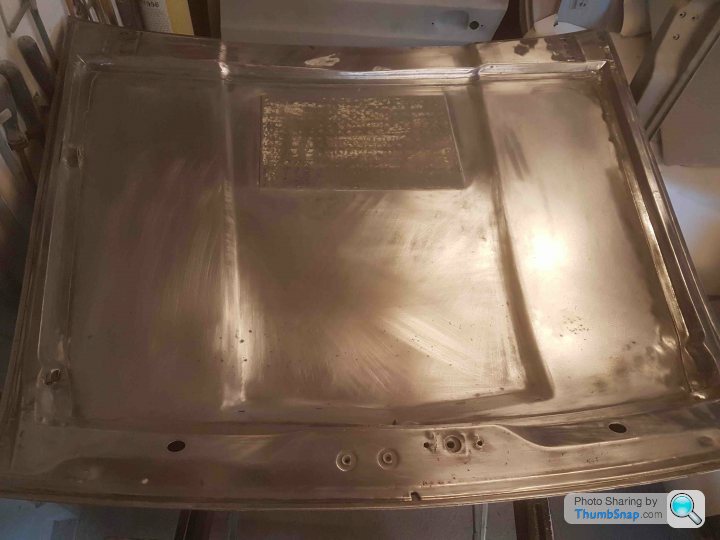
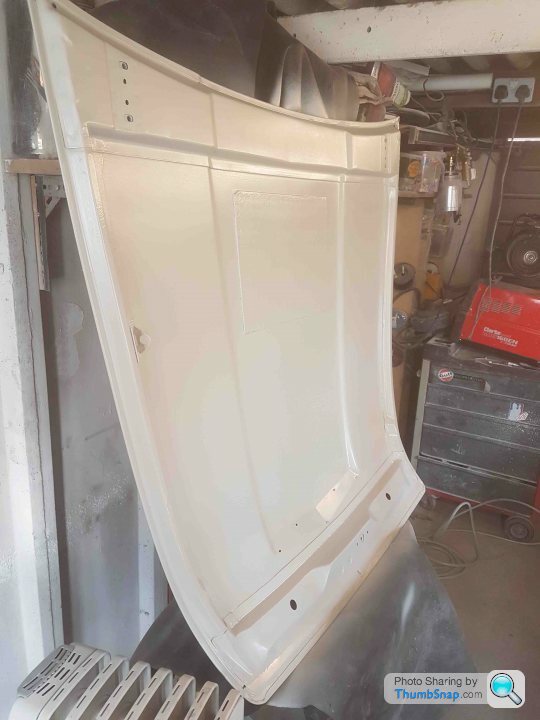


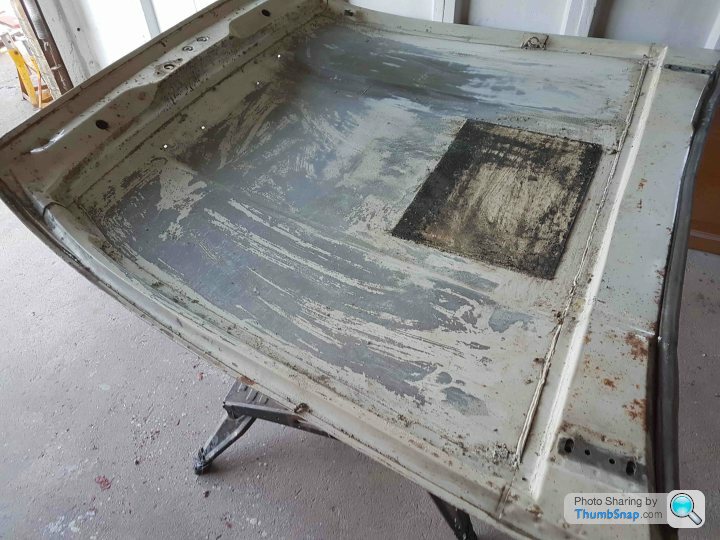
With the doors, bonnet and boot primed and placed in a warm dry environment I went back to sorting the body work.
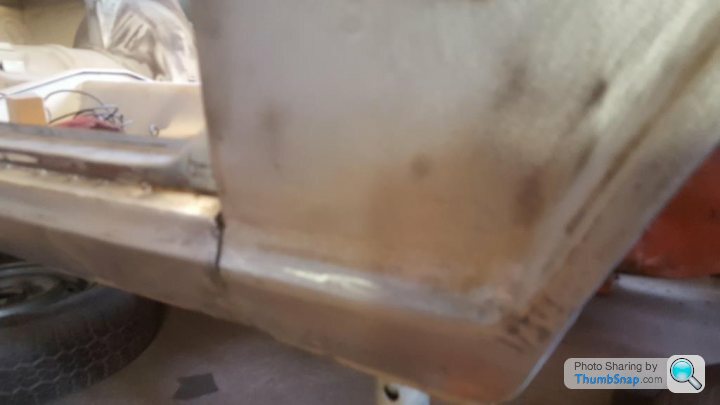
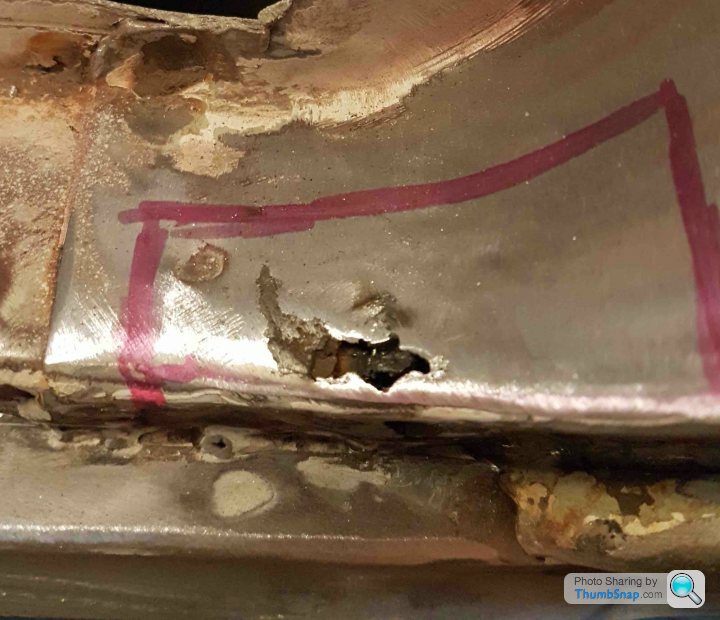
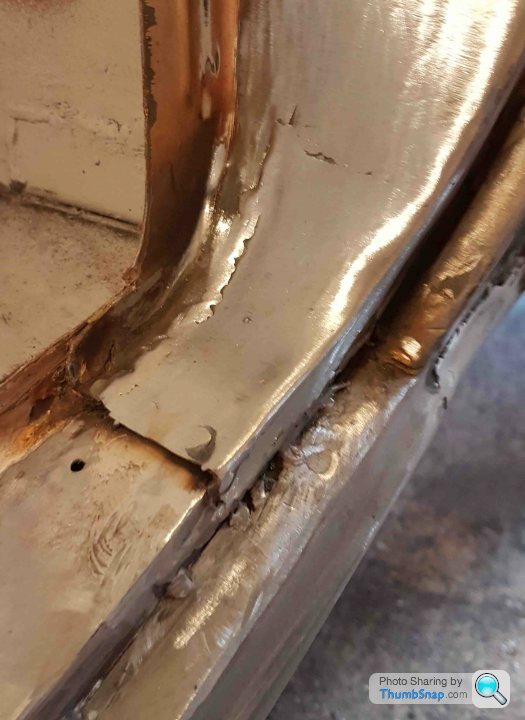
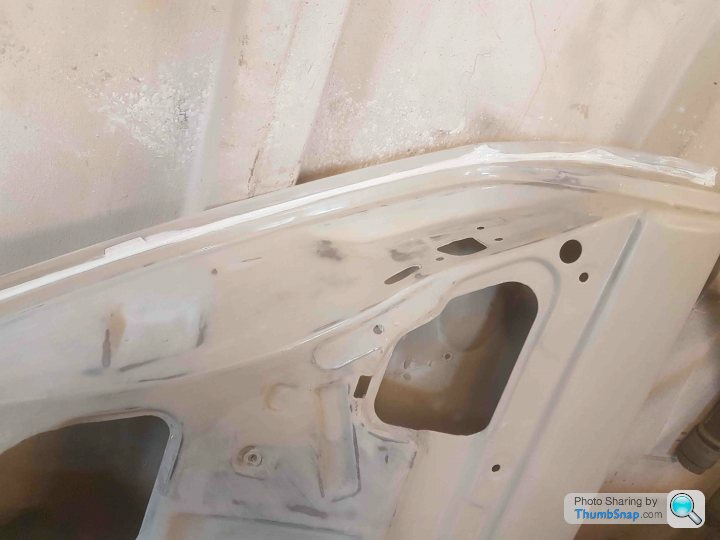
The front wings are genuine ford but were replaced not long after I bought the Cortina in 2005 because the originals were in a poor way. I hadn't noticed till I started the body work that the fit between the wing and the sill was off. The guys who did this work weren't body shop guys and did it as. favour for my Dad, I'm not angry or upset as it got me out of a hole but over the years the lower welded edge had dissolved and needed work.
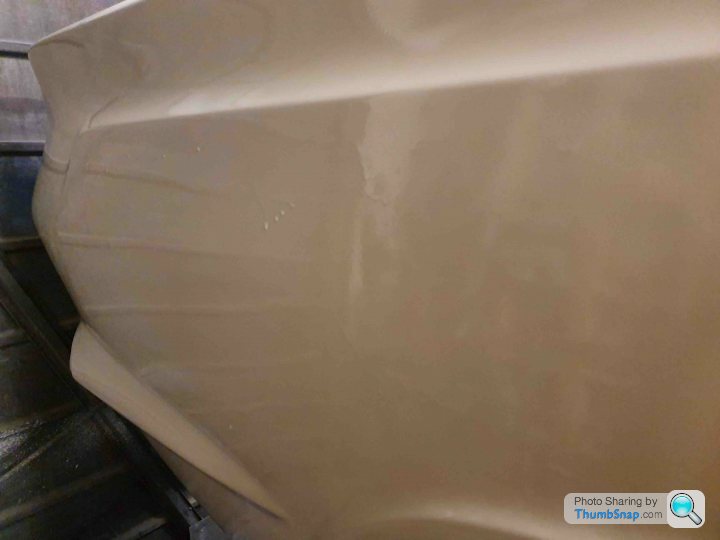
These wings are 50 years old, they were pitted but again I figured work with what I have and if there's an issue I'll replace them. As I've said before the Cortina will be driven so I'm expecting stone chips etc so the body work will no doubt be freshend up from time to time.
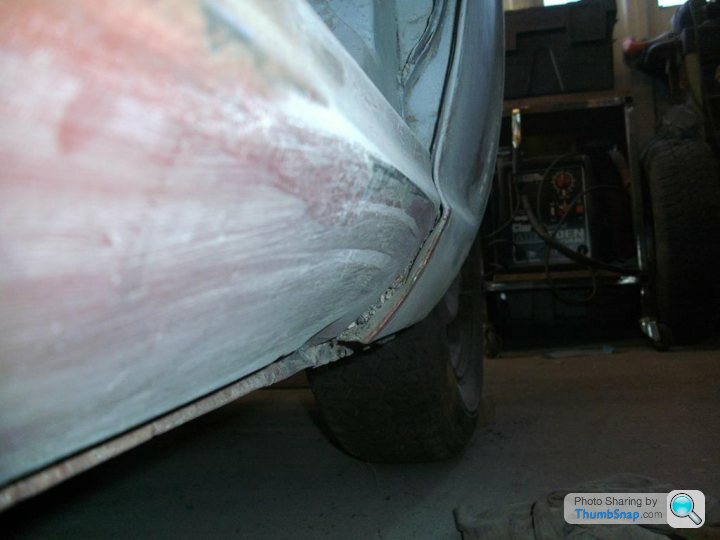

This was measured about 5 times and cut with me holding my breath! The cut is below that of a repair section so if it went south the wing wouldn't be affected in the end. Whilst off I made a new lip - just a simple 90 degree fold in the vice.


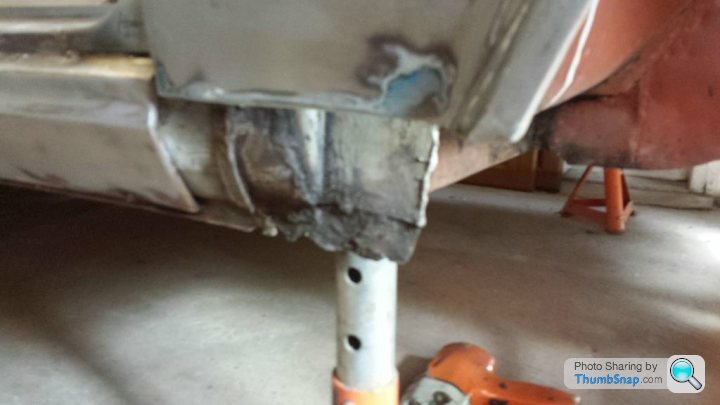
It was then seem welded and dressed back
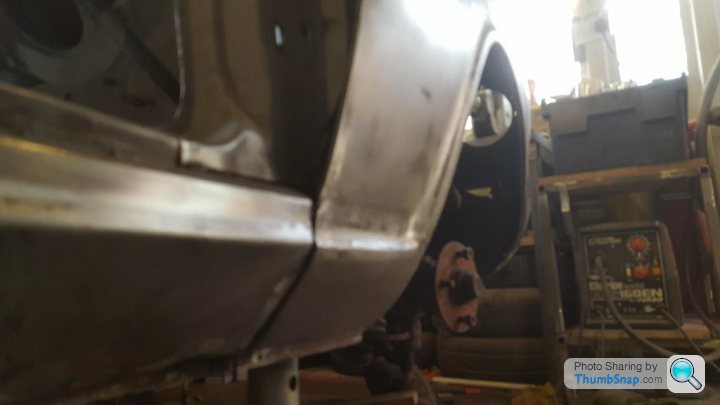
The Nearside had a better fit but was 'crispier'


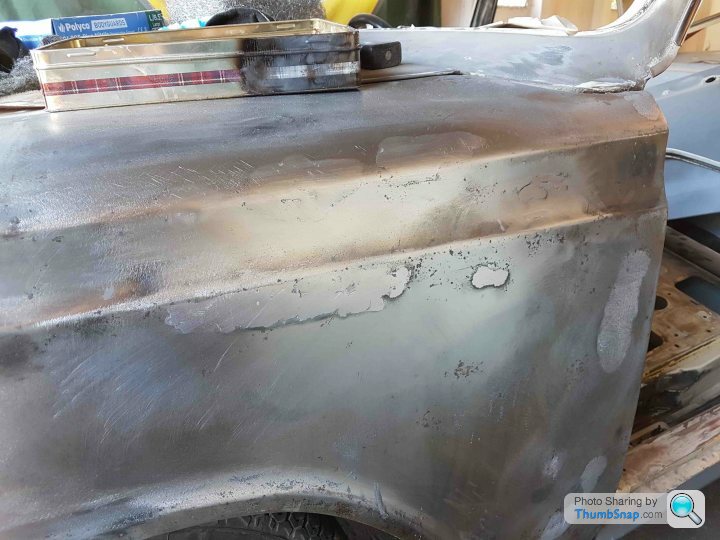
The pitting was wire brushed out, I used a dremmel engraver to ensure the metal was clean before I lead loaded. After this the wings were given a coat of rust treatment and epoxy primer.
I remember that it was a hot day when I applied that paint stripper, it must have gee'd it up because I could hear the reaction - it was like listening to rice crispies!
With the doors, bonnet and boot primed and placed in a warm dry environment I went back to sorting the body work.
The front wings are genuine ford but were replaced not long after I bought the Cortina in 2005 because the originals were in a poor way. I hadn't noticed till I started the body work that the fit between the wing and the sill was off. The guys who did this work weren't body shop guys and did it as. favour for my Dad, I'm not angry or upset as it got me out of a hole but over the years the lower welded edge had dissolved and needed work.
These wings are 50 years old, they were pitted but again I figured work with what I have and if there's an issue I'll replace them. As I've said before the Cortina will be driven so I'm expecting stone chips etc so the body work will no doubt be freshend up from time to time.
This was measured about 5 times and cut with me holding my breath! The cut is below that of a repair section so if it went south the wing wouldn't be affected in the end. Whilst off I made a new lip - just a simple 90 degree fold in the vice.
It was then seem welded and dressed back
The Nearside had a better fit but was 'crispier'
The pitting was wire brushed out, I used a dremmel engraver to ensure the metal was clean before I lead loaded. After this the wings were given a coat of rust treatment and epoxy primer.
Bobberoo99 said:
Amazing!! As an engineer of 34 years I bow to your welding abilities, I've said it before, give me a lump of metal, a simple drawing and a couple of machines and I'll make pretty much what ever you want, ask me two weld to things together and I'll admit defeat immediately!!!
That's a huge compliment given your experiences, I always felt short changed by University when it came to practical skills. In 4 years we had a morning of lathe use followed by an afternoon of welding. I can design components but sometimes I fall foul to the practicalities of making a tangible part - the curse of modern CAD systems!My first welder was 2nd hand and got me started learning on scraps of steel, I was fortunately given some amazon vouchers as a bonus where I used to work which paid for a new welder 1 year and the materials to get the Cortina fully primed and ready to paint.
I'd love to learn more machining skills so I bow to anyone who can turn a lump of metal into anything other than swarf!
Retro_Jim said:
That's a huge compliment given your experiences, I always felt short changed by University when it came to practical skills. In 4 years we had a morning of lathe use followed by an afternoon of welding. I can design components but sometimes I fall foul to the practicalities of making a tangible part - the curse of modern CAD systems!
My first welder was 2nd hand and got me started learning on scraps of steel, I was fortunately given some amazon vouchers as a bonus where I used to work which paid for a new welder 1 year and the materials to get the Cortina fully primed and ready to paint.
I'd love to learn more machining skills so I bow to anyone who can turn a lump of metal into anything other than swarf!
It's like anything in life, if you have the aptitude, a logical can do approach, and equipment available to learn on, you can be taught to do most things, I have no aptitude to welding at all, it's just something I've never been able to pick up, turning, milling, jig boring, grinding, programing, design, tool making, yep, welding, pigeon poo!!!! My first welder was 2nd hand and got me started learning on scraps of steel, I was fortunately given some amazon vouchers as a bonus where I used to work which paid for a new welder 1 year and the materials to get the Cortina fully primed and ready to paint.
I'd love to learn more machining skills so I bow to anyone who can turn a lump of metal into anything other than swarf!
I couldn't agree more Bob.
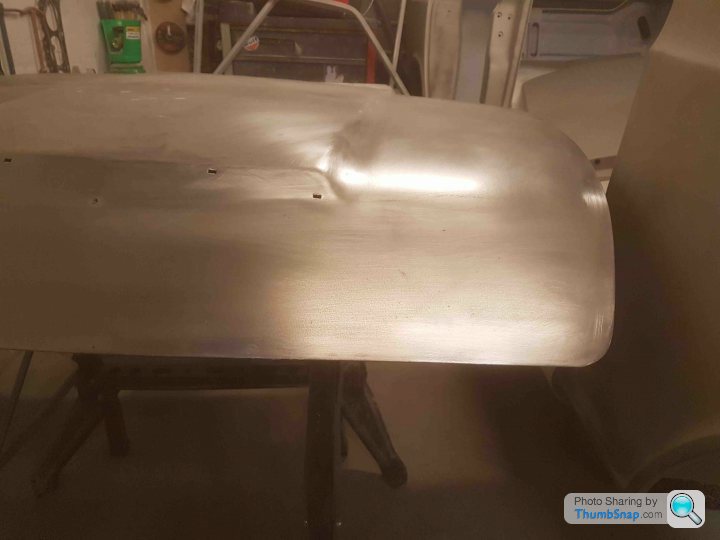
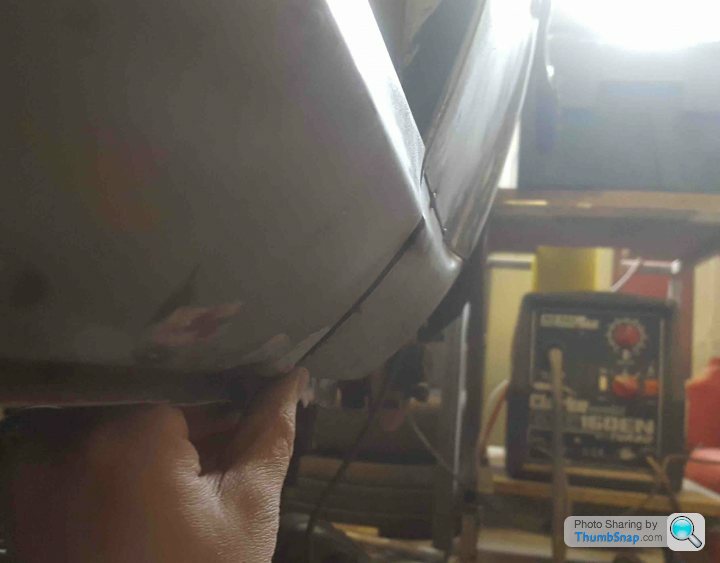
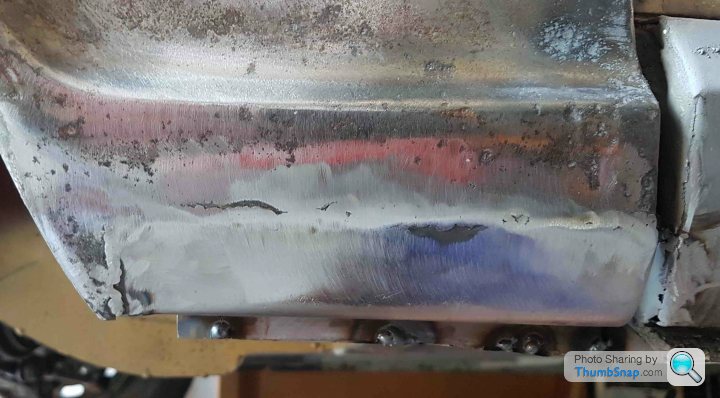
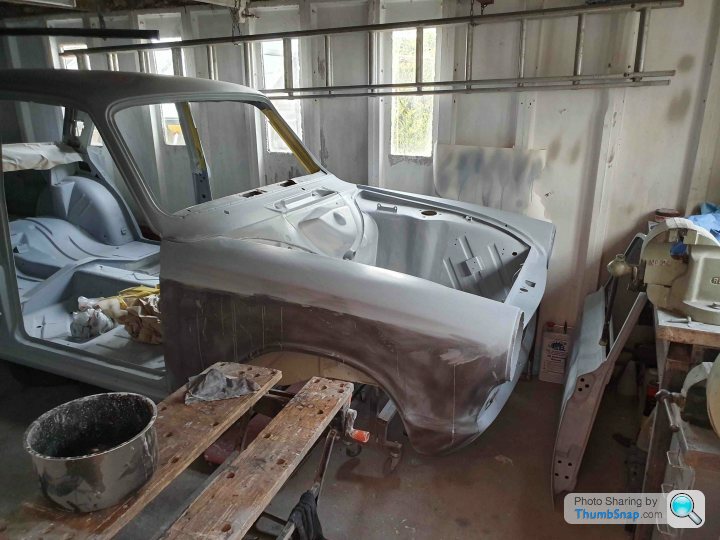
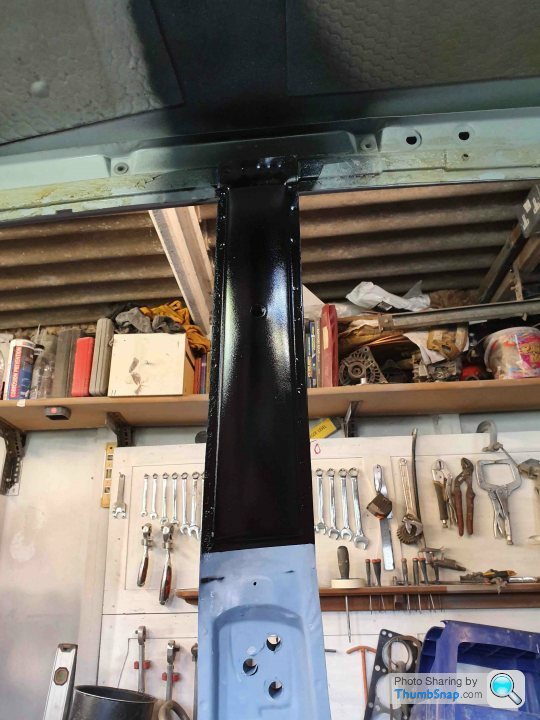
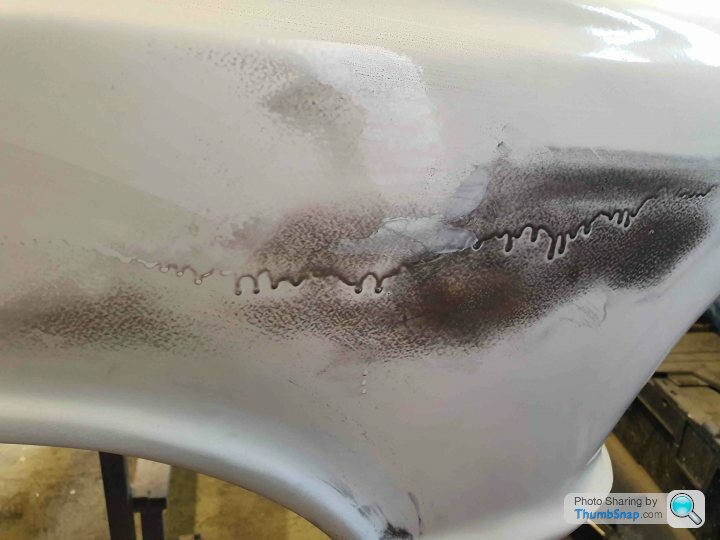
With the front wings now having been repairs and reattached I carried on my battle against old paint when I came across this beauty.
Which then grew into this
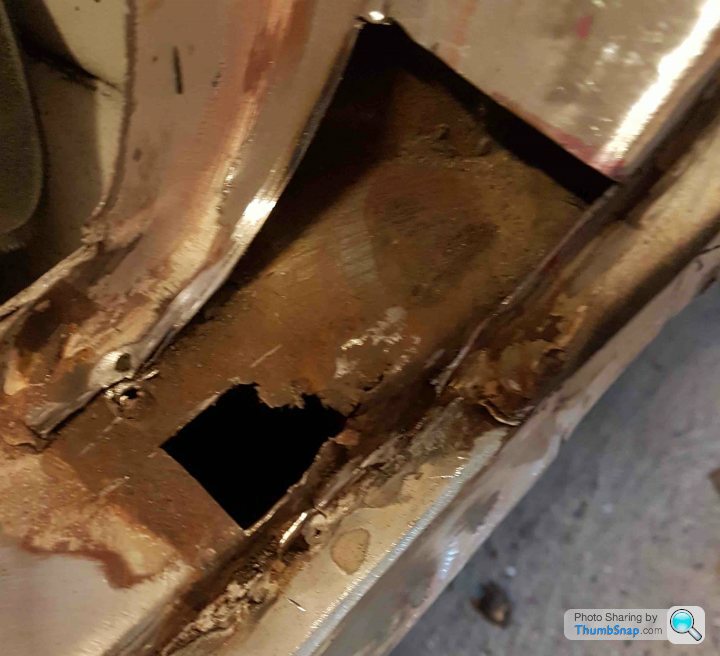
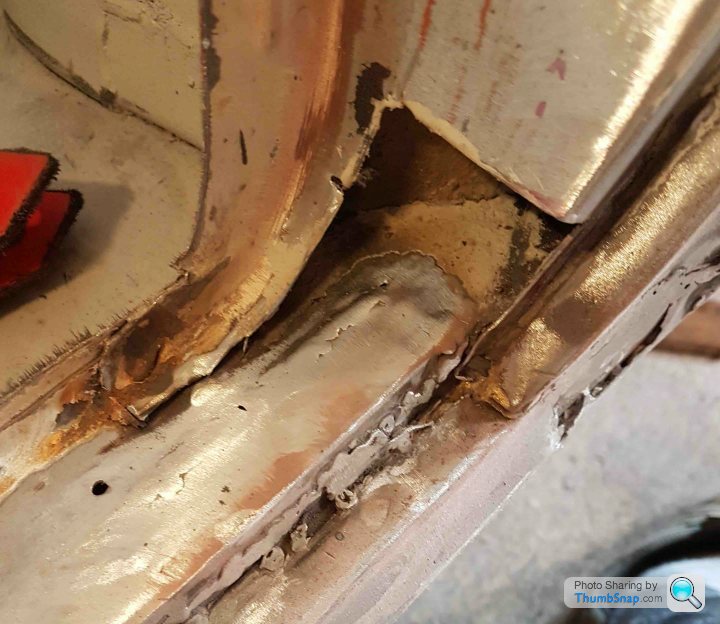
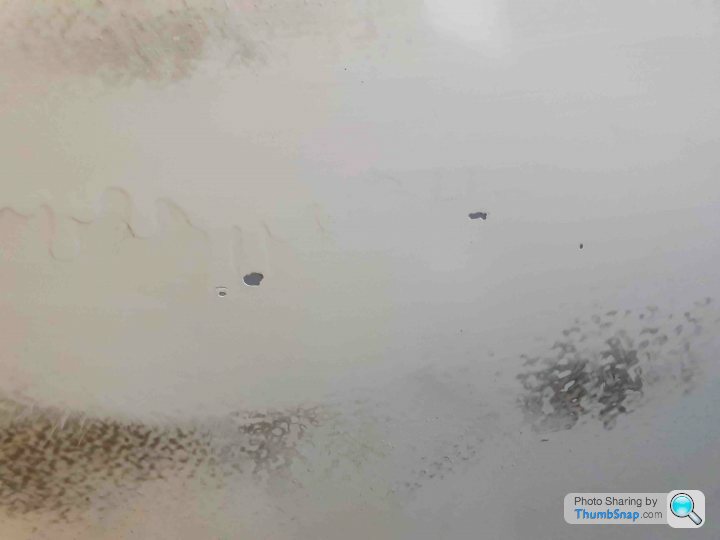
The steel was primed before the top piece was welded on. I believe this is the last of the welding repair I made for the Cortina, I don't miss it but I was surprised about how quickly I did that repair, if I recall it was a morning from discovery to wrapping up which was a lot quicker than how I worked on previous repairs.
To celebrate I went back to filling and sanding!

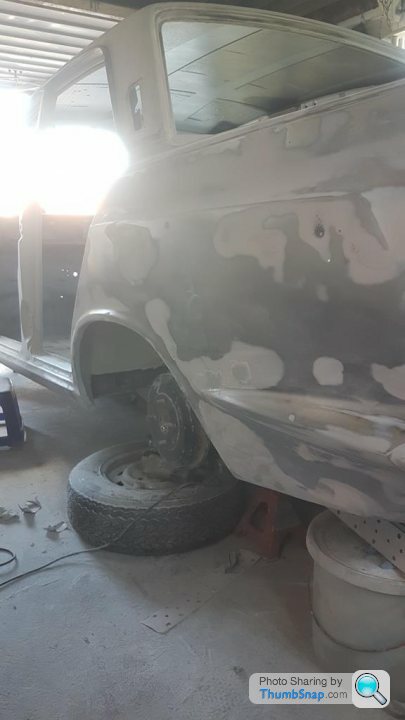

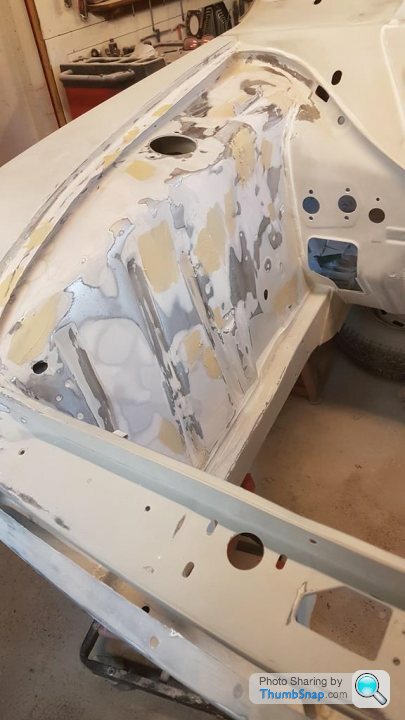
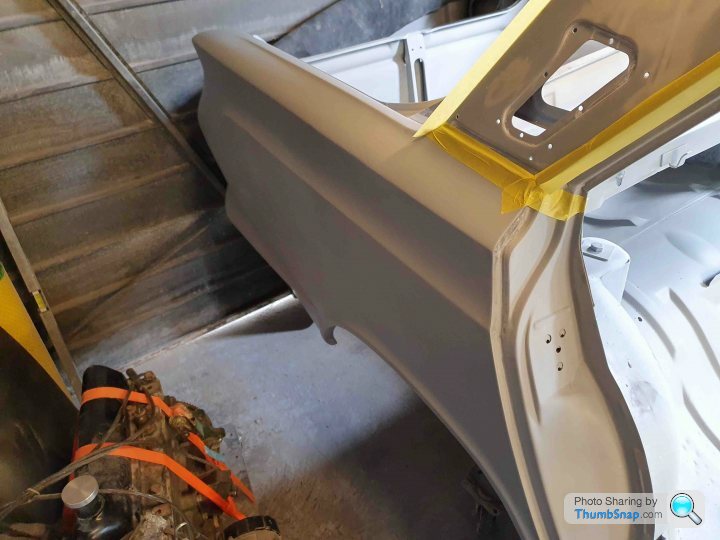
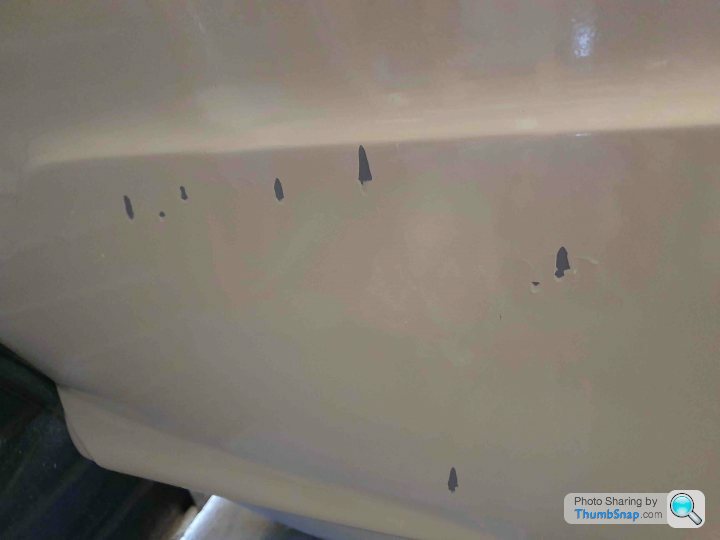
Generally the wings were in a decent state, I went to this trouble to sort small dings and ensure they looked right in the case of the front wings get the headlight gaps finely tuned.


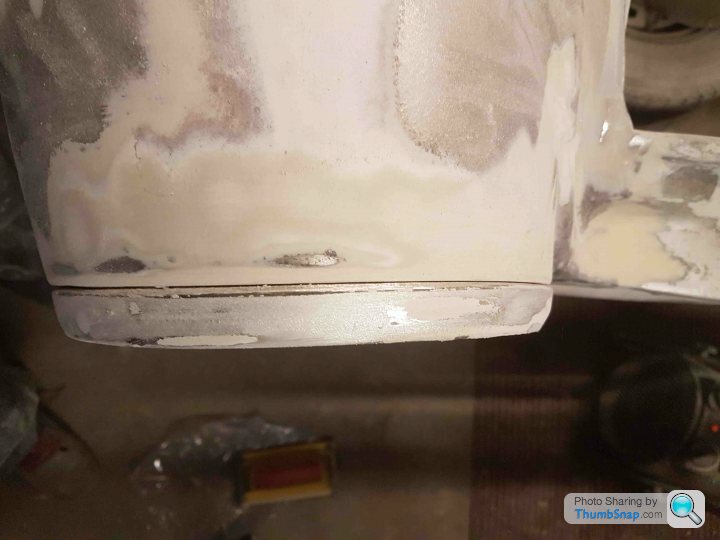

This little tool was £2 from B&Q and its great for jobs like this, I even used it to tidy the gaps between the welded wings

It was about 12 months ago when I was doing this and as luck would have it my wife was sent on a course in London for 6 days spread over 6 weeks so I was tasked with getting her to Nottingham train station for 6 am. I don't mind getting up early but my current job starts at 9am and it takes 25 mins approx to get there so I figured once I got home from dropping Mrs. Jim off I had a bit of free time. Given that body work prep is primarily time over money and making a batch of filler or hand sanding panels - yes I did all this prep work by hand! was a perfect way to catch up on time lost.
I have enjoyed it so much that every morning I'm in the garage at about 6 till 7 which roughly equates to the average time I'd spend on a Saturday, as a bonus this is the same time Mrs. Jim fires up her jet powered hairdryer so she's awake already and I get garage time without neglecting our marriage to spend time on the car!
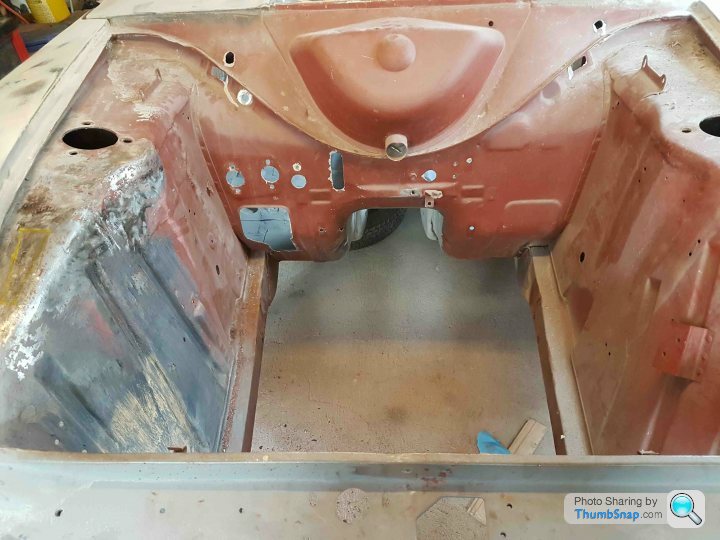
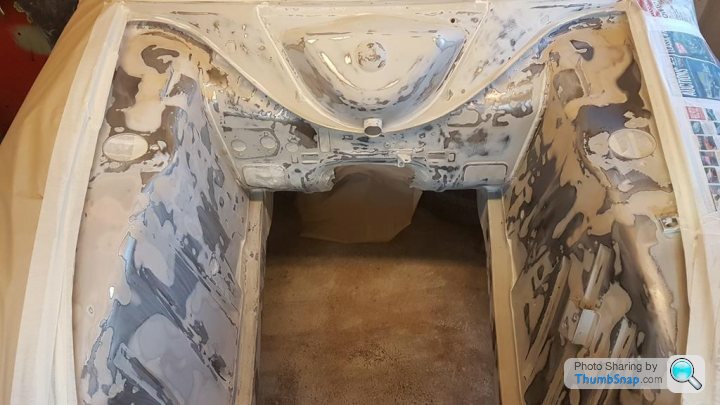
I was finally at a point I was happy with the exterior wings I decided to sort the engine bay because of 2 reasons:
1 - Classic car buffs including myself love a good engine bay
2 -I want it to look pretty when it breaks down and the AA are having a look at what I've broken!

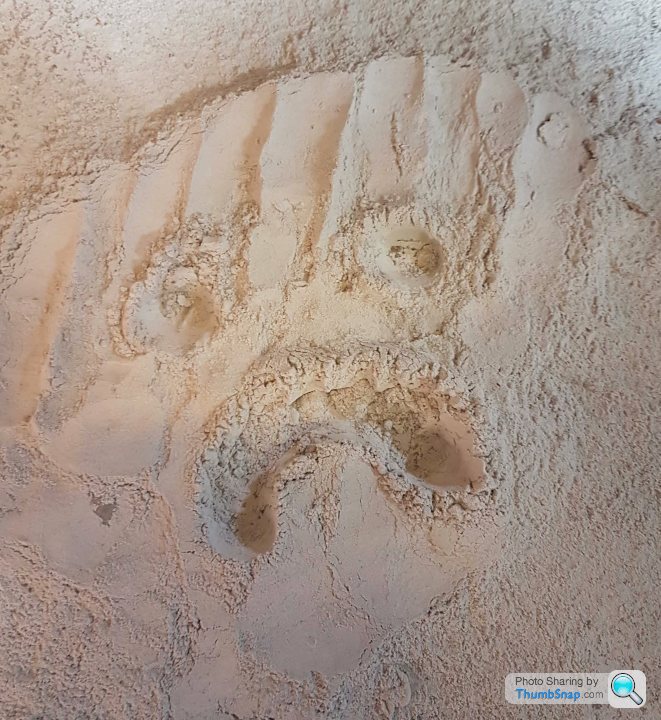
It was around this time Mrs. Jim took pity on me one Saturday and bought me a cup of tea - this doesn't happen often as the odds of a spider jumping out on her in the garage is too high for her to warrant plus it was very dusty in there given the work I was doing but she did take this photo of me which is Instagram worthy!

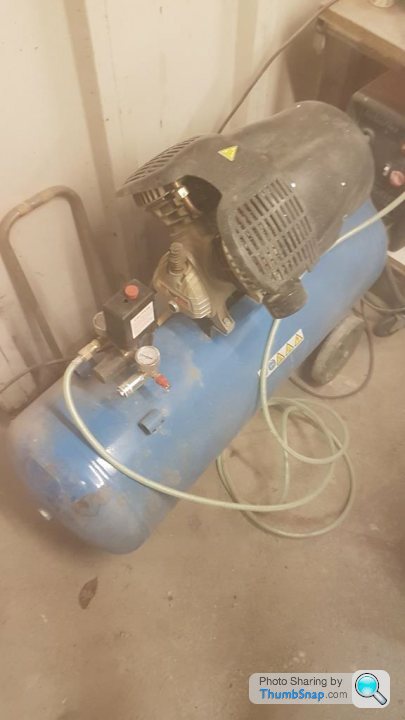
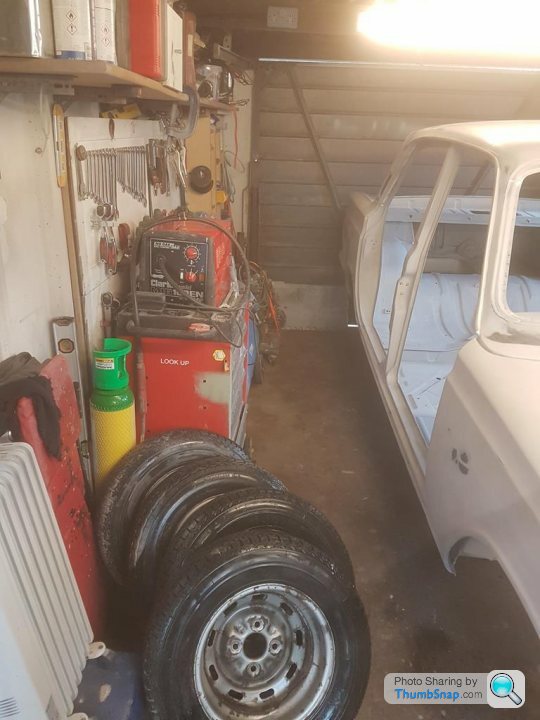
At the time I found that the Aldi compressor I was borrowing from my father whilst doing a decent job of supplying air for small priming jobs it was struggling to provide for larger areas, this compressor turned up on eBay rather cheaply but was sold as a repair job. Usually the pressure relief switch goes on compressors and they're cheap to fix so I put a bid on for £45 as I figured if it's that knackerd I'd put it back on. As it turns out it just needed a 13 amp fuse!
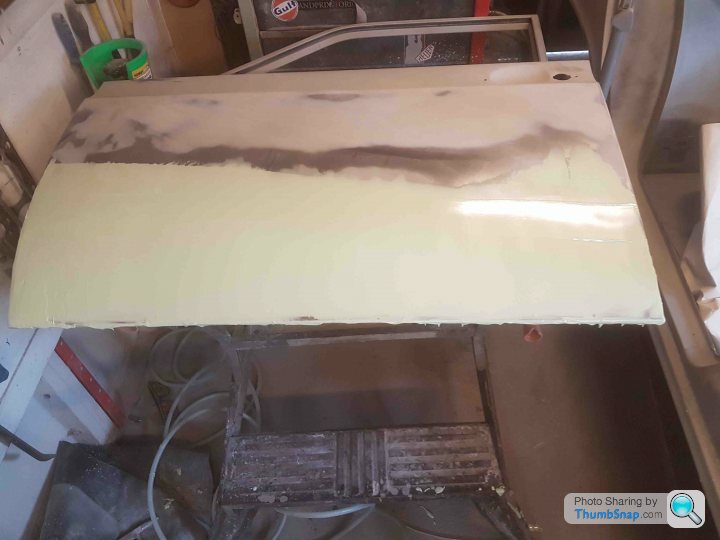
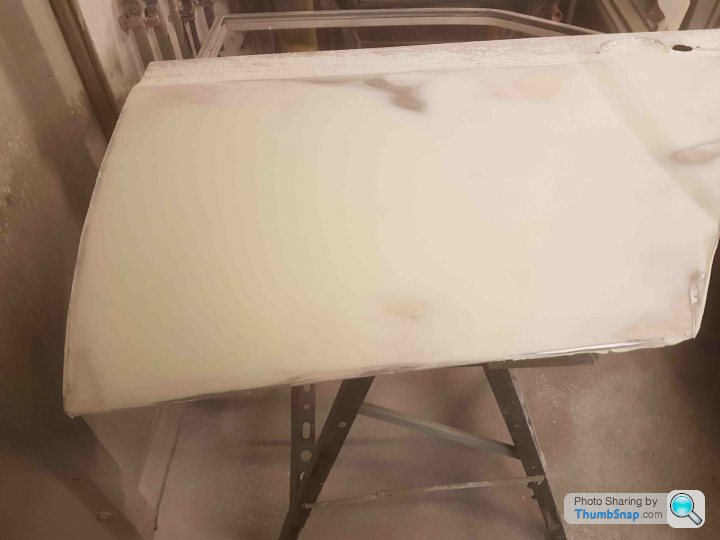
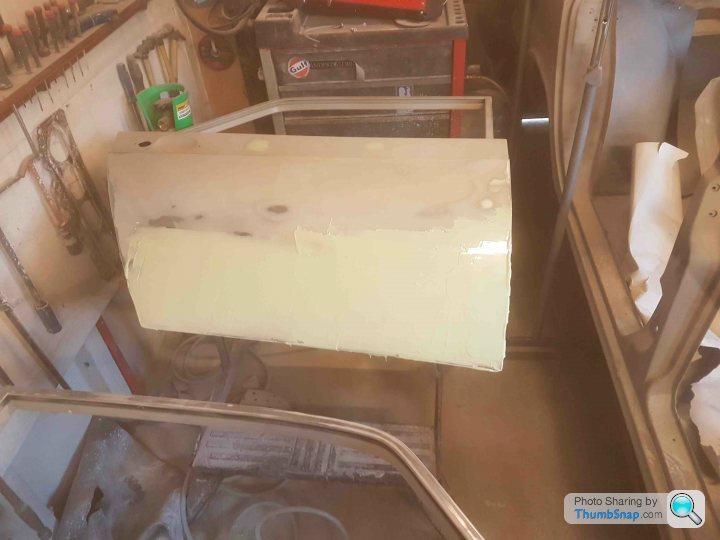
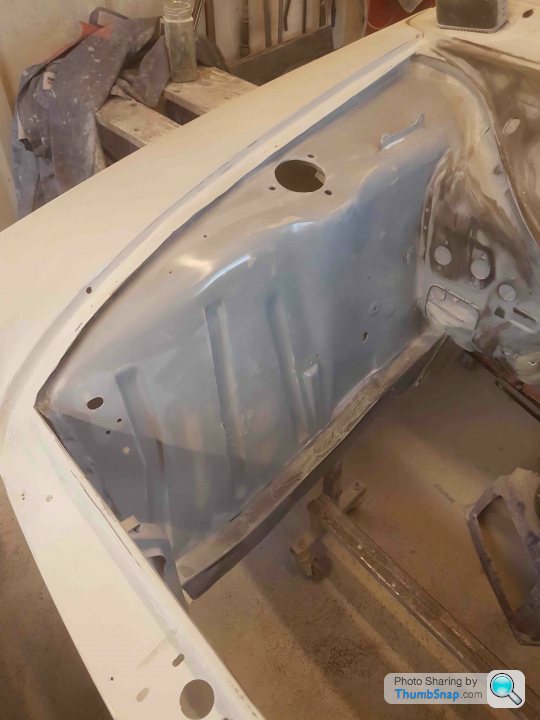
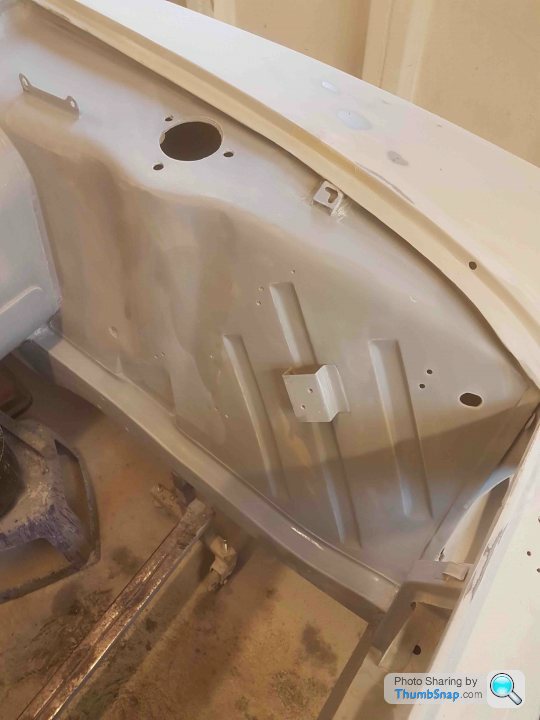
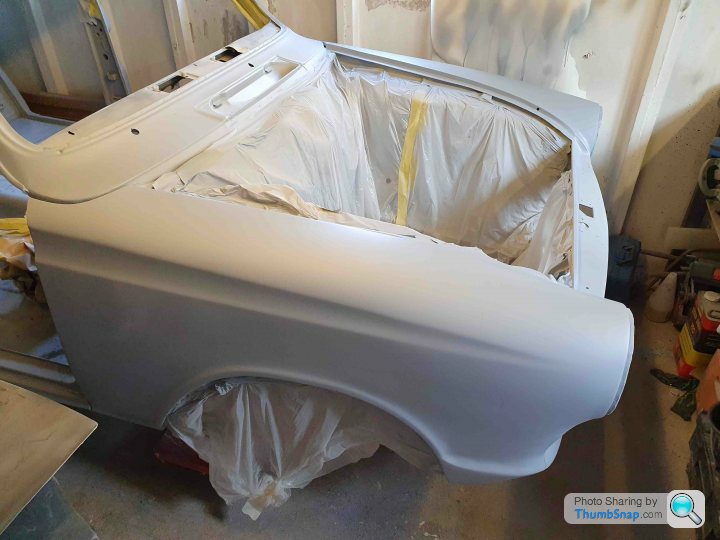
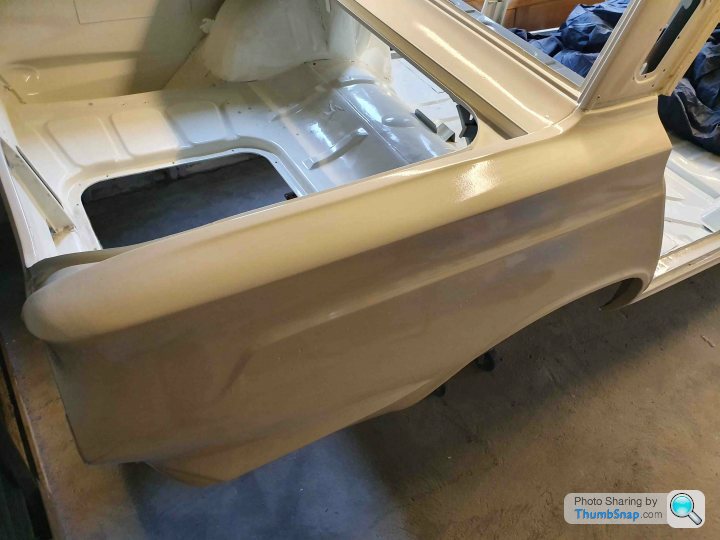
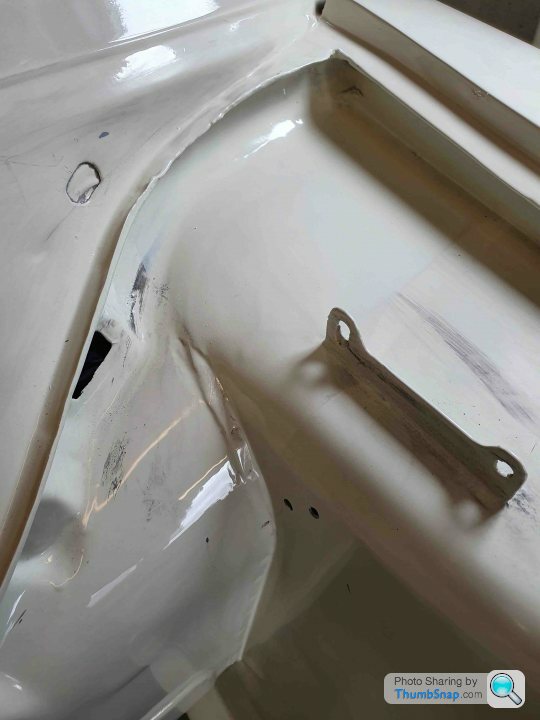
In an unbelievable twist of fate I managed to get back into Mrs. Jim's good books by removing the offending doors back into the garage so that they could be tidied up, the repairs I had made were functional - but they didn't follow the curved profile of the original skin, I had to use filler - I'm not a fan of using filler this way but I believe that the maximum depth of the filler is 3mm and there is less filler on the doors than before.


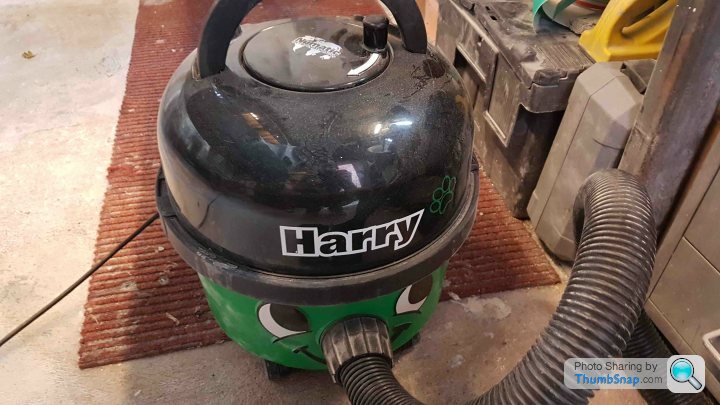
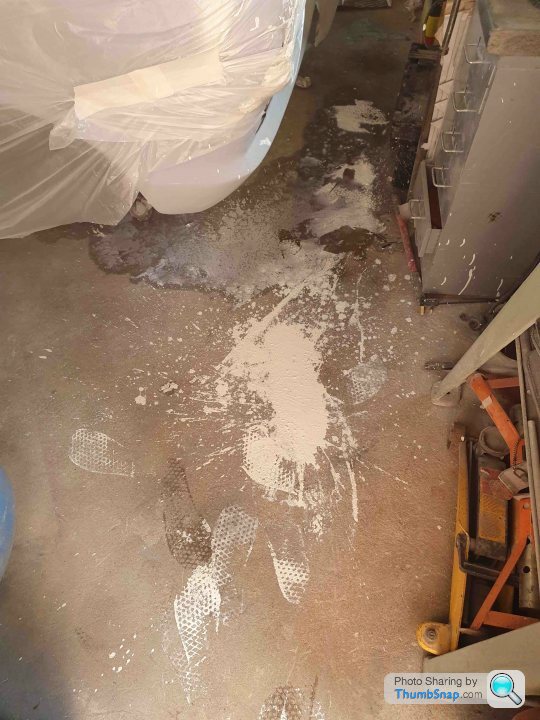
All this sanding generated a huge amount of dust in the garage.

All of this dust was collected up in Harry who has never quite been the same after consuming all this suspicious looking white powder!
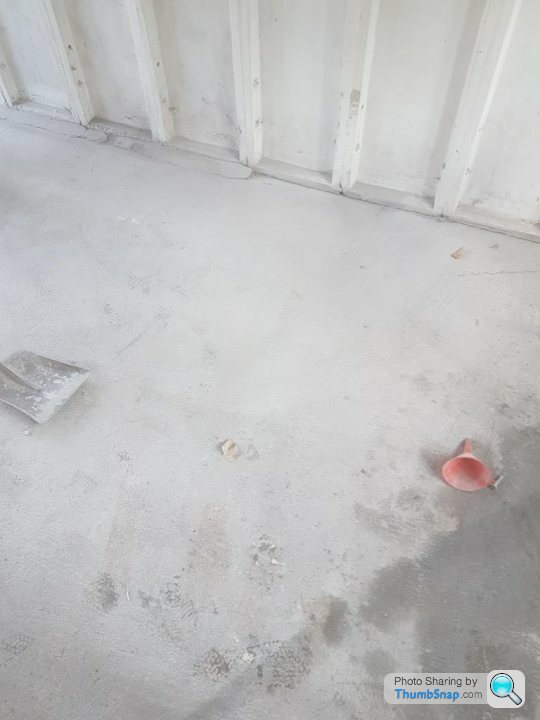
To totally get rid of the dust and try and prepare the garage for more primer and eventually paint I had to get as clinical as I could. Everything was kicked out of the garage, I then hosed the garage down but there was so much dust on the cement floor that the water was sitting on top of the dust - we had to get wash it twice to get it all off. I then slowly cleaned everything before I was allowed to be placed back in the garage. Mrs Jim took pity on me again and helped out which but even then it took 12 hours all in to sort!
With the front wings now having been repairs and reattached I carried on my battle against old paint when I came across this beauty.
Which then grew into this
The steel was primed before the top piece was welded on. I believe this is the last of the welding repair I made for the Cortina, I don't miss it but I was surprised about how quickly I did that repair, if I recall it was a morning from discovery to wrapping up which was a lot quicker than how I worked on previous repairs.
To celebrate I went back to filling and sanding!
Generally the wings were in a decent state, I went to this trouble to sort small dings and ensure they looked right in the case of the front wings get the headlight gaps finely tuned.
This little tool was £2 from B&Q and its great for jobs like this, I even used it to tidy the gaps between the welded wings
It was about 12 months ago when I was doing this and as luck would have it my wife was sent on a course in London for 6 days spread over 6 weeks so I was tasked with getting her to Nottingham train station for 6 am. I don't mind getting up early but my current job starts at 9am and it takes 25 mins approx to get there so I figured once I got home from dropping Mrs. Jim off I had a bit of free time. Given that body work prep is primarily time over money and making a batch of filler or hand sanding panels - yes I did all this prep work by hand! was a perfect way to catch up on time lost.
I have enjoyed it so much that every morning I'm in the garage at about 6 till 7 which roughly equates to the average time I'd spend on a Saturday, as a bonus this is the same time Mrs. Jim fires up her jet powered hairdryer so she's awake already and I get garage time without neglecting our marriage to spend time on the car!
I was finally at a point I was happy with the exterior wings I decided to sort the engine bay because of 2 reasons:
1 - Classic car buffs including myself love a good engine bay
2 -I want it to look pretty when it breaks down and the AA are having a look at what I've broken!
It was around this time Mrs. Jim took pity on me one Saturday and bought me a cup of tea - this doesn't happen often as the odds of a spider jumping out on her in the garage is too high for her to warrant plus it was very dusty in there given the work I was doing but she did take this photo of me which is Instagram worthy!
At the time I found that the Aldi compressor I was borrowing from my father whilst doing a decent job of supplying air for small priming jobs it was struggling to provide for larger areas, this compressor turned up on eBay rather cheaply but was sold as a repair job. Usually the pressure relief switch goes on compressors and they're cheap to fix so I put a bid on for £45 as I figured if it's that knackerd I'd put it back on. As it turns out it just needed a 13 amp fuse!
In an unbelievable twist of fate I managed to get back into Mrs. Jim's good books by removing the offending doors back into the garage so that they could be tidied up, the repairs I had made were functional - but they didn't follow the curved profile of the original skin, I had to use filler - I'm not a fan of using filler this way but I believe that the maximum depth of the filler is 3mm and there is less filler on the doors than before.
All this sanding generated a huge amount of dust in the garage.
All of this dust was collected up in Harry who has never quite been the same after consuming all this suspicious looking white powder!
To totally get rid of the dust and try and prepare the garage for more primer and eventually paint I had to get as clinical as I could. Everything was kicked out of the garage, I then hosed the garage down but there was so much dust on the cement floor that the water was sitting on top of the dust - we had to get wash it twice to get it all off. I then slowly cleaned everything before I was allowed to be placed back in the garage. Mrs Jim took pity on me again and helped out which but even then it took 12 hours all in to sort!

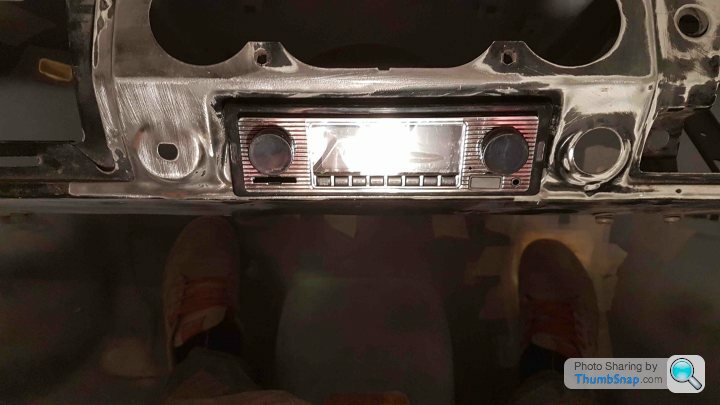
When the Cortina was built the radio was an optional extra which wasn't ticked, I had driven the car for 2 years without one and sometimes missed it. This was mainly on longer trips especially when motorway driving was involved as the loud droning sound got a bit much.
There are a few firms offering classic radios with modern internals boasting bluetooth, digital radio and hot/cold running water but they're quite expensive. I'm not begrudging spending £500 on the Cortina but a radio won't put it back on the road! After trawling eBay I came across this:

It's a DIN head unit that's retro styled, it has bluetooth, handsfree calling, radio and USB input - whilst the look is shiny plastic it's worth the £15 I paid for it, looking at how it's made I could draw a new facia and knobs that are reminiscent of a Motorola radio of the time and have them 3D printed and apply a chrome effect wrap to the outer edge to give it some shine.
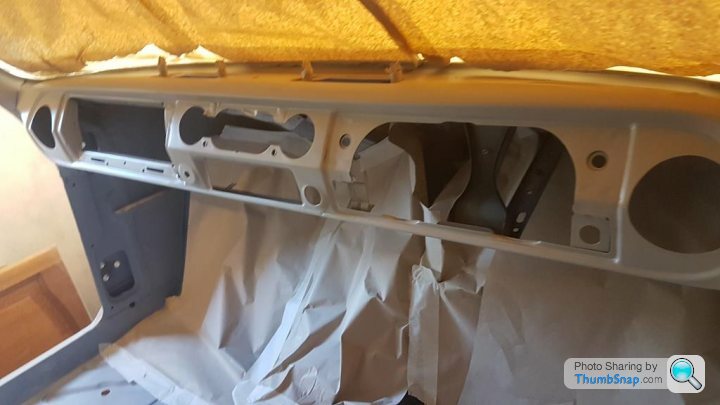
The only downside was the dashboard itself which needed the radio hole cutting to remove the radio support plate and opening out marginally to allow the fitment of a DIN radio - I did this gingerly so that if I needed to weld that plate back in it could be done easily.
I'm not expecting big things or thumping bass and crystal clear quality but it's better than a poke in the eye!
Plus it gave me something to do between spraying primer!
I found the photos of the garage clean up just to show that I wasn't over emphasising the dust problem


Even bag puss had to be hosed off [insert wet pussy comment here]

There are a few firms offering classic radios with modern internals boasting bluetooth, digital radio and hot/cold running water but they're quite expensive. I'm not begrudging spending £500 on the Cortina but a radio won't put it back on the road! After trawling eBay I came across this:
It's a DIN head unit that's retro styled, it has bluetooth, handsfree calling, radio and USB input - whilst the look is shiny plastic it's worth the £15 I paid for it, looking at how it's made I could draw a new facia and knobs that are reminiscent of a Motorola radio of the time and have them 3D printed and apply a chrome effect wrap to the outer edge to give it some shine.
The only downside was the dashboard itself which needed the radio hole cutting to remove the radio support plate and opening out marginally to allow the fitment of a DIN radio - I did this gingerly so that if I needed to weld that plate back in it could be done easily.
I'm not expecting big things or thumping bass and crystal clear quality but it's better than a poke in the eye!
Plus it gave me something to do between spraying primer!
I found the photos of the garage clean up just to show that I wasn't over emphasising the dust problem
Even bag puss had to be hosed off [insert wet pussy comment here]
Bobberoo99 said:
 Even Bagpuss looks surprised!!!
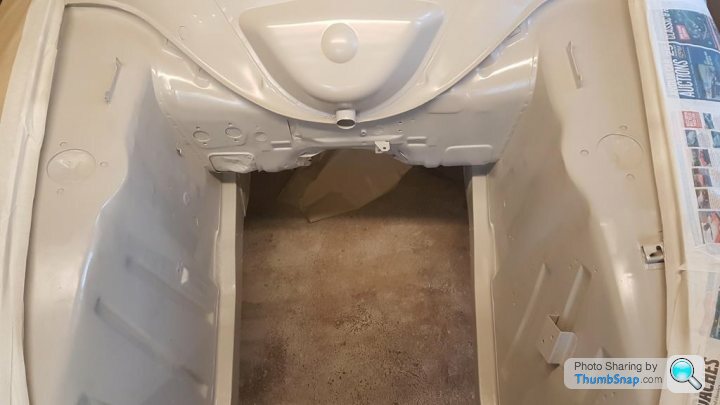
 The high build primer was a lot easier to use than I thought, the epoxy base I started with was thick and even after thinning it was


These were taken just after spraying so they look a lot better but I was happy with the results
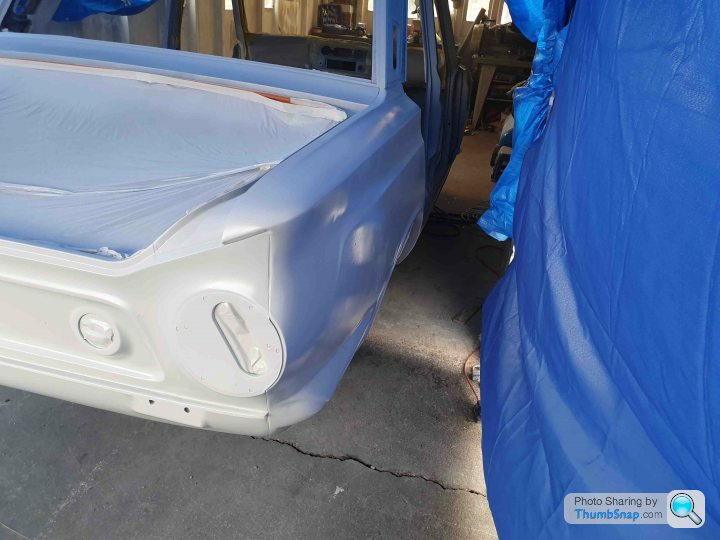
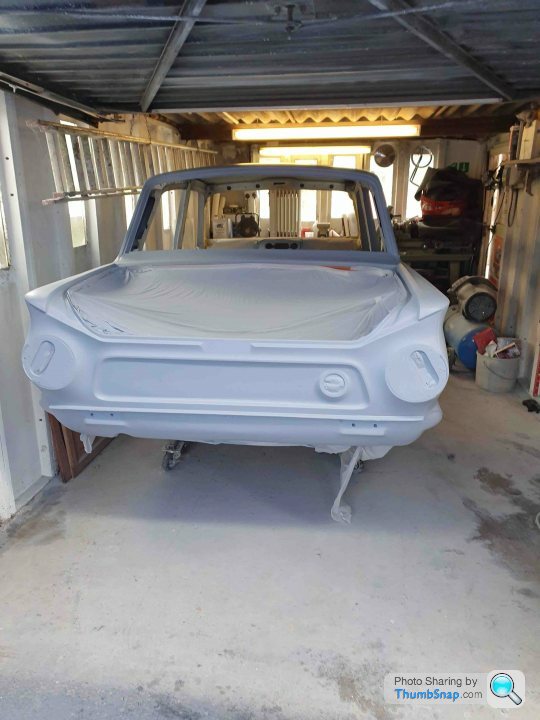
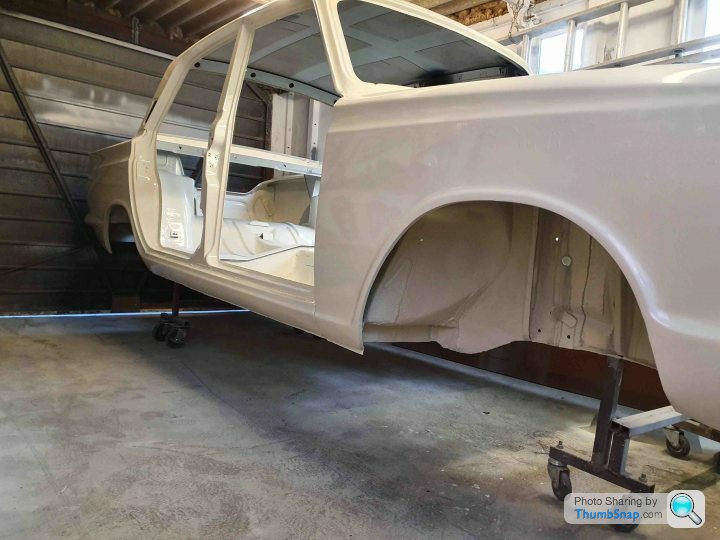
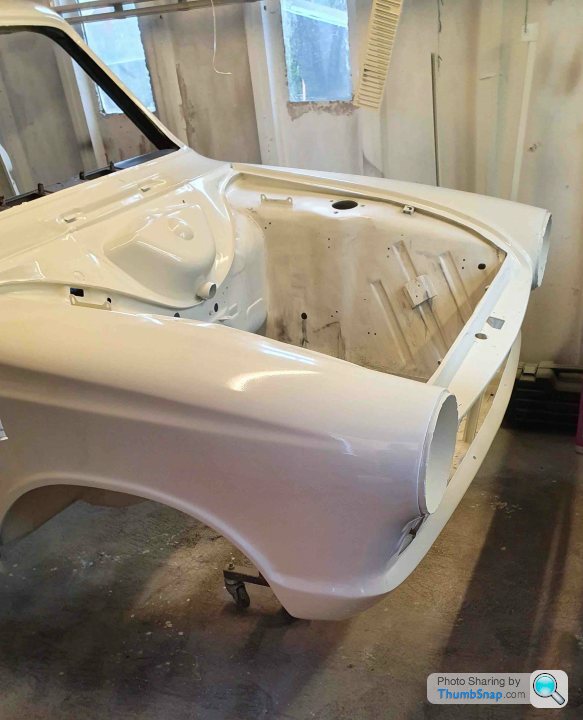
To get the outside of the body in high build came with a new challenge, to date I had been spraying the odd panel or side at most. As you can see in previous posts the Cortina's fit is "snug" in the garage even with my toolbox wheeled outside I can only just get around it if it's positioned correctly.
An out of the box or extension of the box itself came in the form of an awning I'd purchased years ago for the ladies to use whilst we watched Le Mans at home. Conveniently as wide as the garage and tall enough to avoid the up and over door - it even has 3 sides so sealing it to the garage was easier. It looks ramshackle and it was but with the tarpaulin applied correctly it was resistant to wind, rain, outside contaminants and overspray from inside. Plus it looked like a police investigation tent was on our driveway which distracted the neighbours!


This did however create some issues I hadn't considered, the frames I'd made had been designed to the height of the Cortina when its on axle stands at their base setting making spraying the sills easier then made spraying the roof harder because the up and over door restricted head height by 200mm which lead to runs. Then the width of the garage at the door created a bottle neck that I caught the hose on the sill and also got to close when spraying making runs.
The point of this was to learn - the only failure from this would be not to learn fro my mistakes, the benefit is that it's only primer. It just needed more flatting.

There is something therapeutic about flatting primer, I'd put some music on and just wet sand a panel - before you know it you're an album down and the panel looks amazing!

Bobberoo99 said:
I truly am in awe of your gumption Jim!! I absolutely abhor sanding, in fact, I'd rather cheesegrater my nut sack than attempt what you've done!!!
Thank you Bob, it mainly comes down to spending 6 years in Yorkshire - sometimes I only breathe in!I had missed a few photos after the doors were all filled and tidied - I seem sealed which isn't overly exciting it again is a therapeutic job.


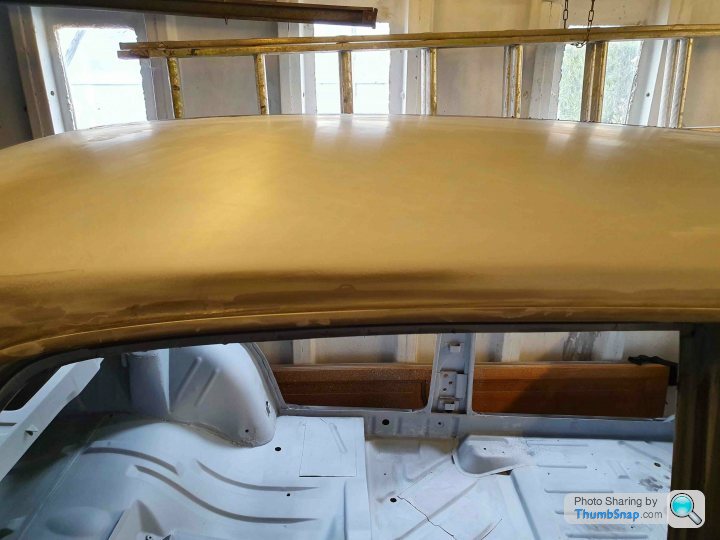
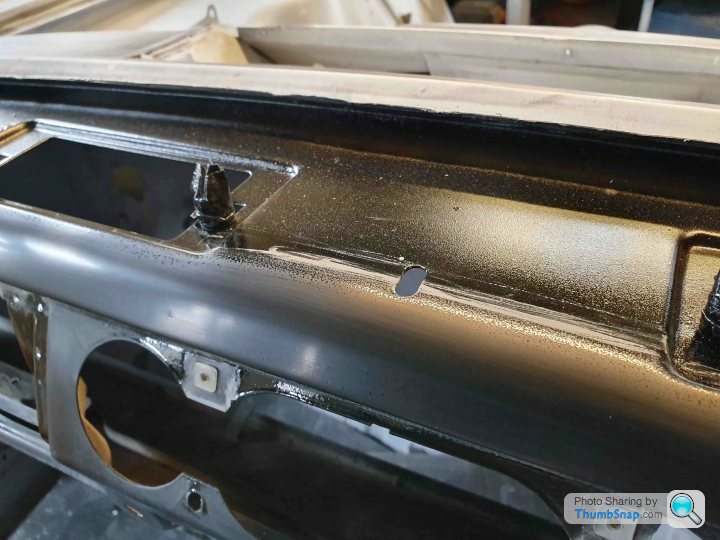
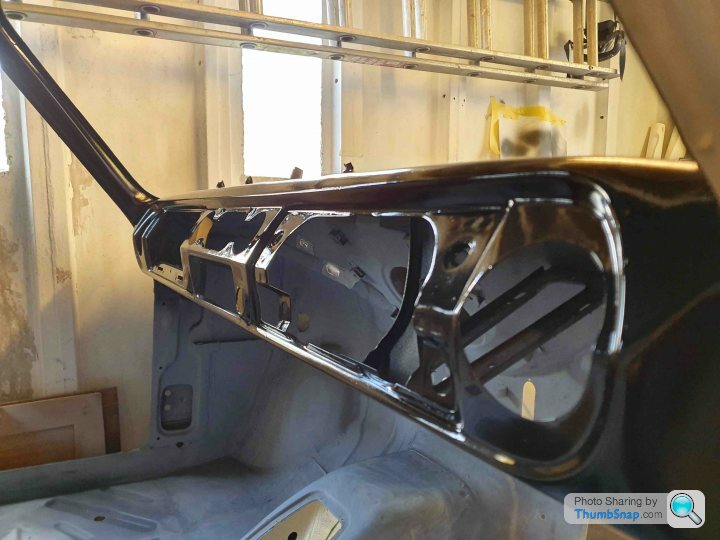
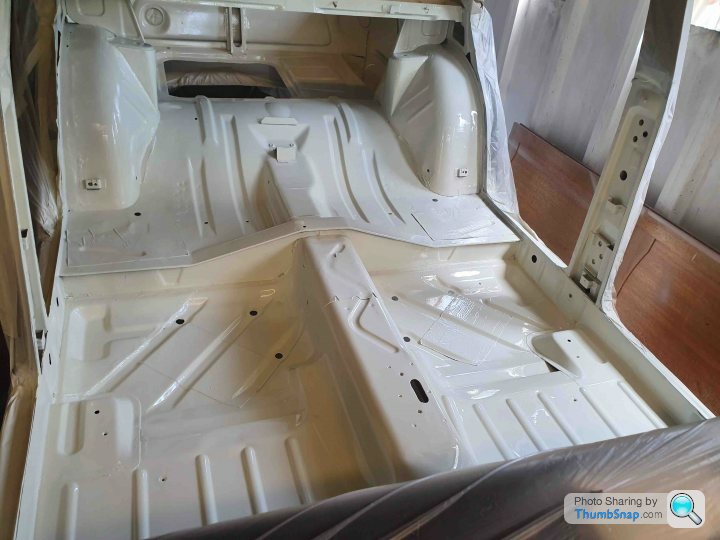
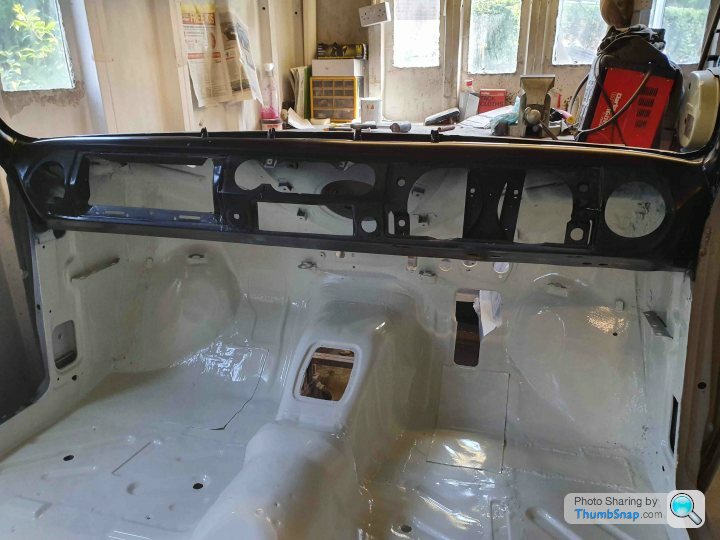
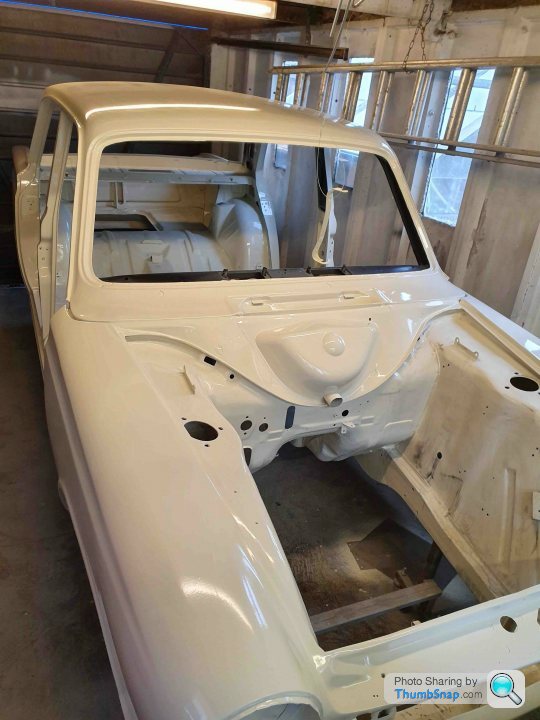
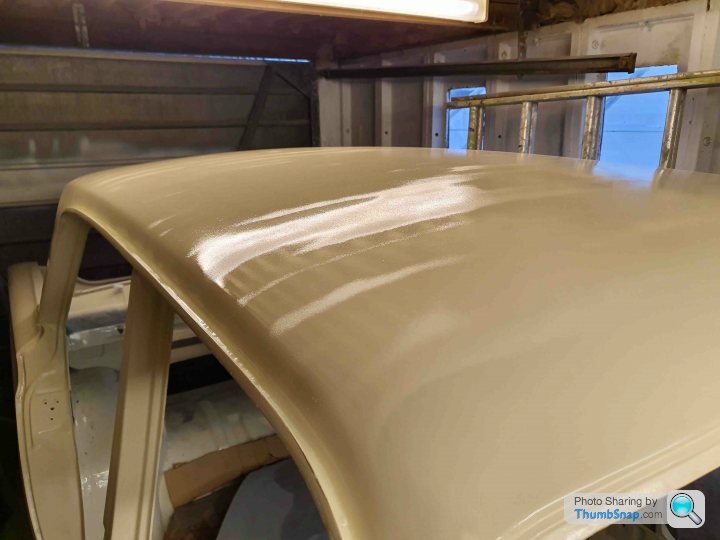
In the midst of wet sanding I decided to have a break and spray the dash, A and B pillars. They're the only black parts other than running gear and I figured that it's easier to mask these off than everything else once I'd applied the Ermine white.
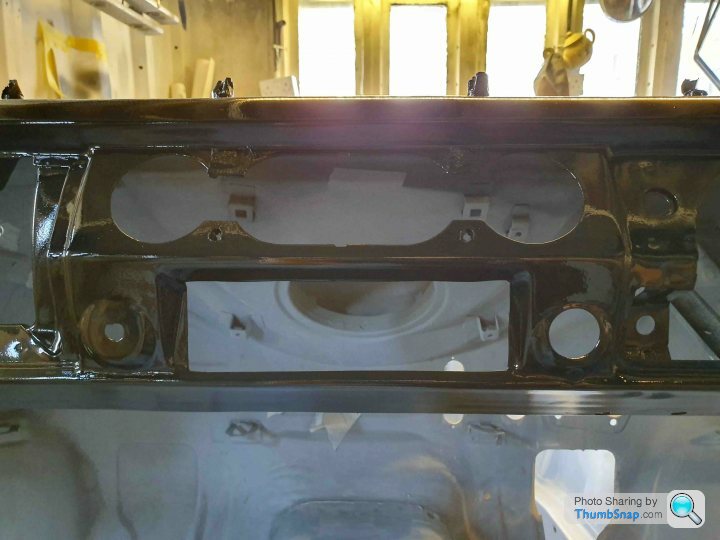
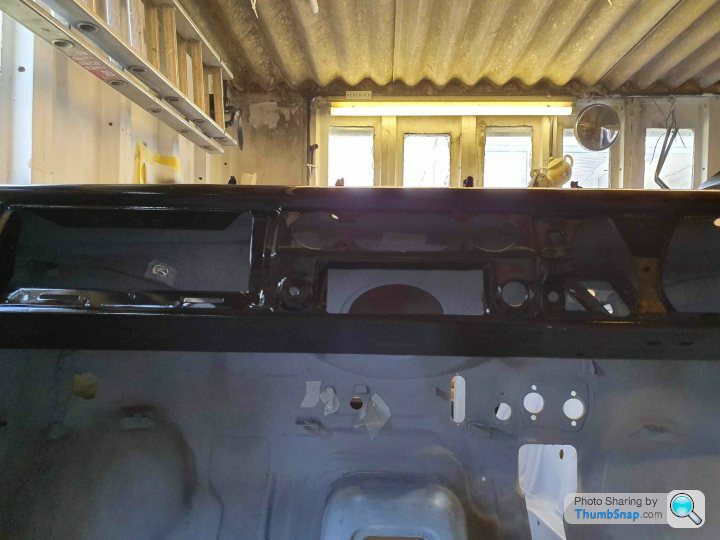

Granted there's some peel which happens but the dash once flattened to 1500 and polished came it nicely
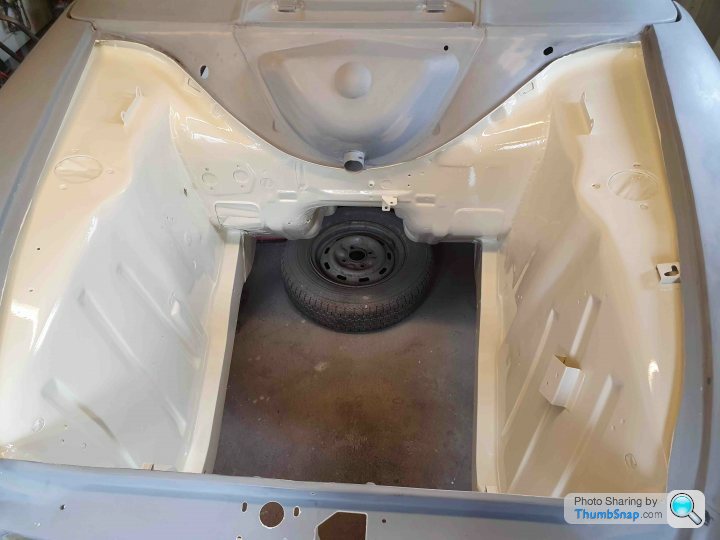
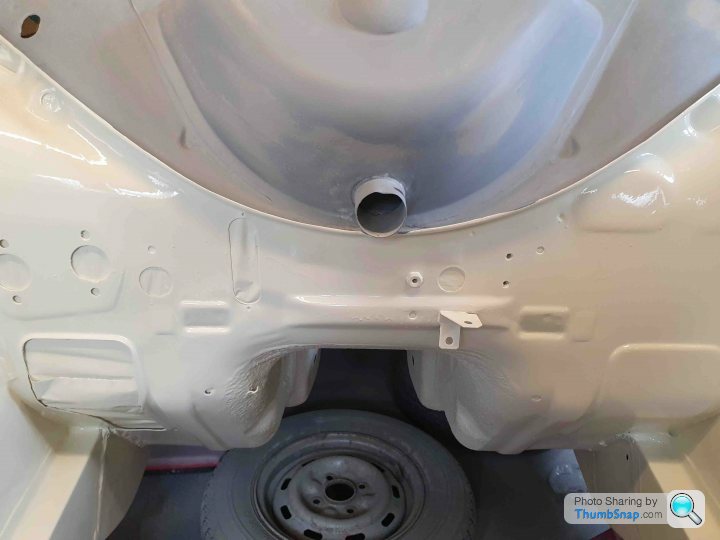
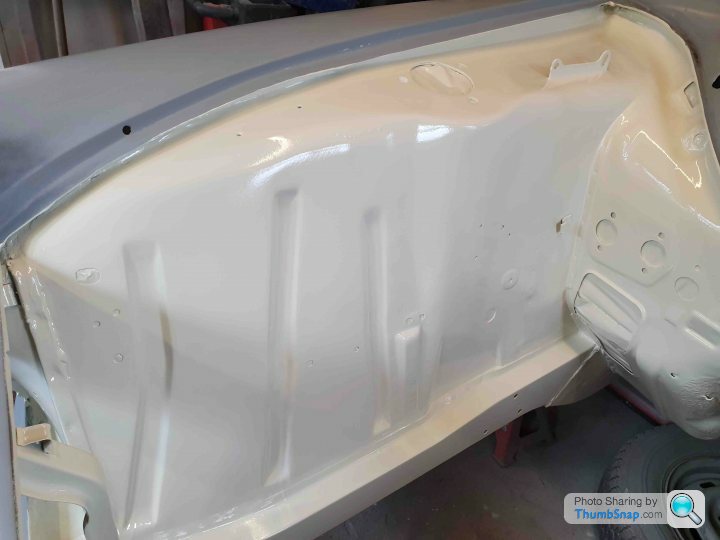
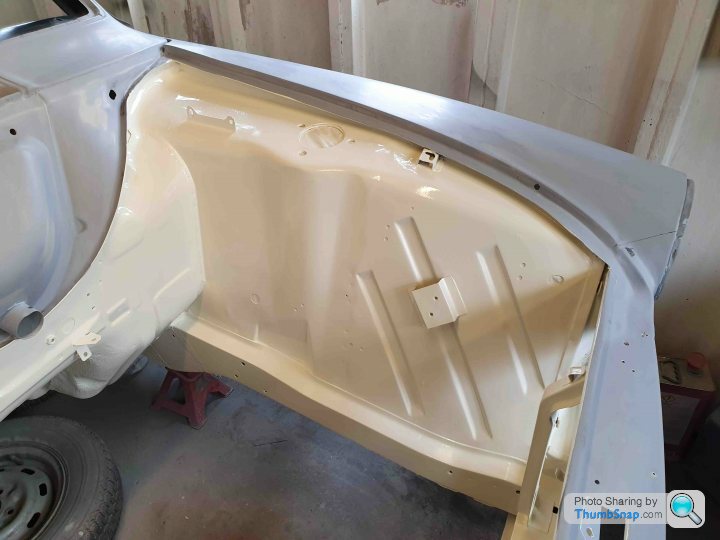
Timewise we're the back end of June 2019, Mrs. Jim and I were off to New York for a week at the beginning of July and I thought it would be a great excuse to apply some paint to the interior and let it cure for a week in the garage which becomes an oven in the summer.
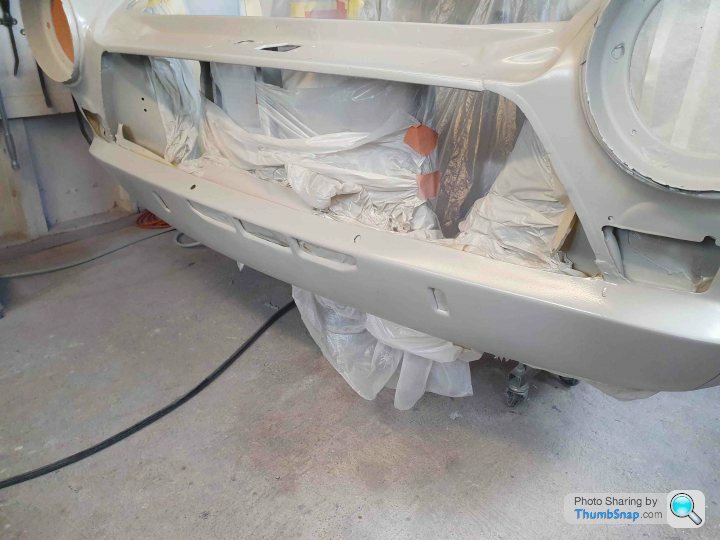
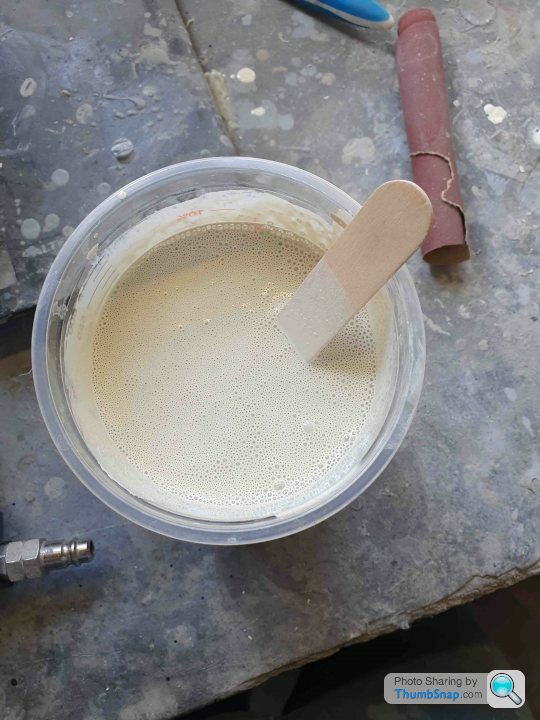
A gratuitous shot of the 1st batch of Ermine White I made for spraying - it was a big day!
A gratuitous shot of me then spilling half of said cup because I didn't tighten the cap on the gun correctly - I had to get my breath back as I was rushing which is a stupid thing to do given the job I was doing...
but the results...
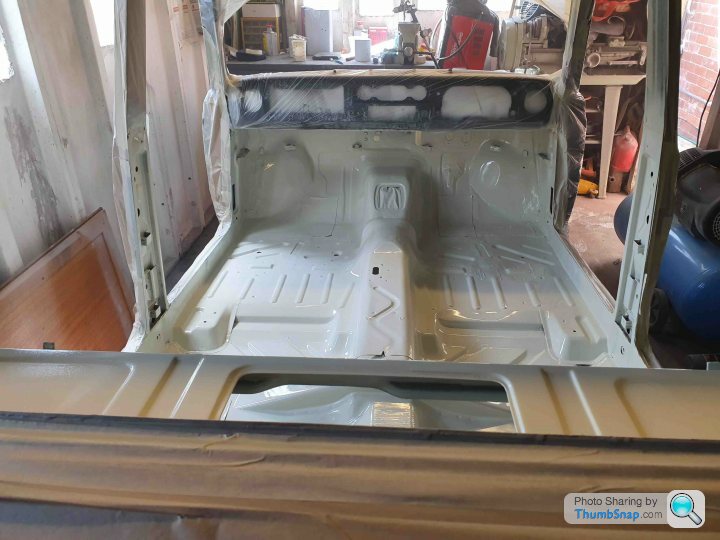


I was amazed, the finish was much better than I expected and to be honest a shame to put carpet on it but I needed something to practice with before doing areas that people will see. I struggled with the back panel in the boot because of access and turbulence in the air but it wasn't that bad and easily fixed.
After a great time in NYC albeit sweaty because it was 38 degrees with no breeze and woeful tea making facilities I thought it would be time to make the engine bay look as good as the interior.
It looks good doesn't it?
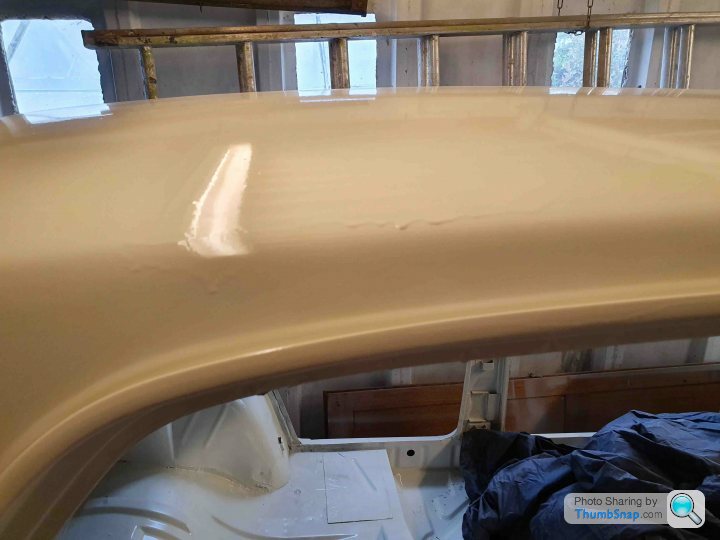
Good wasn't great, and it'll do wouldn't do for me. It was ok from a distance but in reality I could see orange peel and the odd run - both common and even the professionals have these but I wanted it better so I set about flatting the paint which improved things vastly.
This is where the story takes one of its many turns...


Knowing I'd want a glossy finish with the depth of the Mariana Trench I purchased a polisher from eBay I didn't do my research which has bitten my in the arse as even on the lowest speed setting its a brute and isn't dual action so I burnt the paint


Bugger - I downed tools and walked away, a bit of time to regroup, read a bit more about what I'm trying to do and come back a better person!

LimeyBoy said:
A favorite thread, so enjoyable to follow your progress (and the odd bump). Thanks for taking the time to share
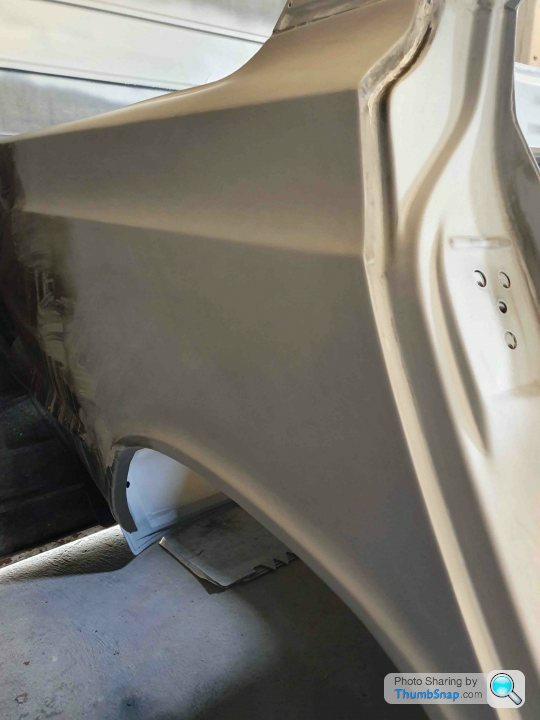
Thank you LimeyBoy, you're welcome. I'm hoping that some of this serves as a cautionary tale but also that not only is it ok to make mistakes it's worth having a go.This leads me into the next steps with the Cortina; with the inner wing paint needing repairs I flattened the paint, masked it off and the rest of the shell and figured whilst I was mixing paint I'll might as well do the rest of the shell.

I had problems with the finish with this, I found the first patches I sprayed were ok but then seemed to be rather thick - I had always mixed the paint at 10% which was correct but when this happened I removed the paint, stirred it and added another 5% approx to get a decent spray. It worked and I continued and from the pictures above it on the whole looked great. I was constantly moving the shell to ensure I wasn't too close as per the primer spraying issues and it seemed to work but christ was I sore!
With everything cleaned and packed away I called it a day, I went back into the garage the next day to asses the work and was treated by this horror show!

It looked like it was melting!
I had over thinned the paint, instead of stopping and potentially losing 500ml of paint I'd wasted 2L approximately all because I made a bad call. My only excuse for this is my want to get the Cortina back on the road.
Because of the over thinned paint it wouldn't cure fully - especially the outer coat (1 applied 3 coats in that session 30 mins between which at the temperature in the garage was more than enough for the previous coat to flash off.) So when I went to sort the runs the paint peeled off.
I spoke to some people on another forum who confirmed my errors and so I was tasked with brush painting the areas of paint that had peeled and wet sanding the entire body back to 400 - putting me back to square 1.
This took longer to do than primer as the paint would bind up the sanding pads - here begineth the lesson!
A month later I had sorted the paint issue and gone to a level of detail that was above and beyond necessary but this is all down to prep. I tried again.

I had tried my best when cleaning the gun after spraying sessions and between paint batches but I must have missed something and as I found out gun wash exists for a reason, I believe that the reason I struggled before was because of a blockage or reduced flow through the gun due to a build up of primer, black paint and now ermine white. This meant the latest spray whilst only have the 1 run looked like artex!

I was annoyed, at myself admittedly I'd now used up 5L which should have sorted the whole car!
I was also annoyed because it beat me, I didn't want to gamble £5-600 on materials for a 3rd spray that given my last 2 attempts could be awful. I called in a professional - he was very kind to me, he was surprised what I'd achieved in my garage using DIY tools and offered to teach me some skills (which I should take him up on.) I decided to concede and let him do the work as I was offered a full spray job, flattened and polished and the spraying could be done within a fortnight. It was September by this time so I knew I'd lost the weather so if I sanded the body to 400 they'd sort the rest. I'd also have to prep the doors, bonnet and boot to high build which was straight forward and I used a new gun which proved that the last one was a write off.
Then I had a disaster! Yes another!...
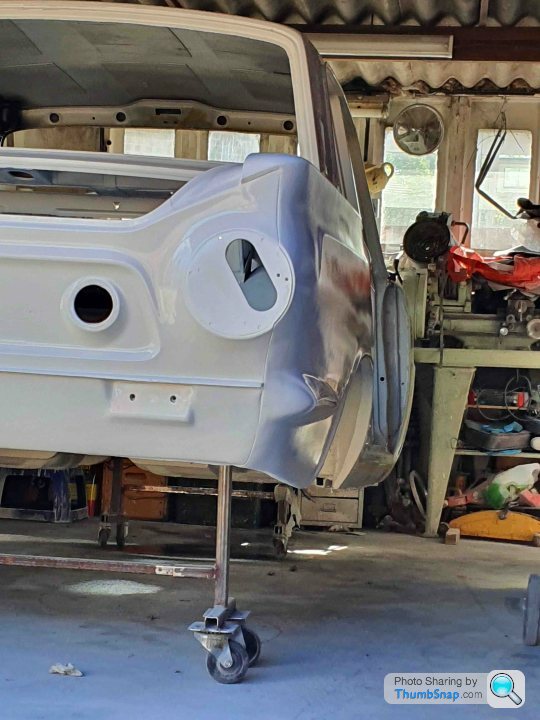
When taking the NS rear door off the hanger I lost my grip and dropped it.
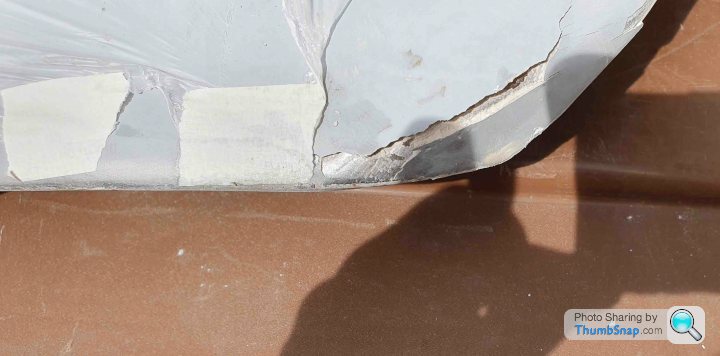
I knew it was bad because whilst venting my frustration like John Cleese at his Austin 1100 in Fawlty Towers my wife came out because she thought I had injured myself!
The door skin wasn't worth saving - this was the one with a crease across it, so I ordered a new skin - it only arrived this week! I was told it would be 6 weeks not 4 months!
The bodyshop have been great and have said they'll sort the skin and the spraying of the door as part of the original quote. so it'll be going back soon.
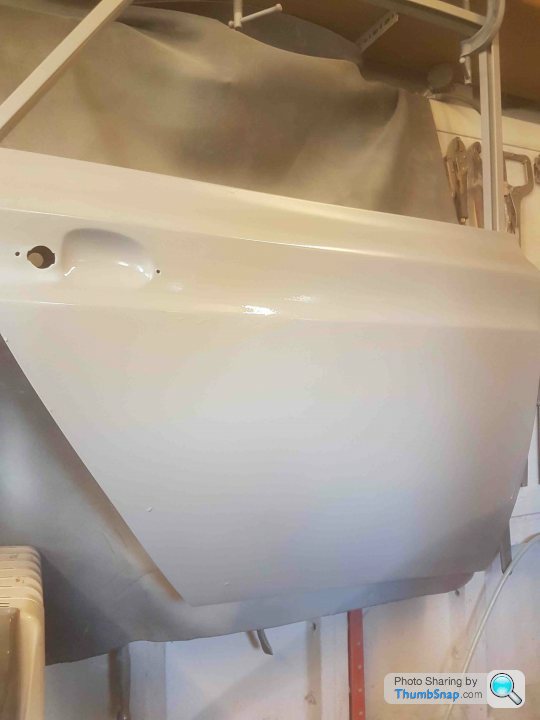
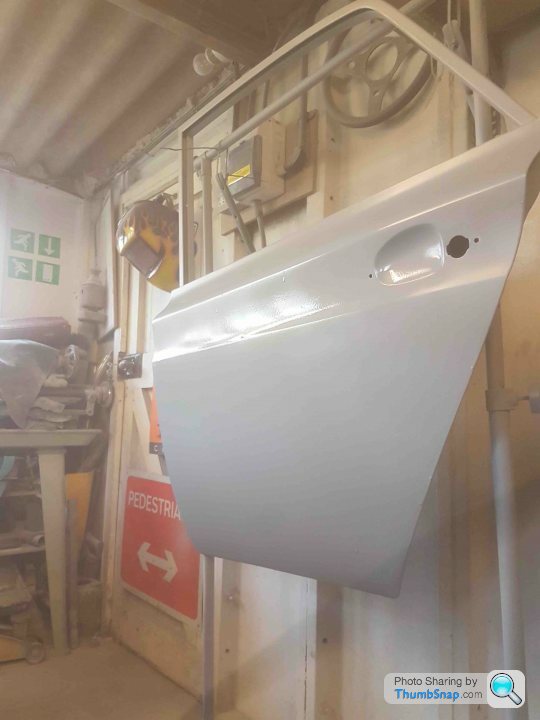
However - the rest of the car has been painted and I'm much happier with the finish and I'm also terrified of getting too close to the paint when in the garage!

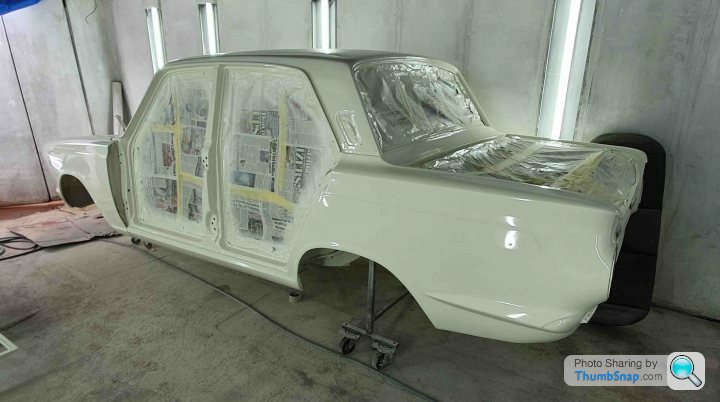

A happy ending (not like that!) but now the posts are about me fitting stuff to the Cortina!
Gassing Station | Readers' Cars | Top of Page | What's New | My Stuff