R5GTT project - off the road from 1998 to 2014
Discussion


Hello Folks,
This is a copy of a thread posted on another forum.
October 2013
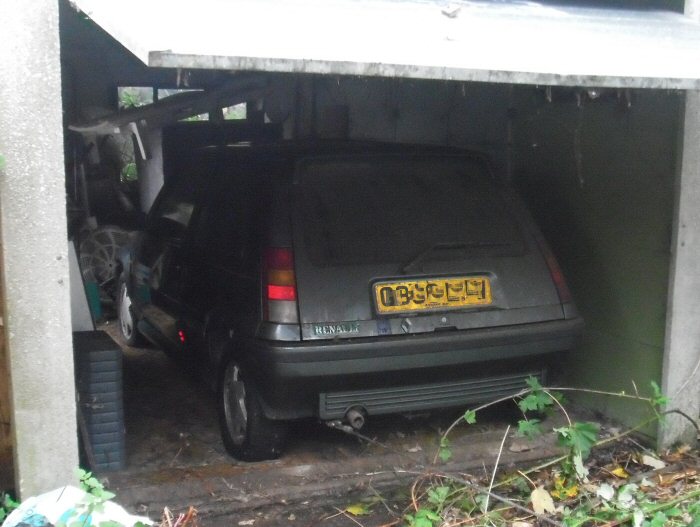
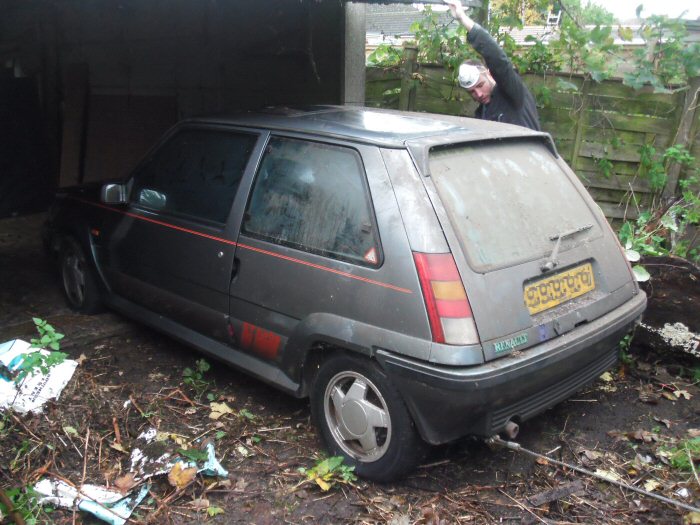
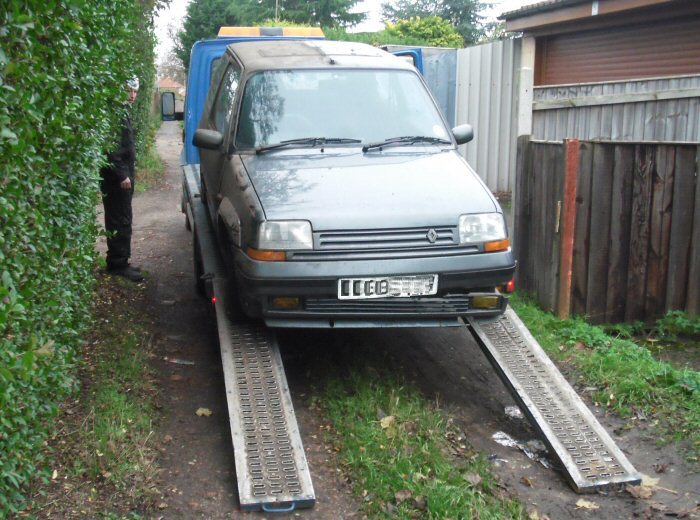
Well, I've finally got round to it. Lurking in my garage for the past 15 years,
almost to the day is my old R5GTT. It had served me well for several years
before I bought myself a brand new Megane Alizé in September 1998.
Of course, the intention of keeping it on the road was always there, but I got
overtaken by events, not least with my health, progress of my disability, etc.
Anyway, after a very long while of not even setting eyes on the car, simply
because the path was overgrown on the garden side and an old tree stump
blocking the outside garage entrance, I finally regained access.
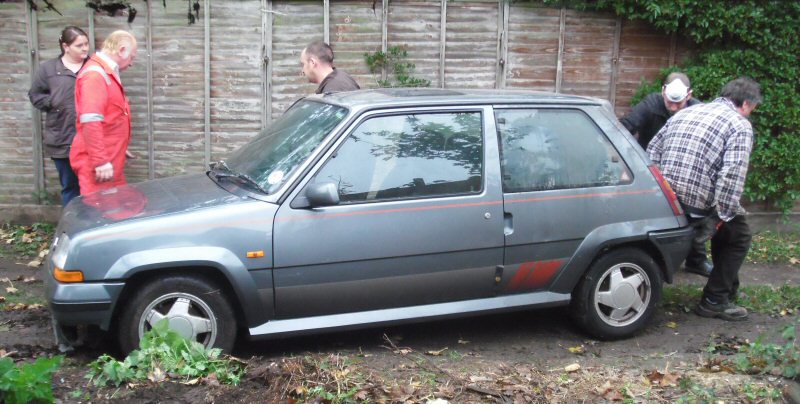
What I found was relatively surprising! The car was in far better shape than I
had imagined it might be. The restoration will be done by the guy who looked
after this car for me when it was on the road. He came round to give the car
a quick survey today. I could not believe my eyes because he came equipped
with a charged battery.
I remarked that he was a bit optimistic, but he just shrugged his shoulders
and said: "You never know..." After a good look around underneath, finding
and pronouncing a pretty solid looking car, even with sound jacking points
he then proceeded to connect said battery and got the engine turning over.
His immediate reaction being that there was good oil pressure!
The engine oil was still remarkably clean and the coolant was still its bright
green in the expansion pot! It seems that I've been hugely lucky that the
car hasn't just disintegrated. I guess that was partly because it was well
looked after when it was roadworthy. It looks like that's paid-off handsomely!
Video Compilation
Now that the thread has grown to such a size, you might prefer to watch
these compilation videos of the restoration progress. They should look quite
good full-screen.
There are 10 in the playlist...
Otherwise...
I'll let these photos start the story...
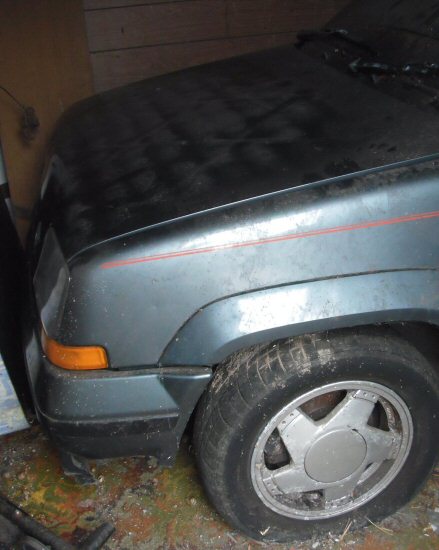
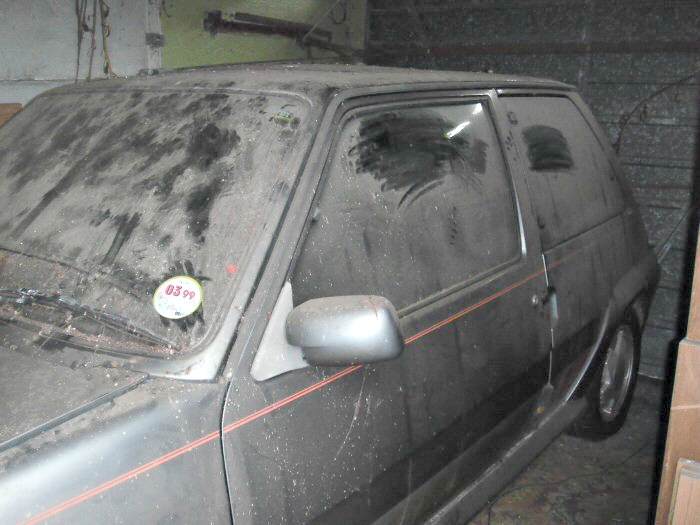
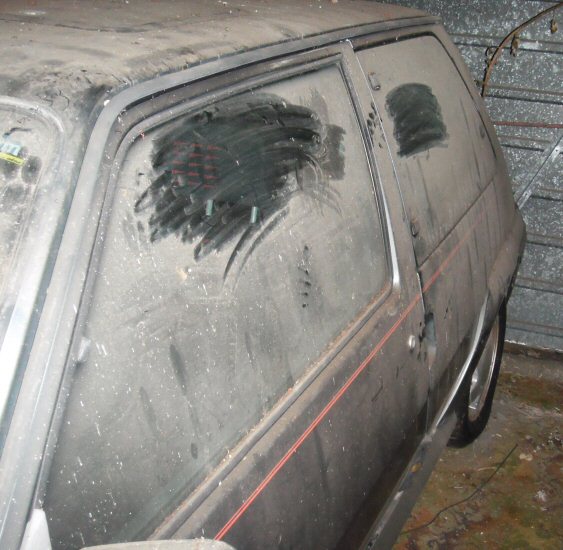
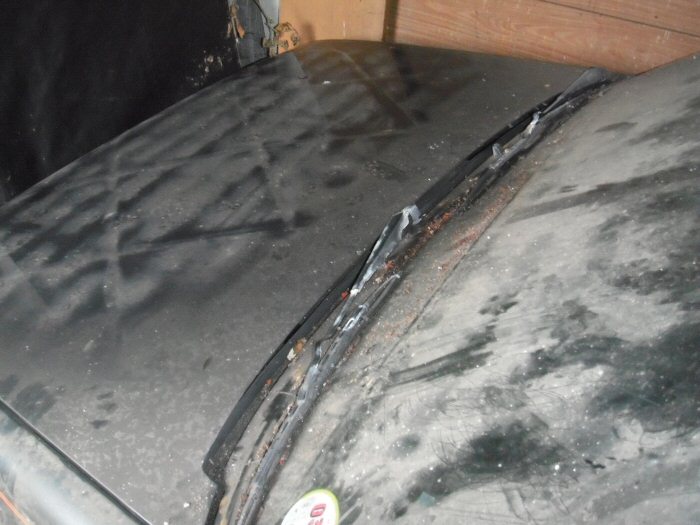
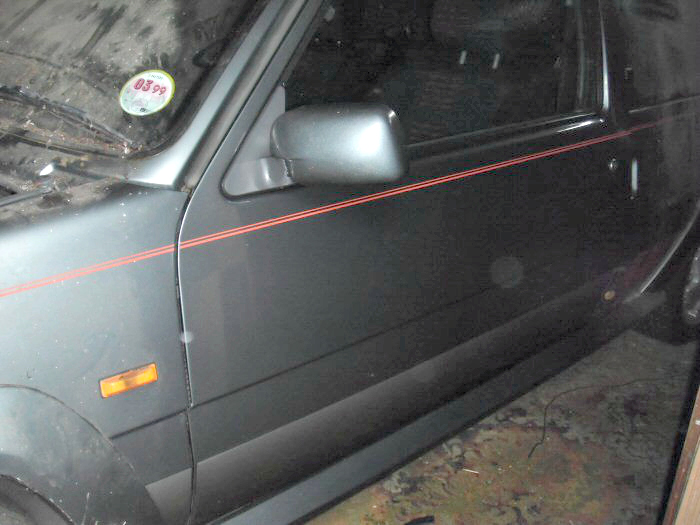
So, that's the body not looking in too bad shape. The main worry was the
scuttle below the windscreen, but that only seems to be showing light
surface rust. We'll be taking the screen out to have a better look in due
course, but there's no cause for concern
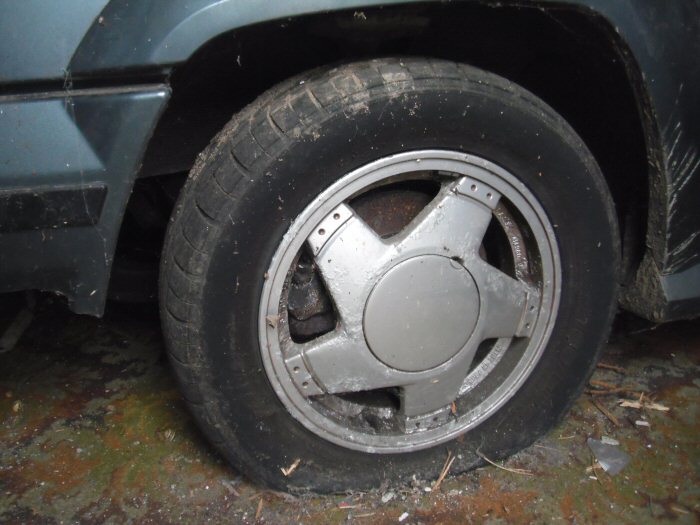
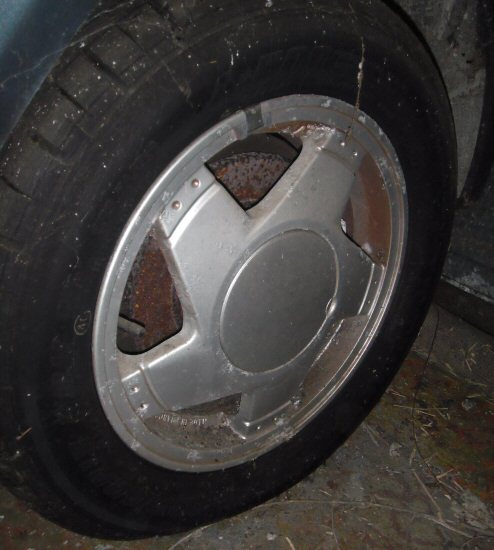
The wheels will want a refurb...
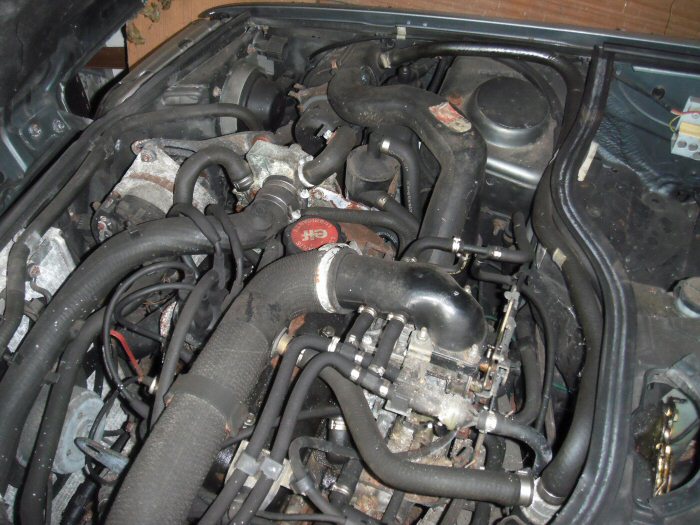
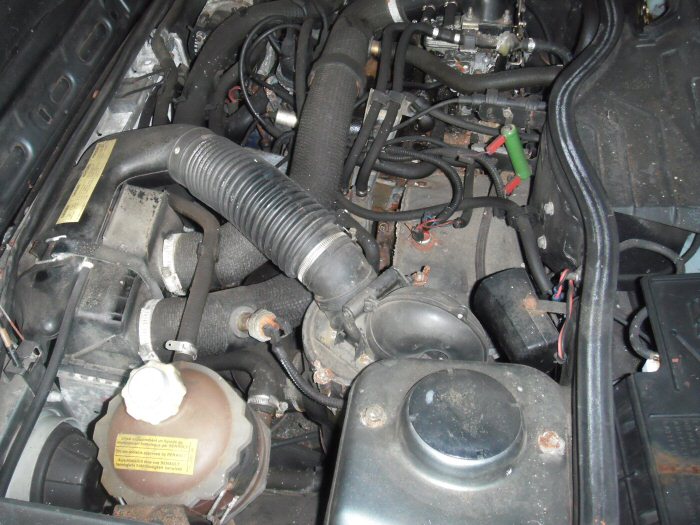
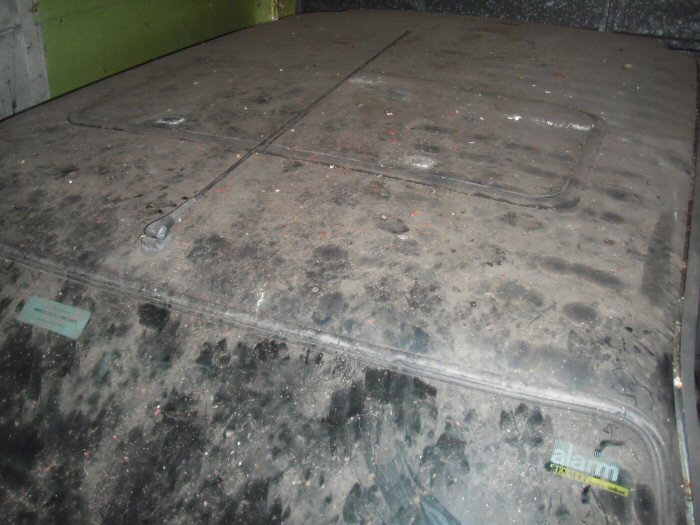
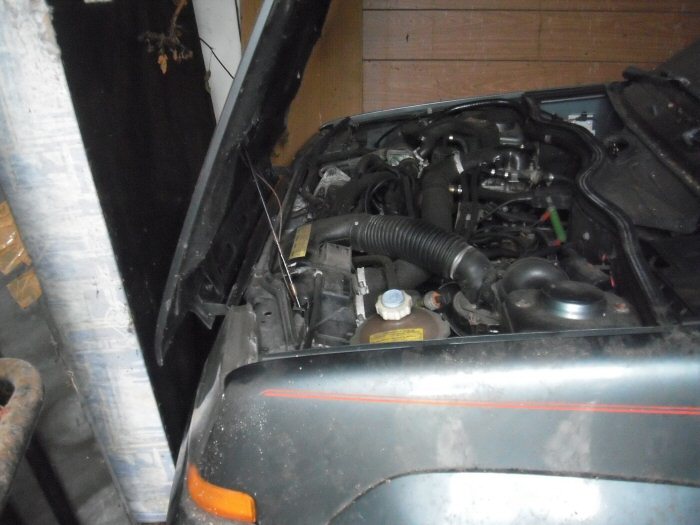
The biggest surprise was under the bonnet! That completely belies 15years
of neglect. I suppose that betrays me as a long-term detailer
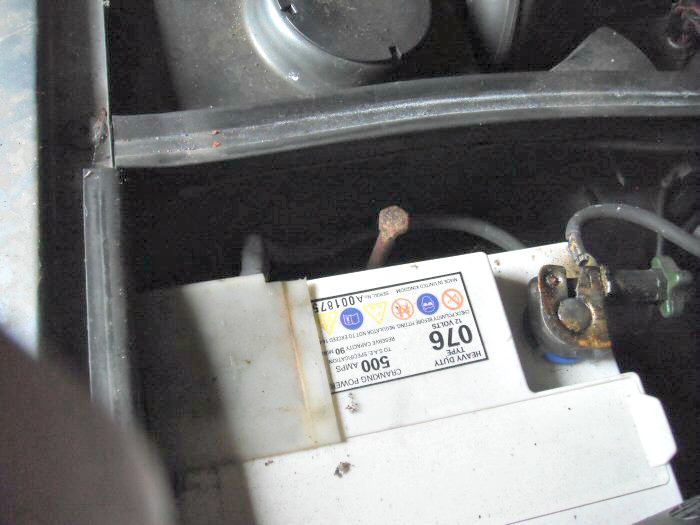
I could not believe how clean the battery terminals were! I was expecting
them to be furred-up completely...
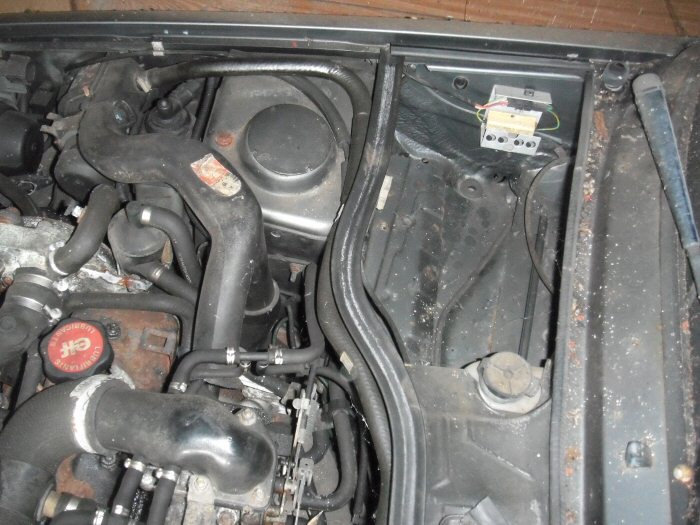
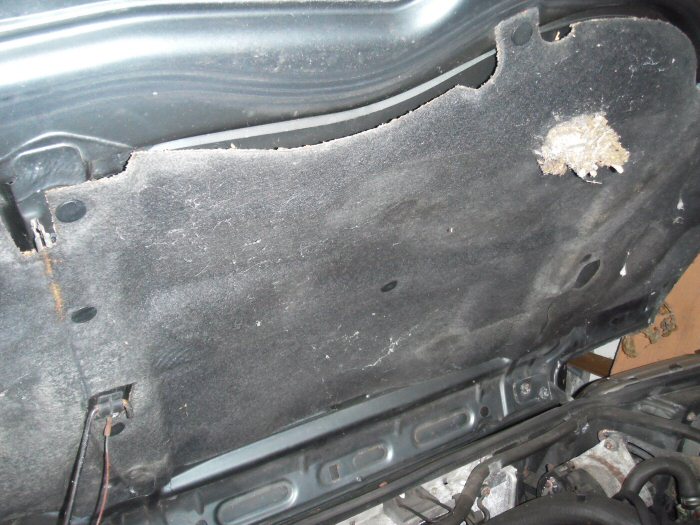
Something decided to nest in the sound dampening pad below the bonnet,
though not much damage caused...
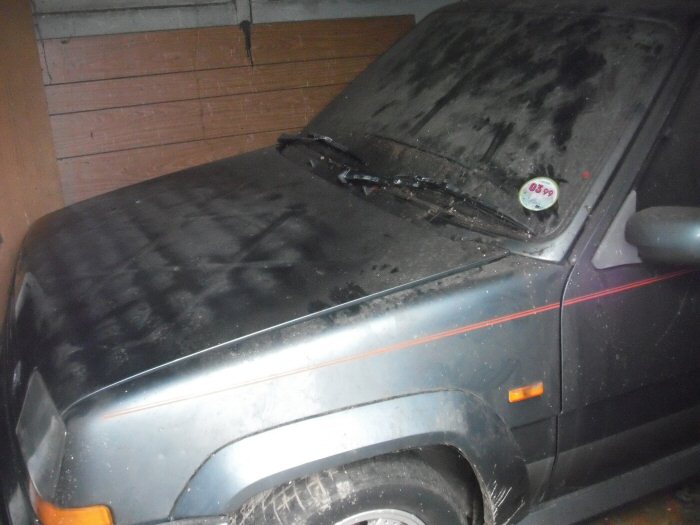
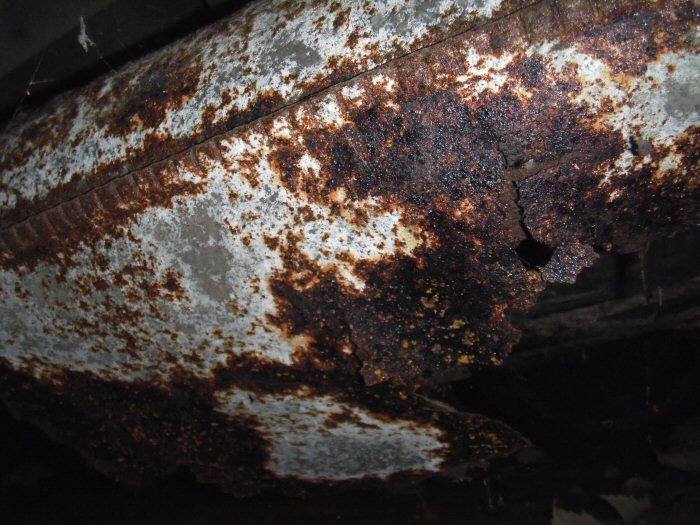
Here's the scuttle close-up! That's probably the most expensive bit to get
repaired if the tin-worm gets its way - phew!!

It looks like a cat has been after the nest-building mice...
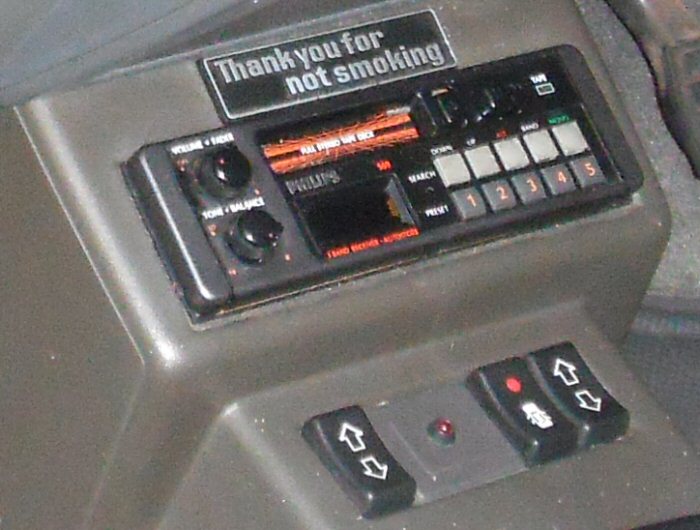
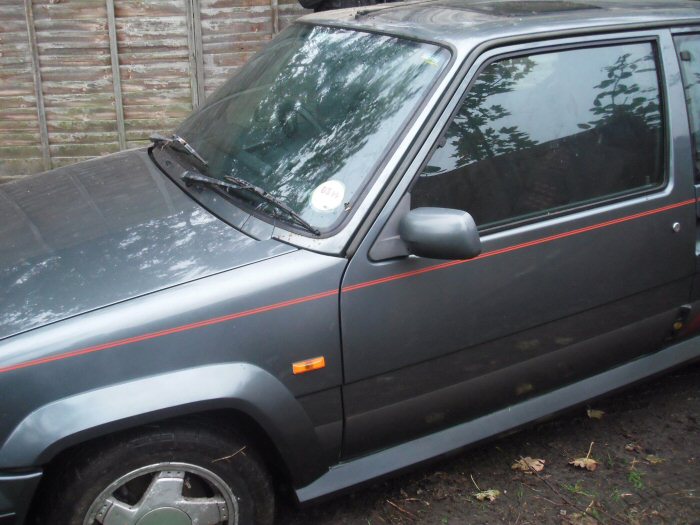
The car was always dealer serviced and the blue label beside the rear view
mirror is worthy of mention. Initially, such cars were identified by a yellow
sticker affixed to the passenger side. These were displaced by this label
which showed the date and mileage the next service was due on.
There is MoT notifiable damage to the windscreen, so it will need replacing.
Sadly, I won't be able to transfer the service reminder label, it'll disintegrate
the moment it's touched.
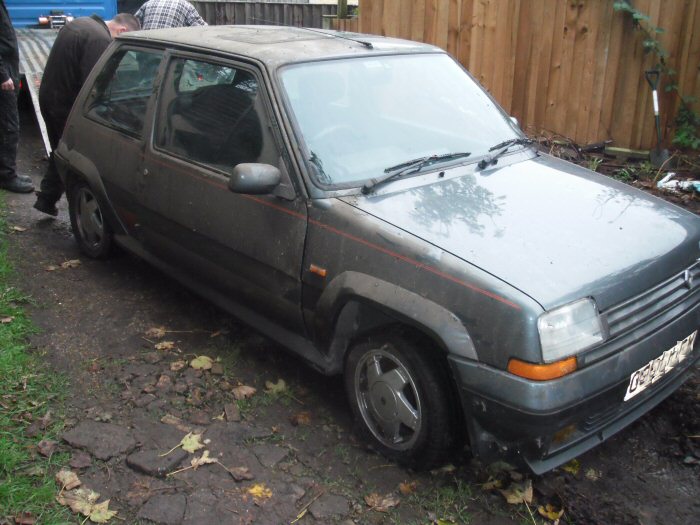
So, now to the clean-up. The following photos are showing nothing more than
a very quick clean, using Optimum No Rinse (ONR) from the QD bottle, some
Serious Performance cleaning QD and a half-bucket of water with 2 capfuls of
Chemical Guys Hose-Free Eco (HFE) in it. A noodle mitt and a small selection
of MF cloths will be used for wiping and drying.
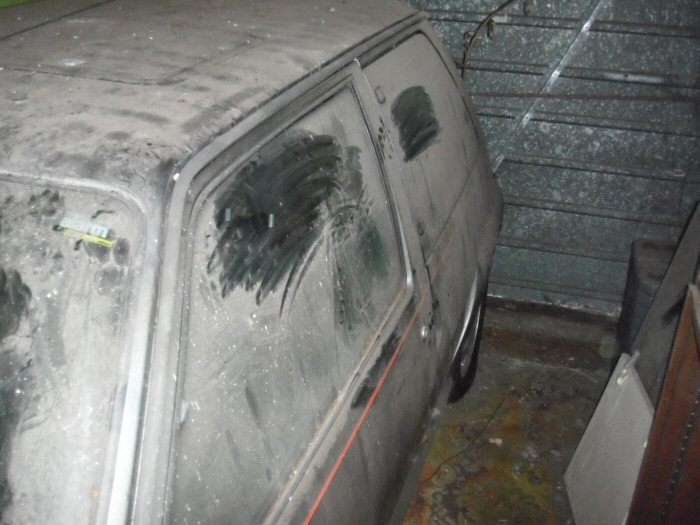
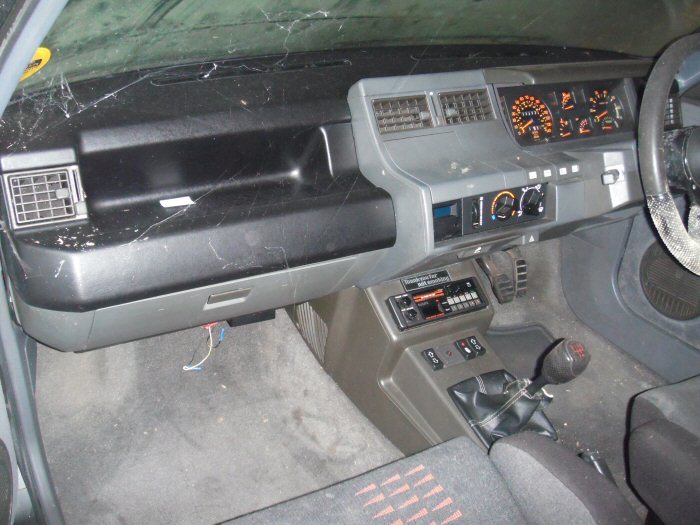
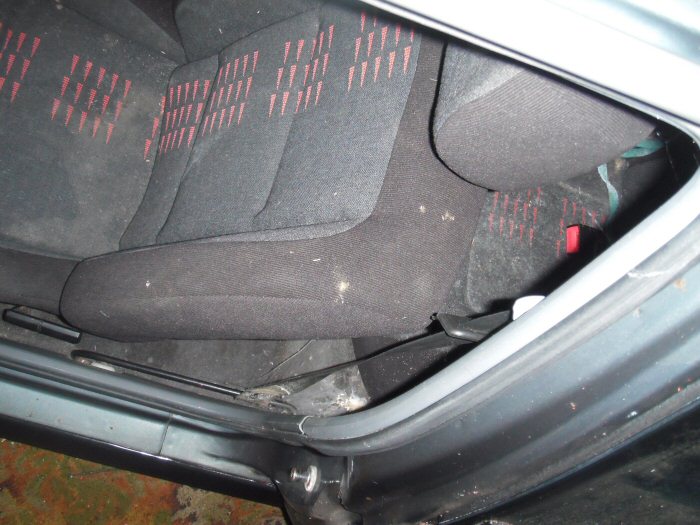
The door window cleaned for a first glimpse of the interior...
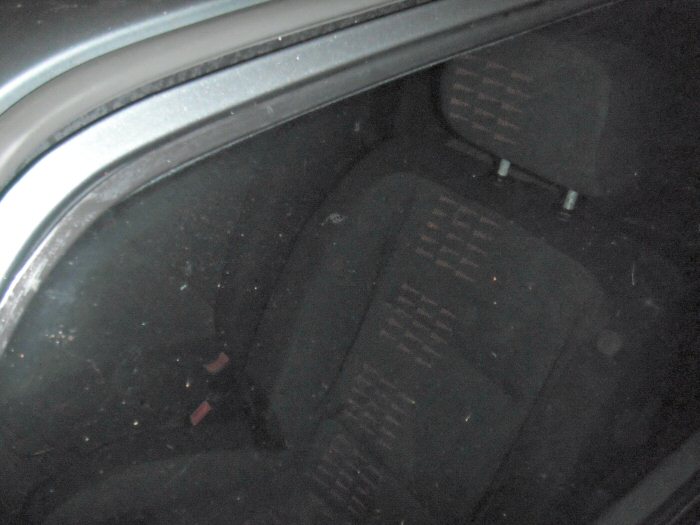
Then 4 views of the interior. Not bad, bar the few cobwebs
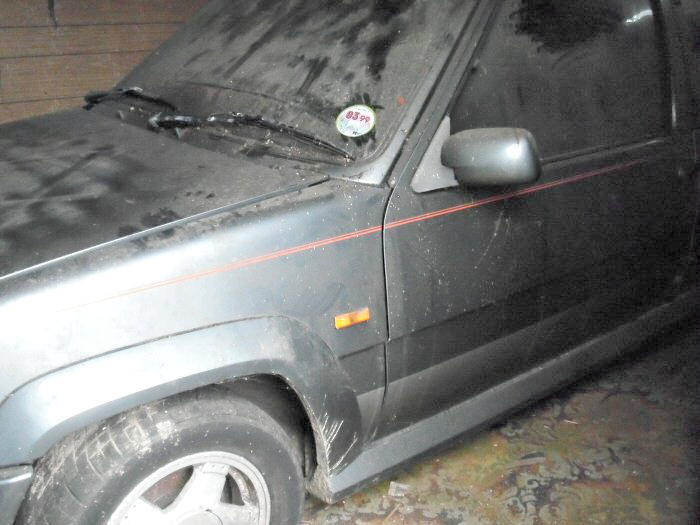
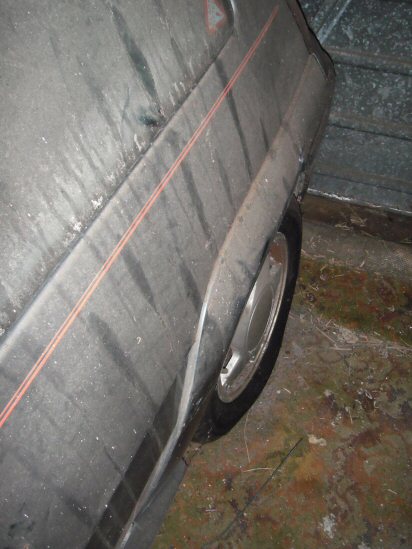
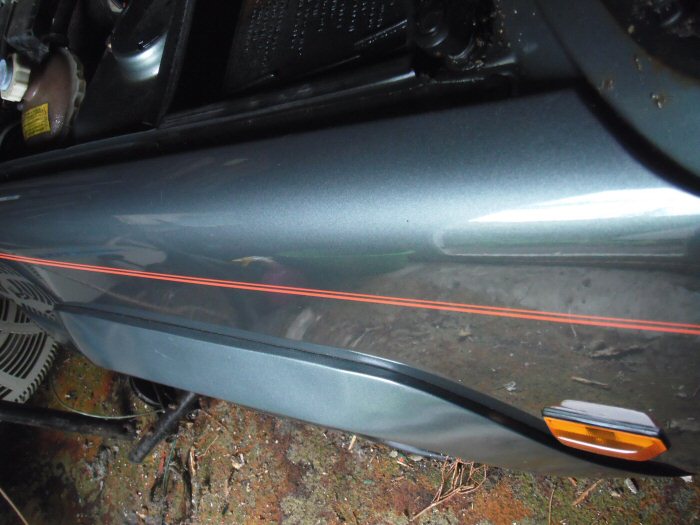
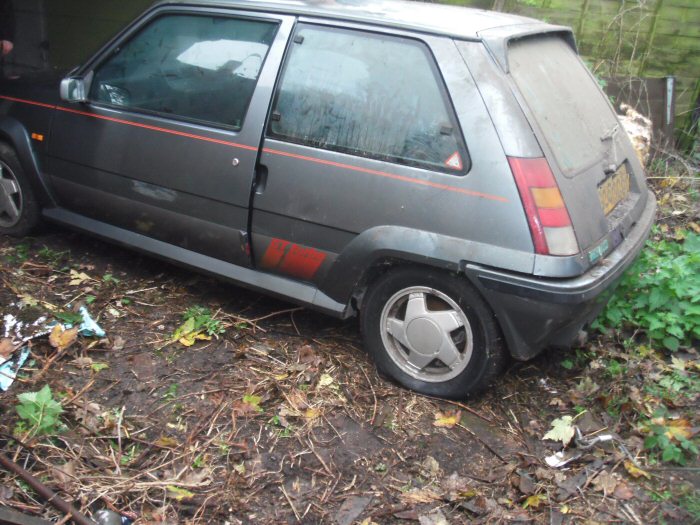
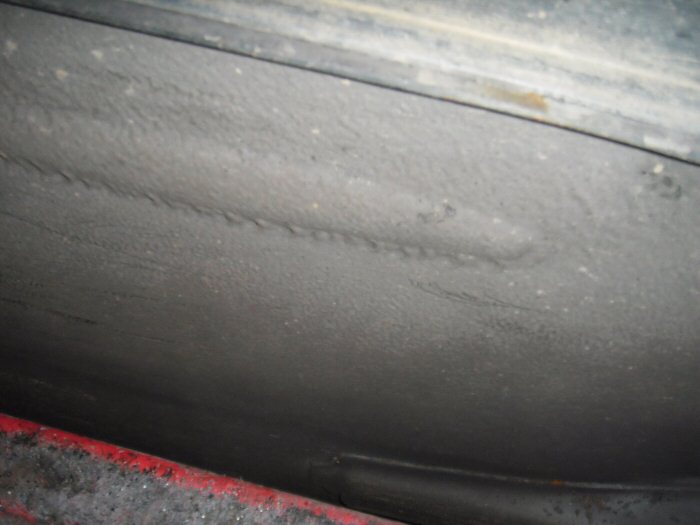
Now 3 views of the passenger side door-shut. Some minor tin-worm evidence!
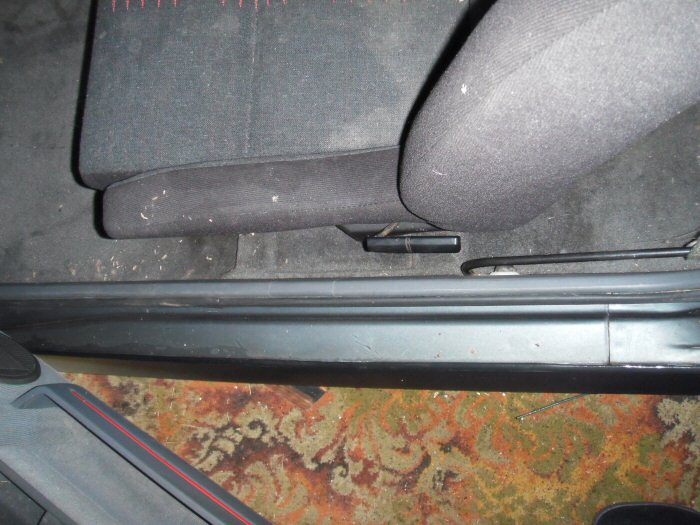
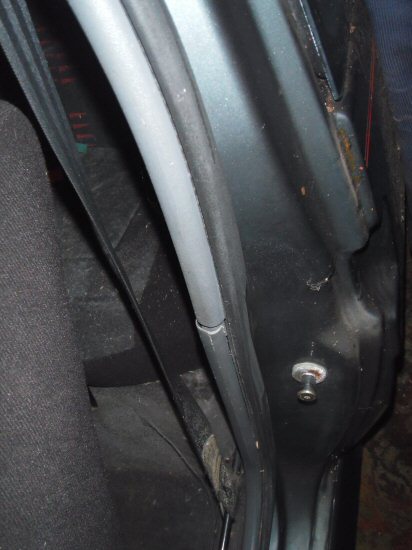
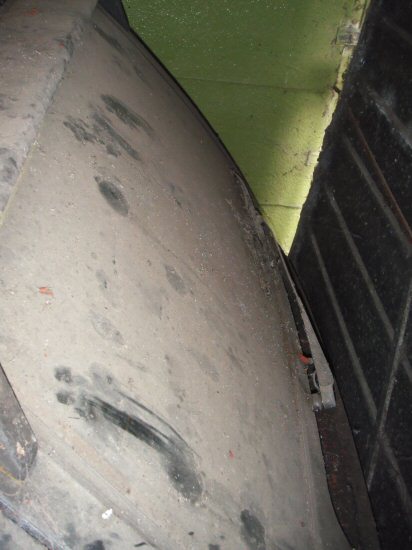
The bit that I'm still very cross about. I parked the car in a council car park
and when I reversed out caught part of the footing of an ancient ice-cream
stall. Waveney DC denied all knowledge!
So, I've got the door clean...
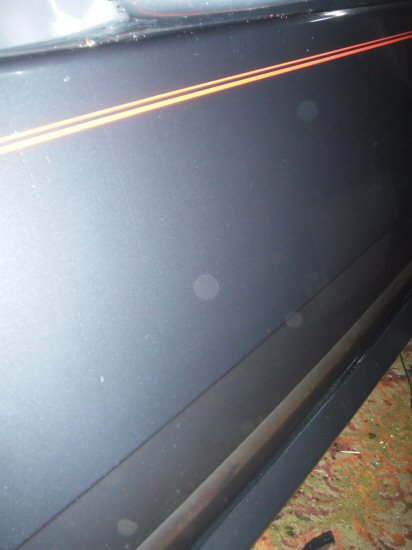
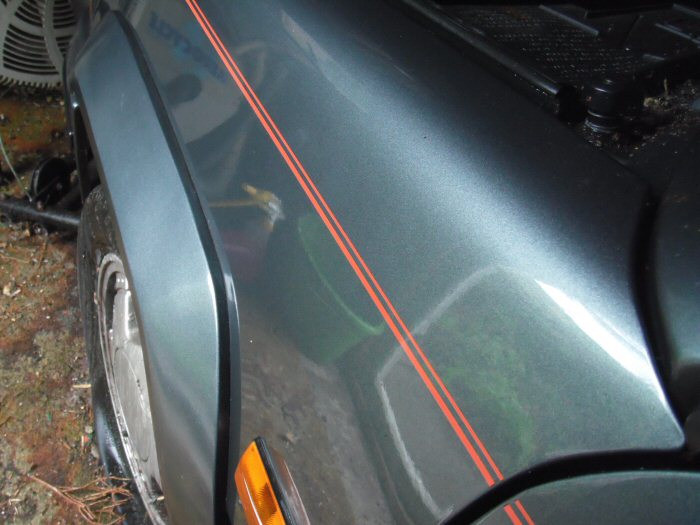
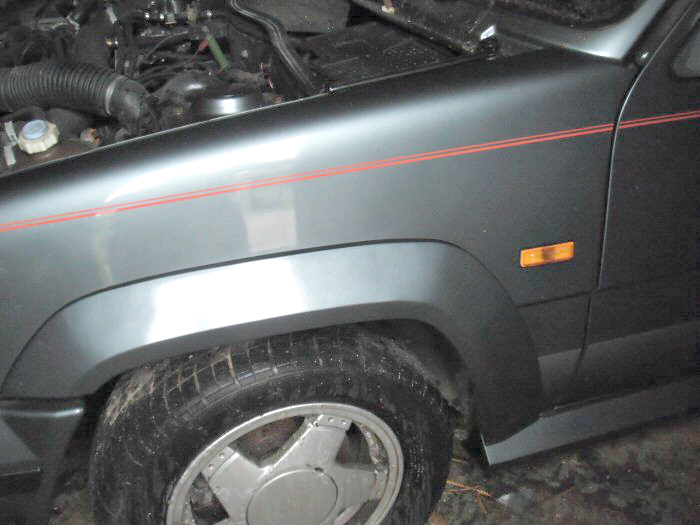
Now the front wing. Thats just an ONR / HFE combination clean - honest!
The next three pictures will give an indication of how the paintwork
was looked-after when I first had the car on the road. The car was
maintained with Harlys Wax and I can barely believe that 15 years
later it would still look this good. I'm not expecting any trace of the
wax to be left, but it shows how important your prep is ahead.
A cheeky 50/50 :lol:

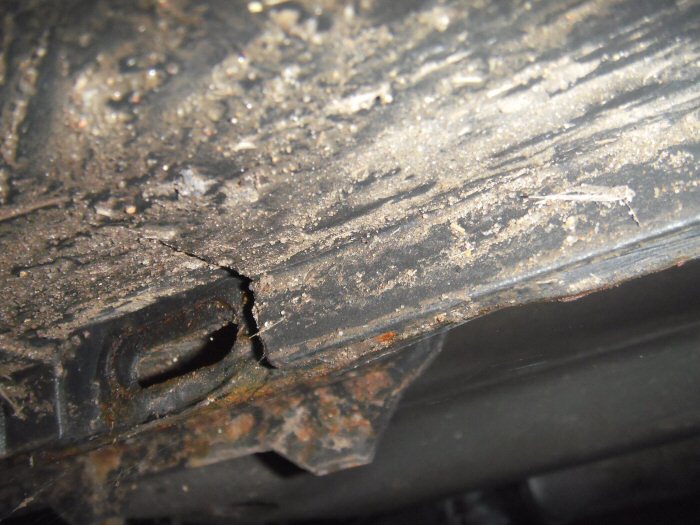
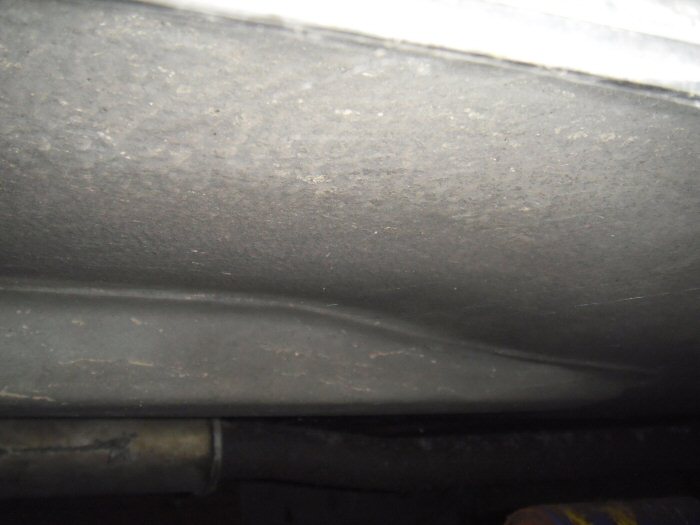
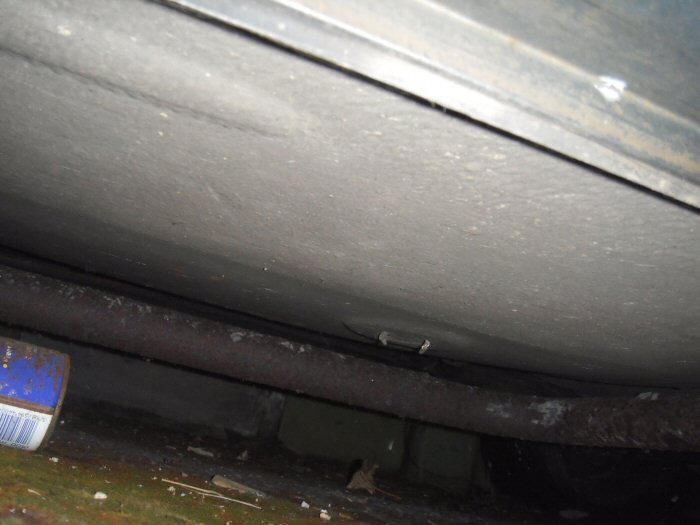
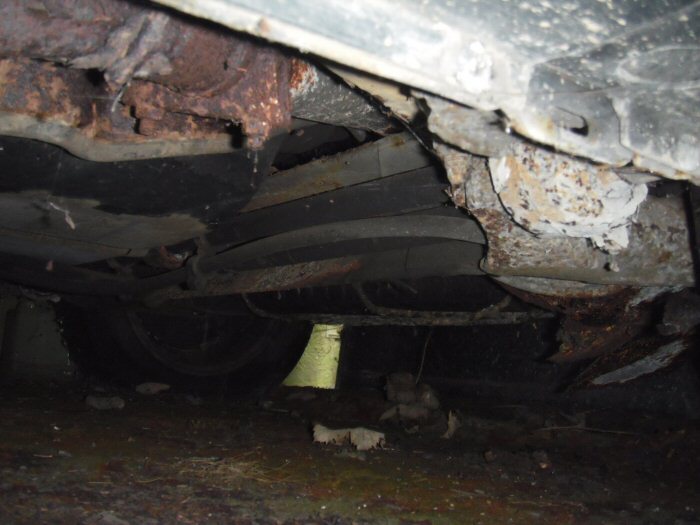
...and now the bits I was really dreading. Of course, the exhaust system is
going to need replacing, but otherwise, things under there don't look too bad.
Nothing was falling off when the door got closed. The floorpan is remarkably
solid, so it's not going to be an horrendously expensive restoration.
I'll be updating this thread over the coming weeks. The next stage is to put
in a new battery, plugs, some new petrol etc., and maybe get the engine
started. It'll then be moved to a new location for work to begin.
Regards,
Steve
This is a copy of a thread posted on another forum.
October 2013
Well, I've finally got round to it. Lurking in my garage for the past 15 years,
almost to the day is my old R5GTT. It had served me well for several years
before I bought myself a brand new Megane Alizé in September 1998.
Of course, the intention of keeping it on the road was always there, but I got
overtaken by events, not least with my health, progress of my disability, etc.
Anyway, after a very long while of not even setting eyes on the car, simply
because the path was overgrown on the garden side and an old tree stump
blocking the outside garage entrance, I finally regained access.
What I found was relatively surprising! The car was in far better shape than I
had imagined it might be. The restoration will be done by the guy who looked
after this car for me when it was on the road. He came round to give the car
a quick survey today. I could not believe my eyes because he came equipped
with a charged battery.
I remarked that he was a bit optimistic, but he just shrugged his shoulders
and said: "You never know..." After a good look around underneath, finding
and pronouncing a pretty solid looking car, even with sound jacking points
he then proceeded to connect said battery and got the engine turning over.
His immediate reaction being that there was good oil pressure!
The engine oil was still remarkably clean and the coolant was still its bright
green in the expansion pot! It seems that I've been hugely lucky that the
car hasn't just disintegrated. I guess that was partly because it was well
looked after when it was roadworthy. It looks like that's paid-off handsomely!
Video Compilation
Now that the thread has grown to such a size, you might prefer to watch
these compilation videos of the restoration progress. They should look quite
good full-screen.
There are 10 in the playlist...
Otherwise...
I'll let these photos start the story...
So, that's the body not looking in too bad shape. The main worry was the
scuttle below the windscreen, but that only seems to be showing light
surface rust. We'll be taking the screen out to have a better look in due
course, but there's no cause for concern
The wheels will want a refurb...
The biggest surprise was under the bonnet! That completely belies 15years
of neglect. I suppose that betrays me as a long-term detailer
I could not believe how clean the battery terminals were! I was expecting
them to be furred-up completely...
Something decided to nest in the sound dampening pad below the bonnet,
though not much damage caused...
Here's the scuttle close-up! That's probably the most expensive bit to get
repaired if the tin-worm gets its way - phew!!
It looks like a cat has been after the nest-building mice...
The car was always dealer serviced and the blue label beside the rear view
mirror is worthy of mention. Initially, such cars were identified by a yellow
sticker affixed to the passenger side. These were displaced by this label
which showed the date and mileage the next service was due on.
There is MoT notifiable damage to the windscreen, so it will need replacing.
Sadly, I won't be able to transfer the service reminder label, it'll disintegrate
the moment it's touched.
So, now to the clean-up. The following photos are showing nothing more than
a very quick clean, using Optimum No Rinse (ONR) from the QD bottle, some
Serious Performance cleaning QD and a half-bucket of water with 2 capfuls of
Chemical Guys Hose-Free Eco (HFE) in it. A noodle mitt and a small selection
of MF cloths will be used for wiping and drying.
The door window cleaned for a first glimpse of the interior...
Then 4 views of the interior. Not bad, bar the few cobwebs
Now 3 views of the passenger side door-shut. Some minor tin-worm evidence!
The bit that I'm still very cross about. I parked the car in a council car park
and when I reversed out caught part of the footing of an ancient ice-cream
stall. Waveney DC denied all knowledge!
So, I've got the door clean...
Now the front wing. Thats just an ONR / HFE combination clean - honest!
The next three pictures will give an indication of how the paintwork
was looked-after when I first had the car on the road. The car was
maintained with Harlys Wax and I can barely believe that 15 years
later it would still look this good. I'm not expecting any trace of the
wax to be left, but it shows how important your prep is ahead.
A cheeky 50/50 :lol:
...and now the bits I was really dreading. Of course, the exhaust system is
going to need replacing, but otherwise, things under there don't look too bad.
Nothing was falling off when the door got closed. The floorpan is remarkably
solid, so it's not going to be an horrendously expensive restoration.
I'll be updating this thread over the coming weeks. The next stage is to put
in a new battery, plugs, some new petrol etc., and maybe get the engine
started. It'll then be moved to a new location for work to begin.
Regards,
Steve
Edited by LowiePete on Friday 22 May 17:35
LP said:
Look forward to seeing it live again, whats it's mileage?
69K in 8 years. I only took it off the road because I fancied a Meganeand its much smoother ride. Being disabled, the R5 was jarring on longer
runs. I do feel very lucky though; None of the rubber pipes look to have
perished, though that might become a different story once the engine
starts and things warm up again.
I'll be replacing the braking system. New lines, disks and pads, etc. I've
been looking at various options, as I guess the Renault originals are long
gone, or hugely expensive. The EBC brakes with greenstuff pads work out
at about £166 with discount. As the car won't be tracked, are the GS pads
overkill? Should I go for Brembo's instead or are they overkill+ ?

Cheers

Regards,
Steve
Hi A,
Cheers for your reply. :agree:
Someone on the Detailing World Forum suggested that I get _all_ my spares from Mike
at GT Turbo Spares, including the brake parts. Sounds like a simple solution. It would
certainly save me hours and hours of chasing my tail on t'interweb...
Regards,
Steve
Cheers for your reply. :agree:
A said:
Steve - I popped some EBC yellows up front and Exceliums at the rear and both grip well. If you're not tracking her I'd go with the exceliums all round, cheap and effective stopping (too effective in my case :sad2
Do you have a link?Someone on the Detailing World Forum suggested that I get _all_ my spares from Mike
at GT Turbo Spares, including the brake parts. Sounds like a simple solution. It would
certainly save me hours and hours of chasing my tail on t'interweb...
Regards,
Steve
Hello Folks,
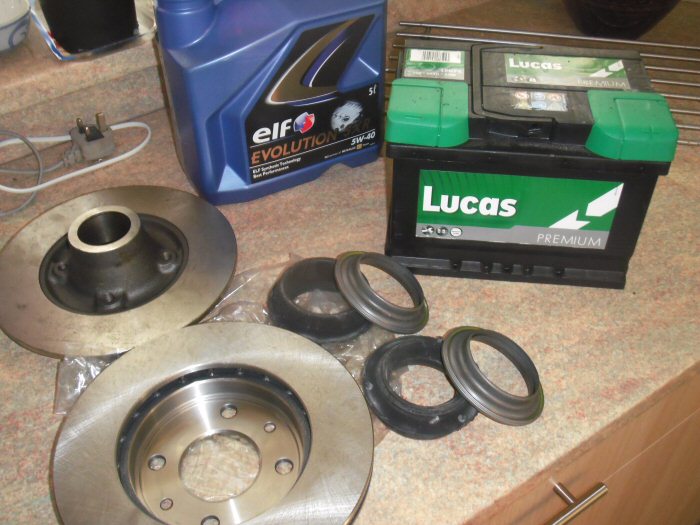
As November 1st approaches, the day the car gets moved, I'm quite quickly
building quite a cache of parts. So, my first haul was a carb kit and a couple
of OEM oil filters...

The next challenge was an exhaust system at a reasonable price. For a mild
steel OEM I was quoted £450 - so I set to and scoured t'interweb
to find this in stainless steel for just £175 delivered...


Yeah, you _can_ laugh! 3.5" bore, while not OEM it _was_ all the rage in the
early 1990s - that's my excuse anyway!
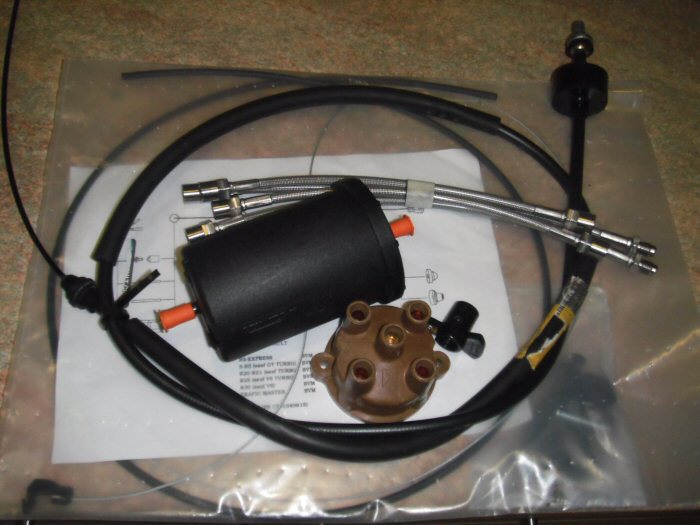
Then it was a trip to an Alladin's Cave down south to purchase lots of little
niggly bits, various cables, OEM fuel filter, dizzy cap, rotor arm etc. The
braided cables were a group buy on RTOC for £35 delivered.
What's not pictured is the replacement front bumper, in tungsten, and a
complete set of brake disks with new rear bearings. That lot came to £370.
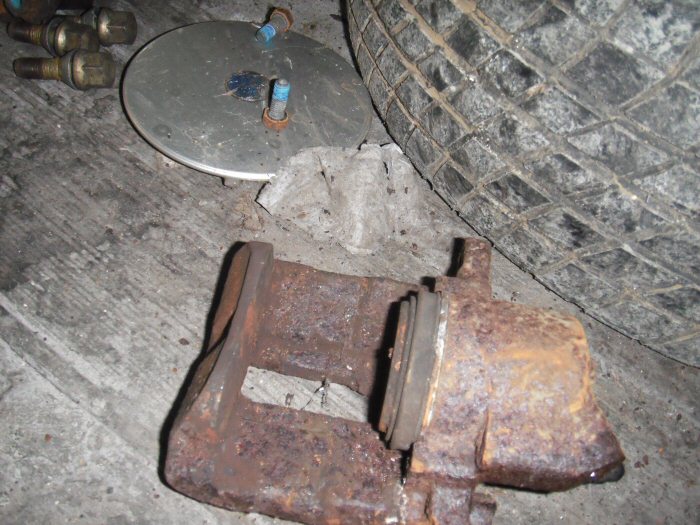
The remaining brake parts will be ordered once we remove what's presently
there.
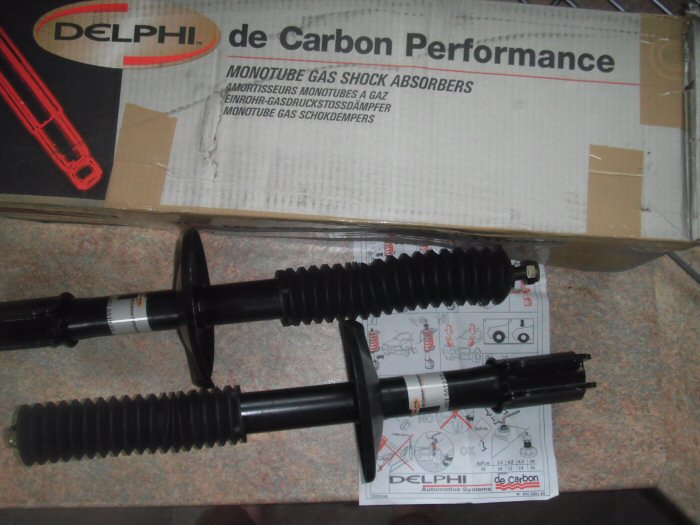
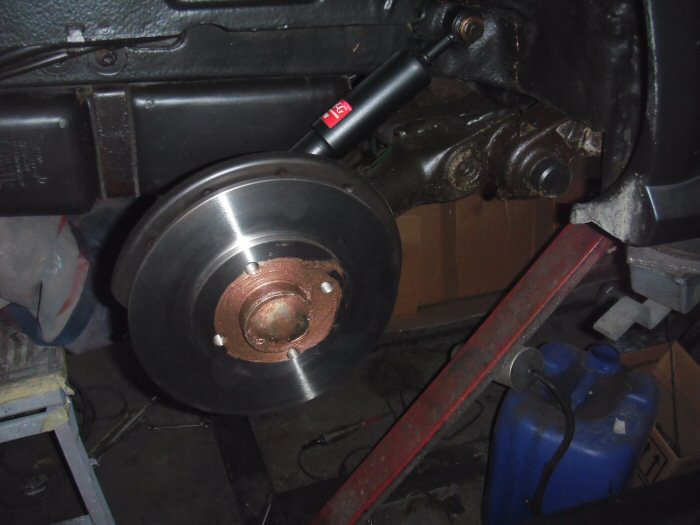
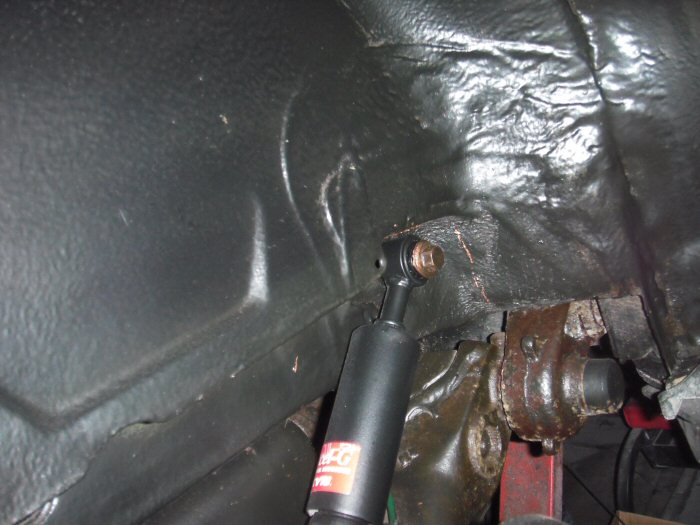
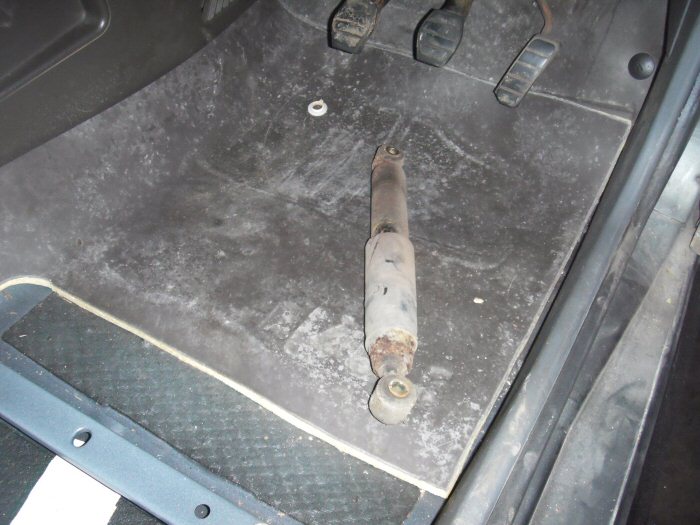
As the suspension is being fiddled with, I've decided to replace the shocks.
No point in doing a similar job in two parts if the existing bits decide to fail.
Finding front shock absorbers at an affordable price was quite a task. Found
these for £52 delivered...
There will be another instalment later in the week. I've now assembled most
of the replacement bits that are needed to hopefully get the car roadworthy
once more. Including the bits ordered today, the parts bill so far comes to
over £870
A bit more to add to the haul...
took that picture and remembered that I should have added the wipers. I
got some proper retro ones, as I'm not counting on using them too often...
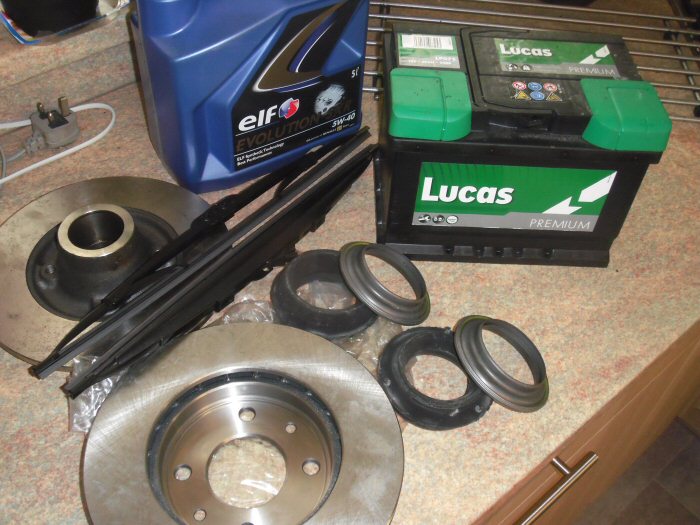
With the cost of the battery, I've now got no more than a few pence change
out of a grand With luck, the car should be getting moved this
time next week. I can't wait!
Even though I've spent so much so far, I've got some bargains. I have some
Bougicord HT leads coming from France, £18 instead of £87! I can barely
believe I paid the same price for the front suspension bearings as I did on the
surplus stock front shock absorbers - all de Carbon products.
The other savings have been in sourcing a front bumper. I remember my local
Renault dealer quoting me the best part of £400 +vat, unpainted. The 2nd
hand one, painted in tungy grey, cost me £150
Regards,
Steve
As November 1st approaches, the day the car gets moved, I'm quite quickly
building quite a cache of parts. So, my first haul was a carb kit and a couple
of OEM oil filters...
The next challenge was an exhaust system at a reasonable price. For a mild
steel OEM I was quoted £450
- so I set to and scoured t'interwebto find this in stainless steel for just £175 delivered...
Yeah, you _can_ laugh! 3.5" bore, while not OEM it _was_ all the rage in the
early 1990s - that's my excuse anyway!
Then it was a trip to an Alladin's Cave down south to purchase lots of little
niggly bits, various cables, OEM fuel filter, dizzy cap, rotor arm etc. The
braided cables were a group buy on RTOC for £35 delivered.
What's not pictured is the replacement front bumper, in tungsten, and a
complete set of brake disks with new rear bearings. That lot came to £370.
The remaining brake parts will be ordered once we remove what's presently
there.
As the suspension is being fiddled with, I've decided to replace the shocks.
No point in doing a similar job in two parts if the existing bits decide to fail.
Finding front shock absorbers at an affordable price was quite a task. Found
these for £52 delivered...
There will be another instalment later in the week. I've now assembled most
of the replacement bits that are needed to hopefully get the car roadworthy
once more. Including the bits ordered today, the parts bill so far comes to
over £870
A bit more to add to the haul...
took that picture and remembered that I should have added the wipers. I
got some proper retro ones, as I'm not counting on using them too often...
With the cost of the battery, I've now got no more than a few pence change
out of a grand
With luck, the car should be getting moved thistime next week. I can't wait!
Even though I've spent so much so far, I've got some bargains. I have some
Bougicord HT leads coming from France, £18 instead of £87! I can barely
believe I paid the same price for the front suspension bearings as I did on the
surplus stock front shock absorbers - all de Carbon products.
The other savings have been in sourcing a front bumper. I remember my local
Renault dealer quoting me the best part of £400 +vat, unpainted. The 2nd
hand one, painted in tungy grey, cost me £150
Regards,
Steve
Hello Folks,
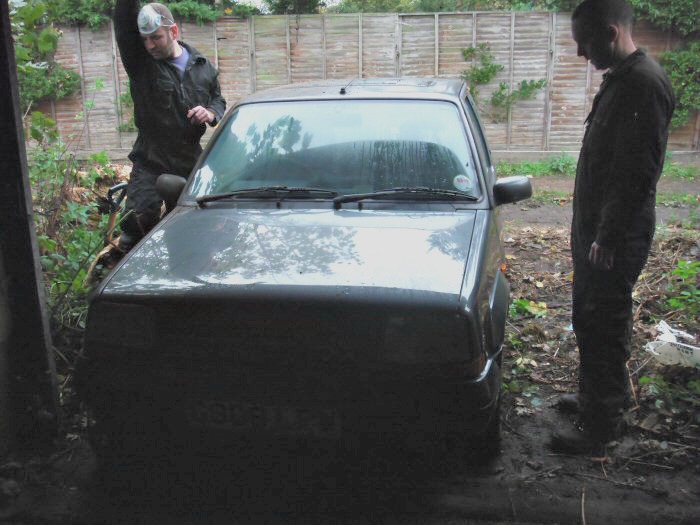
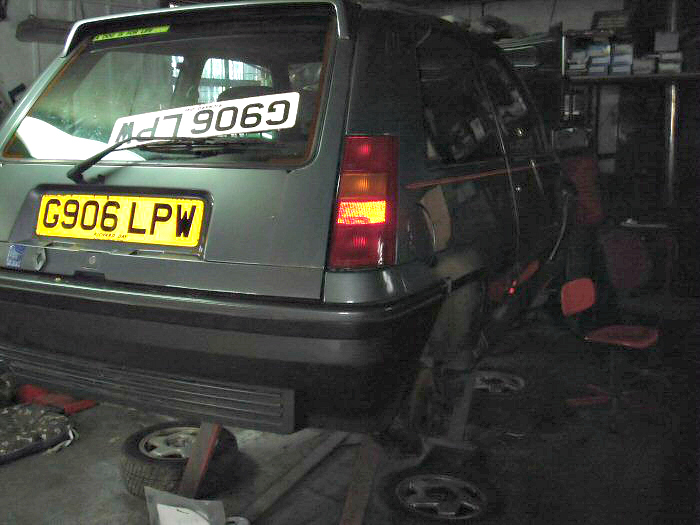
So, for the first time in 15 years, the car has moved. Most pleasing of all was
to see all 4 wheels turning within inches of its first movement by the winch.
So, at least the handbrake hasn't siezed.
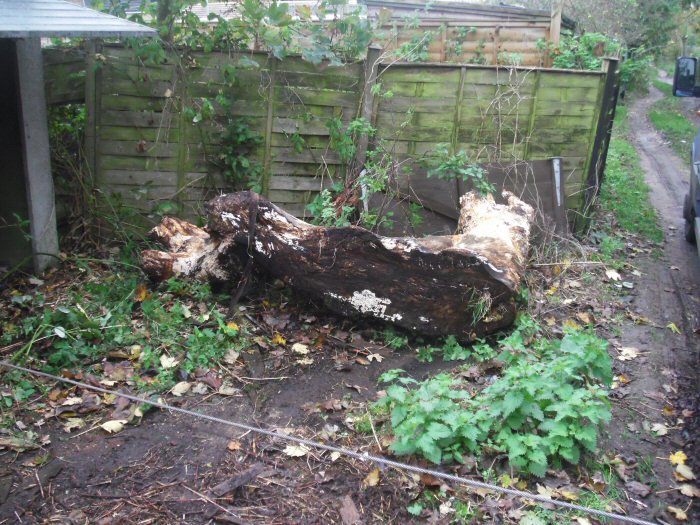
How about this for security? That stump came from a huge eucalyptus tree
that got brought down in the 2001 storm and was pulled out of the ground
earlier this year...
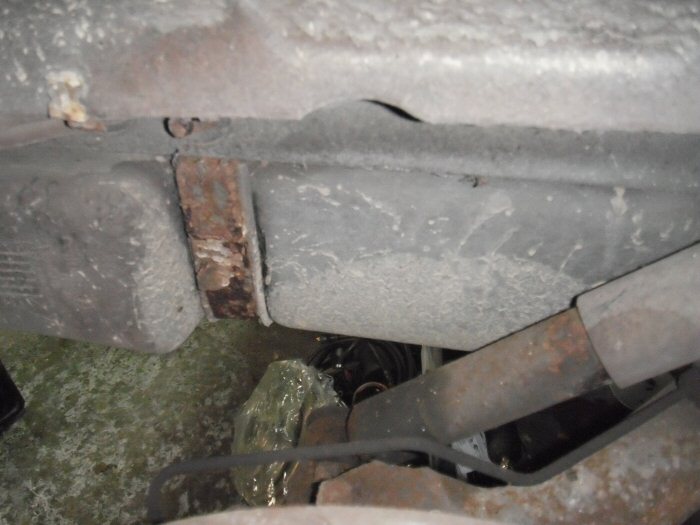
The pattern of rust left off the exhaust...
Once cleaned, this car looks like it'll come up a treat. This photo is almost a
bit of a cheat...
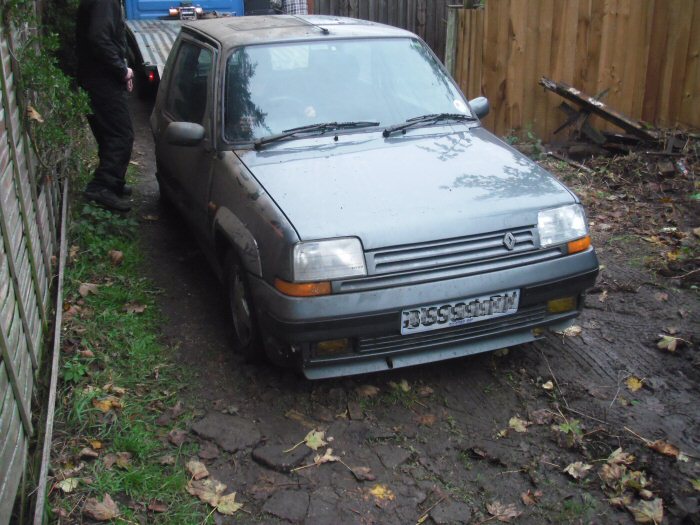
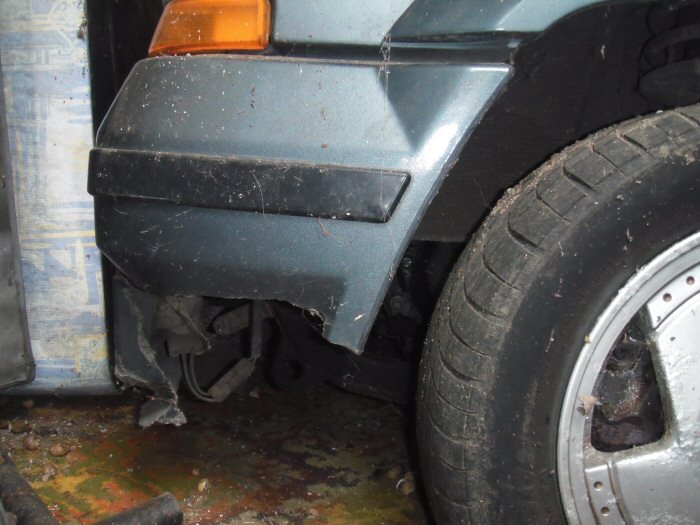
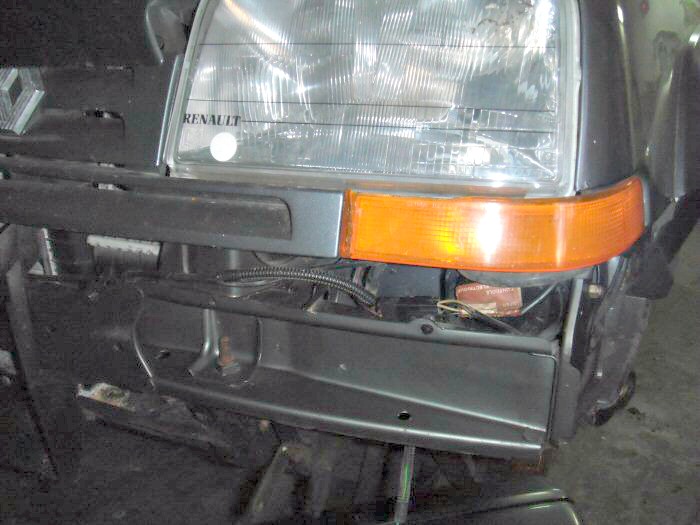
With the front tyres almost flat, the front bumper took a bit of a beating.
Luckily, there's a new one to fit in its place. Indeed, most of the parts are
now to hand, other than fiddly bits for the brake calipers.

As you can probably imagine, the excitement is growing!
Regards,
Steve
So, for the first time in 15 years, the car has moved. Most pleasing of all was
to see all 4 wheels turning within inches of its first movement by the winch.
So, at least the handbrake hasn't siezed.
How about this for security? That stump came from a huge eucalyptus tree
that got brought down in the 2001 storm and was pulled out of the ground
earlier this year...
The pattern of rust left off the exhaust...
Once cleaned, this car looks like it'll come up a treat. This photo is almost a
bit of a cheat...
With the front tyres almost flat, the front bumper took a bit of a beating.
Luckily, there's a new one to fit in its place. Indeed, most of the parts are
now to hand, other than fiddly bits for the brake calipers.
As you can probably imagine, the excitement is growing!
Regards,
Steve
G said:
Before the front bumpers became obsolete they were around £120 from Renault.
Wow, if I had been quoted that price, I'd have got it replaced. That was probablytheir unpainted price; t'was the prep and painting that hit hardest. I think plastic
primers will have come a long way since.
Mind you, the £400 quoted was cheap compared to £78 for a couple
of 4Control badges to go on my Laguna Coupé.
If anyone knows of a cheaper source, do please let me know. Apparently,
my GT missed the application of these badges by just a few weeks
Regards,
Steve
Hello Folks,
28 November 2013
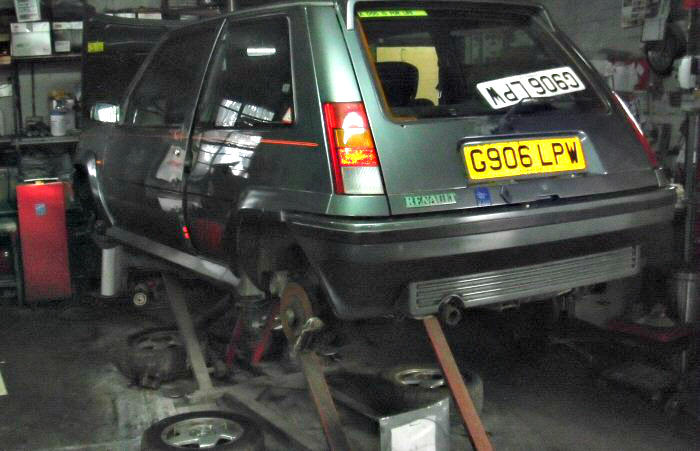
The car hoisted in its temporary new home...
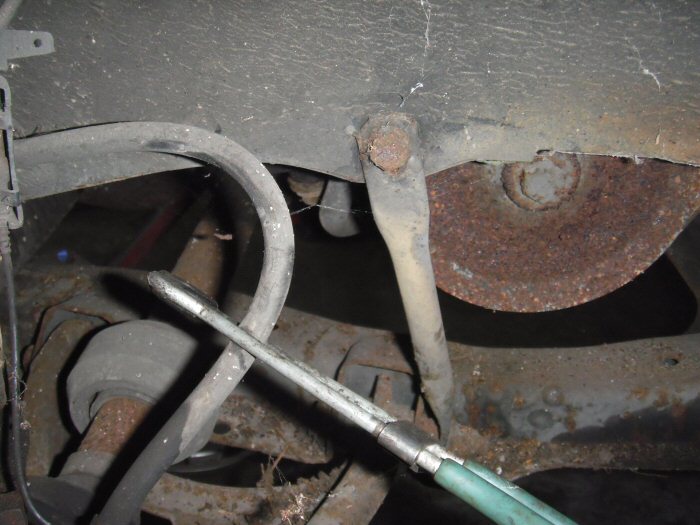
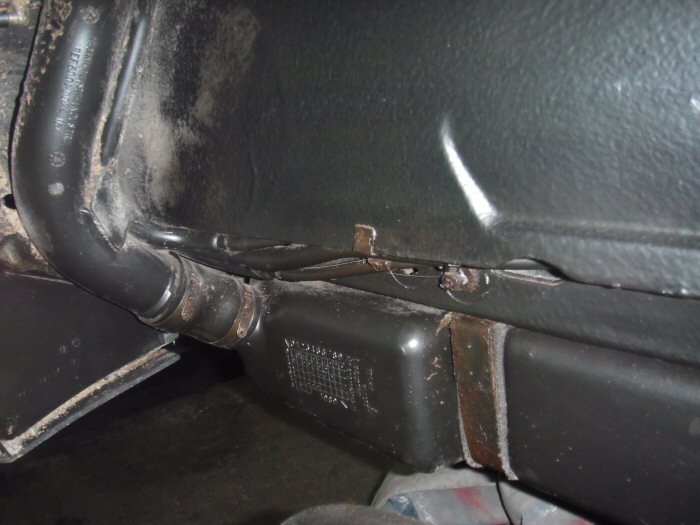
Under driver's side rear arch. Any patches that look like oil leaks are just
where some WD40 has been sprayed. I cannot believe how good and solid
the fuel tank is.
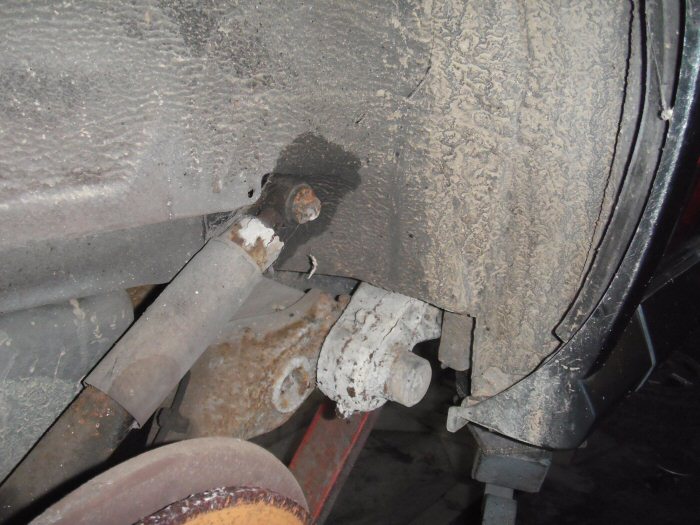
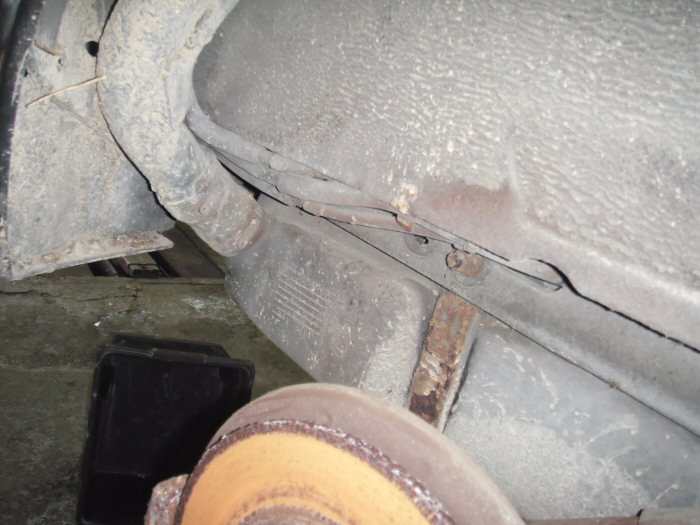
It's still a bit of a job for me to get photos of the underside, but the
omens look good...
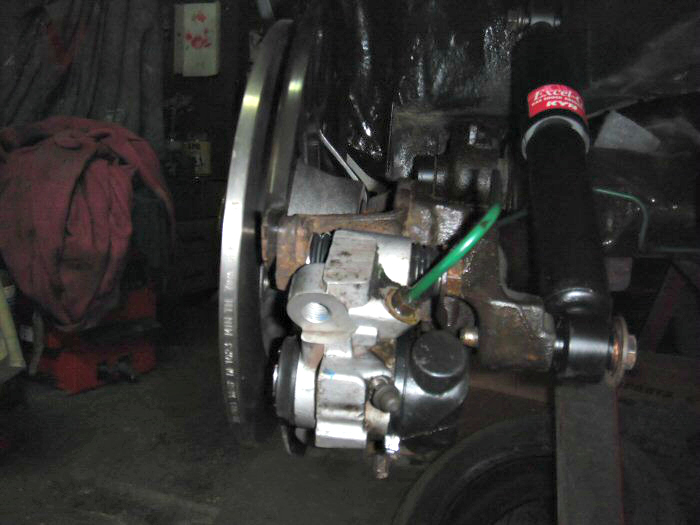
Under front wheel arch...
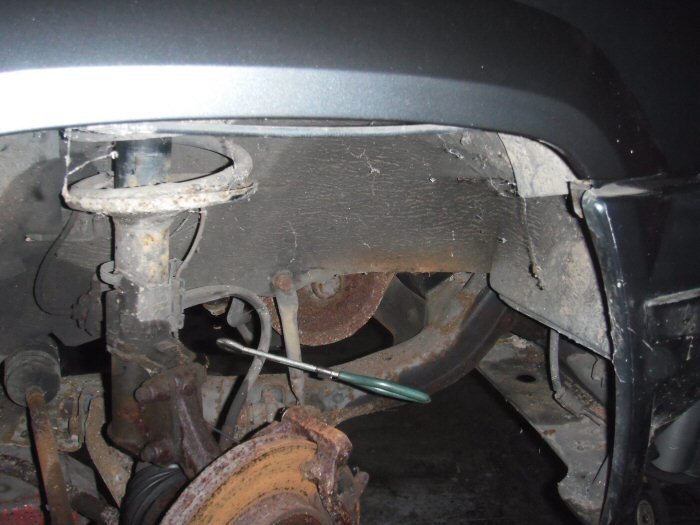
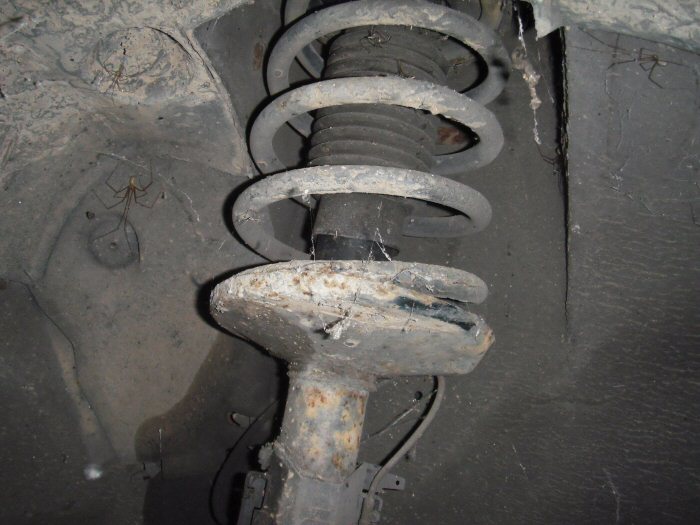
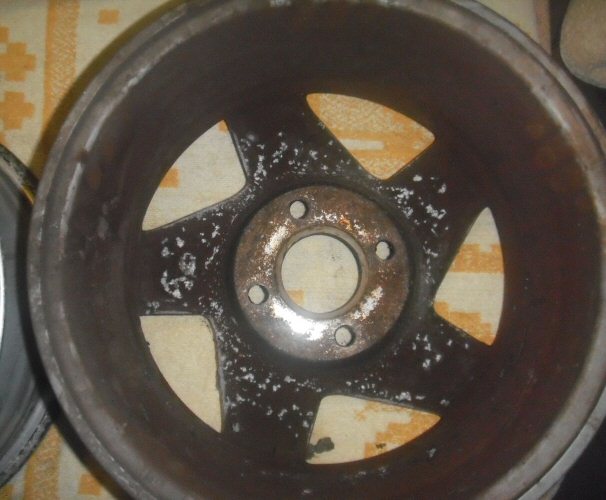
I think that the rather rusty pulley wheel will need a visit to the powder
coaters too.
I can't wait to see this all cleaned up and painted...
The carburettor has been removed and dunked into a soak bath to help it
release. The coolant pipes to and from the carb are also in soak as they're
blocked by dried-up coolant.
Regards,
Steve
28 November 2013
The car hoisted in its temporary new home...
Under driver's side rear arch. Any patches that look like oil leaks are just
where some WD40 has been sprayed. I cannot believe how good and solid
the fuel tank is.
It's still a bit of a job for me to get photos of the underside, but the
omens look good...
Under front wheel arch...
I think that the rather rusty pulley wheel will need a visit to the powder
coaters too.
I can't wait to see this all cleaned up and painted...
The carburettor has been removed and dunked into a soak bath to help it
release. The coolant pipes to and from the carb are also in soak as they're
blocked by dried-up coolant.
Regards,
Steve
December 2013
I went round to see Karl my mechanic today, mostly to pay him some money
for the work he's done so far. We also discussed strategies for how the ongoing
work would be done. Earlier in the week, he'd taken the tyres off and brought
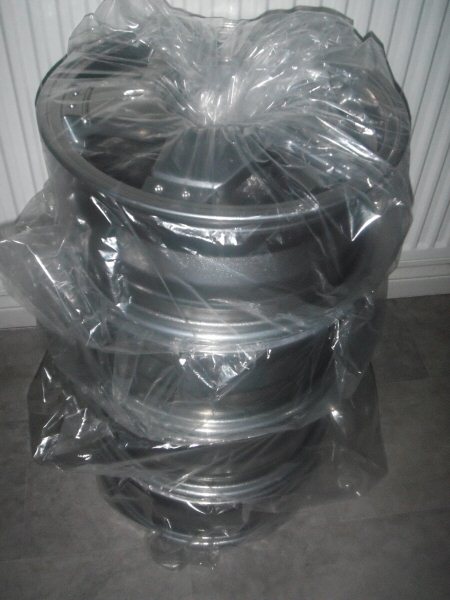
the bare wheels round for me to do some cleaning.
The upshot of that is that 2 wheels definitely need a refurb, so all 4 are going
off to AeroCoat, early next week. I've also placed an order for 4 ZIEX Falken
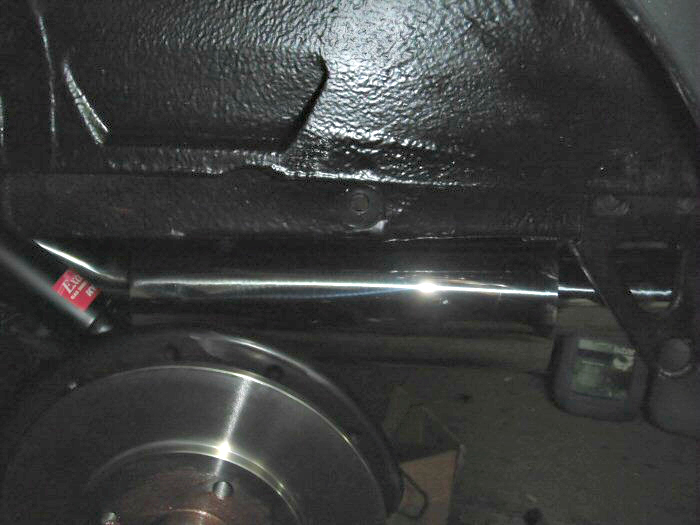
tyres. Unbeknown to me, Karl had made some further progress. The tell-tale
sign being this...
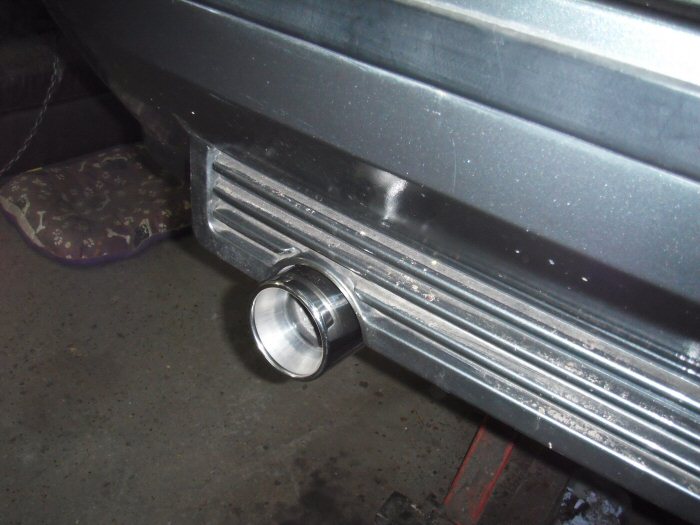
Oh, what joy! For weeks, ever since that new exhaust arrived, I've wondered
what that tailpipe would look like in its bumper slot. I was a bit concerned
that it might be overkill, a tad "penile-extension" - thankfully not! To my
mind that looks the part. The remaining bits are not yet attached, hence it
being a tad off-centre.
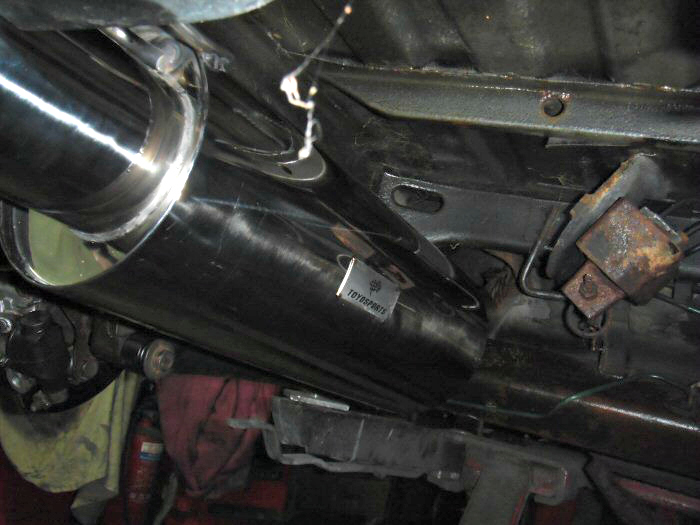
Then came the bigger surprise. Being a man of few words, all I got from Karl
was: "You might like to look round here..."
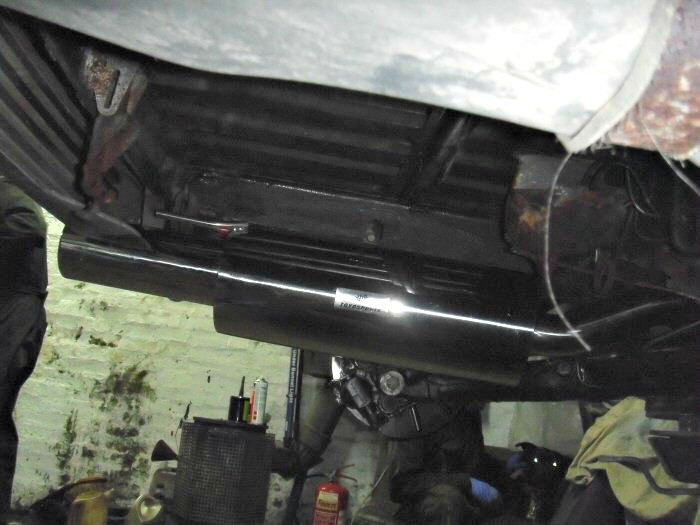
...where I found this
...and this
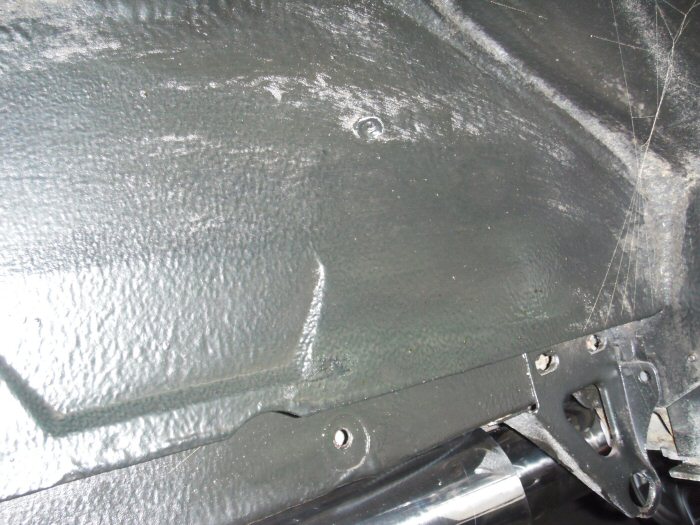
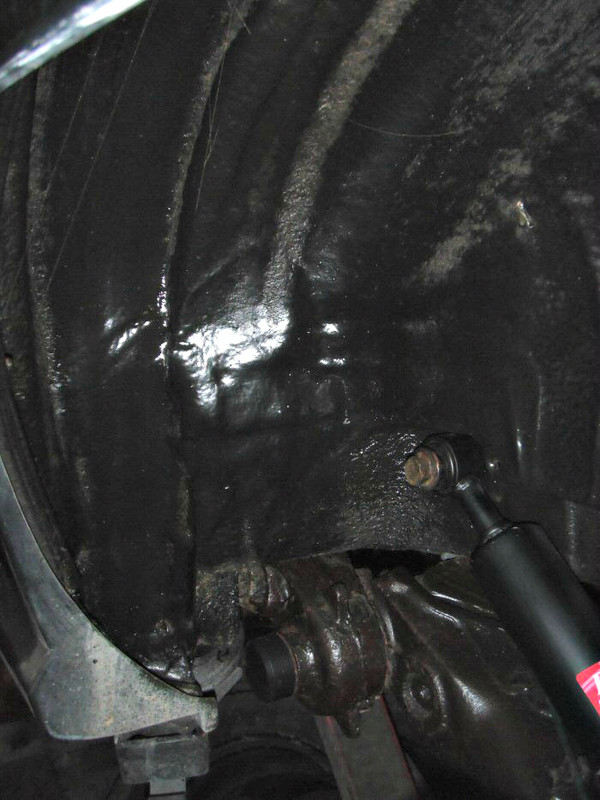
The underside is treated with Bilt Hamber Dynax UC which gives a much
less messy finish than other body waxes.
The almost total absence of rust is just astonishing! One of the guys round
there said that if it had been a Ford Escort of that vintage, it would have
needed fully stripping back to bare metal, and he spoke from experience.
If anyone reading this has doubts about French cars...
A few more pictures...
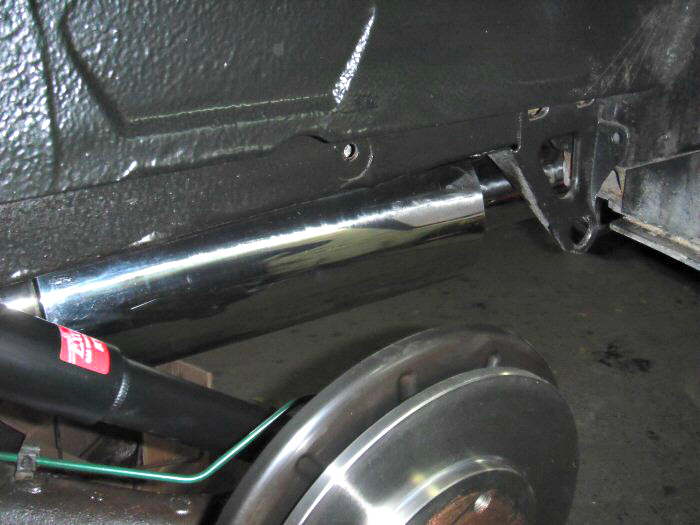
Old versus new flexible brake pipes...
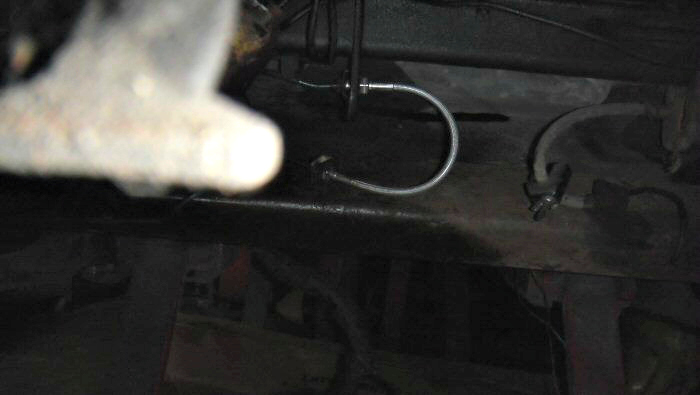
I'm just thrilled to bits. There's no question that Karl is putting a lot his own
personality into his work. I feel very privileged to have access to his craft
With Season's Greetings,
Steve
MR said:
Good work mate, paint work looks in great order after a wash! gtt's have plastic fuel tanks  :agree:
Hello Folks, :agree:I went round to see Karl my mechanic today, mostly to pay him some money
for the work he's done so far. We also discussed strategies for how the ongoing
work would be done. Earlier in the week, he'd taken the tyres off and brought
the bare wheels round for me to do some cleaning.
The upshot of that is that 2 wheels definitely need a refurb, so all 4 are going
off to AeroCoat, early next week. I've also placed an order for 4 ZIEX Falken
tyres. Unbeknown to me, Karl had made some further progress. The tell-tale
sign being this...
Oh, what joy! For weeks, ever since that new exhaust arrived, I've wondered
what that tailpipe would look like in its bumper slot. I was a bit concerned
that it might be overkill, a tad "penile-extension" - thankfully not! To my
mind that looks the part. The remaining bits are not yet attached, hence it
being a tad off-centre.
Then came the bigger surprise. Being a man of few words, all I got from Karl
was: "You might like to look round here..."
...where I found this
...and this
The underside is treated with Bilt Hamber Dynax UC which gives a much
less messy finish than other body waxes.
The almost total absence of rust is just astonishing! One of the guys round
there said that if it had been a Ford Escort of that vintage, it would have
needed fully stripping back to bare metal, and he spoke from experience.
If anyone reading this has doubts about French cars...
A few more pictures...
Old versus new flexible brake pipes...
I'm just thrilled to bits. There's no question that Karl is putting a lot his own
personality into his work. I feel very privileged to have access to his craft
With Season's Greetings,
Steve
Edited by LowiePete on Friday 3rd April 07:21
Hello Folks,
December 2013
The speedlines are going in for refurb at Aerocoat this week. So, there's
a decision to be made over new tyres. I have quotes for Falkens @ £200
for 4 or Yokohamas for £268. I presently have Falkens on the Laguna
Coupé and they're much better than the Bridgestone Potenzas that they
replaced.
The 5GTT will be driven to shows and stuff, so I'm thinking Falkens. It
had Yokos on there until now, but my vague recollection was that they
were possibly not as good as the hype suggested.
Has anyone here some experience of Falkens on their R5?
Firstly, can I just thank everyone for their very supportive messages here
so far. I've now settled upon the Falken tyres.
The Speedline wheels went off for refurb at Aerocoat today. The original satin
finish on the silver will make way for "titanium chrome" - more of a really bright
silver. Hopefully, they'll be back by the end of the week...
Hello Folks,
A little ahead of schedule, this part was meant to happen when I got the car
back into my garage, it has been off with the tyres and down to getting the
wheels treated. Then came the agonising decision, if they needed to go to the
powder coater's what colour should I choose? However, I'm ahead of myself.
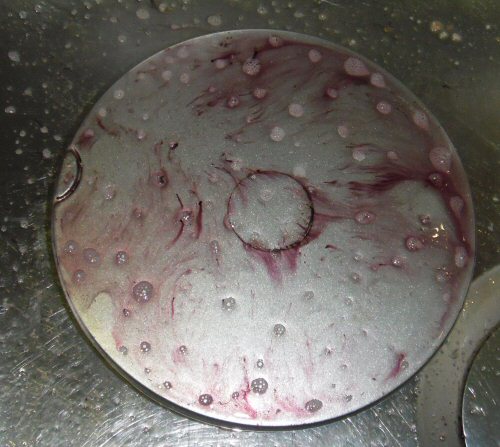
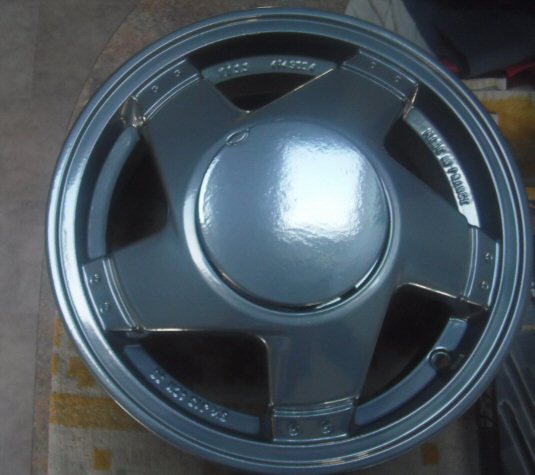
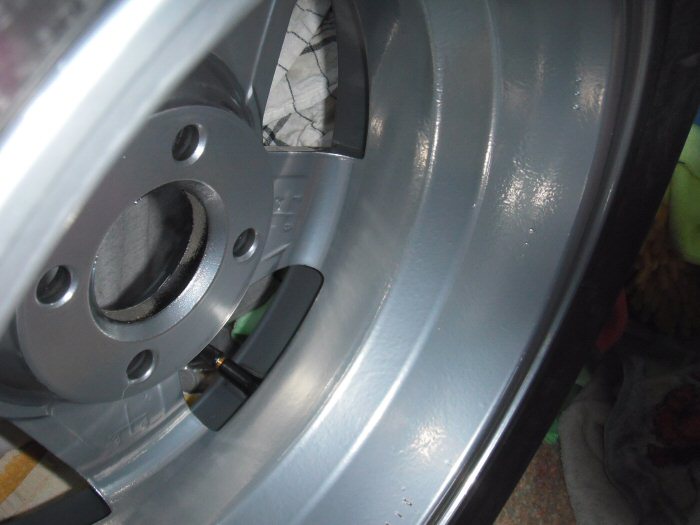
Karl brought the wheels round along with the centre caps. Here's one getting
a test bath of Bilt Hamber Autowheel...
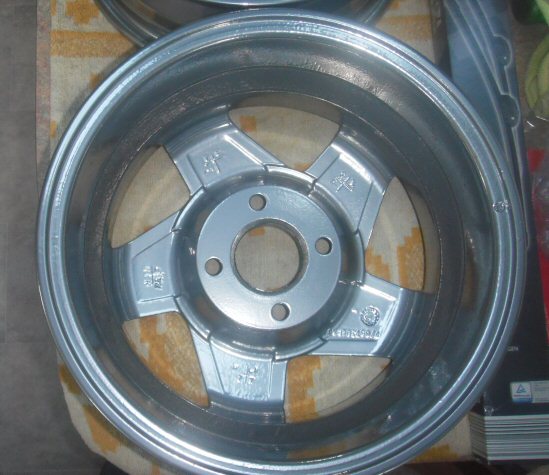
When it came to examining the wheels themselves, it came to the need for 2
of them to go for refurb. So, who gets just two wheels done? The next pics
show two of the better wheels.
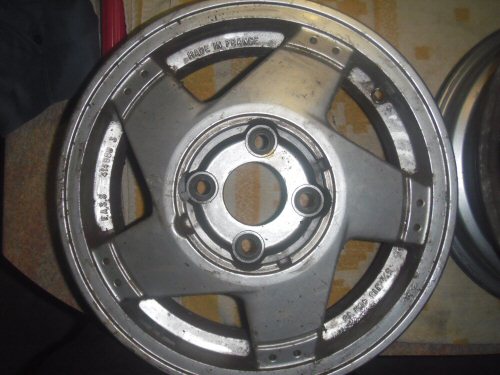
Certainly some crud to remove from inside! One thing about my coating colour
decision was that there was no way I was going to repeat the OEM semi-matt
finish.
A little diversion while the wheels were away. Just a few more parts gathered
together...
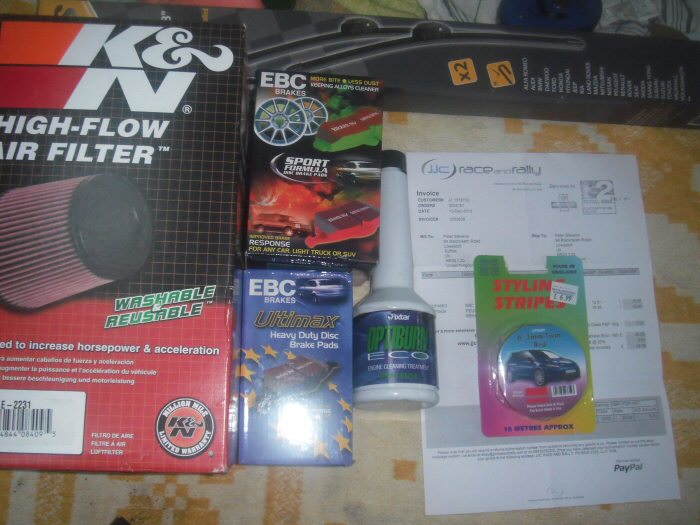
Having discussed this with Karl, in the absence of getting Red Stuff pads for
both front and back because they're unavailable, we've plumped for some
Green Stuff pads for the front, and standard pads for the rear. At least there
should be a lot less dust on the front wheels
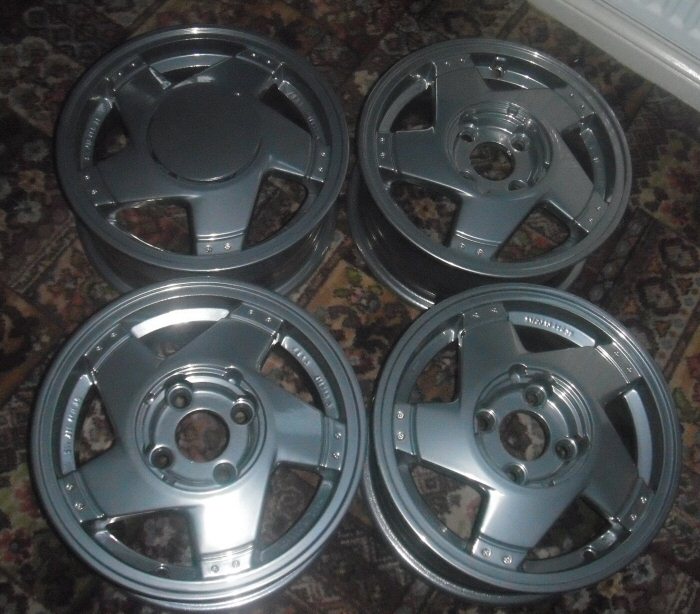
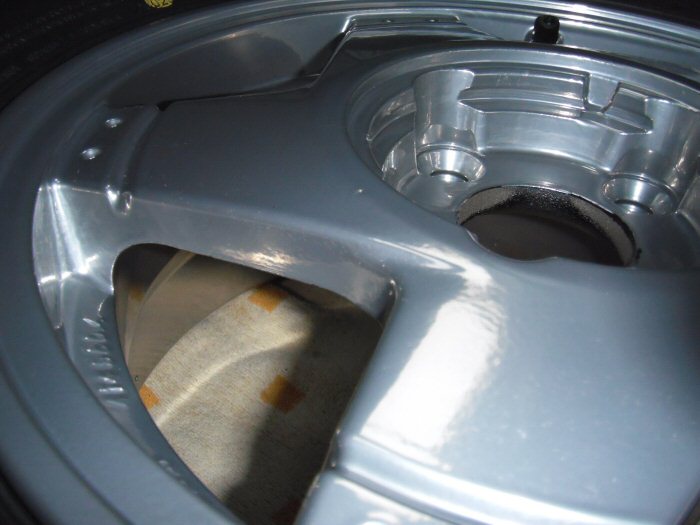
Especially as they now look like this...
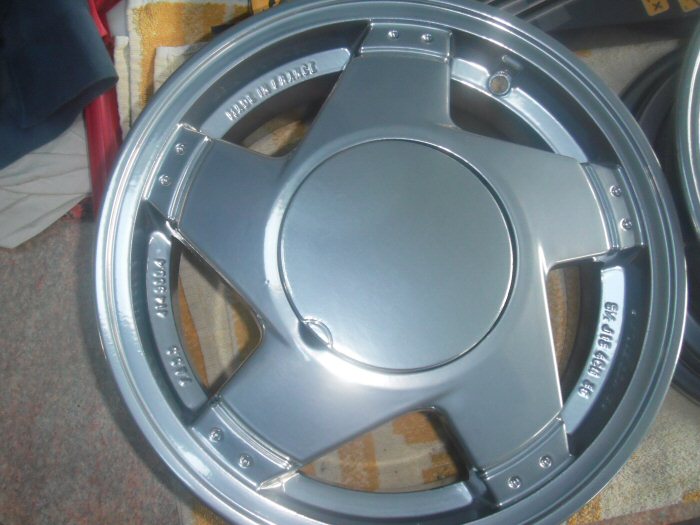
They appear to be very difficult to photograph indoors with the flash, even
though I had another go...
The finish, called Titatium Chrome, is just superb and out in the sunlight they
have just enough bling, without being overpowering. The guys at Aerocoat
in St Olaves have done me proud
The next stage is to get them coated with the ADS ArtDeWheel that came in
my gift Octagon Formula box. I'll be posting pictures up in due course.
With Season's Greetings,
Steve
December 2013
The speedlines are going in for refurb at Aerocoat this week. So, there's
a decision to be made over new tyres. I have quotes for Falkens @ £200
for 4 or Yokohamas for £268. I presently have Falkens on the Laguna
Coupé and they're much better than the Bridgestone Potenzas that they
replaced.
The 5GTT will be driven to shows and stuff, so I'm thinking Falkens. It
had Yokos on there until now, but my vague recollection was that they
were possibly not as good as the hype suggested.
Has anyone here some experience of Falkens on their R5?
Firstly, can I just thank everyone for their very supportive messages here
so far. I've now settled upon the Falken tyres.
The Speedline wheels went off for refurb at Aerocoat today. The original satin
finish on the silver will make way for "titanium chrome" - more of a really bright
silver. Hopefully, they'll be back by the end of the week...
Hello Folks,
A little ahead of schedule, this part was meant to happen when I got the car
back into my garage, it has been off with the tyres and down to getting the
wheels treated. Then came the agonising decision, if they needed to go to the
powder coater's what colour should I choose? However, I'm ahead of myself.
Karl brought the wheels round along with the centre caps. Here's one getting
a test bath of Bilt Hamber Autowheel...
When it came to examining the wheels themselves, it came to the need for 2
of them to go for refurb. So, who gets just two wheels done? The next pics
show two of the better wheels.
Certainly some crud to remove from inside! One thing about my coating colour
decision was that there was no way I was going to repeat the OEM semi-matt
finish.
A little diversion while the wheels were away. Just a few more parts gathered
together...
Having discussed this with Karl, in the absence of getting Red Stuff pads for
both front and back because they're unavailable, we've plumped for some
Green Stuff pads for the front, and standard pads for the rear. At least there
should be a lot less dust on the front wheels
Especially as they now look like this...
They appear to be very difficult to photograph indoors with the flash, even
though I had another go...
The finish, called Titatium Chrome, is just superb and out in the sunlight they
have just enough bling, without being overpowering. The guys at Aerocoat
in St Olaves have done me proud
The next stage is to get them coated with the ADS ArtDeWheel that came in
my gift Octagon Formula box. I'll be posting pictures up in due course.
With Season's Greetings,
Steve
Edited by LowiePete on Friday 3rd April 07:40
December 2013
Hi A,
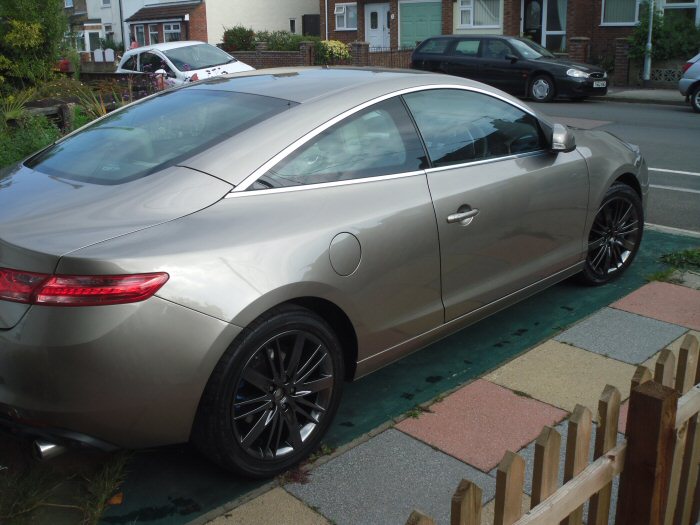
the Shadow Chrome on the Coupé GT wheels and I get nothing but complimentary
remarks about how well they suit the car
the OE pad dusting. It was horrendous! The R5 might visit a track or two, but I have little
intention of doing any circuits at speed. My disability would probably preclude me anyway
These Speedlines are notoriously difficult to photograph, but here's another go...
and again...
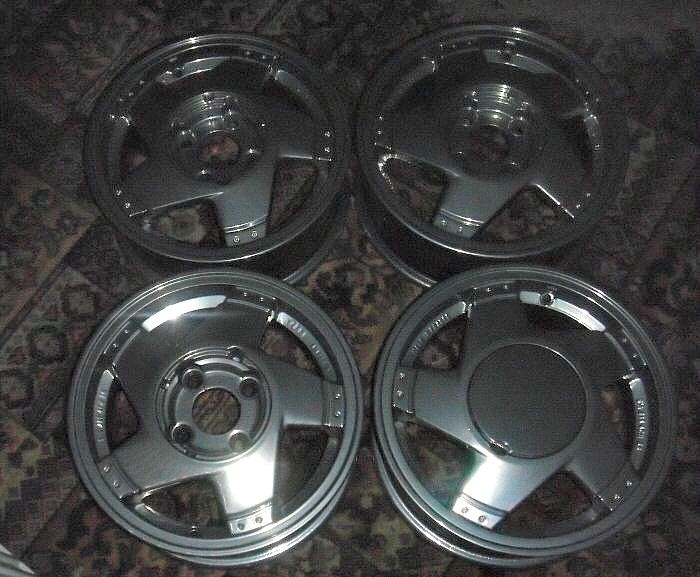
I did have another two or three goes with the caps, but I've given up. Hopefully,
they'll look good once they're back on the car. Wheels now put away...
With Season's Greetings,
Steve
Hi A,
A said:
Aero-coat do a mint job, they are the one's down near the Haddiscoe bends right?
Yeah, just before the bridge on the left as you head toward Great Yarmouth. They didthe Shadow Chrome on the Coupé GT wheels and I get nothing but complimentary
remarks about how well they suit the car
A said:
you won't be disappointed with the EBC's fella, they have given me a much improved braking performance over standard. Even on track with yellow up front and ultimax on the rear, they never faded and kept on biting. Why Red?
I have Red Stuff on the Laguna Coupé, which are excellent. I changed mainly to reducethe OE pad dusting. It was horrendous! The R5 might visit a track or two, but I have little
intention of doing any circuits at speed. My disability would probably preclude me anyway
These Speedlines are notoriously difficult to photograph, but here's another go...
and again...
I did have another two or three goes with the caps, but I've given up. Hopefully,
they'll look good once they're back on the car. Wheels now put away...
With Season's Greetings,
Steve
January 2014
Hello Folks,
When I first had this car on the road, it could have been called "Nell's Taxi",
and she travelled on the back seat. Oh, and she didn't appreciate having to
share it with a back seat passenger, oh no!
Anyway, Karl brought the seats round yesterday and seeing them out of the
car showed that they were going to take a little more than a wipe-down with
a damp cloth. With all the dog hair, it presented quite a cleaning challenge.
Having managed to gather a few worthwhile Nectar points over the past 8 to
10 years, I did some research, looking for a cheap steam cleaner.
I ended up buying a 1,300 watt Bush appliance, complete with all the tools,
for just £2.50 in cash - still a bargain at its 25 quid asking price. I had a look
for a review of cheap steam cleaners on here, but couldn't find one. I guess
that's my cue to write one about this little machine.
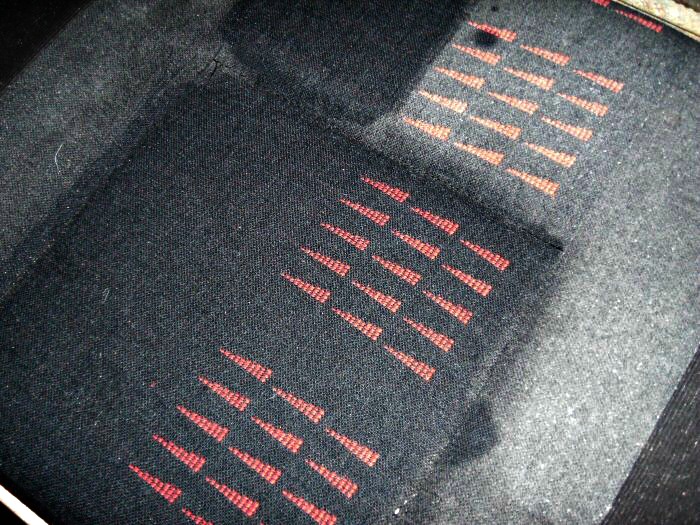
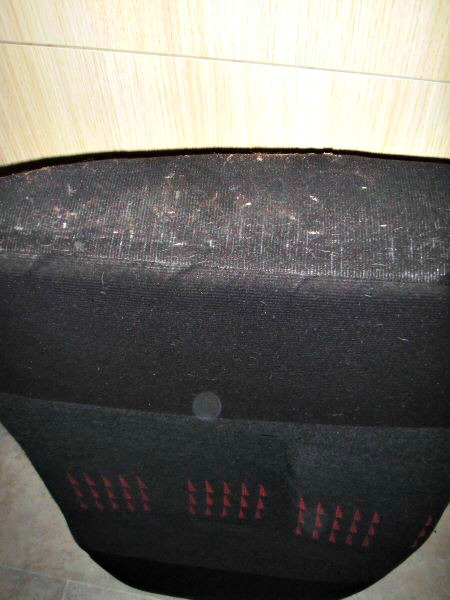
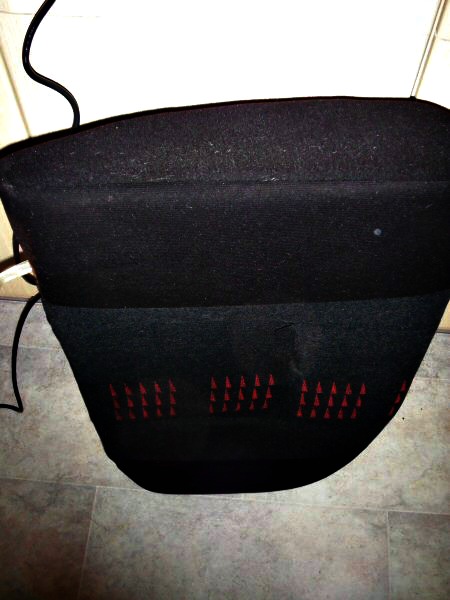
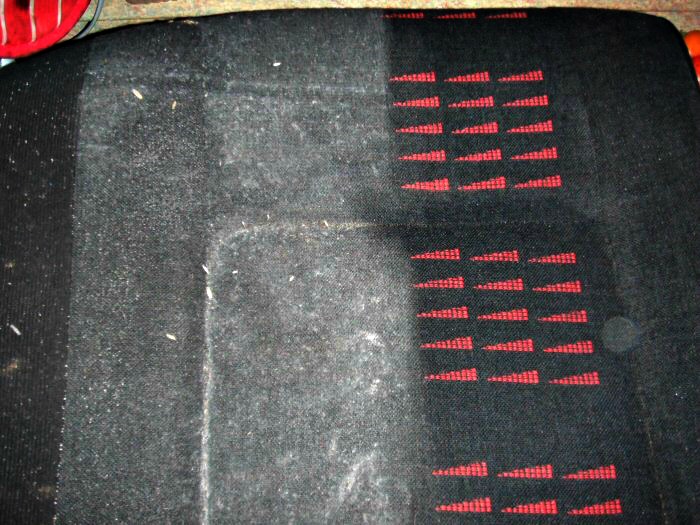
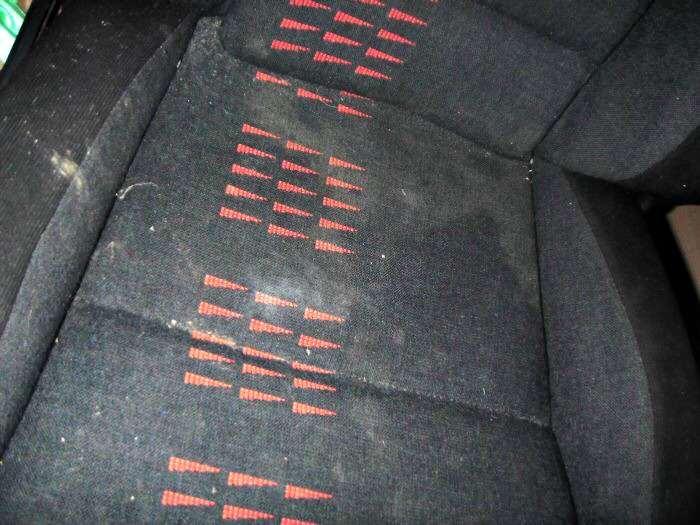
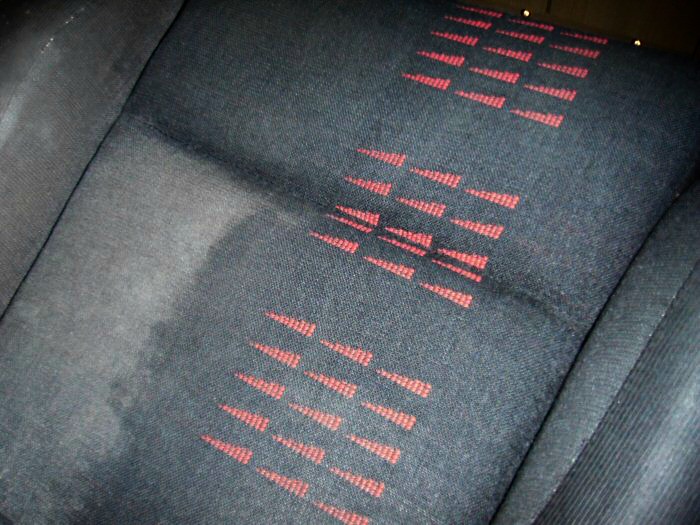
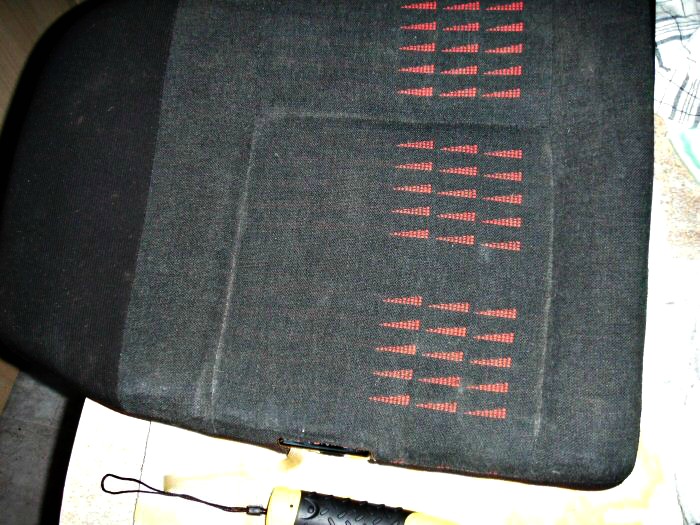
So, to the task in hand - here's some pictures to show how much of a
challenge this was going to be. No light task!
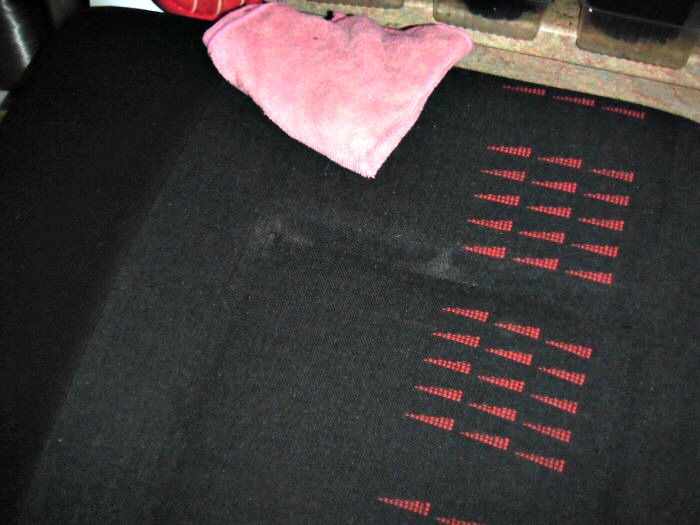
Some "during" pictures...

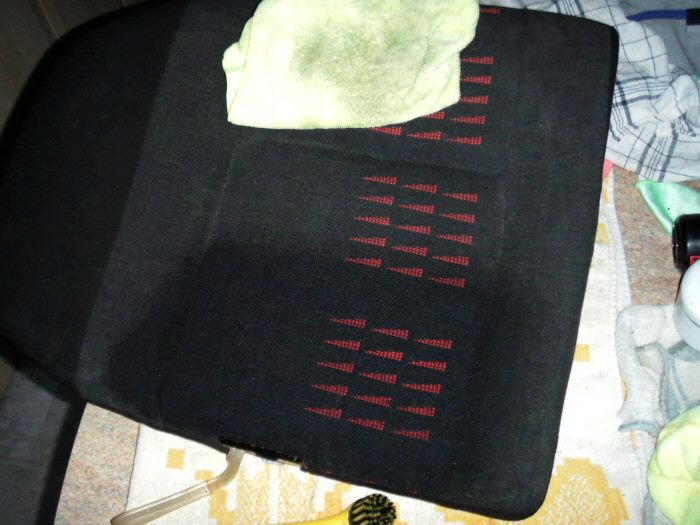
These pictures show just how quickly the steam cleaner was working. Hardly
more than two quick strokes, working north to south. The steamer leaves
the surface rather wet, so I went straight in with a microfibre cloth, though
this wasn't hard work!
The bonnet on the steamer head was certainly picking up the grime!
One of the worst areas was those that are normally hidden from view...
dealt with...
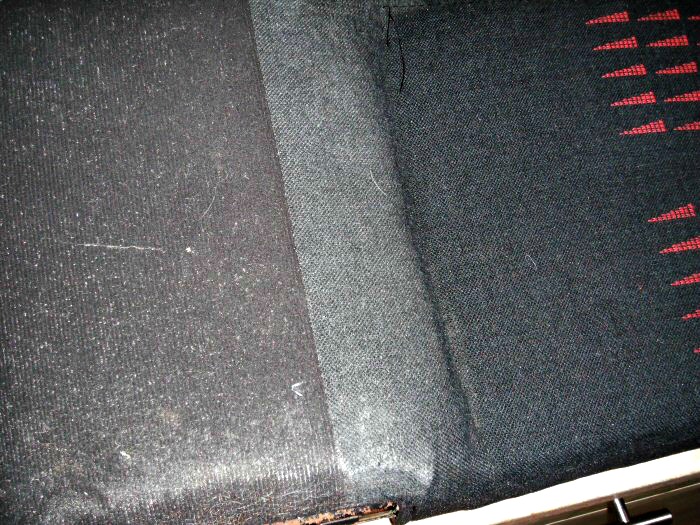
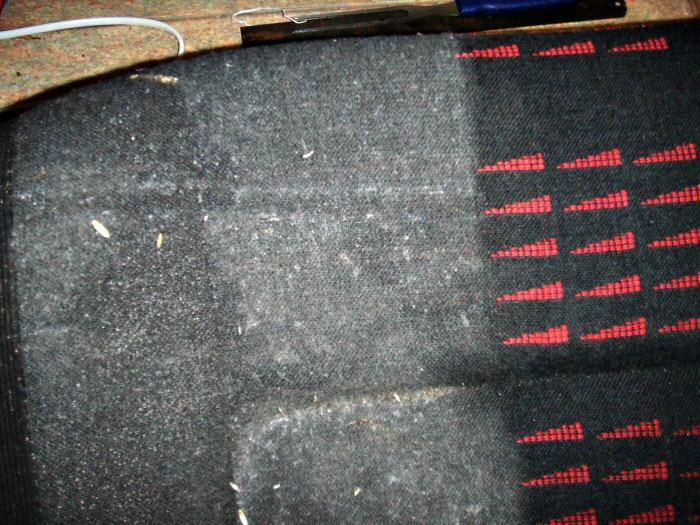
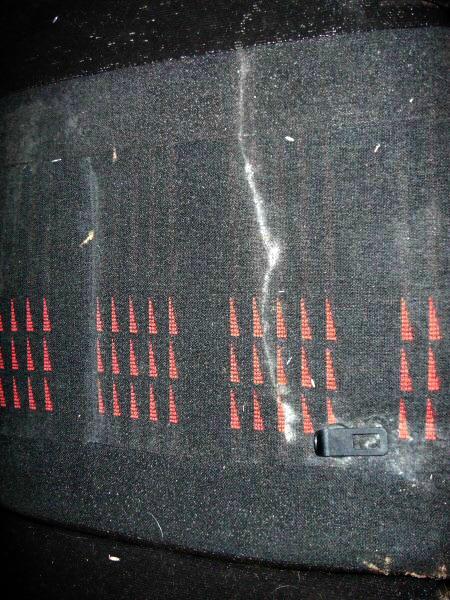
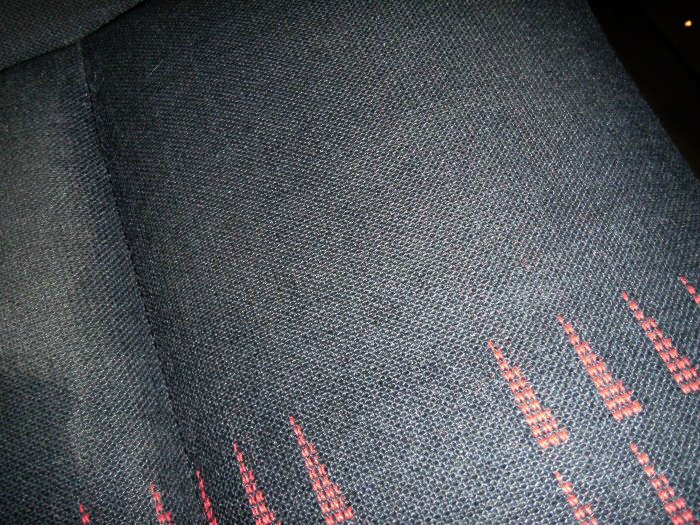
The flash on the camera is highlighting even the smallest flaw. The seats
were being photographed between cleaning bouts, where the fabric hasn't
fully dried. This next photo shows the bits that were difficult to reach with
the steam pad...
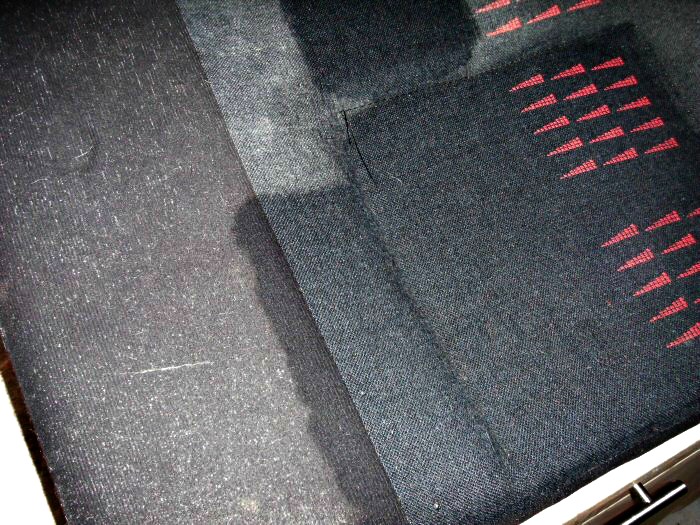
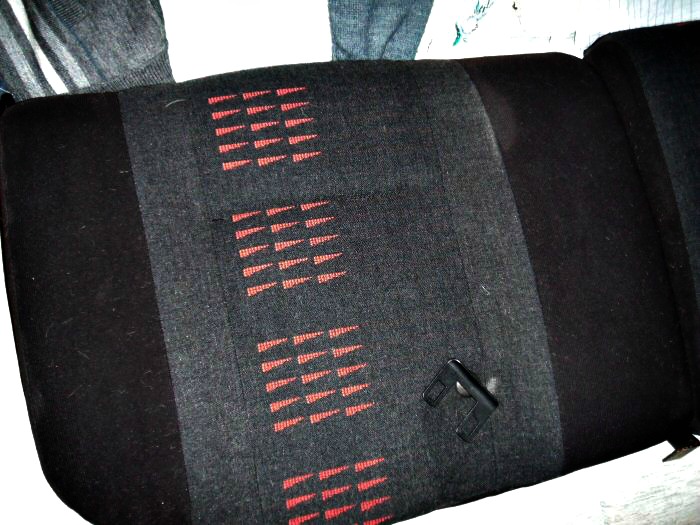
Moving on to the smaller part of the split-seat. No less minging, with a lot
more fungal evidence. It looks like my choice of using steam is the right one.
The steamer has about a teaspoonful of ONR mixed with its water, so that
has limited the possibility of a dank smell filling my kitchen...

Now to the cleaning...
...and cleaned
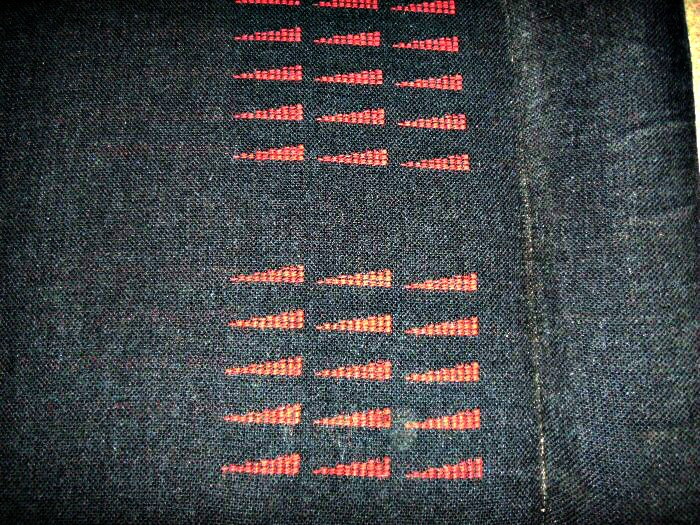
Another hidden edge...
...and cleaned
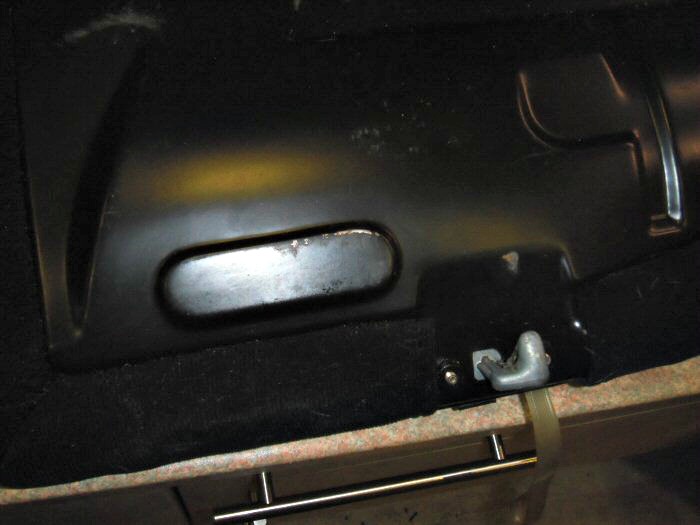
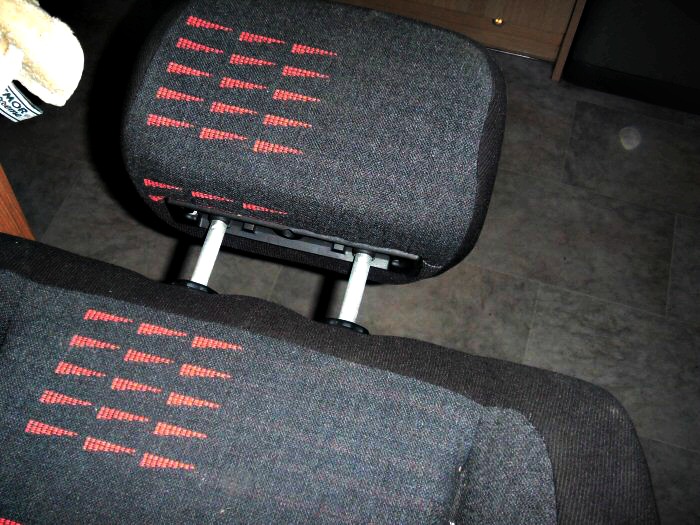
Now the seat back, with its built-in 60/40 split, quite a job to manipulate.

...and cleaned

Well, that was a very productive hour! I had to refill the steam jug just once
and I'm very happy with the results. The seats have since fully dried and
they look really tidy. I'll be giving them a good hoovering to remove all traces
of fine dog hair before they go back into the car.

The tiny circles are flash reflections... grrrrr!
Regards,
Steve
Hello Folks,
When I first had this car on the road, it could have been called "Nell's Taxi",
and she travelled on the back seat. Oh, and she didn't appreciate having to
share it with a back seat passenger, oh no!
Anyway, Karl brought the seats round yesterday and seeing them out of the
car showed that they were going to take a little more than a wipe-down with
a damp cloth. With all the dog hair, it presented quite a cleaning challenge.
Having managed to gather a few worthwhile Nectar points over the past 8 to
10 years, I did some research, looking for a cheap steam cleaner.
I ended up buying a 1,300 watt Bush appliance, complete with all the tools,
for just £2.50 in cash - still a bargain at its 25 quid asking price. I had a look
for a review of cheap steam cleaners on here, but couldn't find one. I guess
that's my cue to write one about this little machine.
So, to the task in hand - here's some pictures to show how much of a
challenge this was going to be. No light task!
Some "during" pictures...
These pictures show just how quickly the steam cleaner was working. Hardly
more than two quick strokes, working north to south. The steamer leaves
the surface rather wet, so I went straight in with a microfibre cloth, though
this wasn't hard work!
The bonnet on the steamer head was certainly picking up the grime!
One of the worst areas was those that are normally hidden from view...
dealt with...
The flash on the camera is highlighting even the smallest flaw. The seats
were being photographed between cleaning bouts, where the fabric hasn't
fully dried. This next photo shows the bits that were difficult to reach with
the steam pad...
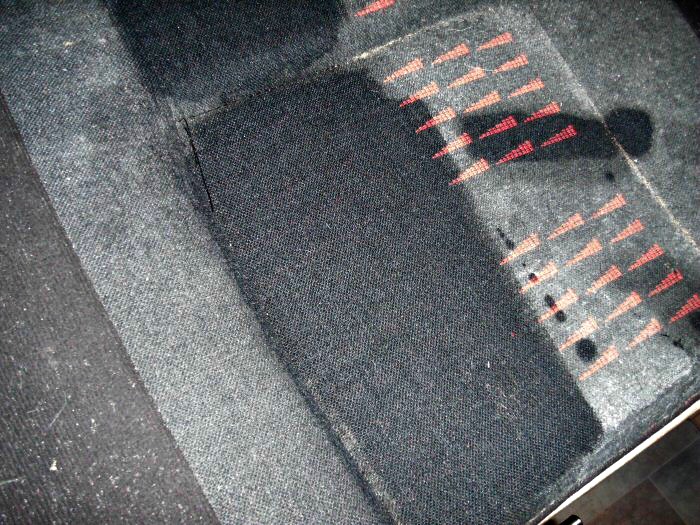
Moving on to the smaller part of the split-seat. No less minging, with a lot
more fungal evidence. It looks like my choice of using steam is the right one.
The steamer has about a teaspoonful of ONR mixed with its water, so that
has limited the possibility of a dank smell filling my kitchen...
Now to the cleaning...
...and cleaned
Another hidden edge...
...and cleaned
Now the seat back, with its built-in 60/40 split, quite a job to manipulate.
...and cleaned
Well, that was a very productive hour! I had to refill the steam jug just once
and I'm very happy with the results. The seats have since fully dried and
they look really tidy. I'll be giving them a good hoovering to remove all traces
of fine dog hair before they go back into the car.
The tiny circles are flash reflections... grrrrr!
Regards,
Steve
January 2014
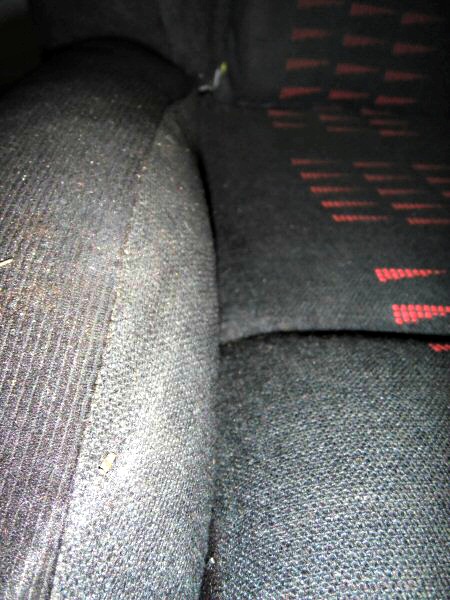
Now to the Front Seats
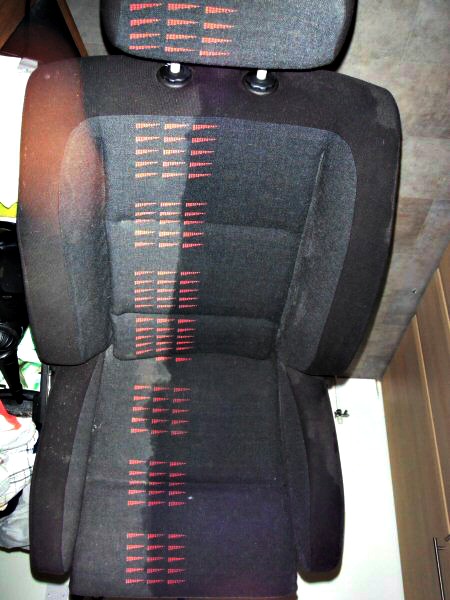
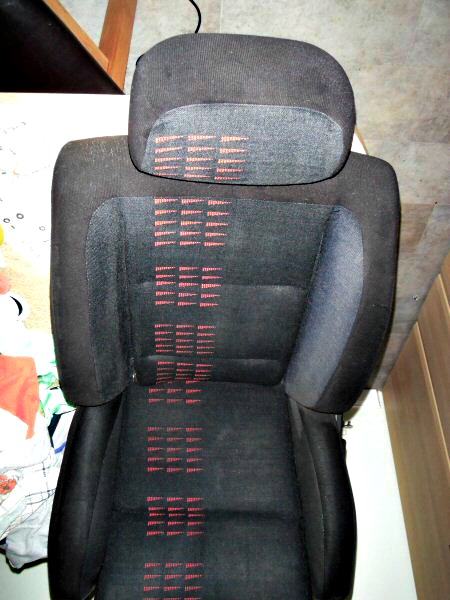
While I'm happy with the way that the back seats have cleaned up, it'll be
the front ones that will throw up the biggest challenge, especially the driver's
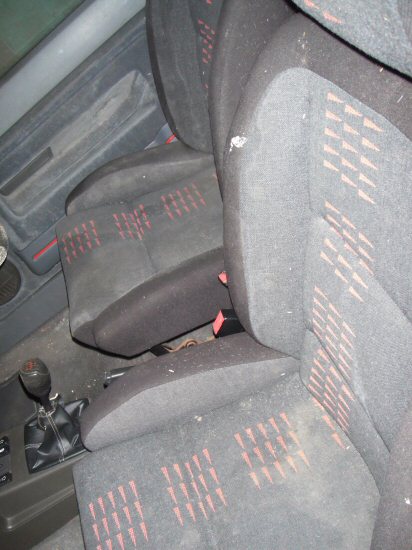
seat! However, let's start with the passenger seat. At first sight, it doesn't
seem too bad...
OK, so the back seems fairly clean, but the squab is going to need some
attention.

So, the cleaning begins. This picture shows one of the drawbacks of the
steamer. To get into those vertical crannies, it's going to be necessary to
turn the seat on its side. Giving a good blast of steam is going to help deal
with any nasties in the crevices.

Seat completed. The steamer doesn't leave an even pattern of dampness
across the surface, so drying isn't even either. I was quite surprised at how
much dirt the separate microfibre towel was collecting as I tried absorbing as
much of the liquid as I could.
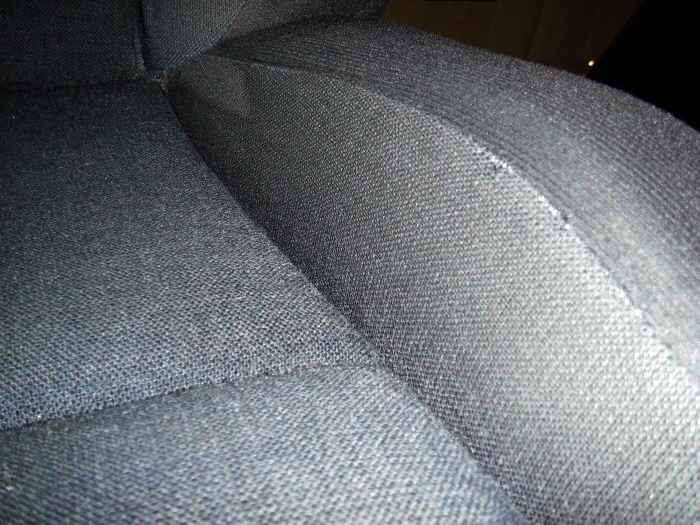
So, now we come to the driver's seat. When I first used the car, I found that
the seat wasn't properly supporting my legs below the lower thigh. I took the
car to a local upholsterers who specialised in boat outfitting. He was able to
pad out the front of the seat squab by about an inch without having to tear
or damage the fabric.
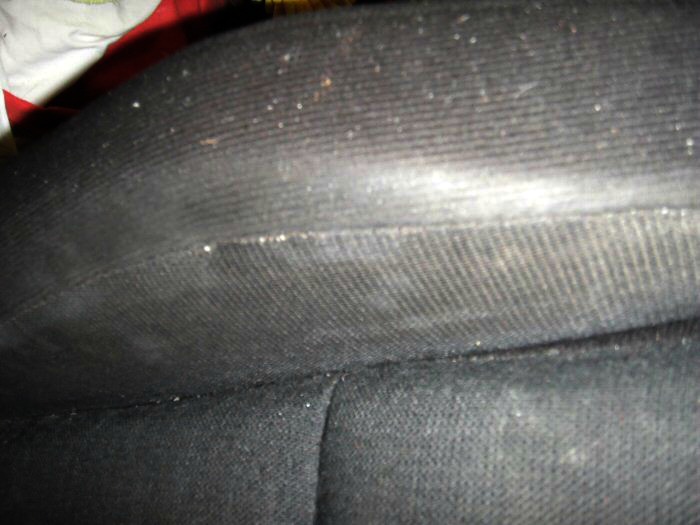
With my massive frame getting into and out of the car, the wings of the seat
squabs took a fair of stick and the "tide mark" of shininess gives this away.
I reckon that I'll be pleased if I can reduce this, I doubt very much if I'll get
rid of it altogether...
Compared to the passenger seat, this one is not in good condition, so it looks
like it will be quite a challenge!
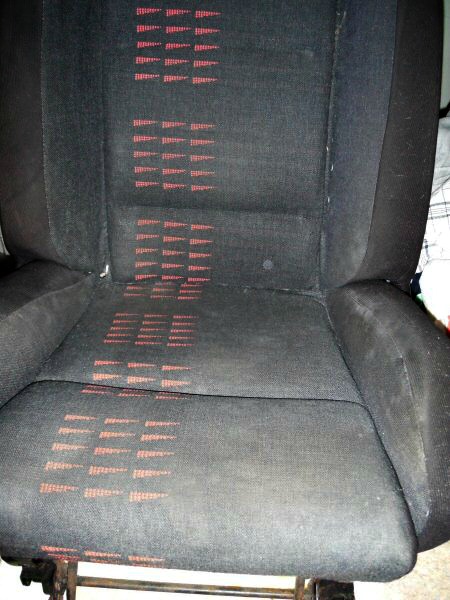
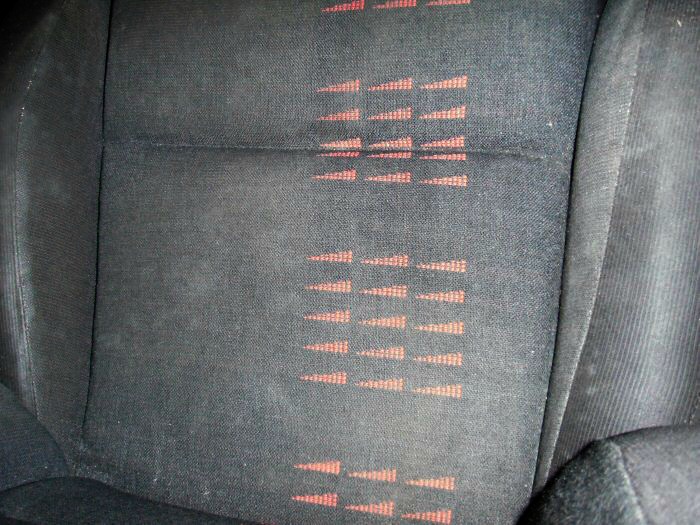
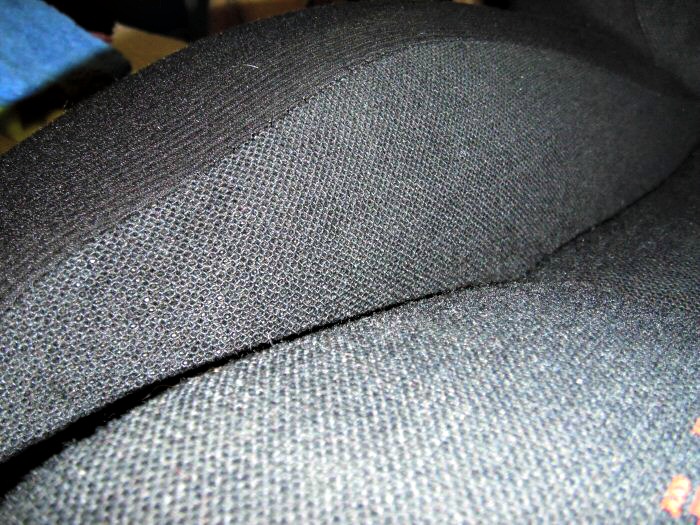
So, down to the clean. The steamer made short work of most of the base
areas. The raised area at the front had some shiny areas, where I have used
my hands to support myself getting in and out.
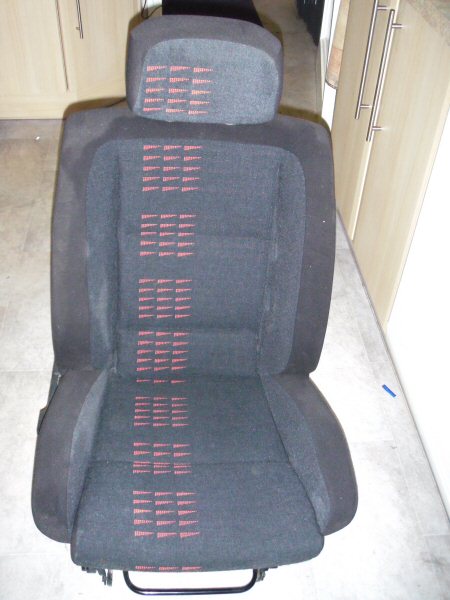
All clean, as this close-up shows...
The completed seat...
Now, more close-ups of the seat wings.
Before...

After...
There is still the vestige of a tide-mark. However, I'm delighted with this
cleaning result..!
The seat squab on completion...
So, that's my first outing with a steam cleaner. I was quietly dreading the
prospect of dealing with whatever might be lurking in that fabric. However,
around 3 hours of work in total has produced results that really delight me!
One thing I don't regret is that I added half a capful of ONR to the 350 ml of
water the steamer took. I would not normally advocate doing this, in fact I
was reticent, but I didn't want my home smelling like a musty chinese laundry.
The seats, and indoors, now have that pleasant odour that comes from ONR
Wash and Shine
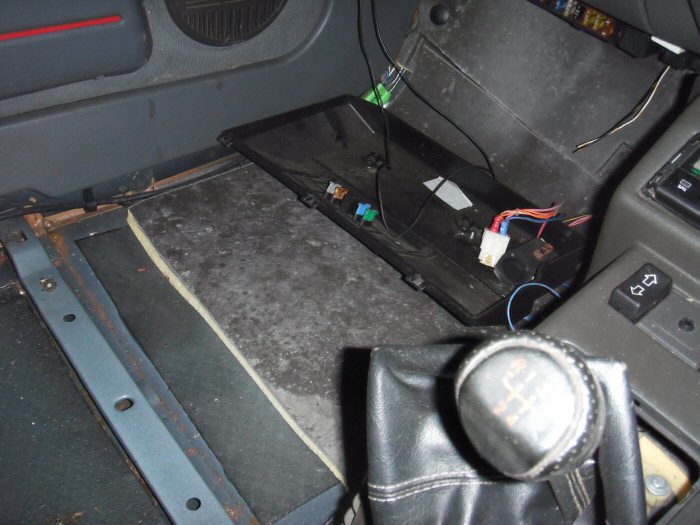
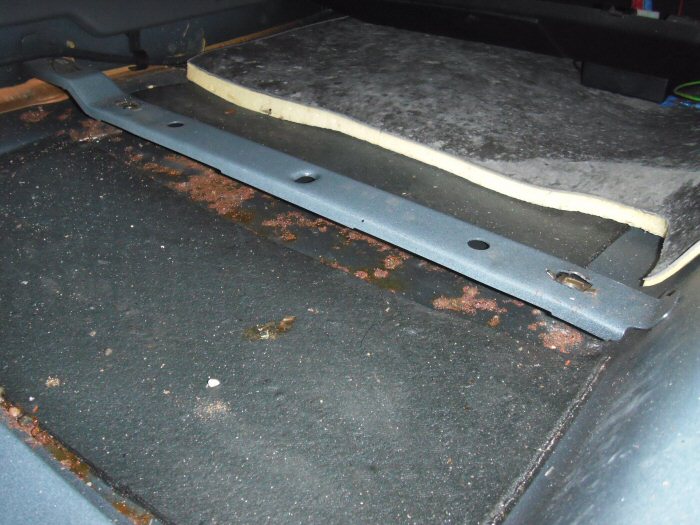
I'm so pleased with the way the seats have come up, I've asked Karl to take
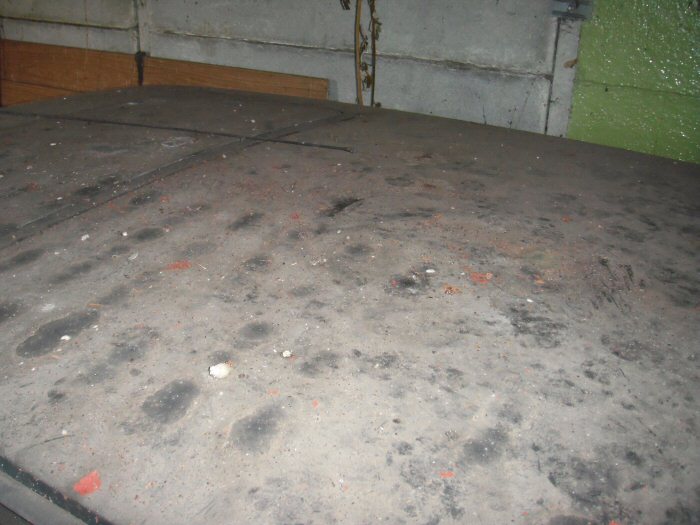
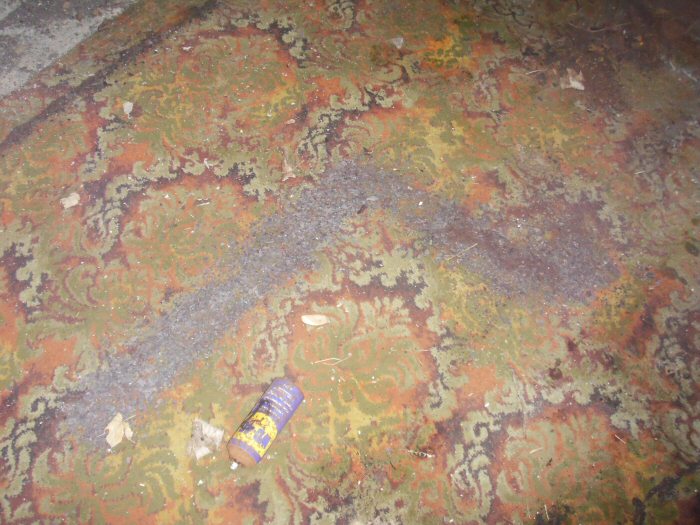
out the carpet, so I can give it a once-over with my floor-cleaning steamer.
Once that happens, I'll go round and take some photos of the car's floor. That
should be very revealing!
Regards,
Steve
Now to the Front Seats
While I'm happy with the way that the back seats have cleaned up, it'll be
the front ones that will throw up the biggest challenge, especially the driver's
seat! However, let's start with the passenger seat. At first sight, it doesn't
seem too bad...
OK, so the back seems fairly clean, but the squab is going to need some
attention.
So, the cleaning begins. This picture shows one of the drawbacks of the
steamer. To get into those vertical crannies, it's going to be necessary to
turn the seat on its side. Giving a good blast of steam is going to help deal
with any nasties in the crevices.
Seat completed. The steamer doesn't leave an even pattern of dampness
across the surface, so drying isn't even either. I was quite surprised at how
much dirt the separate microfibre towel was collecting as I tried absorbing as
much of the liquid as I could.
So, now we come to the driver's seat. When I first used the car, I found that
the seat wasn't properly supporting my legs below the lower thigh. I took the
car to a local upholsterers who specialised in boat outfitting. He was able to
pad out the front of the seat squab by about an inch without having to tear
or damage the fabric.
With my massive frame getting into and out of the car, the wings of the seat
squabs took a fair of stick and the "tide mark" of shininess gives this away.
I reckon that I'll be pleased if I can reduce this, I doubt very much if I'll get
rid of it altogether...
Compared to the passenger seat, this one is not in good condition, so it looks
like it will be quite a challenge!
So, down to the clean. The steamer made short work of most of the base
areas. The raised area at the front had some shiny areas, where I have used
my hands to support myself getting in and out.
All clean, as this close-up shows...
The completed seat...
Now, more close-ups of the seat wings.
Before...
After...
There is still the vestige of a tide-mark. However, I'm delighted with this
cleaning result..!
The seat squab on completion...
So, that's my first outing with a steam cleaner. I was quietly dreading the
prospect of dealing with whatever might be lurking in that fabric. However,
around 3 hours of work in total has produced results that really delight me!
One thing I don't regret is that I added half a capful of ONR to the 350 ml of
water the steamer took. I would not normally advocate doing this, in fact I
was reticent, but I didn't want my home smelling like a musty chinese laundry.
The seats, and indoors, now have that pleasant odour that comes from ONR
Wash and Shine
I'm so pleased with the way the seats have come up, I've asked Karl to take
out the carpet, so I can give it a once-over with my floor-cleaning steamer.
Once that happens, I'll go round and take some photos of the car's floor. That
should be very revealing!
Regards,
Steve
January 2014
Now to coating the wheels
Hello Folks,
Now that the wheels have been beautifully refurbished, I'm intent on keeping
them looking nice. So, the first coat of protection is ADS ArtDeWheel and it
needs a bit of preparation, not just for the surface, but for the operator too!
There are two vital pieces of kit to don before you open the bottle. Oh, and
it's _not_ a good idea to sniff it to check for perfume! Some protective gloves
and a face mask are basic PPE requirements. This is especially important if,
like me, you're working indoors.
Working with these things makes this not the most pleasant of tasks. What
makes it even more difficult is that you can barely see the coating on the
already very reflective silver. However, I'm ahead of myself, as usual.
The most vital aspect is that the surface is spotlessly clean! So, a proper
wipe over with the ArtDeParadise panel wipe ensured this. In common with
all the ADS products, less is definitely more, so while it took several drops
to prime the pad for the first wheel, it took no more than 6 to 8 drops more
when replenishing.

Out of the 20ml bottle, I ended up using just half. Yes, all four wheels coated
inside and out by just 10ml of product! Again, just as with the other coatings,
you can get in there almost straight away with the buffing cloth. The sudden
feeling of slickness is noticeable.
Once you have finished, and put your disposable gloves and mask in the bin,
make a point to _go and wash your hands_!
As I write this, in another room, the wheels are drying. This will need a couple
of hours minimum. I'll probably follow this coating up with some ADS Obsidian
wax, as a belt and braces approach to the protection. That will be the
sacrificial layer.
The seats have now dried and it's probable that I'll have a second go with
the steamer on the 40% size seat squab. Otherwise, I'm thrilled with the way
that they have cleaned up
Regards,
Steve
Now to coating the wheels
Hello Folks,
Now that the wheels have been beautifully refurbished, I'm intent on keeping
them looking nice. So, the first coat of protection is ADS ArtDeWheel and it
needs a bit of preparation, not just for the surface, but for the operator too!
There are two vital pieces of kit to don before you open the bottle. Oh, and
it's _not_ a good idea to sniff it to check for perfume! Some protective gloves
and a face mask are basic PPE requirements. This is especially important if,
like me, you're working indoors.
Working with these things makes this not the most pleasant of tasks. What
makes it even more difficult is that you can barely see the coating on the
already very reflective silver. However, I'm ahead of myself, as usual.
The most vital aspect is that the surface is spotlessly clean! So, a proper
wipe over with the ArtDeParadise panel wipe ensured this. In common with
all the ADS products, less is definitely more, so while it took several drops
to prime the pad for the first wheel, it took no more than 6 to 8 drops more
when replenishing.
Out of the 20ml bottle, I ended up using just half. Yes, all four wheels coated
inside and out by just 10ml of product! Again, just as with the other coatings,
you can get in there almost straight away with the buffing cloth. The sudden
feeling of slickness is noticeable.
Once you have finished, and put your disposable gloves and mask in the bin,
make a point to _go and wash your hands_!
As I write this, in another room, the wheels are drying. This will need a couple
of hours minimum. I'll probably follow this coating up with some ADS Obsidian
wax, as a belt and braces approach to the protection. That will be the
sacrificial layer.
The seats have now dried and it's probable that I'll have a second go with
the steamer on the 40% size seat squab. Otherwise, I'm thrilled with the way
that they have cleaned up
Regards,
Steve
January 2013
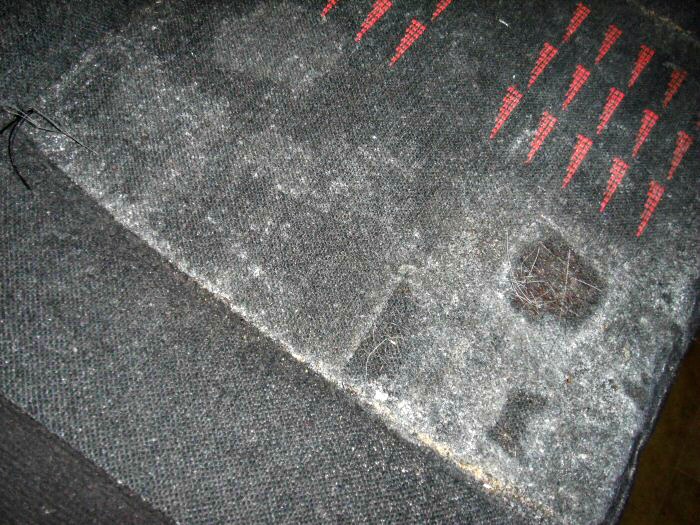
...and Enter the Sonic Brush!
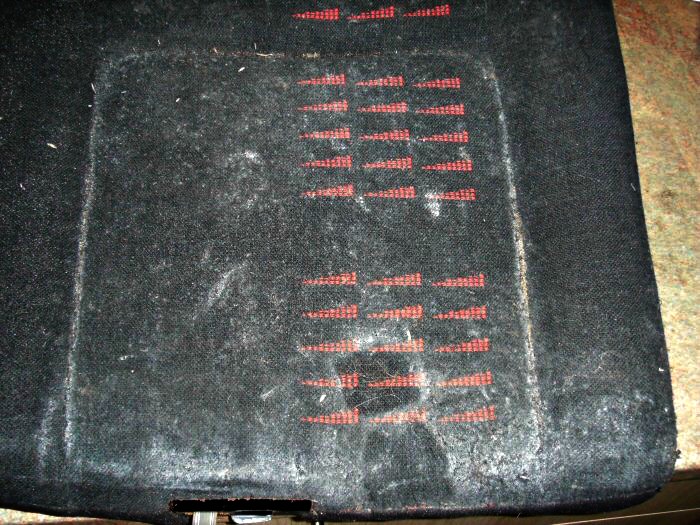
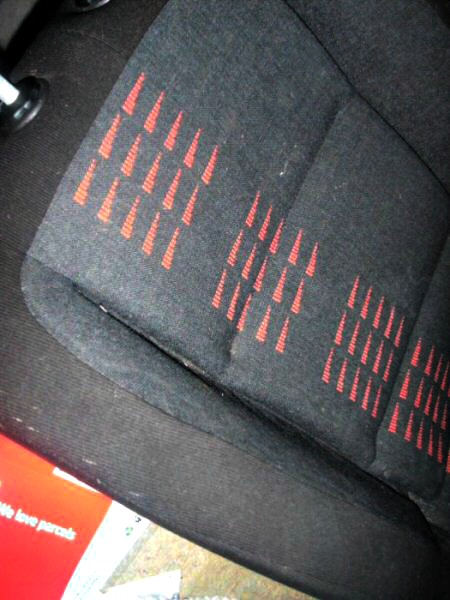
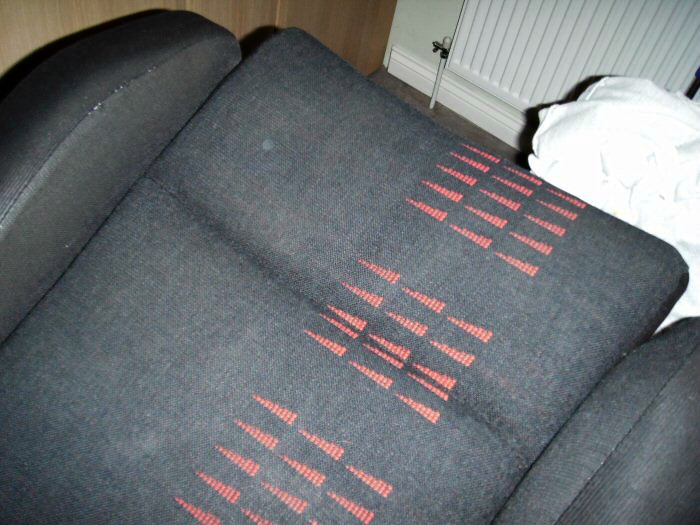
Although the steamer has done some excellent cleaning work, it looks like my
gammy hands have let me down a bit. This was particularly noticeable on the
squab of the smaller rear seat, as seen in these two pictures...

A friend of mine came round today to look at the progress, and I was able to
tap into his better knowledge of modern cleaning methods for cloth and
alcantra seats. Professionally, he'd be using G101, but in the absence of that
we tried some Flash All Purpose Cleaner, diluted at about 20:1 from a spray
bottle.
Initially, we just sprayed a little on and gave it a good scrub with a high
denier weave microfibre cloth. His biggest tip was to use short strokes in
just one direction, with a slight hand rotation, so that he used as many
clean fibres as he could. Sadly, his application force was one that I don't
have the strength to replicate
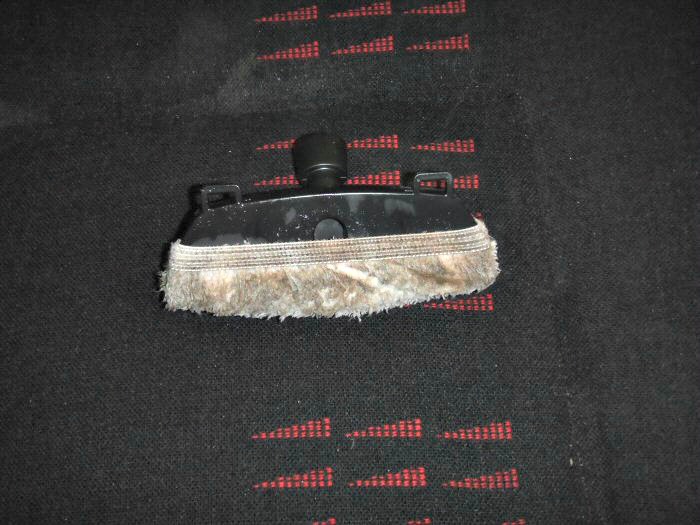
So, To A New Tool
Last weekend, Aldi offered a sonic brush set for a tenner, and I saw this as
an ideal tool for cleaning things like the outside of the carburettor and other
aluminium based parts. However, the biggest of the three brushes looked like
they might suit the purpose, showed it to my mate and got a nod of approval!
So, I got the seat squab in position, gave a small section a few sprays of
APC and set to with the brush. Like the cloth, straight strokes in just one
direction was doing the business. A quick follow-up with the MF cloth and
it was amazing just how much dirt had been left the first time round!
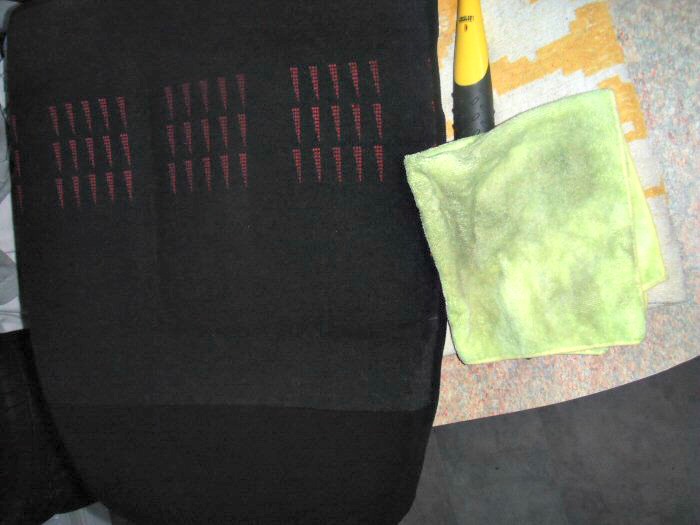
Here's a quick 50/50, though we need to see the seat dry before pronouncing
on how clean it actually is. The dirt on the cloth was giving good indicators
of dirt removal...
...and here's the completed seat sqab
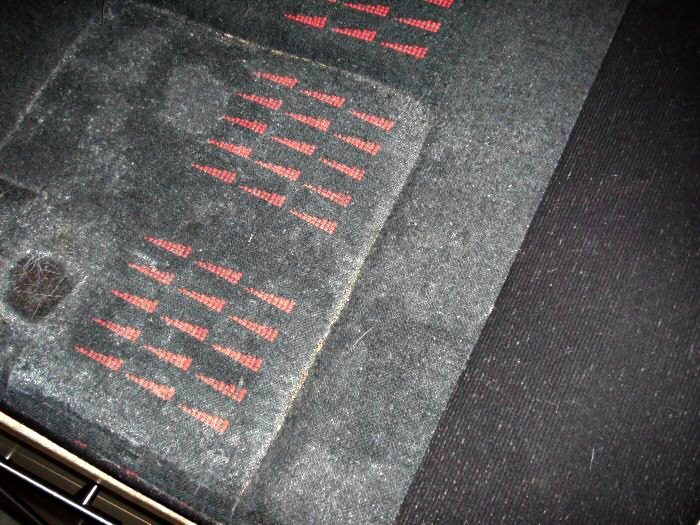
Before concluding that the steamer might not have worked as well as hoped,
we need to remember how these seats started out. Here's a quick reminder...
What pleases me about the steamer is that the heat will have killed off the
fungal spores without them being distributed far and wide. All this second
clean is really doing is helping to compensate for my lack of scrubbing ability.
Either way, the seats will come up like new by the time I've finished!
Regards,
Steve
...and Enter the Sonic Brush!
Although the steamer has done some excellent cleaning work, it looks like my
gammy hands have let me down a bit. This was particularly noticeable on the
squab of the smaller rear seat, as seen in these two pictures...
A friend of mine came round today to look at the progress, and I was able to
tap into his better knowledge of modern cleaning methods for cloth and
alcantra seats. Professionally, he'd be using G101, but in the absence of that
we tried some Flash All Purpose Cleaner, diluted at about 20:1 from a spray
bottle.
Initially, we just sprayed a little on and gave it a good scrub with a high
denier weave microfibre cloth. His biggest tip was to use short strokes in
just one direction, with a slight hand rotation, so that he used as many
clean fibres as he could. Sadly, his application force was one that I don't
have the strength to replicate
So, To A New Tool
Last weekend, Aldi offered a sonic brush set for a tenner, and I saw this as
an ideal tool for cleaning things like the outside of the carburettor and other
aluminium based parts. However, the biggest of the three brushes looked like
they might suit the purpose, showed it to my mate and got a nod of approval!
So, I got the seat squab in position, gave a small section a few sprays of
APC and set to with the brush. Like the cloth, straight strokes in just one
direction was doing the business. A quick follow-up with the MF cloth and
it was amazing just how much dirt had been left the first time round!
Here's a quick 50/50, though we need to see the seat dry before pronouncing
on how clean it actually is. The dirt on the cloth was giving good indicators
of dirt removal...
...and here's the completed seat sqab
Before concluding that the steamer might not have worked as well as hoped,
we need to remember how these seats started out. Here's a quick reminder...
What pleases me about the steamer is that the heat will have killed off the
fungal spores without them being distributed far and wide. All this second
clean is really doing is helping to compensate for my lack of scrubbing ability.
Either way, the seats will come up like new by the time I've finished!
Regards,
Steve
Edited by LowiePete on Wednesday 8th April 16:37
January 2014
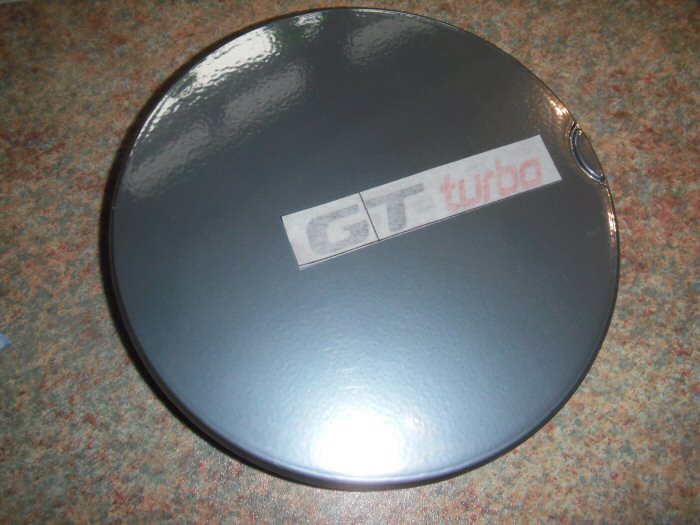
Wheel Caps get some attention
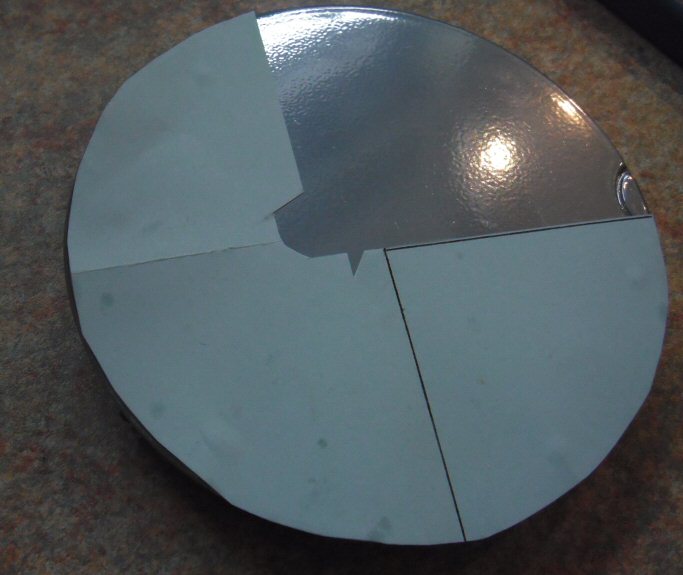
Hello Folks,
Having seen these graphics, it set an idea in motion. I was not having the
wheels refurbed in the boring original satin finish, so how about a bit of a
21stC touch too? Having secured some correctly coloured graphics the 2nd
time around, it's time to apply them. Obviously, I want them all to match,
so a bit of preparation work was needed. Here's the start...
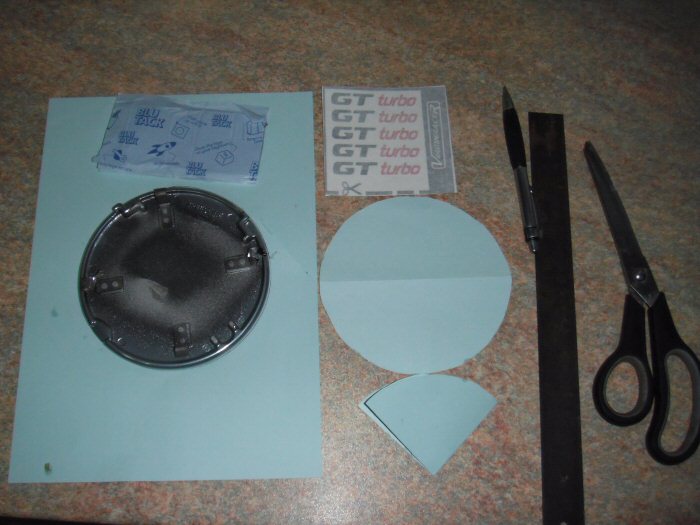
What I've done is to draw the cap outline onto two pieces of coloured paper.
The second is a spare, just in case. Fold the circle into half and ensure you
have a very sharp folded edge. This helps when you come to fold it in half
once more.
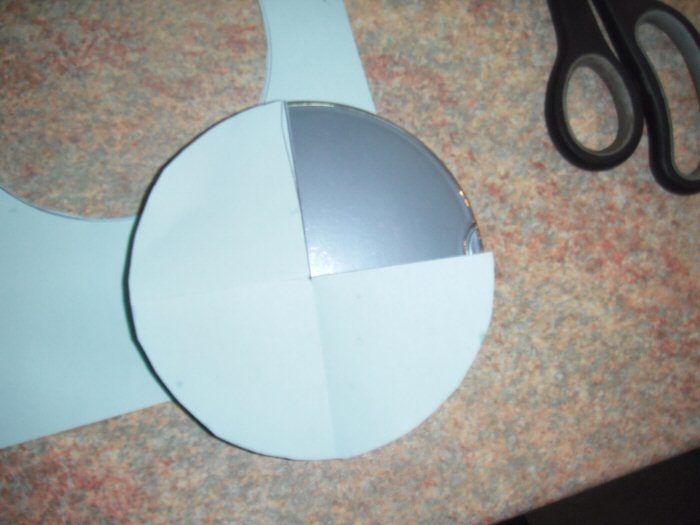
Draw a line along the entire way along one fold. Note that this is absent in
this photo! Cut out a quadrant and test out the position on the disc. Remove
and set aside.
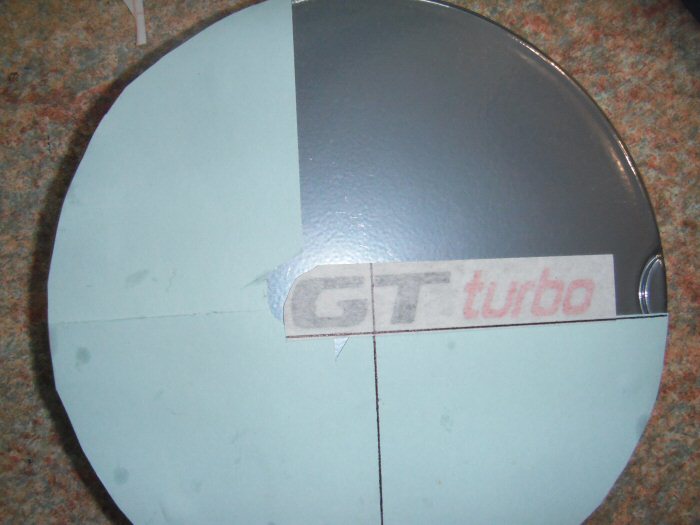
Next comes the preparation of the decals. You need to decide on your centre
line. Note that I have lined up with the T edge, rather than guess where the
middle of the two letters comes. I'm working with a chunky biro, because my
hands cannot cope with a fine pencil...
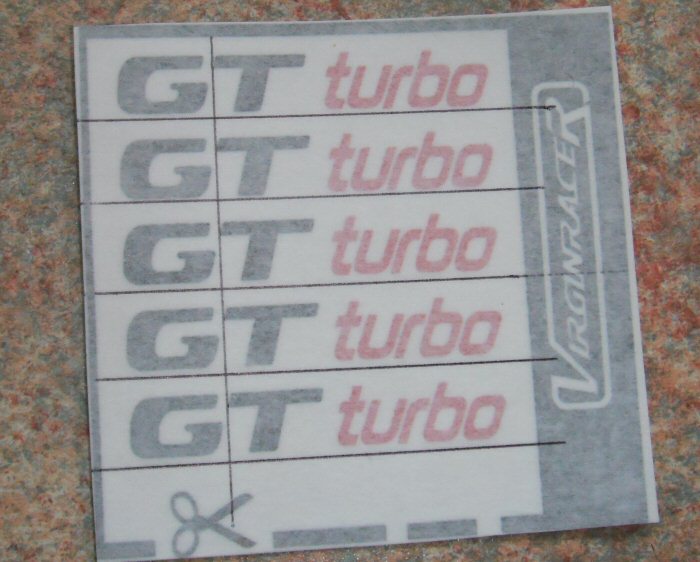
Then underline each piece leaving about one millimetre gap below the letters.
Number 2 in this sequence is too close, so will become my spare if it all goes
wrong. The vertical line will be used to match up with the centre line on the
blue template, and the horizontal will be placed over another line on the
template, which is our next stage. First, measure the exact height of the
larger letters. Just 1cm.
Now carefully measure and draw a black line 6.5mm from one of the quadrant
edges. Cut away 6mm so that your black line is still visible on the template.
That will give you your base line.
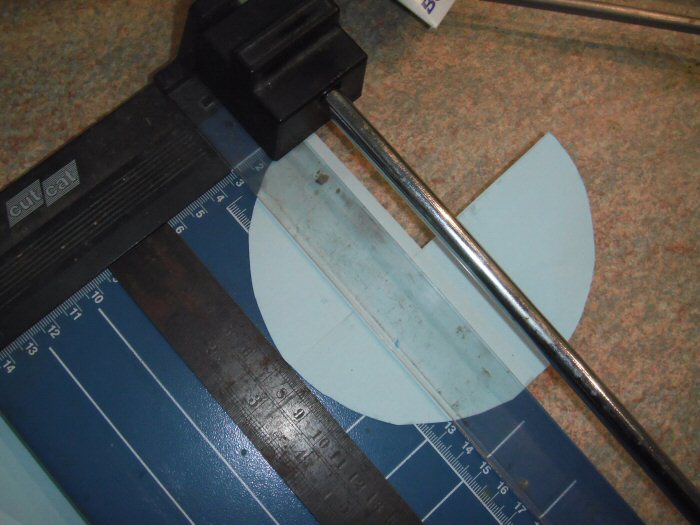
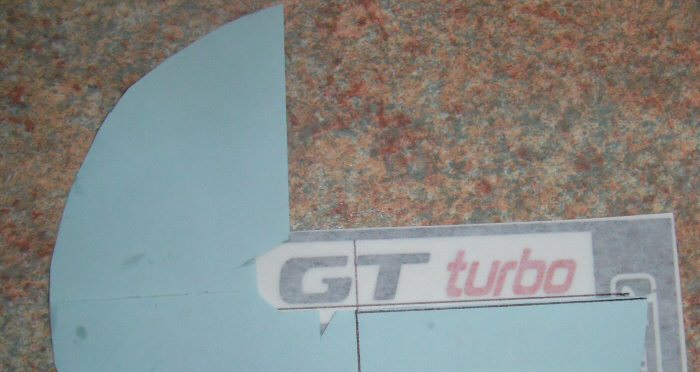
Remove about 10mm from the other quadrant edge, don't overdo this or you
will lose some of your centering that the template provides. Then cut away
in the centre so that the lettering can be placed freely, as this mock-up
shows. On the cap, the baseline of the decal will go over the line on the
template.
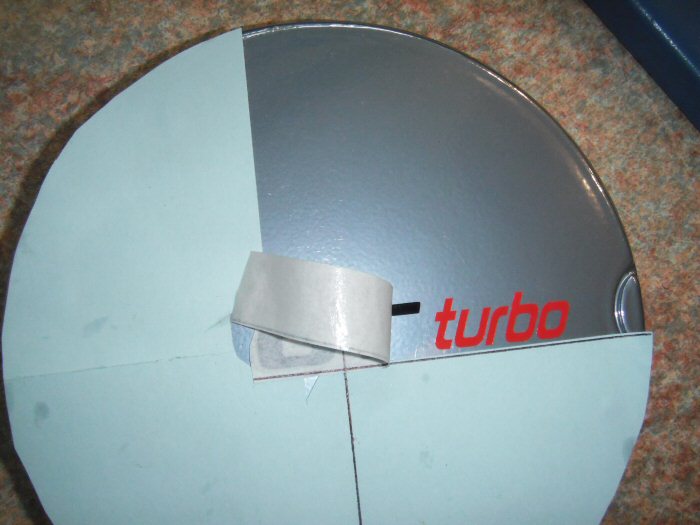
Apply tiny dots of blu-tack to the template and place into position. The
height of the access curve on the cap is 2cm, so I'm placing the baseline of
the template about 4mm above the bottom of the curve.
Now, it's time to remove the backing paper. The trick here is to curve the
backing paper away from the decal paper, keeping that as flat as you can.
Hold the complete decal gently twixt thumb and forefinger in the vertical,
while bending the backing paper over the forefinger as you progressively feed
the decal. Take your time here!
Now place the decal into position, so that the vertical lines match and that
the drawn line on the decal paper rests over that on the template. Once in
position, give the decal a gentle but firm press into position with a microfibre
cloth stretched over the end of your forefinger.
Now, carefully remove the decal covering paper. You need to keep the lifted
edge at an open angle of greater than 140 degrees if you can. Once you
have peeled back, remove the template and gently firm the lettering with
the MF cloth.
The first cap completed...
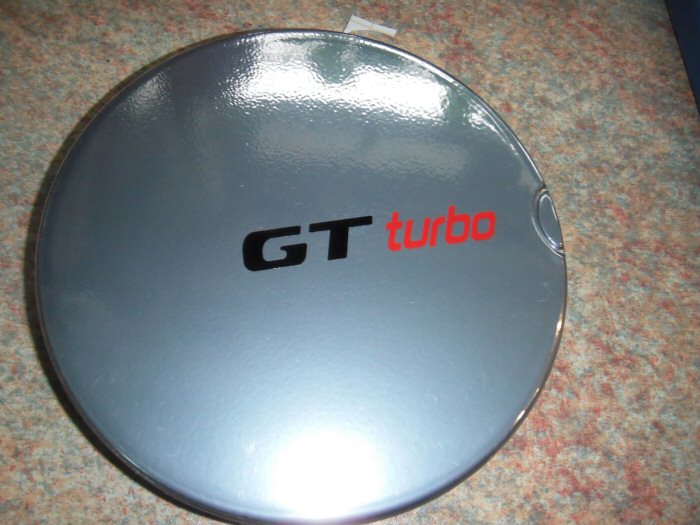
For the subsequent caps, I found it easier to remove the template first. With
the slight overlap of the backing paper, I took my time so nothing moved out
of position.
All four caps completed...

...and in position on the wheel
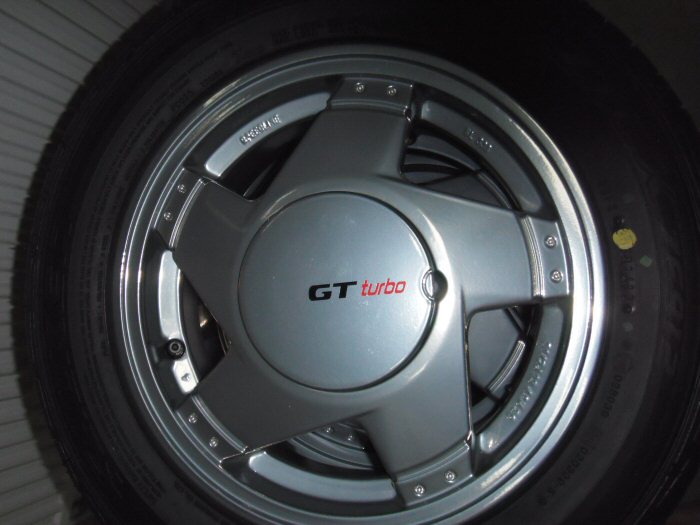
Considering my gammy hands, I thoroughly enjoyed myself doing this! Who
cares if it divides opinion..?
Regards,
Steve
Wheel Caps get some attention
Hello Folks,
Having seen these graphics, it set an idea in motion. I was not having the
wheels refurbed in the boring original satin finish, so how about a bit of a
21stC touch too? Having secured some correctly coloured graphics the 2nd
time around, it's time to apply them. Obviously, I want them all to match,
so a bit of preparation work was needed. Here's the start...
What I've done is to draw the cap outline onto two pieces of coloured paper.
The second is a spare, just in case. Fold the circle into half and ensure you
have a very sharp folded edge. This helps when you come to fold it in half
once more.
Draw a line along the entire way along one fold. Note that this is absent in
this photo! Cut out a quadrant and test out the position on the disc. Remove
and set aside.
Next comes the preparation of the decals. You need to decide on your centre
line. Note that I have lined up with the T edge, rather than guess where the
middle of the two letters comes. I'm working with a chunky biro, because my
hands cannot cope with a fine pencil...
Then underline each piece leaving about one millimetre gap below the letters.
Number 2 in this sequence is too close, so will become my spare if it all goes
wrong. The vertical line will be used to match up with the centre line on the
blue template, and the horizontal will be placed over another line on the
template, which is our next stage. First, measure the exact height of the
larger letters. Just 1cm.
Now carefully measure and draw a black line 6.5mm from one of the quadrant
edges. Cut away 6mm so that your black line is still visible on the template.
That will give you your base line.
Remove about 10mm from the other quadrant edge, don't overdo this or you
will lose some of your centering that the template provides. Then cut away
in the centre so that the lettering can be placed freely, as this mock-up
shows. On the cap, the baseline of the decal will go over the line on the
template.
Apply tiny dots of blu-tack to the template and place into position. The
height of the access curve on the cap is 2cm, so I'm placing the baseline of
the template about 4mm above the bottom of the curve.
Now, it's time to remove the backing paper. The trick here is to curve the
backing paper away from the decal paper, keeping that as flat as you can.
Hold the complete decal gently twixt thumb and forefinger in the vertical,
while bending the backing paper over the forefinger as you progressively feed
the decal. Take your time here!
Now place the decal into position, so that the vertical lines match and that
the drawn line on the decal paper rests over that on the template. Once in
position, give the decal a gentle but firm press into position with a microfibre
cloth stretched over the end of your forefinger.
Now, carefully remove the decal covering paper. You need to keep the lifted
edge at an open angle of greater than 140 degrees if you can. Once you
have peeled back, remove the template and gently firm the lettering with
the MF cloth.
The first cap completed...
For the subsequent caps, I found it easier to remove the template first. With
the slight overlap of the backing paper, I took my time so nothing moved out
of position.
All four caps completed...
...and in position on the wheel
Considering my gammy hands, I thoroughly enjoyed myself doing this! Who
cares if it divides opinion..?
Regards,
Steve
Edited by LowiePete on Friday 3rd April 08:06
Loving the progress on this and the work done so far. I'm a big R5GTT fan.
Interior is certainly coming up nicely there, definitely want to kill off the mould although as long once it's cleaned up and the car is regularly aired and warmed up it'll stay away.
Look forward to seeing the progress.
Interior is certainly coming up nicely there, definitely want to kill off the mould although as long once it's cleaned up and the car is regularly aired and warmed up it'll stay away.
Look forward to seeing the progress.
Hello Folks,
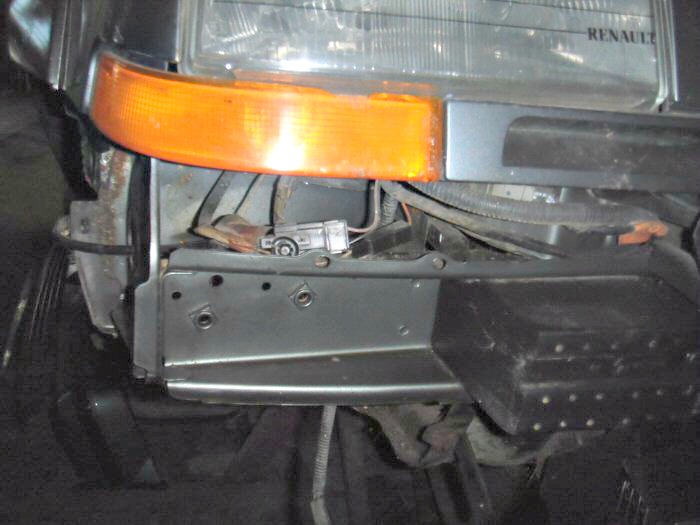
Back to the Workshop
After the Xmas break, and time to think through a forthcoming strategy, I
went to talk to Karl today. There was some more progress, with the front
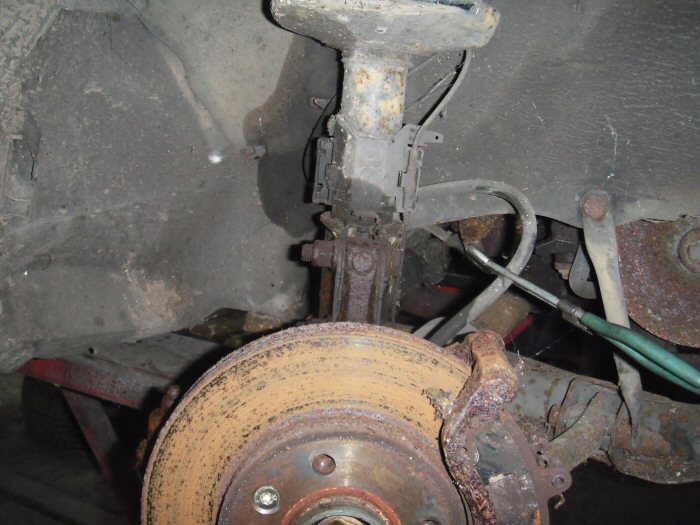
bumper removed to reveal this...
So, part of the discussions for future work involved the hub carriers which
will be powder-coated in black. I've also ordered new front bearings and wish
bones. The springs, not seen here, will be powdercoated in red.
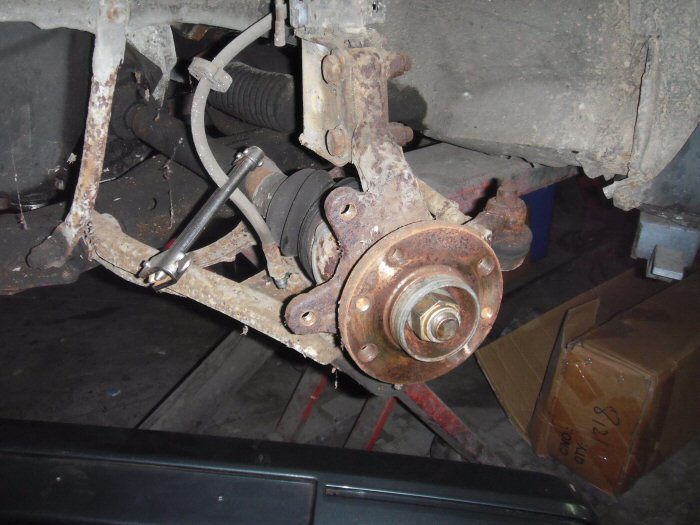
The front sub-frame is in excellent condition, with just odd patches of surface
rust. There is no steering play. Anyway, the plan of action is to restore all the
front suspension. Then we'll concentrate on getting the engine started to
have a listen. Once done, it's engine out with surface maintenance and clutch
and gearbox inspection.
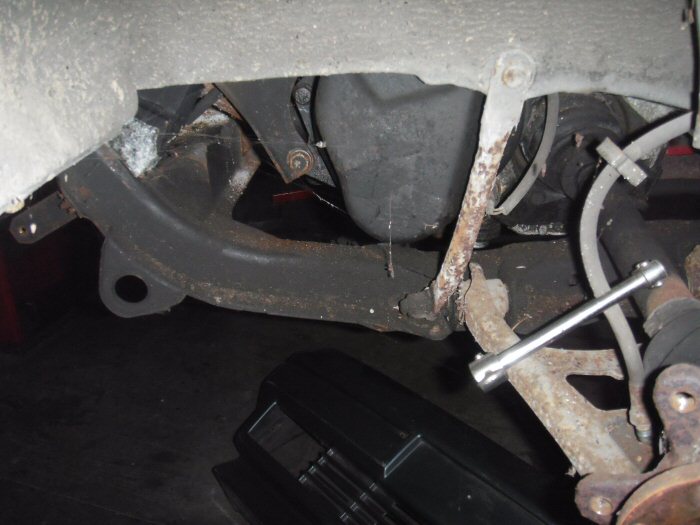
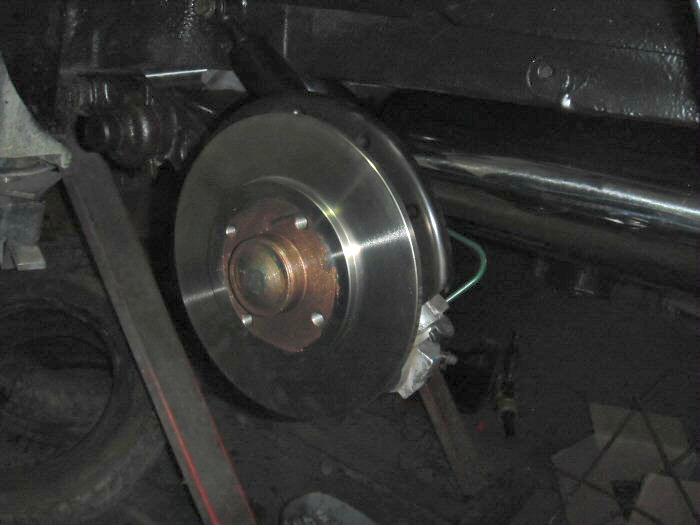
The next 3 pictures show the restored rear suspension on the driver's side,
with views under the wing...
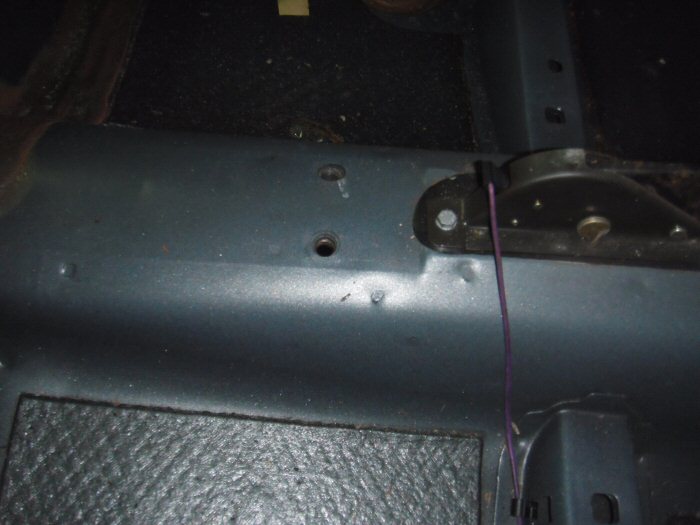
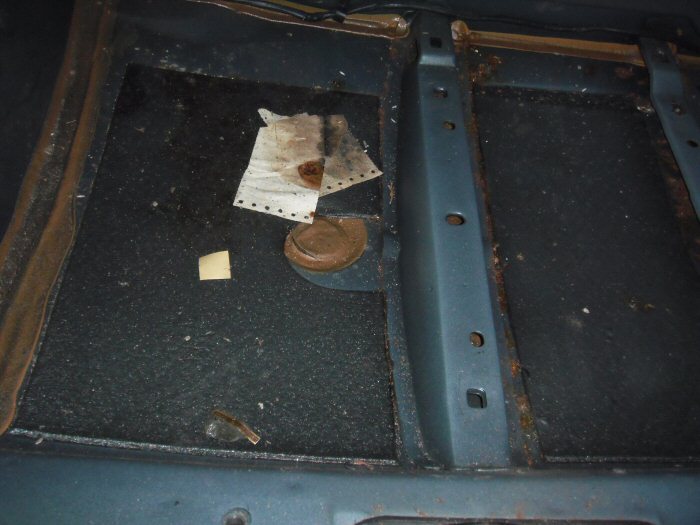
Now we come to the interior. Probably the biggest surprise of the whole resto
project. Basically, as the last three pictures show, there's only a small amount
of surface rust on the passenger side. Otherwise, it's all as sound as a bell!
On a scale of 1 to 10 of luck - guess where?
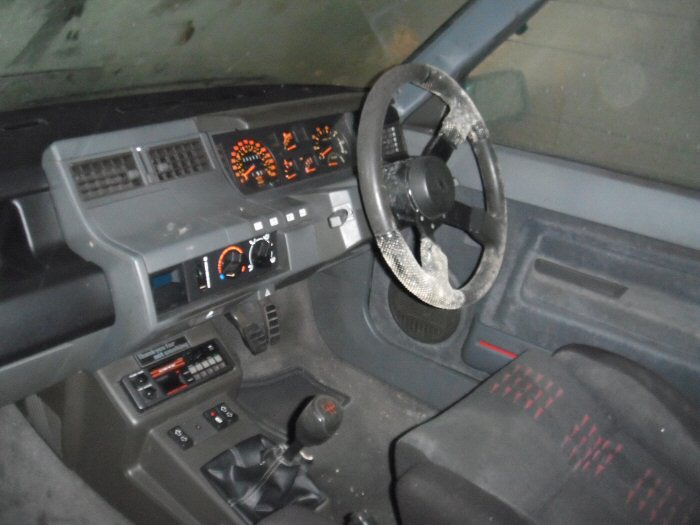
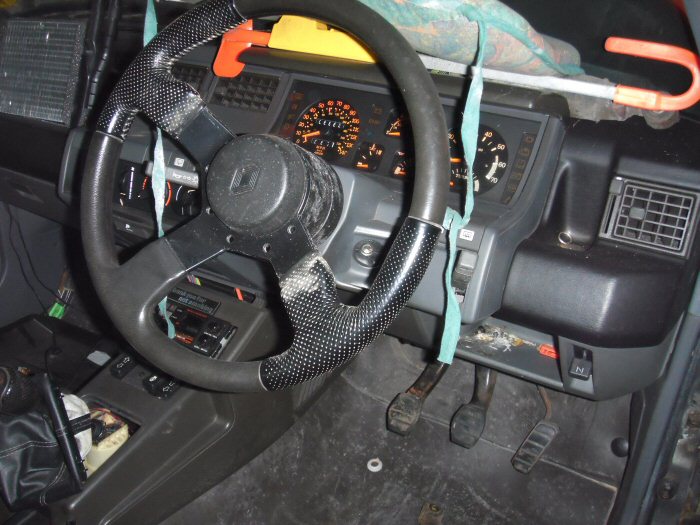
In the early pictures, the steering wheel looked like it had seen better days.
As this photo shows, that's been spared a replacement...
One other thing has been resolved. The bent driver's door is going to be
replaced with a brand new one - coming from France - the very last one?
By the time I pay a ton for second hand one, 60 quid plus for van hire and
80 quid or more in fuel, it works out at the same price.
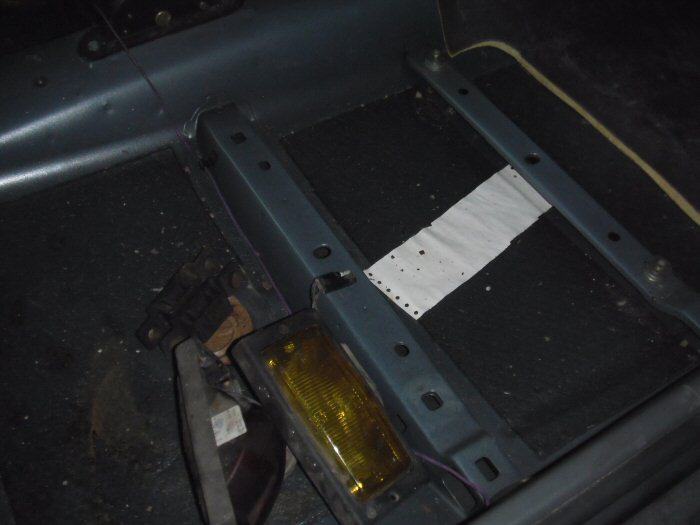
Also arrived are new floor mats, matching the carpet grey, with red banding.
My dog has also had a new travel pod ordered so she can travel in similar style
to that to which she has become accustomed in the Coupé. That'll also help
protect my beautifully cleaned seats.
Talking of the seats, the Scotch-Gard treatment tins arrived today and I'm
already half way through giving the seats a good coating. It looks like a wise
move because I may have dispersed the ghosting left behind by the mould.
Oh, and one last thing to report. I've managed to secure a full set of body
decals, so when we get to the point of re-spraying, the biggest onward cost
hurdle will have been jumped
Regards,
Steve
Back to the Workshop
After the Xmas break, and time to think through a forthcoming strategy, I
went to talk to Karl today. There was some more progress, with the front
bumper removed to reveal this...
So, part of the discussions for future work involved the hub carriers which
will be powder-coated in black. I've also ordered new front bearings and wish
bones. The springs, not seen here, will be powdercoated in red.
The front sub-frame is in excellent condition, with just odd patches of surface
rust. There is no steering play. Anyway, the plan of action is to restore all the
front suspension. Then we'll concentrate on getting the engine started to
have a listen. Once done, it's engine out with surface maintenance and clutch
and gearbox inspection.
The next 3 pictures show the restored rear suspension on the driver's side,
with views under the wing...
Now we come to the interior. Probably the biggest surprise of the whole resto
project. Basically, as the last three pictures show, there's only a small amount
of surface rust on the passenger side. Otherwise, it's all as sound as a bell!
On a scale of 1 to 10 of luck - guess where?
In the early pictures, the steering wheel looked like it had seen better days.
As this photo shows, that's been spared a replacement...
One other thing has been resolved. The bent driver's door is going to be
replaced with a brand new one - coming from France - the very last one?
By the time I pay a ton for second hand one, 60 quid plus for van hire and
80 quid or more in fuel, it works out at the same price.
Also arrived are new floor mats, matching the carpet grey, with red banding.
My dog has also had a new travel pod ordered so she can travel in similar style
to that to which she has become accustomed in the Coupé. That'll also help
protect my beautifully cleaned seats.
Talking of the seats, the Scotch-Gard treatment tins arrived today and I'm
already half way through giving the seats a good coating. It looks like a wise
move because I may have dispersed the ghosting left behind by the mould.
Oh, and one last thing to report. I've managed to secure a full set of body
decals, so when we get to the point of re-spraying, the biggest onward cost
hurdle will have been jumped
Regards,
Steve
Gassing Station | Readers' Cars | Top of Page | What's New | My Stuff