As 2020 hasn't been awful enough yet = my £750 Citroen C6!
Discussion


seiben said:
This is just all kinds of amazing. A newly-discovered Kitchski thread is always a treat 
Am I right in thinking this is the same engine and box that Jag used in the S-types of the era?
I'd be surprised if the gearbox was the same! This is front drive with a transverse engine while an S Type is rear drive with a longitudinal engine Am I right in thinking this is the same engine and box that Jag used in the S-types of the era?
Maybe worth asking Speedy Cables or similar about getting a new handbrake cable made up, as there's clearly a demand and £300+ is just outrageous and it's clearly a weakpoint. Whoever came up with the idea of electronic handbrakes should be fired out of a cannon at a safety net tensioned by f ked electronic handbrake mechanisms.
ked electronic handbrake mechanisms.seiben said:
This is just all kinds of amazing. A newly-discovered Kitchski thread is always a treat
Am I right in thinking this is the same engine and box that Jag used in the S-types of the era?
Engine: Yes. Am I right in thinking this is the same engine and box that Jag used in the S-types of the era?
Box: No.
Engine also used in various Land Rovers, though they use a single-turbo version because of some reasons.
hidetheelephants said:
Maybe worth asking Speedy Cables or similar about getting a new handbrake cable made up, as there's clearly a demand and £300+ is just outrageous and it's clearly a weakpoint. Whoever came up with the idea of electronic handbrakes should be fired out of a cannon at a safety net tensioned by fked electronic handbrake mechanisms.
There's a fella in Poland who has supplied them in the past, but I couldn't get hold of his details.ked electronic handbrake mechanisms.I wouldn't trust Speedy Cables to turn them around with 4 years, but there's always Cable-Tec. Used them before, and they were decent.
I think the idea of the electronic parking brake is a sound one, but the reality seems to be that they are inherently flawed.
bungz said:
Great write up as always.
That handbrake set up is absolute bks though, the motor needs coding to the car? costs a grand? Looks like its worth about 10 quid.
Apparently so, yes. I suspect it's because everything is controlled by the main computer/body module, and everything has to be coded together to prevent people tampering...or repairing them cheaply outside of the dealer network. As with many PSA coded stuff, it can only be coded once, rendering a used replacement useless...unless you pull it apart and pinch the cables! That handbrake set up is absolute b
ks though, the motor needs coding to the car? costs a grand? Looks like its worth about 10 quid.
As for the cost, it's a C6; Anything specifically C6 seems to be bloody expensive.
Retro_Jim said:
I appreciate your optimism and tenacity OP, having grown up with French cars such as the AX, BX, CX and xsara VTS I do find myself looking at old citroens to relive childhood road trips.
Your C6 has motivated me to look again!
Go for it!Your C6 has motivated me to look again!
shalmaneser said:
Very enjoyable and an awesome car! I reckon running some new oil through the gearbox might still be a good idea before you get too greasy swapping the boxes....
Thing is, that's already been done once. I guess I could try it again, just to see. A well-reknowned C6 specialist seemed to think it was potentially knackered, though.Kitchski said:
So, further sessions with the top of lap, and we have done a success:

Very satisfying, hearing the motor run up and the cables tensioning for the first time!
As I mentioned in my message, it should be an auto handbrake as I have in mine. Basically you need not touch the button. When you put the car in park and turn it off the handbrake is applied automatically. Then, when you start the car, put it into drive, give it a second then push the go pedal. The handbrake should release automatically.Very satisfying, hearing the motor run up and the cables tensioning for the first time!
You can of course override this by pushing the button on and off as required, but its a cool feature. It's also very good for hill starts as you can apply it manually then just drive off as required.
It might not be in the C6 however....
Edited by S100HP on Monday 26th October 20:17
shalmaneser said:
Fair enough - I suspected there had just been a fair amount of teeth sucking and huffing and puffing and the verdict of 'knackered' handed on down. If someone has already drained and refilled and it's still acting up it does rather suggest it's a goner.
It's probably a bit of both. Having looked at the box from underneath (and realised that it is a right pig to remove) I might try the fluid changes first - not decided either way. But, I know it's had one already and I know it went to another garage who specialise in C6s, and they seemed to think it was borked.S100HP said:
As I mentioned in my message, it should be an auto handbrake as I have in mine. Basically you need not touch the button. When you put the car in park and turn it off the handbrake is applied automatically. Then, when you start the car, put it into drive, give it a second then push the go pedal. The handbrake should release automatically.
You can of course override this by pushing the button on and off as required, but its a cool feature. It's also very good for hill starts as you can apply it manually then just drive off as required.
It might not be in the C6 however....
Let you know when I drive it (with working handbrake!)You can of course override this by pushing the button on and off as required, but its a cool feature. It's also very good for hill starts as you can apply it manually then just drive off as required.
It might not be in the C6 however....
Mikebentley said:
I love your tenacity OP. I have advised my wife should I ever turn up at home with one of these magnificent cars to have me sectioned immediately.
And I love your optimism! As if your wife would still be there if you brought one of these home...croissant said:
Just seen this... excellent work. Must be satisfying to have that sorted now! Since seeing your first post on this I've been looking at these. Wonderful cars!
Join the happy gang!Great stuff, OP.
A C6 in the wild is a sight to behold, on the rare occasions you’re lucky enough to see one. They have such presence, fabulous cars.
I was very tempted by an immaculate black Exclusive a few years ago, the plan was to run it alongside my DS5 as a pair of large, quirky French cars. In the end I replaced the DS5 with a Traction Avant, but I still have a soft spot for the C6.
It’s the sort of car that needs a bit of time and a bit of money invested in it, but it’s well worth saving. Good luck with it.
With a car as vast as a C6, a list of issues accompanying a cheap, mildly-neglected one isn't likely to be small! For this reason, I decided to set my project out into three stages:
Stage One (pre-MoT):
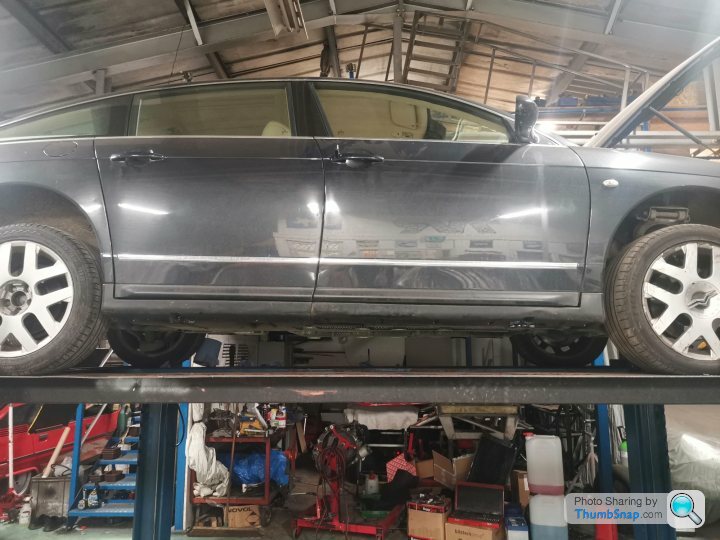
Well, the handbrake is effectively done, but while the car has the four post ramp occupied, it made sense to tackle the sills, which are suffering from the initial effects of tinworm. I know....I'm surprised too! I've owned plenty of Rennes-built cars over the years* , including BXs, Xantias and a Peugeot 407SW. In the case of the latter, which is very much of the same DNA a the C6, there was little to no rust at all. It's cliche, but it actually looked like new underneath!
* Plenty of cars from the Rennes plant, yes, but how many how their own wood-laminated production line?


The reason this is a stupid idea, is because a vertical strip of metal is only strong if a load is applied to it, well, vertically. You have to lift the car completely squarely underneath, otherwise you stand a chance (a chance laden with high-probability for fk up) of bending the jacking point.
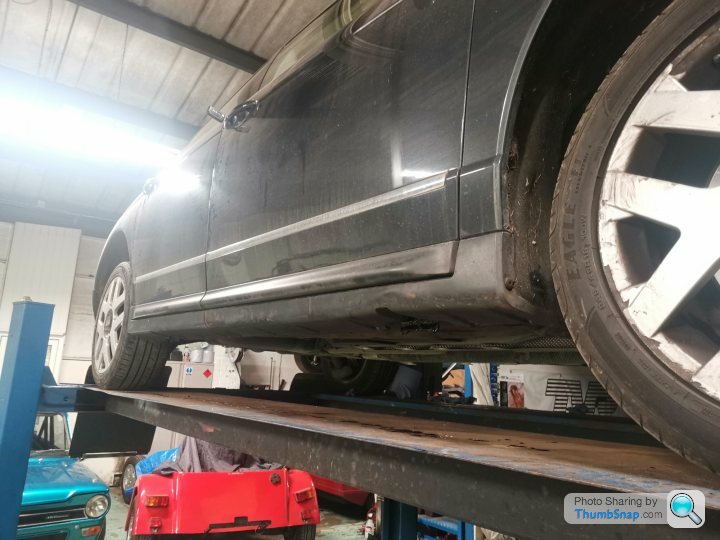
This is fine... if you're using a two-post ramp, which is able to lift the entire car squarely, but if you're using a Halfords trolley jack on a gravel driveway, this happens:

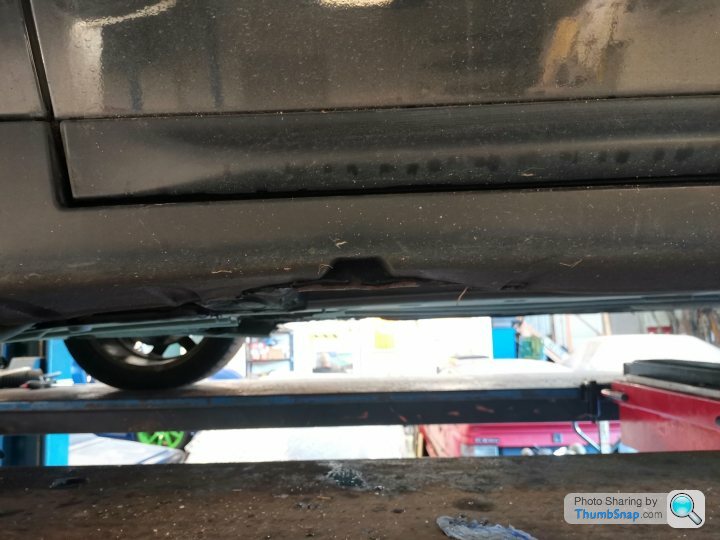
This has the added advantage of breaking up the underseal all along the sill, aswell as bending and breaking much of the panel that the sideskirt attaches to, causing the skirt to pop its rivets and partially detach from the car. Neat!
Time to remove the skirts, then.


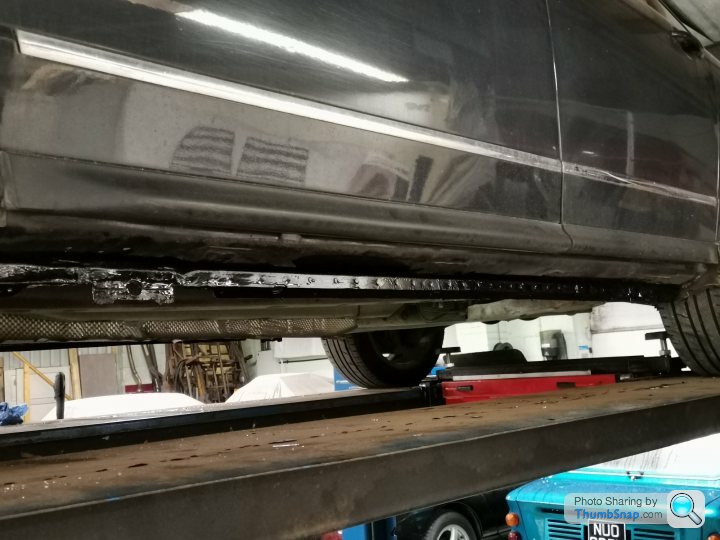
You can see the state of the jacking points! This is a heavy hector, and a single jack placed under one corner at a time is a receipe for disaster. I would go as far as to say that you just shouldn't do it, full stop.
Now, the thing I want to try and avoid doing, is welding on this car. A number of reasons for this: Firstly, it's a 2009 (or 2007) car - it shouldn't need welding! Secondly, there is a lot of sound-deadening in there, and I can't be arsed with removing it all and breaking every type of trim clip ever devised in doing so. Thirdly, there are many, many ECUs in this car; law of sod dictates that, despite disconnecting the battery, I will annihilate one of them.
Luckily, there are no holes. No structural issues that I can see, other than the bent jacking points, so I set about straightening those with a special straightening device and rubbing down all the affected areas.

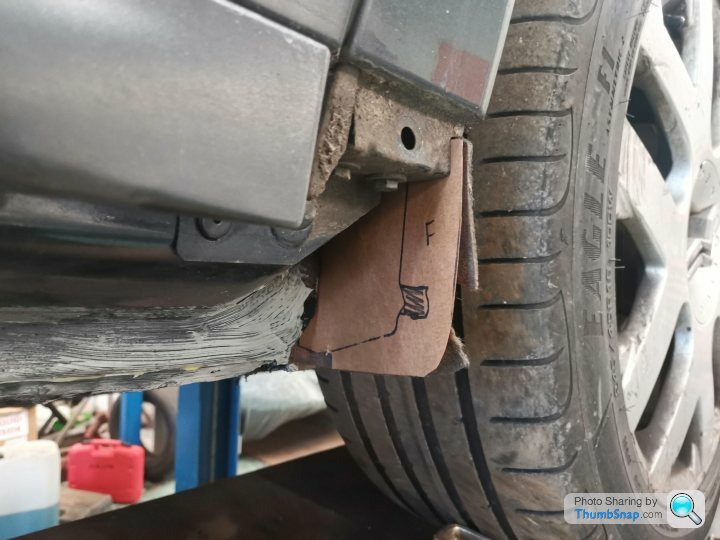
The nearside does leave me with more to do than I'd hoped, as once I'd began grinding the paint/rust away, I found that the little flimsy return lip which the lower portion of the sideskirt attaches to was, effectively, missing for a small portion under the B-pillar. You can just see it in the picture above (locate the yellow stanley knife, look up towards the wheel of the car behind and spot the bit missing...yes, I know it's a bad picture, but what do you want; This is free, isn't it?! )
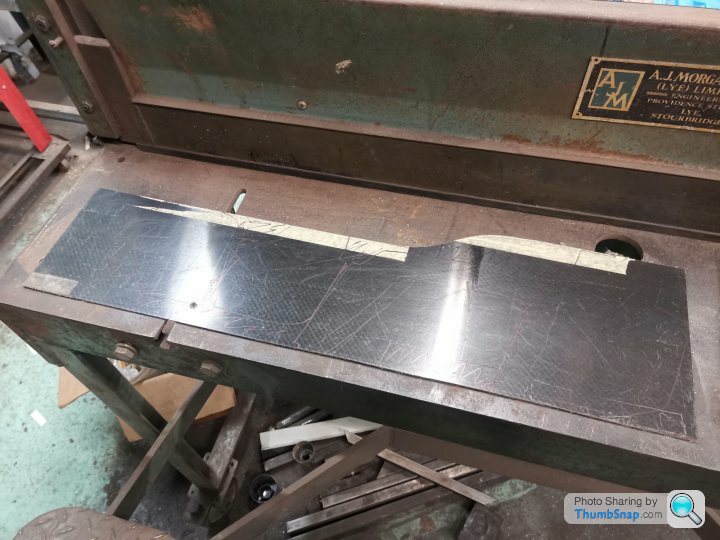
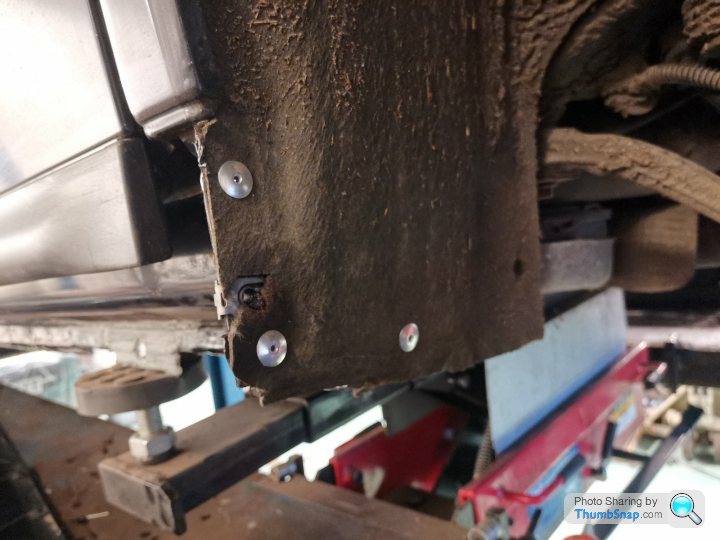
I ground away both sides, and once the metal was all good, I treated it with some copper-based weld-thru primer (even though I'm not welding it, it's just good primer!) Then I made a selection of 2mm alloy strips:


The purpose of these was to both realign, and strengthen the lips at the bottom of the sills. Though only a small portion had corroded away, the tin there was so flimsy and felt so weak, I decided to beef them up with something that won't rust. So, behind every part of this section, I placed a strip of alloy, which was bonded and then riveted in place. The alloy strips would also give the trim clips something stronger to anchor to.
Here's the nearside strip going in

Once the pieces were all in place (three each side; a small piece either side of the jacking points, and a big'un in the middle) I riveted them in and treat the primed areas with some black paint. Says it's tough chassis paint from Frost; In honesty it was a new product I was testing out to see how tough it was, because if it's decent I'll begin to use it in my professional life!
While the paint was going off, I took the skirts outside for a date with the pressure washer. They're not in bad condition at all, but they're hideously filthy (like everything else on the car!)

Meanwhile, I'd decided the paint I'd applied wasn't the right stuff for the job. The finish was nice, and I think I'd use it in certain situations (such as bracketry, uprights, driveshafts etc - basically a good version of Hammerite) but it's not hardcore enough to use as a chassis-based paint. It's not a proper 2k paint, to be fair, so I would have been surprised if it was as good as something like Rustbuster 121.
Because I didn't know what other paints could go over the top of it, I decided to keep my fingers crossed and stick some seam sealer OVER the top of the paint, because I wanted that thick, rubberised finish that would repell stones, grit and water.
I didn't cross my fingers enough, because again due to the law of sod, the seam sealer ate its way into the paint and caused it to become runny once more, two days after it had dried!
At this point I had two hopes:
One thing I've come to realise during this work, is that the French automotive industry shouldn't listen to those who moan about build quality. In all the years I've worked on these things, I've never had too much trouble removing trim from a PSA motor (can't speak for Renault, as I've worked on surprisingly few). If you discount the BX 16V (the sideskirts of which are, without doubt, the hardest body panel to remove of any car, anywhere) they're all pretty easy to strip down. Sure, BMW have got the art of making lasting solutions when it comes to underbody trim, and their engineering really does shine when you take a 20 year old car, and easily remove things like sideskirts, arch liners, heat shields etc. But, for everybody else (VAG; Ford...I'm looking at you), yes, not a lot falls off, but trying to simply remove pieces just to access certain areas is a nightmare of rusted fasters, broken clips, rounded nuts and pain.
With the French cars, there is normally (or, there used to be) the bare-minimum holding everything together. The bare-minimum is fine, and with the bare-minimum everything stays in place, but if one monkey mechanic or bodyshop breaks something when they pull it apart, that's when things start falling off. I'm a firm believer that French engineers are among the best in the business, but when the vibe I'm getting with my time under the C6 is that they've been pressured into doing things the same way as everybody else.

This is a pain I am used to, owning an S-Max, but on Citroen? It's new, and not in a good way.
There are spring nuts, and fabric-type arch liners (like you get on Fords). This means it's practically impossible to remove and blind nuts, once they've rusted a bit, and you end up tearing the arch liner. Everything is bolted to everything else. There are the sort of clips and fixings you see on Golfs, and sure enough the same cable ties you find, due to the fact that half of the fixings seem only to work from the factory, and then sheer off once the warranty has passed.
I would actually go as far as to say (get your sharp intakes of breath ready, people) that the C6, in many ways, is more poorly executed than a Saxo. There is plenty that is good, and even some that is amazing, but every seemingly menial job ends up taking three times as long as it should, because you spend more time faffing about trying to find ways to resecure various components (like sideskirts), because the original design has proved to be flawed. A regular garage would say "Oh no, that's terrible!" And then put it back together anyway, or even leave the said component off, but I don't want to do that. I want everything to be where it's meant to be, and for it all to work, partly because OCD is a bh, and partly because what's the point of having something if it doesn't work like it's intended?
The bottom of the arch-liners, which fasten to the skirts, use the same half-witted blind nuts as shown above. Of course, these turned to rust and it has not been possible to disconnect everything without breaking it. That in turn has ripped the arch liners, and so unless I want them flapping in the breeze, I need to make them strong again.
Que cardboard!
Then some genuinely real-life carbon fibre that is absolutely NOT plastic...
Bit of time with the bandsaw later...


OK, yes...you spotted it! I've used one of those stupid blind-nut things exactly where the new ones went. Why? Because I'm short of time, and I felt a rivnut would have just pulled out of the plastic I used. No...carbon fibre!
You can't get to the back of it, and I wanted to keep the bolt head that would originally be there in place, so using a plastic fixing was out of the question (ridiculous, aren't I?)
So, the bolts are back in place, and this time with a lot of grease on them. Hopefully the plastic will prove to be less of a sponge than the original arch liner it was secured to, so it might even last!
But now, the skirts are straight, and they're fully secured unlike before. Also straight are the jacking points, though I'm not prepared to test them with a trolley jack just now....or ever.
Question you're all asking, is where did that blind-nut clip/stty thing come from. It was all silver and clean, and new looking! Well, I didn't buy any new ones - it came from somewhere else on the car, and I will reveal that location once I've been to the loo and made cup of tea.
(The loo and the cup of tea are different exercises; I'm not making a cup of tea in the toilet! Not again, anyway)
Stage One (pre-MoT):
- Sort handbrake (done, aside from rubbing down and painting some clamps)
- Try and improve the condition of the sills (more on this later)
- Lights - sort out the ones that do not...well, light.
- Bootlid - it rattles and clangs and falls down on you when you're leaning into the boot. Honest, it does!
- Check the air-con system for leaks, while the car runs etc.
- MoT test (to get a list of failures to attend to)
- Change gearbox (just like that! 5 min job for sure)
- Renew brakes
- Try to improve fitting of various damaged undertrays and arch liners
- Oil leaks...find them, and stop them
- Coolant hoses - there are a number of pipes that are renowned for rusting through and failing, so while I'm elbow deep, it makes sense to replace them (if they haven't already been replaced)
- Evans Waterless Coolant conversion - look into suitability of this.
- Wheels/tyres - while the car is in the air, all four wheels can be removed, so it makes sense to make this the time to sort out the absolutely battered state of the rims. Two of the tyres have slow punctures, too. I might just end up renewing the tyres, as they're half-worn already. Will inspect them closely first.
- Get the MoT pass.
- Suspension fault-finding: Trying to figure out what the issue(s) with the suspension is/are, basically.
- Wheel alignment
Well, the handbrake is effectively done, but while the car has the four post ramp occupied, it made sense to tackle the sills, which are suffering from the initial effects of tinworm. I know....I'm surprised too! I've owned plenty of Rennes-built cars over the years* , including BXs, Xantias and a Peugeot 407SW. In the case of the latter, which is very much of the same DNA a the C6, there was little to no rust at all. It's cliche, but it actually looked like new underneath!
* Plenty of cars from the Rennes plant, yes, but how many how their own wood-laminated production line?
- edited to add - It looks like the answer to the above question is the Peugeot 407 Coupe. All I had to do was look at the picture!
The reason this is a stupid idea, is because a vertical strip of metal is only strong if a load is applied to it, well, vertically. You have to lift the car completely squarely underneath, otherwise you stand a chance (a chance laden with high-probability for f
k up) of bending the jacking point.This is fine... if you're using a two-post ramp, which is able to lift the entire car squarely, but if you're using a Halfords trolley jack on a gravel driveway, this happens:
This has the added advantage of breaking up the underseal all along the sill, aswell as bending and breaking much of the panel that the sideskirt attaches to, causing the skirt to pop its rivets and partially detach from the car. Neat!
Time to remove the skirts, then.
You can see the state of the jacking points! This is a heavy hector, and a single jack placed under one corner at a time is a receipe for disaster. I would go as far as to say that you just shouldn't do it, full stop.
Now, the thing I want to try and avoid doing, is welding on this car. A number of reasons for this: Firstly, it's a 2009 (or 2007) car - it shouldn't need welding! Secondly, there is a lot of sound-deadening in there, and I can't be arsed with removing it all and breaking every type of trim clip ever devised in doing so. Thirdly, there are many, many ECUs in this car; law of sod dictates that, despite disconnecting the battery, I will annihilate one of them.
Luckily, there are no holes. No structural issues that I can see, other than the bent jacking points, so I set about straightening those with a special straightening device and rubbing down all the affected areas.
The nearside does leave me with more to do than I'd hoped, as once I'd began grinding the paint/rust away, I found that the little flimsy return lip which the lower portion of the sideskirt attaches to was, effectively, missing for a small portion under the B-pillar. You can just see it in the picture above (locate the yellow stanley knife, look up towards the wheel of the car behind and spot the bit missing...yes, I know it's a bad picture, but what do you want; This is free, isn't it?!
)I ground away both sides, and once the metal was all good, I treated it with some copper-based weld-thru primer (even though I'm not welding it, it's just good primer!) Then I made a selection of 2mm alloy strips:
The purpose of these was to both realign, and strengthen the lips at the bottom of the sills. Though only a small portion had corroded away, the tin there was so flimsy and felt so weak, I decided to beef them up with something that won't rust. So, behind every part of this section, I placed a strip of alloy, which was bonded and then riveted in place. The alloy strips would also give the trim clips something stronger to anchor to.
Here's the nearside strip going in
Once the pieces were all in place (three each side; a small piece either side of the jacking points, and a big'un in the middle) I riveted them in and treat the primed areas with some black paint. Says it's tough chassis paint from Frost; In honesty it was a new product I was testing out to see how tough it was, because if it's decent I'll begin to use it in my professional life!
While the paint was going off, I took the skirts outside for a date with the pressure washer. They're not in bad condition at all, but they're hideously filthy (like everything else on the car!)
Meanwhile, I'd decided the paint I'd applied wasn't the right stuff for the job. The finish was nice, and I think I'd use it in certain situations (such as bracketry, uprights, driveshafts etc - basically a good version of Hammerite) but it's not hardcore enough to use as a chassis-based paint. It's not a proper 2k paint, to be fair, so I would have been surprised if it was as good as something like Rustbuster 121.
Because I didn't know what other paints could go over the top of it, I decided to keep my fingers crossed and stick some seam sealer OVER the top of the paint, because I wanted that thick, rubberised finish that would repell stones, grit and water.
I didn't cross my fingers enough, because again due to the law of sod, the seam sealer ate its way into the paint and caused it to become runny once more, two days after it had dried!
At this point I had two hopes:
- Bob Hop....no, wrong anaology; That'd I'd be able to simply scrape it all off and start again. lol.
- That it would all cure together in one thick, ugly, lumpy cast, and flukely do the job I wanted. Even more lol.
One thing I've come to realise during this work, is that the French automotive industry shouldn't listen to those who moan about build quality. In all the years I've worked on these things, I've never had too much trouble removing trim from a PSA motor (can't speak for Renault, as I've worked on surprisingly few). If you discount the BX 16V (the sideskirts of which are, without doubt, the hardest body panel to remove of any car, anywhere) they're all pretty easy to strip down. Sure, BMW have got the art of making lasting solutions when it comes to underbody trim, and their engineering really does shine when you take a 20 year old car, and easily remove things like sideskirts, arch liners, heat shields etc. But, for everybody else (VAG; Ford...I'm looking at you), yes, not a lot falls off, but trying to simply remove pieces just to access certain areas is a nightmare of rusted fasters, broken clips, rounded nuts and pain.
With the French cars, there is normally (or, there used to be) the bare-minimum holding everything together. The bare-minimum is fine, and with the bare-minimum everything stays in place, but if one monkey mechanic or bodyshop breaks something when they pull it apart, that's when things start falling off. I'm a firm believer that French engineers are among the best in the business, but when the vibe I'm getting with my time under the C6 is that they've been pressured into doing things the same way as everybody else.
This is a pain I am used to, owning an S-Max, but on Citroen? It's new, and not in a good way.
There are spring nuts, and fabric-type arch liners (like you get on Fords). This means it's practically impossible to remove and blind nuts, once they've rusted a bit, and you end up tearing the arch liner. Everything is bolted to everything else. There are the sort of clips and fixings you see on Golfs, and sure enough the same cable ties you find, due to the fact that half of the fixings seem only to work from the factory, and then sheer off once the warranty has passed.
I would actually go as far as to say (get your sharp intakes of breath ready, people) that the C6, in many ways, is more poorly executed than a Saxo. There is plenty that is good, and even some that is amazing, but every seemingly menial job ends up taking three times as long as it should, because you spend more time faffing about trying to find ways to resecure various components (like sideskirts), because the original design has proved to be flawed. A regular garage would say "Oh no, that's terrible!" And then put it back together anyway, or even leave the said component off, but I don't want to do that. I want everything to be where it's meant to be, and for it all to work, partly because OCD is a b
h, and partly because what's the point of having something if it doesn't work like it's intended?The bottom of the arch-liners, which fasten to the skirts, use the same half-witted blind nuts as shown above. Of course, these turned to rust and it has not been possible to disconnect everything without breaking it. That in turn has ripped the arch liners, and so unless I want them flapping in the breeze, I need to make them strong again.
Que cardboard!
Then some genuinely real-life carbon fibre that is absolutely NOT plastic...
Bit of time with the bandsaw later...
OK, yes...you spotted it! I've used one of those stupid blind-nut things exactly where the new ones went. Why? Because I'm short of time, and I felt a rivnut would have just pulled out of the plastic I used. No...carbon fibre!
You can't get to the back of it, and I wanted to keep the bolt head that would originally be there in place, so using a plastic fixing was out of the question (ridiculous, aren't I?)
So, the bolts are back in place, and this time with a lot of grease on them. Hopefully the plastic will prove to be less of a sponge than the original arch liner it was secured to, so it might even last!
But now, the skirts are straight, and they're fully secured unlike before. Also straight are the jacking points, though I'm not prepared to test them with a trolley jack just now....or ever.
Question you're all asking, is where did that blind-nut clip/s
tty thing come from. It was all silver and clean, and new looking! Well, I didn't buy any new ones - it came from somewhere else on the car, and I will reveal that location once I've been to the loo and made cup of tea.(The loo and the cup of tea are different exercises; I'm not making a cup of tea in the toilet! Not again, anyway)
Cup of tea took a fair bit longer to make than planned.
Anyway, where did the rouge clips come from, you ask (I know you didn't, but just pretend you did for a minute...)
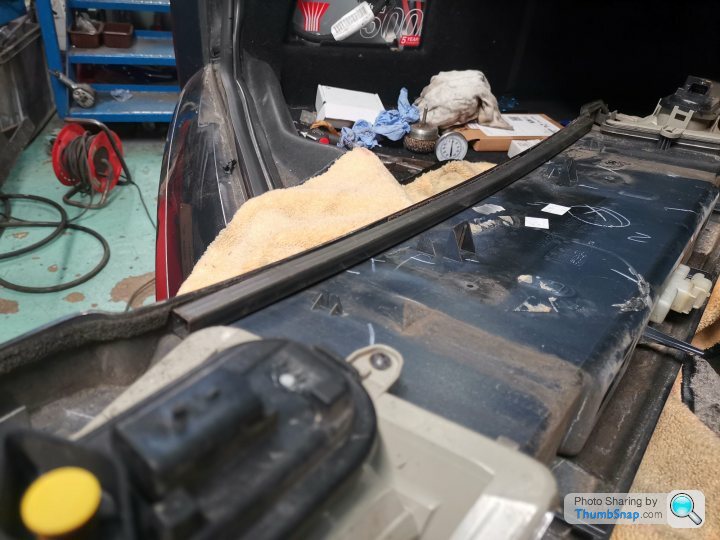
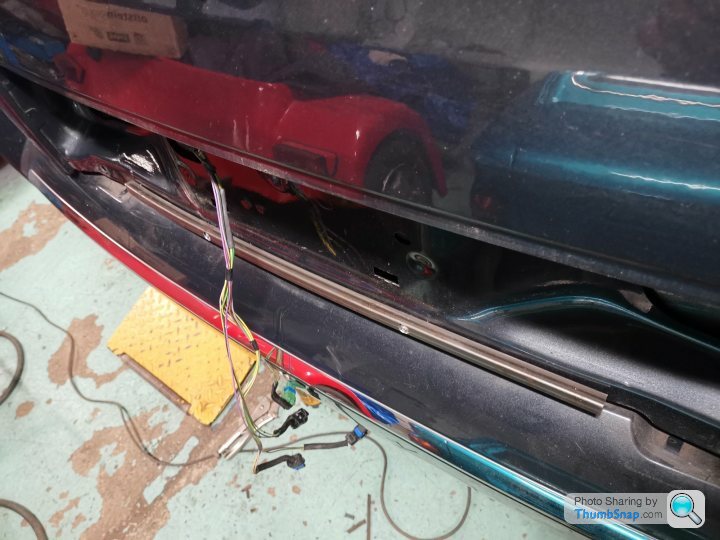
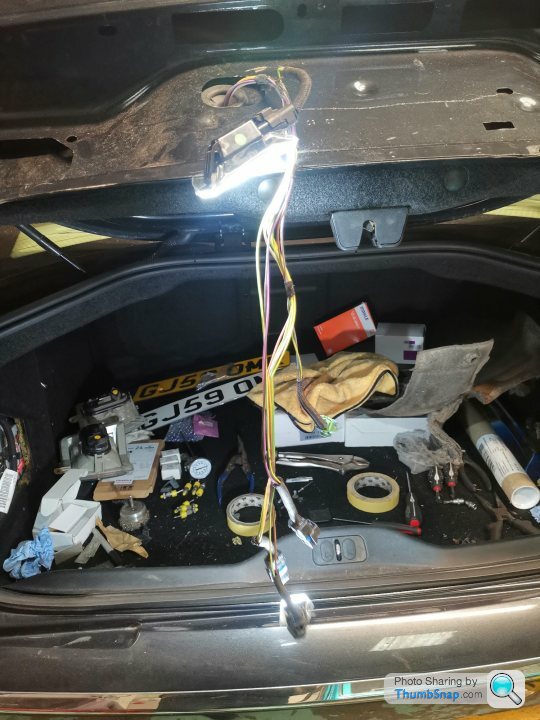
They came from here (this is the only remaining un-broken fixing!):
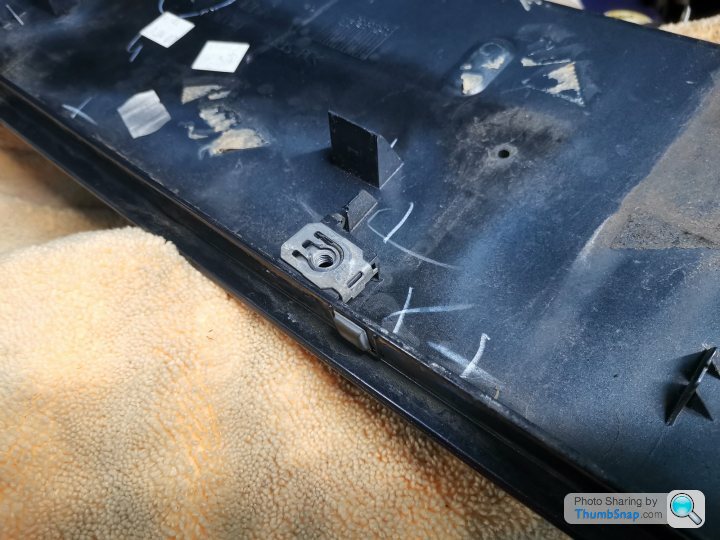
This is the back of the bootlid trim. On the bootlid itself, you've got a plastic insert which houses the reverse & fog lamps and numberplate. Here's a terrible picture of it, for reference:

This trim is secured in multiple places, much like the arch liners. What would have once sufficed with a couple of clips and some ingenuity about where they should be positioned has been replaced with the now more common 'cover it in fixings and break half of them when you need to remove it' policy, only this time they're thrown in the added bonus of securing the lower portion of the trim in a method that fails, should you not operate the bootlid EXACTLY as Citroen intend you do.
What this causes, is the entire trim to work loose along the lower edge, meaning when you shut the bootlid, the panel rattles and clangs and sounds like people who slag off French cars expect it to sound, rather than how it should sound. Can't be having that in a car that is marginally more noticeable to Joe public than your average grey saloon car!
It's not an issue unique to myknackered more experienced example, as many owners report the same problem. It's down to the fact that the retaining method along the lower lip (where most people catch the bootlid as it closes) is, well, for lack of a better word; wk. It comprises of four plastic tabs that more of these blind nut-things clip in to, the fixing bolt for which goes in from the reverse of the bootlid, hiding them in the process. The plastic tabs break off from the trim, causing the trim to rattle and annoy me.
Problem is, how to refix the trim in the same manner, i.e. with hidden fixings, but with a lot more strength so this doesn't happen again. Most of the remains of the original fixing tabs have long-gone, so any chances of caking those in fibreglass are long gone. Only one thing for it - I've got to hit it Project Binky-style!
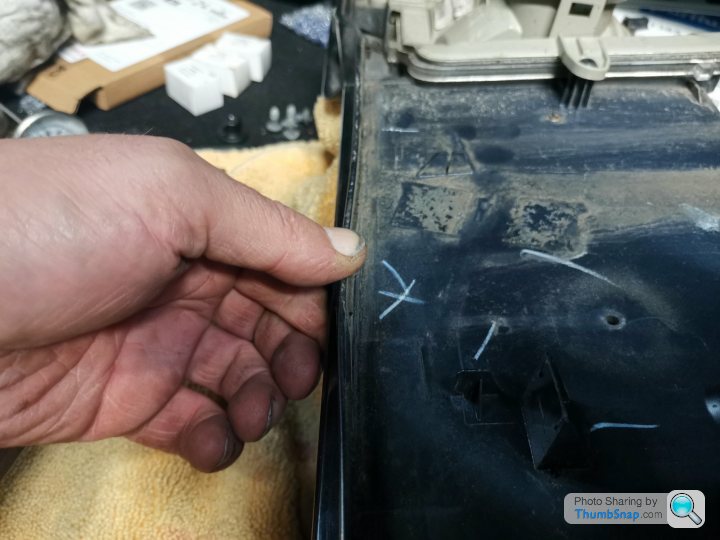
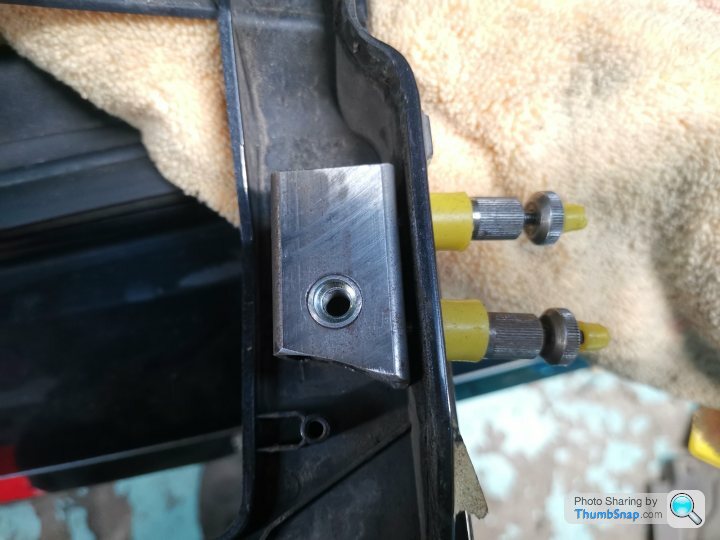
Here's the rear of the panel. The fixings used to clip onto little plastic tabs along the bottom edge, but those are gone.
There are four fixing points (circled in the picture), and you can just make out the remains of the original fixings. You can also see the space limitations, and why this required some head-scratching!

Like I say, every job on this car is, so far, taking longer than you anticipate it will. If I was paying for labour, this would be an expensive C6 already!
To compound issues, the panel is curved in multiple plains, meaning anything I make has to fit the curvature of the bootlid, and the panel. It also has to fit in the remaining space between the two, which is approx. 8-10mm. Meanwhile, the outer mounts have to occupy a deeper space, but fit in around the fog/reverse lamp housings.
I decided what I needed some something tough, but malleable. That ruled out aluminium, which would have been ideal...if I had some the right size. I did have carbon fibre, but that was even less suitable! So, it was back to good ol' box section steel.
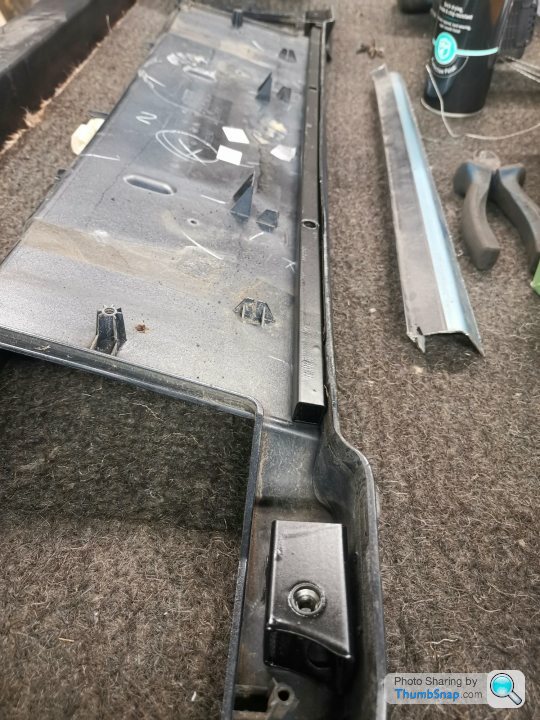
I managed to find a thin strip of (what I assume was) 10mmx10mm box, and cut it to length. Then I spent forever bending it to just the right shape.

There was the added complication on my car that the trim itself had been busted for so long, it had fractured:
I can't deal with external evidence of a repair, so whatever I make had to deal with this, too. It hadn't broken all the way along, so it was perfectly saveable, if I could find the right way to save it.
I took apunt carefully measured where the brace needed to sit and drilled a single 3.2mm hole in the centre, before fixing the brace in the place (London!) that it needs to be, once fitted up to the bootlid.
I measured and marked everything else out so that I could take it back to the bench and finished the drilling etc.

(n.b. the bench isn't the TVR bonnet pictured! I just put everything back down on that because it needs weight on it while the bonding agent on it goes off!
To be continued....
Anyway, where did the rouge clips come from, you ask (I know you didn't, but just pretend you did for a minute...)
They came from here (this is the only remaining un-broken fixing!):
This is the back of the bootlid trim. On the bootlid itself, you've got a plastic insert which houses the reverse & fog lamps and numberplate. Here's a terrible picture of it, for reference:
This trim is secured in multiple places, much like the arch liners. What would have once sufficed with a couple of clips and some ingenuity about where they should be positioned has been replaced with the now more common 'cover it in fixings and break half of them when you need to remove it' policy, only this time they're thrown in the added bonus of securing the lower portion of the trim in a method that fails, should you not operate the bootlid EXACTLY as Citroen intend you do.
What this causes, is the entire trim to work loose along the lower edge, meaning when you shut the bootlid, the panel rattles and clangs and sounds like people who slag off French cars expect it to sound, rather than how it should sound. Can't be having that in a car that is marginally more noticeable to Joe public than your average grey saloon car!
It's not an issue unique to my
k. It comprises of four plastic tabs that more of these blind nut-things clip in to, the fixing bolt for which goes in from the reverse of the bootlid, hiding them in the process. The plastic tabs break off from the trim, causing the trim to rattle and annoy me.Problem is, how to refix the trim in the same manner, i.e. with hidden fixings, but with a lot more strength so this doesn't happen again. Most of the remains of the original fixing tabs have long-gone, so any chances of caking those in fibreglass are long gone. Only one thing for it - I've got to hit it Project Binky-style!
Here's the rear of the panel. The fixings used to clip onto little plastic tabs along the bottom edge, but those are gone.
There are four fixing points (circled in the picture), and you can just make out the remains of the original fixings. You can also see the space limitations, and why this required some head-scratching!
Like I say, every job on this car is, so far, taking longer than you anticipate it will. If I was paying for labour, this would be an expensive C6 already!
To compound issues, the panel is curved in multiple plains, meaning anything I make has to fit the curvature of the bootlid, and the panel. It also has to fit in the remaining space between the two, which is approx. 8-10mm. Meanwhile, the outer mounts have to occupy a deeper space, but fit in around the fog/reverse lamp housings.
I decided what I needed some something tough, but malleable. That ruled out aluminium, which would have been ideal...if I had some the right size. I did have carbon fibre, but that was even less suitable! So, it was back to good ol' box section steel.
I managed to find a thin strip of (what I assume was) 10mmx10mm box, and cut it to length. Then I spent forever bending it to just the right shape.
There was the added complication on my car that the trim itself had been busted for so long, it had fractured:
I can't deal with external evidence of a repair, so whatever I make had to deal with this, too. It hadn't broken all the way along, so it was perfectly saveable, if I could find the right way to save it.
I took a
I measured and marked everything else out so that I could take it back to the bench and finished the drilling etc.
(n.b. the bench isn't the TVR bonnet pictured! I just put everything back down on that because it needs weight on it while the bonding agent on it goes off!
To be continued....
So....
Now that I'm able to secure it to the bootlid trim, the next stage (I realise I'm going into a inordinate amount of detail for this) is to sort out the method of securing it to the bootlid itself. Seems silly not to use the original fixings, or the original fixing holes, so in place of the two crappy blind nut things, I've inserted some rivnuts.


Because the box section is so small, I had to create another hole in the opposite side for the rivnut to protrude through!

This would be a problem, but only if the rivnut didn't sink below the surface of the tube once it had been riveted in. Which, of course, it didn't, because I'm awesome.
Rivnut in place and doing its job:


And a test fit bolting to the bootlid:
That's the two inner bolts taken care of, but what about the outer? Can I just use more of the same? Well, no, because that section of the panel is deeper. Of course it is, why wouldn't it be?!
So, some 20x20mm box for this me thinks.

A bit of reverse engineering to get the fixing holes for the rivets (I've left the lamps out for now, as they foul this small piece of box section).

With everything mocked up in the rear panel, it looks like this:

The keen eyed will spot that the centre brace has had a lick of paint!
The outer pieces took a fair bit of fettling to both get them to fit properly (without fouling the lamps), plus adding lots of holes for lightness.

OK, so the holes may not be there for lightness. They're actually there because (and some of you might be ahead of me here) that in their current design, they only secure to the bottom inner lip, or to put it plainly, they only secure on one side. And, with the centre brace, the one side is already partially broken. So, the holes serve a purpose, which you'll see in a minute.
Everything gets coatings of black stonechip paint:


And eventually, dry-fitted, everything looks like this:
Now I have the four mounting holes as per the original design, only this time they're mounted in steel, not 1mm thick cheap plastic.
And those holes? Here's the reason:

Lots of sticky sealant! I didn't want to risk using glue, or something you mix together incase the heat generated warped or caused the plastic panel to mishapen (it would have been very noticeable from outside!) This PU sealant will bridge gaps, brace cracks and stick like st to a blanket.
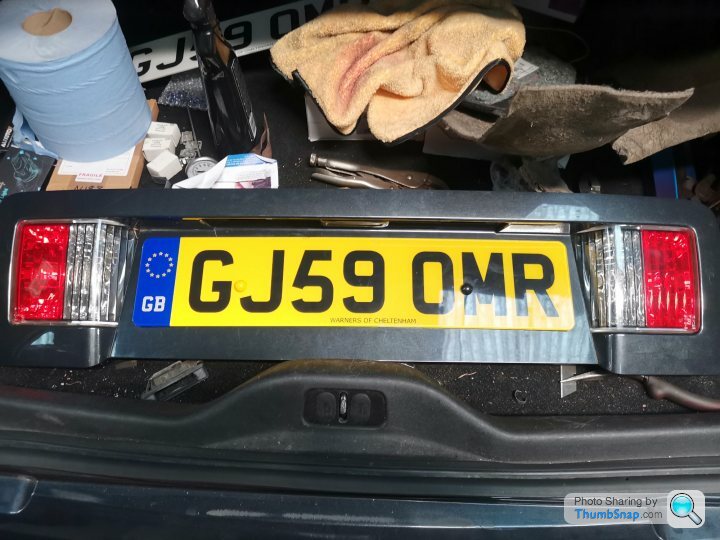
A pair of Remoaner numberplates were sourced (while I still can - aside from the fact I'm a blatant remoaner, I plan to drive the car to France when normal life resumes....one day!) These were fitted along with a set of LED number plate lamps, as per my C4 VTS (I fitted them ages ago, just haven't updated that thread!)
Everything was put back together, and I even treated the bootlid to new gas struts! Now it doesn't fall down any more, which is nice.
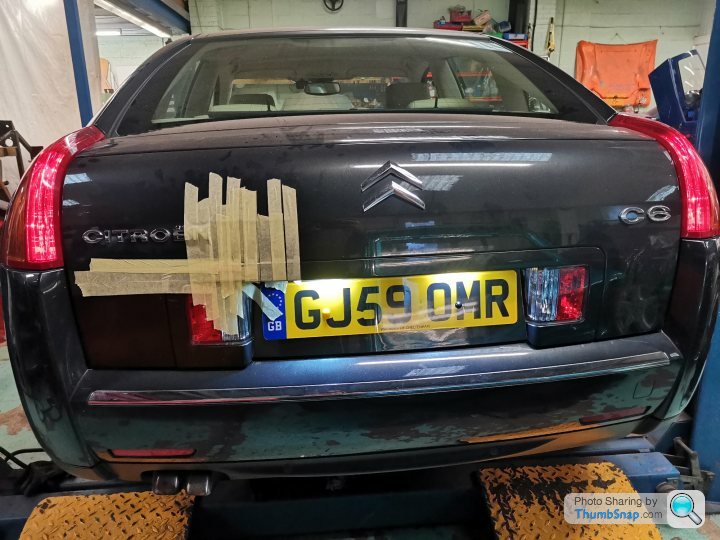
Oh, the tape? Yea, I didn't spot the top retaining clip that was also broken off, meaning despite all my efforts, the trim didn't sit totally flush. But this point patience was a virtue I no longer possessed, so that top corner was also bonded. Now it's solid!
As well as the work on the bootlid, I discovered that a number of bulbs weren't working, including all but one of the amber marker lights at the front and rear corners. Some LEDs sorted that:

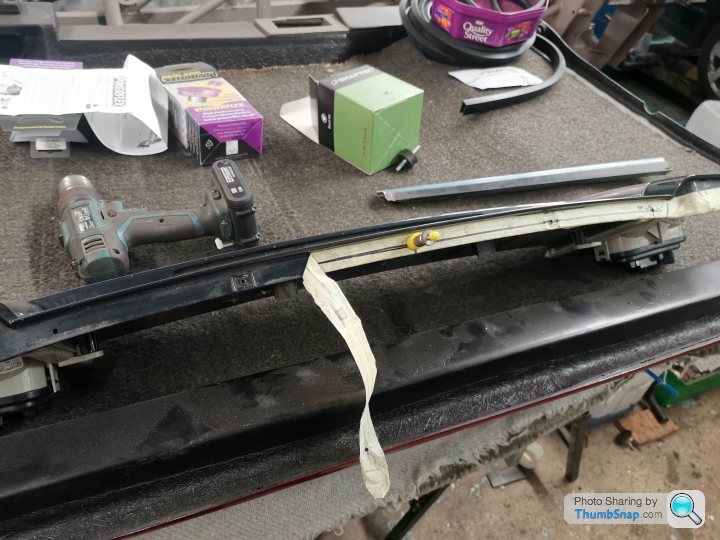
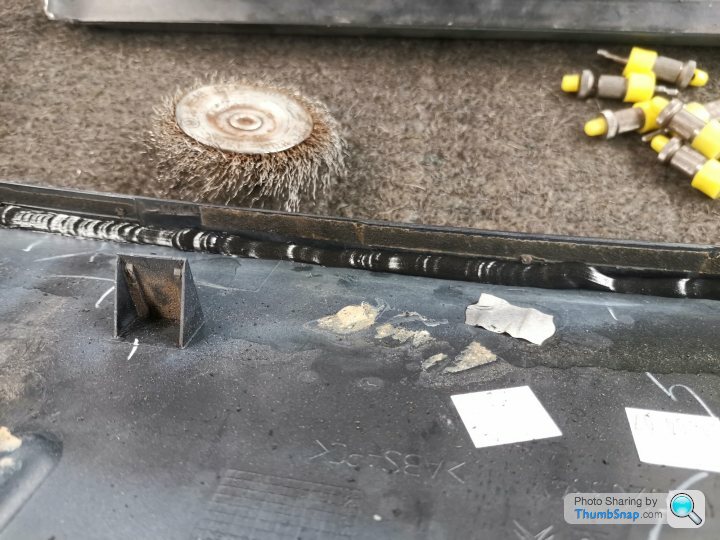
I managed to get an MoT slot for the 4th, so just before this I recitified the faulty windscreen washers. The O/S barely worked, and the N/S was hanging out. Here's a pic of the bonnet with the old ones removed:

Were you expecting a picture of the new ones? No? Good, because I forgot to take one. They worked, though!

That's a set of brand new Valeo blades on there, too. I really pushed the boat out!
So, MoT time rolled around. I cautiously took it to the test centre and kept fingers crossed that it didn't bite me in the arse. A small list of cheap failure points that I can attend to within the free-retest period would be ideal.

Only went through first time, didn't it?!

The advisories are no big deal, either. The brakes I knew about (I even told the tester about them). I've bought new ones, I just haven't got round to fitting them yet, because I've been too busy farting around with sills.
The rack gaiter I hadn't spotted, but I'll order a pair of genuine ones I expect. They tend to fit better than the aftermarket ones.
The pins it mentions are effectively lower swivel joints. I'll get some of those too, so all the advisories will be done in the next few weeks regardless.
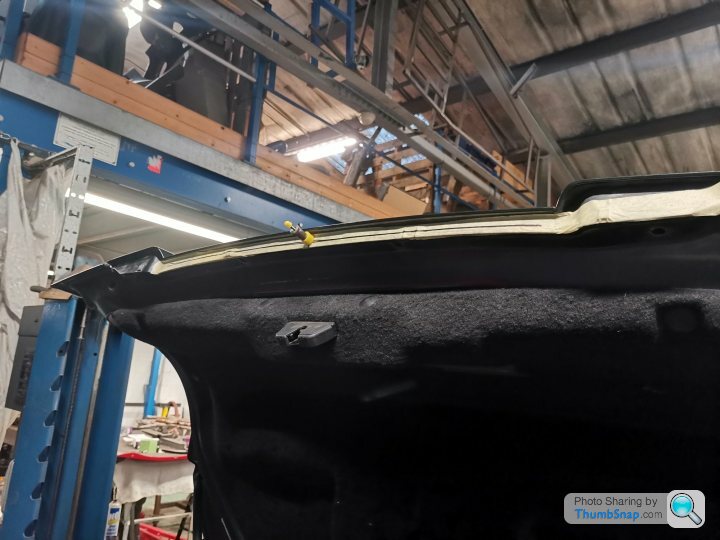
But, it's roadworthy once more, and that's a big relief! If only it wasn't tempered by the sight of this:
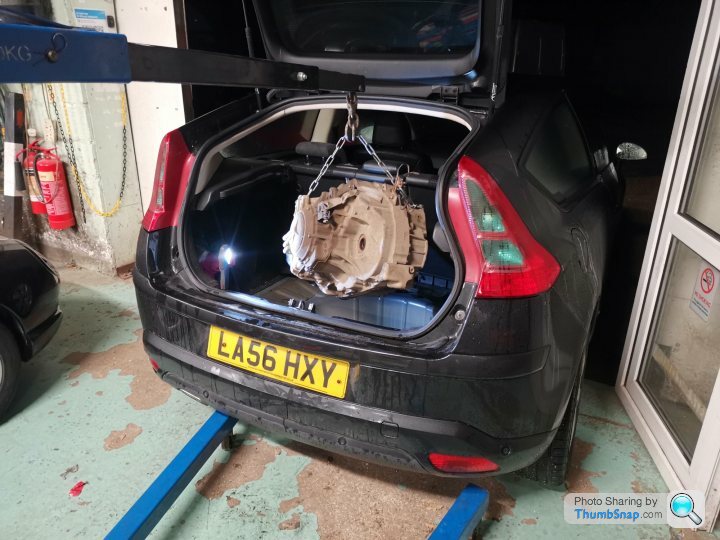


I am very much not looking forward to this...
Now that I'm able to secure it to the bootlid trim, the next stage (I realise I'm going into a inordinate amount of detail for this) is to sort out the method of securing it to the bootlid itself. Seems silly not to use the original fixings, or the original fixing holes, so in place of the two crappy blind nut things, I've inserted some rivnuts.
Because the box section is so small, I had to create another hole in the opposite side for the rivnut to protrude through!
This would be a problem, but only if the rivnut didn't sink below the surface of the tube once it had been riveted in. Which, of course, it didn't, because I'm awesome.
Rivnut in place and doing its job:
And a test fit bolting to the bootlid:
That's the two inner bolts taken care of, but what about the outer? Can I just use more of the same? Well, no, because that section of the panel is deeper. Of course it is, why wouldn't it be?!
So, some 20x20mm box for this me thinks.
A bit of reverse engineering to get the fixing holes for the rivets (I've left the lamps out for now, as they foul this small piece of box section).
With everything mocked up in the rear panel, it looks like this:
The keen eyed will spot that the centre brace has had a lick of paint!
The outer pieces took a fair bit of fettling to both get them to fit properly (without fouling the lamps), plus adding lots of holes for lightness.
OK, so the holes may not be there for lightness. They're actually there because (and some of you might be ahead of me here) that in their current design, they only secure to the bottom inner lip, or to put it plainly, they only secure on one side. And, with the centre brace, the one side is already partially broken. So, the holes serve a purpose, which you'll see in a minute.
Everything gets coatings of black stonechip paint:
And eventually, dry-fitted, everything looks like this:
Now I have the four mounting holes as per the original design, only this time they're mounted in steel, not 1mm thick cheap plastic.
And those holes? Here's the reason:
Lots of sticky sealant! I didn't want to risk using glue, or something you mix together incase the heat generated warped or caused the plastic panel to mishapen (it would have been very noticeable from outside!) This PU sealant will bridge gaps, brace cracks and stick like s
t to a blanket.A pair of Remoaner numberplates were sourced (while I still can - aside from the fact I'm a blatant remoaner, I plan to drive the car to France when normal life resumes....one day!) These were fitted along with a set of LED number plate lamps, as per my C4 VTS (I fitted them ages ago, just haven't updated that thread!)
Everything was put back together, and I even treated the bootlid to new gas struts! Now it doesn't fall down any more, which is nice.
Oh, the tape? Yea, I didn't spot the top retaining clip that was also broken off, meaning despite all my efforts, the trim didn't sit totally flush. But this point patience was a virtue I no longer possessed, so that top corner was also bonded. Now it's solid!
As well as the work on the bootlid, I discovered that a number of bulbs weren't working, including all but one of the amber marker lights at the front and rear corners. Some LEDs sorted that:
I managed to get an MoT slot for the 4th, so just before this I recitified the faulty windscreen washers. The O/S barely worked, and the N/S was hanging out. Here's a pic of the bonnet with the old ones removed:
Were you expecting a picture of the new ones? No? Good, because I forgot to take one. They worked, though!
That's a set of brand new Valeo blades on there, too. I really pushed the boat out!
So, MoT time rolled around. I cautiously took it to the test centre and kept fingers crossed that it didn't bite me in the arse. A small list of cheap failure points that I can attend to within the free-retest period would be ideal.
Only went through first time, didn't it?!
The advisories are no big deal, either. The brakes I knew about (I even told the tester about them). I've bought new ones, I just haven't got round to fitting them yet, because I've been too busy farting around with sills.
The rack gaiter I hadn't spotted, but I'll order a pair of genuine ones I expect. They tend to fit better than the aftermarket ones.
The pins it mentions are effectively lower swivel joints. I'll get some of those too, so all the advisories will be done in the next few weeks regardless.
But, it's roadworthy once more, and that's a big relief! If only it wasn't tempered by the sight of this:
I am very much not looking forward to this...
Gassing Station | Readers' Cars | Top of Page | What's New | My Stuff