1996 BMW E36 328i Coupe - we have history...
Discussion


B'stard Child said:
Go to a scrap yard and get some old panels - practice on them - cutting sections out and welding them back in initially and then go for cutting sections out and making sections to fit back in 
With a little practice you'll do a much better job than "MOT std pass" patches.
I'm not too fussed about the wings to be fair. I could just whack some filler in there and it'd look ok-ish in the end. I'm more worried about the jacking points. I don't fancy my first welding attempts to be structural and safety critical!With a little practice you'll do a much better job than "MOT std pass" patches.
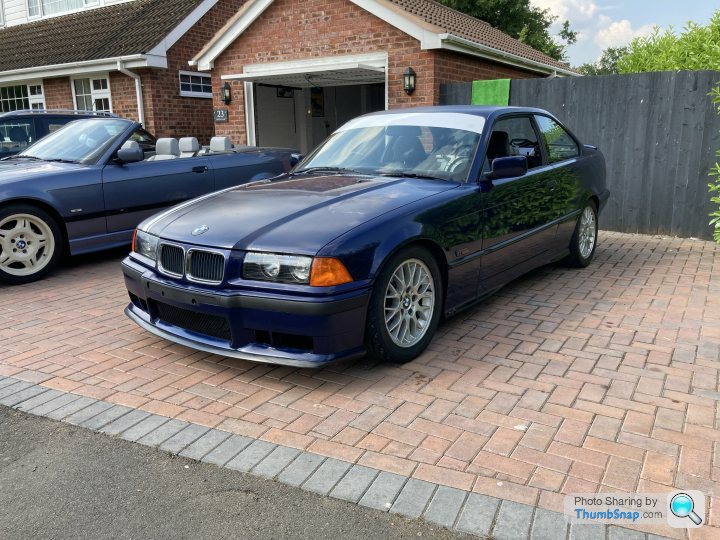
I had a free day today, so after a busy week I treated myself to a lie in. Then I went to Halfords in the convertible to get a few bits (and M&S next door for baked goods, obviously...), and came home intending to spend the rest of the day fettling whatever took my fancy. The coupe is up on stands with holes in its wings, waiting for the welder to come and pass judgement, so Derek the convertible was firmly in my sights.
I decided to have a look at the bonnet release cable because it seems to have stretched to the point that it barely manages to release the catches at full extension.

Obviously I broke the handle assembly because, well... me.

That settled it then. I was going to see if there was a way of adjusting it, but after that mishap I've ordered a new one that comes with the handle assembly on the end. Hopefully installing the new one will be a simple case of attaching the ends together and pulling the new one through with the old one. Will it really be that straightforward? I somehow doubt it.
For now I'll keep a pair of pliers in the car in case I need to pull on the end of the cable to open the bonnet
I moved on from there to the passenger door, whose handle appeared to be struggling, needing to be pulled to its fullest extent before releasing the catch. However, on my test pulls it seemed to be working ok. I decided to leave it, but squirted some WD40 into the lock and down the lock button, because it seemed like a good idea...
One of the things I got from Halfords this morning was this:

When washing Derek I had been washing the wheels with the same car shampoo that I was doing the bodywork with, but there were some stubborn spots that it wasn't shifting. Plus the inside of the barrels were pretty mucky. With the wheels being a light colour, I wanted to really try and get rid of all the stubborn spots, because even small ones are quite obvious.
One by one, the wheels came off, got jet washed inside and out, wheel cleaner applied, scrubbed with a scrubbing brush and a toothbrush, rinsed, wheel cleaner reapplied where necessary, and jet washed again to get all the loose muck off. I was pretty impressed with the ability of the autoglym stuff to shift the baked on muck, but I supposed that is what it's for.


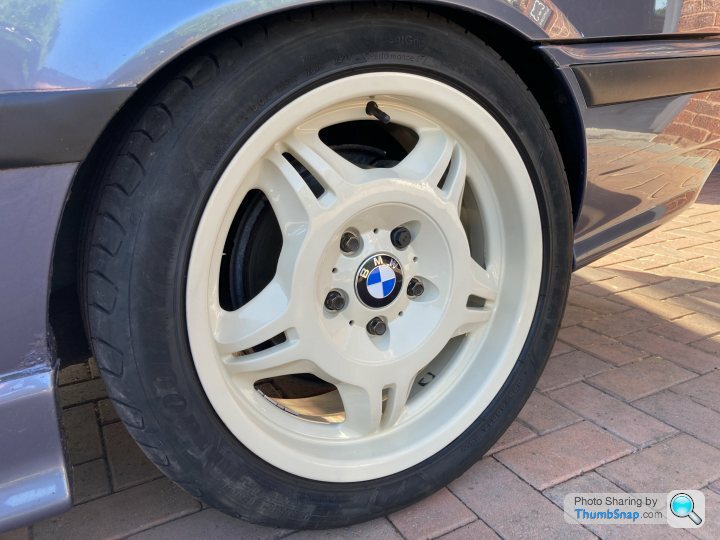
I think they came up well, though where there was some corrosion and bubbling, I have flaked a bit of paint off with my scrubbing and jet washing.


Annoying, but nothing about this car or these wheels was ever perfect, so I'll try not to worry about it. Maybe I can cover up the gaps with some tippex...
Inspired by the coupe's rusty holes, while I had the front wheels off I also took out the arch liners to inspect and clean out the inner wings. Jet washed everything, obviously. Let's compare the inside of the wings:
Coupe:

Convertible:

The convertible is definitely wearing its age better. It seems to be safe from developing any serious issues in those areas any time soon, but I cleaned them out and let them dry thoroughly before putting it all back together. I cleaned everything I could get to while the arch liners were out and then put it all back together. I plan to wash the bodywork tomorrow, and maybe have a go at the interior if I have time before my pesky social arrangements.


I decided to have a look at the bonnet release cable because it seems to have stretched to the point that it barely manages to release the catches at full extension.
Obviously I broke the handle assembly because, well... me.
That settled it then. I was going to see if there was a way of adjusting it, but after that mishap I've ordered a new one that comes with the handle assembly on the end. Hopefully installing the new one will be a simple case of attaching the ends together and pulling the new one through with the old one. Will it really be that straightforward? I somehow doubt it.
For now I'll keep a pair of pliers in the car in case I need to pull on the end of the cable to open the bonnet
I moved on from there to the passenger door, whose handle appeared to be struggling, needing to be pulled to its fullest extent before releasing the catch. However, on my test pulls it seemed to be working ok. I decided to leave it, but squirted some WD40 into the lock and down the lock button, because it seemed like a good idea...
One of the things I got from Halfords this morning was this:
When washing Derek I had been washing the wheels with the same car shampoo that I was doing the bodywork with, but there were some stubborn spots that it wasn't shifting. Plus the inside of the barrels were pretty mucky. With the wheels being a light colour, I wanted to really try and get rid of all the stubborn spots, because even small ones are quite obvious.
One by one, the wheels came off, got jet washed inside and out, wheel cleaner applied, scrubbed with a scrubbing brush and a toothbrush, rinsed, wheel cleaner reapplied where necessary, and jet washed again to get all the loose muck off. I was pretty impressed with the ability of the autoglym stuff to shift the baked on muck, but I supposed that is what it's for.
I think they came up well, though where there was some corrosion and bubbling, I have flaked a bit of paint off with my scrubbing and jet washing.
Annoying, but nothing about this car or these wheels was ever perfect, so I'll try not to worry about it. Maybe I can cover up the gaps with some tippex...
Inspired by the coupe's rusty holes, while I had the front wheels off I also took out the arch liners to inspect and clean out the inner wings. Jet washed everything, obviously. Let's compare the inside of the wings:
Coupe:
Convertible:
The convertible is definitely wearing its age better. It seems to be safe from developing any serious issues in those areas any time soon, but I cleaned them out and let them dry thoroughly before putting it all back together. I cleaned everything I could get to while the arch liners were out and then put it all back together. I plan to wash the bodywork tomorrow, and maybe have a go at the interior if I have time before my pesky social arrangements.
buy_cheap_pay_later said:
I had a free day today, so after a busy week I treated myself to a lie in. Then I went to Halfords in the convertible to get a few bits (and M&S next door for baked goods, obviously...), and came home intending to spend the rest of the day fettling whatever took my fancy. The coupe is up on stands with holes in its wings, waiting for the welder to come and pass judgement, so Derek the convertible was firmly in my sights.
I decided to have a look at the bonnet release cable because it seems to have stretched to the point that it barely manages to release the catches at full extension.
Obviously I broke the handle assembly because, well... me.
That settled it then. I was going to see if there was a way of adjusting it, but after that mishap I've ordered a new one that comes with the handle assembly on the end. Hopefully installing the new one will be a simple case of attaching the ends together and pulling the new one through with the old one. Will it really be that straightforward? I somehow doubt it.
For now I'll keep a pair of pliers in the car in case I need to pull on the end of the cable to open the bonnet
I moved on from there to the passenger door, whose handle appeared to be struggling, needing to be pulled to its fullest extent before releasing the catch. However, on my test pulls it seemed to be working ok. I decided to leave it, but squirted some WD40 into the lock and down the lock button, because it seemed like a good idea...
One of the things I got from Halfords this morning was this:
When washing Derek I had been washing the wheels with the same car shampoo that I was doing the bodywork with, but there were some stubborn spots that it wasn't shifting. Plus the inside of the barrels were pretty mucky. With the wheels being a light colour, I wanted to really try and get rid of all the stubborn spots, because even small ones are quite obvious.
One by one, the wheels came off, got jet washed inside and out, wheel cleaner applied, scrubbed with a scrubbing brush and a toothbrush, rinsed, wheel cleaner reapplied where necessary, and jet washed again to get all the loose muck off. I was pretty impressed with the ability of the autoglym stuff to shift the baked on muck, but I supposed that is what it's for.
I think they came up well, though where there was some corrosion and bubbling, I have flaked a bit of paint off with my scrubbing and jet washing.
Annoying, but nothing about this car or these wheels was ever perfect, so I'll try not to worry about it. Maybe I can cover up the gaps with some tippex...
Inspired by the coupe's rusty holes, while I had the front wheels off I also took out the arch liners to inspect and clean out the inner wings. Jet washed everything, obviously. Let's compare the inside of the wings:
Coupe:
Convertible:
The convertible is definitely wearing its age better. It seems to be safe from developing any serious issues in those areas any time soon, but I cleaned them out and let them dry thoroughly before putting it all back together. I cleaned everything I could get to while the arch liners were out and then put it all back together. I plan to wash the bodywork tomorrow, and maybe have a go at the interior if I have time before my pesky social arrangements.
Those wheels are lovely but I think they really need to be silver! Will give that cleaning stuff a go, my wheels are horrendous I decided to have a look at the bonnet release cable because it seems to have stretched to the point that it barely manages to release the catches at full extension.
Obviously I broke the handle assembly because, well... me.
That settled it then. I was going to see if there was a way of adjusting it, but after that mishap I've ordered a new one that comes with the handle assembly on the end. Hopefully installing the new one will be a simple case of attaching the ends together and pulling the new one through with the old one. Will it really be that straightforward? I somehow doubt it.
For now I'll keep a pair of pliers in the car in case I need to pull on the end of the cable to open the bonnet
I moved on from there to the passenger door, whose handle appeared to be struggling, needing to be pulled to its fullest extent before releasing the catch. However, on my test pulls it seemed to be working ok. I decided to leave it, but squirted some WD40 into the lock and down the lock button, because it seemed like a good idea...
One of the things I got from Halfords this morning was this:
When washing Derek I had been washing the wheels with the same car shampoo that I was doing the bodywork with, but there were some stubborn spots that it wasn't shifting. Plus the inside of the barrels were pretty mucky. With the wheels being a light colour, I wanted to really try and get rid of all the stubborn spots, because even small ones are quite obvious.
One by one, the wheels came off, got jet washed inside and out, wheel cleaner applied, scrubbed with a scrubbing brush and a toothbrush, rinsed, wheel cleaner reapplied where necessary, and jet washed again to get all the loose muck off. I was pretty impressed with the ability of the autoglym stuff to shift the baked on muck, but I supposed that is what it's for.
I think they came up well, though where there was some corrosion and bubbling, I have flaked a bit of paint off with my scrubbing and jet washing.
Annoying, but nothing about this car or these wheels was ever perfect, so I'll try not to worry about it. Maybe I can cover up the gaps with some tippex...
Inspired by the coupe's rusty holes, while I had the front wheels off I also took out the arch liners to inspect and clean out the inner wings. Jet washed everything, obviously. Let's compare the inside of the wings:
Coupe:
Convertible:
The convertible is definitely wearing its age better. It seems to be safe from developing any serious issues in those areas any time soon, but I cleaned them out and let them dry thoroughly before putting it all back together. I cleaned everything I could get to while the arch liners were out and then put it all back together. I plan to wash the bodywork tomorrow, and maybe have a go at the interior if I have time before my pesky social arrangements.
shalmaneser said:
Those wheels are lovely but I think they really need to be silver! Will give that cleaning stuff a go, my wheels are horrendous
Style 24s are my favourite I think. I went for these because, as ever, I’m doing things on the cheap. Silver ones would have cost more, because who the hell wants ivory ones? I quite like that they’re a bit quirky and different. They will absolutely do for now. If I fancy changing them in the future I can do.
Today is one of those days that I regret not taking a ‘before’ picture.
Not wanting to just sit around and waste my evening (always a dangerous motivation as it usually leads me to do things that are poorly thought out and for which I’m completely unprepared), I decided to have a go at bodywork/paint correction. What could possibly go wrong?
Specifically, I had a go at a section on the corner of the front bumper that looked as though a previous owner had bumped into Wolverine in a car park and then thrown some paint at the resulting gashes. I felt reasonably confident that I couldn’t make it worse…
This being a spontaneous Monday evening activity, obviously it was a case of using what I had in the garage rather than the correct tools and materials for the job. Some years ago I had, somewhat misguidedly, bought a DA polisher and some detailing supplies which have been languishing on my shelves since a fairly disastrous effort on the coupe when I tried touching up some of the paintwork and just made a massive mess of it. I wasn’t going to use the DA on this small section, but I had some clay and some clay lubricant, and some IPA, so surface preparation was at least assured.
The ‘repair’ that had been done previously had left some paint quite significantly proud of the surface, so I decided wet sanding was the answer. I went for a dig in my box of tricks and found some 800, 1200, and 3000 grit wet and dry paper. I thought I’d spare poor Derek the 800 and started with the 1200 to flatten down the proud bits, then a bit of 3000 to smooth it off. To be honest, at this point I thought I may have gone too deep and there might be no going back, but it didn’t look too bad when I cleaned it up.
I then found some ancient T-Cut of unknown provenance, and some probably not quite as ancient Autoglym super resin polish. The scratches already looked better after the wet sanding, but the paintwork around them didn’t so much. I went at it with the T-Cut and a muslin (they had to go somewhere when the kids were no longer babies). A bit of elbow grease and brow sweat later, and they looked about as good as I think they’re going to get. I cleaned it up again and finished it off with the super resin polish.
To be honest, I’m really happy with the results. There are still visible scratches, obviously. I’m not a wizard. I struggled to find an angle at which I could make them visible on a photo though, which I’d say is a very good sign!
As I said, I didn’t take a ‘before’ photo (daft), but here’s a crop of a previous shot on which you can see the mess I started with, albeit not very clearly.

And after:

Ok, it’s not the same angle or the same lighting, but hopefully you’ll agree that it’s waaaay better!
It’s given me some confidence that I can tackle some more paint correction tasks around the car (probably with less wet sanding!). I have already ordered a Chipex kit, actually. It’ll take a bit of preparation though because whoever threw paint at the bumper scratches has also thrown paint at the various other chips and scratches around the car. Could be a fun ongoing project…
In other news, my bumper mouldings arrived today for the track car (who has become known as Trixie because my daughter wanted one of them to be a girl and Trixie the Track Car is nicely alliterative). I wasn’t going to update on this until the M3 style mesh insert has arrived as well (cheapest I could find on eBay, obviously), but I’m here so what the hell…


Not wanting to just sit around and waste my evening (always a dangerous motivation as it usually leads me to do things that are poorly thought out and for which I’m completely unprepared), I decided to have a go at bodywork/paint correction. What could possibly go wrong?
Specifically, I had a go at a section on the corner of the front bumper that looked as though a previous owner had bumped into Wolverine in a car park and then thrown some paint at the resulting gashes. I felt reasonably confident that I couldn’t make it worse…
This being a spontaneous Monday evening activity, obviously it was a case of using what I had in the garage rather than the correct tools and materials for the job. Some years ago I had, somewhat misguidedly, bought a DA polisher and some detailing supplies which have been languishing on my shelves since a fairly disastrous effort on the coupe when I tried touching up some of the paintwork and just made a massive mess of it. I wasn’t going to use the DA on this small section, but I had some clay and some clay lubricant, and some IPA, so surface preparation was at least assured.
The ‘repair’ that had been done previously had left some paint quite significantly proud of the surface, so I decided wet sanding was the answer. I went for a dig in my box of tricks and found some 800, 1200, and 3000 grit wet and dry paper. I thought I’d spare poor Derek the 800 and started with the 1200 to flatten down the proud bits, then a bit of 3000 to smooth it off. To be honest, at this point I thought I may have gone too deep and there might be no going back, but it didn’t look too bad when I cleaned it up.
I then found some ancient T-Cut of unknown provenance, and some probably not quite as ancient Autoglym super resin polish. The scratches already looked better after the wet sanding, but the paintwork around them didn’t so much. I went at it with the T-Cut and a muslin (they had to go somewhere when the kids were no longer babies). A bit of elbow grease and brow sweat later, and they looked about as good as I think they’re going to get. I cleaned it up again and finished it off with the super resin polish.
To be honest, I’m really happy with the results. There are still visible scratches, obviously. I’m not a wizard. I struggled to find an angle at which I could make them visible on a photo though, which I’d say is a very good sign!
As I said, I didn’t take a ‘before’ photo (daft), but here’s a crop of a previous shot on which you can see the mess I started with, albeit not very clearly.
And after:
Ok, it’s not the same angle or the same lighting, but hopefully you’ll agree that it’s waaaay better!
It’s given me some confidence that I can tackle some more paint correction tasks around the car (probably with less wet sanding!). I have already ordered a Chipex kit, actually. It’ll take a bit of preparation though because whoever threw paint at the bumper scratches has also thrown paint at the various other chips and scratches around the car. Could be a fun ongoing project…
In other news, my bumper mouldings arrived today for the track car (who has become known as Trixie because my daughter wanted one of them to be a girl and Trixie the Track Car is nicely alliterative). I wasn’t going to update on this until the M3 style mesh insert has arrived as well (cheapest I could find on eBay, obviously), but I’m here so what the hell…
Nice work. The cab looks pretty rot free which is a big plus. How about a DIY wheel refurb? I did it once many moons ago and it looked alright although I later found a reasonably priced refurbed locally (£140 a set) so it’s not really worth the effort.
Love how you just get stuck in, not overthinking things too much.
Love how you just get stuck in, not overthinking things too much.
I told you someone had thrown some paint at some scratches on the convertible:

This is on the lower section of the passenger door, and it’s reeeeaaaally obvious when you look at the car from the side in daylight.
Buoyed by my successes last night, I took some 3000 grit to this section and did away with all that horrible extra paint. A bit more T-Cut and polish and I’m left with some simple scratches, awaiting some Chipex which will hopefully make them all but disappear.

The stone rash on the bonnet will take some work but I’m getting into this polishing malarkey now.
Over in Trixie land (Trixie the Track Car, remember), the mesh arrived, and was attached with duct tape in the absence of star lock washers, which I think is the proper way of mounting it.


If you look carefully (past the artistically placed finger) in the second photo, you’ll see that the cracks that I professionally repaired with hot glue and duct tape have opened up again. I had a feeling it wouldn’t cope very well with life after its tragic accident, and I think it’s probably scrap to be honest.
I’ve been looking around for a while at bumpers and lips etc, and they are quite expensive on the whole, for ones that haven’t been blown up. I’ve also been considering a lip for Derek, which would be about £40-50 in reasonable condition. Tonight I saw this:

£85 delivered? For a bumper, lip, and mesh insert? Given that I’d probably have spent half of that on a lip for Derek, that makes the bumper approximately… free. And Derek will get a bonus mesh insert as well.
Ok, so I’ve had to spend another £60 or so on primer, paint and lacquer (I will bother my arse to lacquer this one), but I still reckon that’s pretty good value. Both cars get an upgrade for under £150.
What have we learned? First of all that if you buy cheap, you pay later. Second of all, since I’ve found the cheapest way out of this mess, we’ve learned that I’ve learned nothing at all. But, erm… it keeps me busy I suppose…
This is on the lower section of the passenger door, and it’s reeeeaaaally obvious when you look at the car from the side in daylight.
Buoyed by my successes last night, I took some 3000 grit to this section and did away with all that horrible extra paint. A bit more T-Cut and polish and I’m left with some simple scratches, awaiting some Chipex which will hopefully make them all but disappear.
The stone rash on the bonnet will take some work but I’m getting into this polishing malarkey now.
Over in Trixie land (Trixie the Track Car, remember), the mesh arrived, and was attached with duct tape in the absence of star lock washers, which I think is the proper way of mounting it.
If you look carefully (past the artistically placed finger) in the second photo, you’ll see that the cracks that I professionally repaired with hot glue and duct tape have opened up again. I had a feeling it wouldn’t cope very well with life after its tragic accident, and I think it’s probably scrap to be honest.
I’ve been looking around for a while at bumpers and lips etc, and they are quite expensive on the whole, for ones that haven’t been blown up. I’ve also been considering a lip for Derek, which would be about £40-50 in reasonable condition. Tonight I saw this:
£85 delivered? For a bumper, lip, and mesh insert? Given that I’d probably have spent half of that on a lip for Derek, that makes the bumper approximately… free. And Derek will get a bonus mesh insert as well.
Ok, so I’ve had to spend another £60 or so on primer, paint and lacquer (I will bother my arse to lacquer this one), but I still reckon that’s pretty good value. Both cars get an upgrade for under £150.
What have we learned? First of all that if you buy cheap, you pay later. Second of all, since I’ve found the cheapest way out of this mess, we’ve learned that I’ve learned nothing at all. But, erm… it keeps me busy I suppose…
Court_S said:
Nice work. The cab looks pretty rot free which is a big plus. How about a DIY wheel refurb? I did it once many moons ago and it looked alright although I later found a reasonably priced refurbed locally (£140 a set) so it’s not really worth the effort.
Love how you just get stuck in, not overthinking things too much.
Thanks… I think Love how you just get stuck in, not overthinking things too much.
I’m impatient and frequently this causes me to bugger things up. That’s why I’m best off owning old cars that aren’t in perfect condition and aren’t worth a huge amount. Worry-free tinkering.
I do wonder what it would take to sort out the corrosion and flaking and get the wheels looking their ivory best, but not sure it’d be worth it at any price!
helix402 said:
I think you may get hit with import tax on that bumper.
Gov.uk is as clear as mud on the subject. It appears that no handling fees should be applicable because the value of the goods is under £135, but I may have to pay VAT depending on whether the seller charged it at the point if sale or not. 
It seems a bold assumption that every non-UK seller will charge VAT at the point of sale on goods worth under £135, but even if VAT is payable at import I still think it’s pretty good value overall.
buy_cheap_pay_later said:
Court_S said:
Nice work. The cab looks pretty rot free which is a big plus. How about a DIY wheel refurb? I did it once many moons ago and it looked alright although I later found a reasonably priced refurbed locally (£140 a set) so it’s not really worth the effort.
Love how you just get stuck in, not overthinking things too much.
Thanks… I think Love how you just get stuck in, not overthinking things too much.
I’m impatient and frequently this causes me to bugger things up. That’s why I’m best off owning old cars that aren’t in perfect condition and aren’t worth a huge amount. Worry-free tinkering.
I do wonder what it would take to sort out the corrosion and flaking and get the wheels looking their ivory best, but not sure it’d be worth it at any price!
Mate of mine has been sorted some corrosion on his partners camper van. Once he starter cutting away there was bit more than expected but he’s getting there with it. Doing it on the drive himself.
Court_S said:
I mean it positively! You seem like a glass half full chap when tackling issues etc.
Mate of mine has been sorted some corrosion on his partners camper van. Once he starter cutting away there was bit more than expected but he’s getting there with it. Doing it on the drive himself.
That’s brave! Mate of mine has been sorted some corrosion on his partners camper van. Once he starter cutting away there was bit more than expected but he’s getting there with it. Doing it on the drive himself.
I’ve got a welder coming tomorrow to poke around at my undercarriage and pass judgement. I suspect it probably is more extensive than I can see at the moment. Large bill incoming!
It was a Derek day today. Any warm sunny day has now become known as a Derek day. He got some love from one of the other dads at school pick up this afternoon. It’s nice for him to get a bit of attention, and good to have a conversation starter.
I had a go at those scratches on the passenger door with the Chipex kit the other day. It didn’t go quite as well as I’d hoped. I don’t know if I’m not giving it enough time (though I’m going by the instructions), or using too much blending solution, or rubbing too hard, or if thr scratches are just too shallow, but the paint just won’t stay in them. I reapplied it three times, and every time just end up polishing it back out of the scratches. Here’s a before photo and a ‘best I can manage’ photo.


I’m not sure what I’m doing wrong. I’m tempted to stick some paint in there and leave it a day or so (they say not to leave more than 30 minutes but I did and it still came off again). If it goes horribly wrong there’s always the 1200 grit again!
Anyway, not a massive drama in the scheme of things. I’ll keep playing with it and see what I can do. Once I’ve figured it out I’ll have a go at the gravel rash on the bonnet. The rest of the paintwork is remarkably good. There is a dent in the top edge of the boot lid though, which is a bit annoying. Could always cover it up with a lip-type spoiler I suppose!
The bonnet release cable is on the way so I should probably start a course at YouTube University to learn how to replace it.
What about Trixie?
The welder man came the other day. Nice chap, very chatty. In short, the plan is to cut out my jacking points and weld in plates to make sure it’s structurally sound and safe. I need to source a boot floor panel (wheel well and battery tray) and he’ll weld that in too. The wings I’m just going to try and find replacements for. I’ve put the feelers out on Facebook to see if anyone has some Montreal Blue ones, because I’d like to avoid painting if I can. Total cost for the welding should be under £500, which I thought not too bad to save her from the dreaded rot. I’ll definitely put far more than that into her in performance parts, pads, tyres etc.
Shelsley Walsh on Tuesday. I’ll probably duct tape over the holes in the wings to cover her embarrassment! And maybe bandage up the disintegrating front bumper in similar style.
Hopefully I’ll be able to get the panels, get her all welded up, new wings, new bumper and good to go for Retro Rides in August, after B’stard Child’s kind invitation (I think that’s what it was…)
It’ll be interesting to see this weekend when I get the wheels back on and the car back on the ground, whether the anti squeal shims and/or grease will make any difference to the mystery clonking (that I’m pretty sure was pad rattle). I suspect it won’t make a blind bit of difference but it was worth a try.
I had a go at those scratches on the passenger door with the Chipex kit the other day. It didn’t go quite as well as I’d hoped. I don’t know if I’m not giving it enough time (though I’m going by the instructions), or using too much blending solution, or rubbing too hard, or if thr scratches are just too shallow, but the paint just won’t stay in them. I reapplied it three times, and every time just end up polishing it back out of the scratches. Here’s a before photo and a ‘best I can manage’ photo.
I’m not sure what I’m doing wrong. I’m tempted to stick some paint in there and leave it a day or so (they say not to leave more than 30 minutes but I did and it still came off again). If it goes horribly wrong there’s always the 1200 grit again!
Anyway, not a massive drama in the scheme of things. I’ll keep playing with it and see what I can do. Once I’ve figured it out I’ll have a go at the gravel rash on the bonnet. The rest of the paintwork is remarkably good. There is a dent in the top edge of the boot lid though, which is a bit annoying. Could always cover it up with a lip-type spoiler I suppose!
The bonnet release cable is on the way so I should probably start a course at YouTube University to learn how to replace it.
What about Trixie?
The welder man came the other day. Nice chap, very chatty. In short, the plan is to cut out my jacking points and weld in plates to make sure it’s structurally sound and safe. I need to source a boot floor panel (wheel well and battery tray) and he’ll weld that in too. The wings I’m just going to try and find replacements for. I’ve put the feelers out on Facebook to see if anyone has some Montreal Blue ones, because I’d like to avoid painting if I can. Total cost for the welding should be under £500, which I thought not too bad to save her from the dreaded rot. I’ll definitely put far more than that into her in performance parts, pads, tyres etc.
Shelsley Walsh on Tuesday. I’ll probably duct tape over the holes in the wings to cover her embarrassment! And maybe bandage up the disintegrating front bumper in similar style.
Hopefully I’ll be able to get the panels, get her all welded up, new wings, new bumper and good to go for Retro Rides in August, after B’stard Child’s kind invitation (I think that’s what it was…)
It’ll be interesting to see this weekend when I get the wheels back on and the car back on the ground, whether the anti squeal shims and/or grease will make any difference to the mystery clonking (that I’m pretty sure was pad rattle). I suspect it won’t make a blind bit of difference but it was worth a try.
buy_cheap_pay_later said:
inkyhands said:
Haven't used it myself, but you can get a product from Renovo to re dye the soft top.
I’m sure I’ve seen a video on that. I might give it a go once I’ve cleaned it a few more times! 


Waterproofing today. I gave it a clean first and a good rinse, let it dry, and then:
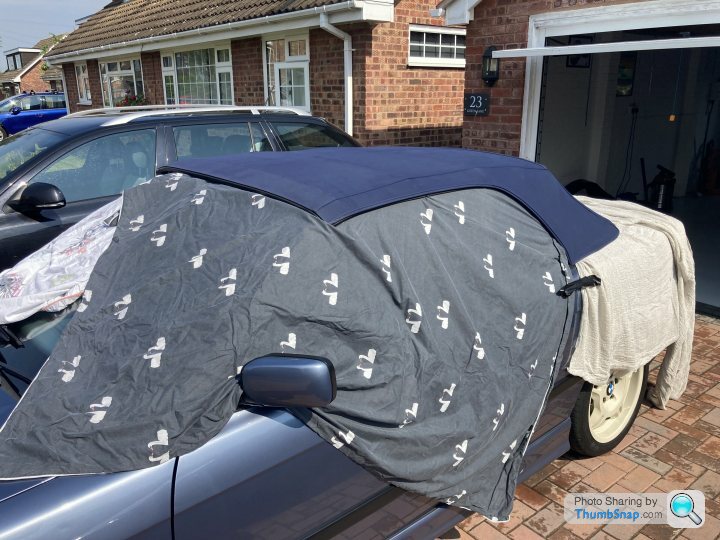

The bottle said to avoid overspray onto glass or paintwork, so I took precautions.
It also said to apply liberally, so I used most of the bottle!
I might park it out in the thunderstorms later and see what happens
The bottle said to avoid overspray onto glass or paintwork, so I took precautions.
It also said to apply liberally, so I used most of the bottle!
I might park it out in the thunderstorms later and see what happens
Court_S said:
How’s the patch holding up?
The fabric protectors are pretty good; the roof on my other half’s old cab would bead almost like I was waxed.
Thanks for asking. It’s good I think. It’s still stuck in there, and keeps the water out when I hose it down. I’ve successfully dodged all rain so far though so it hasn’t had that test.The fabric protectors are pretty good; the roof on my other half’s old cab would bead almost like I was waxed.
Before I waterproofed the fabric, I had the slightly odd situation where water would soak into the fabric but bead on the repair tape. A good sign about the tape I suppose!
I was at Shelsley Walsh today with Trixie the track car. At no point last night when I was getting fuel, or today, has that rattle come back. I’m pretty sure it was the pads, and perhaps the anti-squeal shims have helped. I don’t know. What I do know is that she was very well behaved today. No extra worrying noises and she ran like clockwork all day. If I had one complaint it’s that I struggled to get the power down all day. I don’t know if it’s because I’ve taken all the weight out of the back, but any hint of throttle and the rear wheels were spinning up. Or at least one of them. #opendiff
It was one of their ‘driving schools.’ They run them once a month. You get 8-10 runs up the hill in a day, with instructor feedback at each corner as you come back down. Throughout the day, therefore, you can refine your lines and get neater and faster. I found it a different challenge to circuit driving. On a circuit you can get into a rhythm, stringing corners together and incrementally getting better each lap. On a hillclimb, you get one shot to get all the corners right, then you stop and hang around for a bit, come back down the hill, hang around a bit more, and then bam, another minute or so of trying to string the bends together perfectly. It could be quite frustrating I think. It’s certainly quite hard to put a full good run together. Today was just pure fun though. There was the option to take an exam at the end of the day, which I think means you can then compete, but I didn’t pay much attention because I didn’t intend to do it. I mostly just felt obliged to have at least one go at Shelsley given that I live so close!
It was a good day out. Some lovely machines and some friendly people. I may have got ever so slightly sideways on the final run, but I blame the instructor who said, ‘your lines are good, maybe try carrying some more speed into the corner…’
Righto!
I caught it, and all was well once I’d changed my pants.
Anyway, some photos:
Gassing Station | Readers' Cars | Top of Page | What's New | My Stuff