1996 BMW E36 328i Coupe - we have history...
Discussion


Thank you GPM for the bit of encouragement I needed to give it a go with the heat. Today has been an unmitigated success!
The tools to hand.
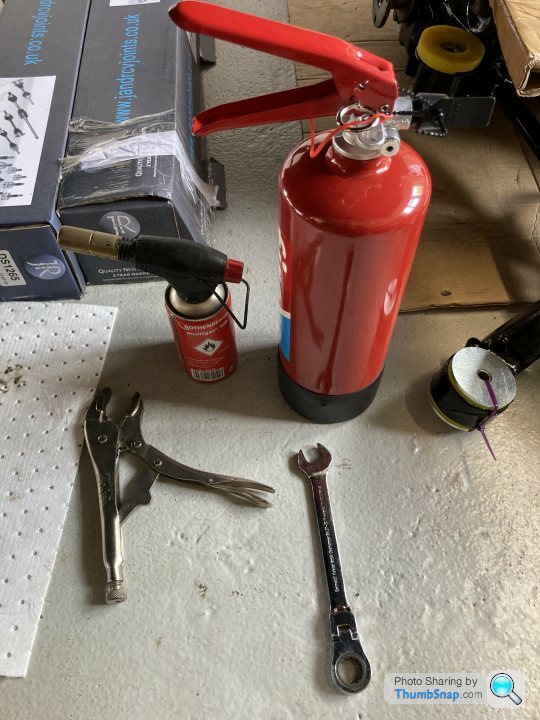
And, ta-dah!
I could hardly contain my excitement!
I had read that if you depress the brake pedal and keep it depressed, it will stop all your brake fluid falling out of open lines (closes the ports or something). So...
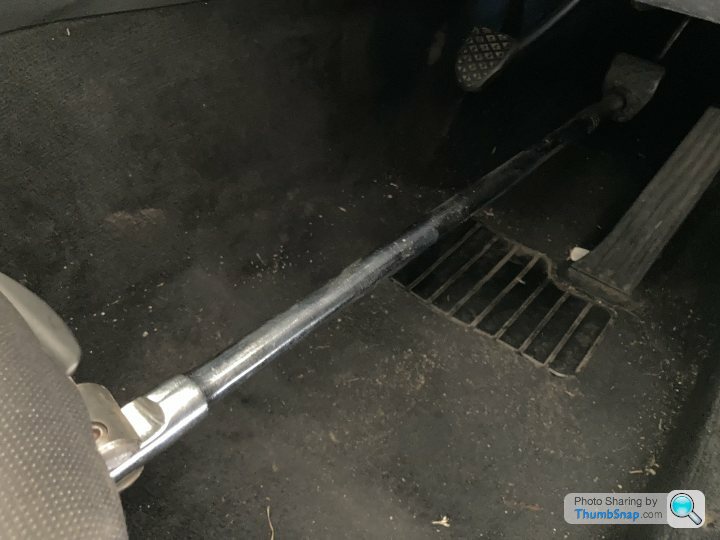
But it didn't seem to work. No leak from the right, but the left was like a racehorse before the race. I put some of the old plumbing back on it so it wasn't splashing everywhere.
I then started playing with my new brake lines and brackets, getting them bent into shape and assembled.
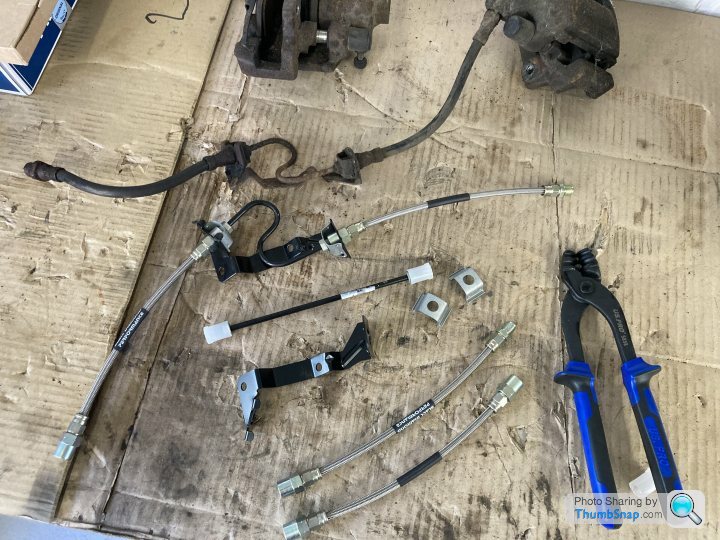
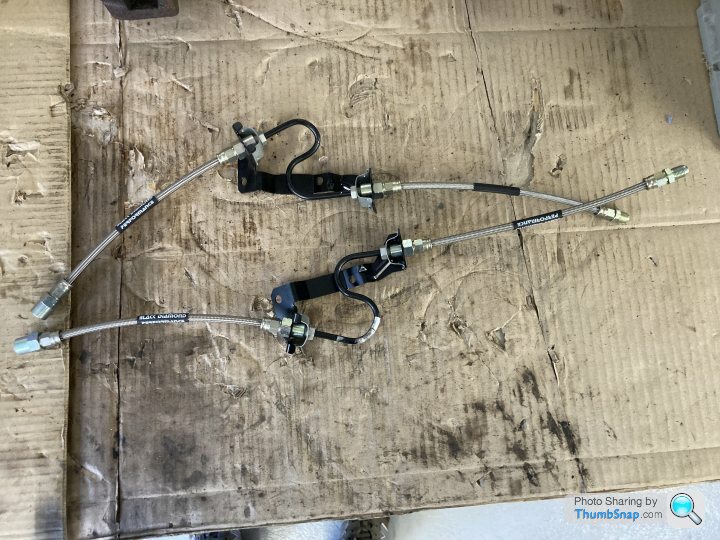
I did it by eye, so they don't match, but as long as I can get the screws in to attach them to the trailing arms, and they don't leak, I'm not really bothered.
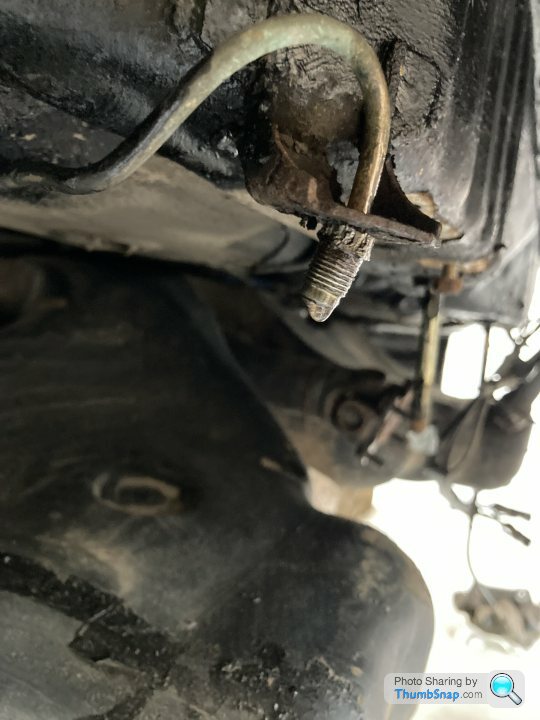
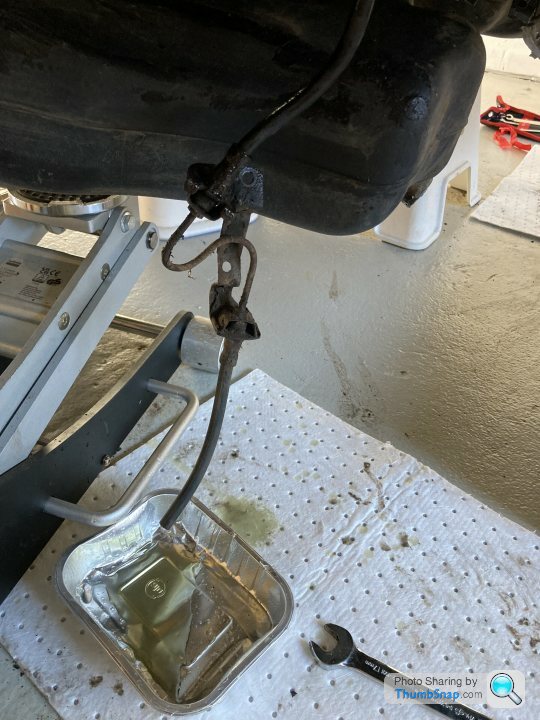
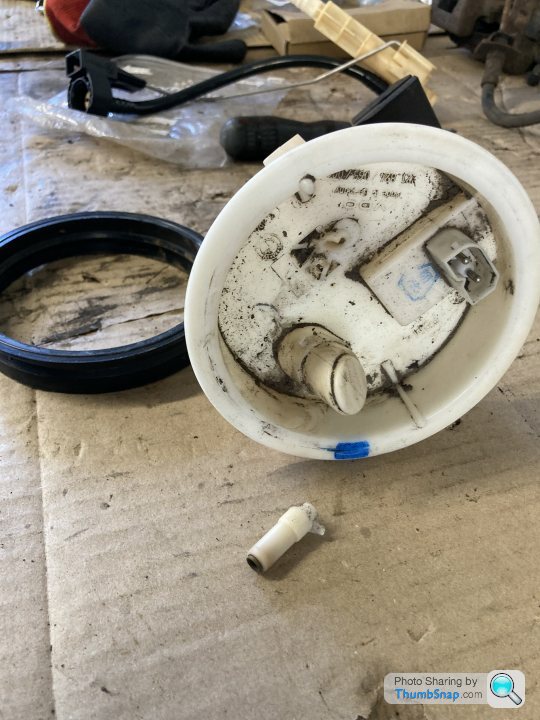
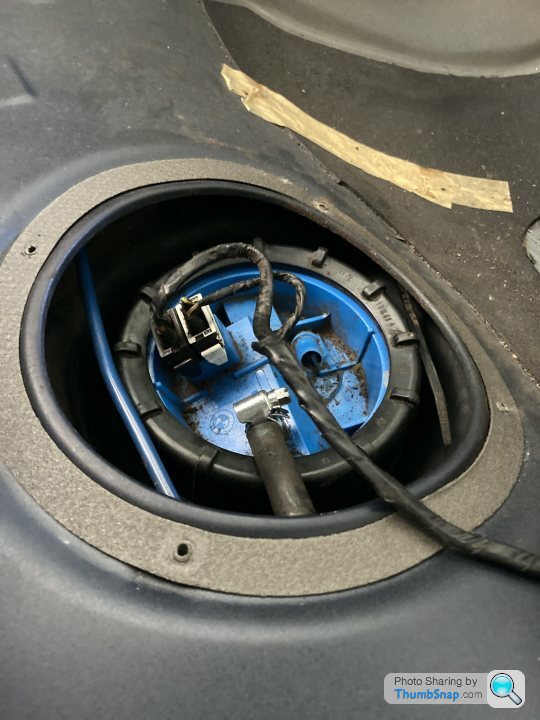
Satisfied with my work on the brake lines, and knowing now that I don't need to dismantle them any further forward than the rear of the fuel tank, I set about putting the fuel system back together. That involved replacing this part, whose spigot I snapped off when trying to unnecessarily dismantle it some time ago:
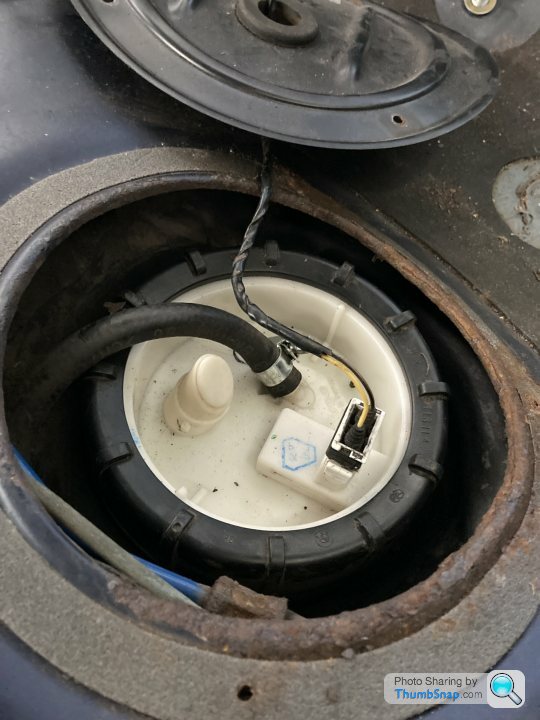
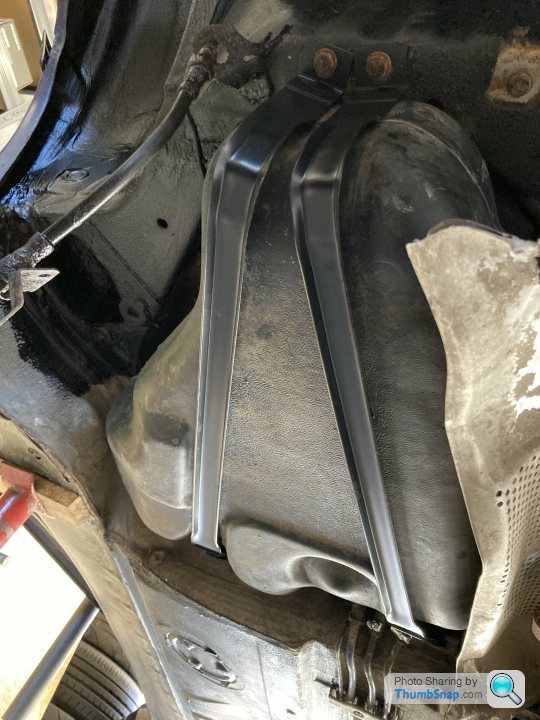
With both sides reassembled and lines reconnected with new clips, I could get the tank back into place and put the new straps on.
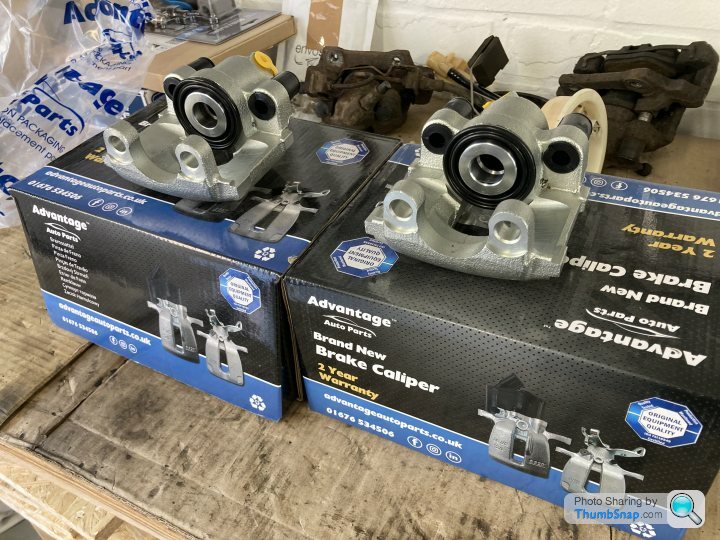
While I was doing all that, the delivery man arrived with my new calipers.
Believe it or not, all that excitement was still not enough for one morning. I had ordered some new brackets for my trailing arms, and discovered that my past self had absolutely sorted me out by buying some new bolts and nuts for them as well. Love that guy. So they went on the trailing arms and torqued up to 110Nm as per Mr Haynes.
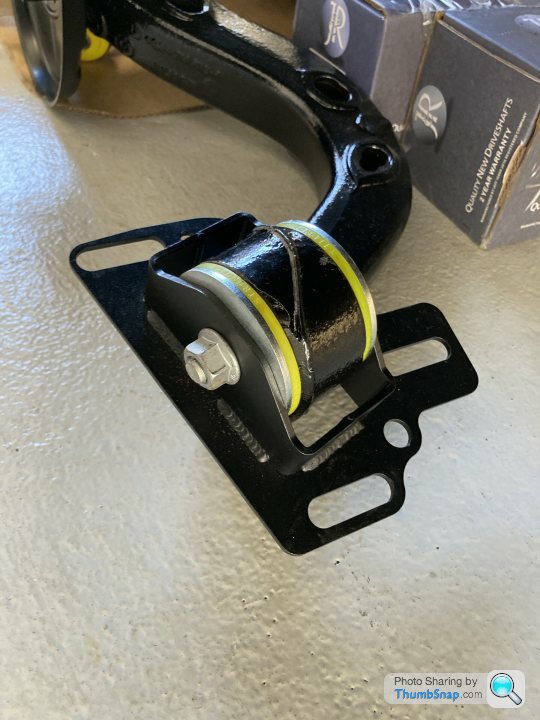
Then I stuck my new handbrake cables through the holes, because... why not?
That much excitement is, I think, enough for now.
I turned my brain to what else I need to do or buy before I can actually get the subframe back on the car. The answer is not a lot. My new calipers need guide pins and caliper carriers. I have resisted the urge to buy everything new just because I can't be bothered to clean things. I gave the caliper carriers a go over with a wire brush and cleaned the guide pins with some of the brake fluid that fell out. The carriers could do with a coat of paint I think, but no need to buy new ones. The brakes discs also look ok, just need a clean. And it turns out I had a set of Eicher rear pads sitting on my shelf. I had wondered what that box was. So I think I'm pretty much ready to start lifting the subframe back into place and bolt everything back together.
I've made more progress in one morning that I have in the last six months. And now I can send my flaring tool back to Amazon, because I don't need it any more!
The tools to hand.
And, ta-dah!
I could hardly contain my excitement!
I had read that if you depress the brake pedal and keep it depressed, it will stop all your brake fluid falling out of open lines (closes the ports or something). So...
But it didn't seem to work. No leak from the right, but the left was like a racehorse before the race. I put some of the old plumbing back on it so it wasn't splashing everywhere.
I then started playing with my new brake lines and brackets, getting them bent into shape and assembled.
I did it by eye, so they don't match, but as long as I can get the screws in to attach them to the trailing arms, and they don't leak, I'm not really bothered.
Satisfied with my work on the brake lines, and knowing now that I don't need to dismantle them any further forward than the rear of the fuel tank, I set about putting the fuel system back together. That involved replacing this part, whose spigot I snapped off when trying to unnecessarily dismantle it some time ago:
With both sides reassembled and lines reconnected with new clips, I could get the tank back into place and put the new straps on.
While I was doing all that, the delivery man arrived with my new calipers.
Believe it or not, all that excitement was still not enough for one morning. I had ordered some new brackets for my trailing arms, and discovered that my past self had absolutely sorted me out by buying some new bolts and nuts for them as well. Love that guy. So they went on the trailing arms and torqued up to 110Nm as per Mr Haynes.
Then I stuck my new handbrake cables through the holes, because... why not?
That much excitement is, I think, enough for now.
I turned my brain to what else I need to do or buy before I can actually get the subframe back on the car. The answer is not a lot. My new calipers need guide pins and caliper carriers. I have resisted the urge to buy everything new just because I can't be bothered to clean things. I gave the caliper carriers a go over with a wire brush and cleaned the guide pins with some of the brake fluid that fell out. The carriers could do with a coat of paint I think, but no need to buy new ones. The brakes discs also look ok, just need a clean. And it turns out I had a set of Eicher rear pads sitting on my shelf. I had wondered what that box was. So I think I'm pretty much ready to start lifting the subframe back into place and bolt everything back together.
I've made more progress in one morning that I have in the last six months. And now I can send my flaring tool back to Amazon, because I don't need it any more!

Gallons Per Mile said:
Well done on the brake lines! They're easy once you know how 
IIRC Eicher are a Euro Car Parts special and you might want to put some nicer brake pads on, especially for being on track with. Keep an eye on them!
You're right, they are. They're on the back though, so aren't doing much of the heavy lifting. If they only last one track day, so be it. I will indeed keep an eye on them!IIRC Eicher are a Euro Car Parts special and you might want to put some nicer brake pads on, especially for being on track with. Keep an eye on them!
Disclaimer - I'm on my new laptop, which is probably far too clever for me. Whatever it's doing is not playing well with the Pistonheads image uploader. The uploader is telling me that it's not a valid image and to go back and try again. The thing is, I know it's an image. I took the image, I moved the image from my phone to my laptop, and I'm looking at the image. It says that it is a JPG, which in my experience is a valid image. So, no pictures with this update. I'm pretty sure I'll be able to add some when I've got my other laptop again.
I had most of this week off, which was nice. I spent it with my kids, which was even nicer. I was also ill, which is less nice. I am still ill. This is a rare occurrence, and for that reason, when I do succumb to some horrendous disease, it is pretty much the end of the world. I cease to function.
I did however optimistically try to cajole the children into helping me out with the car. They were entirely uninterested. Still, I knew I'd have this weekend free, once I'd waved them off to their mum's, so I didn't press the issue. We did things they were more interested in. Then came Saturday. I cancelled all my appointments (I didn't have any) and took the phone off the hook (my kids wouldn't even know what that means), determined to spend the day making progress on the rebuild of Trixie the Track Car. No matter how close I was to death's door, that diff was getting bench pressed into place.
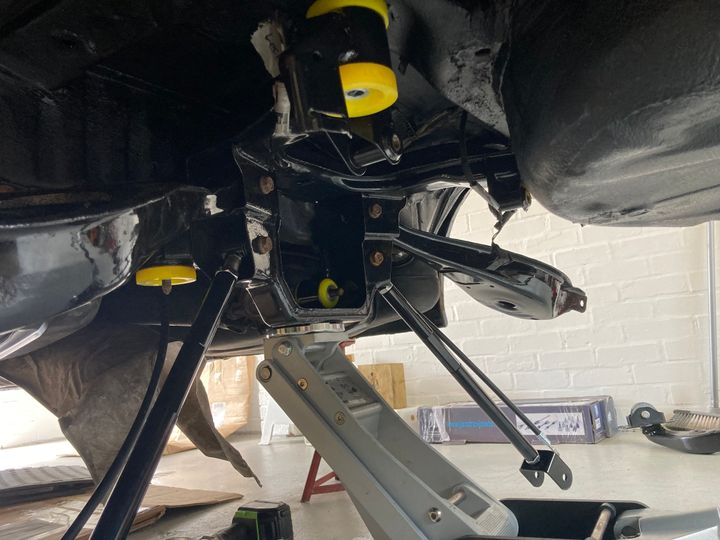
Now, I had already bolted the diff into the subframe, along with the upper and lower arms, because the bolts for the arms are not accessible once the diff is in place. I thought it worth a try lifting it into place like this but had a strong suspicion that I wouldn't be able to get the correct angles to get the flange onto the prop shaft and the subframe bushes onto the studs. If I'd gone for a flat boot floor rather than getting a new spare wheel well welded in, it would have been somewhat easier, but let's not go there...
I'm glad I spent good money on a decent epoxy for the garage floor. It stood up well to me dropping the diff on it from various angles. My cleverly thought out combination of jacks and bits of wood to support the diff at the correct angle to feed into the frame and onto the propshaft ended in failure enough times that I gave up trying to be clever and just brute-forced the thing up and in there using all of my remaining strength, flexibility, and will to live. Once it was up there and held in place with some bolts, I had a good long lie down under the car, contemplating the meaning of life. But it's in. Hooray!
Then it was a case of bolting in the trailing arms and connecting them to the suspension arms so that everything would hang happily in place. After that, drive shafts. I had nice new driveshafts that have been sitting in boxes under the car for months. Bolting them on was fairly straightforward but involved a lot of getting up and down to put the car in or out of gear depending on whether I wanted the shaft to turn to expose the next bolt, or hold firm so I could tighten one. A child in the car responding to commands would have been helpful at this point. It felt a bit like circuit training, which I would very much rather not do in my weakened state.
Anyway, the new shafts went on nicely and I torqued the hub nuts to... quite a lot. My torque wrench doesn't go up to 300Nm, and neither do my arms, so I gave it a good dose of the impact wrench. When I finally take it to an actual professional after all this, they can check such things.
After that I put the suspension back in. My HSD monopro springs and dampers have served me well and seem in pretty good shape. I gave them a wipe off and reinstalled them. I did also order some reinforcement plates for the strut towers. They were only a few quid and seemed a worthwhile precaution. They just sit on top of the strut tower and sandwich the skin of the car between them and the top plate of the damper.
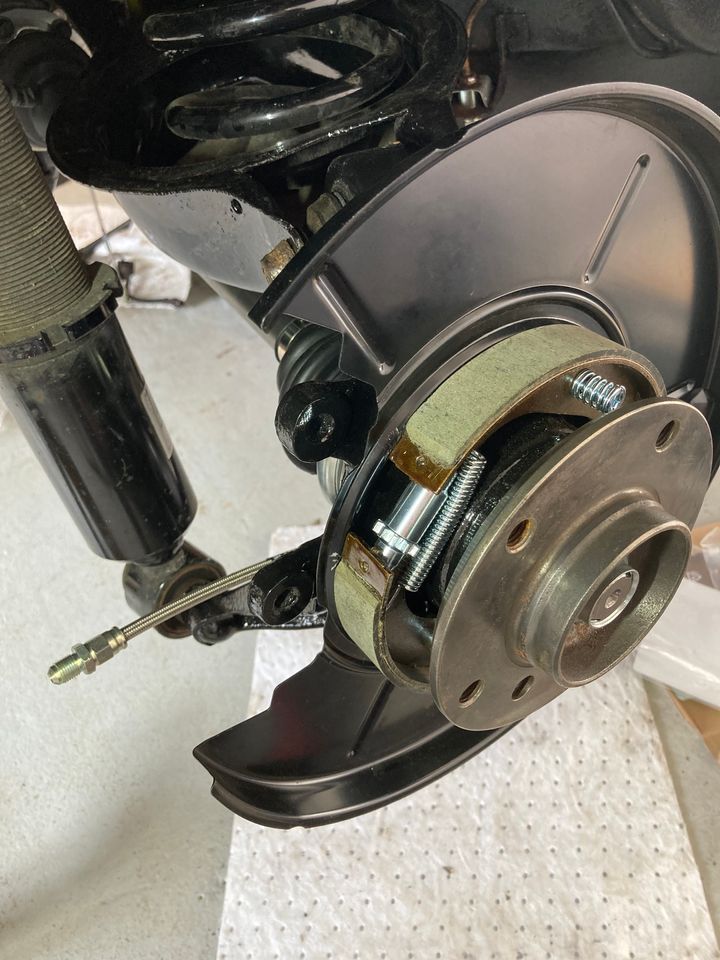
I then tackled the handbrake mechanisms. I had ordered all new parts and they were all sat there ready to go. I've had this weird block for ages about handbrake mechanisms. They seem complicated and arcane. This is entirely irrational. I've had the inlet manifold off this car twice, and I've converted it from auto to manual. There is no reason handbrake mechanisms should give me the heebie-geebies, but their continued mystery played on my mind. Rationally, I knew that as soon as I actually tackled the job it would all make sense and lose its mystique. Obviously, that's what happened. Handbrake mechanisms are not arcane and mysterious. They are, however, fiddly and a massive pain in the arse. How are you meant to get those bloody little springs hooked into the shoes? It almost reduced me to tears. I'm about 80% certain that if I did things in a different order, it would have been a piece of cake. But I did them in the order I did them, and had to fight to the death to get the bloody things in place.
It did help having the extremely rusty reference system to hand, as the old hubs are still lying around in the garage for exactly that reason. I was confident of what it should look like once complete, just made hard work of getting to that point.
Considering my almost terminal condition and total amateur status, I felt that was a pretty good achievement for a Saturday. I'm sure if you know what you're doing then it's probably about 30 minutes of work, but this is me we're talking about.
I had other things to do today, but did spend a couple of hours this morning connecting up the handbrake cables and trying to tension them correctly. Again, probably 10 minutes work for a professional, but boy did I make it hard work! I thought I'd got it once, only to then notice that one of the cables wasn't seated in the hub properly and I had to do that one again. Deep joy. I got there in the end though, and then connected up my calipers. That's as far as I've got for now. Next up will be putting some brake fluid in, replacing the exhaust, and then moving onto the next job...
It is quite satisfying going from a garage full of parts to what could realistically be called a car. One highlight was putting the box for the Black Diamond braided brake lines in the recycling. That box has sat on my shelf and moved with me for probably six years or so, as I could never quite see how I would manage to replace the rear lines. I have now done so, and the box is gone!
Oh, talking of brake lines, I did have one small mishap whilst bolting the brake line bracket to the trailing arm on the driver's side. The threaded holes were fouled with powder coating and I was too lazy to tap them before trying to force the delicate little M5 (maybe M6?) bolts into them. The inevitable happened and one of them snapped off. I was pretty pissed off, but tried to put it in perspective of how much has gone right up to this point. It doesn't even matter that much, I can always cable tie it in place if it comes to it...
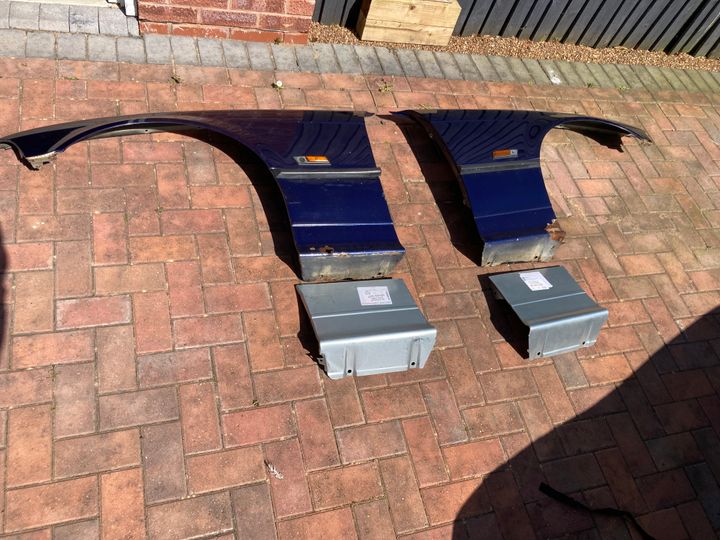
Once the rest of the rear is built (I'm awaiting a new ARB as the chap initially sent me the wrong size, and the exhaust is the last bit), I want to get the front wings off. I've bought some of those repair panels that can be welded onto the bottom section. Both of mine have unsightly rusty holes in them and I'd rather not go into a new track day season looking like I've just driven it out of a scrapheap. My standards may be low, but they do exist!
And..... I bought a cheapo aluminium radiator from eBay. I want to put that on and see how it performs.
I had most of this week off, which was nice. I spent it with my kids, which was even nicer. I was also ill, which is less nice. I am still ill. This is a rare occurrence, and for that reason, when I do succumb to some horrendous disease, it is pretty much the end of the world. I cease to function.
I did however optimistically try to cajole the children into helping me out with the car. They were entirely uninterested. Still, I knew I'd have this weekend free, once I'd waved them off to their mum's, so I didn't press the issue. We did things they were more interested in. Then came Saturday. I cancelled all my appointments (I didn't have any) and took the phone off the hook (my kids wouldn't even know what that means), determined to spend the day making progress on the rebuild of Trixie the Track Car. No matter how close I was to death's door, that diff was getting bench pressed into place.
Now, I had already bolted the diff into the subframe, along with the upper and lower arms, because the bolts for the arms are not accessible once the diff is in place. I thought it worth a try lifting it into place like this but had a strong suspicion that I wouldn't be able to get the correct angles to get the flange onto the prop shaft and the subframe bushes onto the studs. If I'd gone for a flat boot floor rather than getting a new spare wheel well welded in, it would have been somewhat easier, but let's not go there...
I'm glad I spent good money on a decent epoxy for the garage floor. It stood up well to me dropping the diff on it from various angles. My cleverly thought out combination of jacks and bits of wood to support the diff at the correct angle to feed into the frame and onto the propshaft ended in failure enough times that I gave up trying to be clever and just brute-forced the thing up and in there using all of my remaining strength, flexibility, and will to live. Once it was up there and held in place with some bolts, I had a good long lie down under the car, contemplating the meaning of life. But it's in. Hooray!
Then it was a case of bolting in the trailing arms and connecting them to the suspension arms so that everything would hang happily in place. After that, drive shafts. I had nice new driveshafts that have been sitting in boxes under the car for months. Bolting them on was fairly straightforward but involved a lot of getting up and down to put the car in or out of gear depending on whether I wanted the shaft to turn to expose the next bolt, or hold firm so I could tighten one. A child in the car responding to commands would have been helpful at this point. It felt a bit like circuit training, which I would very much rather not do in my weakened state.
Anyway, the new shafts went on nicely and I torqued the hub nuts to... quite a lot. My torque wrench doesn't go up to 300Nm, and neither do my arms, so I gave it a good dose of the impact wrench. When I finally take it to an actual professional after all this, they can check such things.
After that I put the suspension back in. My HSD monopro springs and dampers have served me well and seem in pretty good shape. I gave them a wipe off and reinstalled them. I did also order some reinforcement plates for the strut towers. They were only a few quid and seemed a worthwhile precaution. They just sit on top of the strut tower and sandwich the skin of the car between them and the top plate of the damper.
I then tackled the handbrake mechanisms. I had ordered all new parts and they were all sat there ready to go. I've had this weird block for ages about handbrake mechanisms. They seem complicated and arcane. This is entirely irrational. I've had the inlet manifold off this car twice, and I've converted it from auto to manual. There is no reason handbrake mechanisms should give me the heebie-geebies, but their continued mystery played on my mind. Rationally, I knew that as soon as I actually tackled the job it would all make sense and lose its mystique. Obviously, that's what happened. Handbrake mechanisms are not arcane and mysterious. They are, however, fiddly and a massive pain in the arse. How are you meant to get those bloody little springs hooked into the shoes? It almost reduced me to tears. I'm about 80% certain that if I did things in a different order, it would have been a piece of cake. But I did them in the order I did them, and had to fight to the death to get the bloody things in place.
It did help having the extremely rusty reference system to hand, as the old hubs are still lying around in the garage for exactly that reason. I was confident of what it should look like once complete, just made hard work of getting to that point.
Considering my almost terminal condition and total amateur status, I felt that was a pretty good achievement for a Saturday. I'm sure if you know what you're doing then it's probably about 30 minutes of work, but this is me we're talking about.
I had other things to do today, but did spend a couple of hours this morning connecting up the handbrake cables and trying to tension them correctly. Again, probably 10 minutes work for a professional, but boy did I make it hard work! I thought I'd got it once, only to then notice that one of the cables wasn't seated in the hub properly and I had to do that one again. Deep joy. I got there in the end though, and then connected up my calipers. That's as far as I've got for now. Next up will be putting some brake fluid in, replacing the exhaust, and then moving onto the next job...
It is quite satisfying going from a garage full of parts to what could realistically be called a car. One highlight was putting the box for the Black Diamond braided brake lines in the recycling. That box has sat on my shelf and moved with me for probably six years or so, as I could never quite see how I would manage to replace the rear lines. I have now done so, and the box is gone!
Oh, talking of brake lines, I did have one small mishap whilst bolting the brake line bracket to the trailing arm on the driver's side. The threaded holes were fouled with powder coating and I was too lazy to tap them before trying to force the delicate little M5 (maybe M6?) bolts into them. The inevitable happened and one of them snapped off. I was pretty pissed off, but tried to put it in perspective of how much has gone right up to this point. It doesn't even matter that much, I can always cable tie it in place if it comes to it...
Once the rest of the rear is built (I'm awaiting a new ARB as the chap initially sent me the wrong size, and the exhaust is the last bit), I want to get the front wings off. I've bought some of those repair panels that can be welded onto the bottom section. Both of mine have unsightly rusty holes in them and I'd rather not go into a new track day season looking like I've just driven it out of a scrapheap. My standards may be low, but they do exist!
And..... I bought a cheapo aluminium radiator from eBay. I want to put that on and see how it performs.
Thanks for the comments. Knowing that someone is paying attention does help with the motivation.
I've had a good day. It's not been without its setbacks, but if absolutely everything goes right then I start questioning which version of reality I'm in. Having a few hiccoughs reminds me that I'm still in the real world. I would say there have been more victories than defeats, though. So that's good.
First of all, defeat. I went to put my pads into my shiny new calipers and bolt them to the caliper carriers, only to find that the calipers I'd bought were for cars that use paper brake discs. I believe they are for 10mm discs, whereas mine are 19mm vented. So there was no chance of getting them on with the pads.

It's hard to tell the extent on that photo, but you can see that the span of the new caliper is definitely less than that of the old one. Bum. I've ordered some new ones from Autodoc, which specifically stated they were for 19mm discs. I will return the piddly ones.
So, unable to fill and bleed my brake system, I started putting the remaining bits on the car. I'm still missing an ARB. I had agreed with the guy who I bought the powder coated subframe and axle parts from that he would send me a 20mm ARB, but the one he sent me was 18mm. I've let him know and he said he'll send me a 20mm one, with the correct bushes. It's taking a while though.
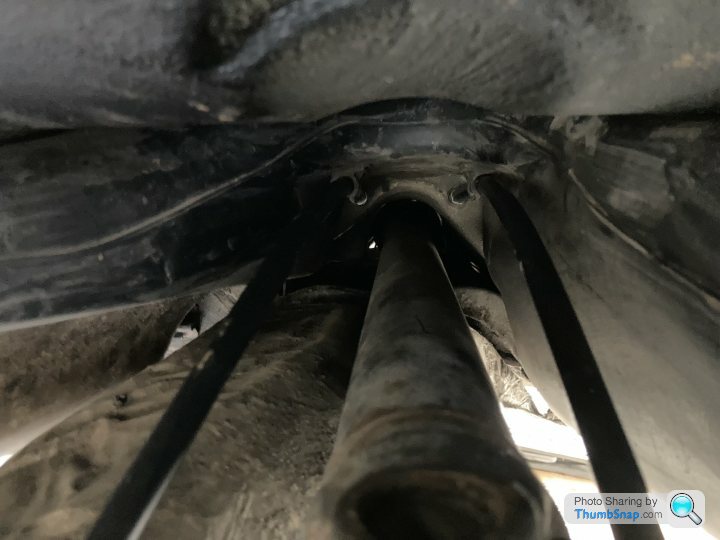
I lifted the exhaust into place and checked that it's possible to install the ARB afterwards. It is, so I went ahead and bolted up the exhaust.
I then tapped the screw holes for the ABS sensors and put them in place. I am a bit confused by the connectors on the right hand side though. On the left there is just a single grey connector for the ABS sensor. On the right (helpfully labelled 'right' by whoever disconnected it...) there is a grey one and a black one. I assume the grey one is for the ABS, but I have no idea what the black one is for. I can't even see a connector that could match up with it.
Answers on a postcard please...
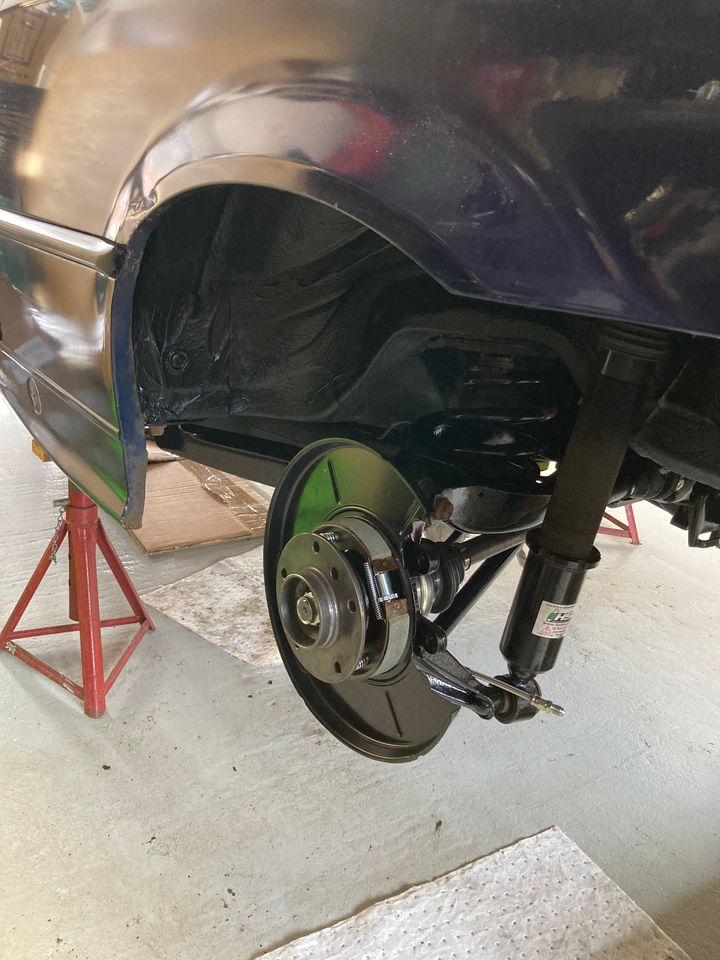
I then put the rear bumper back on, and the rear arch liners. It looks very much like a car.
I couldn't have that, so I took the front wings off.
There is a reason for that, of course. They both have rusty holes in them, and the front jacking points need some work too. Last time the welder came he told me the wings needed to be off for him to fix the jacking points, and it would make it far easier to repair the wings too. I watched a few videos on how to take off an E36 wing, and it's very straightforward and mechanical, which is what I love about these cars.
Screws in the door shut, screws under the car, screws under the scuttle panel (which also hold the bonnet hinges), screws behind the bumper, and then the row of T30 screws along the top edge of the wing. I had heard that these T30s strip quite easily, so I was vey careful with my angles and how much pressure I applied. I got lucky. With 7 out of 8...
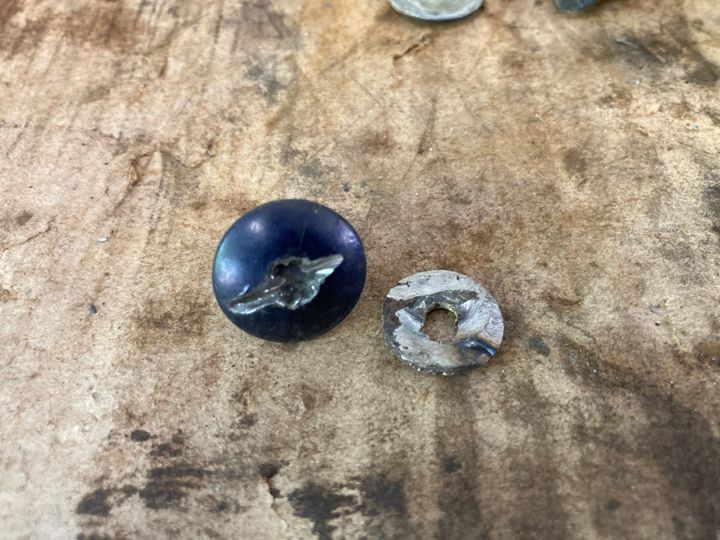
Of course it was the last one that rebelled. Just as I thought I was home free. I ended up cutting a slot in it and whacking it round with a screwdriver and hammer. It came out though.
Here is is with the b d screw that rounded and wouldn't budge, so I ground its head off.
Apart from those two recalcitrant fixings, the rest of the process was remarkably straightforward. You don't even need to take the headlights or bumper off. I did take the headlights off. The first one because I thought I had to, and the second because it made it easier to get to the fixings I needed to fight.
Anyway, they're off, and I've got some repair panels for the welder to fix them with.
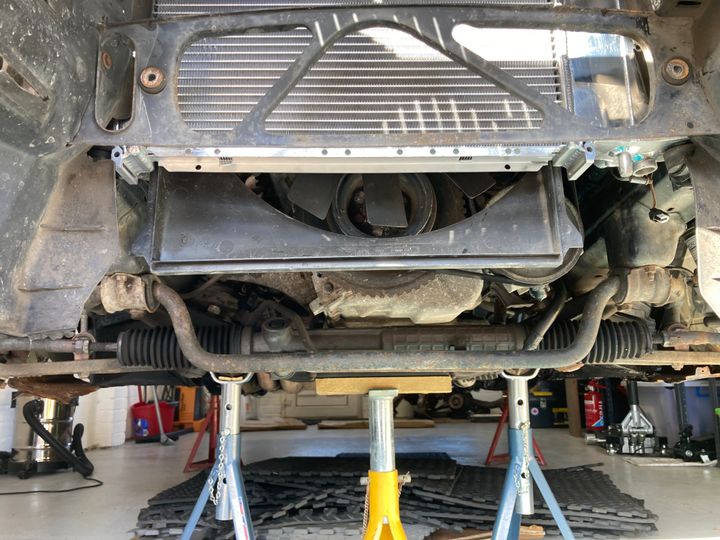
That was a victory. It was swiftly followed by another defeat, as I whipped out my cheapo chinesium-aluminium alloy radiator from eBay. Why anyone would expect such a product to simply work is beyond me.
I took the old radiator out, no problem. Apart from splattering coolant everywhere. Then I had to swap over some parts, like the rubber feet, the inserts for the clips, and the level sensor. The level sensor goes through a hole in the bottom, and is then clamped in place with a large plastic nut. The radiator therefore has to have a hole of the correct size, with (I believe) an M27 male thread on the outside. Well... I fed the coolant sensor through the hole in the new radiator. It was a tight fit but it went in. Then put the big plastic nut over it and screwed it on. Or rather, I didn't screw it on, because the thread is either M26 or 1 inch. The big plastic nut, therefore, just span over the top of it and didn't tighten at all. What the actual f.....?
This takes me back to when I replaced Derek's radiator and discovered that if you order a bleed screw for an E36 radiator you get one of any number of different thread pitches. Why? Just why? How hard is it to make an aftermarket product that has the same specifications as the original? And what am I supposed to do with this radiator now? Any level sensor I order is likely to have a nut that actually fits the OEM radiator.
What I have done is order a 1 inch blanking cap, hoping that will fit the thread and I can just block off the hole. I'll check the level before every track day anyway, and will notice if it is coming out. The sensor isn't necessary.
If the 1 inch cap doesn't fit then I'll probably order a proper ally radiator from a recognised manufacturer and hope that it won't be so bloody annoying!
Oh, and it's also quite short. I think mine was big because it was originally an auto. I'm not sure if the big gap underneath it is going to be a problem though. The fan overlaps it. Will it just draw air under the rad rather than through it?
We shall see.
The last thing I did was to take off the front bumper and stick the plastic mesh back into place with hot glue and duct tape. I just used duct tape previously and it wasn't enough, so I'm hoping hot glue is the answer. When is hot glue not the answer?
Oh, and I put some oil in the diff. All of what was left in the bottle, and it wasn't enough, so I've ordered some more. I'll probably need a dribble of it, after spending the best part of £30 on another 'quart' (whatever that is). I'm metric, these things mean nothing to me.
So, as I said, some wins, some losses. Overall I'm definitely up though. I've contacted the welder to come back and do round 2 (wings and jacking points). Once that's done, and I'm able to sort the brakes and the radiator and properly fill the diff, then I can do something exciting like put some wheels on and fuel in and drive it out of the garage. A few more weeks probably.
I've had a good day. It's not been without its setbacks, but if absolutely everything goes right then I start questioning which version of reality I'm in. Having a few hiccoughs reminds me that I'm still in the real world. I would say there have been more victories than defeats, though. So that's good.
First of all, defeat. I went to put my pads into my shiny new calipers and bolt them to the caliper carriers, only to find that the calipers I'd bought were for cars that use paper brake discs. I believe they are for 10mm discs, whereas mine are 19mm vented. So there was no chance of getting them on with the pads.
It's hard to tell the extent on that photo, but you can see that the span of the new caliper is definitely less than that of the old one. Bum. I've ordered some new ones from Autodoc, which specifically stated they were for 19mm discs. I will return the piddly ones.
So, unable to fill and bleed my brake system, I started putting the remaining bits on the car. I'm still missing an ARB. I had agreed with the guy who I bought the powder coated subframe and axle parts from that he would send me a 20mm ARB, but the one he sent me was 18mm. I've let him know and he said he'll send me a 20mm one, with the correct bushes. It's taking a while though.
I lifted the exhaust into place and checked that it's possible to install the ARB afterwards. It is, so I went ahead and bolted up the exhaust.
I then tapped the screw holes for the ABS sensors and put them in place. I am a bit confused by the connectors on the right hand side though. On the left there is just a single grey connector for the ABS sensor. On the right (helpfully labelled 'right' by whoever disconnected it...) there is a grey one and a black one. I assume the grey one is for the ABS, but I have no idea what the black one is for. I can't even see a connector that could match up with it.
Answers on a postcard please...
I then put the rear bumper back on, and the rear arch liners. It looks very much like a car.
I couldn't have that, so I took the front wings off.
There is a reason for that, of course. They both have rusty holes in them, and the front jacking points need some work too. Last time the welder came he told me the wings needed to be off for him to fix the jacking points, and it would make it far easier to repair the wings too. I watched a few videos on how to take off an E36 wing, and it's very straightforward and mechanical, which is what I love about these cars.
Screws in the door shut, screws under the car, screws under the scuttle panel (which also hold the bonnet hinges), screws behind the bumper, and then the row of T30 screws along the top edge of the wing. I had heard that these T30s strip quite easily, so I was vey careful with my angles and how much pressure I applied. I got lucky. With 7 out of 8...
Of course it was the last one that rebelled. Just as I thought I was home free. I ended up cutting a slot in it and whacking it round with a screwdriver and hammer. It came out though.
Here is is with the b
d screw that rounded and wouldn't budge, so I ground its head off.Apart from those two recalcitrant fixings, the rest of the process was remarkably straightforward. You don't even need to take the headlights or bumper off. I did take the headlights off. The first one because I thought I had to, and the second because it made it easier to get to the fixings I needed to fight.
Anyway, they're off, and I've got some repair panels for the welder to fix them with.
That was a victory. It was swiftly followed by another defeat, as I whipped out my cheapo chinesium-aluminium alloy radiator from eBay. Why anyone would expect such a product to simply work is beyond me.
I took the old radiator out, no problem. Apart from splattering coolant everywhere. Then I had to swap over some parts, like the rubber feet, the inserts for the clips, and the level sensor. The level sensor goes through a hole in the bottom, and is then clamped in place with a large plastic nut. The radiator therefore has to have a hole of the correct size, with (I believe) an M27 male thread on the outside. Well... I fed the coolant sensor through the hole in the new radiator. It was a tight fit but it went in. Then put the big plastic nut over it and screwed it on. Or rather, I didn't screw it on, because the thread is either M26 or 1 inch. The big plastic nut, therefore, just span over the top of it and didn't tighten at all. What the actual f.....?
This takes me back to when I replaced Derek's radiator and discovered that if you order a bleed screw for an E36 radiator you get one of any number of different thread pitches. Why? Just why? How hard is it to make an aftermarket product that has the same specifications as the original? And what am I supposed to do with this radiator now? Any level sensor I order is likely to have a nut that actually fits the OEM radiator.
What I have done is order a 1 inch blanking cap, hoping that will fit the thread and I can just block off the hole. I'll check the level before every track day anyway, and will notice if it is coming out. The sensor isn't necessary.
If the 1 inch cap doesn't fit then I'll probably order a proper ally radiator from a recognised manufacturer and hope that it won't be so bloody annoying!
Oh, and it's also quite short. I think mine was big because it was originally an auto. I'm not sure if the big gap underneath it is going to be a problem though. The fan overlaps it. Will it just draw air under the rad rather than through it?
We shall see.
The last thing I did was to take off the front bumper and stick the plastic mesh back into place with hot glue and duct tape. I just used duct tape previously and it wasn't enough, so I'm hoping hot glue is the answer. When is hot glue not the answer?
Oh, and I put some oil in the diff. All of what was left in the bottle, and it wasn't enough, so I've ordered some more. I'll probably need a dribble of it, after spending the best part of £30 on another 'quart' (whatever that is). I'm metric, these things mean nothing to me.
So, as I said, some wins, some losses. Overall I'm definitely up though. I've contacted the welder to come back and do round 2 (wings and jacking points). Once that's done, and I'm able to sort the brakes and the radiator and properly fill the diff, then I can do something exciting like put some wheels on and fuel in and drive it out of the garage. A few more weeks probably.
Ah, yes, that's probably it. I don't think I've actually had a wear sensor on this car in my ownership. I assume it was never plugged into anything then, and it will remain that way.
Here are some photos of the subframe, diff etc going in earlier in the month, when I couldn't post them.

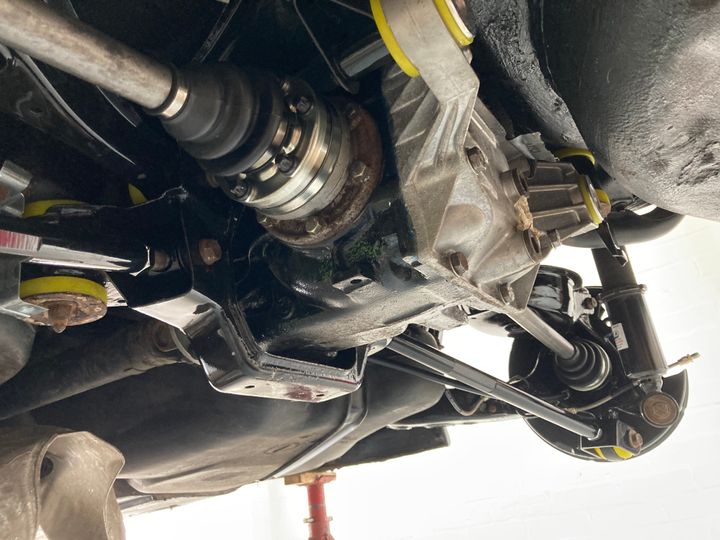
I messaged the chap about the ARB today and it is on its way, which is good. Should be able to get it in this weekend.
In other news, I've finally got round to booking Derek the convertible in for a pre-MOT and MOT at my local village mechanic, who has a bit of a thing for interesting cars and doing race prep etc. A useful man to know! He couldn't fit me in til 7 May though.
Derek needs a pre-MOT because his airbag light is on, which I'm pretty sure is a fail. So I want to get that diagnosed and sorted. And just a general check to make sure he's safe as houses. It might be a while before I have full confidence in the radiator though after last years troubles (largely self-inflicted). I'm looking forward to getting out and about with the top down again. It does put a smile on my face.
Here are some photos of the subframe, diff etc going in earlier in the month, when I couldn't post them.
I messaged the chap about the ARB today and it is on its way, which is good. Should be able to get it in this weekend.
In other news, I've finally got round to booking Derek the convertible in for a pre-MOT and MOT at my local village mechanic, who has a bit of a thing for interesting cars and doing race prep etc. A useful man to know! He couldn't fit me in til 7 May though.
Derek needs a pre-MOT because his airbag light is on, which I'm pretty sure is a fail. So I want to get that diagnosed and sorted. And just a general check to make sure he's safe as houses. It might be a while before I have full confidence in the radiator though after last years troubles (largely self-inflicted). I'm looking forward to getting out and about with the top down again. It does put a smile on my face.
Yes, I’m looking forward to getting it sorted. I just hope the bank holiday weekend isn’t gloriously sunny, otherwise I’ll be kicking myself that I didn’t get it sorted sooner!
My 1 inch blanking cap arrived today. There is some sort of fkery at play here. A 1 inch BSP thread is about 1.3 inches. Obviously.
I’m guessing it’s something to do with allowing a 1 inch bore or something. I don’t really care. All I know is that it also doesn’t fit on the stupidly sized hole on the cheapo radiator. I therefore give up on that idiotic plan and have ordered a different chinesium-alloy radiator. This one is actually the same depth (height?) as the OEM one so I won’t have that big overlap of fan at the bottom of it. We will see, once it’s arrived, whether all the holes and threads are the right sizes. At least I’ve still got the OEM one to fall back on, even if I am currently sharing a bleed screw between the two cars. To be honest that’s the main reason I decided to go for an aluminium one!
My 1 inch blanking cap arrived today. There is some sort of f
kery at play here. A 1 inch BSP thread is about 1.3 inches. Obviously. I’m guessing it’s something to do with allowing a 1 inch bore or something. I don’t really care. All I know is that it also doesn’t fit on the stupidly sized hole on the cheapo radiator. I therefore give up on that idiotic plan and have ordered a different chinesium-alloy radiator. This one is actually the same depth (height?) as the OEM one so I won’t have that big overlap of fan at the bottom of it. We will see, once it’s arrived, whether all the holes and threads are the right sizes. At least I’ve still got the OEM one to fall back on, even if I am currently sharing a bleed screw between the two cars. To be honest that’s the main reason I decided to go for an aluminium one!
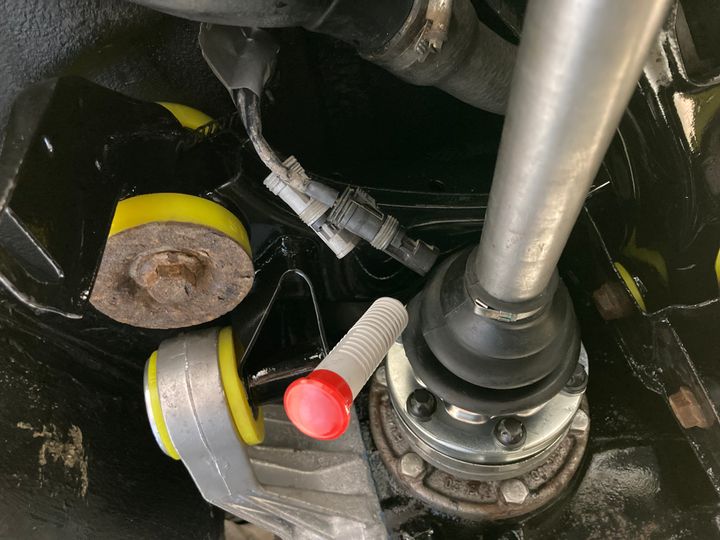
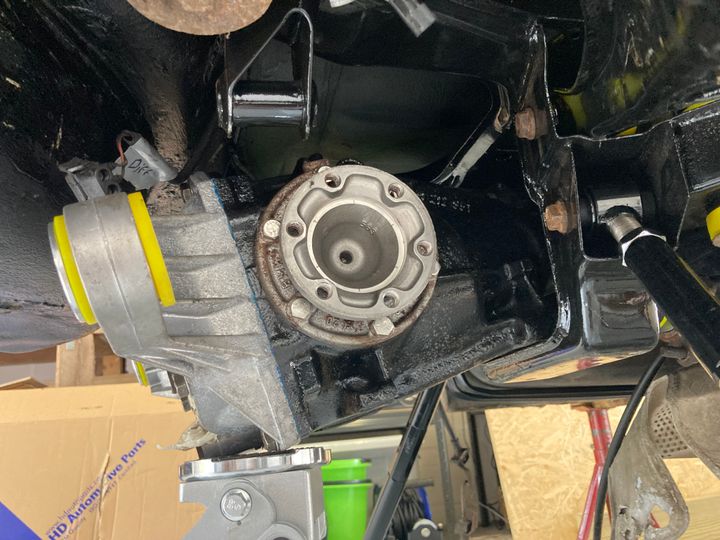
That is a 20mm ARB all bolted into place.
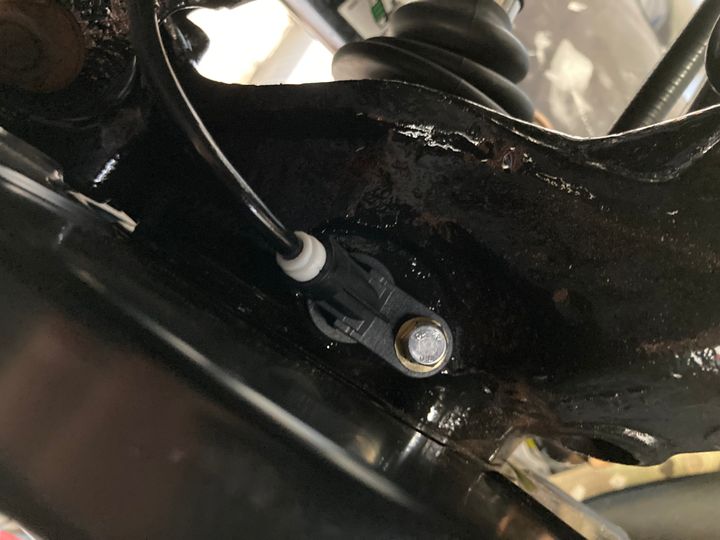
I also put these little plastic boxes onto the subframe and connected up the ABS sensors.
The ARB and those little boxes were a pain in the backside to get fixed into place, but I got them done. May have dropped a ratchet on my face and headbutted the exhaust a few times.
I then filled up my diff, because the oil arrived the other day. It swallowed most of the second quart as well before this happened.
I also took out the stupid radiator and packaged it up ready to return.
Once the calipers arrive I can completely finish the rear end. Once the welding is done on the wings and jacking points, and some sort of radiator is in place, it’ll be good to go!
Gassing Station | Readers' Cars | Top of Page | What's New | My Stuff