Project_5AXO - Reliving my youth!
Discussion


Starting to really get things back in swing now
The car is in the garage for the time. The extension took just under 5 months to complete and Ive ended up with a 2.9 x 8m garage which means plenty of storage space for the car and a little work area at the rear which will likely change as the car becomes more complete.

Also bought a new tool box:

I watched Colin Furze' new workshop video and saw the shadow foam so had to have a go myself:
https://www.instagram.com/reel/CnFJqyCqWgn/?utm_so...
Also meant I had some offcuts and could have a play with them and made this:

Most importantly, i was able to start work on the engine rebuild which leads me to the next episode. Number 36, showing the beginnings of assembling the short block. Progress is slow because I film everything,

In terms of bottom end spec:
Overbored block to 1607cc (1587cc as std)
0.5mm oversize forged low comp Wossner Pistons
PEC rods
ARP hardware
Pug Sport baffled sump plate
Anyway....episode 36 is here:
The car is in the garage for the time. The extension took just under 5 months to complete and Ive ended up with a 2.9 x 8m garage which means plenty of storage space for the car and a little work area at the rear which will likely change as the car becomes more complete.
Also bought a new tool box:
I watched Colin Furze' new workshop video and saw the shadow foam so had to have a go myself:
https://www.instagram.com/reel/CnFJqyCqWgn/?utm_so...
Also meant I had some offcuts and could have a play with them and made this:
Most importantly, i was able to start work on the engine rebuild which leads me to the next episode. Number 36, showing the beginnings of assembling the short block. Progress is slow because I film everything,
In terms of bottom end spec:
Overbored block to 1607cc (1587cc as std)
0.5mm oversize forged low comp Wossner Pistons
PEC rods
ARP hardware
Pug Sport baffled sump plate
Anyway....episode 36 is here:
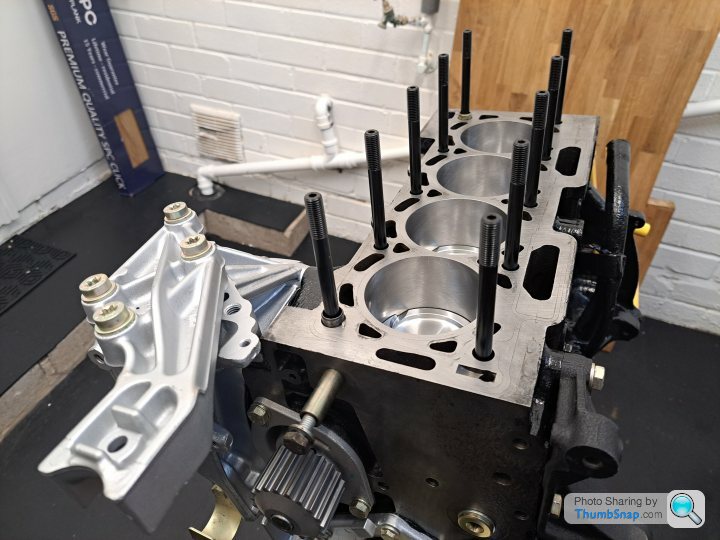
Also made some great progress last night and got the bottom end built. Need to get a new sump and get the oil return feed welded in place but i'll do that once the head it on so I know roughly where to put it. I've got an idea but i'll not rush it.
For those that have used these deplorable sleeves, you'll know they are lethally sharp!
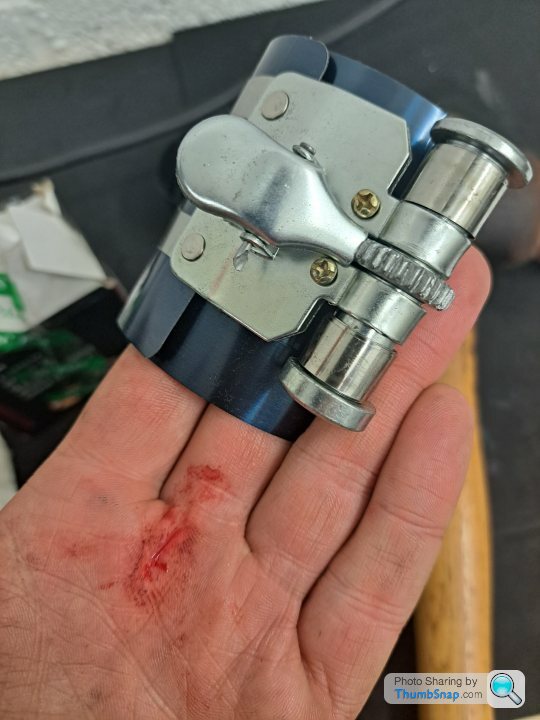
However, they get he job done;

And finally, oil pump on with new drive chain and Pug Sport baffled sump plate in place.


For those that have used these deplorable sleeves, you'll know they are lethally sharp!
However, they get he job done;
And finally, oil pump on with new drive chain and Pug Sport baffled sump plate in place.
Cambs_Stuart said:
I love a good engine build thread. What you're doing here is fantastic, keep it up!
I'm also very jealous of your garage. I'm too old to be crawling round the drive in this cold weather.
Out of everything that's new with the garage the flooring is the biggest win! Taking the axle out the other day was a breeze, not having to scrabble around and worry about scratching things. Thinking about it. If i were to work outside for a day Id consider putting these tiles down on the drive as a temporary measure. I'm also very jealous of your garage. I'm too old to be crawling round the drive in this cold weather.
Been a busy week or two on the engine build. Things starting to come together but not without issue....i'll get to that
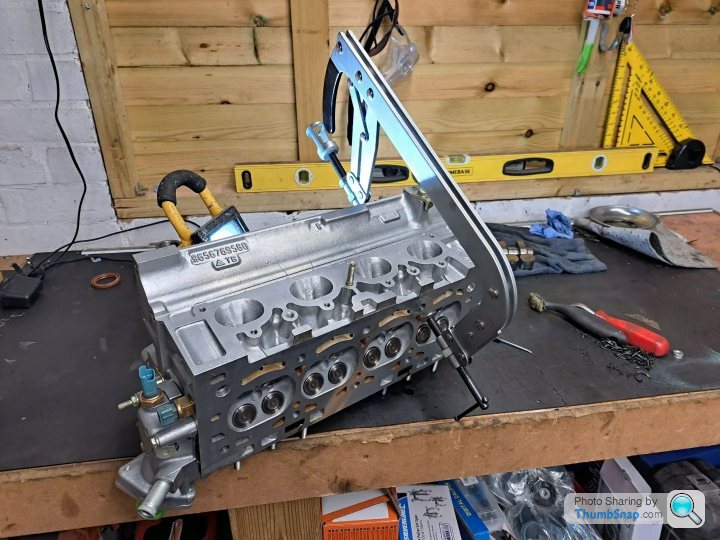
Firstly the ARP head studs went in, Unbelievably these are inserted only hand tight! Then the nuts are torqued in three stages up to 60lbft. Still slightly in shock at how much ARP studs are...for 10 studs it was close to £200! However they are a must on these because head lift can be an issue on standard bolts.
At this stage the head was ready to go on but I noticed the cams had started to develop a little surface rust. The head had been sat in the garage out the back which can get damp at times. So i whipped the cams out, gave them a little polish and chucked em back in. While i was there I thought why not upgrade, so I took out the original TU5 springs and retainers and fitted some CatCams PAC gold series items. Essentially improved fatigue resistance and better heat management compared to std, and higher spring pressure. Not cheap though, £270.

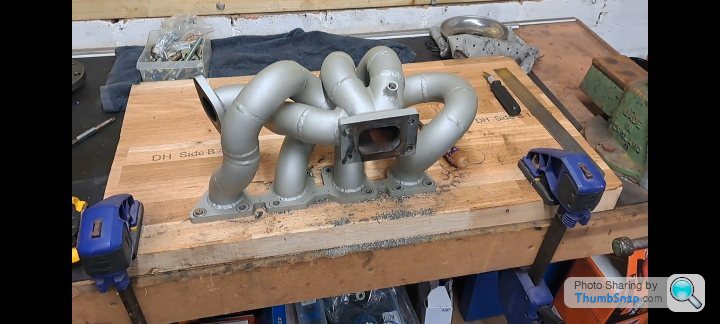
Head bolted on it was time to get the exhaust side of things sorted. Now this is where things deviate from being an ordinary TU5 build. As you may know, these were never turbo from the factory so from here out it all gets a bit custom.
Firstly, the exhaust manifold goes on along with the turbo;

Now this is where I hit an issue. This manifold wasn't new, it was from another turbo TU5 from a chap I know. He essentially moved it on because it wasn't on a V-band. His is a race car so pulling it apart easily it quite appealing. For me this should be a fit and forget component so V band to the turbo isn't a deal breaker. Cut a long story short, the threads on the manifold T5 flange weren't super clean, I took a gamble on this and hoped for the best with them. Sadly, it didn't pay off, when tightening the turbo down the nut just span as soon as any meaningful torque was applied.
Having had the manifold ceramic coated, removing tig'd in studs and putting new ones in mean drilling them out, re welding, re ceramic coating and refit.
So I got to work. Cut them all off, made up some new correct length studs and welded them back in:

Sadly, I had to remove some ceramic coating to weld. I've decided not to redo it. Its only a small patch so I just just tidied it up with some 800Deg VHT paint. I'll see if it holds.

With that sorted I can bolt it down and on the engine again (temporarily for now as I'm waiting some new nuts to arrive)
In the mean time I can get the turbo oil drain sorted so at least the sump bung can be welded in place. Quick job on in the vice to knock up some AN10 stainless braided lines.

Oil feed it easy as I have a spoox 'oil genie'. Essentially a bit of kit that tee's off the oil pressure sensor boss.
Onto the next issue, alternator setup. Plan was to use my refurbished setup. However, the manifold is in the way and I think the 3" exhaust pipe will be too tight:


You can see the alternator clashes with the branch on the manifold and its not fully in it's home position. Plus the heat management problems it will throw at me. Also the route the exh needs to go means it will be too tight...Therefore an alternative solution is needed. Ive decided to go down the route of the Spoox Motorsport Billet race alternator. A much smaller package mounted lower down.

Just waiting on that to arrive at the minute. Episode 38 is due in the next day or two. Should have the engine finished within another week or so I hope.
Firstly the ARP head studs went in, Unbelievably these are inserted only hand tight! Then the nuts are torqued in three stages up to 60lbft. Still slightly in shock at how much ARP studs are...for 10 studs it was close to £200! However they are a must on these because head lift can be an issue on standard bolts.
At this stage the head was ready to go on but I noticed the cams had started to develop a little surface rust. The head had been sat in the garage out the back which can get damp at times. So i whipped the cams out, gave them a little polish and chucked em back in. While i was there I thought why not upgrade, so I took out the original TU5 springs and retainers and fitted some CatCams PAC gold series items. Essentially improved fatigue resistance and better heat management compared to std, and higher spring pressure. Not cheap though, £270.
Head bolted on it was time to get the exhaust side of things sorted. Now this is where things deviate from being an ordinary TU5 build. As you may know, these were never turbo from the factory so from here out it all gets a bit custom.
Firstly, the exhaust manifold goes on along with the turbo;
Now this is where I hit an issue. This manifold wasn't new, it was from another turbo TU5 from a chap I know. He essentially moved it on because it wasn't on a V-band. His is a race car so pulling it apart easily it quite appealing. For me this should be a fit and forget component so V band to the turbo isn't a deal breaker. Cut a long story short, the threads on the manifold T5 flange weren't super clean, I took a gamble on this and hoped for the best with them. Sadly, it didn't pay off, when tightening the turbo down the nut just span as soon as any meaningful torque was applied.
Having had the manifold ceramic coated, removing tig'd in studs and putting new ones in mean drilling them out, re welding, re ceramic coating and refit.
So I got to work. Cut them all off, made up some new correct length studs and welded them back in:
Sadly, I had to remove some ceramic coating to weld. I've decided not to redo it. Its only a small patch so I just just tidied it up with some 800Deg VHT paint. I'll see if it holds.
With that sorted I can bolt it down and on the engine again (temporarily for now as I'm waiting some new nuts to arrive)
In the mean time I can get the turbo oil drain sorted so at least the sump bung can be welded in place. Quick job on in the vice to knock up some AN10 stainless braided lines.
Oil feed it easy as I have a spoox 'oil genie'. Essentially a bit of kit that tee's off the oil pressure sensor boss.
Onto the next issue, alternator setup. Plan was to use my refurbished setup. However, the manifold is in the way and I think the 3" exhaust pipe will be too tight:
You can see the alternator clashes with the branch on the manifold and its not fully in it's home position. Plus the heat management problems it will throw at me. Also the route the exh needs to go means it will be too tight...Therefore an alternative solution is needed. Ive decided to go down the route of the Spoox Motorsport Billet race alternator. A much smaller package mounted lower down.
Just waiting on that to arrive at the minute. Episode 38 is due in the next day or two. Should have the engine finished within another week or so I hope.
WCZ said:
love it! what do you expect the total cost of this build to come out at?
I do keep a track of this....its a large number! Take what you think and double it! and maybe double it again. I keep track of everything I buy, from consumables, to tools and equipment and of course parts for the car. Well into 5 figures at the moment. I wish I could operate at the binky level. This was just an off the shelf option thankfully. I'll need to keep my old setup just in case this can't put out enough umph. Either wat it came along and it fitted a dream:


Next up, inlet manifold...and what do you know, it doesn't fit! FML!
Next up, inlet manifold...and what do you know, it doesn't fit! FML!

Gassing Station | Readers' Cars | Top of Page | What's New | My Stuff