Megane 250 CUP Track Car
Discussion


The Bearded Tit said:
I see the rear seats are gone too, any idea how much weight that took out? ... and then how much weight the half-cage added back?
Well spotted yes rear seats have been removed and I was going to update the weight difference. Rear seats are .
Rear seat back rests 24.3 Kg
Back seats 7.6 Kg
Boot support 4.2 Kg
Parcel shelf 1.6 Kg
Rear seat belts and brackets 4.8 Kg
Total 42.5 Kg
The SW motorsport half cage has a weight of 28.7 Kg
So 13.8 Kg removed from the car replacing the rear seats with the half cage .
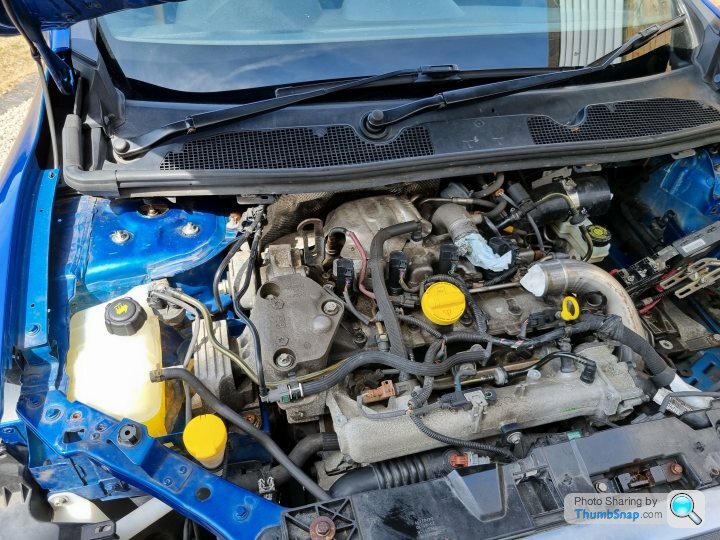
Some more boring updates with just a few new under bonnet OEM parts .
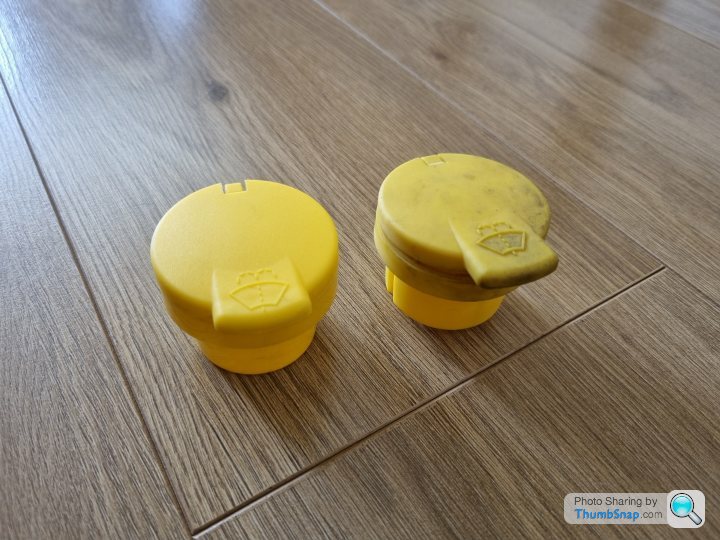
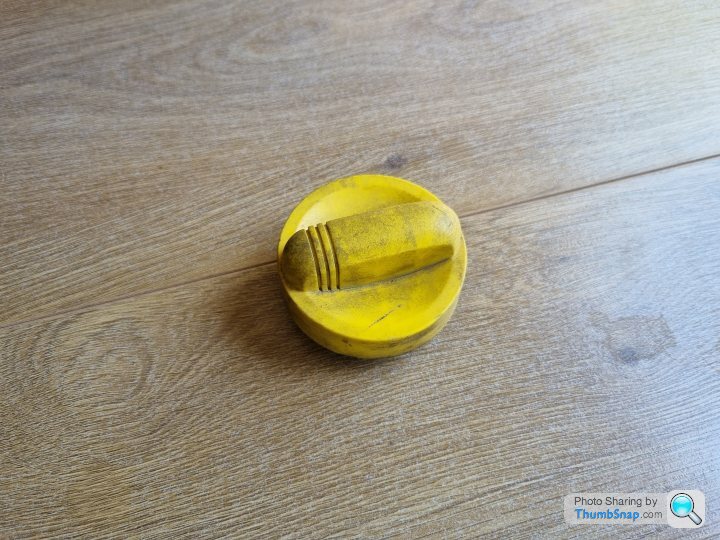
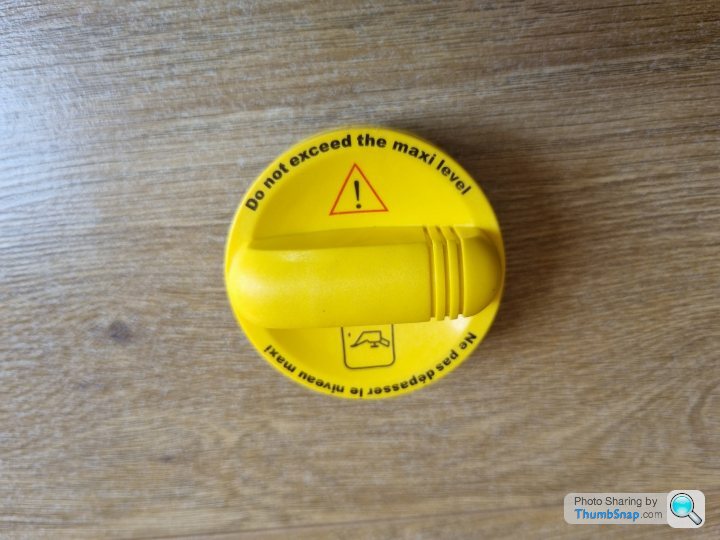
As there was a sale on with RPD i thought i would look to order a few caps and dip stick as the stock units could do with a refresh so i ordered new Renault washer cap , oil cap , coolant cap and oil dip stick .


The washer cap was first .
Old .

New .

Old vs new .
Then the coolant cap .
Old .
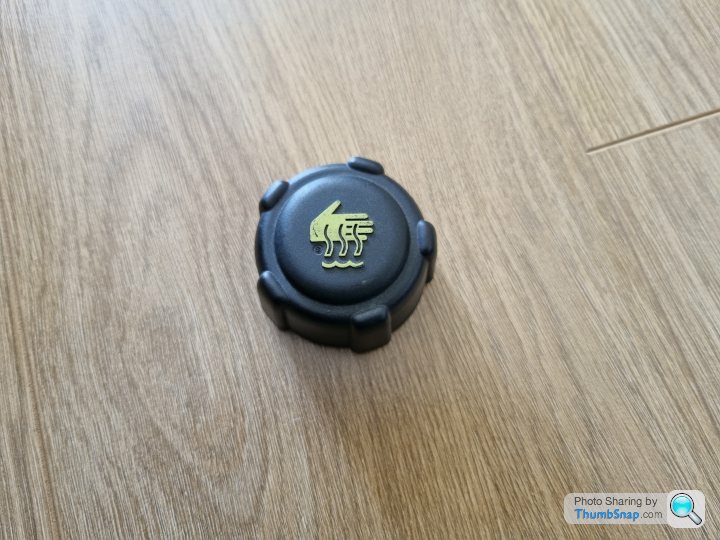
New .
Old vs new .
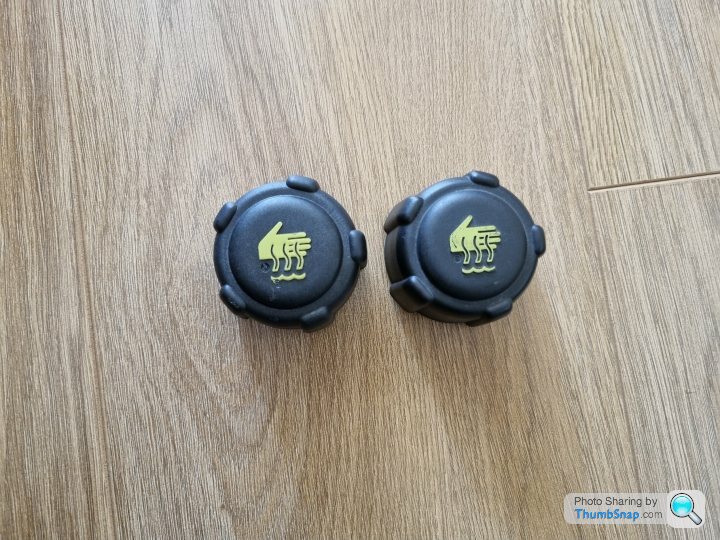
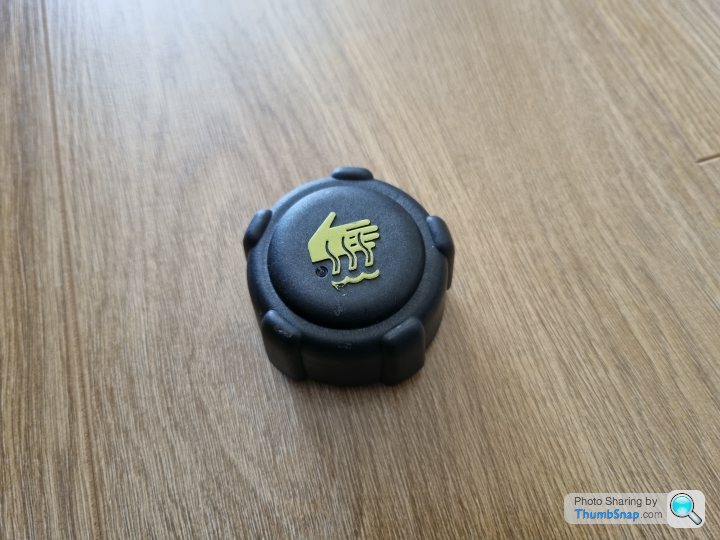
Then Oil cap .
Old .
New .
Old vs new .

Then to finish off the oil dip stick .
Old .

New .

Old vs new .

And all installed .
As there was a sale on with RPD i thought i would look to order a few caps and dip stick as the stock units could do with a refresh so i ordered new Renault washer cap , oil cap , coolant cap and oil dip stick .
The washer cap was first .
Old .
New .
Old vs new .
Then the coolant cap .
Old .
New .
Old vs new .
Then Oil cap .
Old .
New .
Old vs new .
Then to finish off the oil dip stick .
Old .
New .
Old vs new .
And all installed .
MDifficult said:

Finally I find someone who’s more of a fuss-pot than I am.
Seriously… enough with the new caps… get out and rag that thing before the summer’s over!

I think i may get this car out by the end of the year but yet again i put a plan in my head for all that i want to get done before im happy with it and that list seems to go on and on .
Edited by Kaveney on Friday 12th August 12:46
A bit of a more exciting update on the progress of the car this time .
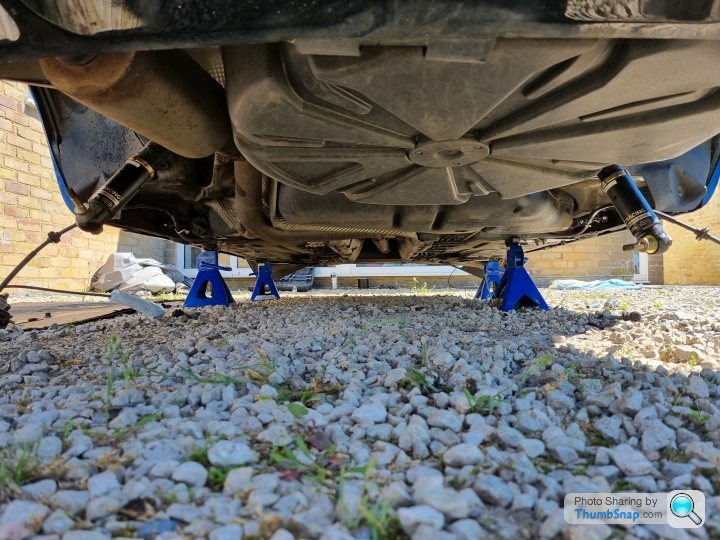
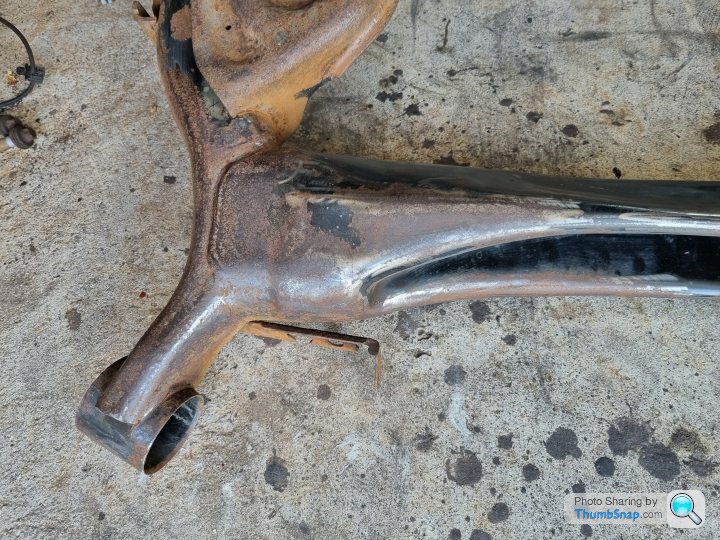
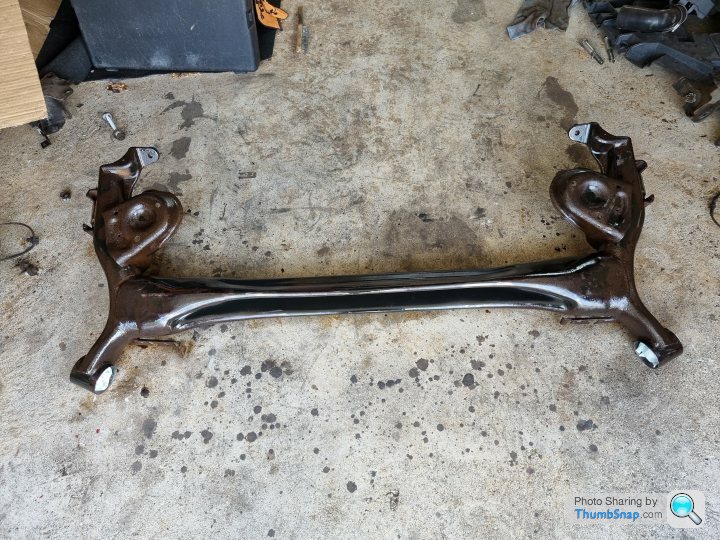
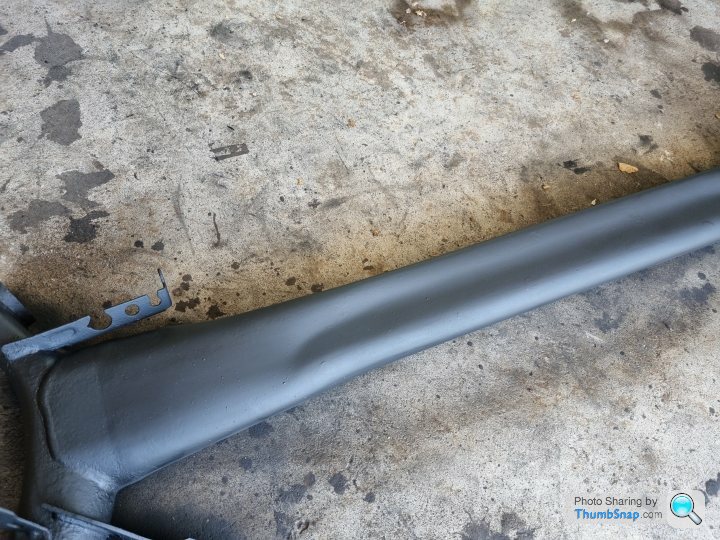
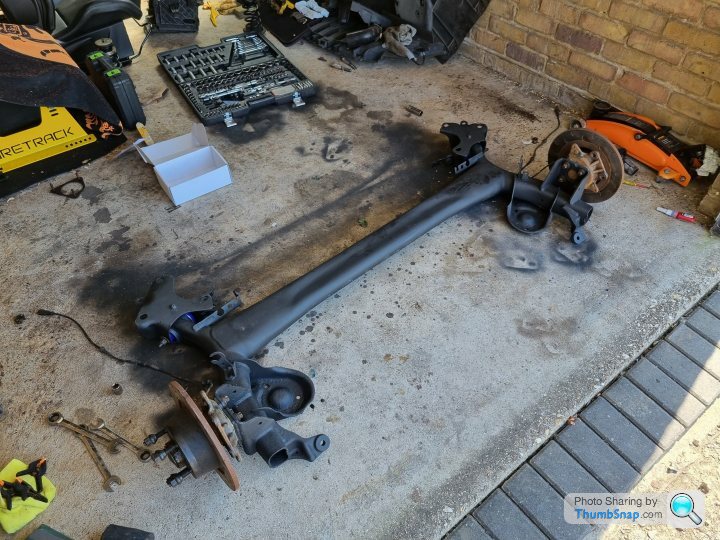
After i picked the car up and had a good look round and everything is in great nick but the one arear that could do with some attention was the rear subframe as this had some surface rust and could do with a tidy up .
After looking at this more it would make more sense to remove the whole unit to be able to do a proper job and also it would make it easy to fit some new parts when it is off the car .
First was to un bolt the coilovers and all the brake lines , handbrake , ABS sensors etc .
And after an hour or so the rear subframe was removed .
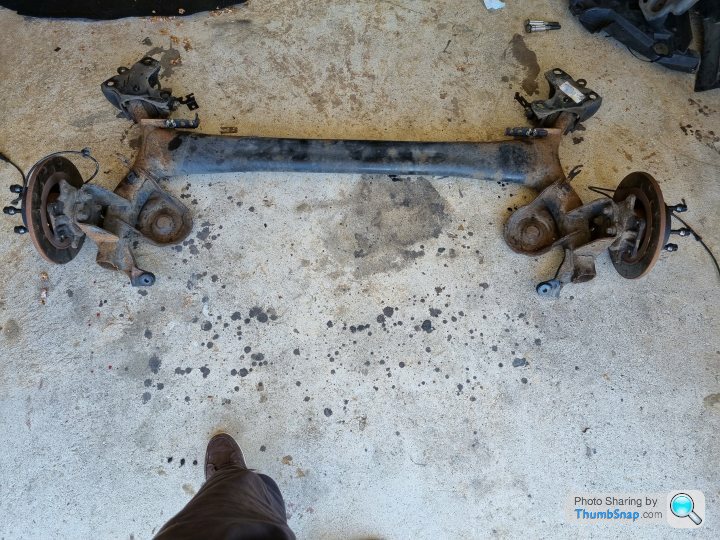
Then it was on to removing the rear hubs / brake discs and hangers .
Then after a good clean up and some sanding of the surface rust the unit was looking much better and ready for the next stage .
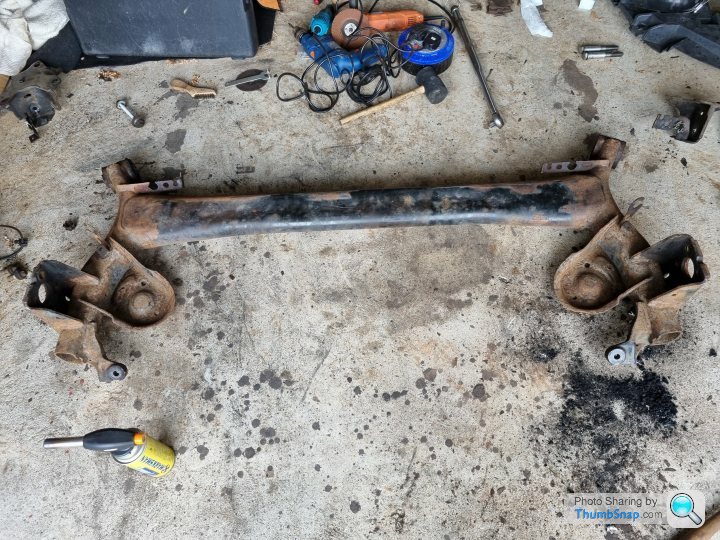
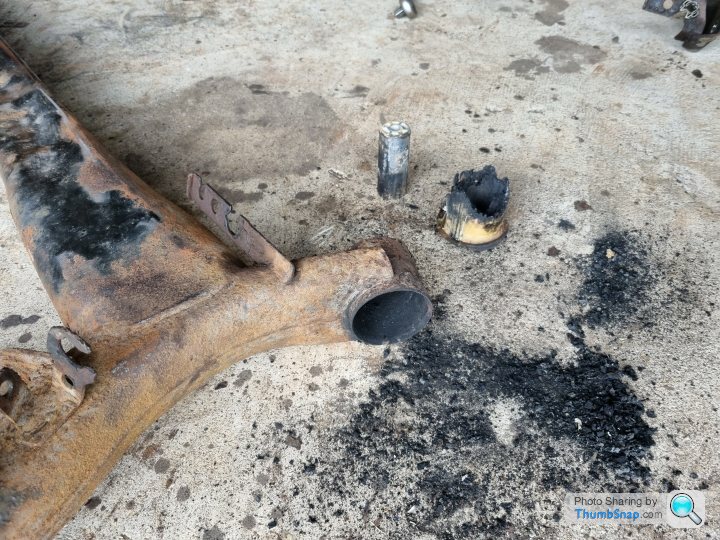
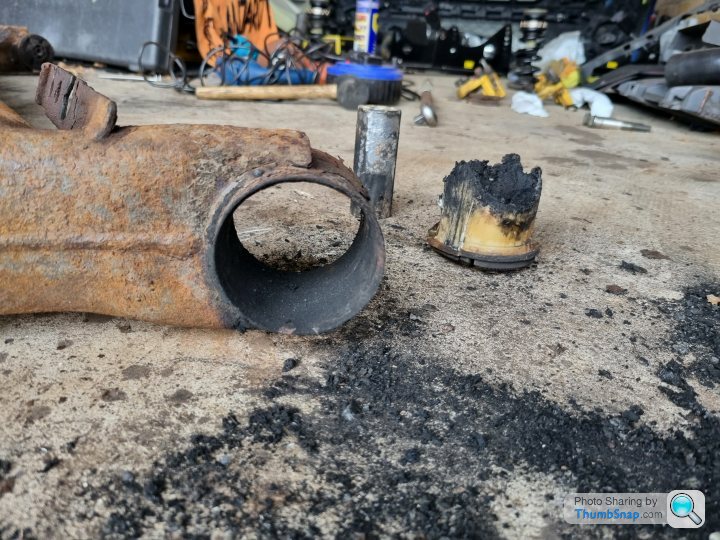
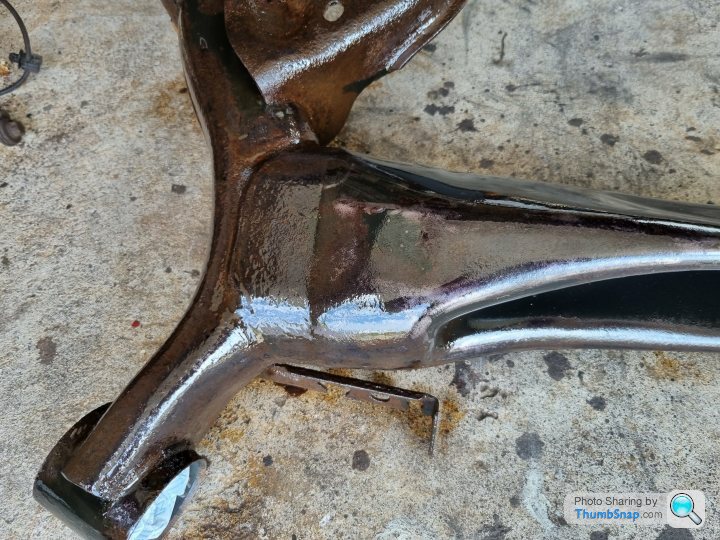
Then it was on to removing the stock OEM rubber rear subframe bush .
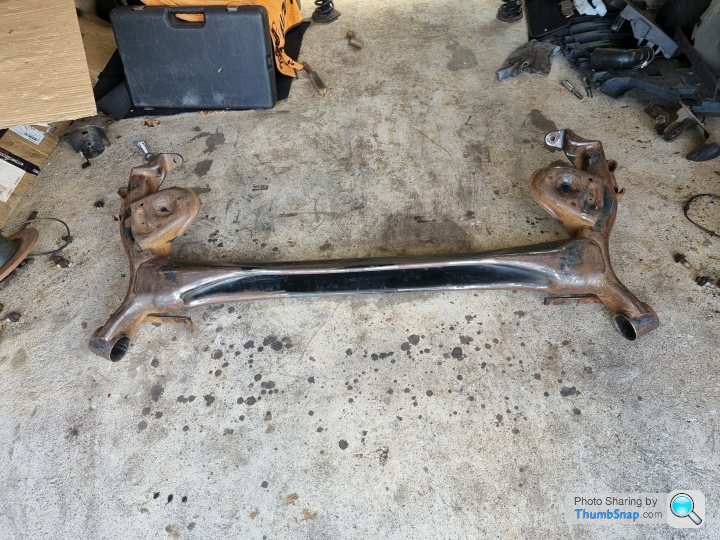
With all this prep work done i could then set about applying the rust converter .
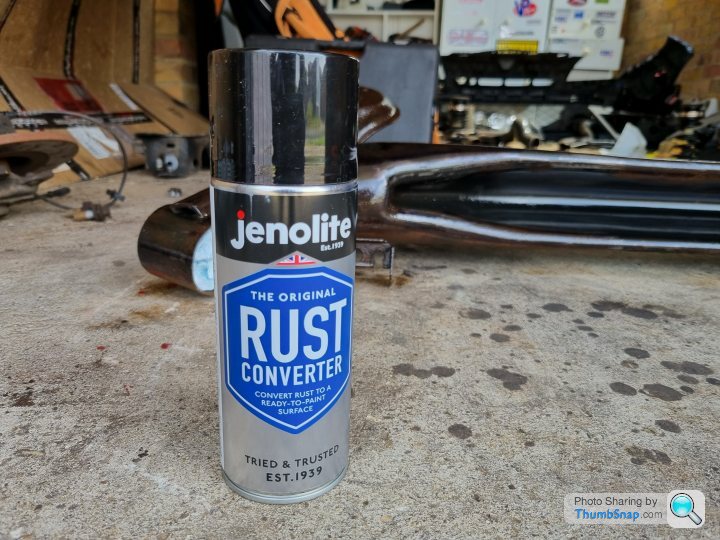

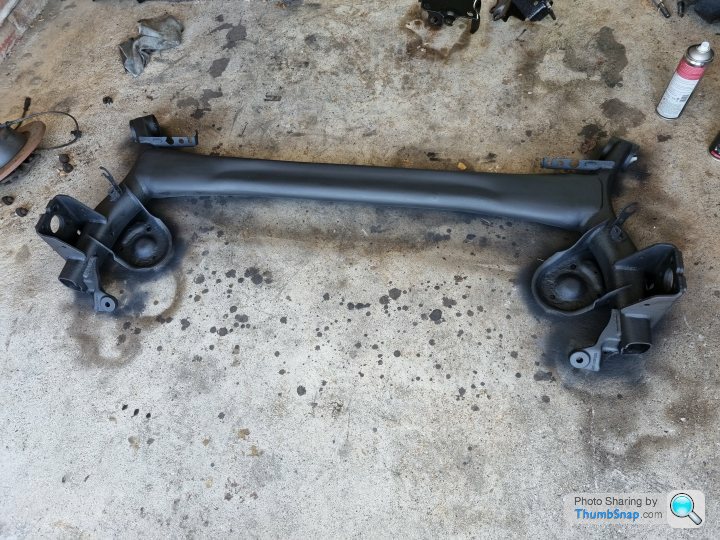
After giving this a day to fully dry it was then time to give a few coats of black stone chip to give more protection and tidy the subframe up a bit .

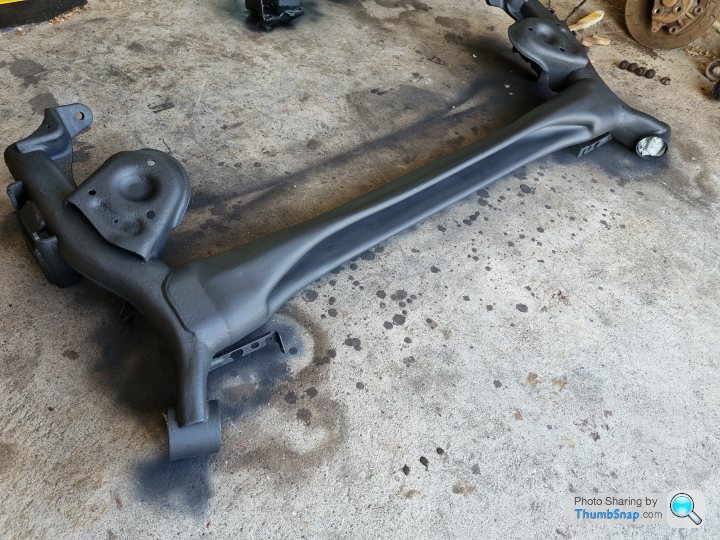
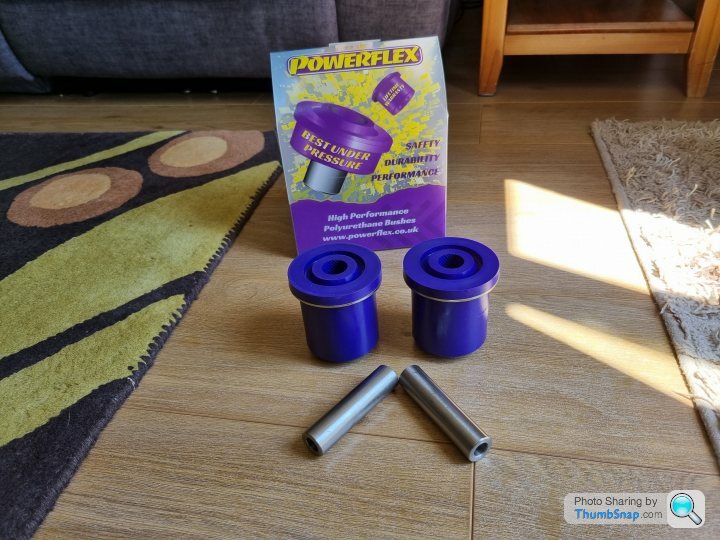
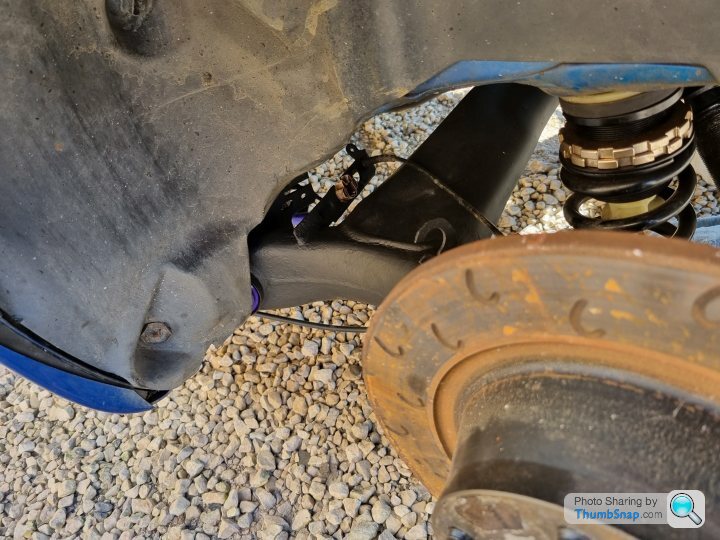
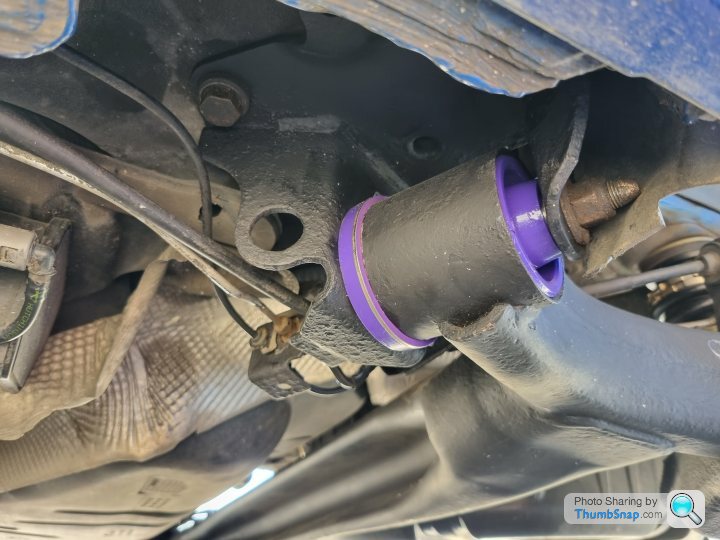
Then i fitted some upgraded Powerflex polyurethane bush in a Purple medium compound ( there are Yellow soft , Purple medium and Black hard that can be had in this range )
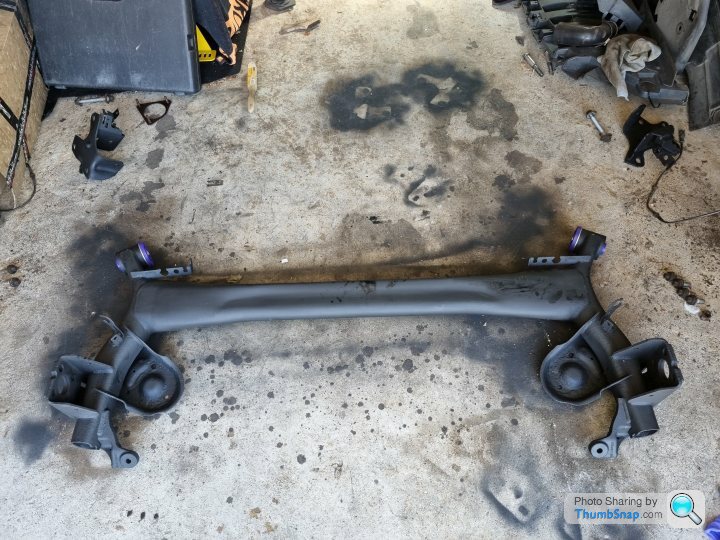
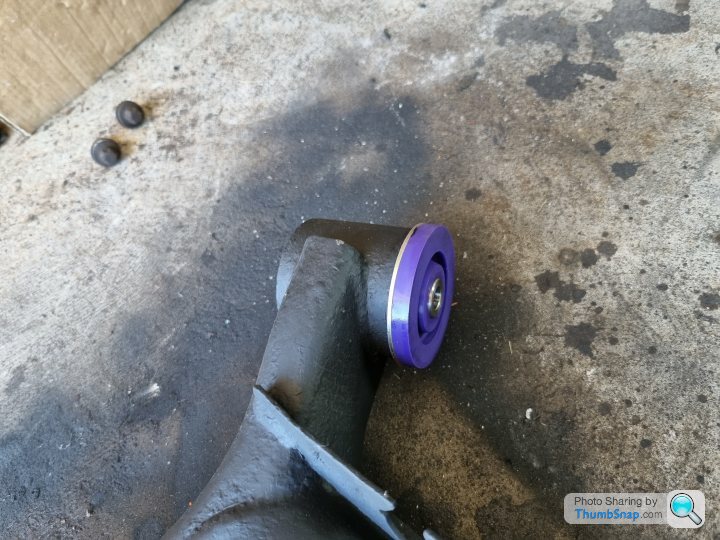
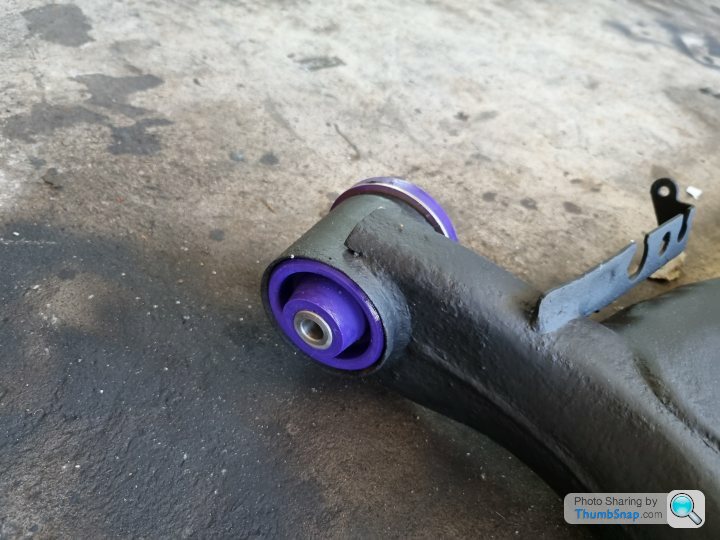
And then on to the last part of fitting some new Pure motorsport rear camber plates .
The come in different sizes but I have gore for a 1.5 deg set up as this has been recommended as the best set up and should give around - 2 deg of negative rear camber when installed as the cars run 0.5 deg as standard .

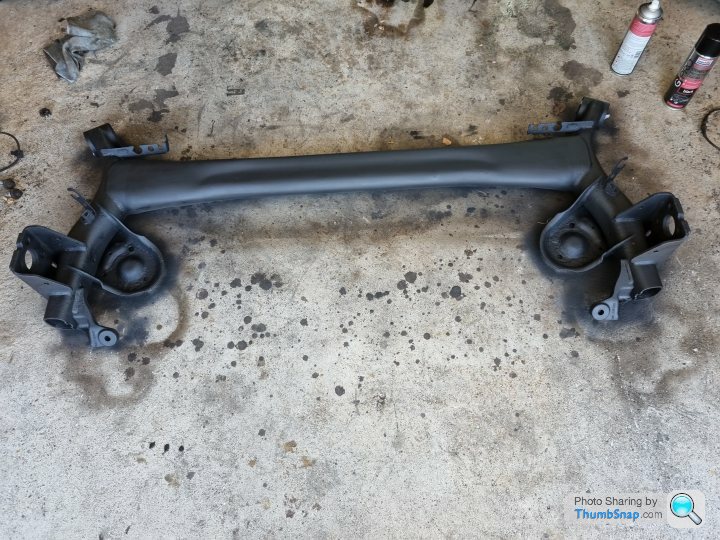
and installed .

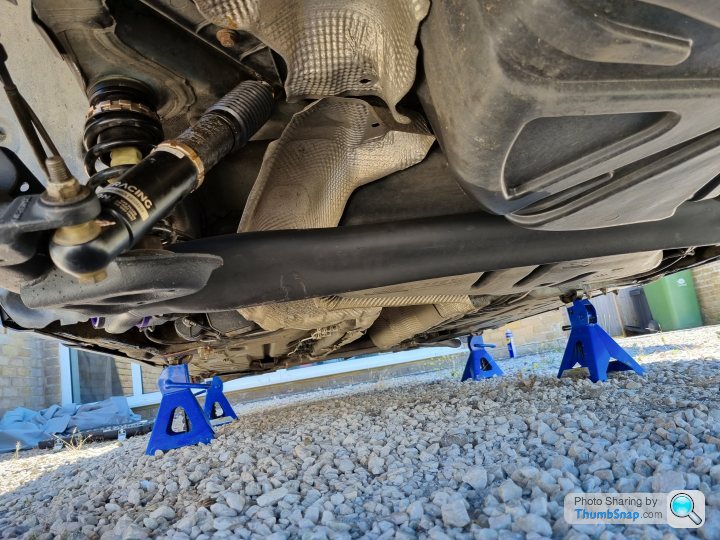
Then to re install everything back on the rear subframe .
And then the last part installing the rear subframe back on the car .

After i picked the car up and had a good look round and everything is in great nick but the one arear that could do with some attention was the rear subframe as this had some surface rust and could do with a tidy up .
After looking at this more it would make more sense to remove the whole unit to be able to do a proper job and also it would make it easy to fit some new parts when it is off the car .
First was to un bolt the coilovers and all the brake lines , handbrake , ABS sensors etc .
And after an hour or so the rear subframe was removed .
Then it was on to removing the rear hubs / brake discs and hangers .
Then after a good clean up and some sanding of the surface rust the unit was looking much better and ready for the next stage .
Then it was on to removing the stock OEM rubber rear subframe bush .
With all this prep work done i could then set about applying the rust converter .
After giving this a day to fully dry it was then time to give a few coats of black stone chip to give more protection and tidy the subframe up a bit .
Then i fitted some upgraded Powerflex polyurethane bush in a Purple medium compound ( there are Yellow soft , Purple medium and Black hard that can be had in this range )
And then on to the last part of fitting some new Pure motorsport rear camber plates .
The come in different sizes but I have gore for a 1.5 deg set up as this has been recommended as the best set up and should give around - 2 deg of negative rear camber when installed as the cars run 0.5 deg as standard .
and installed .
Then to re install everything back on the rear subframe .
And then the last part installing the rear subframe back on the car .
Another part has been installed on the car so the list of things to get done is going down .
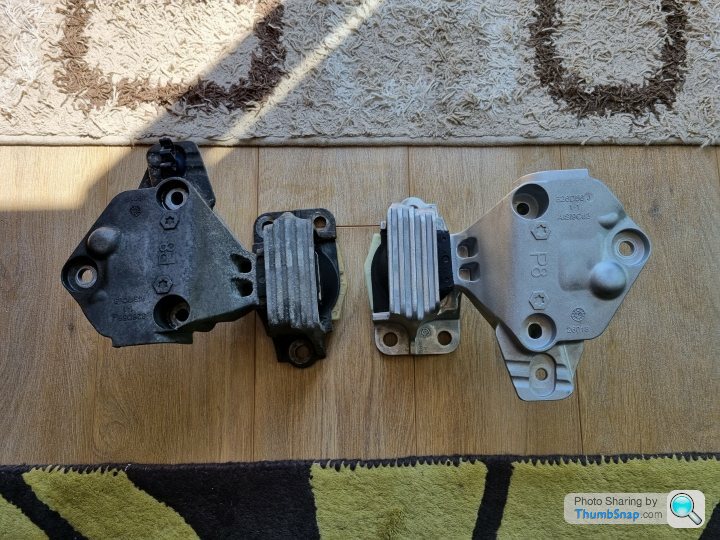
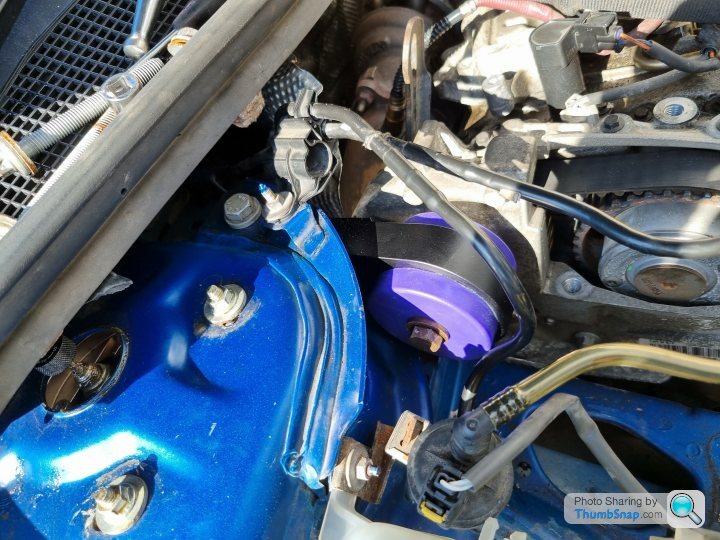
One part of the car that i wanted to look to change / renew was the engine mounts as the car is still running the stock Renault units that will be getting a bit tired by now .
First was to remover the OEM upper engine mount .
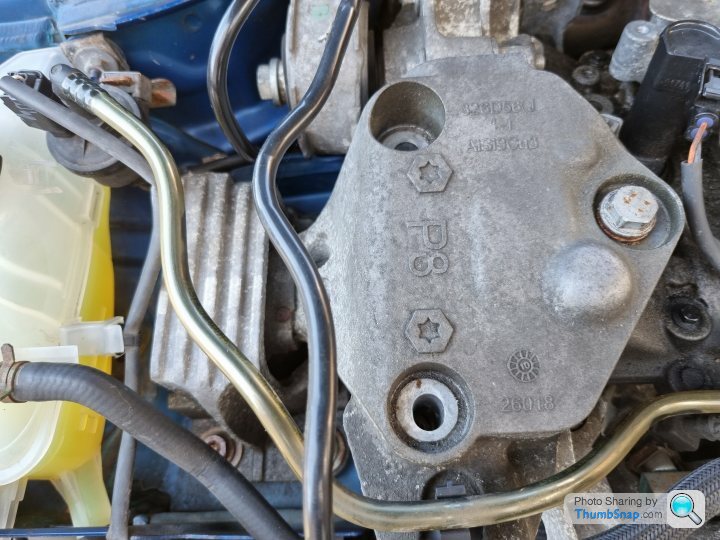

I ordered a new OEM Renault unit to replace the old one .
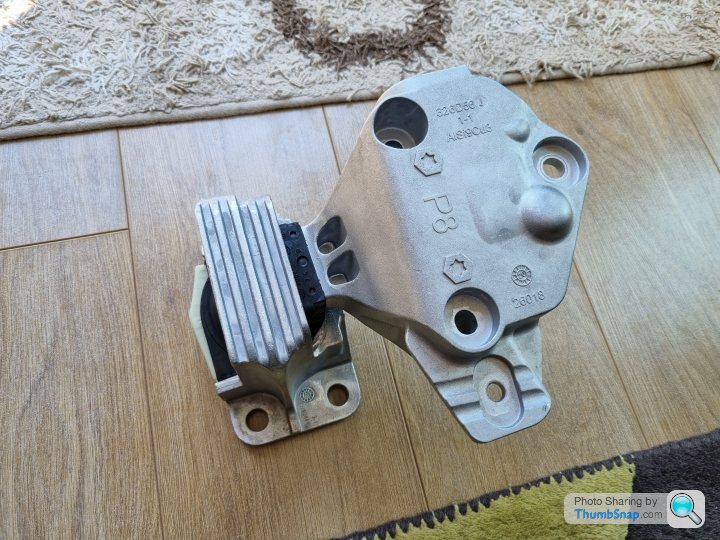
New and old unit .
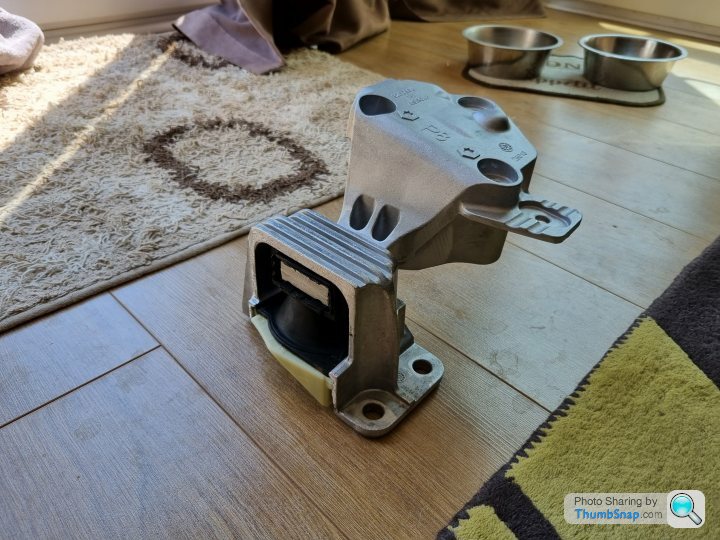
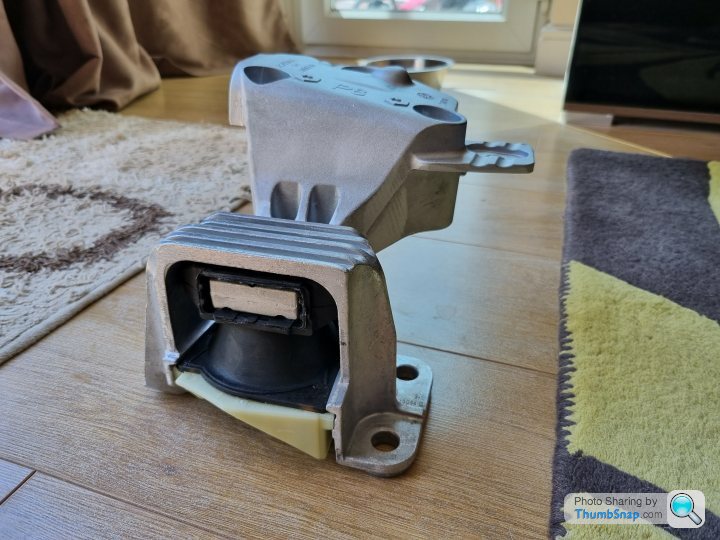
To add to the new mount i have ordered a Powerflex insert .
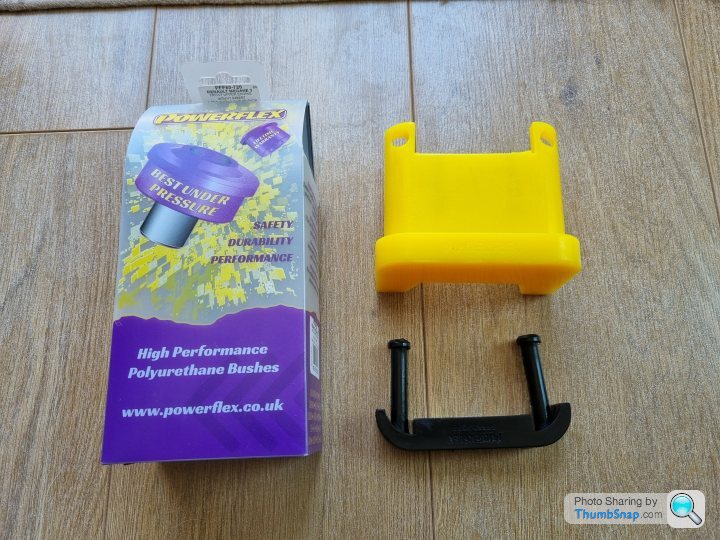
Then the easy job of installing this on to the new OEM mount .

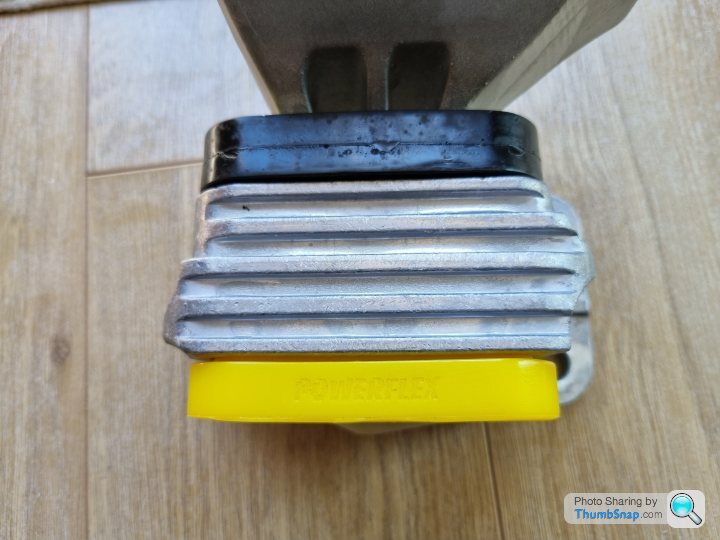
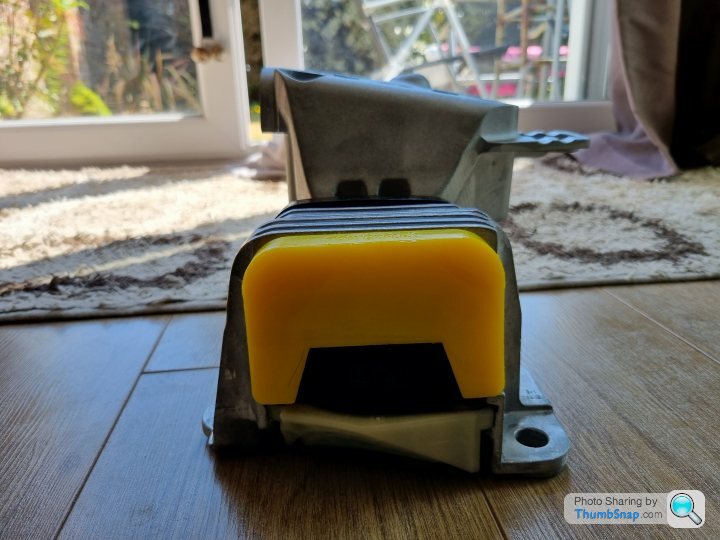
Then all installed back on the car .
I will look to change all the mounts on the car and there are x 4 of them so there will be another x 3 left to do .
One part of the car that i wanted to look to change / renew was the engine mounts as the car is still running the stock Renault units that will be getting a bit tired by now .
First was to remover the OEM upper engine mount .
I ordered a new OEM Renault unit to replace the old one .
New and old unit .
To add to the new mount i have ordered a Powerflex insert .
Then the easy job of installing this on to the new OEM mount .
Then all installed back on the car .
I will look to change all the mounts on the car and there are x 4 of them so there will be another x 3 left to do .
Gilhooligan said:
Nice work on the rear beam. I’ve heard stuffer upper engine mounts can be pretty hardcore. What’s the NVH like now?
I will let you know as the car is still up on axle stands as I have a few more bits to do .I had this type of mount on my old Fiesta ST and that was ok so I'm hoping that this will be the same and if not I can allways remove it .
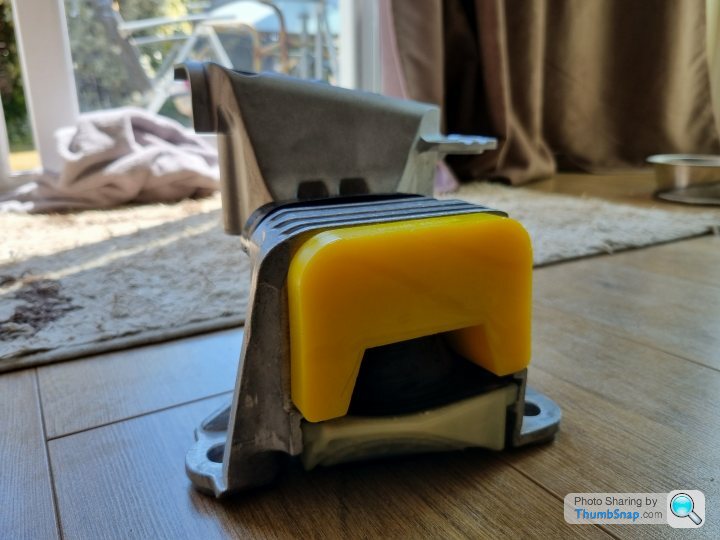
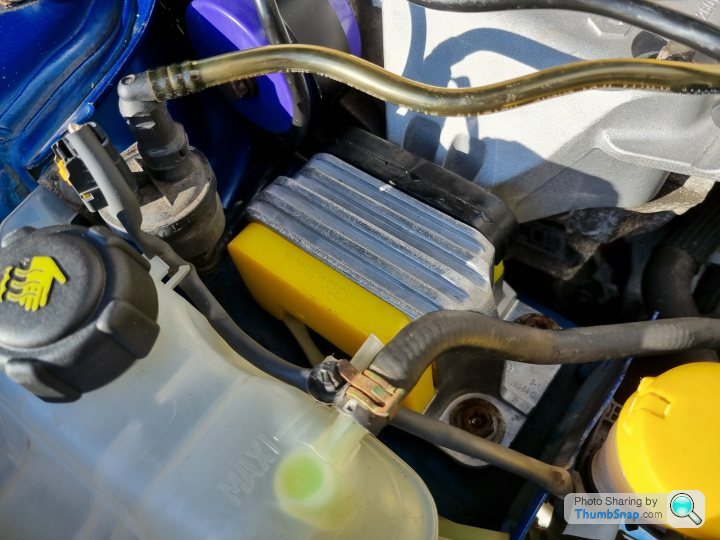
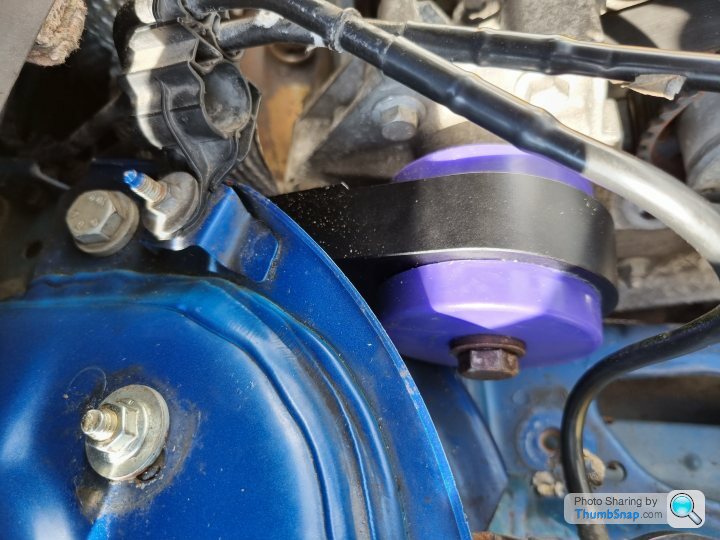
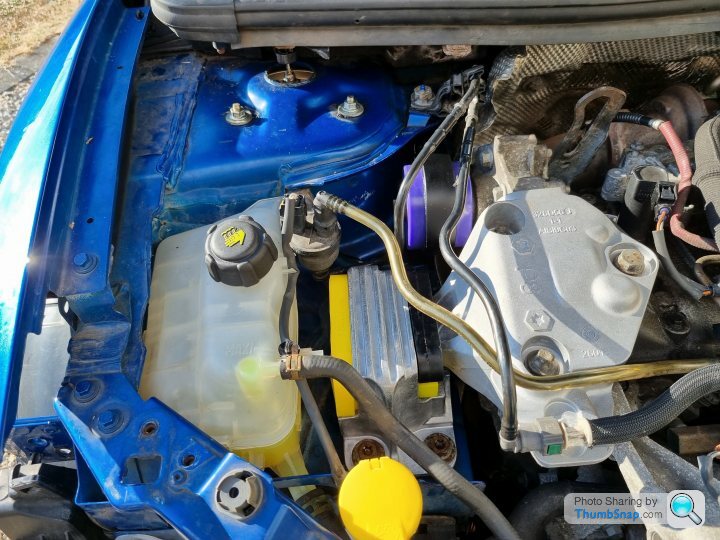
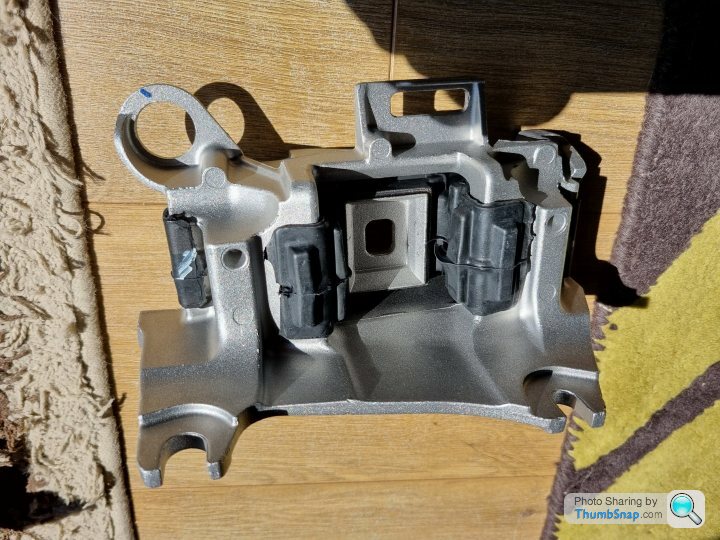
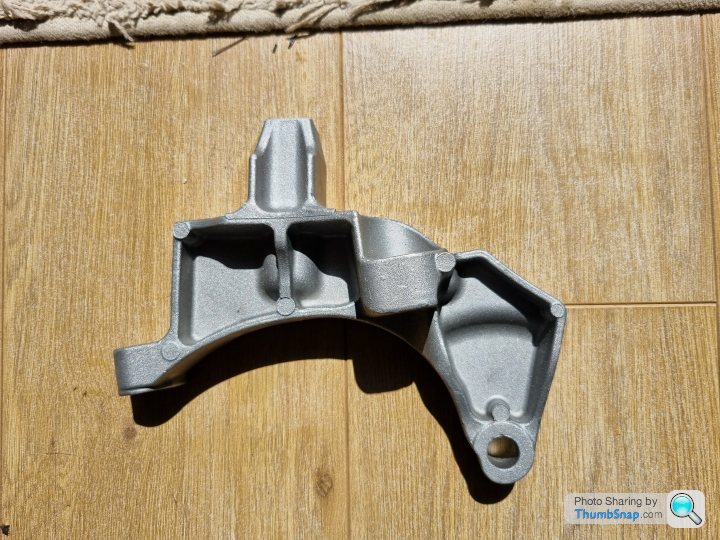
After installing the upper engine mount this week it was time to change the OEM upper engine torque mount .
First was to remove the OEM mount .
The stock OEM mount had a bit of play in it so was due a change .

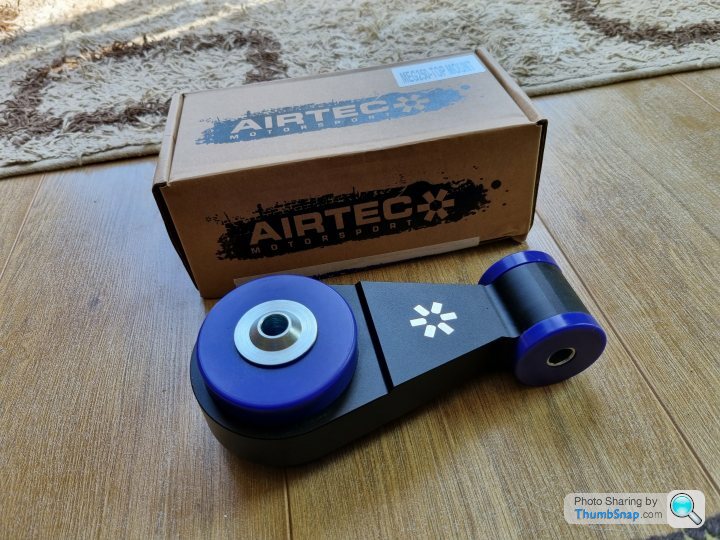
The new unit is an Airtec polyurethane unit in a Purple grade middle stiffness .
Then to re install the new unit .
First was to remove the OEM mount .
The stock OEM mount had a bit of play in it so was due a change .
The new unit is an Airtec polyurethane unit in a Purple grade middle stiffness .
Then to re install the new unit .
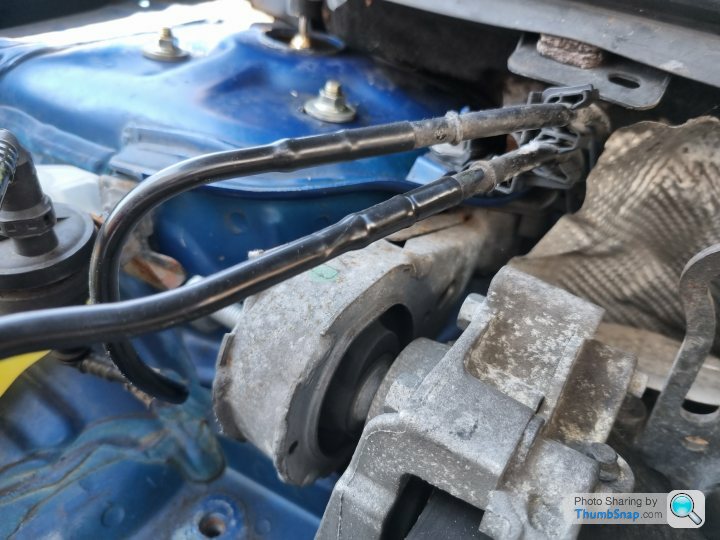
Keeping the mount theme going next was to look at the lower gearbox mount ( dog bone mount )
I found out that the car is all ready running a Vibra Technics lower gearbox mount but having a look at this it looked a little worn but still in good shape but as im changing all the mounts on the car i thought i would get a new unit .
First was to remove the Vibra Technics mount .

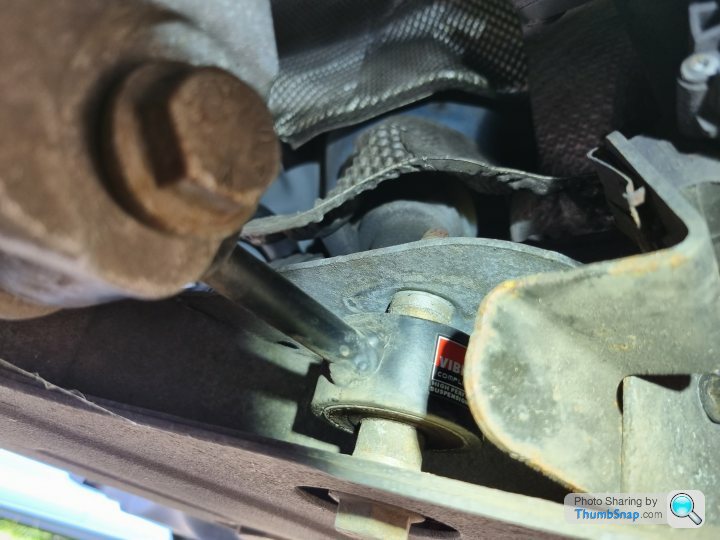
old and a bit worn but still in good condition .
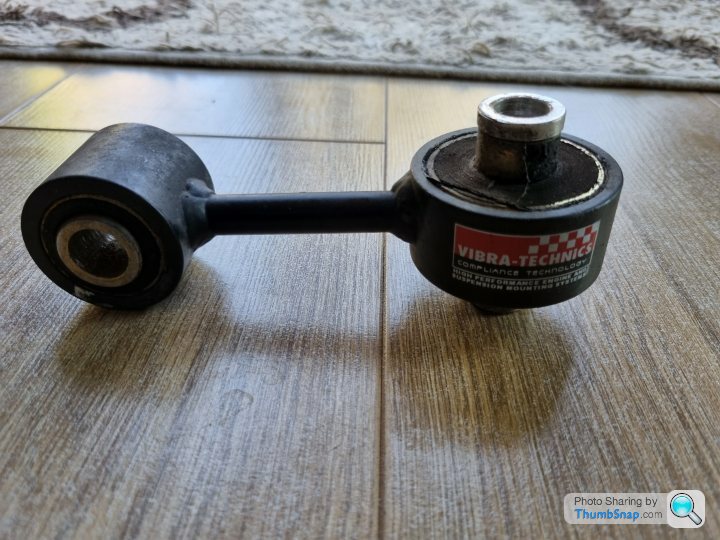
I have ordered in a new Airtec unit again in Purple grade stiffness .
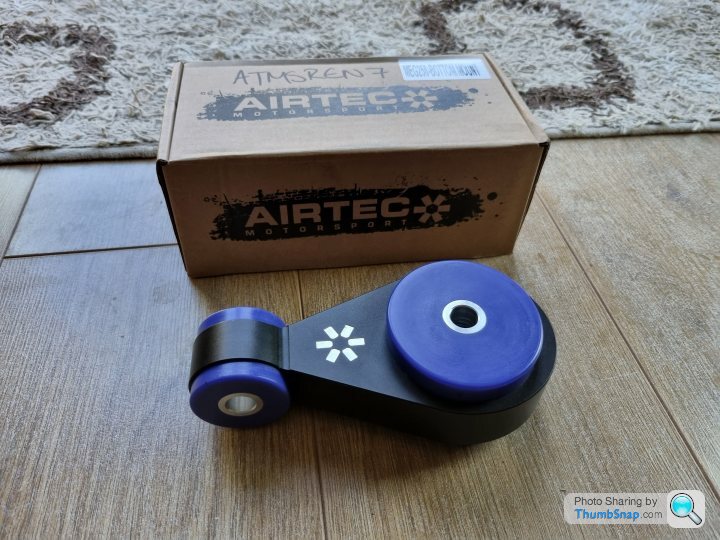
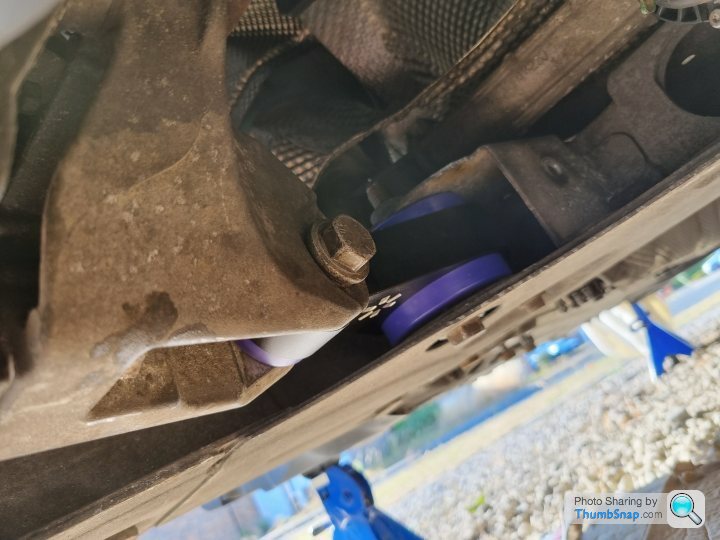
Then re installed with the new mount .


That just leaves me with one mount left to do .
I found out that the car is all ready running a Vibra Technics lower gearbox mount but having a look at this it looked a little worn but still in good shape but as im changing all the mounts on the car i thought i would get a new unit .
First was to remove the Vibra Technics mount .
old and a bit worn but still in good condition .
I have ordered in a new Airtec unit again in Purple grade stiffness .
Then re installed with the new mount .
That just leaves me with one mount left to do .
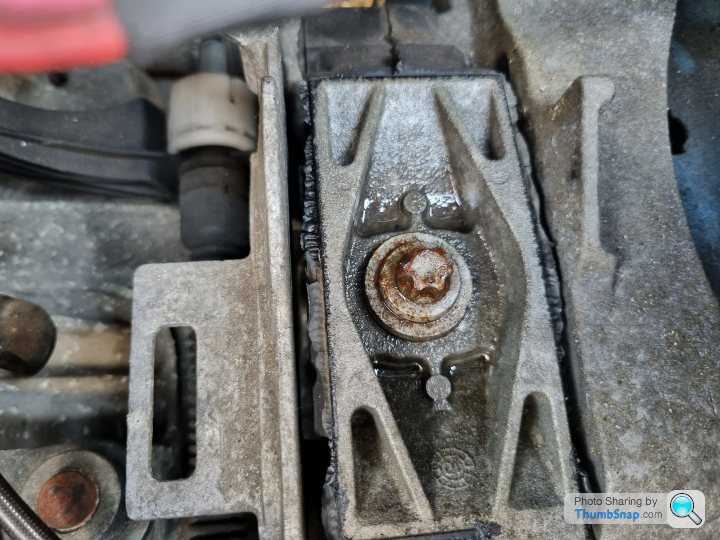
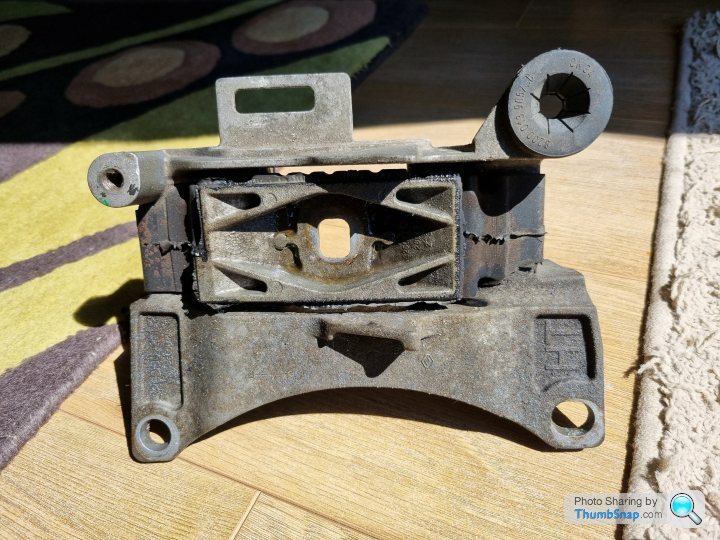
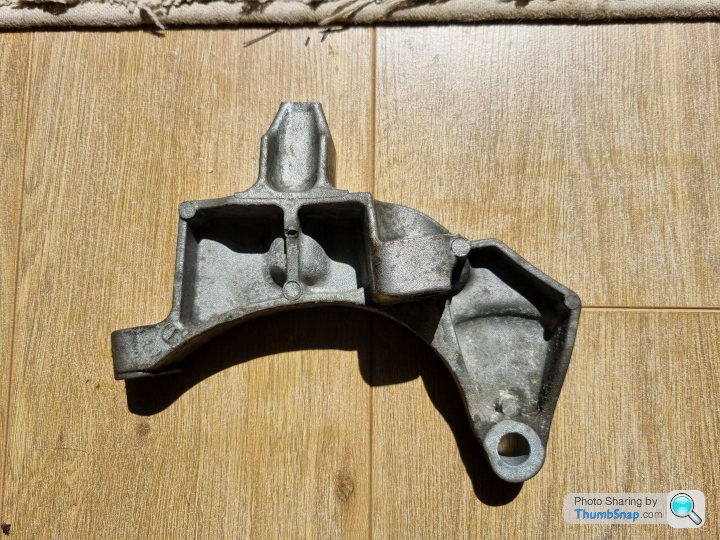
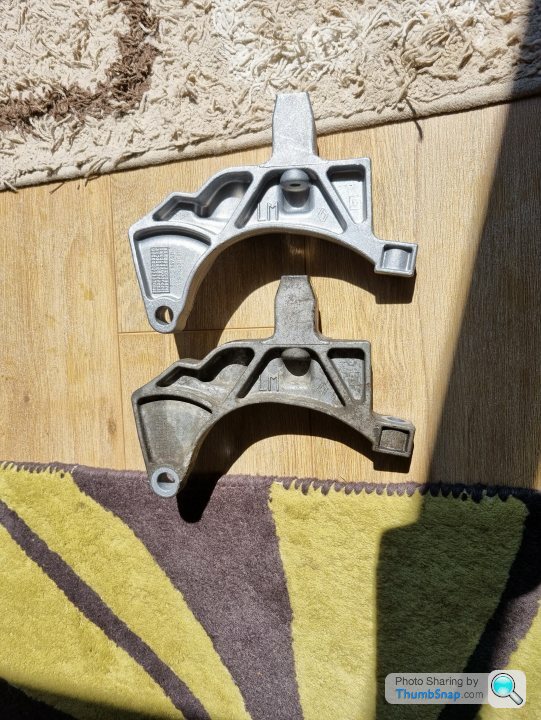
So on to the last mount on the car then .
The gear box mount on the 250 does not have an aftermarket replacment but you can fit the uprated OEM mount from the 275 modle that is stiffer so a new one of them was ordered .
First up was to remove the old 250 gear box mount and for this you need to remove the battery , battery tray , ECU etc .

One of the common faults with the gearbox mount is that the bolt is week and can snaps over time so i removed this with caution .
Old mount removed .
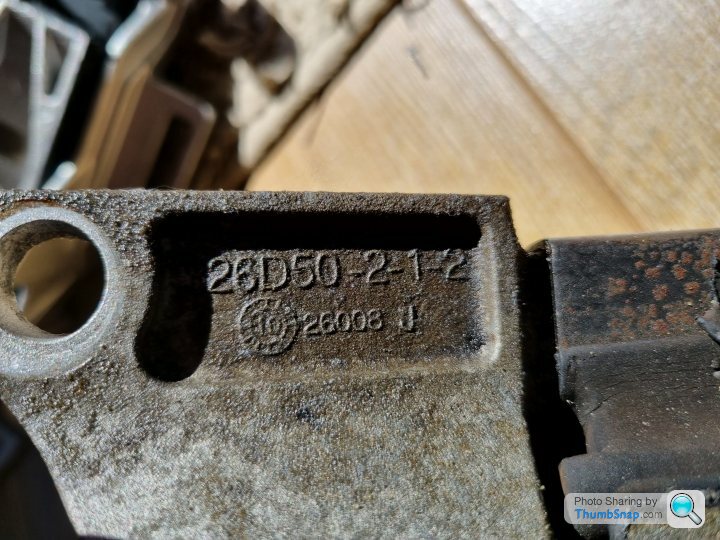
Old part number .
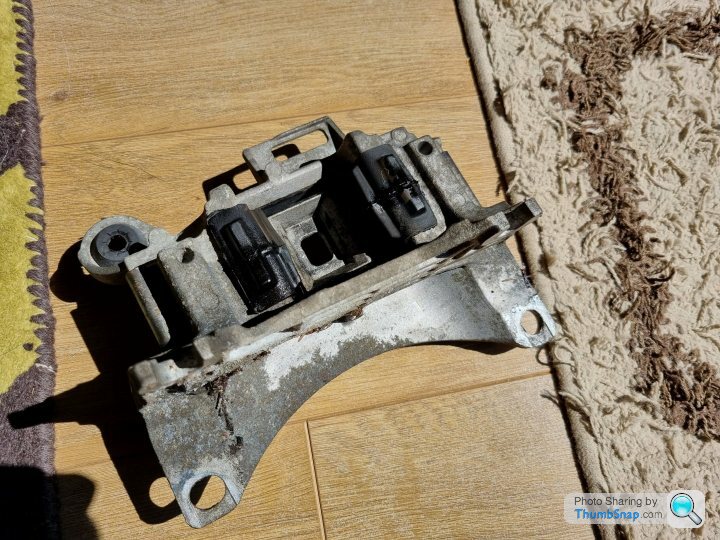
New 275 mount .
New part number .
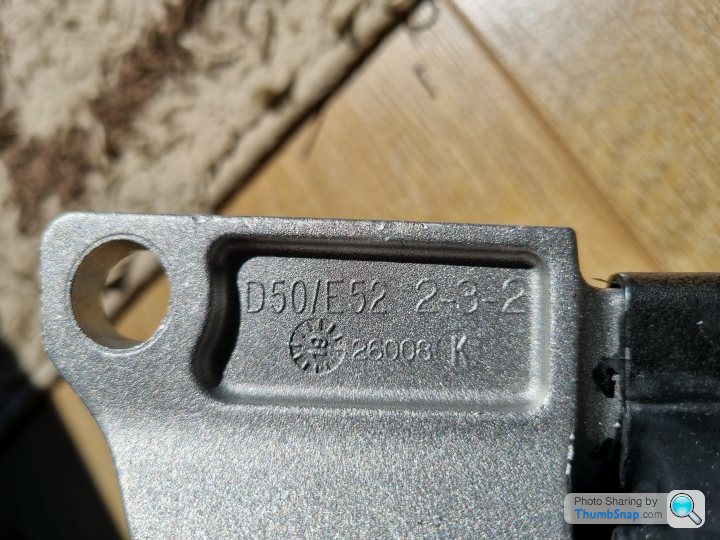
New and old monut side by side .
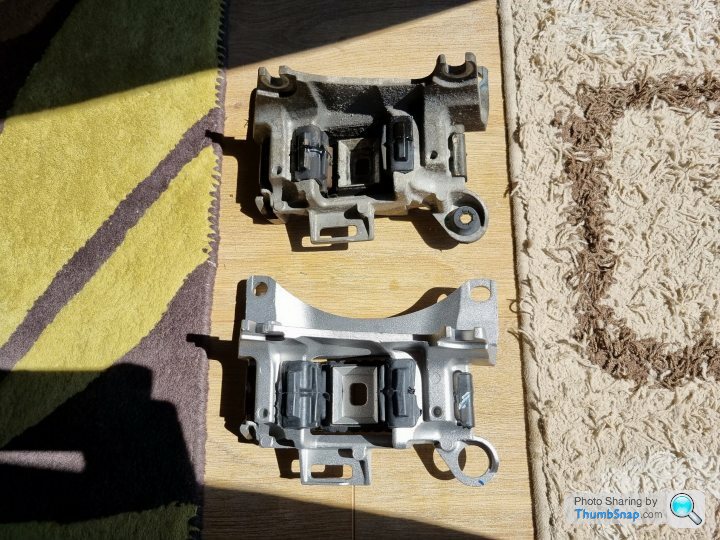
I also replaced the gearbox mounting bracket .
Old bracket .
Old part number .

New bracket .
New part number .

New and old bracket side by side .
The last part to change was the bolt for the new bracket so the OEM renault bolt that is rated at a 10.9 tensile was replaced with a new unit bolt that is rated at 12.9 tensile .
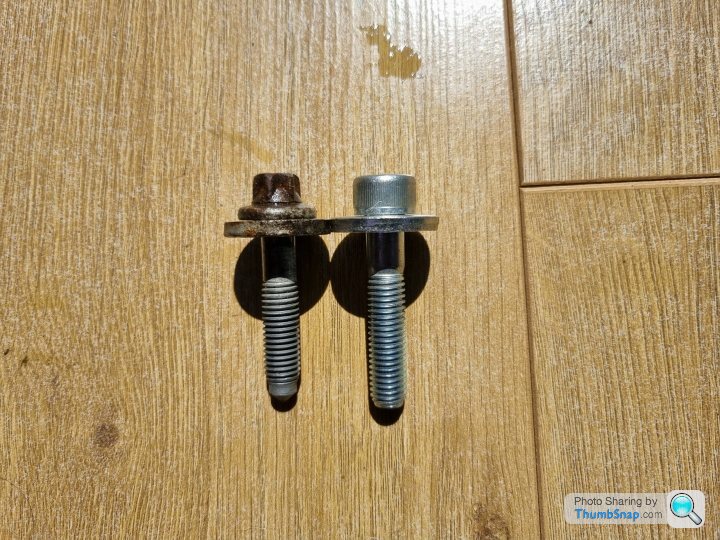 [url]
[url]
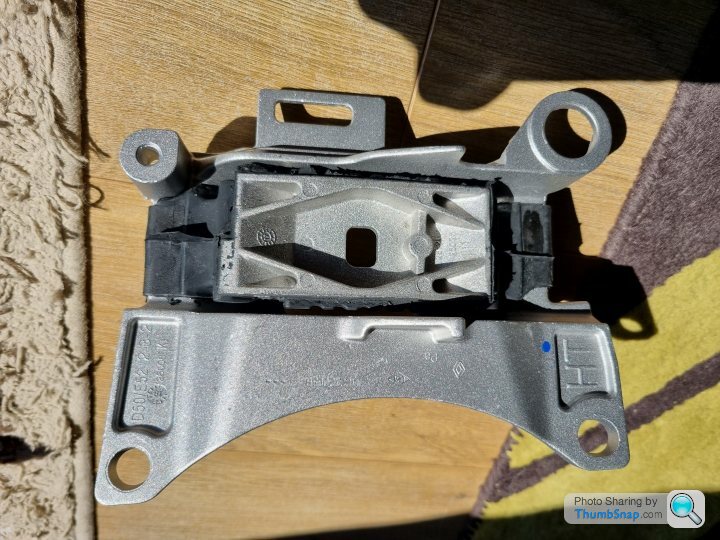
And then the new mount and bolt installed .
 |https://thumbsnap.com/WtsTGVm1[/url]
That is now all of the engine mounts changed on the car for new upgraded units .
The gear box mount on the 250 does not have an aftermarket replacment but you can fit the uprated OEM mount from the 275 modle that is stiffer so a new one of them was ordered .
First up was to remove the old 250 gear box mount and for this you need to remove the battery , battery tray , ECU etc .
One of the common faults with the gearbox mount is that the bolt is week and can snaps over time so i removed this with caution .
Old mount removed .
Old part number .
New 275 mount .
New part number .
New and old monut side by side .
I also replaced the gearbox mounting bracket .
Old bracket .
Old part number .
New bracket .
New part number .
New and old bracket side by side .
The last part to change was the bolt for the new bracket so the OEM renault bolt that is rated at a 10.9 tensile was replaced with a new unit bolt that is rated at 12.9 tensile .
[url]And then the new mount and bolt installed .
|https://thumbsnap.com/WtsTGVm1[/url]That is now all of the engine mounts changed on the car for new upgraded units .
OppoLocksmith said:
Looks ace. Any feedback on the Fiesta now the mounts have been changed, I'm contemplating doing mine which is now on 80,000. Cheers
Still have not driven the car yet as I still have a few things to do but will report back when it is back on the road .My one is on 97,000 miles and the OEM mounts were ok but were getting a bit tired so this should firm things up but as I have a mix of polly and rubber im hoping it will be like my old car set up giving more stiffness but not causing NVH issues .
Jakg said:
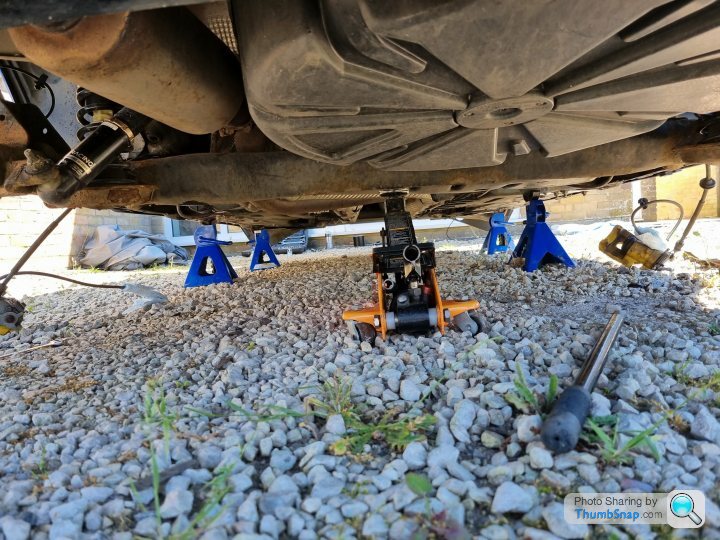
Love the way most of the pictures are of the car floating in midair without any wheels.
Reminds me of when I bought my Megane, ended up sitting without any front suspension for a while while I tidied up the car

You are very correct and i have only driven the car once when picking it up 4 months ago and from then it has been up on axle stands and will remain like this until i stop fiddling with it Reminds me of when I bought my Megane, ended up sitting without any front suspension for a while while I tidied up the car

Note to self must stop buying more new parts and get on finishing the car and driving it !!!!!!!!
MDifficult said:
Amen to that! You’ve got all winter to tinker with it.. get out on the road and kick it in the balls while there’s some daylight left
I know best summer we have had and I'm wasting it .I have a track day planned for this month but TBH I won't have it ready then and October is looking doubtful.
Are you still looking at next month to get the Atom out on track ?
MDifficult said:
Even if you get it into the road, you can do a few hundred miles of ‘shakedown’ which should give you the chance to iron out any frustrations before your first trackday. Come on… you know you want too 
I’m all booked for the Atom to go on track. 14th of October. At Pembrey. In Wales.
I must be out of my mind. I’ll pack my scuba gear
Tbh i should have just driven it over the summer and then spent the winter messing around with it .I’m all booked for the Atom to go on track. 14th of October. At Pembrey. In Wales.
I must be out of my mind. I’ll pack my scuba gear
I have not done Pembrey but it look like there is lots of run off so you should be fine if maybe a touch wet and cold
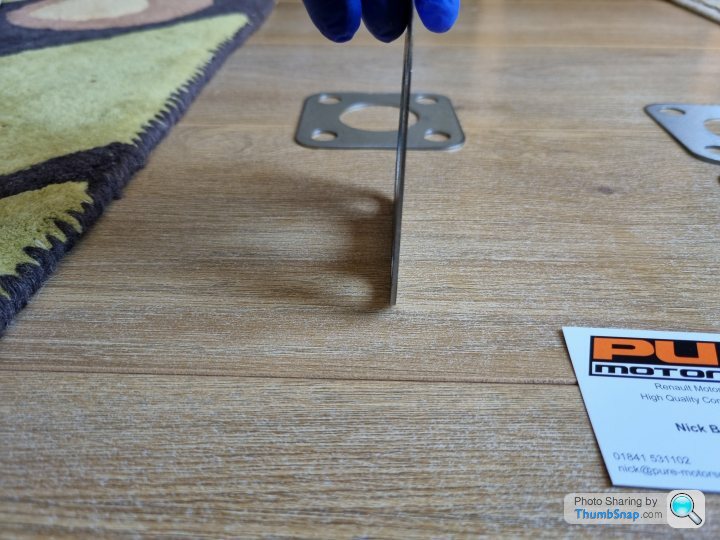
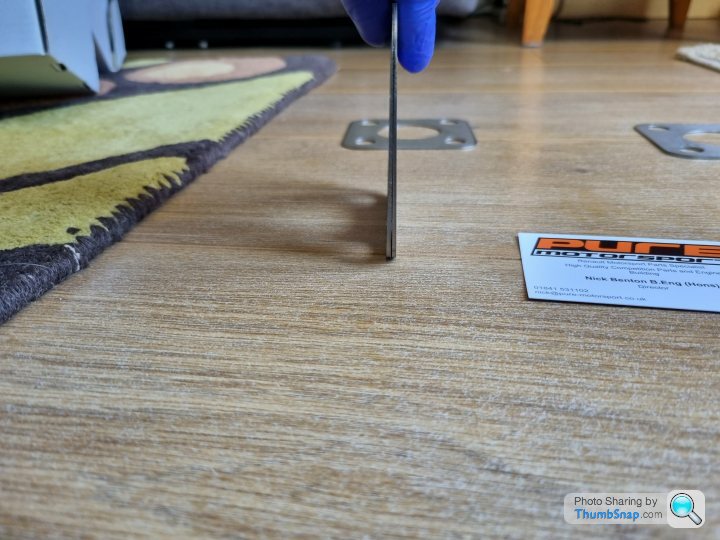
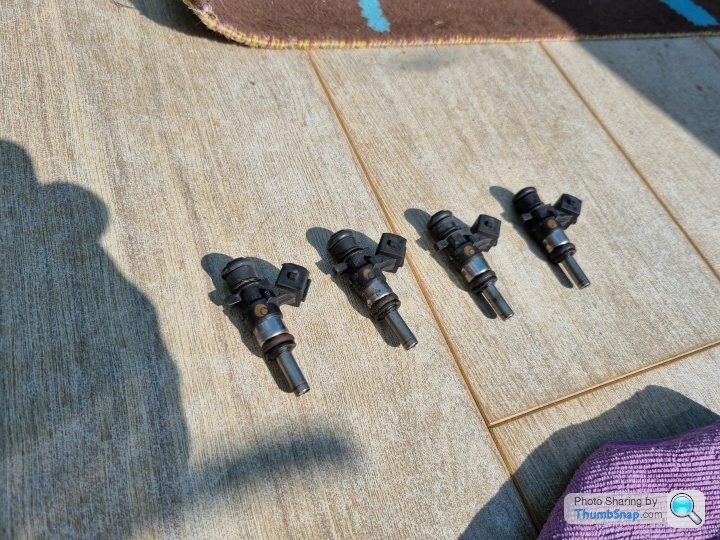
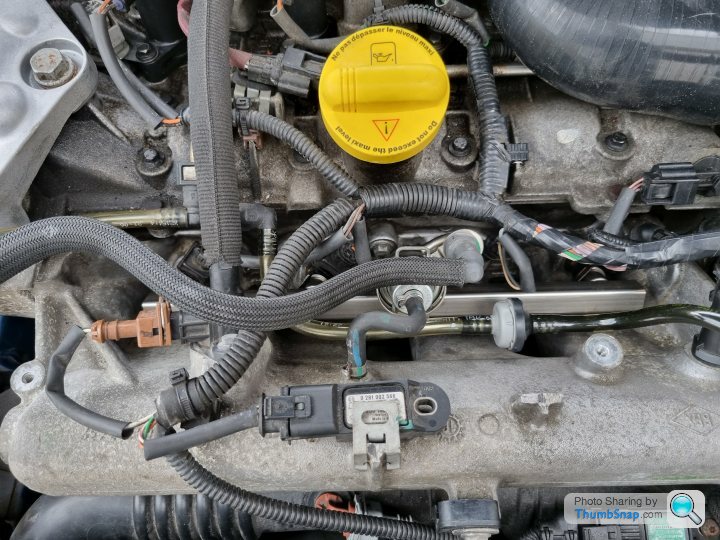
Next on the list of items that i have looked in to changing is the Fuel injectors as the car has done 96K miles and they are still the original units on the car and this is the one arear that can give problems so as there was a sale offer on with RPD i ordered some new injector units and also a new FPR .
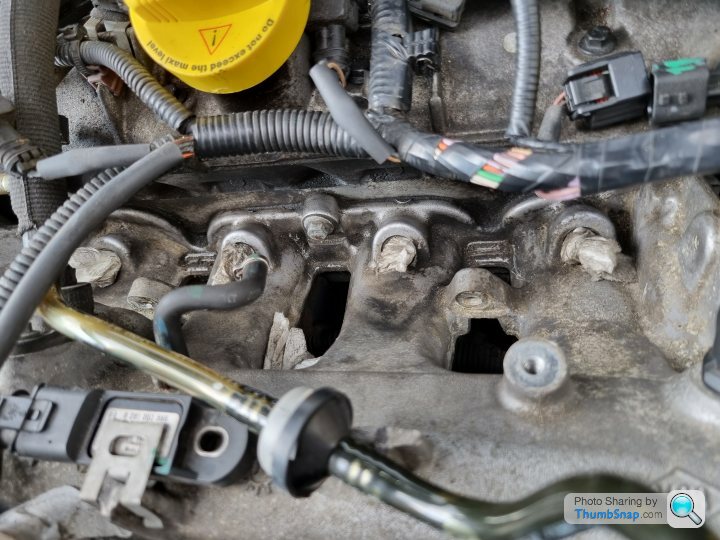
First was to remove the fuel rail and injectors and as this is not a direct injection engine on the Megane 250 , 265 , 275 this job was made much easer .
Fuel rail and injectors removed .


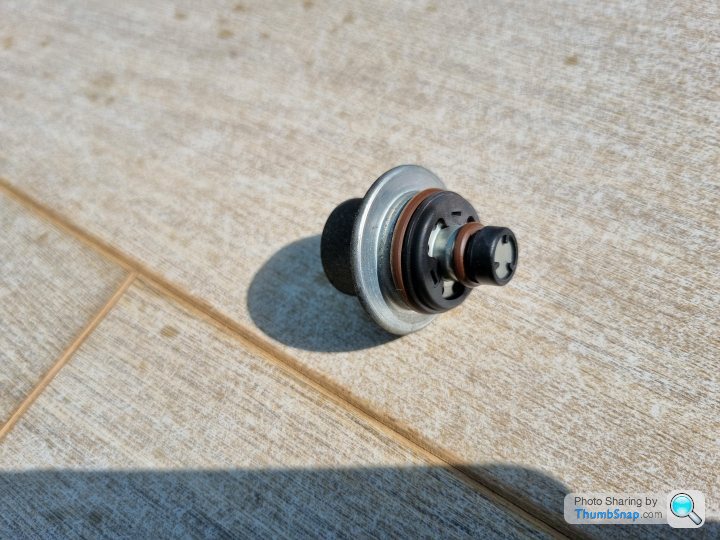
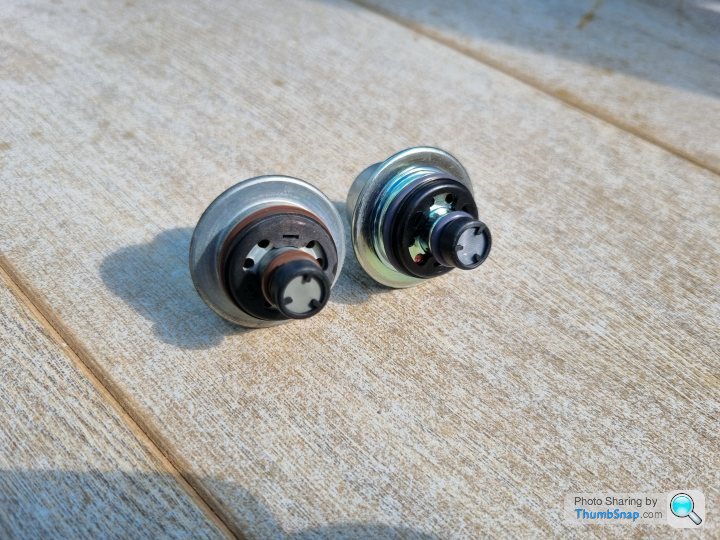
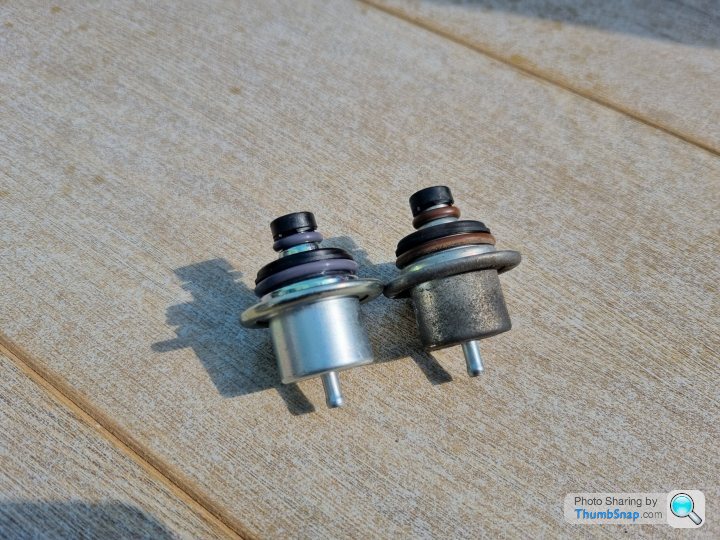
Old fuel pressure regulator .

Fuel Rail all cleaned .

New OEM FPR from Kam racing .


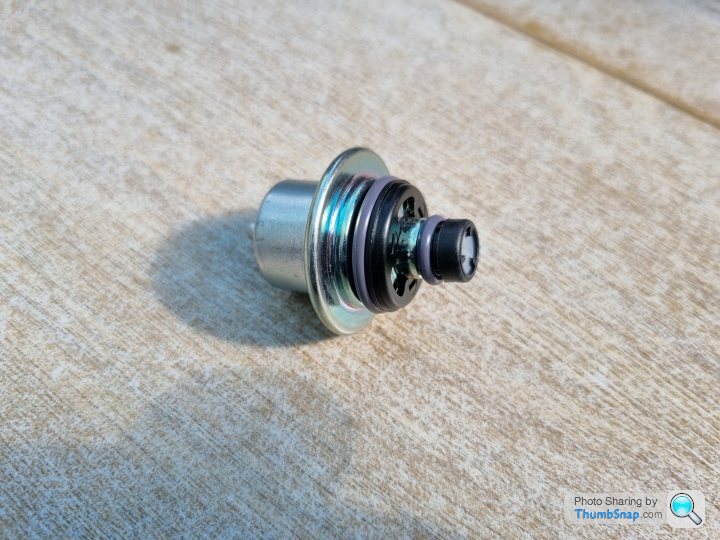
Old and new unit .
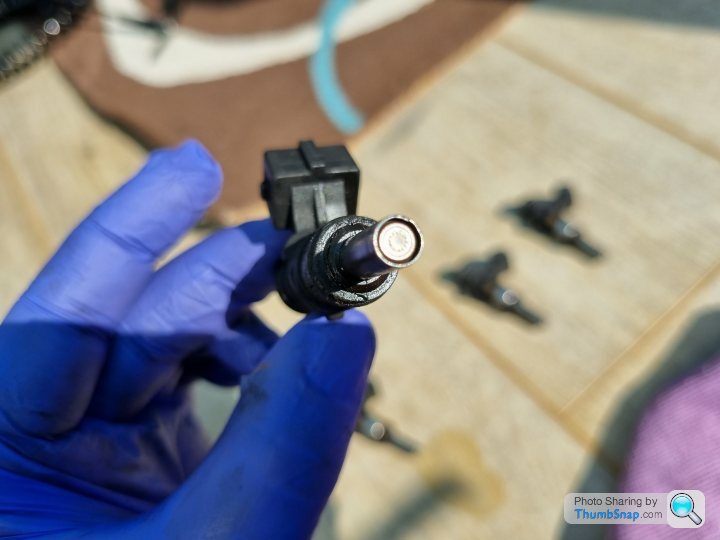
New OEM fuel injectors .

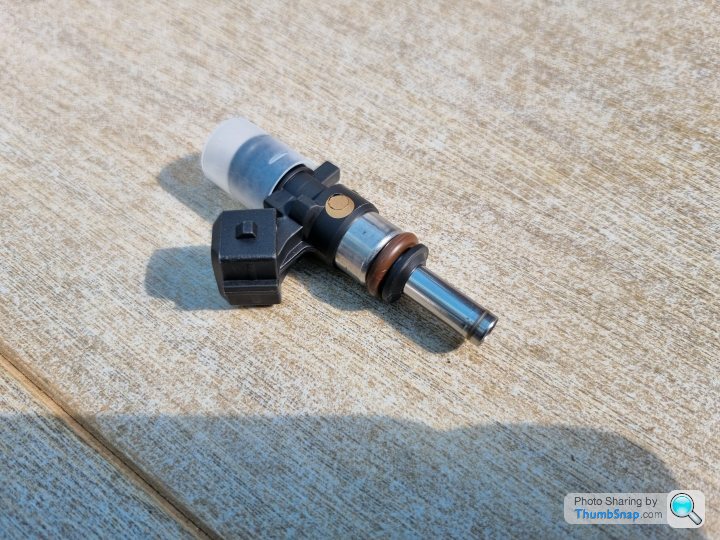
Then installed in to a clean and shiny fuel rail .
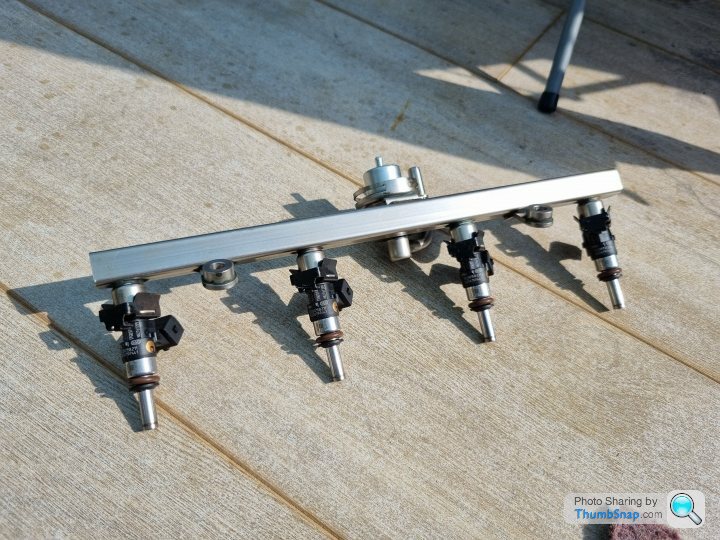
Then installed .
This is another job done that should futureproof the car with regards to fuelling .
First was to remove the fuel rail and injectors and as this is not a direct injection engine on the Megane 250 , 265 , 275 this job was made much easer .
Fuel rail and injectors removed .
Old fuel pressure regulator .
Fuel Rail all cleaned .
New OEM FPR from Kam racing .
Old and new unit .
New OEM fuel injectors .
Then installed in to a clean and shiny fuel rail .
Then installed .
This is another job done that should futureproof the car with regards to fuelling .
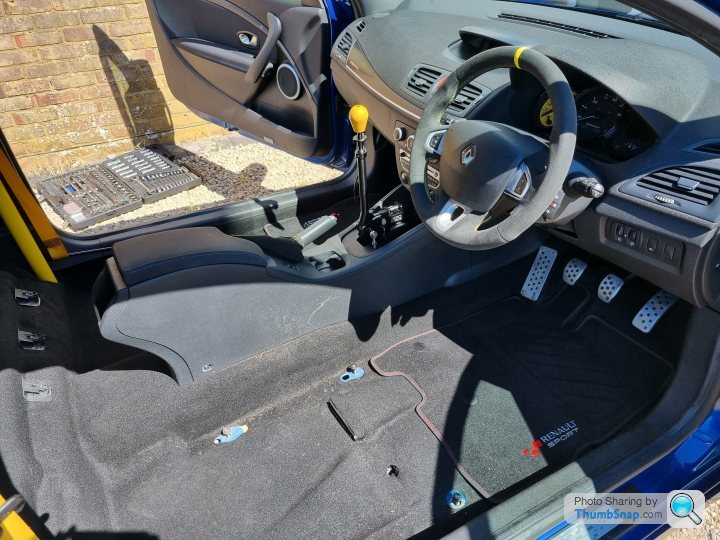
Another update on the car with regards to seats this time .
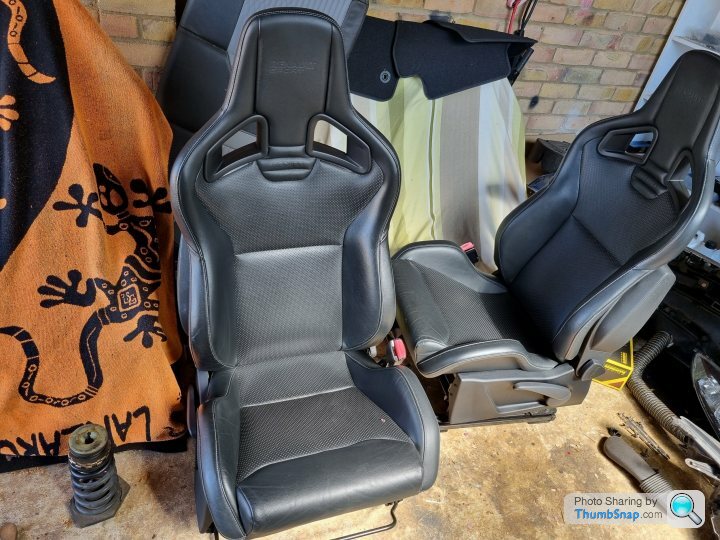
The car came with some rather lovely leather Recaro sportster seats and my first plane was to change them over for some bucket seats and harnesses but after having a re think on this i have come up with a much better plan .
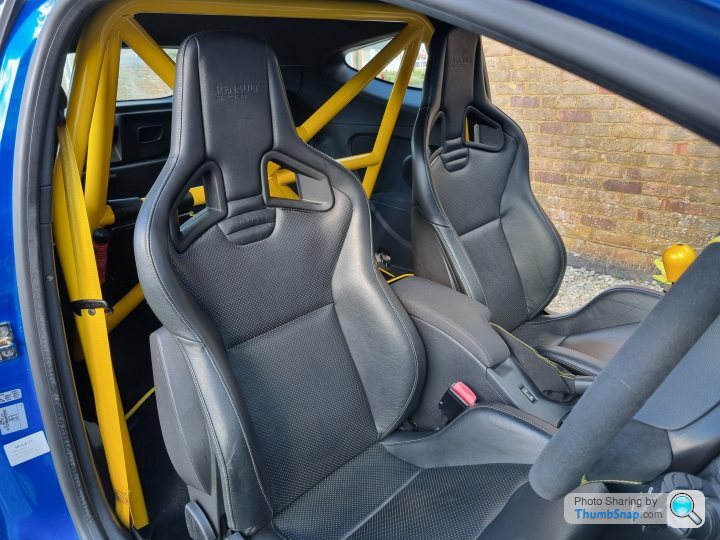
First up was to remove to leather Recaro seats and this is just x 4 simple bolts so this was very easy .
They are in very good condition with no rips or damage to them and just need a quick clean up so i orders some cleaner and some leather cream .

Before .

After .
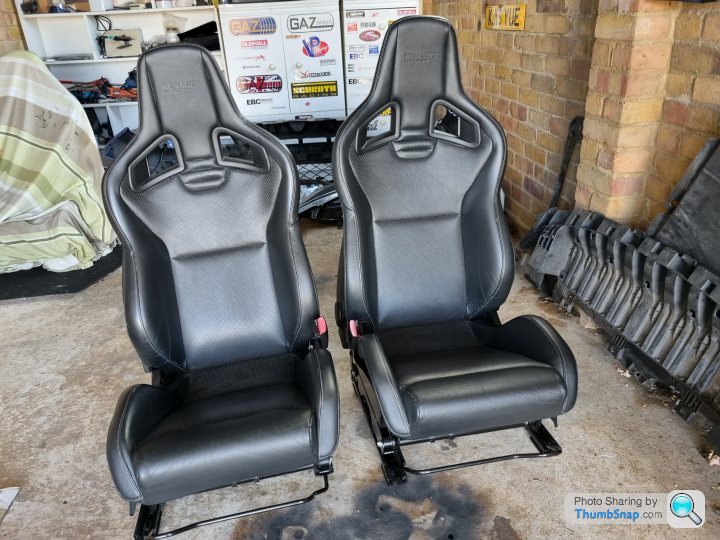
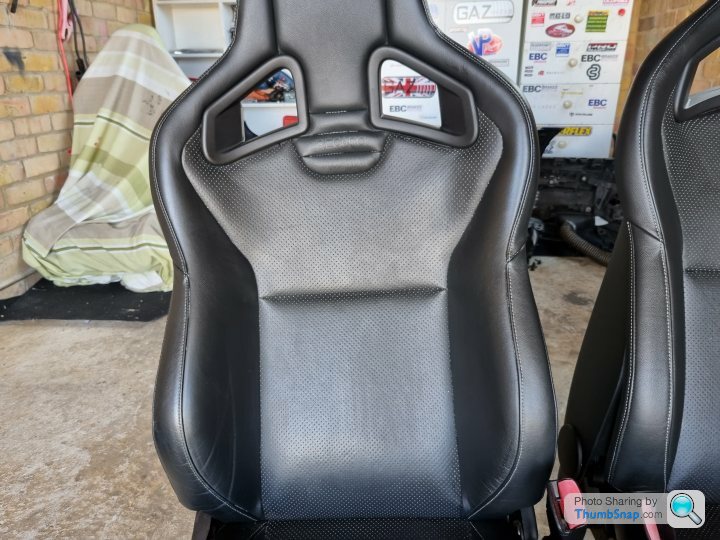
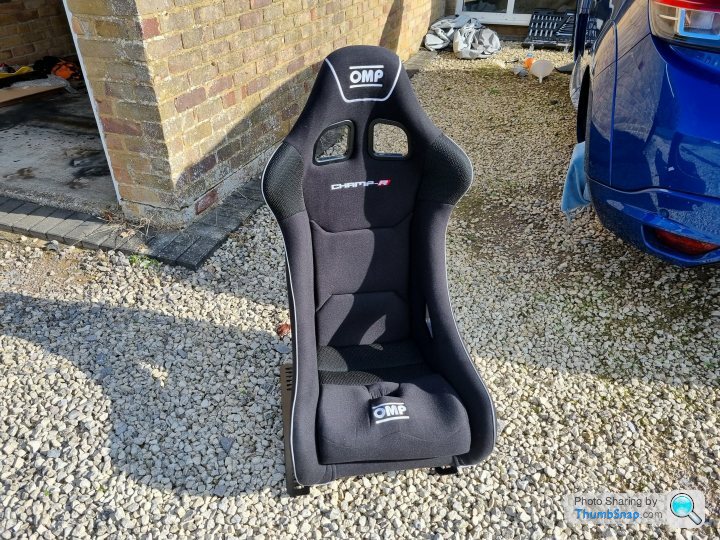
So my plan was to remove the stock seats and install bucket seats but after thinking about this a much better plan would be to keep the stock seats for every day driving and then have a bucket seat that is all made up that can be bolted in for track days .
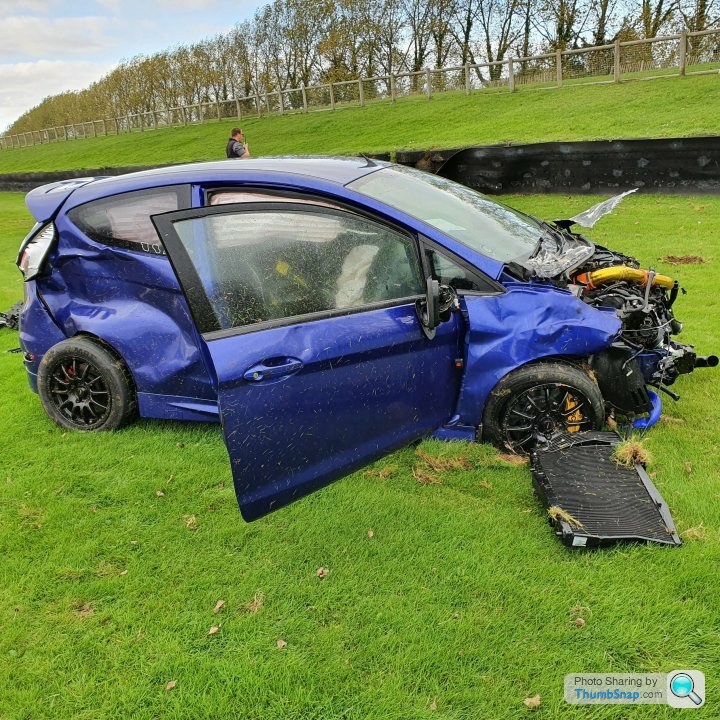
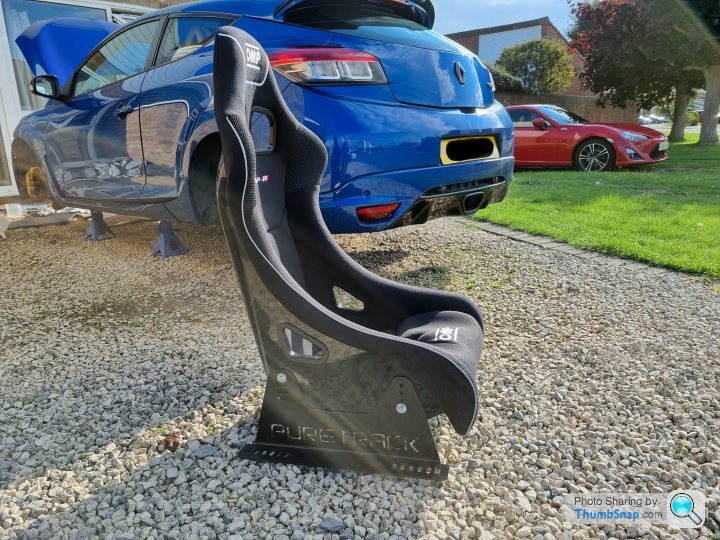
The bucket seat i will be using will be a OMP Champ R and as luck would have it i have a spare one in the garage as it is one of the only things that was undamaged on my old track car .

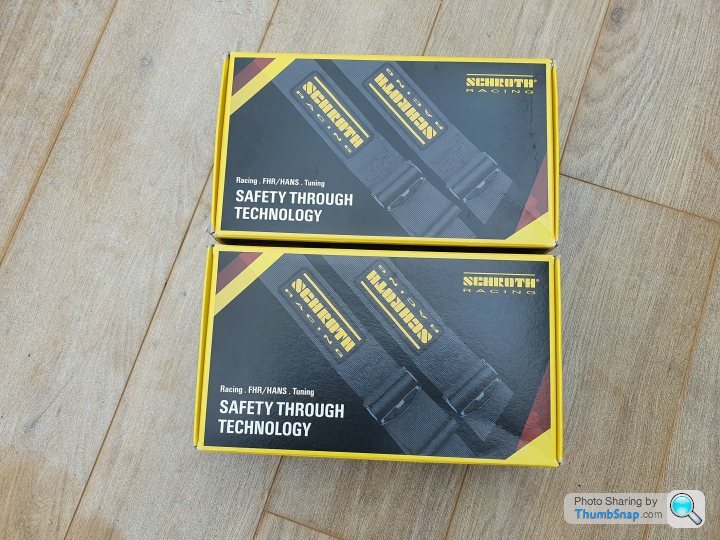
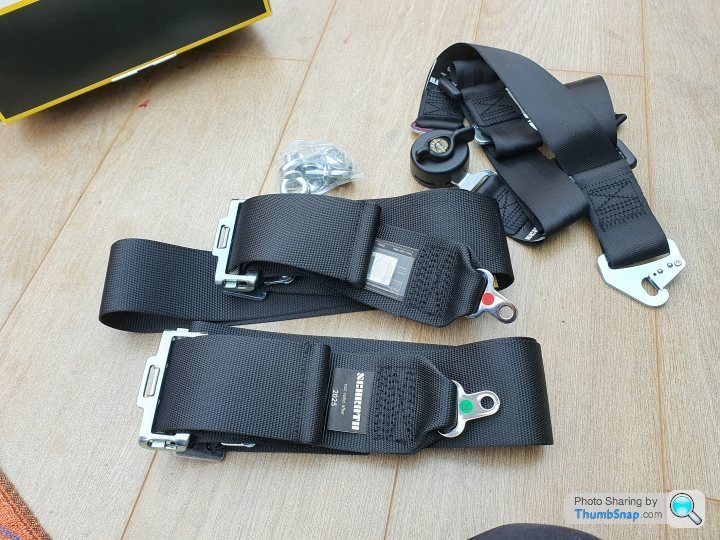
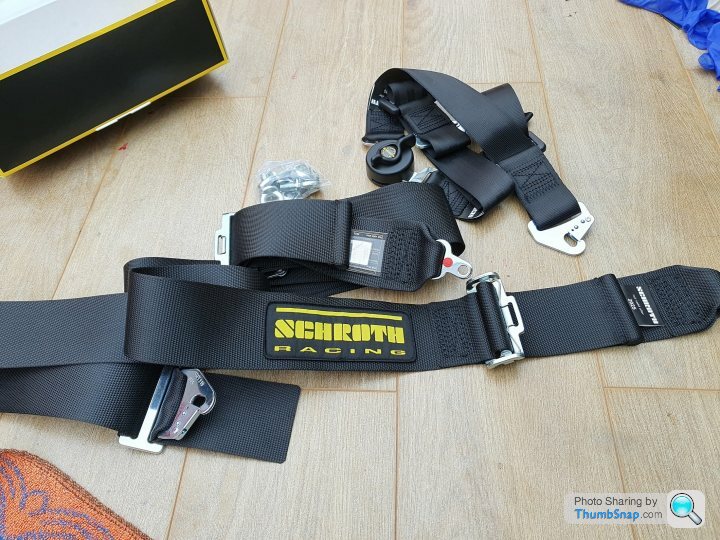
I also ordered a new set of Schroth AMS 4 point harnesses .
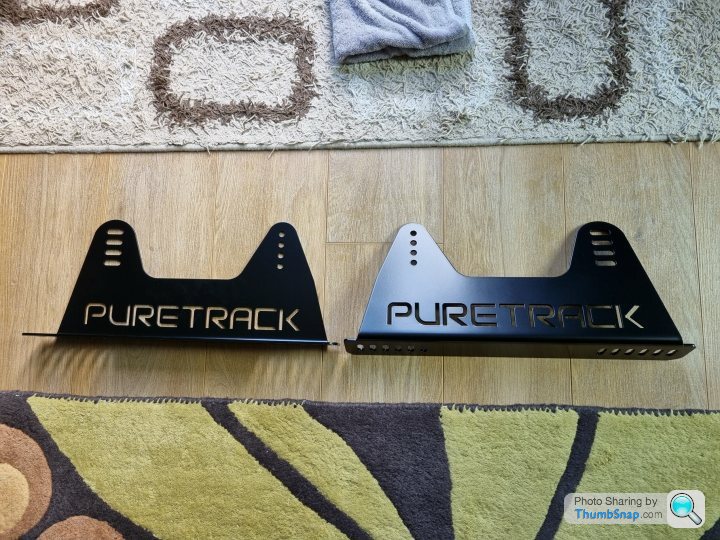
As the OMP bucket seat will only be used on track i have ordered a floor mounted side mount from Pure Motorsport .

And installed to the seat .
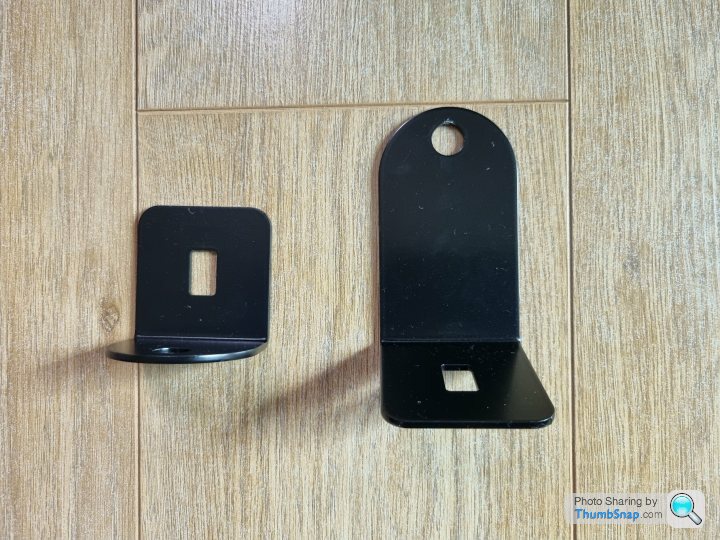
I also ordered a set of set of harness mounting brackets from Pure Motorsport .
Then to test fit in to the car .
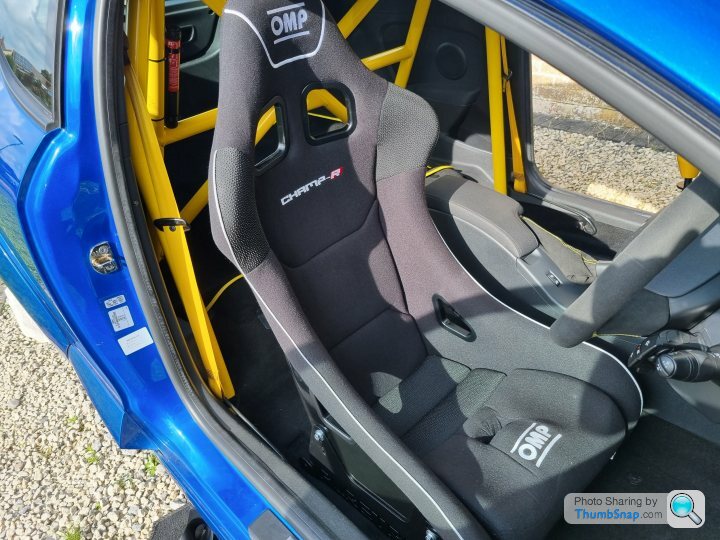
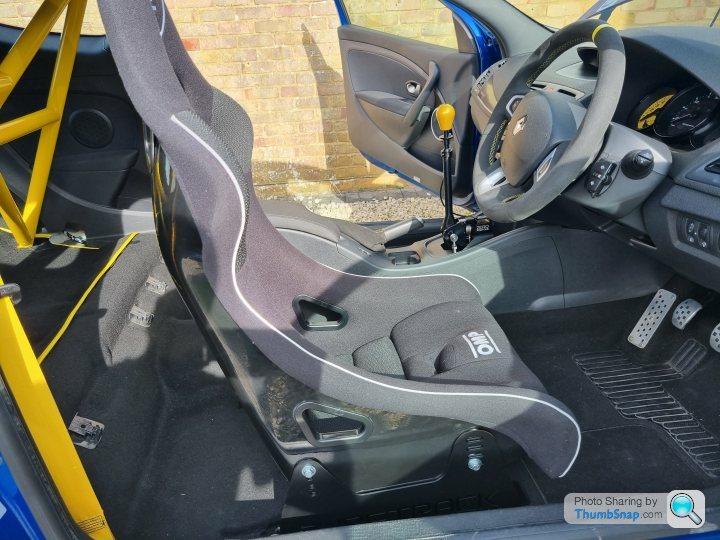
And installed with the harnesses .
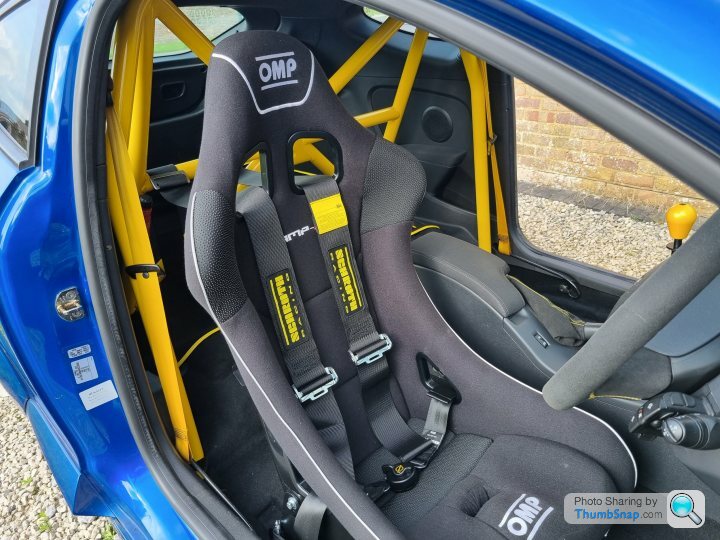

I will keep the shoulder harness belts attached to the roll cage but all tied up out of the way and the OMP bucket seat has all of the side harness and mounting brackets attached so this should be a very quick swap in and swap out job .
Then it was back to re installing the leather Recarco seats .


Last part was to find out how much of a weight saving the seat swap out would give ( old habits die hard ) .
The Renault leather Recarco seats are very heavy and have a weight of 27.5 Kg .

The OMP Champ R and side mount are much lighter and have a weight of 5.5 Kg .

So if i remove the x 2 Recarco seats and just use the x 1 OMP seat this gives a weight saving of 49.5 Kg so a very good saving .
I still have a long list of parts still to fit so getting the car on a track day this year is look less likely so i will have to plan for early next year i think .
The car came with some rather lovely leather Recaro sportster seats and my first plane was to change them over for some bucket seats and harnesses but after having a re think on this i have come up with a much better plan .
First up was to remove to leather Recaro seats and this is just x 4 simple bolts so this was very easy .
They are in very good condition with no rips or damage to them and just need a quick clean up so i orders some cleaner and some leather cream .
Before .
After .
So my plan was to remove the stock seats and install bucket seats but after thinking about this a much better plan would be to keep the stock seats for every day driving and then have a bucket seat that is all made up that can be bolted in for track days .
The bucket seat i will be using will be a OMP Champ R and as luck would have it i have a spare one in the garage as it is one of the only things that was undamaged on my old track car .
I also ordered a new set of Schroth AMS 4 point harnesses .
As the OMP bucket seat will only be used on track i have ordered a floor mounted side mount from Pure Motorsport .
And installed to the seat .
I also ordered a set of set of harness mounting brackets from Pure Motorsport .
Then to test fit in to the car .
And installed with the harnesses .
I will keep the shoulder harness belts attached to the roll cage but all tied up out of the way and the OMP bucket seat has all of the side harness and mounting brackets attached so this should be a very quick swap in and swap out job .
Then it was back to re installing the leather Recarco seats .
Last part was to find out how much of a weight saving the seat swap out would give ( old habits die hard ) .
The Renault leather Recarco seats are very heavy and have a weight of 27.5 Kg .
The OMP Champ R and side mount are much lighter and have a weight of 5.5 Kg .
So if i remove the x 2 Recarco seats and just use the x 1 OMP seat this gives a weight saving of 49.5 Kg so a very good saving .
I still have a long list of parts still to fit so getting the car on a track day this year is look less likely so i will have to plan for early next year i think .
MDifficult said:
Are you sure it's undamaged?
Have you checked it carefully?
Because I imagine your a hole probably took a pretty big bite out of it during the accident
Joking aside - looks like a great move on the seats. Keep going!
Just to confirm the seat is from the passenger side that avoided the impact and I have check the seat from top to bottom and it is 100 % .Have you checked it carefully?
Because I imagine your a
hole probably took a pretty big bite out of it during the accident Joking aside - looks like a great move on the seats. Keep going!
Edited by MDifficult on Friday 23 September 20:06
The drivers seat did not fair as well so it was scrapped and may have had a few brown stains on it after the crash
Another update to the car last weekend .
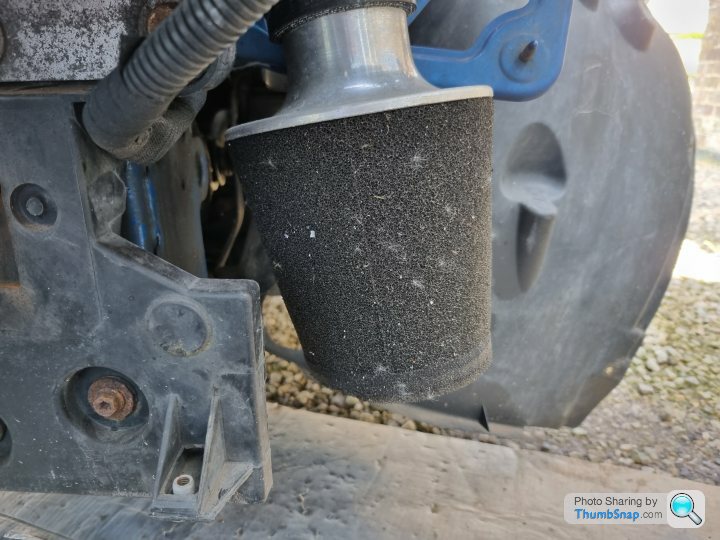
The car was running an ITG induction set up when i got the car but the location of this set up has always worried me with regards to sucking up water as the location of the filter is low at the front of the car and even tho a lot of people run this set up and have not had a problems it still would bug me .
Old ITG induction set up .
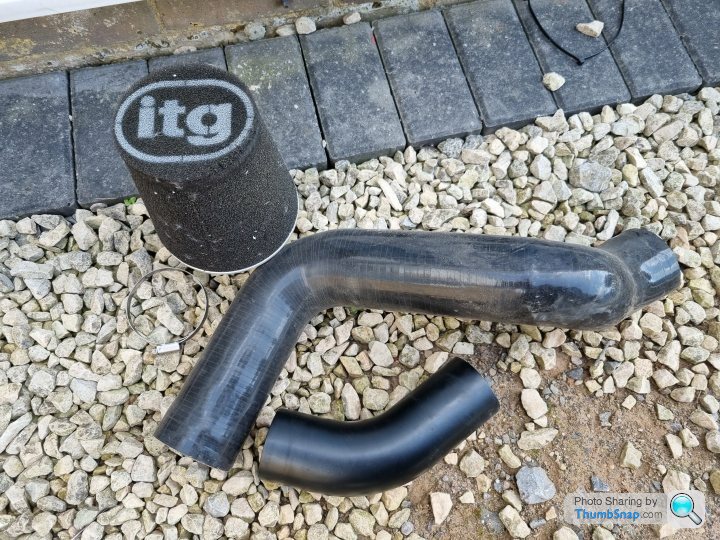

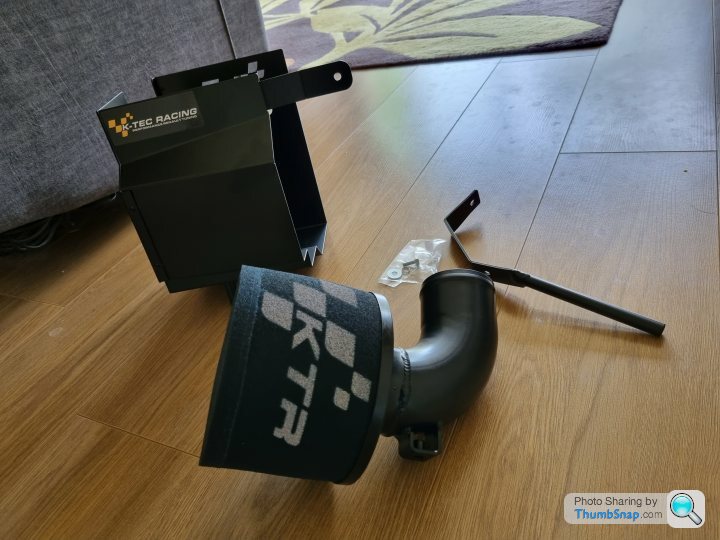
The ITG was removed and a order placed for a new K-Tec induction set up .
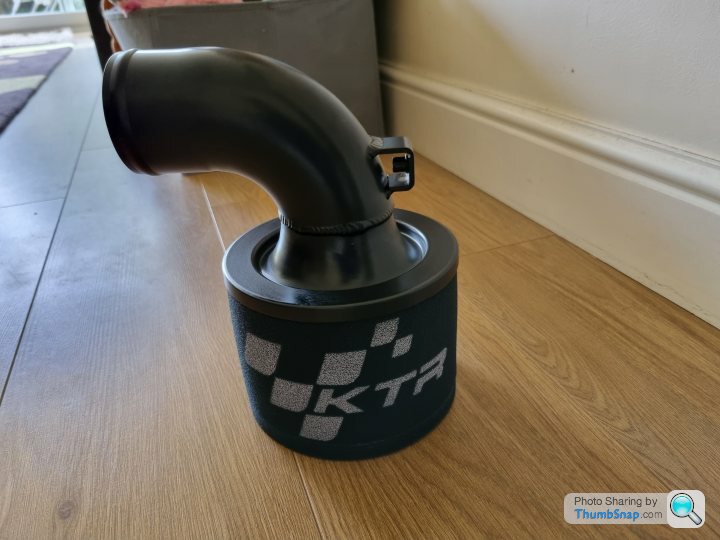
New K-Tec induction kit .
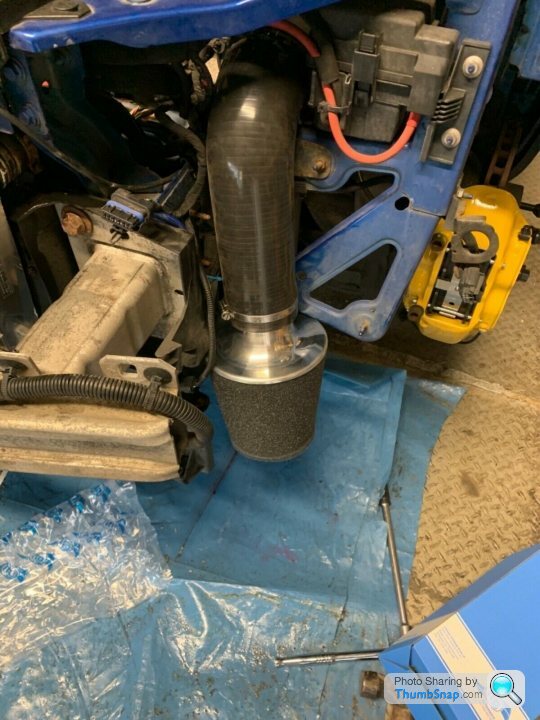
Then all installed .
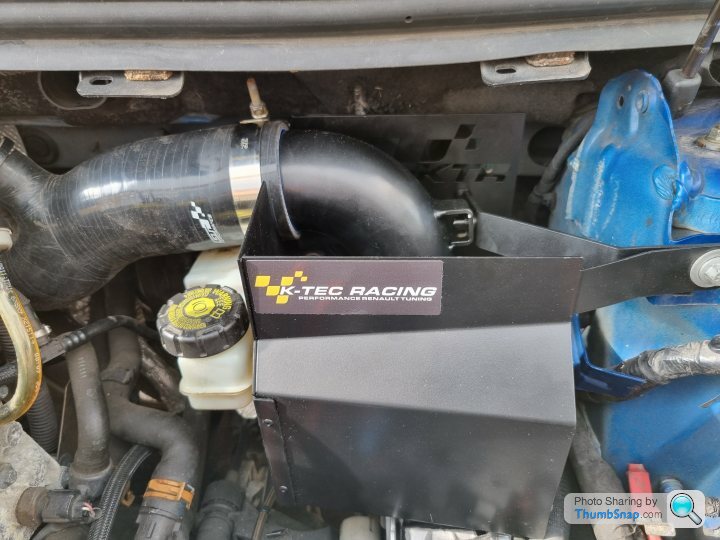
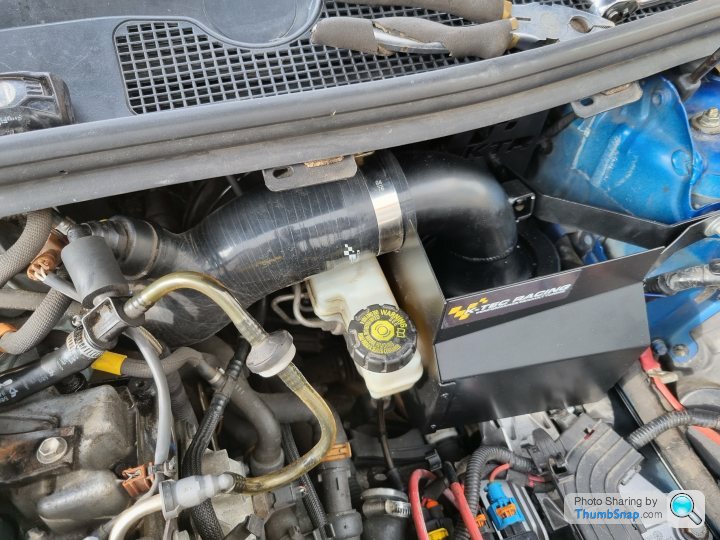

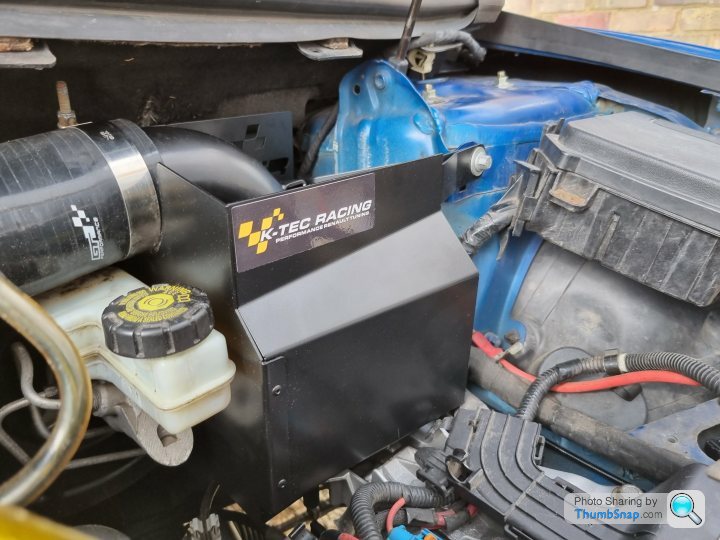
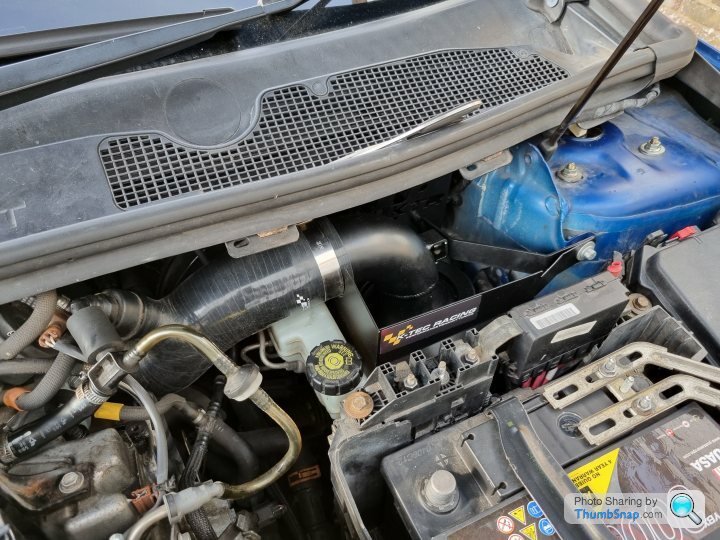
The K-Tec kit is well made and fits nicely and it will remove my fears of any problems with water ingress and also is much easier to access to clean the filter etc .
The ITG will perform better due to its location but the K-Tec has a heat shield box and is tucked out of the way of the engine so should not lost too many horses with heat soak vs the ITG .
The car was running an ITG induction set up when i got the car but the location of this set up has always worried me with regards to sucking up water as the location of the filter is low at the front of the car and even tho a lot of people run this set up and have not had a problems it still would bug me .
Old ITG induction set up .
The ITG was removed and a order placed for a new K-Tec induction set up .
New K-Tec induction kit .
Then all installed .
The K-Tec kit is well made and fits nicely and it will remove my fears of any problems with water ingress and also is much easier to access to clean the filter etc .
The ITG will perform better due to its location but the K-Tec has a heat shield box and is tucked out of the way of the engine so should not lost too many horses with heat soak vs the ITG .
Just a small update this time .
As the crossover intake pipe sits next to the engine i have ordered some DEI heat tape to wrap the pipe in as one it will keep this a bit cooler and two i love a bit of gold in the engine bay
crossover intake pipe .

And then wrapped in the Gold DEI heat tape .
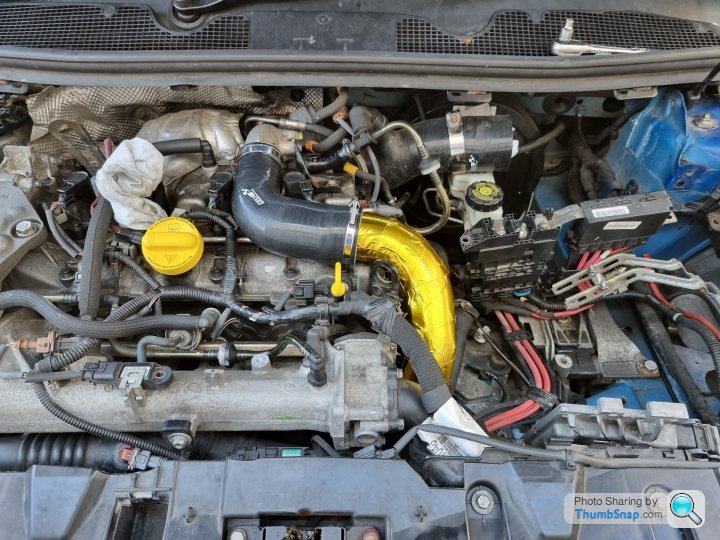
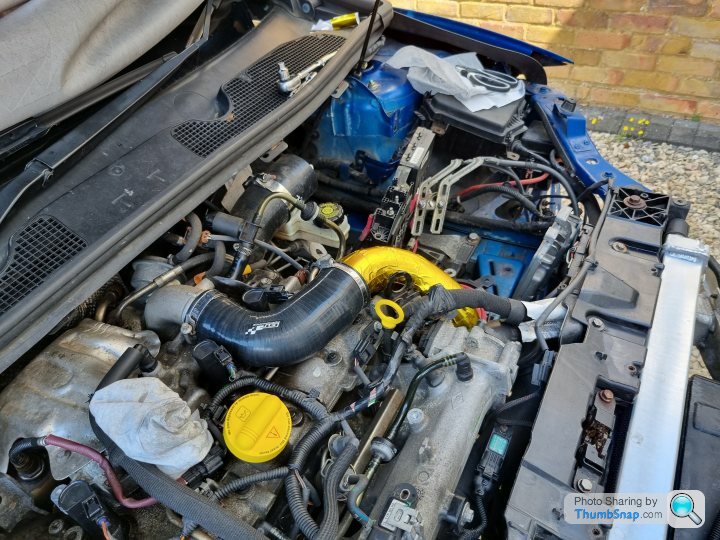
Was not the most easy thing to wrap but should help to keep the metal pipe a touch cooler .
As the crossover intake pipe sits next to the engine i have ordered some DEI heat tape to wrap the pipe in as one it will keep this a bit cooler and two i love a bit of gold in the engine bay
crossover intake pipe .
And then wrapped in the Gold DEI heat tape .
Was not the most easy thing to wrap but should help to keep the metal pipe a touch cooler .
Gassing Station | Readers' Cars | Top of Page | What's New | My Stuff