Discussion


gib6933 said:
gary71 said:
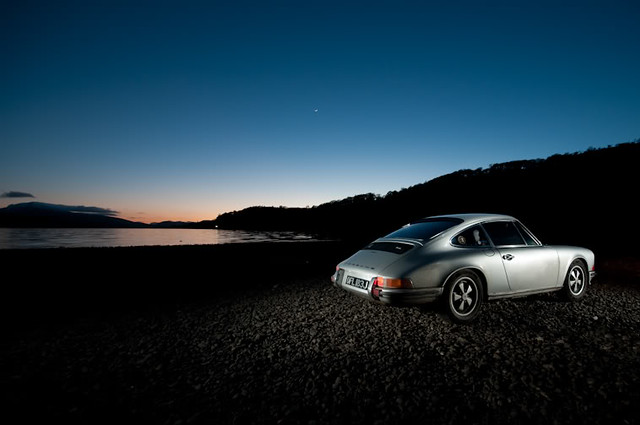
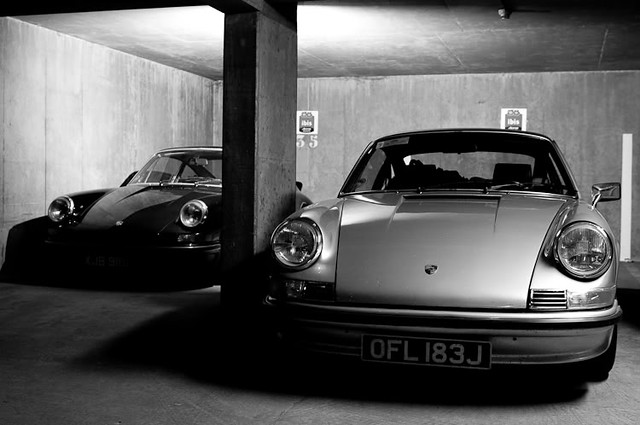
The final paint was done by my local Audi main dealer in Crewe, and a great job they did 
Have you been driving between crewe and nantwich in the past month?Edited by gary71 on Tuesday 20th October 22:44
I have have being hearing an old (read non cat and other rubbish)flat 6 go past at work.
It started me off looking at old 911s, then I found the photo of yours and thought that's what I want!
Whereabouts are you?I drag it out and about most Fridays or over the weekend, once the encrusted salt layer gets washed away I'll use it a bit more!
Just back from a great drive down to Classic Le Mans. A truly great event! If you've never been and fancy a dose of real petrolhead nirvana then make time for it in 2012 No car problems except a misfire early on that was cured using 'The Italian tune up' method over a couple of roundabouts!
First stop after the tunnel:
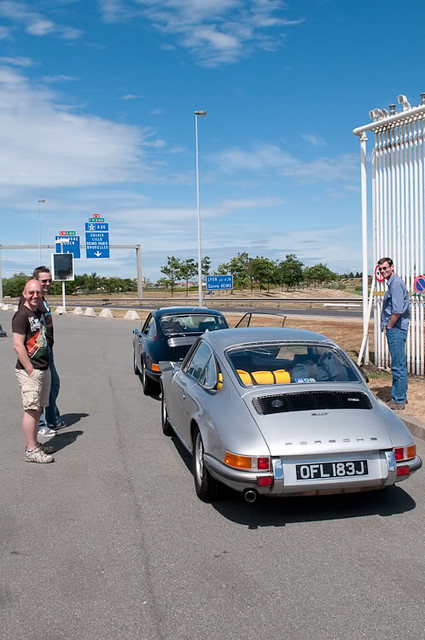
With a few friends on the Mulsanne chicane:
At the hotel:
Lunch stop:
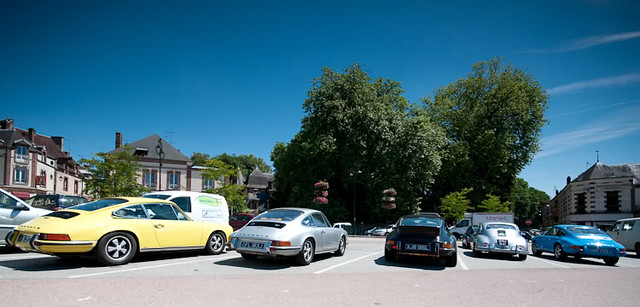
No car problems except a misfire early on that was cured using 'The Italian tune up' method over a couple of roundabouts!First stop after the tunnel:
With a few friends on the Mulsanne chicane:
At the hotel:
Lunch stop:
Edited by gary71 on Thursday 3rd August 18:20
Gad-Westy said:
Utterly gorgeous car. I've got a real hankering for one of these but is it the sort of car you have to spend a lot of time fiddling with or does it just work?
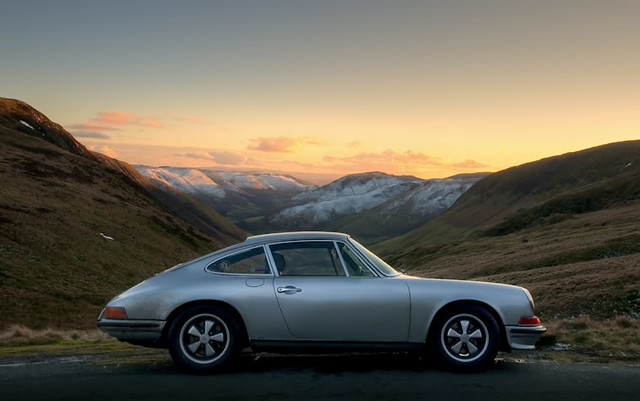
Thanks, It's nearly 40 years old, so you have to fiddle/weld/paint it occasionally, or have deep pockets to get someone who knows to do it for you. Luckily I know how to use a spanner!Get a good one, and they will just run and run, but it's not a modern and they need to be used regularly and hard to keep them in top mechanical order. Although this does take it's toll on the body!
On the plus side it's all pretty simple under there except the engine. It is bit of a Swiss watch, so you can't just expect to do a 'quick' rebuild and get away with it.
...but it will get under your skin and is utterly addictive!

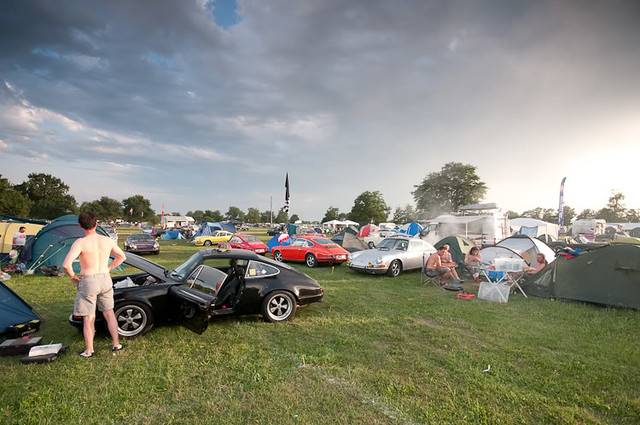
I can't go anywhere now! I always park around that side, but that truck is more suitable for getting in and out of the parking areas!
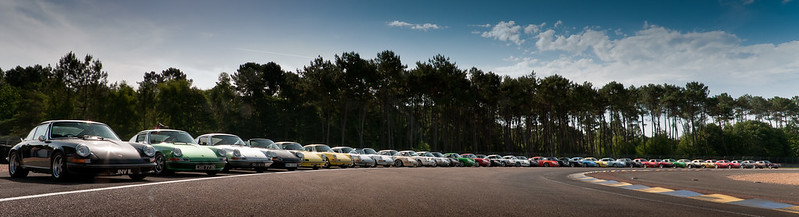
It was a fantastic day wasn't it? Great racing and that Moss chap out on track to add even more prestige.

I always park around that side, but that truck is more suitable for getting in and out of the parking areas!It was a fantastic day wasn't it? Great racing and that Moss chap out on track to add even more prestige.
Edited by gary71 on Thursday 3rd August 18:23
It's up. Now take it apart. by Suggs, on Flickr
Now I have a reliable daily drive I can get on with the jobs I have been putting off for some time!
These are just some of them...
1. Clutch
2. Aluminium trailing arms
3. 3.2 Carrera brakes
4. Valve clearances
5. Split and reseal gearbox
6. Front top mounts
7. etc
Should keep me busy for a few nights!
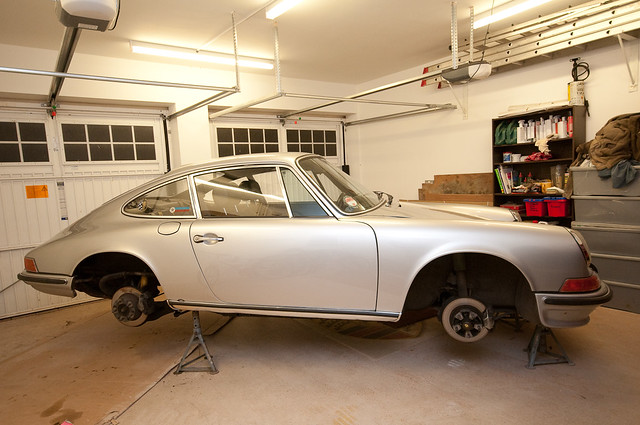
Work so far today:
Engine & box out, rear suspension & brakes off.
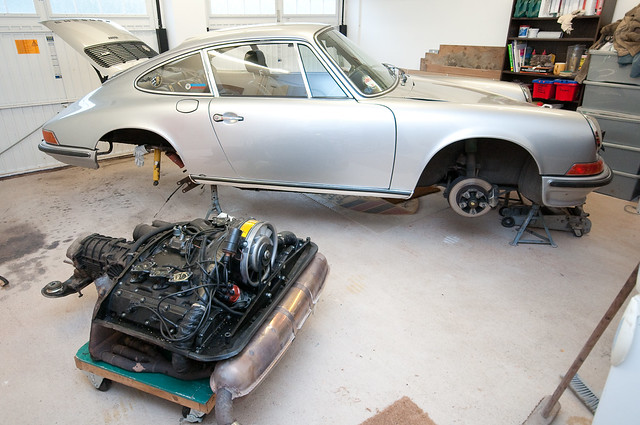
A productive morning by Suggs, on Flickr
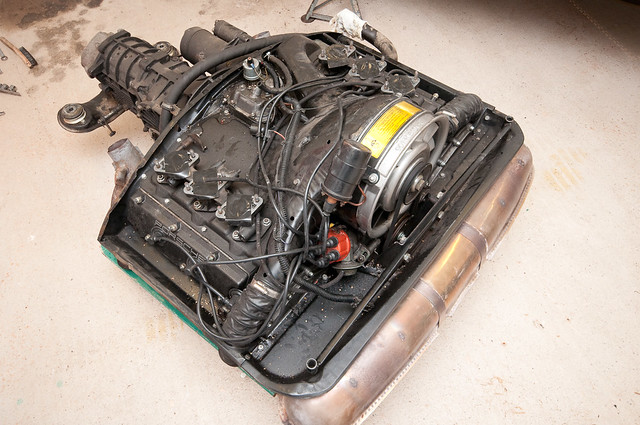
911 Engine & Box by Suggs, on Flickr
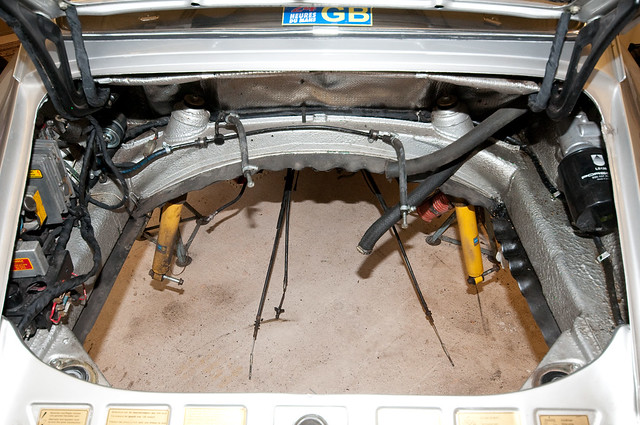
911 Engine Bay by Suggs, on Flickr
Engine & box out, rear suspension & brakes off.
A productive morning by Suggs, on Flickr
911 Engine & Box by Suggs, on Flickr
911 Engine Bay by Suggs, on Flickr
Edited by gary71 on Friday 1st October 12:41
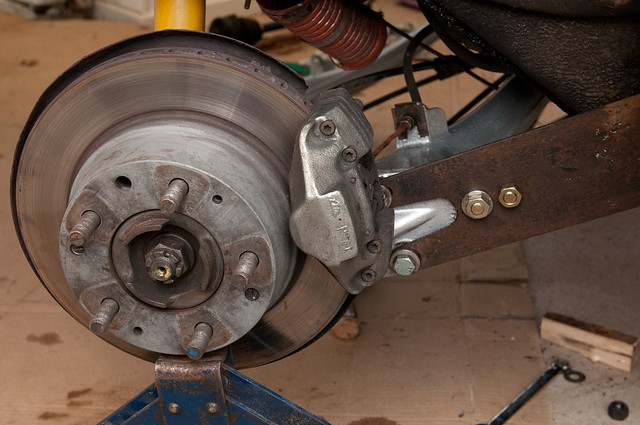
3.2 Carrera brakes are the same size
The 'upgrade' is that the caliper and pad are bigger and the discs thicker. So more for fade resistance than outright stopping power. The carrera caliper is also less prone to flex, so more of your effort gets to the disc.
This car only weighs 1000kg and has 130bhp, so dinner plate discs and six pots are not required
Cheers
Suspension is now going back on, just working out the various combination of new and old bits to make the later aluminium arms works an early car...
Old bits and new bits by Suggs, on Flickr
Suspension is now going back on, just working out the various combination of new and old bits to make the later aluminium arms works an early car...
Old bits and new bits by Suggs, on Flickr
Well of course it wasn't going to be that easy was it?
Finished the side in the picture above then started to work on the other side and found a little bit of flaky rust...
So I poked a hole in it. Swore a little then started to clean it back.

Still doesn't look too bad does it?

...now it does...

...this is how far it went...

I spent last night making up some bits of card to plan exactly how to tackle rebuilding this highly complex area.

Anyone who says their 911 is 'rust free' just hasn't found it yet! The design of this area is the most impressive water trap I have ever seen. Once that heater tube has gone through then you also spend each winter pumping hot moist air into the sill..
Luckily I'm not afraid of welding, but at the same time I'd rather just have put the suspension back on!
Finished the side in the picture above then started to work on the other side and found a little bit of flaky rust...
So I poked a hole in it. Swore a little then started to clean it back.
Still doesn't look too bad does it?
...now it does...
...this is how far it went...
I spent last night making up some bits of card to plan exactly how to tackle rebuilding this highly complex area.
Anyone who says their 911 is 'rust free' just hasn't found it yet! The design of this area is the most impressive water trap I have ever seen. Once that heater tube has gone through then you also spend each winter pumping hot moist air into the sill..
Luckily I'm not afraid of welding, but at the same time I'd rather just have put the suspension back on!
Edited by gary71 on Thursday 4th September 11:00
Thanks for the comments
Welding started today! Always the frustrating bit as it never looks as good as you hope...

The first two pieces are now in, next is the floor patch for a similar butt joint repair.
Then I'll get back on with the inner reinforcing, which I've been ignoring because it's hard!

Floor now all welded in.
The mess in the middle of the repair is the remains of the plug welds through the panel up onto the sill inner. The rest of the mess is just my welding!

Floor/sill end/heelboard repairs in place.
I need to clean this up a bit and get rid of the ends of welding wire.
Should all disappear under a coat of paint!
Welding started today! Always the frustrating bit as it never looks as good as you hope...
The first two pieces are now in, next is the floor patch for a similar butt joint repair.
Then I'll get back on with the inner reinforcing, which I've been ignoring because it's hard!
Floor now all welded in.
The mess in the middle of the repair is the remains of the plug welds through the panel up onto the sill inner. The rest of the mess is just my welding!
Floor/sill end/heelboard repairs in place.
I need to clean this up a bit and get rid of the ends of welding wire.
Should all disappear under a coat of paint!
@Northandy Thanks, Trouble is I aspire to a standard of sheet metal work I have witnessed but cannot achieve It will do for the next ten years
I got a good bit of work completed this afternoon, bit more cutting out, bit more fabrication, bit more welding!
Floor/Sill/Engine bay inner panel welded in and soaked with weld through primer so it won't rot out in 5 minutes. There is a small hole above this section that you can get to after assembly, so I intend to pump this section full of oil!

The inner reinforcing is a complete arse of a panel to make, but got there eventually. Spot the useless hole for plug welding. I got carried away with the drill.

The plug welds at the bottom will get flushed back to make a good surface for the final flange dropping down from outside panel.
Next job. The heater tube. Another section I've been trying to avoid.

It will do for the next ten years I got a good bit of work completed this afternoon, bit more cutting out, bit more fabrication, bit more welding!
Floor/Sill/Engine bay inner panel welded in and soaked with weld through primer so it won't rot out in 5 minutes. There is a small hole above this section that you can get to after assembly, so I intend to pump this section full of oil!
The inner reinforcing is a complete arse of a panel to make, but got there eventually. Spot the useless hole for plug welding. I got carried away with the drill.
The plug welds at the bottom will get flushed back to make a good surface for the final flange dropping down from outside panel.
Next job. The heater tube. Another section I've been trying to avoid.
Gassing Station | Readers' Cars | Top of Page | What's New | My Stuff