Discussion


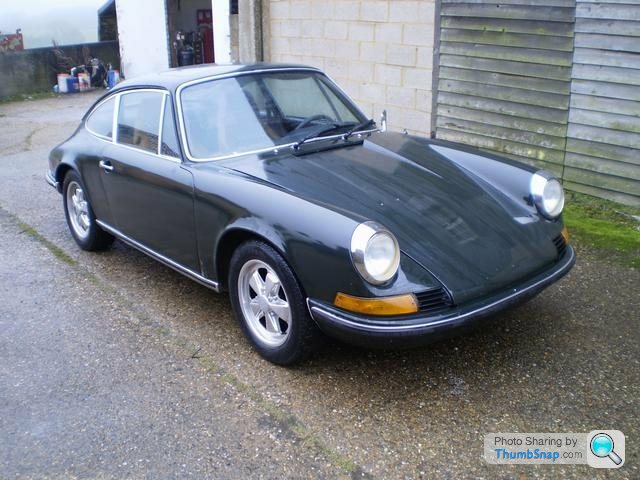
Look at this heap of s t.
t.
£30'000+
Really?
I know it's a 1971 2.4 but it's f*ck*d out of its brains.
https://www.ebay.co.uk/itm/1972-Porsche-911T-UK-Mo...
t.£30'000+
Really?
I know it's a 1971 2.4 but it's f*ck*d out of its brains.
https://www.ebay.co.uk/itm/1972-Porsche-911T-UK-Mo...
iSore said:
Look at this heap of st.
£30'000+
Really?
I know it's a 1971 2.4 but it's f*ck*d out of its brains.
https://www.ebay.co.uk/itm/1972-Porsche-911T-UK-Mo...
I wouldn't pay that for itt.£30'000+
Really?
I know it's a 1971 2.4 but it's f*ck*d out of its brains.
https://www.ebay.co.uk/itm/1972-Porsche-911T-UK-Mo...
However with 70's 2.4's having asking prices of 100,000 to 150,000 looks like a decent resto job could be done and a pot of tea still in it
Firstly Gary, if you feel this post detracts in ANY way from your truly wonderful ownership thread, do please tell me and I'll delete/remove whichever bits you feel aren't pertinent (or indeed the whole post)
However it did have a few nasties. Outer sills, front panel butchered for a retro aircon install, tan/front suspension mount panel, a previously badly repaired rear panel, and rotten front and rear screen surrounds.
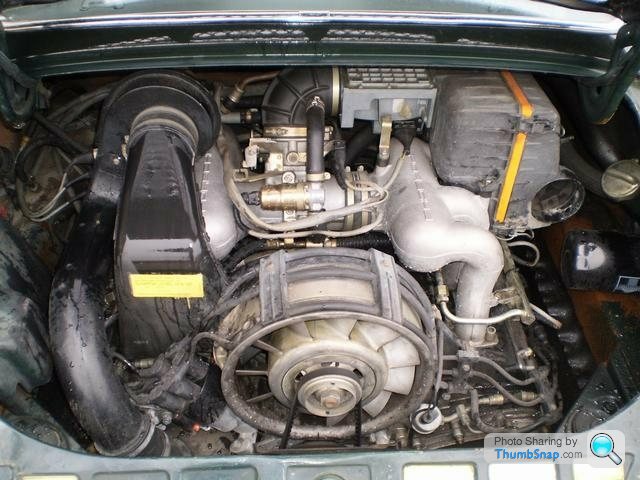
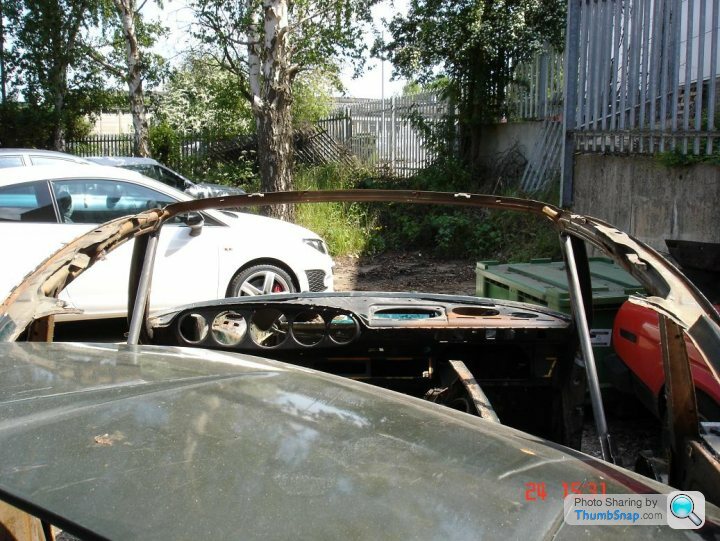
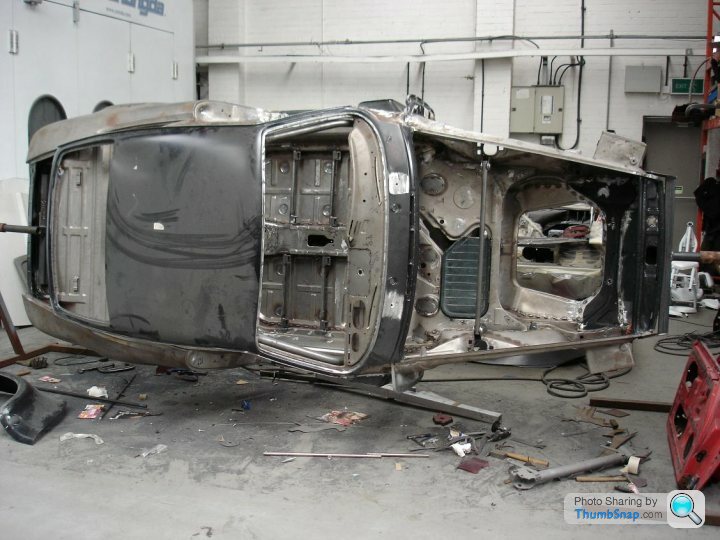
But perhaps I should elucidate further ? The car came from California, it was originally a T but had been fitted with a 3.2 Carrera engine and an interior that was .... well here you go, judge for yourself ... :
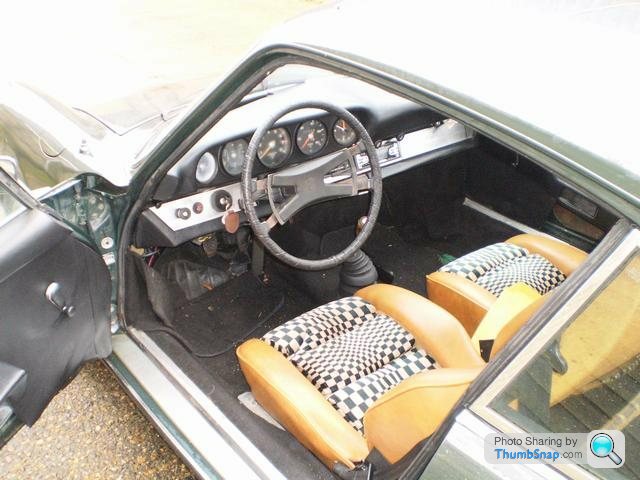

Despite the horrendous interior, dodgy engine conversion and hand/brush painted Irish green paint job, it was actually a cracking shell and perfect for the job. I purchased the car as the base for a perfect ‘73 2.8 RSR replica back in 2010.
But without further derailing your wonderful thread Gary (and going too far off topic, though clearly it’s relevant to your current refurbishment project) and if nothing else, it shows that even a seemingly solid ex-Californian car can and will hide some surprises.
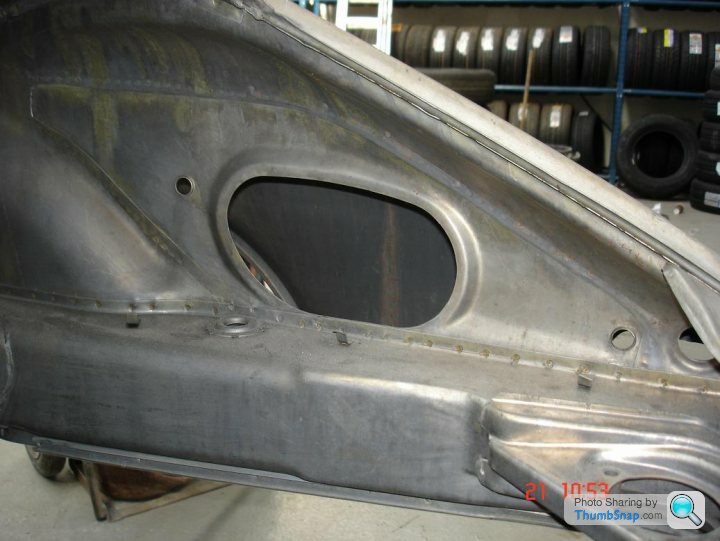
I bought it because it was solid (far, far more solid than any UK car, as you know all too well...) LHD and a 1973 model (though the hole in the OSR inner quarter for the oil fill pipework led us to believe it was built from some ‘72 parts the factory had left on the shelves, or was a '72 shell ....)
The condition of the interior wasn’t a concern, as 90% of it was due to be consigned to the bin anyway.
The engine was a bonus, as it wasn't needed and easily saleable.
Converting the T shell into an RSR shell was no small undertaking, as there were a lot of modifications carried out at the factory to make the shell usable for it's intended purpose (I'd planned to get FIA papers on it and then rally it to gain some nice provenance)
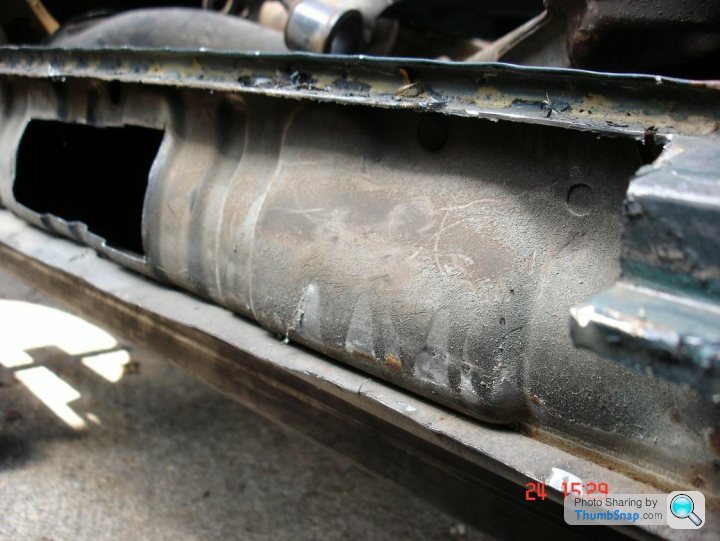
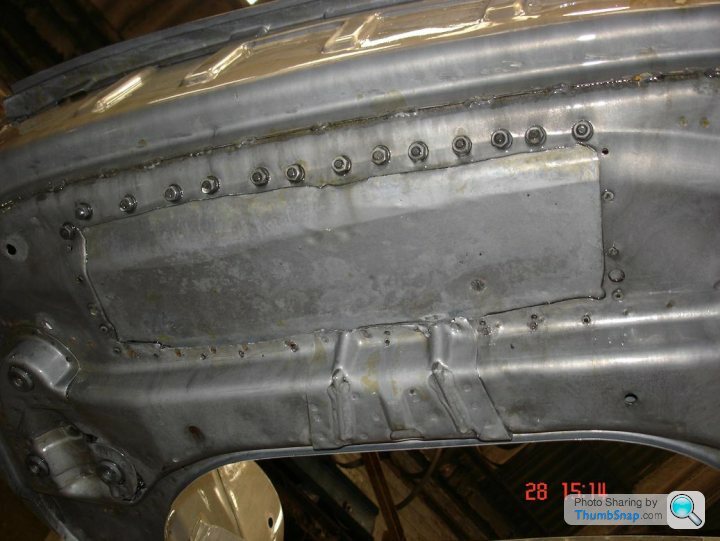
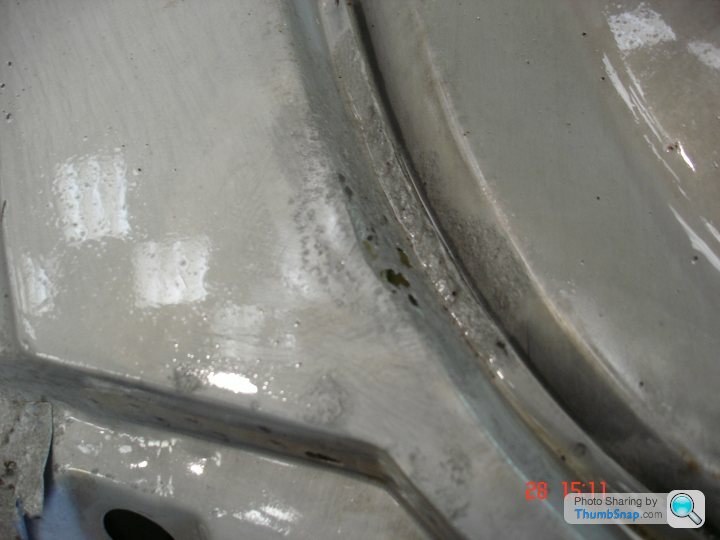
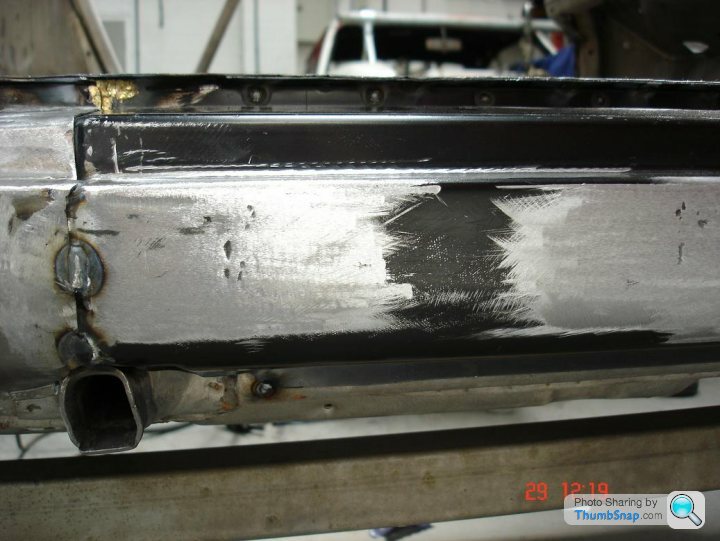
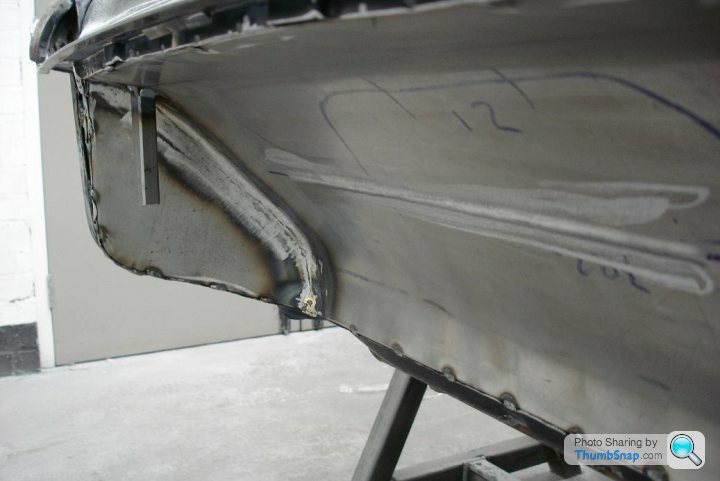
The list of replacement panels was longer than I'd first anticipated : Non sunroof roof skin (now a 993 part that encompasses the rear windscreen surround and the front scuttle, fortuitous as both needed repairing/replacing anyway. Outer sills (NLA, but superseded by 993 parts) front panel, tank support panel, A post/door hinge pillars (NLA), rear panel (NLA) the latter two because the parts had been superseded by 3.2 parts (which are different and thus needed modifying for originality). The doors, bonnet, and engine cover were either corroded or previously damaged and poorly repaired. Here's the leading edge of the bonnet once stripped ...
Having stripped the shell by hand using hand held wire brushes, rotary wire brushes and a hot air gun (used for shrink wrapping pallets (BTW I don't envy you one bit Gary) and some vicious paint stripper, the rotten outer sills were removed and access panels cut from the inner sills to enable the removal of the heater tubes prior to dipping the shell.
Along with the roof (which meant bracing the door apertures to ensure the goons at Surface Processing didn't twist the shell out of all recognition) read into that last comment what you will about my thoughts on SP ...
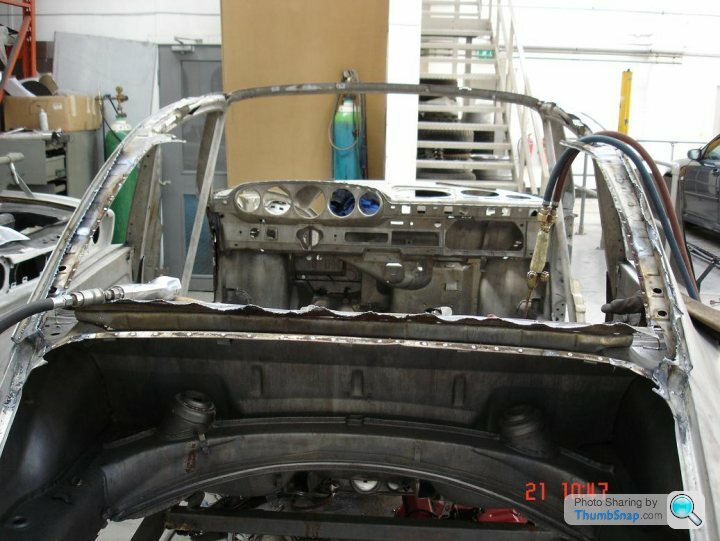
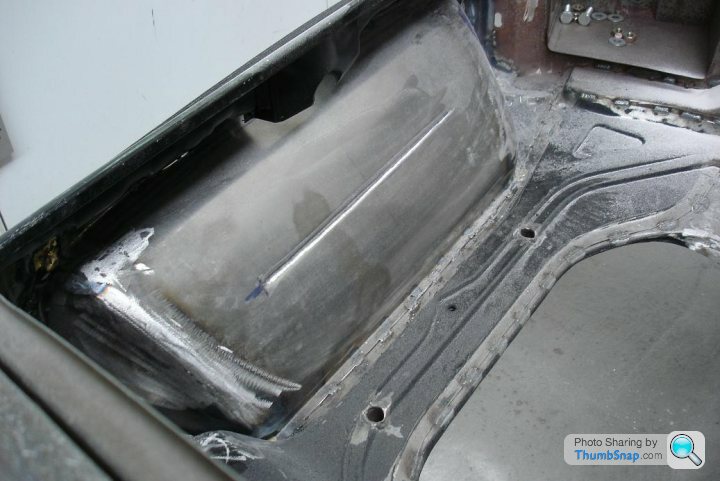
Once dipped it was clear the floorpan and inner sills were in almost perfect condition (see previously posted images)
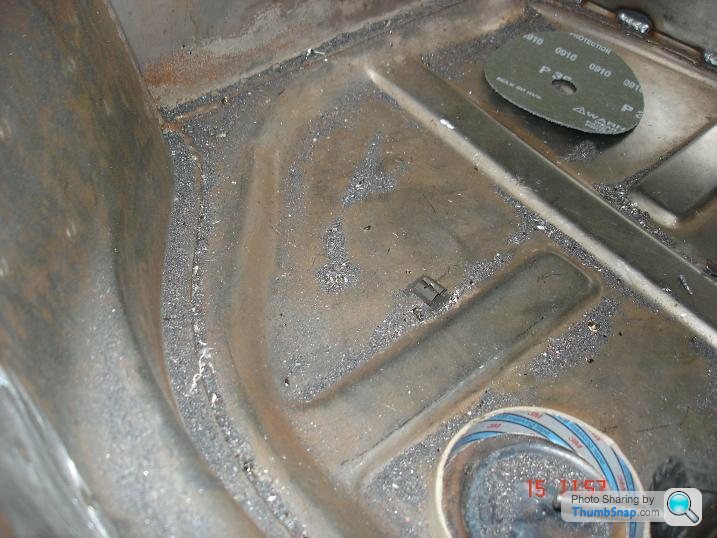
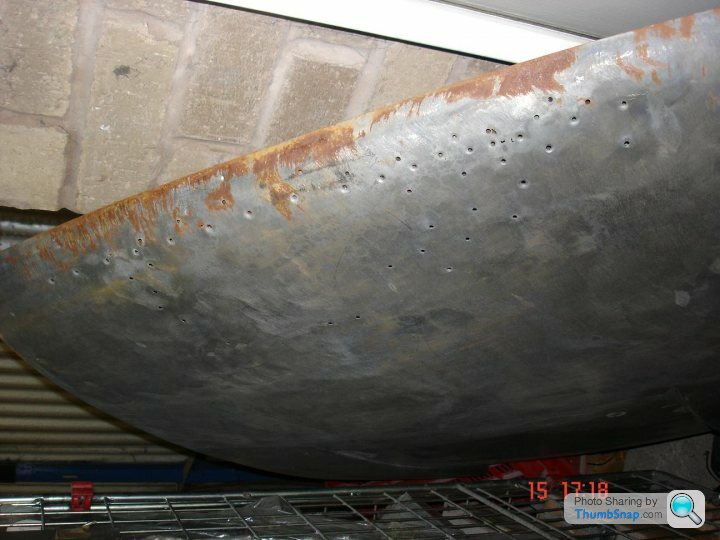
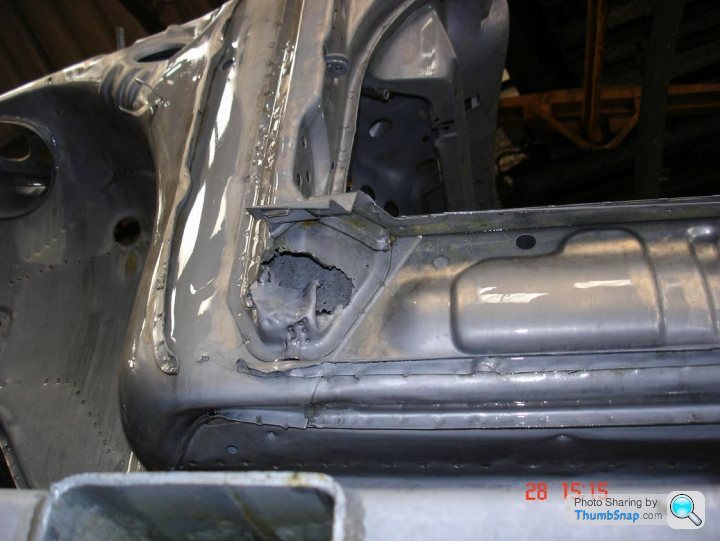
but the scale of the corrosion became more obvious ... :
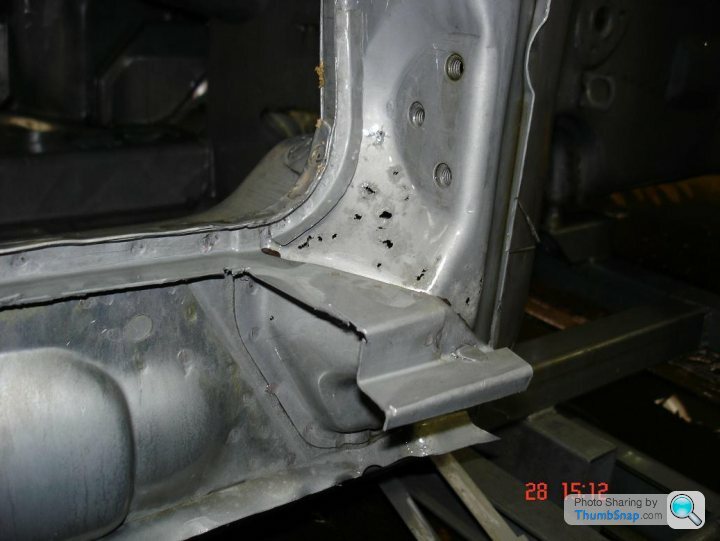
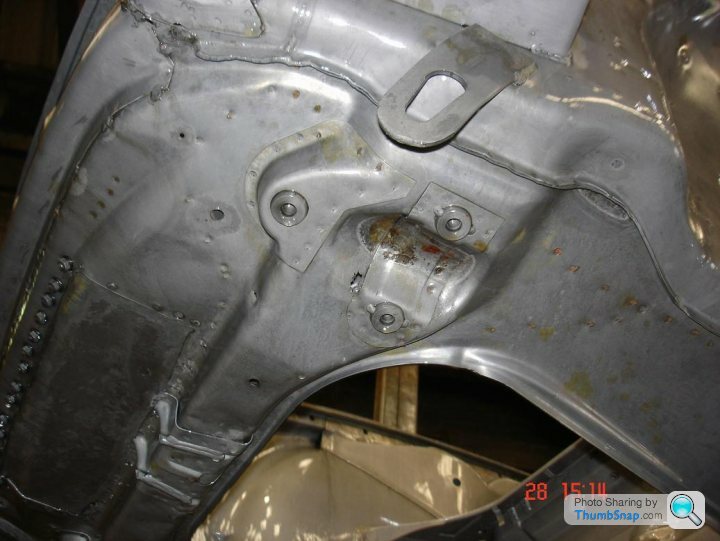
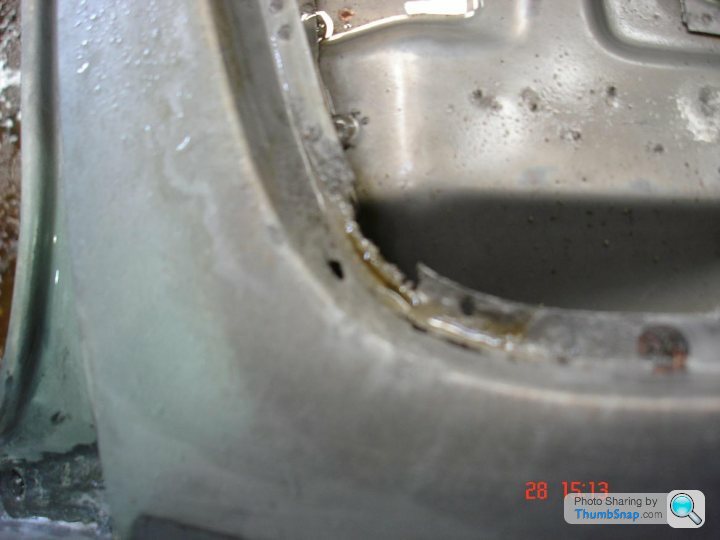
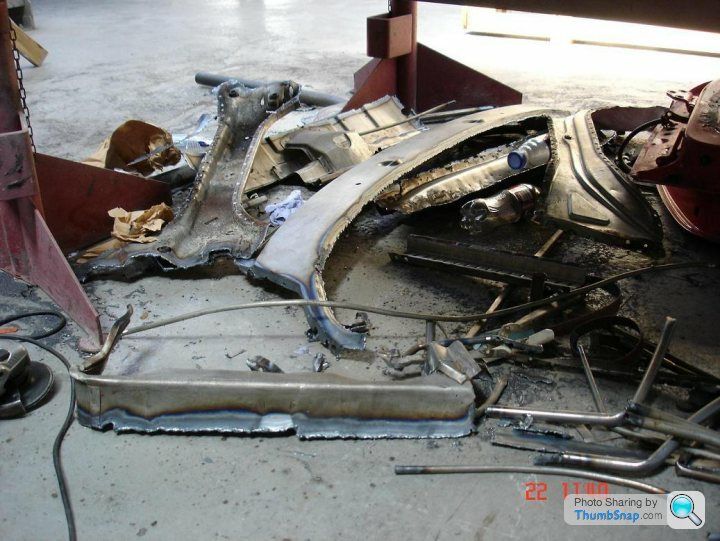
Some of the offending panels removed :
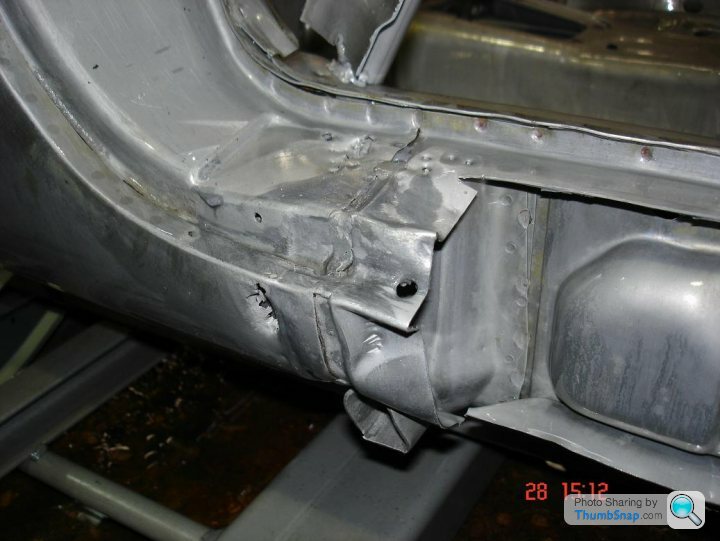
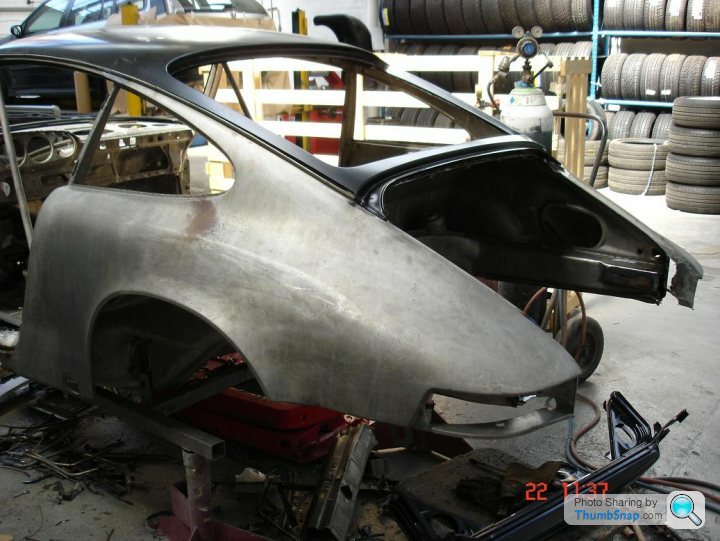
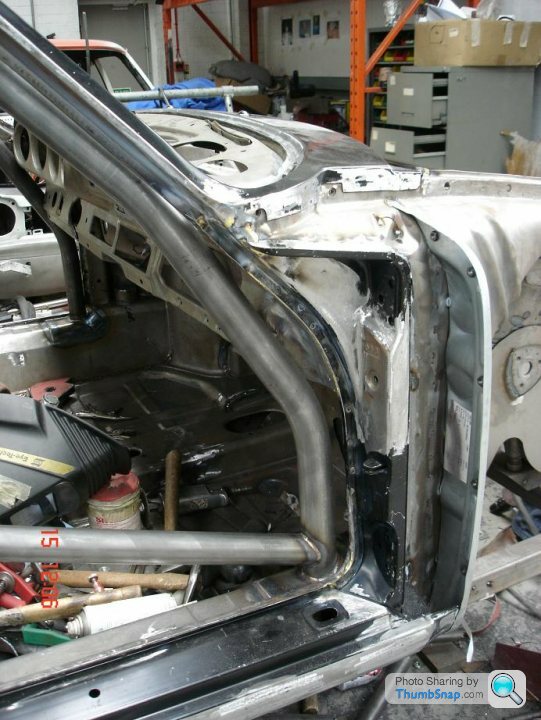
With the damaged/corroded panels removed, reassembly/modifying and the cage install/strengthening/seam welding could begin ...
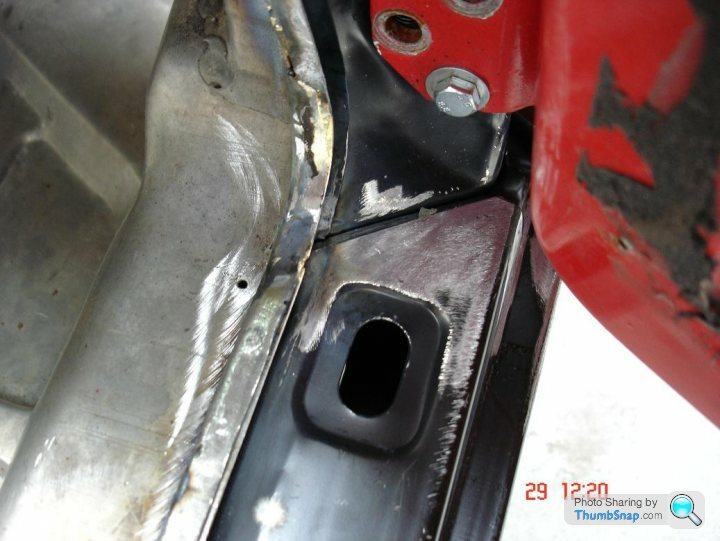
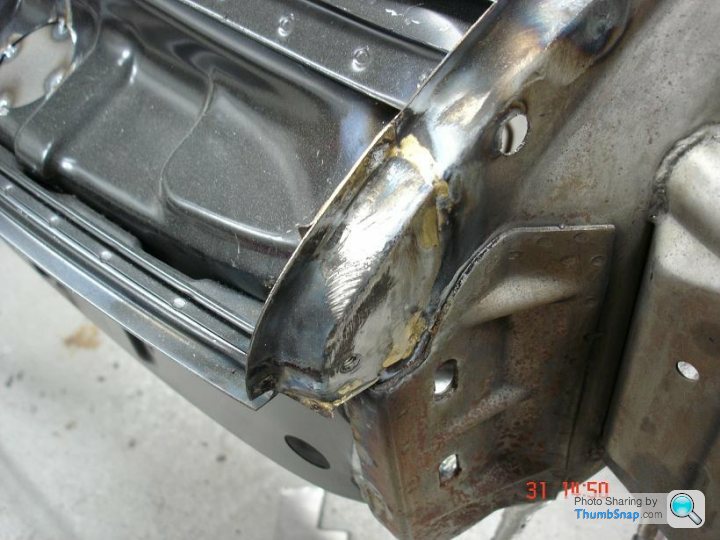
The 3.2 A post door hingle pillar panels don't come with the "M8" stamped into them anymore, so these were carefully removed from the original panels and frenched into the new ones ... Note the use of brazing wherever the cars were brazed at the factory.

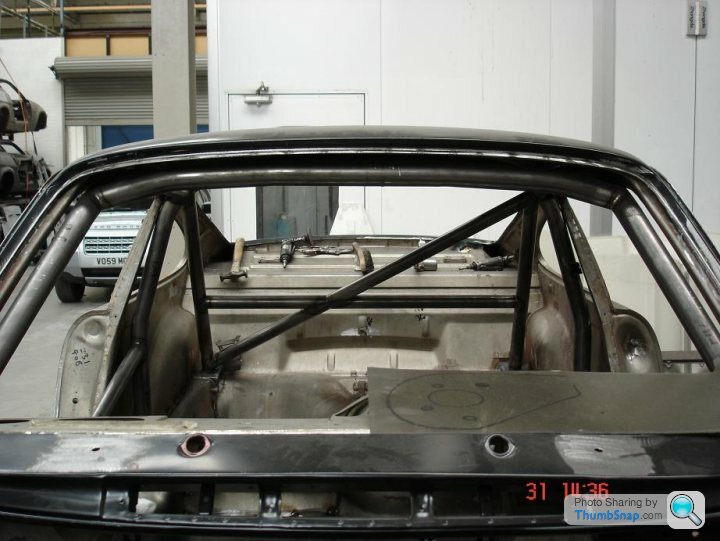
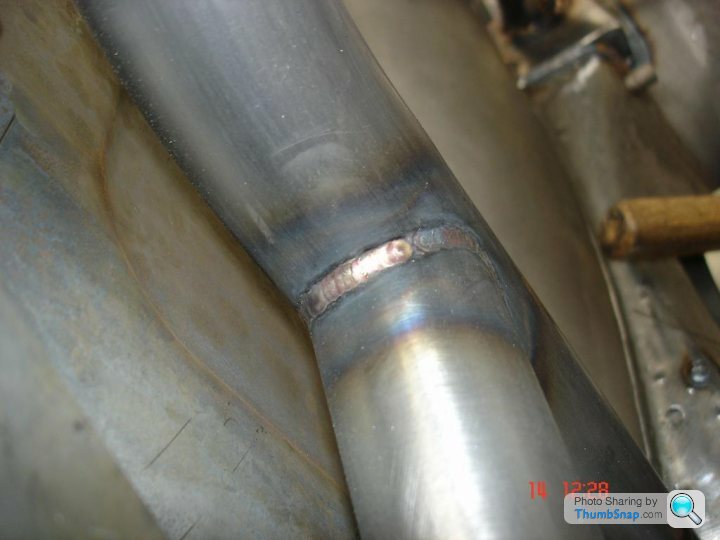
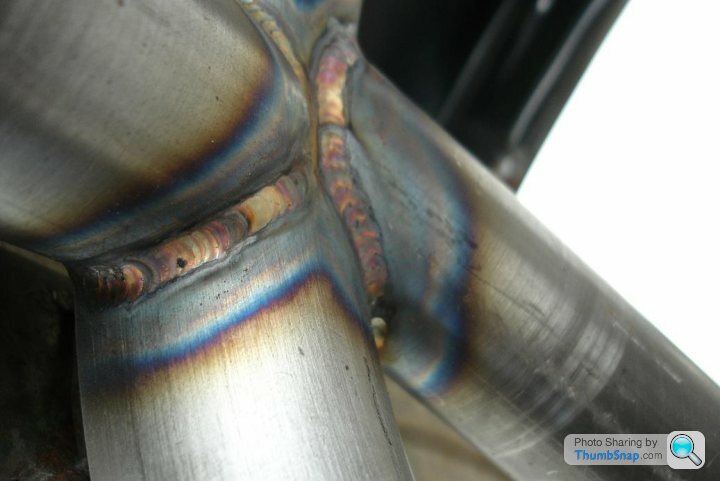
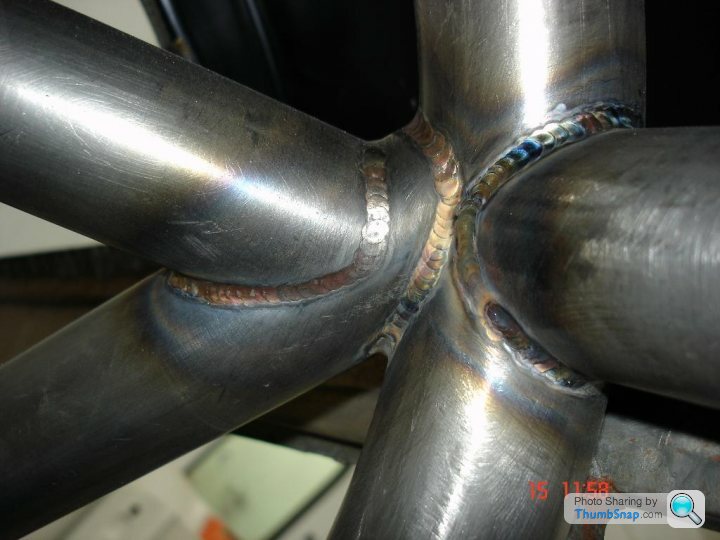
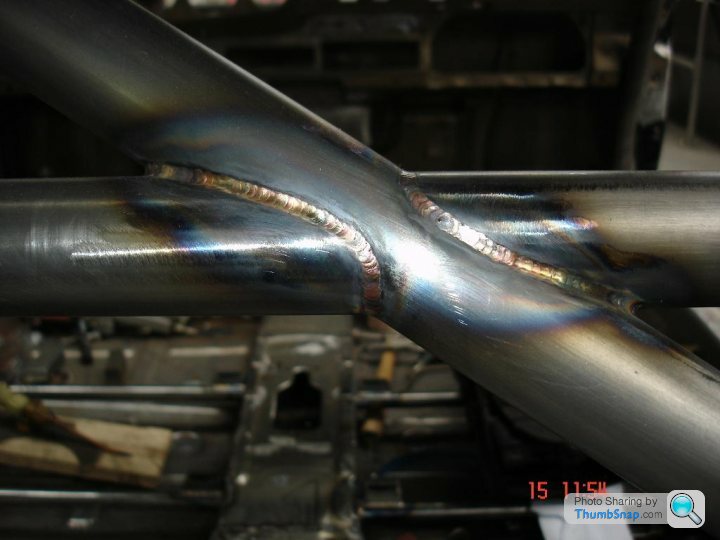
TIG cage install :
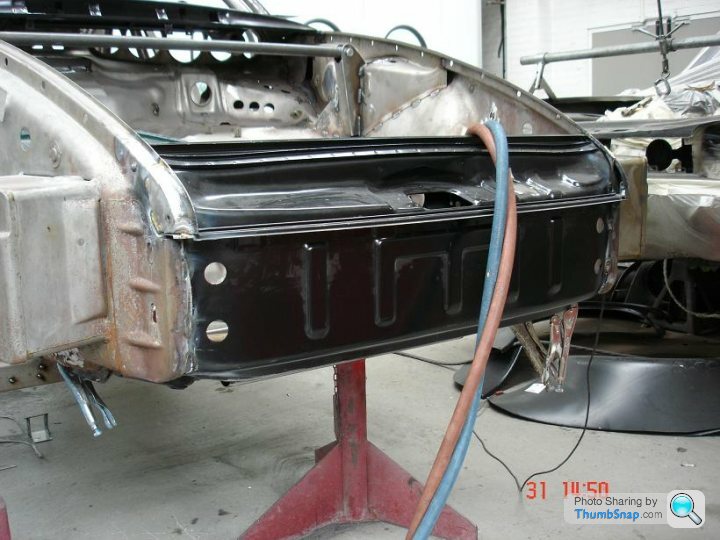
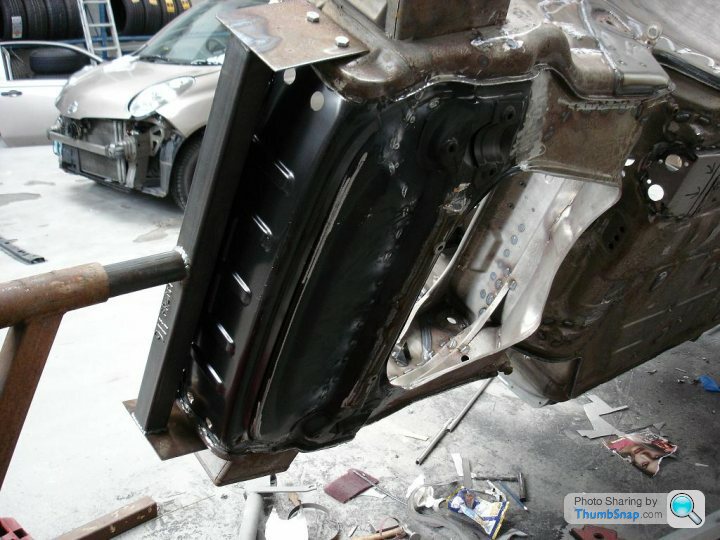
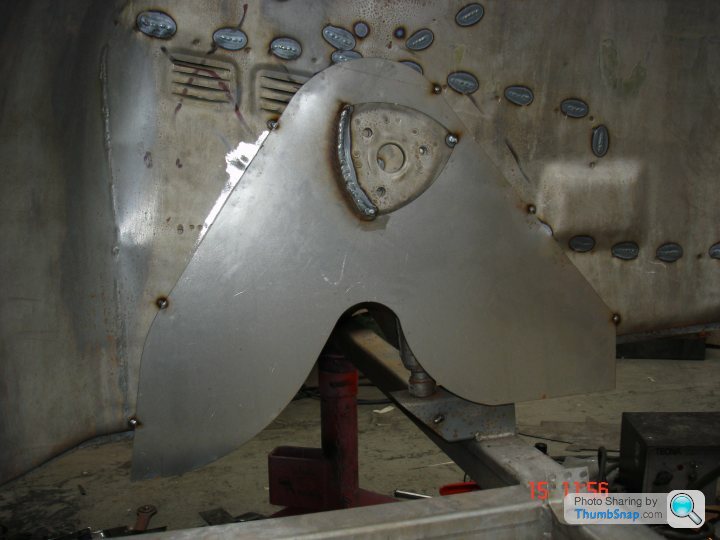
New front panel fitted and modified using hand fabbed panel for factory spec front mounted oil cooler :
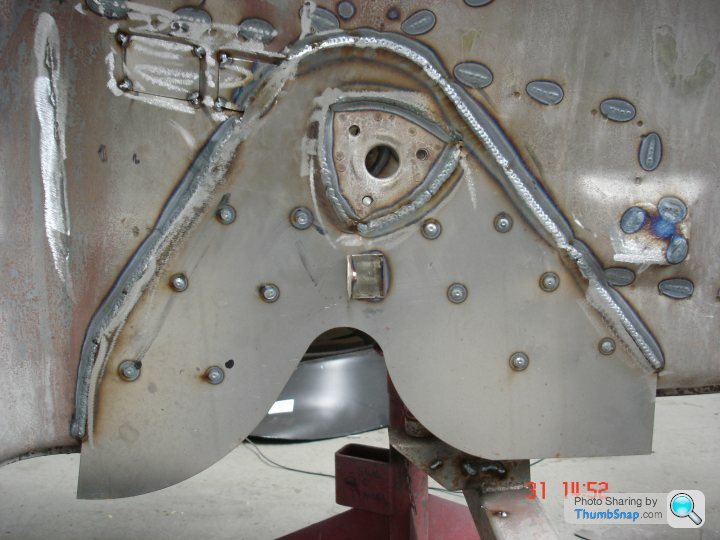
Seam welding :
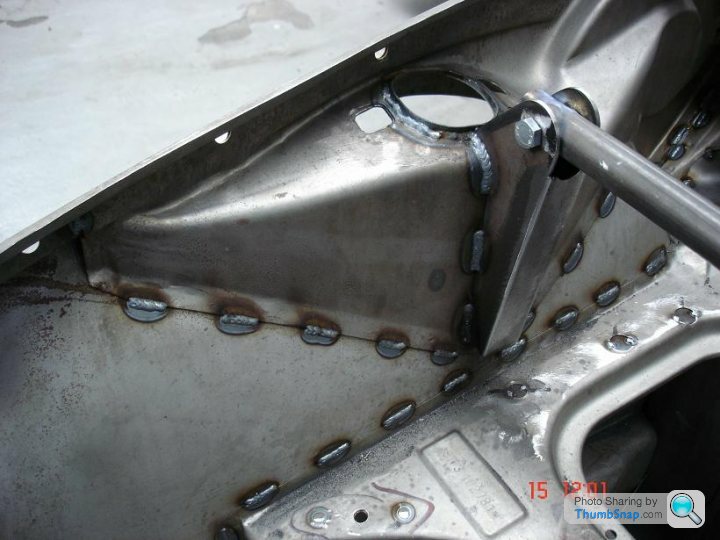

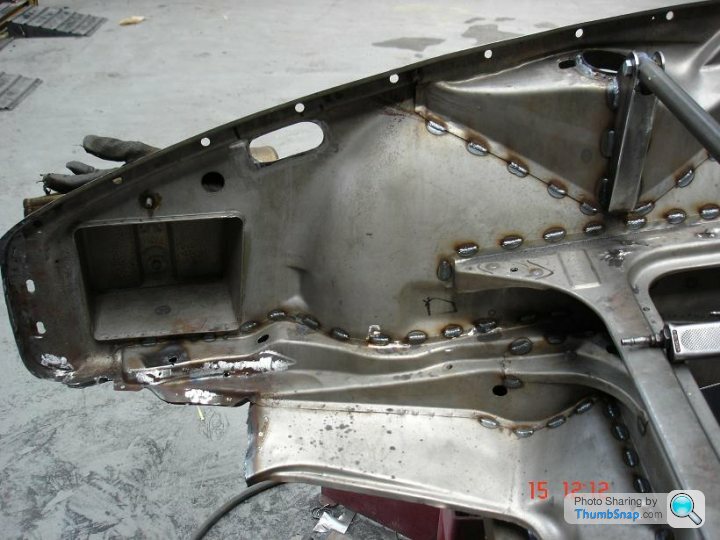
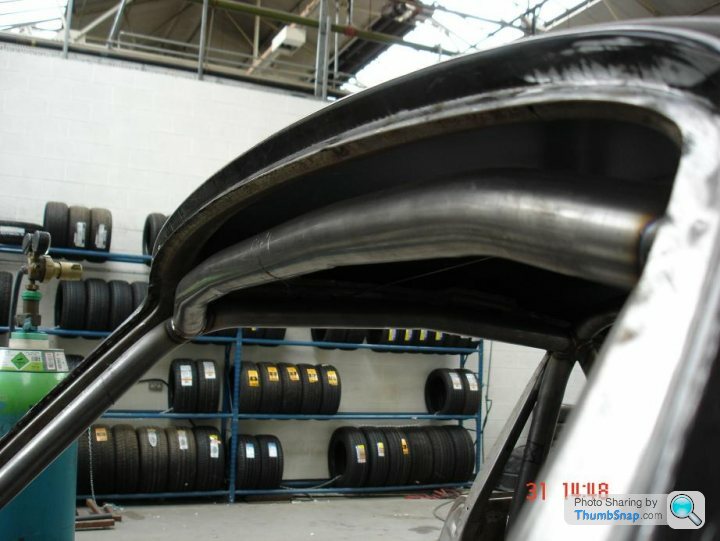
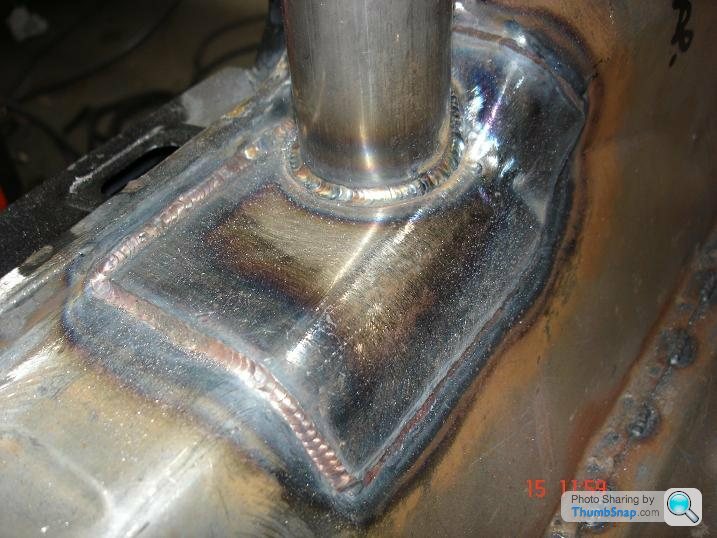
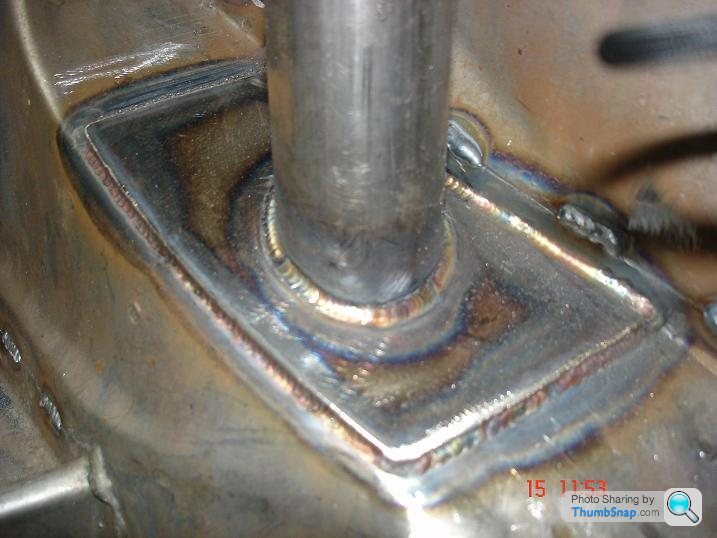
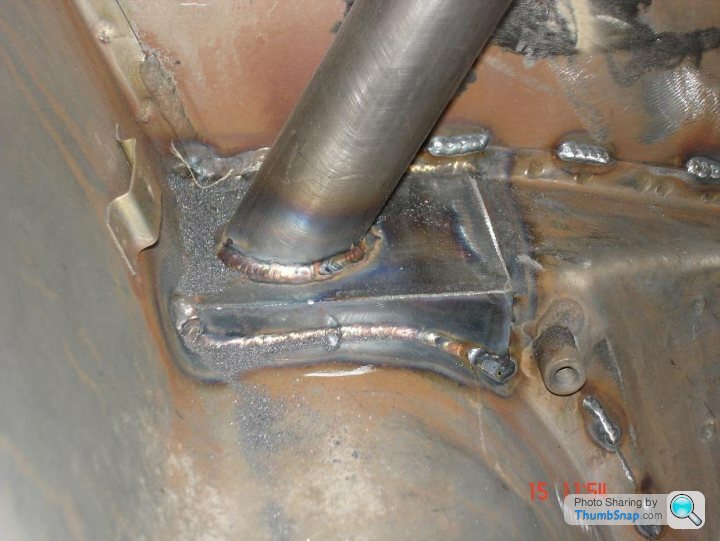
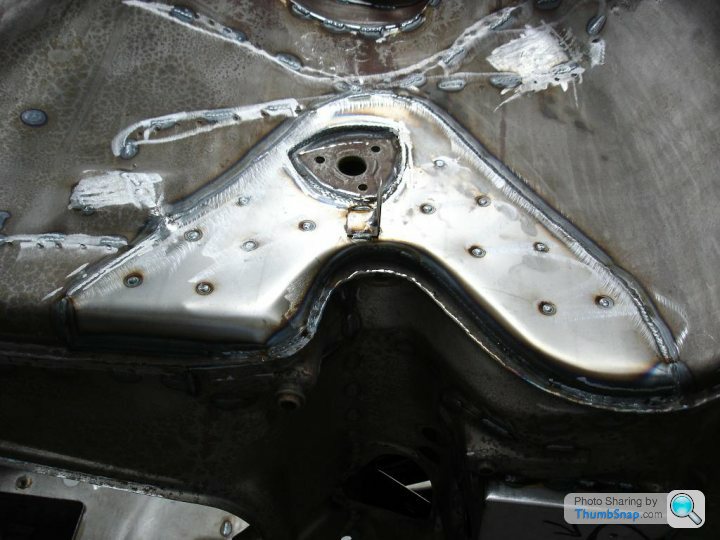
The early 911 shell isn't THAT strong, so some reinforcement was necessary :
Regrettably with the shell prep near finished (along with aluminium skinned doors and superb custom pressed steel RSR wheel arches, I felt the costs of completing the built were going to be prohibitive (circa £130K back in 2011) AND that the finished product would not make for a particularly nice road car. Accordingly I abandoned the project and sold it on to someone with considerably deeper pockets. I'm glad to say it was completed and is one of the finest, most accurate 2.8 RSR replicas built.
All crdit to you Gary for keeping and maintaining your car over all these years, the Porsche world could do with more owners like you
gary71 said:
That shell looks fantastic. A few tiny bits here and there but nothing of note!
You'd think wouldn't you ? However it did have a few nasties. Outer sills, front panel butchered for a retro aircon install, tan/front suspension mount panel, a previously badly repaired rear panel, and rotten front and rear screen surrounds.
But perhaps I should elucidate further ? The car came from California, it was originally a T but had been fitted with a 3.2 Carrera engine and an interior that was .... well here you go, judge for yourself ... :
Despite the horrendous interior, dodgy engine conversion and hand/brush painted Irish green paint job, it was actually a cracking shell and perfect for the job. I purchased the car as the base for a perfect ‘73 2.8 RSR replica back in 2010.
But without further derailing your wonderful thread Gary (and going too far off topic, though clearly it’s relevant to your current refurbishment project) and if nothing else, it shows that even a seemingly solid ex-Californian car can and will hide some surprises.
I bought it because it was solid (far, far more solid than any UK car, as you know all too well...) LHD and a 1973 model (though the hole in the OSR inner quarter for the oil fill pipework led us to believe it was built from some ‘72 parts the factory had left on the shelves, or was a '72 shell ....)
The condition of the interior wasn’t a concern, as 90% of it was due to be consigned to the bin anyway.
The engine was a bonus, as it wasn't needed and easily saleable.
Converting the T shell into an RSR shell was no small undertaking, as there were a lot of modifications carried out at the factory to make the shell usable for it's intended purpose (I'd planned to get FIA papers on it and then rally it to gain some nice provenance)
The list of replacement panels was longer than I'd first anticipated : Non sunroof roof skin (now a 993 part that encompasses the rear windscreen surround and the front scuttle, fortuitous as both needed repairing/replacing anyway. Outer sills (NLA, but superseded by 993 parts) front panel, tank support panel, A post/door hinge pillars (NLA), rear panel (NLA) the latter two because the parts had been superseded by 3.2 parts (which are different and thus needed modifying for originality). The doors, bonnet, and engine cover were either corroded or previously damaged and poorly repaired. Here's the leading edge of the bonnet once stripped ...
Having stripped the shell by hand using hand held wire brushes, rotary wire brushes and a hot air gun (used for shrink wrapping pallets (BTW I don't envy you one bit Gary) and some vicious paint stripper, the rotten outer sills were removed and access panels cut from the inner sills to enable the removal of the heater tubes prior to dipping the shell.
Along with the roof (which meant bracing the door apertures to ensure the goons at Surface Processing didn't twist the shell out of all recognition) read into that last comment what you will about my thoughts on SP ...
Once dipped it was clear the floorpan and inner sills were in almost perfect condition (see previously posted images)
but the scale of the corrosion became more obvious ... :
Some of the offending panels removed :
With the damaged/corroded panels removed, reassembly/modifying and the cage install/strengthening/seam welding could begin ...
The 3.2 A post door hingle pillar panels don't come with the "M8" stamped into them anymore, so these were carefully removed from the original panels and frenched into the new ones ... Note the use of brazing wherever the cars were brazed at the factory.
TIG cage install :
New front panel fitted and modified using hand fabbed panel for factory spec front mounted oil cooler :
Seam welding :
The early 911 shell isn't THAT strong, so some reinforcement was necessary :
Regrettably with the shell prep near finished (along with aluminium skinned doors and superb custom pressed steel RSR wheel arches, I felt the costs of completing the built were going to be prohibitive (circa £130K back in 2011) AND that the finished product would not make for a particularly nice road car. Accordingly I abandoned the project and sold it on to someone with considerably deeper pockets. I'm glad to say it was completed and is one of the finest, most accurate 2.8 RSR replicas built.
All crdit to you Gary for keeping and maintaining your car over all these years, the Porsche world could do with more owners like you
B'stard Child said:
iSore said:
Look at this heap of st.
£30'000+
Really?
I know it's a 1971 2.4 but it's f*ck*d out of its brains.
https://www.ebay.co.uk/itm/1972-Porsche-911T-UK-Mo...
I wouldn't pay that for itt.£30'000+
Really?
I know it's a 1971 2.4 but it's f*ck*d out of its brains.
https://www.ebay.co.uk/itm/1972-Porsche-911T-UK-Mo...
However with 70's 2.4's having asking prices of 100,000 to 150,000 looks like a decent resto job could be done and a pot of tea still in it
gary71 said:
Still a sweet shell, I’d have that lot done in an afternoon!
As it is today I continued with the other longit and ground some of my wrist away!

Ouch !! Savage things, I did that just the once before I invested in a pair of gauntlets we used for pouring molten metal in the foundry :As it is today I continued with the other longit and ground some of my wrist away!
https://www.arco.co.uk/products/1258800
But you’re right, it was good shell.
As I mentioned, I borrowed one of these (or something very similar) to strip my shell.
https://www.hilltop-products.co.uk/leister-forte-s...
It enabled me to heat up large areas of seam sealer and underseal quickly (and when I say heat up, I mean incinerate...) to enable it to be easily scraped, wire brushed by hand, or ripped off with MBX wheels :
https://www.abtec4abrasives.com/wire-brush-power-t...
Decent ventilation is a necessity when using such a high temp hot air source though, as I suspect the sealants used back them released some pretty nasty fumes when heated up ...
Edited by Slippydiff on Saturday 8th September 00:53


I’ve had a fairly productive time today and made the bulk of the big panel. Annoyingly I had to cut the end as I couldn’t make the 3D curve.
I’ve a day off tomorrow so this should be welded in and then I can start on the other side, which is in much better condition.


I’ll dress the welds back a bit, but I’m not getting obsessive about a smooth finish inside the arch as I’d rather keep the strength. The inside engine bay side is visible, but covered in stone chip and behind the CDI box!
I’ve a day off tomorrow so this should be welded in and then I can start on the other side, which is in much better condition.
I’ll dress the welds back a bit, but I’m not getting obsessive about a smooth finish inside the arch as I’d rather keep the strength. The inside engine bay side is visible, but covered in stone chip and behind the CDI box!
Edited by gary71 on Sunday 16th September 17:43
More welding and panel fettling today, and some paint!


I’ve cut the quarters back a bit further to get at the foam inside and improve access for the parcel shelf and the top of the RH inner wing.
The paint is epoxy 121 rollered and brushed on, masked off where more welding is needed. There’s weld through primer covering those areas. I couldn’t stand to see all that shiny steel go rusty again!
Next is the end of the LH inner wing and working out what to do with the bit where the oil breather pipes go through as it’s mainly lace!


Great work, always good to see an update on this thread! I put a few patch panels into one of my old mr2s, nothing on this scale but even small bits can soak up lots of hours. One thing I have always wondered: when you do this much cutting and welding to a car, the metal might end up being the right shape, but is it as strong as the original? I am thinking of factors like the heat affected zone of the weld, crack initiation sites, resistance to fatigue etc.
Definitely not as strong as clean steel. That’s why I’m not fully grinding back the welds. I’m going far enough to eliminate any craters that I couldn’t clean out otherwise and so it won’t be too obvious once it’s got a coat of spray stonechip over it.
However it’s a lot stronger than holes and rust
Most of the key structural parts (sills etc) will be done with complete panels spot welded as original, so all that is OK.
However it’s a lot stronger than holes and rust
Most of the key structural parts (sills etc) will be done with complete panels spot welded as original, so all that is OK.


Gassing Station | Readers' Cars | Top of Page | What's New | My Stuff