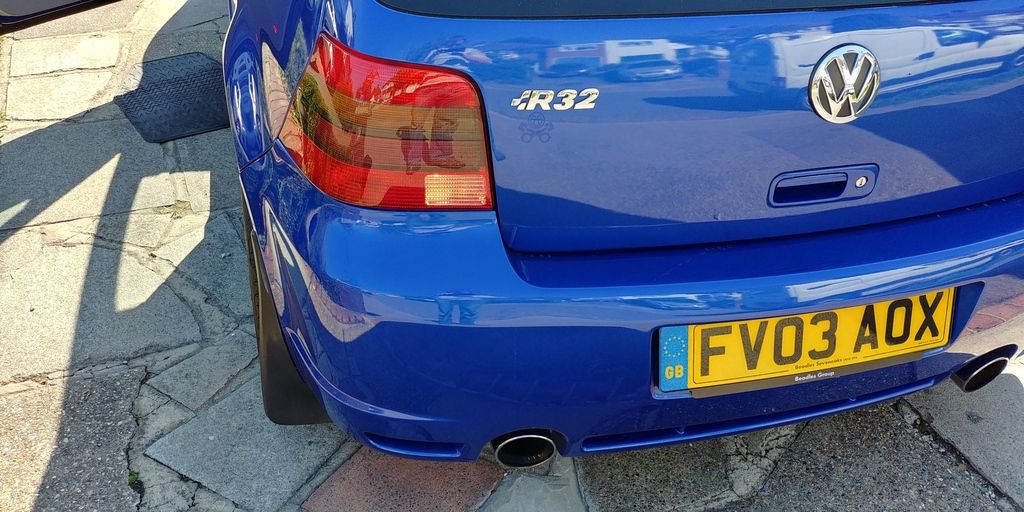
Rotrex powered R32
Discussion


zexel said:
Excellent work! Brilliant thread.
Can I ask what these are/do on the brake pads?
Sorry i missed this, I have no idea what they are for, i have wondered myself.Can I ask what these are/do on the brake pads?
A couple of weeks ago I took the car to GTI international at Rockingham, I did a few runs on the 1/8th mile. My best was 7.54 seconds with a top speed of 94.7mph and a 0-60 of 3.31 seconds. I’m pretty pleased with that as its good for a heavy old Golf
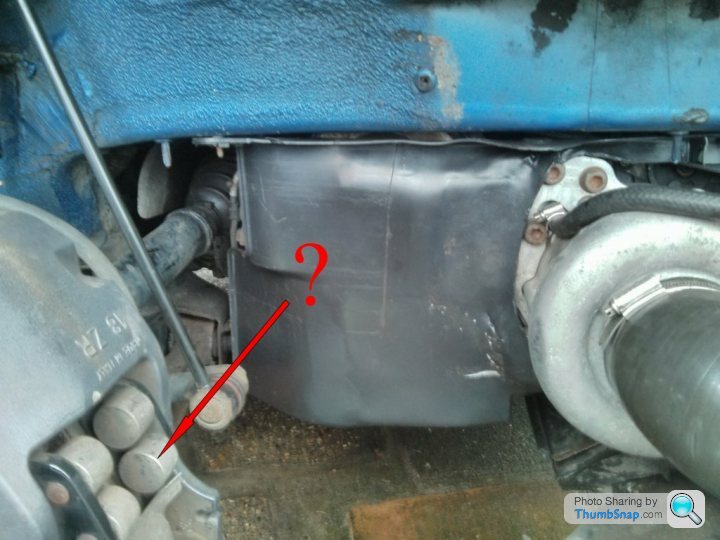
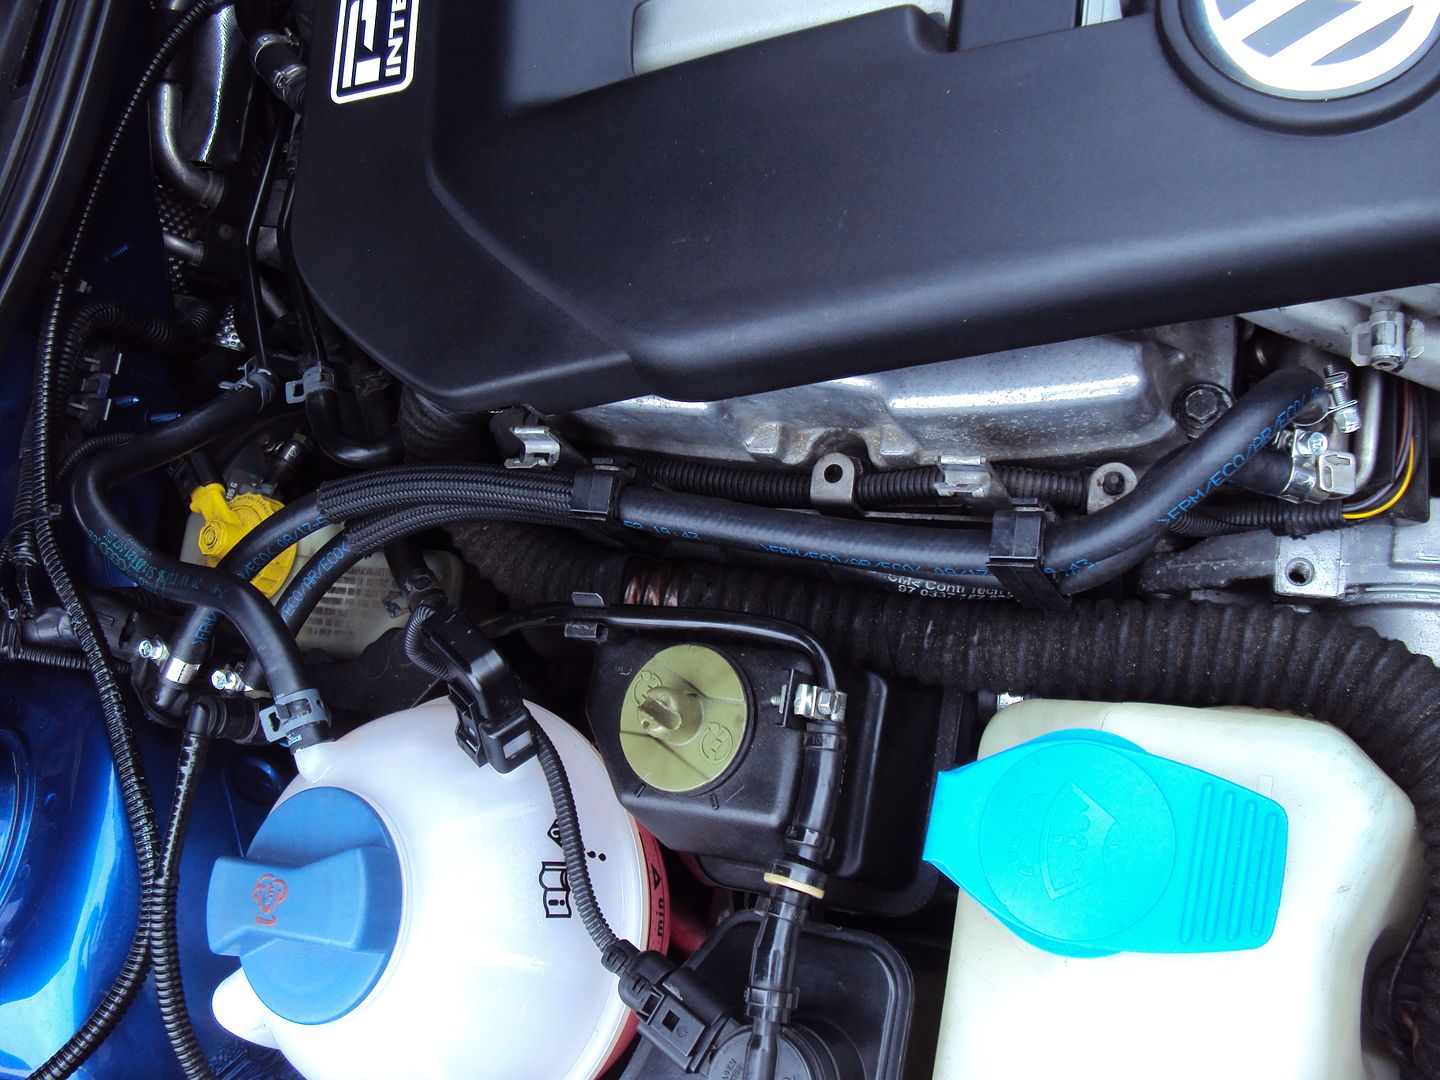
Had a lucky escape earlier this week, just as I was leaving home for work I was getting a strong smell of petrol, I stopped at the top of the road and found the rubber hose for the high-pressure feed to the fuel rail had perished and split and was spraying fuel everywhere. Managed to bodge it with a hose clamp so I could get it back on the drive.
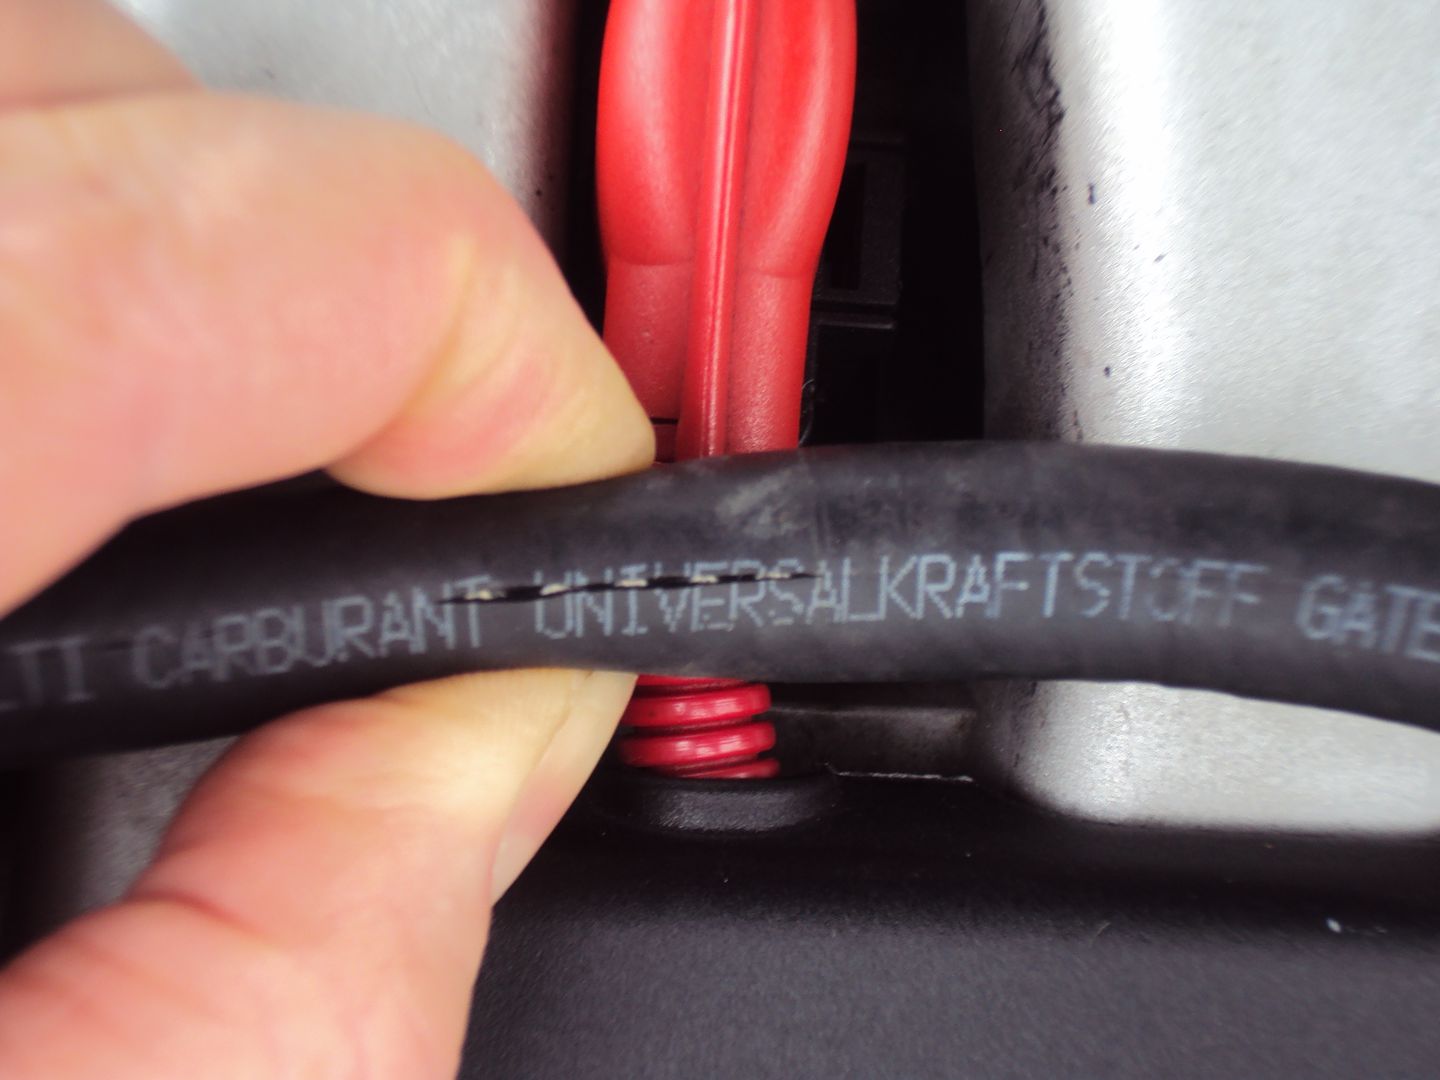
Today I replaced both the feed and return lines, on the surface the high pressure hose looked ok, but when I removed it had splits in various places along the entire length, wondering if it’s a manufacturing defect?
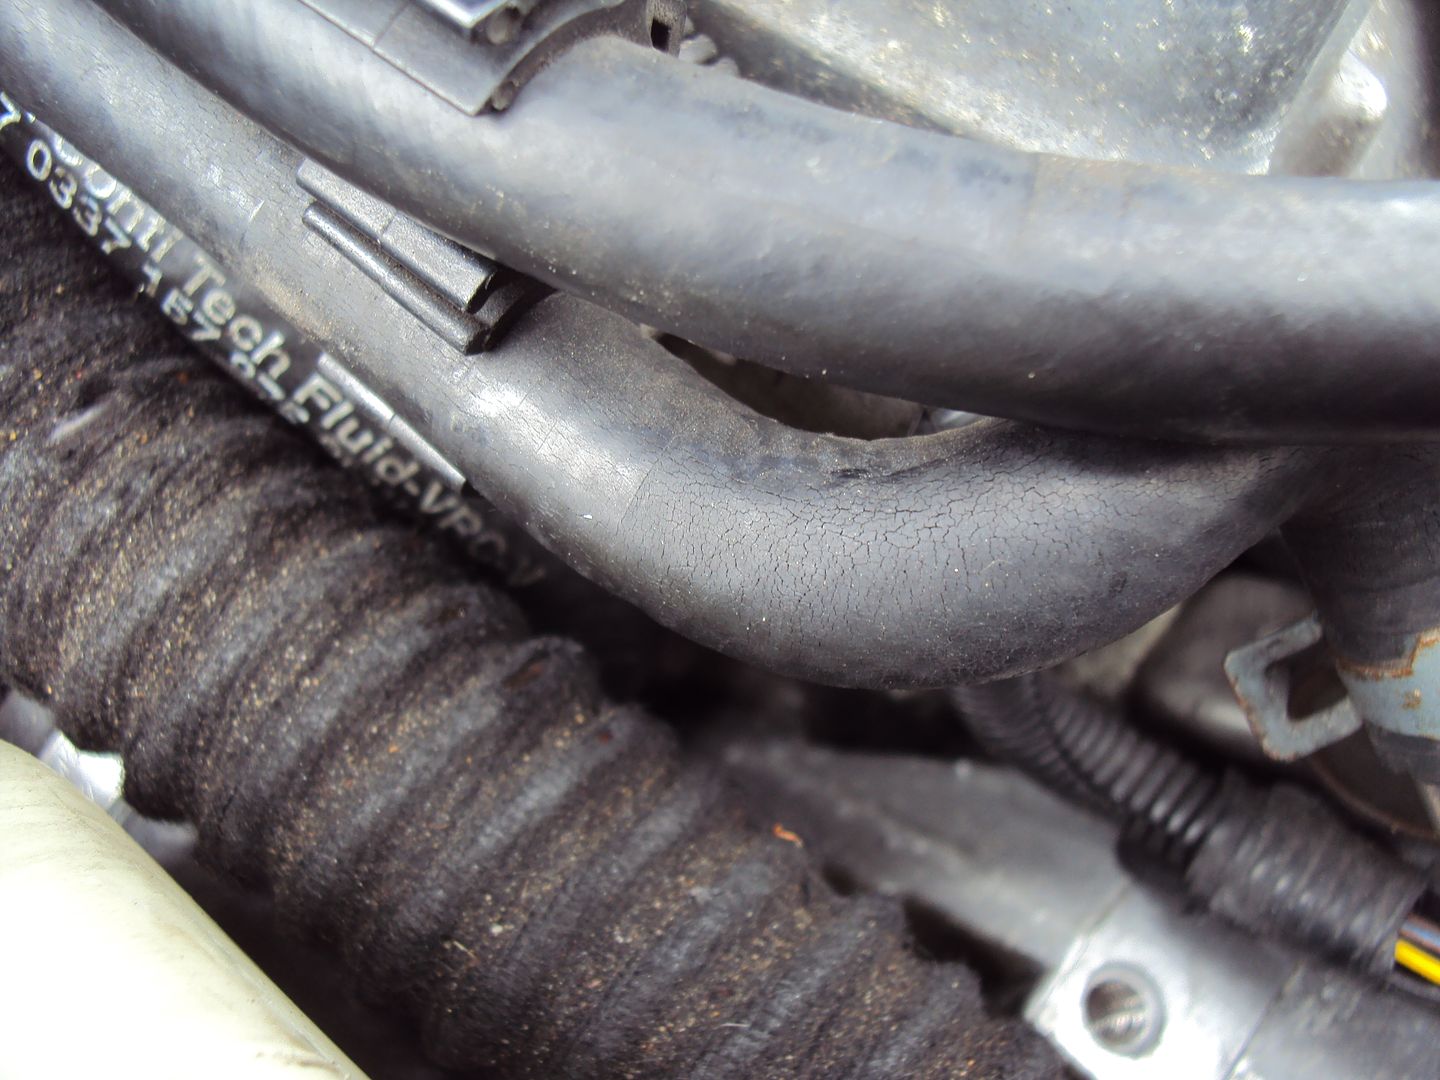
The return wasn't looking too good either
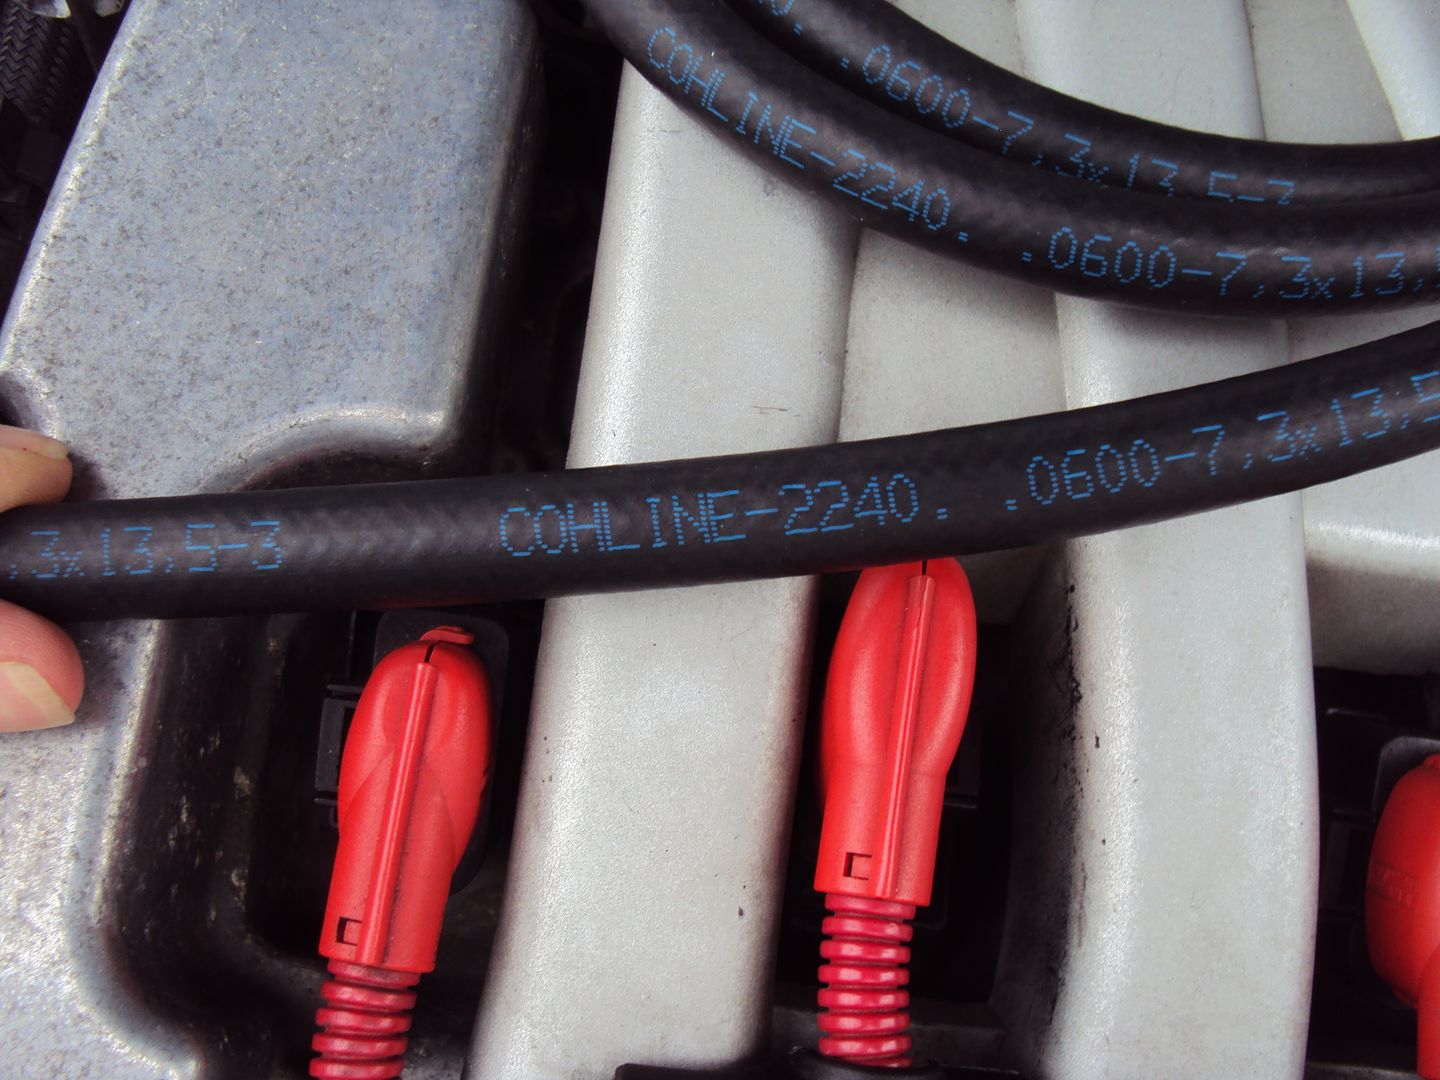
Both the feed and return were replaced with Cohline-2240 hose which is good for 10bar and upto 125c so should last for a while
New fuel lines in place with new hose clips
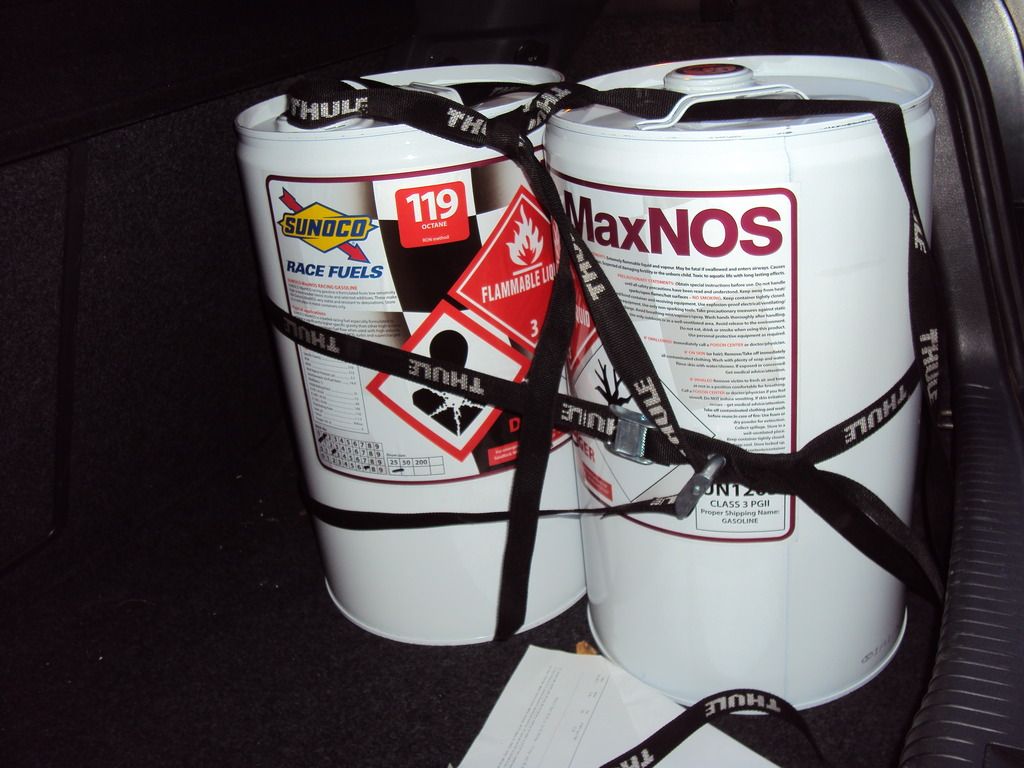
Going Back to Santa pod for VW action on Sunday, thought I'd give some of this a try
Assuming all goes well, the following day the car will be going back to The Phirm to get a pair of Jetex high temperature race cats fitted. The cats will be fitted with V-band clamps so i can remove them for track use.
Assuming all goes well, the following day the car will be going back to The Phirm to get a pair of Jetex high temperature race cats fitted. The cats will be fitted with V-band clamps so i can remove them for track use.
GregK2 said:
Any updates? 
The race fuel didn't make any difference to my 1/4mile times, car did run better though gained a couple of extra mpg's. Also turned the exhausts white
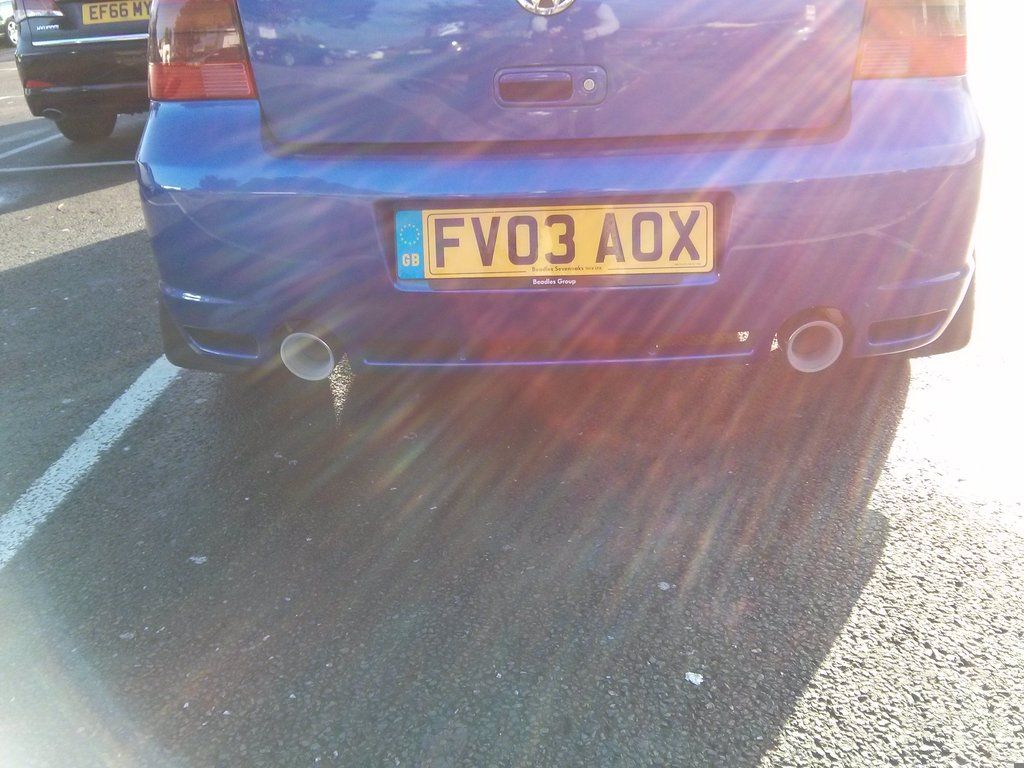
Got the100cell sports cats fitted just before xmas, which has quietened the exhaust down making it soo much nicer to drive on long trips. Not had a chance to see if they have had any effect on performance. Will get some photos next time the car is up on the ramps.
Had an expensive month,
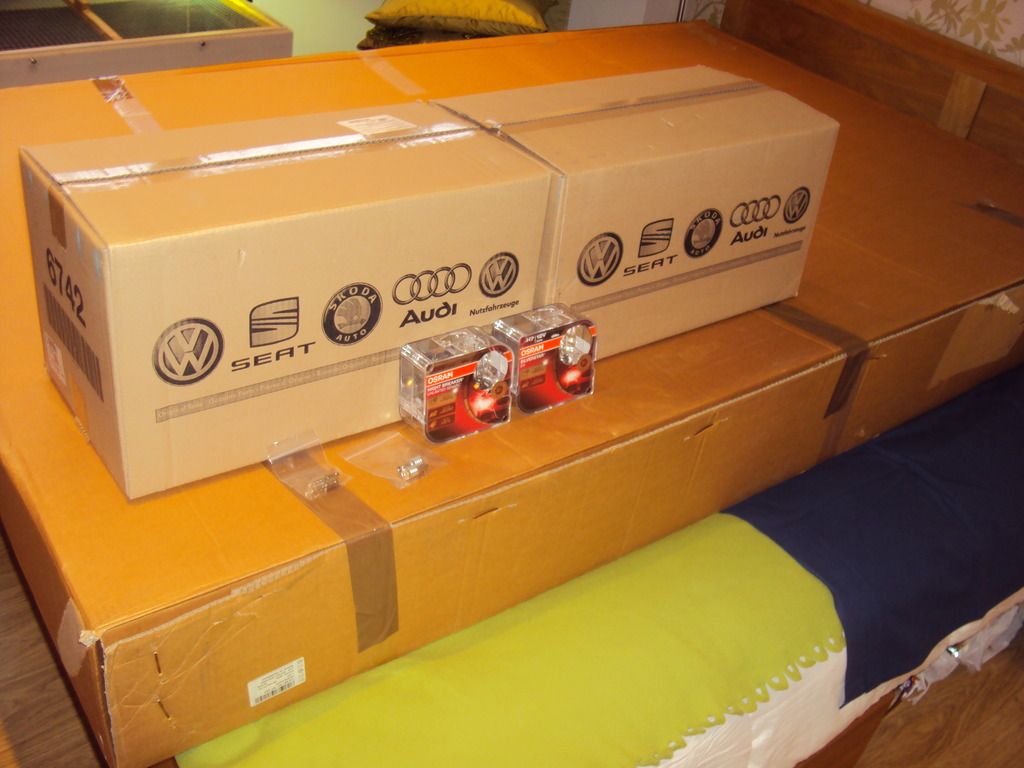
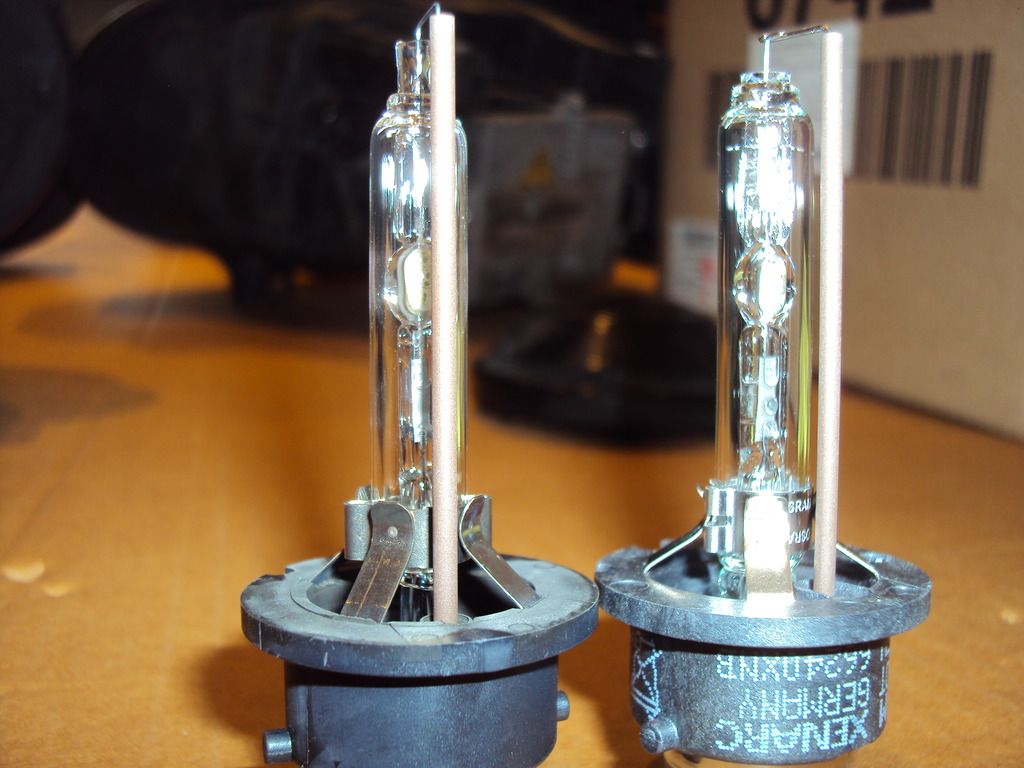
In the pile of boxes there are 2 new MKIV R32 HID headlights, Osram Xenarc night breaker unlimited D2S lamps, Osram Silverstar H7 lamps, and the big box is a new headlining.
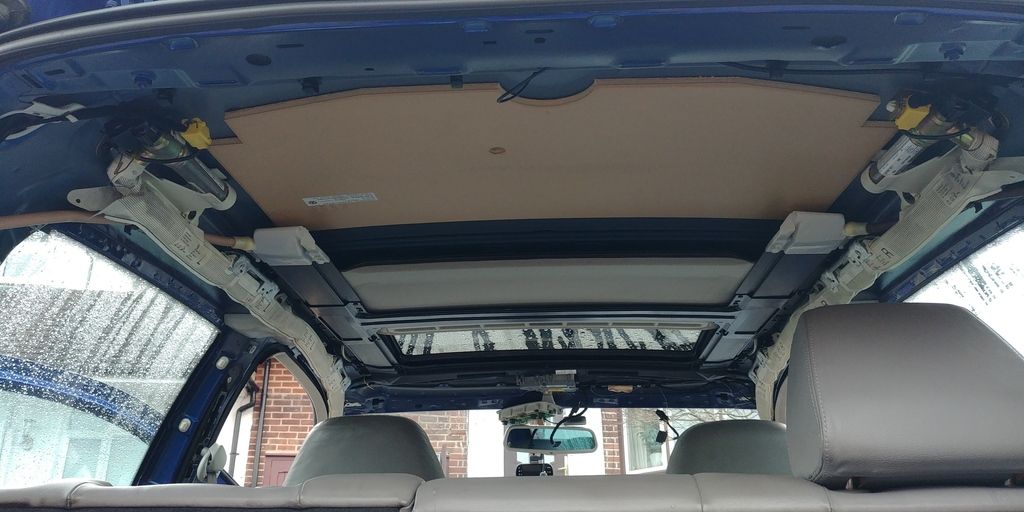
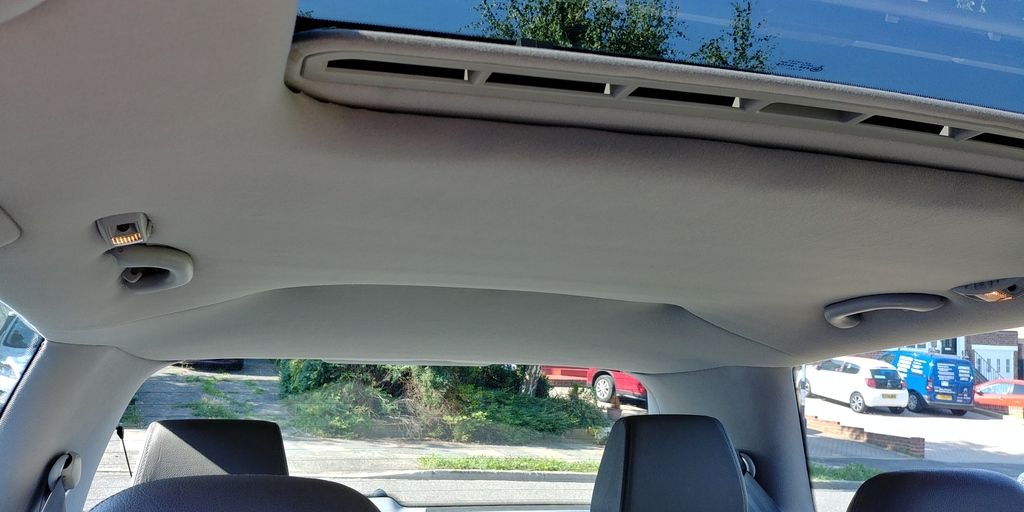
The headlining is because this happened over xmas
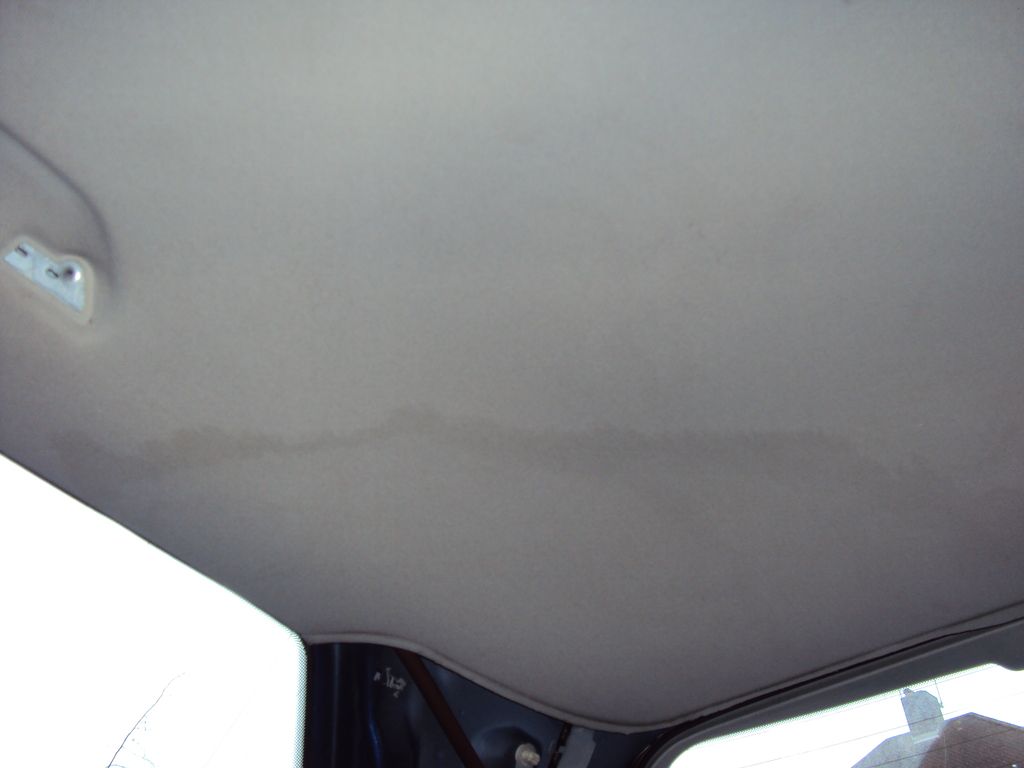
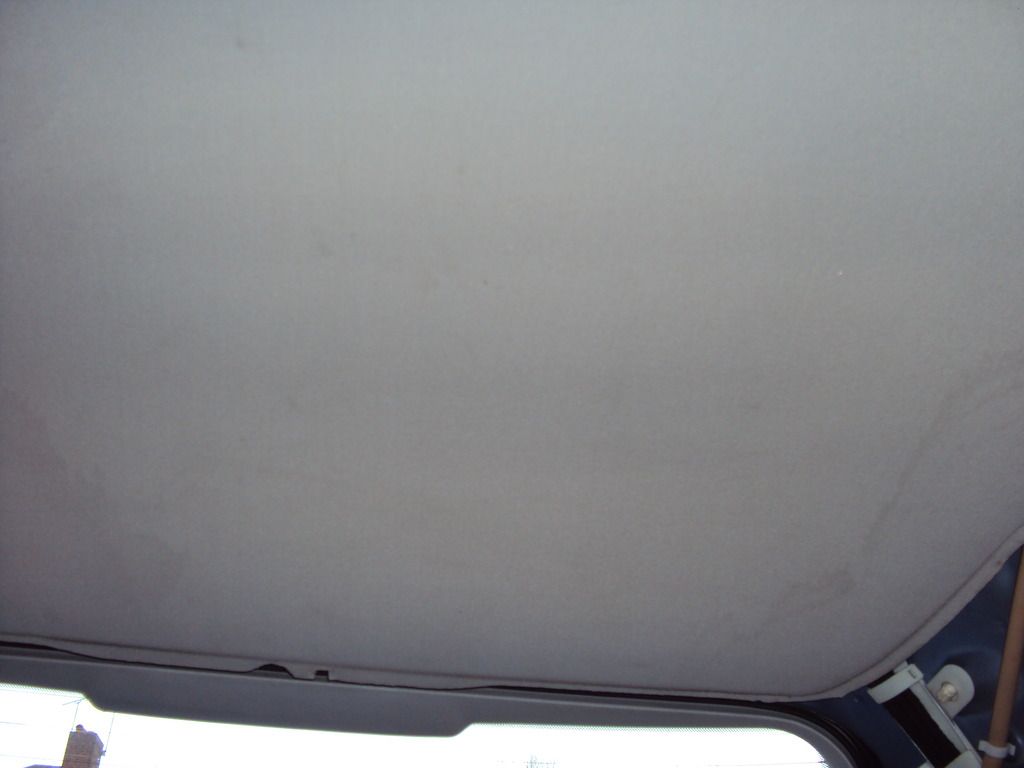
The sunroof leaked again leaving watermarks in the headlining (drains were clear!). I was hoping to be able to clean it, however the fabric is starting to peel away from the backing so decided to replace.
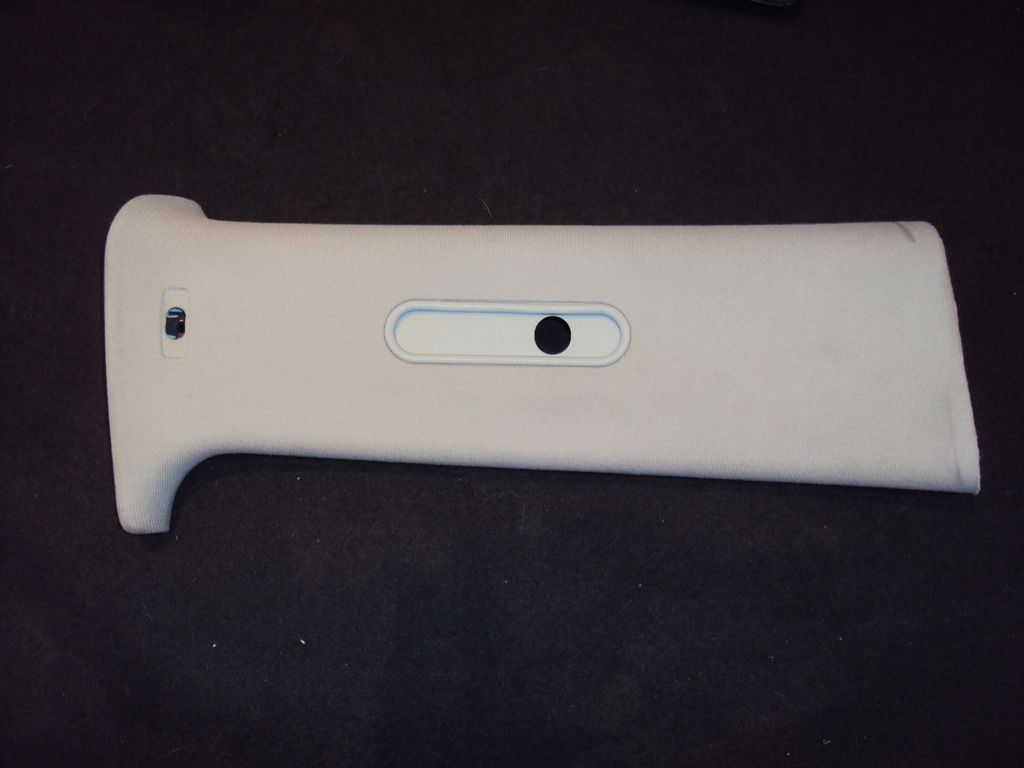
In preparation for swapping the headlining I had to remove the pillar trims which gave me a opportunity to give them a well needed clean.
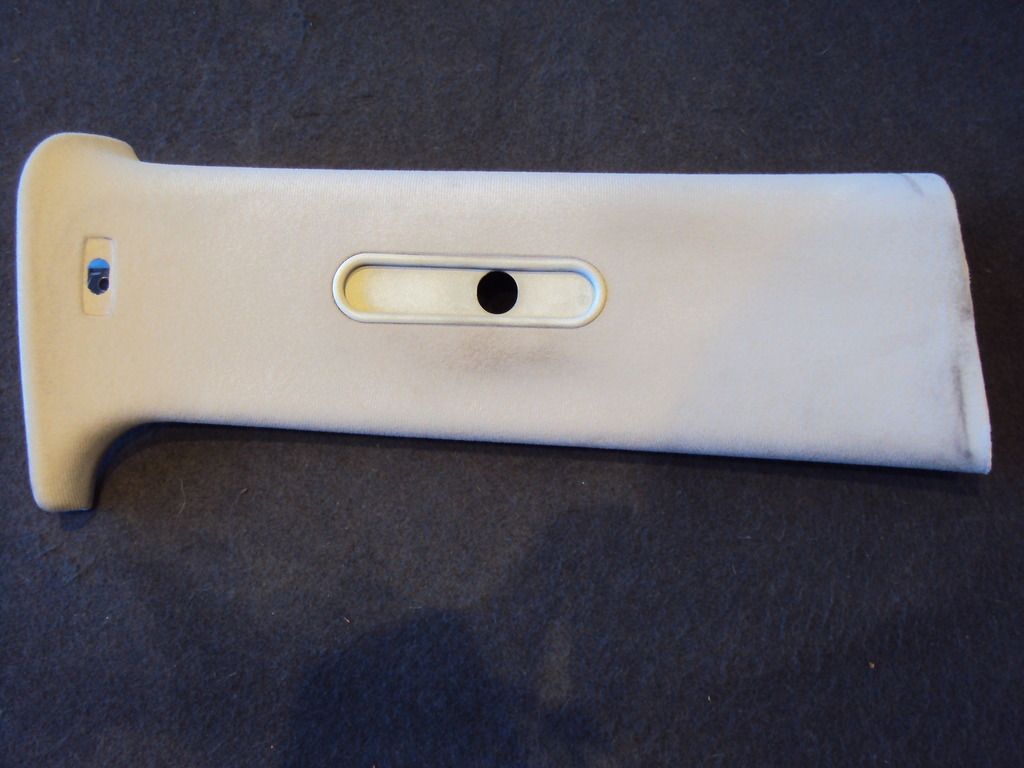
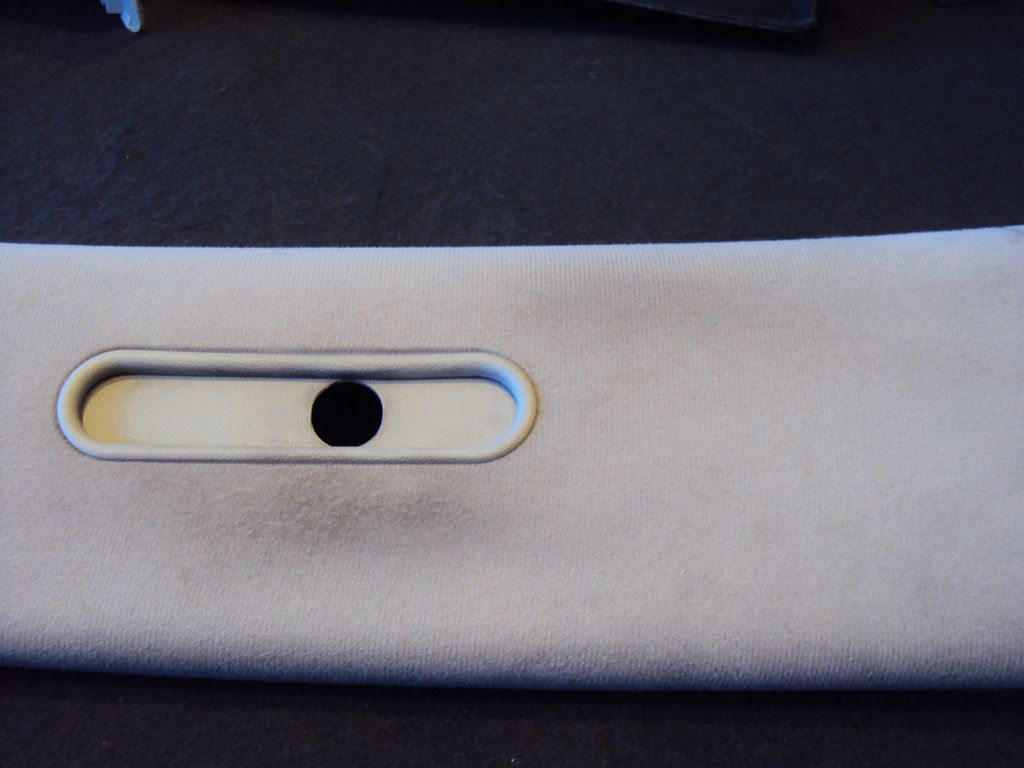
After a few applications of Autoglym interior shampoo the trims were looking a lot better.
There were some marks I couldn’t remove, however they are hidden by other bits of trim so I’m not too worried.
Currently the plan once I get a dry weekend is to remove the old headlining and drop the whole sunroof mechanism out so I can give the drain channels a good clean and replace the seal around the edge of the glass.
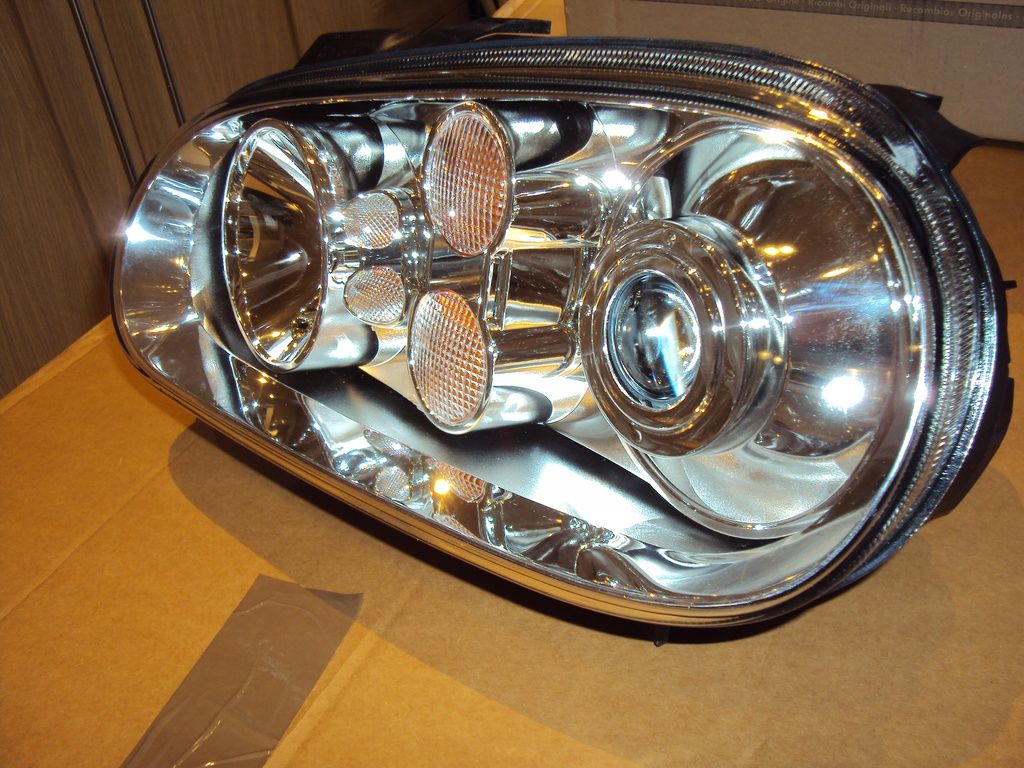
While I wait for the weather to improve I got on with swapping the headlights,
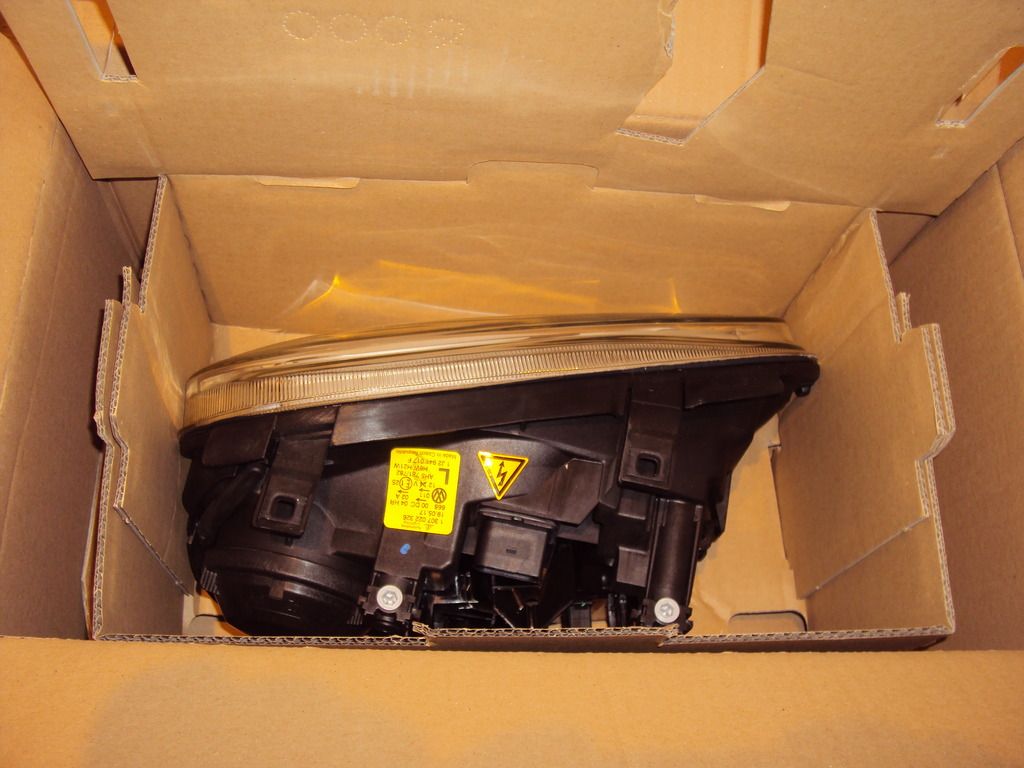
Shiny and new
14 year old Xenon lamp vs new, what doesn’t show on the photo that well is that the capsule where the arc? Is formed has gone cloudy.
The main reason I decided to change the headlights was that I noticed they didn’t seem to illuminate the road as well as the headlights in my new UP!
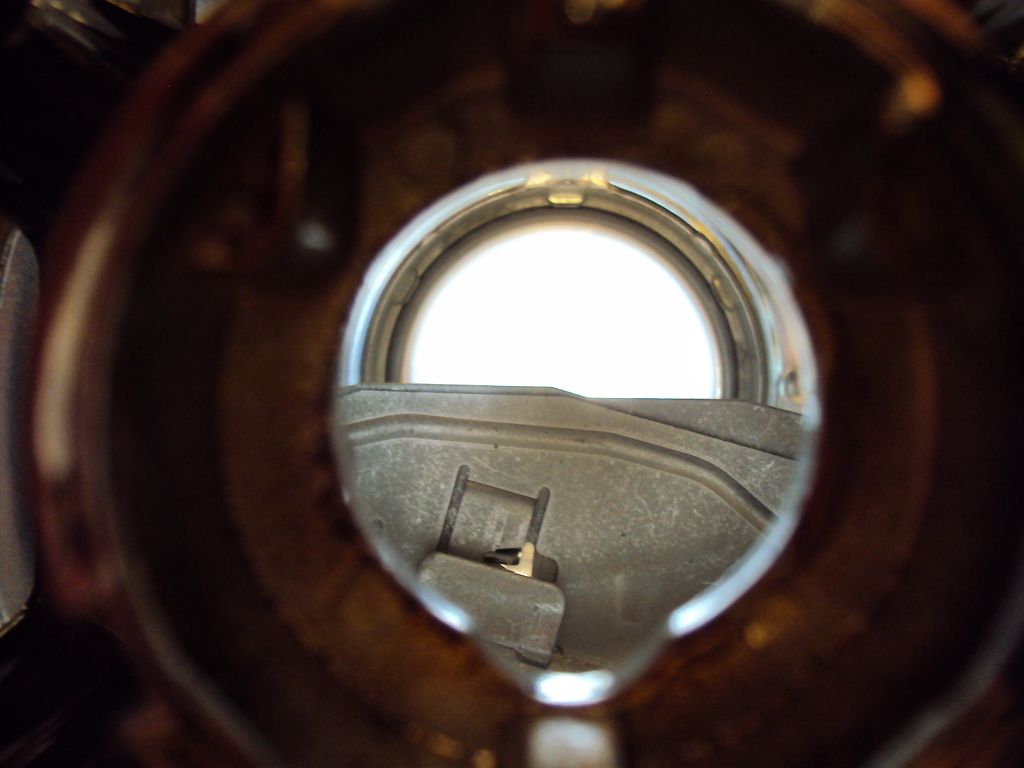
When I removed the headlights I found the projector lenses had gone cloudy, so decided to change them as they are notoriously difficult to dismantle for cleaning
Photo through old headlight
Same with new
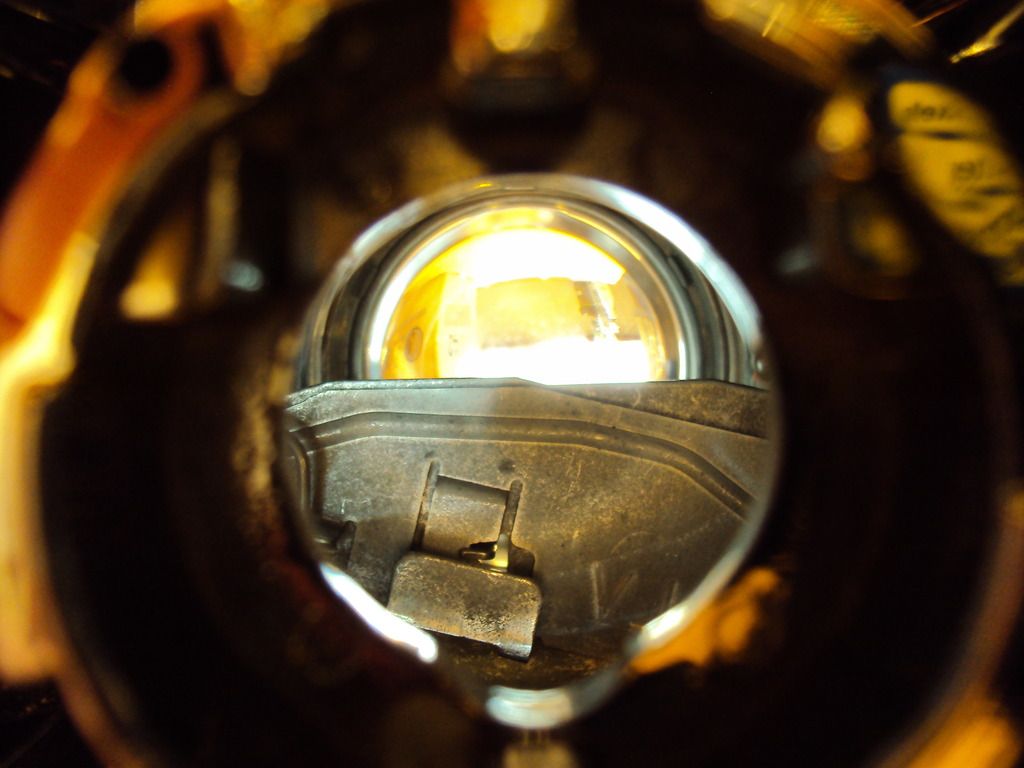
Bit different!
Didn't get photos of the new lights fitted as it started chucking it down just as I finished.
Car is booked in to the VW dealer later this week to get the new headlights aligned properly.
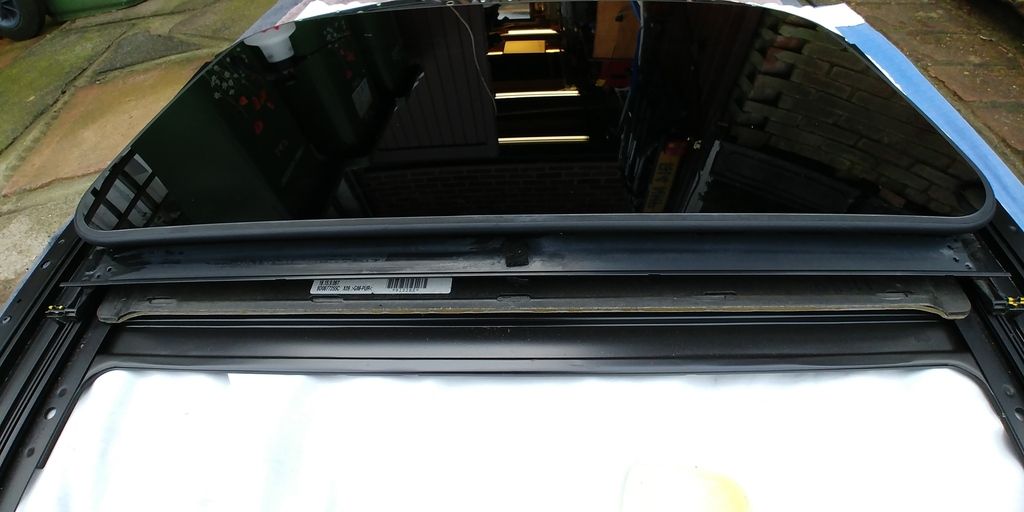
Made more progress today with fixing the leak from the sunroof, got the headlining removed so I could drop the sunroof mechanism out to replace the seal around the edge the glass.
Sunroof removed

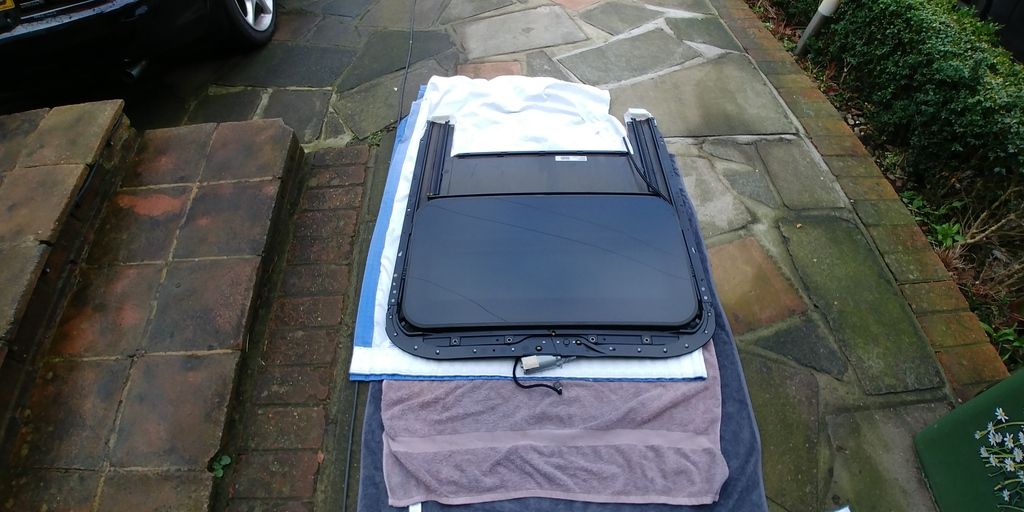
Decided to do it this way as it would keep the glass aligned and at the correct height.
Old seal with algae and gunk along the bottom edge
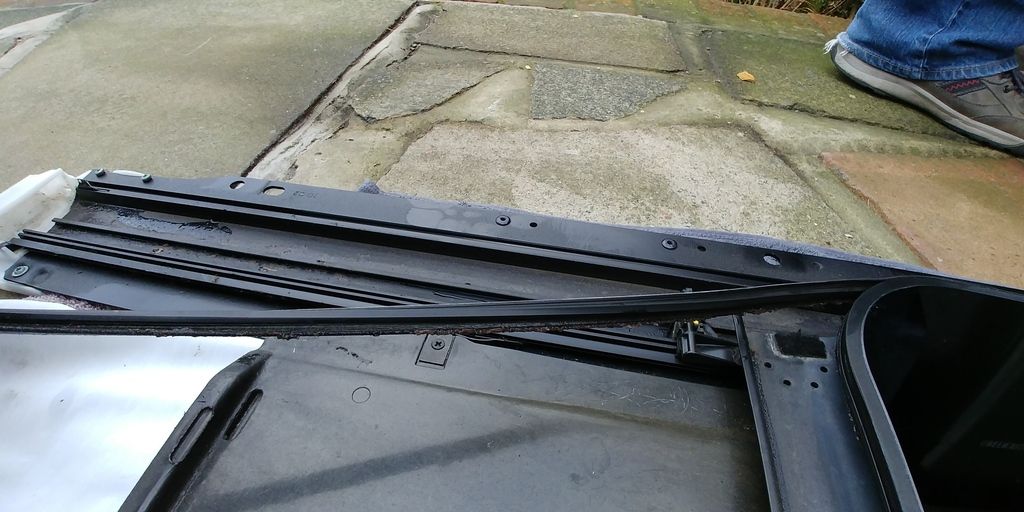
The drain channels were cleaner than I expected
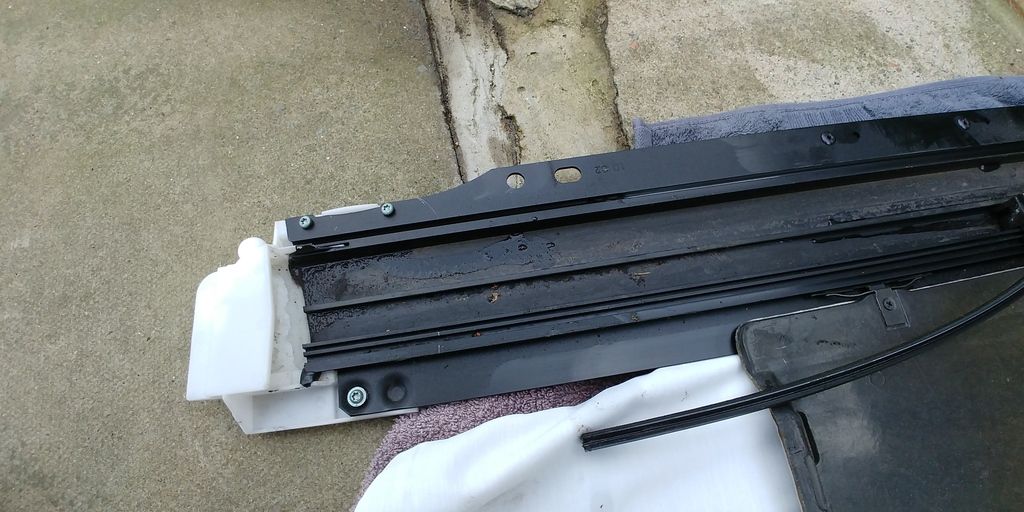
Pressing new seal into the glass
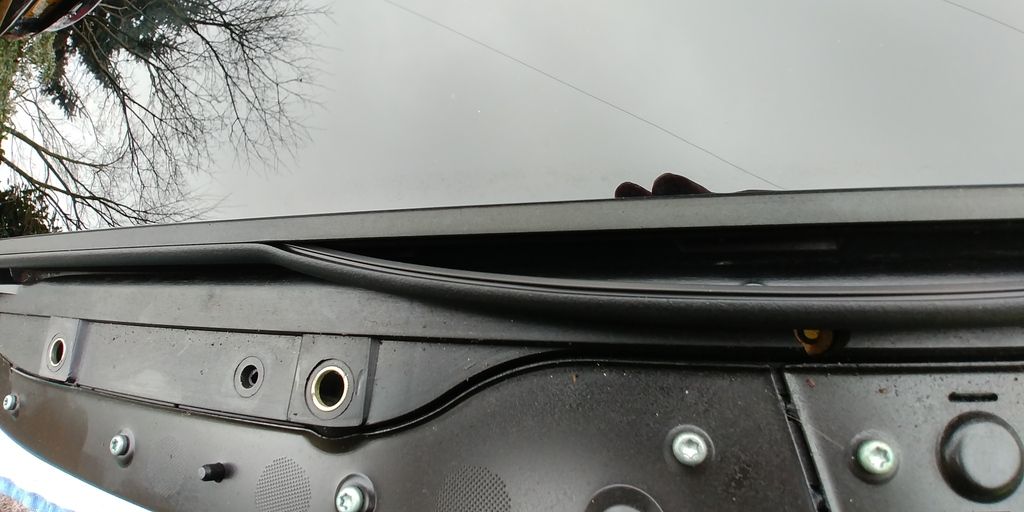
All done
Got the sunroof refitted, was a bit of a faff to get it all aligned properly but went back together ok. Best of all, after a test with a can of water poured around the edge of the glass proved it was leak free
Next I started looking at the headlining, the original had all the wiring for the interior lights and alarm sensors attached to it which would need transferring to the new one.
Old with wiring
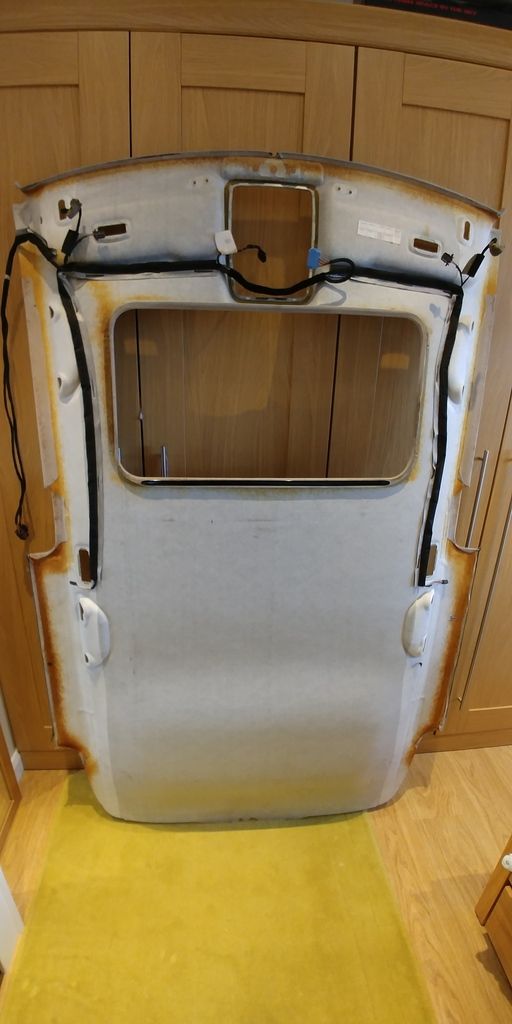
New without wiring.
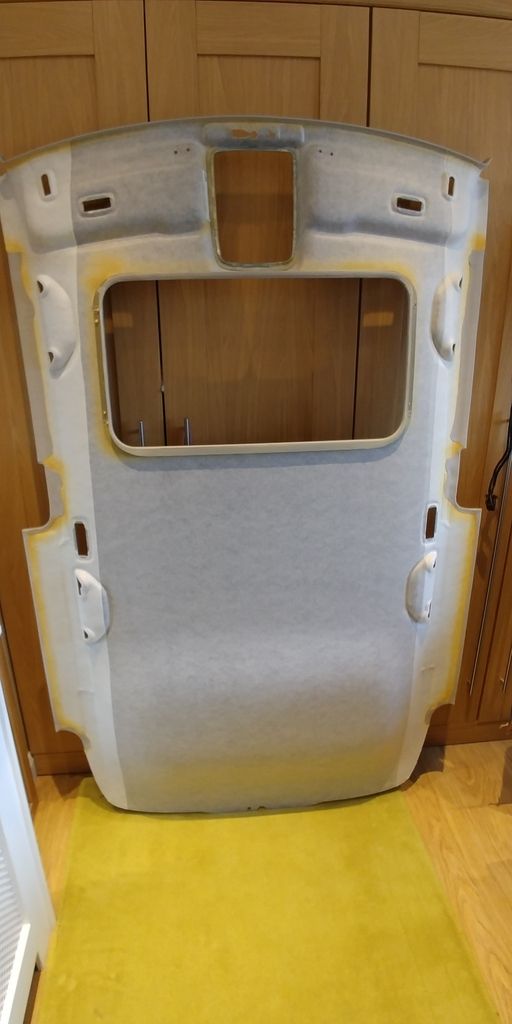
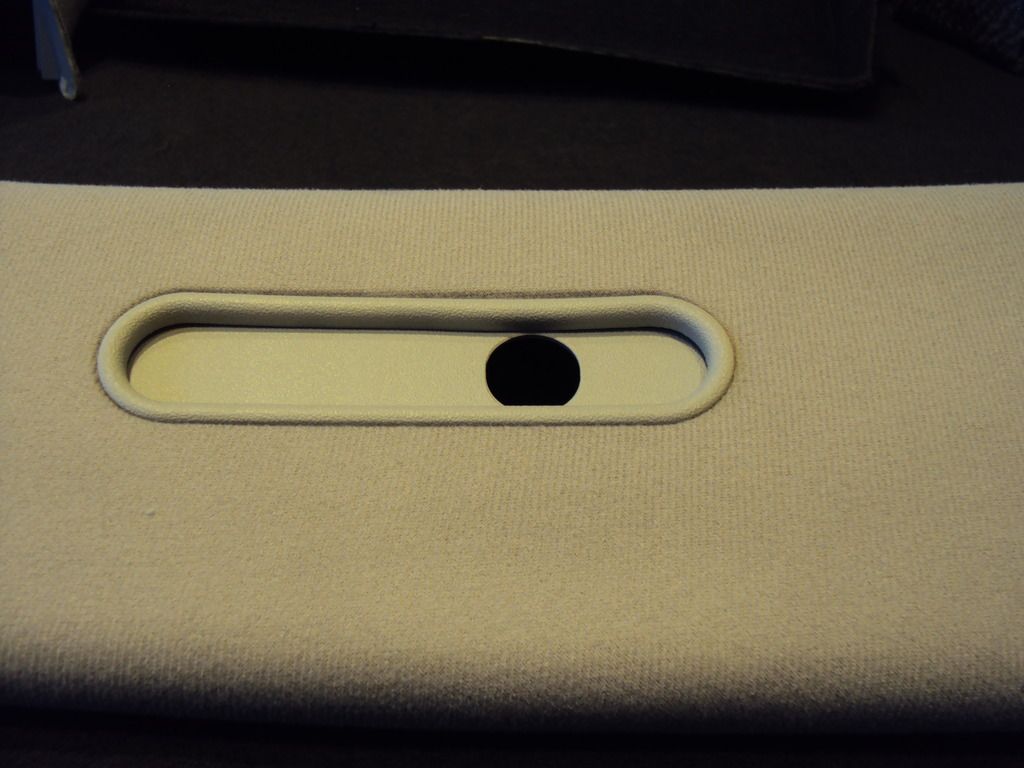
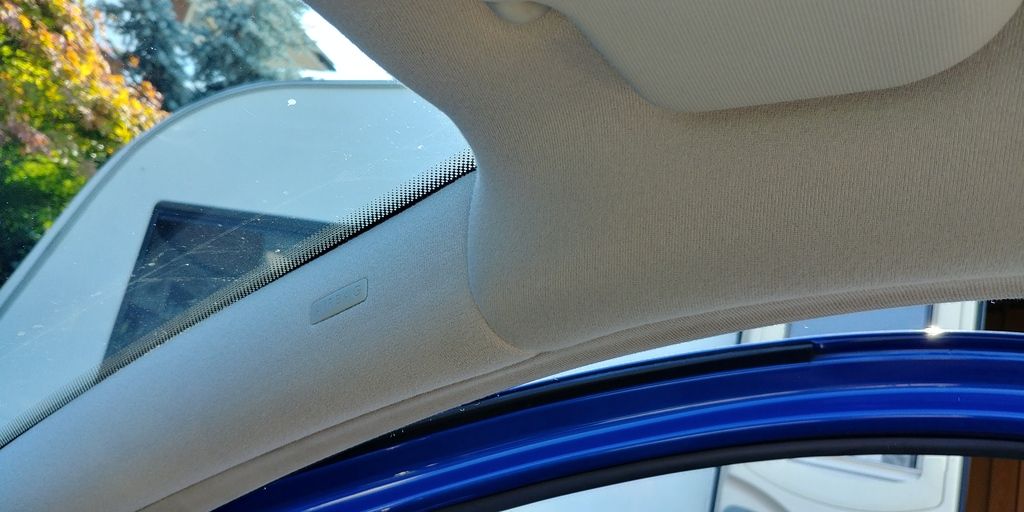
It was at this point I noticed a significant problem with the new headlining, the fabric is a different finish to the original . With the cover panel for the sunroof motor in place the difference is obvious.


Guess this is what happens when purchasing parts for a car that has been out of production for 13 years. Now need to decide what to do as none of the pillar trims will match the new headlining, so either got to replace everything or return the new headlining and try to clean/repair the original.
I have e-mailed the parts guy at my local dealer to check if the headlining I have is the correct one, if it is an VW changed the fabric style during production I have a decision to make.
Rough estimate from my old copy of ETKA to replace everything assuming the same fabric finish as the new headlining.
A pillar trim £25 each
B pillar trim £43 each
C pillar trim £85 each
Sunroof panel £233
Total £539
Maybe the parts guy will feel sorry for me and give a significant discount
Sunroof removed
Decided to do it this way as it would keep the glass aligned and at the correct height.
Old seal with algae and gunk along the bottom edge
The drain channels were cleaner than I expected
Pressing new seal into the glass
All done
Got the sunroof refitted, was a bit of a faff to get it all aligned properly but went back together ok. Best of all, after a test with a can of water poured around the edge of the glass proved it was leak free
Next I started looking at the headlining, the original had all the wiring for the interior lights and alarm sensors attached to it which would need transferring to the new one.
Old with wiring
New without wiring.
It was at this point I noticed a significant problem with the new headlining, the fabric is a different finish to the original
. With the cover panel for the sunroof motor in place the difference is obvious.Guess this is what happens when purchasing parts for a car that has been out of production for 13 years. Now need to decide what to do as none of the pillar trims will match the new headlining, so either got to replace everything or return the new headlining and try to clean/repair the original.
I have e-mailed the parts guy at my local dealer to check if the headlining I have is the correct one, if it is an VW changed the fabric style during production I have a decision to make.
Rough estimate from my old copy of ETKA to replace everything assuming the same fabric finish as the new headlining.
A pillar trim £25 each
B pillar trim £43 each
C pillar trim £85 each
Sunroof panel £233
Total £539
Maybe the parts guy will feel sorry for me and give a significant discount
Finally got the reverse lights working as since fitting he DSG gearbox the reverse lights never worked, due to the car the gearbox came from used the CANBUS to control the lights.
I started off by trying to go high tech by programming an Arduino to sniff the CAN BUS for the reverse signal. Struggled with decoding the signals no the CAN Bus so gave up.
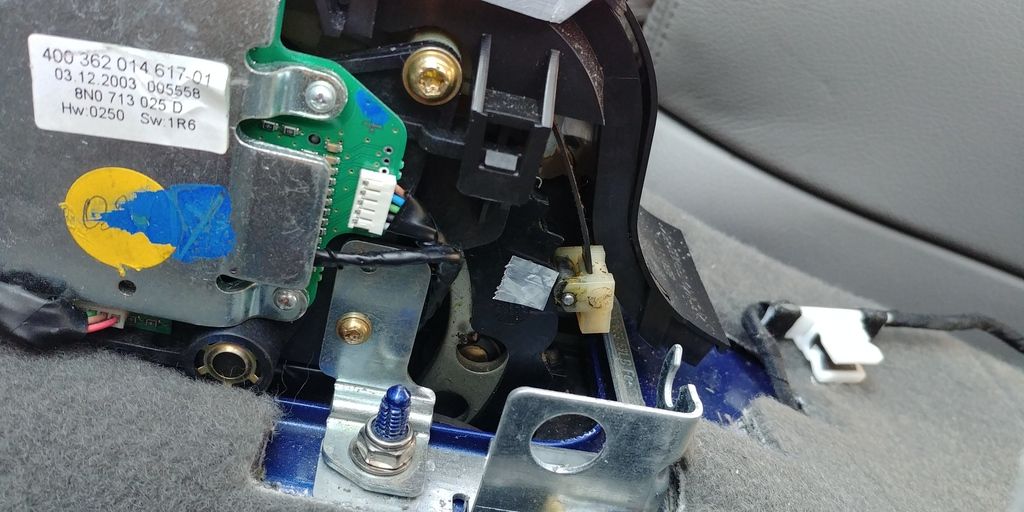
Next attempt was to pick up a signal from the shifter, the shifter has magnets on the moving parts and magnetic sensors on the PCB. As the shifter is moved between P, R, N, D, S the magnets operate the sensors.
I found the output of one of the sensors would turn on when the shifter was put into reverse. The plan was to use the signal to operate a relay.
All went well until I shorted something on the shifter which resulted in he car being immobilised in the middle of the drive for a week while I sourced a new shifter.
Using my blown up shifter as a test bed I built a small circuit which used a optical sensor to operate the reverse lights relay.
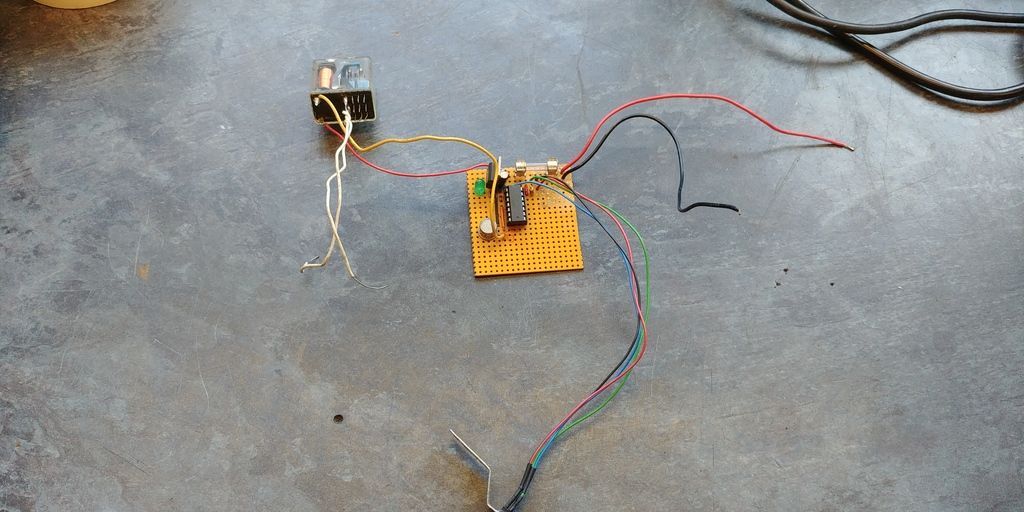
The sensor works by sending an infrared beam out which is picked up by a detector when it passes a reflective surface. To make the reflective surface I glued some foil to the shifter mechanism.
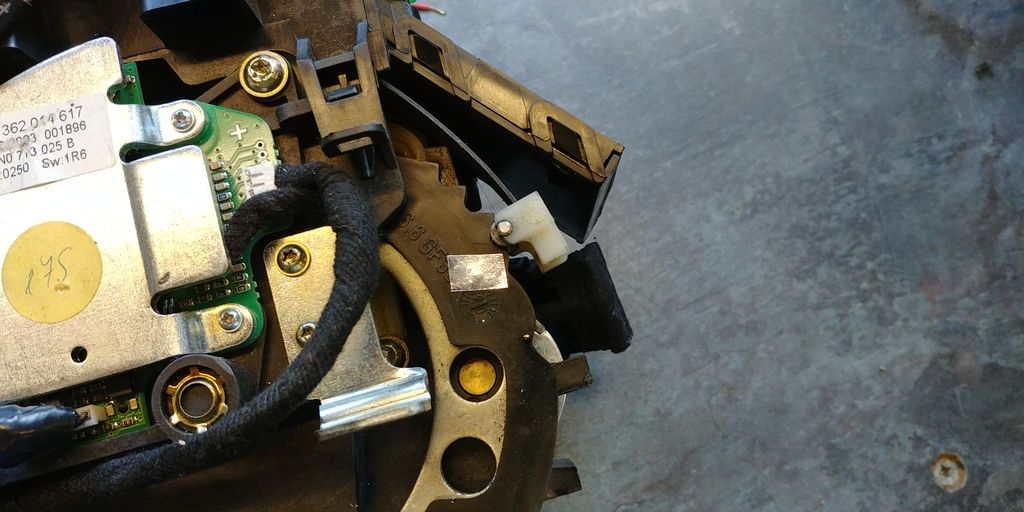
Sensor in place on shifter
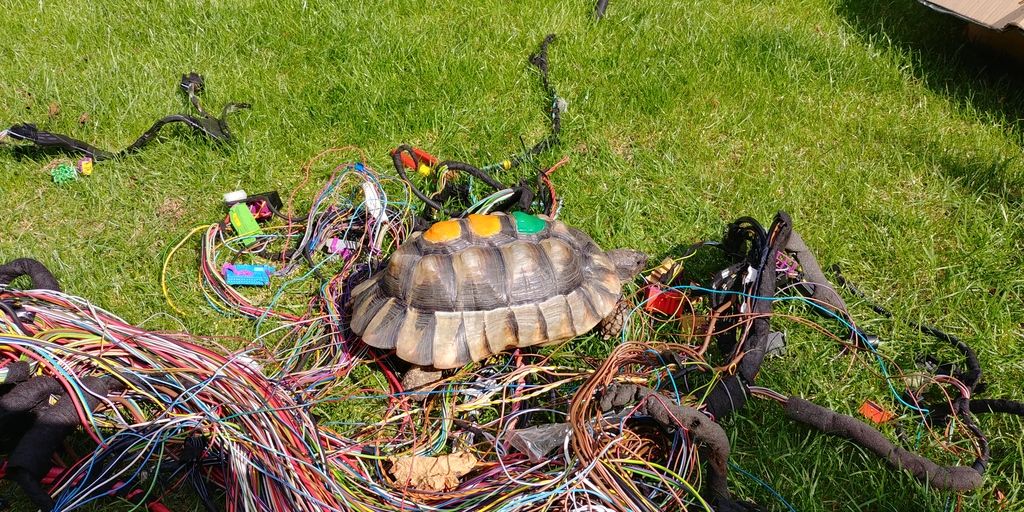
To wire the circuit into the car I decided I wanted to use the correct colour coded wire for power and control signal to the reverse lights relay. I dug out the remains of the TT wiring loom that I got when I began the conversion.
While looking for the wire colours I needed, a “helper” came over for a look
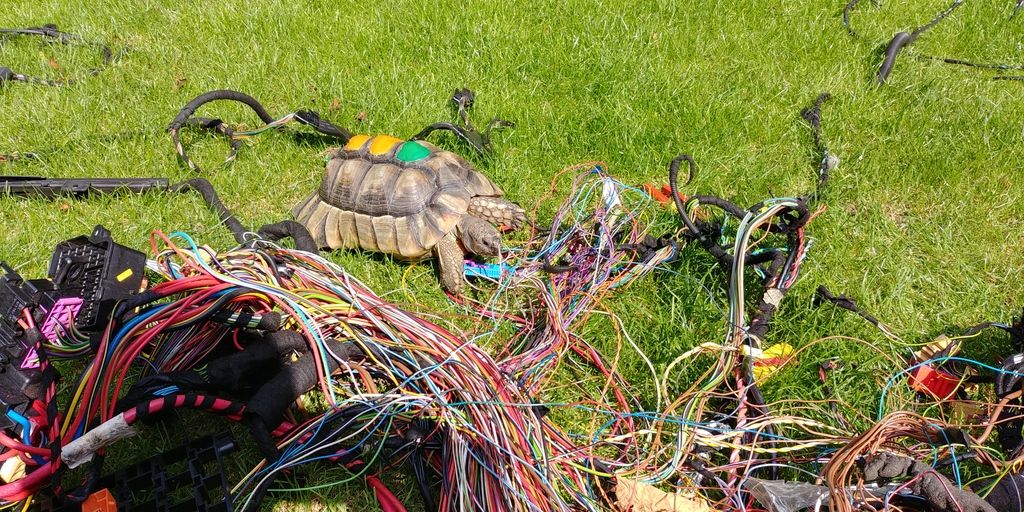
After deciding he didn’t know anything about VW electrics and not liking the taste of loom tape and PVC wire he wondered off.
Mounted the circuit in a small box, and used a 9 pin D type connector so it can be removed if there are any problems with it later on.

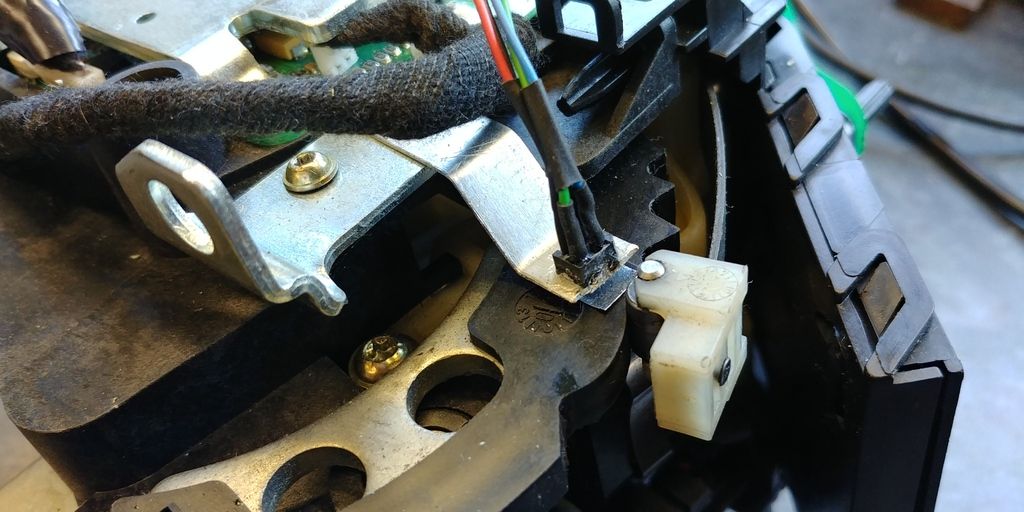
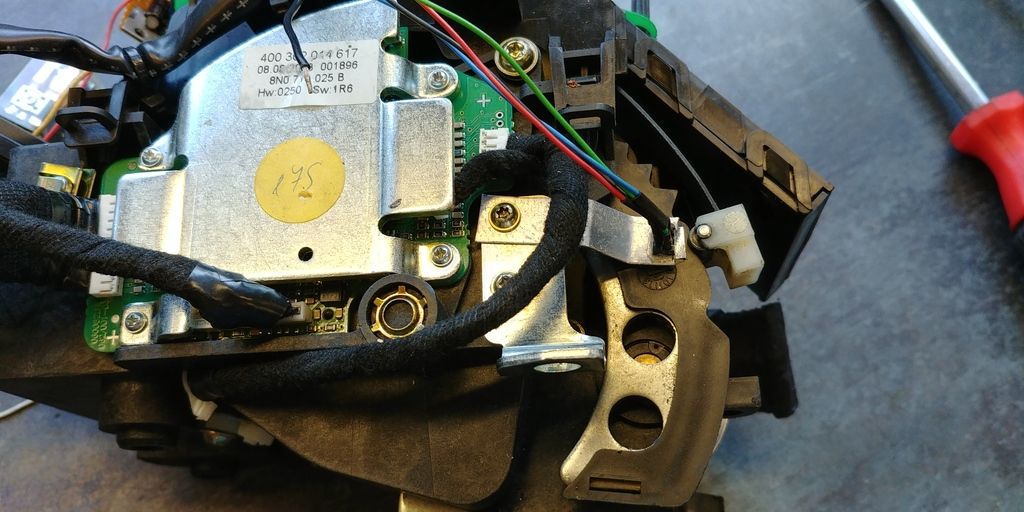
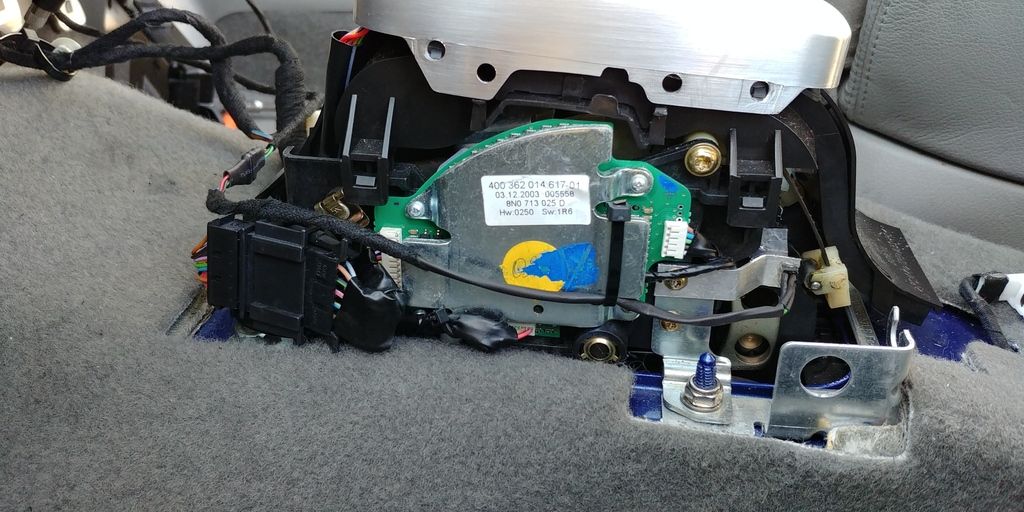
Foil reflector on shifter in car
Optical sensor mounted and wiring secured to existing wiring
Box mounted on relay plate
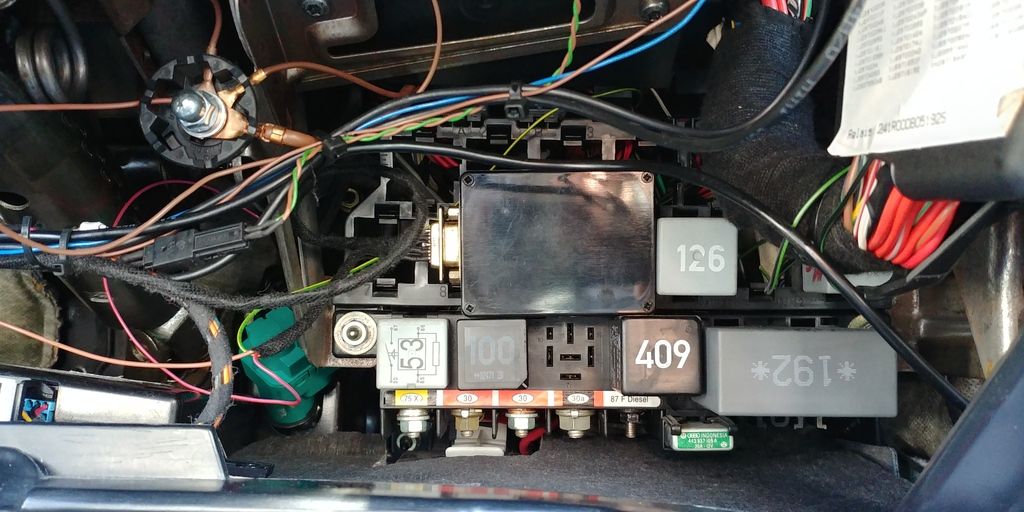
Working reverse lightsfor first time in nearly 3 years
Also got the head lining sorted, I found a supplier on ebay that did the matching fabric, only downside is it is foam backed so not easy to stick to the backing board. A pleat had to be sewn into the fabric so it could be held up against the backing board.
Colour match is close enough it’s too noticeable.
Its better than the old water stained fabric that was peeling off the backing board.
I started off by trying to go high tech by programming an Arduino to sniff the CAN BUS for the reverse signal. Struggled with decoding the signals no the CAN Bus so gave up.
Next attempt was to pick up a signal from the shifter, the shifter has magnets on the moving parts and magnetic sensors on the PCB. As the shifter is moved between P, R, N, D, S the magnets operate the sensors.
I found the output of one of the sensors would turn on when the shifter was put into reverse. The plan was to use the signal to operate a relay.
All went well until I shorted something on the shifter which resulted in he car being immobilised in the middle of the drive for a week while I sourced a new shifter.
Using my blown up shifter as a test bed I built a small circuit which used a optical sensor to operate the reverse lights relay.
The sensor works by sending an infrared beam out which is picked up by a detector when it passes a reflective surface. To make the reflective surface I glued some foil to the shifter mechanism.
Sensor in place on shifter
To wire the circuit into the car I decided I wanted to use the correct colour coded wire for power and control signal to the reverse lights relay. I dug out the remains of the TT wiring loom that I got when I began the conversion.
While looking for the wire colours I needed, a “helper” came over for a look
After deciding he didn’t know anything about VW electrics and not liking the taste of loom tape and PVC wire he wondered off.
Mounted the circuit in a small box, and used a 9 pin D type connector so it can be removed if there are any problems with it later on.
Foil reflector on shifter in car
Optical sensor mounted and wiring secured to existing wiring
Box mounted on relay plate
Working reverse lightsfor first time in nearly 3 years
Also got the head lining sorted, I found a supplier on ebay that did the matching fabric, only downside is it is foam backed so not easy to stick to the backing board. A pleat had to be sewn into the fabric so it could be held up against the backing board.
Colour match is close enough it’s too noticeable.
Its better than the old water stained fabric that was peeling off the backing board.
Richlee180 said:
Awesome car. I'm particularly impressed with your tenacity and attention to detail. I hope the car is still running well - any updates ?
I replaced both my A pillar trims and they came with subtly different finishes. I'm the only one who notices, but it really annoys me.
ThanksI replaced both my A pillar trims and they came with subtly different finishes. I'm the only one who notices, but it really annoys me.
Yep it still running well, had a new supercharger belt a few weeks ago as the old one was slipping so it was only making 6-8psi of boost instead of the 14-15psi it should.
Only other update is I had the steering wheel recovered in nappa leather by Royal Steering wheels. The original finish was starting to flake off and i had already had it recolonised once so decided to go for a full re trim.
Before:


After:


Looks and feels so much better.
Haven’t done much to the car since the last update, just been driving and enjoying it.
A few weeks ago I decided the front and rear subframes and suspension could do with some attention as over the last couple of years it’s all starting to look very rusty.
Now I’m in lock down I have plenty of time on my hands to make a start.
As the car will be laid up for a while, I wanted to keep it ventilated as over the winter there was a water leak through a panel which the engine and gearbox wiring loom passes through. The leak is fixed but there is still some dampness in the carpet.
To get some air movement I used the pollen filter as a template

Made a panel with a fan which fits in the pollen filter housing and blows air through the heater ducts.

Fitted in place of pollen filter

The fan runs from the battery which is kept topped up by a maintainer/charger.
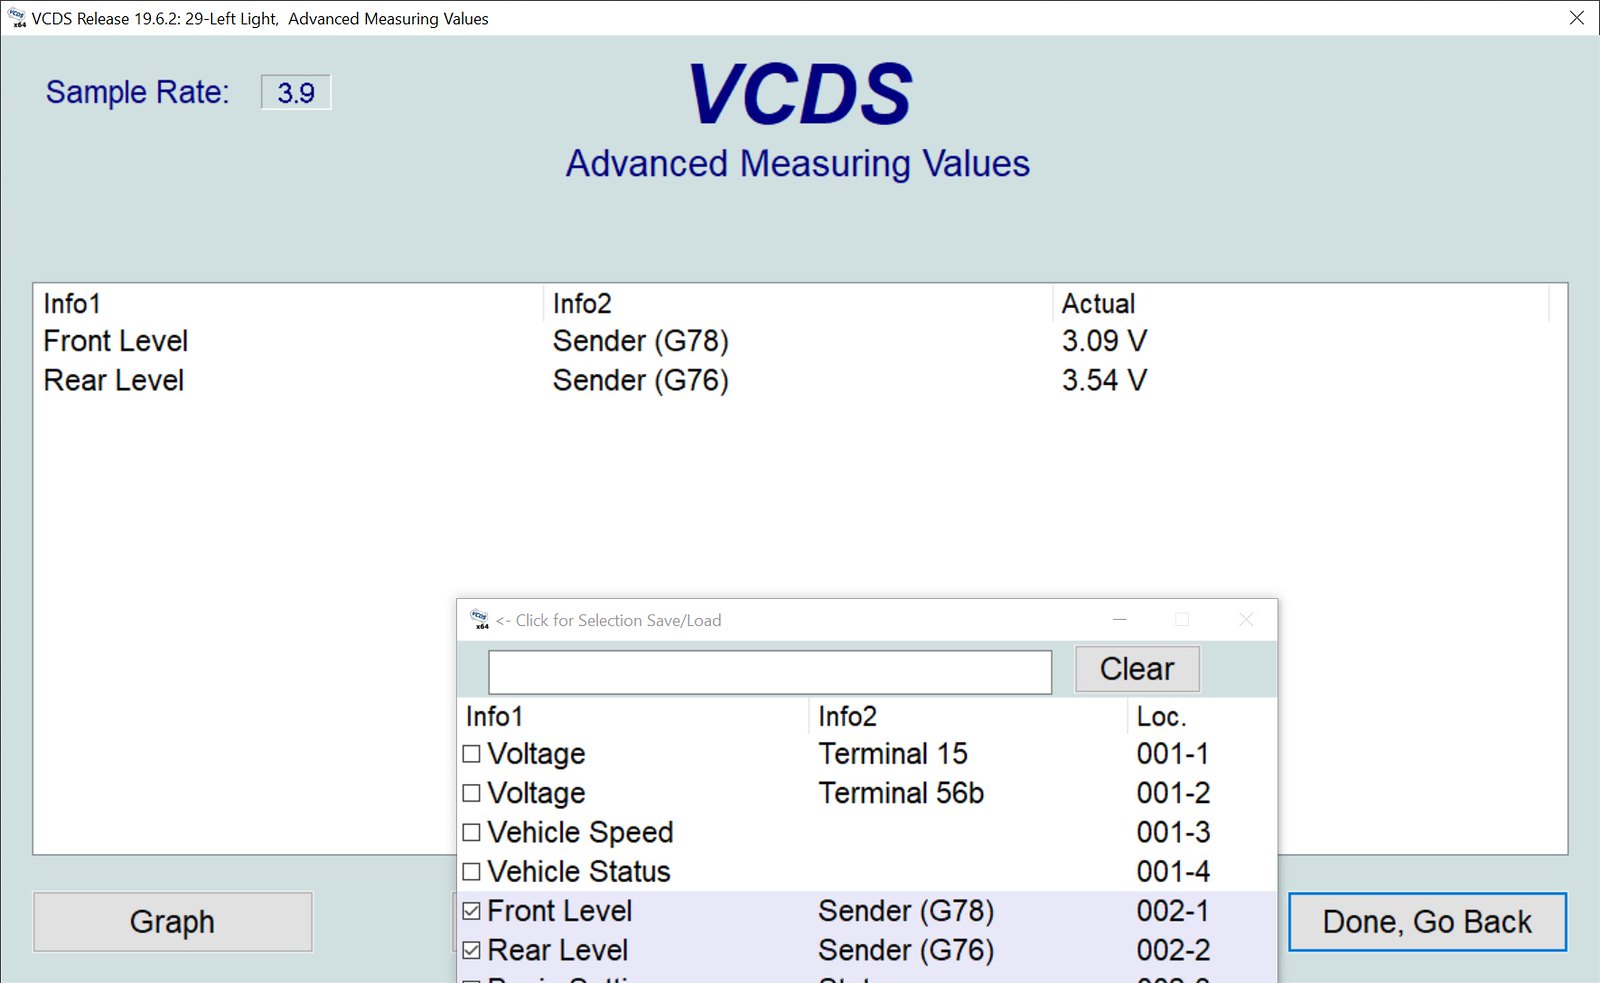
At the last MOT at the beginning of the month, the car failed due to headlight aim, this was tracked down to the front levelling sensor.

VCDS reading from sensor showing maximum

The sensor is mounted in the wheel arch and attached to the lower wishbone.

When I removed the sensor, I discovered the connector body was broken, fortunately the rubber seal was ok so there were no problems with water getting into the pins.

I plugged the new sensor in and checked the with VCDS which was showing a more sensible value.
For the moment I have put it all back together, but once I start dismantling everything to restore the subframe I’ll replace the connector body.


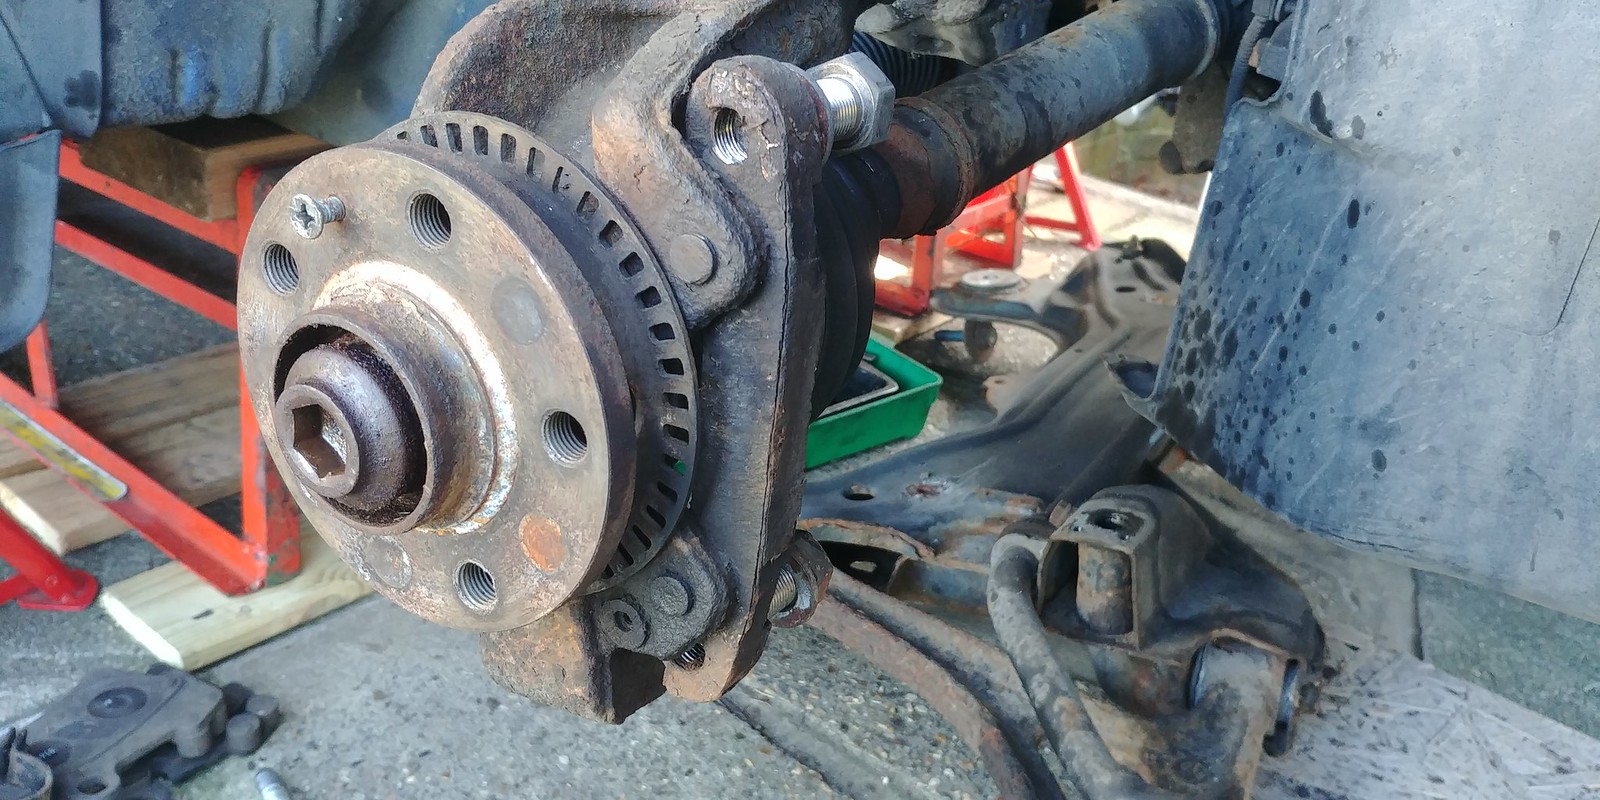
Got the car up on blocks so I can get trolley jacks underneath so I can put axle stands under the jacking points on the sills.

First job before starting on the subframe is the release the hub bolts so I can remove the driveshafts, the hub bolts are torqued to 250nm +90 degrees so tight and then some!
M16 hub bolt

Started with an extending wheel brace bar which I managed to snap.

Also tried a T bar and jack handle but ended up bending the bar so I treated myself to a DEWALT DCF899N in the hope the 950Nm would get the bolt to budge.

Unfortunately, it didn’t shift the bolt, so now waiting on a 24” breaker bar to turn up so I can have another go.
A few weeks ago I decided the front and rear subframes and suspension could do with some attention as over the last couple of years it’s all starting to look very rusty.
Now I’m in lock down I have plenty of time on my hands to make a start.
As the car will be laid up for a while, I wanted to keep it ventilated as over the winter there was a water leak through a panel which the engine and gearbox wiring loom passes through. The leak is fixed but there is still some dampness in the carpet.
To get some air movement I used the pollen filter as a template
Made a panel with a fan which fits in the pollen filter housing and blows air through the heater ducts.
Fitted in place of pollen filter
The fan runs from the battery which is kept topped up by a maintainer/charger.
At the last MOT at the beginning of the month, the car failed due to headlight aim, this was tracked down to the front levelling sensor.
VCDS reading from sensor showing maximum
The sensor is mounted in the wheel arch and attached to the lower wishbone.
When I removed the sensor, I discovered the connector body was broken, fortunately the rubber seal was ok so there were no problems with water getting into the pins.
I plugged the new sensor in and checked the with VCDS which was showing a more sensible value.
For the moment I have put it all back together, but once I start dismantling everything to restore the subframe I’ll replace the connector body.
Got the car up on blocks so I can get trolley jacks underneath so I can put axle stands under the jacking points on the sills.
First job before starting on the subframe is the release the hub bolts so I can remove the driveshafts, the hub bolts are torqued to 250nm +90 degrees so tight and then some!
M16 hub bolt
Started with an extending wheel brace bar which I managed to snap.
Also tried a T bar and jack handle but ended up bending the bar so I treated myself to a DEWALT DCF899N in the hope the 950Nm would get the bolt to budge.
Unfortunately, it didn’t shift the bolt
, so now waiting on a 24” breaker bar to turn up so I can have another go. Mikeeb said:
Hi
Are you still running the Touareg callipers? Are they a direct fit to the standard uprights or do they need brackets?
Cheers
Yep still running the Touareg calipers, they fit to the standard uprights using an adapter bracket to the original caliper fixings. I'll try and remember to put a picture up as i dismantle everything. Are you still running the Touareg callipers? Are they a direct fit to the standard uprights or do they need brackets?
Cheers
Some more progress
Halfords breaker bar for the win

Result, hub bolt freed up

As the car will be on axle stands for a while, I got some sill protectors, they have a slot in the top for the pinch weld of the sill to sit in

The other side has a reses that sits on the top of the axle stand

The new impact driver made short work of most of the bolts, but some were seized and rusty which required the application of fire and WD40 to free up.
Track rod ends, drop links, bottom ball joints freed up and removed Brake disk and caliper.

Success


Couldn’t get the left (passenger side) bottom ball joint released from the hub so had to unbolt it from the wishbone and leave it attached to the hub until I can get the hub off the car to work on the bench.
Next step is to finish stripping the subframe down and start cleaning up all the rust and flaking pant to get it ready for respraying.
Also need to make a shopping list, I got some parts before the lockdown, but now need more.
Photo of adapter bracket as requested by Mikeeb
Halfords breaker bar for the win
Result, hub bolt freed up
As the car will be on axle stands for a while, I got some sill protectors, they have a slot in the top for the pinch weld of the sill to sit in
The other side has a reses that sits on the top of the axle stand
The new impact driver made short work of most of the bolts, but some were seized and rusty which required the application of fire and WD40 to free up.
Track rod ends, drop links, bottom ball joints freed up and removed Brake disk and caliper.
Success
Couldn’t get the left (passenger side) bottom ball joint released from the hub so had to unbolt it from the wishbone and leave it attached to the hub until I can get the hub off the car to work on the bench.
Next step is to finish stripping the subframe down and start cleaning up all the rust and flaking pant to get it ready for respraying.
Also need to make a shopping list, I got some parts before the lockdown, but now need more.
Photo of adapter bracket as requested by Mikeeb
More progress,
Got the subframe stripped down

Started attacking the wishbones with a wire brush in the grinder

Getting there

After a lot of wire brushing they ended up looking like this

And with a coat of paint they look like new

The hub/bearing carriers got the same treatment


The hubs got a good wire brushing and were zinc plated along with the caliper brackets to try and keep further rusting at bay.

The rough finish on the brackets is from where the rust was chemically removed.
I’m now stuck as I need to order a load of parts so I can start reassembly, I have got to wait for the lockdown to lift so the parts counter at the local VW dealer reopens.
Got the subframe stripped down
Started attacking the wishbones with a wire brush in the grinder
Getting there
After a lot of wire brushing they ended up looking like this
And with a coat of paint they look like new
The hub/bearing carriers got the same treatment
The hubs got a good wire brushing and were zinc plated along with the caliper brackets to try and keep further rusting at bay.
The rough finish on the brackets is from where the rust was chemically removed.
I’m now stuck as I need to order a load of parts so I can start reassembly, I have got to wait for the lockdown to lift so the parts counter at the local VW dealer reopens.
Finally, been able to make some progress.
Got the driveshafts cleaned up and repainted.

New wheel bearings and the hubs pressed into the hub/bearing carrier

New left and right ABS sensors

ABS sensor fitted with stainless steel bolts, which may have been polished (just because I could)

Now the VW dealers are starting to open up I was able to order all the parts I need to put the car back together.

On the table:
Left/right track rod ends
Left/right brake hoses
Top mounts & bearings
Drop links
Nuts & bolts for fixing wishbones to subframe
Anti-roll bar bolts
Steering rack bolts
Dog bone mount bolts
The can at the back is OE underseal
Also splashed out on a new subframe

It worked out a little bit more cost wise than refurbishing the original subframe. The bonded aluminium/rubber bushes (either side at top in picture) are around £50 each x4 (upper and lower), so nearly £200 in bushes alone.
I thought by the time I have paid for original subframe be sand blasted and powder coated the new subframe wasn’t much more at £560 and it comes with new bushes.
To make sure the new subframe stays looking good I have given it a couple of coats of eastwood chassis paint

Before fitting it will get a coat of Bilt Hamber Dynax S-50 wax inside and out for extra protection.
Got the driveshafts cleaned up and repainted.
New wheel bearings and the hubs pressed into the hub/bearing carrier
New left and right ABS sensors
ABS sensor fitted with stainless steel bolts, which may have been polished (just because I could
)Now the VW dealers are starting to open up I was able to order all the parts I need to put the car back together.
On the table:
Left/right track rod ends
Left/right brake hoses
Top mounts & bearings
Drop links
Nuts & bolts for fixing wishbones to subframe
Anti-roll bar bolts
Steering rack bolts
Dog bone mount bolts
The can at the back is OE underseal
Also splashed out on a new subframe
It worked out a little bit more cost wise than refurbishing the original subframe. The bonded aluminium/rubber bushes (either side at top in picture) are around £50 each x4 (upper and lower), so nearly £200 in bushes alone.
I thought by the time I have paid for original subframe be sand blasted and powder coated the new subframe wasn’t much more at £560 and it comes with new bushes.
To make sure the new subframe stays looking good I have given it a couple of coats of eastwood chassis paint
Before fitting it will get a coat of Bilt Hamber Dynax S-50 wax inside and out for extra protection.
pistolpedro said:
Enjoy following the this thread, I particularly like the DSG conversion I would imagine it really suits the character of the car.
Did you think about Defcon sleeves to the wishbones?
Nope, completely forgot Defcon sleeves existed, had to google themDid you think about Defcon sleeves to the wishbones?
 then remembered they were all the rage for the MKIV platform years ago. I have gone for the standard SuperPro bushes on the wishbones. Should be better than the 16/17 year old bushes that came off
 Gassing Station | Readers' Cars | Top of Page | What's New | My Stuff