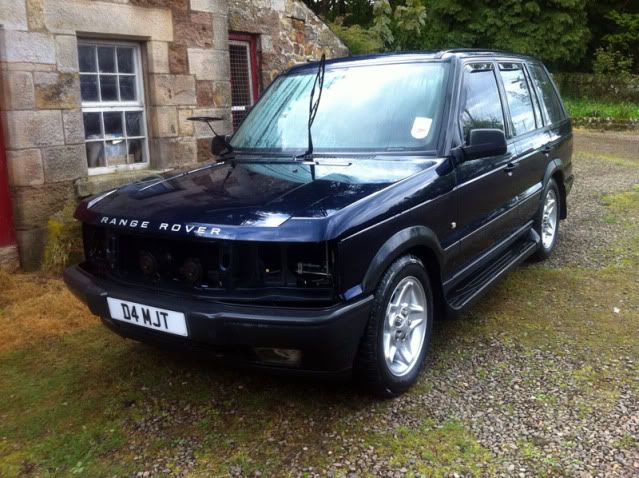
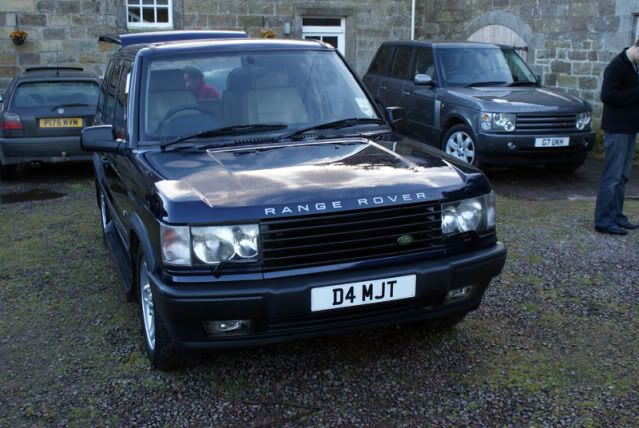
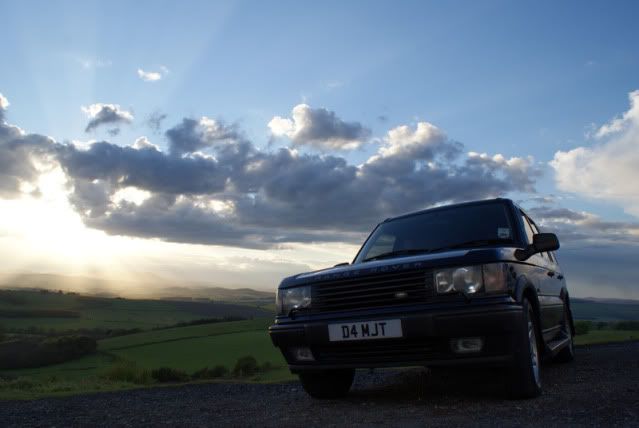
My brief car history, and my Range Rover 4.6
Discussion


I love your collection, you sound just like me!
My first car was a 2001 Jaguar XJR, and then I went off and bought a 1987 Jaguar V12 Vanden Plas Series 3, and then a 1986 XJ6, and then a 1991 XJ40, and then 1982 XJ12, and then a 1973 XJ6 S1, and then a 1989 V12 Vanden Plas Series 3, and now I run a 2006 XJ8 as a daily driver. I also have a Porsche 911 C2 and a Maserati Biturbo.
Except, unlike you, I never went "sensible"
Edited by MPoon on Thursday 10th February 23:33

I had my first Jag at 21, a 1986 Series III 4.2.
I've had Jags almost continuously since, multiple XJs, XJSs, XJC etc... Now on my 3rd XJR.
And more spookily recently bought myself a 2000 4.6 Vogue as a weekend/winter car.
Obviously I like my Jags, but I love tooling around in the RR at the weekends too.
Great taste
All lovely cars to be in.
I've had Jags almost continuously since, multiple XJs, XJSs, XJC etc... Now on my 3rd XJR.
And more spookily recently bought myself a 2000 4.6 Vogue as a weekend/winter car.
Obviously I like my Jags, but I love tooling around in the RR at the weekends too.
Great taste
All lovely cars to be in.

You certainly have some taste! I plan to use my XJ40 as my first car, having bought it when I was just 10 (12 now) I'm doing some minor work to it at the moment to bring it up to tip-top condition.
http://www.pistonheads.com/xforums/topic.asp?h=0&a...
http://projectxj40.weebly.com/
http://www.pistonheads.com/xforums/topic.asp?h=0&a...
http://projectxj40.weebly.com/
That's fantastic Kamil, best of luck with your car. XJ40's are good fun to work on, I really enjoyed mine. Keith Parrington of XJ Restorations is a good guy to contact if you need any parts or advice, his dad used to break them and supplied me with all kinds.
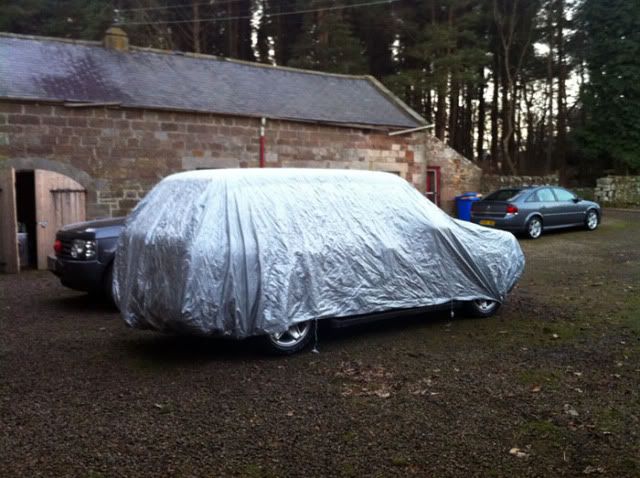
Update on the Range Rover, it's dead lol. I think it's split a head gasket between the cylinder and air, so I need to sort some time to pull it apart and see. In the meantime.... I decided it was time to tackle a few odd jobs that bug me. The ones that don't affect the functionality of the car so you never get round to :lol:
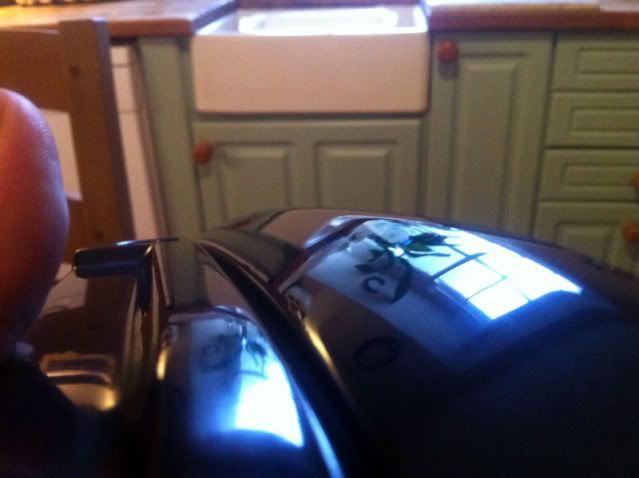
My sunroof slide panel has been screwed since I got the car, the trim material has all come away and scrunched up inside the sunroof so it'll only pull half way forwards and it looks really tatty and drops old dried glue dust everywhere. Despite advice to the contrary from a few forums, I can now say it's impossible to remove that panel without pulling the sunroof out.
Good news is it's a doddle to do.
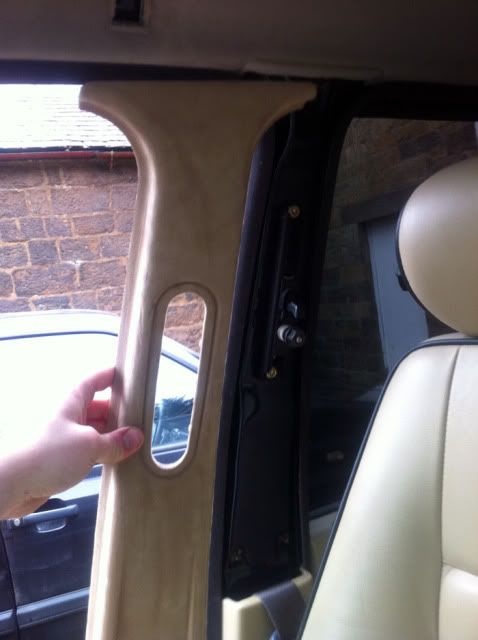
I started removing the pillar trims, these are easy to do, they just have pull clips on them, a firm pull away should see them all come loose:
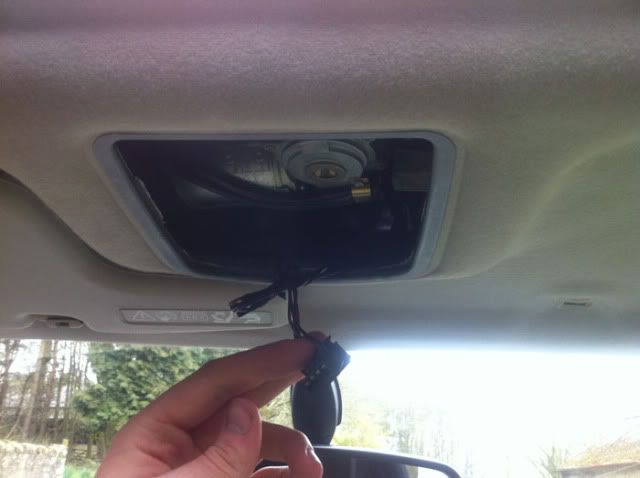
You need to remove the top mounting bolts for the seat belts to pull the trims clean away, I guess you could let them hang loose but it's easier to take them off imo. Then I removed the interior light, this should just pull down, and has a connection to undo for the light. Don't pull the loom to much as the wiring for the rear view mirror is spliced from it and it hasn't got much give.
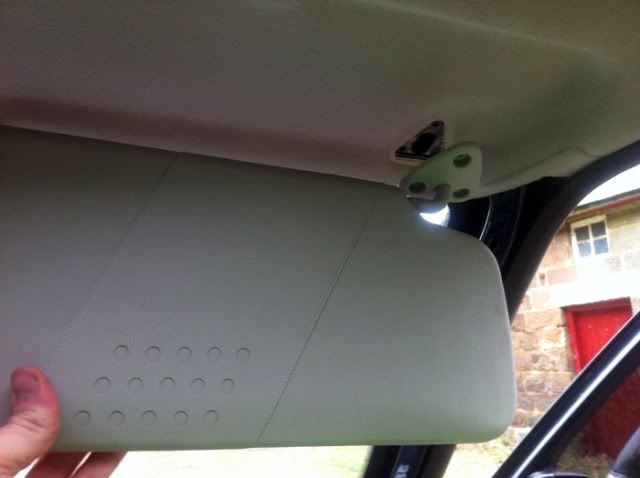
The sun visors are easy to remove, 3 philips screws in each one:
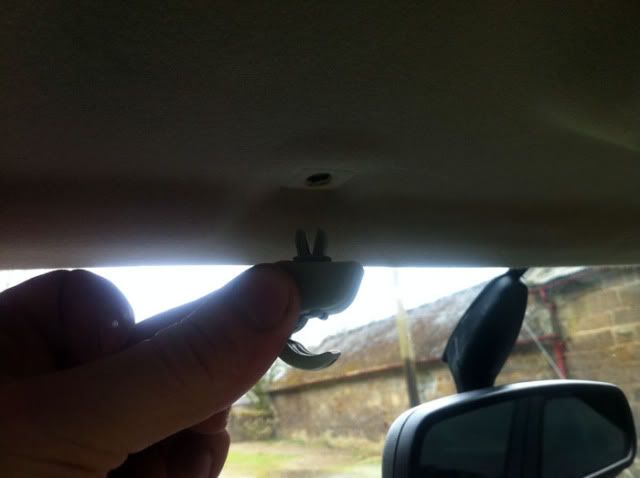
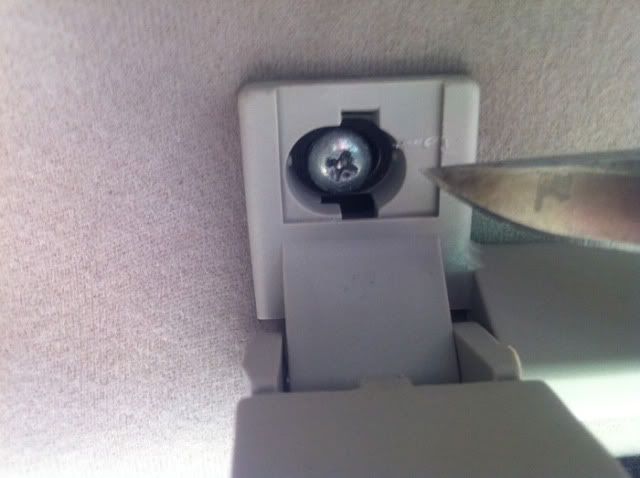
And the visor clips are located by a screw that presses a clip apart, they should just pull free after you've removed the screw:
The Interior Grab handles have covers over the screws that flick off with a knife if you're careful. Then just unscrew them, and pull down and away to release them from the clips:
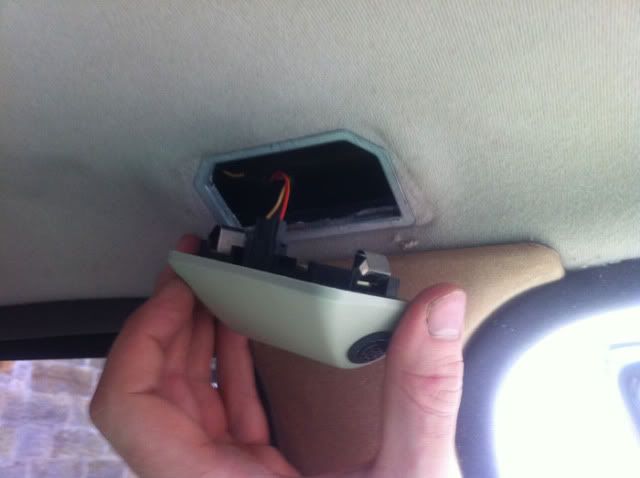
The rear interior lights are screwed into place, you need to lever the lense off with a knife, and then undo the screws and pull them away. There is a connection for the lights to undo behind them:
The alarm sensors just pop out with a pull:
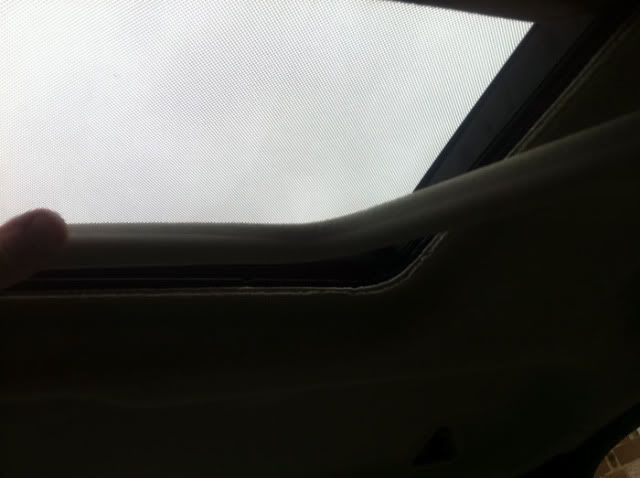
The sunroof trim just pulls off:
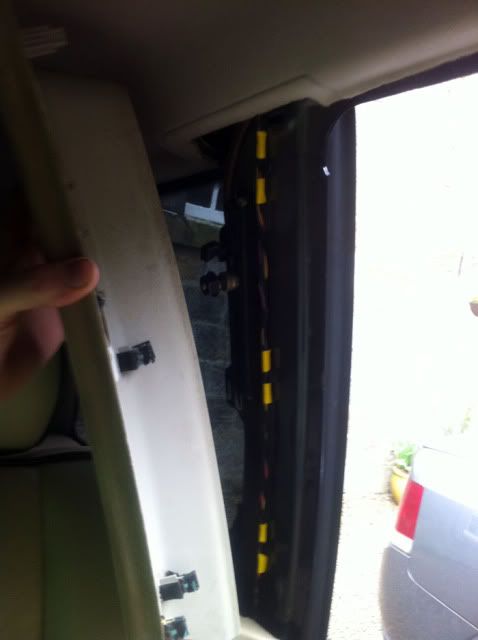
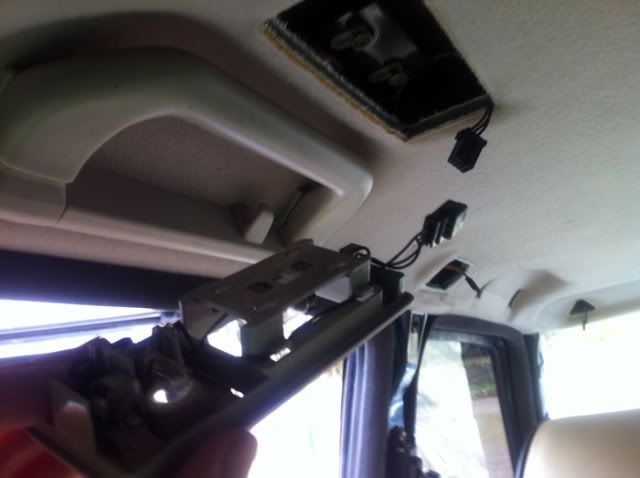
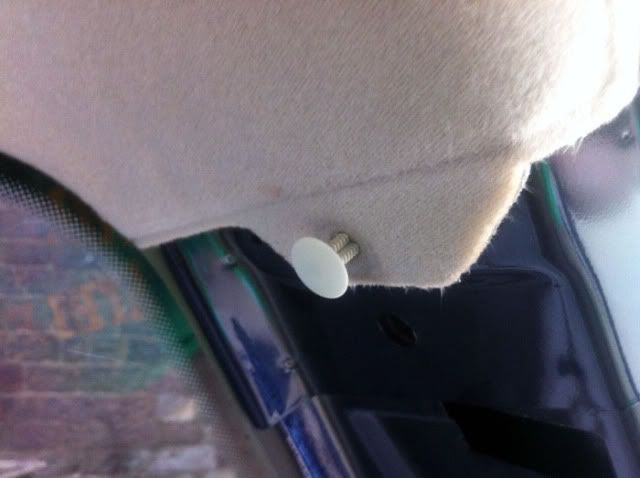
At which point the headlining is only held in by the door seals, and 2 trim screws in the rear D pillars:
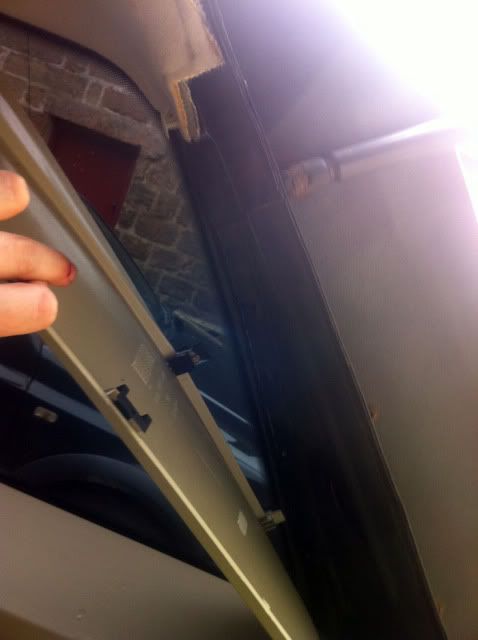
I found it easiest to remove the door seals at the front working back, and lower the headlining onto the headrests, undoing the trim screws at the back last. It should then just pull out from the back of the car, you need to be careful as it has to bend slightly to pull free, but it's a pretty tough headlining, the upperside is fibreglassed to give it strength. That should leave you with this:
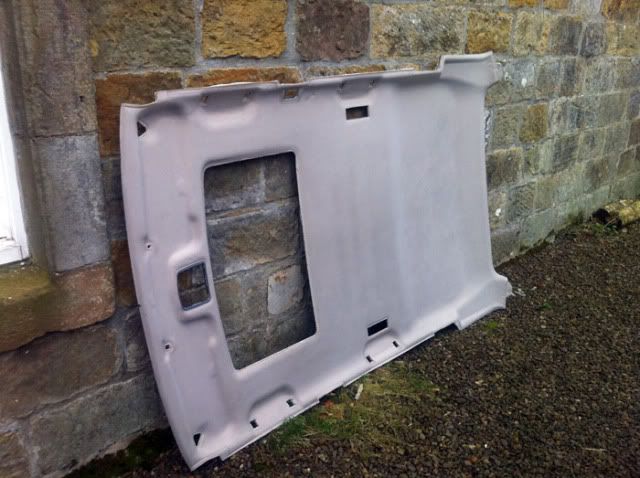
and this:
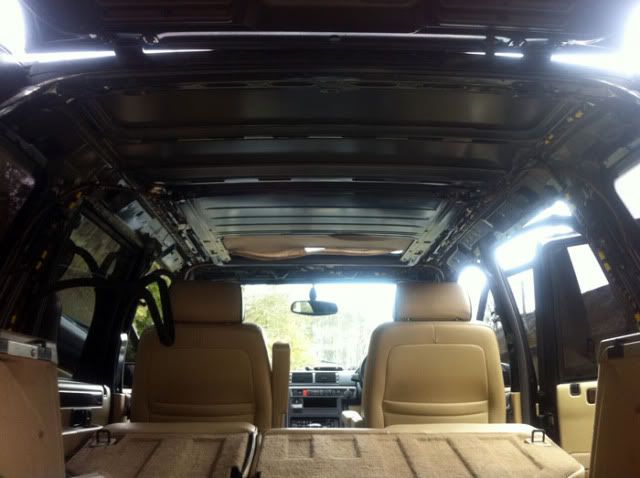
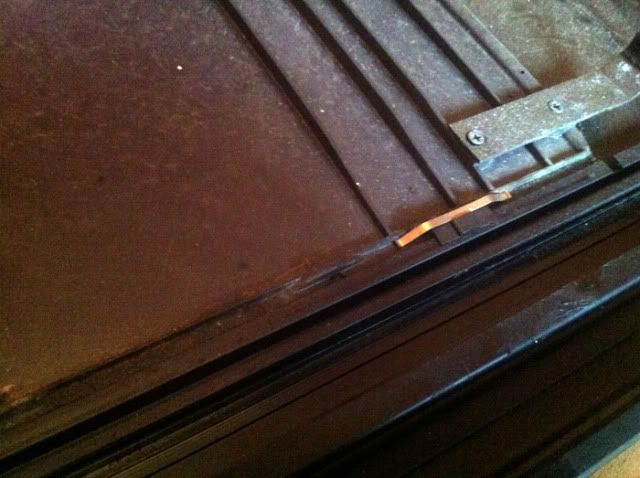
You can see here the sunroof panel trim is shot.
Removing the sunroof is fairly straightforward. First off I opened it upwards to make it easier to maneouver out, this turned out to be a necessity later to across some crossbar screws, so do it. Then there are 8 bolts holding the assembly to the roof. Undo the two bolts at the motor bracket first, as the bracket is flimsy, and will just bend if the weight of the sunroof is resting on it as you undo it:
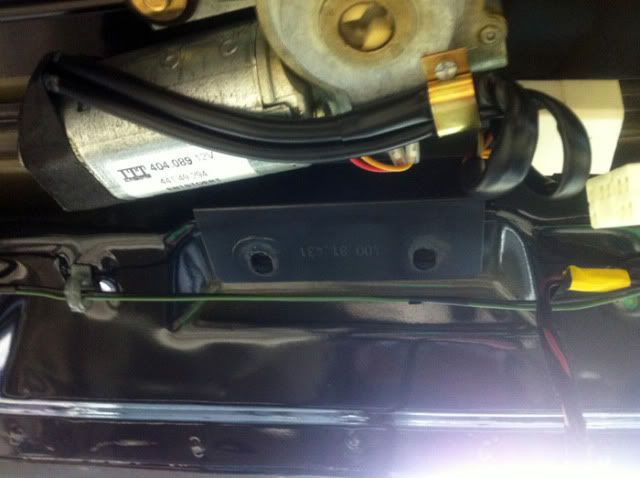
The sunroof drain tubes also need to be popped off, slide the cable ties away, and then slide the drain tubes off and out the way:
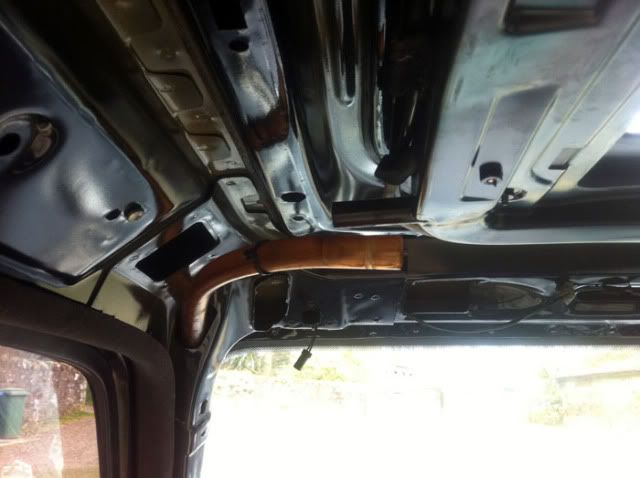
You need two people at least to lower the sunroof assembly out, as it's heavy and you can't position yourself in the car with access to all 6 bolts left to remove it. I got Tom to hold it while I undid the last 6 bolts, 1 in each corner and 2 in the middle, and then it just drops out, hopefully not literally:
Typically at this point it started to rain so I lashed the cover back on the car to stop it filling with water and took the sunroof assembly indoors to remove the trim panel:
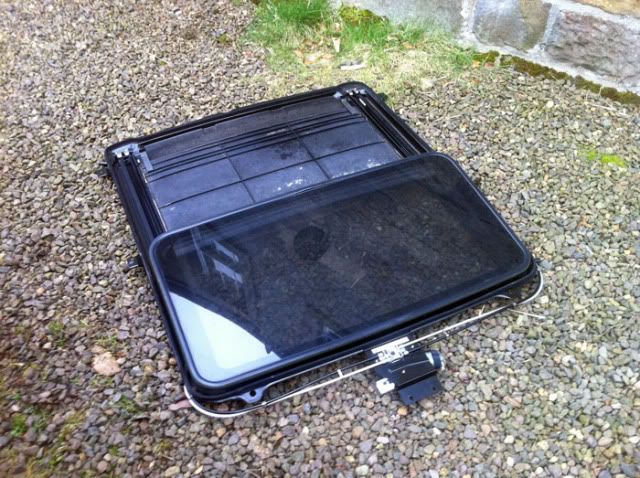
You need to remove the crossbar below, there are 2 screws in each side:
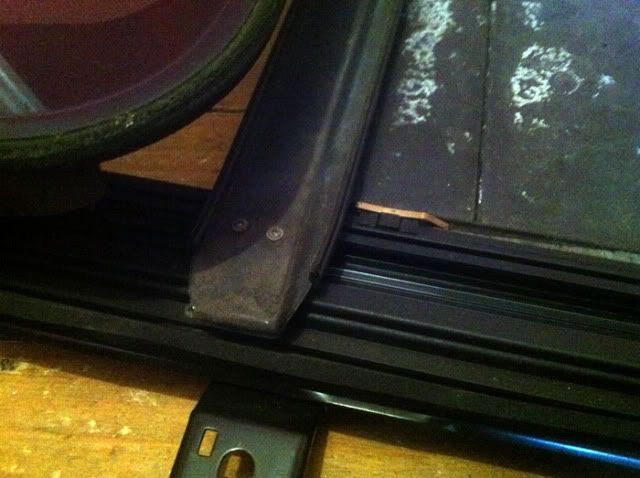
and then remove all 4 of these small spring clips that press the panel onto the rails:
After that, you can push the panel to one side and lift it out of the runners, ready for re-trimming. I didn't get out for material at the weekend so that's stored ready to be done and I've just bolted the sunroof back in to the car for now until it's done.
More progress over the weekend on the head gasket side of things, another post for that though while the pictures upload :lol:
Update on the Range Rover, it's dead lol. I think it's split a head gasket between the cylinder and air, so I need to sort some time to pull it apart and see. In the meantime.... I decided it was time to tackle a few odd jobs that bug me. The ones that don't affect the functionality of the car so you never get round to :lol:
My sunroof slide panel has been screwed since I got the car, the trim material has all come away and scrunched up inside the sunroof so it'll only pull half way forwards and it looks really tatty and drops old dried glue dust everywhere. Despite advice to the contrary from a few forums, I can now say it's impossible to remove that panel without pulling the sunroof out.
Good news is it's a doddle to do.
I started removing the pillar trims, these are easy to do, they just have pull clips on them, a firm pull away should see them all come loose:
You need to remove the top mounting bolts for the seat belts to pull the trims clean away, I guess you could let them hang loose but it's easier to take them off imo. Then I removed the interior light, this should just pull down, and has a connection to undo for the light. Don't pull the loom to much as the wiring for the rear view mirror is spliced from it and it hasn't got much give.
The sun visors are easy to remove, 3 philips screws in each one:
And the visor clips are located by a screw that presses a clip apart, they should just pull free after you've removed the screw:
The Interior Grab handles have covers over the screws that flick off with a knife if you're careful. Then just unscrew them, and pull down and away to release them from the clips:
The rear interior lights are screwed into place, you need to lever the lense off with a knife, and then undo the screws and pull them away. There is a connection for the lights to undo behind them:
The alarm sensors just pop out with a pull:
The sunroof trim just pulls off:
At which point the headlining is only held in by the door seals, and 2 trim screws in the rear D pillars:
I found it easiest to remove the door seals at the front working back, and lower the headlining onto the headrests, undoing the trim screws at the back last. It should then just pull out from the back of the car, you need to be careful as it has to bend slightly to pull free, but it's a pretty tough headlining, the upperside is fibreglassed to give it strength. That should leave you with this:
and this:
You can see here the sunroof panel trim is shot.
Removing the sunroof is fairly straightforward. First off I opened it upwards to make it easier to maneouver out, this turned out to be a necessity later to across some crossbar screws, so do it. Then there are 8 bolts holding the assembly to the roof. Undo the two bolts at the motor bracket first, as the bracket is flimsy, and will just bend if the weight of the sunroof is resting on it as you undo it:
The sunroof drain tubes also need to be popped off, slide the cable ties away, and then slide the drain tubes off and out the way:
You need two people at least to lower the sunroof assembly out, as it's heavy and you can't position yourself in the car with access to all 6 bolts left to remove it. I got Tom to hold it while I undid the last 6 bolts, 1 in each corner and 2 in the middle, and then it just drops out, hopefully not literally:
Typically at this point it started to rain so I lashed the cover back on the car to stop it filling with water and took the sunroof assembly indoors to remove the trim panel:
You need to remove the crossbar below, there are 2 screws in each side:
and then remove all 4 of these small spring clips that press the panel onto the rails:
After that, you can push the panel to one side and lift it out of the runners, ready for re-trimming. I didn't get out for material at the weekend so that's stored ready to be done and I've just bolted the sunroof back in to the car for now until it's done.
More progress over the weekend on the head gasket side of things, another post for that though while the pictures upload :lol:
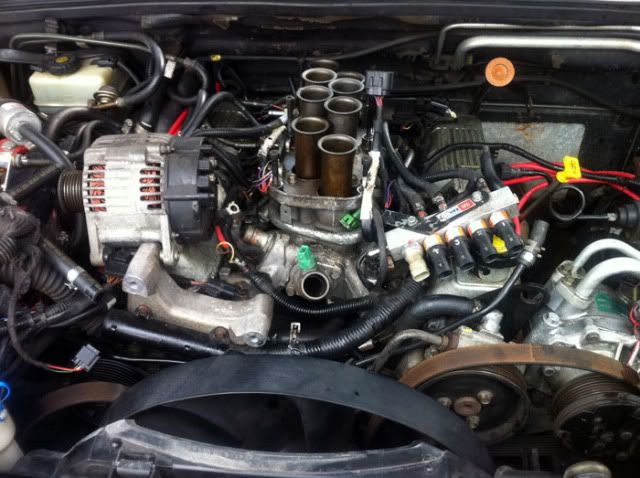
Onto the head gasket then, first off get your tools handy:
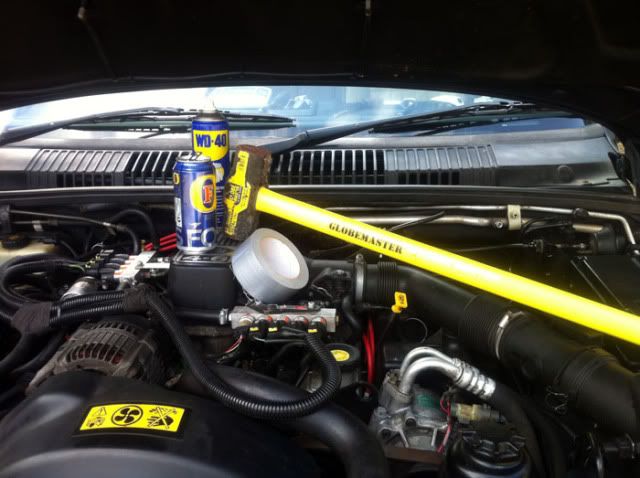
I started off removing the MAF, air recirc gubbins and intake hosing to the throttle body:
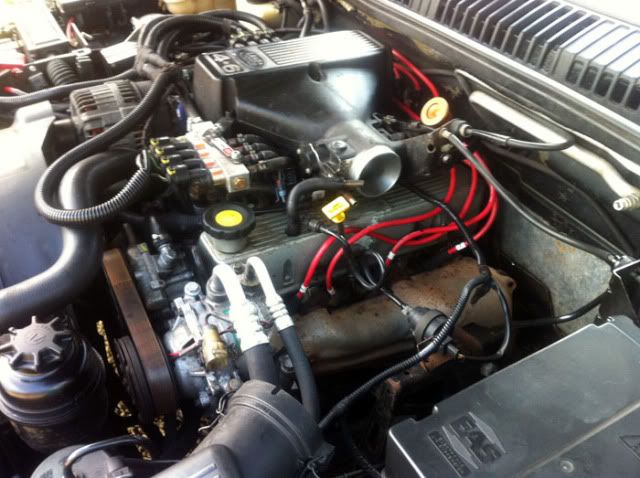
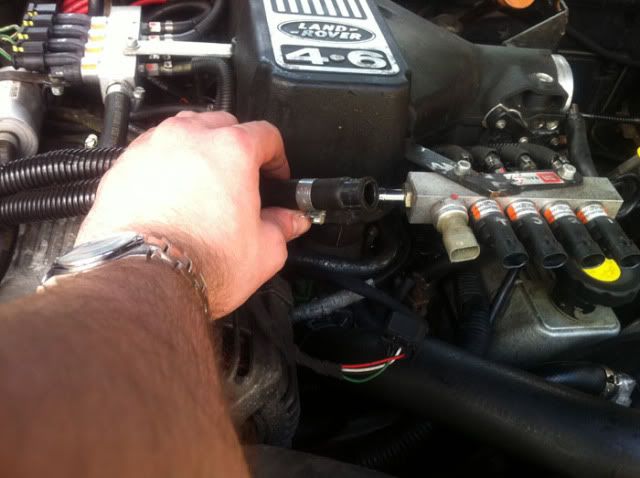
My car has a sequential injection LPG system fitted, so the next thing I needed to do was disconnect the LPG feed to the injectors, I have 2 banks of 4:
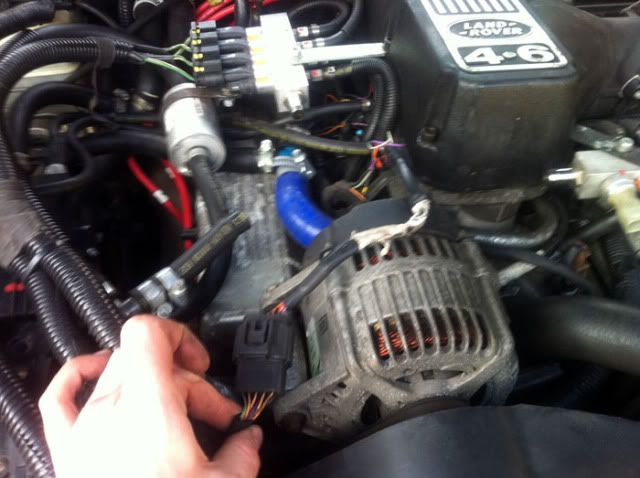
Then I unplugged the harness for the fuel injection system to give a bit more freedom in moving the wiring about:
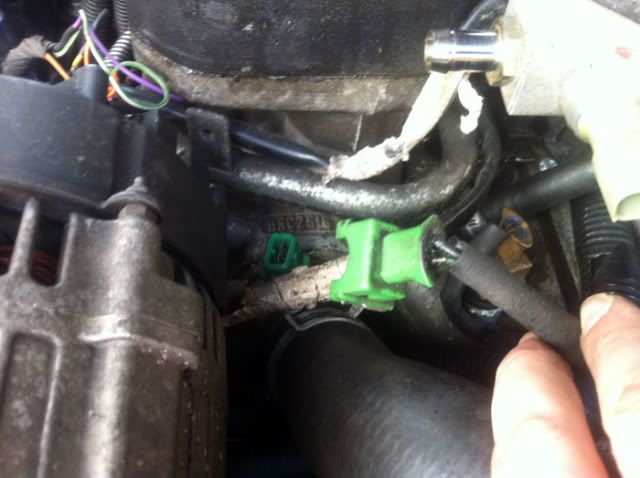
Also the water temp sensor on the thermostat housing:
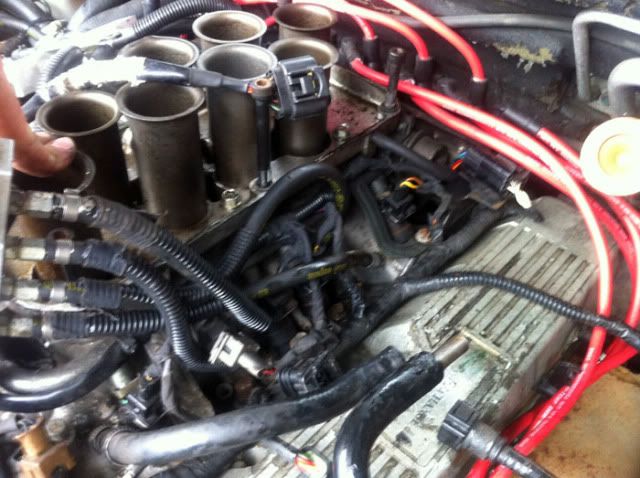
And after disconnection the throttle and cruise cables and unbolting the transmission dipstick, I undid the 6 bolts holding the plenum onto the intake manifold, and removed this. It's not necessary to remove this to remove the intake manifold, but it makes life far easier, and I'm nosey.
Time to drain the coolant system now if you haven't already, there's a handy drain plug in the bottom of the radiator:
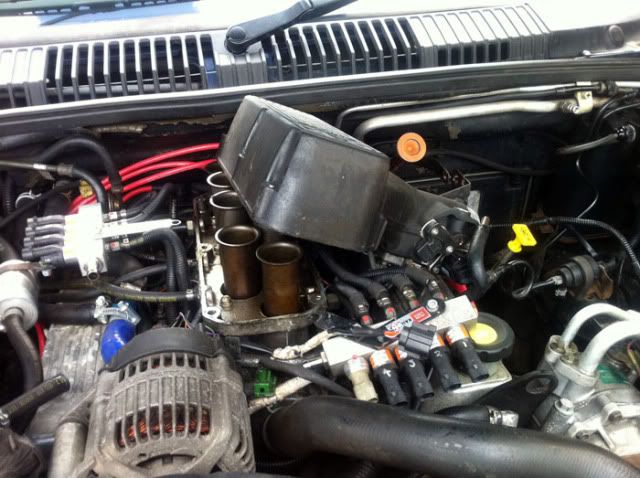
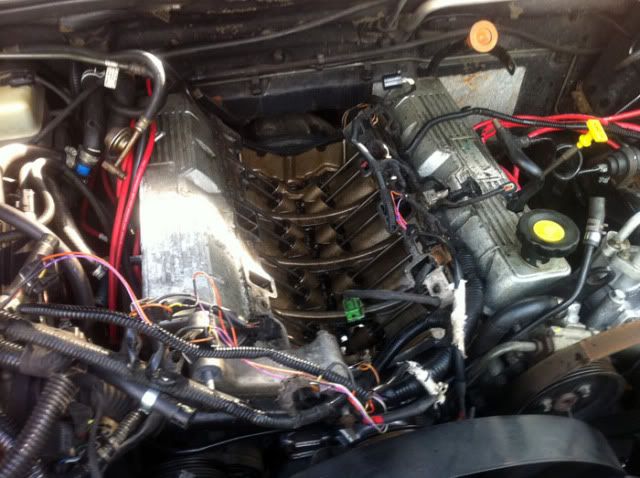
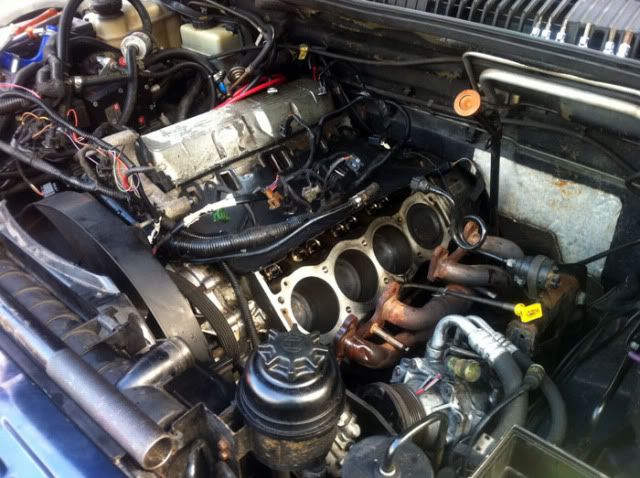
Then it's a case of starting to get access and unbolt the inlet manifold, the wiring looks a bit of a mare but it's fairly simple, there are 10 bolts holding the inlet manifold down, 8 are easy to get to, the far front and back are more of a mare:
To get at the rear two, you need to unbolt and remove the coilpacks, and disconnect the fuel supply lines, as below:

The only real snag of the day, during this process I had to move my LPG injector hosing out of the way, and one has snapped, so I'll need to drill it out and get a new hose, gah.

With that done you can unbolt the coilpacks at the other side as well before removing and getting access to the rear 2 inlet manifold bolts:

The front two, to access these you need to remove the alternator and air con and powersteering pumps. Undo the serpentine belt tensioner, and release the belt, then the alternator just pulls out, and I decided it was easiest to just unbolt the bracket holding the air con and power steering pumps and set them down in the engine bay out the way, least hassle.
The inlet manifold should then lift off after you remove the last 2 bolts.
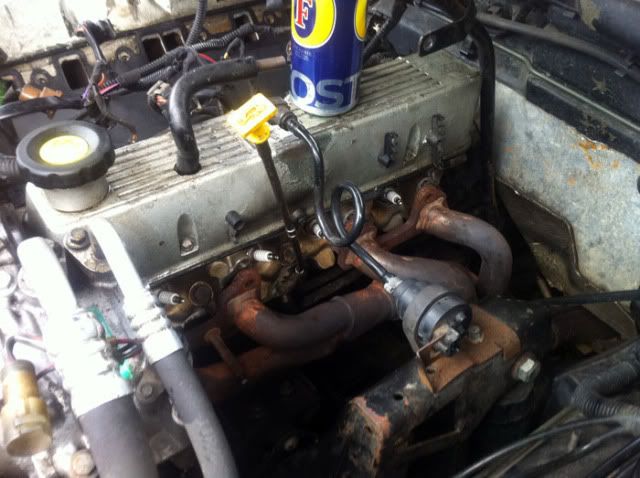
The inlet manifold gasket will still be present in the valley, I just removed it for a look at the cam, which thankfully appears to be in great order. I wanted to visually inspect it for scoring as the cams can wear causing poor running and performance. Although mine is a replacement engine and has very low mileage, I wanted to check anyway.
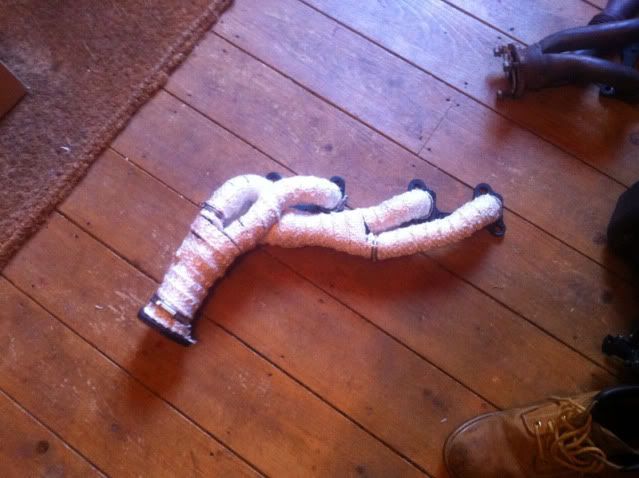
Next it's time to unbolt the exhaust manifold, the heatshield is a bit of a mission to remove, and I think I may choose to heatwrap the manifolds instead when I refit, my experience of Rover V8's is that they can eat exhaust manifold gaskets quickly, and it's a 2 hour job for both sides with the heatshields in place, or 15/20 minutes without them.
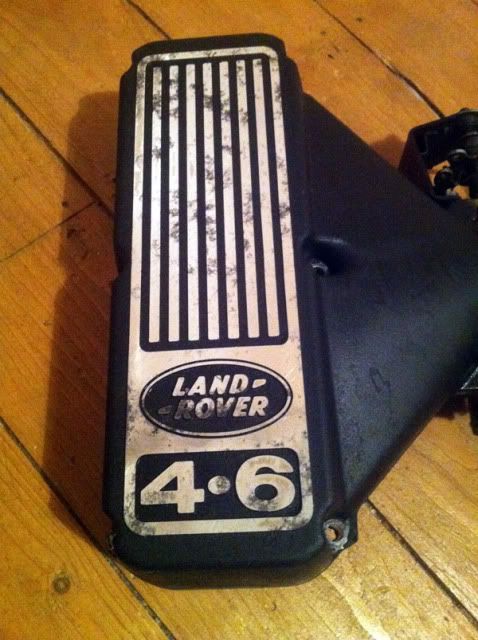
Next I removed the rocker cover, and unbolted the rocker assembly. Undo the bolts in sequence to even the load as you remove it:
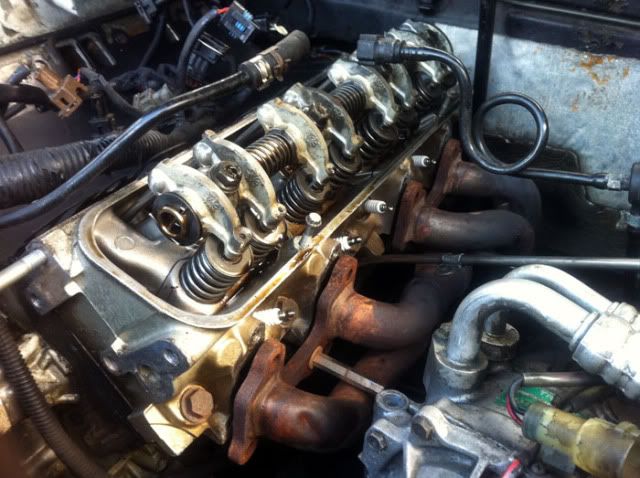
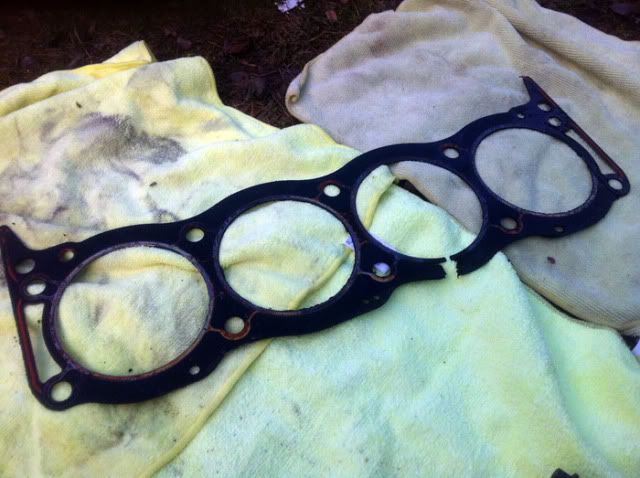
Next I unbolted the 10 head bolts in sequence, and pulled the head. It's clear straight away that the gasket has cracked / disintegrated around Cylinder 3:
Ouch:
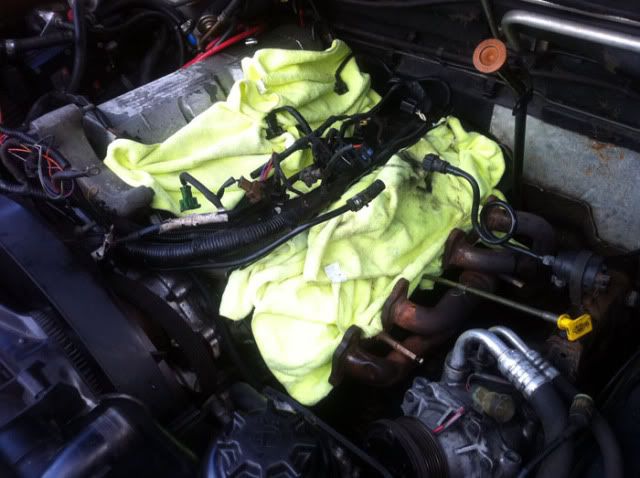
Ran out of time to pull the other side, so I packed the bores with cloths and covered everything up till I can spend some more time on it:
Going to try and sort time to pull the other side tonight :-)
I started off removing the MAF, air recirc gubbins and intake hosing to the throttle body:
My car has a sequential injection LPG system fitted, so the next thing I needed to do was disconnect the LPG feed to the injectors, I have 2 banks of 4:
Then I unplugged the harness for the fuel injection system to give a bit more freedom in moving the wiring about:
Also the water temp sensor on the thermostat housing:
And after disconnection the throttle and cruise cables and unbolting the transmission dipstick, I undid the 6 bolts holding the plenum onto the intake manifold, and removed this. It's not necessary to remove this to remove the intake manifold, but it makes life far easier, and I'm nosey.
Time to drain the coolant system now if you haven't already, there's a handy drain plug in the bottom of the radiator:
Then it's a case of starting to get access and unbolt the inlet manifold, the wiring looks a bit of a mare but it's fairly simple, there are 10 bolts holding the inlet manifold down, 8 are easy to get to, the far front and back are more of a mare:
To get at the rear two, you need to unbolt and remove the coilpacks, and disconnect the fuel supply lines, as below:
The only real snag of the day, during this process I had to move my LPG injector hosing out of the way, and one has snapped, so I'll need to drill it out and get a new hose, gah.
With that done you can unbolt the coilpacks at the other side as well before removing and getting access to the rear 2 inlet manifold bolts:
The front two, to access these you need to remove the alternator and air con and powersteering pumps. Undo the serpentine belt tensioner, and release the belt, then the alternator just pulls out, and I decided it was easiest to just unbolt the bracket holding the air con and power steering pumps and set them down in the engine bay out the way, least hassle.
The inlet manifold should then lift off after you remove the last 2 bolts.
The inlet manifold gasket will still be present in the valley, I just removed it for a look at the cam, which thankfully appears to be in great order. I wanted to visually inspect it for scoring as the cams can wear causing poor running and performance. Although mine is a replacement engine and has very low mileage, I wanted to check anyway.
Next it's time to unbolt the exhaust manifold, the heatshield is a bit of a mission to remove, and I think I may choose to heatwrap the manifolds instead when I refit, my experience of Rover V8's is that they can eat exhaust manifold gaskets quickly, and it's a 2 hour job for both sides with the heatshields in place, or 15/20 minutes without them.
Next I removed the rocker cover, and unbolted the rocker assembly. Undo the bolts in sequence to even the load as you remove it:
Next I unbolted the 10 head bolts in sequence, and pulled the head. It's clear straight away that the gasket has cracked / disintegrated around Cylinder 3:
Ouch:
Ran out of time to pull the other side, so I packed the bores with cloths and covered everything up till I can spend some more time on it:
Going to try and sort time to pull the other side tonight :-)

Holy update batman! It's fixed :-)
So, from where I left off then, I continued stripping down the drivers side bank, and removed the Cylinder head. Anyone who's done one of these on a P38
will know what a mission it is getting the lower exhaust manifold bolt out from Cylinder 8. It's difficult enough to get access anyway, but with the
steering column in the way so you can't get a ratchet in cleanly, and the manifold preventing easily getting a knuckle in, it's a right mission, never mind
with all the gas gubbins there. I reckon it took me about 2 hours to get that bolt out, and 10 minutes for the others :lol:
one stripped block:
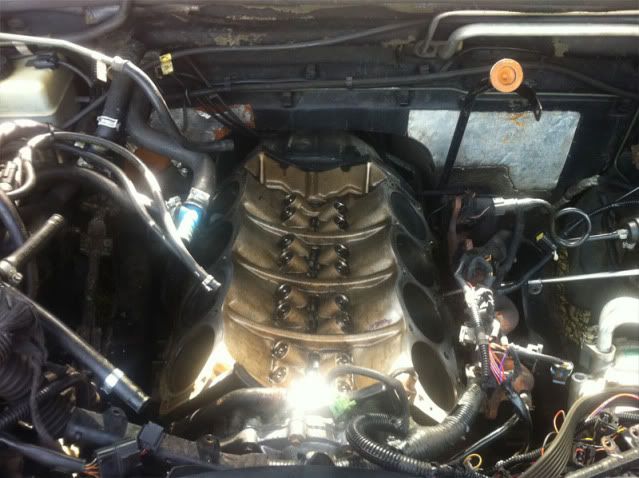
I started cleaning the decks of the block up ready for new gaskets:

And while I was on thought I might have a bit of a basic tidy up. So, I started cleaning down the cylinder heads:
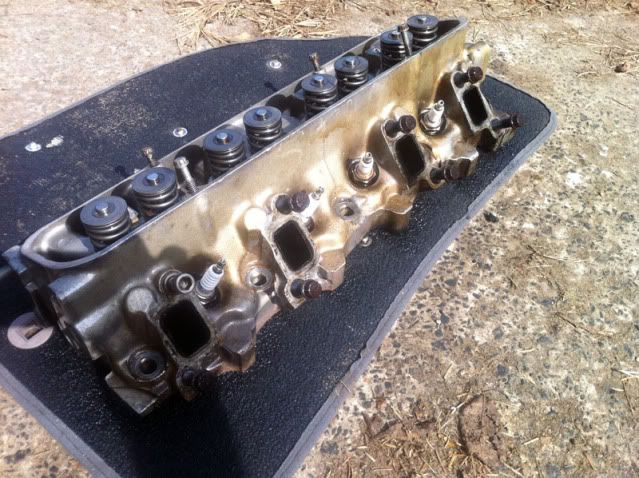
Then painted them and lacquered them with high temperature engine paint and lacquer:
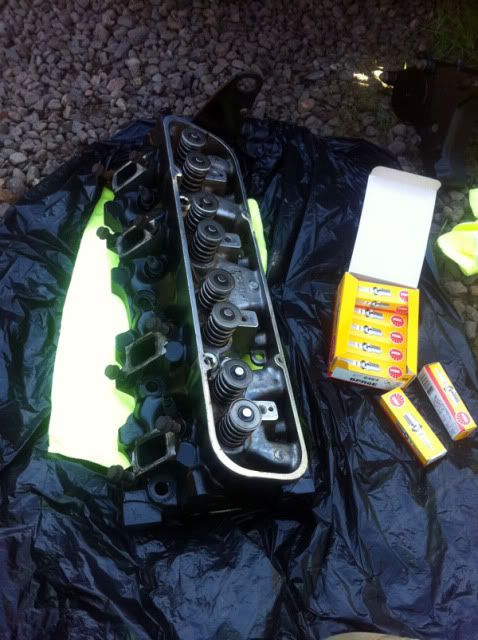
You can see the old plugs in there still, I left them in during painting to keep the plug holes safe and masked off.
I also decided that during the strip down process, and having had classic's before that eat exhaust manifold gaskets regularly, there was no way in hell
the standard heatshields were going back on, they're a nightmare to fit and refit and just hold the job up. So I set about tidying up the manifolds for
refit, and ordered some heatwrap to use in place of the heat shields.
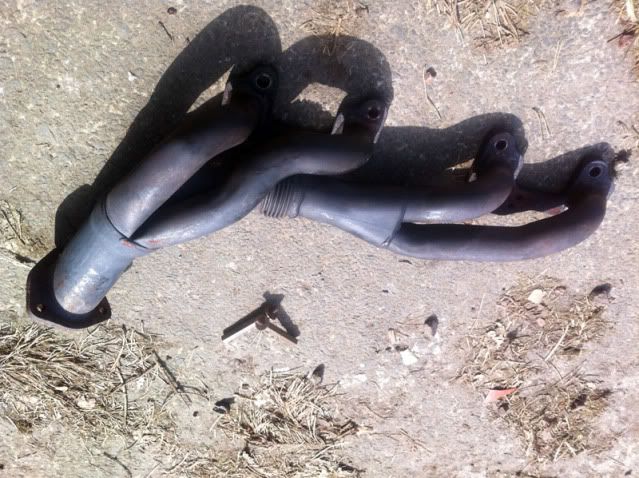
Manifold after tidy up:
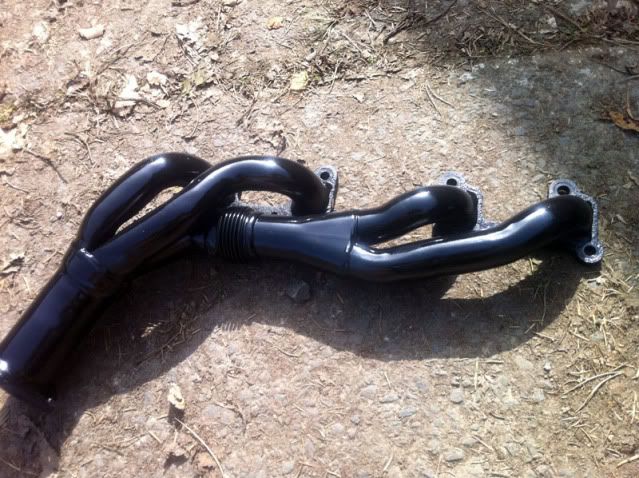
Then I set about wrapping them with the heatwrap:
Thanks to a postal cock up I only ended up with enough heatwrap to do one and half manifolds, so I wrapped the drivers side bank as it's under the gas kit,
and hardest to remove, and I'm waiting on more for the passengers side, which is pretty easy to remove and wrap at a later date.
Carrying on with a basic tidy up, I started cleaning up the plenum chamber as well, as it was pretty mucky and corroded:
Looking a bit better:

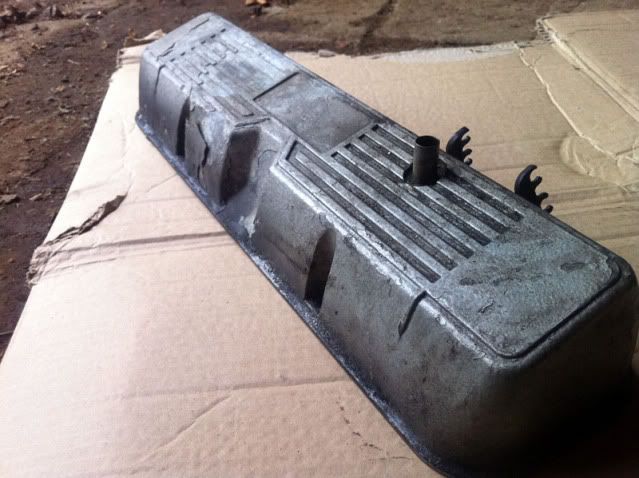
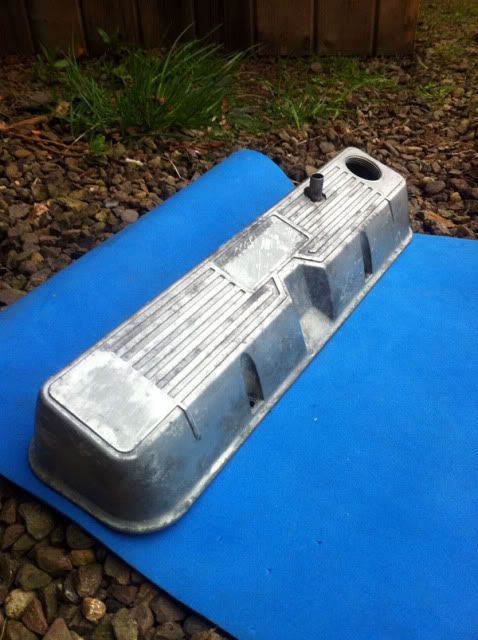
Next up were the rocker covers, which were really tatty.
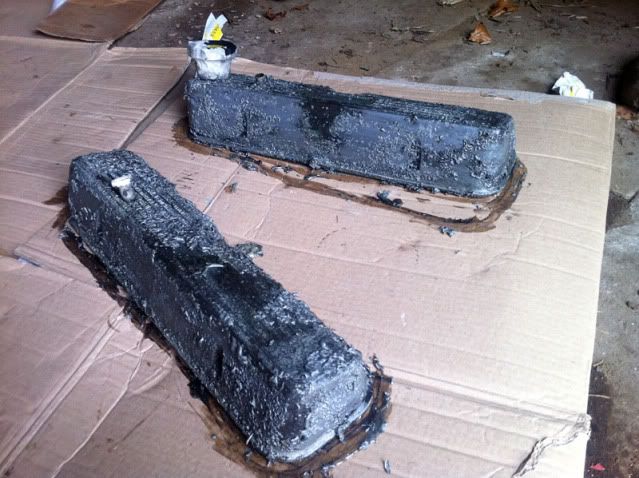
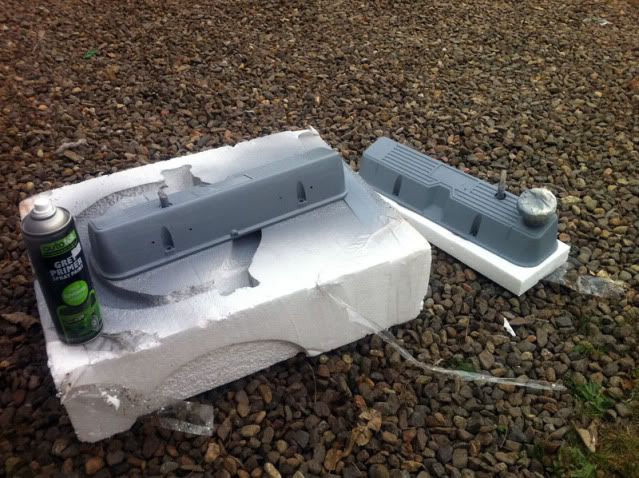
I nitro morsed them down, and removed all the old paint and crud:
That left me with these, which already looked better:
A few coats of primer lashed on:
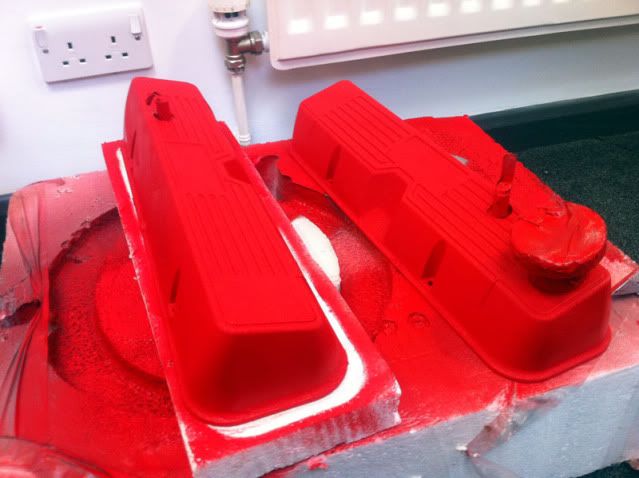
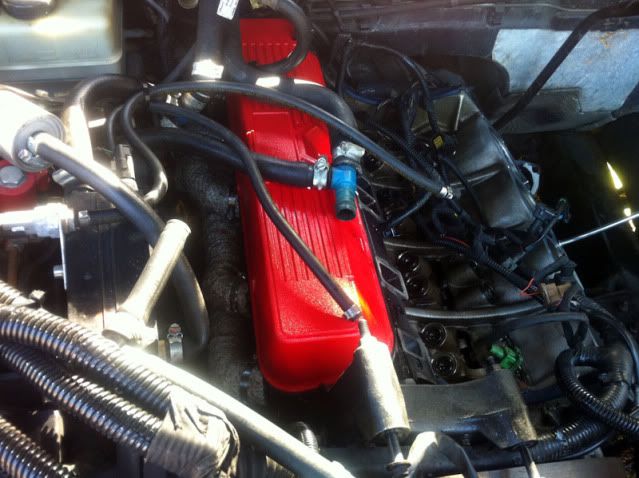
And some crinkle effect red high temperature paint tidied them up nicely:
Next I started to re-assemble the engine, bolting the heads back to the block with new stretch bolts and composite gaskets.
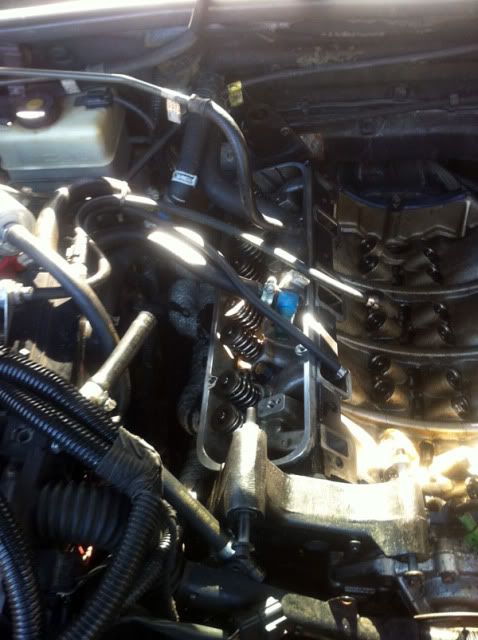
Test fitted the rocker covers:
Then I refitted the passenger side cylinder head and rocker cover:
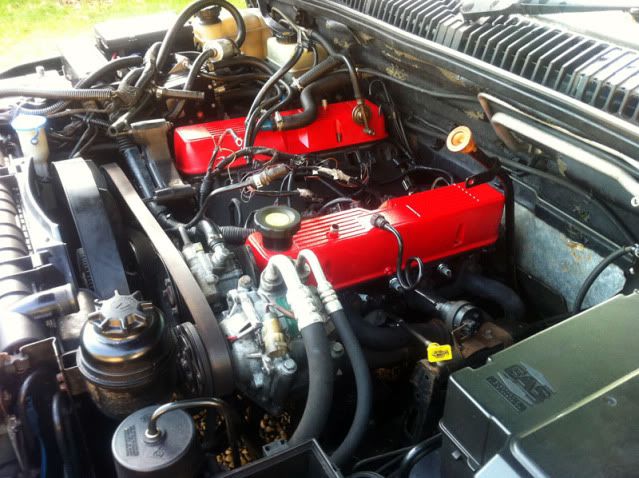
Then it was pretty much just a case of refitting connectors and bolting everything back up. I fitted a new inlet manifold gasket, as well as new rocker
cover gaskets, stainless inlet manifold and rocker cover bolts, and fully serviced the car, fitting the correct NGK plugs, and doing an oil flush before
fitting new oil and fuel filters, and firing it up. Fired up a treat first time, chuffed was I :-)
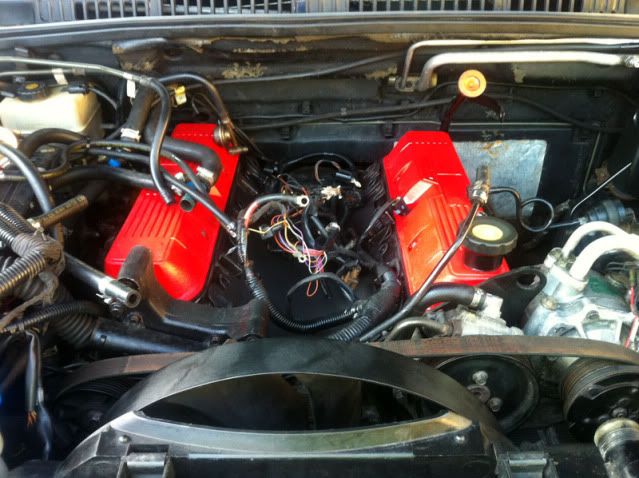
Shamefully, I've just realised I've not actually got a picture of the completed engine bay, I'll grab one later on. It's looking a bit better anyway. The
car is completely transformed, I suspect the head gasket has been slightly blowing since I bought the car, as it's far smoother and quieter now than it's
ever been. The idle is back to perfect as well, whereas before I was having problems with random high idle issues.

So, from where I left off then, I continued stripping down the drivers side bank, and removed the Cylinder head. Anyone who's done one of these on a P38
will know what a mission it is getting the lower exhaust manifold bolt out from Cylinder 8. It's difficult enough to get access anyway, but with the
steering column in the way so you can't get a ratchet in cleanly, and the manifold preventing easily getting a knuckle in, it's a right mission, never mind
with all the gas gubbins there. I reckon it took me about 2 hours to get that bolt out, and 10 minutes for the others :lol:
one stripped block:
I started cleaning the decks of the block up ready for new gaskets:
And while I was on thought I might have a bit of a basic tidy up. So, I started cleaning down the cylinder heads:
Then painted them and lacquered them with high temperature engine paint and lacquer:
You can see the old plugs in there still, I left them in during painting to keep the plug holes safe and masked off.
I also decided that during the strip down process, and having had classic's before that eat exhaust manifold gaskets regularly, there was no way in hell
the standard heatshields were going back on, they're a nightmare to fit and refit and just hold the job up. So I set about tidying up the manifolds for
refit, and ordered some heatwrap to use in place of the heat shields.
Manifold after tidy up:
Then I set about wrapping them with the heatwrap:
Thanks to a postal cock up I only ended up with enough heatwrap to do one and half manifolds, so I wrapped the drivers side bank as it's under the gas kit,
and hardest to remove, and I'm waiting on more for the passengers side, which is pretty easy to remove and wrap at a later date.
Carrying on with a basic tidy up, I started cleaning up the plenum chamber as well, as it was pretty mucky and corroded:
Looking a bit better:
Next up were the rocker covers, which were really tatty.
I nitro morsed them down, and removed all the old paint and crud:
That left me with these, which already looked better:
A few coats of primer lashed on:
And some crinkle effect red high temperature paint tidied them up nicely:
Next I started to re-assemble the engine, bolting the heads back to the block with new stretch bolts and composite gaskets.
Test fitted the rocker covers:
Then I refitted the passenger side cylinder head and rocker cover:
Then it was pretty much just a case of refitting connectors and bolting everything back up. I fitted a new inlet manifold gasket, as well as new rocker
cover gaskets, stainless inlet manifold and rocker cover bolts, and fully serviced the car, fitting the correct NGK plugs, and doing an oil flush before
fitting new oil and fuel filters, and firing it up. Fired up a treat first time, chuffed was I :-)
Shamefully, I've just realised I've not actually got a picture of the completed engine bay, I'll grab one later on. It's looking a bit better anyway. The
car is completely transformed, I suspect the head gasket has been slightly blowing since I bought the car, as it's far smoother and quieter now than it's
ever been. The idle is back to perfect as well, whereas before I was having problems with random high idle issues.
Next on the agenda, cosmetic tidying up a bit. Over the winter I acquired a nasty scratch down the drivers side rear door. It's really obvious with the car being a dark colour, and I've been wanting to have it painted for some time. Seeing as it needed painted anyway, I decided to have a go at wet sanding the scratch out, and polishing it up.
The scratch originally:
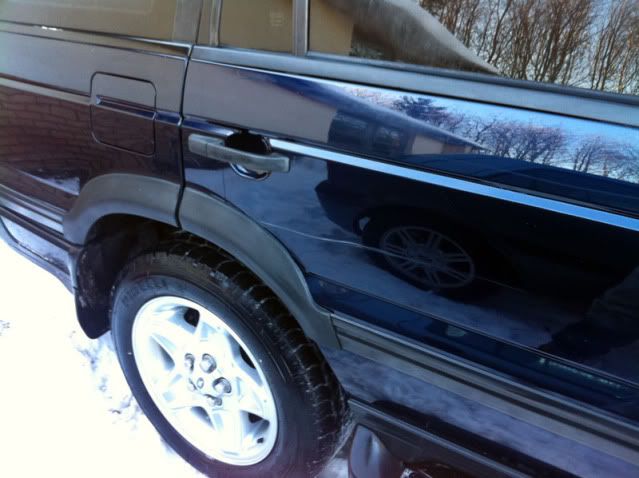
During the wet sanding process:
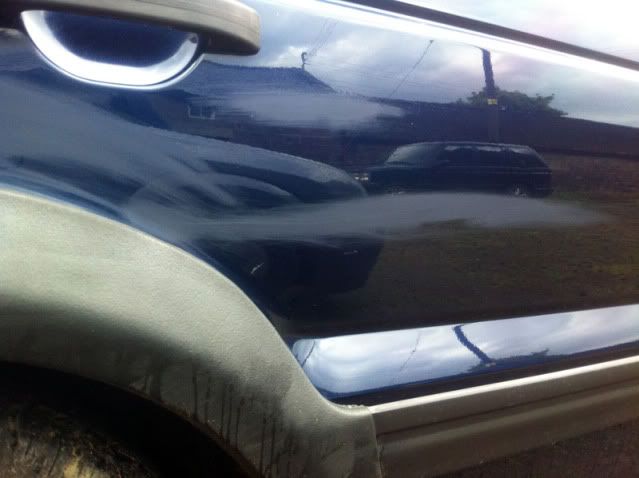
And after 2 passes with some rubbing compound, and a good dose of SRP, it's now looking like this:
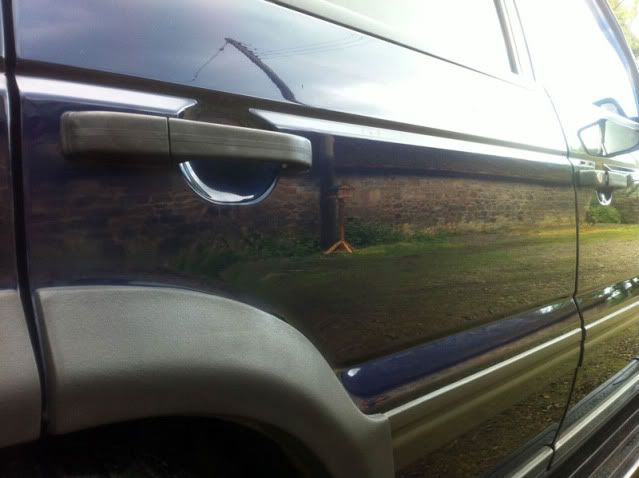
It's slightly duller, I reckon it'll need another polish, but it's far better than it was, I'm happy with it for now.
Next modification:
It's now cleaned and polished and all the residue is removed, I prefer it tbh, a bit cleaner and I never really liked the green and gold of the Land Rover badge against the blue.
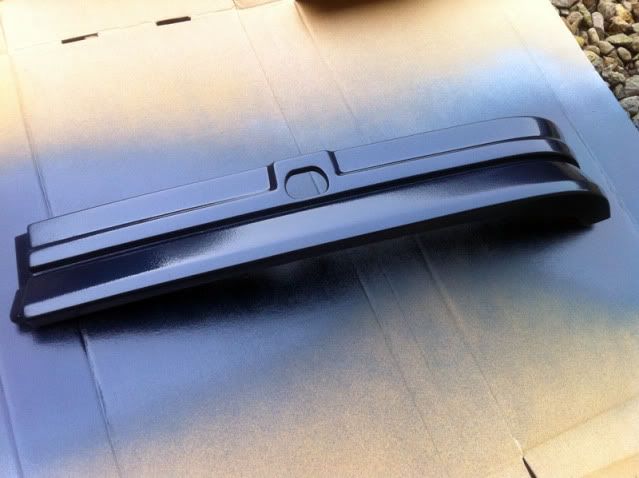
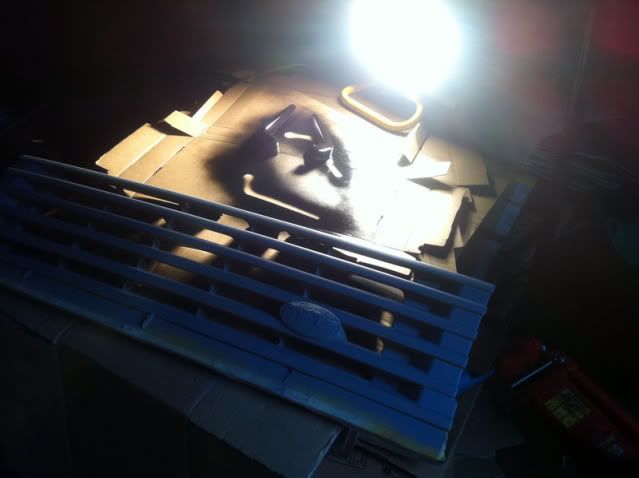
Then I wanted to clean up the front end a bit, there is a wealth of plastic trim on the front of the car, both the lights have lips underneath, the lower half is colour coded, the upper being black plastic. The grille is also black plastic, and I'm forever trying to keep it black and stop it from fading.
I removed the front grille and light assemblies:
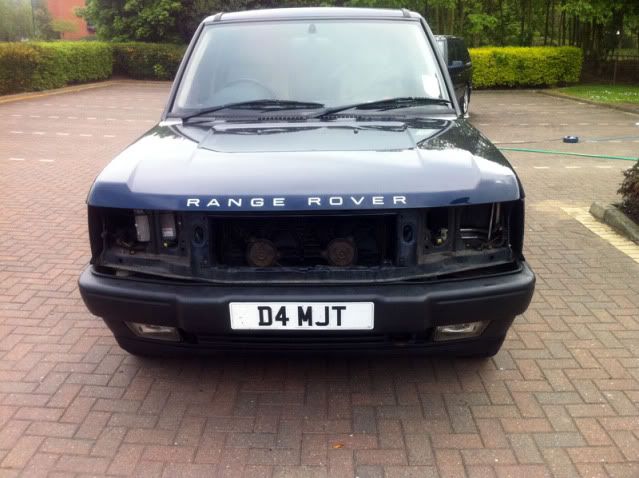
Next was removing the lower lips from the lights, and the light wipers, for painting, a quick rub down and then some filler primer:
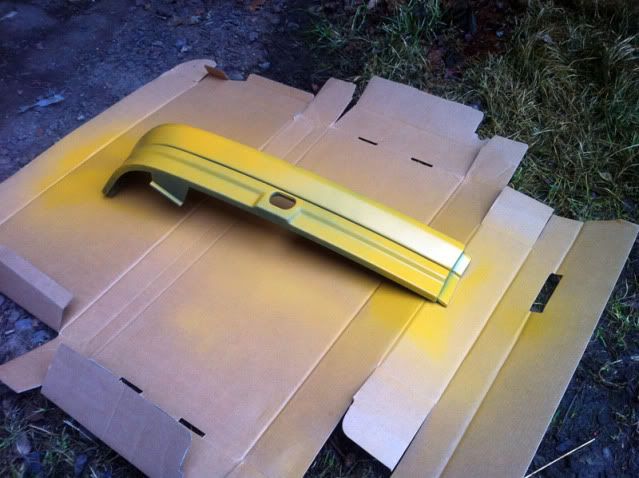
followed by a few coats of plastic primer:
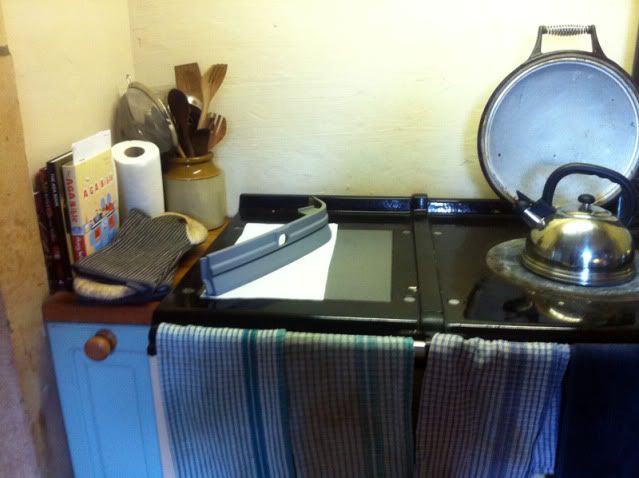
AGA's are well handy for quickly drying coats of paint :lol: :
Lash on a few coats of colour, I got the paint matched and mixed by Ashington Autospares:
Also I was rubbing down and priming the wipers and grille:
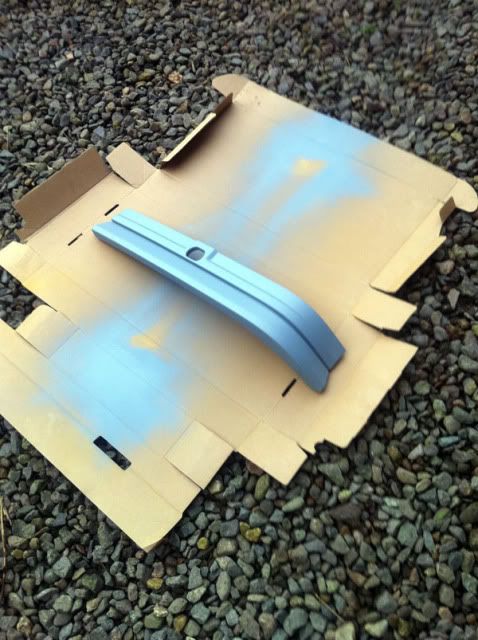
After lacquering, the light lips had a fair bit of orange peel having been rattle canned:
I started wet sanding these down, took this pic halfway through:
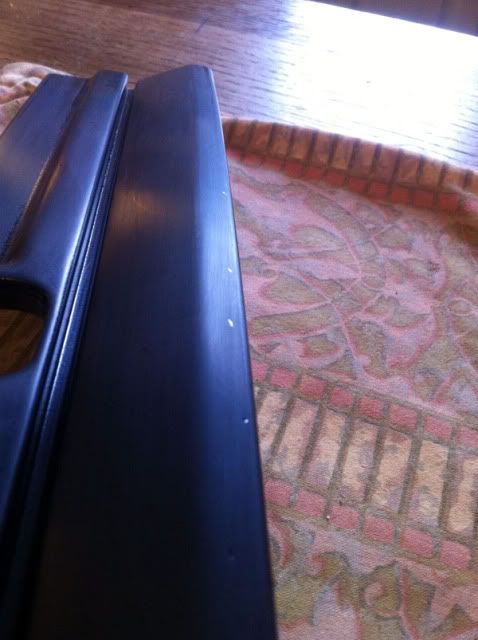
and then brought them up using rubbing compound and SRP:
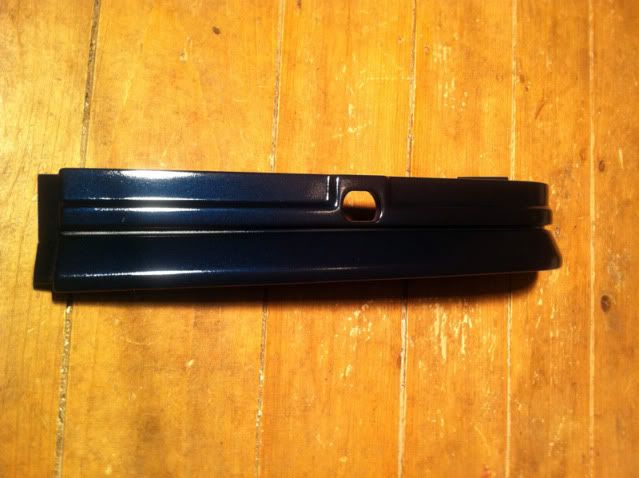
I chose Land Rover Java Black for the grille and wipers, I wasn't sure whether to go with a dark grey or black, but I've chosen black. I'd like to get the bumpers colour coded in the future, so I think the black will look better then.
All the painting of bits finished left me with enough time to give the car a quick wash off ready to refit the newly painted bits:

And fitted:
Took a quick trip over Alnwick moors and grabbed this picture:
It's nice to have it back in one piece and looking half decent again
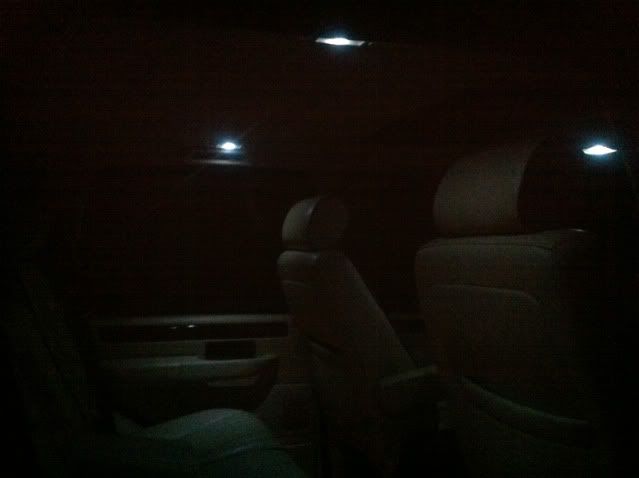
I think the only other thing I've been doing is to start replacing the old amber / yellow interior lights with fresh white LED's, it's hard to get a good picture of what it looks like, but they're really nice, a bit softer than the old lights.
The scratch originally:
During the wet sanding process:
And after 2 passes with some rubbing compound, and a good dose of SRP, it's now looking like this:
It's slightly duller, I reckon it'll need another polish, but it's far better than it was, I'm happy with it for now.
Next modification:
It's now cleaned and polished and all the residue is removed, I prefer it tbh, a bit cleaner and I never really liked the green and gold of the Land Rover badge against the blue.
Then I wanted to clean up the front end a bit, there is a wealth of plastic trim on the front of the car, both the lights have lips underneath, the lower half is colour coded, the upper being black plastic. The grille is also black plastic, and I'm forever trying to keep it black and stop it from fading.
I removed the front grille and light assemblies:
Next was removing the lower lips from the lights, and the light wipers, for painting, a quick rub down and then some filler primer:
followed by a few coats of plastic primer:
AGA's are well handy for quickly drying coats of paint :lol: :
Lash on a few coats of colour, I got the paint matched and mixed by Ashington Autospares:
Also I was rubbing down and priming the wipers and grille:
After lacquering, the light lips had a fair bit of orange peel having been rattle canned:
I started wet sanding these down, took this pic halfway through:
and then brought them up using rubbing compound and SRP:
I chose Land Rover Java Black for the grille and wipers, I wasn't sure whether to go with a dark grey or black, but I've chosen black. I'd like to get the bumpers colour coded in the future, so I think the black will look better then.
All the painting of bits finished left me with enough time to give the car a quick wash off ready to refit the newly painted bits:
And fitted:
Took a quick trip over Alnwick moors and grabbed this picture:
It's nice to have it back in one piece and looking half decent again
I think the only other thing I've been doing is to start replacing the old amber / yellow interior lights with fresh white LED's, it's hard to get a good picture of what it looks like, but they're really nice, a bit softer than the old lights.
Thanks for your comments :-)
Imran, it is better on LPG. It has a sequential injection system, so there really is no discernible difference in running between gas or petrol. Petrol is very slightly quicker.
On LPG this morning on the way to work I got 22.3mpg average out of it. That's the best I've ever had, it seems far better, and far smoother since the rebuild. At 73p a litre for gas I think it works out at 15p a mile "ish"?
Spoof said:
Bloody hell, it's looking fantastic now.
Cheers Chris Got a few other bits and bobs to sort over the next month or so, but it's getting there. I'm starting to gather bits for a suspension overhaul as well now, bottom ball joints, bushes, and some new Bilstein Shocks.
Just takes time!
Gassing Station | Readers' Cars | Top of Page | What's New | My Stuff