My brief car history, and my Range Rover 4.6
Discussion


strangehighways said:
Your taste is just superb. I am sure many (a few) young people say "Oh I'd love to Lord it around in a Jag" but you actually did, a few times! It is really refreshing to see people in cars that break the stereotypes.
Those Jag interiors look incredible. I much prefer them to the techy/cold types nowadays.
I'd love to do it, and have toyed with the idea several times, but uni life is raping my wallet at the minute and my parents are a bit restrictive (both in accounts so running costs/insurance are the first thing that comes into their heads).Those Jag interiors look incredible. I much prefer them to the techy/cold types nowadays.

So, I've done 1,800 miles now since the rebuild, and the good news is, the engine is sweet as a nut. Now that that's sorted though, I'd like to turn my attention to some other areas. Ideally before the end of the summer, I'll have these jobs knocked off as well:
Lower Ball Joints (urgh)
4 x New Bilstein Shock Absorbers
4 x New Tyres
Rear Discs and Pads
Gearbox Flush and Filter
Diff Oils
Main Beam HID's
Stainless Exhaust
I can't see me getting through all of that yet, but we'll see, I've started piling bits up for it.
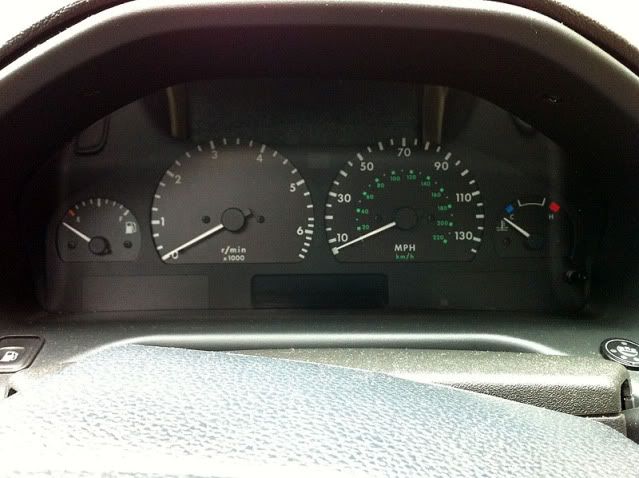
This weekend though, it was raining so time for a bit of cosmetic rather than mechanical fettling. One of the things I find really boring about the car is the stock dashboard:
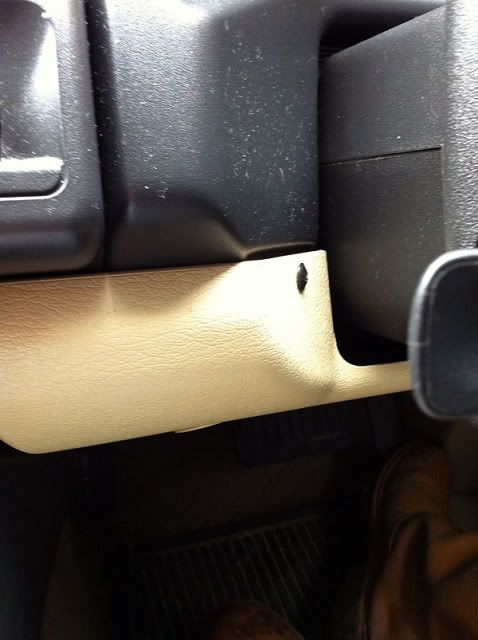
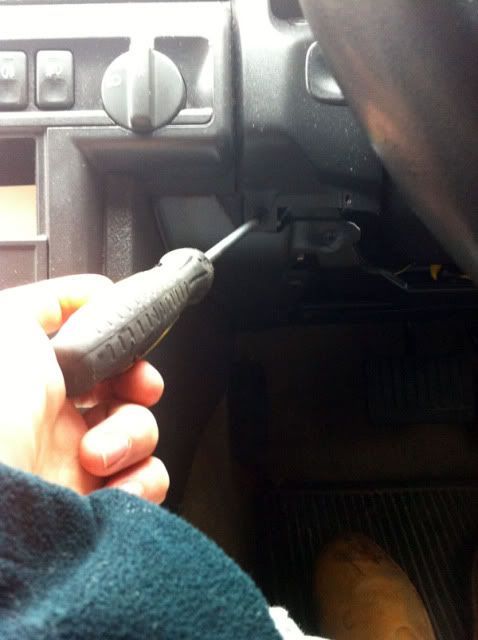
So, I've got a few bits to freshen it up, which I've fitted this weekend. First off, remove the clocks. To do this you can extend the steering wheel column fully to gain access, and unbolt 2 small screws on either side of the column:
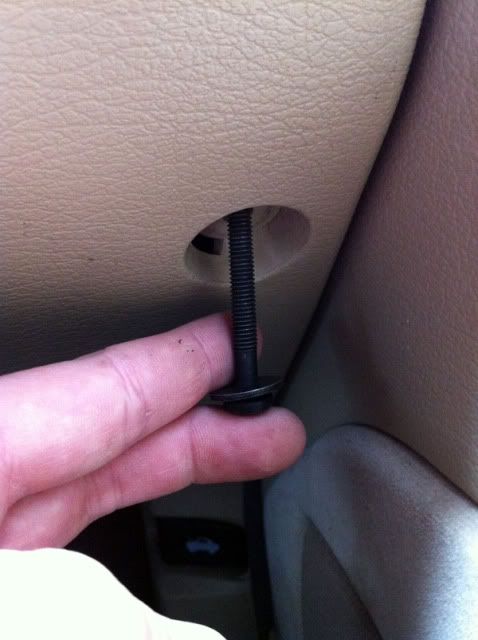
Then you can undo 4 of these bolts to remove the panel under the column:
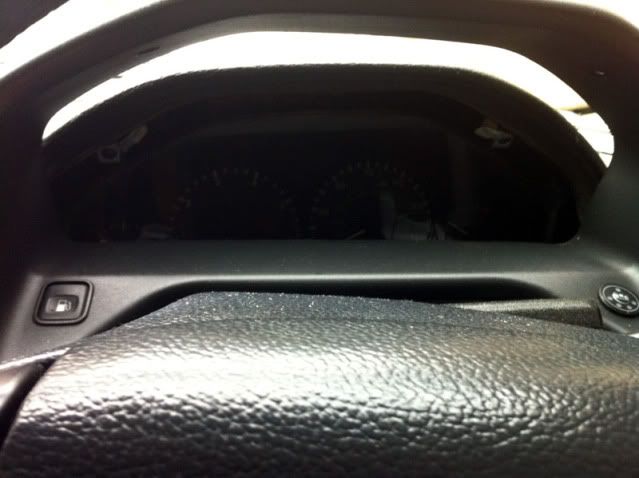
Leaving you with this:
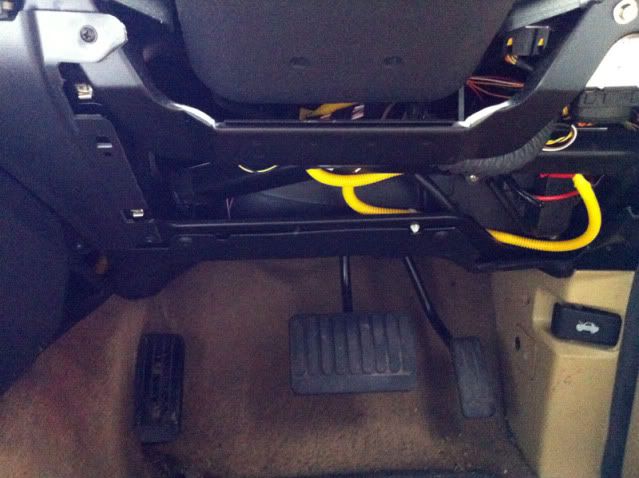
Now you can get access to undo the 2 lower screws holding the instrument shroud in place:
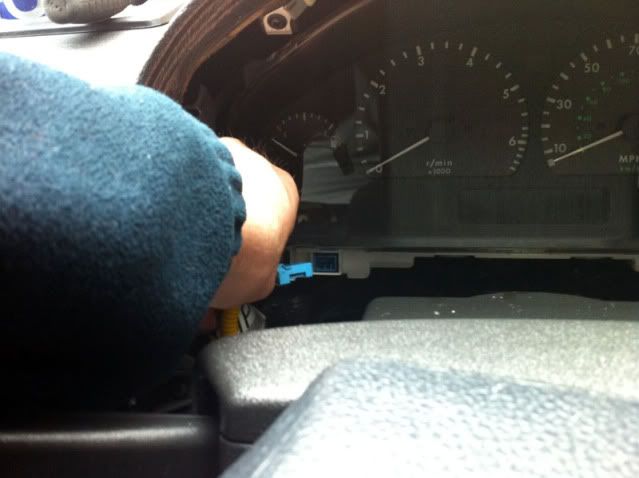
This should then lift out:
There are 2 multiplugs for the dash to remove, a blue one on the left, and a black on the right:
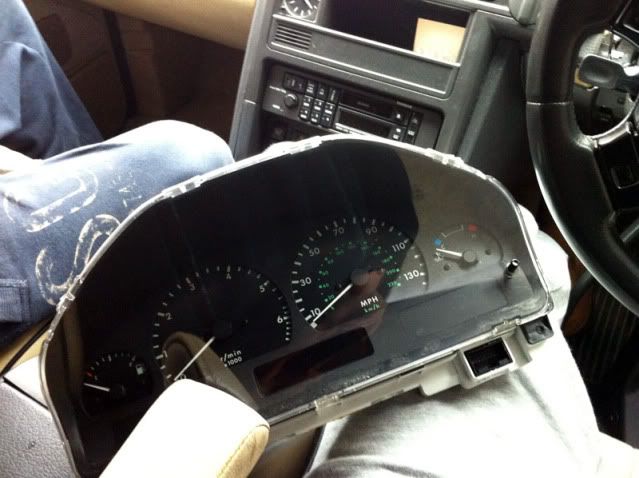
Then you can undo 4 screws to remove the cluster itself, leaving you with this:
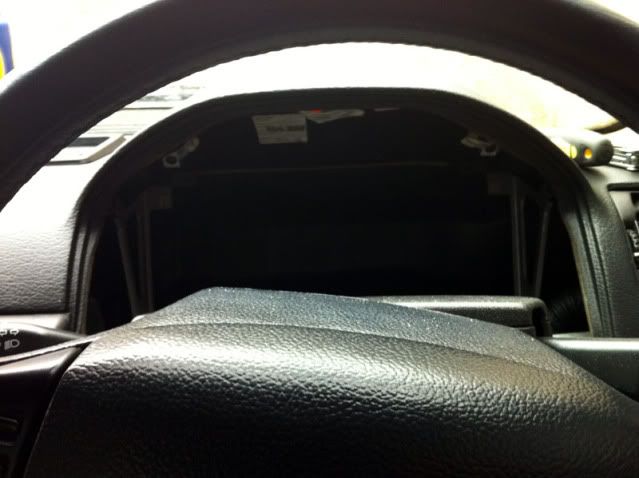
and this:
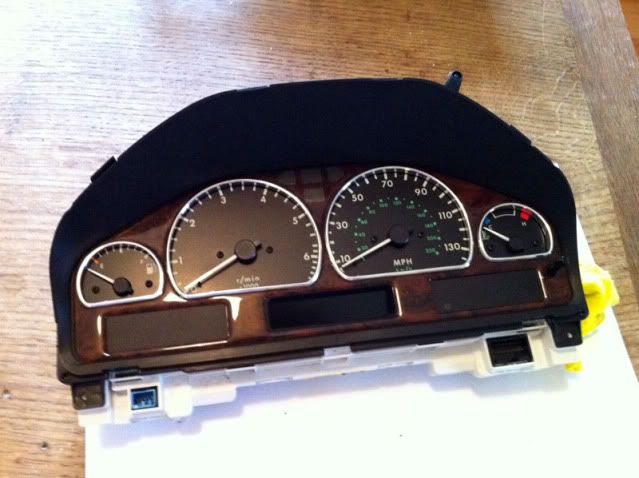
Having retreated indoors and cracked a beer open, it's then just a case of pressing some tabs out to take the instrument cluster apart:
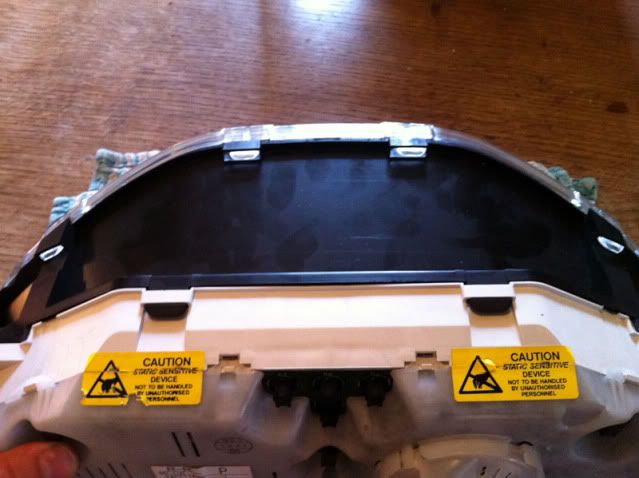
Which give you this:

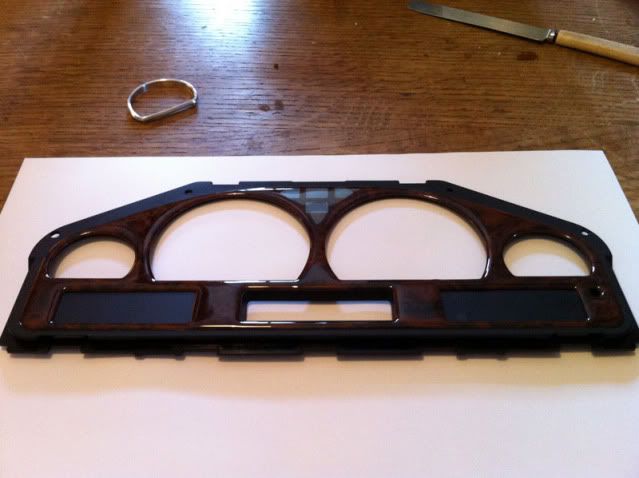
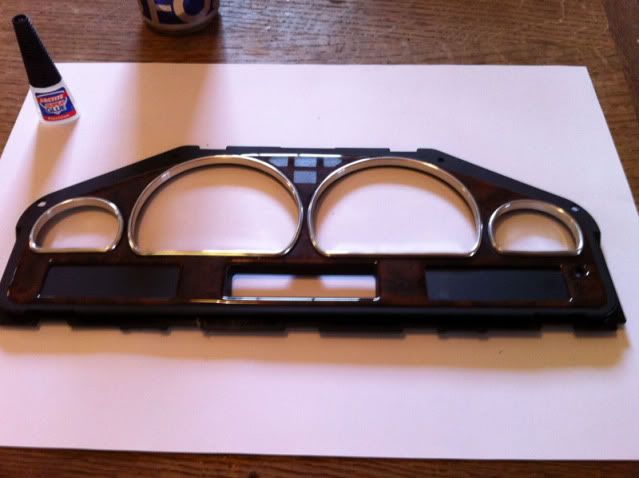
I then carefully applied a walnut inlay to the dial panel:
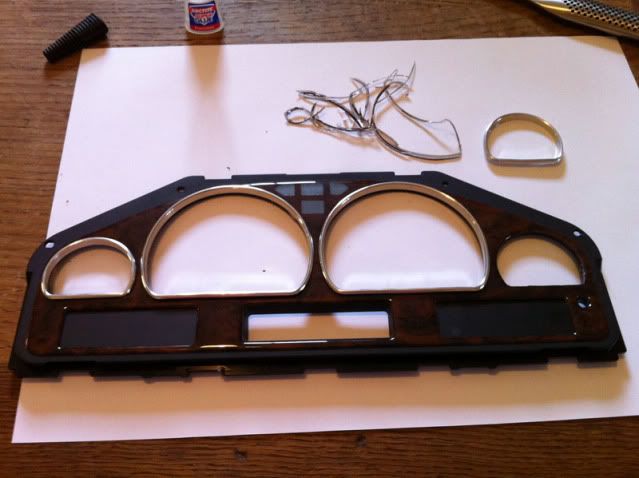
I also have some chrome dial rings I wanted to add to this, so I carefully trimmed out the inside of the dials / walnut inlay to fit the dials:
Then I applied a thin layer of superglue to the dials to make sure they didn't come loose over time, and let it dry:
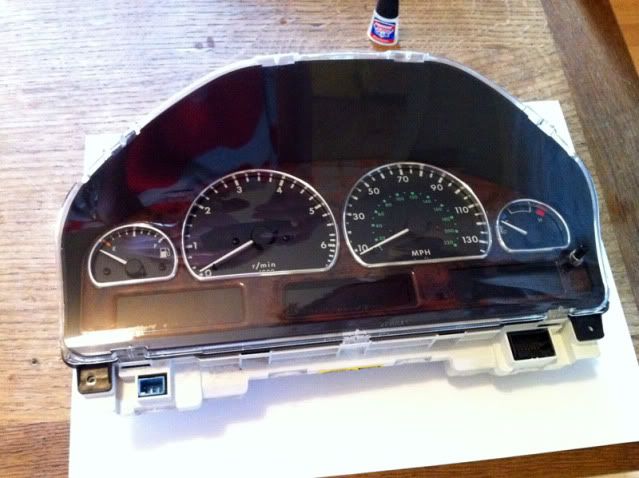
Then it was just a case of whacking it all back together:
And fitting the plastic cover:
and then refitted:
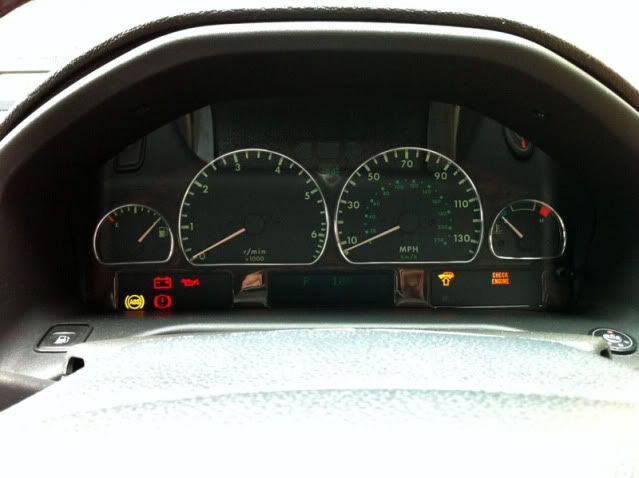

I like them, I think it just smartens the whole affair up a bit. The keen eyed will notice a light out in the cluster, I've removed this as I want to get some replacement LED's, I'm not keen on the green lighting, so I'm going to change it.
Kept me out of bother for a few hours anyway!
Lower Ball Joints (urgh)
4 x New Bilstein Shock Absorbers
4 x New Tyres
Rear Discs and Pads
Gearbox Flush and Filter
Diff Oils
Main Beam HID's
Stainless Exhaust
I can't see me getting through all of that yet, but we'll see, I've started piling bits up for it.
This weekend though, it was raining so time for a bit of cosmetic rather than mechanical fettling. One of the things I find really boring about the car is the stock dashboard:
So, I've got a few bits to freshen it up, which I've fitted this weekend. First off, remove the clocks. To do this you can extend the steering wheel column fully to gain access, and unbolt 2 small screws on either side of the column:
Then you can undo 4 of these bolts to remove the panel under the column:
Leaving you with this:
Now you can get access to undo the 2 lower screws holding the instrument shroud in place:
This should then lift out:
There are 2 multiplugs for the dash to remove, a blue one on the left, and a black on the right:
Then you can undo 4 screws to remove the cluster itself, leaving you with this:
and this:
Having retreated indoors and cracked a beer open, it's then just a case of pressing some tabs out to take the instrument cluster apart:
Which give you this:
I then carefully applied a walnut inlay to the dial panel:
I also have some chrome dial rings I wanted to add to this, so I carefully trimmed out the inside of the dials / walnut inlay to fit the dials:
Then I applied a thin layer of superglue to the dials to make sure they didn't come loose over time, and let it dry:
Then it was just a case of whacking it all back together:
And fitting the plastic cover:
and then refitted:
I like them, I think it just smartens the whole affair up a bit. The keen eyed will notice a light out in the cluster, I've removed this as I want to get some replacement LED's, I'm not keen on the green lighting, so I'm going to change it.
Kept me out of bother for a few hours anyway!
thanks :-)
I wasn't sure about the rings tbh. I wanted to put the wood in because it ties in with the rest of the walnut already in the car, and I think perhaps it would still have looked quite plain with just the rings on the black plastic. Either way, it's a bit more jazzy now, and nicer to look at. I like!
I wasn't sure about the rings tbh. I wanted to put the wood in because it ties in with the rest of the walnut already in the car, and I think perhaps it would still have looked quite plain with just the rings on the black plastic. Either way, it's a bit more jazzy now, and nicer to look at. I like!
This weekend I managed to get some more done on the car.
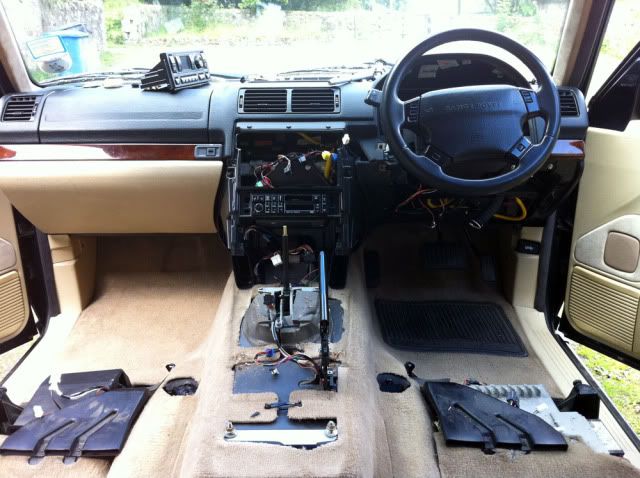
Since the last update, the heater matrix o-rings failed. I was pretty much expecting this, as I had to put some decent force on the heater matrix pipes in the engine bay during the head gasket change. Not the nicest of jobs as the access is very limited, Land Rover's procedure is a 12 hour job involving removal of the dashboard, steering column, and disconnection of air-con etc.
There are many documented ways to do the job with a few shortcuts, and I had a few other jobs / ideas up my sleeve at the same so I actually stripped the interior from the car before I started. I'd highly recommend this, it made being in the right place to get my arms up inside the dash far easier, I can't imagine how fiddly difficult it is to do with the seats in, and they're only 4 bolts a seat to remove.
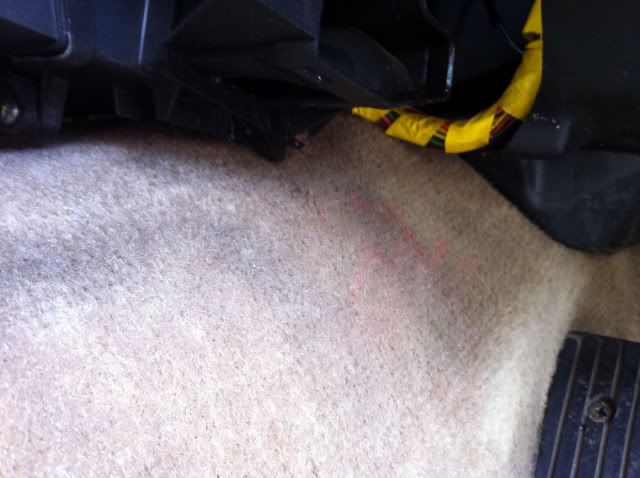
This is a classic symptom of o-ring failure, coolant dripping in the drivers footwell:
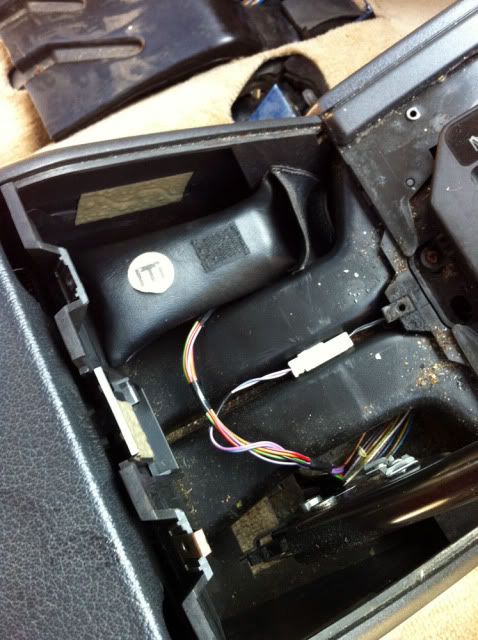
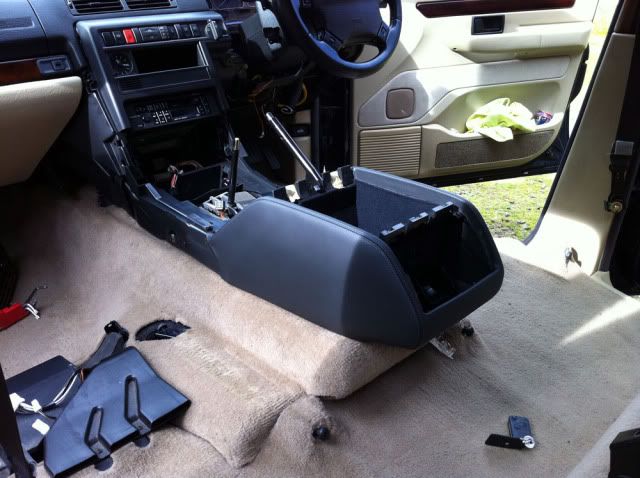
I also chose to remove the centre console and cubby box, as I have some new bits to fit, and I also wanted to clean the carpet properly. While doing this, I found the original leather pouch and nut cover removal tool for my locking wheel nut set, buried down in the depths of the cubby, god knows when it ended up there:
The interior comes out really nicely, no horrible jobs or brittle clips.

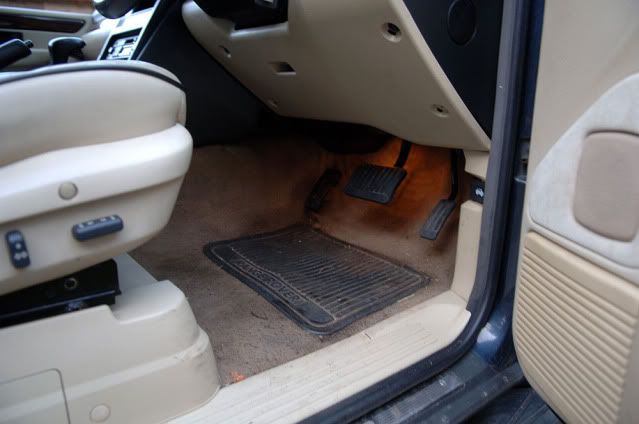
The carpet suffered over last winter and during the head gasket, and was looking worse for wear:
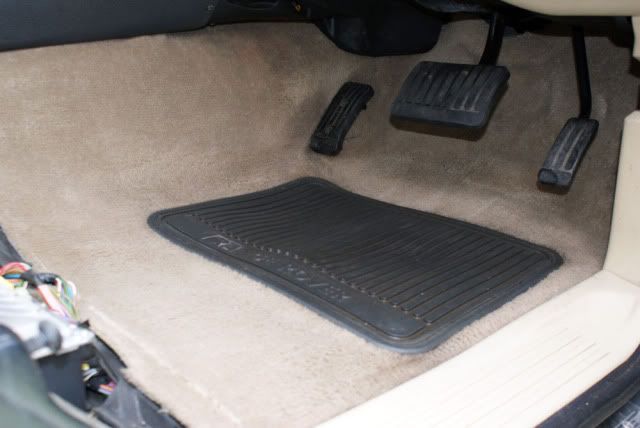
But after a good session with "George" the carpet cleaner, who's green instead of the red "Henry" ones, it came up a good bit better:
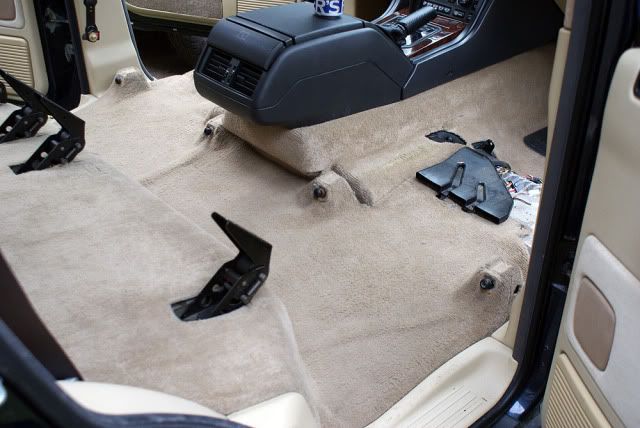
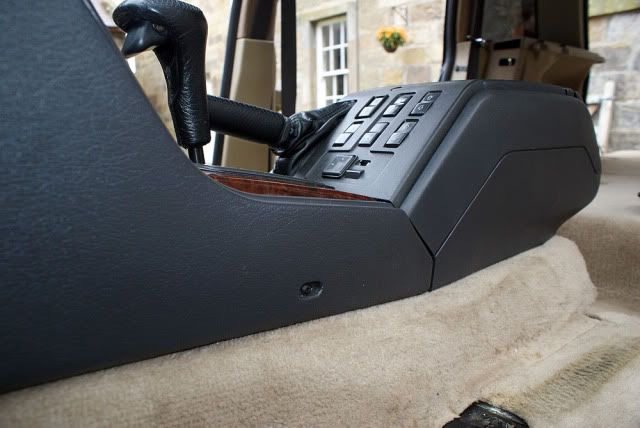
cracked on with removing the HEVAC unit and console:
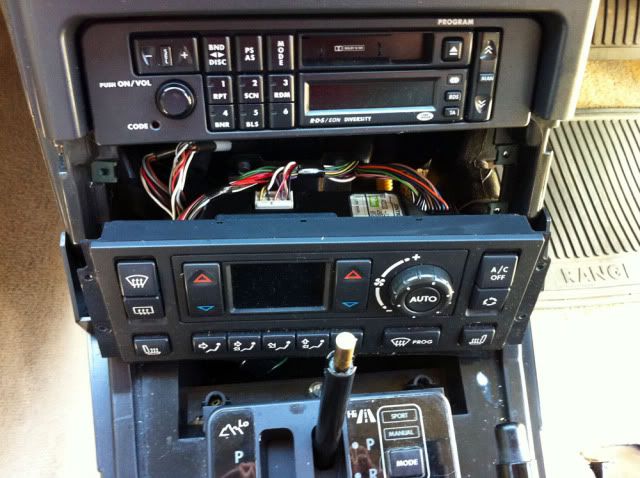
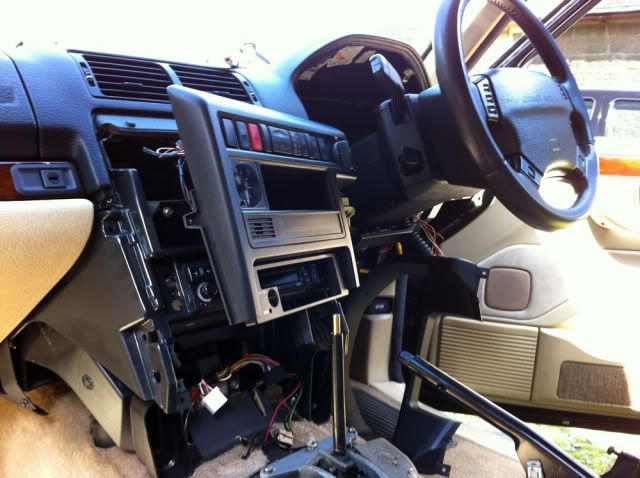
Which gave me plenty of room to work:
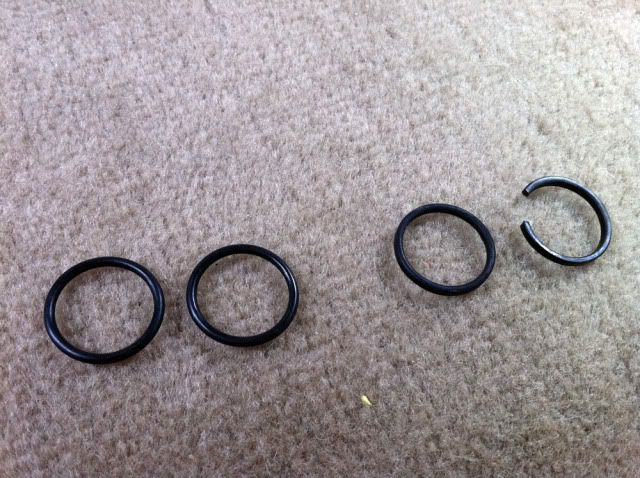
Old shot heater o-rings on the right, nice new ones on the left:
All in I think it took about 3.5 hours including bleeding the coolant system back up. Pretty happy with that.
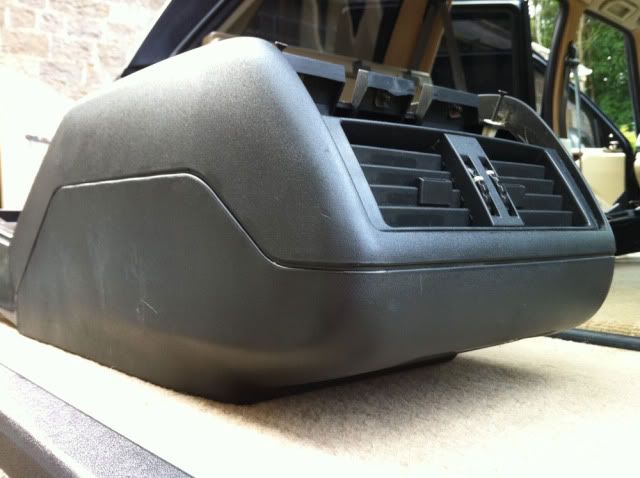
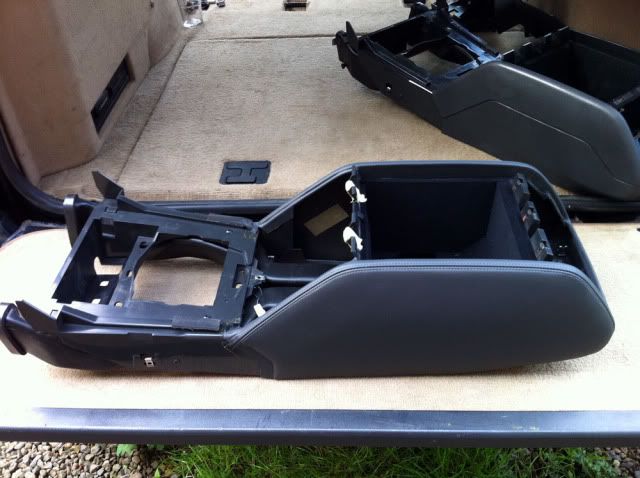
The reason I stripped the rest of the interior then. I've been wanting to tidy it up and make it a bit more special for some time, and I've been stockpiling parts to do this with. So, starting with the centre console cubby box, this got binned. The old unit as you can see is pretty plain and plastic:
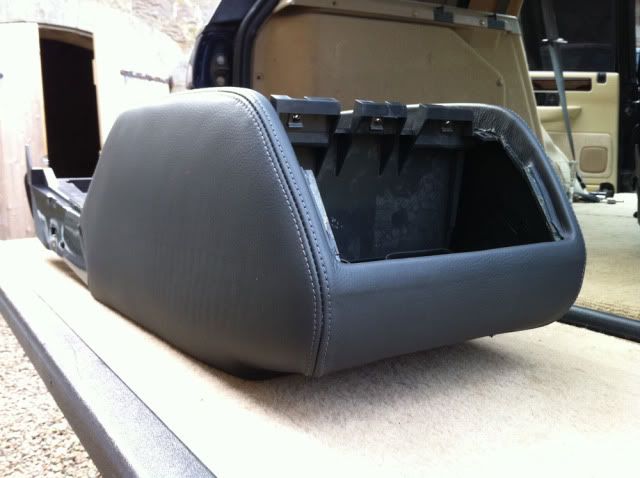
I've replaced this with a new genuine Land Rover Autobiography item, trimmed in Ash Grey leather:
Along with this, I've also pulled together these, which took a while:
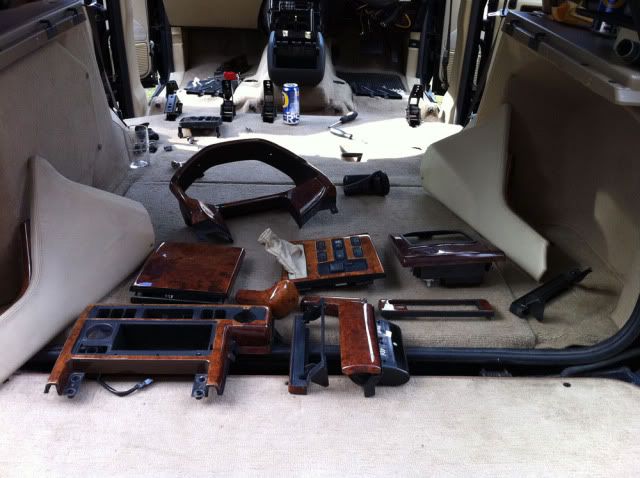
Now I've got some polishing and tidying up to do on them, so I haven't fitted them yet, but I did a test fit to see what it all looked like:
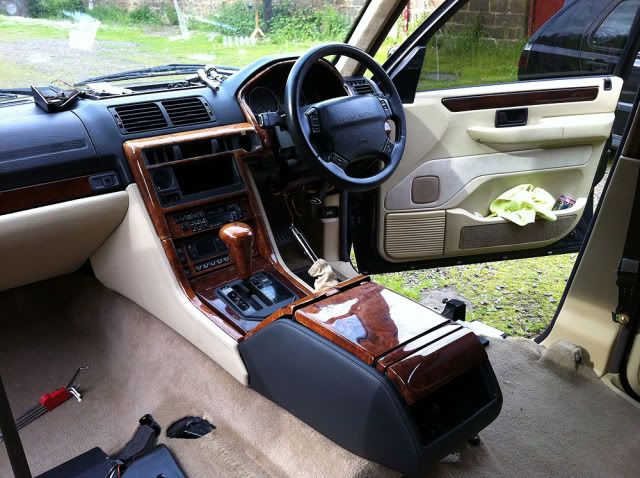
It should look far better when it's all finished, and a nice upgrade from standard. I'm on the look out for a half wood and leather wheel now.
Also, since I've had the car it's been missing a parcel shelf, and trying to get hold of a decent lightstone one was nigh on impossible. I bagged one a few weeks back though, needs a good clean up but it'll do the job nicely. Typically I've seen about 3 for sale in this colour since then!
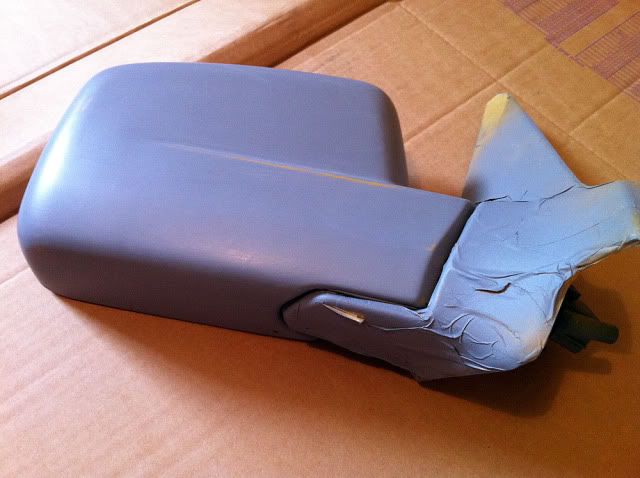
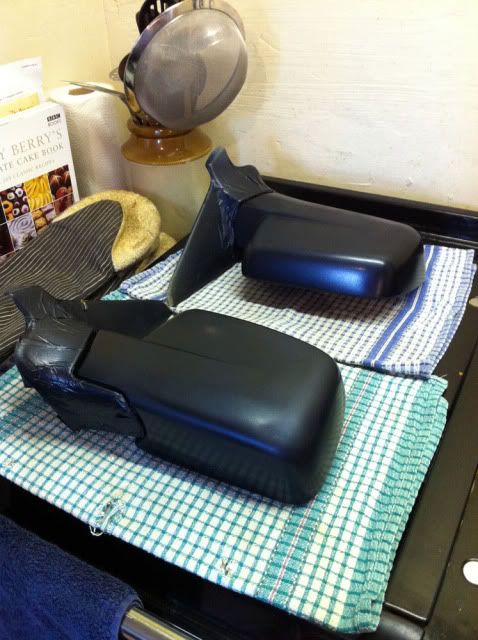
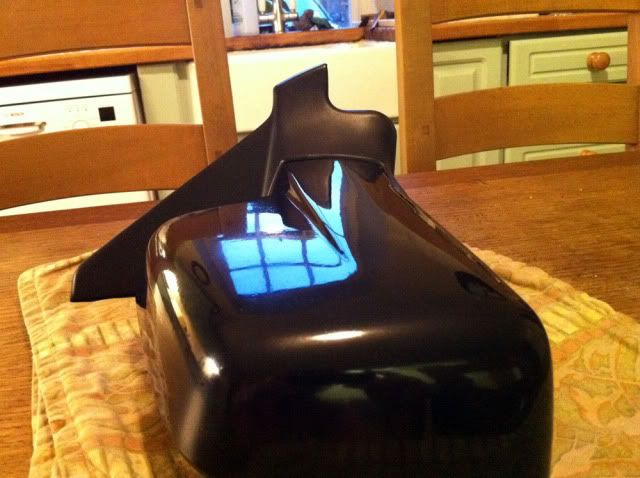
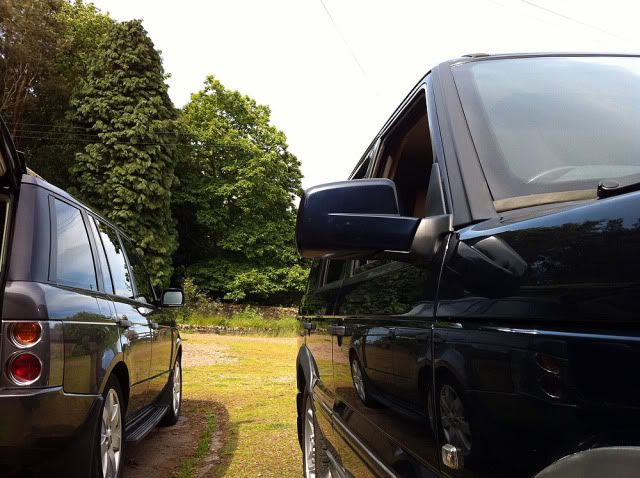
I've also had a crack at colour coding the wing mirrors, I used a high build primer first, then plastic primer. A few coats of colour and then lacquer. They need another few coats of lacquer and a polish yet, but I've test fit one to get an idea and they look ok I think:
And finally, the reason the seats came out. The leather is in pretty good order for the year, but as with most P38's my heated seats don't work, and the surfaces are starting to crack, so out they came. I'm going to have a shot at re-trimming these myself. As they say, what's the worst that could happen?
Think that's it since the last update! It's coming together slowly, I'm still stockpiling suspension parts too, I've got track rod ends and bar, steering damper and a few other bits here, I need 4 shocks and 2 bags and then I'll fettle that little lot.
Keeps my idle fingers out of mischief anyway
Since the last update, the heater matrix o-rings failed. I was pretty much expecting this, as I had to put some decent force on the heater matrix pipes in the engine bay during the head gasket change. Not the nicest of jobs as the access is very limited, Land Rover's procedure is a 12 hour job involving removal of the dashboard, steering column, and disconnection of air-con etc.
There are many documented ways to do the job with a few shortcuts, and I had a few other jobs / ideas up my sleeve at the same so I actually stripped the interior from the car before I started. I'd highly recommend this, it made being in the right place to get my arms up inside the dash far easier, I can't imagine how fiddly difficult it is to do with the seats in, and they're only 4 bolts a seat to remove.
This is a classic symptom of o-ring failure, coolant dripping in the drivers footwell:
I also chose to remove the centre console and cubby box, as I have some new bits to fit, and I also wanted to clean the carpet properly. While doing this, I found the original leather pouch and nut cover removal tool for my locking wheel nut set, buried down in the depths of the cubby, god knows when it ended up there:
The interior comes out really nicely, no horrible jobs or brittle clips.
The carpet suffered over last winter and during the head gasket, and was looking worse for wear:
But after a good session with "George" the carpet cleaner, who's green instead of the red "Henry" ones, it came up a good bit better:
cracked on with removing the HEVAC unit and console:
Which gave me plenty of room to work:
Old shot heater o-rings on the right, nice new ones on the left:
All in I think it took about 3.5 hours including bleeding the coolant system back up. Pretty happy with that.
The reason I stripped the rest of the interior then. I've been wanting to tidy it up and make it a bit more special for some time, and I've been stockpiling parts to do this with. So, starting with the centre console cubby box, this got binned. The old unit as you can see is pretty plain and plastic:
I've replaced this with a new genuine Land Rover Autobiography item, trimmed in Ash Grey leather:
Along with this, I've also pulled together these, which took a while:
Now I've got some polishing and tidying up to do on them, so I haven't fitted them yet, but I did a test fit to see what it all looked like:
It should look far better when it's all finished, and a nice upgrade from standard. I'm on the look out for a half wood and leather wheel now.
Also, since I've had the car it's been missing a parcel shelf, and trying to get hold of a decent lightstone one was nigh on impossible. I bagged one a few weeks back though, needs a good clean up but it'll do the job nicely. Typically I've seen about 3 for sale in this colour since then!
I've also had a crack at colour coding the wing mirrors, I used a high build primer first, then plastic primer. A few coats of colour and then lacquer. They need another few coats of lacquer and a polish yet, but I've test fit one to get an idea and they look ok I think:
And finally, the reason the seats came out. The leather is in pretty good order for the year, but as with most P38's my heated seats don't work, and the surfaces are starting to crack, so out they came. I'm going to have a shot at re-trimming these myself. As they say, what's the worst that could happen?
Think that's it since the last update! It's coming together slowly, I'm still stockpiling suspension parts too, I've got track rod ends and bar, steering damper and a few other bits here, I need 4 shocks and 2 bags and then I'll fettle that little lot.
Keeps my idle fingers out of mischief anyway
Max M4X WW said:
Looks really good with the new interior bits and cleaning of the carpet etc!
I'm not sure about re-trimming the seat though, re-colonise the leather instead maybe?
Thanks I'm not sure about re-trimming the seat though, re-colonise the leather instead maybe?

I've tried all kinds to be honest, it's regularly fed and I use quality products on it to keep it in good order, it's just not coming back to the standard I'd like. If it goes pete tong, I'll get someone to do a proper job

Lovely job, miss my '38 now.
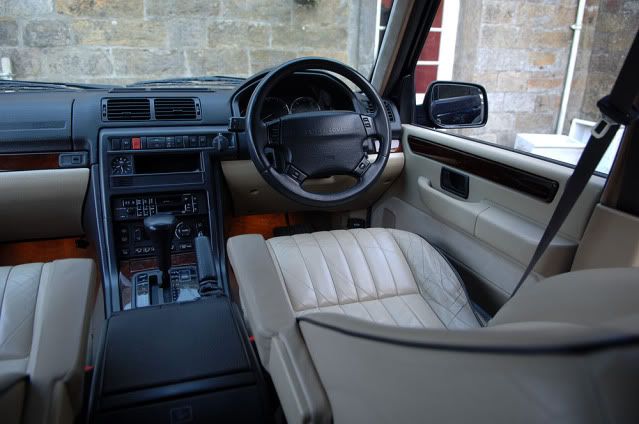
Mine was an early Autobiography so had all that walnut trim inside and colour coded outside. Fabulous place to be. Just like a Bentley but you can go anywhere of course.
My radio display died and contrary to net opinion, I plugged a new Alpine iPod control one straight in. Worked lovely through the Harmon Kardon extra amps, but you'd never want the volume above about 4!
Please NEVER get rid of the air suspension: best bit about it imo
Hey D4MJT!
I have a 1997 P38 2.5DSE.
I've owned her for about 5 months but in all of that time I've been having work done on her. She had an EAS fault and was on the bump-stops. We've just got to the bottom of it so if it ever goes wrong persevere. They are nasty on springs.
Turns out that the EAS pump seals in the "new recon" pump were kaput and had caused a hard-fault locking down the ECU and locking her in "Slow 35MPH" mode. Anyway, the "titanic" has now been risen!
She's had:
1 x Recon EAS Pump
4 x New EAS Suspension Airbags
1 x New EAS pump seal kit (for the "Recon" EAS pump!!!!! - not impressed)
£00's of diagnostics to get me to this stage.
The red herring was the "recon" EAS pump which in turn has cost me a fortune by diverting our attention elsewhere
Then;-
1 x New Water Pump
1 x New top hose (viscous fan split the old hose as the old water pump had so much play!!!!).
4 x New Tyres.
Next job is the Air-conditioning compressor and to replace the Viscous fan which is permanently stuck on.
The bearings in the compressor are worn so the belt has been removed. When I bought it, I was told it must have snapped. Why can't people be honest? I would have still bought it!
I also want to paint my front grille.
What colour did you use on yours?
G.
Edited by Gallen on Monday 27th June 15:38
ouch, unlucky mate. One of the first things I got was a serial cable adapter and the downloadable software for the EAS system. Have you come across this? Not much help this time but it might help you in future?
I painted my grill in Land Rover Metallic Java Black. It'll look better when I've had the bumpers colour coded I think, it annoys me that there's black plastic bumper under the grill that isn't as black!
I painted my grill in Land Rover Metallic Java Black. It'll look better when I've had the bumpers colour coded I think, it annoys me that there's black plastic bumper under the grill that isn't as black!
Cheers guys,
- I've got EAS Unlock and cable. Additionally I have bought an "EAS Kicker" (just incase).
The problem was it was showing up as a RHF Height sensor - even though this was ok. All faults were cleared but still it refused to raise.
As a last resort, my freind whipped off the "recon" EAS pump and took it apart. He cleaned it up and re-assembled it and it worked! However it lost pressure overnight so armed with fairy-liquid and a spray pump, he identified that the seals were leaky. New OEM seal kit fitted and it works perfectly! Its a fantastic ride.
A few £££ down the pan but should last a good few years now
She's on 16" alloys so am running at 32psi all round and is nice and smooth.
I will have alook at the pics again. I am hoping to paint the front plastics at the weekend.
G.
Thanks mate, appreciate it I'll grab some finished photo's of the bay shortly for you.
Onto the re-trim then, at the moment it's about 75% complete. It's taken me about 3-4 days total to get to where I am now, over about a fortnight. It's good fun, and the end result, thankfully is looking promising and rewarding.
I did the smaller split rear seat first, and this has been re-fitted to the car for about a week now, then I moved onto the larger split rear seat with the central armrest, and then tackled the drivers seat.
I've got plenty of pictures but I'll concentrate on the drivers seat as the rears are pretty straightforward.
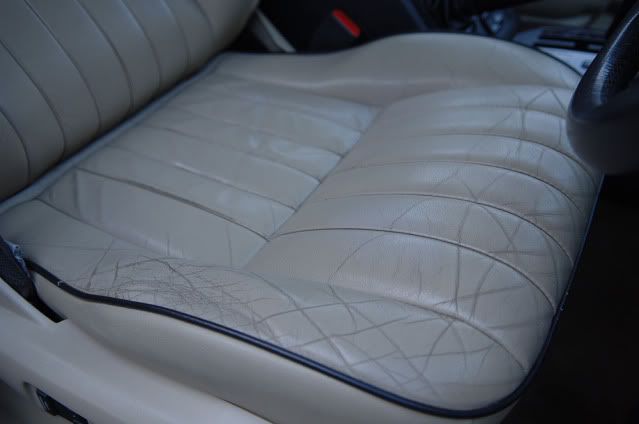
Before I started, it was cracked and the bolster had broken down and was folded over under the trim:
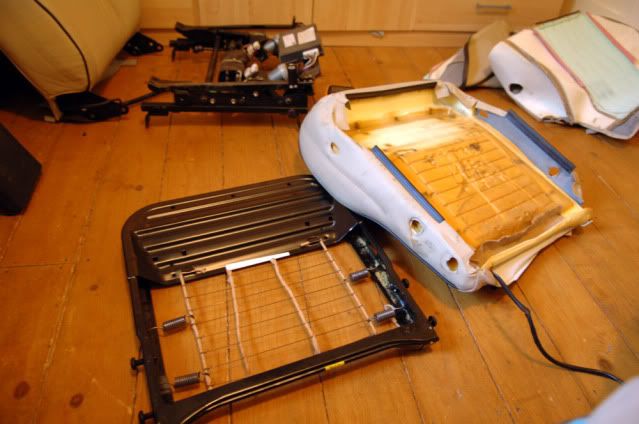
The hardest part was seperating the lower black clip along the bottom of the seat base which you can see in the picture below, it takes some force to remove from the seat base frame:
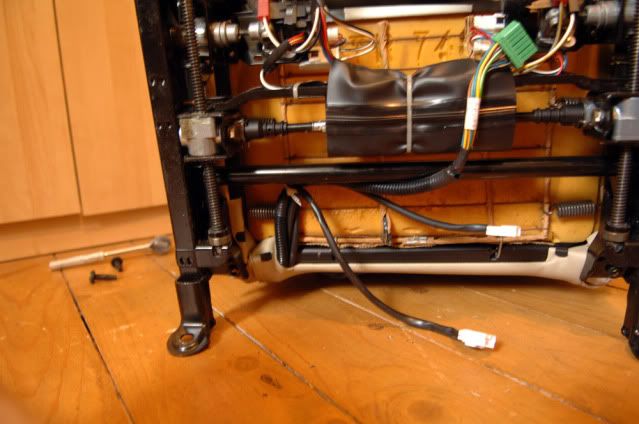
The seat frame is held to the seat base holding the motors etc by 4 bolts, this is the seat split:
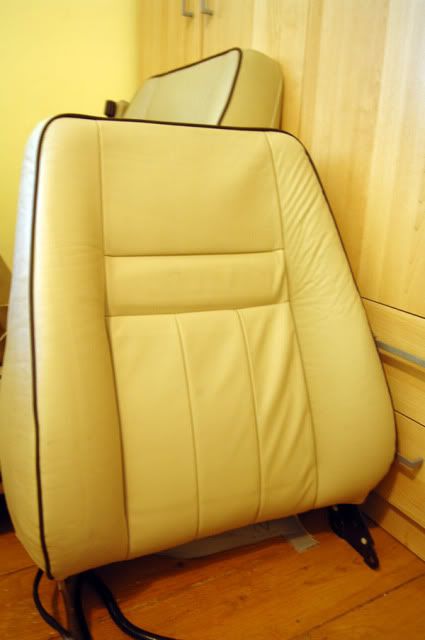
I didn't get any durings while I re-trimmed the back rest, as i got a bit carried away to see what it would look like, but here it is re-trimmed:
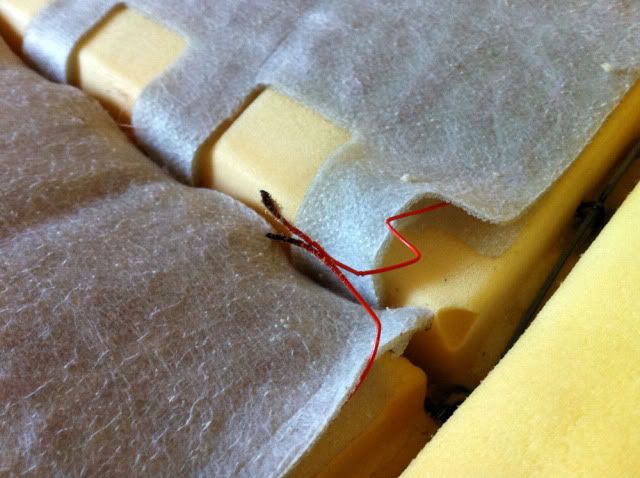
I had faulty heated seat elements. I was also a bit put off by the £200 cost of replacing all 4 elements, so I had a nosey. You can test whether they work easily by using a multimeter on the 2 connector pins. The seat back was fine, and was unbroken, and the seat base, was broken exactly where they all go, in the middle of the seat in the join. Easy to spot, I repaired the wires, and it works fine now:
Here you can see the condition of the old drivers seat base:
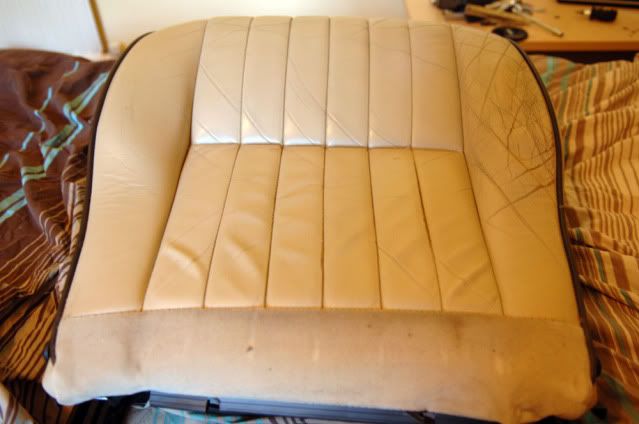
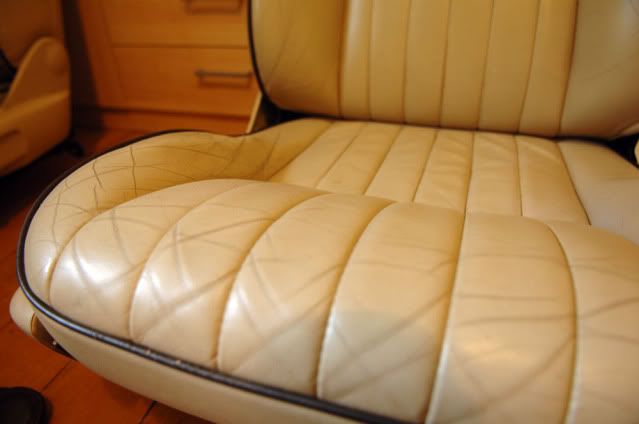
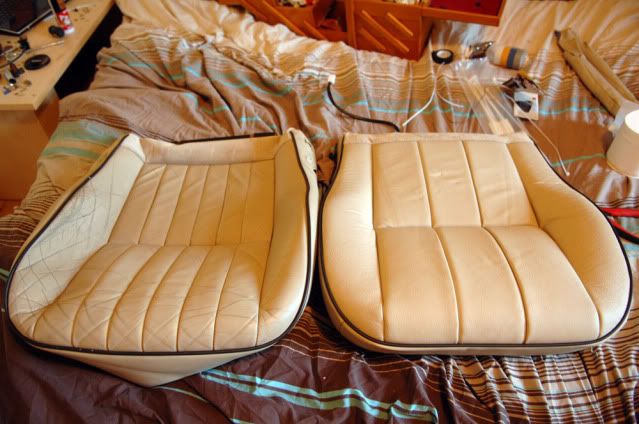
and now the finished trimmed base alongside the old leather:
Happily, the bolster damage was also only to the old cover, the sponge on the underside of the trim had seperated and rolled in on itself creating a ridge.
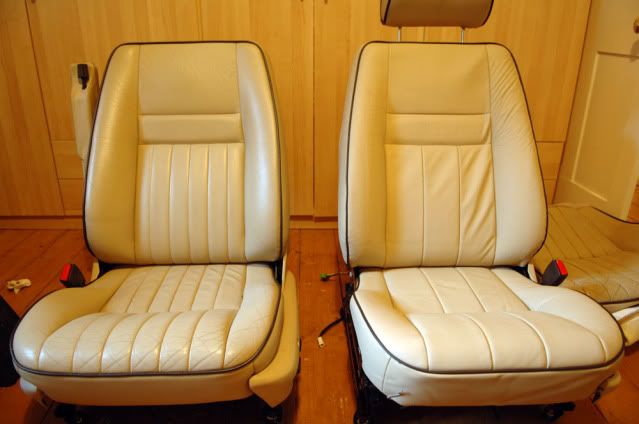
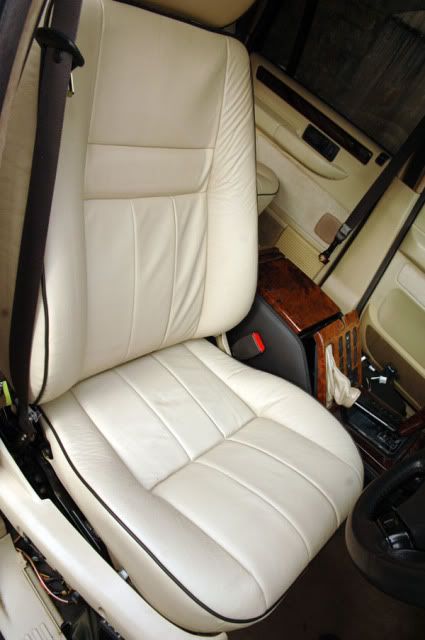
As they say in Haynes, refitting is the reverse of removal, so I lashed it all back together, and took a comparison between my re-trimmed drivers seat, and the still to do passengers seat:
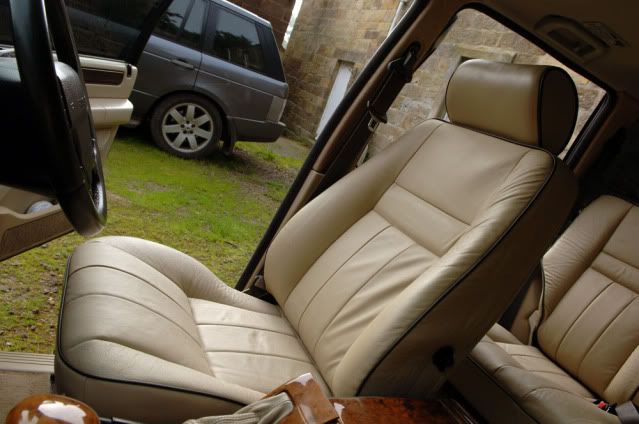
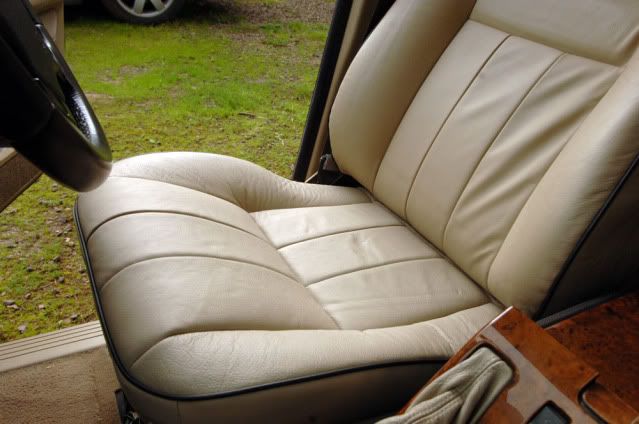
Here are some pics of the seat trial fitted back to the car:
and the rear seats:
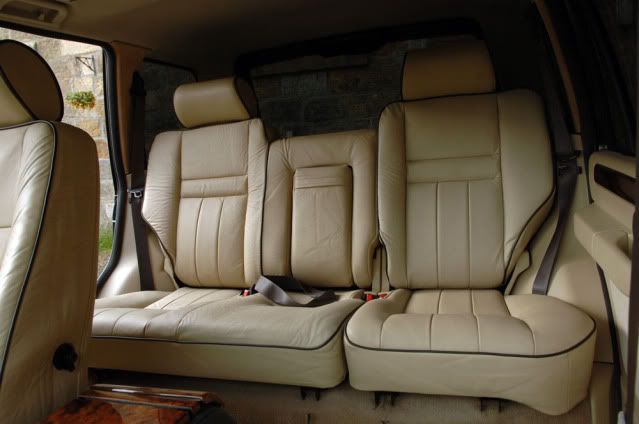
You can see in this shot, the single folding rear seat which has been in the car longest, has settled, and the creases and folds have dropped out of the leather. The other seats should settle out too, as they have a few creases etc in still.
Anyway, I'm really happy with how it's looking so far!
I'll grab some finished photo's of the bay shortly for you.Onto the re-trim then, at the moment it's about 75% complete. It's taken me about 3-4 days total to get to where I am now, over about a fortnight. It's good fun, and the end result, thankfully is looking promising and rewarding.
I did the smaller split rear seat first, and this has been re-fitted to the car for about a week now, then I moved onto the larger split rear seat with the central armrest, and then tackled the drivers seat.
I've got plenty of pictures but I'll concentrate on the drivers seat as the rears are pretty straightforward.
Before I started, it was cracked and the bolster had broken down and was folded over under the trim:
The hardest part was seperating the lower black clip along the bottom of the seat base which you can see in the picture below, it takes some force to remove from the seat base frame:
The seat frame is held to the seat base holding the motors etc by 4 bolts, this is the seat split:
I didn't get any durings while I re-trimmed the back rest, as i got a bit carried away to see what it would look like, but here it is re-trimmed:
I had faulty heated seat elements. I was also a bit put off by the £200 cost of replacing all 4 elements, so I had a nosey. You can test whether they work easily by using a multimeter on the 2 connector pins. The seat back was fine, and was unbroken, and the seat base, was broken exactly where they all go, in the middle of the seat in the join. Easy to spot, I repaired the wires, and it works fine now:
Here you can see the condition of the old drivers seat base:
and now the finished trimmed base alongside the old leather:
Happily, the bolster damage was also only to the old cover, the sponge on the underside of the trim had seperated and rolled in on itself creating a ridge.
As they say in Haynes, refitting is the reverse of removal, so I lashed it all back together, and took a comparison between my re-trimmed drivers seat, and the still to do passengers seat:
Here are some pics of the seat trial fitted back to the car:
and the rear seats:
You can see in this shot, the single folding rear seat which has been in the car longest, has settled, and the creases and folds have dropped out of the leather. The other seats should settle out too, as they have a few creases etc in still.
Anyway, I'm really happy with how it's looking so far!
Gassing Station | Readers' Cars | Top of Page | What's New | My Stuff