500+bhp Mk3 Fiesta Project
Discussion


Thanks guys - I definitely will get some video once it's all complete 
Ponk - Thanks for the suggestion. I believe that the Corsa pumps are EPAS rather than EHPAS, and I want to avoid those systems because of the poor feedback.
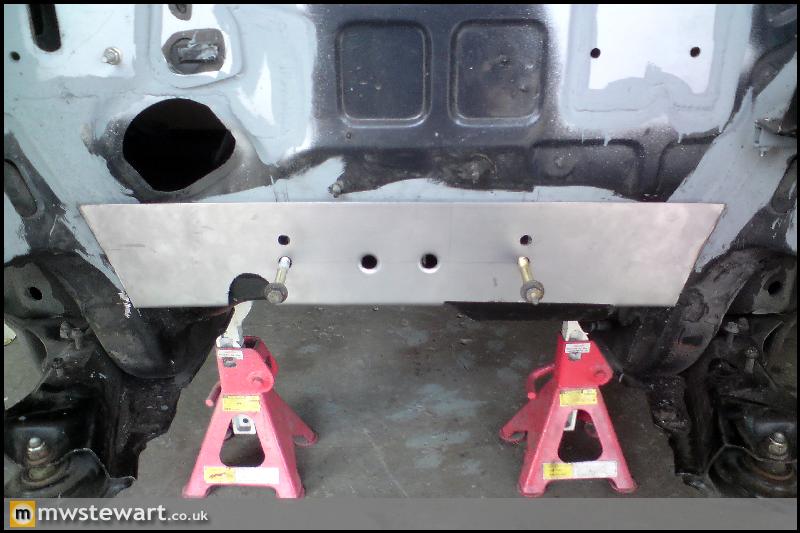
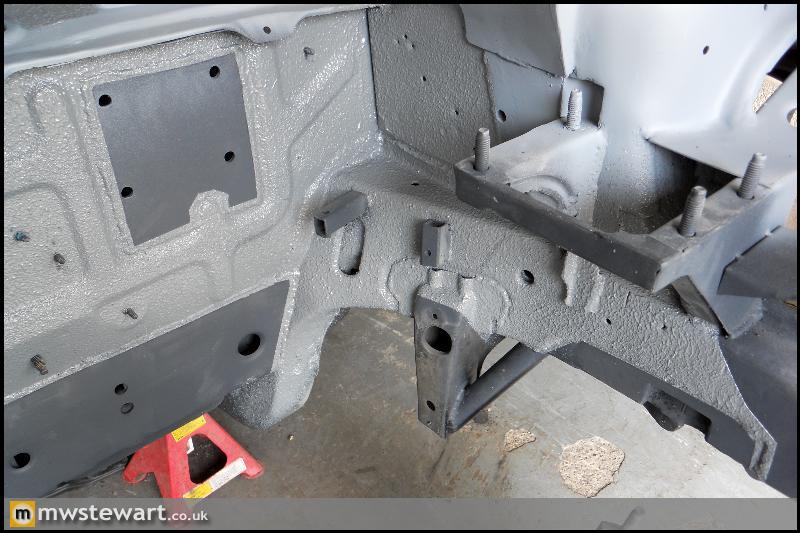
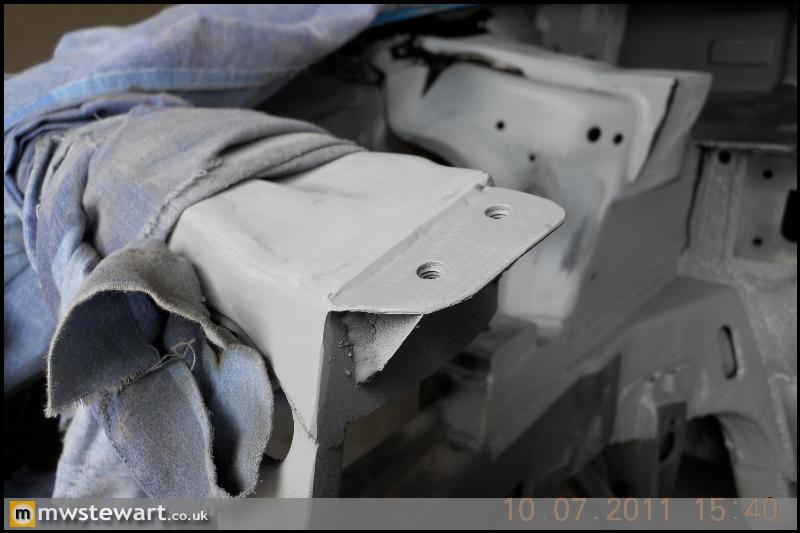
Today I finished off the mounting for the new cross member.
I wanted to bolt to some existing tabs that protrude down from the chassis legs, so I added some tube to prevent the tabs bending as the bolts are tightened:
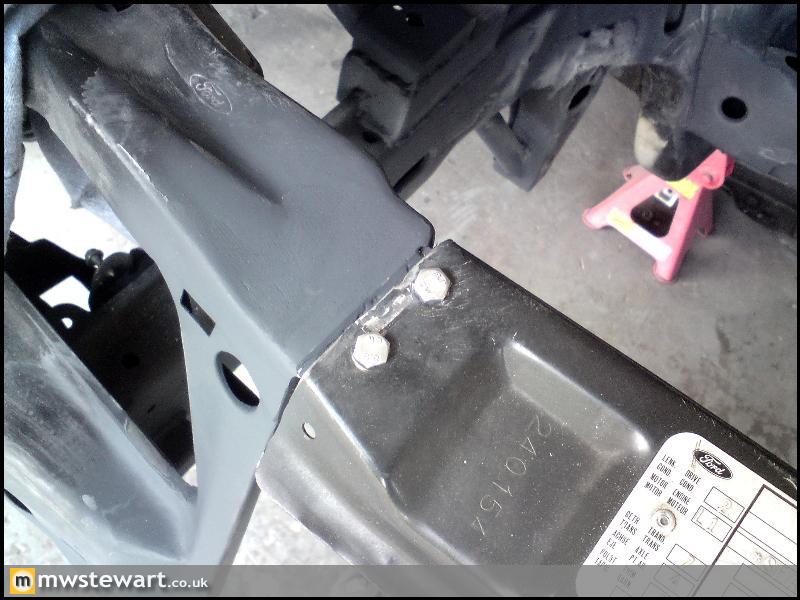
I then boxed over them, drilled through, and welded a captive nut to the outside face of the tabs:
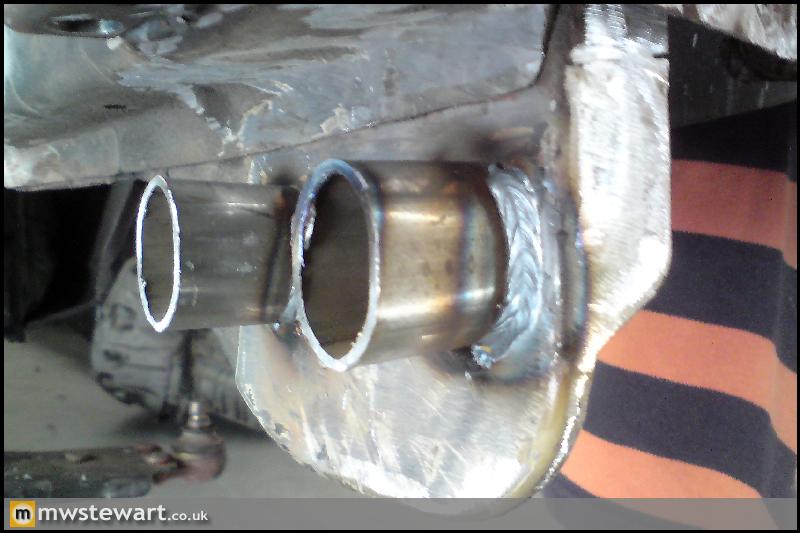
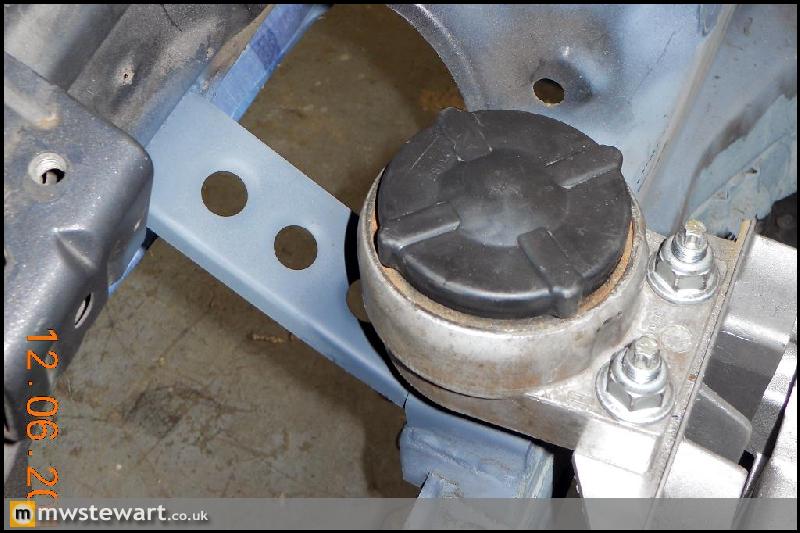
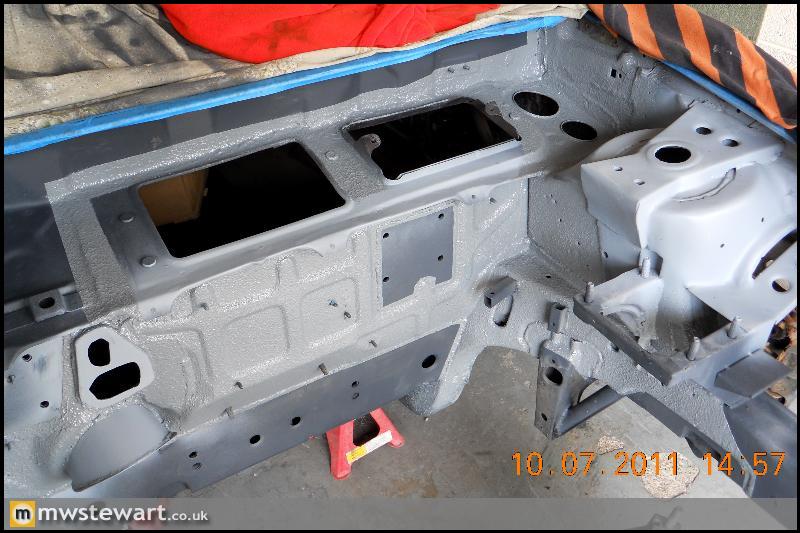
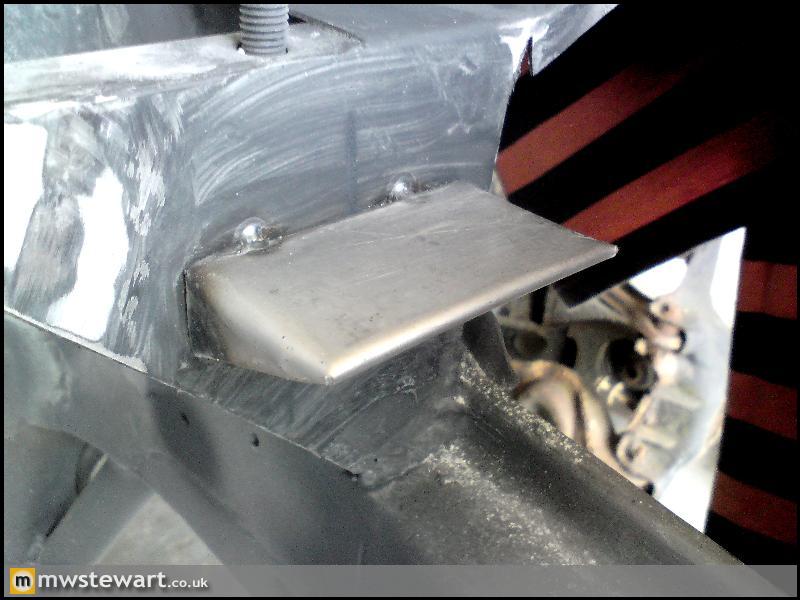
Next up is reinforcement of the steering rack mounting area to help further improve steering feel. The photo below is of the area in standard form, it's not particularly clear from the photo but the central 'pad' that the rack mounts to is isolated from the chassis rails either side of it:
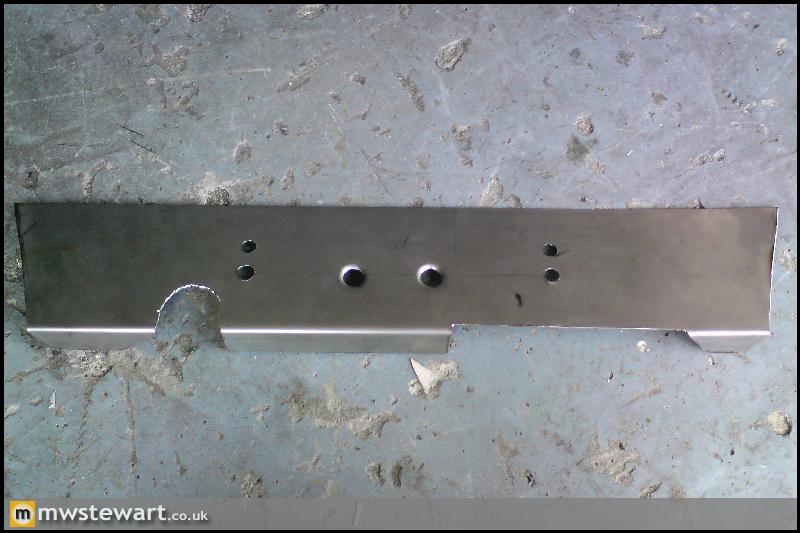
The reinforcement piece I made which will link the rack mounts to the chassis rails:
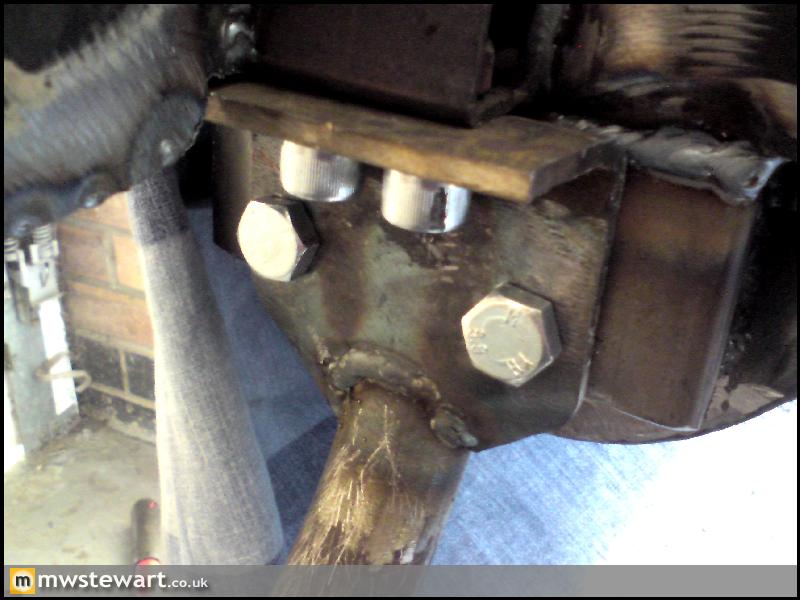
And in place:
I ran out of time today so didn't get chance to weld it in. The above jobs look insignificant but take a fair amount of time.
Ponk - Thanks for the suggestion. I believe that the Corsa pumps are EPAS rather than EHPAS, and I want to avoid those systems because of the poor feedback.
Today I finished off the mounting for the new cross member.
I wanted to bolt to some existing tabs that protrude down from the chassis legs, so I added some tube to prevent the tabs bending as the bolts are tightened:
I then boxed over them, drilled through, and welded a captive nut to the outside face of the tabs:
Next up is reinforcement of the steering rack mounting area to help further improve steering feel. The photo below is of the area in standard form, it's not particularly clear from the photo but the central 'pad' that the rack mounts to is isolated from the chassis rails either side of it:
The reinforcement piece I made which will link the rack mounts to the chassis rails:
And in place:
I ran out of time today so didn't get chance to weld it in. The above jobs look insignificant but take a fair amount of time.
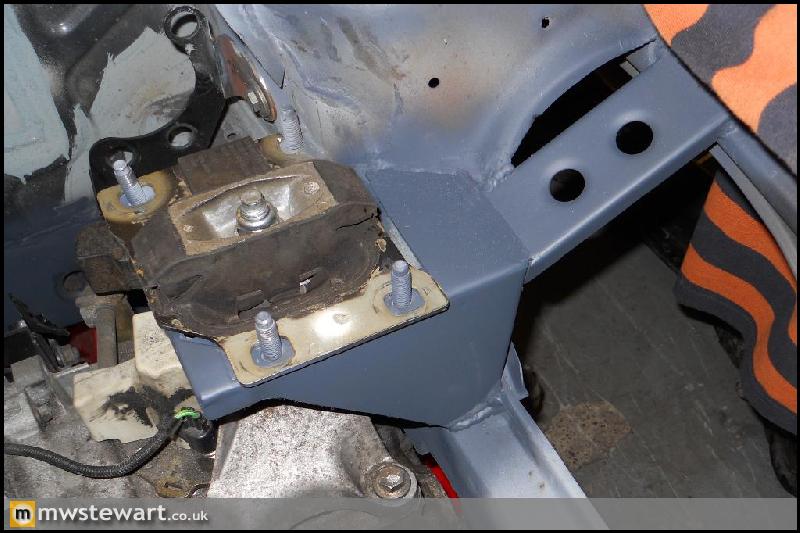
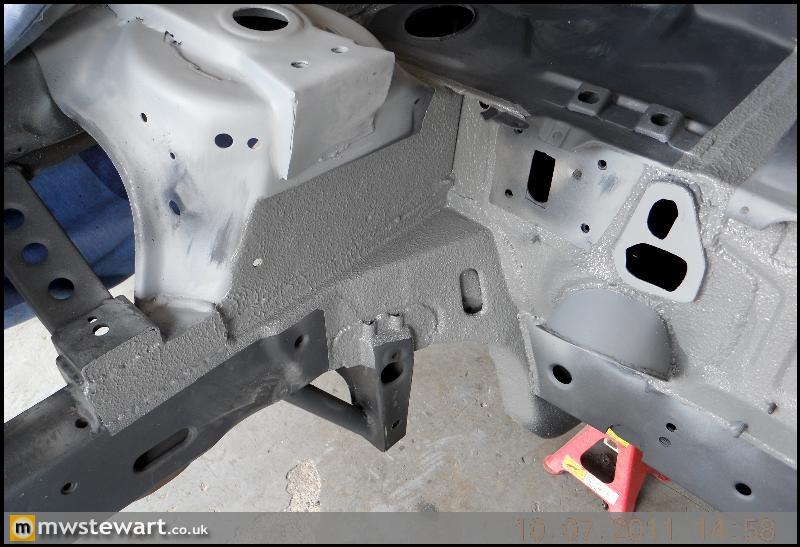
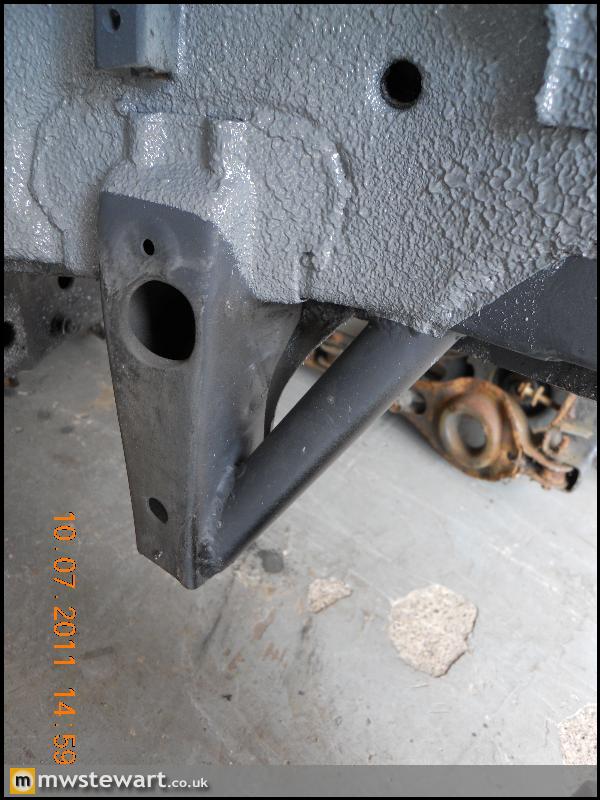
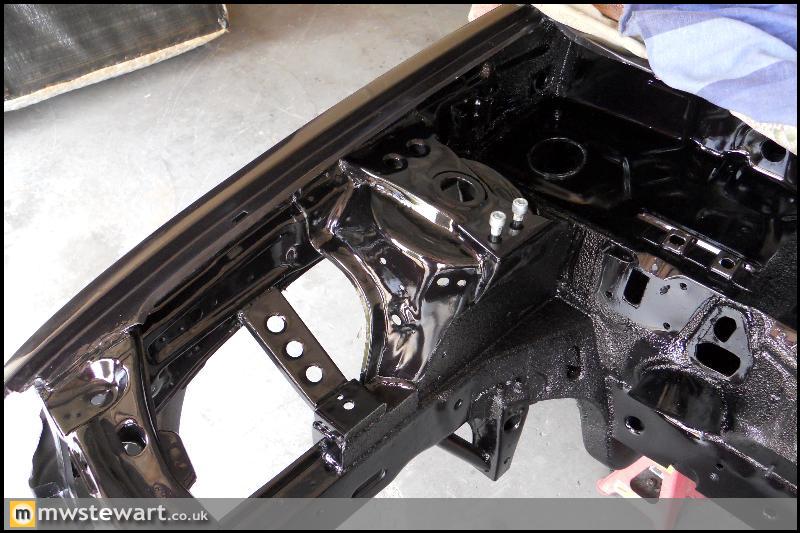
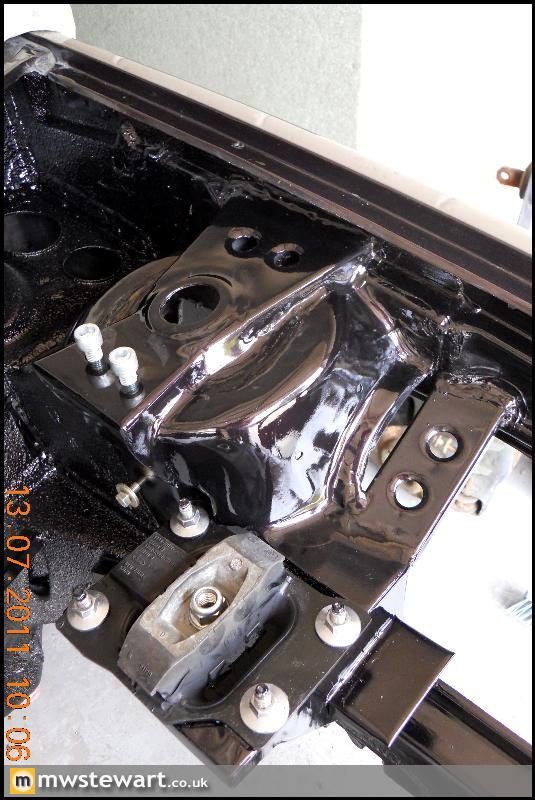
Engine mount bridged to inner wing:
Gearbox mount plated over and bridged to inner wing:
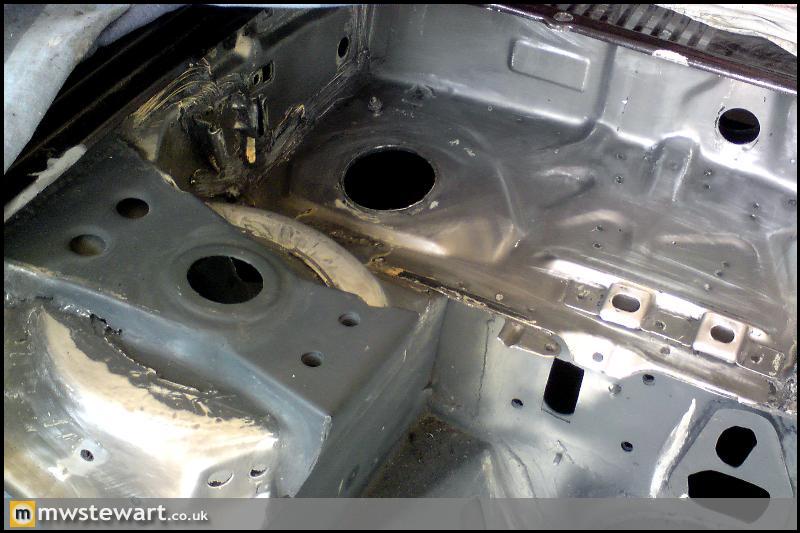
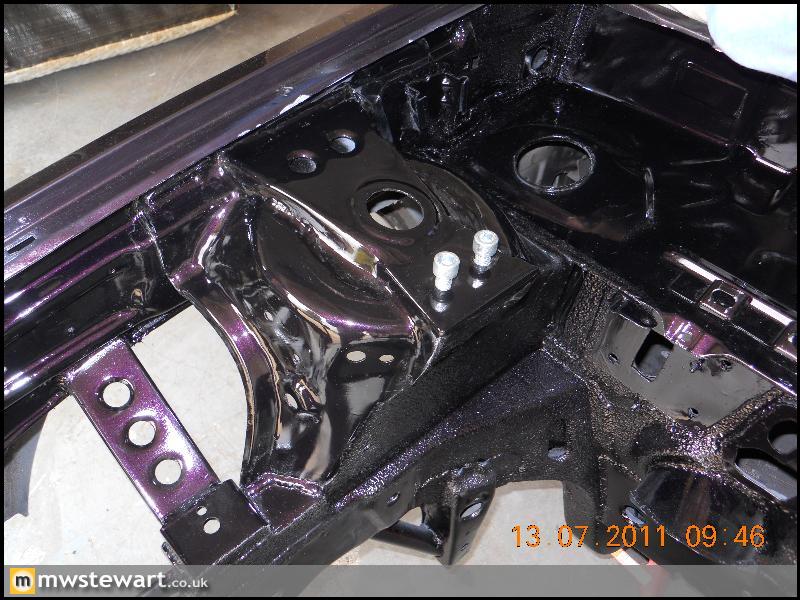
Steering rack reinforcement is on:

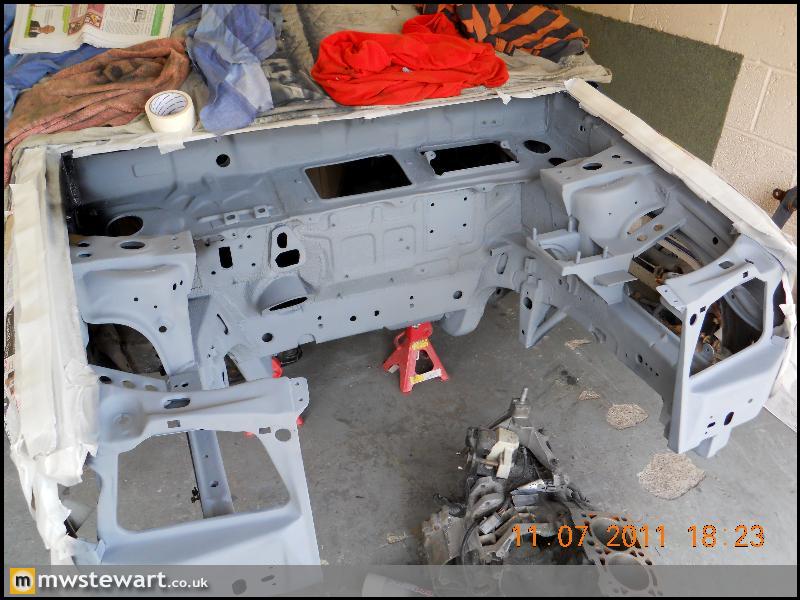
That's pretty much all the engine bay fabrication complete so now I can finally prep it for paint.
I also did some planning for the cooling system. I bought a Focus and Mondeo radiator pack to have a play around with, as these were the best fit for my engine bay.
Original radiator core: 500mm x 298mm x 27mm
Focus Mk1 core: 600mm x 358mm x 27mm
Mondeo Mk1 & Mk2 core: 620mm x 395mm x 27mm
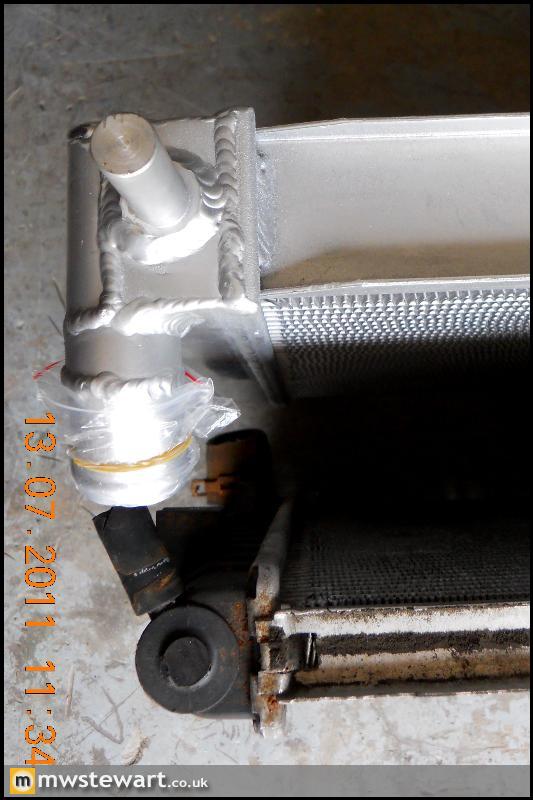
I managed to get the Mondeo rad to fit however the outlet spigot is too close to the A/C pump. I have found a company who make uprated radiators for the Mondeo, so I have ordered an all aluminum rad with a 50mm core. I can then cut off the spigot and re weld in a slightly higher position.
Gearbox mount plated over and bridged to inner wing:
Steering rack reinforcement is on:
That's pretty much all the engine bay fabrication complete so now I can finally prep it for paint.
I also did some planning for the cooling system. I bought a Focus and Mondeo radiator pack to have a play around with, as these were the best fit for my engine bay.
Original radiator core: 500mm x 298mm x 27mm
Focus Mk1 core: 600mm x 358mm x 27mm
Mondeo Mk1 & Mk2 core: 620mm x 395mm x 27mm
I managed to get the Mondeo rad to fit however the outlet spigot is too close to the A/C pump. I have found a company who make uprated radiators for the Mondeo, so I have ordered an all aluminum rad with a 50mm core. I can then cut off the spigot and re weld in a slightly higher position.

Engine Bay Preparation
I stripped back to bare metal in key areas of the engine bay, to ensure a good finish.
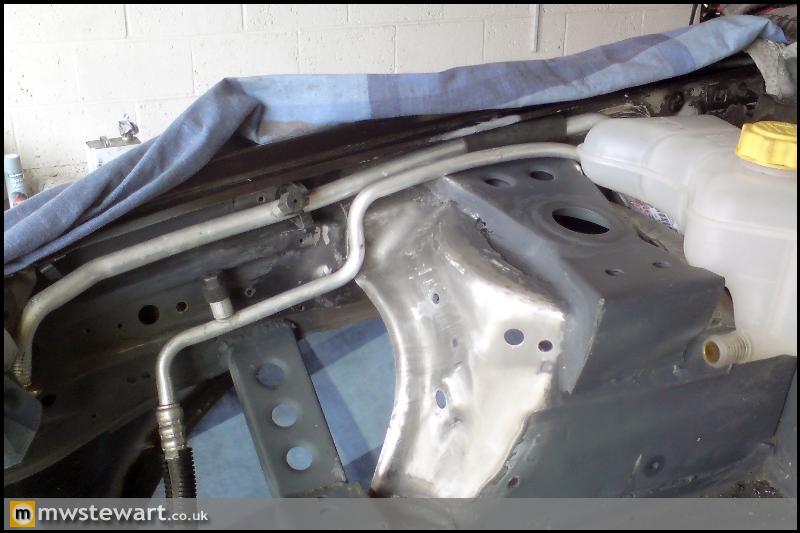
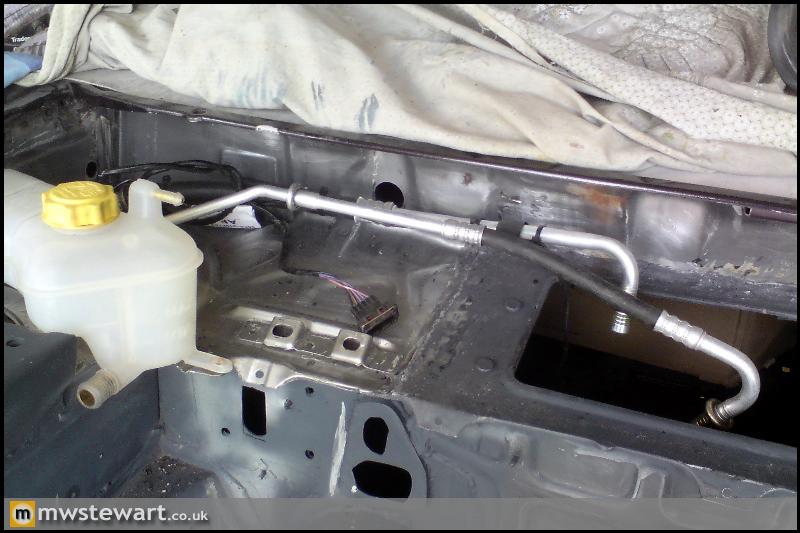
Air Conditioning Pipes - Test Fit
The AC pipes are from a Ford Puma which has an engine bay that is dimensionally very similar to the Mk3 Fiesta, so only a small amount of bending and reshaping was required. I've ordered some heat shrink to fit over areas which come close to the chassis.
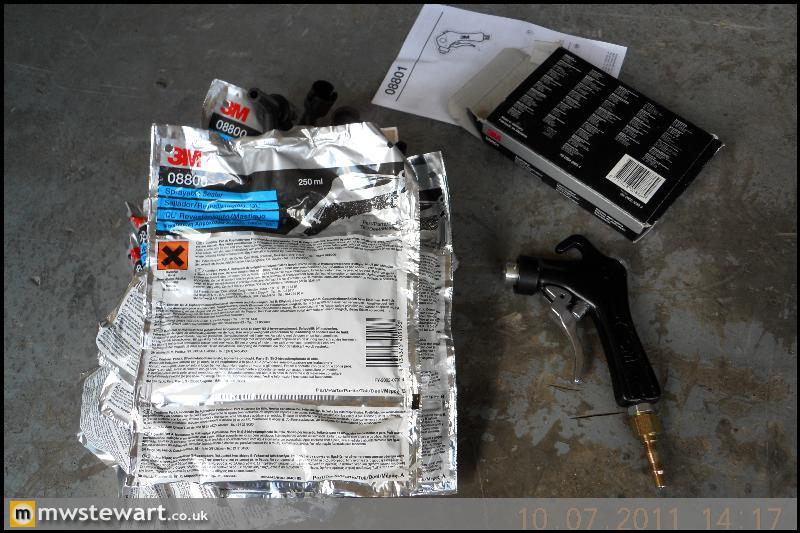
Sealer Application
3M 08800 is regarded as the best sealer available, it's not cheap but the quality and finish is superb - it's OEM for premium brands. A special applicator gun is required and is pictured below.
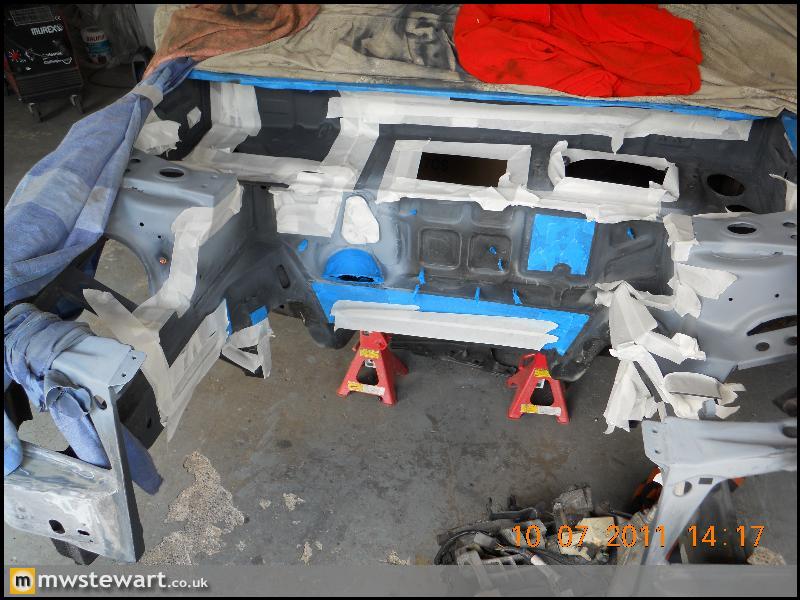
Engine bay masked off and 'panel wiped':
Sealed
Engine Bay Modifications
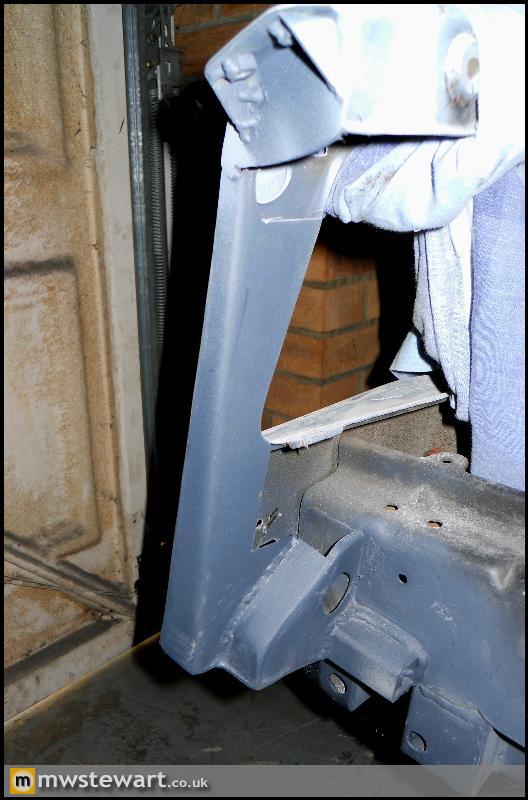
I'm relocating the screen wash reservoir to the rear of the O/S wheel arch in order to liberate space for the AC receiver. I added a swaged plate to the O/S inner wing so I can pass a filler tube through, I have Caravan black waste pipe in mind for this.
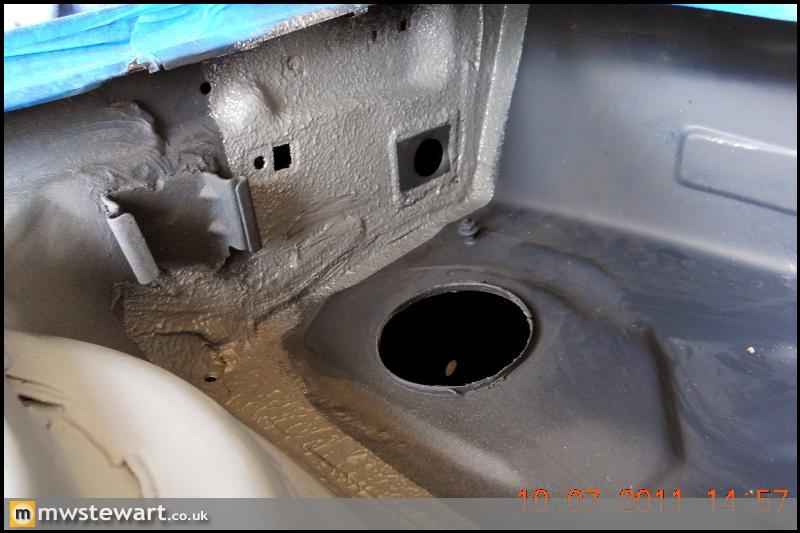
Bracket for a battery positive terminal. I'm relocating the battery to the boot so this terminal will let me join the existing positive wires to a 300 Amp cable that will run to the boot.
The original steering column was sealed on the bulkhead with a rubber grommet, and the UJ was still left exposed to the elements. The slight play in my UJ was testament to this. Taking inspiration from a later Fiesta I fabricated a shroud on the bulkhead which will enable me to mount a cover for the UJ.

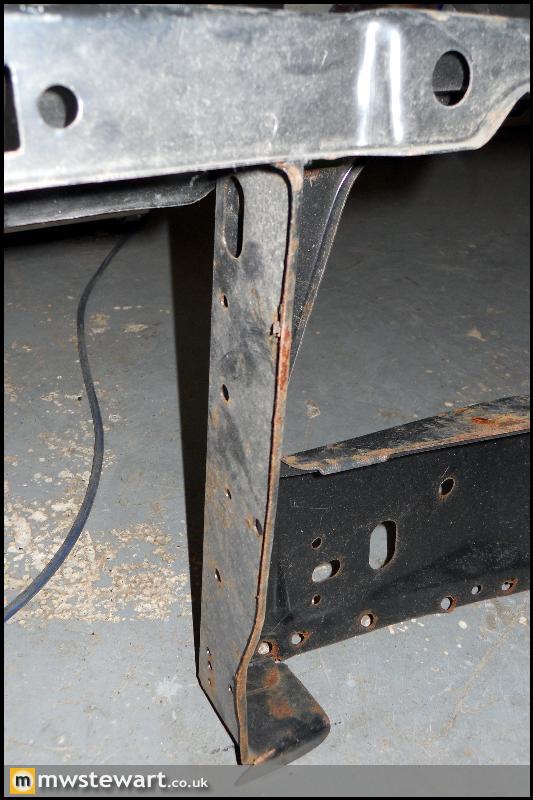
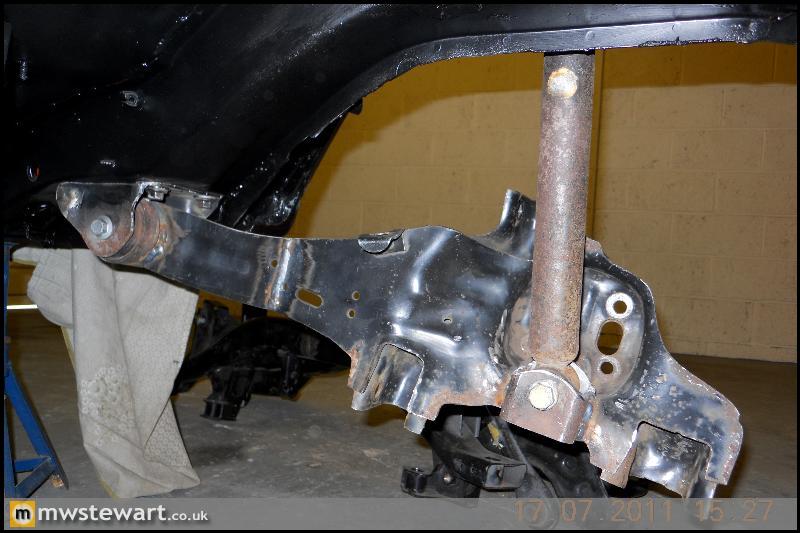
Lower arm points reinforced to chassis leg
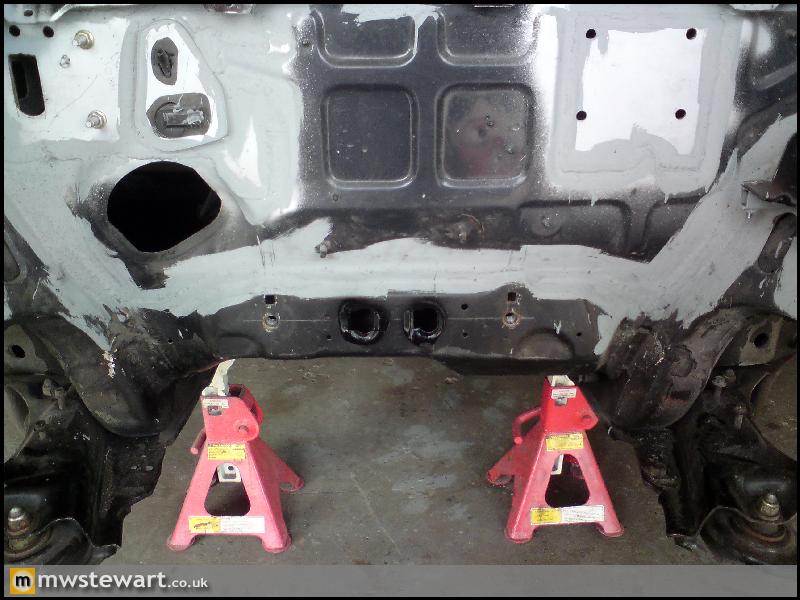
Slam panel clearanced for large radiator, and sectioned to be made removable in order to improve access to the radiators and engine. The first photo is of a standard panel for reference.
Painting
In primer
Painted
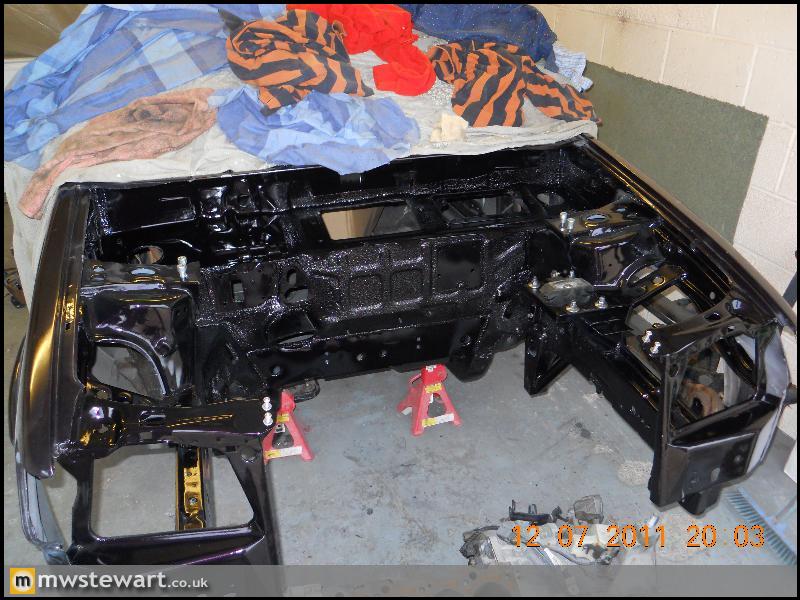
The rich colour really comes through in this shot:
Independent rear suspension
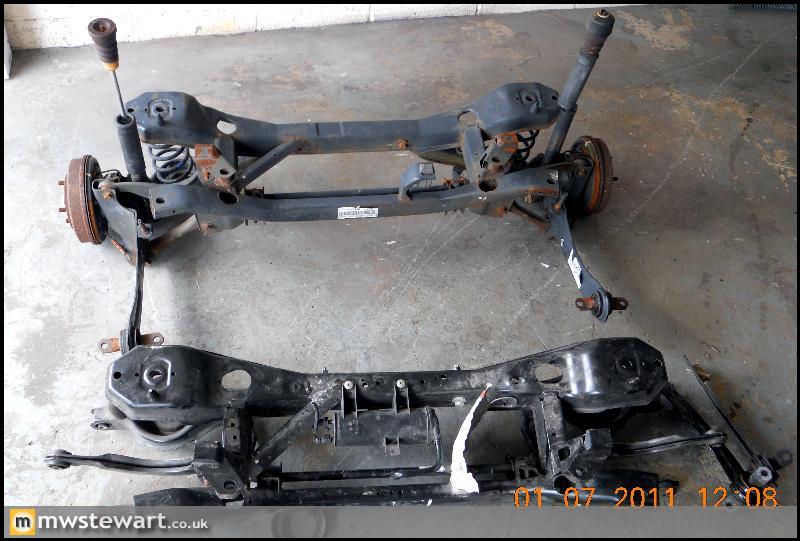
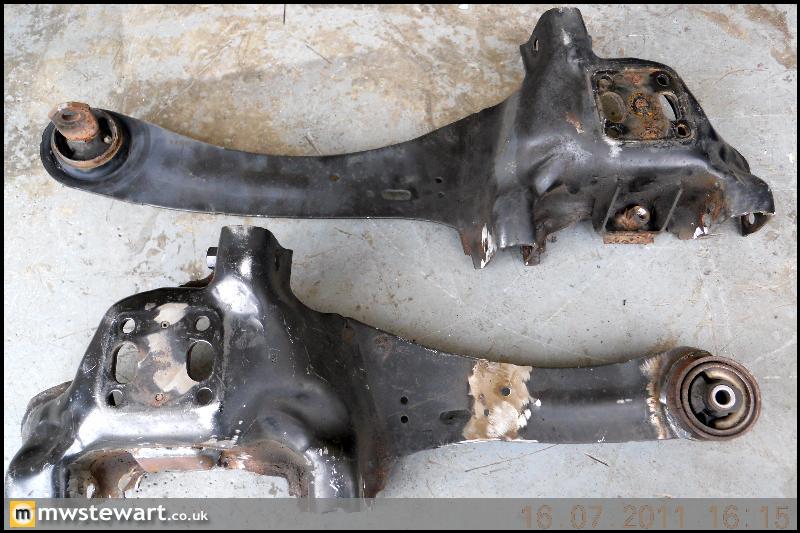
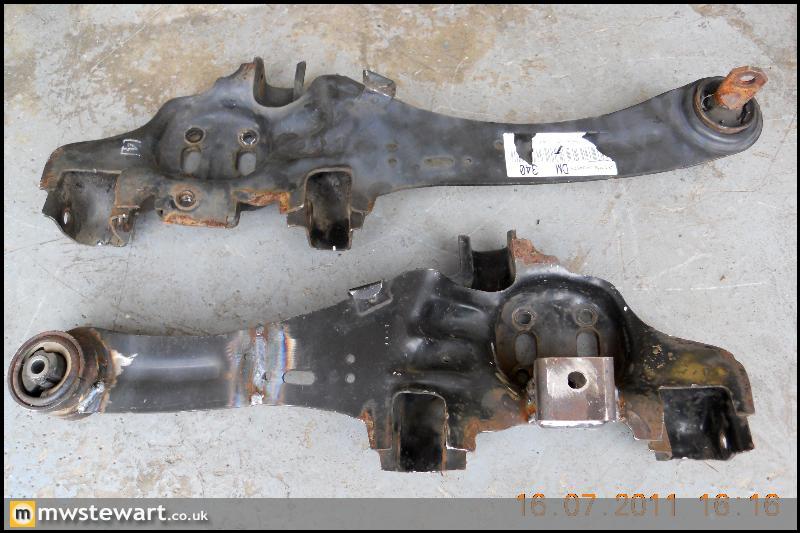
The next phase of the project is independent rear suspension taken from a Focus. I knew the Mk1 and Mk2 Focus shared an identical rear suspension arrangement aside from the hubs (5 bolt vs 4 bolt) so I bought a very low mileage rear beam/sub frame from a 2009 Focus. It turns out that the Mk2 hubs also have a significant track increase which meant I'd be running too much positive offset on the rear wheels when compared with my existing front axle. The green line in the photo below shows the distance between the lower arm and the hub mounting face:

I bought another rear end, this time from a Mk1 Focus and the photo below shows the dramatic reduction in track width:

A comparison shot. I will use the newer Mk2 subframe and arms but with the Mk1 hubs and my own disc brake conversion.
MIG Welding Aluminium
I wanted to break the dependence I had on local engineering firms for Alloy welding, so I bought some parts for my Mig Welder that will let me perform the job myself; pure Argon, Alloy wire (a general grade), oversize tips, Stainless Steel wire brushes and a Teflon lined torch.
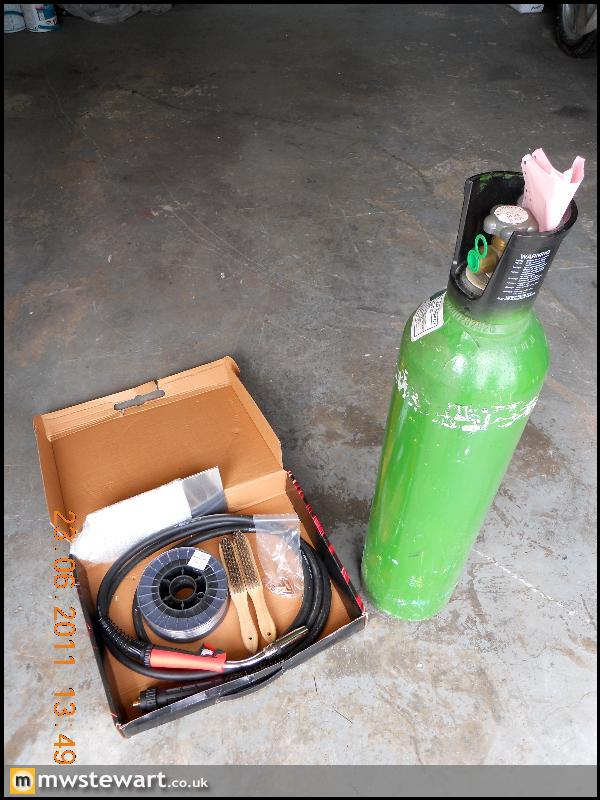
My first Alloy welding job will be to make some radiator brackets for my new radiator. It is an 'uprated' Mondeo radiator, all alloy and double capacity.
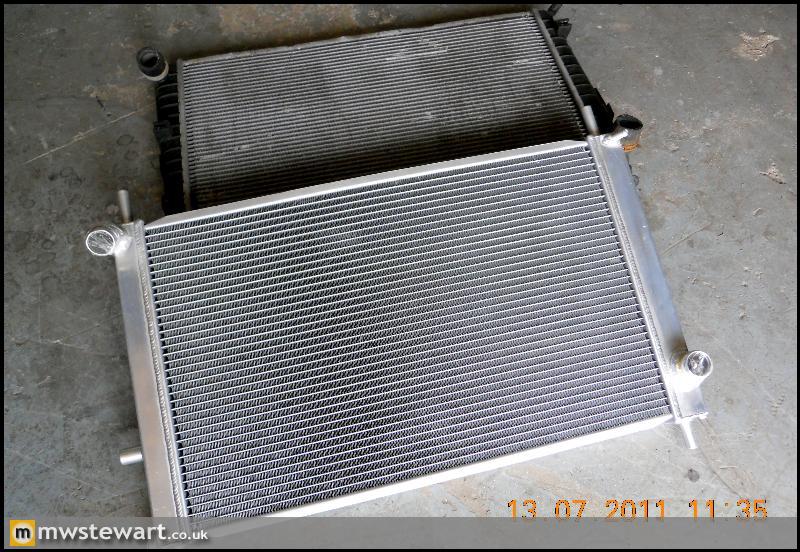
50mm vs 27mm core.
I stripped back to bare metal in key areas of the engine bay, to ensure a good finish.
Air Conditioning Pipes - Test Fit
The AC pipes are from a Ford Puma which has an engine bay that is dimensionally very similar to the Mk3 Fiesta, so only a small amount of bending and reshaping was required. I've ordered some heat shrink to fit over areas which come close to the chassis.
Sealer Application
3M 08800 is regarded as the best sealer available, it's not cheap but the quality and finish is superb - it's OEM for premium brands. A special applicator gun is required and is pictured below.
Engine bay masked off and 'panel wiped':
Sealed
Engine Bay Modifications
I'm relocating the screen wash reservoir to the rear of the O/S wheel arch in order to liberate space for the AC receiver. I added a swaged plate to the O/S inner wing so I can pass a filler tube through, I have Caravan black waste pipe in mind for this.
Bracket for a battery positive terminal. I'm relocating the battery to the boot so this terminal will let me join the existing positive wires to a 300 Amp cable that will run to the boot.
The original steering column was sealed on the bulkhead with a rubber grommet, and the UJ was still left exposed to the elements. The slight play in my UJ was testament to this. Taking inspiration from a later Fiesta I fabricated a shroud on the bulkhead which will enable me to mount a cover for the UJ.
Lower arm points reinforced to chassis leg
Slam panel clearanced for large radiator, and sectioned to be made removable in order to improve access to the radiators and engine. The first photo is of a standard panel for reference.
Painting
In primer
Painted
The rich colour really comes through in this shot:
Independent rear suspension
The next phase of the project is independent rear suspension taken from a Focus. I knew the Mk1 and Mk2 Focus shared an identical rear suspension arrangement aside from the hubs (5 bolt vs 4 bolt) so I bought a very low mileage rear beam/sub frame from a 2009 Focus. It turns out that the Mk2 hubs also have a significant track increase which meant I'd be running too much positive offset on the rear wheels when compared with my existing front axle. The green line in the photo below shows the distance between the lower arm and the hub mounting face:
I bought another rear end, this time from a Mk1 Focus and the photo below shows the dramatic reduction in track width:
A comparison shot. I will use the newer Mk2 subframe and arms but with the Mk1 hubs and my own disc brake conversion.
MIG Welding Aluminium
I wanted to break the dependence I had on local engineering firms for Alloy welding, so I bought some parts for my Mig Welder that will let me perform the job myself; pure Argon, Alloy wire (a general grade), oversize tips, Stainless Steel wire brushes and a Teflon lined torch.
My first Alloy welding job will be to make some radiator brackets for my new radiator. It is an 'uprated' Mondeo radiator, all alloy and double capacity.
50mm vs 27mm core.

Impressive stuff....
on a side, am I correct you are using a 5 speed box? i'm not 100% sure but isnt it the same one used in Nobles as i'm sure we use one from the zetec focus? if so there are things you can do to make it take the power... main one is fitting a quaife (as open diff is the weak point and will break above 350ftlb).... I have friends running 500bhp plus in their nobles with the 5 speed.
Also if its the same one you can upgrade to the ST220 6 speed box (same shaft position and similar size) which I did and I now run 630bhp
if its a different box altogether ignore me lol
Thanks guys!
Andy - You are absolutely correct! The MTX75 is what I'm using. Ford recently sold off all of their Focus RS Mk1 parts stock so I took the opportunity to pick up a couple of Quaife ATB's (they were very cheap) and a Focus RS Gearbox, which has the Quaife ready fitted together with shot peened gears.
Is the 6 speed the MMT6? which was fitted to the Mk3 Mondeo and later? I know there's also a Getrag MT285 which was fitted to the Focus ST170, but I don't think that's rated as highly as even the MTX.
Very good to know that your friends are putting 500 through the MTX; I knew it was a pretty sturdy box. It should be even better for me as I won't have any where near the level of the grip your Noble has.
The 6 speed box I have is ST220 only as far as I know... the 5 speeder had many varients I believe?
anyhow we shot pean and polish the gears, replace the plastic bearing cages with steel ones and add oil cooling, the quaife is a must... people are running over 450ftlb through them and reving them to over 7000rpm.
If you need a clutch that can hold the power again you can look at the noble, with the 5 speed it even uses the same ford thrust bearing.
the 6 speed ST220 box is stronger as it has 2 shafts holding all the gears rather than 1 long one (like the 5 speed) but its weak point is 3rd gear overheating with high power... this is overcome by oil cooling.
Incidentally Im running over 530ftlb and can give it full beans in 1st gear with my 295 048's and its not broke... yet... some cars in the states claim loads more power reliably but I'm unconvinced and need to prove it myself... I have deliberatelly capped torque to 530ftlb to save the box as the engine clearly was going to make over 600ftlb but as it revs to 8k (and holds power till redline) I dont need to search torque too much to get good power.
Andy - Thank you. I will now make Gearbox oil cooling part of the final spec
Mouse - Thanks, nice 500!
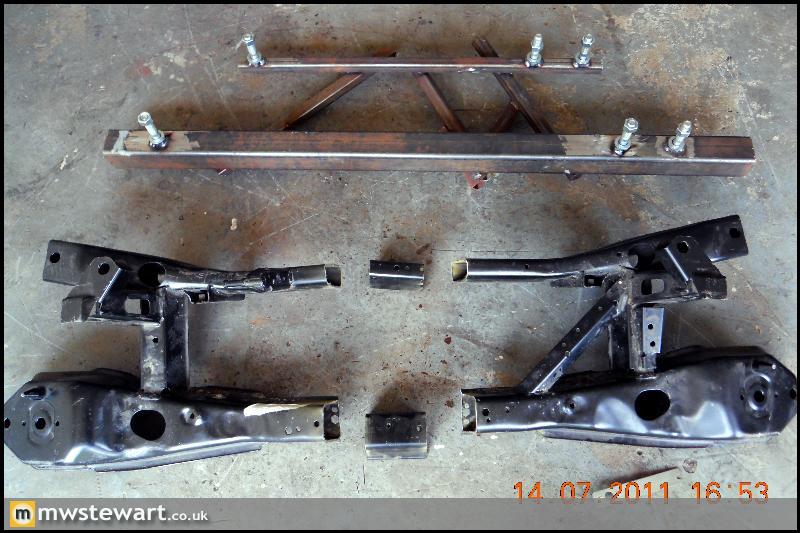
Independent rear suspension, Part 1 – Modification of Focus components
My own requirements were that the Fiesta McPherson struts would remain as would the forward mounting points for a Fiesta rear beam, this way I would not be forced to mix and match suspension and as contingency I could bolt up a Fiesta beam should I ever need to. I started by gathering data for the key dimensions of Fiesta and Focus rear suspension so measurements such as distance between trailing arms, strut mounting points, chassis legs, subframe mounts etc. Based on this data I decided that the best way forward would be to modify the Focus suspension to provide standard Fiesta track width, and to achieve this Focus subframe and knuckle/trailing arm assemblies would be modified to suit the Fiesta struts and forward beam mounts.
The first step was to create a jig based on the standard Focus subframe. At this stage I marked on two pieces of steel the position of standard Focus mounting points and also new mounting points at a reduced width which would produce standard Fiesta rear track. I fixed bolts to the Steel and bolted it to the unmodified Focus beam to begin fabrication of the jig, this way I ensured that everything was perfectly parallel. Once that was done I welded on bolts in the shortened position and sectioned the beam to suit.
Jig #1 did its job well: here's the shortened subframe welded together but still attached to the jig.
Next up I went back to the Fiesta beam to make a jig that would help me modify the Focus trailing arms, and my life here was made easier by the fact I'd previously upgraded to a Puma/Mk5 Fiesta beam which actually shares the same hub mounting bolt pattern as the Focus; this allowed me to make a jig to provide the Fiesta lower strut mount and forward beam mount based on the common hub mounting face/bolt pattern. The alternative would be to make a jig based on wheel bolt flange and centreline, which would have taken longer.
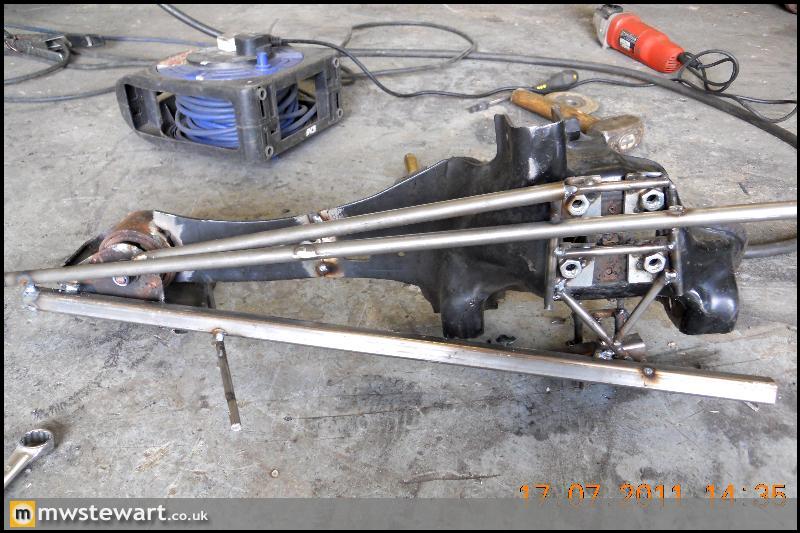
Here's the horrific looking but sturdy and accurate jig # 2 in action
The second jig enabled me to fabricate the Fiesta lower strut mounts, shorten the Focus trailing arms, and change the angle of the trailing arms to suit the position of the Fiesta forward beam mount. I decided at this point to sacrifice the Fiesta beam for its front mounts/bushes to incorporate into the Focus arms, and in doing so replaced the trailing arm Focus bushes which are a weak point.
Top: Standard Focus, Bottom: Modified
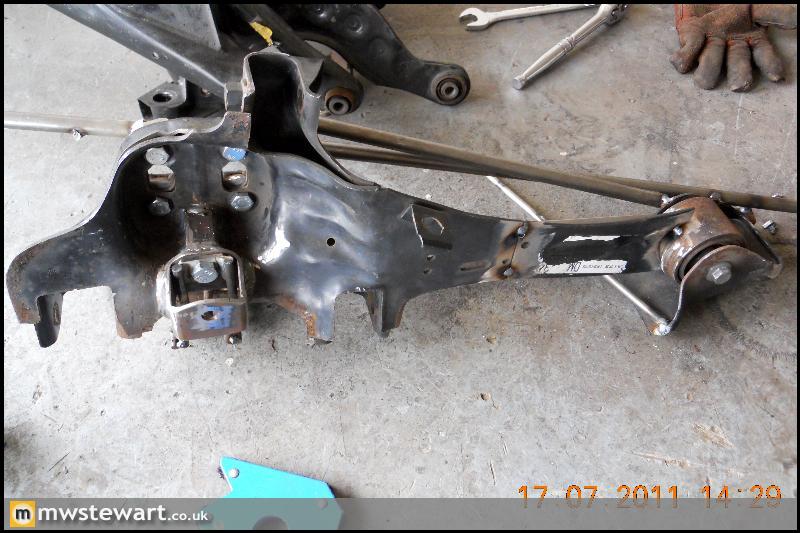
This image shows the shortened trailing arm, the difference between Focus and Fiesta lower suspension mounts, and the reinforcing I made around the new lower mount. I was conscious here that the majority of load on the Focus system would have been taken by the lower arm that houses the spring, so as I was mounting a McPherson strut assembly in place of a damper, I made sure that the shock mount was of far sturdier construction than the original.
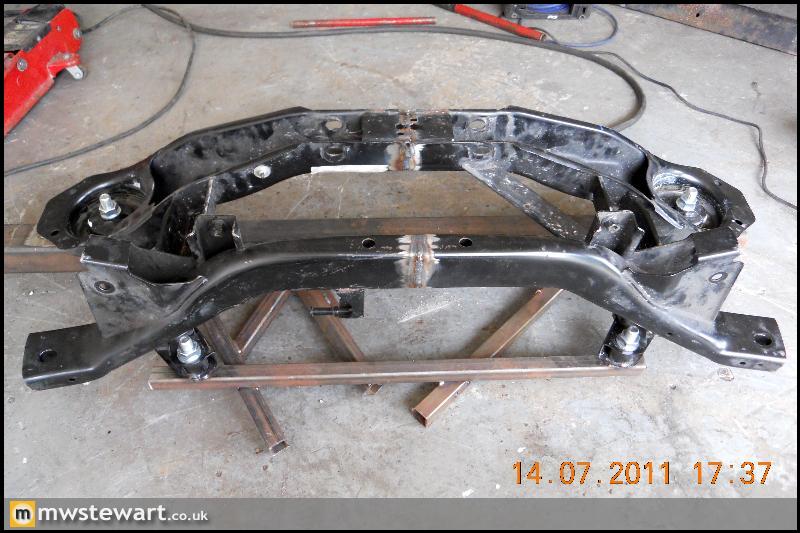
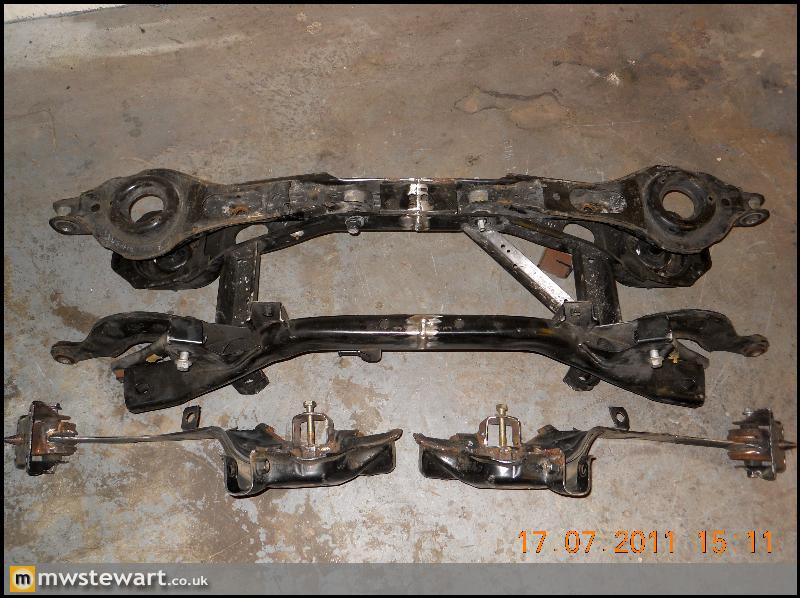
Subframe etc. completed.
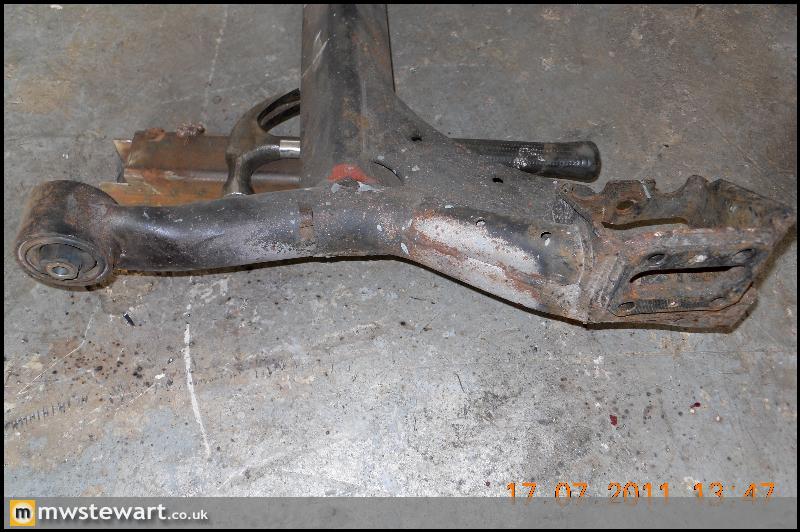
Modified knuckle/trailing arm mounted to the Fiesta.
The next stage is to modify the Fiesta chassis to mount the subframe.
Mouse - Thanks, nice 500!
Independent rear suspension, Part 1 – Modification of Focus components
My own requirements were that the Fiesta McPherson struts would remain as would the forward mounting points for a Fiesta rear beam, this way I would not be forced to mix and match suspension and as contingency I could bolt up a Fiesta beam should I ever need to. I started by gathering data for the key dimensions of Fiesta and Focus rear suspension so measurements such as distance between trailing arms, strut mounting points, chassis legs, subframe mounts etc. Based on this data I decided that the best way forward would be to modify the Focus suspension to provide standard Fiesta track width, and to achieve this Focus subframe and knuckle/trailing arm assemblies would be modified to suit the Fiesta struts and forward beam mounts.
The first step was to create a jig based on the standard Focus subframe. At this stage I marked on two pieces of steel the position of standard Focus mounting points and also new mounting points at a reduced width which would produce standard Fiesta rear track. I fixed bolts to the Steel and bolted it to the unmodified Focus beam to begin fabrication of the jig, this way I ensured that everything was perfectly parallel. Once that was done I welded on bolts in the shortened position and sectioned the beam to suit.
Jig #1 did its job well: here's the shortened subframe welded together but still attached to the jig.
Next up I went back to the Fiesta beam to make a jig that would help me modify the Focus trailing arms, and my life here was made easier by the fact I'd previously upgraded to a Puma/Mk5 Fiesta beam which actually shares the same hub mounting bolt pattern as the Focus; this allowed me to make a jig to provide the Fiesta lower strut mount and forward beam mount based on the common hub mounting face/bolt pattern. The alternative would be to make a jig based on wheel bolt flange and centreline, which would have taken longer.
Here's the horrific looking but sturdy and accurate jig # 2 in action
The second jig enabled me to fabricate the Fiesta lower strut mounts, shorten the Focus trailing arms, and change the angle of the trailing arms to suit the position of the Fiesta forward beam mount. I decided at this point to sacrifice the Fiesta beam for its front mounts/bushes to incorporate into the Focus arms, and in doing so replaced the trailing arm Focus bushes which are a weak point.
Top: Standard Focus, Bottom: Modified
This image shows the shortened trailing arm, the difference between Focus and Fiesta lower suspension mounts, and the reinforcing I made around the new lower mount. I was conscious here that the majority of load on the Focus system would have been taken by the lower arm that houses the spring, so as I was mounting a McPherson strut assembly in place of a damper, I made sure that the shock mount was of far sturdier construction than the original.
Subframe etc. completed.
Modified knuckle/trailing arm mounted to the Fiesta.
The next stage is to modify the Fiesta chassis to mount the subframe.
Absolutely stunning work there, I have really enjoyed following this thread over the months.
I do have one question though regarding the modified trailing arm, did you get the welds checked for penetration and defects? The last thing you want after all your hard work is a weld failing under load possibly causing damage to your pride and joy.
I can see the standard of your work is second to none, I only ask as it's an area I deal in with work.
bob1179 said:
Absolutely stunning work there, I have really enjoyed following this thread over the months.
I do have one question though regarding the modified trailing arm, did you get the welds checked for penetration and defects? The last thing you want after all your hard work is a weld failing under load possibly causing damage to your pride and joy.
I can see the standard of your work is second to none, I only ask as it's an area I deal in with work.
Thank you! Although I am confident in my work and would be happy driving with these parts on the car, I would be open to having the parts inspected. Is this done using ultrasonic equipment?I do have one question though regarding the modified trailing arm, did you get the welds checked for penetration and defects? The last thing you want after all your hard work is a weld failing under load possibly causing damage to your pride and joy.
I can see the standard of your work is second to none, I only ask as it's an area I deal in with work.
FYI I bevelled the edges of joints and I did get good penetration (the weld nicely sunk and there was a great amount of heat going in to the piece). The surfaces were clean and there aren't any imperfections/impurities that I can see.
RE: the trailing arm welding. I would just "puddle weld" a small plate on the back of the trailing arm (where it won't be seen) to reforce the butt weld with an extra "lap welded" plate.
Also, generally speaking, on modern cars, the damper peak loads are actually higher than the spring loads until you actually start hitting the bump stops!
Also, generally speaking, on modern cars, the damper peak loads are actually higher than the spring loads until you actually start hitting the bump stops!
mwstewart said:
Thank you! Although I am confident in my work and would be happy driving with these parts on the car, I would be open to having the parts inspected. Is this done using ultrasonic equipment?
FYI I bevelled the edges of joints and I did get good penetration (the weld nicely sunk and there was a great amount of heat going in to the piece). The surfaces were clean and there aren't any imperfections/impurities that I can see.
The welds actually look really good, they don't look spattery or blobby, I think any good welding shop should be able to NDT the welds for you, they can be ultrasonically tested or radiographically tested. You can dye penetrant test the welds (it's the cheapest form of testing) but it won't tell you what is going on inside the weld.FYI I bevelled the edges of joints and I did get good penetration (the weld nicely sunk and there was a great amount of heat going in to the piece). The surfaces were clean and there aren't any imperfections/impurities that I can see.
Just bookmarked, I'll have a proper read later as I'm at work right now.
I'm in the middle of fitting a Focus rear sub frame to my Escort Van (stop laughing) and due to the DVLA points system I can not weld the sub frame or weld the floor of the van. So I'm making a sub frame for the sub frame so it all bolts together. Could work.
Not going for 500bhp but a few more than the standard 40 broken horses would be nice.
Gassing Station | Readers' Cars | Top of Page | What's New | My Stuff