500+bhp Mk3 Fiesta Project
Discussion


Looks bloody amazing. The only trouble with alcantara is you spend hours brushing it so it looks the same colour as it can look different, kind of like a lawn does with the mowed stripes.
If your really anal you can put stripes in it really easily. Then it looks amazing till someone moves it and you have to put it back again!
Do you have a website for the people who did the seats?
If your really anal you can put stripes in it really easily. Then it looks amazing till someone moves it and you have to put it back again!
Do you have a website for the people who did the seats?

I wish I was a very rich man. I'd employ you mwstewart, as well as the guy on the other who's turning his Civic coupe into KITT, full time at whatever salary you demanded to build me cars like these. Maybe an FSO Polonez with the interior and running gear out of an M5 or perhaps an Allegro hiding Nissan GT-R mechanicals within.
This car deserves much more than a couple of pages in a specialist Ford mag once it's done.
This car deserves much more than a couple of pages in a specialist Ford mag once it's done.
Thanks again. I haven't thought about a magazine feature actually, probably because I don't really read the Ford magazines. I like Evo, but this probably isn't on that kind of level 
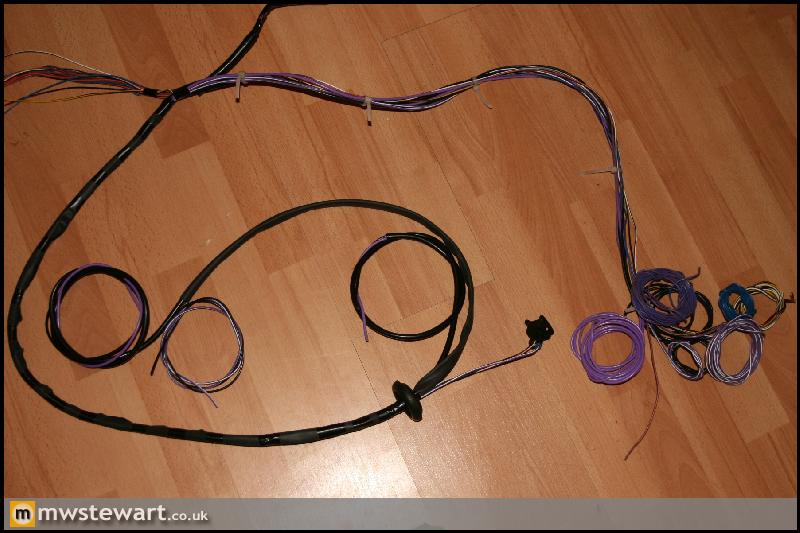
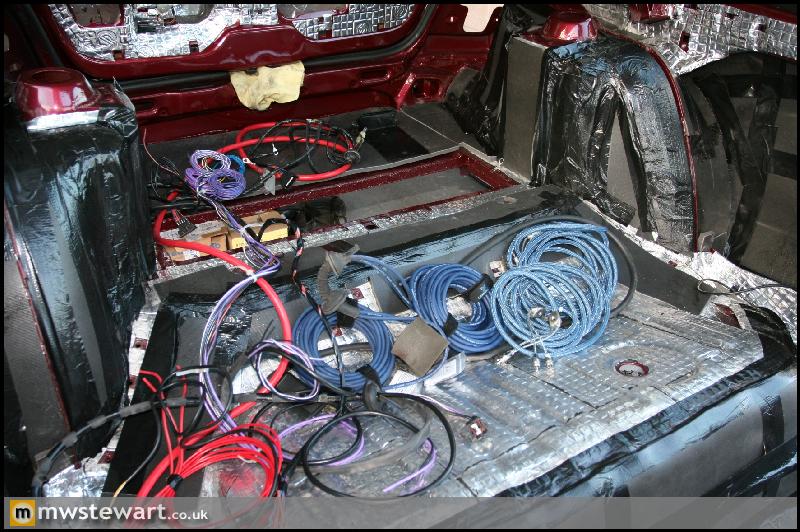
I've finally finished the interior wiring loom, which took a lot longer than I expected it to. The result to the untrained eye is something that looks like a factory loom; I followed the factory colour schema and used factory connectors to extend or add functionality. I've added 25 new features but to cover each would make for pretty dull reading, so I'll cover just one as an example:
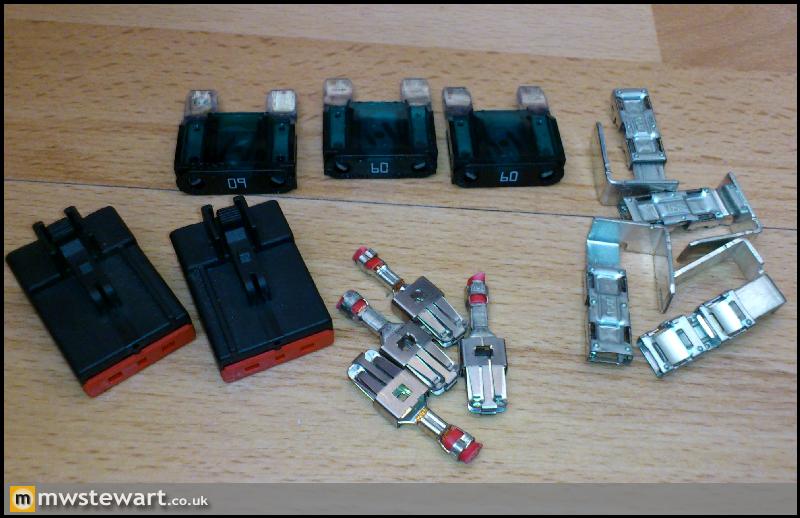
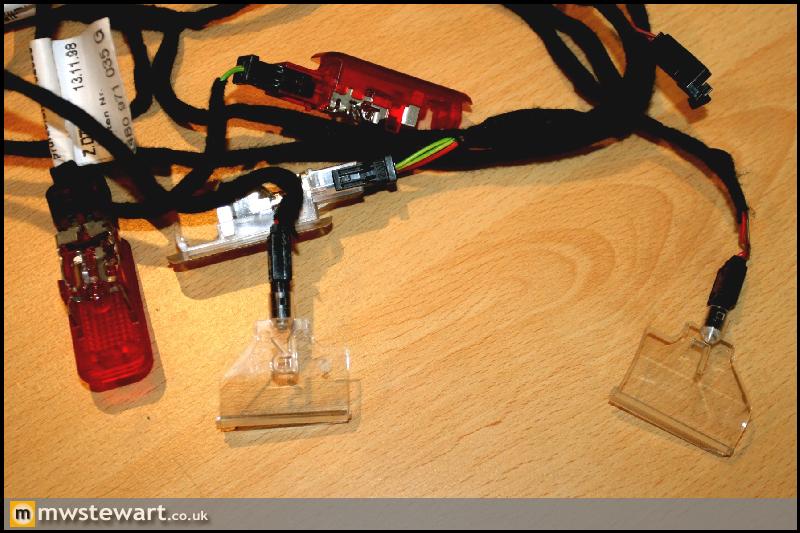
Here's the standard set of multi plugs to join the interior loom to the engine bay loom. The four thicker red cables feed power from the engine bay fuse/relay box to the in car fuse/relay box...
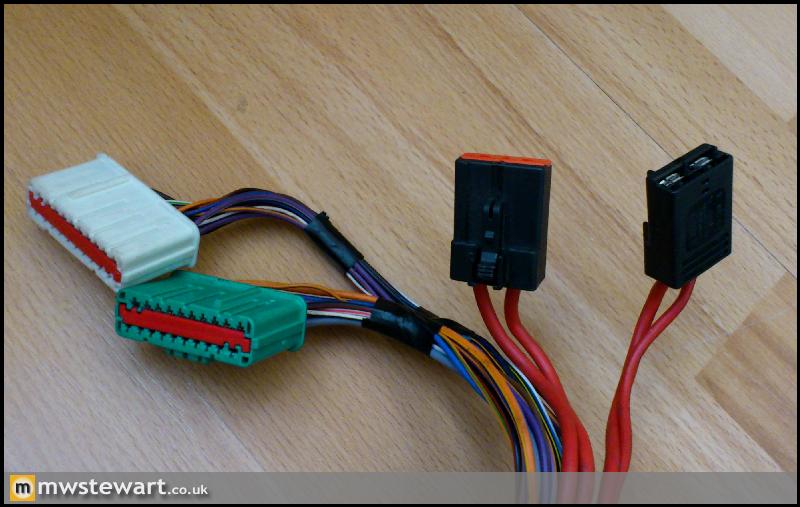
As I'm moving the battery to the boot it would mean these wires unnecessarily feed into to the engine bay then back to the battery in the boot, so I stripped them out and ran them back to the boot instead.
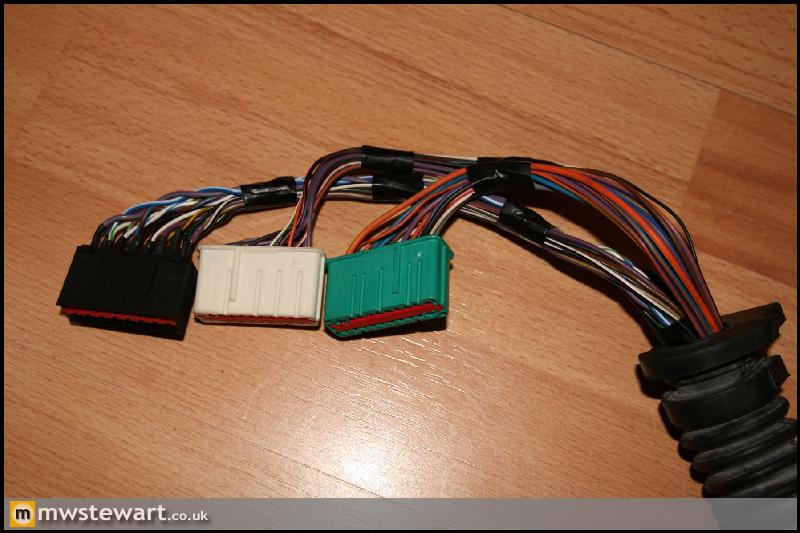
I also removed the fuses and terminals from the engine bay fuse box so it's obvious that nothing should plug there. I've actually created a document which details all changes made to the loom so it's easy to maintain the car going forward.
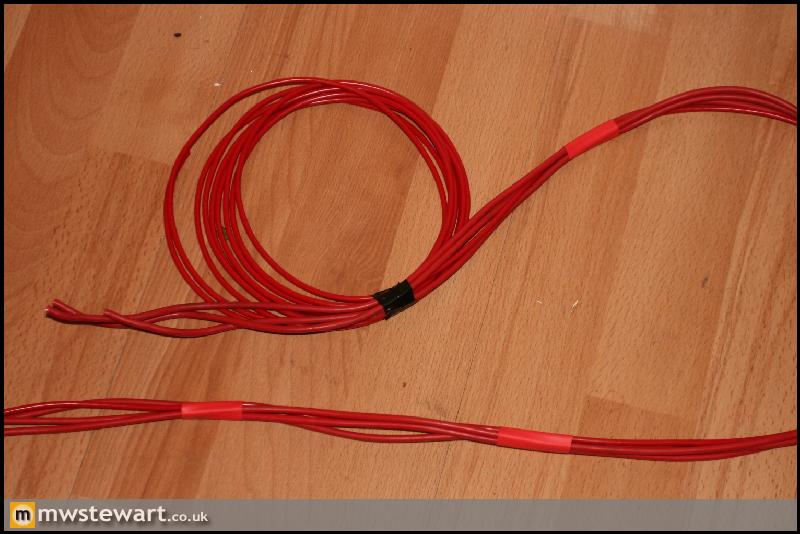
Here's the finished result. The new black multiplug is from an earlier Fiesta and all its wires are for new functions. I created twisted pairs for any data lines in order to minimize RFI.
Wiring for four fuel pumps. I've used the existing grommet under the seat and run the new cables through and split them into two sets and covered with PVC sheath. There will be two lift pumps in tank, and two Bosch 044s mounted to the side of the tank, fed from an internal swirl pot. I don't need two 044's - the second is just for resilience. The looped wires to the right of the photo will be run to a dedicated fuse & relay board in the boot.
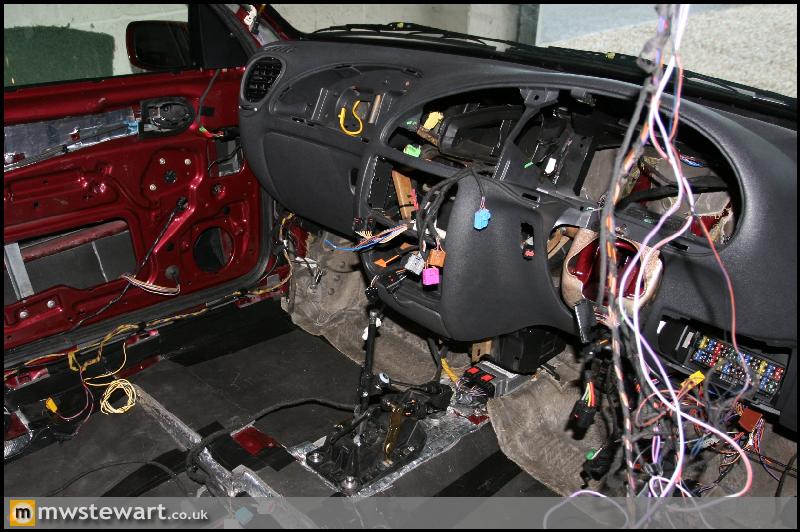
The wiring in place behind the dashboard. The thick red cable runs from the engine bay, across the dash, and down the right hand side of the car. I've used this route so that there aren't any 12v lines on the left hand side of the car that could possibly induce interference in the audio RCA cables that will be run on that side.
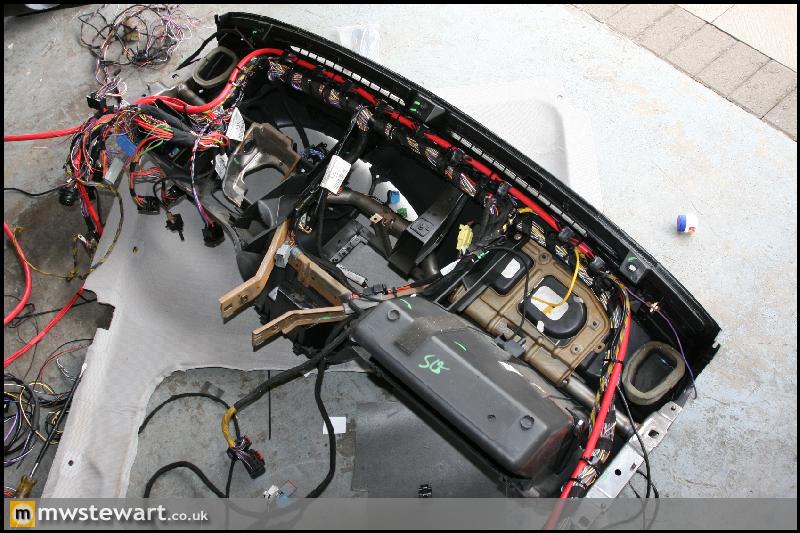
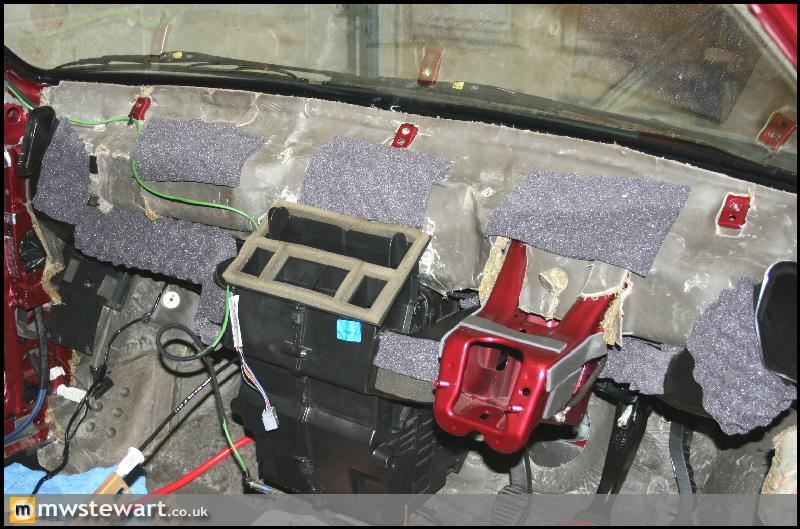
Here's the dashboard in place. I've now got to retrofit a passenger airbag and fit the HVAC controls.
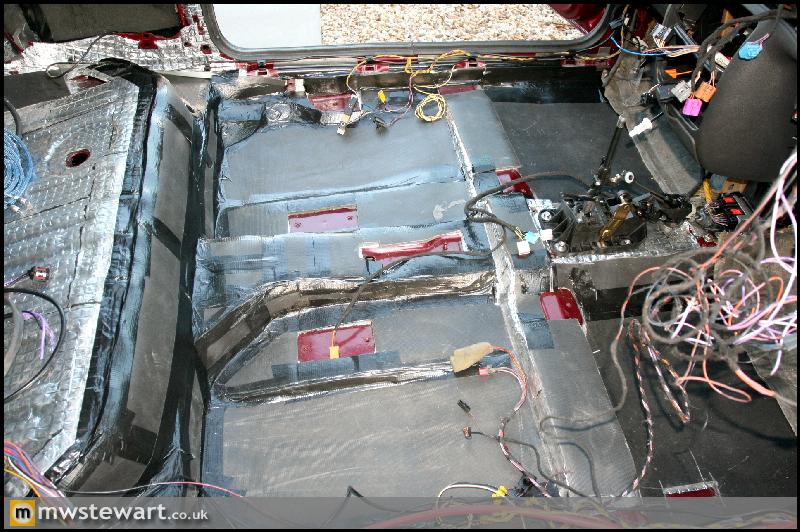
There's now a layer of Luxury Liner Pro on all of the lower panels. Thanks to my Dad again for that!
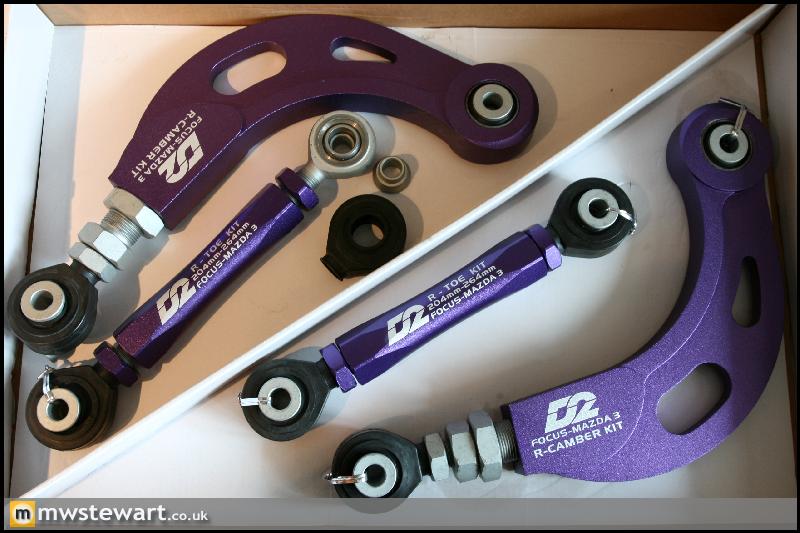
The first new components for the rear suspension arrived and these new adjustable alloy arms replace two of the three standard arms on each side. They are currently fitted with spherical joints but I'm having them modified to accept Focus RS bushes, which are still a considerable upgrade for a Fiesta. The third arm on each side will be replaced with a billet 7075 pieces made to my specification, and I'm also having the rear hubs copied in billet 7075 together with some disc bells, and brackets specifically for the AP calipers. Everything will be anodised in Gold.
I've finally finished the interior wiring loom, which took a lot longer than I expected it to. The result to the untrained eye is something that looks like a factory loom; I followed the factory colour schema and used factory connectors to extend or add functionality. I've added 25 new features but to cover each would make for pretty dull reading, so I'll cover just one as an example:
Here's the standard set of multi plugs to join the interior loom to the engine bay loom. The four thicker red cables feed power from the engine bay fuse/relay box to the in car fuse/relay box...
As I'm moving the battery to the boot it would mean these wires unnecessarily feed into to the engine bay then back to the battery in the boot, so I stripped them out and ran them back to the boot instead.
I also removed the fuses and terminals from the engine bay fuse box so it's obvious that nothing should plug there. I've actually created a document which details all changes made to the loom so it's easy to maintain the car going forward.
Here's the finished result. The new black multiplug is from an earlier Fiesta and all its wires are for new functions. I created twisted pairs for any data lines in order to minimize RFI.
Wiring for four fuel pumps. I've used the existing grommet under the seat and run the new cables through and split them into two sets and covered with PVC sheath. There will be two lift pumps in tank, and two Bosch 044s mounted to the side of the tank, fed from an internal swirl pot. I don't need two 044's - the second is just for resilience. The looped wires to the right of the photo will be run to a dedicated fuse & relay board in the boot.
The wiring in place behind the dashboard. The thick red cable runs from the engine bay, across the dash, and down the right hand side of the car. I've used this route so that there aren't any 12v lines on the left hand side of the car that could possibly induce interference in the audio RCA cables that will be run on that side.
Here's the dashboard in place. I've now got to retrofit a passenger airbag and fit the HVAC controls.
There's now a layer of Luxury Liner Pro on all of the lower panels. Thanks to my Dad again for that!
The first new components for the rear suspension arrived and these new adjustable alloy arms replace two of the three standard arms on each side. They are currently fitted with spherical joints but I'm having them modified to accept Focus RS bushes, which are still a considerable upgrade for a Fiesta. The third arm on each side will be replaced with a billet 7075 pieces made to my specification, and I'm also having the rear hubs copied in billet 7075 together with some disc bells, and brackets specifically for the AP calipers. Everything will be anodised in Gold.
Possibly the best, most informative and innovative build thread I have ever read, I congratulate you sir.
I love the small touches like the twin one touch windows, auto dip mirror etc, features that a mj3 fiesta never had, but your fitting and making it look 100% Factory fitted.
Keep the updates coming.
Oh yes, your interior looks absolutely gorgeous.
I love the small touches like the twin one touch windows, auto dip mirror etc, features that a mj3 fiesta never had, but your fitting and making it look 100% Factory fitted.
Keep the updates coming.
Oh yes, your interior looks absolutely gorgeous.
 this just continues to get better with every update. I vaguely remember being made aware of this thread on FT by Max several years ago, but never expected it to be this detailed!


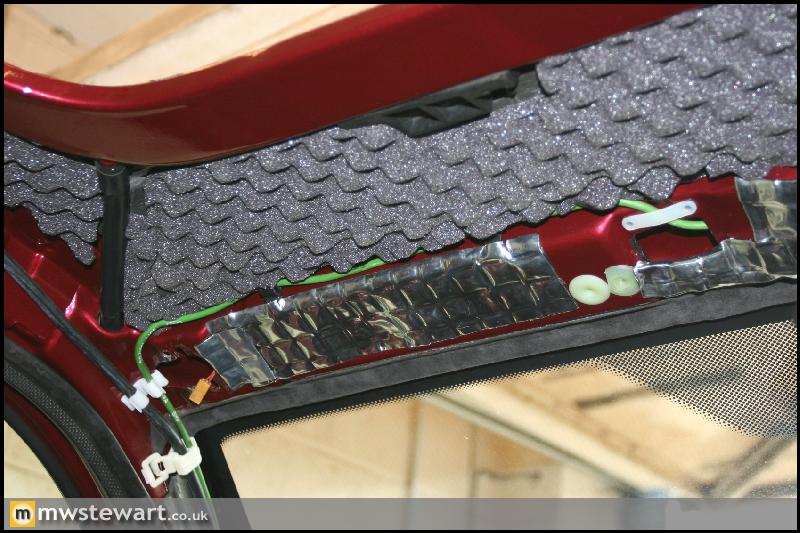
The sound deadening and vibration damping is now complete. There were some voids between the roof skin and headlining so they have been covered with a layer of Silent Coat Sound Absorber 15 over Silent Coat Noise Isolator 8. The base is RAAMmat BXT II which covers the entire roof skin.
Rear section complete.
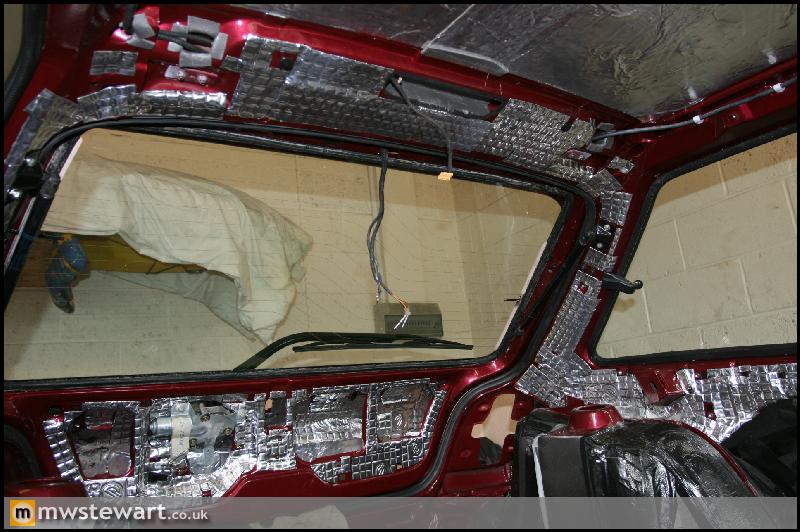
I've used Silent Coat Noise Isolator 4 on edges of any apertures in order to protect against chaffing.
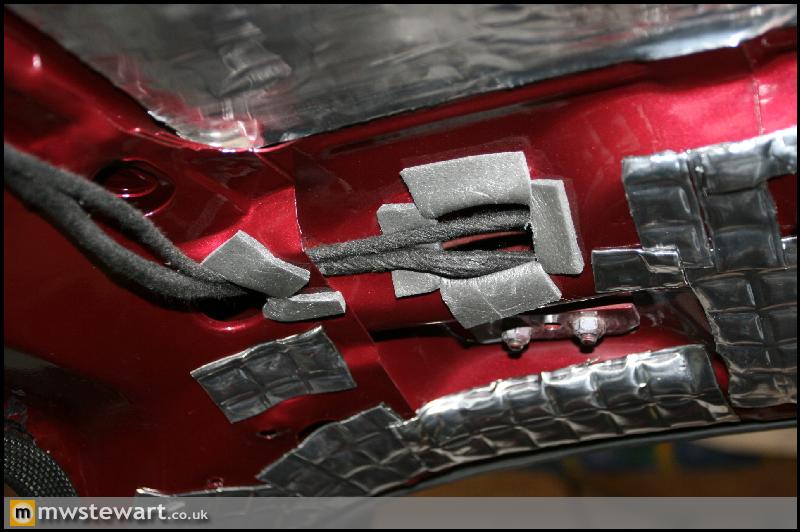
I removed the dashboard again in order to apply Silent Coat Sound Absorber 15 to any surfaces which were in close proximity. The material is great for preventing any squeaks or groans, not that there are many from the very solid Mk5 dashboard.
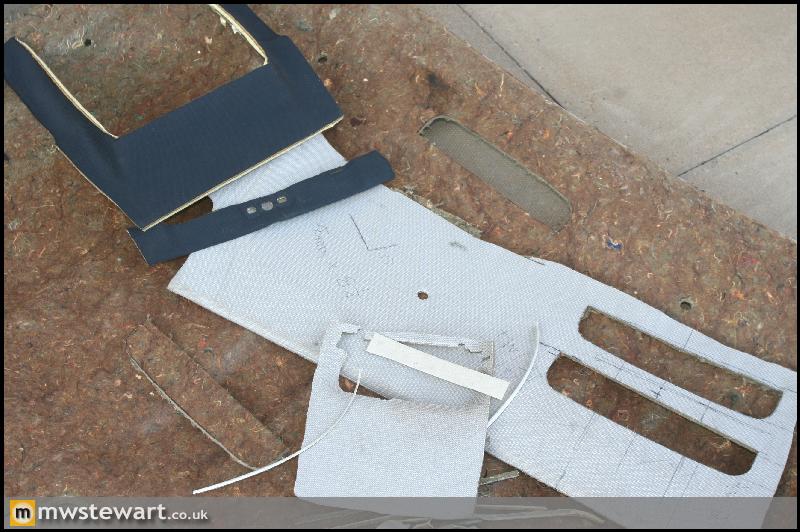
Next I moved onto the roof furniture. I was originally going to spray the original accessories to match the new headlining, but as time went on I decided that they weren't special enough.
So, I went out and purchased some accessories from an Audi B5 A4 Facelift 'Sport' model which included new interior lights and a section of the surrounding headlining, then using some spare Fiesta headlinings, I figured out how to modify and mount the parts.
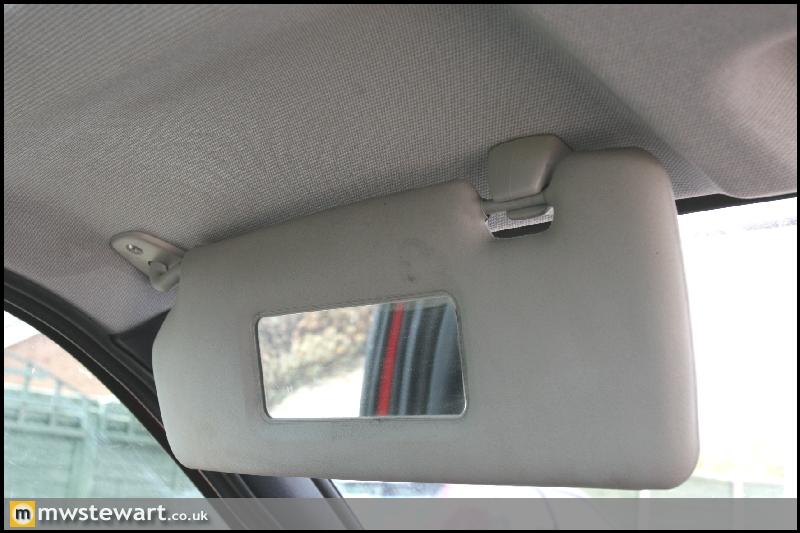
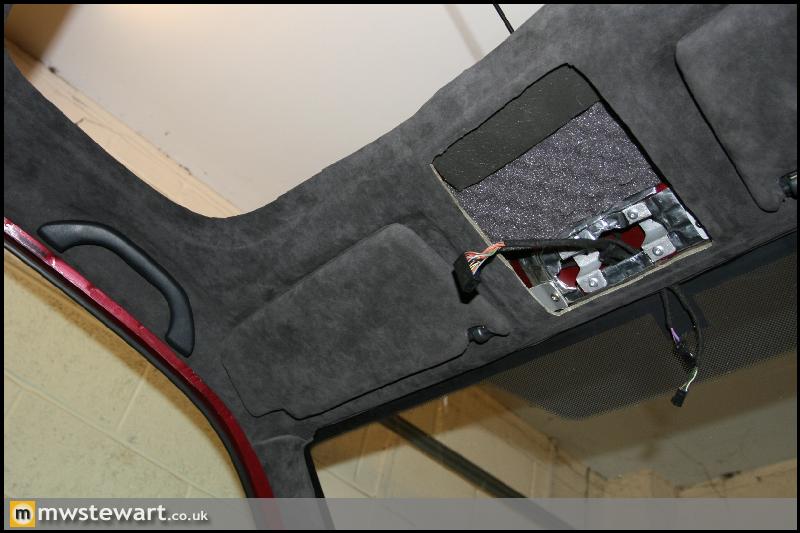
The position of the fixed mount on the Astra sun visors is different to where it was on the Fiesta, which wouldn't have been an issue except one of the screw holes in the new position fell over a recess and punched hole in the overhead chassis box. I made a couple of removable brackets up to get around this as I wasn't happy securing something with only one screw when it should have two. The connectors in focus are for the auto dim mirror and rain/light sensor.
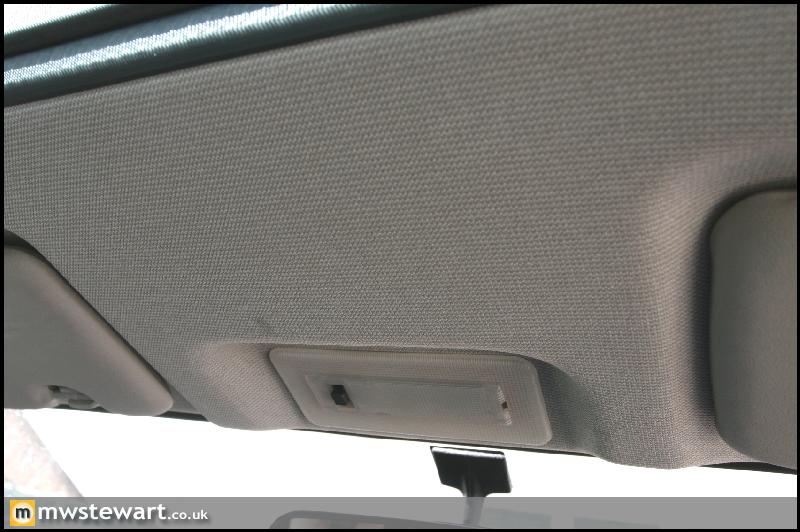
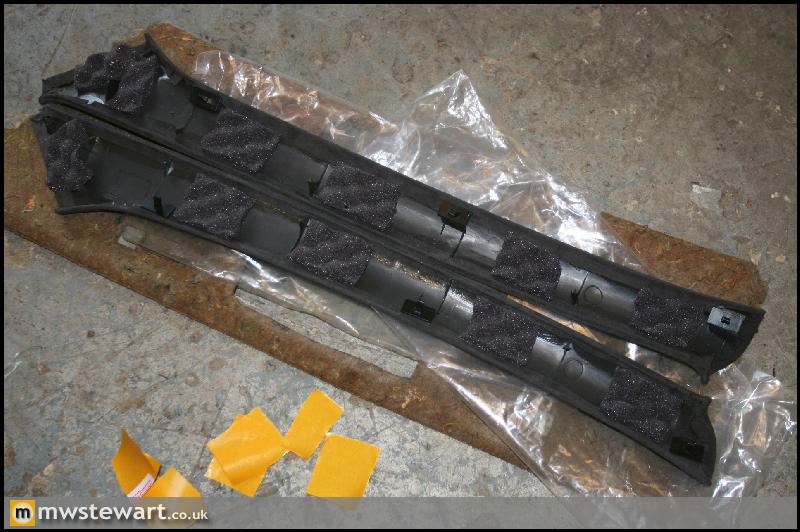
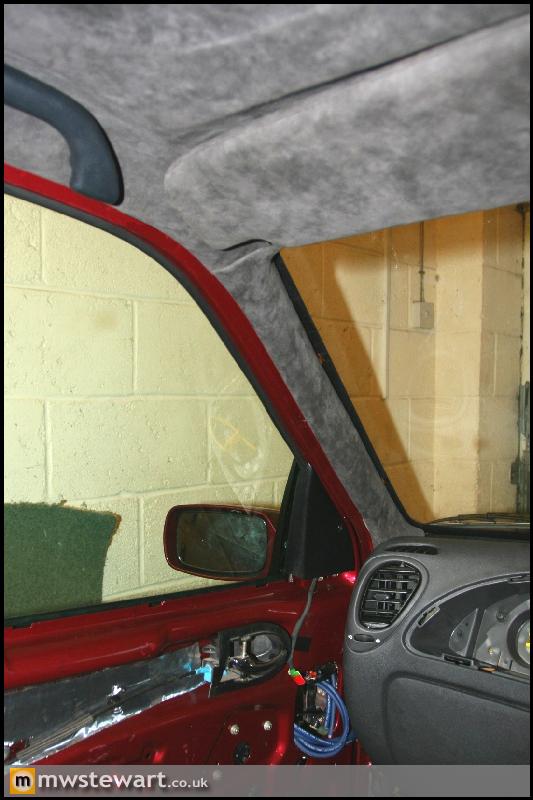
I have fitted the re trimmed headlining and A pillar trims. I used pads of Silent Coat Sound Absorber 15 behind all trim to prevent any minor squeaks etc.
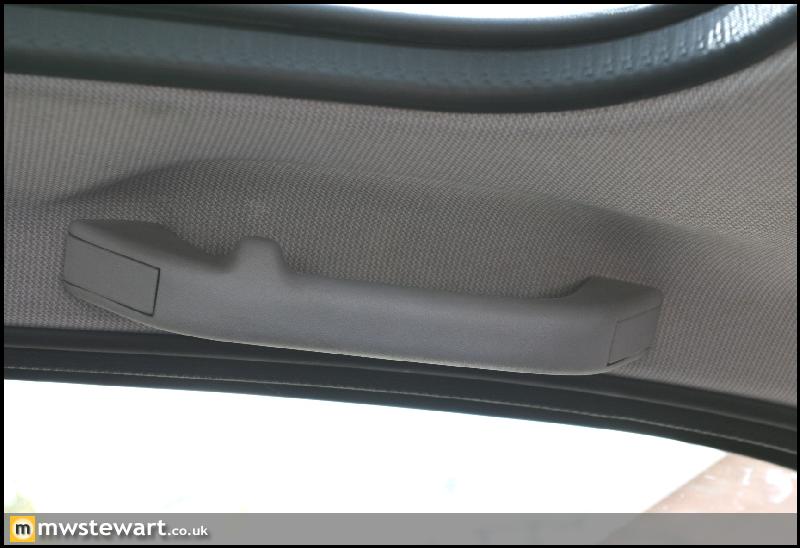
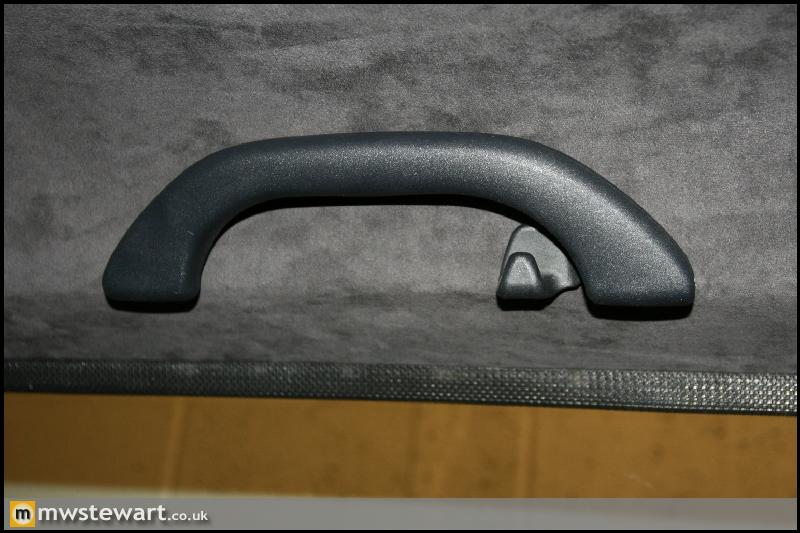
A4 roof handles modified to fit. They are silicone damped.
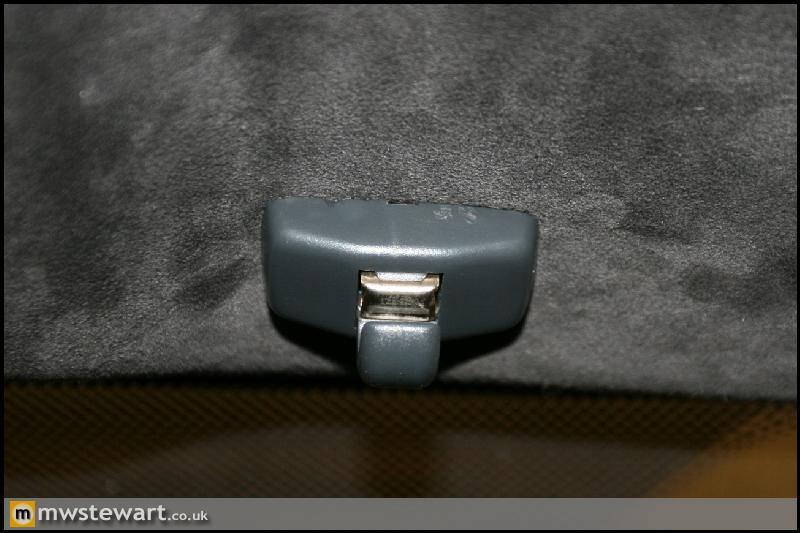
A4 Sun Visor clips fitted.
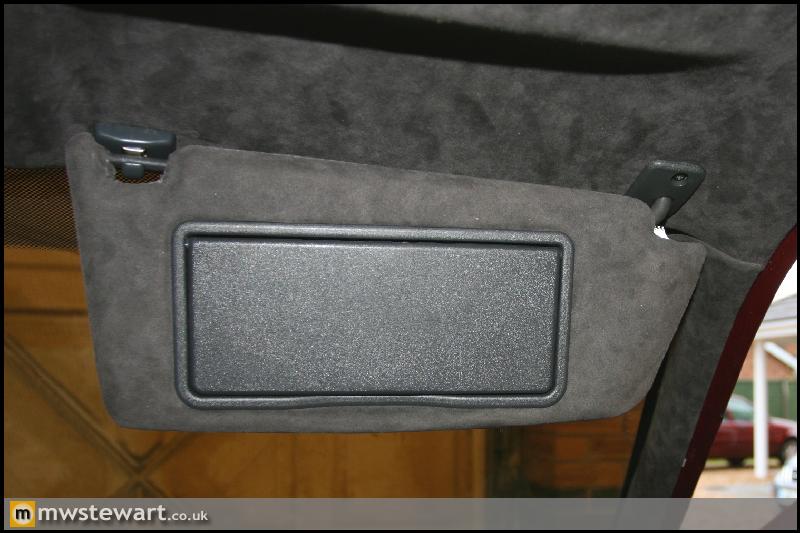
Re-trimmed Astra VXR Sun visors fitted.

A4 Rear interior light fitted.
I had to tweak the A Pillars slightly to get the Mk4/5 trims on. I'm pleased with the fit.
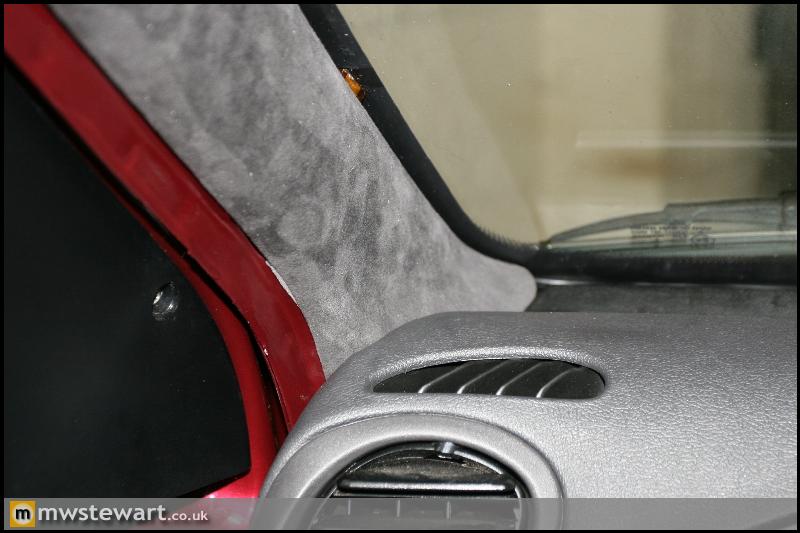
Here's the cut-out ready for the Audi front light which I shall cover later in this post. I haven't fitted the door seals yet which is why exterior paint is visible. I have a set of new original door seals but before they go on I'm going to investigate if any of the velour finished door seals from Audi/BMW/Mercedes etc. will fit.
I've purchased a set of door looms from an Audi A6 that was equipped with the 'interior light pack'; the clear objects in the front of the photo are lenses to direct LED light into the interior door handle reveals. I will incorporate these looms into my doors together with the A6 puddle lights and door marker lights. I had already got Peugeot courtesy/puddle lights but the quality and design is, as to be expected, not a match for the Audi parts.
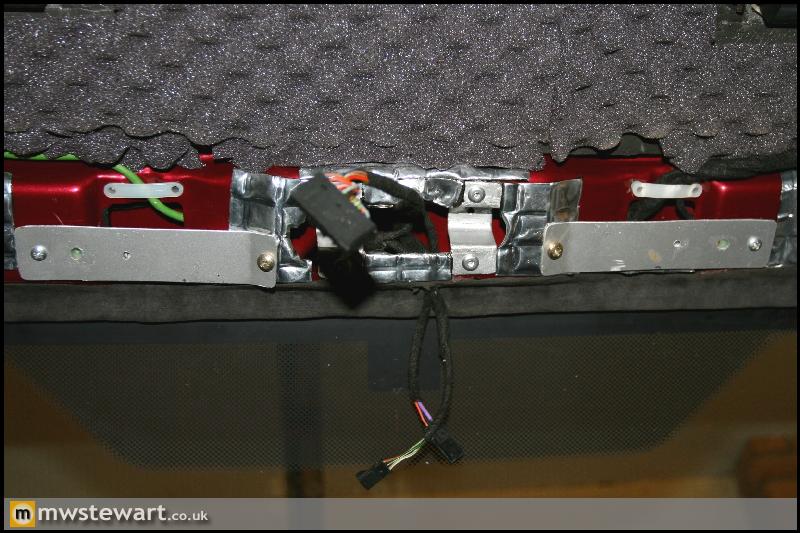
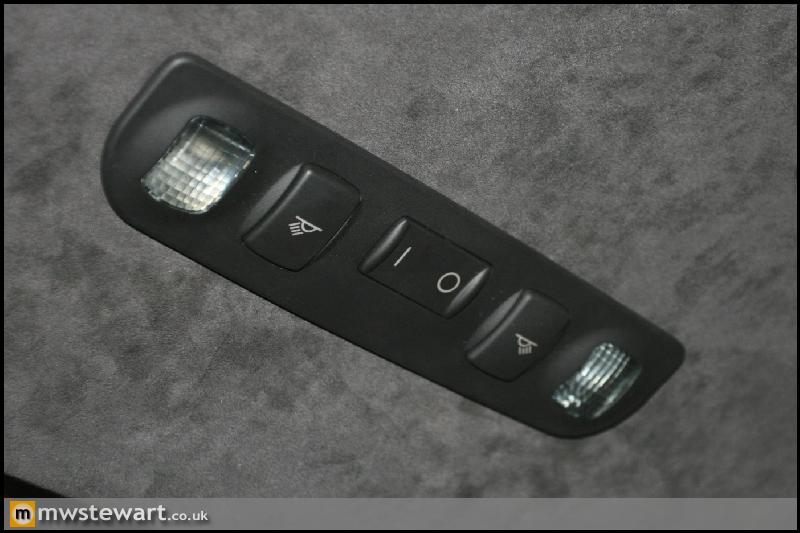
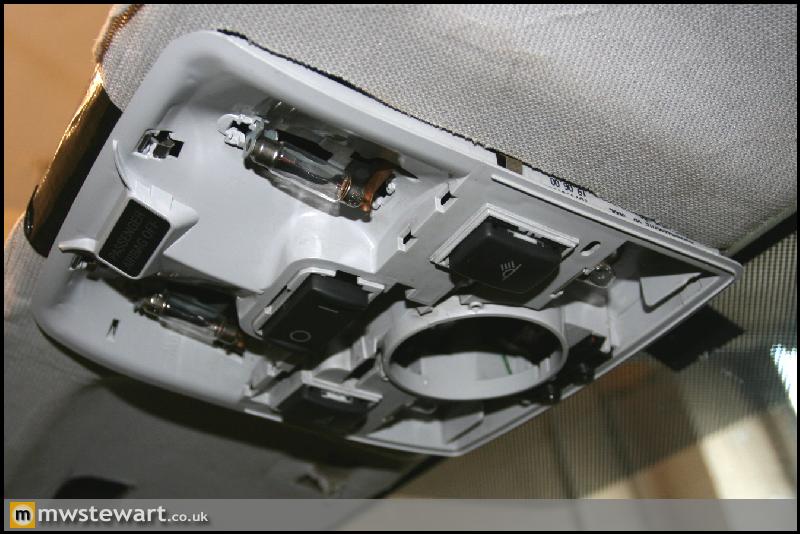
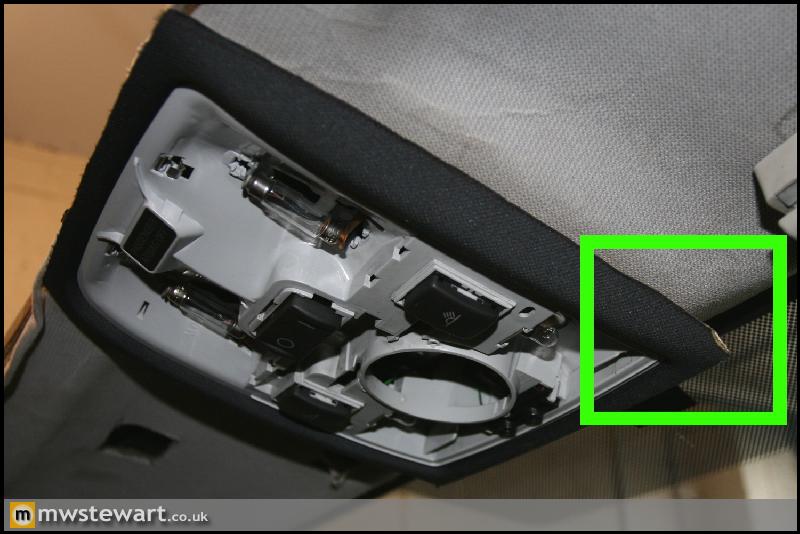
Here's the new front interior light which is actually more of a multifunction console than a light; it is from a well specified model so has LED based submarine lighting, map lights, and provision for a Telephone Microphone. The on/off switch is dual pole so has dedicated control of the rear light i.e. the rear light comes on with the front light in position 1 (that isn't as straight forward to achieve as sounds). The unit mounts by two screws through the lugs outlined in the photo:
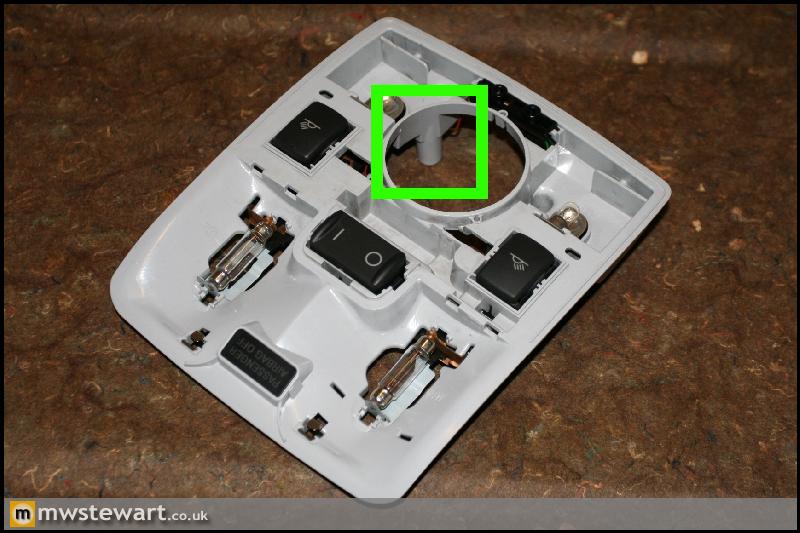
I enlarged the original Fiesta light recess and fabricated the two Top Hat shaped brackets to secure the new light.
The first test fit in a scrap headlining.
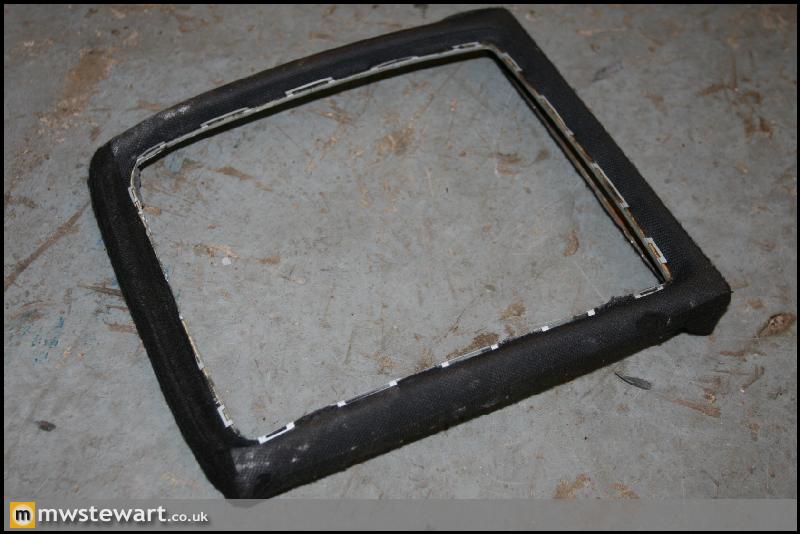
I carefully cut the original Audi headlining and mounted it to the Fiesta attached to the light. I got the sides to fit perfectly but the front and rear edges were a problem, particularly the front as highlighted in the second photo.
I fabricated a metal part to fill the gap.
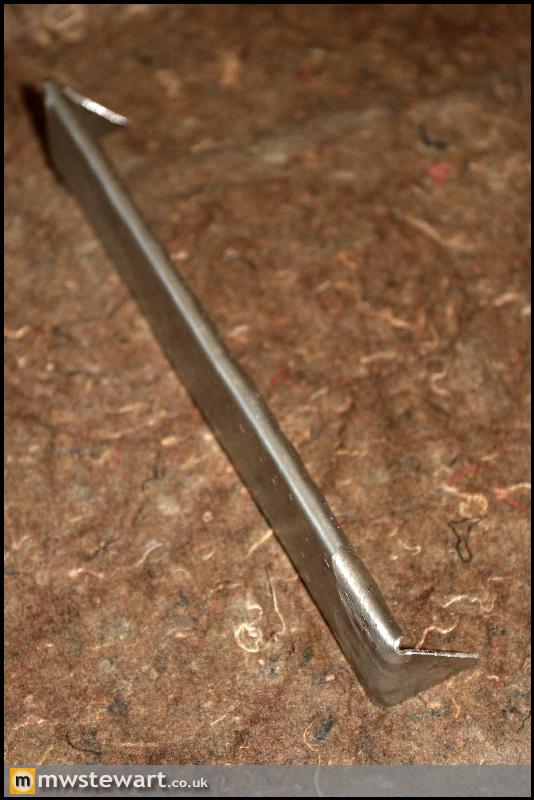
Next I welded the infill piece to the light mount frame, and then used Epoxy to reshape the outer edges of the headlining.
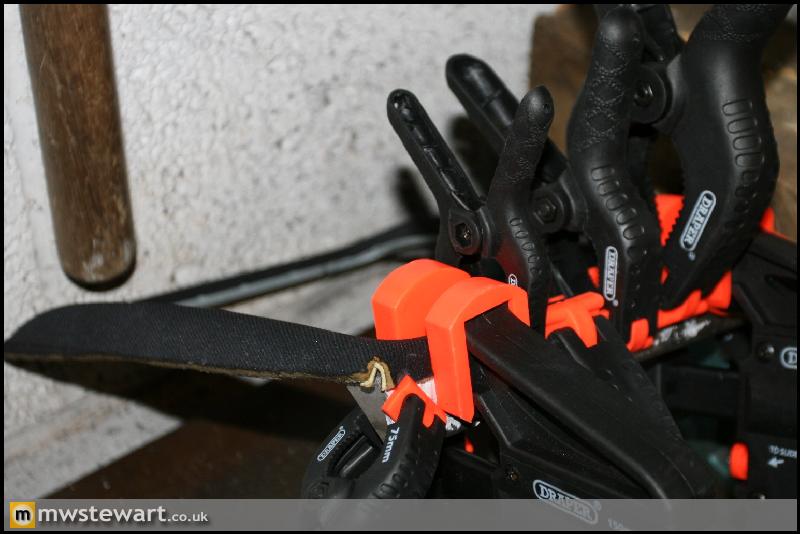
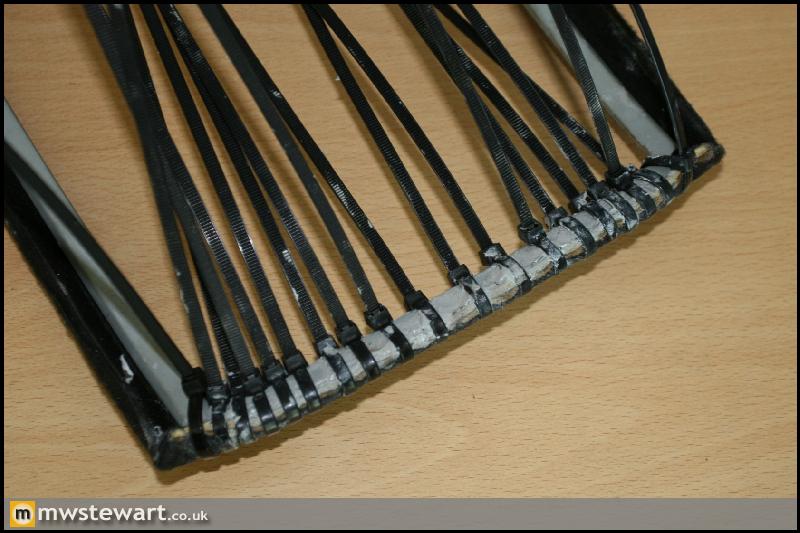
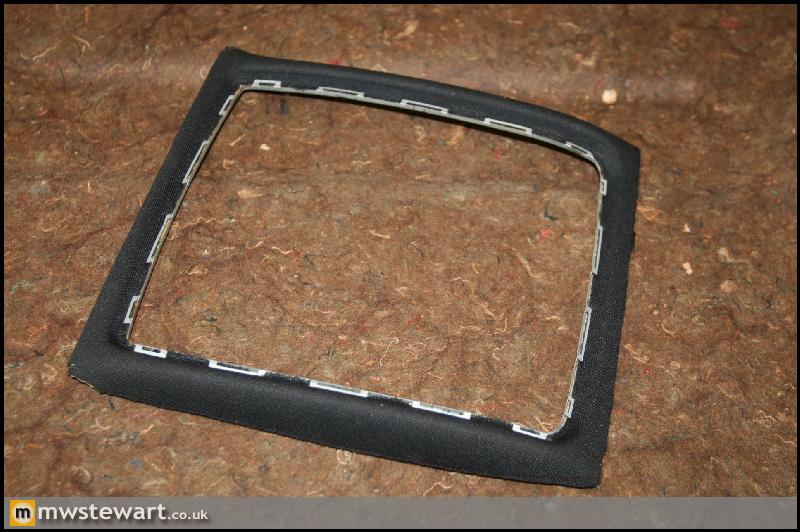
It doesn't look like much, but I've used a combination epoxy, adhesive foam and finally fabric tape to reshape the Audi headlining to fit perfectly against the Fiesta headlining. The next step is to cover it in Alcantara.
Rear section complete.
I've used Silent Coat Noise Isolator 4 on edges of any apertures in order to protect against chaffing.
I removed the dashboard again in order to apply Silent Coat Sound Absorber 15 to any surfaces which were in close proximity. The material is great for preventing any squeaks or groans, not that there are many from the very solid Mk5 dashboard.
Next I moved onto the roof furniture. I was originally going to spray the original accessories to match the new headlining, but as time went on I decided that they weren't special enough.
So, I went out and purchased some accessories from an Audi B5 A4 Facelift 'Sport' model which included new interior lights and a section of the surrounding headlining, then using some spare Fiesta headlinings, I figured out how to modify and mount the parts.
The position of the fixed mount on the Astra sun visors is different to where it was on the Fiesta, which wouldn't have been an issue except one of the screw holes in the new position fell over a recess and punched hole in the overhead chassis box. I made a couple of removable brackets up to get around this as I wasn't happy securing something with only one screw when it should have two. The connectors in focus are for the auto dim mirror and rain/light sensor.
I have fitted the re trimmed headlining and A pillar trims. I used pads of Silent Coat Sound Absorber 15 behind all trim to prevent any minor squeaks etc.
A4 roof handles modified to fit. They are silicone damped.
A4 Sun Visor clips fitted.
Re-trimmed Astra VXR Sun visors fitted.
A4 Rear interior light fitted.
I had to tweak the A Pillars slightly to get the Mk4/5 trims on. I'm pleased with the fit.
Here's the cut-out ready for the Audi front light which I shall cover later in this post. I haven't fitted the door seals yet which is why exterior paint is visible. I have a set of new original door seals but before they go on I'm going to investigate if any of the velour finished door seals from Audi/BMW/Mercedes etc. will fit.
I've purchased a set of door looms from an Audi A6 that was equipped with the 'interior light pack'; the clear objects in the front of the photo are lenses to direct LED light into the interior door handle reveals. I will incorporate these looms into my doors together with the A6 puddle lights and door marker lights. I had already got Peugeot courtesy/puddle lights but the quality and design is, as to be expected, not a match for the Audi parts.
Here's the new front interior light which is actually more of a multifunction console than a light; it is from a well specified model so has LED based submarine lighting, map lights, and provision for a Telephone Microphone. The on/off switch is dual pole so has dedicated control of the rear light i.e. the rear light comes on with the front light in position 1 (that isn't as straight forward to achieve as sounds). The unit mounts by two screws through the lugs outlined in the photo:
I enlarged the original Fiesta light recess and fabricated the two Top Hat shaped brackets to secure the new light.
The first test fit in a scrap headlining.
I carefully cut the original Audi headlining and mounted it to the Fiesta attached to the light. I got the sides to fit perfectly but the front and rear edges were a problem, particularly the front as highlighted in the second photo.
I fabricated a metal part to fill the gap.
Next I welded the infill piece to the light mount frame, and then used Epoxy to reshape the outer edges of the headlining.
It doesn't look like much, but I've used a combination epoxy, adhesive foam and finally fabric tape to reshape the Audi headlining to fit perfectly against the Fiesta headlining. The next step is to cover it in Alcantara.
This car and your attention to detail just gets more incredible every time I check this thread.
You do realise that you're building this to a standard far beyond that of any custom car business? A business simply would not be able to afford to spend the time that you have put in on a customer's car.
Bear in mind what I said before about getting the car featured in the media. You might not want to blow your own trumpet but I'm sure that there are plenty of magazines or even TV shows who would be interested.
What will you do re suspension set-up? Can you do it yourself or will you get professional advice on spring/damper settings and geometry?
Thanks gents!
This will be the last car project I do for a while. I have been lusting after an E-Type restoration project but my next priority is learning to fly next and getting a license.
In terms of suspension set up my starting point will be a full geometry and corner weighting session based on some safe and conservative settings. I'm going for KW Variant 3 Coilovers, so those combined with the custom suspension parts equals way more adjustment than I have experienced before in a car. I'm looking forward to getting to grips with it and dialling it all to my taste, but when the time comes I will be asking for professional advice in that area.
Cheers,
Mark
Awesome.
This is quite a different way of modifying a car that I haven't really seen before, usually a car is modified for a sole purpose. This is like turning a Fiesta in to an upmarket car which can be used every day, it can comfortably and quietly take you down the shops or for a flat out hoon over the nearest back roads. Very cool.
This is quite a different way of modifying a car that I haven't really seen before, usually a car is modified for a sole purpose. This is like turning a Fiesta in to an upmarket car which can be used every day, it can comfortably and quietly take you down the shops or for a flat out hoon over the nearest back roads. Very cool.
Gassing Station | Readers' Cars | Top of Page | What's New | My Stuff